

JerryC
-
Posts
71 -
Joined
-
Last visited
Content Type
Profiles
Forums
Gallery
Events
Posts posted by JerryC
-
-
It’s looking good. Did you get the kit with paint tools and all included? I got mine like that and made a nice model with it while on vacation.
-
Sparky, are you going to do a build log? I’d love to follow along.
I put my framing together so long ago that I don’t remember, but I think I would have glued it to add strength. I did use the walnut caulking supplied on the bow and stern, like Rab999 did, but on the main deck, I just blackened the edges as I installed them. It was easier and I think it looks better.
-
Historic Ship Models is available from Alibris!

-
I think you may have installed some of the bulkheads backwards, such as the intende forward side to the rear. Some kits advise having the forward bulkheads with the numbers on the face of the bulkhead facing forward and the bulkhead letters facing rearward. Doesn’t help with your difficulties at this point, but your getting great advice from others here.
-
-
Then, there’s the missing rabbet. I don’t have a suggestion about how to add one at this point so I’ll leave that for the more experienced members.
-
-
-
-
-
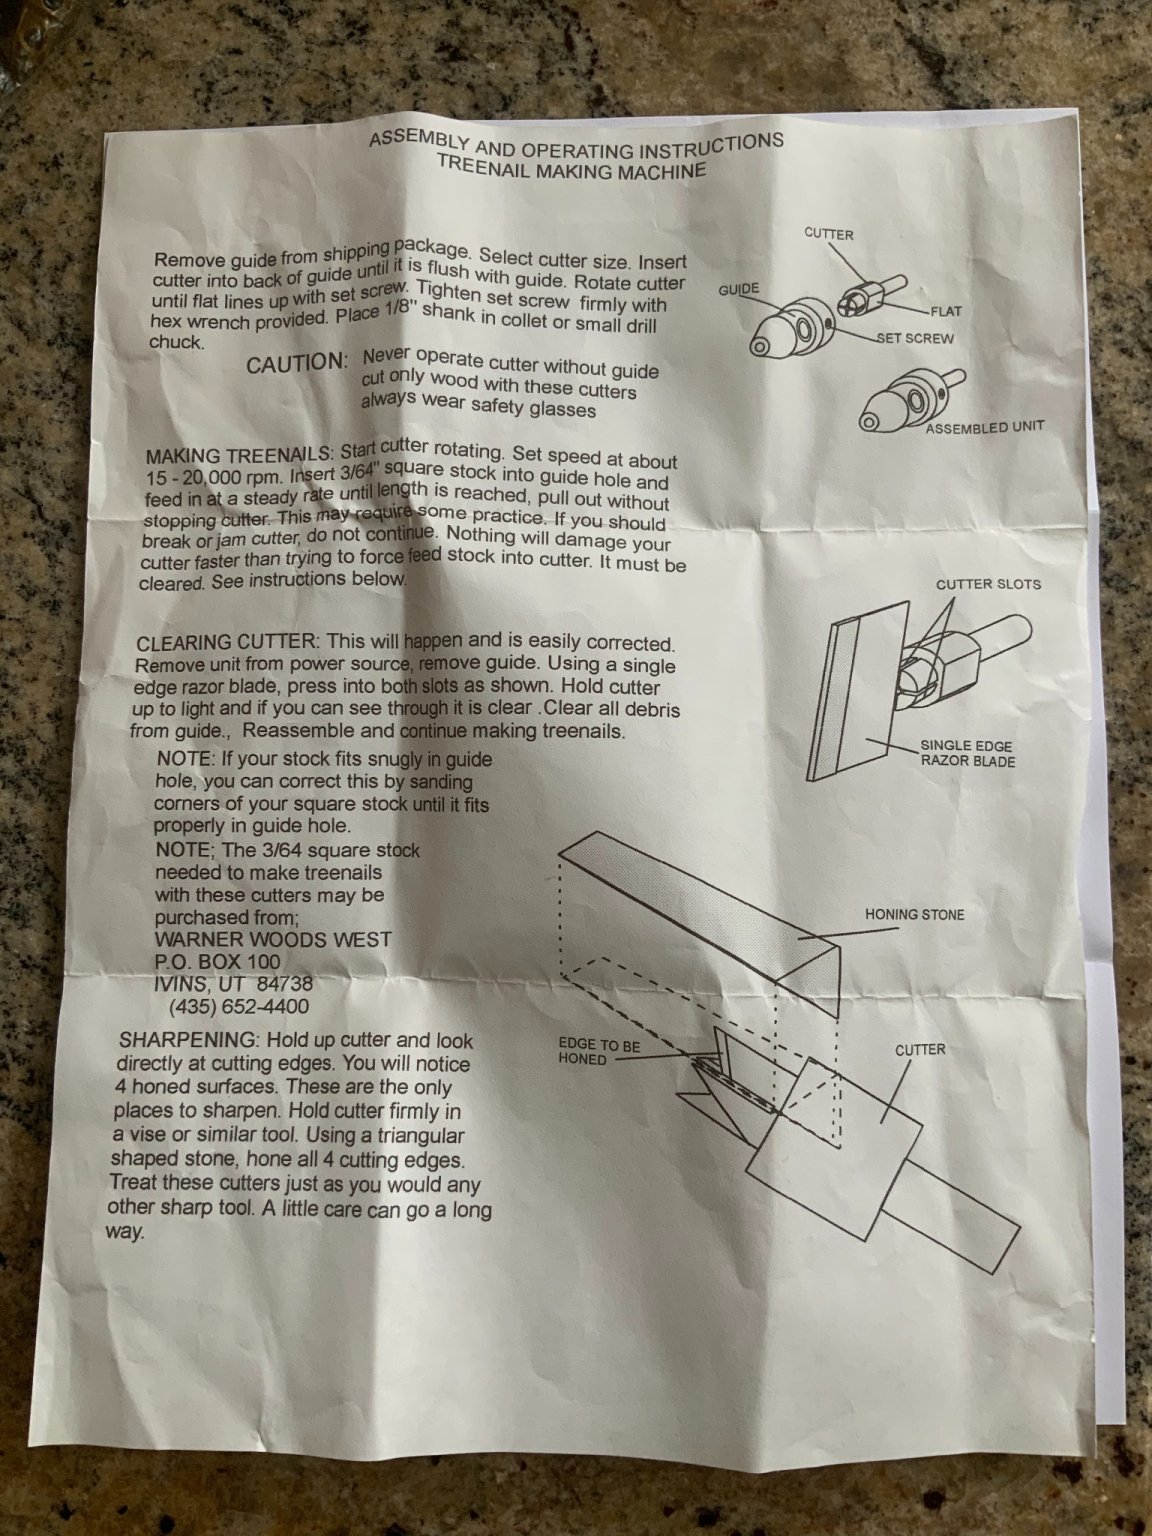
Does anybody use the Royal Products treenail maker? I have Ave one and like it. They no longer produce them. I guess the demand isn’t there. I see a lot of posts here that ask “how can I fasten this to that” and I want to jump in and say “use a treenail” but, making treenail with a draw plate and some chopsticks is a task I wouldn’t wish on anyone. If there are enough people that are interested, perhaps Royal Products could be persuaded to make them. Or maybe Jim Byrnes could tackle it. It would slot in nicely with his product line. I don’t know about patents or copyright stuff that would need to be addressed.
-
-
-
-
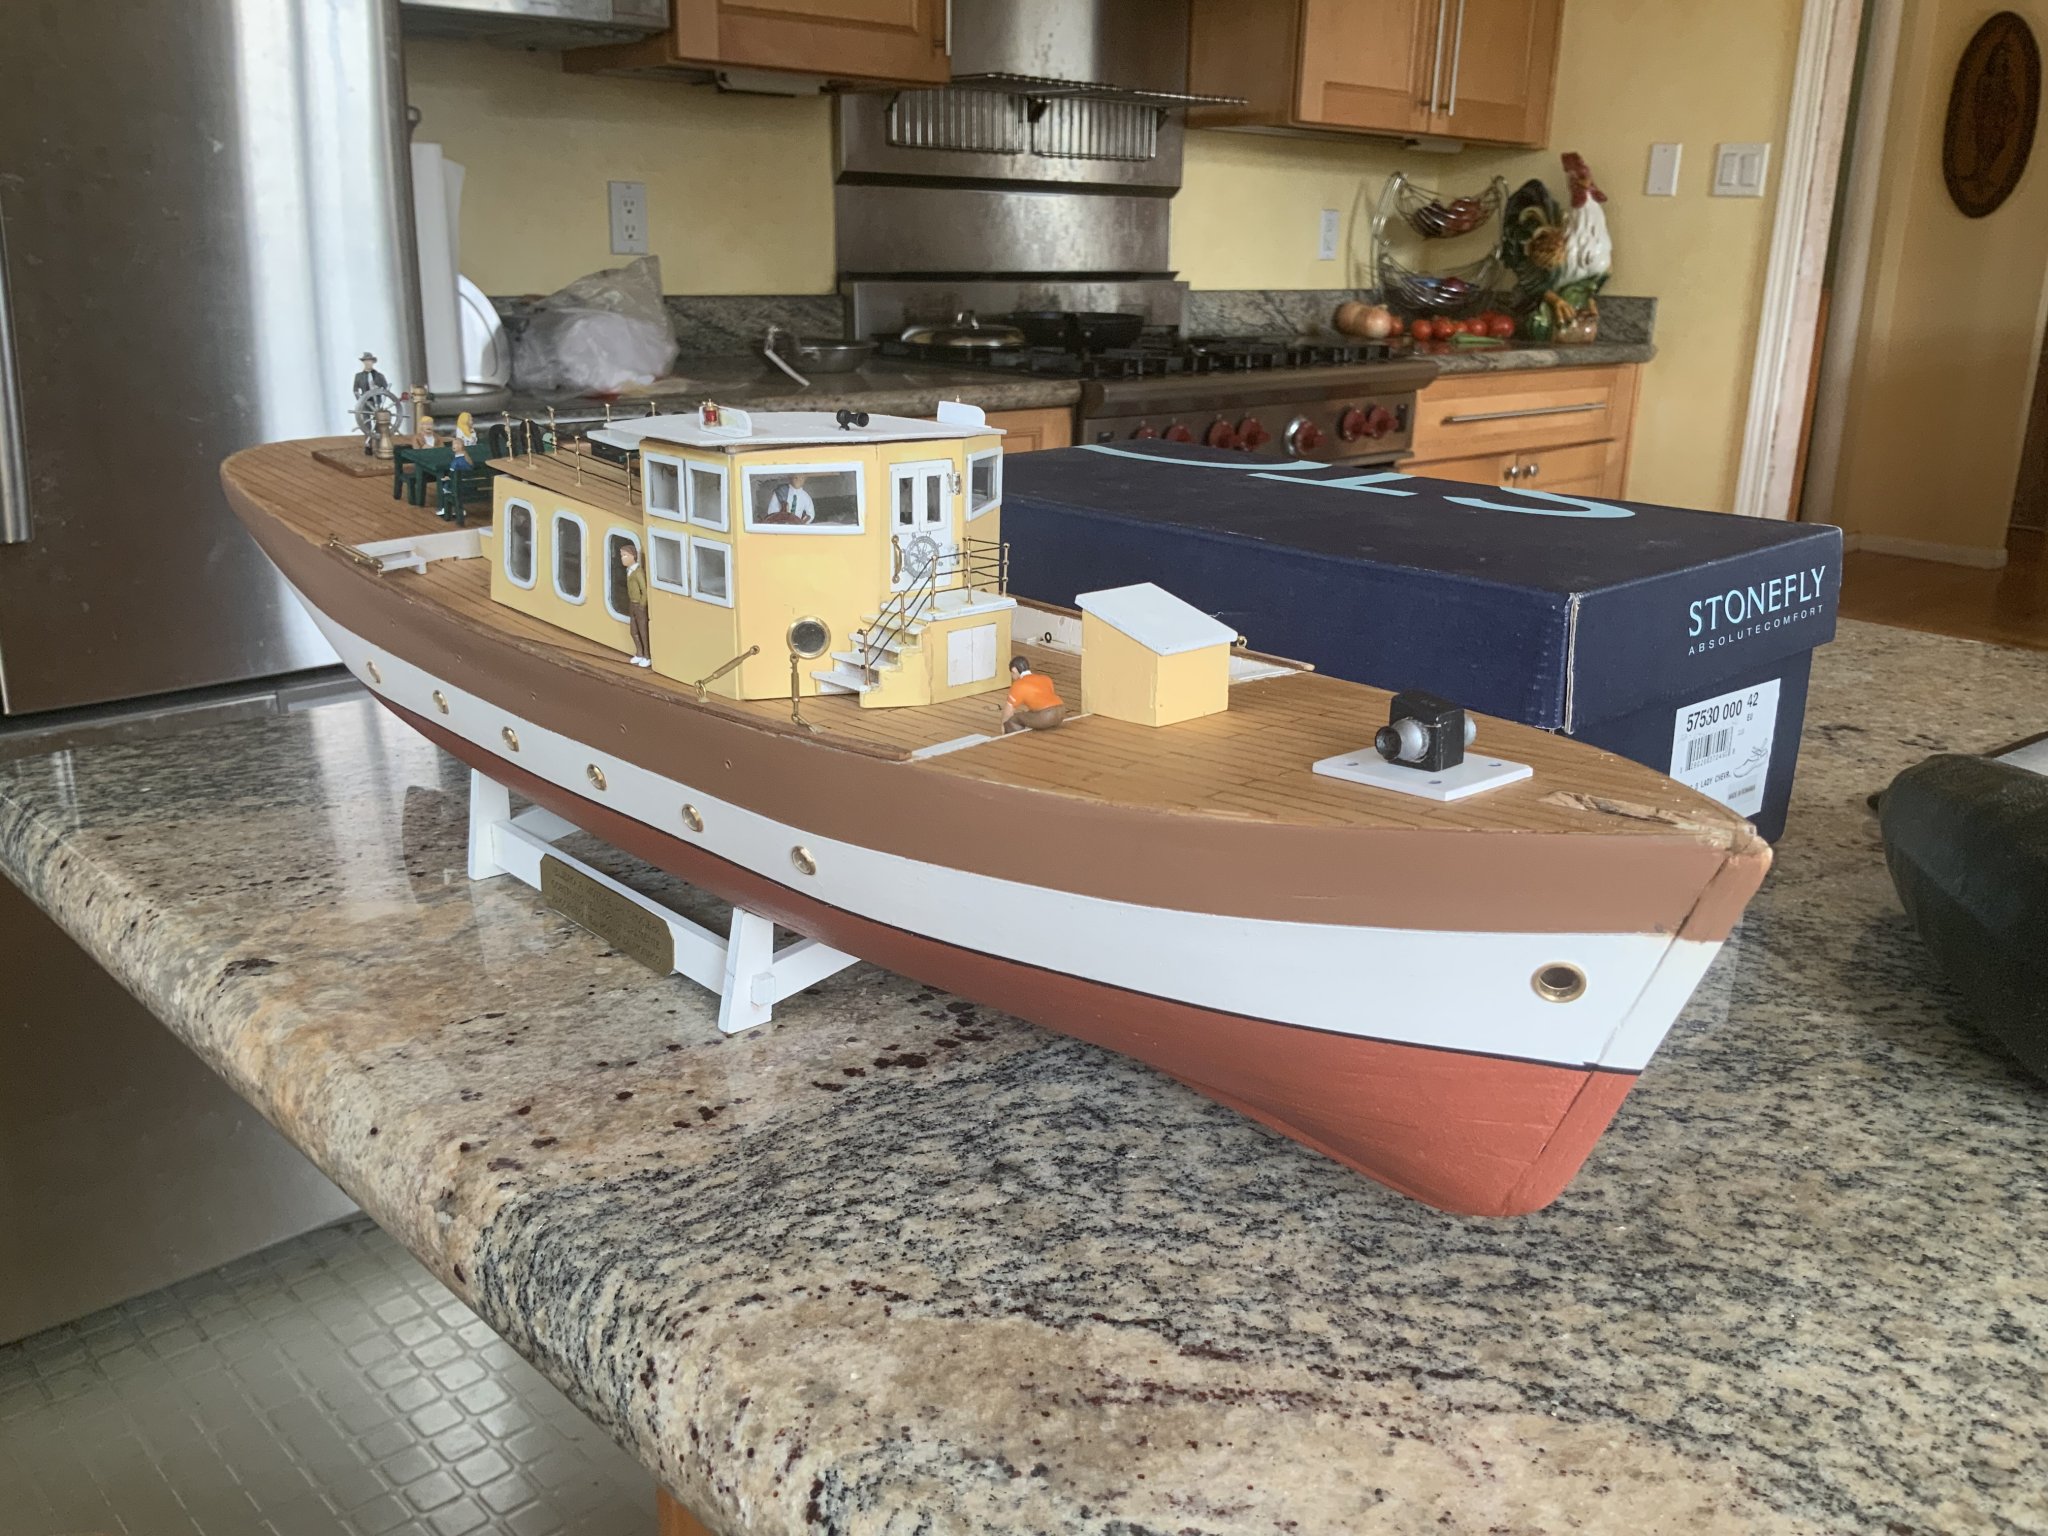
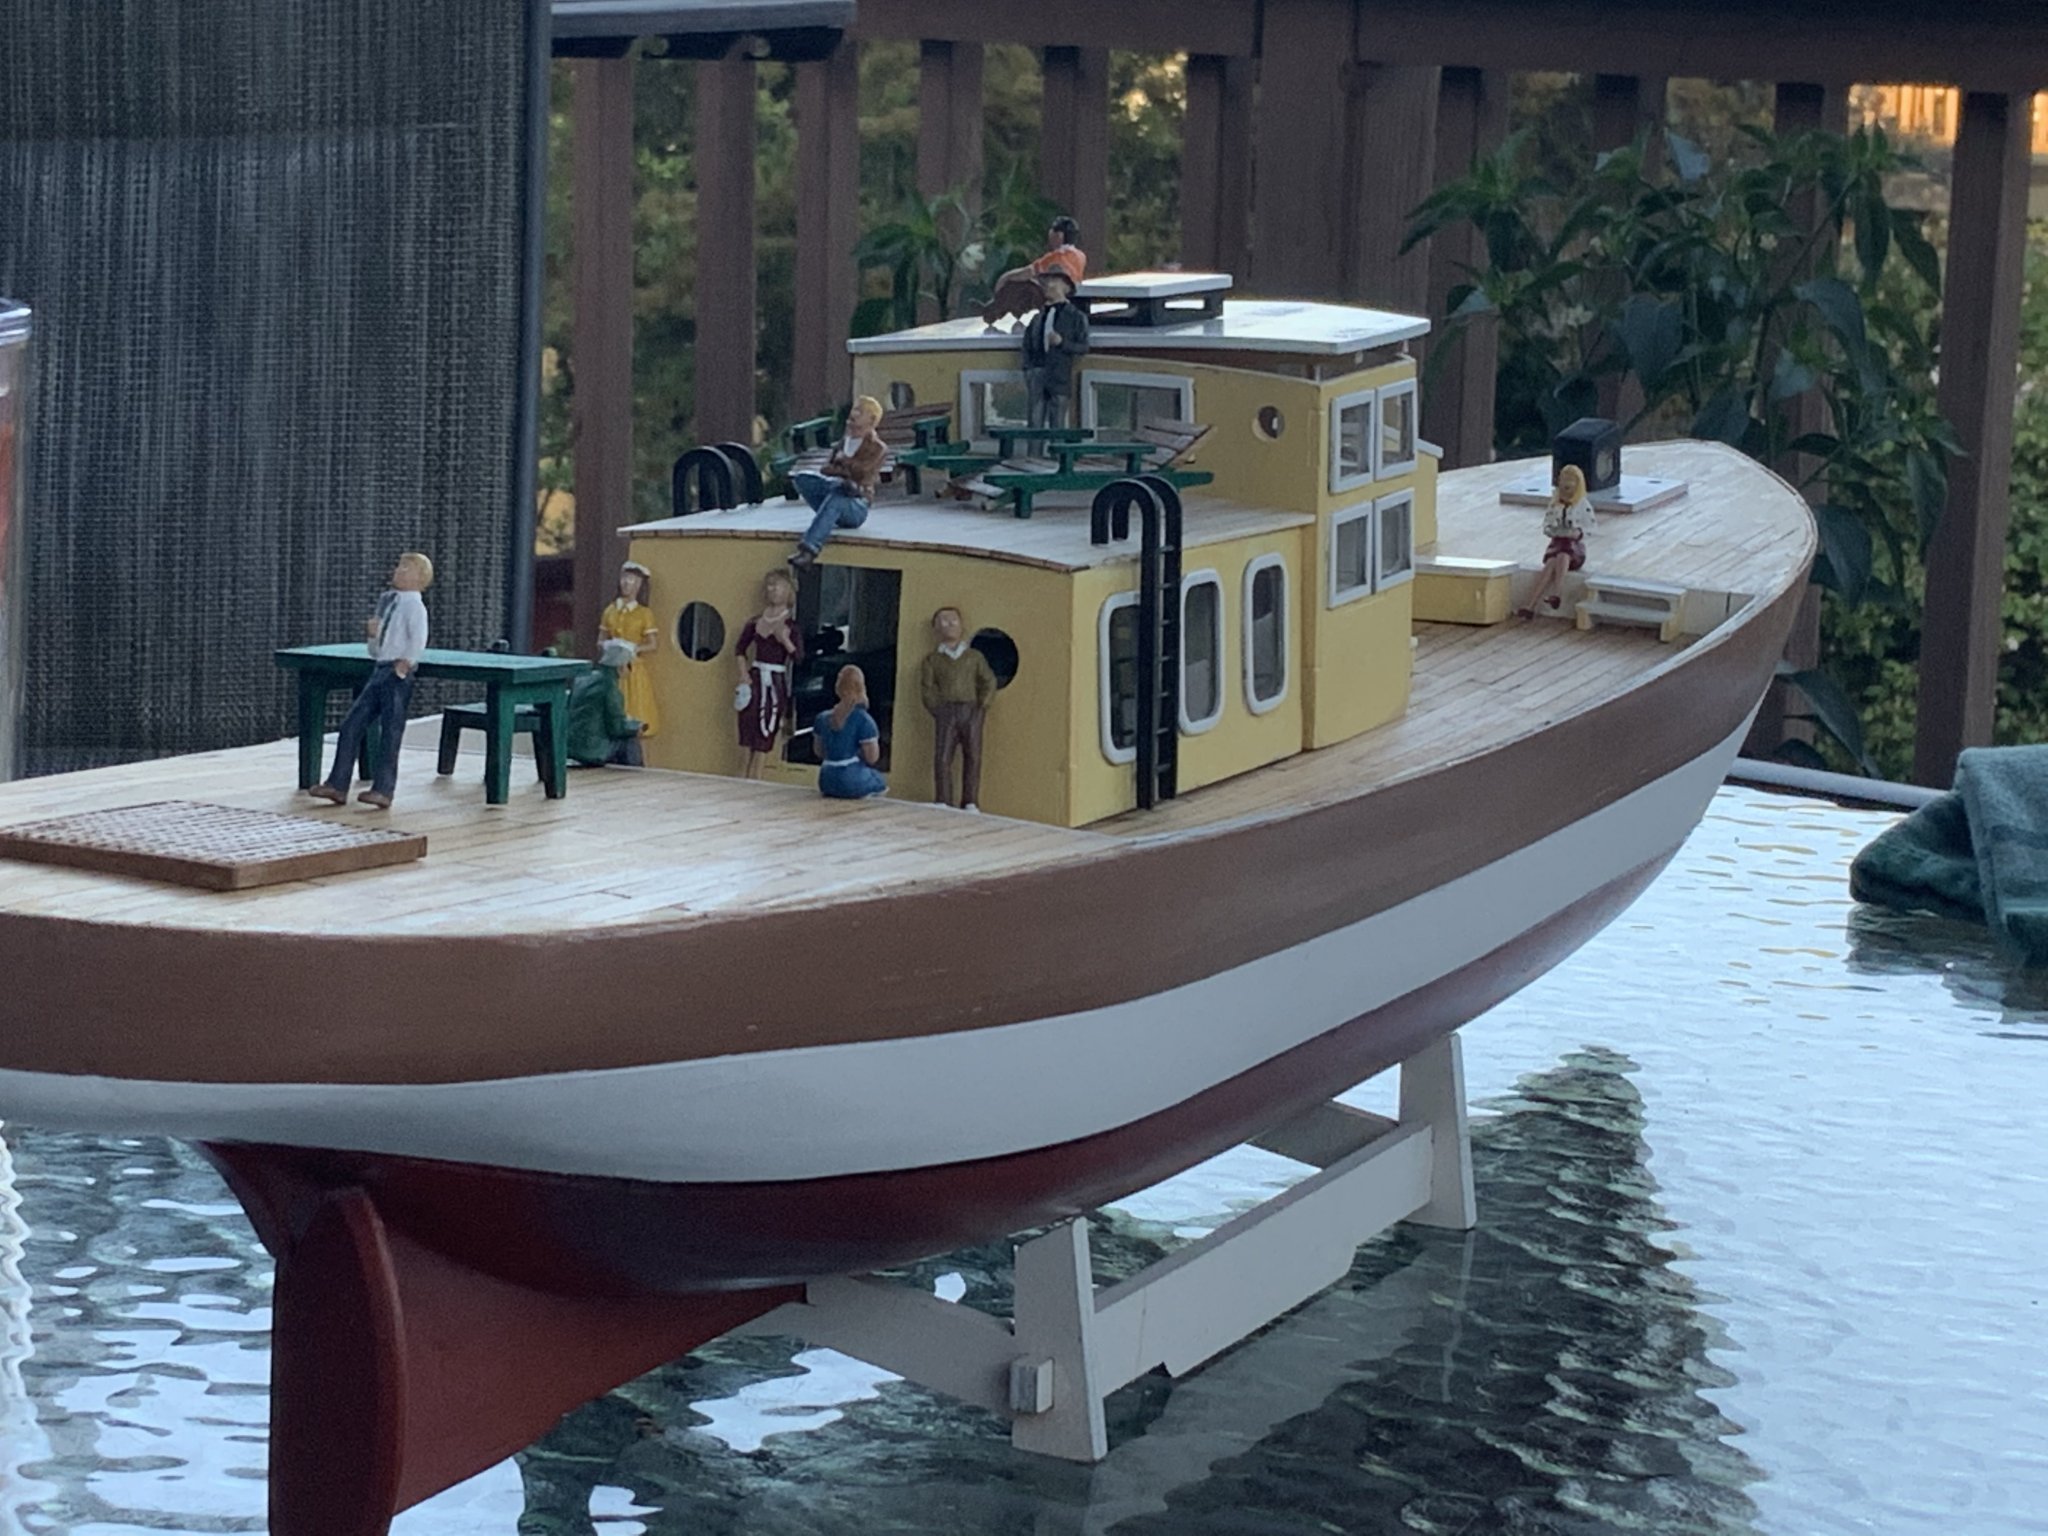
I have one of these that’s almost complete. I have enjoyed working on it so much that I bought another kit so that I can have a do-over. I used the copper nails included with the kit. I also found them to be out of scale and even purchasing additional nails wasn’t going to cut it. So, I moved on to copper wire. That worked out well. Then I bought some sterling wire from fire mountain gems that I will use on my next build. I figure if it tarnishes, it will be black. It’s stiff enough to push through drilled holes and soft enough to flatten with a punch and an anvil.
I don’t have the skills and dedication you have shown on your build, but I will enjoy the work and results of my next build.
-
I don’t see the need for filler, unless you want the practice! Just fill in the small square at the stern them smooth the whole thing out. It’s looking really good. I like the way you used the walnut down the center. Are you going continue that on the main deck?
-
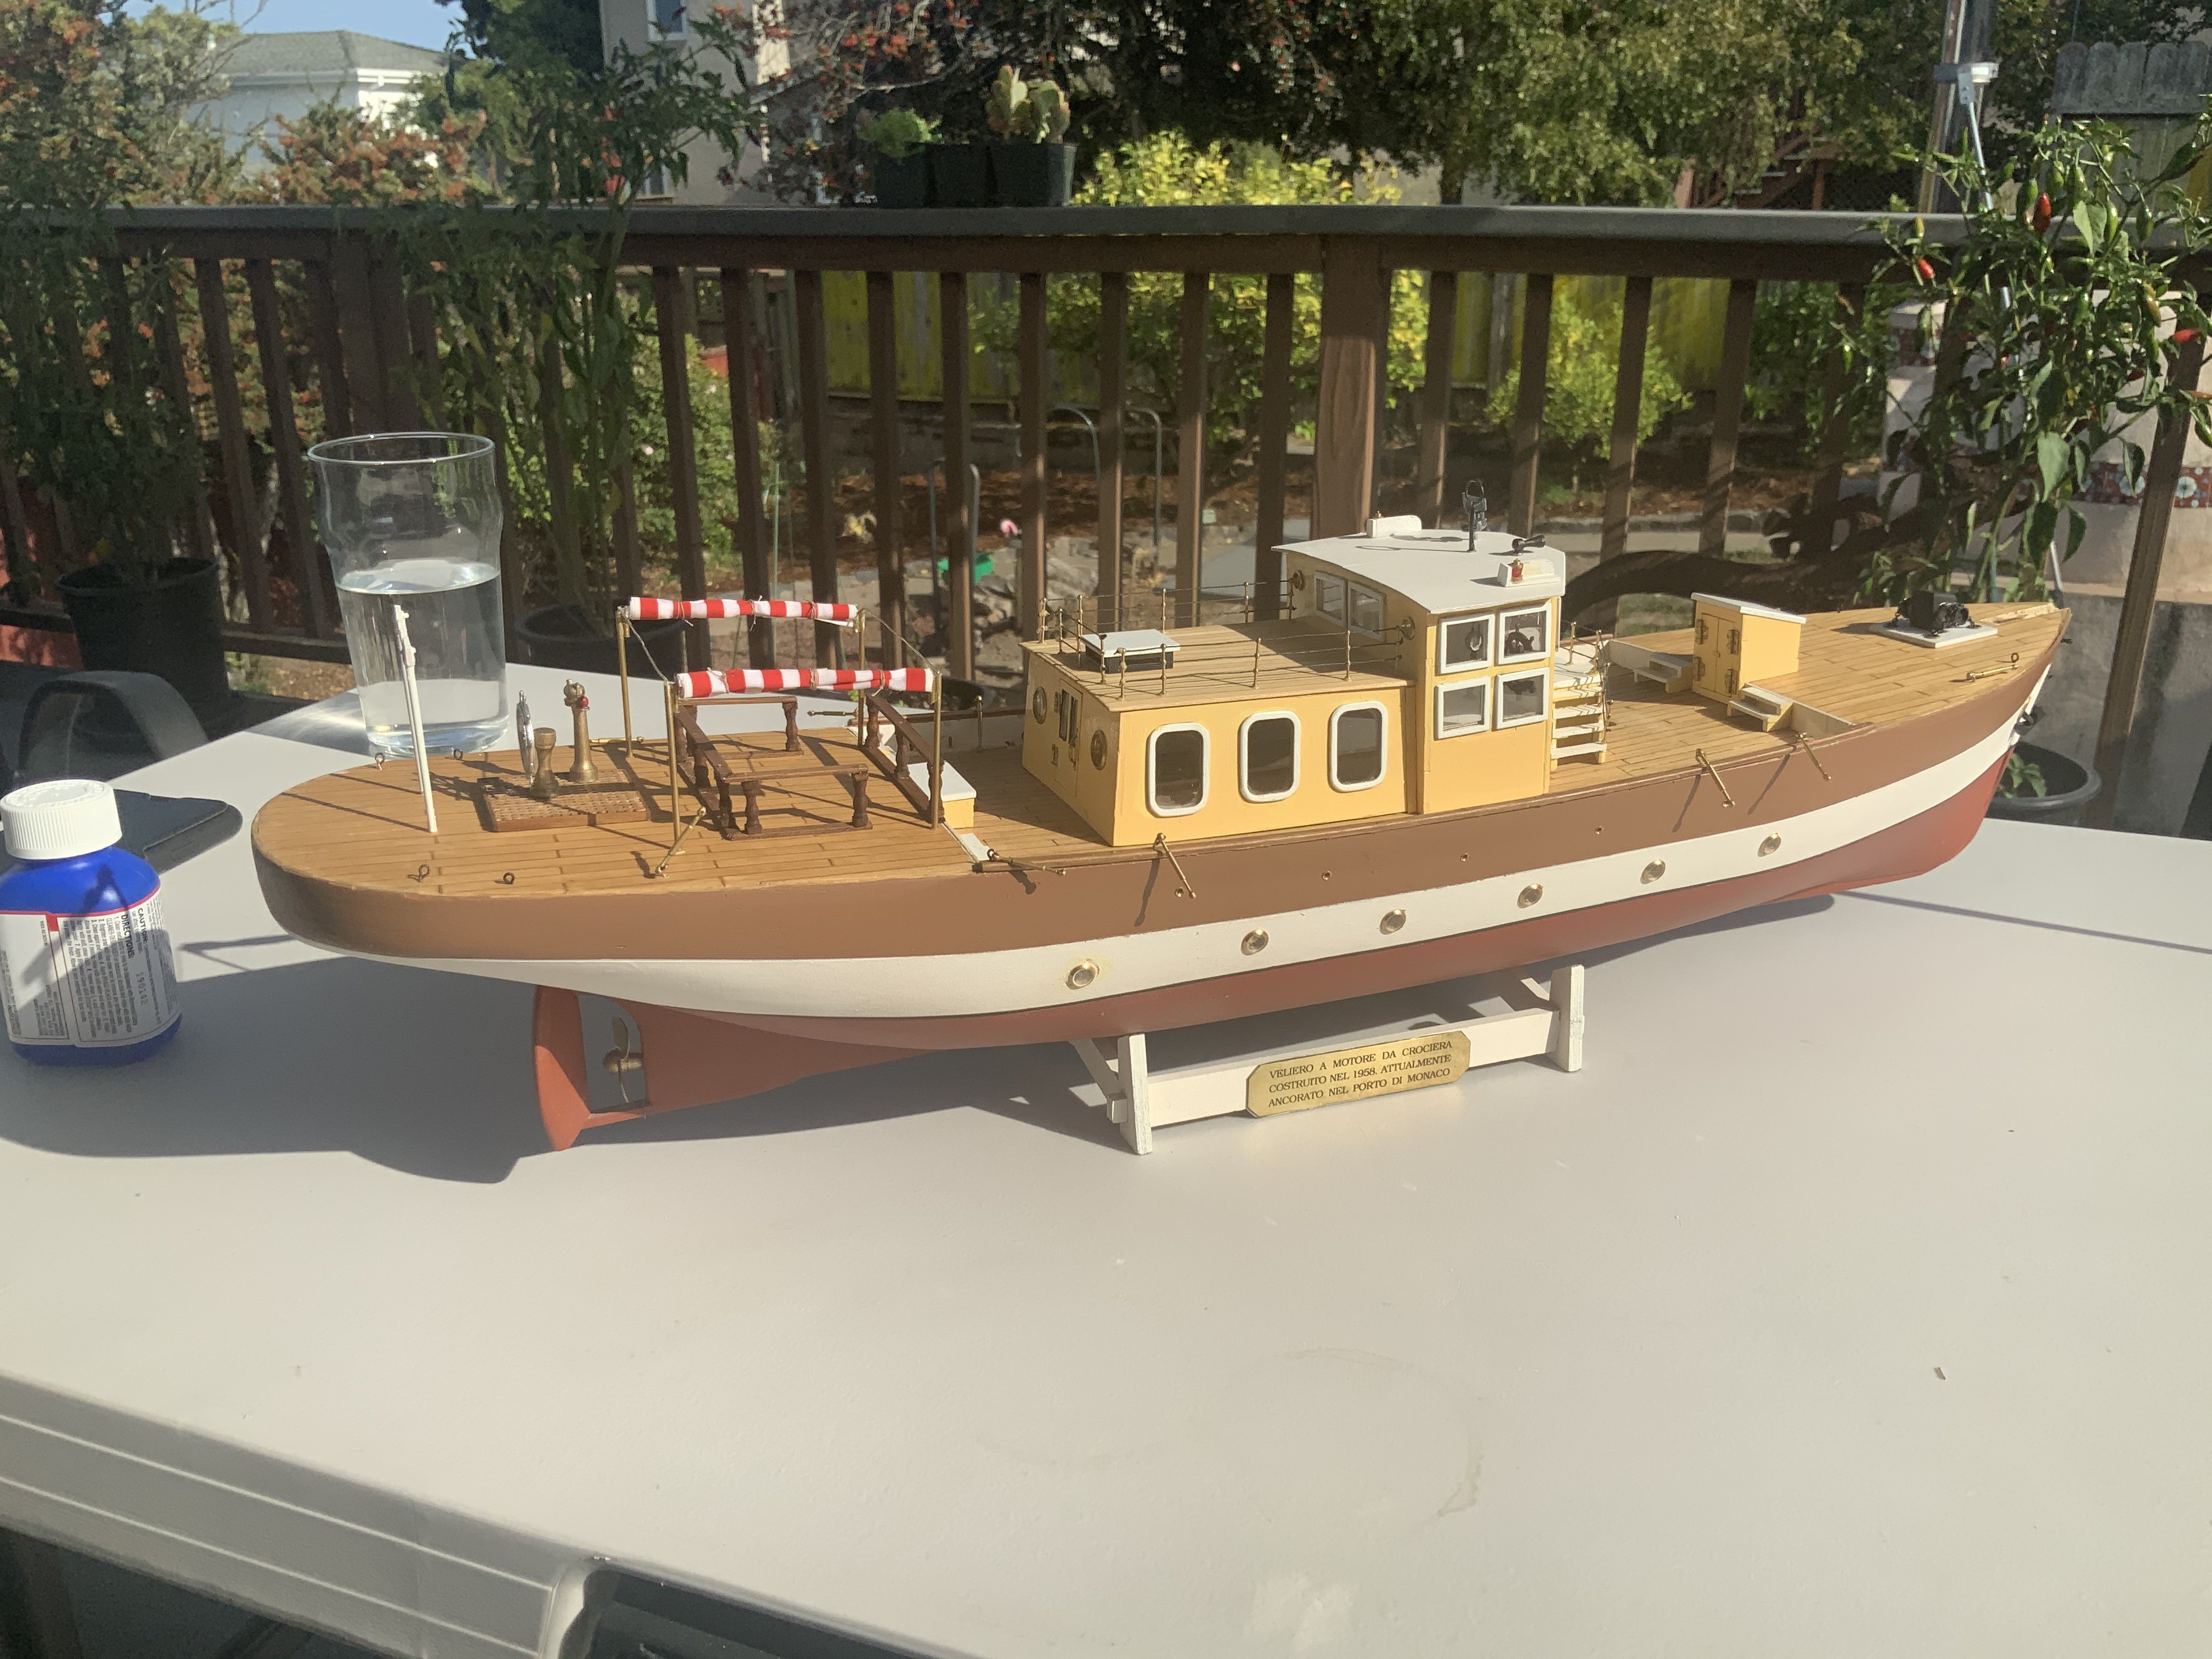
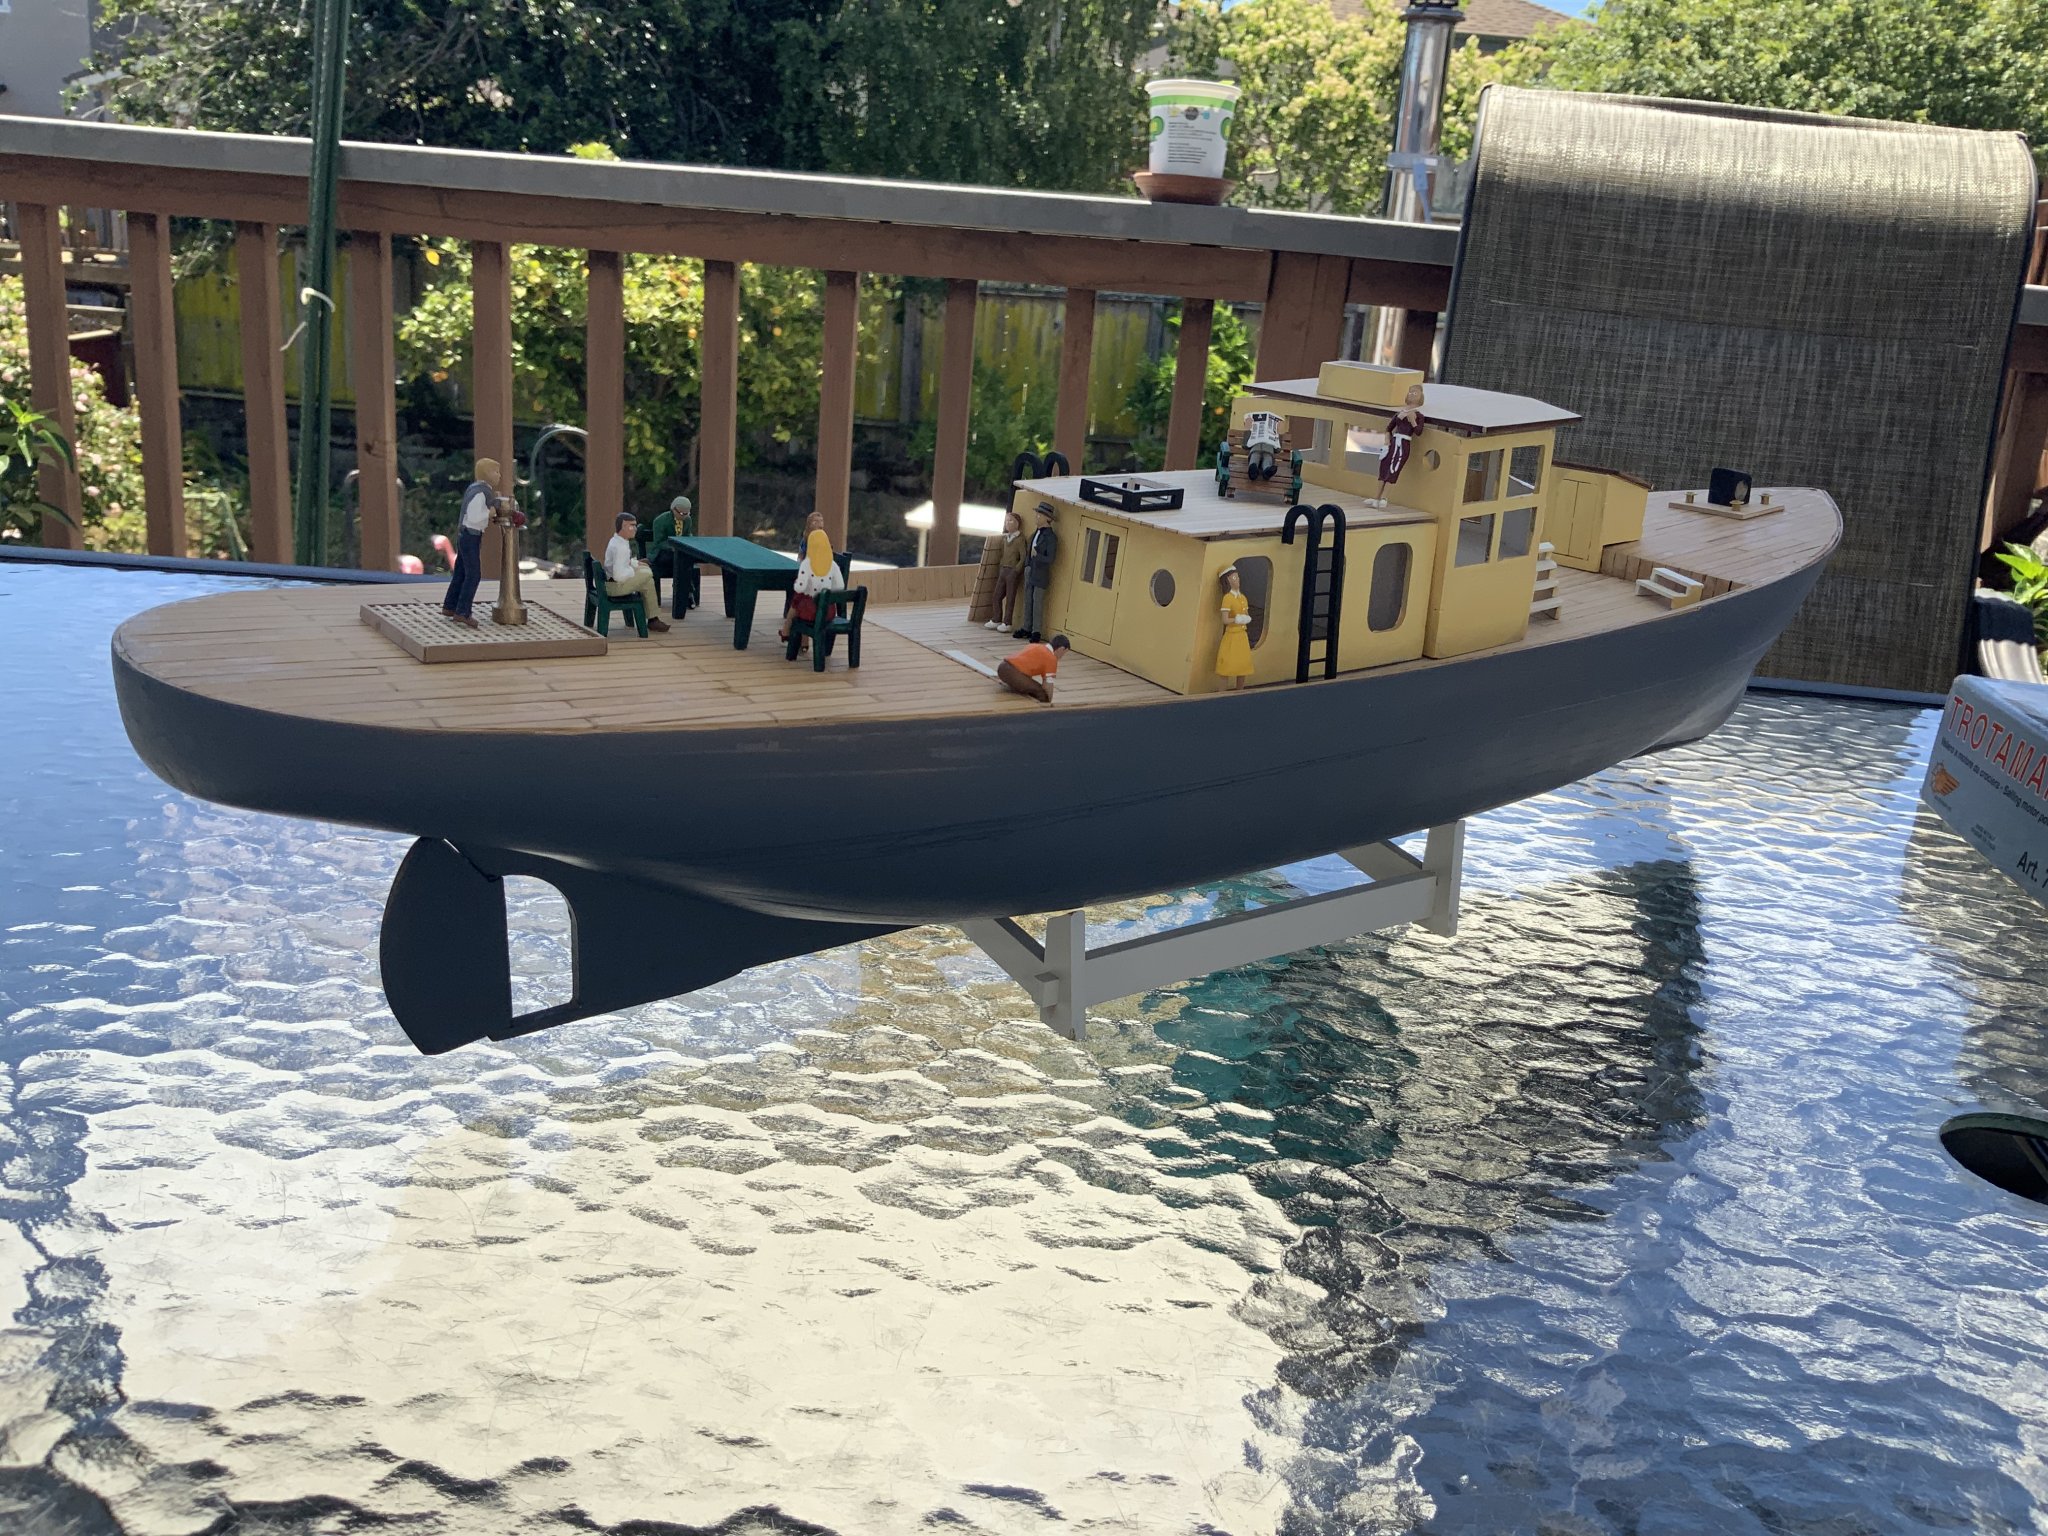
I was traveling in Italy and purchased this kit sometime around 1995. I started it sometime in the 90s, but got frustrated with the second layer of planking and put it away. What with our current environment, I pulled it out again and have been making some good progress. The photo is staged none of the deck furniture is fastened yet. You’ve got your work cut out for you. I will enjoy following along.


Pin Vice Help Needed
in Modeling tools and Workshop Equipment
Posted
It looks good in the photo showing it all assembled. I had a problem tightening the one I have until I reversed the central body tube to have the longer threads facing the business end.