HOLIDAY DONATION DRIVE - SUPPORT MSW - DO YOUR PART TO KEEP THIS GREAT FORUM GOING!
×


Bill97
-
Posts
2,704 -
Joined
-
Last visited
Content Type
Profiles
Forums
Gallery
Events
Everything posted by Bill97
-
Oh OK. So now let me look back at your comment to see if I understand.
-
Ok Kevin you might have me stumped with this one. Not sure I am following you. May be because I am not yet familiar with all the nautical terms. Not sure what the stern plate is and where the hull butts up to it.
-
I saw in Daniel’s blog that he was able to open them so I gave it a try. Port side (first try) looks OK. Will fine tune it a bit and do the starboard side a little better. Included the Evergreen frame on inside.

-
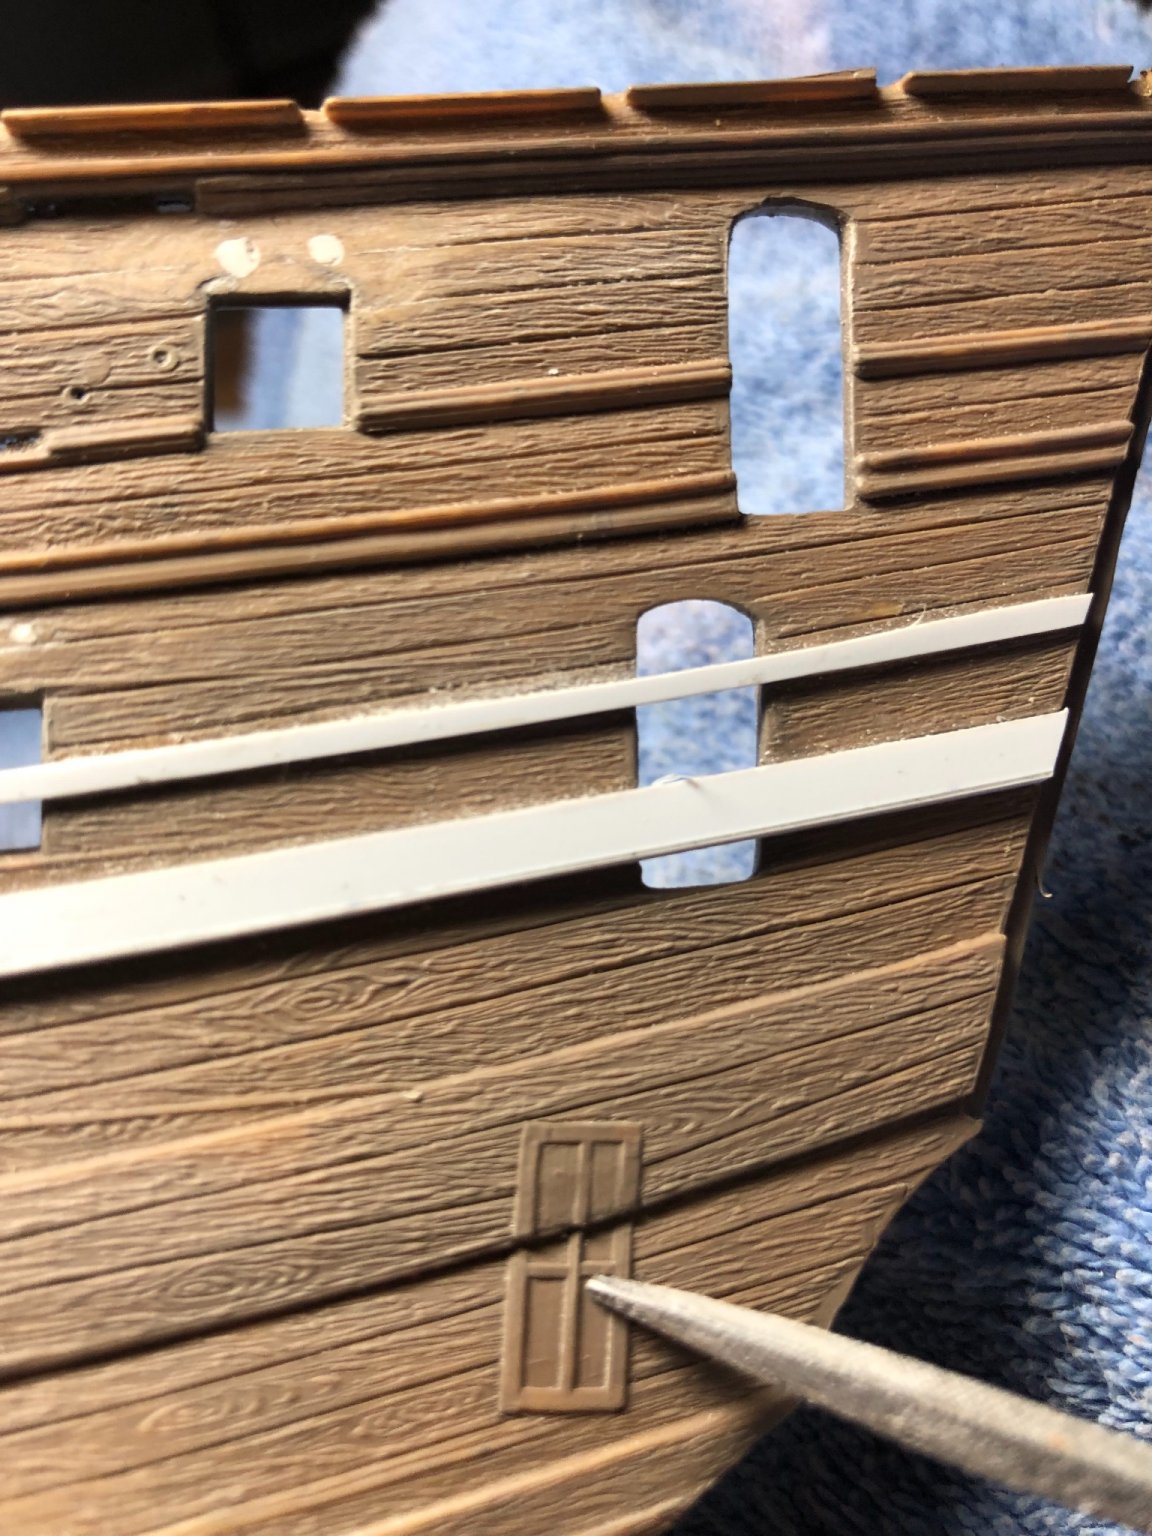
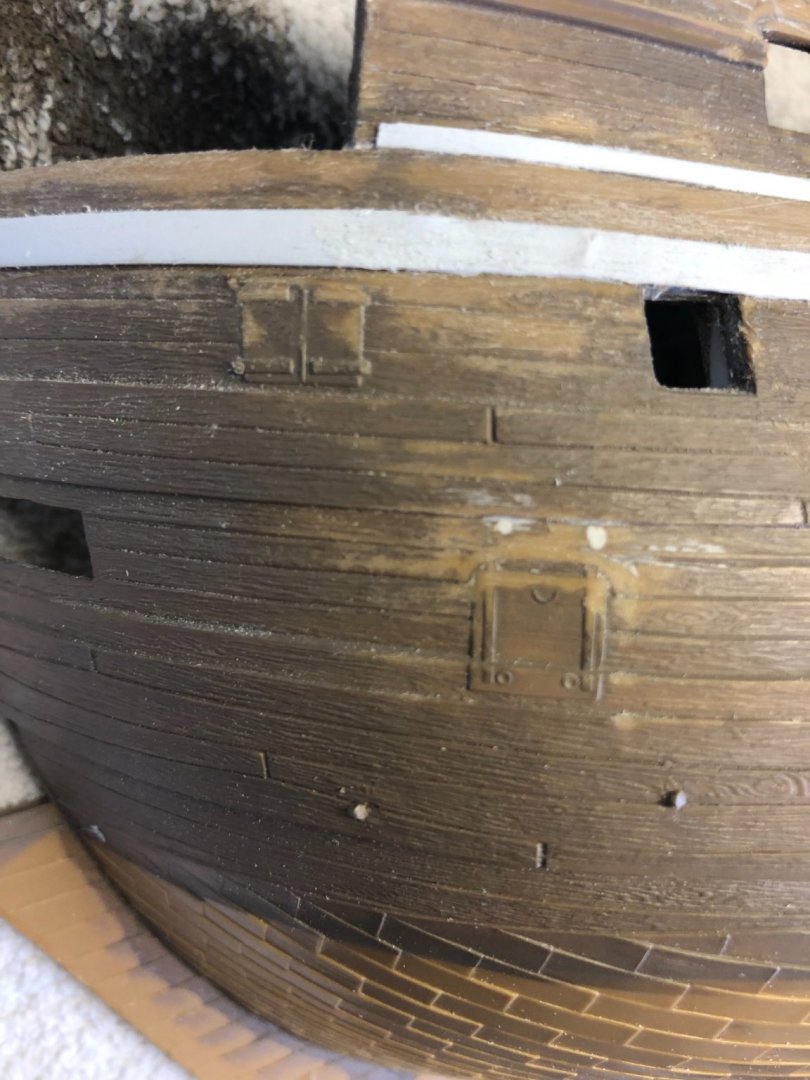
Have any of you guys opened either, or both, of the hatches on your he bow of the ship? I looked back through a couple build logs and did not see if you did. I may have just missed it. If I do I will obviously need to frame it with Evergreen and then make Evergreen hatch covers.
-
Great Kevin, thanks. I am avoiding those bee lines. I also noticed I covered with the evergreen several dots that looked as if they may be glue points for future parts. I guess if I find they were I will just drill more through the Evergreen. BTW while watching the Olympic opening ceremony last night I paged through the rigging section of Longridge’s book. Quite a few great diagrams showing the rigging. Diagrams show quite a bit of extensive rigging at each mast. Did you try to replicate every rope (thread) pictured? Wow! That would be a monstrous undertaking!
-
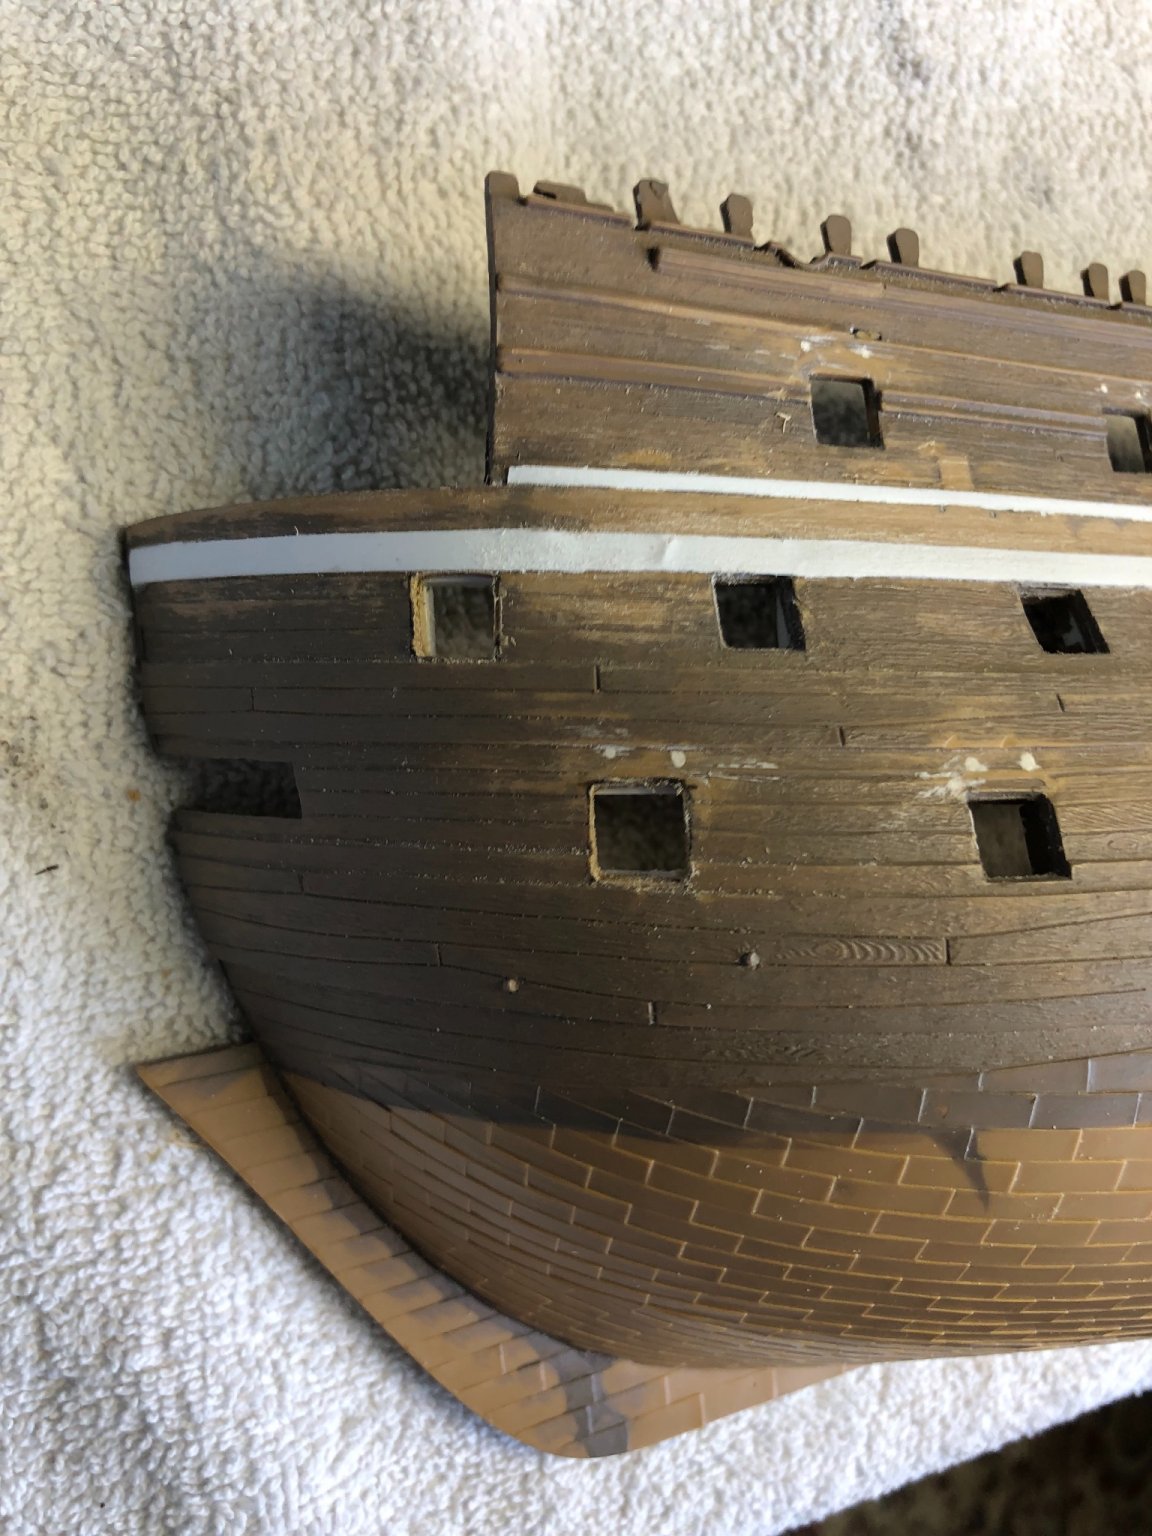
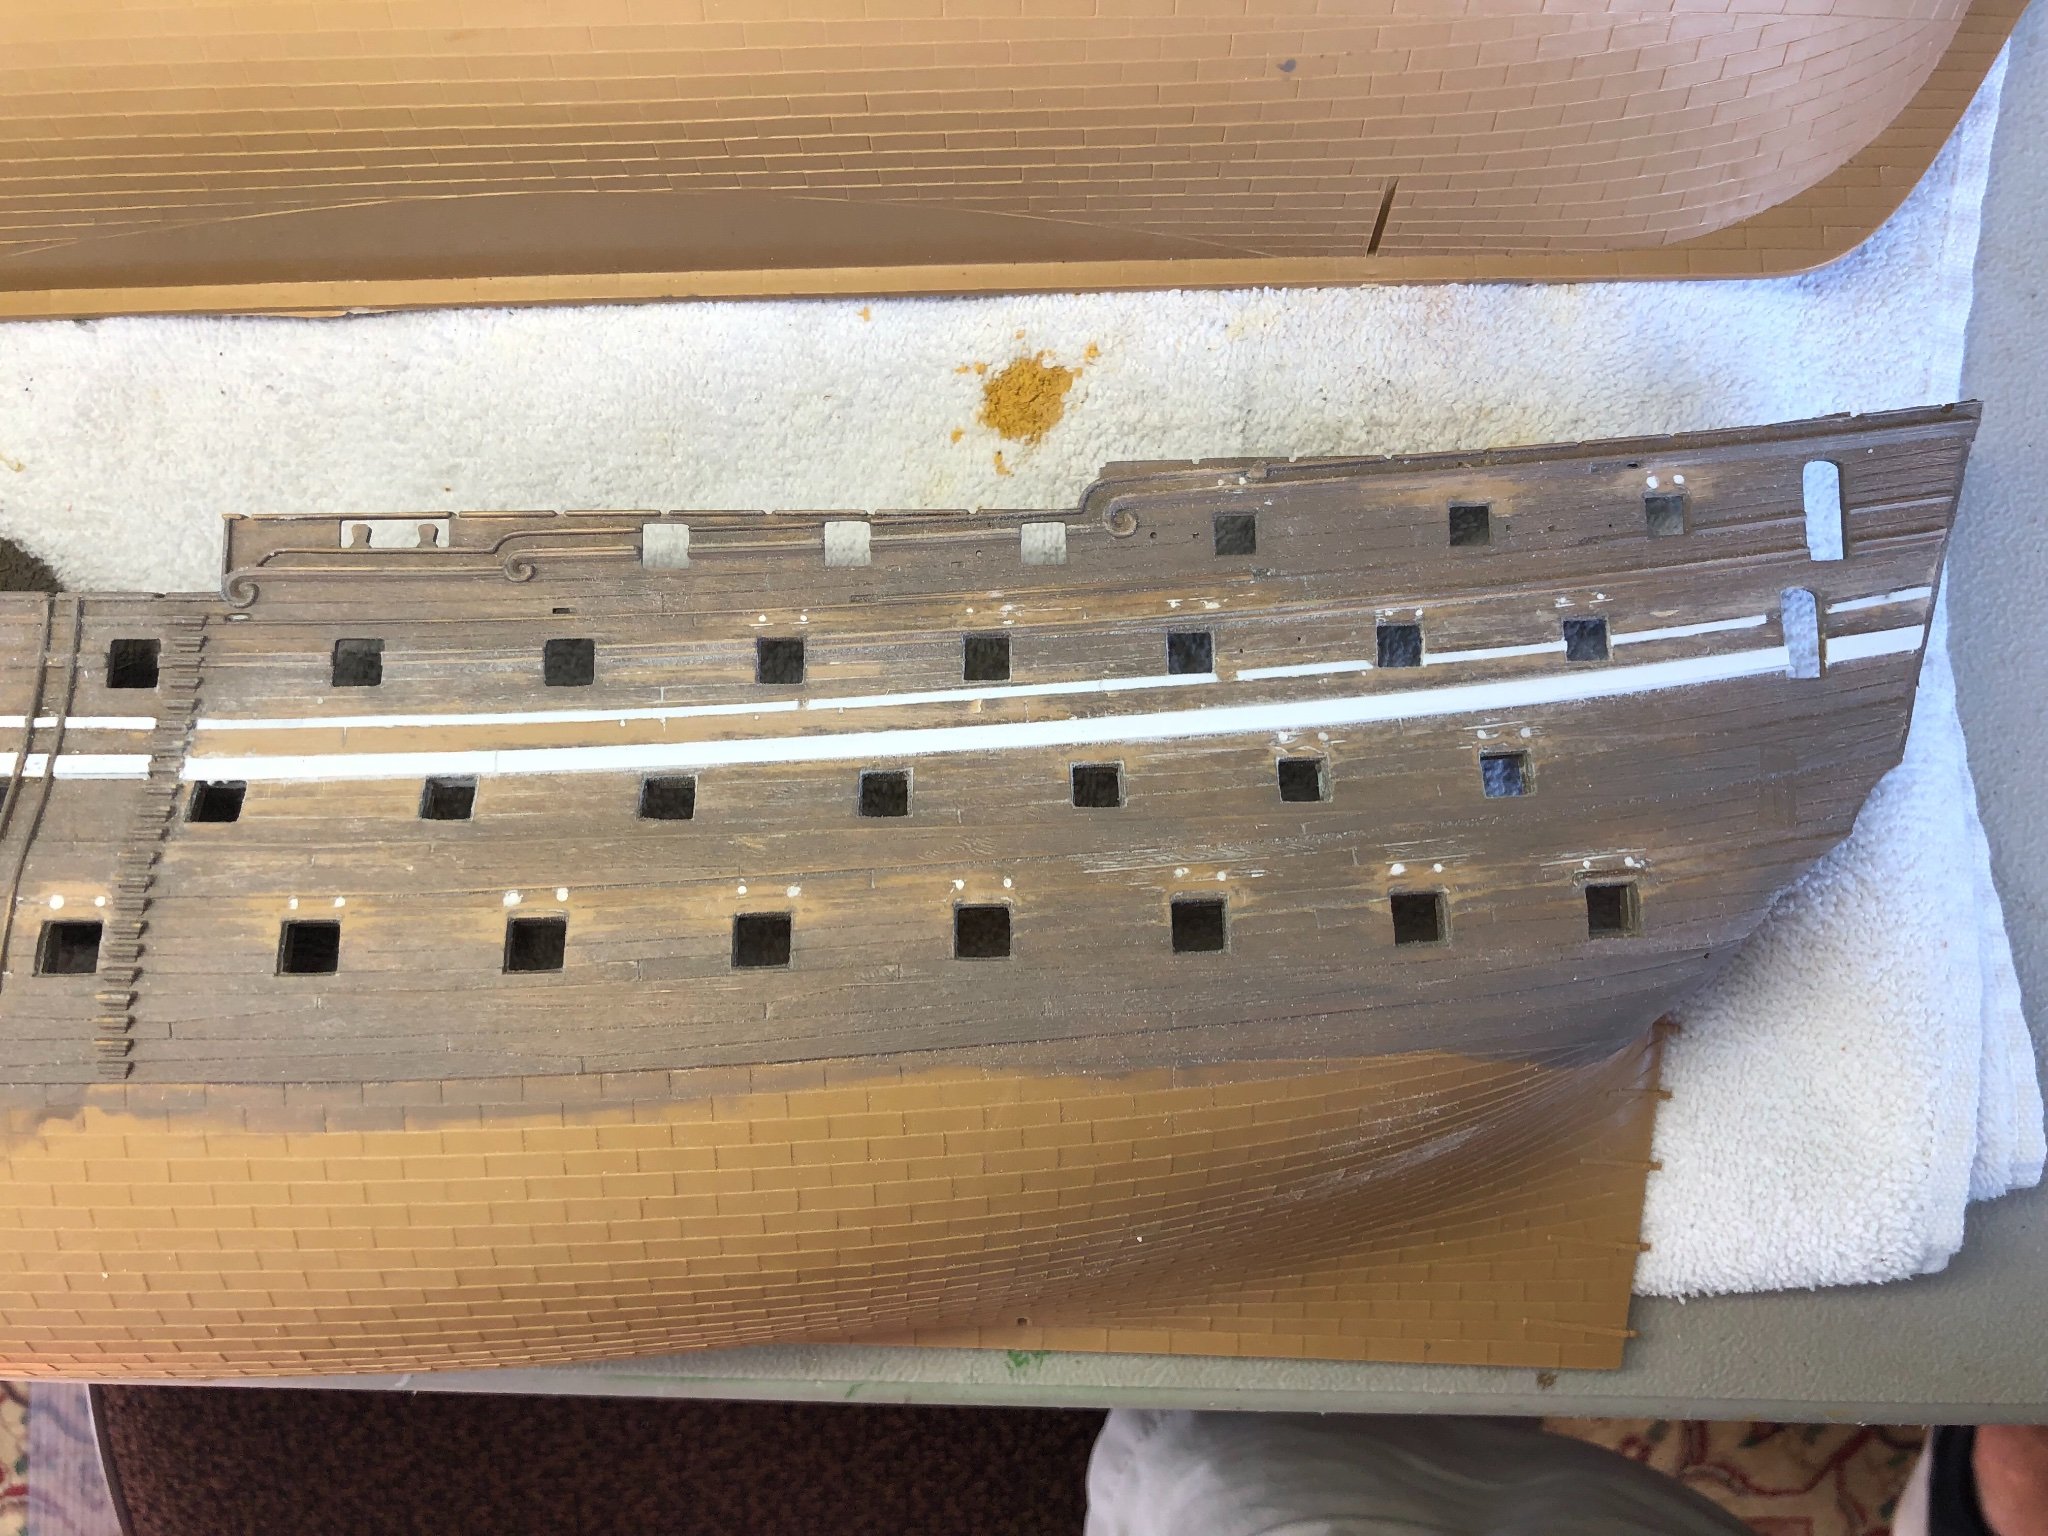
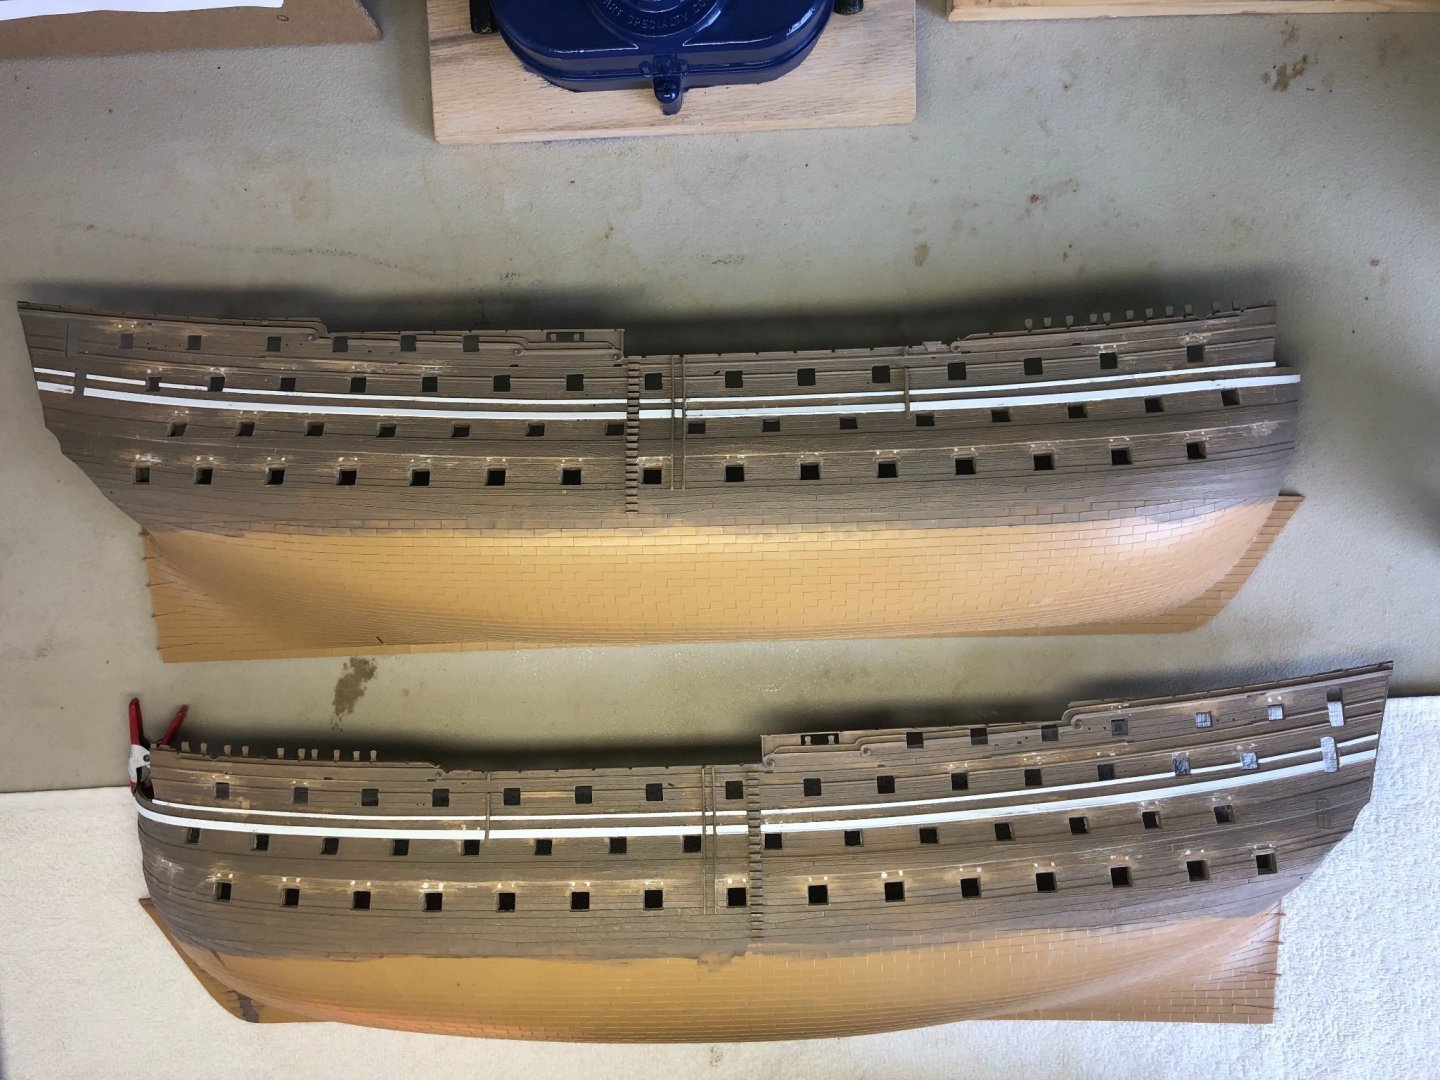
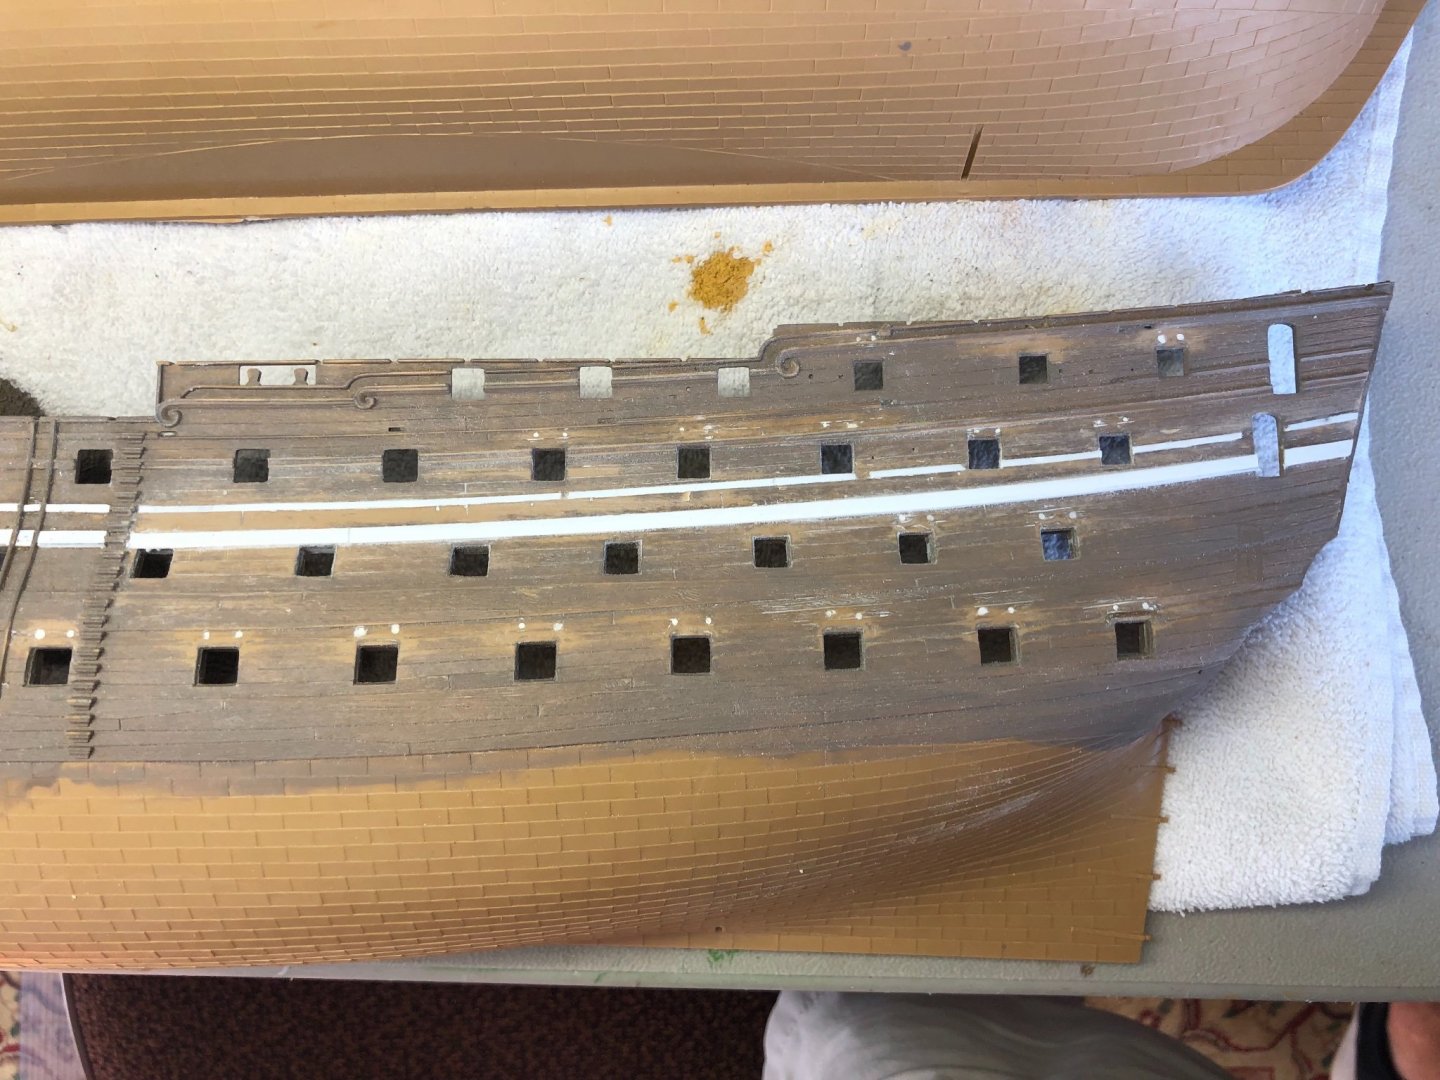
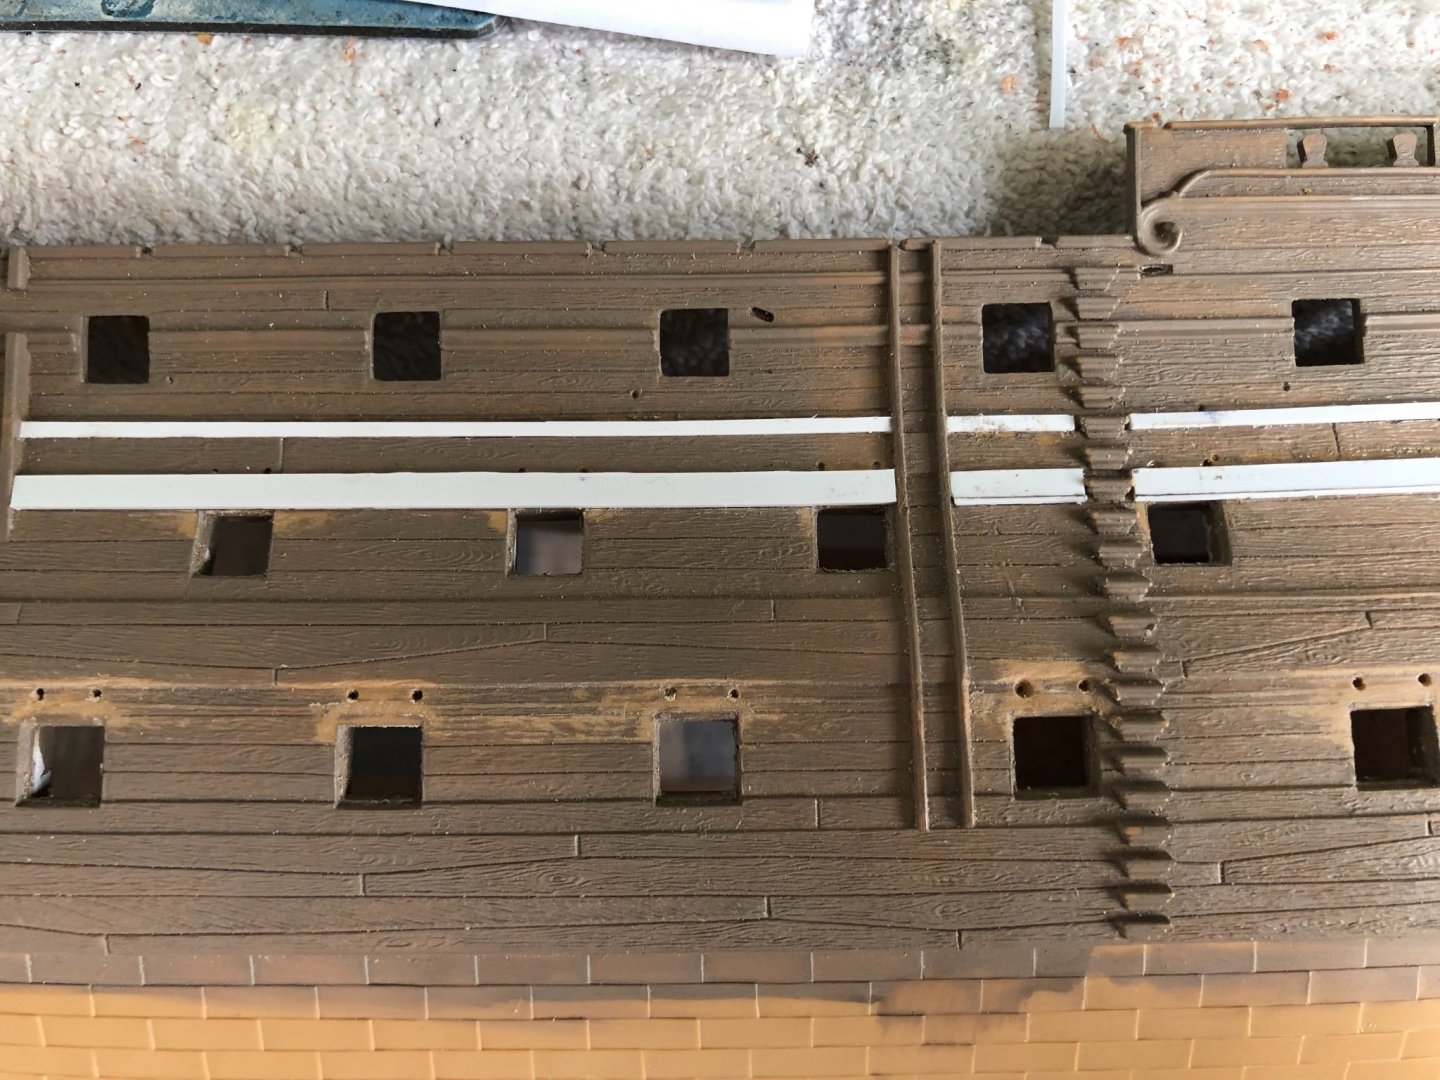
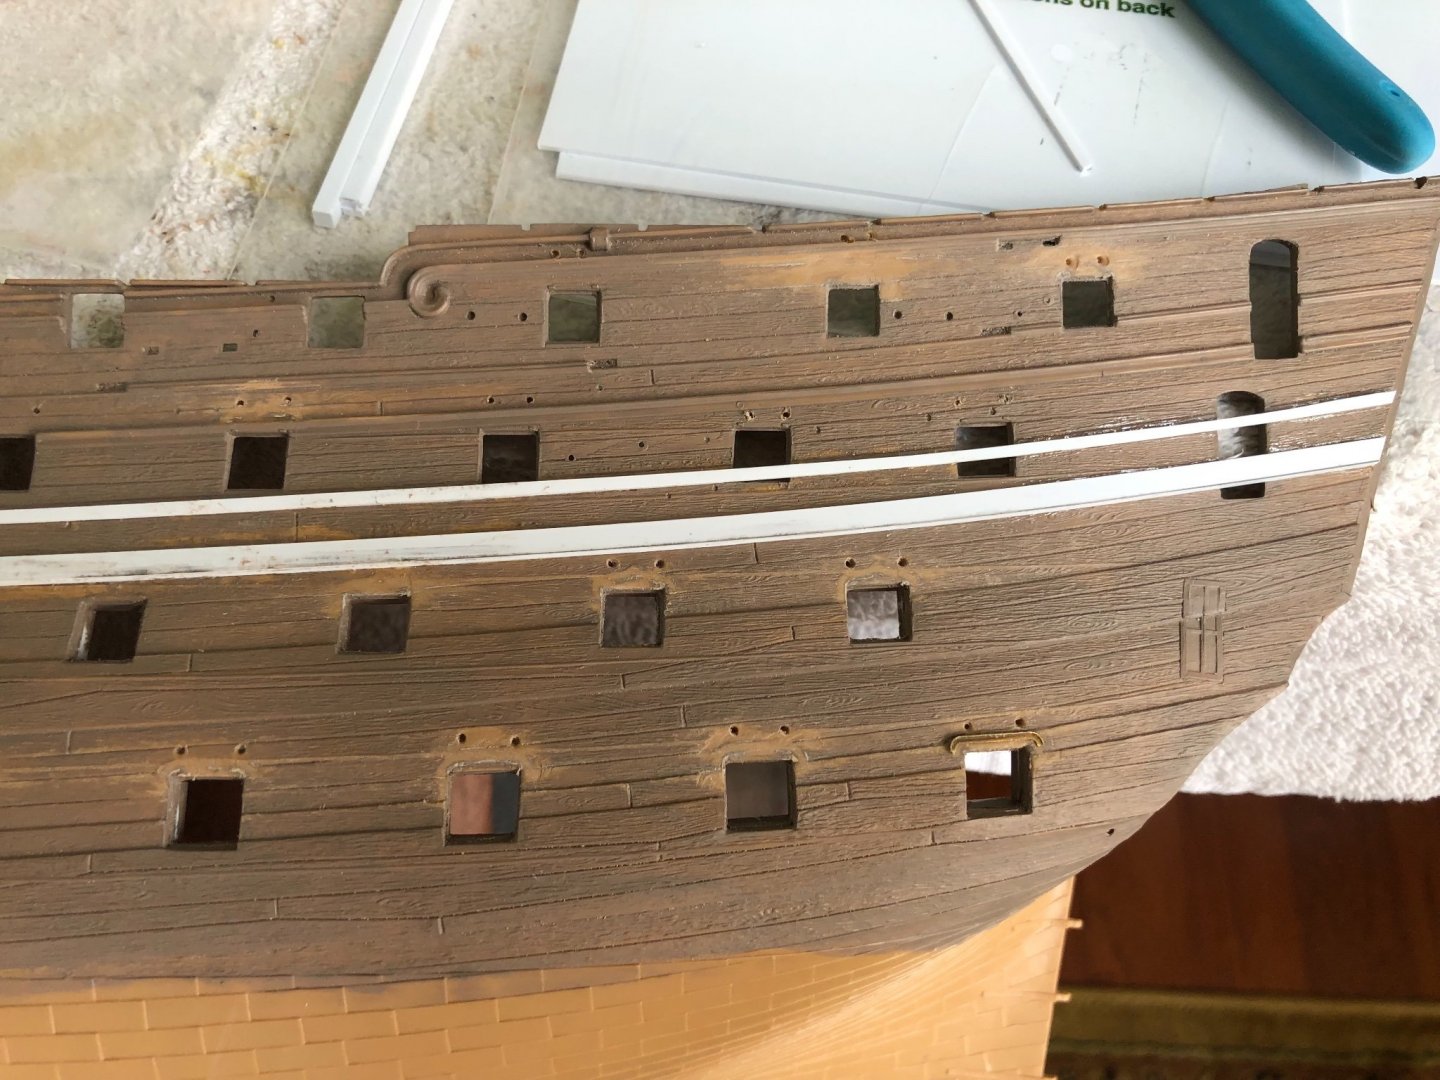
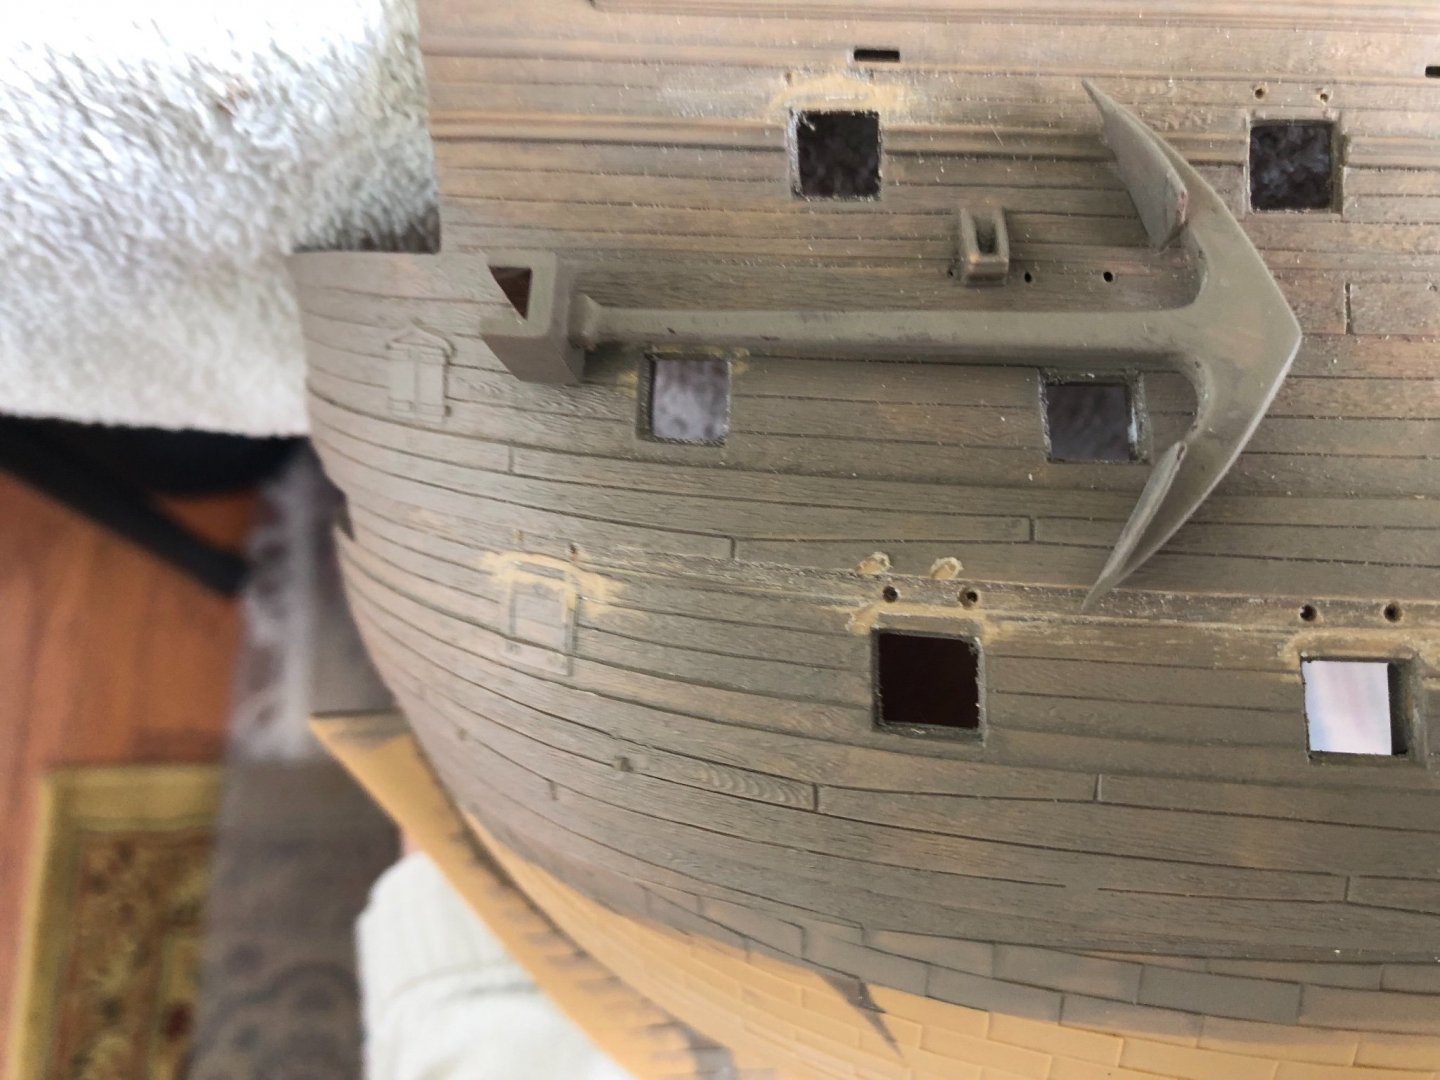
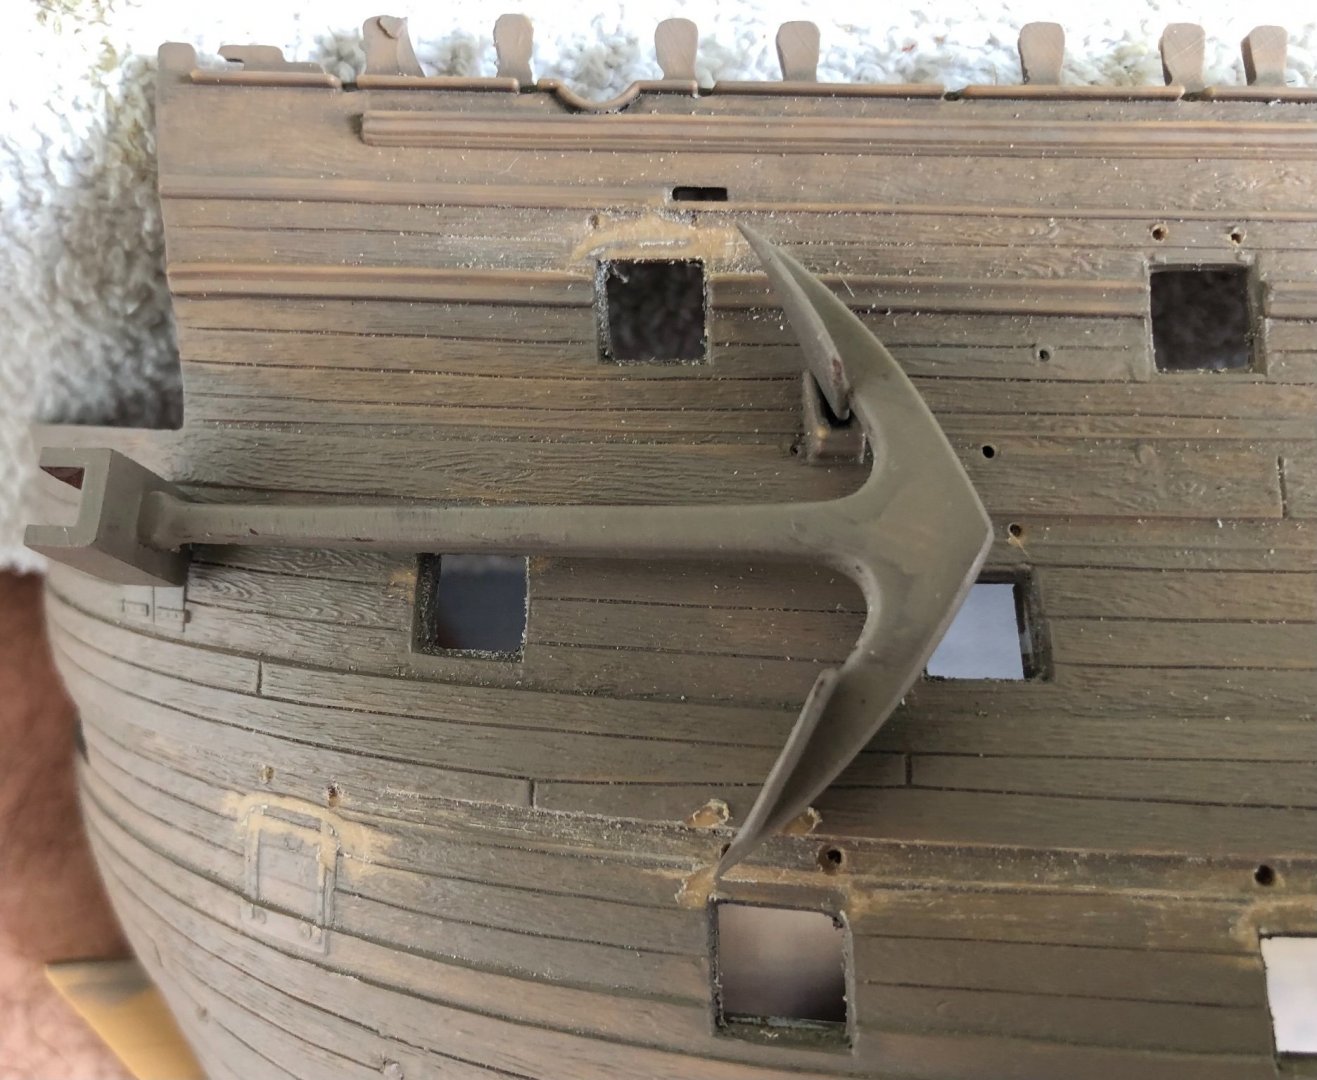
All right gang I have fixed all the messy holes I poorly drilled for the cannon hatch support wires. I also now have all the rigols shaved off and hull sanded smooth where they were. Ready for Daniel’s etched rigols. I also have all the evergreen strips in place to widen the wales. The evergreen I used was unfortunately a bit thicker than I wanted (1mm). Could not find thinner and was to impatient to wait for online delivery. But as a result I now have to hand sand it down to be flush with the narrow wale that is already on the hull. As I do this sanding, and all the other required sanding, this is the first time I am concerned I may do more damage than good! I hope not. As I sanded, with fine grit paper, the rigol areas and now the evergreen widen wales I am realizing I can not avoid sanding off the simulated wood grain at those spots and areas. I don’t want to sand down the entire hull above the simulated brass plates. I am hoping once I paint the hull and the future rigging of he channels, etc will cover areas where the grain is gone. Have you guys experienced the same issue?
-
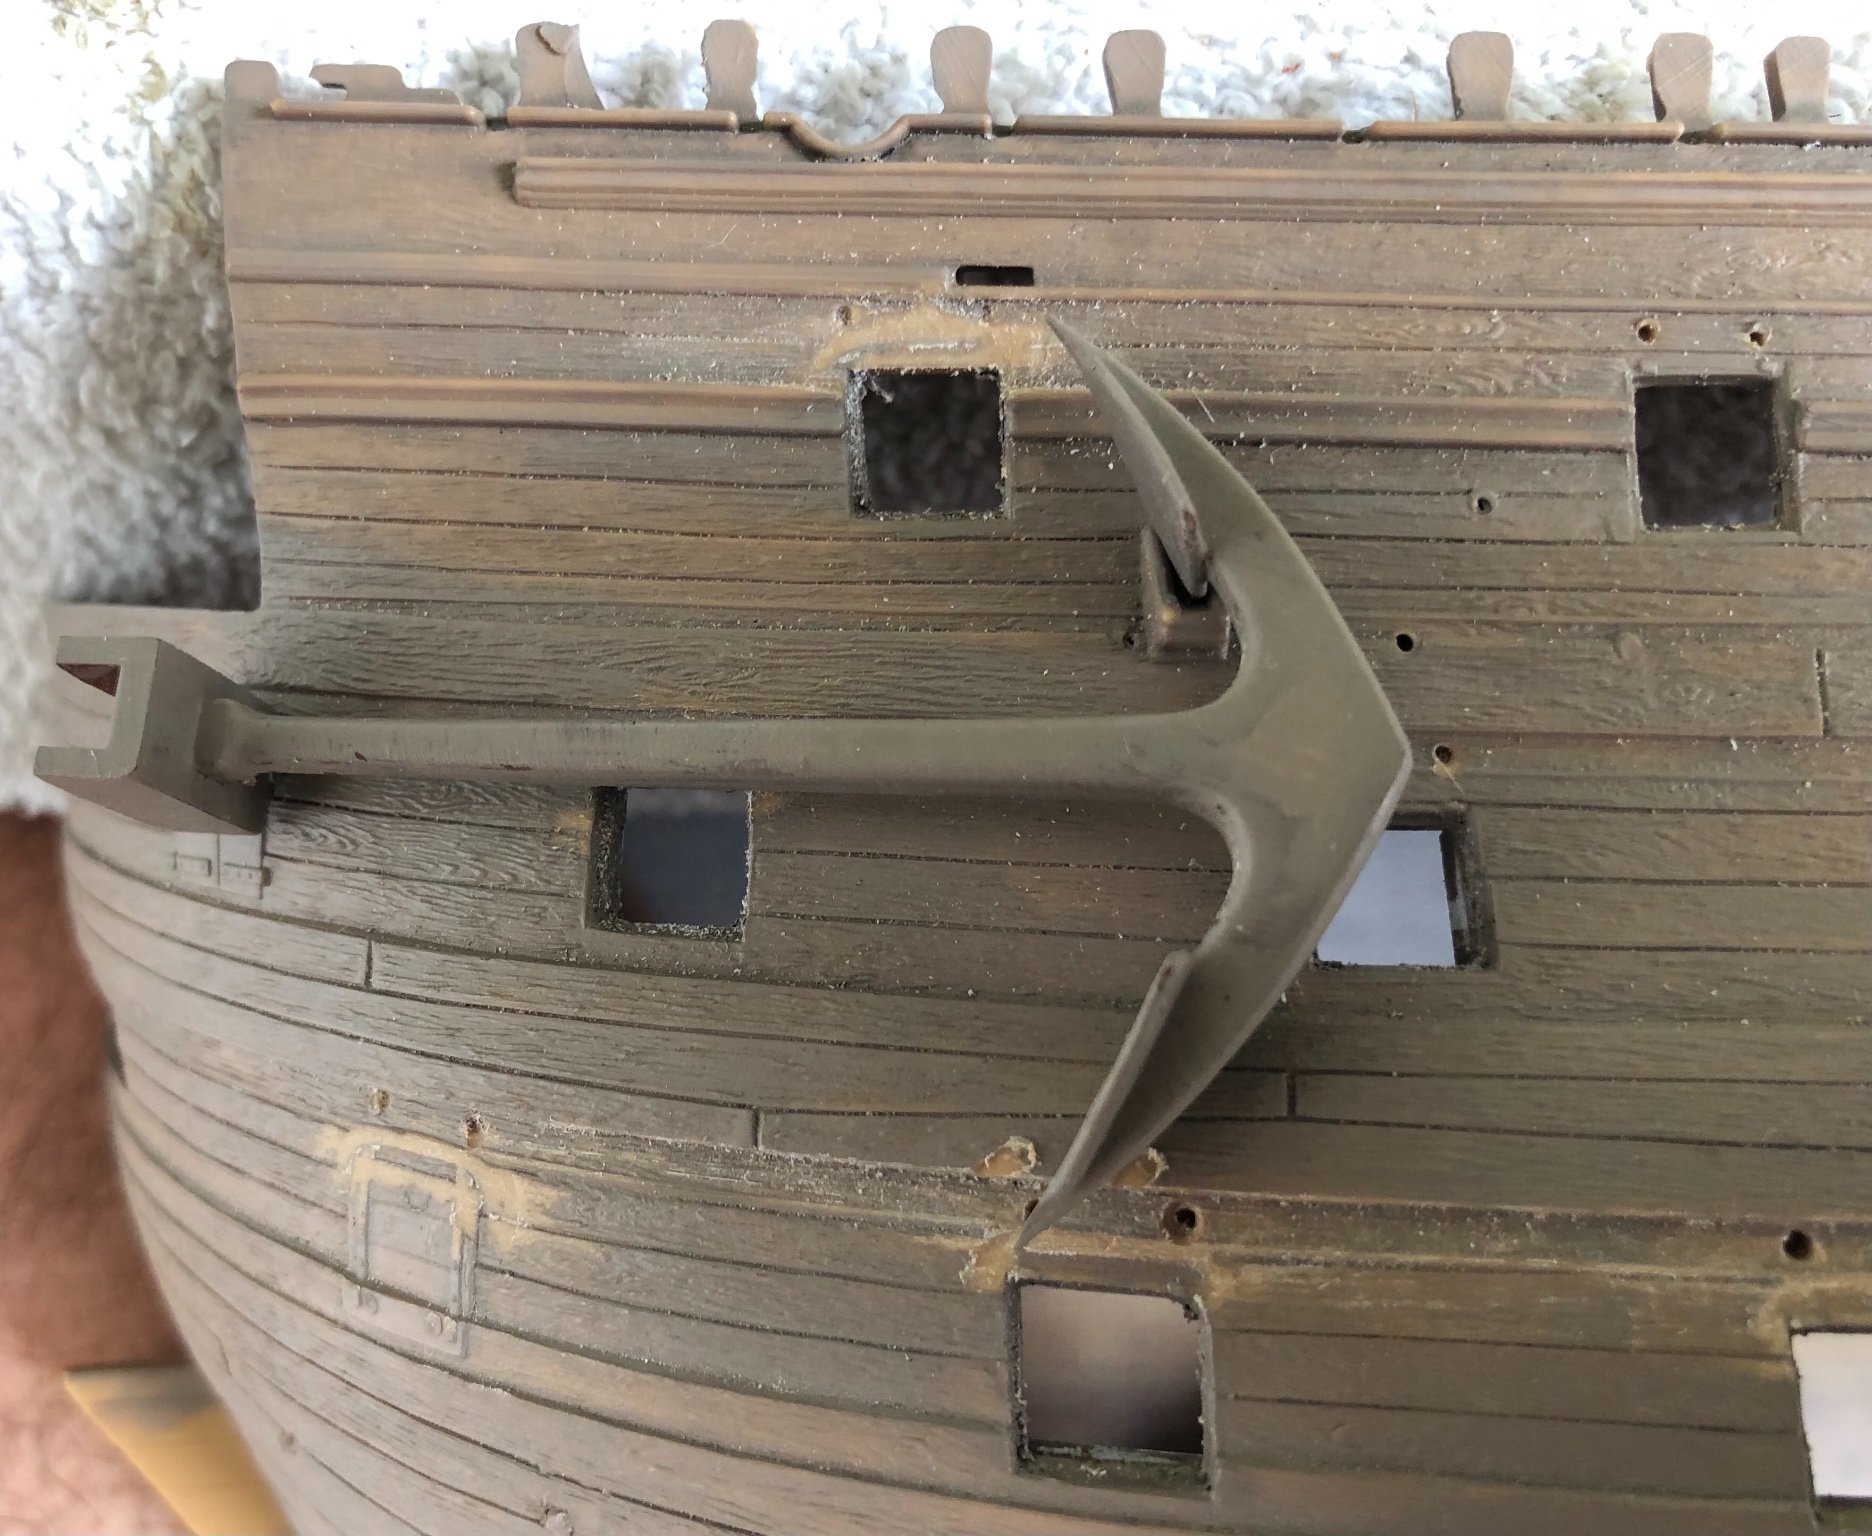
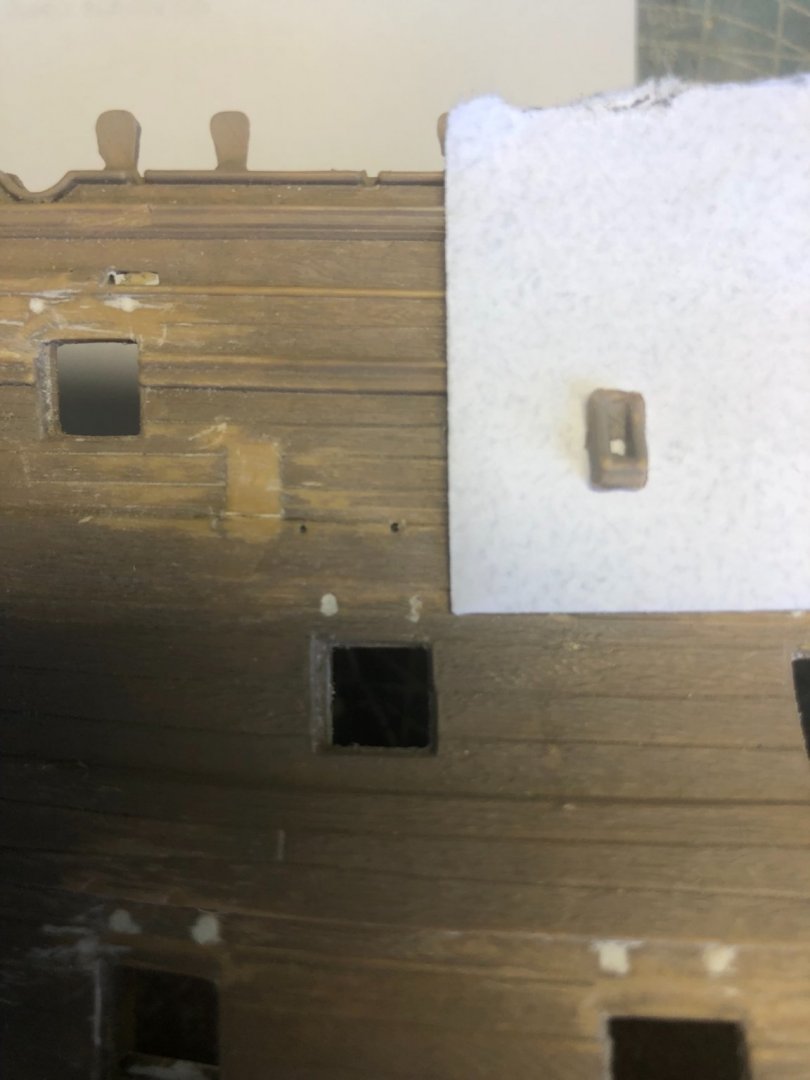
Was able to cleanly cut the anchor shoes off. Will not need to make new ones. Going to wait to decide where to reposition it later when I know exactly where to position it.
-
Thanks Kevin. Man! Looking at some of the build blogs you guys post I can see you have some serious build areas an tools! Great work.
-
Thanks Daniel and Kevin. Since I am in absolutely no hurry to finish this beauty I will probably do the doors as well. With that in mind I am curious about the added side entrance. The model obviously does not come that way. I see some builders bash it to add the entrance, some leave it as is. Your thoughts? And if you did do it, did you make the decorative architectural piece that goes around it? And of course I know I would need to change the steps. Daniel I had a nice surprise yesterday. I was looking over the downloads for the plates I got. I forgot that included in plate 4 is the very tiny additions for the cannons, which I thought I had finished and stored away until needed. Looks like I will be getting them back out and putting my magnifying lamp to work 😀.
-
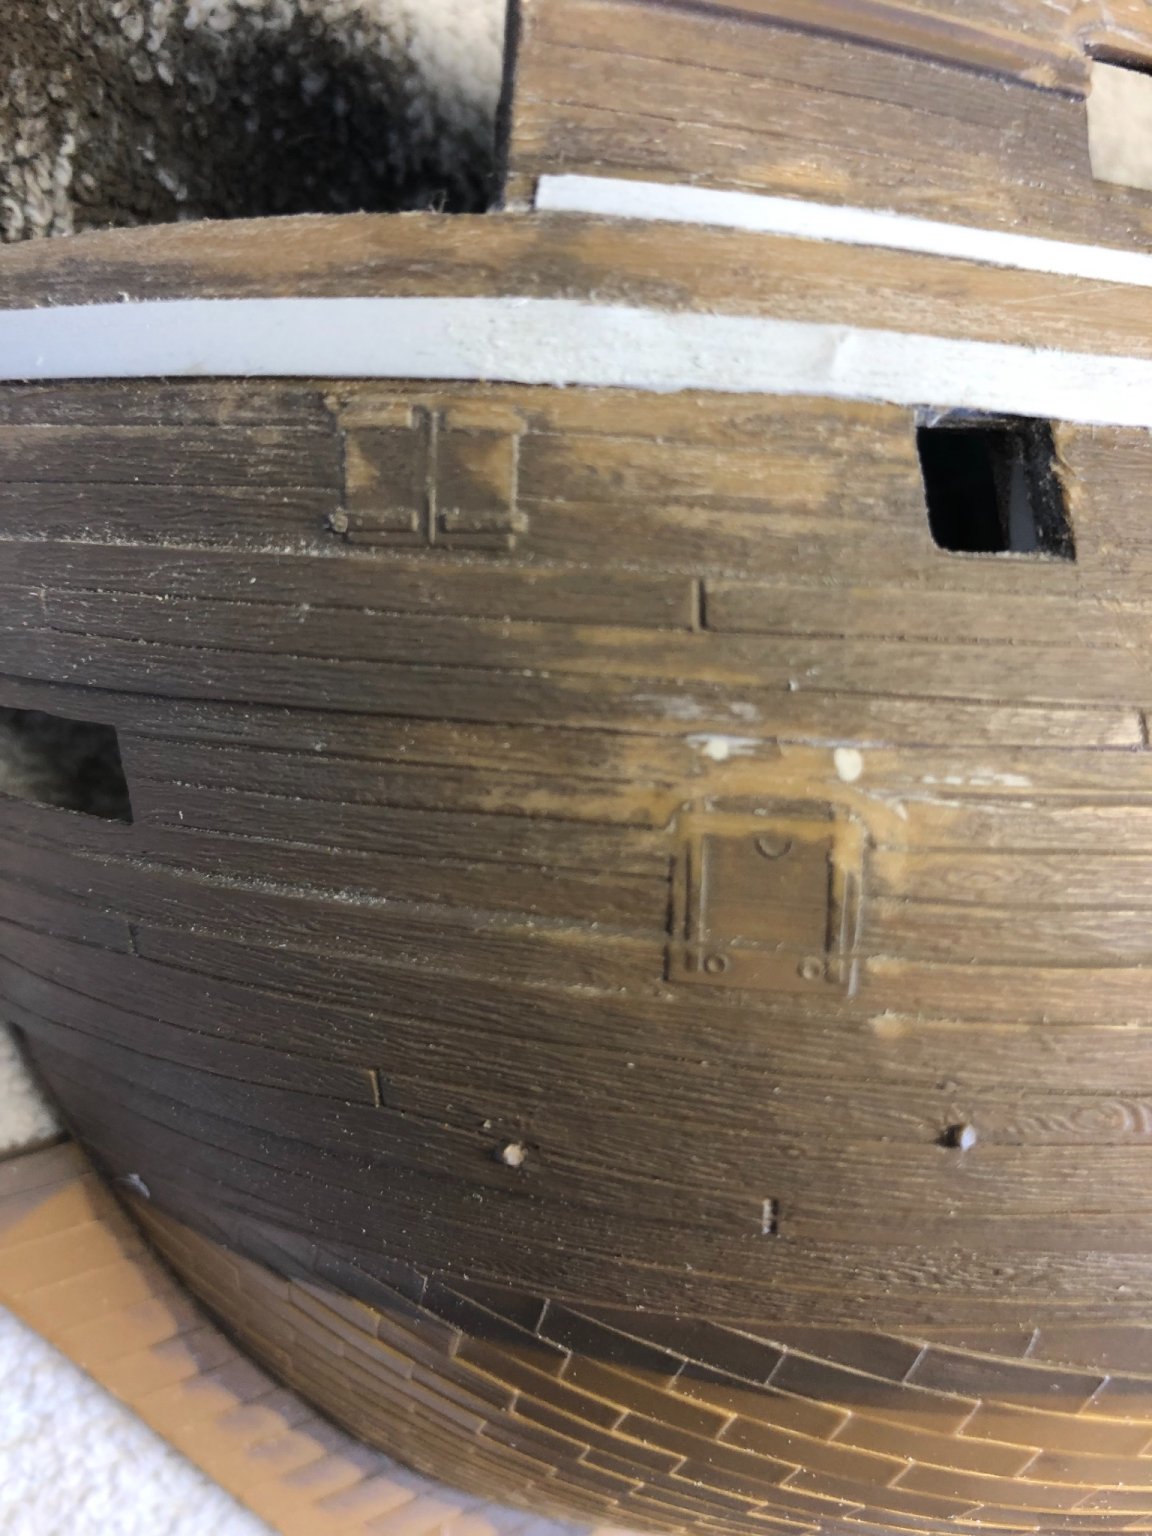
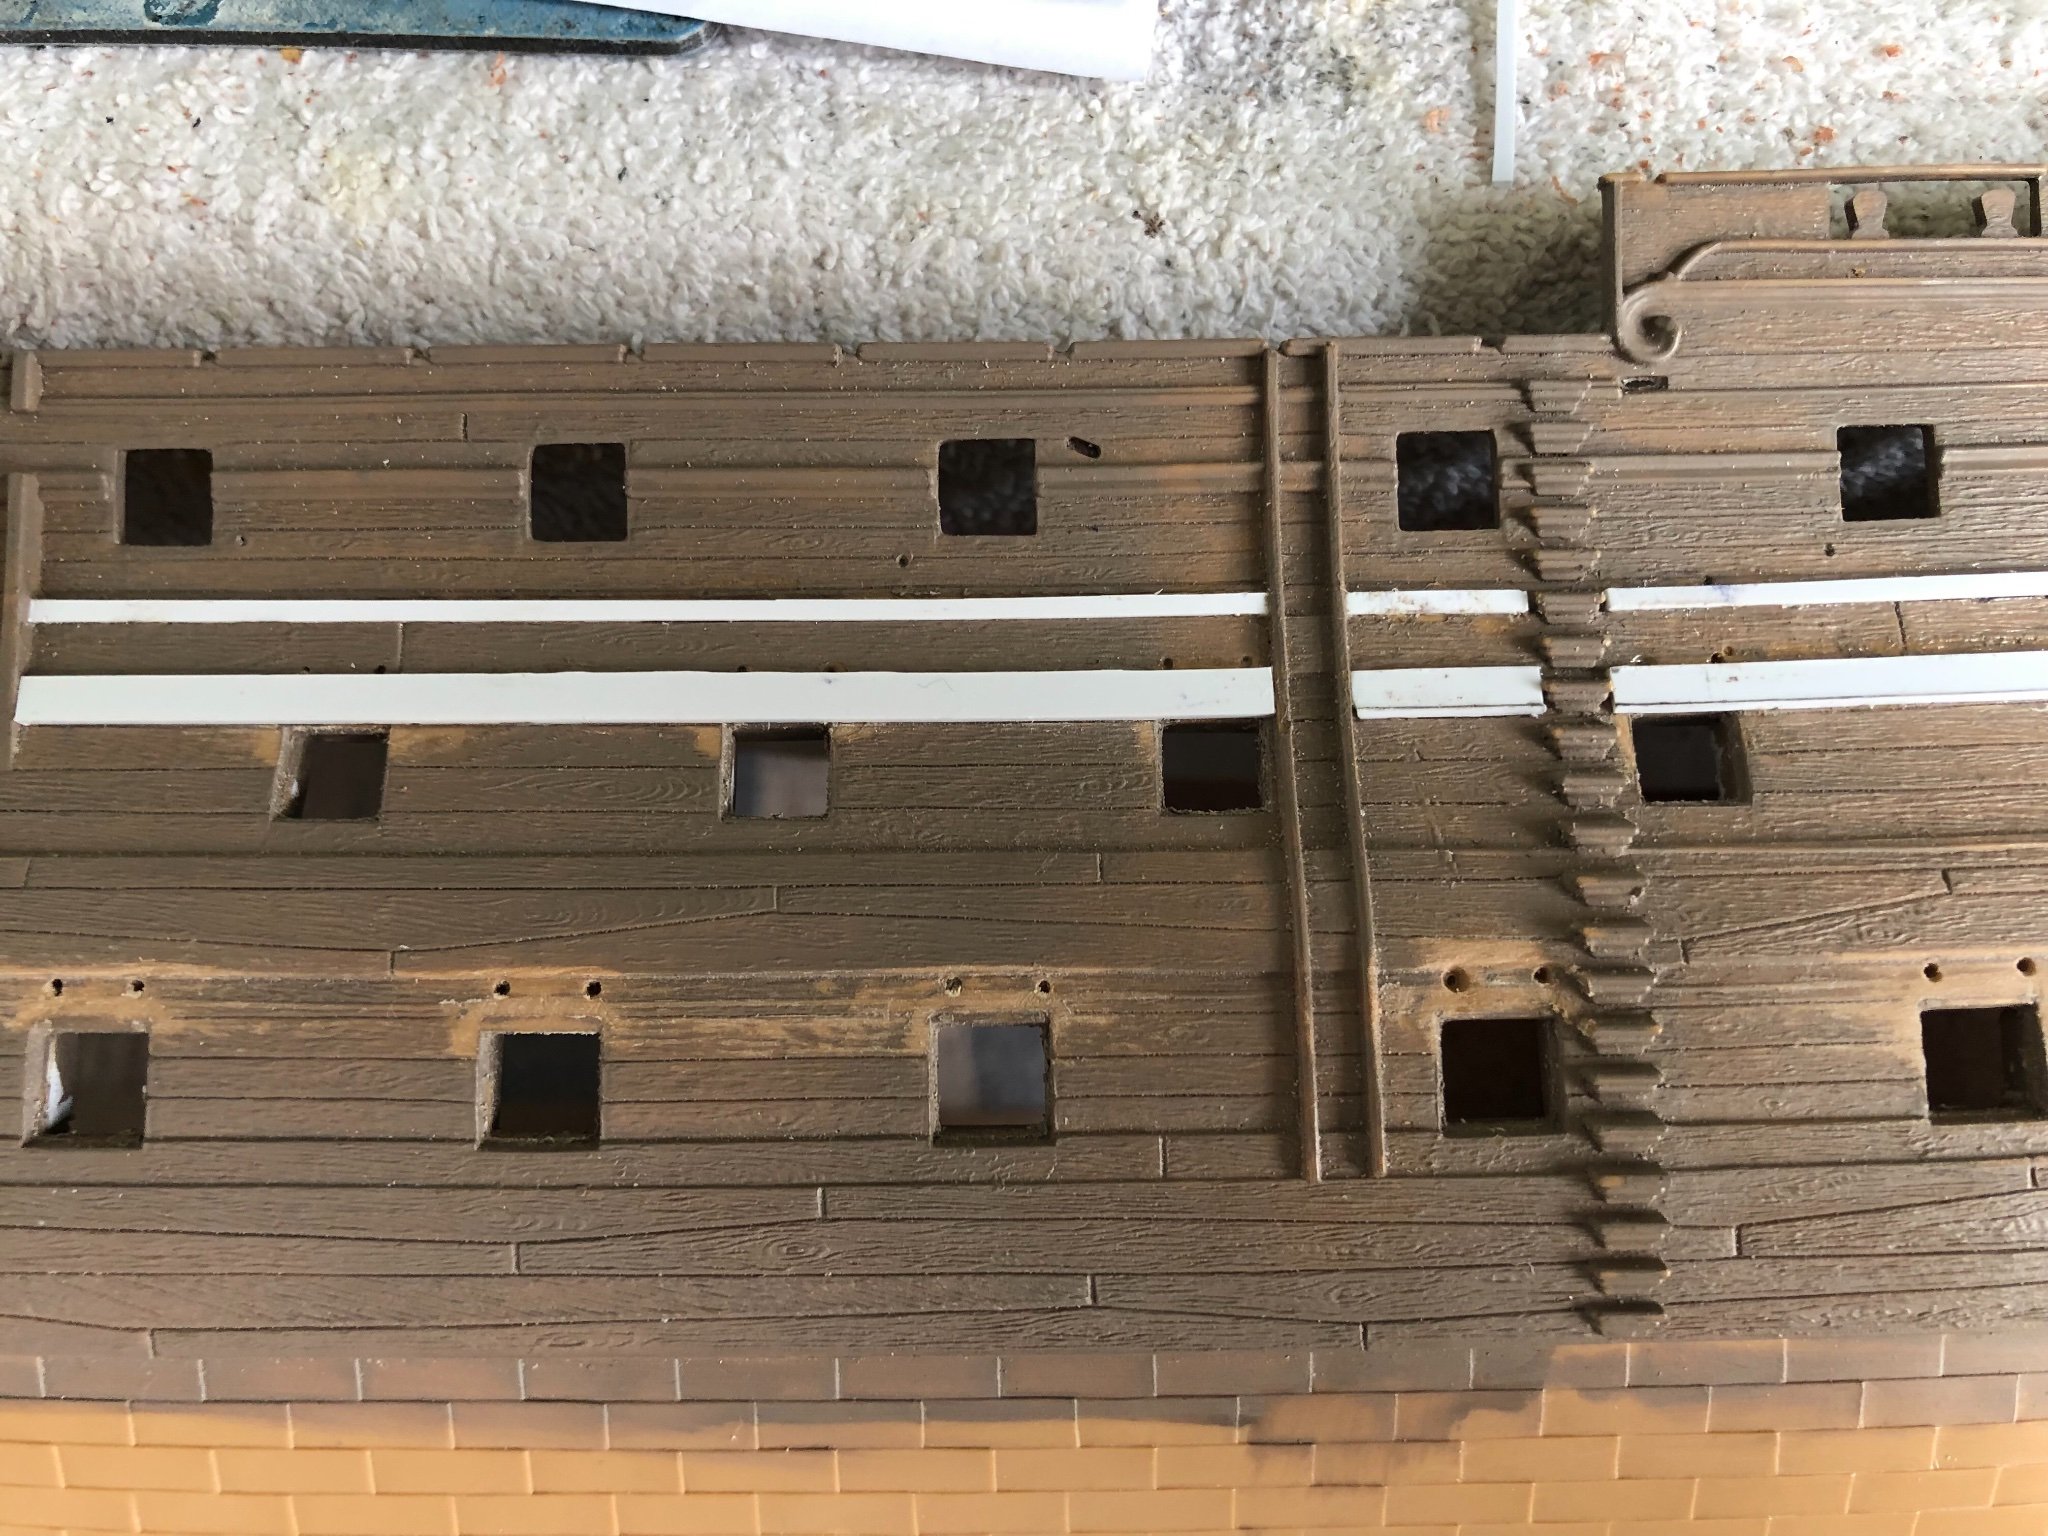
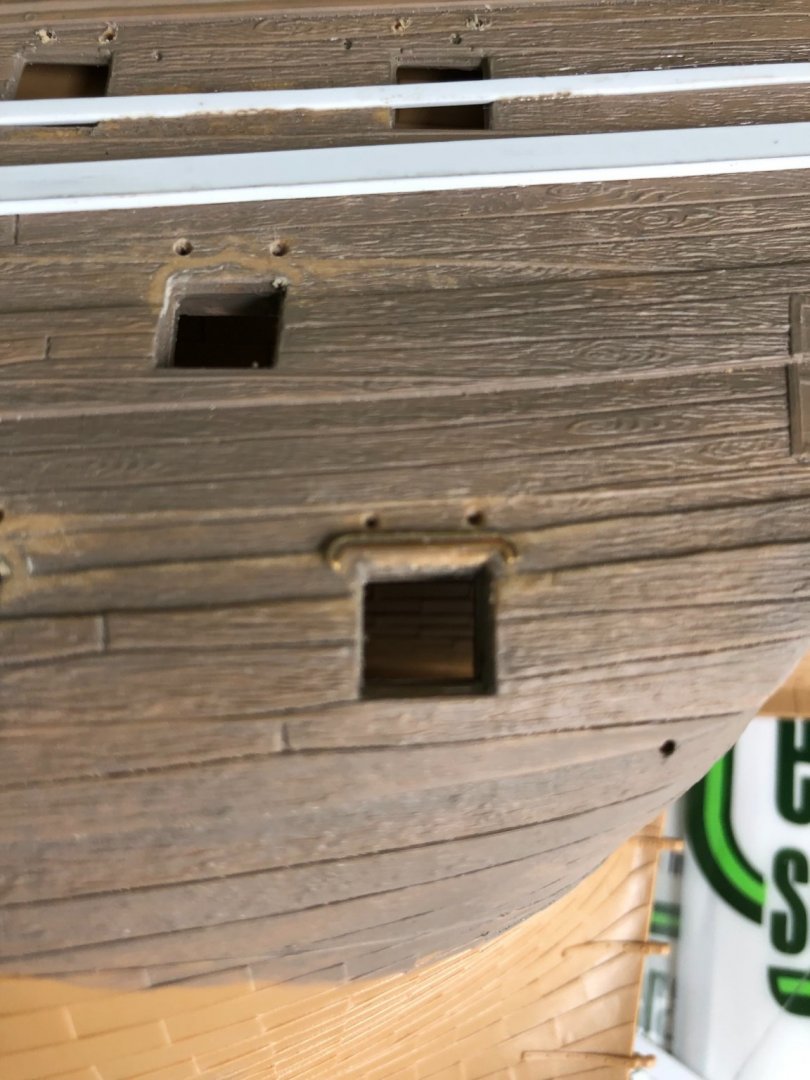
Daniel and Kevin, disregard the current evergreen I am using to widen the wales. Reference your current comment about opening the lower door to the side gallery. Are you talking about the one I am pointing to in the photo? If so what was your process/method to do it?

-
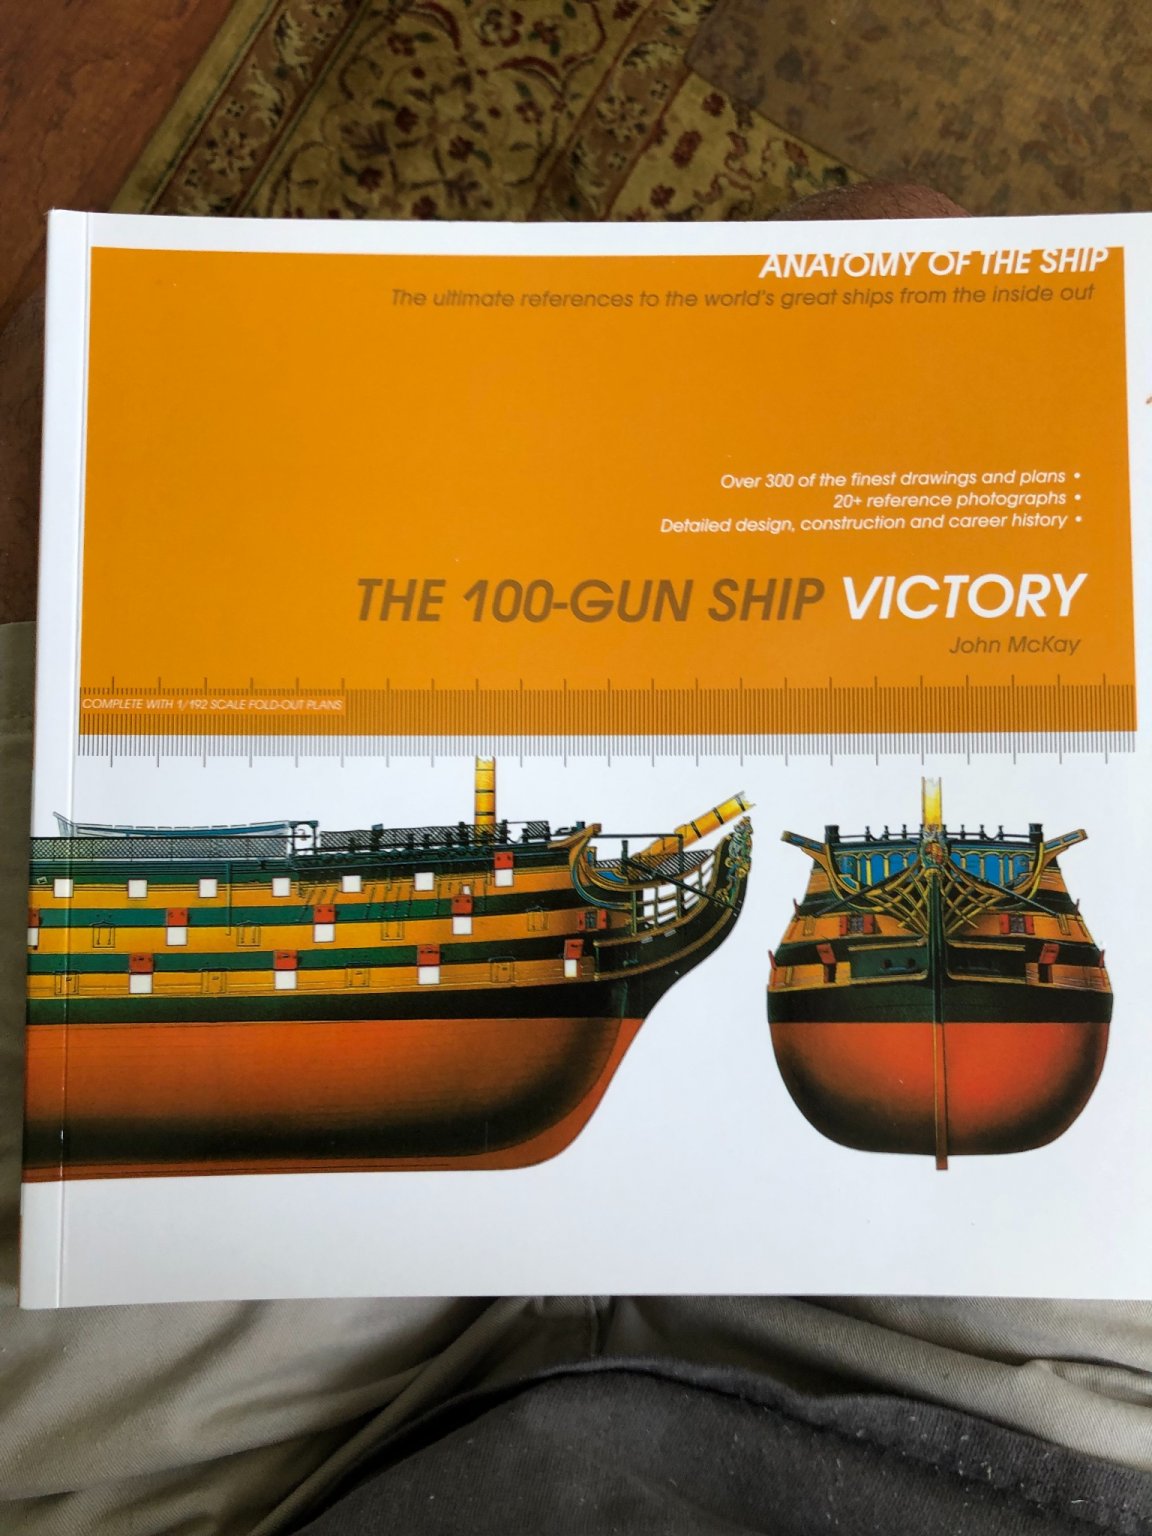
I want to thank all you guys who recommended I pick up the book The Anatomy of Admiral Nelson’s ships. I initially procrastinated because I could only find new copies for over $60. I eventually found a used copy for a very reasonable price and glad I did! Even though I am not building a wooden model from scratch I am still enjoying reading the book cover to cover. As a wood worker first for many years I can so appreciate the craftsmanship in the original ships of the era. It is also helping me to more clearly understand the design and physics of my plastic model. Especially for any bashing I want to do. And yes, as you guys have said, throw away the Heller rigging instructions. This book is going to make that so much more understandable with all the drawings. I have a pretty good supply of different size wooden deadeyes to replace the plastic ones. I also need to load up on wooden blocks. For size would you think I can simply measure the plastic ones included in the kit and then purchase wooden the same size? I guess I will need a variety of single and double blocks? Again thanks for the book recommendation.
-
Ian I looked back through my blog to try to find the comment I was confident you made about the order of the deck supports being out of order. Could not find the comment. If it in fact was you, could you advise me the correct order? I know it will be awhile before I need this but I always read ahead. Thanks

-
Yes Daniel you are right about the holes and how I did them. Really did not like them either. Will use your advice to correct the ones that came out messy. I have a lot more of the enlargement of the wales to go. Just showing where I am heading with bashing the hull. Daniel I need to look further into your build, but how did you display the cannon hatch door around the anchor once you repositioned the anchor? Looks like if open the hatch door will be up against the anchor.
-
Ok gentlemen now that I have Daniel’s sheets I am going to get back into working on the hull. I looked back through my blog to find all the recommended bashing to complete before I begin the much anticipated painting. I am working on adding the Evergreen to widen the wale. Sanding off the molded rigols and adding Daniel’s etched rigols. Plan to move the anchor shoe to the more correct place. Anything I am missing? Any other recommendations for me to consider?
-
Thanks Daniel.
-
There you go. That sounds like a perfectly good reason. Thanks Ian.
-
Sounds like I got a plan. I am just curious here and will show my ignorance happily. But what is the reason or advantage of blackening a etched part first if I am later going to paint it? Picture me setting wide eyed at the knee of the great masters absorbing all your great knowledge! 😀 Bill (aka Grasshopper)
-
Thanks Ian. I took your advice and scrolled through the mentioned forum. Interesting the product I mentioned is talked about in one of them.
-
Ok gentlemen, those who have used Daniel’s etched brass sheets (and you as well Daniel). Now that I have my sheets talk me through how to blacken them. Daniel suggest a product from Knick that you just soak the item in overnight. I can’t find that but I can find a product called Brass Black. Left off the brand name since I am not sure if that is OK on MSW. Seems like a similar product. Do you need to rub down pieces with very vine abrasive first, or can they go right from Daniel’s packaging to the liquid?Do you need to blacken those pieces that will be painted later or just leave them as is?
-
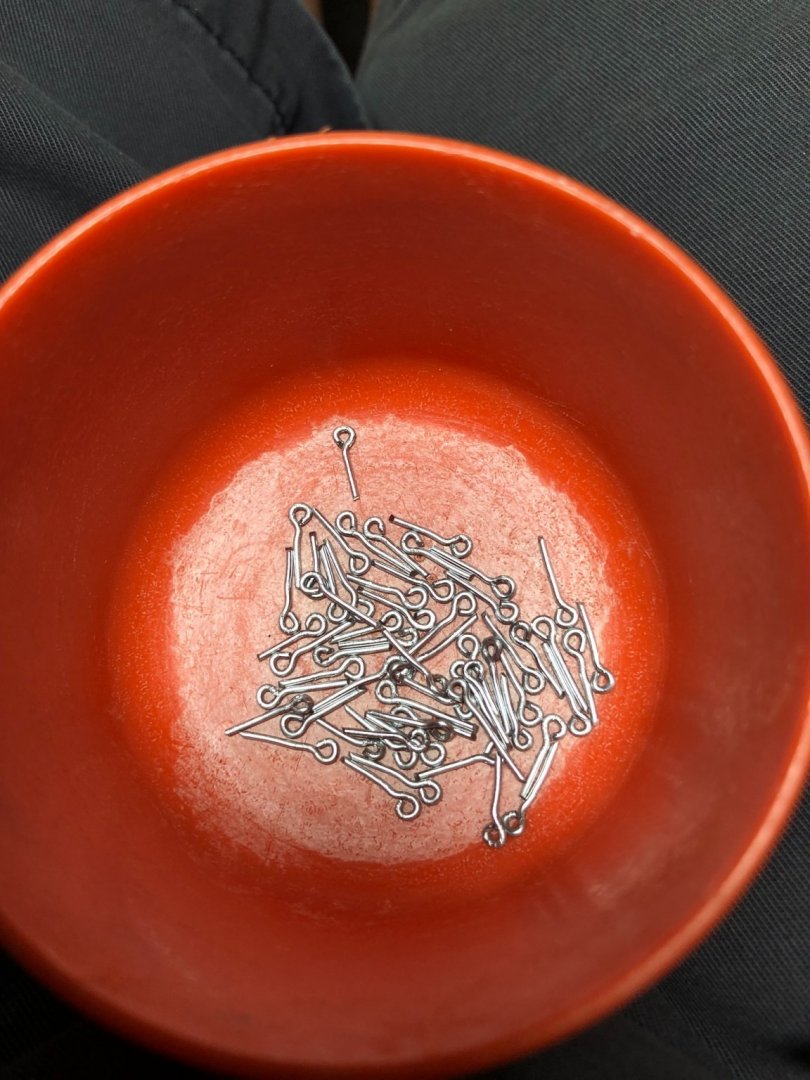
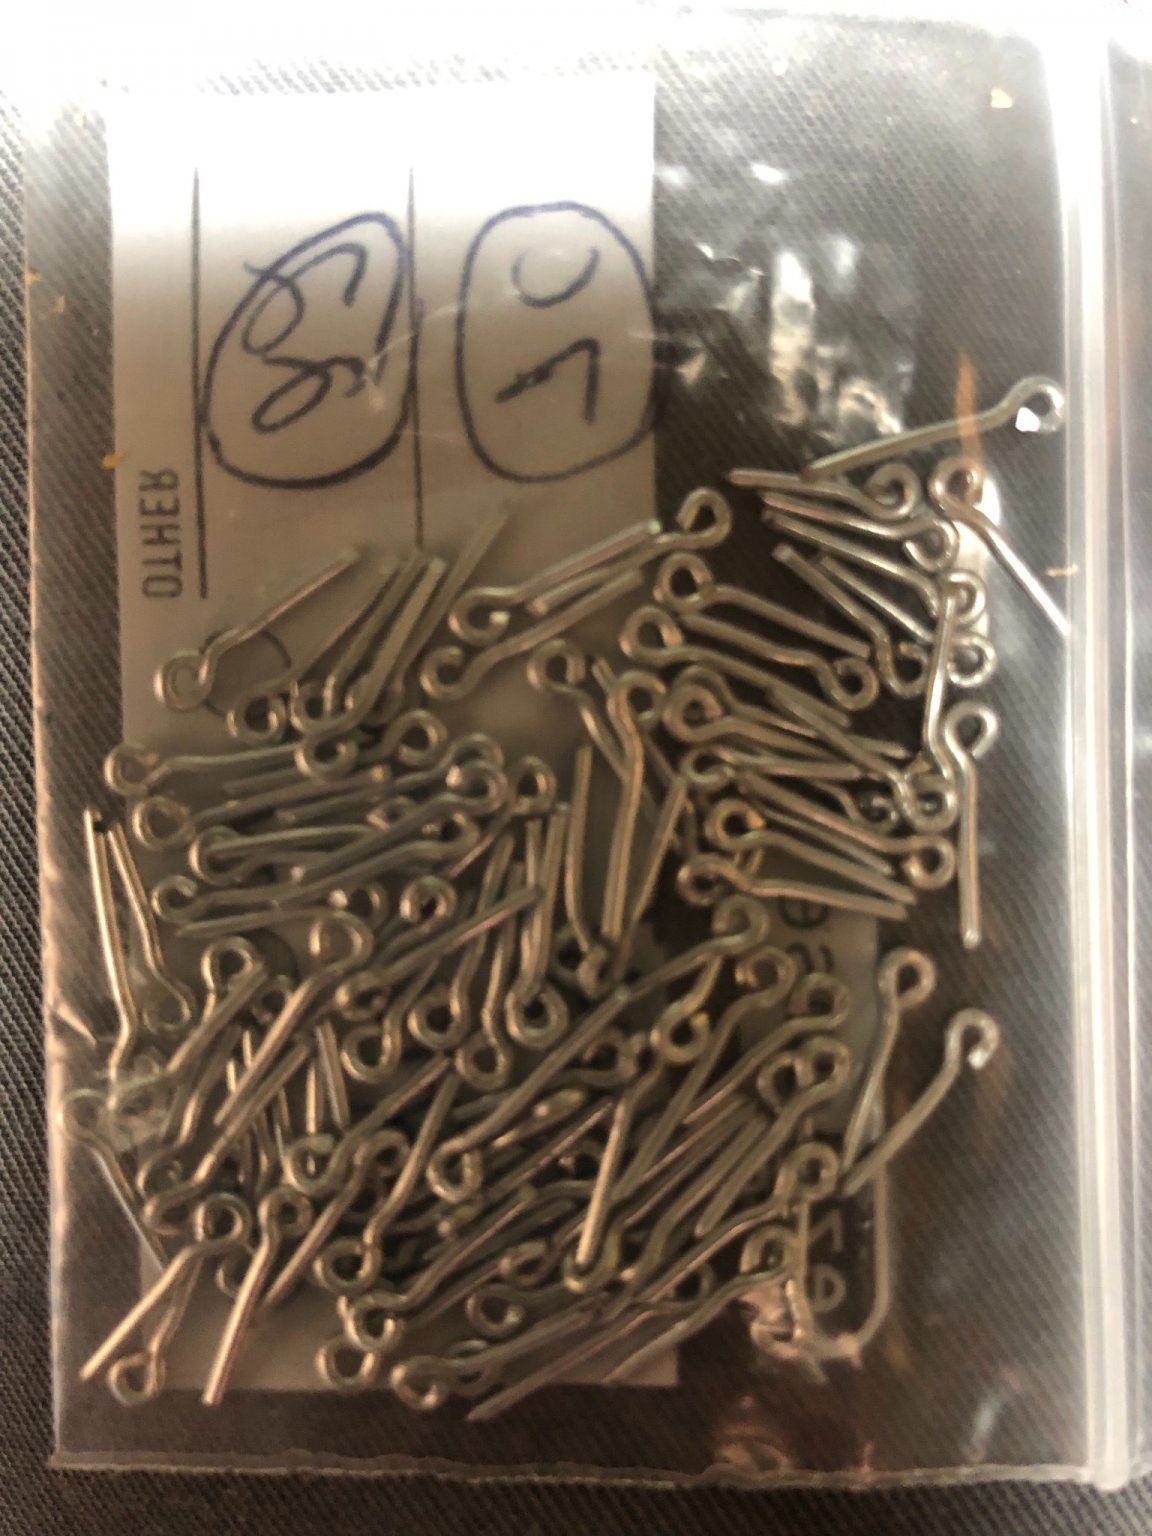
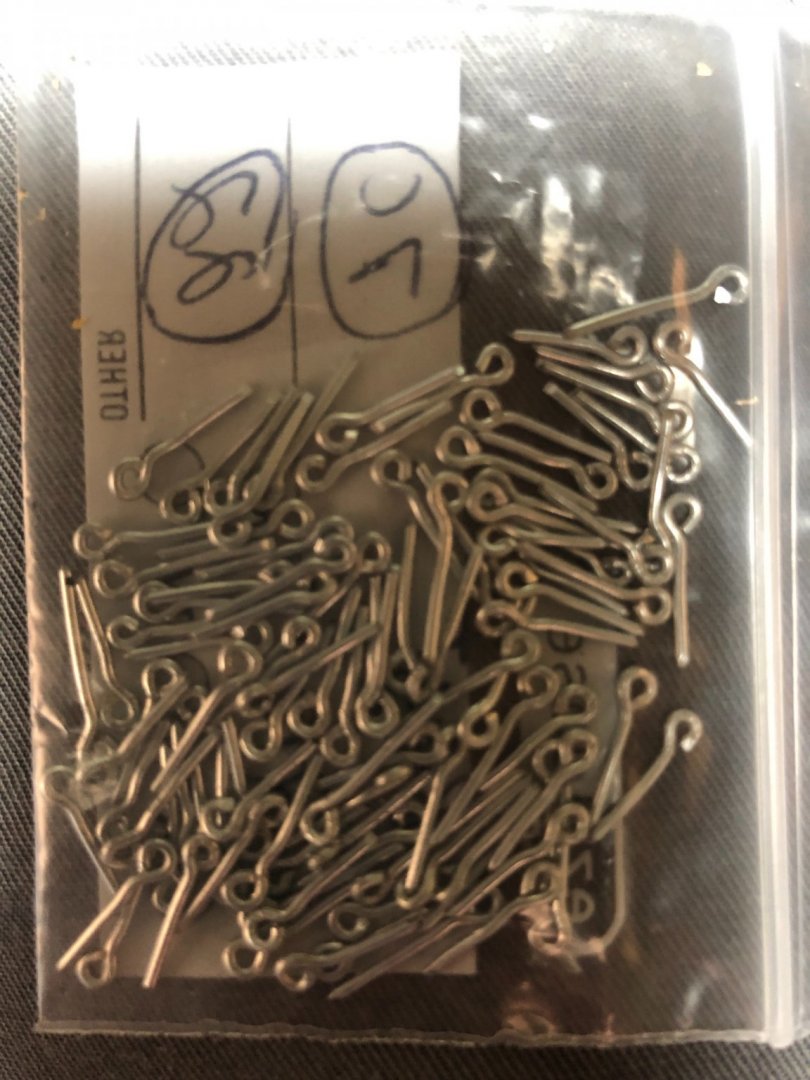
Thanks Ian. I wondered about the extra ships in your picture since my Heller only came with three. I will most likely just leave the size as is but am going to use Evergreen to make the floor boards. Finished my first 100 eyebolts.
-
Spending this nice Sunday afternoon in the recliner with my feet propped up making eyebolts. Don’t have a goal of how many, will just keep making them till get tired. Will have to blacken them before I use them.