HOLIDAY DONATION DRIVE - SUPPORT MSW - DO YOUR PART TO KEEP THIS GREAT FORUM GOING!
×


Bill97
-
Posts
2,704 -
Joined
-
Last visited
Content Type
Profiles
Forums
Gallery
Events
Everything posted by Bill97
-
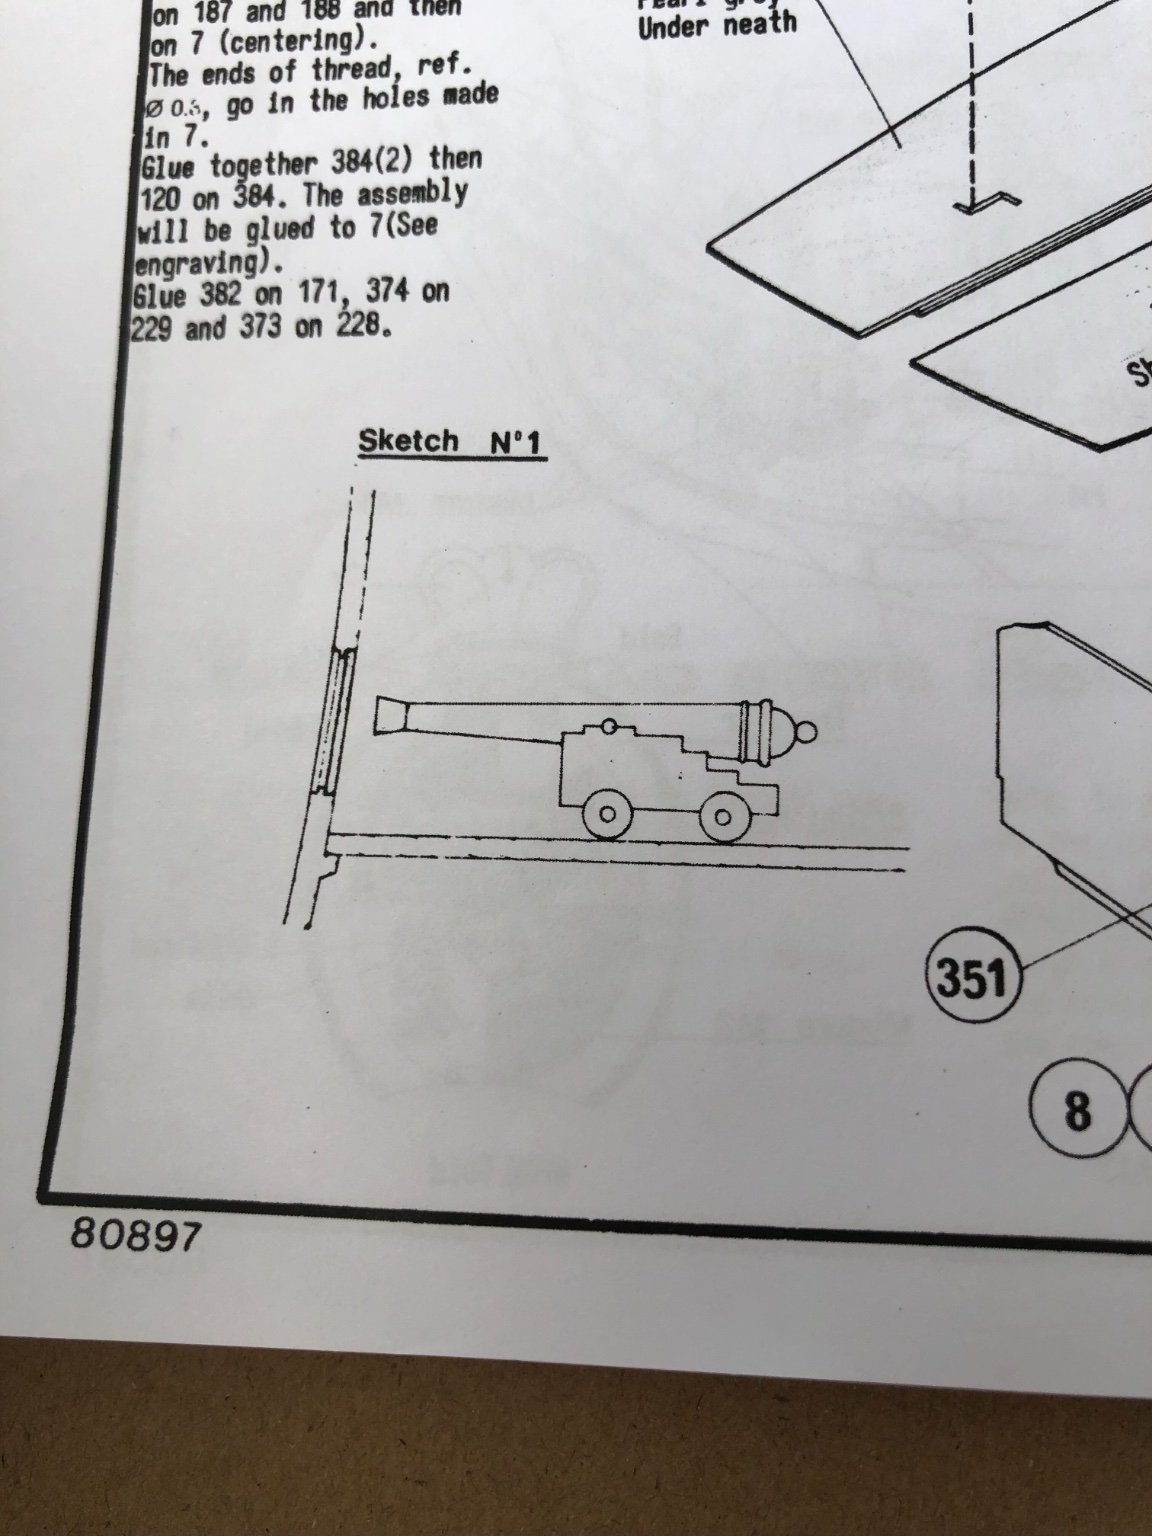
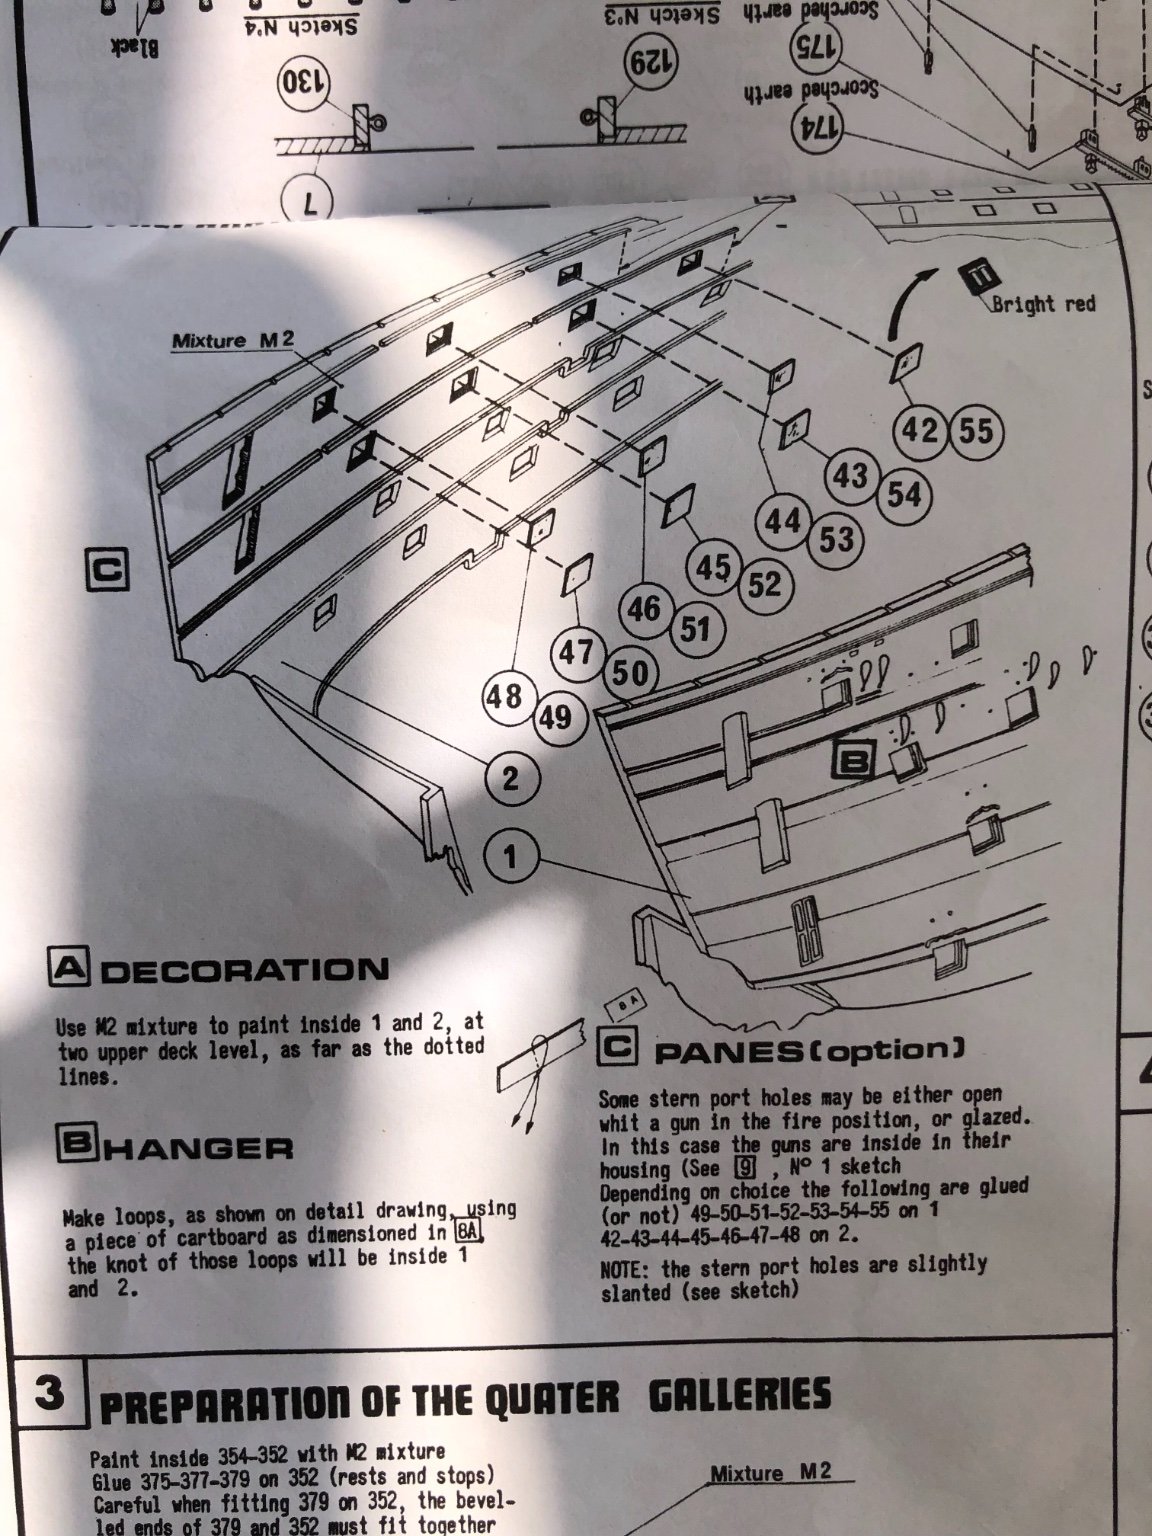
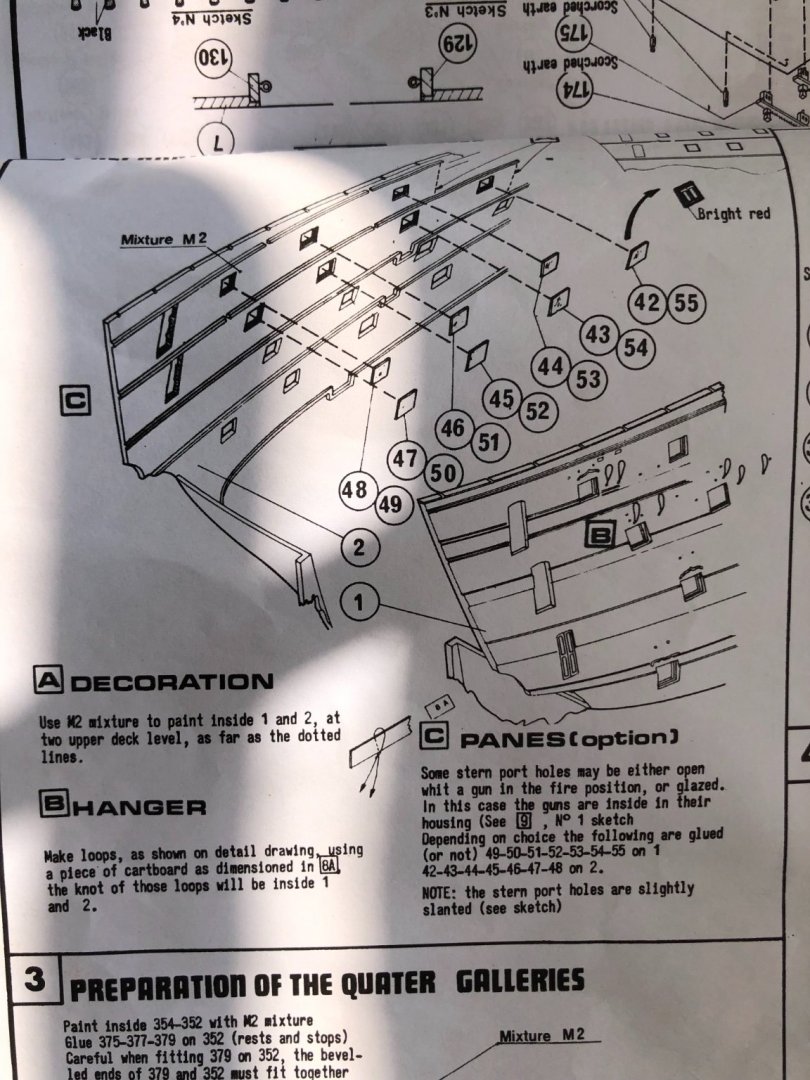
Ok guys I am just looking for your opinion and what you like. The instructions show the option of putting glazing (windows) on 7 of the hatches on each side at the stern end of the ship. In that case you position the gun back from the hatch. I guess the option is I can glaze some openings if I want and have guns extended out others, or do all either one way or the other. How did you do your’s? Not seen example of hatches glazed.


-
Thanks Veszett. The picture is perfect for guidance.
-
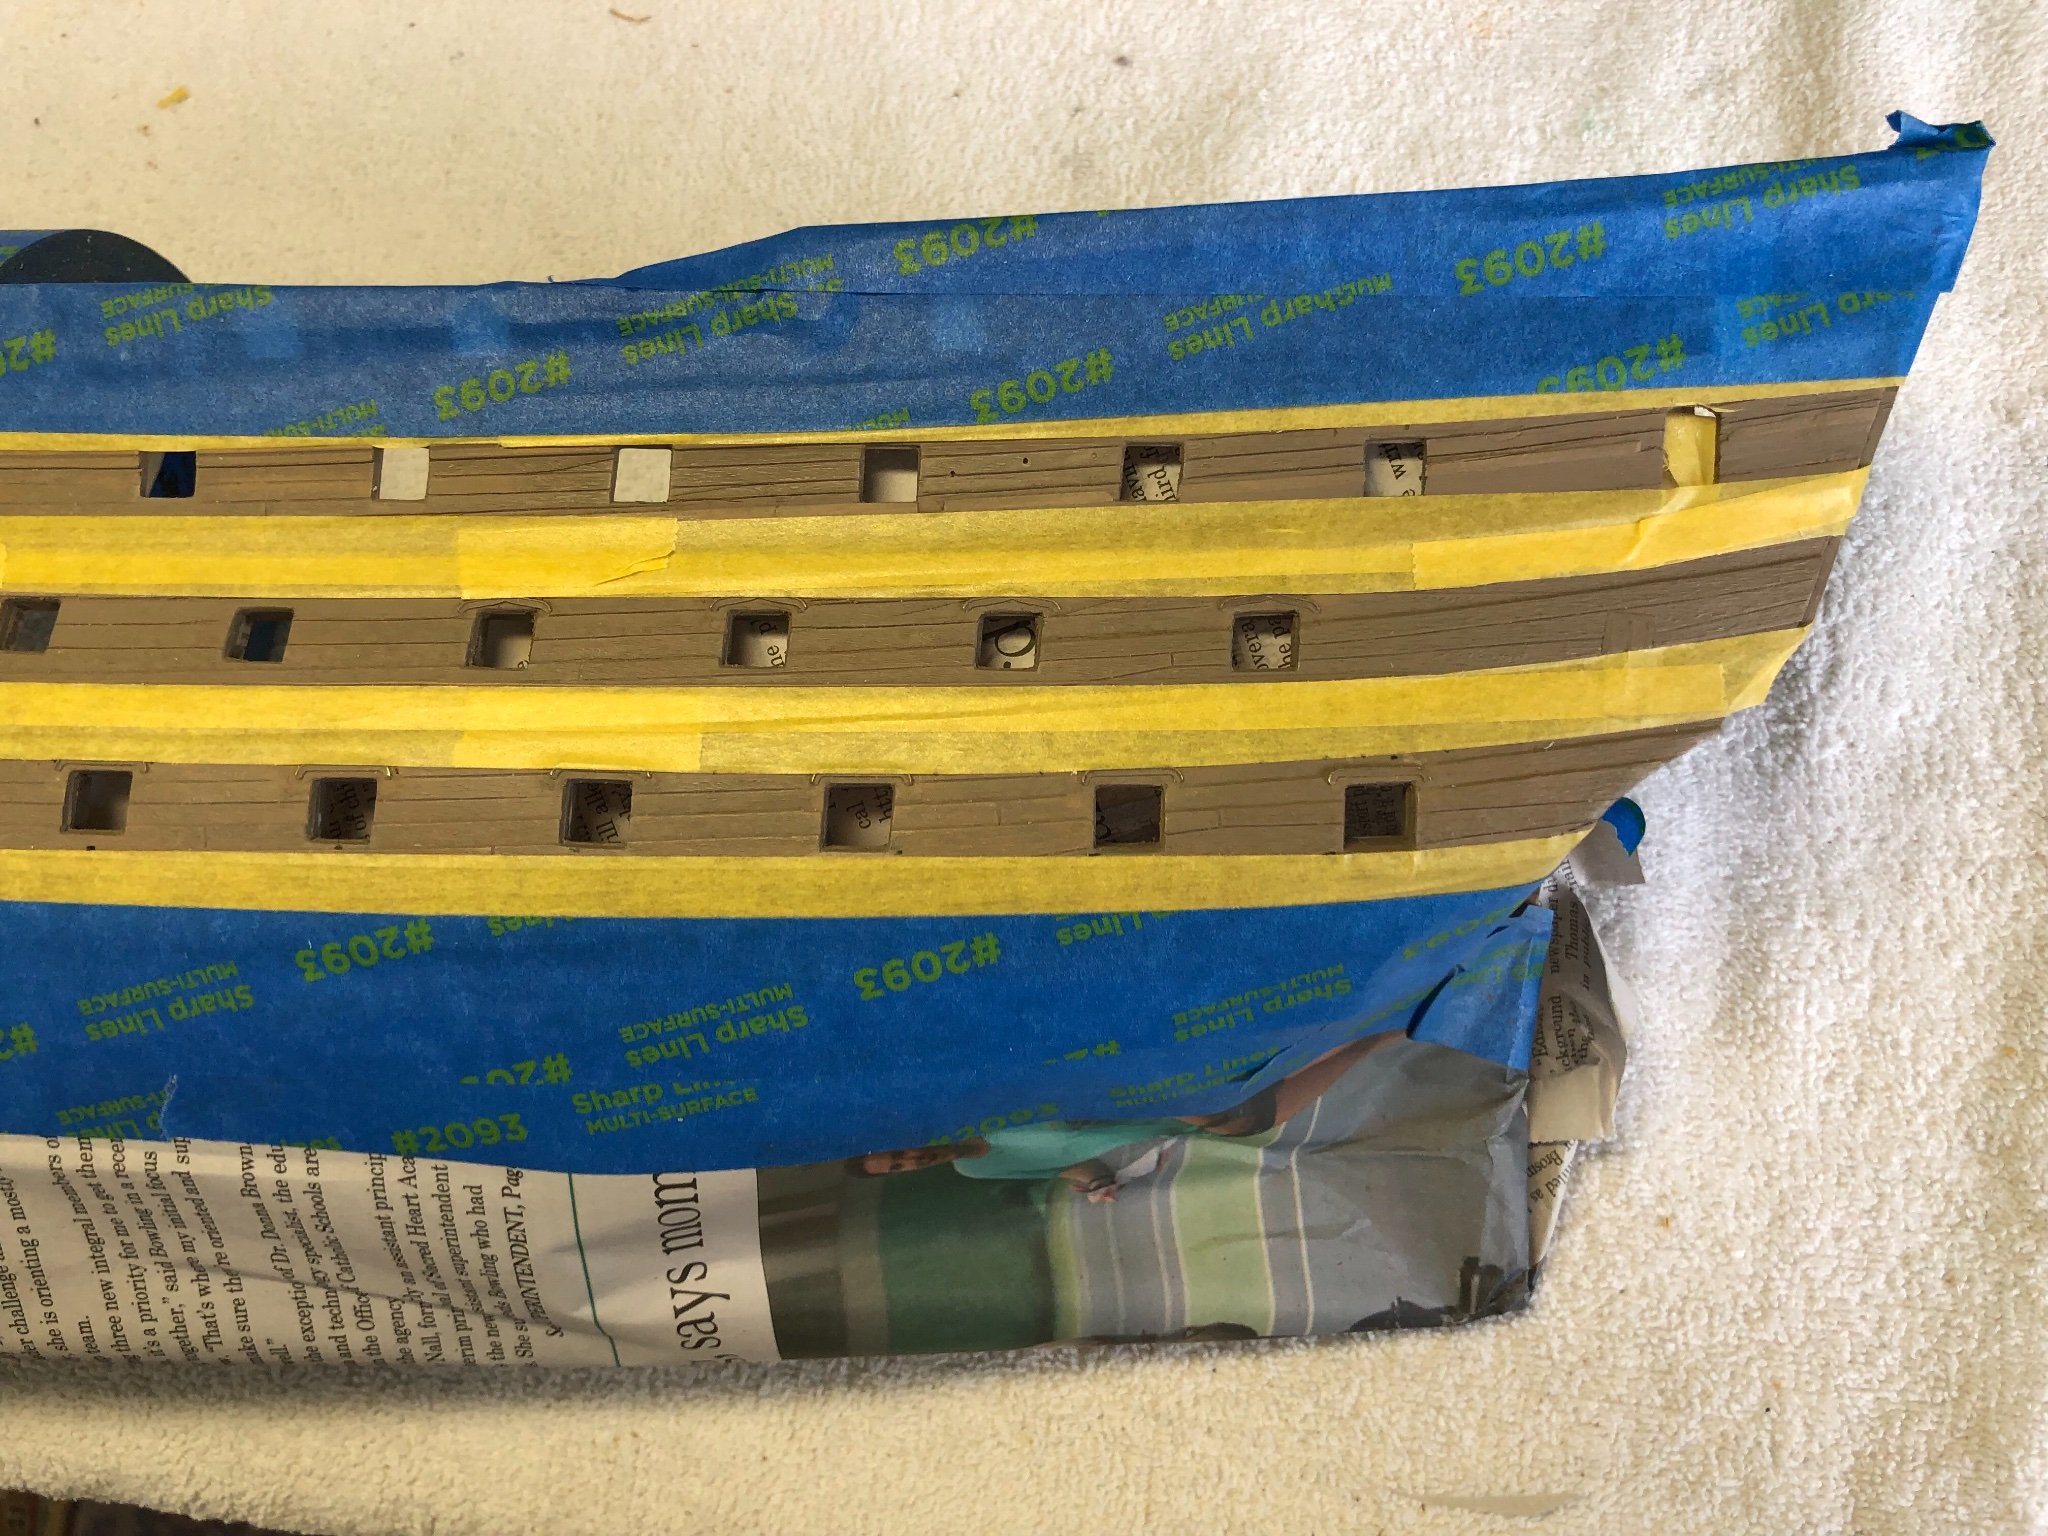
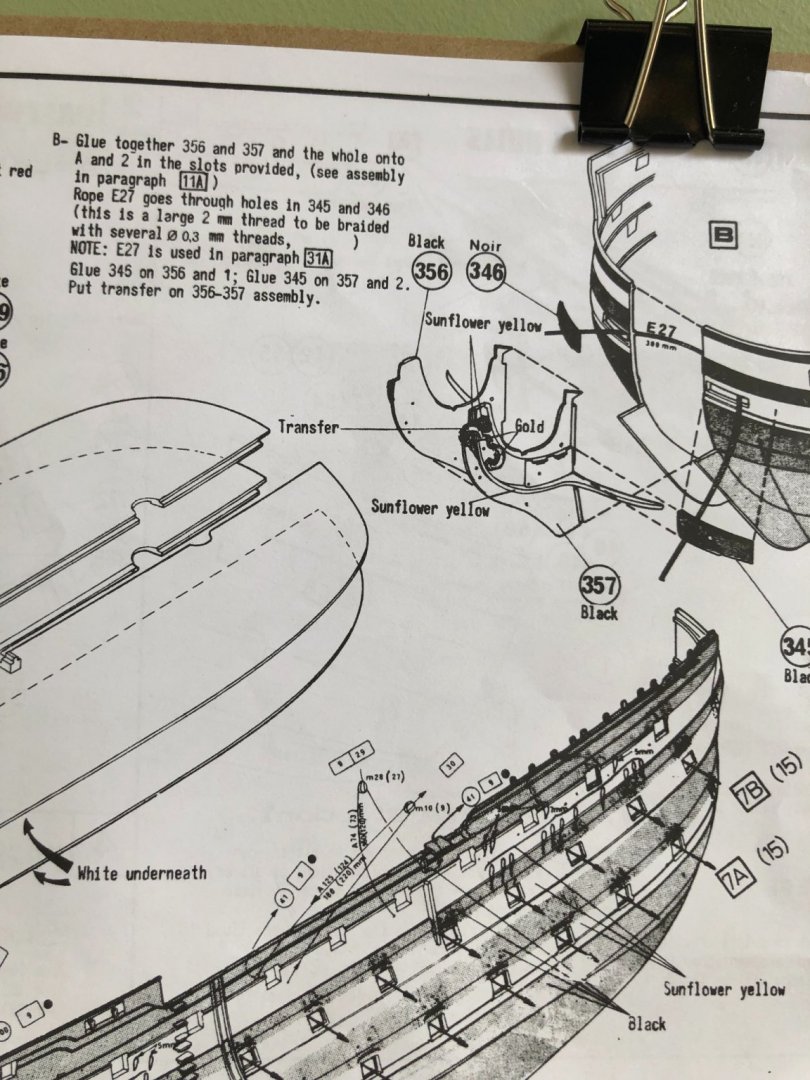
Hubac I was looking at that. Is it OK to glue them onto the hull in advance of attaching parts 356 and 357? I was not planning on adding 356 and 357 until after I assemble the hull and decks together. The instructions say to glue to the hull and to 356 or 357 at same time. Will it make a difference if I glue the hawser entry hole pieces on in advance of the half cutwater?


-
Your right Michael. I sanded it down and it does look better. Hubac I think you and I have birthdays coming up here pretty soon. You on the 11th and me the 15th! Of course I have 21 more years! ☹️
-
Not sure either Michael. This is what I have always used over Vallejo acrylics. I don’t think it was a reaction to the acrylics because I also had areas of white on the newspaper I had under the hull sections. I think it was a defective spray can. Either way I am undertaking fixing it. The port side was not affected to much and the repair was easy. The starboard side, which was the second section sprayed, fared worse. I was able to repaint all the lines, still have some fine tuning to do, but did end up with some unwanted build up near the middle. I am sanding it down and will make it right. Very little, if any, cracking as I go toward bow and stern. It is kind of funny. I wondered if it were not for my friends here on MSW if I might have just lived with the cracking. Now that I have several friendly judges I decided I better fix it, and I am glad I am. Thank you guys for keeping me building at the quality level this ship deserves.


-
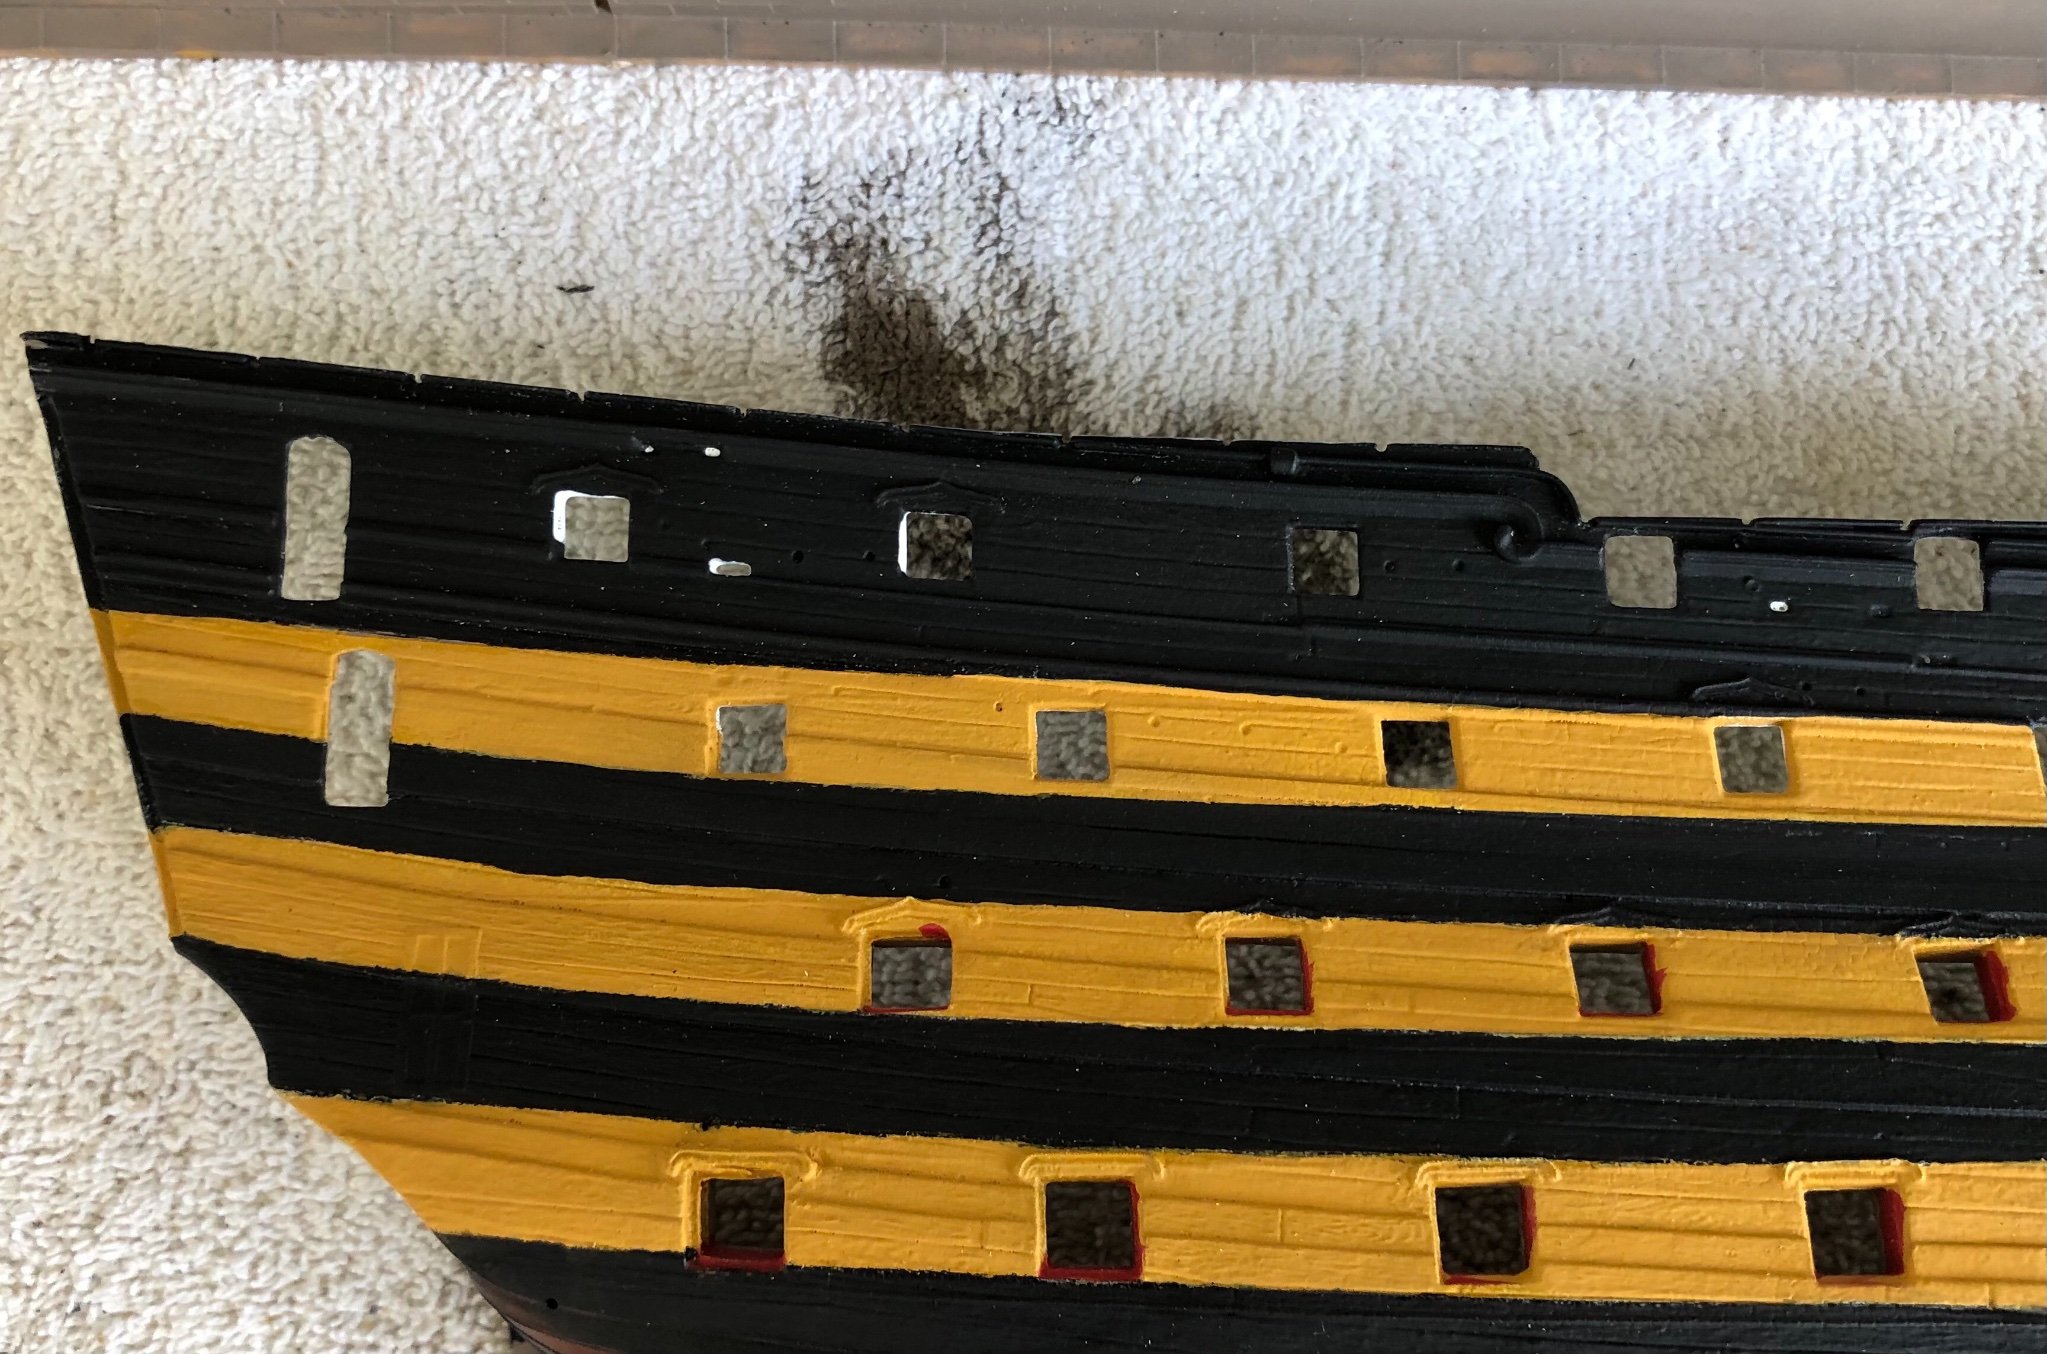
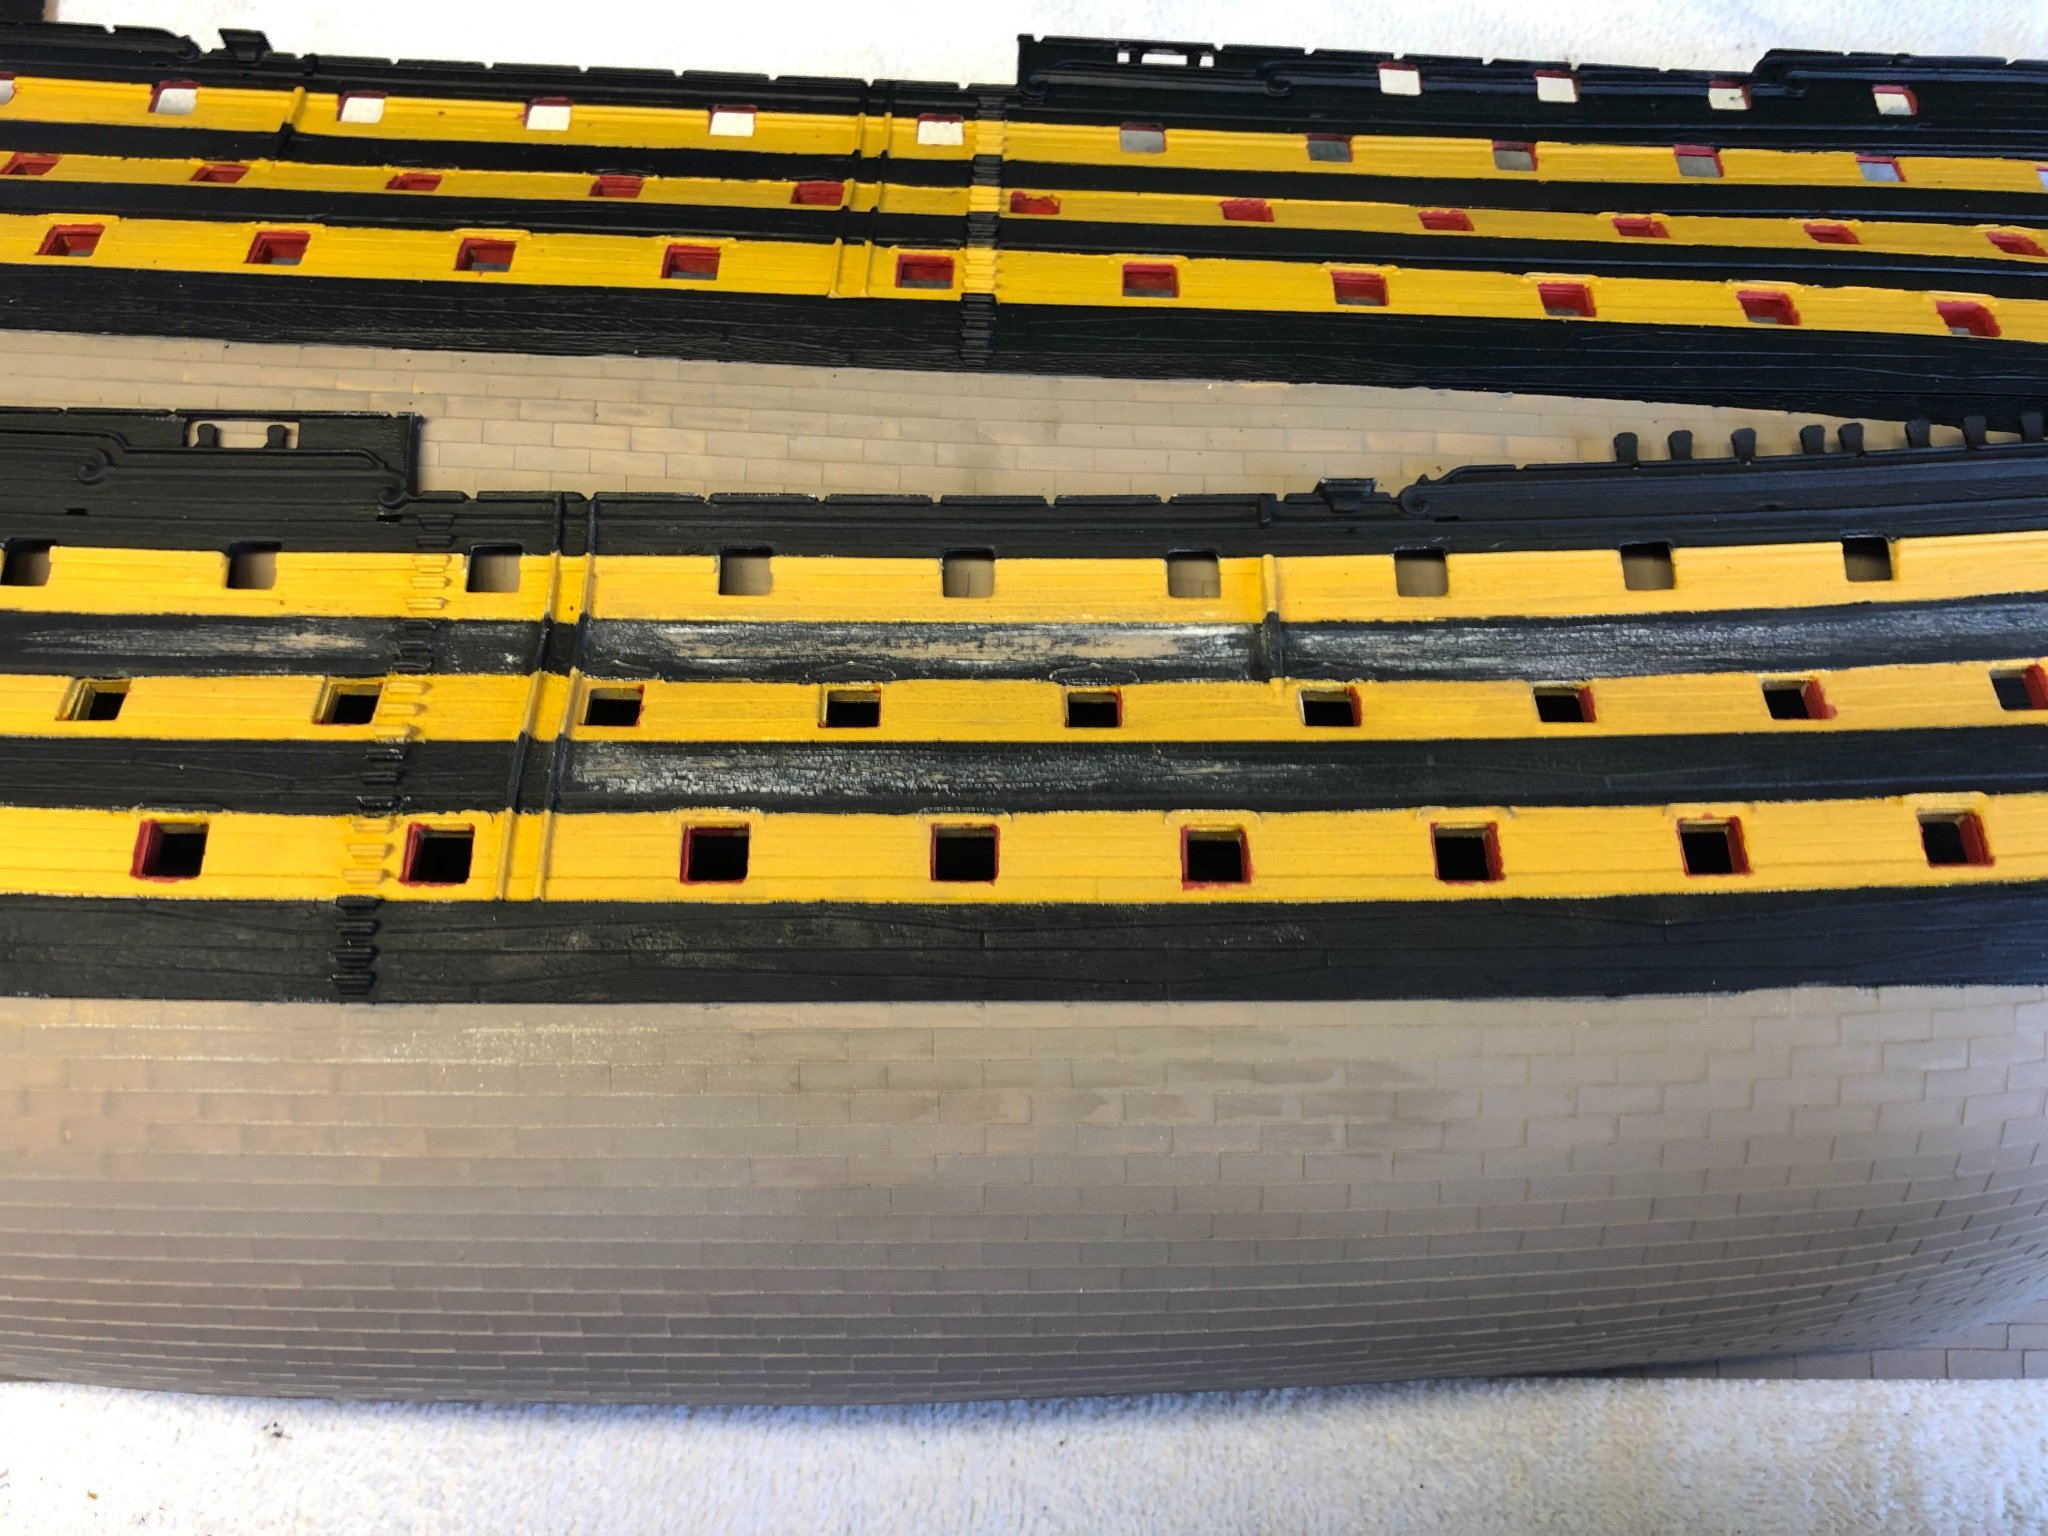
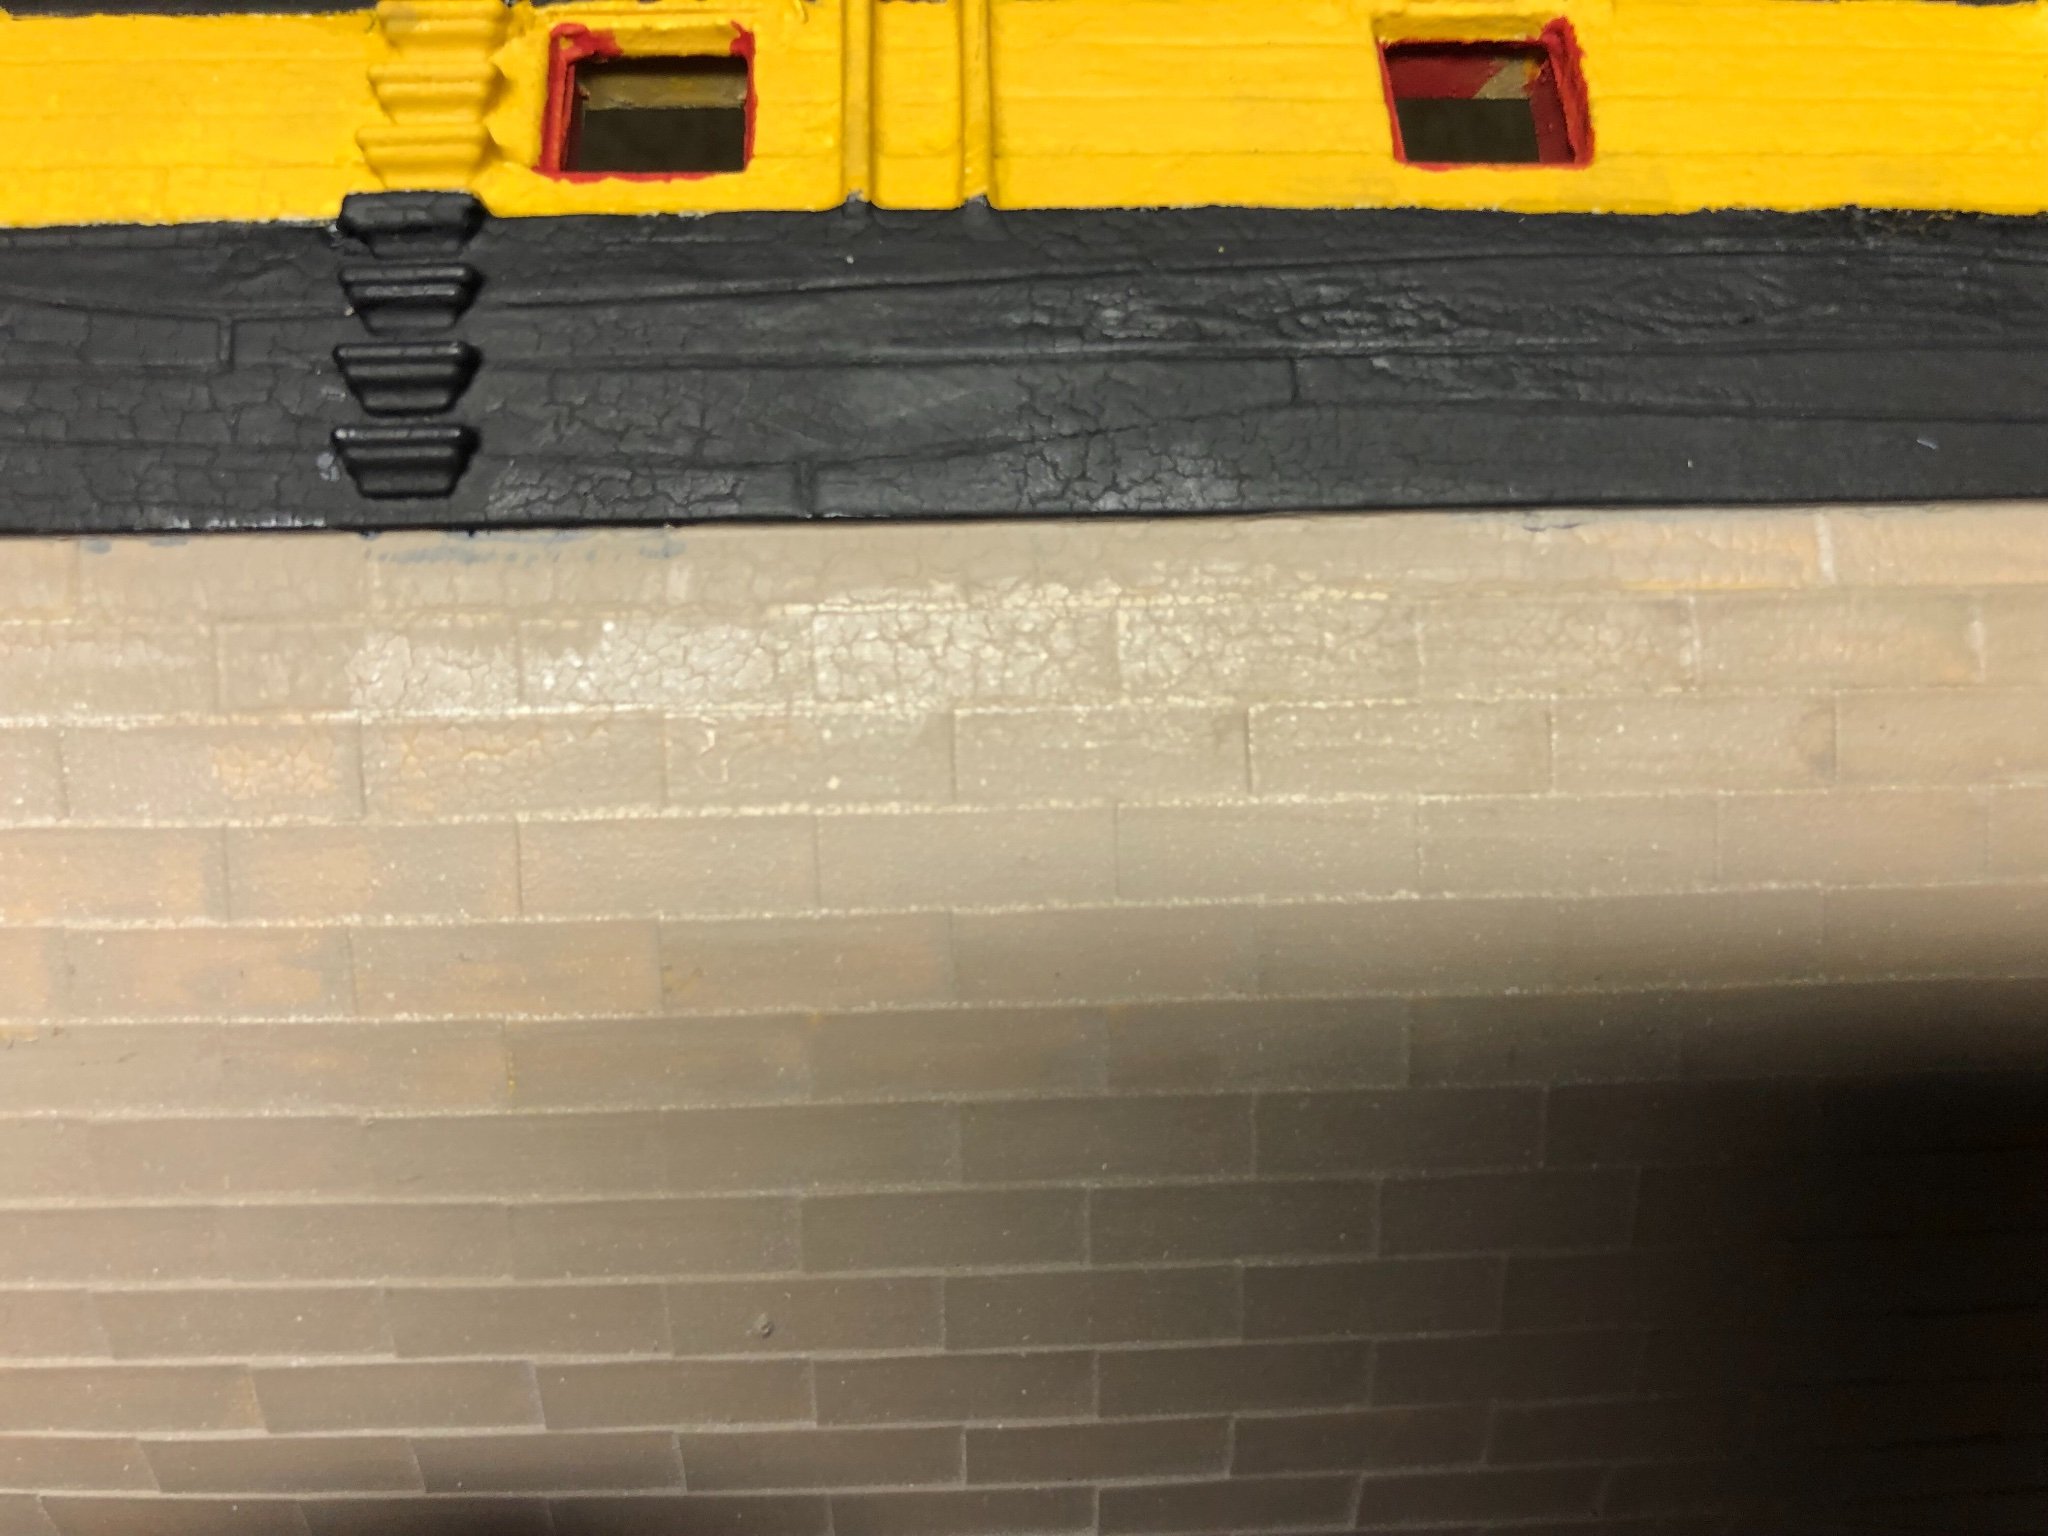
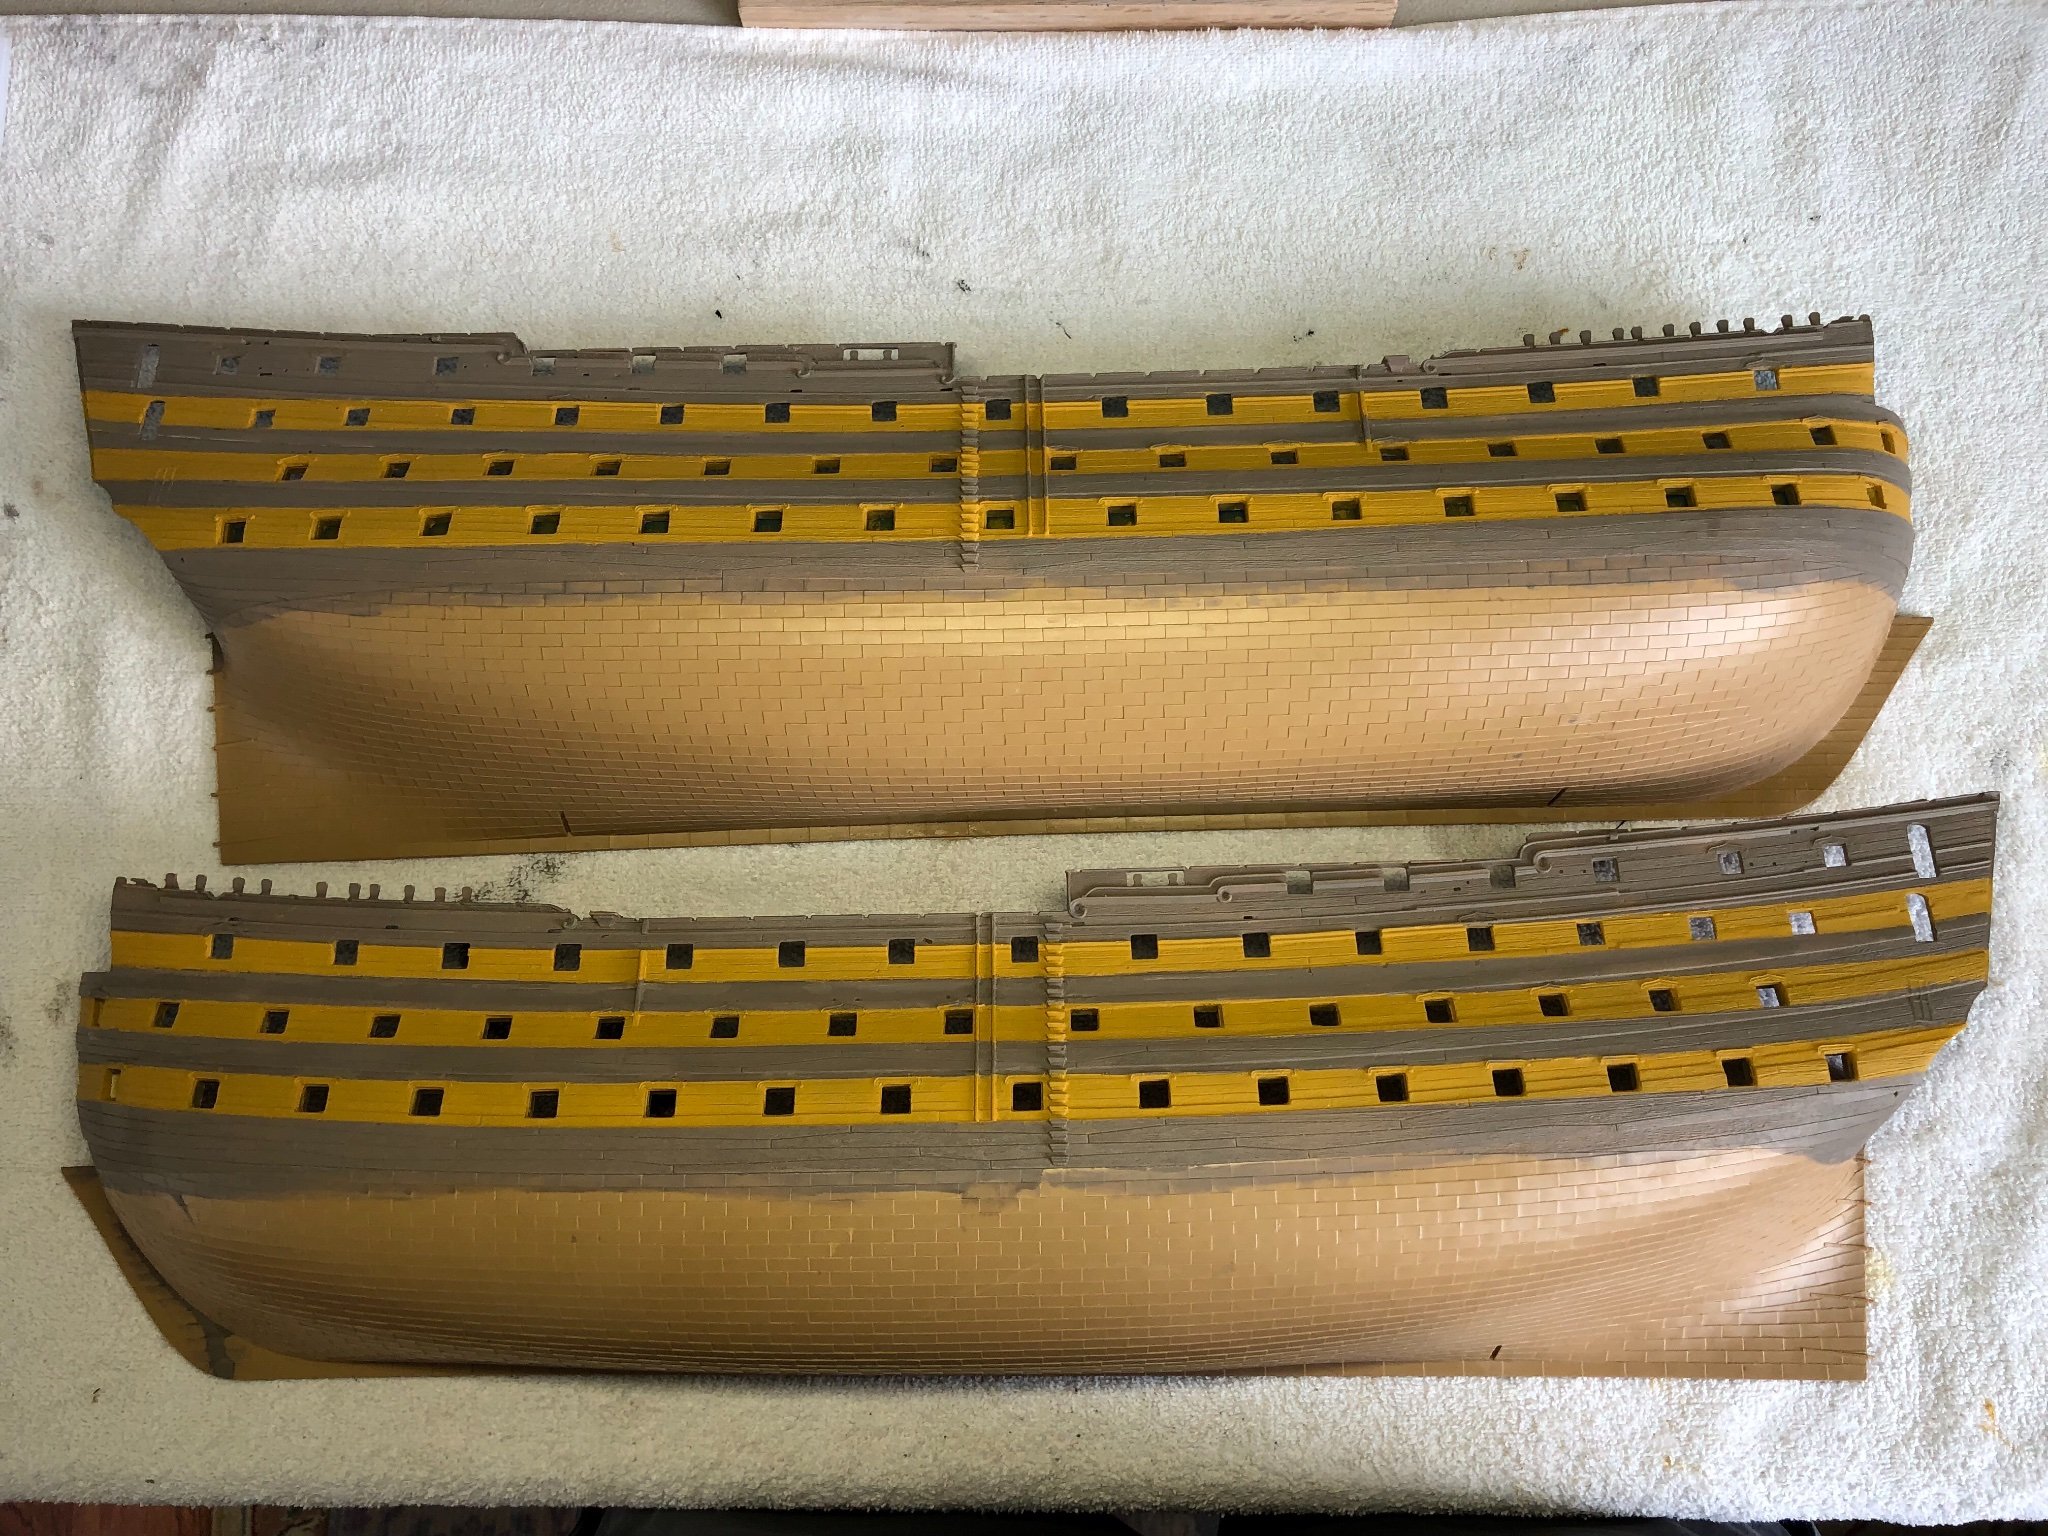
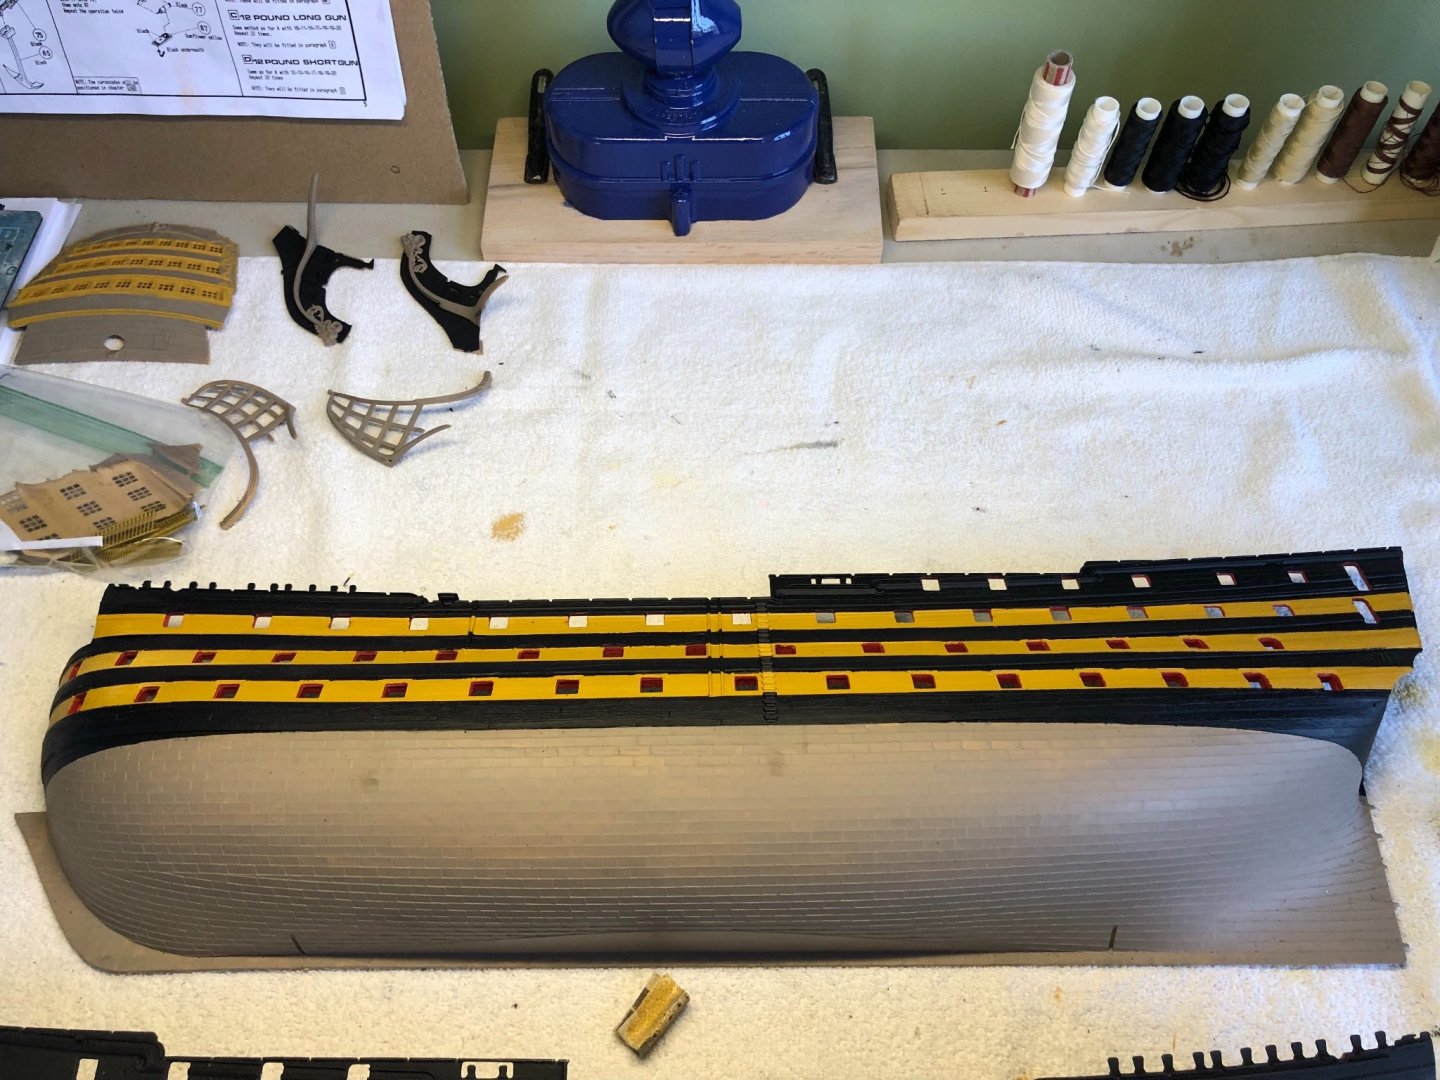
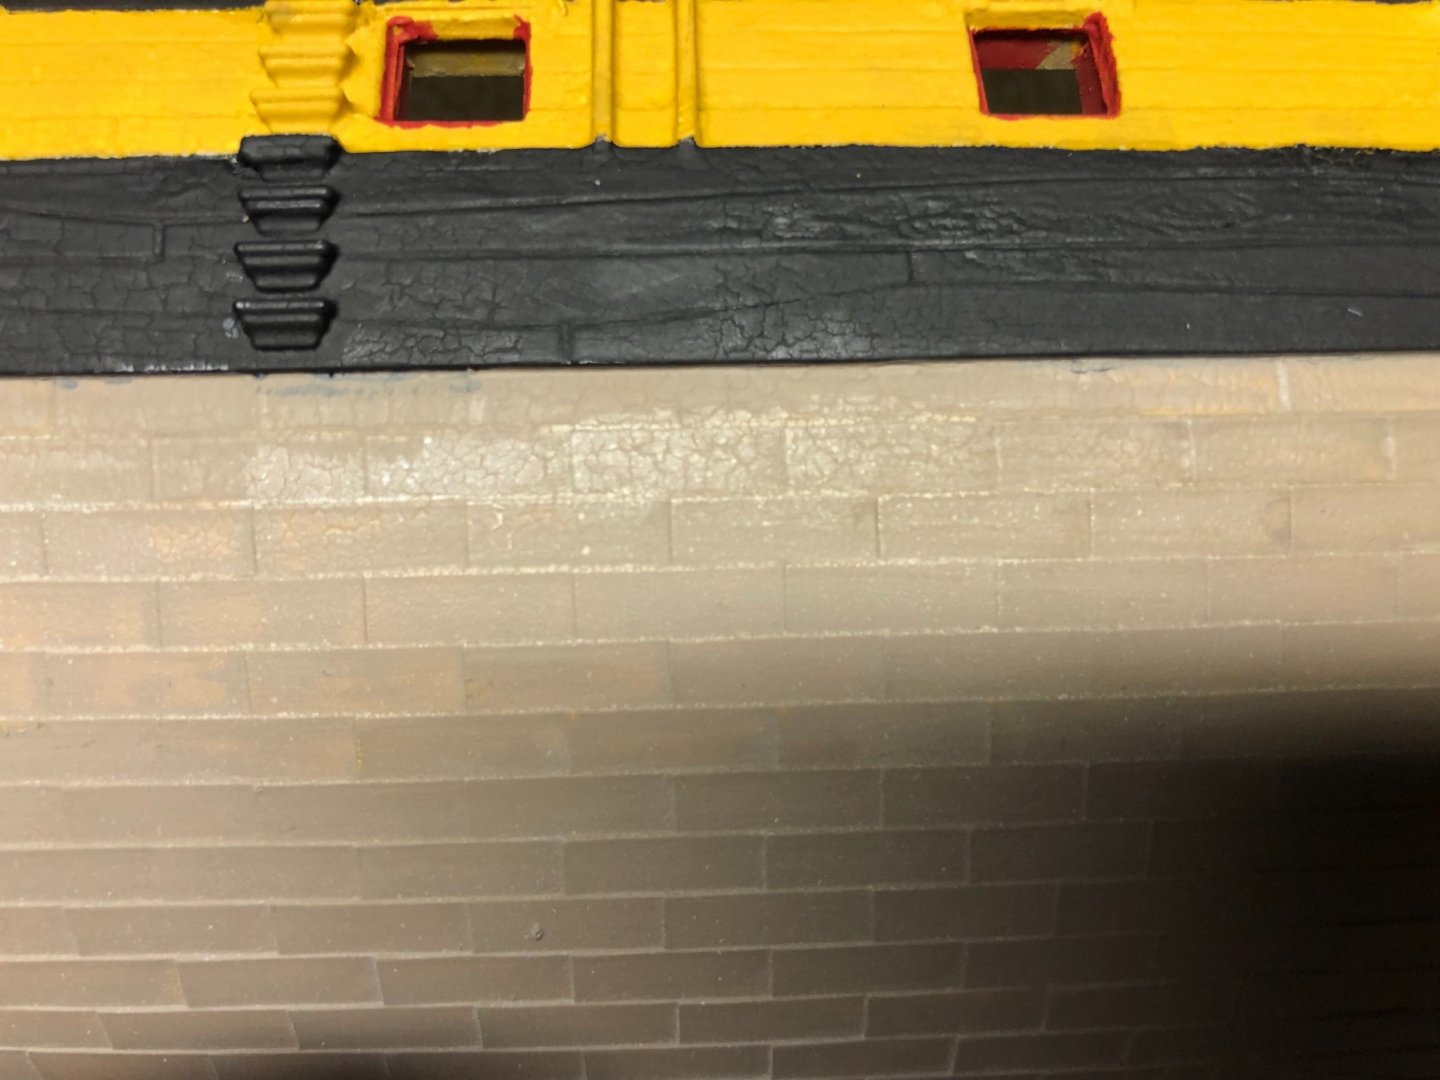
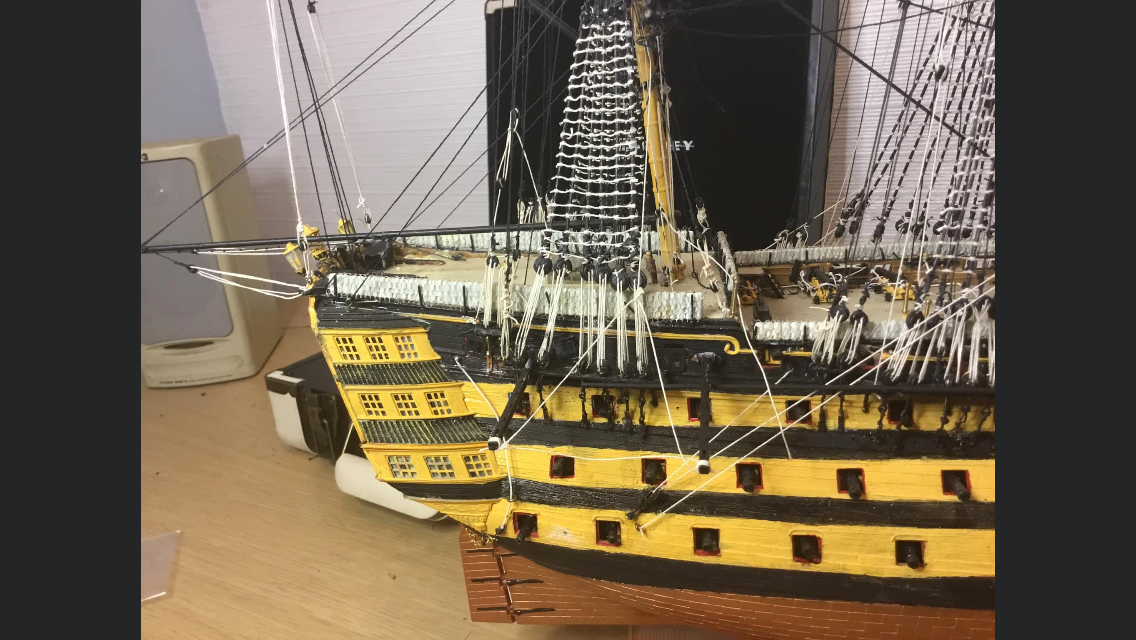
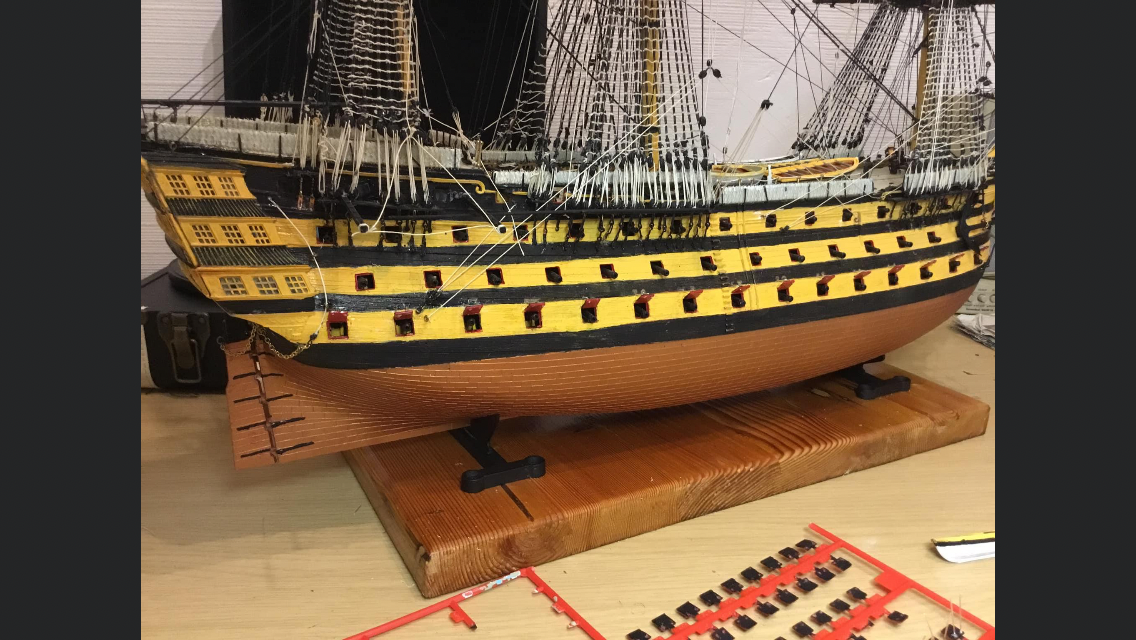
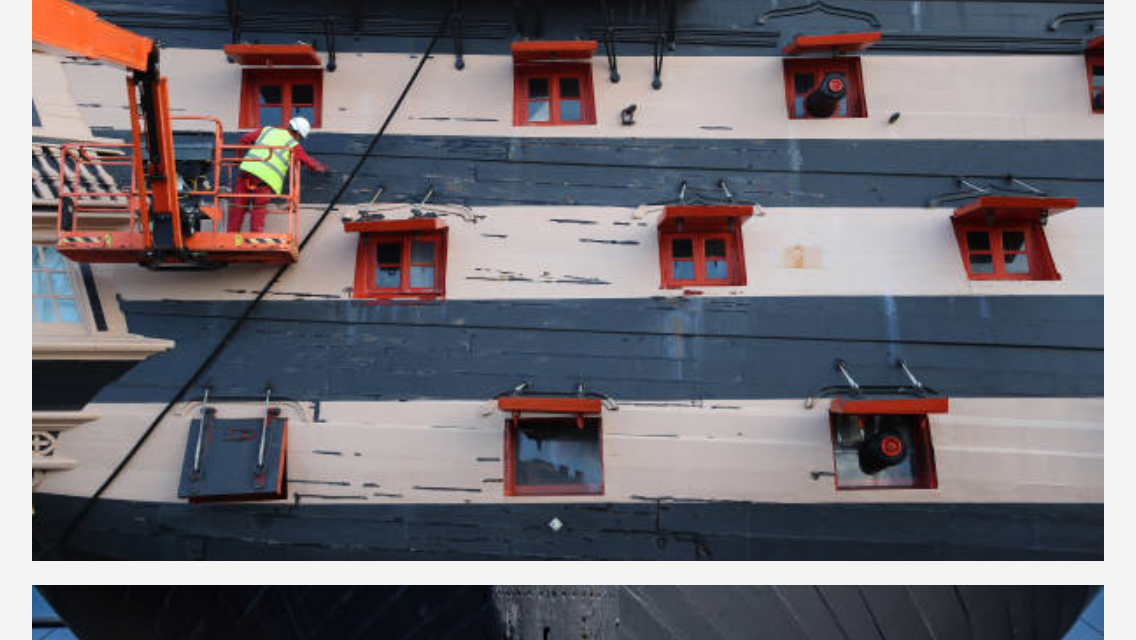
Wow! What a mess up today! 🤯 As you saw in my previous pictures I have both sides of the hull painted with the black and yellow ochre stripes. Spent many hours getting them as smooth as I could. Today I decided before I scratch or in any way mess them up I was going to put a flat clear top coat on it. Purpose was to provide a hard protective surface. I have always used a clear spray can product from a well known spray paint producer. Never had a problem in the past. Again I emphasize IN THE PAST! Set both halves on my work bench in my garage (where I spray paints that are not good to spray indoors). Gave the starboard half a nice thin coat. Looked nice. All good. Then gave the port side a simile coat. WHAT THE &$@(%> IS THIS? Across my beautiful painted stripes on my hull half was what appeared to a light white paint! 🤯🤯. All across my black and yellow lines! No idea what caused it. I sprayed a few places on some news paper and there was a little more white then went crystal clear again. Heart broken and saying a few not very church like words I let it thoroughly dry then started the process of repainting my lines to cover the mysterious white residue. As a result my paint layers are a little thicker than I would have preferred. But I am not going to strip it all off and start over. Checked on line later to see if any reports of similar issue. Apparently high humidity can cause this. But the humidity was not that high today. Will forever be a mystery. Not a mystery that I will never spray my ship with this product again. I did not take picture of disaster but below is a photo of my repair work and you can see a little of the white on what will be the copper area. The picture also shows in some areas I am going to have to sand it down because the paint thickness caused it to crack. You will notice I have started painting the inside edge of gun hatches red.

-
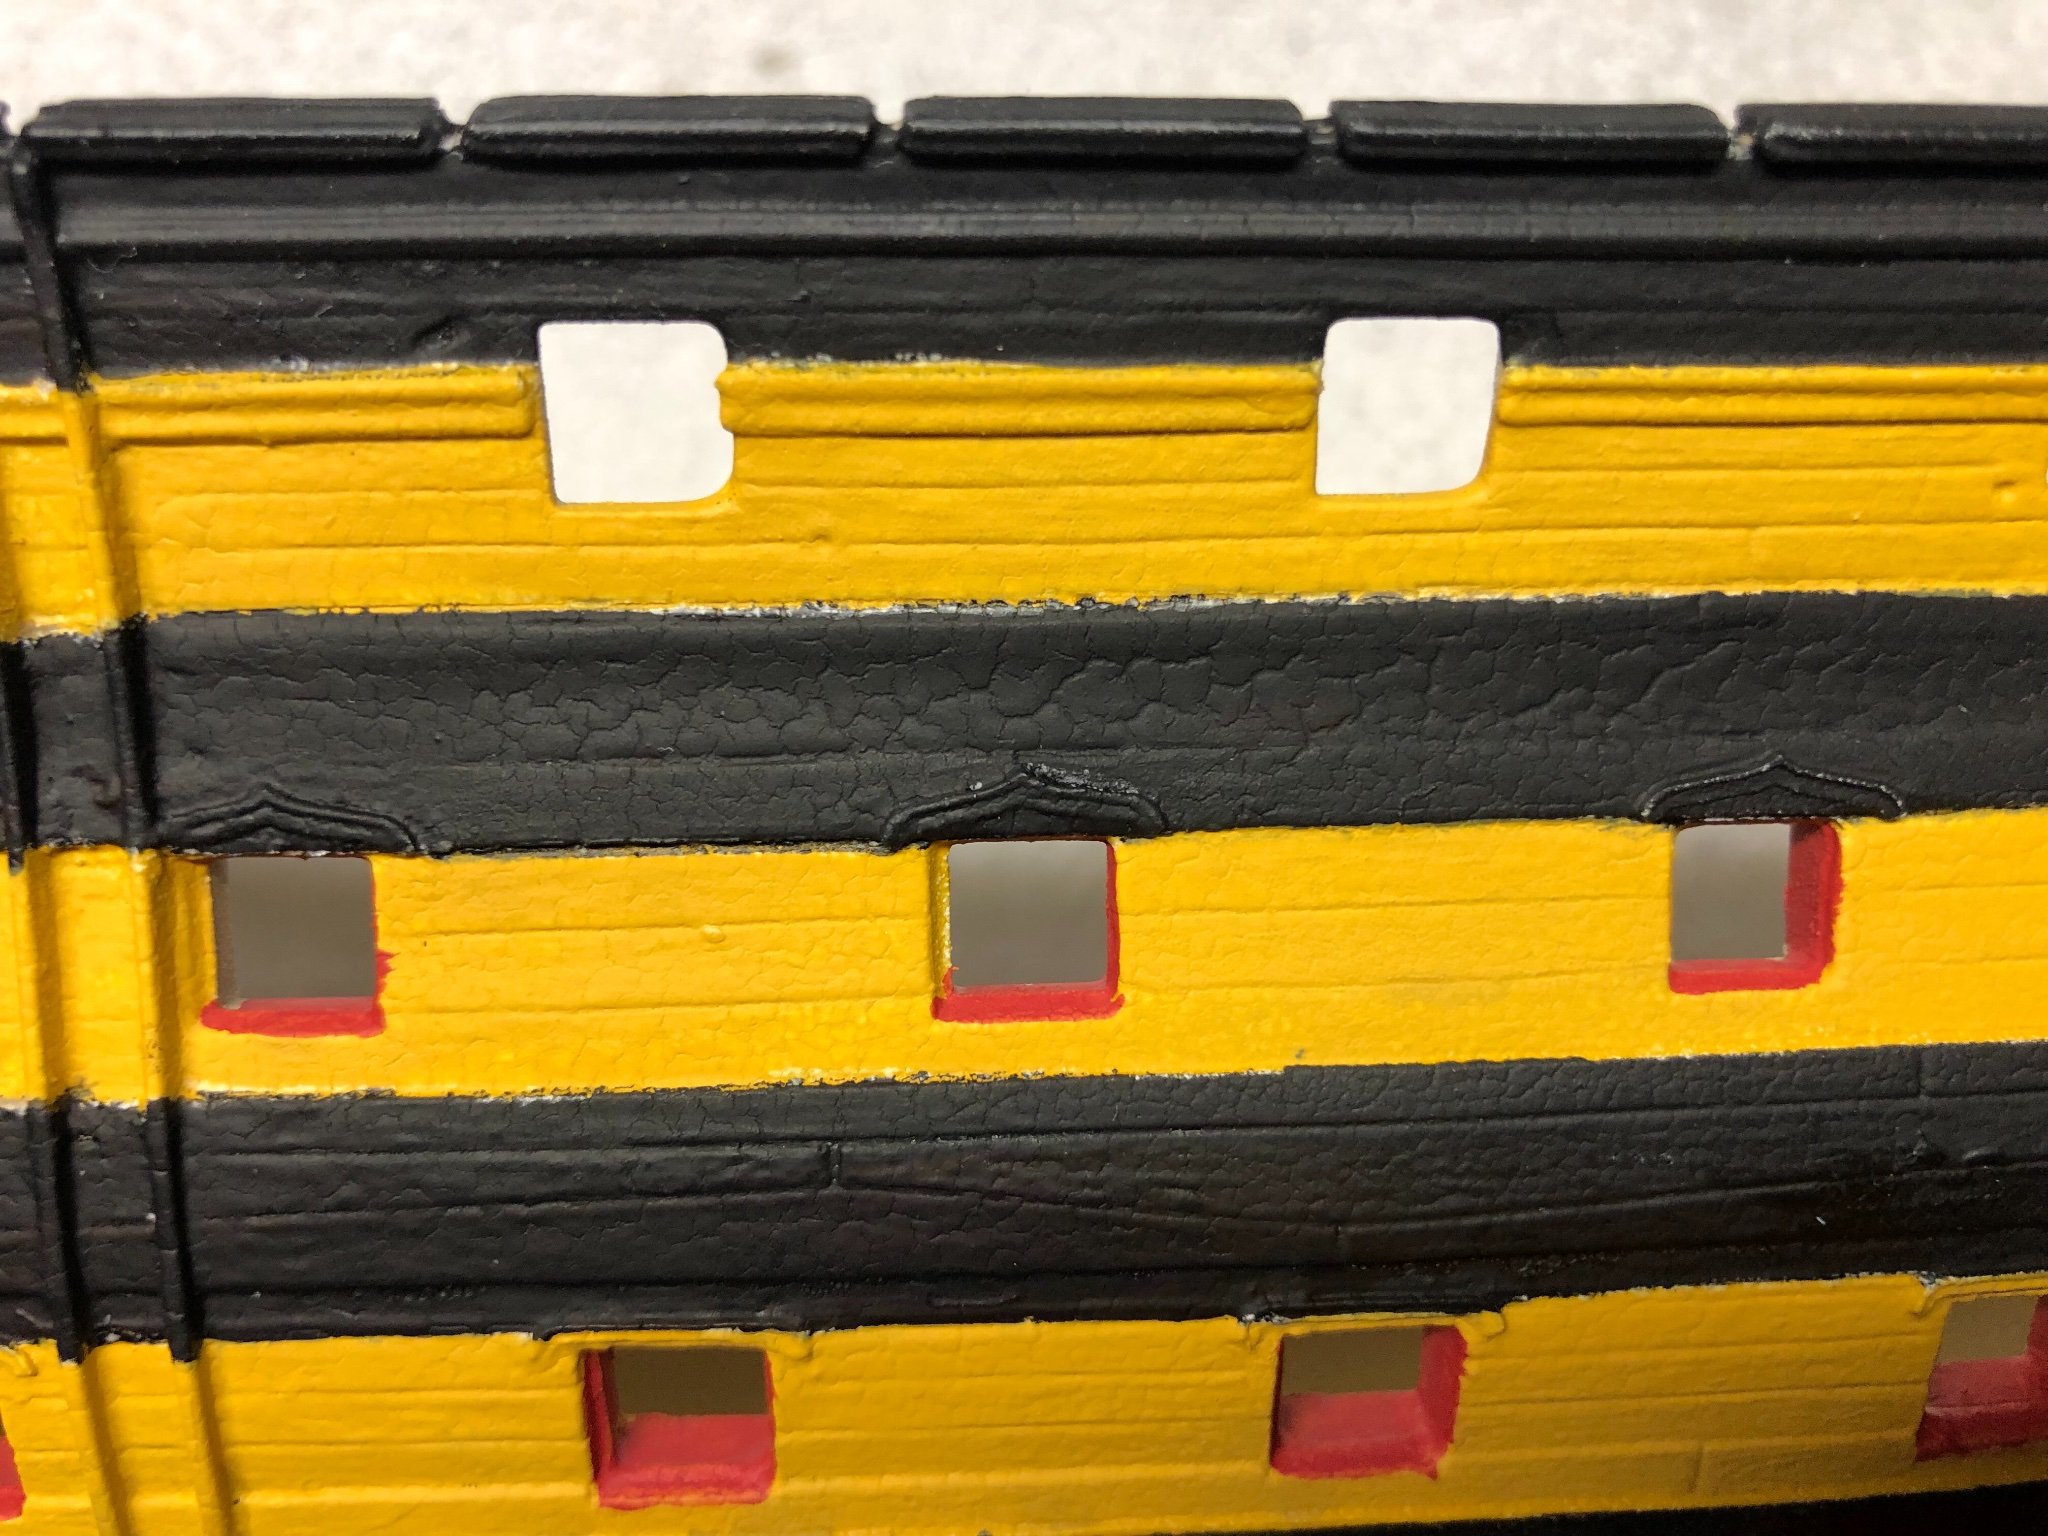
Wow. Pictures don’t lie. I can see in my photo that on the port side below third cannon hatch I need a little work on black line v
-
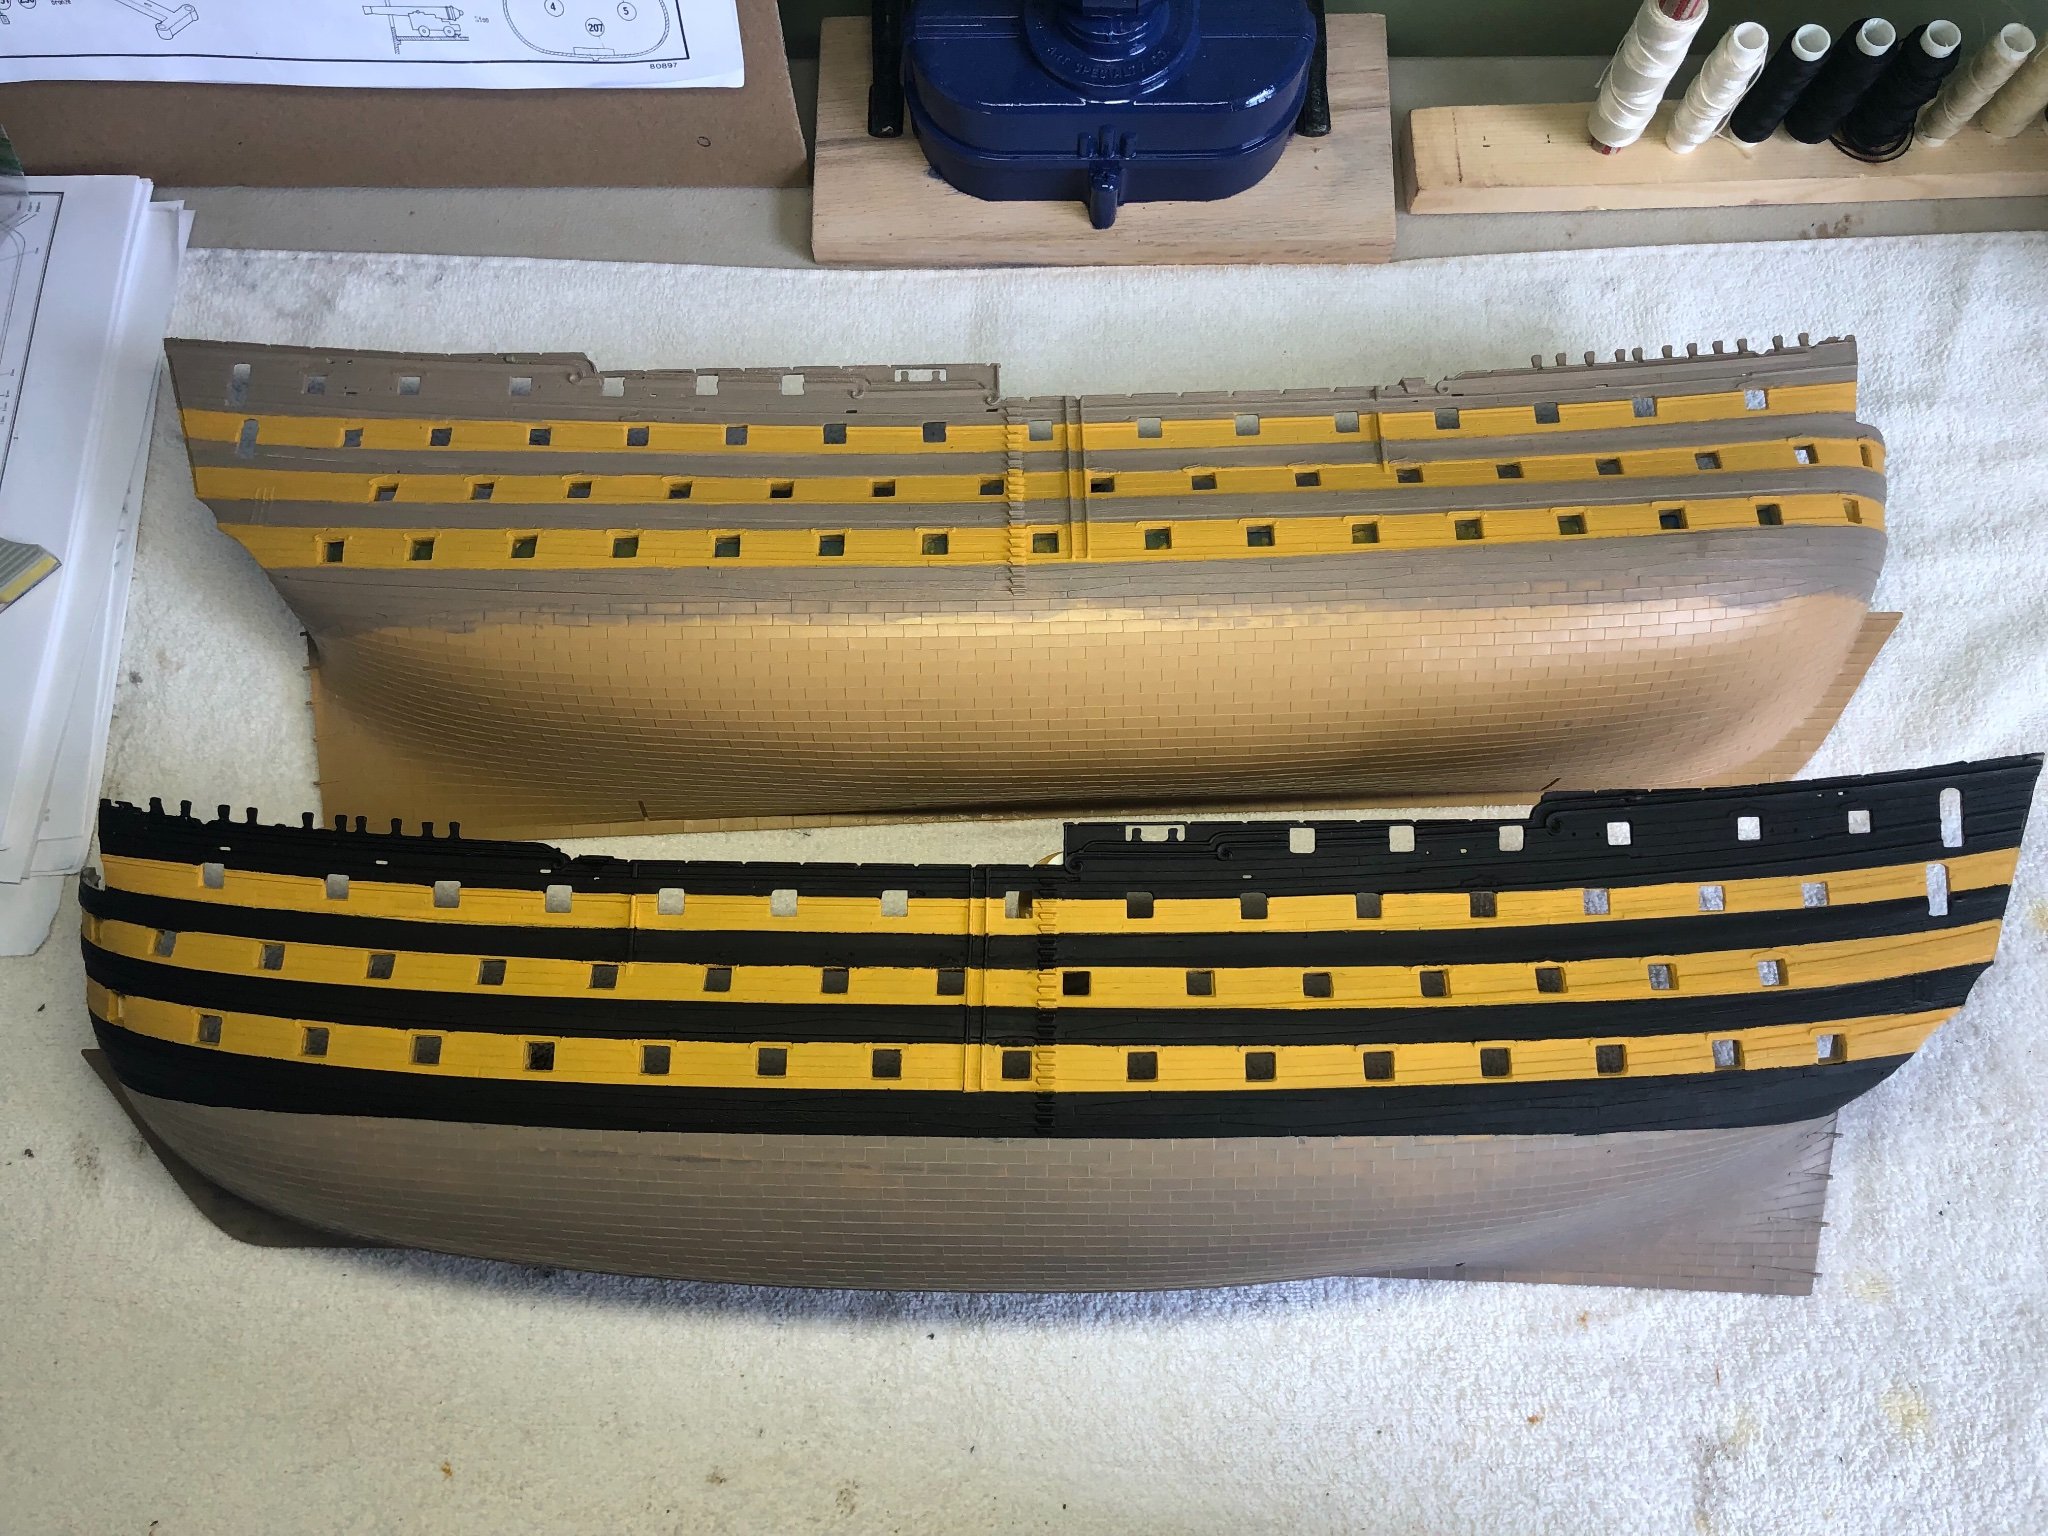
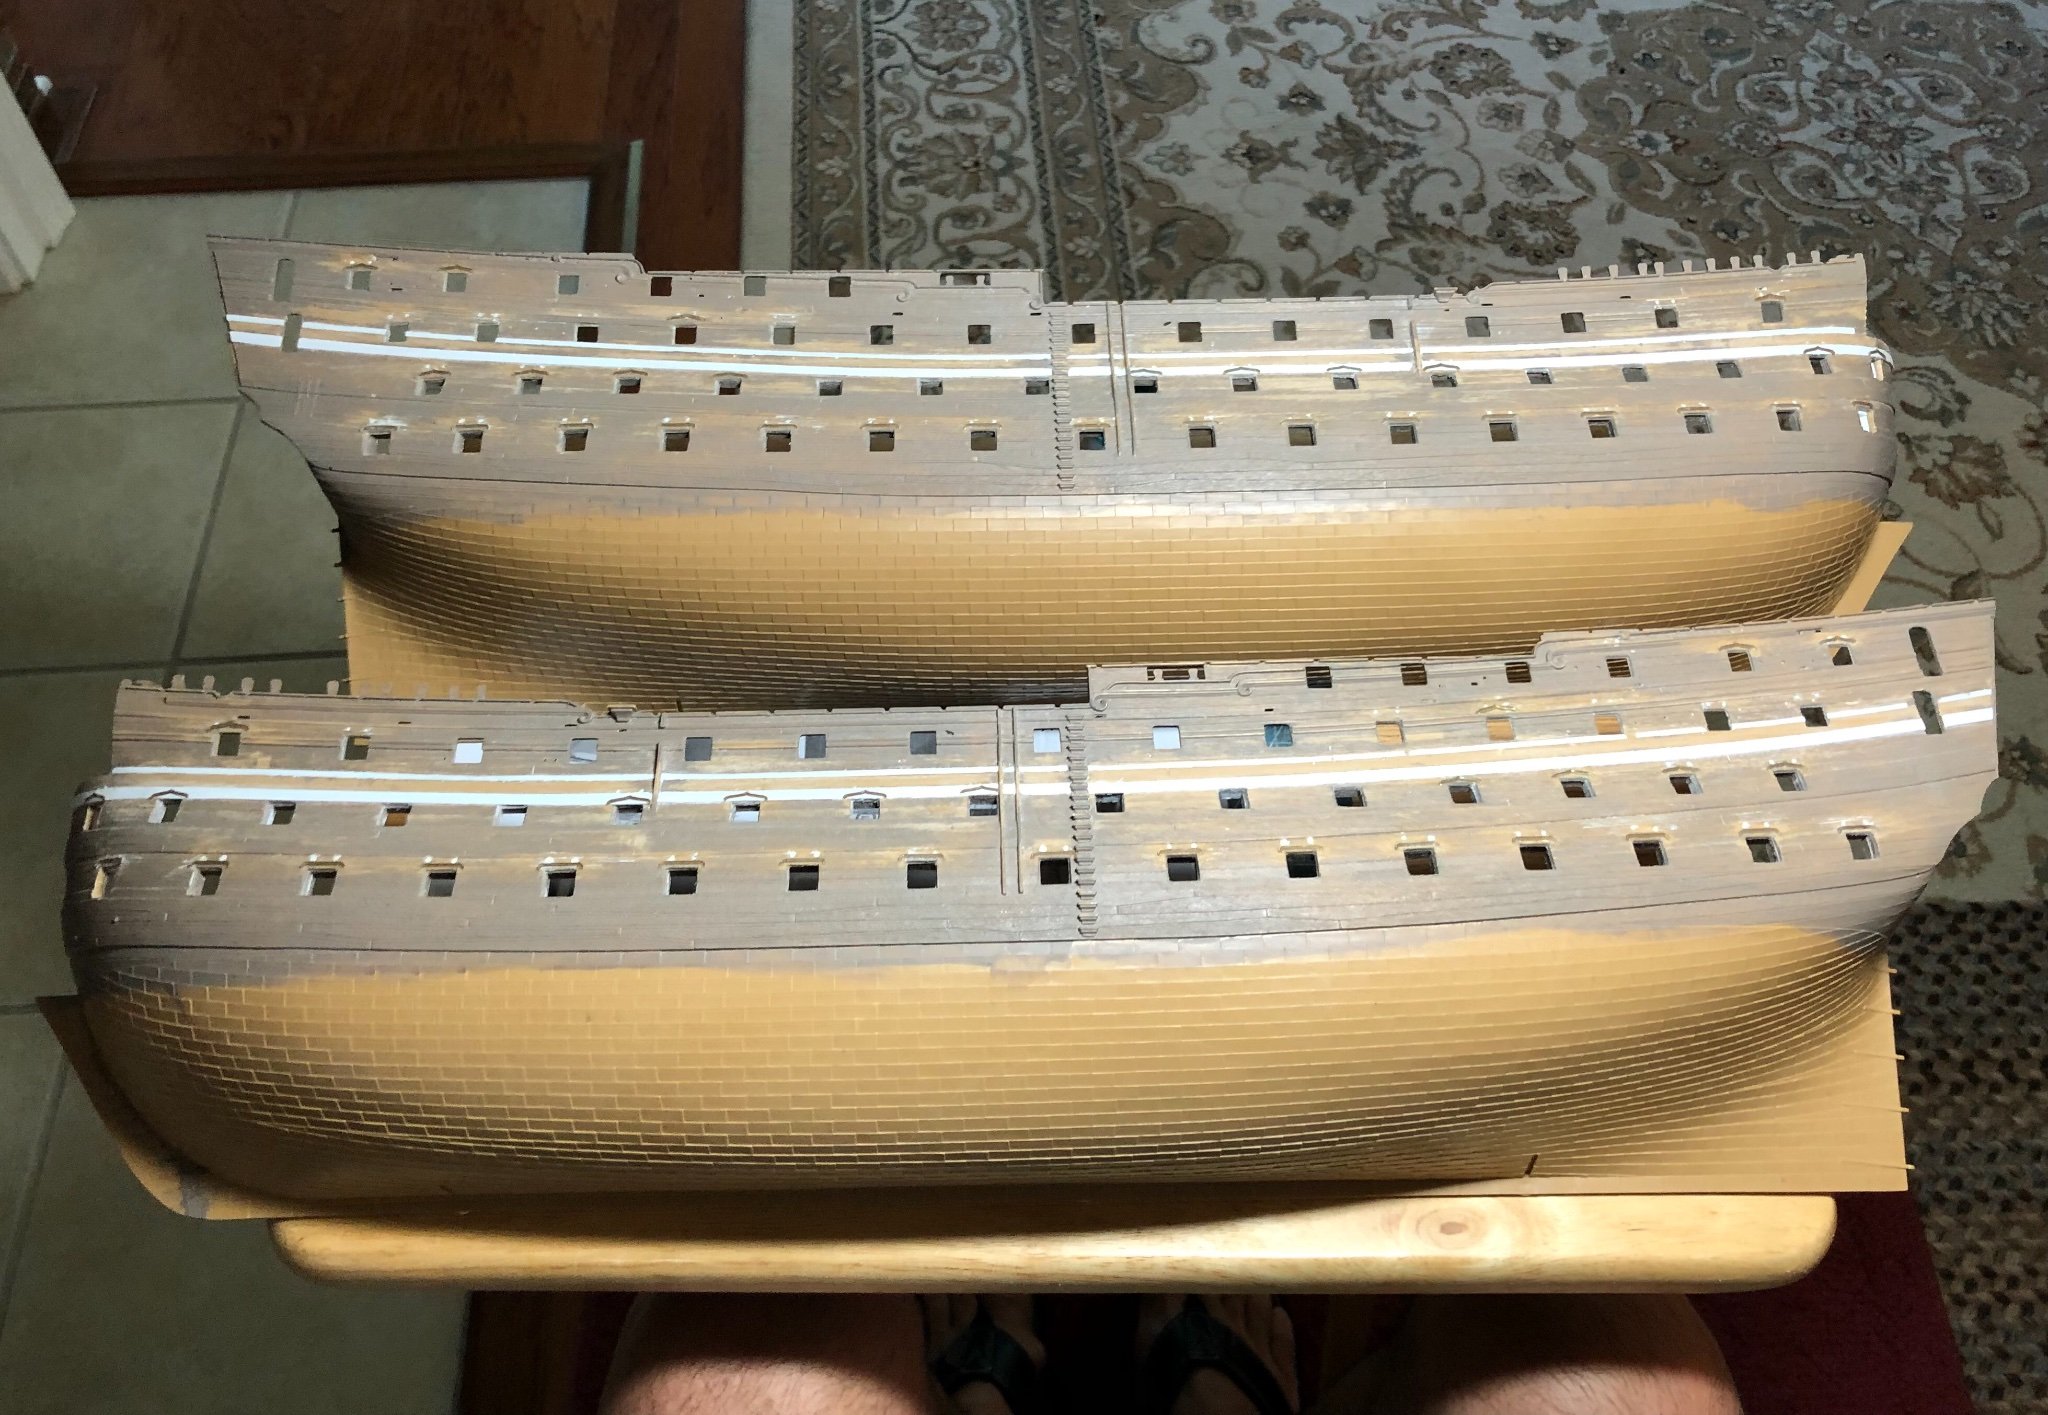
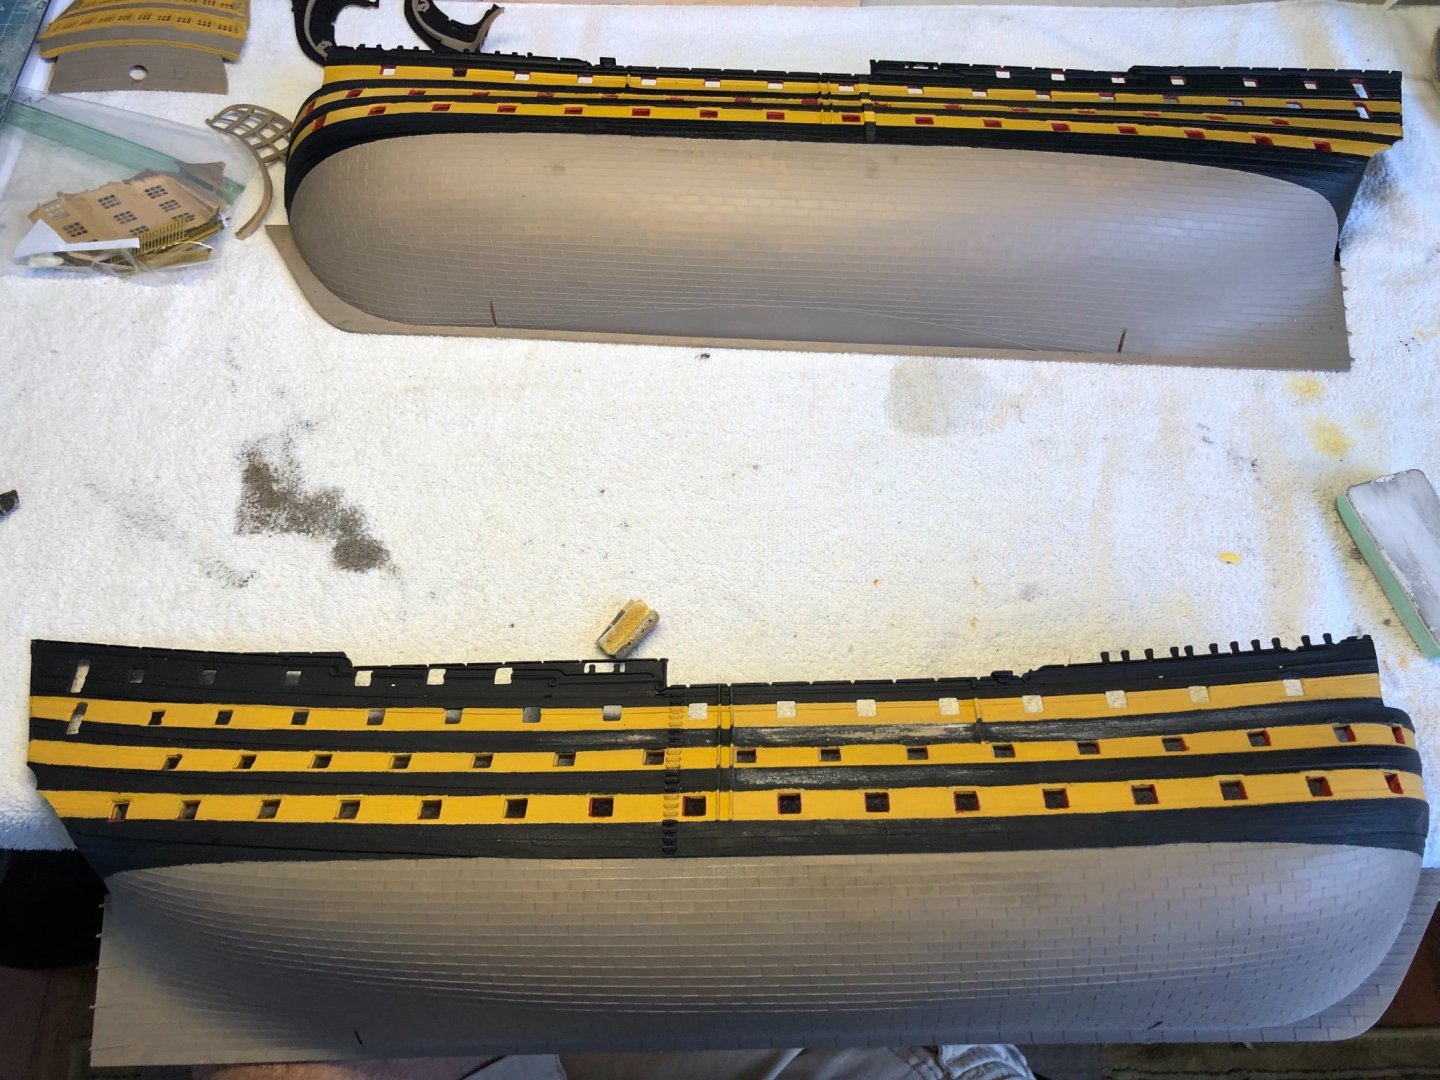
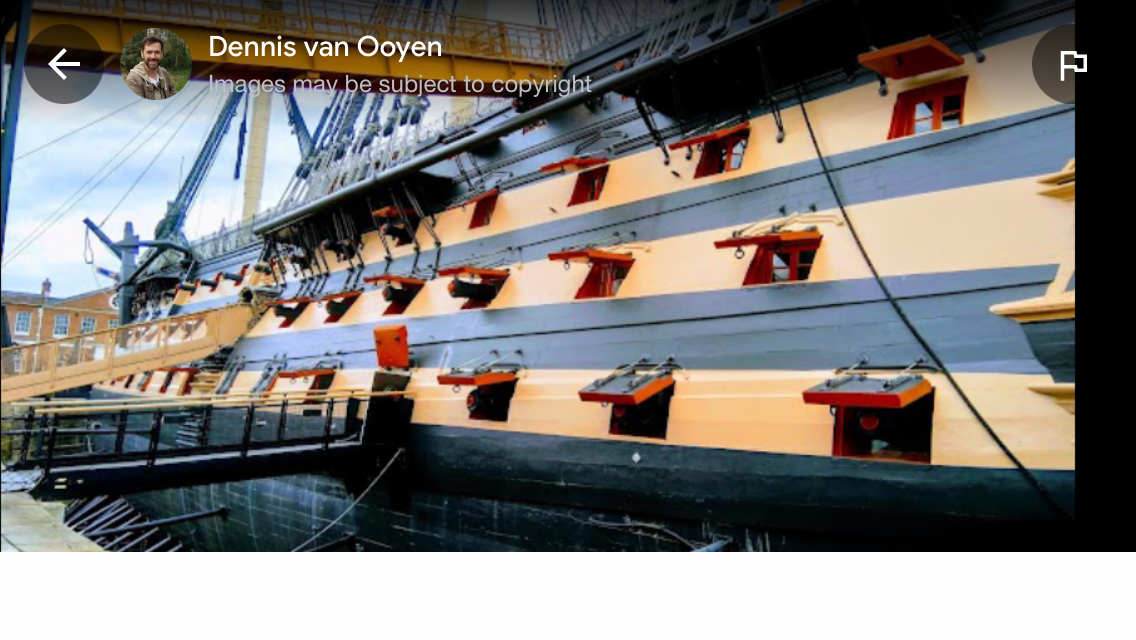
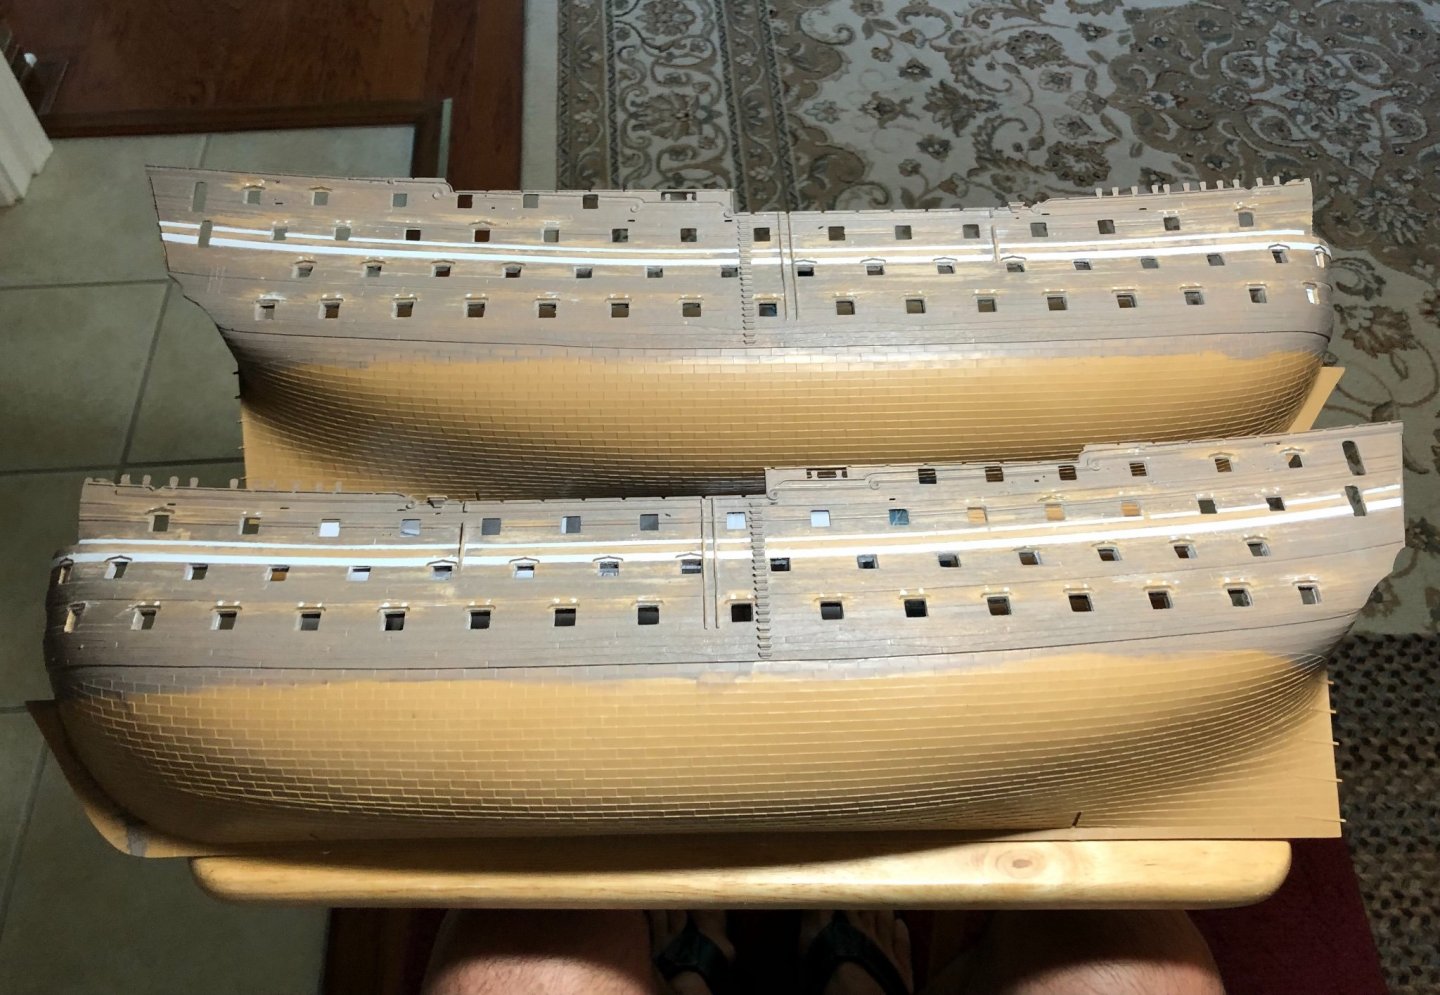
Both sides of hull exterior painted except for copper bottom! Dry fitted to make sure bee lines flow together. Much more to go on hull halves. Paint copper at the bottom, cannon hatches red inside, and all the inside of the hull painting to go as well as drilling all the tiny holes for the hatch ropes.

-
Thank you Hubac. So nice of you to say.
-
Thanks guys. So you think good to go as is? On to the black then.
-
Yellow ochre stripes painted! This was more time consuming than it should have been! Gray color is undercoat where black will go. Then the copper bottom of the hull.

-
Thanks gentlemen. I hope to finalize my masking lines tomorrow. Downloaded a few more pictures from other builders to further cause my analysis paralysis! 😊

-
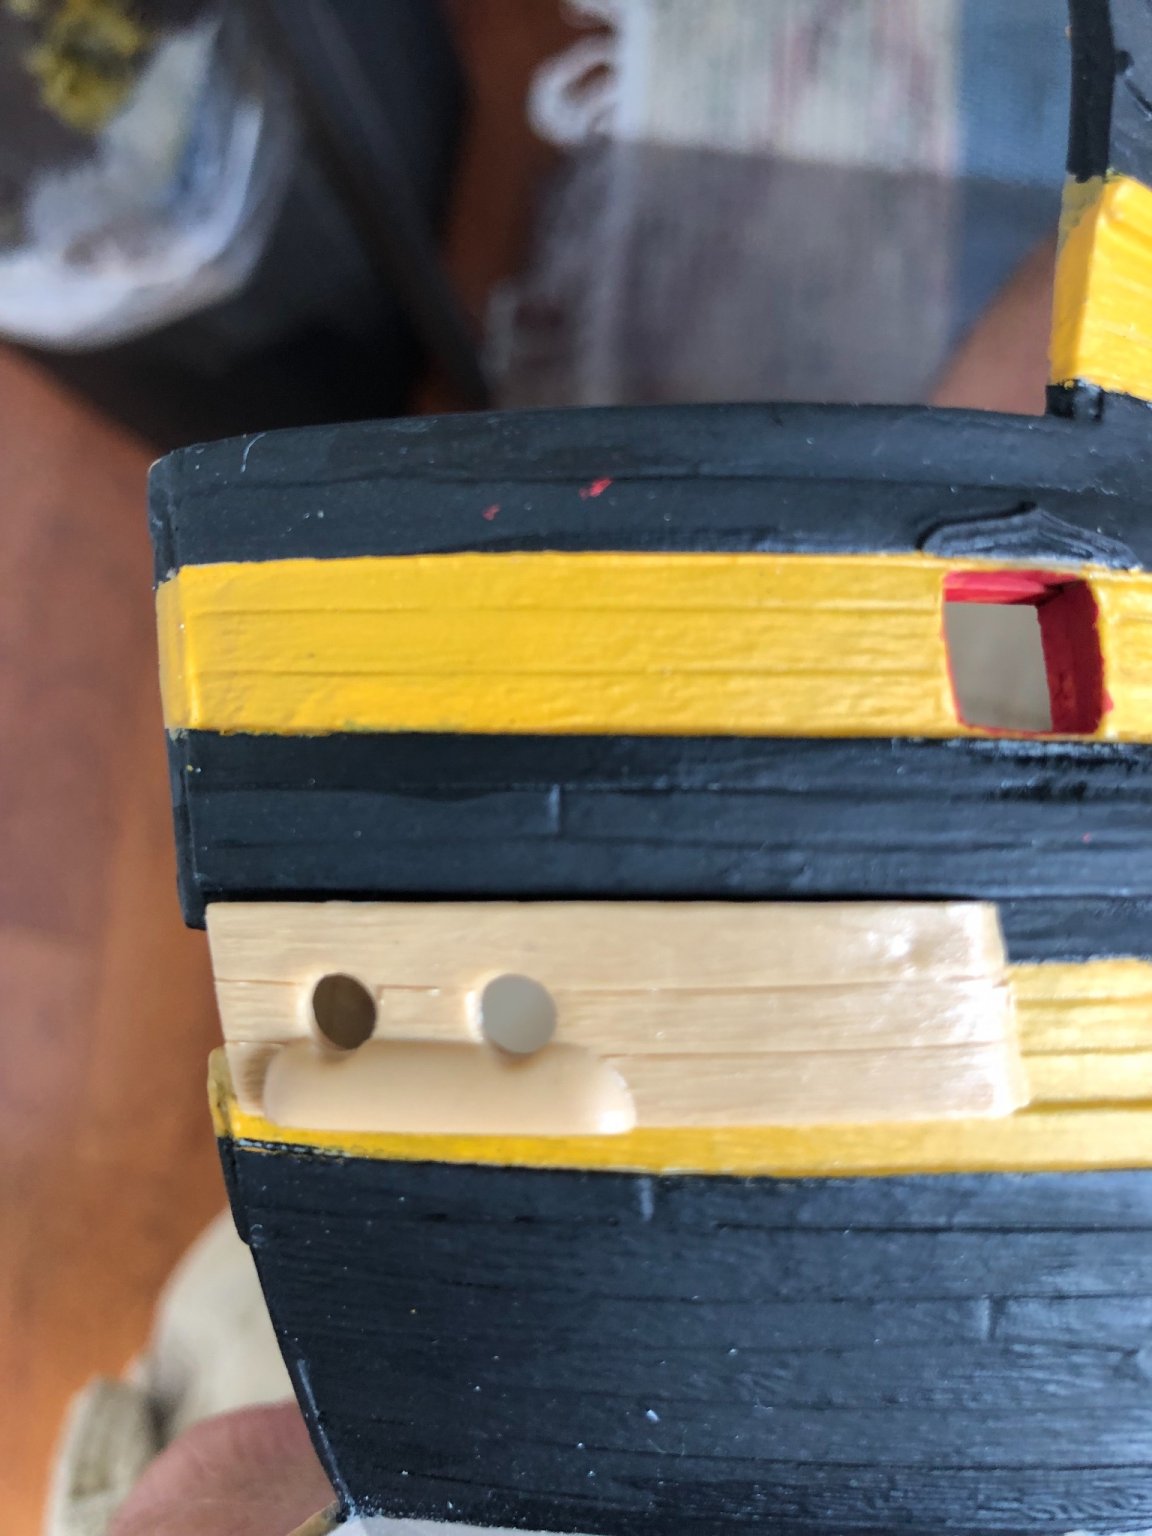
Thanks Daniel. Always appreciate your advice. In the below picture (if you zoom in) you can see how nicely the rigols came out. Have a bit of primer on them.

-
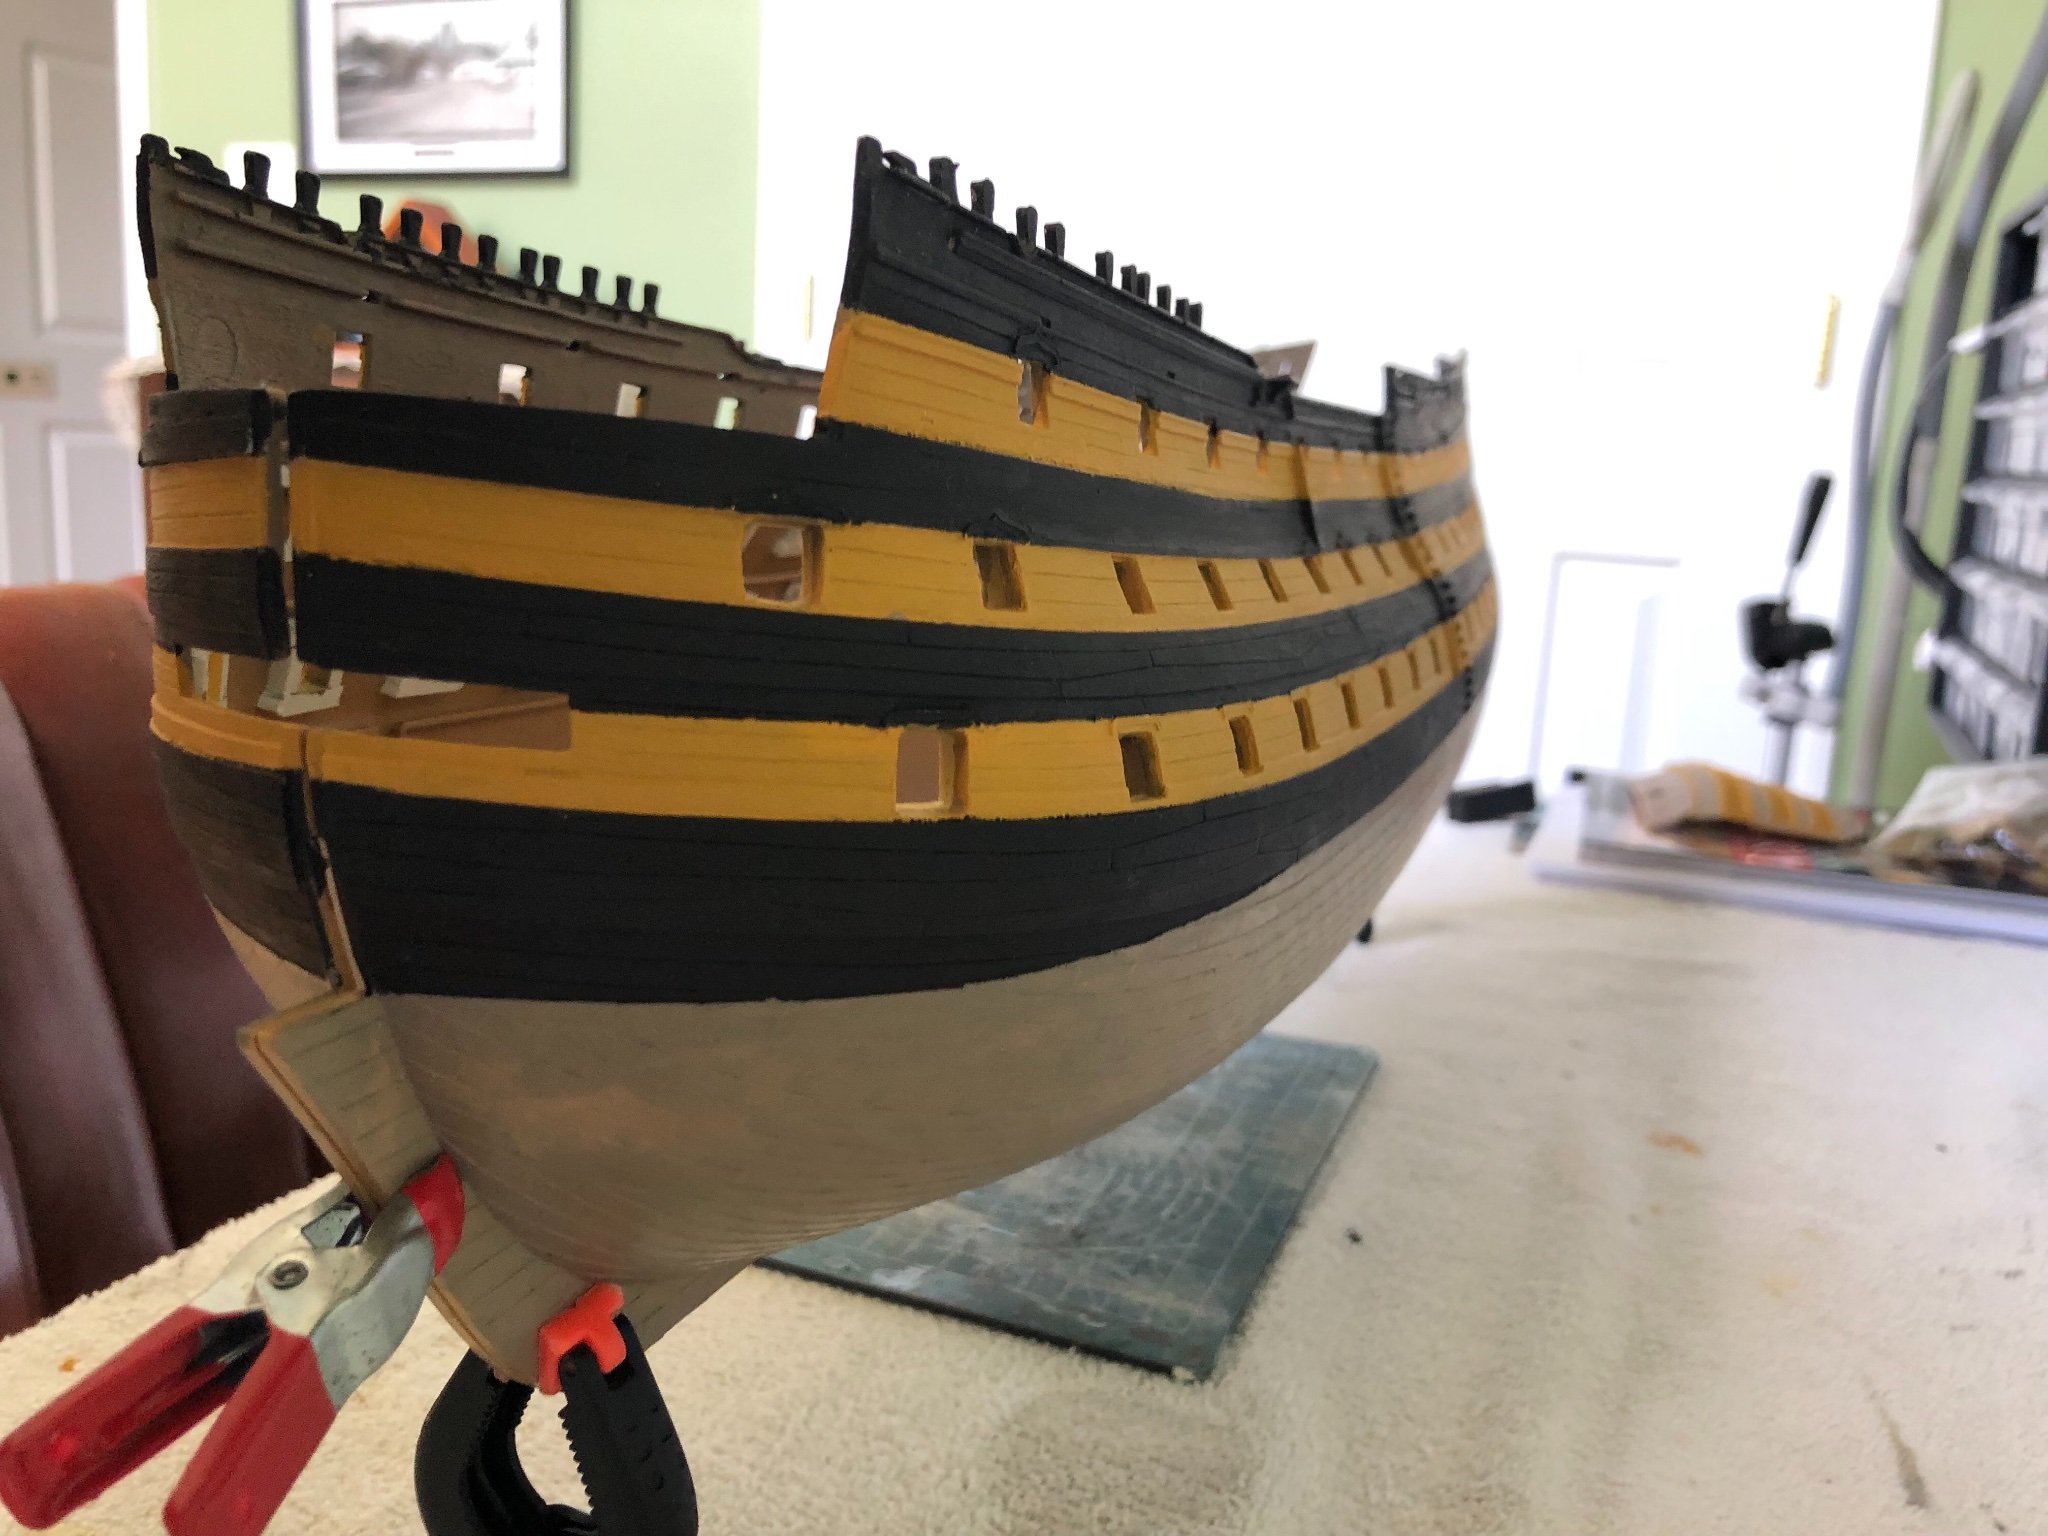
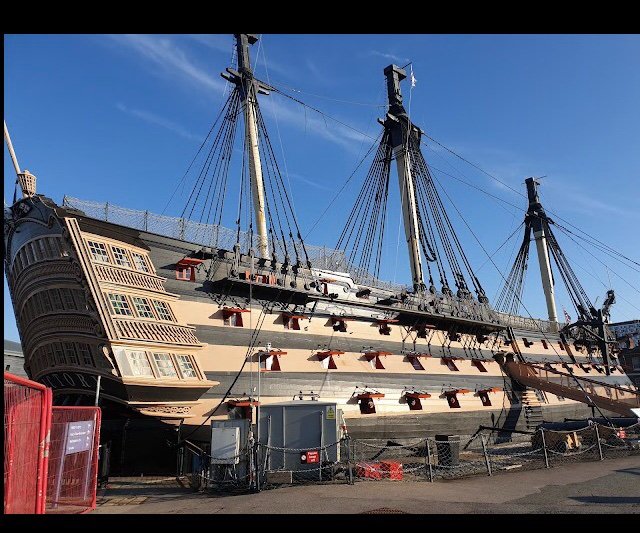
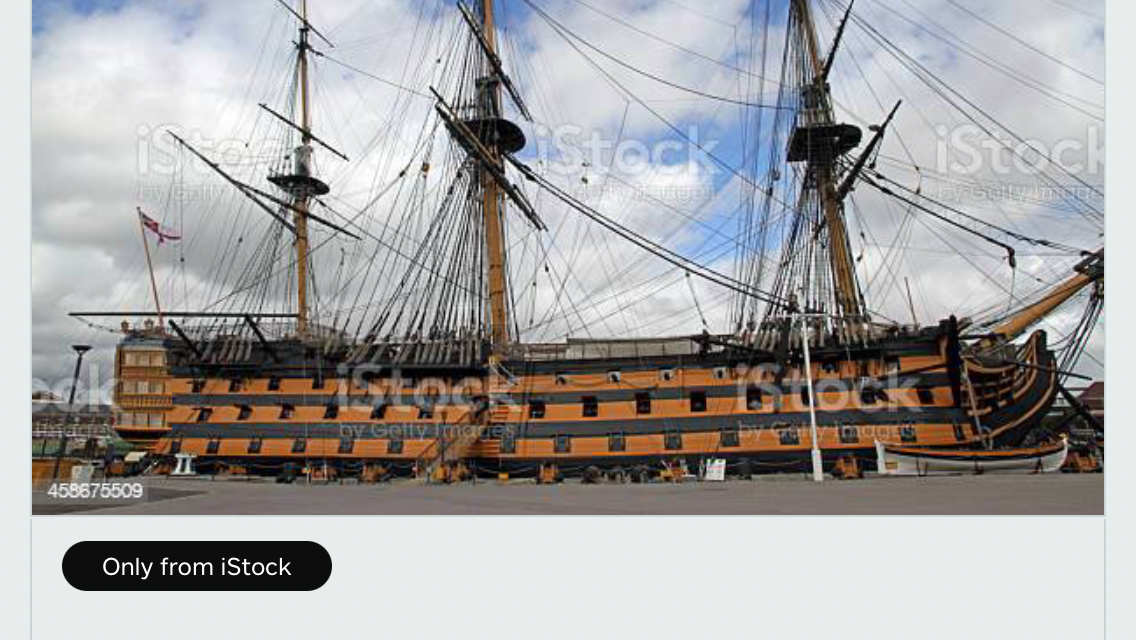
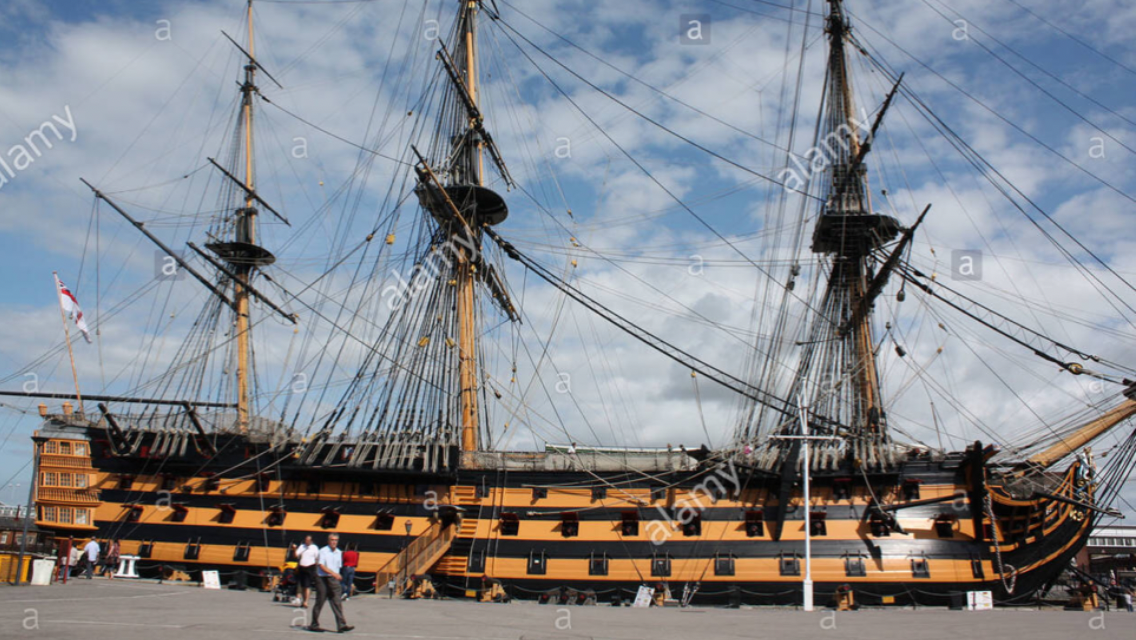
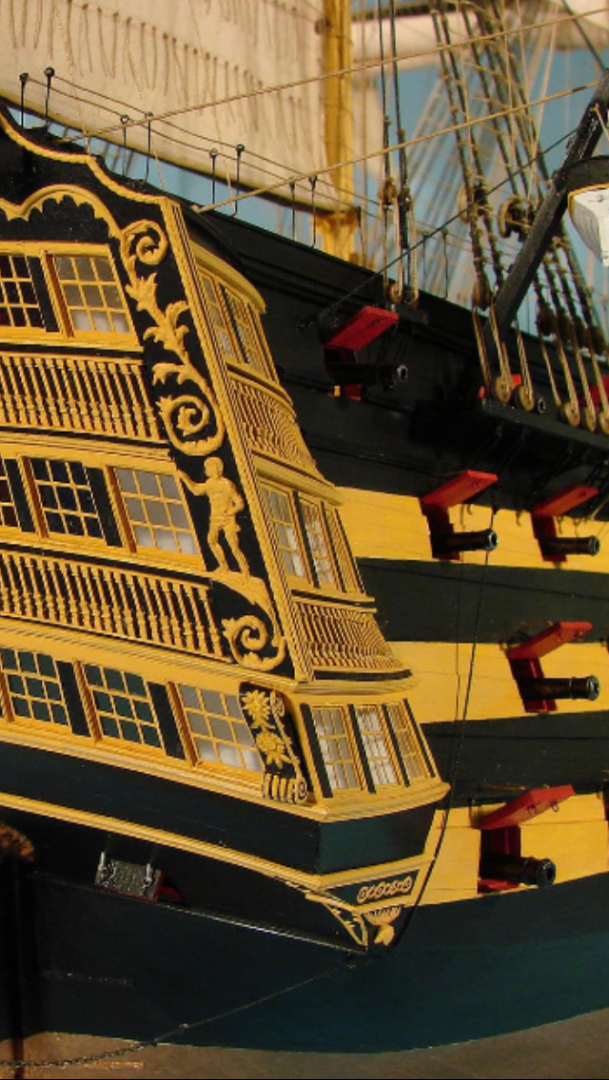
Oh no Ian. That’s great. I understand from your photos now. Is that your Victory you included a photo of. Beautiful job! I do see what you mean by the stripes lining up smoothly with the windows in the quarter gallery. I found these stock photos that help as well.

-
Ian I read your recommendation again and looked at the attached photo. Can you further explain what you mean by “offer up the quarter galleries to your hulls before you paint and make sure the ocher bee lines meet nicely with the lower two levels of gallery windows.” In this photo there does not seem to be a meeting of the hull lines to the quarter gallery. I may be a little confused what you are advising me. Bill
-
Great idea on the quarter galleries Ian. I will do that before I finalize my masking. Bill
-
Thanks Kevin. If I don’t hear from Ian or Daniel that I am completely wrong I am going to go with this masking. Seriously doubt I will be rigging this year! 😊 Bill
-
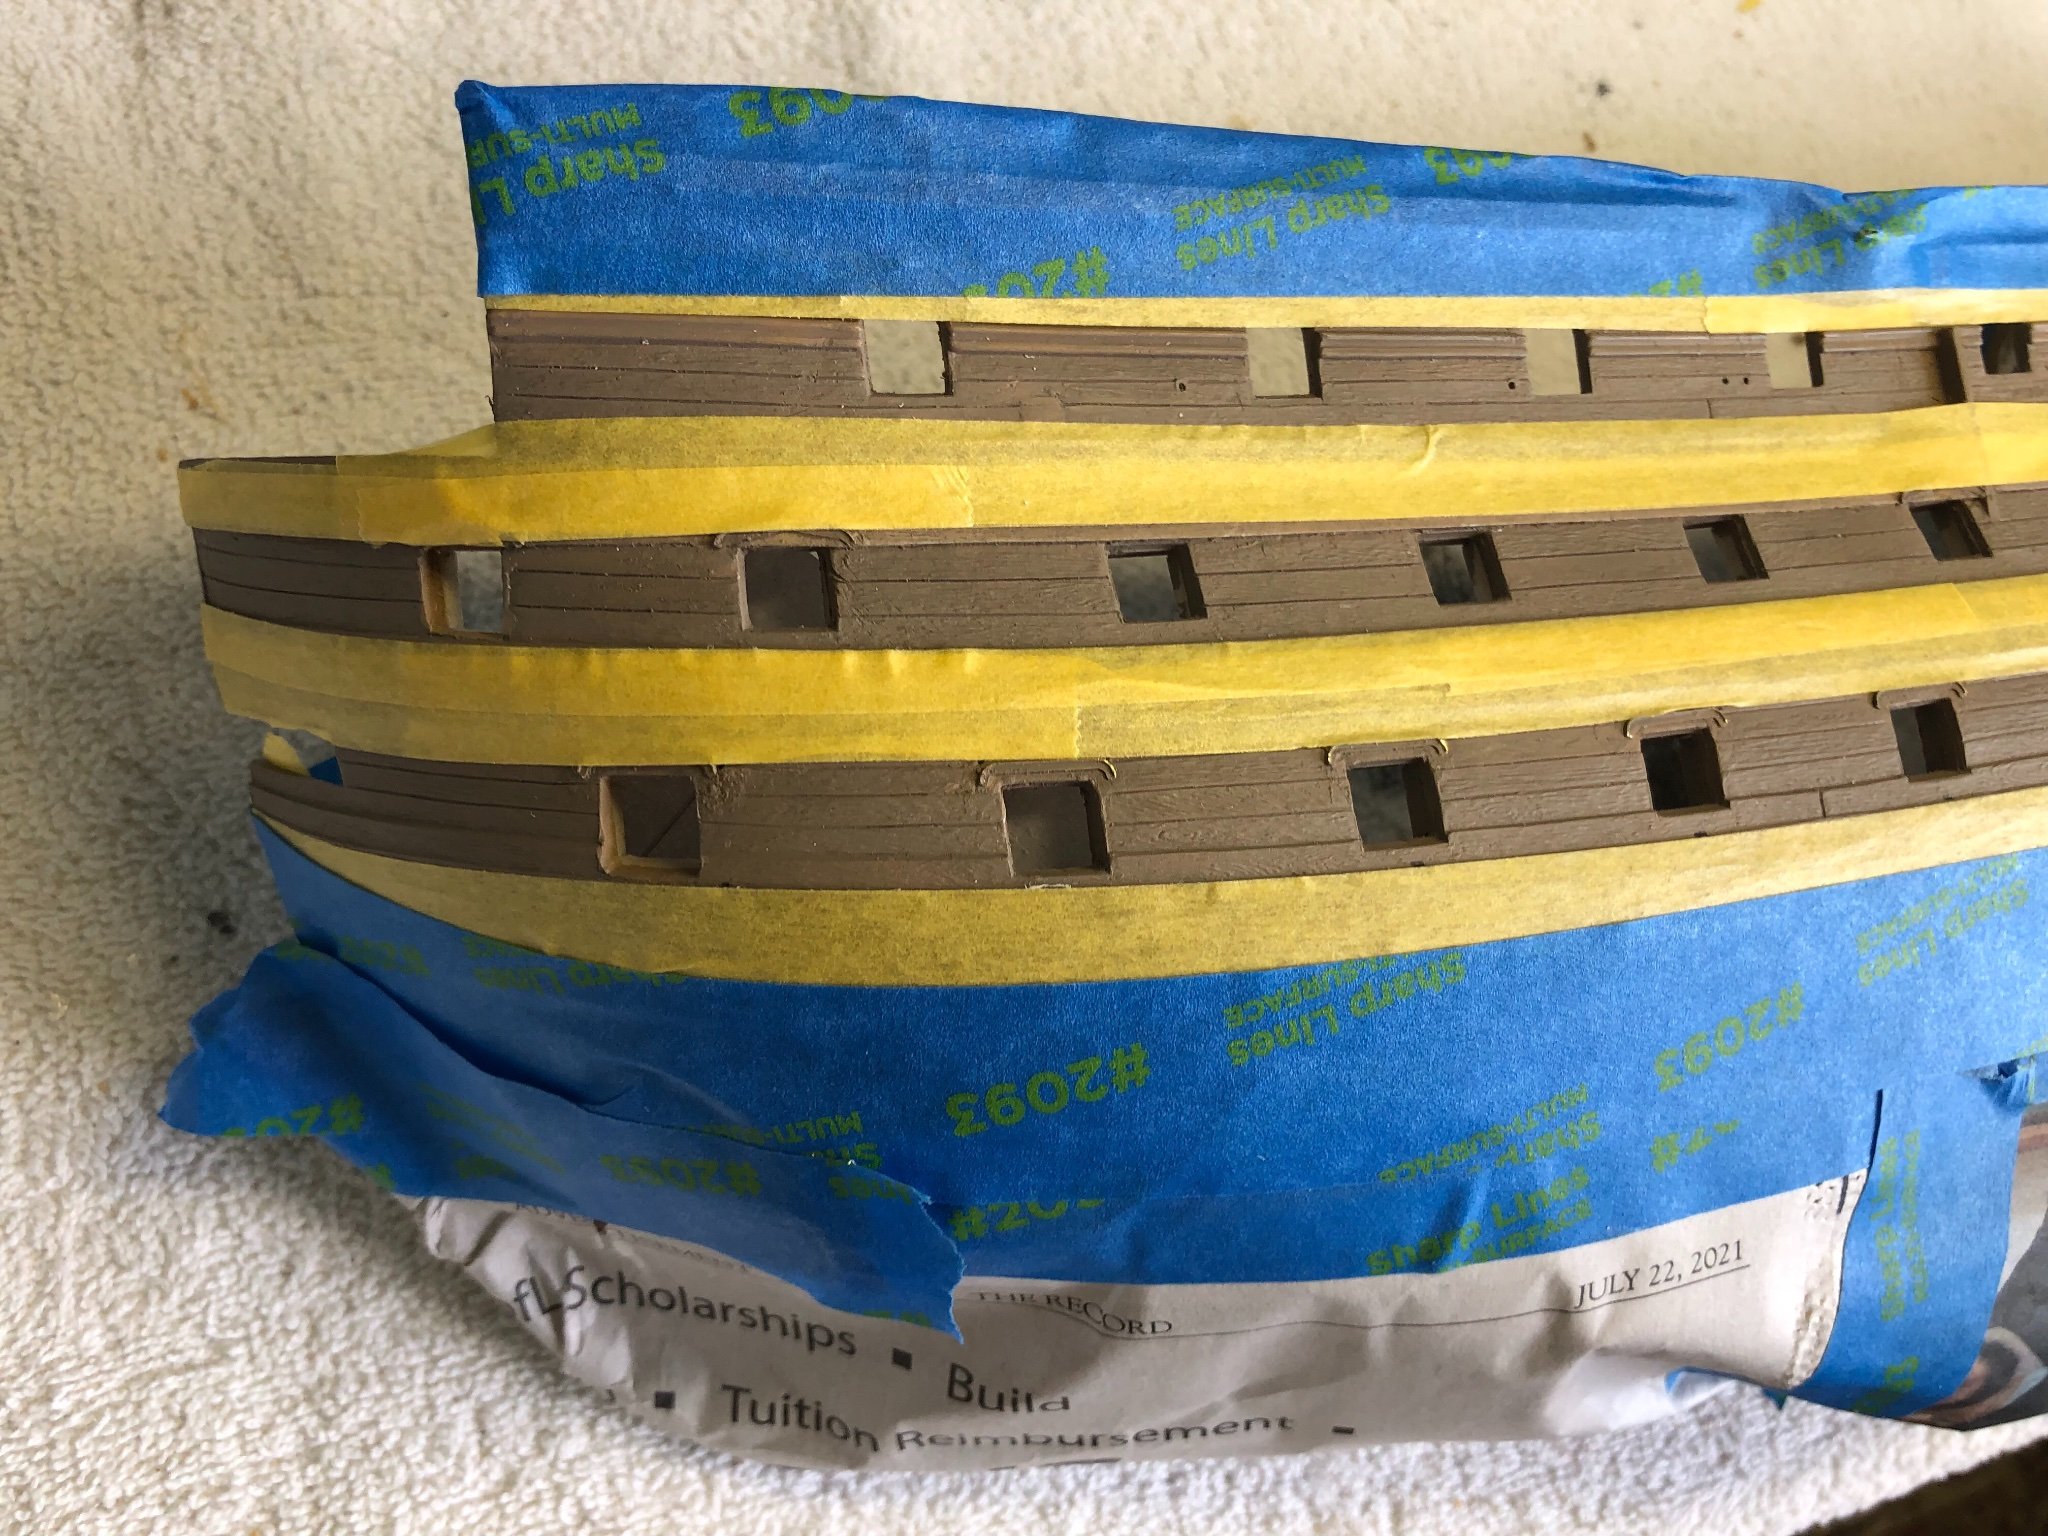
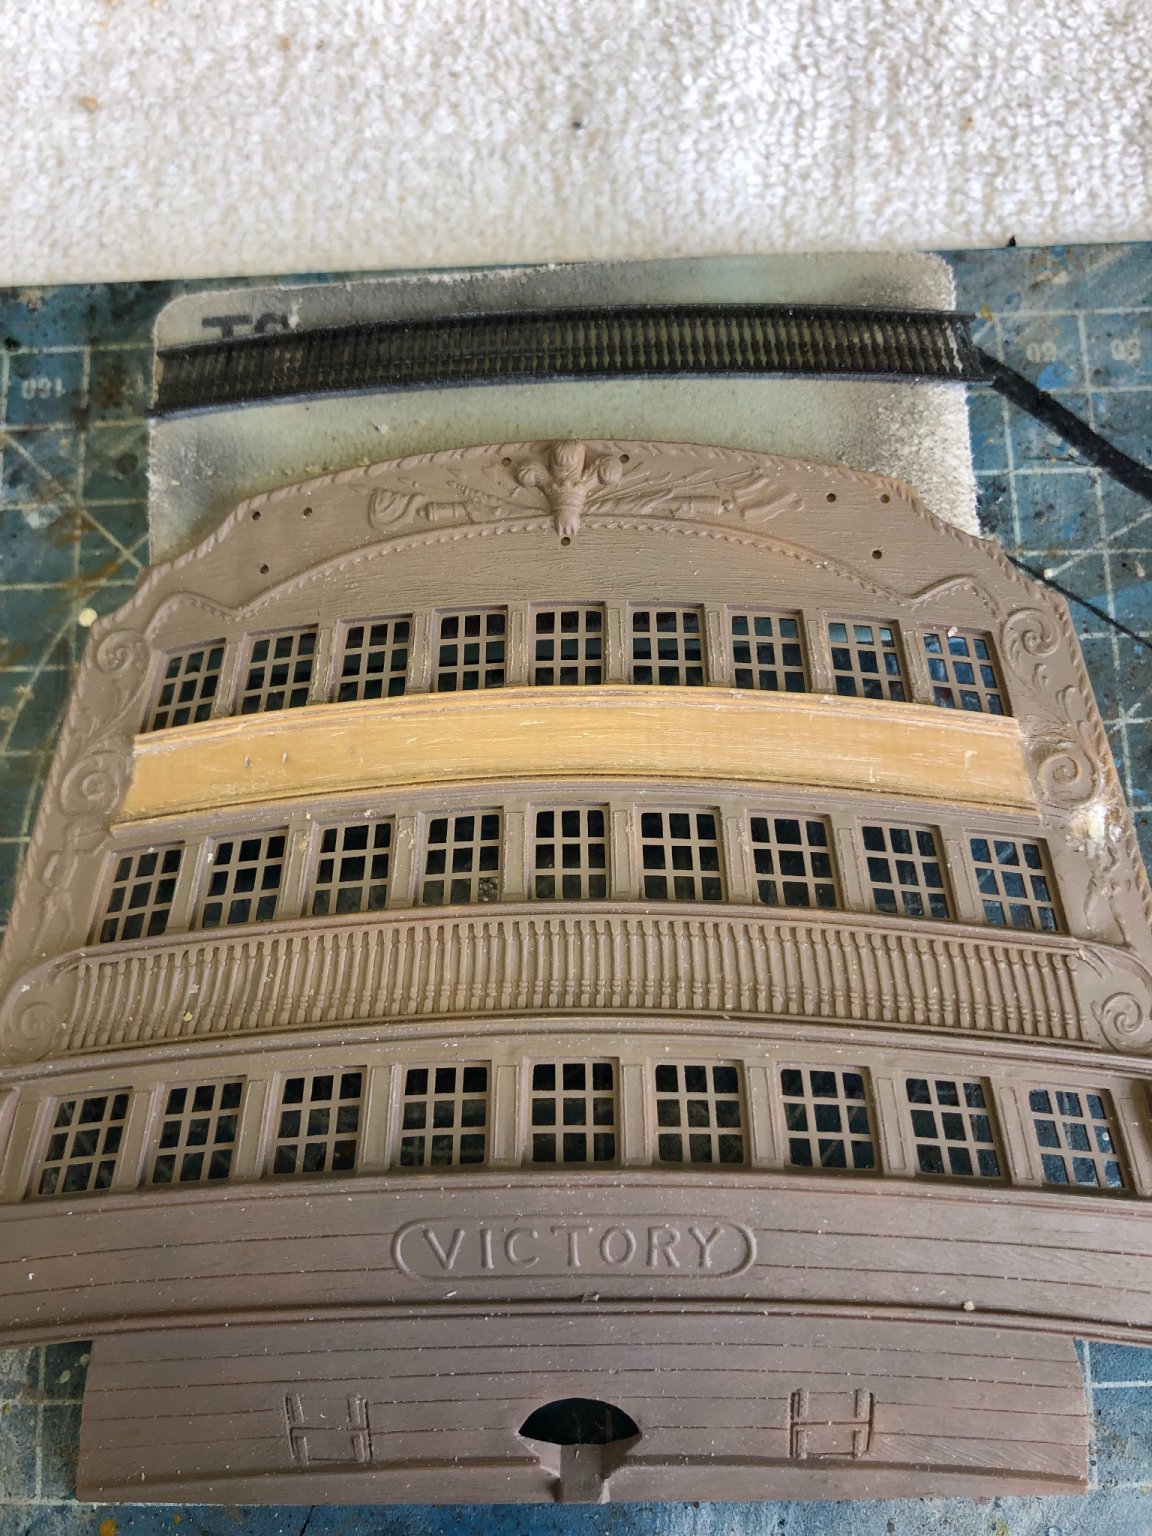
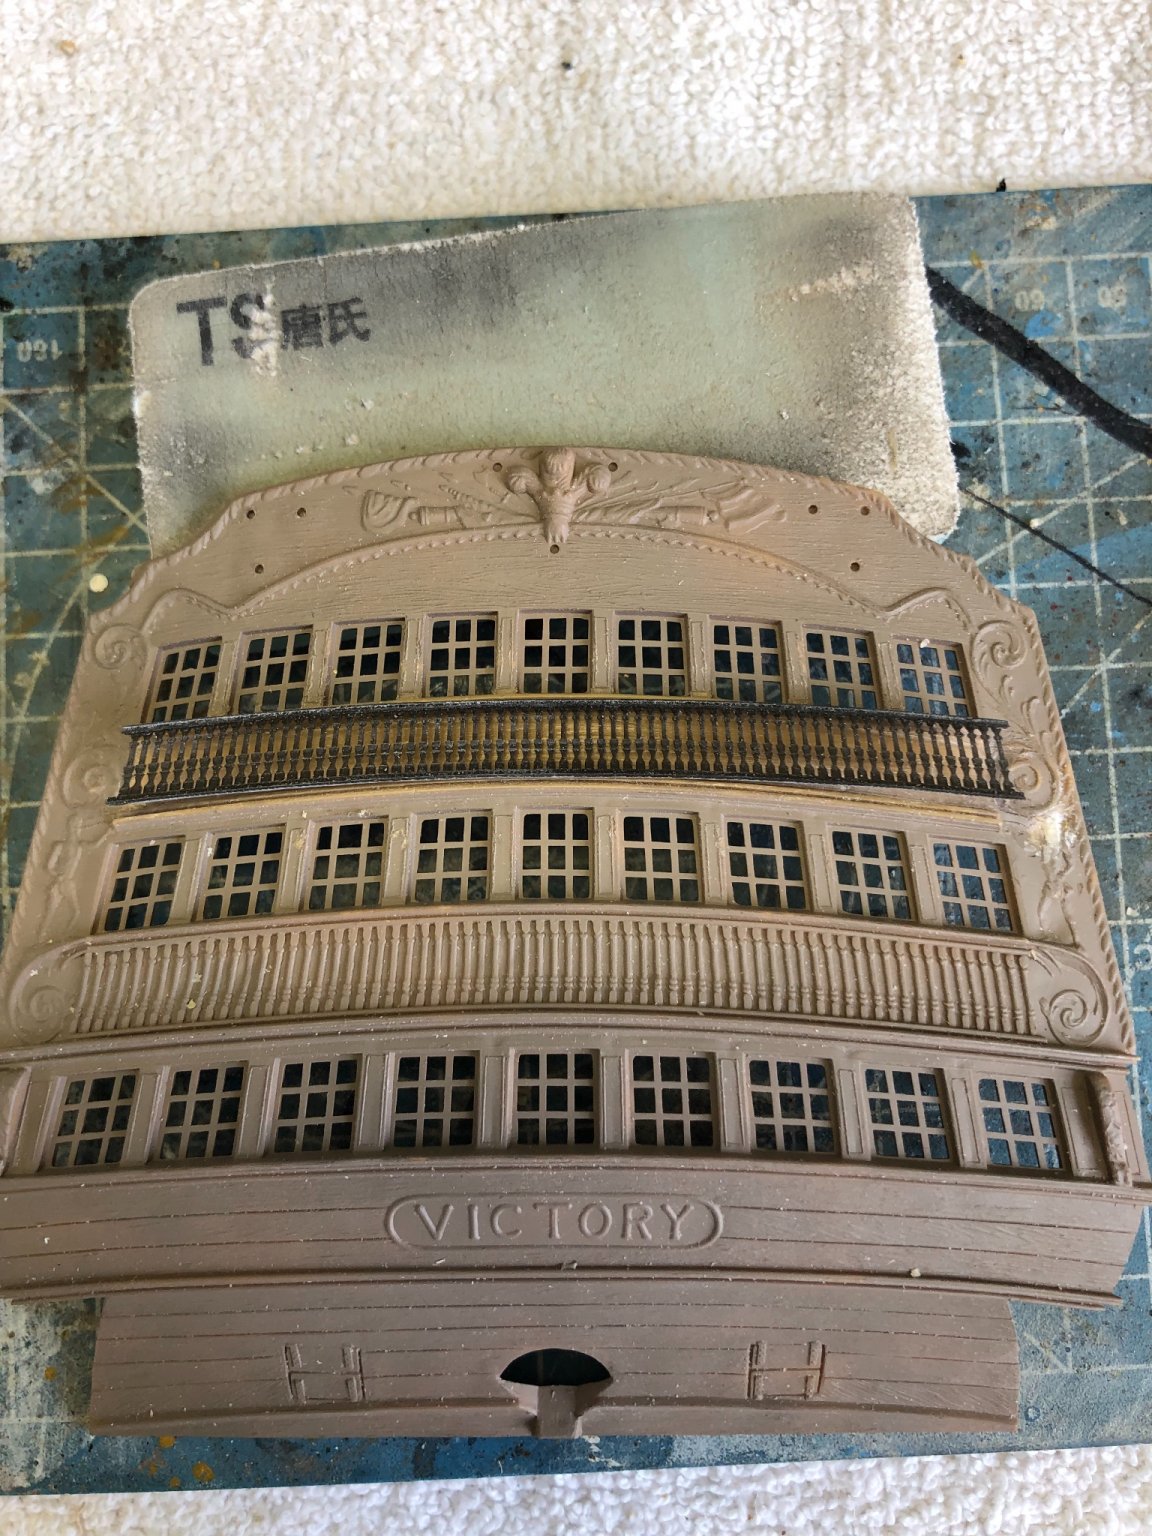
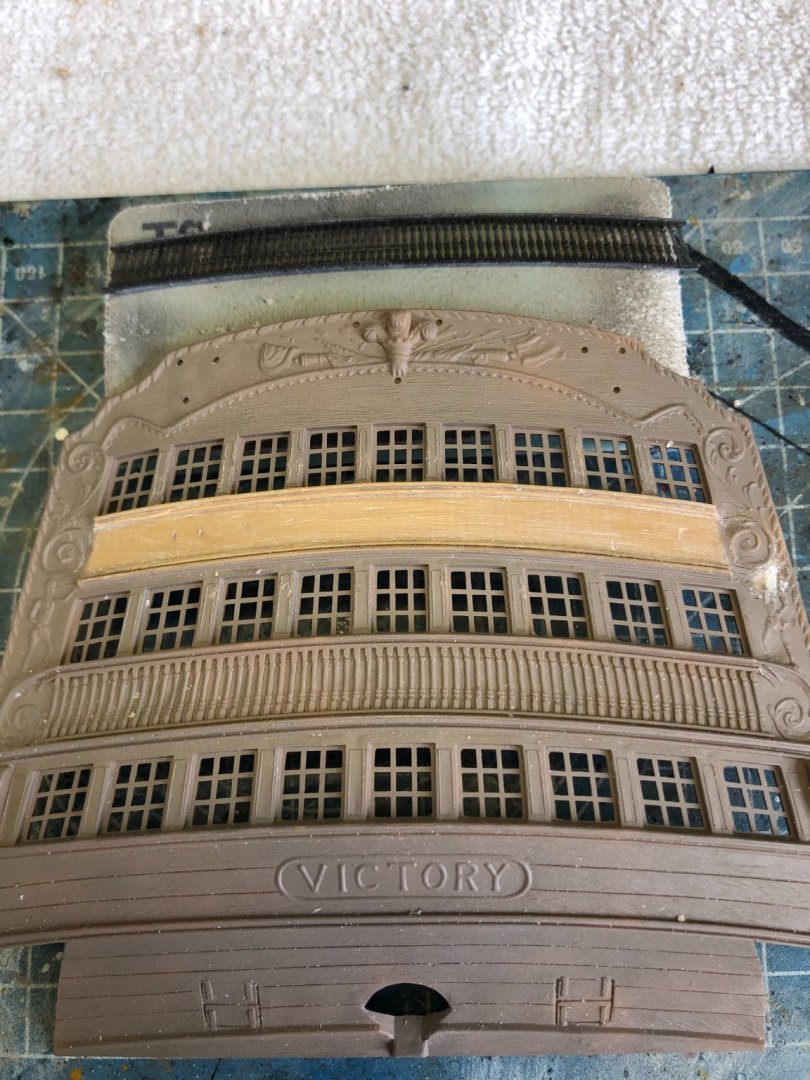
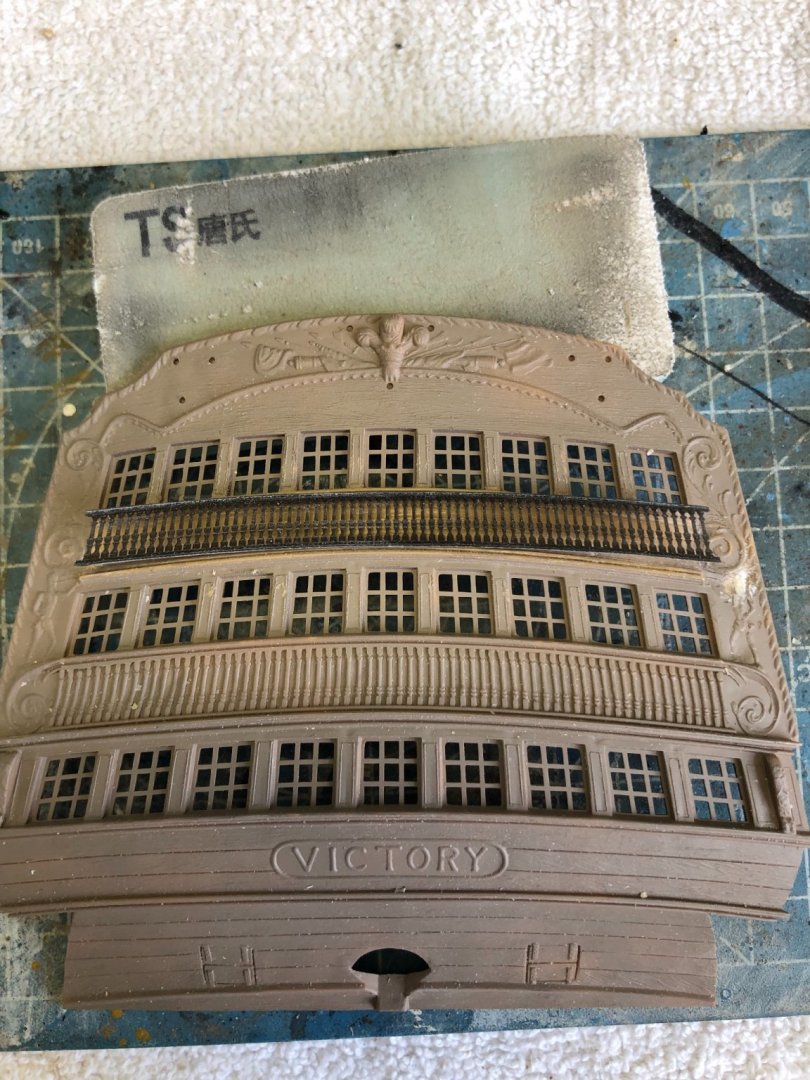
Thanks Kevin. So you think I am pretty close as to where my divisions lines cut either above, below, or through the gun ports? While I wait for confirmation of my lines to begin painting I have moved to working on the stern. Removing the molded balusters in prep for adding Daniel’s resin balusters. One of the figures on the right side of the stern was defective by a sunken spot in the plastic where the head should be. Going to have to fill and attempt to shape it to match the left side.
-
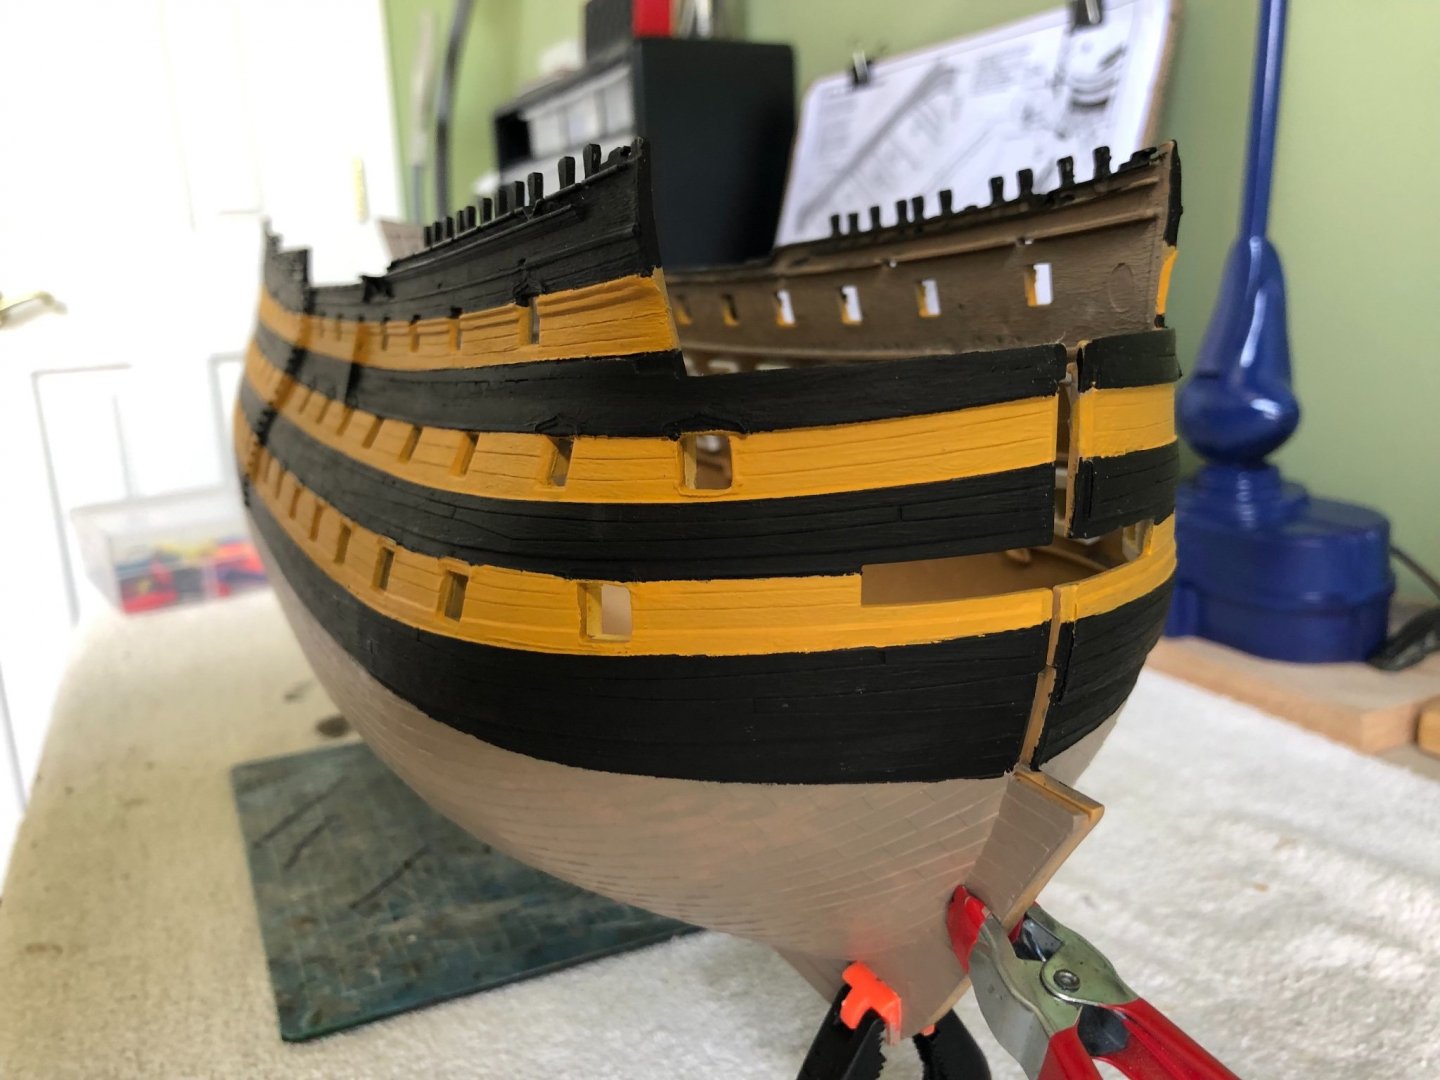
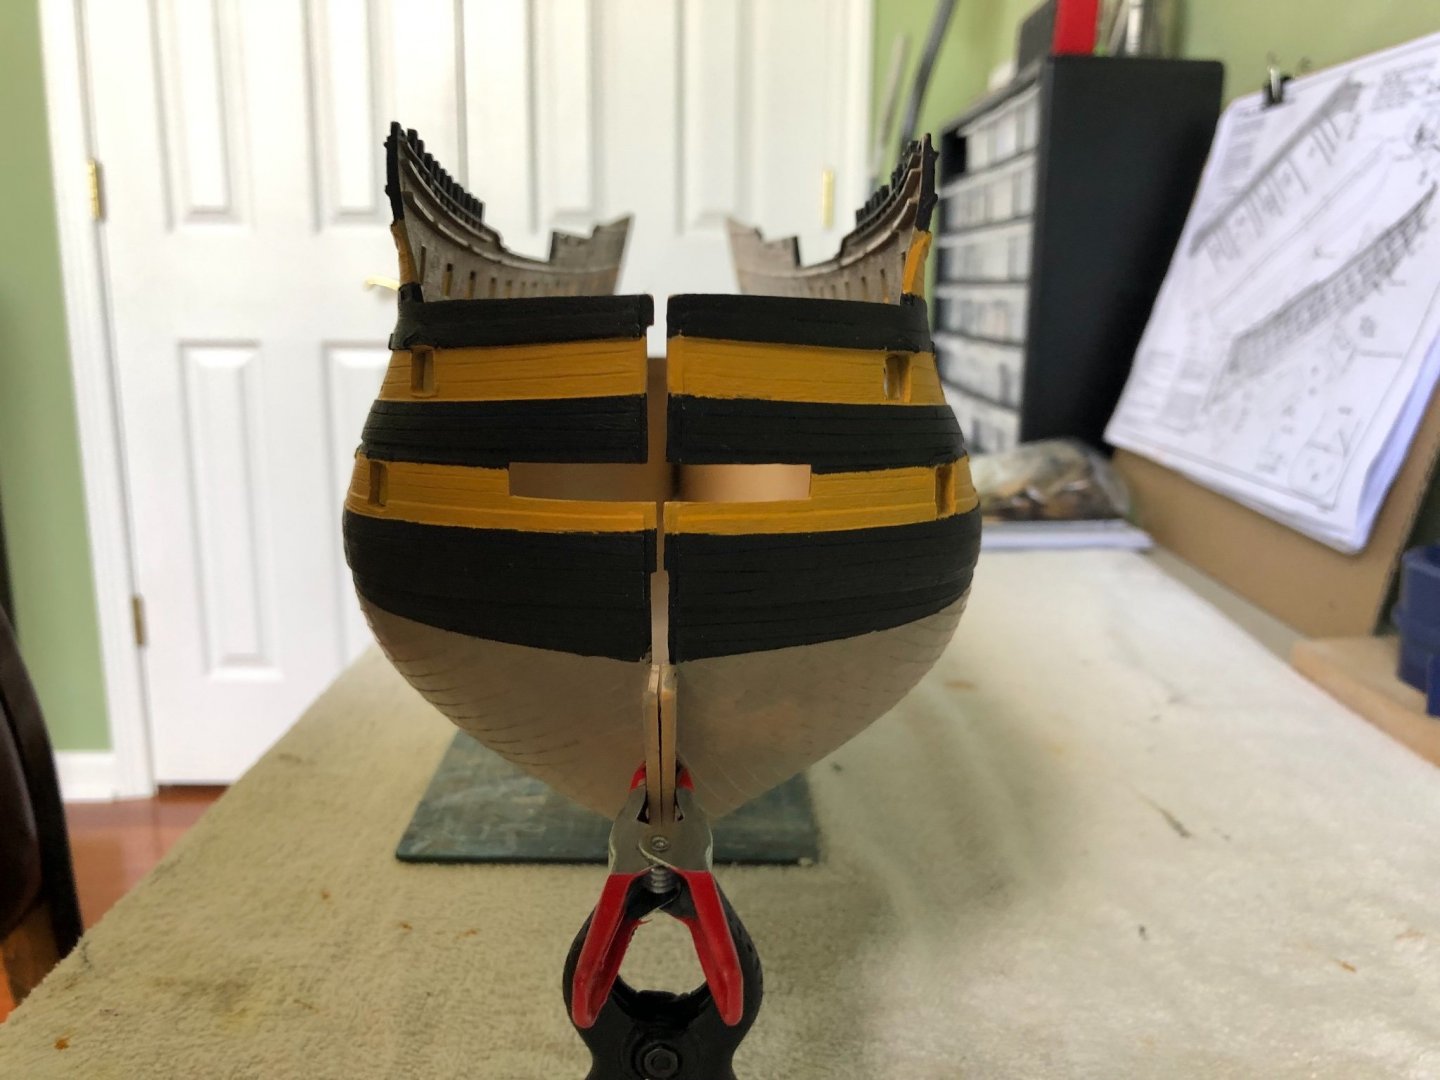
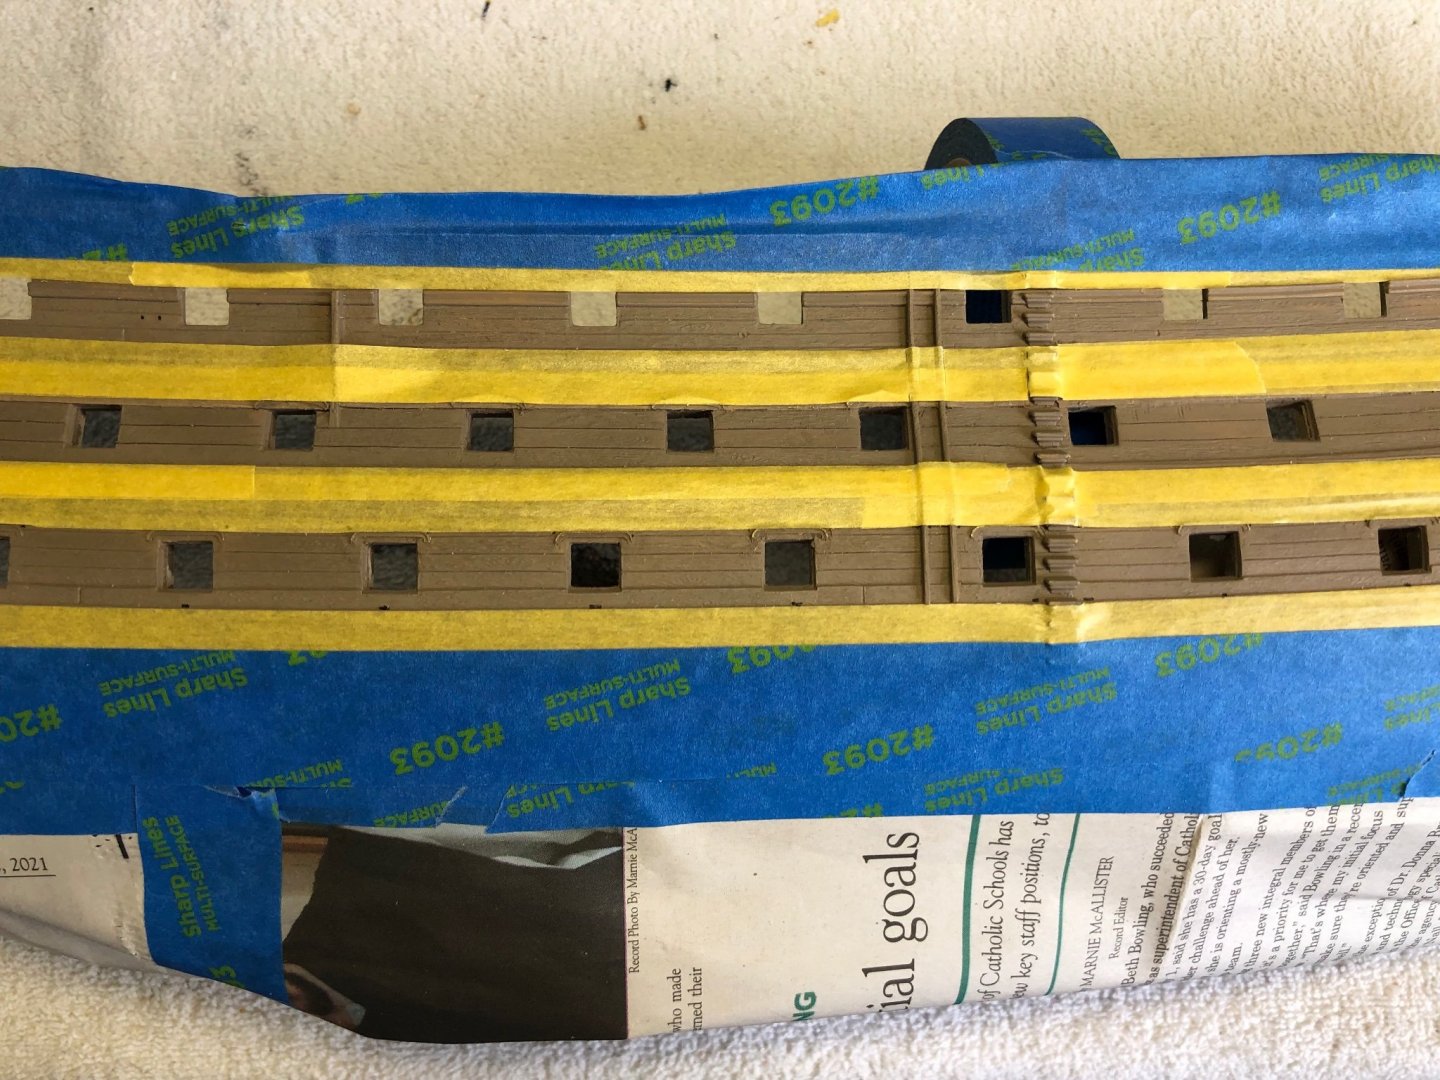
OK gentlemen, especially those of you with a sharp eye for detail, I need your analysis and critique. After completing the bashing of the hull (sanding, etc) I unfortunately lost long sections of the very vine bee line to follow for the yellow and black stripes on the hull. Using a number of photos I found in the reference books I have and on line I attempted to be pretty accurate with the flow of the lines using my masking tape. If you would please check my attached pictures and let me if any adjustments you recommend. The areas not masked will obviously be the yellow ochre stripes.


-
All the rigols are added to the hull. Have to zoom in to see them up close. Thank you Daniel for including a few extra. I messed up one or two. Was good to have the extras. Now on to priming and painting.
-
I like that Kevin. Did you just not put glazing on those windows?
-
Thanks Daniel. Rigols go on today. Bill
-
Ok guys. I got the hull bashing done, I think. Wales widened, two hatches at the bow opened on each side, anchor shoes moved, and hatches thickened. I think I have decided against bashing to add the side entrance. As you know that would require modification to the steps and getting the architectural piece that goes around the opening from Daniel. I am sure there will be many more things I will want to get as I progress so I sadly figure I better manage my budget to get things I deem most important. 😩 Hoping this is not a wrong decision. So finally after all my modifications I am ready to prep for painting the hull. A task I have looked forward to. Two questions reference this upcoming task for you guys. Do you put the hull sections together before you paint or paint separately then put together? On all my other builds I assembled first, puttied and sanded the crack in the keel and other joints, and then painted as one unit. I am wondering if that is the best plan with the Victory? Maybe not. My second question is Daniel’s rigols. Do you paint the hull then add the rigols followed by touching up the rigols with a little paint, or do you add the rigols before you start painting?