Bill97
-
Posts
2,731 -
Joined
-
Last visited
Content Type
Profiles
Forums
Gallery
Events
Everything posted by Bill97
-
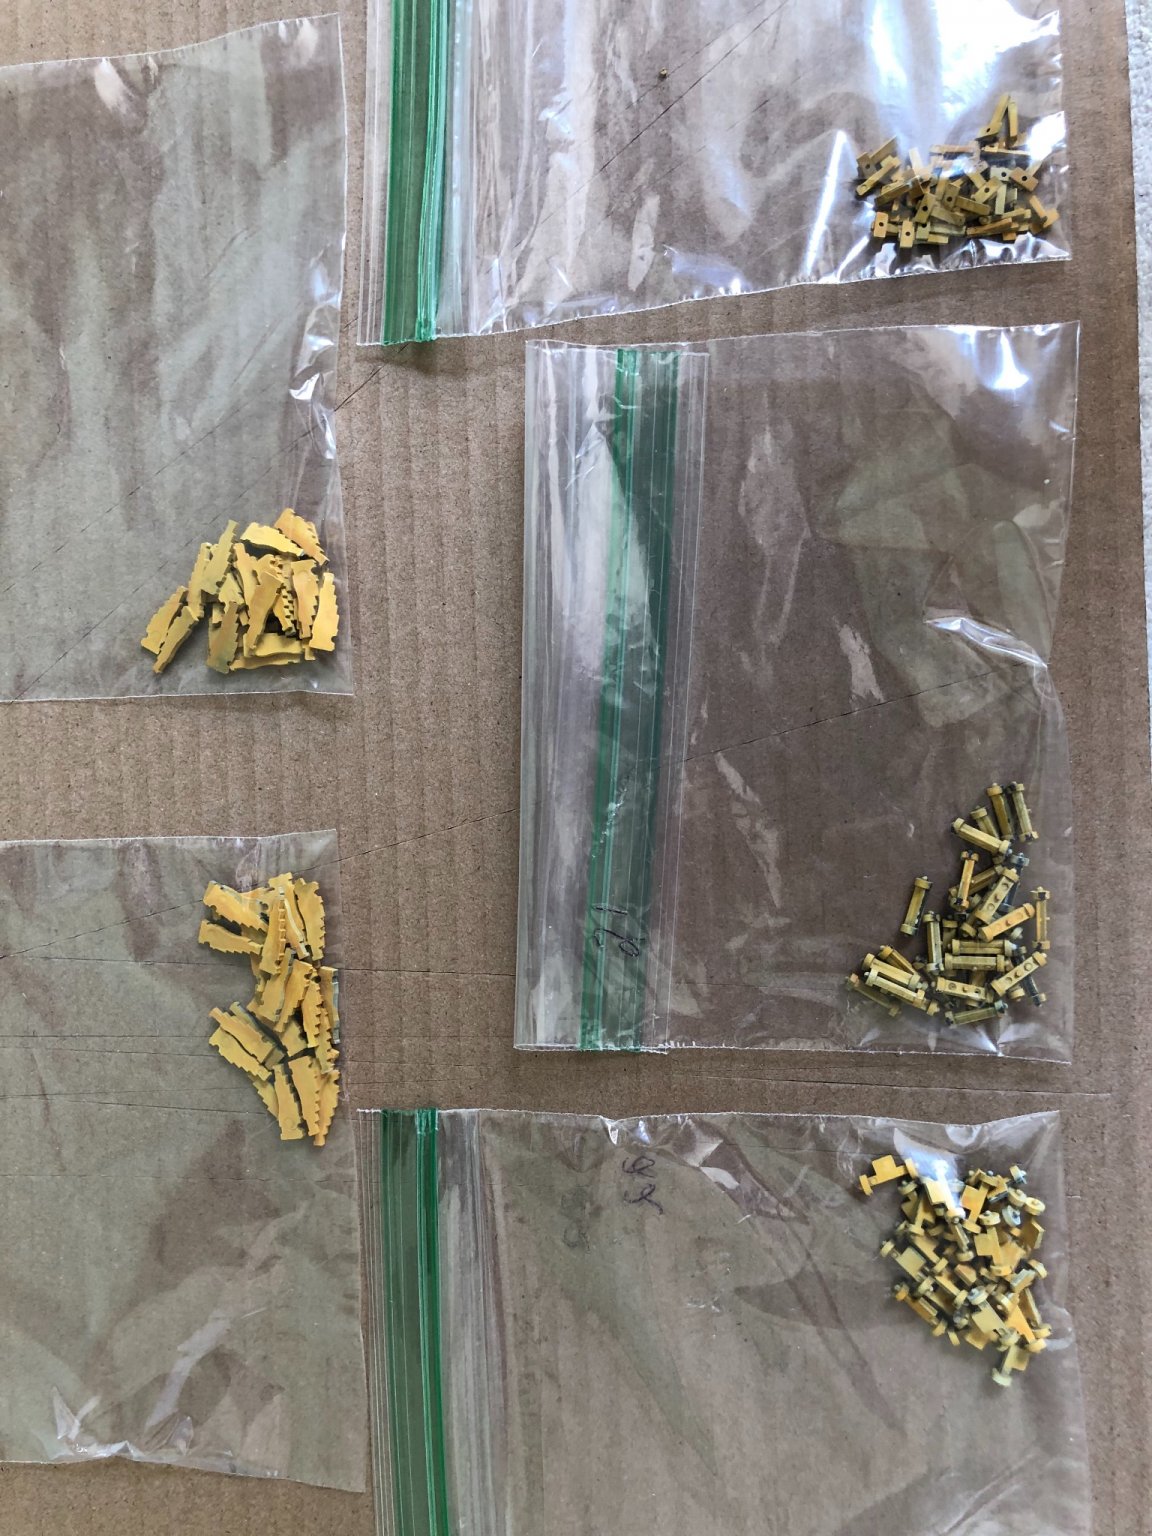
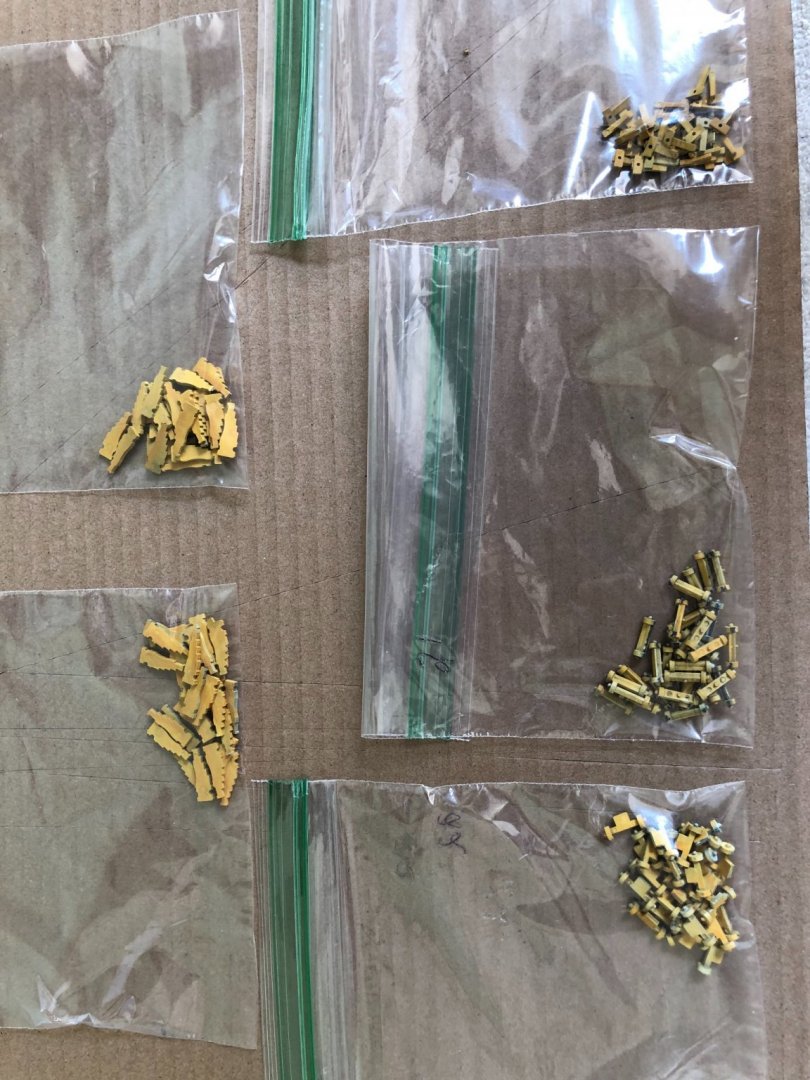
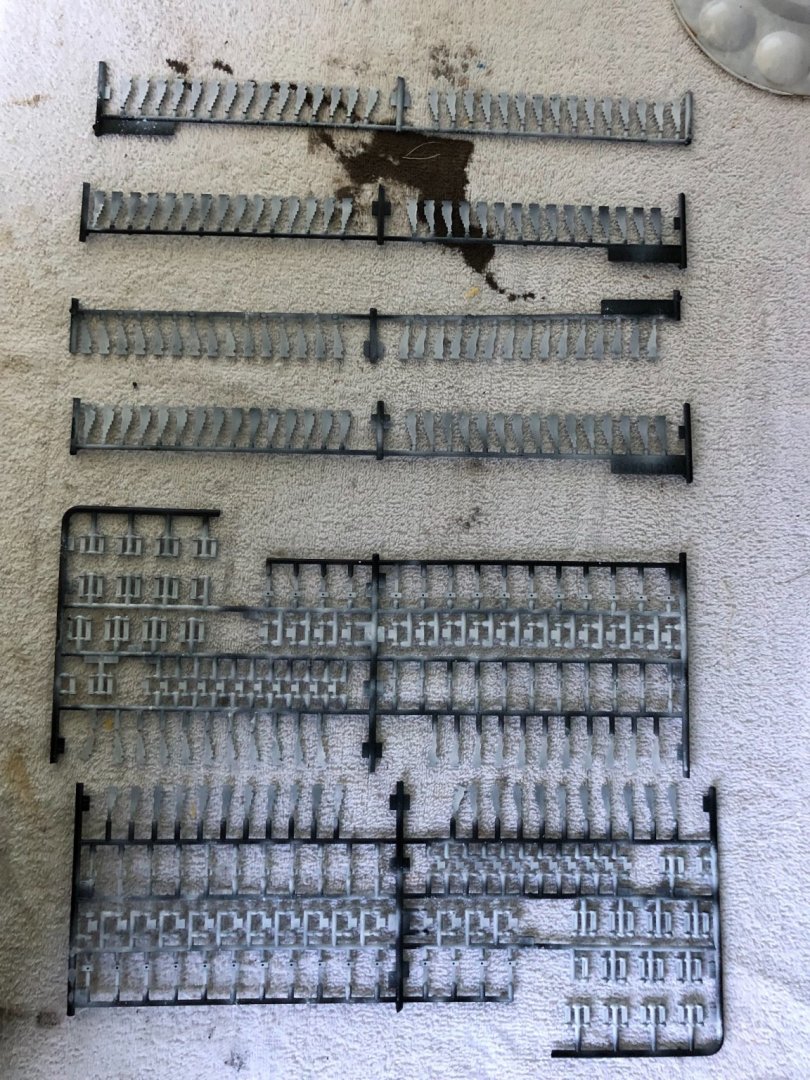
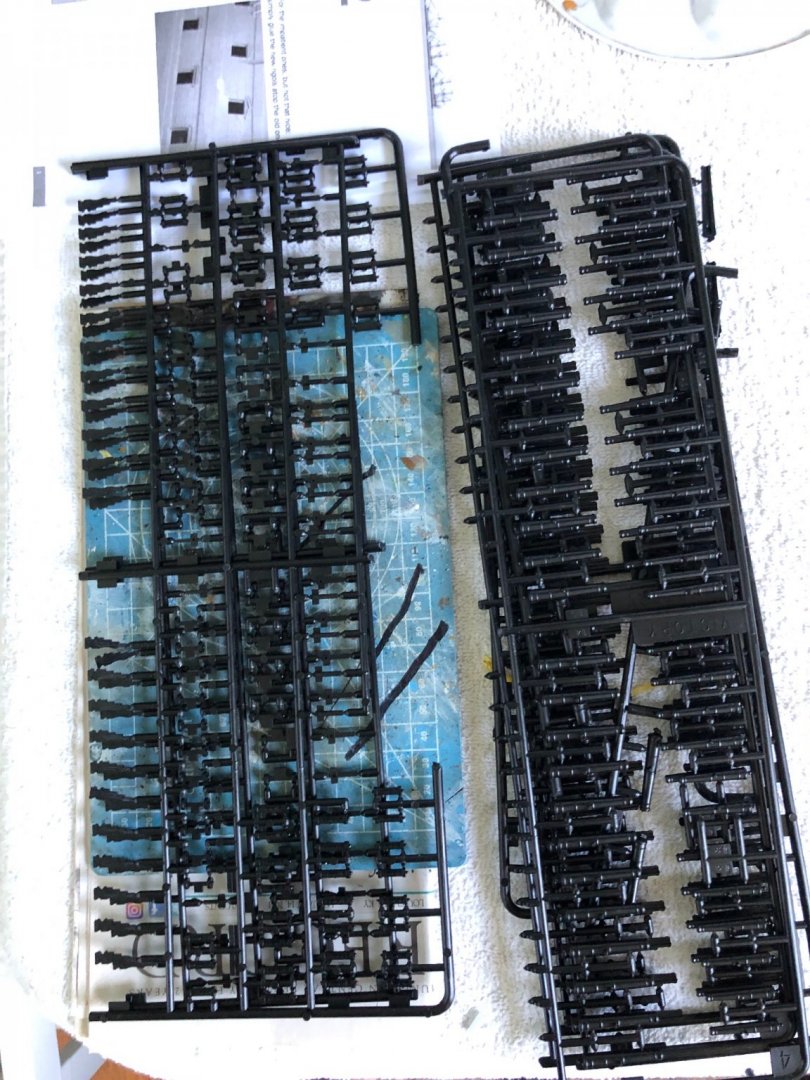
Hello Kevin. I agree with your thoughts about the Victory, especially the growing end cost! But hey, I don’t have any other costly vices so I can convince myself I deserve it 😉. Been away from my Victory, and this site for a few days. Back now sorting cannon carriage parts to begin the assembly. Think I will complete one gun size, then switch to some other part of the build, then complete the next size gun. Should help maintain sanity! Going to do the thirty 32 pound guns first. Started off by making the barrels. I then put a primer and light base coat on the carriage parts. I will now assemble the thirty carriages, finish painting them, weather the barrels a bit, and then attach them to the carriages. Wish me luck.
-
Thanks Dan. I got an update saying my package processed through Frankfurt Flughafen! Woo Hoo it is on its way to my anxious fingers. Never stop telling me bashing options. I would rather know and decide against it than not know until it is to Kate to do it. 😊 Bill
-
I am very much looking more forward to the trip (building the ship, including bashing) rather than the actual finish. Based on what you guys have said this could easily be a couple years or more of enjoyment which I am so much looking forward to. And I agree with both of you that once you start bashing you get the fever! I know I have after adding the Evergreen to the gunports and seeing all I can do with Daniel’s sheets. There is a bit of pride in being able to use one’s own talents to improve on the kit. Maybe like the difference in a paint-by-number painting and an actual artist’s painting. In very much takes talent a patience to follow the instructions step 1, step 2, and so on. But to be able to add to those steps your own artistic expression in very rewarding. I want to do as much bashing as I think I have the talent to do, and can afford to do. I expect different builders have different bashings as well. Just have to research, read, and get smart as I go along. Hope you guys are on board for most of it, and you too Daniel! Bill
-
Thanks again Ian. That is very encouraging. I am I guess looking for assurance that as I move along I can bash as I feel I want but if I am satisfied with what the instructions tell me to do I can still be successful in this build. Based on your encouragement I believe I can. What started my curiosity is the picture of your ship showing the cannons. Your carriages show rigging using rings, eye bolts, and blocks. After seeing your picture I checked the instructions with the kit to see if this rigging and parts are included. It is not so I need to decide if I want to replicate what you did, which I like a lot, and if so purchase the necessary rigging parts. If not, I just do it simply as shown in drawing. My choice. So I guess that is the way it will be throughout as I move along. Really appreciate you Ian. Bill
-
I guess a question I have might be how much bashing would be needed to complete the model successfully? I know for sure I have learned a lot and have already done some bashing (Daniel’s etched parts, thickening the gun ports and the wales, etc.). I fully plan to do further bashing as I move along. But I am curious if there is some bashing that is a must in order to complete the build? Bashing that if not done will leave the builder completely frustrated as to how to proceed using the out of box instructions only to the point they give up. Or based on your experience is the kit and instructions such that a builder could complete it successfully, and have a model they can be proud of? I know I do not have the skills to replicate the build Daniel did (Daniel that is a sincere compliment to the incredible job you did). I do know I have the skills to up the model beyond strictly out of box. So my goal is somewhere between the two. Not strictly 100 percent authentic to the actual Victory setting in port, to include all the rigging, but an impressive model I can be proud to have built. In the bashing can you say I think I will do that and also say no I don’t think I will bash that but just follow the instructions there? Asking this to get my mind fully wrapped around my quest ahead. Bill
-
Thanks. I will look for it. The one diagram you showed above was enough to convince me!
-
Thanks Ian for your picture of the parrals. I would really like to copy that for sure. A this your design or did you see instructions for making this somewhere. I know I have a long while before I will need these but if you could explain your steps I would really appreciate it. Bill
-
A lot of great advice and information. I often wonder as I read comments from you guys and others what parts are actually included with the kit (blocks, eye bolts, etc) for rigging the cannons, masts, etc? I am not so far into the build to do an inventory of all the rigging parts I will need compared to what is supplied. I have an assortment of wooden deadeyes I plan to use but without going through every step of the instructions and counting “I need 3 deadeyes there, 2 eye bolts there, and so on” how in the world do you know in advance what you are going to need, especially if you “bash” the model and refer to other sources like Longridge’s book? I would not expect a model builder would attempt a model of the complexity of the 1/100 Heller Victory as their first build with no experience, but if they did, and were completely unaware of sites like MSW, they would not know about parrals and such. I am so thankful for you guys help. Many say this model is fantastic right out of the box with no modifications but some of the things mentioned that Heller “forgot” seem to be more than items that would simply enhance the model. Some seem like things you actually need to do to complete it. I can only imagine someone without help from other builders throwing their hands up in frustration having absolutely no idea how to complete a task like simply attaching a yard to the mast.
-
Another great idea OC. I did that with a mast or two in the past but never a yard. How did you connect the wooden yard to the plastic mast? Do you have a build log for your Black Pearl? Would love to read/see it.
-
Ian is this picture from your Victory build. Looks great. I am going to save the picture. Try to zoom in and see if I can copy your rigging. Thanks Bill
-
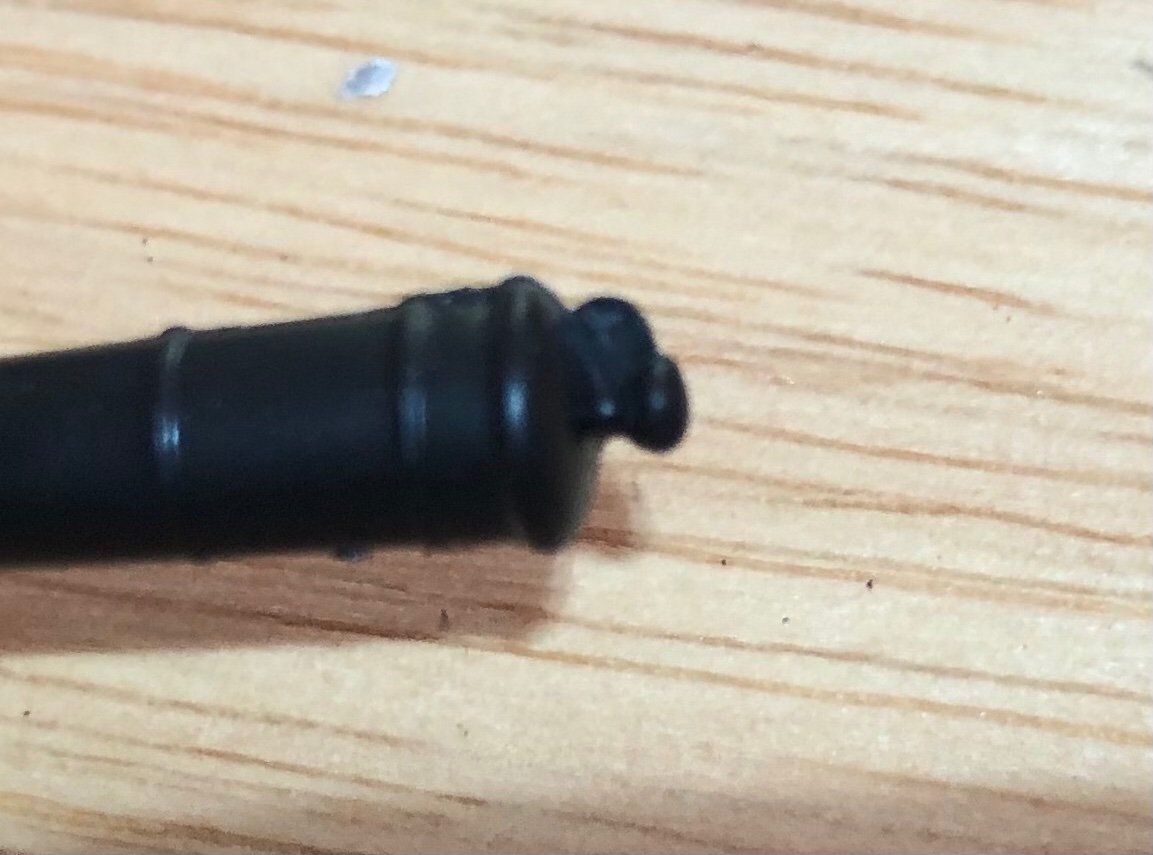
Ian just to make sure we are talking about the same “flash”, you are referencing not trimming off what I show in the picture? Should I drill a small hole through it to look like a breeching ring?
-
Thank you Ian. Just in time. I am cleaning up my cannons as I am commenting here. I have already filed off the “flash” on 7 of the gun pommels! I will stop that immediately. Glad I felt a need to check my blog 😀 Thanks for the tip Daniel. I will watch for that. And for the tracking info for my etched parts.
-
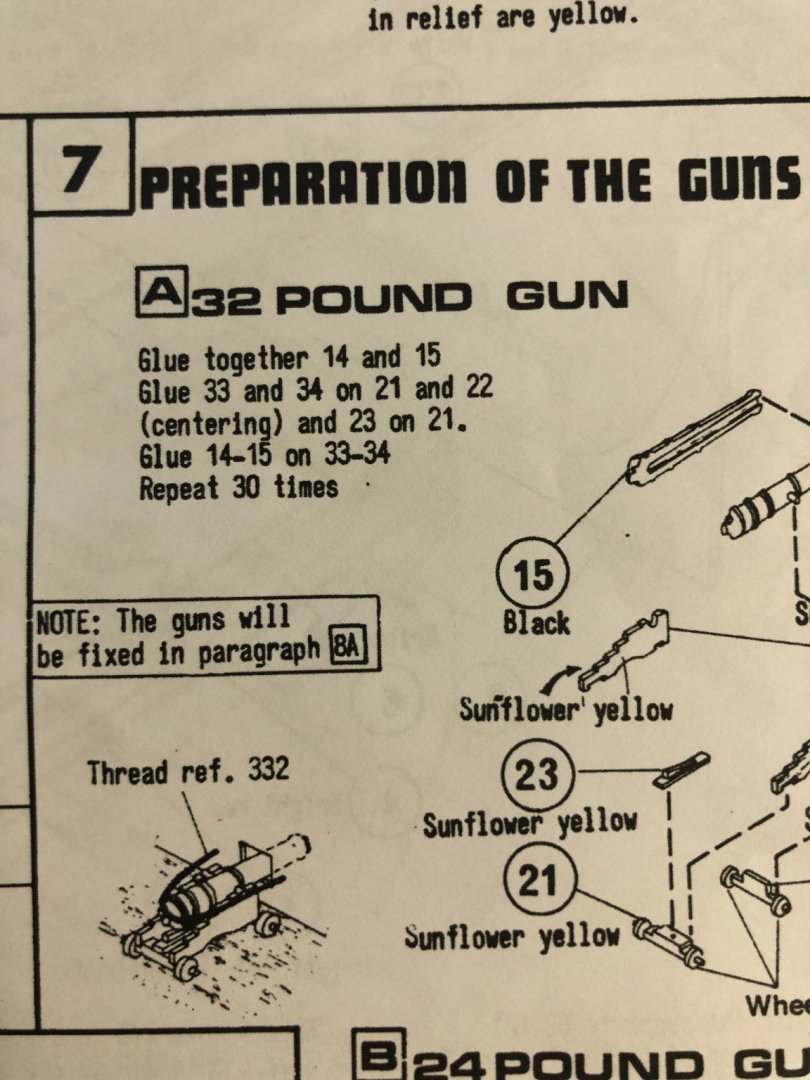
Alright, another question for you guys who are building this Victory or did recent enough to remember. Working on the guns which is no problem, just repetitive. I like to thoroughly read over each instruction before I proceed to make sure I don’t jump the gun on something. In instruction 7 (preparation of the guns) there is a small drawing of a completed cannon in the left corner. In the photo there is a line pointing to the gun rigging with the caption “Thread ref. 332”. I am guessing this is advising me what size thread yo use, but I don’t know. I have no idea what ref 332 is. I wondered if there may be a chart or something in the instructions numbered 332 but no. There is a part number 332 but that is a port lid. There is a table of threads but does not go anywhere near 332. Any idea what “ ref 332” is?
-
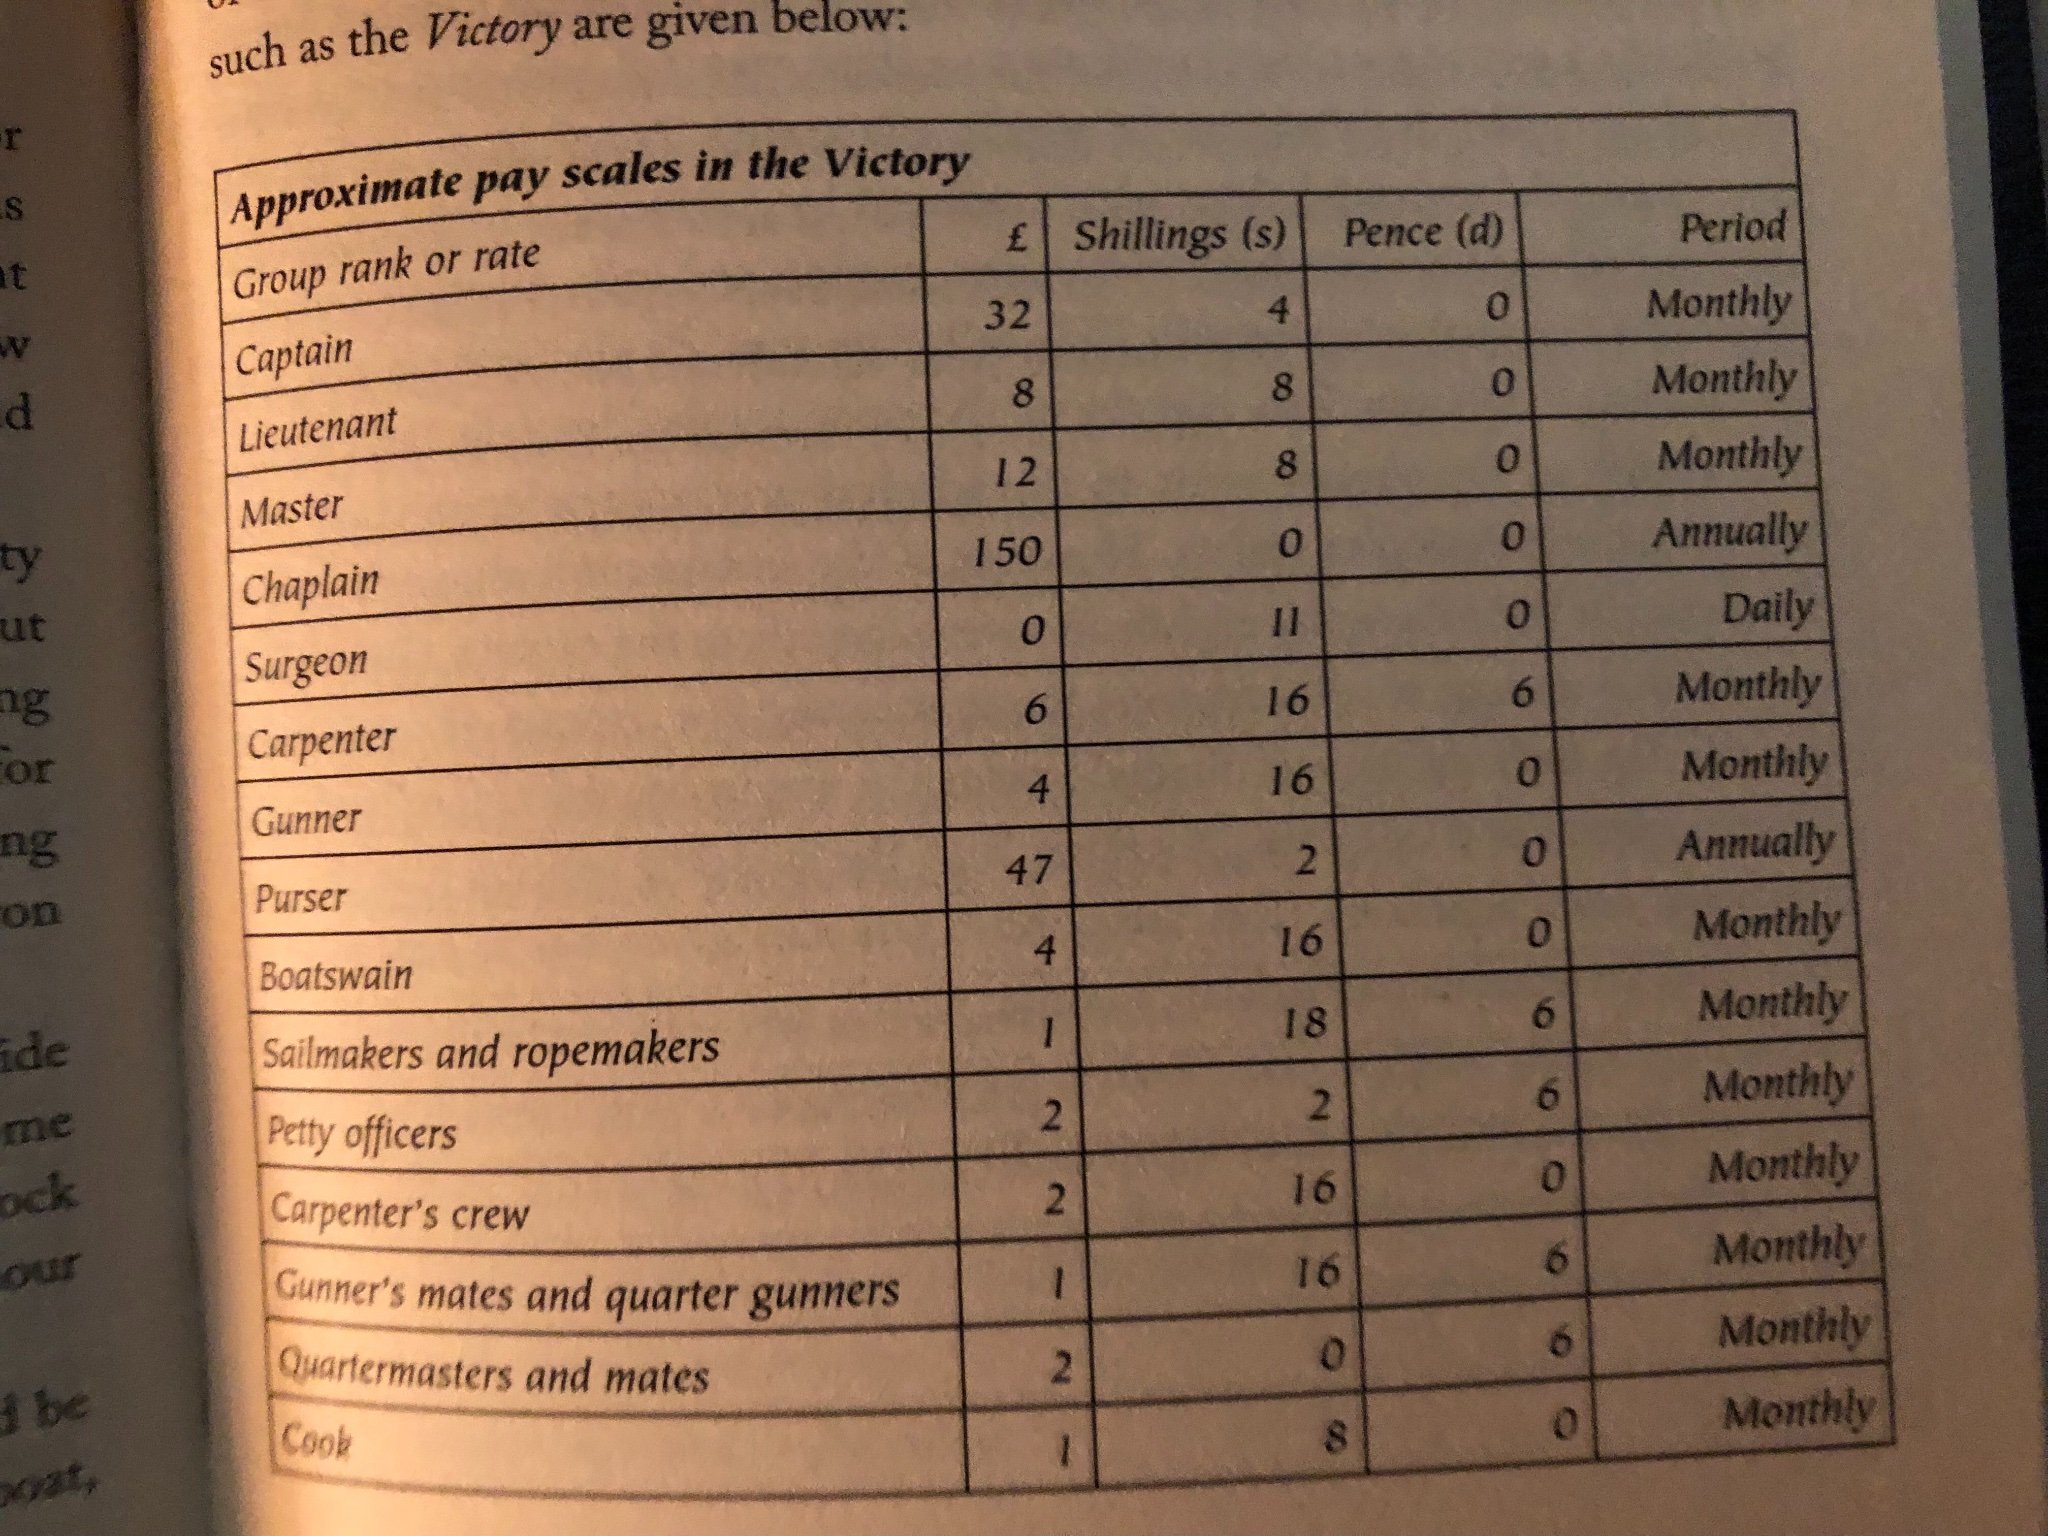
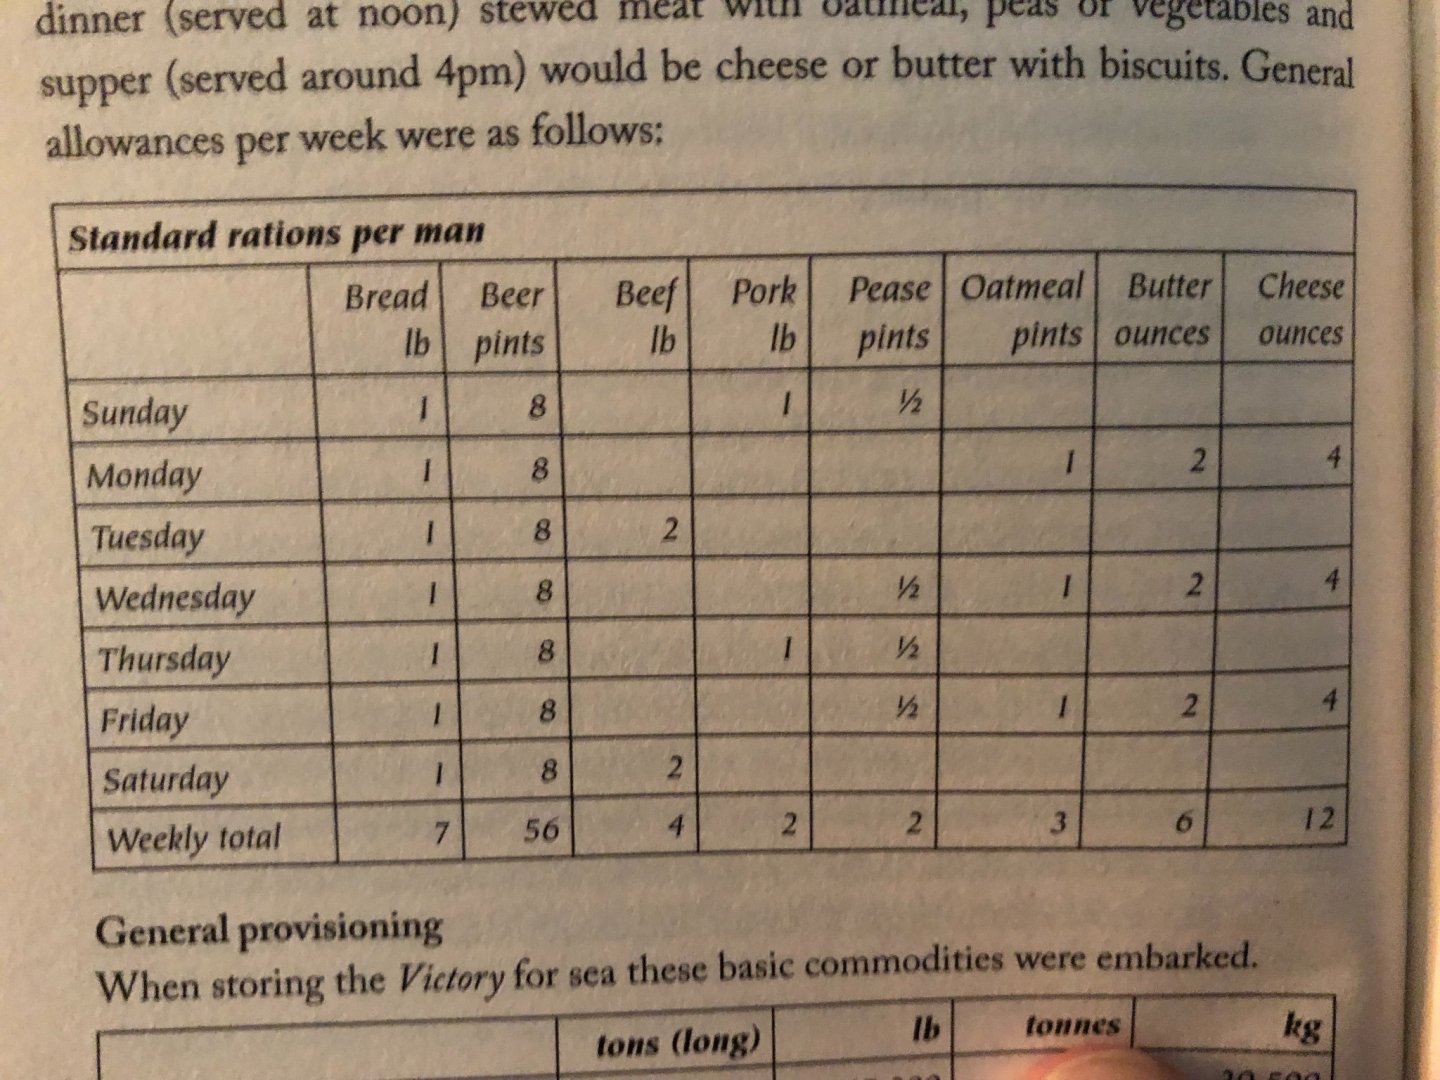
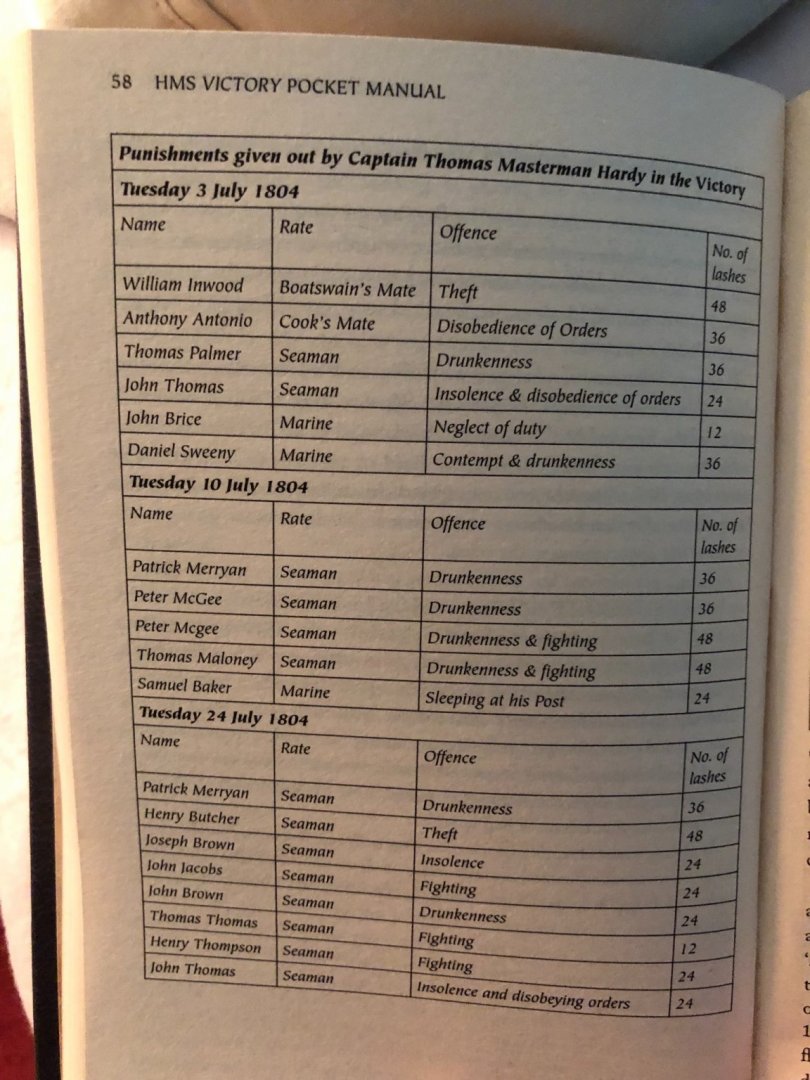
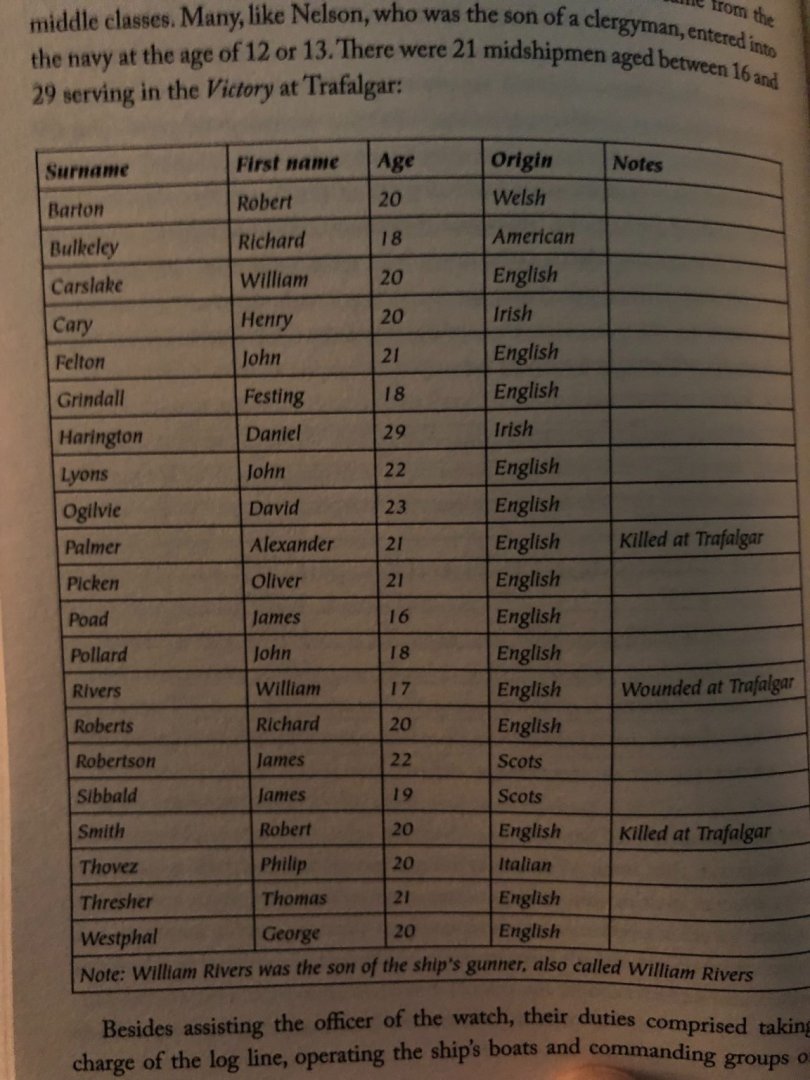
When I am not working on my Victory I am reading this great little book I picked up. Admiral Nelson’s Pocket Manual 1805. Not reading it so much for tips on building the model, even though there are a number of physical features of the ship included in the pocket manual, I am fascinated more about his reports of general daily life on board the Victory in 1805. Some of the interesting charts included in the book are the rations planned for each crewman, the pay scale by rank/position, the age of his crew, and most interesting is the discipline. Chart indicates by name offense a crewman committed and number of lashes he got for the crime. If a crime was committed that warranted the death penalty a crewman was hung from a yard and left there for an hour or more for others to witness as a deterrent.


-
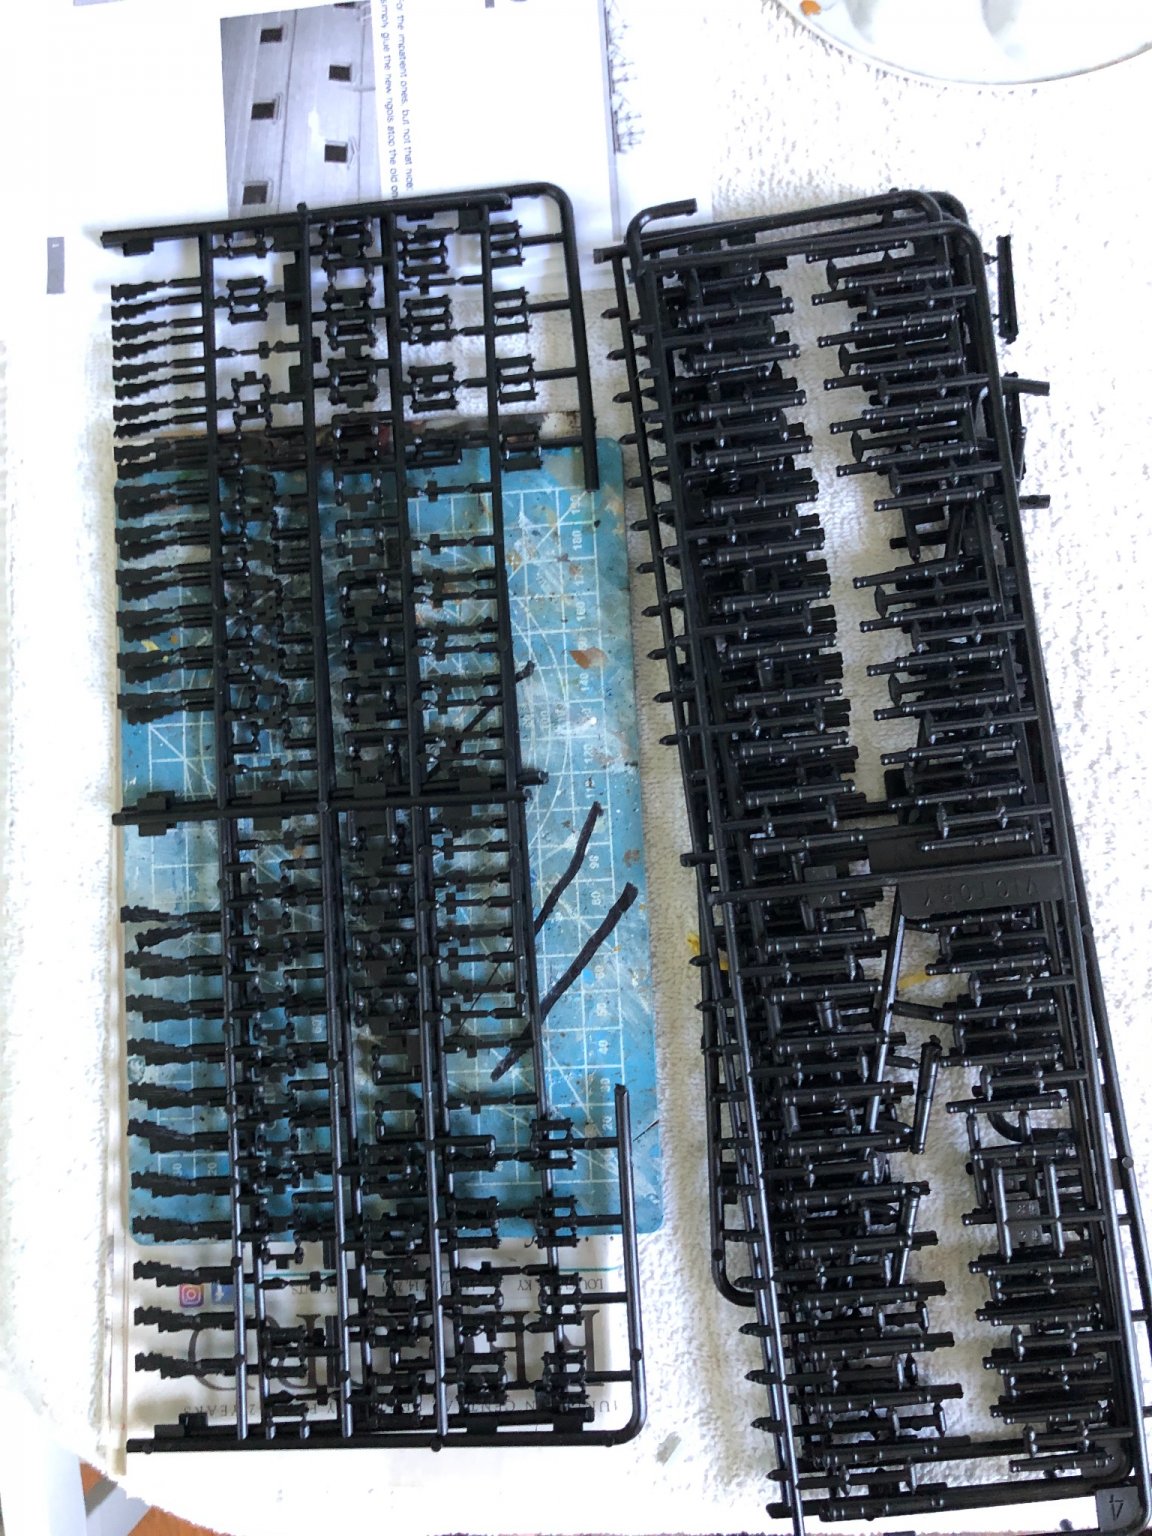
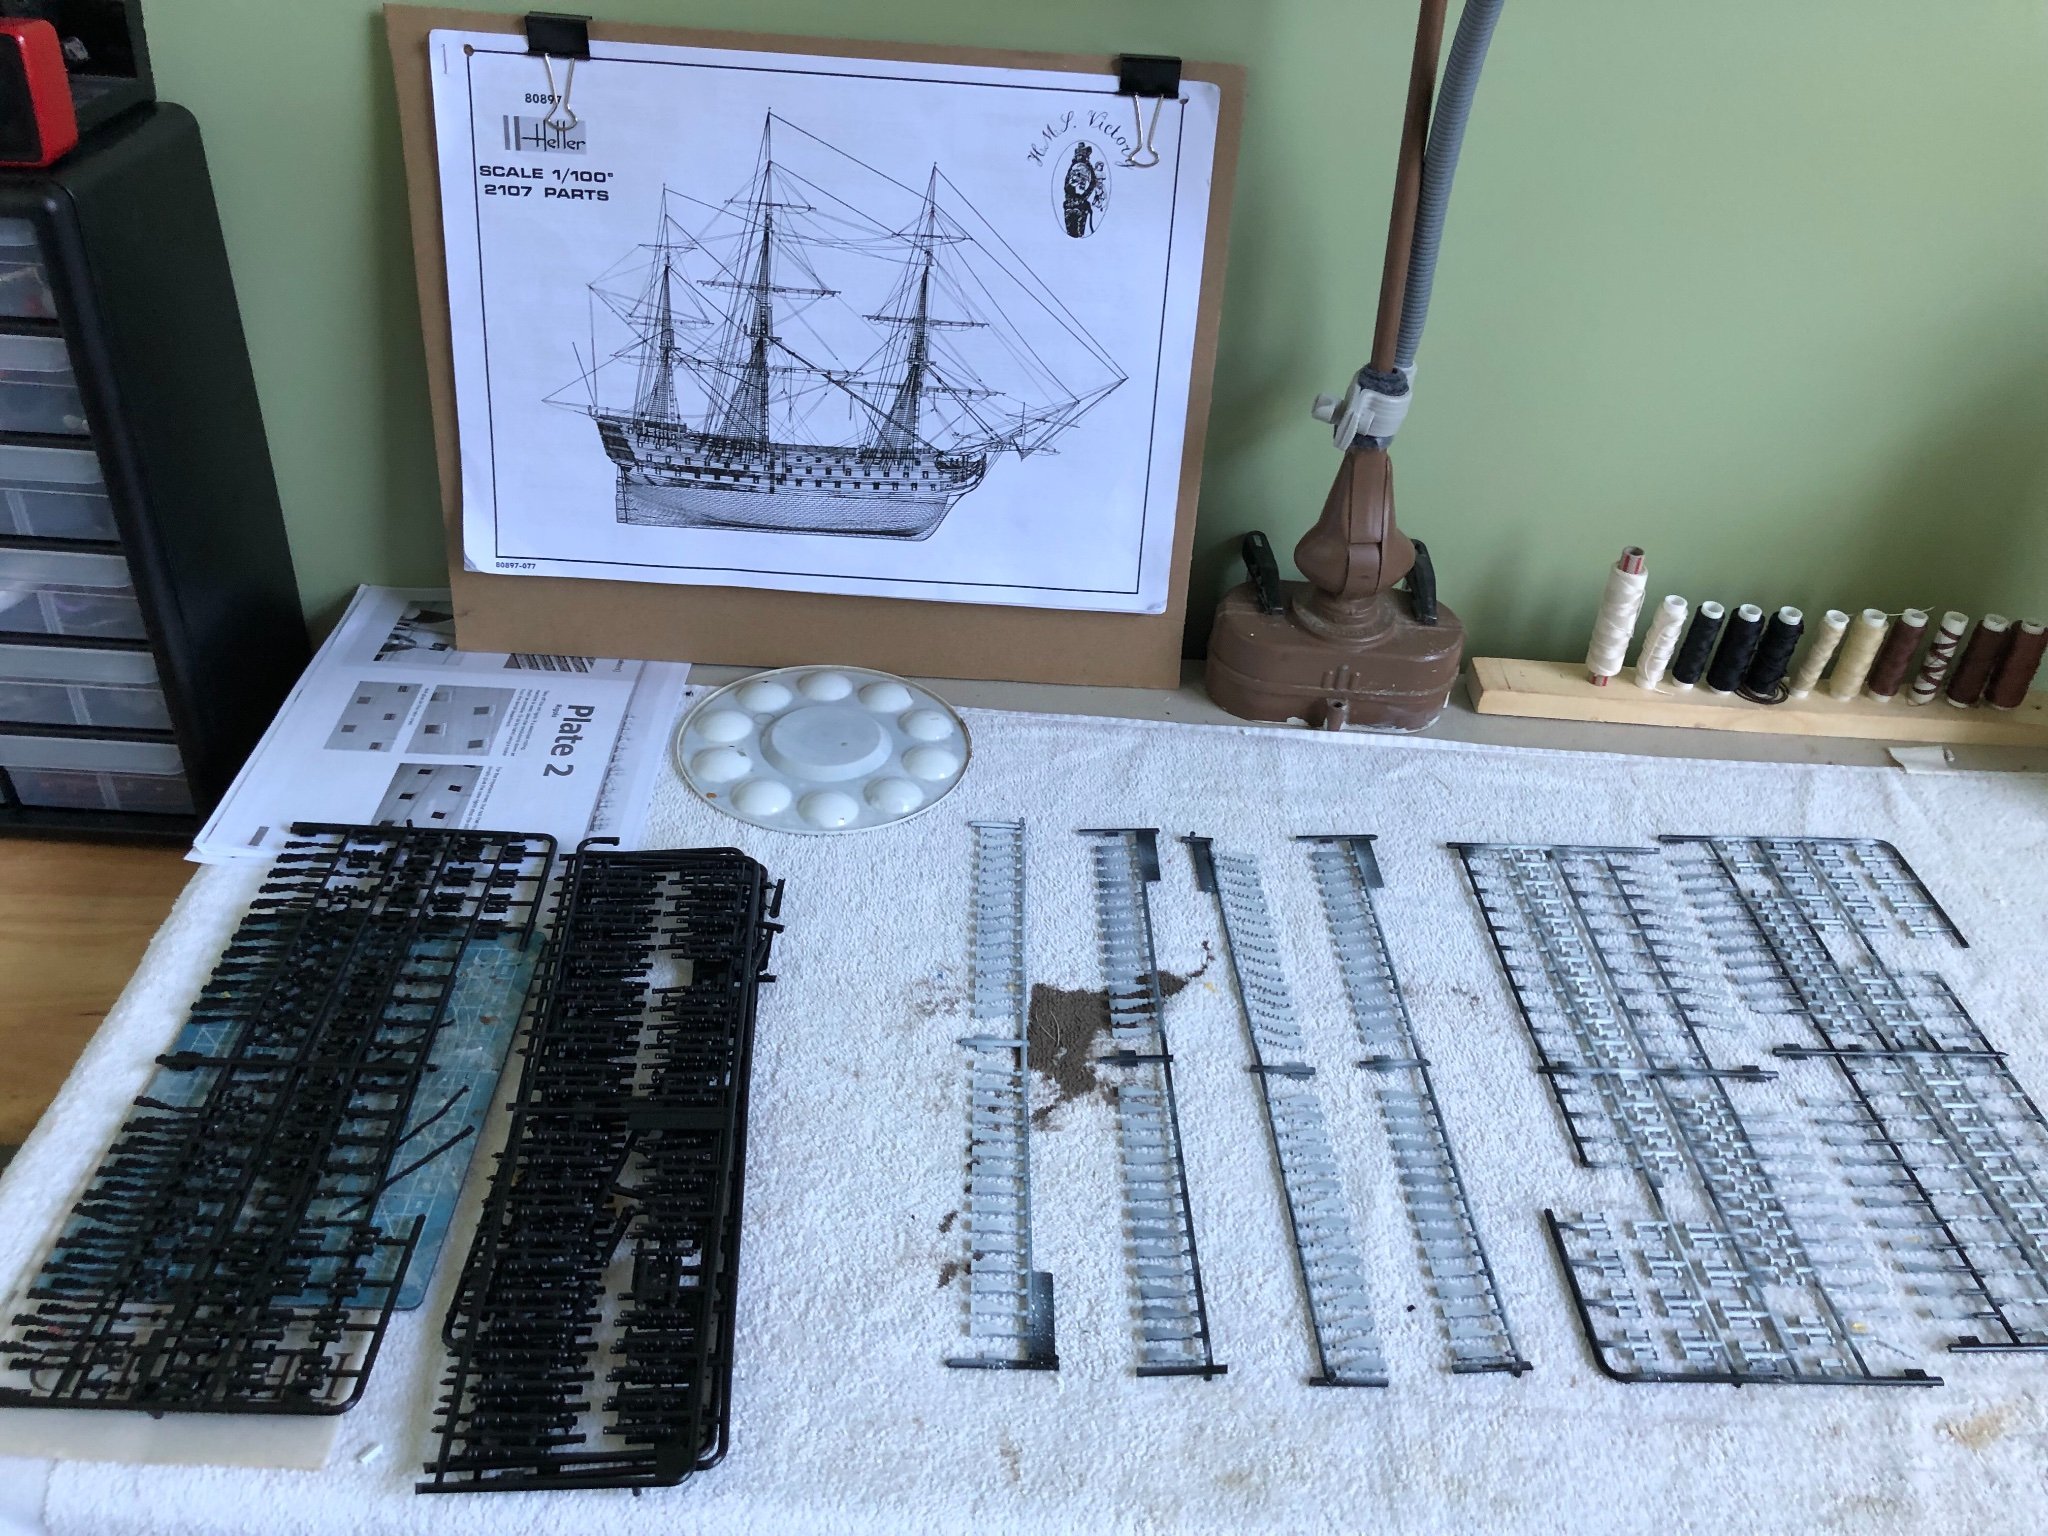
Started out working on the 100+ cannons by airbrushing surface primer on the carriage and wheel parts while still all together. Thought this would be easier than assembling them first and then priming them individually one at a time. I have now realized I may have to scratch the primer off the connection points before I can glue them. Maybe I should build the carriages minus the barrels and then prime and paint them. This is definitely a pace yourself task as you all know. Have seen some beautiful paint jobs on the cannons here on MSW. Hope I can come close to the work others have done.

-
Oh no Daniel I don’t mind at all. I enjoy the different conversations. As you can tell we are up to page 5 and I have only just begun my build. I hope everyone continues to share and discuss on my blog throughout. I have decided to wait until I get your plates before I add the Evergreen to the hull to increase the wale. I will need to remove the molded rigors to add the Evergreen. Don’t want to do that until I have the new ones in hand. Just in case something would happen that I would not get them. Working on guns now while I patiently wait.
-
Thanks Daniel. This build is getting very enjoyable. Looking forward to receiving my delivery from you in a couple weeks!
-
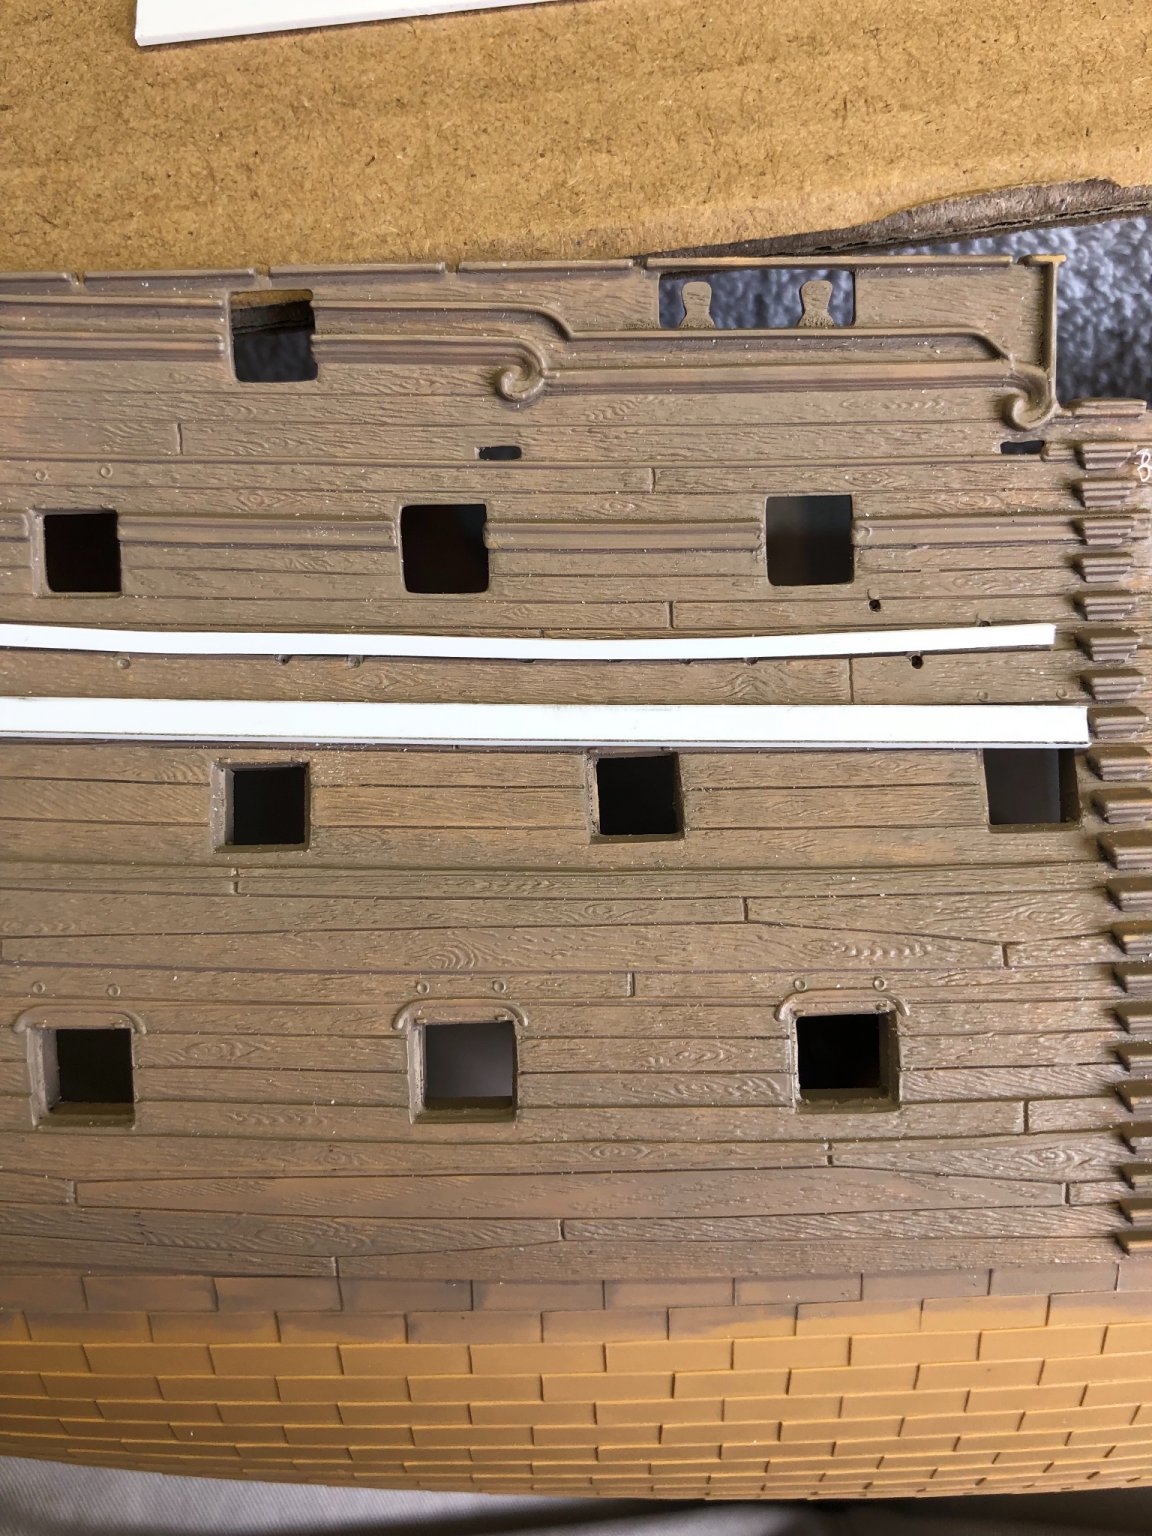
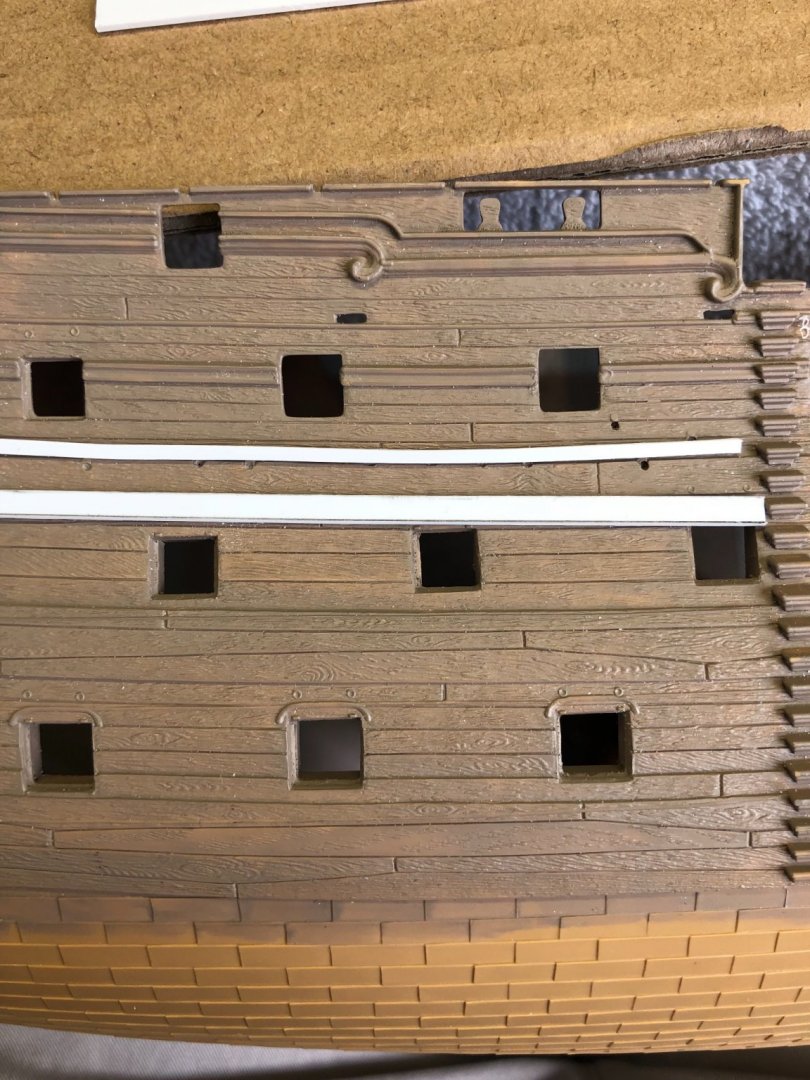
Alright I believe this is going to work once I glue it in place. A little extra work to knock off about .5 mm in depth but should not be to much trouble. If you do this modification you for sure have to get Daniel’s plate 2 with the rigors. The Evergreen covers 6 on each side. Thanks everyone for helping me understand this. For sure was scratching my head.
-
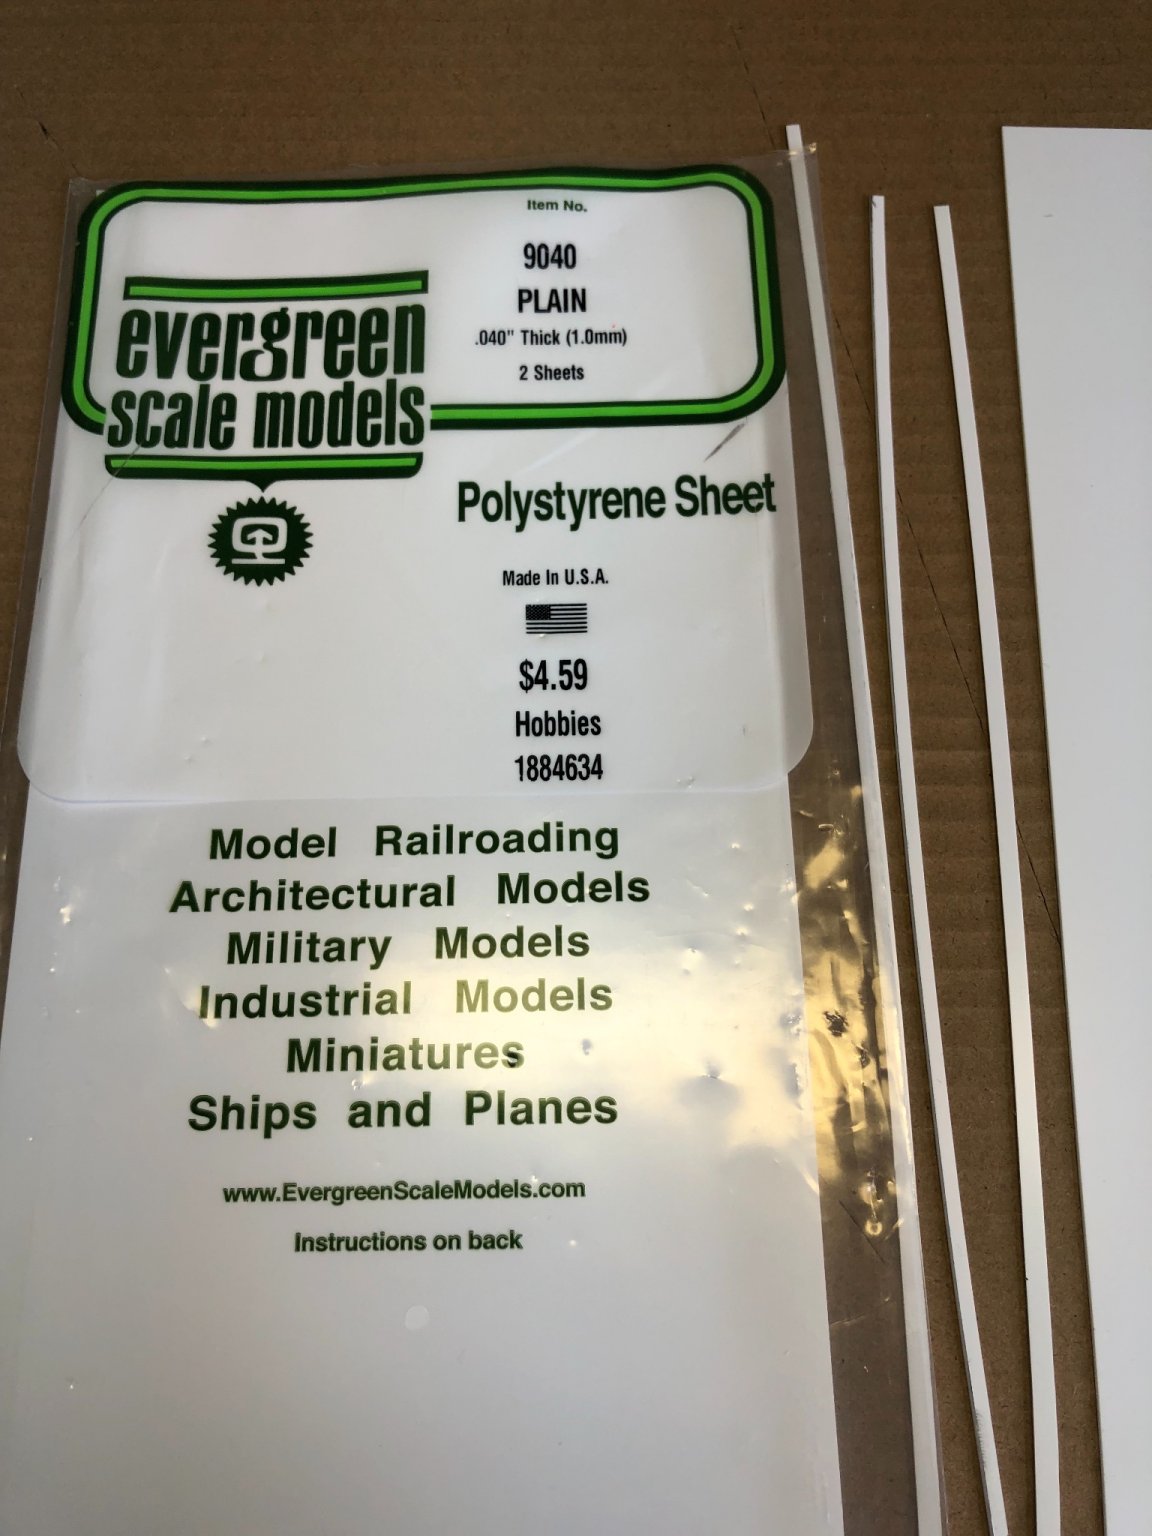
Thanks Ian. You are a great help. My hobby shop did not have those great sizes so I bought. 1mm sheet and will just cut some 3 mm strips and some 1 mm strips. Glue them on and sand down about 1/2 mm. Will probably use a little course grain paper to establish some wood grain. Will let you know how it goes.

-
Thanks Ian. I may head back to my Hobby Lobby and check again. Regardless which Evergreen size I use to accomplish the task, am I right that I want to add 1mm at the top and 3mm at the bottom? And about .5mm deep?
-
Ok here I go. Daniel if you are out there give me a holler if I am wrong. I am assuming the Evergreen measurement is .44mm deep and 1mm tall. .44mm is close to the depth of the raised area on the hull at this point. So if that is correct I am widening the raised area 1mm at the top and 3mm at the bottom. Unfortunately the thinnest Evergreen I could find is 1mm so I may have to sand it down flush with the existing raised area. Somebody holler if I am wrong before I screw up! 😳😀