
manic8479
-
Posts
55 -
Joined
-
Last visited


-
 Knocklouder reacted to a post in a topic:
USS Enterprise 1799 by manic8479 - FINISHED - Constructo - My first ever build
Knocklouder reacted to a post in a topic:
USS Enterprise 1799 by manic8479 - FINISHED - Constructo - My first ever build
-
Dave_E reacted to a post in a topic:
USS Enterprise 1799 by manic8479 - FINISHED - Constructo - My first ever build
-
Dave_E reacted to a post in a topic:
USS Enterprise 1799 by manic8479 - FINISHED - Constructo - My first ever build
-
thanks for the advice - I will be sure to follow it. My name is William
- 89 replies
-
- 1
-
-
- Enterprise
- first build
- (and 2 more)
-
Cathead reacted to a post in a topic:
USS Enterprise 1799 by manic8479 - FINISHED - Constructo - My first ever build
-
 manic8479 reacted to a post in a topic:
USS Enterprise 1799 by manic8479 - FINISHED - Constructo - My first ever build
manic8479 reacted to a post in a topic:
USS Enterprise 1799 by manic8479 - FINISHED - Constructo - My first ever build
-
If this build has taught me anything it is that I should spend a lot of time and energy choosing my next ship. I have had some great advice from fellow members and I am looking at ships from victory models or vanguard models. what ever I choose I would like to paint the next ship and make her as accurately as possible.
- 89 replies
-
- 2
-
-
- Enterprise
- first build
- (and 2 more)
-
Gregory reacted to a post in a topic:
USS Enterprise 1799 by manic8479 - FINISHED - Constructo - My first ever build
-
src reacted to a post in a topic:
USS Enterprise 1799 by manic8479 - FINISHED - Constructo - My first ever build
-
Cathead reacted to a post in a topic:
USS Enterprise 1799 by manic8479 - FINISHED - Constructo - My first ever build
-
Cathead reacted to a post in a topic:
USS Enterprise 1799 by manic8479 - FINISHED - Constructo - My first ever build
-
Cathead reacted to a post in a topic:
USS Enterprise 1799 by manic8479 - FINISHED - Constructo - My first ever build
-
manic8479 reacted to a post in a topic:
USS Enterprise 1799 by manic8479 - FINISHED - Constructo - My first ever build
-
manic8479 reacted to a post in a topic:
USS Enterprise 1799 by manic8479 - FINISHED - Constructo - My first ever build
-
manic8479 reacted to a post in a topic:
USS Enterprise 1799 by manic8479 - FINISHED - Constructo - My first ever build
-
manic8479 reacted to a post in a topic:
USS Enterprise 1799 by manic8479 - FINISHED - Constructo - My first ever build
-
Snug Harbor Johnny reacted to a post in a topic:
USS Enterprise 1799 by manic8479 - FINISHED - Constructo - My first ever build
-
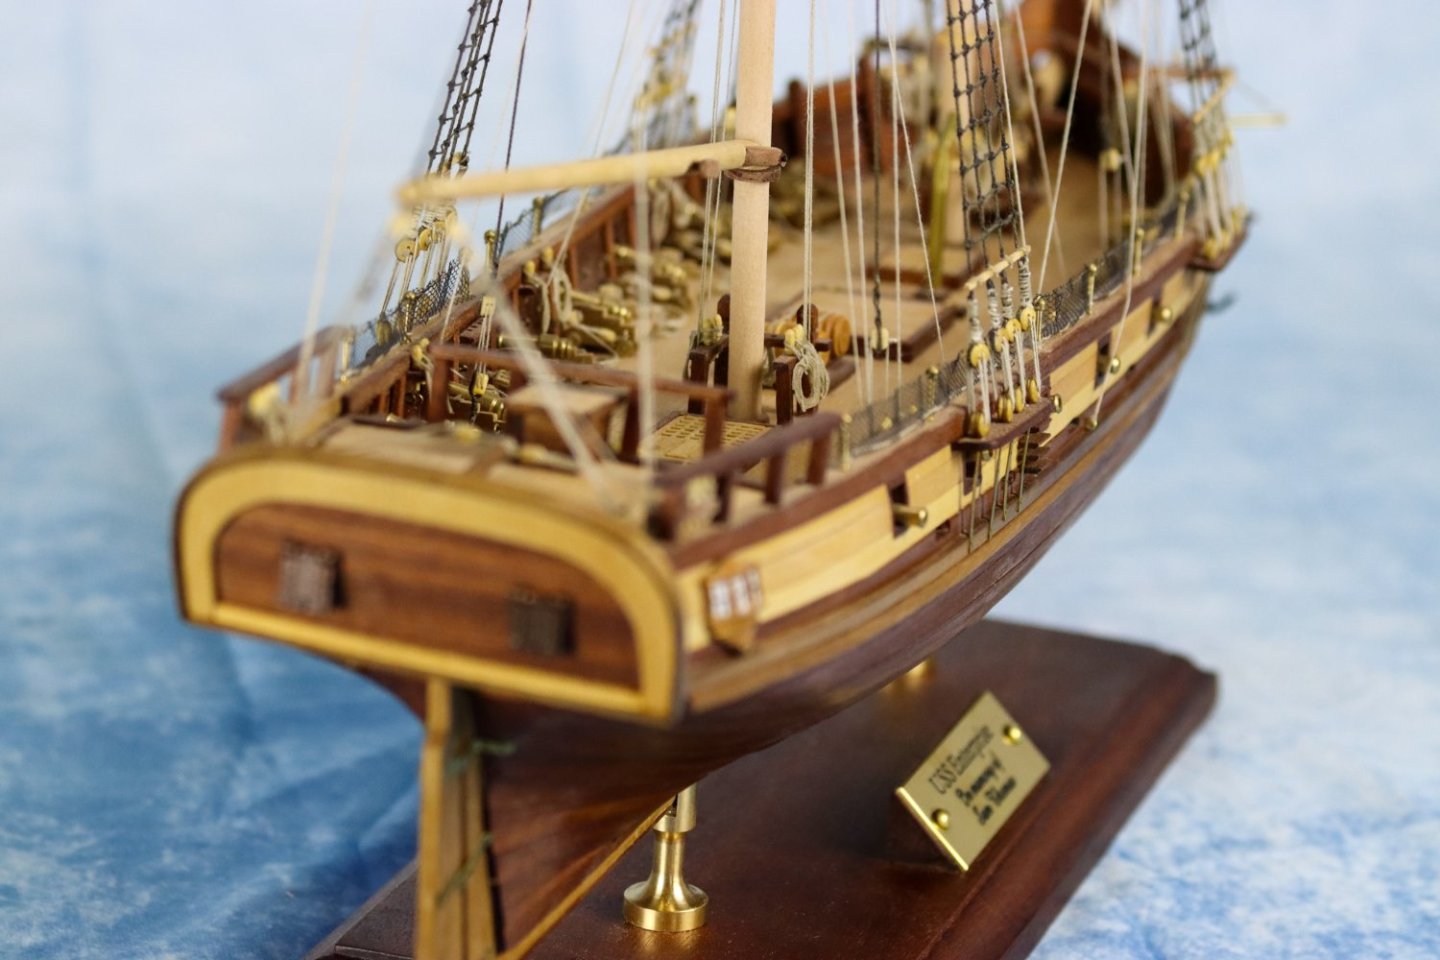
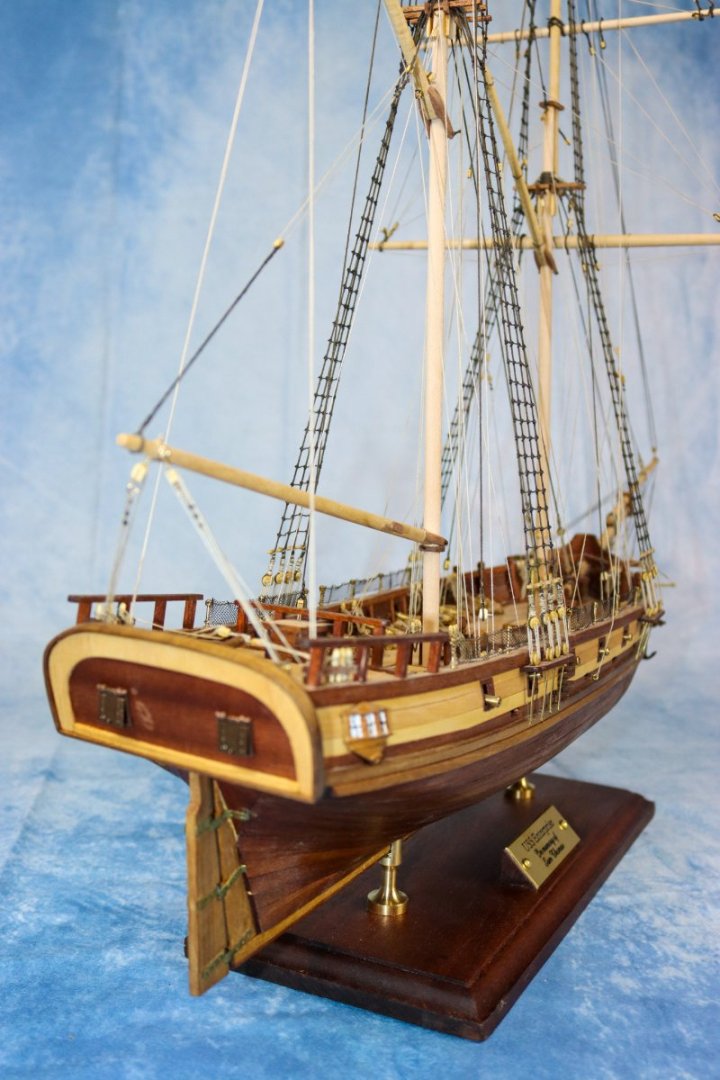
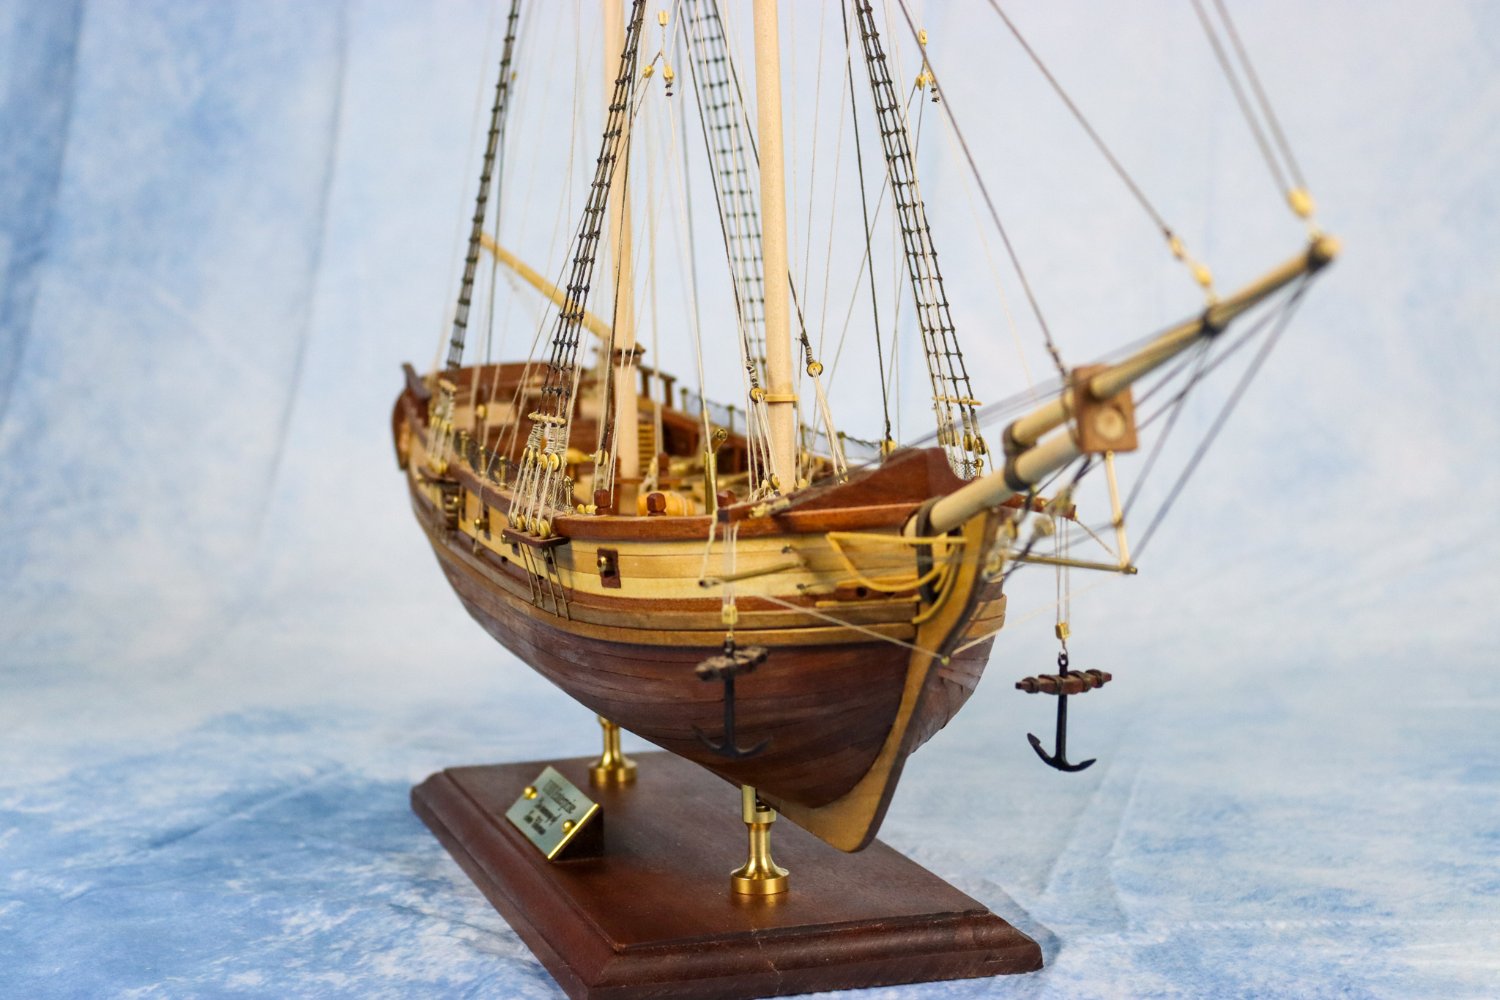
Well I think I am done - this is the my final result It has been a fantastic Experience and one which I hope to repeat in the future. Needless to say, when I do get another ship to build I will start a build log and share the journey. I honestly don't think I would have - or even could have - completed the build without the advice and support of this group. Thank you all very much, your support has been greatly appreciated.


- 89 replies
-
- 11
-
-
-

-
- Enterprise
- first build
- (and 2 more)
-
manic8479 reacted to a post in a topic:
USS Enterprise 1799 by manic8479 - FINISHED - Constructo - My first ever build
-
Thank you The Syren 'rope'rocket', looks fascinating - I have just looked at several videos and it looks like a great and possibly simple (although it may take some practice) solution Thanks.
- 89 replies
-
- 1
-
-
- Enterprise
- first build
- (and 2 more)
-
manic8479 reacted to a post in a topic:
USS Enterprise 1799 by manic8479 - FINISHED - Constructo - My first ever build
-
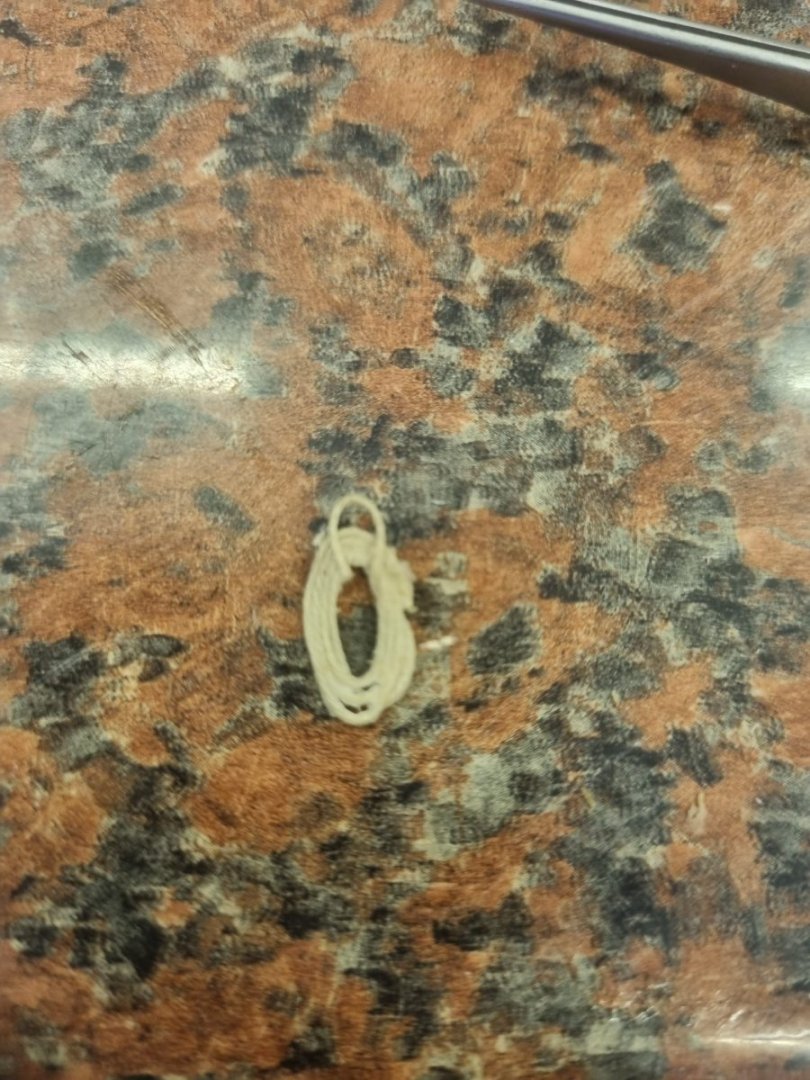
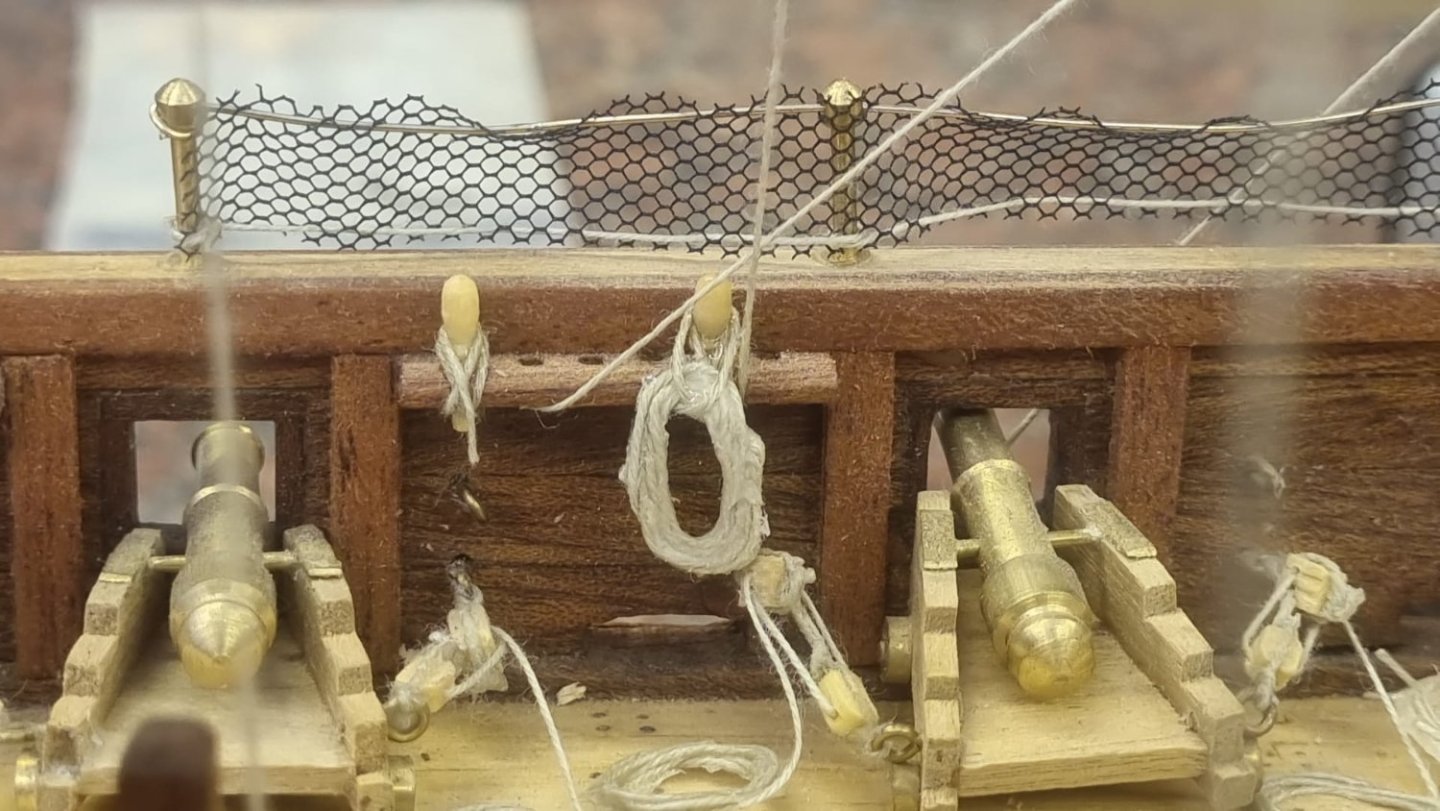
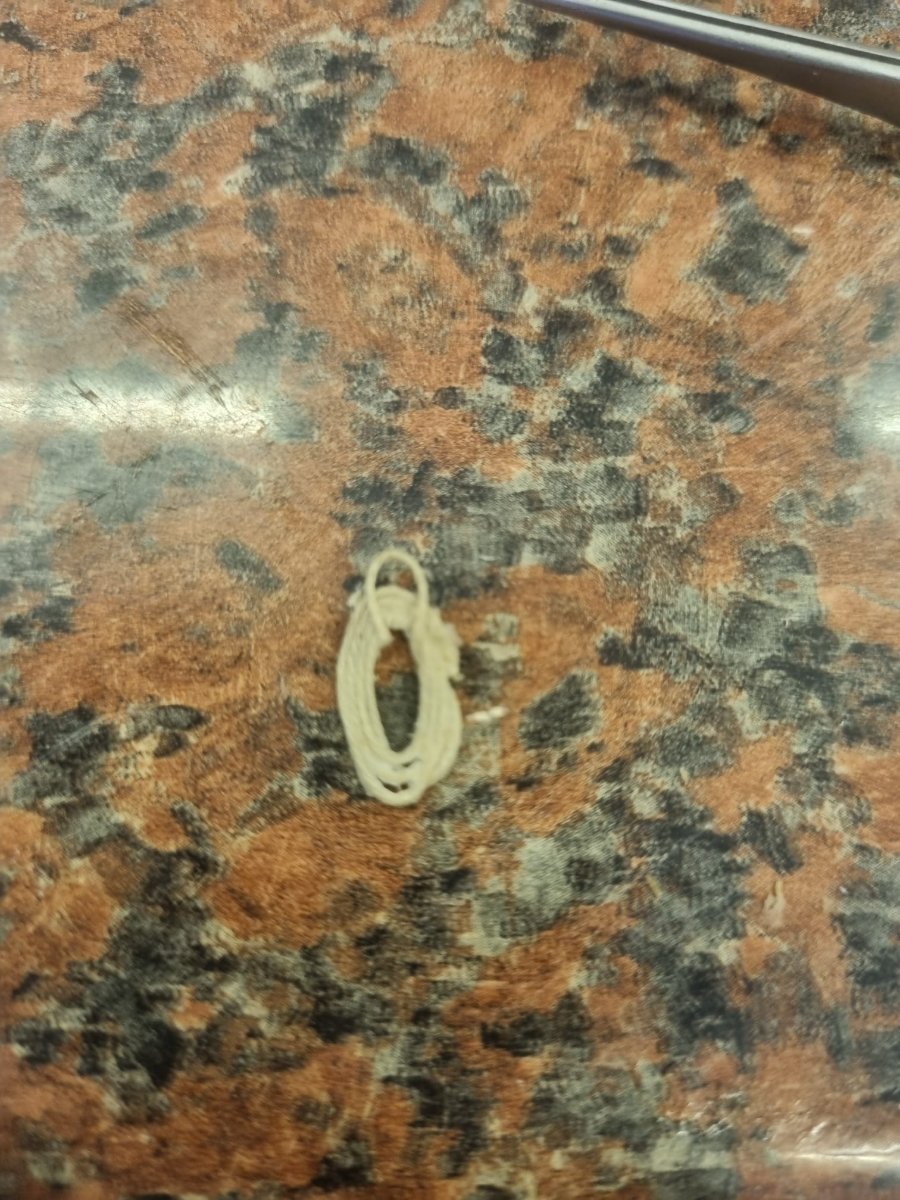
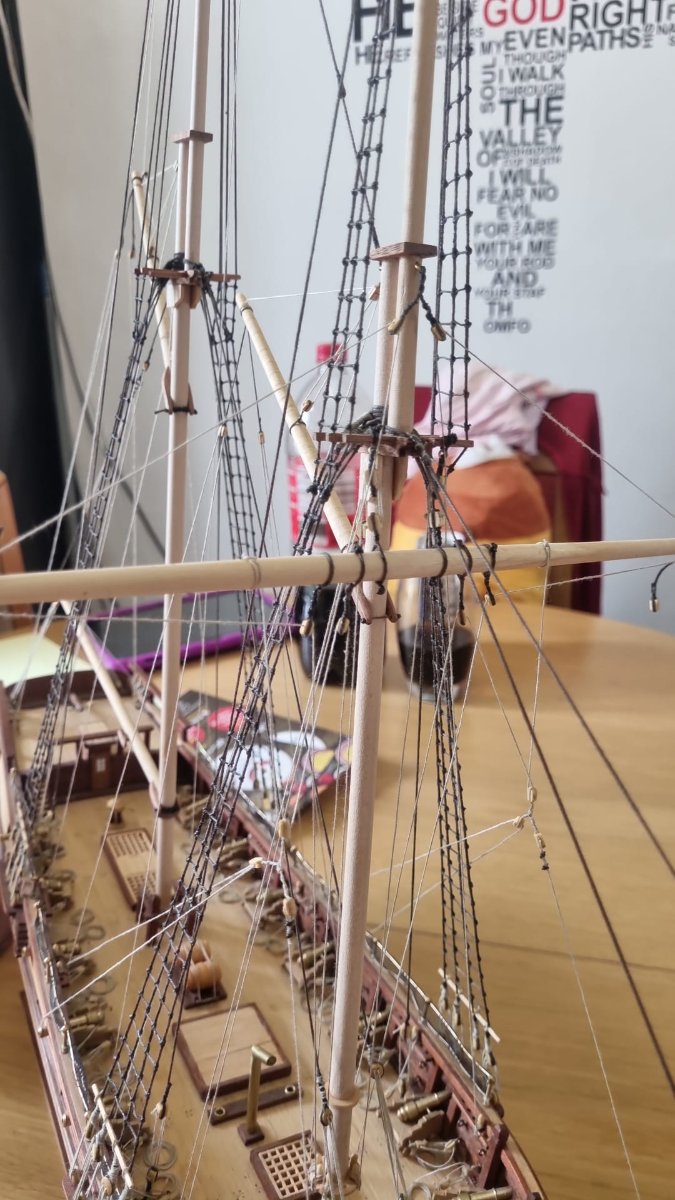
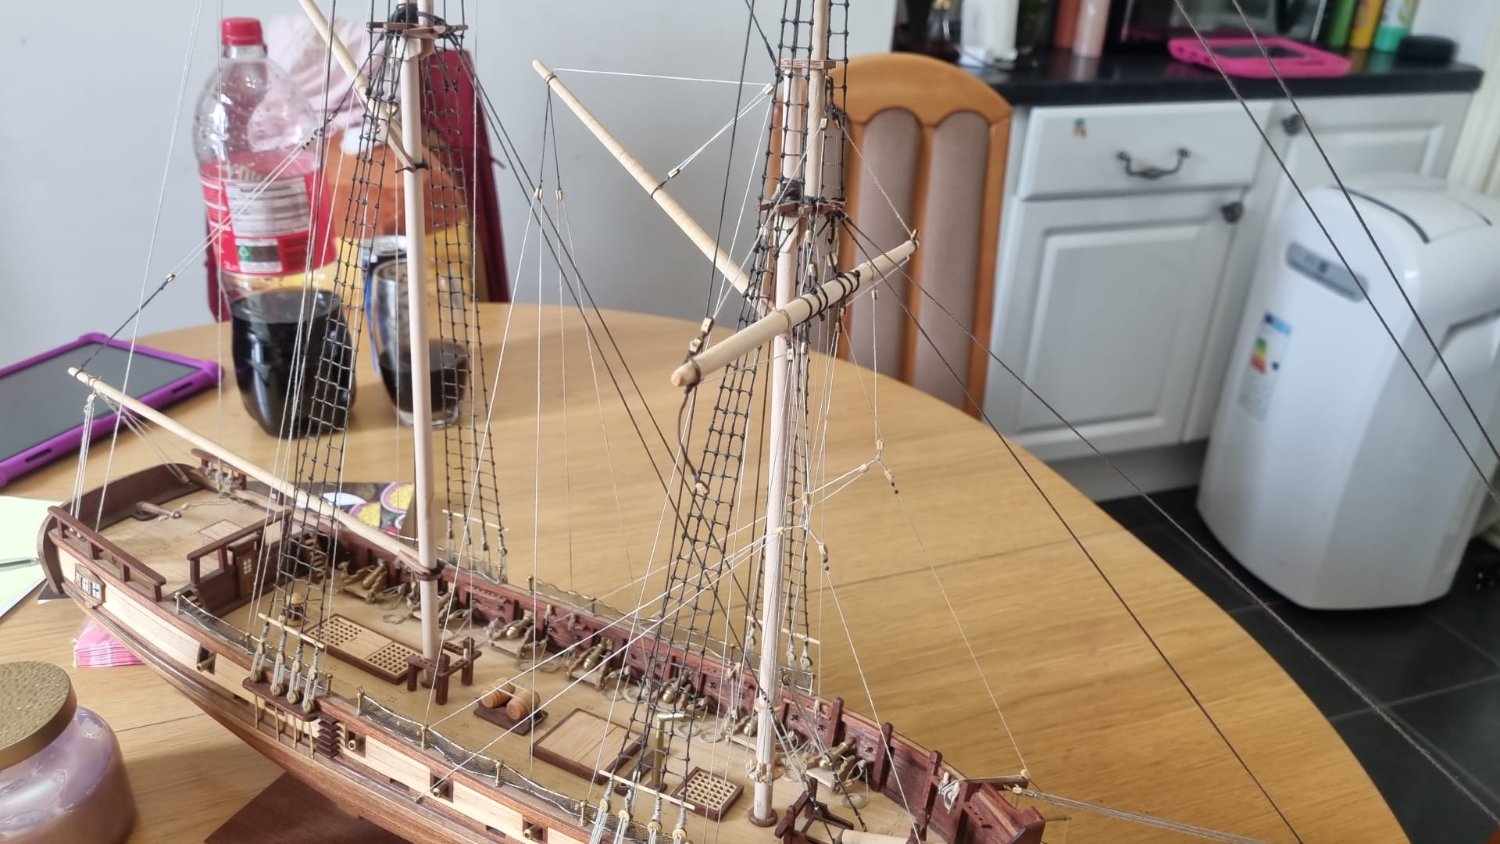
Slow and steady, gradually getting deeper has worked wonders. This second attempt looks much better. I have already sanded it and have applied some Danish wood Oil. I will say it looks really nice. The holes are drilled ready for the brass pedestals but I need some new washers. I figured since I was buying washers I would by some extra thread as well. I have been trying to make the lines and belaying pins look more natural. This is the solution I have devised... I made a coil of 'rope' and what I hope looks like a hitch (I have been watching some you tube videos which show this being tied on a real ship) and then just hook the hoop onto the pin. There is a lot on deck I need to straighten out and make tidy - I which I had done it before creating a spiders web of rope - it is not easy to access the deck anymore. I hope these are lessons learned for when I make another ship. there are a great many things I would do differently were I to star over - but I suppose that is the same for most people starting off. Anyway, I hope this will look more realistic.

- 89 replies
-
- 5
-
-
- Enterprise
- first build
- (and 2 more)
-
I am almost finished. There is just some touching up to do. I have tied most of the lines, and now want to prep some coils of rope to each of the belaying pins. I hope I can get them all to look uniform - I recon that would look neatest. I am thinking about making a sort of false hitch to hang them onto the belaying pin making it look like the real thing. We'll see if I can pull it off.
- 89 replies
-
- 1
-
-
- Enterprise
- first build
- (and 2 more)
-
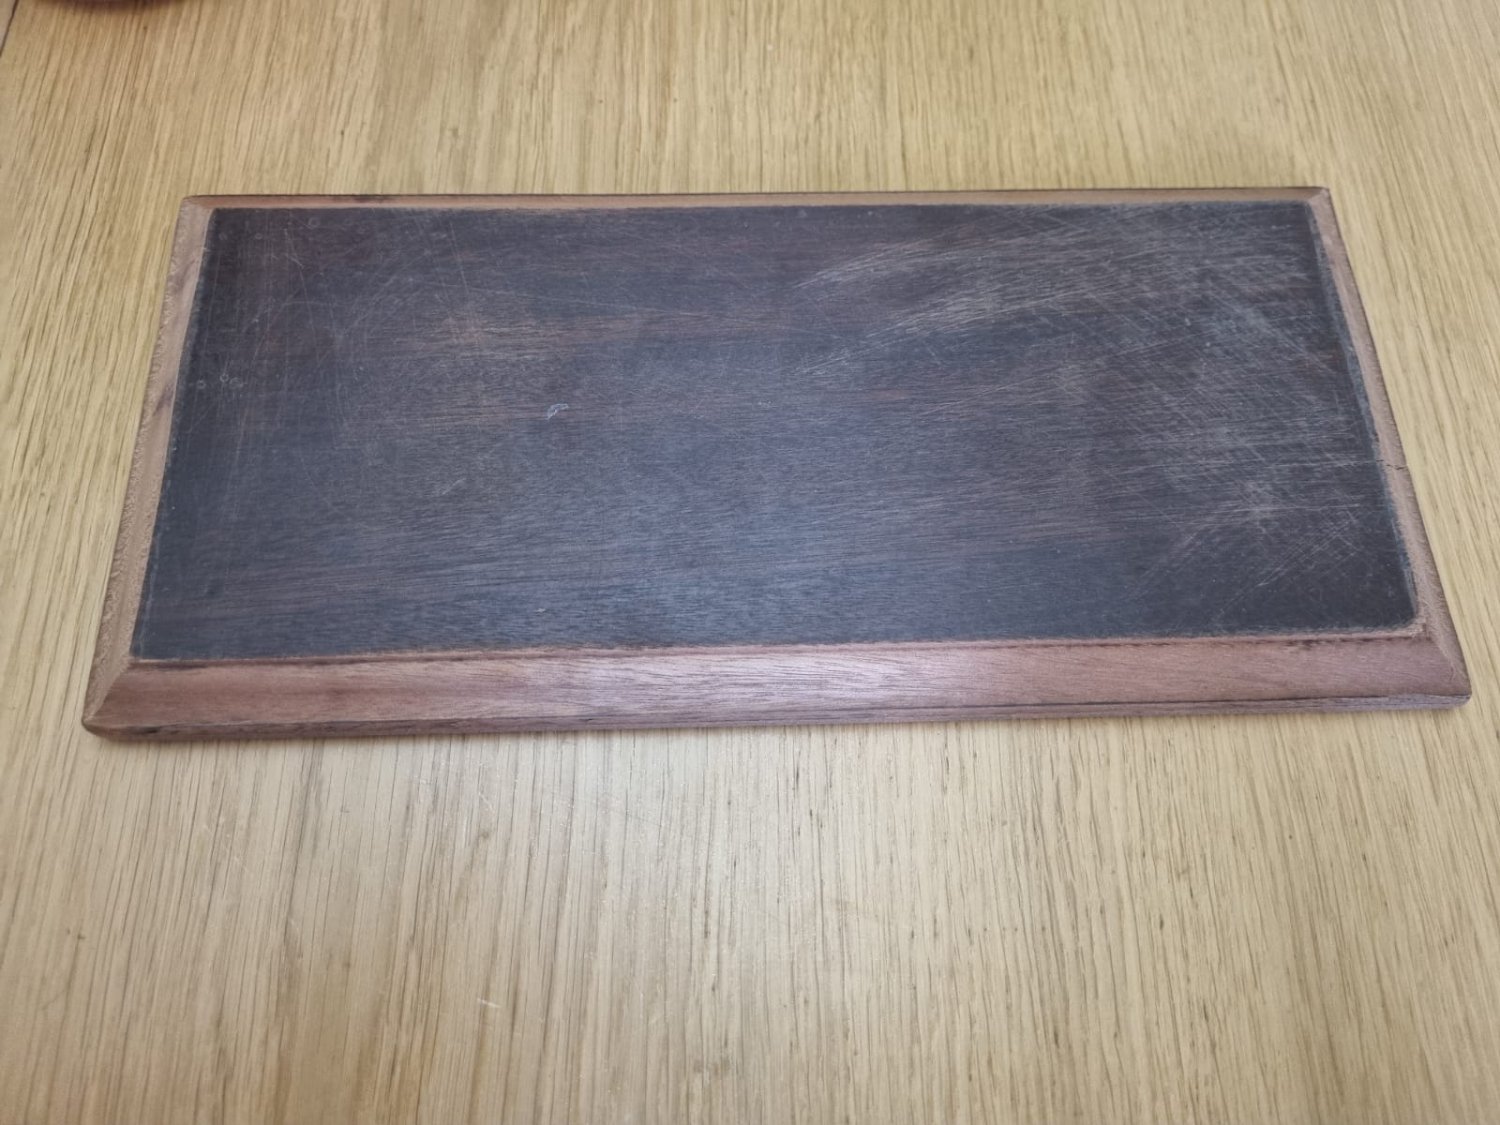
Thank you Sam - the router is a triton I think it's 1400 watt. I will try again making several passes as you suggested going deeper in stages, I have another piece from the same stock as the first and would rather do it again so it looks as good as possible.
- 89 replies
-
- 2
-
-
- Enterprise
- first build
- (and 2 more)
-
manic8479 reacted to a post in a topic:
USS Enterprise 1799 by manic8479 - FINISHED - Constructo - My first ever build
-
I have been ploughing away and must say I am loving this part of the build. It seems that even running 1 line makes a huge difference to the overall appearance of the ship, making it very satisfying indeed! She is not complete, by any stretch of the imagination, but she is looking great - If I do say so myself. My only frustration is I seem to have run out of the thread I should be using. It is a shame that more wasn't provided - but my wife has forbidden me to spend any more money on this particular build☹️ I have been reading through some of the threads on how to take photos of the ships once they are finished, and So will produce come better pictures of the completed ship, once I get to that stage.


- 89 replies
-
- 7
-
-
- Enterprise
- first build
- (and 2 more)
-
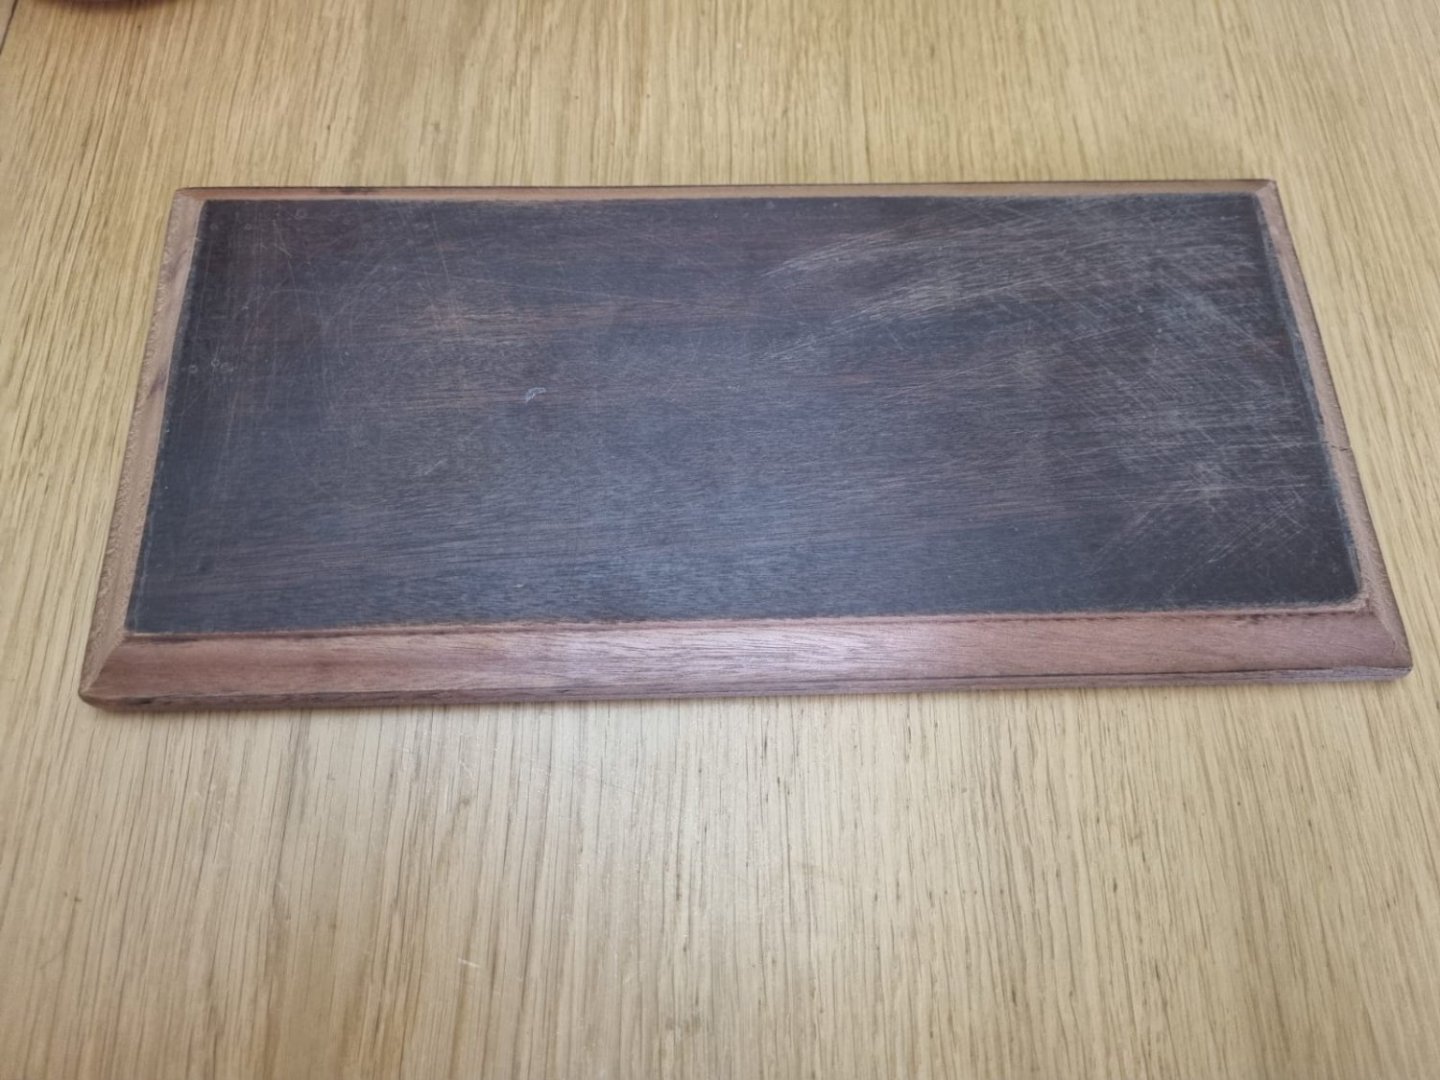
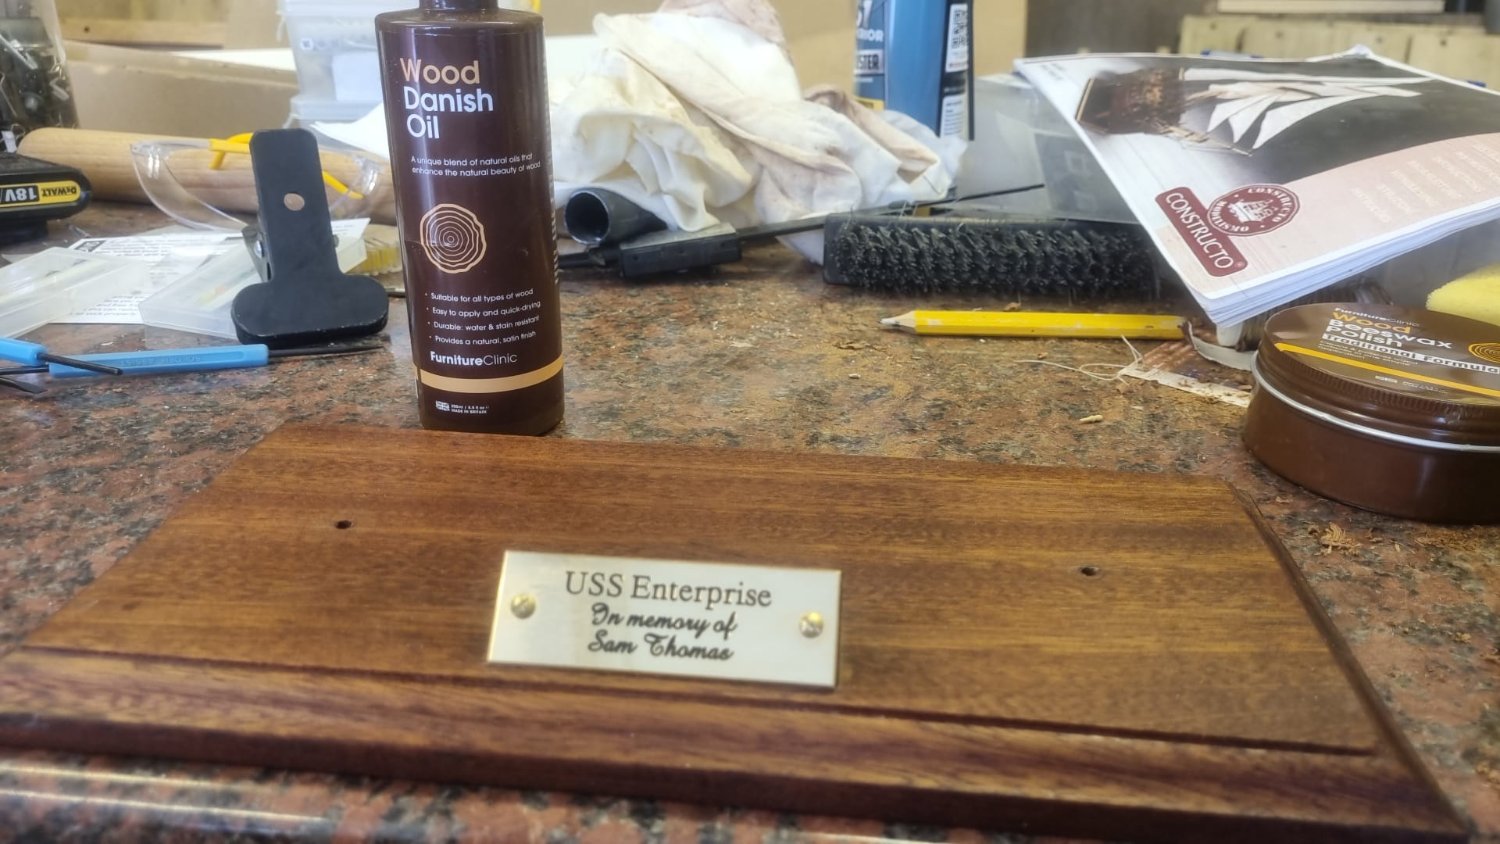
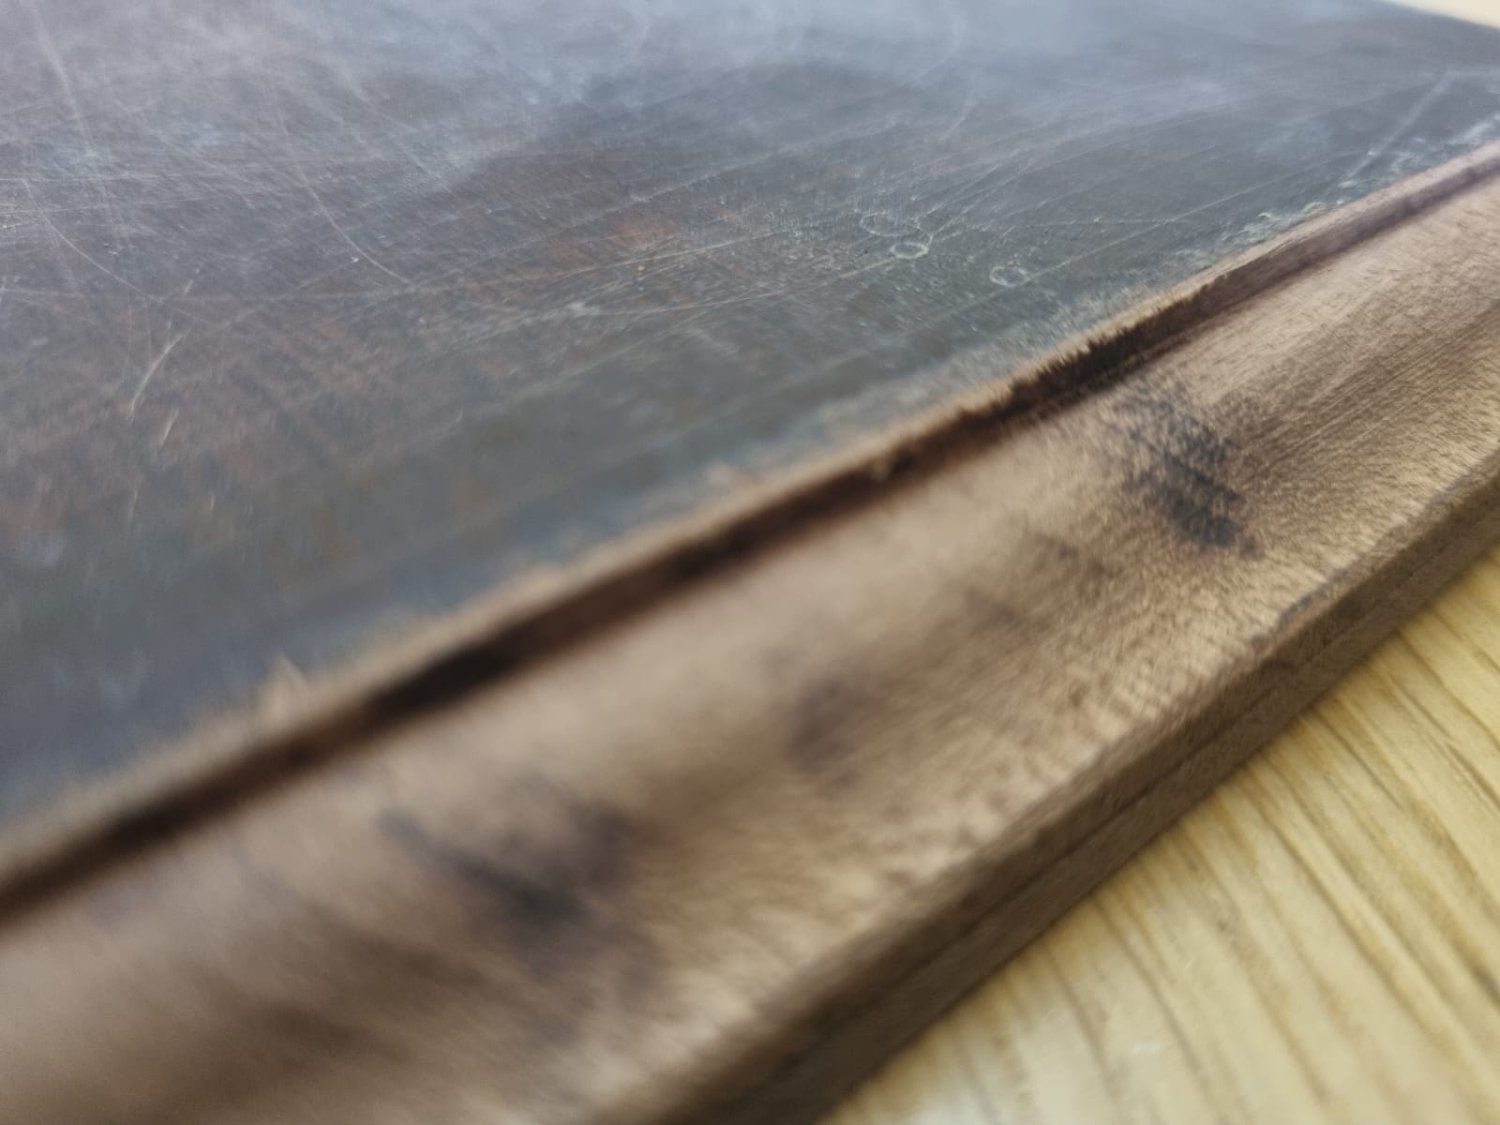
so I have began turning my attention to the stand on which the ship will sit. I was helping Michele sort through Sam's shed and came across a piece of ?mahogany? Michele commented that he used to collect all sorts of things and I asked if I could have the wood. I used the router Sam gave me years ago to shape the edges but I seem to have some burn marks. I am not sure if its because I went to quickly, or too slowly, or whether I had it too fast or too slow. I have another piece but don't want to make the same mistake again - does anyone know why this would have occurred??? is it something I can just sand out and then varnish/oil?? The whole thing needs a lot of sanding!, but I want it too look good. I have also ordered brass pedestals for the ship to sit on.

- 89 replies
-
- 2
-
-
- Enterprise
- first build
- (and 2 more)
-
I am opting not to have sails on the finished model based mainly on my complete inability to sew. I tried a few stitches this afternoon and failed miserably. I saw a lovely model ship today in the window of the local adult learning centre and was amazed by how great it looked even without her sails, which has given me the confidence not to include them on this build. So I have continued with the build. This is where I am up to so far.
.thumb.jpeg.db3a29843d60a478cc68cfd8f2feaaee.jpeg)

- 89 replies
-
- 3
-
-
- Enterprise
- first build
- (and 2 more)
-
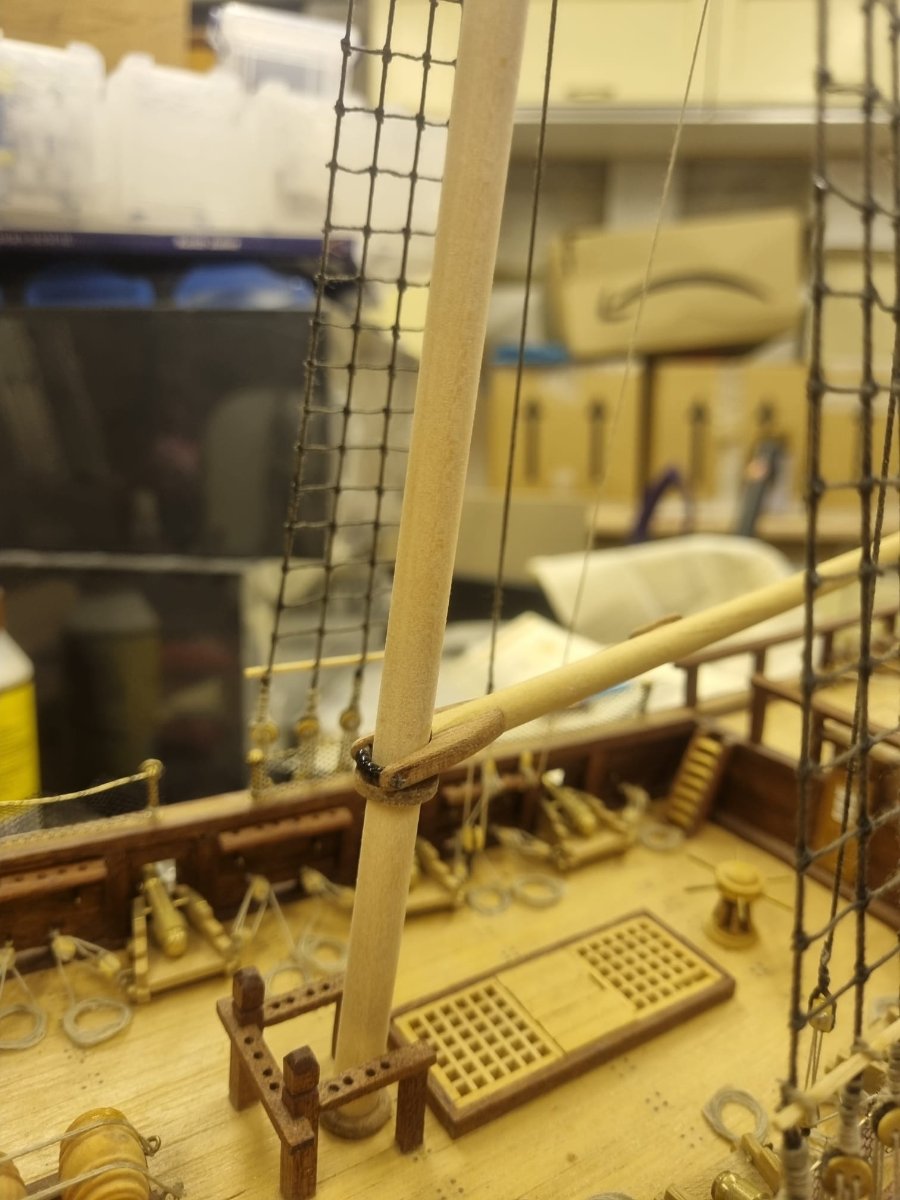
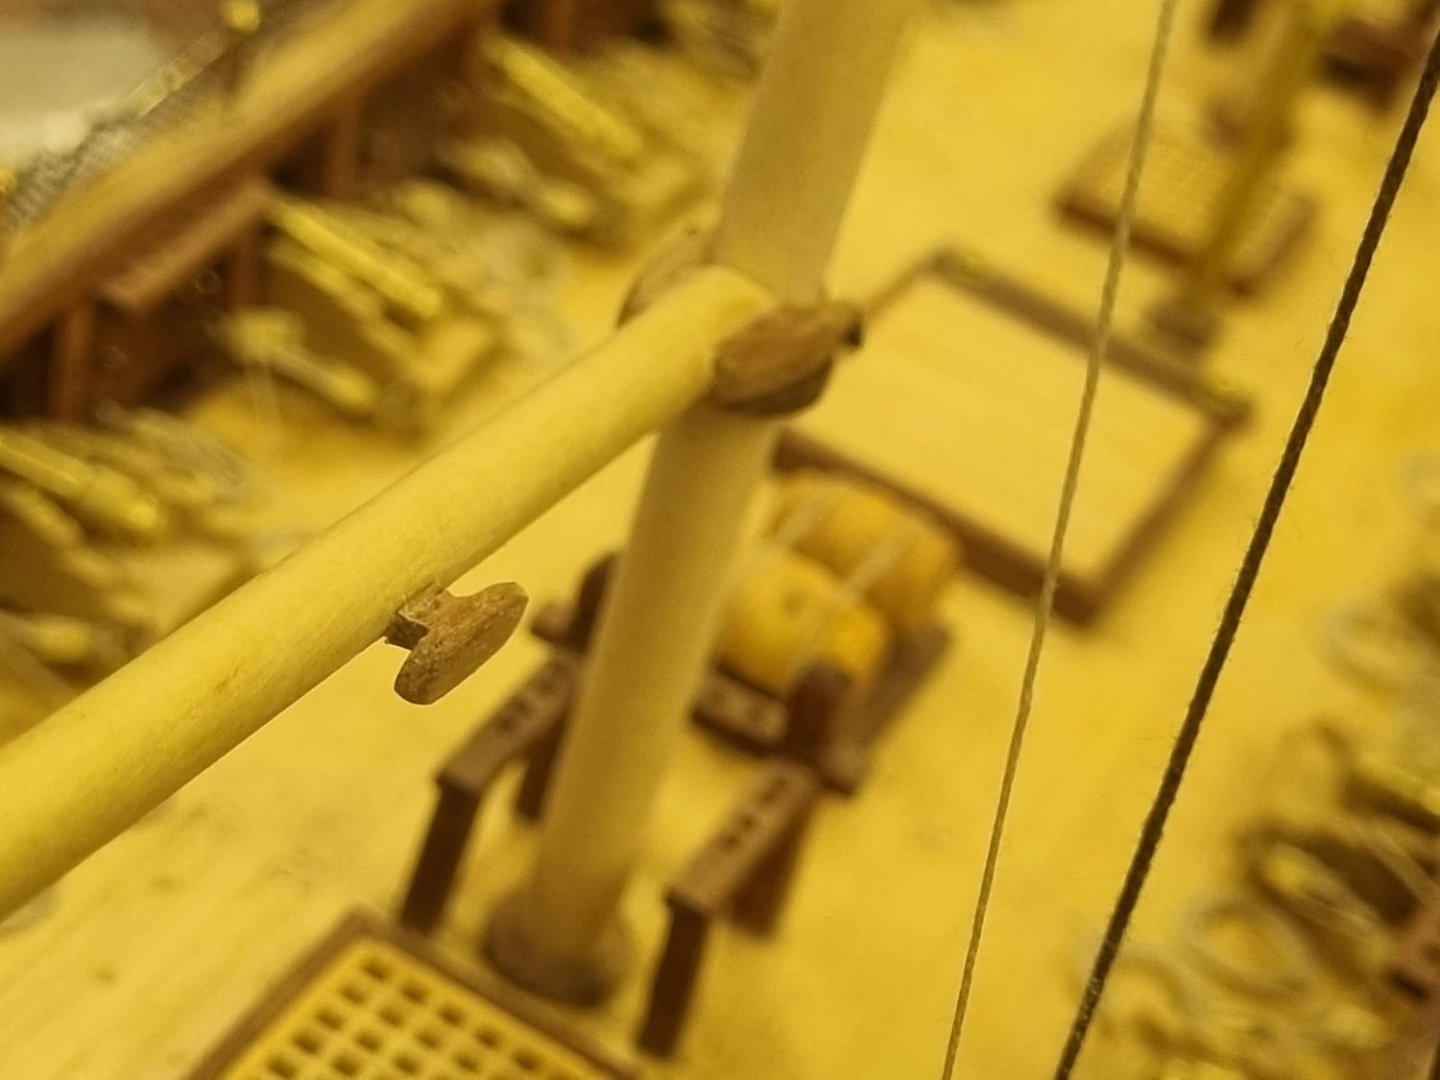
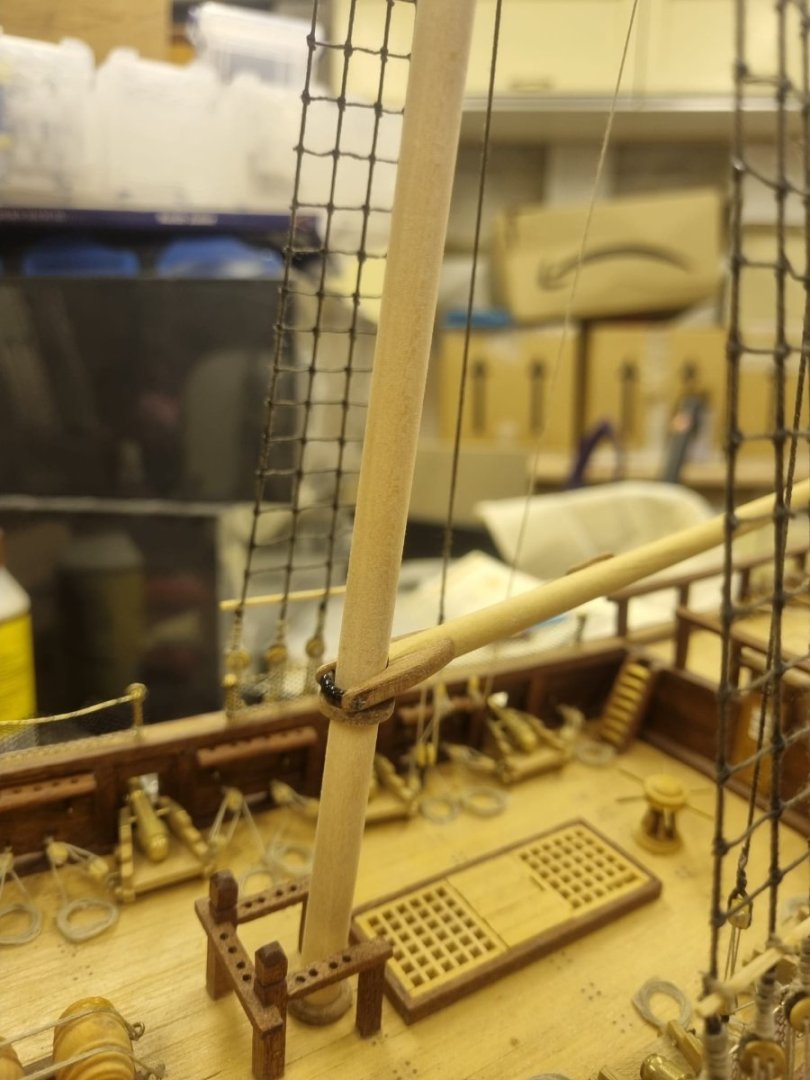
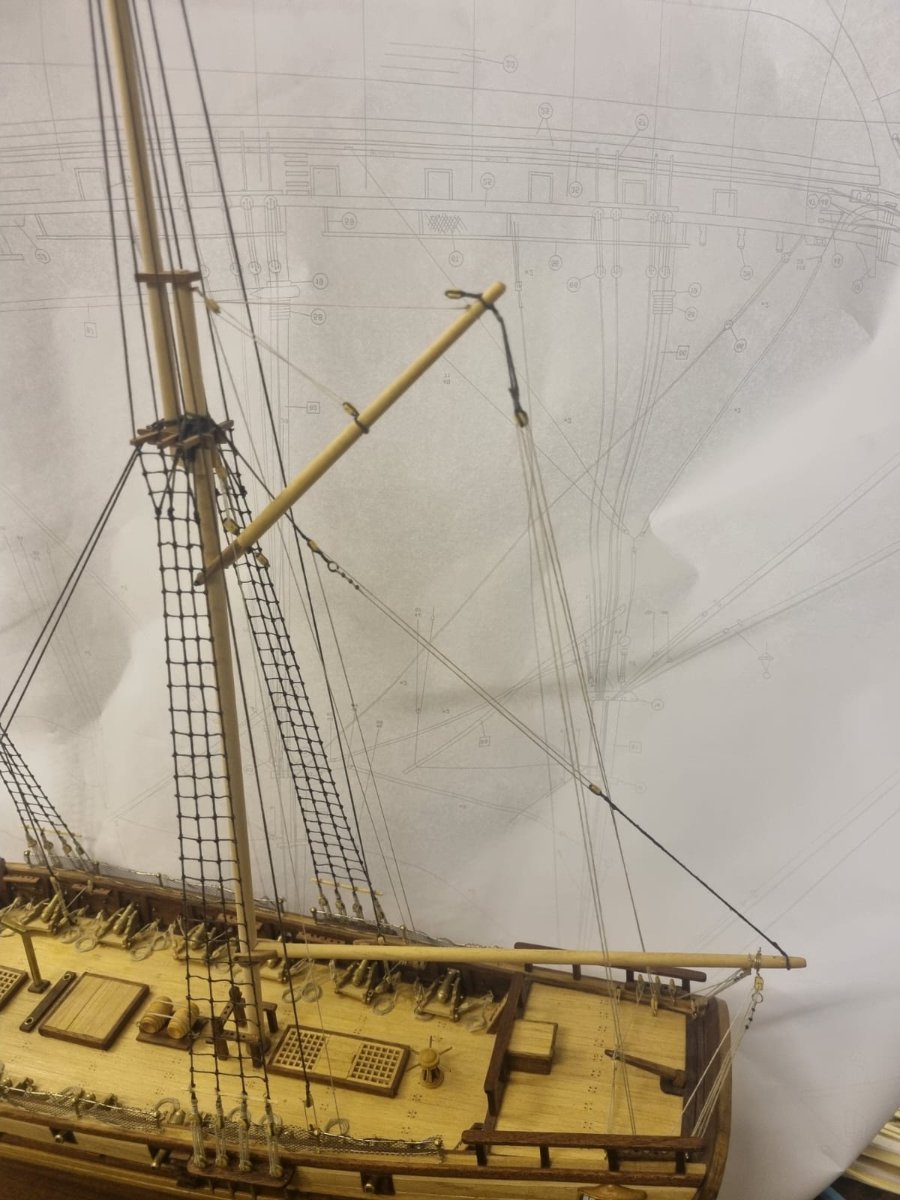
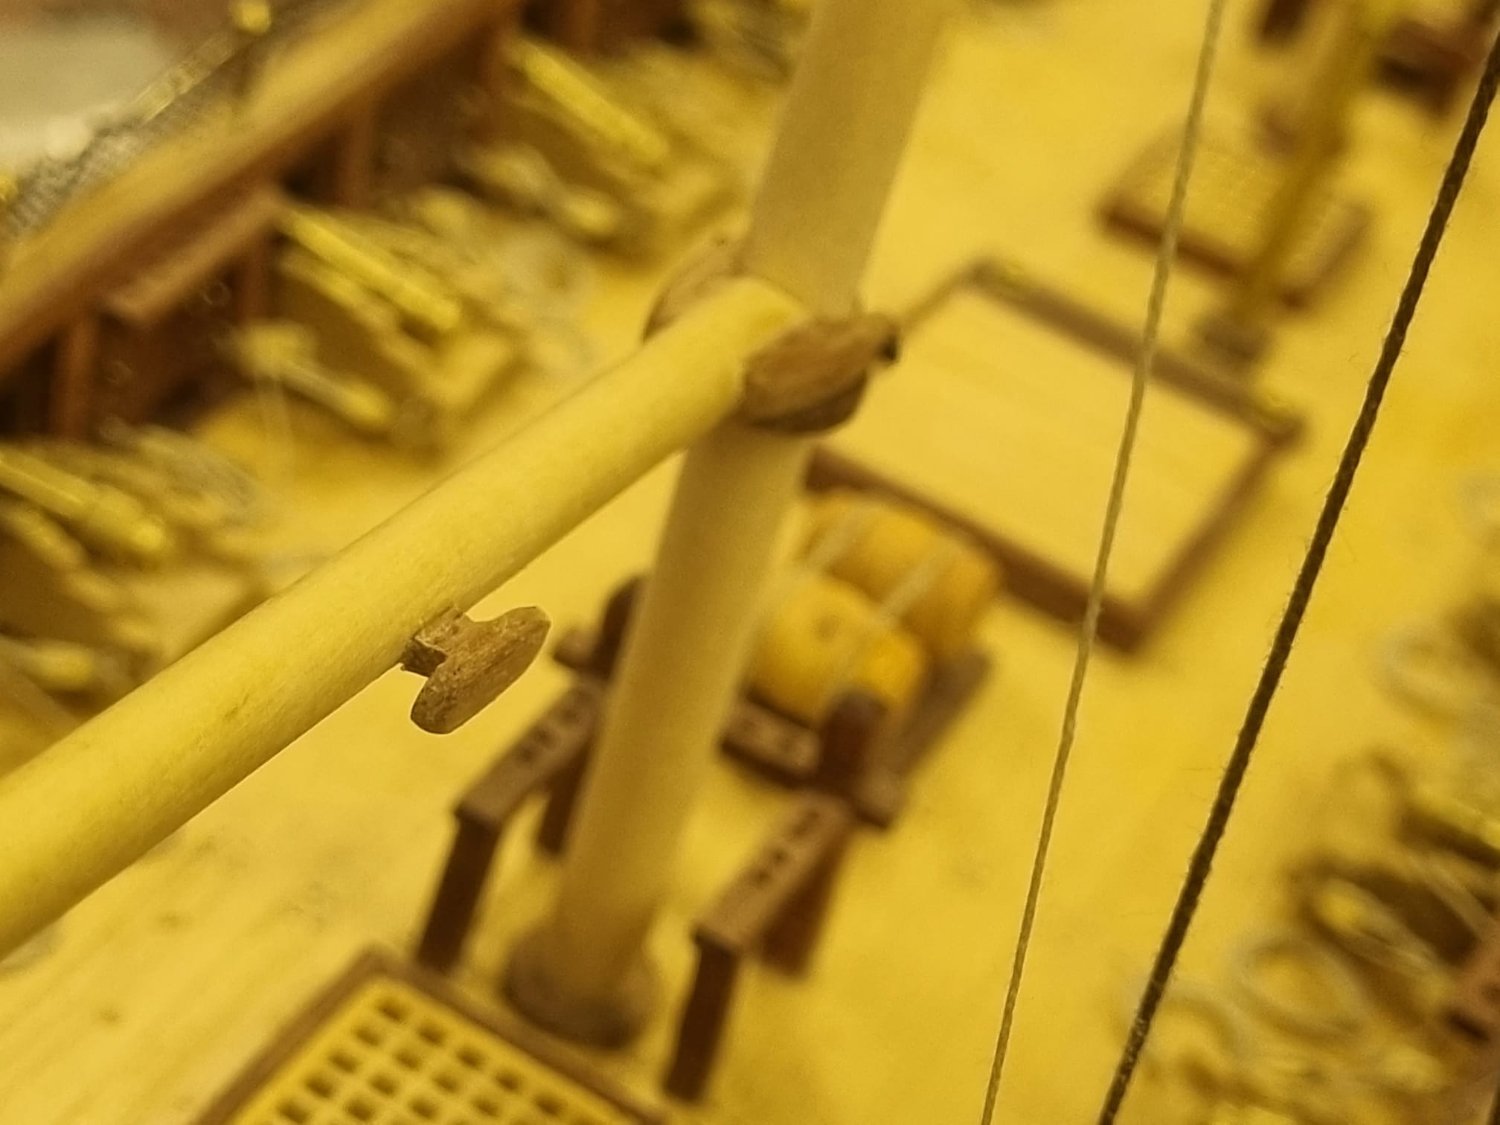
As I had hoped I was able to spend much of the afternoon on the boom. I made a cleat by filing down a small piece of wood to the approximate shape needed. I seem to have lost the cast metal one which came with the ship - which in retrospect was a good thing, because I like the contrast of the woods I have used - as well as the simple fact that wood, in my opinion, looks better. Forgive the picture quality - I cannot fathom why this photo is yellow?!? I was able to get the boom completely installed before Michele, Sam's wife, came round for a chat and a coffee. I was able to show her the ship for the first time which was really nice and emotional. We have agreed that Michele will keep the ship, as it was originally intended for Sam. I was comforted to hear from her how much he would have loved it, had he lived to see it. And I am generally grateful for the encouragement from several MSW members to complete the ship in memory of Sam. I hope to get the all the booms on the main mast completed soon and will keep you apprised of my progress.
.thumb.jpeg.ddf00be85a52758d4555fd60f63c475f.jpeg)
.thumb.jpeg.b2a9b5b7dcb6b68a3e49b6a1af8ab0b7.jpeg)
.thumb.jpeg.3064165d4193f0229dbc558399bd5503.jpeg)
.thumb.jpeg.dd5a1cd60e23aaa1c9530491cb8a9b77.jpeg)
- 89 replies
-
- 5
-
-
- Enterprise
- first build
- (and 2 more)
-
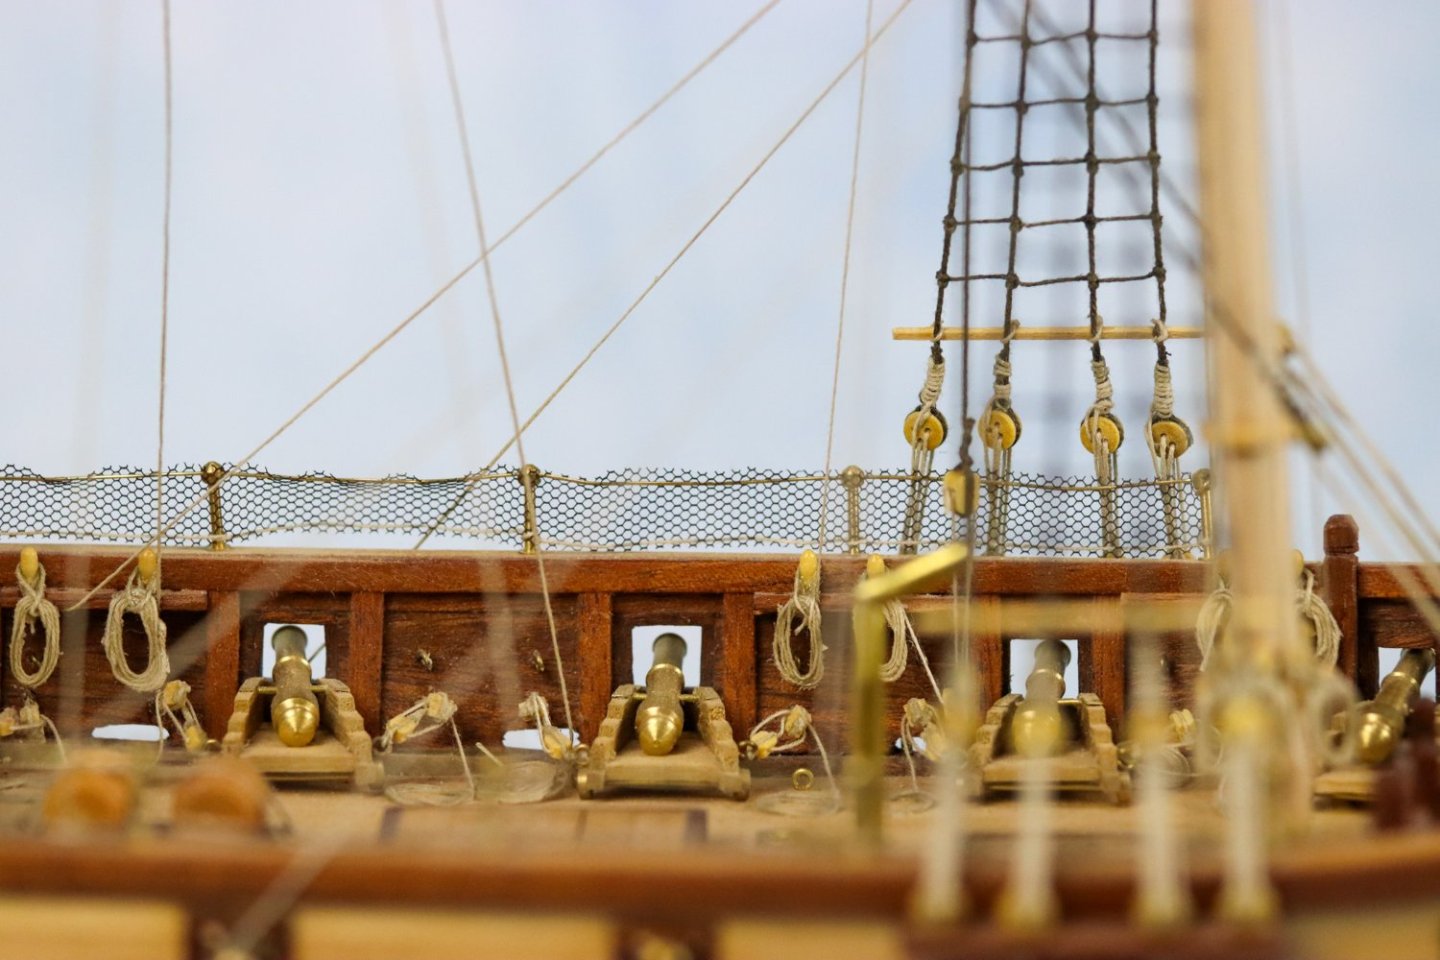
This is a shame, I hadn't realised that the carriages were too wide, but now that you point it out it is obvious to me. This whole build has been rather frustrating, in fact there is another build log for the USS Enterprise on MSW titled something like "lessons in, adapt and overcome" relating to the inaccuracy of this build. It is a shame this kit is not that good - The warning signs were all there - the sealed kit I brought didn't even have any instructions, and some of the plans were missing! The PDF I got from Constructo is actually for a different version of this ship build, so I don't have half the parts they are referring to. It is a shame that so many aspects of this build are not accurate - but at the time of building I was ignorant (and still am in many cases) of the correct way a ship of the period should look. My only other experience of ship building was of plastic model space ships as a child. I loved Star Trek and my family would buy me various models which I would paint and assemble. I would have preferred her to be more accurate, but I have researched (with the help of other MSW members) a few companies (including Vanguard models) who I am assured make much more accurate models. I plan to buy one of these as my second attempt. I hope that as I learn and develop some of the wood working skills I need I will be confident enough to make changes in the future, to kits that may not be so accurate.
- 89 replies
-
- 2
-
-
- Enterprise
- first build
- (and 2 more)
-
Well - I know its been a while since I posted anything, and in truth its been a while since I did anything new on the ship. I don't have any pictures but I have tied the stays and all the ratlines (that took a while!)Well - I know its been a while since I posted anything, and in truth its been a while since I did anything new on the ship. I don't have any pictures but I have tied the stays and tapered all the boom's and one of the Yards. I still need to add all the blocks, and belaying cleats, but the end is in sight. Tomorrow I will finish the spanker boom and hoist it into place which will be a good time to take a photo and share. I am still not sure about adding the sales or not? Done well it can look amazing - miss the mark and it looks flat and immobile. to make it look as though it is sailing on a westerly wind, would be great.... but almost certainly out of my comfort zone, and probably beyond my abilities.
- 89 replies
-
- 2
-
-
- Enterprise
- first build
- (and 2 more)
-
I have been looking at the instruction manual for the HMS Flirt on Vanguard models website - their manual is so much more detailed and helpful then mine and although I know the 2 ships are very different I have noticed that the "stays" (I think) for the masts are use a hart shaped block to tie them to the bowsprit (I think). This seems to be the same as what 'Sam SRC' did in his build. I can only find 7 or 10mm blocks in wood online, and I am worried that they would be too big for the ship and look disproportionate. they also have card ones at 4, 5 or 6mm. Which should I go for? smaller but card, or larger wood to match the wood in the ship? Any advice would be really appreciated. The block I have used so far in the build have been either 3mm or 4mm.


.jpeg.5c5e500d66a3143660252b43e05d2fe7.jpeg)
.jpeg.b000e93f5512644ad21fbe3edf7896f2.jpeg)
.jpeg.7d50535c52d11ca608a2b7d63cd3338b.jpeg)
.jpeg.84ec318f21c0ef424d82bf28174b0012.jpeg)
.jpeg.dd9106691e892ecbb541b30842bde6a5.jpeg)