
HOLIDAY DONATION DRIVE - SUPPORT MSW - DO YOUR PART TO KEEP THIS GREAT FORUM GOING! (Only 27 donations so far out of 49,000 members - C'mon guys!)
×
Havelock
-
Posts
71 -
Joined
-
Last visited
Content Type
Profiles
Forums
Gallery
Events
Everything posted by Havelock
-
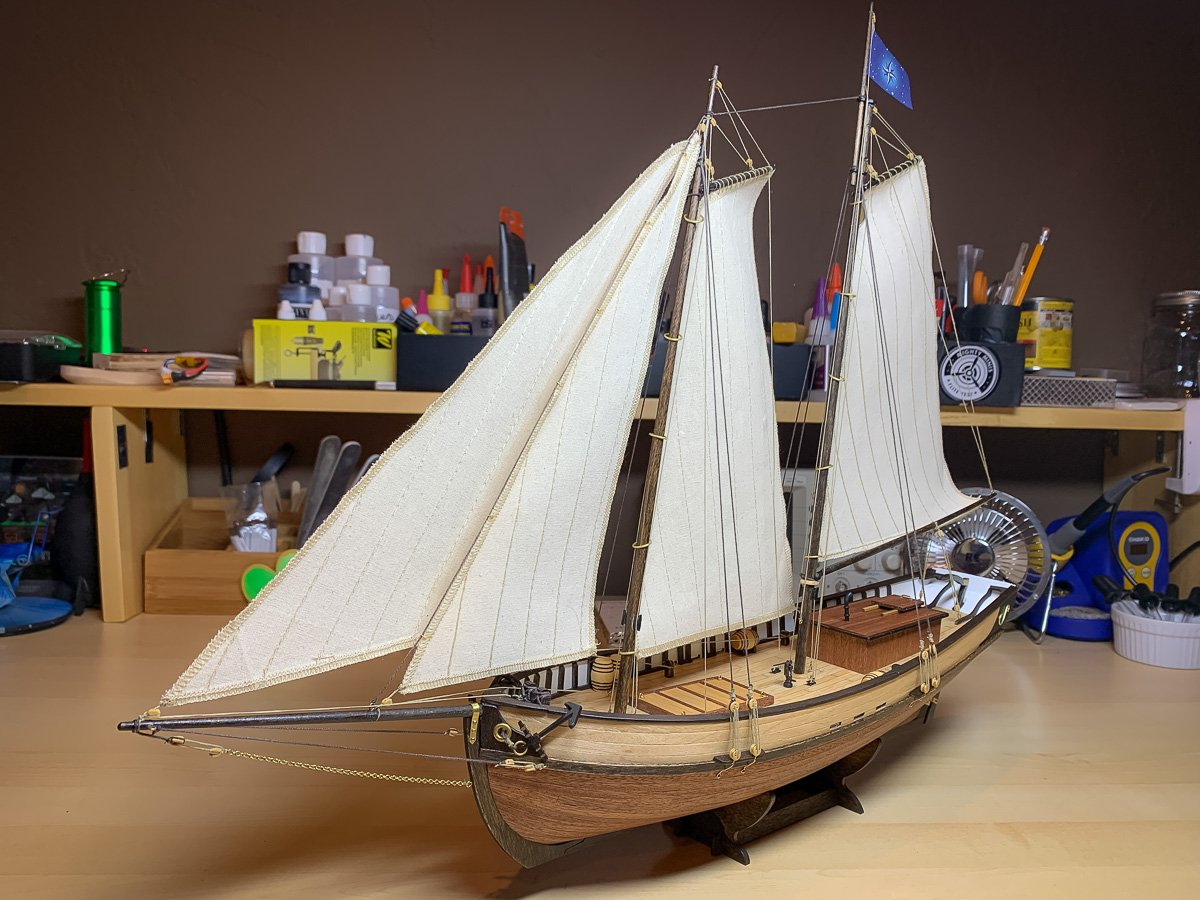
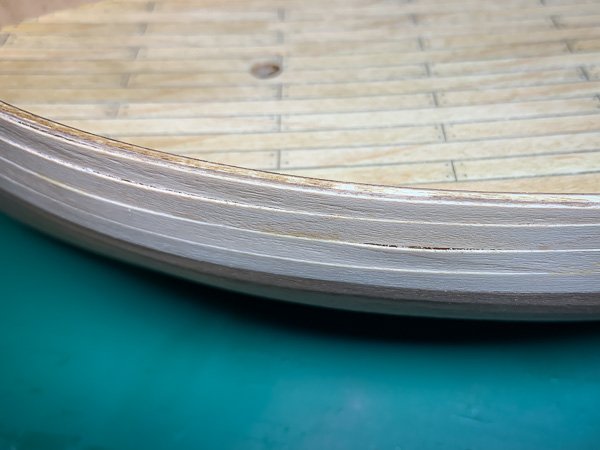
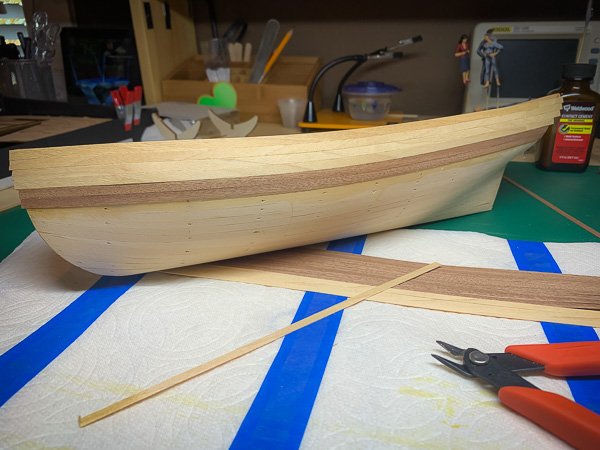
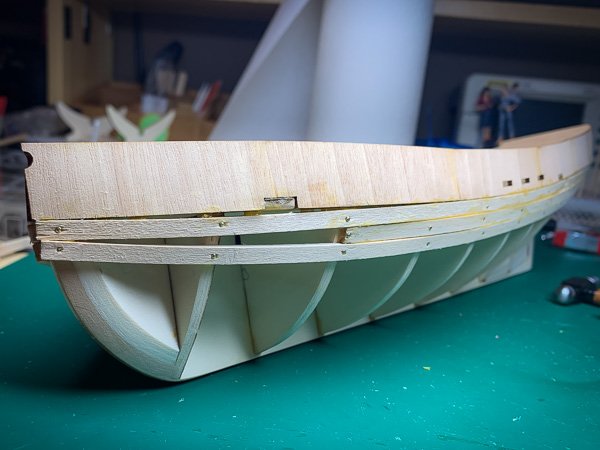
 Yay! Starting to look like a boat... warts and all: Laying down the rub railings was nerve racking. I used small amounts of CA glue in the center and ends of the railing with wood glue along the rest. Actually started in the center (where the freeing ports are), then the stern and then the bow. Worked out really well. Laying the stem, keel and sternpost was hard. Didn't do the best job. I realise now how much work it is to get really good results. I'm amazed at the level of execution I see here in NSW. Truly astounding! It's a real shot in the arm to see her actually looking like a boat but unfortunately won't be able to work further on her till next week. So bummed!
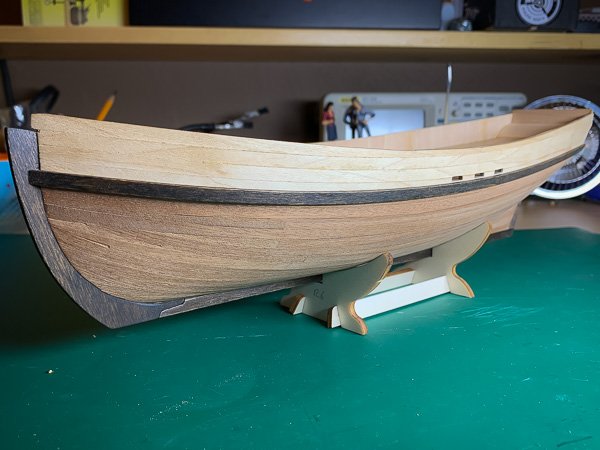

- 64 replies
-
- 10
-

-
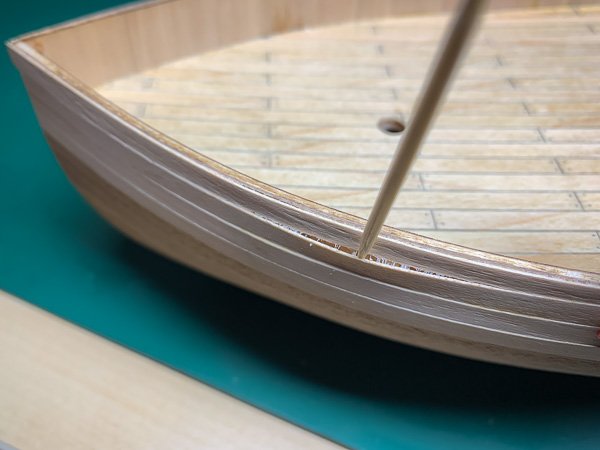
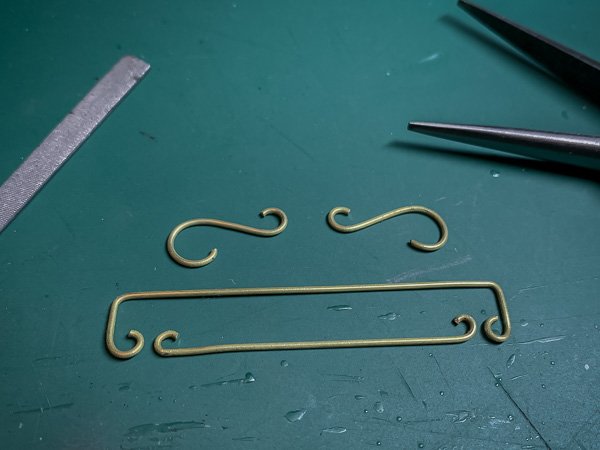
Minor update. Did a lot of sanding of the hull and bulwark areas. Cut out the freeing ports. Batch sanded and stained most of all the parts that will need staining (as it takes time for the stain to dry fully): Did quite a bit of work sanding/filing the bow section so the stem fits on nicely. Also a fair bit of sanding of the keel sections so that they mate up nicely. At present trying to bend the rub rails but really need to make some kind of jig. In the instructions/video they glue the railings down without bending using super glue. I'm not a fan of CA and in this case I'm sure I'd mess it up royally. Going to use wood glue instead but need to bend the planks before gluing or it's going to be really hard to hold them in place. In the meantime I notice more problems with the bulwark planking near the bow: I messed up applying the contact cement in this area. Put too much down (and probably didn't let it dry enough) and so the top edges of the planks are not secure. However, you can see two places above where the planks have really separated. Thankfully I'm able to get wood glue in there using an X-acto knife and toothpick: And do a fairly decent job of fixing them up. There are two or there spots on the hull planking that have similar problems but not as bad as the bulwark. Also took a crack at wire bending the decorations for the stern of the boat: Not great but I think passable for this build. Might do some research on tools to use for shaping metal. Here I was just using some cheap needle nose pliers. Definitely harder than it looks in the videos.
-
Polaris by LHsmith - OcCre - 1:50
Havelock replied to LHsmith's topic in - Kit build logs for subjects built from 1801 - 1850
Looking great, LH. I really like your planking pattern! Much much better than the instructions. Wish I had thought of that! -
The planking looks amazing! Great work!
- 217 replies
-
- 1
-
-
- medway longboat
- Syren Ship Model Company
- (and 1 more)
-
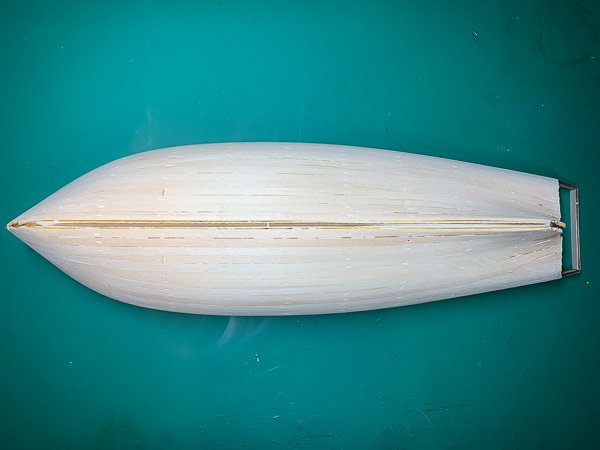
That. Was. Hard. Can't believe I spent 3 hours filling in 18 holes. But it's done: Well the hull is done. Still, it seems like the hull is the most stressful part of the whole build so I'm thinking it's plain sailing from here on out.... I'm actually most excited about getting to the above deck stuff. Should be getting there soon once I've completed the keel, waling planks and the bulwark work...
-
Excellent suggestion! I didn't think of that simply because I am following the instructions verbatim for now, but for sure I would consider that for future builds.
-
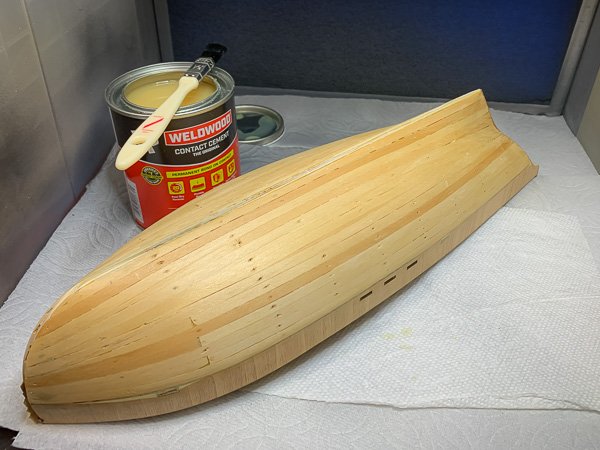
Got the main planking done: Filling in the gaps is going to be really hard. The one thing I learnt with contact cement is to not have too much laid down, i.e. remove any excess. There are some areas where the strips are a little "springy", though nothing too serious. Once I got used to using the glue, the planks went down very quickly. That was very satisfying.
-
That's so annoying! Hopefully you don't have to wait much longer. The Palamos looks really cool!
-
Looking good! I like the kit. Definitely fair the ribs well. In my first build I didn’t pay enough attention to the fairing and it made planking harder. For my Polaris build I did and planking was much smoother. I would lay one of the thin strips across the ribs to ensure they conform fully.
-
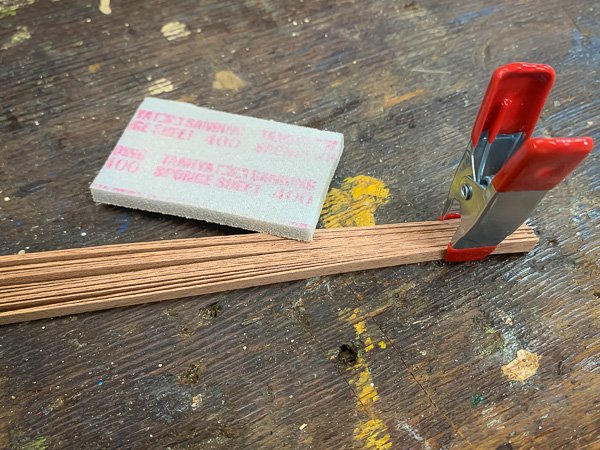
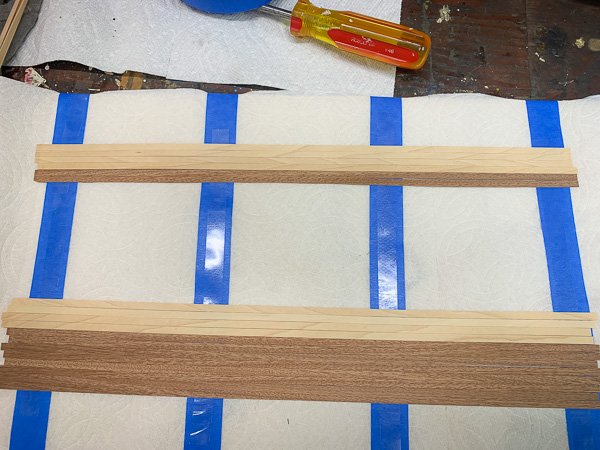
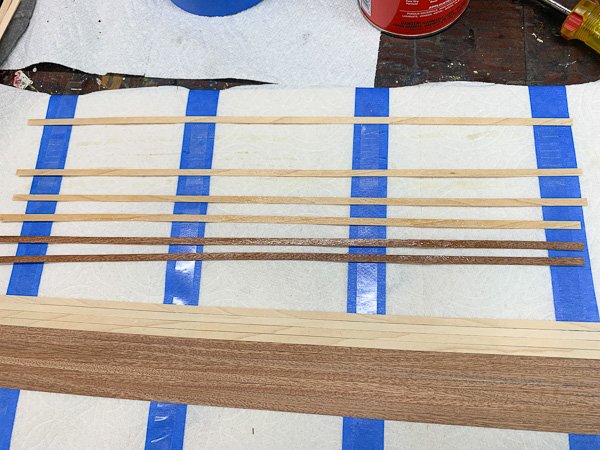
Made some progress on planking the hull. It's been a learning process with using contact glue for sure. First though had to smooth the rough edges of the planking strips: Used some 400 grit sanding foam. Surprising how rough some of the dark strips where. Then setup a "jig" of sorts to stick down the strips using double sided tape: Was planning doing a bunch of planks but then decided to just do the port side bulwark and two sheer planks, so a total of 6 strips. Also remembered this time to separate the strips before the glue dries. When doing a test run before I forgot to separate them and it was a bit of a mess: Applied glue to the port bulwark.... and managed to get the strips on well enough: The main issue I'm finding with the contact cement is that it gets totally soaked up by the wood and needs two or three coats before I got a good application. So for now did a coat of glue over the whole hull: Will let it dry so that tomorrow hopefully I'll have an easier go of it. Can't say I like working with contact cement - it's horrible stuff - but do like that I'm getting some experience with it. Definitely has its uses.
-
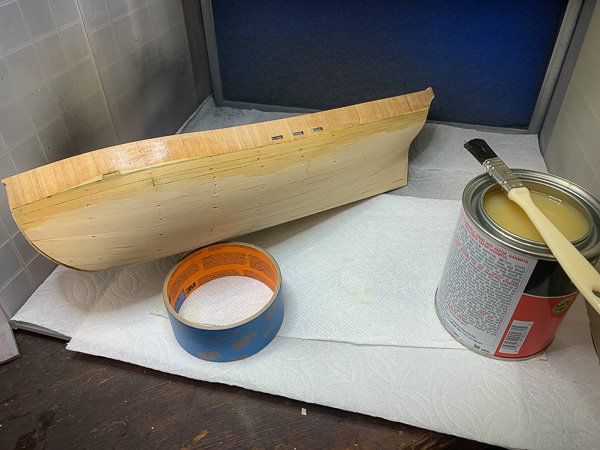
Thx, Bruce. Your Mediator build is very impressive. I'll be following for sure. I planked the stern: The contact cement is horrible to work with. I've been using Weldbond from a bottle (you can see in the top right of the second image) but it's very thick and the built in applicator is a nightmare to use; very hard to apply well and goes on too thickly. I've also bought a quart of the stuff, i.e. in a can, and am going to see how much better it is to work with with a different applicator (brush). Will do some test runs to see if I can get better at applying the glue.

-
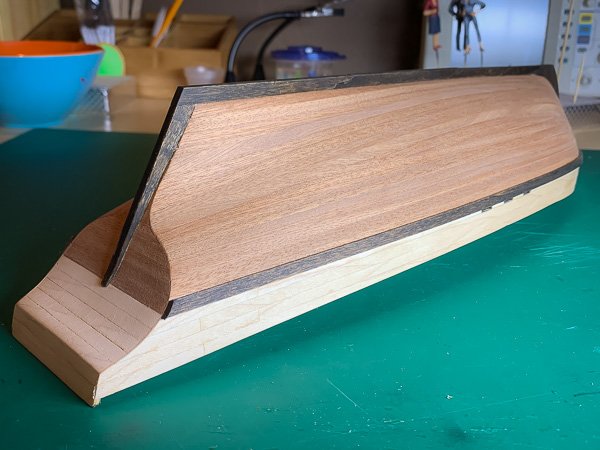
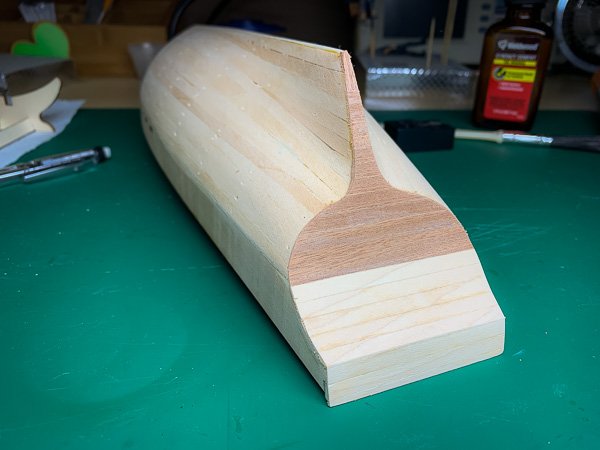
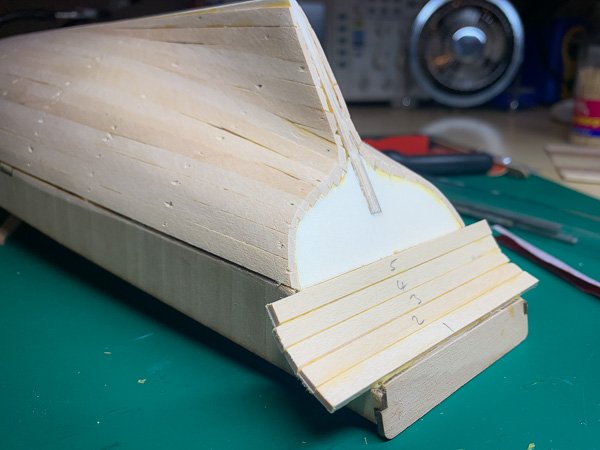
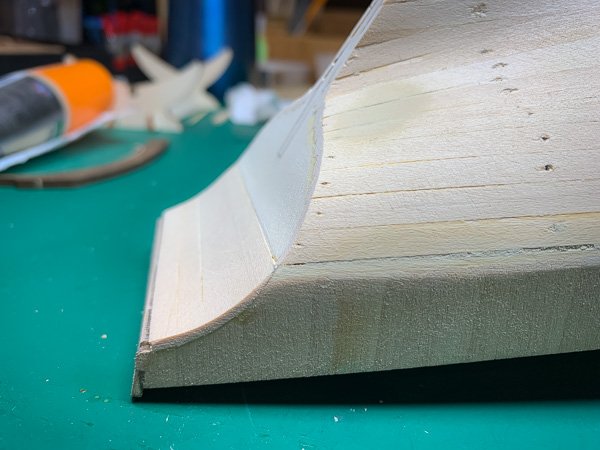
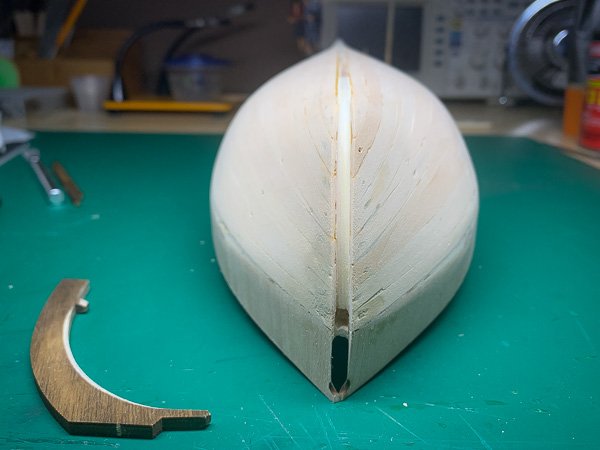
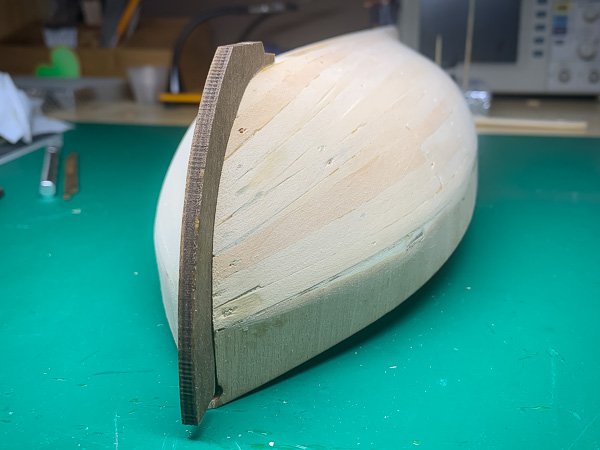
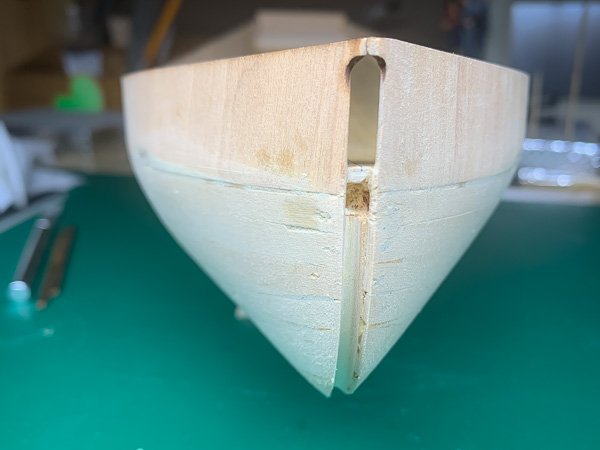
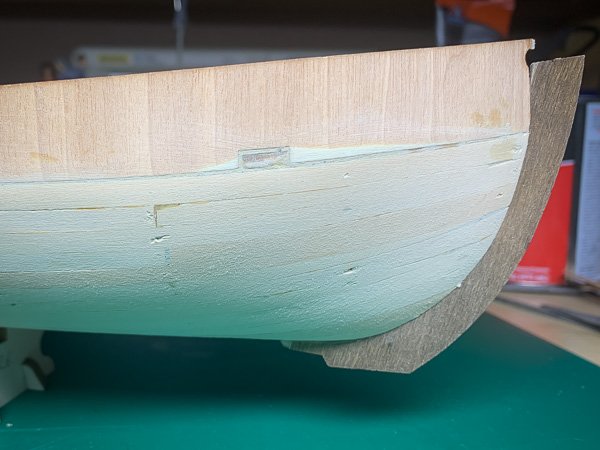
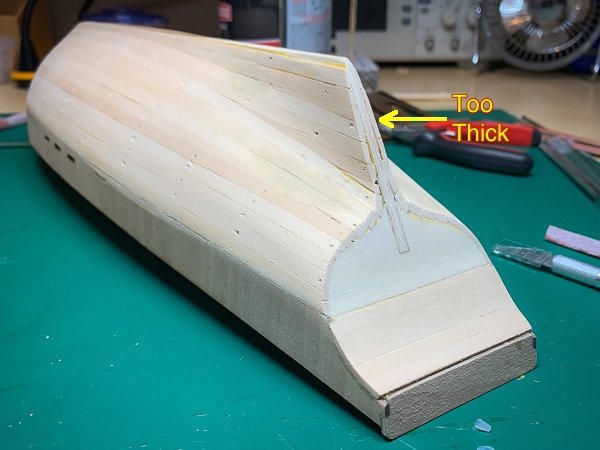
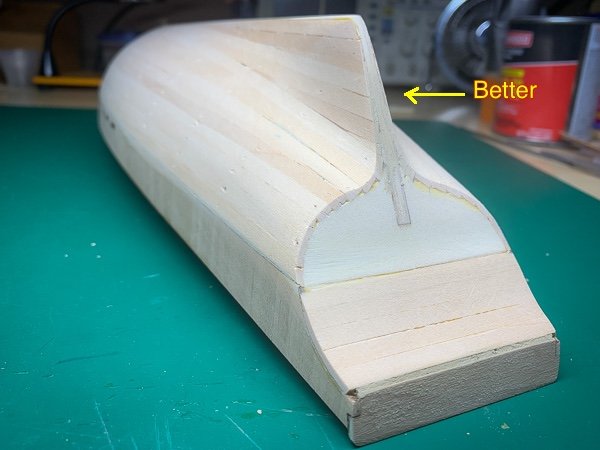
Ended up using Elmer's Wood Filler for what little filling I needed to do: Which was mainly where the bulwark doesn't quite meet the sheer plank. Added the stern planks: Trimmed and sanded them down: Noticed the stern post area is too thick so did more sanding: The post at the bow (don't know the technical term for it) was bit more of a challenge to figure out. Mine doesn't look like the pictures in the instructions but I think it works fine: Thinking I'm nearly ready to start the second planking. Going to go over the instructions and video one more time, and do some more dry fitting of the keel and the stern and bow posts.

-
Thx, Bruce. The wood is pretty soft. I'm guessing use sawdust with wood glue?
-
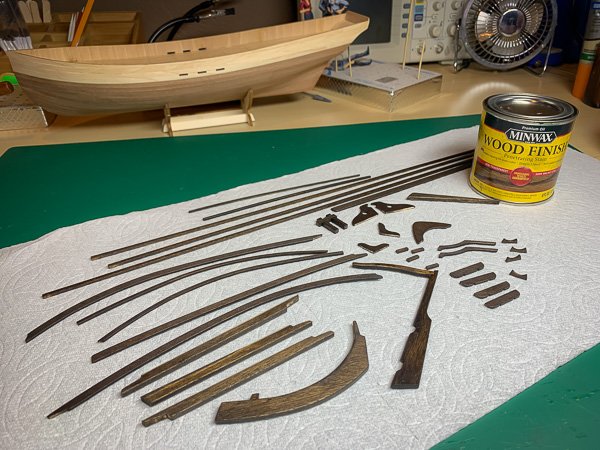
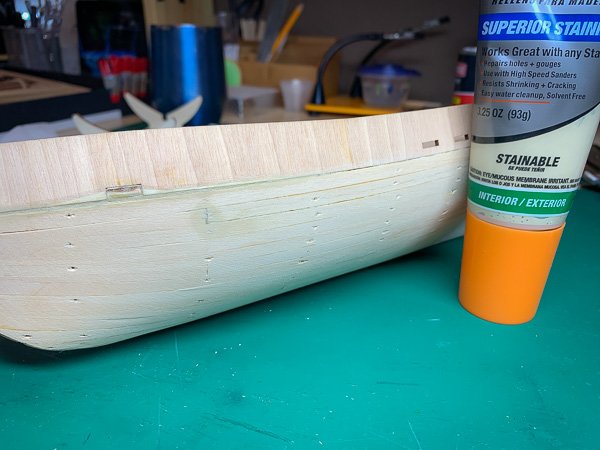
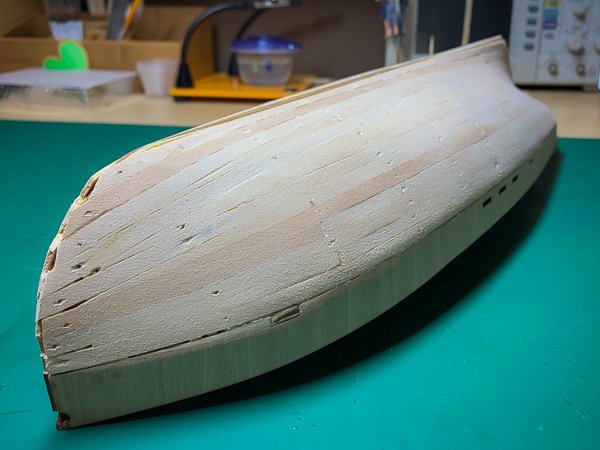
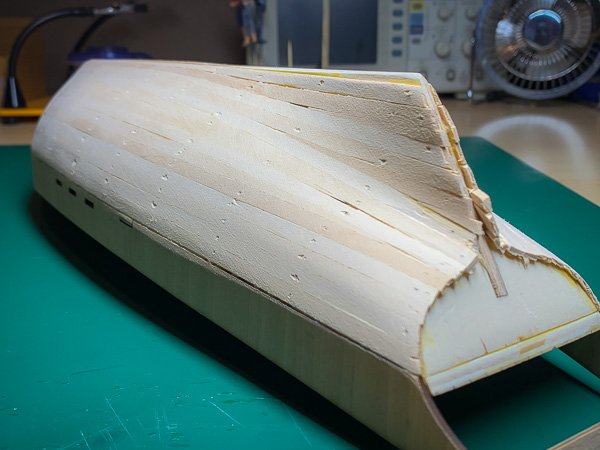
Got the initial sanding done: Need to fill in some gaps, and do a final sanding... For the filling I plan on using Durham's (Rock Hard) Water Putty.
-
Started sanding the hull and boy am I glad I removed the nails! It would have been a nightmare! Thx Wahka! Also didn’t realize that it needs so much sanding. Some of the planks were noticeably thicker so require a lot more work.
-
Ah, my strategy was to push the heads in as far as I could but I think it's best to remove them as you say. I gave it a go and it's not too hard: A little bit of damage but nothing that should affect the second planking. Next time I will definitely not drive the heads in so far.

-
Please excuse the amazon link but it is to a book I own that has a condensed visual history of the automobile: Car: The Definitive Visual History You can click on the "Look inside" to see its simple visual format. I would like to find something similar for ships/boats, either a book or online resource. I realize ships have been around so much longer and across lots of cultures and epochs so having a condensed history would be very crude but I'm just trying to get a rough top level view that I can then drill down further. In fact I would be fine for now with one that just focused on the Western Civilizations ranging from middle ages to mid 20th century.
-
Oops! Sorry, Jim! [Sheesh... Now I feel like Kanye West at Taylor Swift's MTV awards 🤭 ... handing the mic back now]
-
Thx, Sweep. I ordered some. Always interested in trying out new glues. Main planking done. Just need to fill in 16 holes: Side note: Thought I was following the planking from the videos but messed up with the 5th plank from the keel at the stern. Oh well....
-
I got the Polaris too. Shame about the false deck being incorrect. That is really annoying! Make a build log for the Carmen II! I've been eyeing that one... but to be honest I think I got a ways to go before I'm able to attempt it. Definitely figure out plank bending. Luckily I started out trying to build Model Shipway's 18th Century Longboat where plank bending is crucial. I had to put that project on hold as the level of plank shaping is beyond me at present but I did learn enough to make planking the Polaris so much easier.
-
Following. Jaw dropping work, Tom! I’m blown away by the level of detail and execution!
-
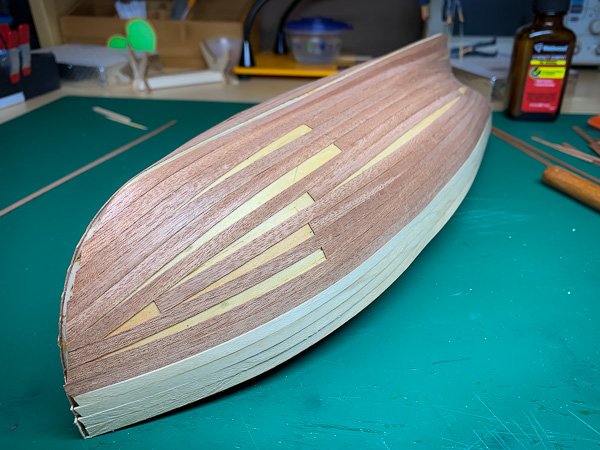
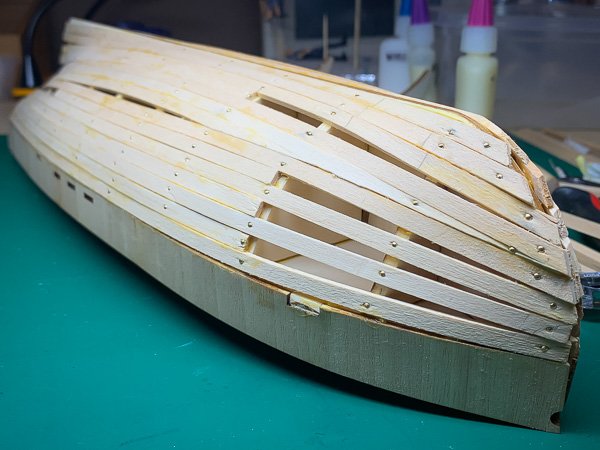
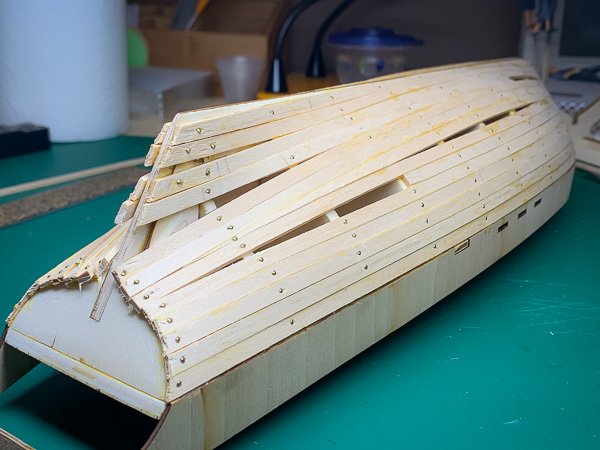
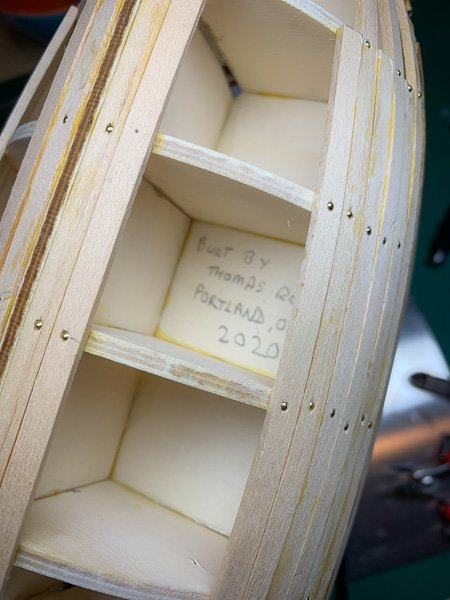
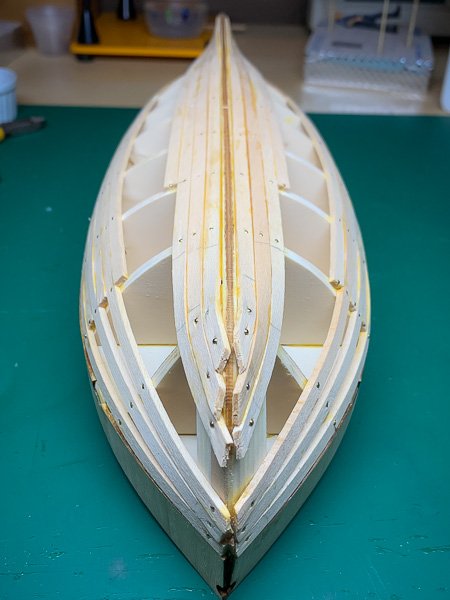
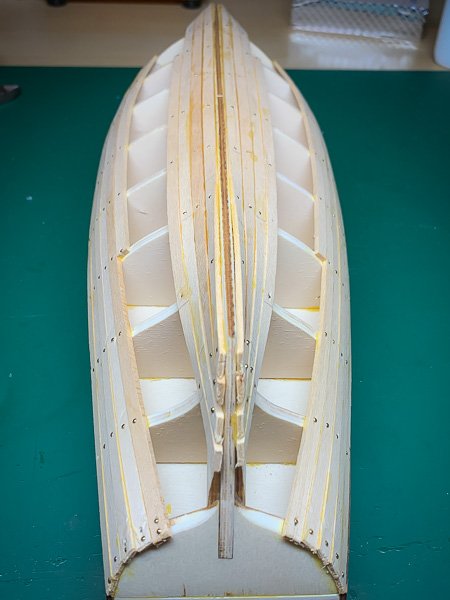
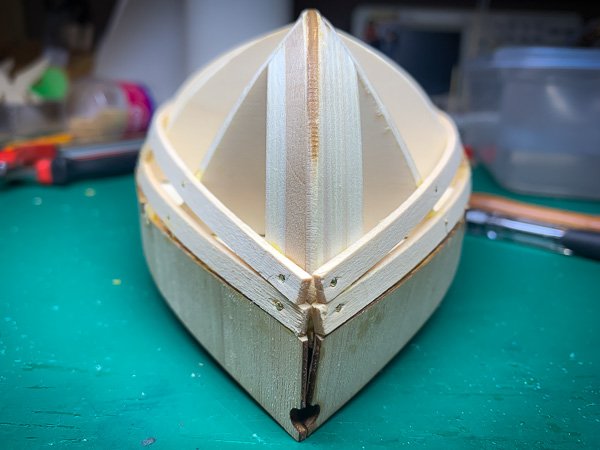
Making progress but it's slow going. Doing the garboard planks and upwards was quite challenging at the bow. Luckily I got experience bending planks while trying to build Model Shipway's 18th Century Longboat. That build is proving too hard for me at present but it gave me enough experience to be able to pre-bend these planks to get an easier time of laying them down nicely. However, the very tippy part of the bow I had to soak and then bend and nail into place as it is simply too server a curve. Some pics of the progress so far: For fun I added a little "Built by..." message inside: Should add a little object in there too... so it makes an annoying rattling sound... 😁 So far spent 12 hours on this build.

-
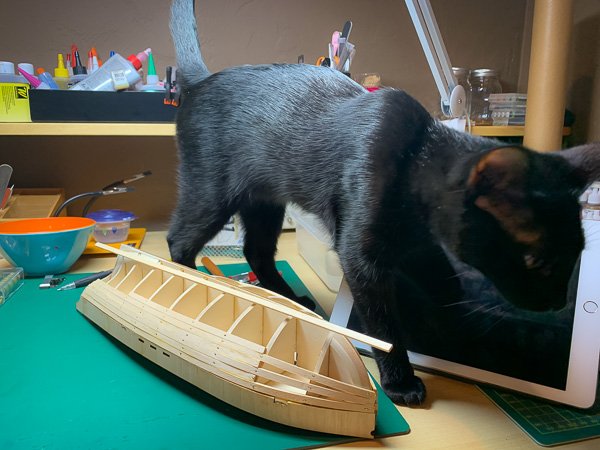
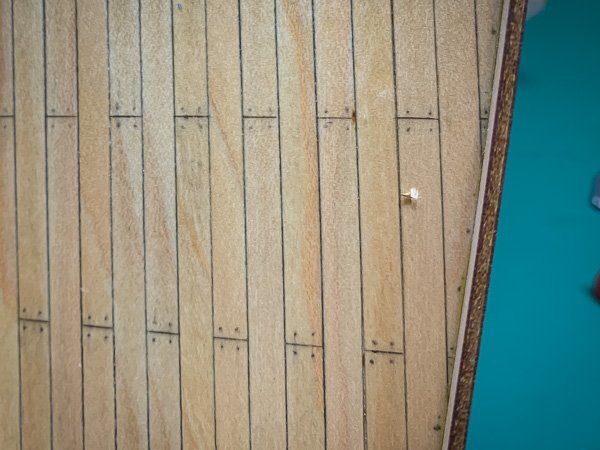
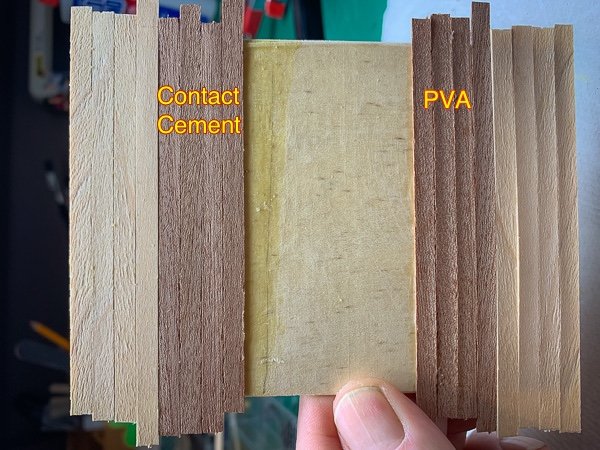
Still working on the first planking but thought I would share two things: 1) Just noticed that one of the planking nails managed to penetrate up into the decking: Ugh! I was able to remove it and push down the "bump" so it's not terribly noticeable. Definitely a cautionary tale for other newbie's like myself. Thankfully it was only one and not a bunch of them. 2) I've been thinking about the second planking and using contact cement (CC) as shown in the instructions. Decided to do a test run on a scrap of wood to see how hard/easy it was as I've never used it before and people have mentioned it bounds too quickly and so is unforgiving when placing the strips. I also tested using PVA glue: I found laying down the strips on the CC was not too hard although, in reality, on the hull the strips will be much longer and have slight curving. Still I found that if I'm gingerly with laying them down then there is a some wiggle room for adjustments. My main concern with using wood glue is that there's not good way to "clamp" the strips down while the glue cures. I'd have to keep manually pressing them down and I think that will be too laborious for all the strips needed. I also noticed with the PVA'd strips that they "cup", as you can see in the photo above. Not sure if that is a deal breaker. I guess sanding will remove the cupping but I don't think I'd want to sand too much with these super thin strips. I'll see how much the cupping reduces over time as the strips dry out fully. Anyone have other suggestions for gluing the second planking? For now using CC seems the simplest. In other news: Had a pop inspection at the shipyard: The Admiralty were not impressed. They mentioned something about there being a lack of consumables...
-
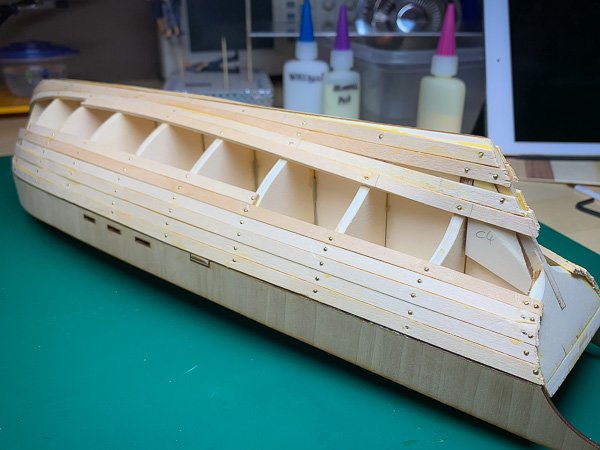
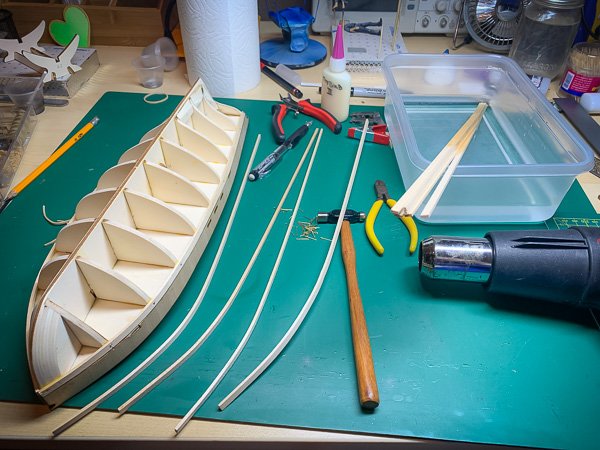
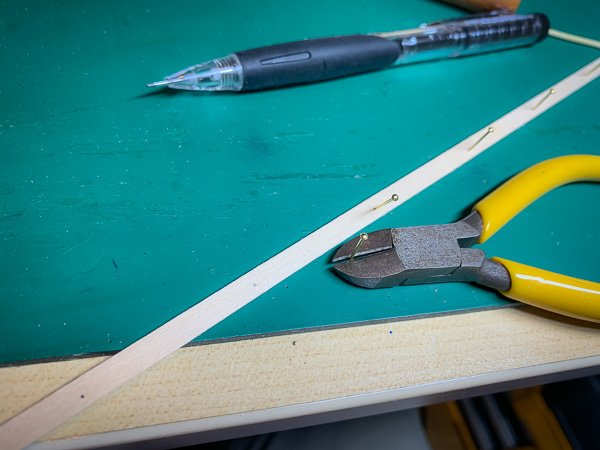
Was planning on laying down the first 6 planks on each side but ended up only managing 3 for now. Started by bending the planks first so that they conform better to the hull: Six of the planks span the full hull and required significant bending at the bow. The other six don't span the full hull and only require a slight bend. Not sure if one really needs to bend them in order to do the planking but it sure makes it easier to manage. In the OcCre videos they use a small brad pusher to nail the planks to the ribs. I don't have one of those so had to use a mini hammer instead. I did find that life is much easier if you first mark where the nails go in along the plank and pre-push the nails in: After that it was plain sailing, though I was a bit too judicious initially with the wood glue between the planks: It took more time than I thought but part of that was figuring out a process for both the plank bend and installation. The next pass should be more productive....

-
Ha, I also build plastic models and have 6 projects on going! Oh well.....