MORE HANDBOOKS ARE ON THEIR WAY! We will let you know when they get here.
×

LucienL
-
Posts
121 -
Joined
-
Last visited
Content Type
Profiles
Forums
Gallery
Events
Everything posted by LucienL
-
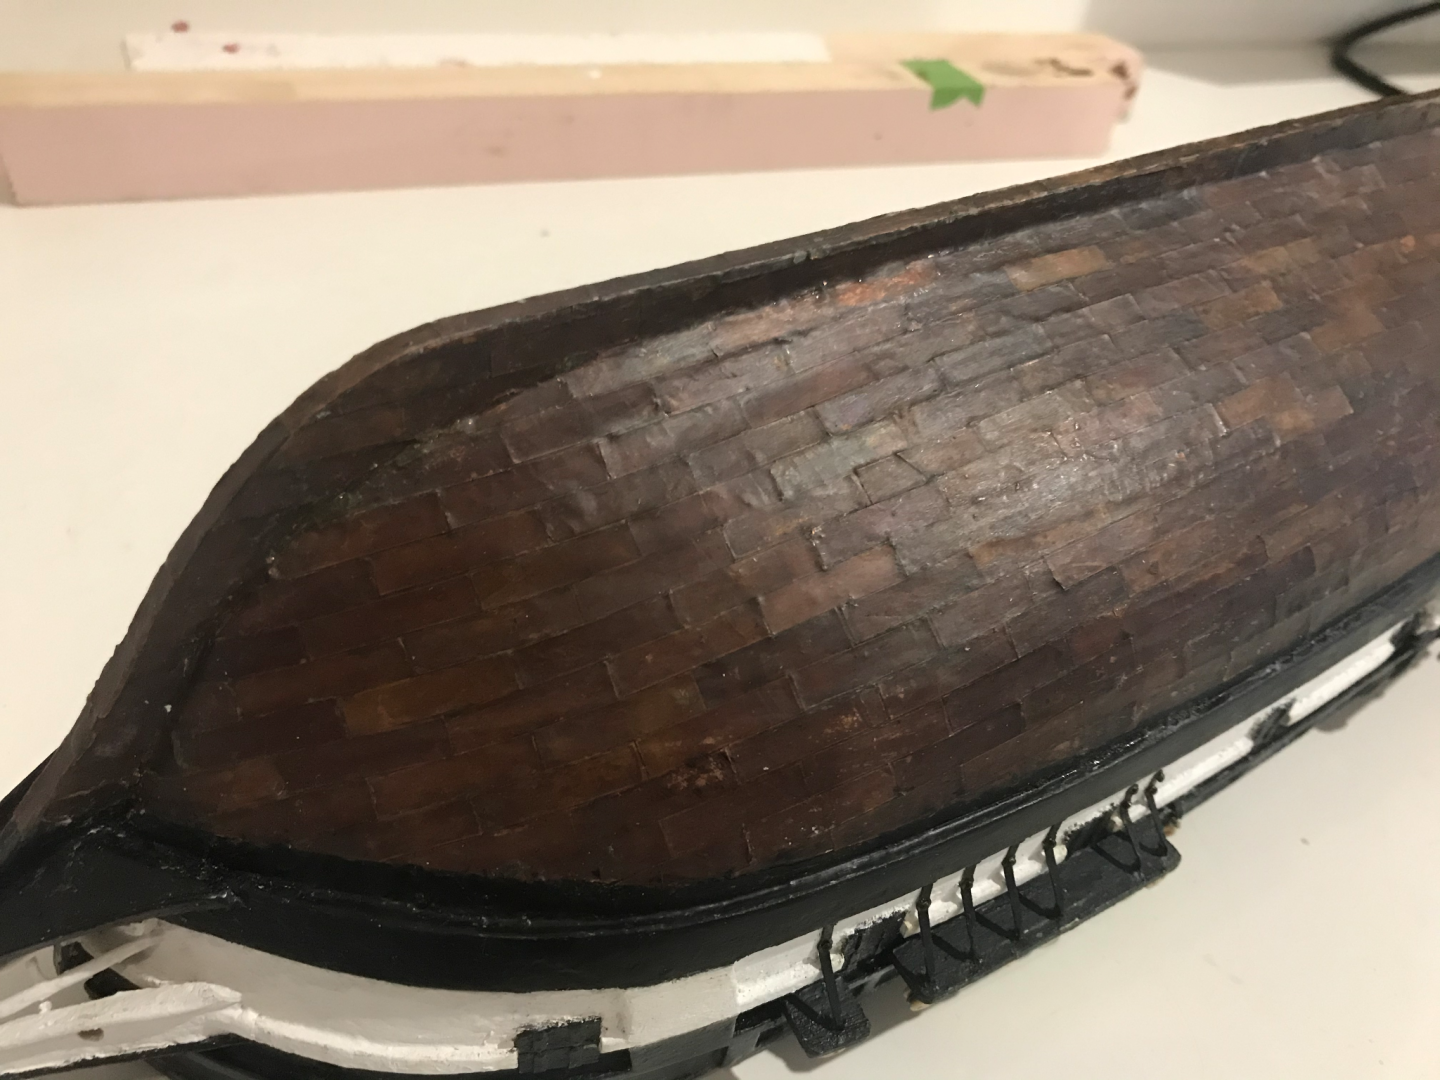
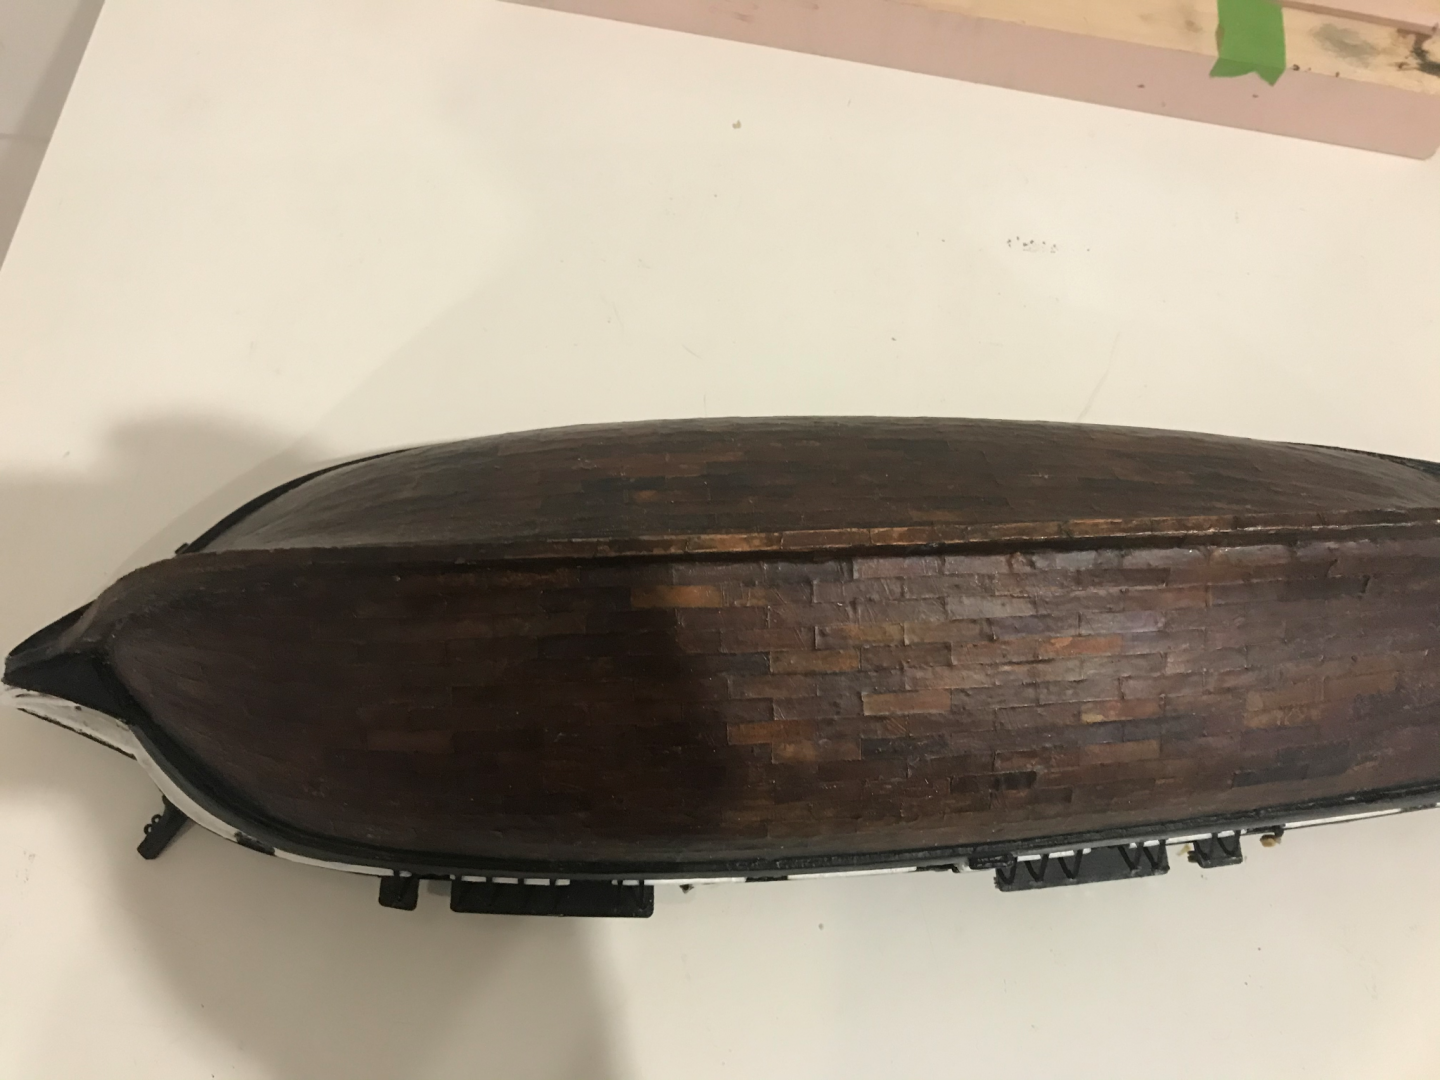
 Hey everyone, sorry for the delay between posts. A bit slammed right now. I'm still working on re-doing a few things. I did get to the wheel, which I made way more complicated than I needed to. I ended up drilling holes into the the area behind the wheel and feeding the thread through there. it was very fiddly and probably not worth it, but I've done it now. More recently, I went back to the copper to give it a proper finish. The matt effect from the wood varnish still wasn't quite right as it was so thin and couldn't be sanded without losing the patina. I decided to lay a lot of the copper protector over it to give a very thick coat that could be sanded. Then I sanded it smooth and used a light dusting from far away of a matt spray sealant. This gave the desired effect and I am now pretty happy with it The deadeyes and belaying pins have arrived so I will get onto that soon. I ended up going with 3 mm deadeyes for the mizzen masts and tops and 4 mm deadeyes for the main and fore masts. The belaying pins are small 9 mm brass pins that are actually shaped correctly and I will probably paint a beige colour to try to match the boxwood ones. I will need to cut a new fore pin rail however as the holes are way too big for the tiny belaying pins (they're only around 0.5 mm thick)
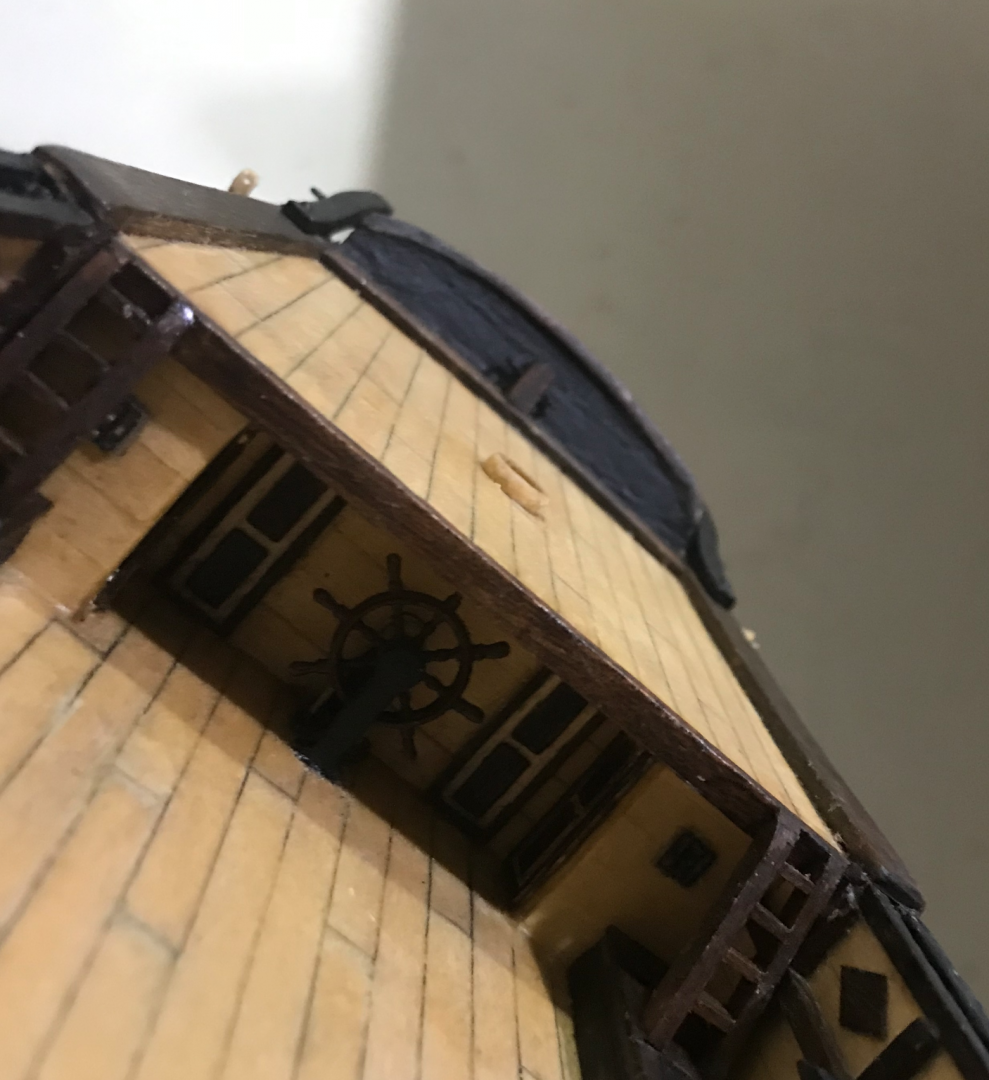


-
Thanks Allan, it almost looks like you wouldn't be able to tell that those pins weren't black from a distance. I have a blackening solution that I might use, but thanks for the tip on Birchwood technologies.
-
Alternatively, I could blacken them. How realistic would black belaying pins be?
-
Hey everyone, thanks for all the responses I sent cast your anchor an email about the pins. They responded quite quickly (given that I am on the wrong side of the globe), but it seems like those top pins are indeed a fairy tale. I like your thinking and you are probably right that even 2 mm is out of scale, however I have already drilled 2 mm holes for all of the kit belaying pins and would need to order more material to drill some smaller ones, so I will probably have to live with ‘somewhat close to scale’ rather than completely out of scale. hmm yes, they do say .5mm on the site, but I think they have done the conversion wrong or there is some other mistake. The next size up is 2 mm (for the 11 mm pins) and the inches on the 9 mm pin list 5/64ths of an inch, which I believe comes to around 2 mm as well I think I’ll go with the brass pins this time around, but thank you everyone for your thoughts. With that said, does anyone know anything about the actual use of brass pins during the age of sail? The ship I’m building is from 1820 (HMS Beagle) and there are some photos of actual brass belaying pins in a google image search but they seem more recent. Were brass pins ever used, or should I paint them a brown/beige colour to mimic wood?
-
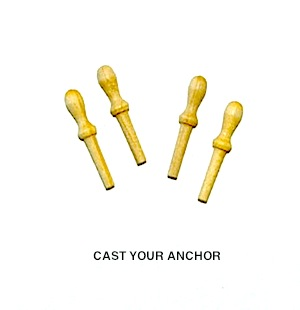
Has anyone bought the 8 mm boxwood belaying pins from Cast Your anchor hobbies? This is the image they have on their site I'm somewhat skeptical that they actually look like the pins as pictured, as they have the same image for each size of pin. I'm worried it will turn out to still be the rounded head pins without that shape and will instead look like the image below.

-
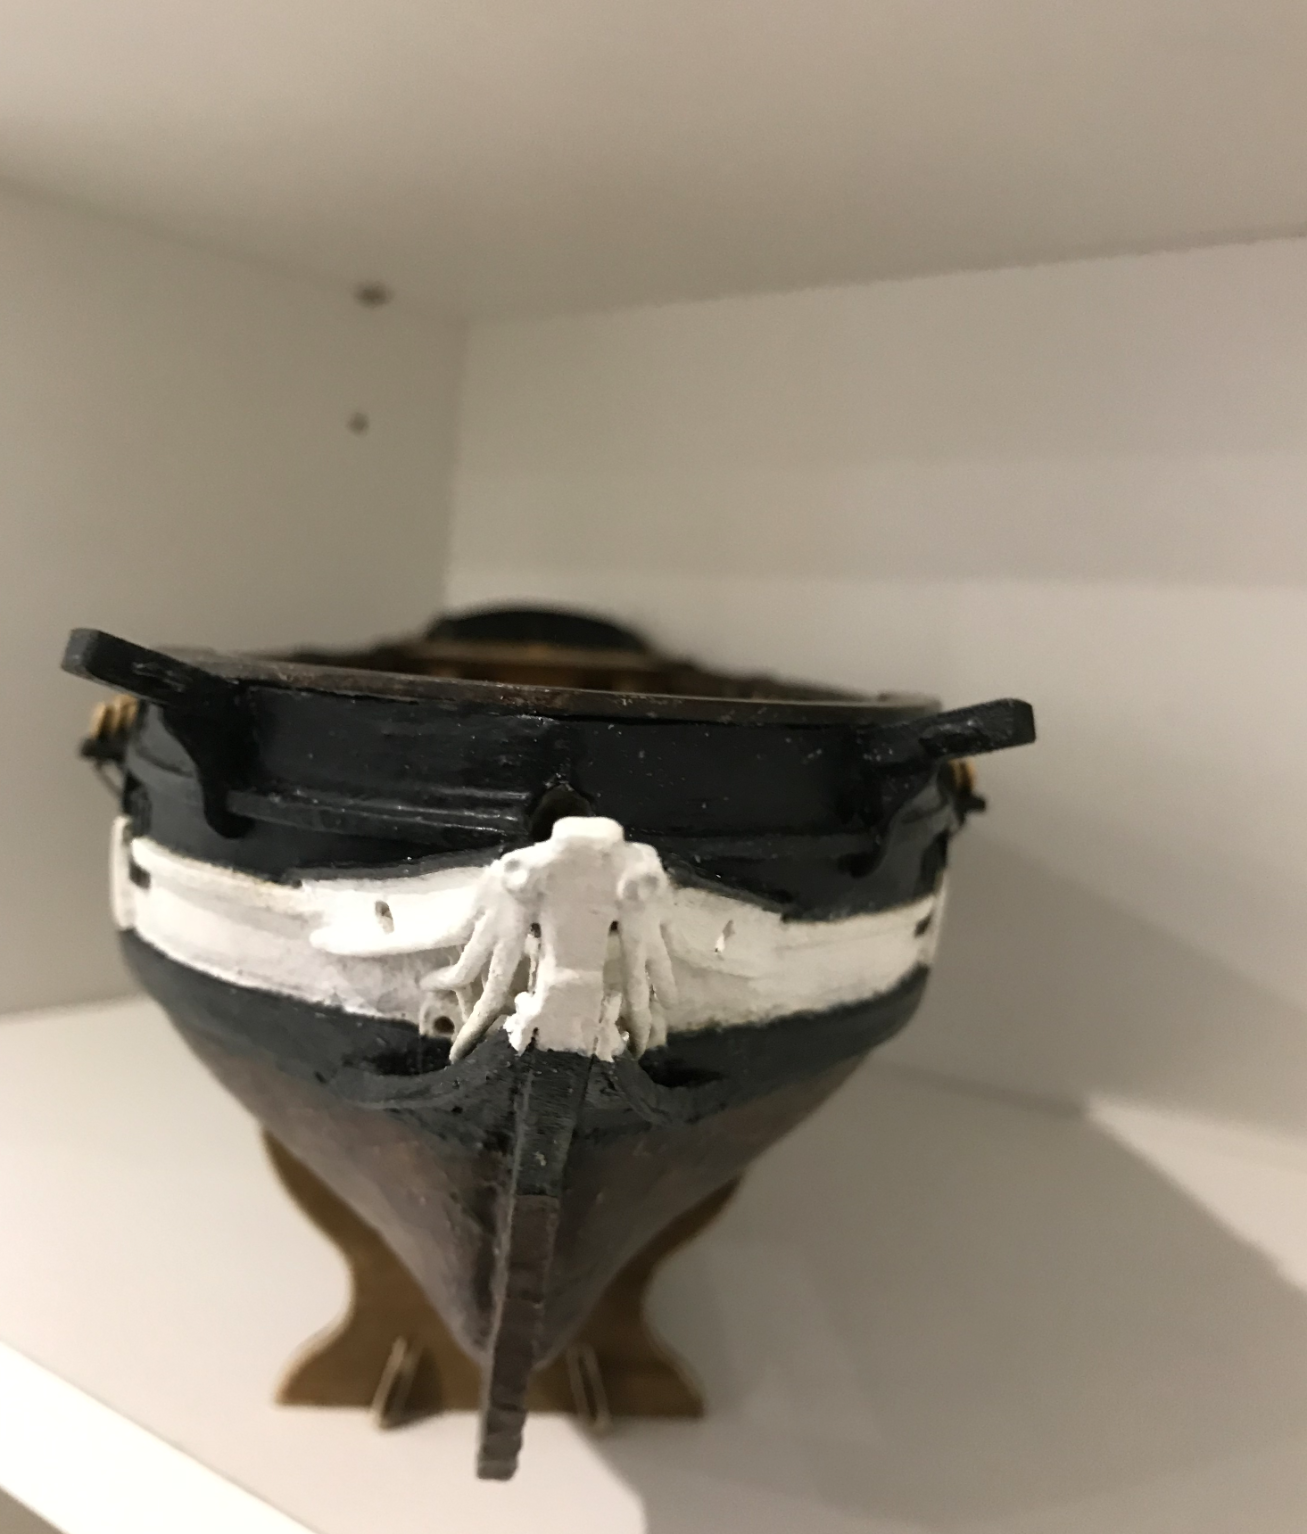
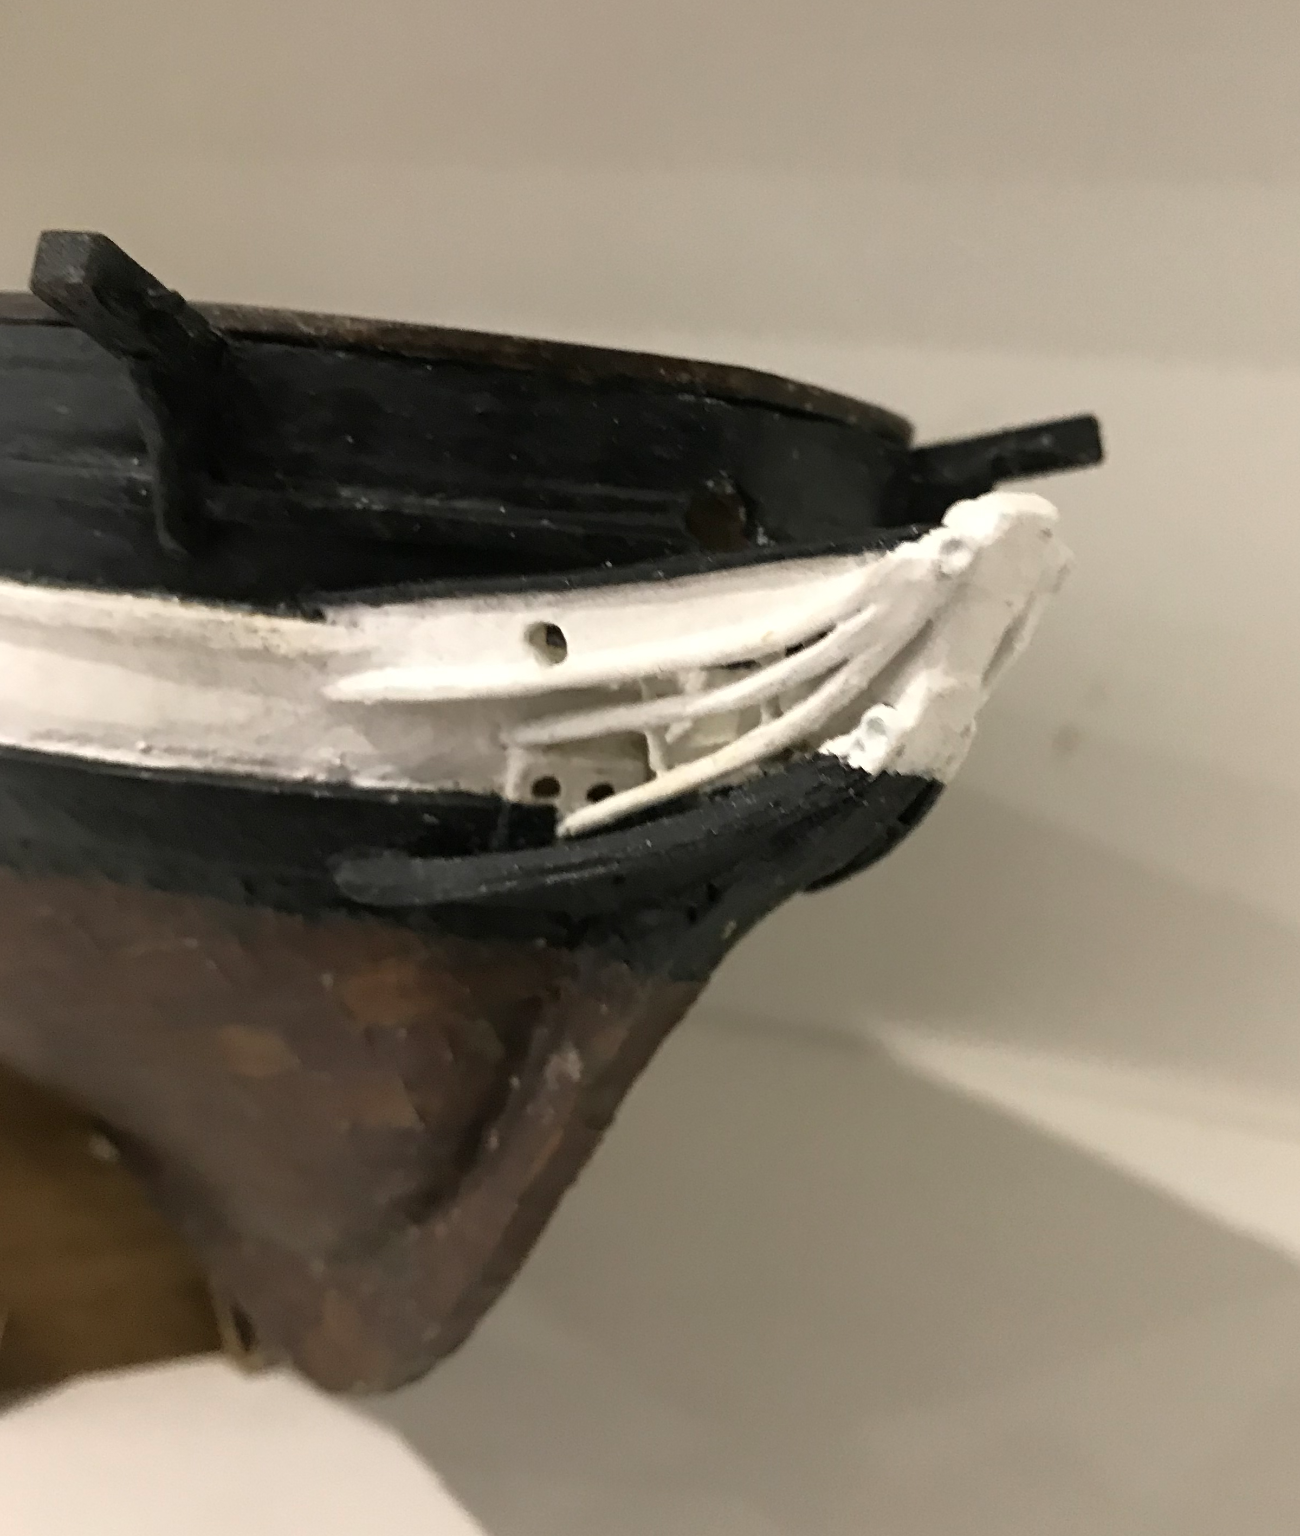
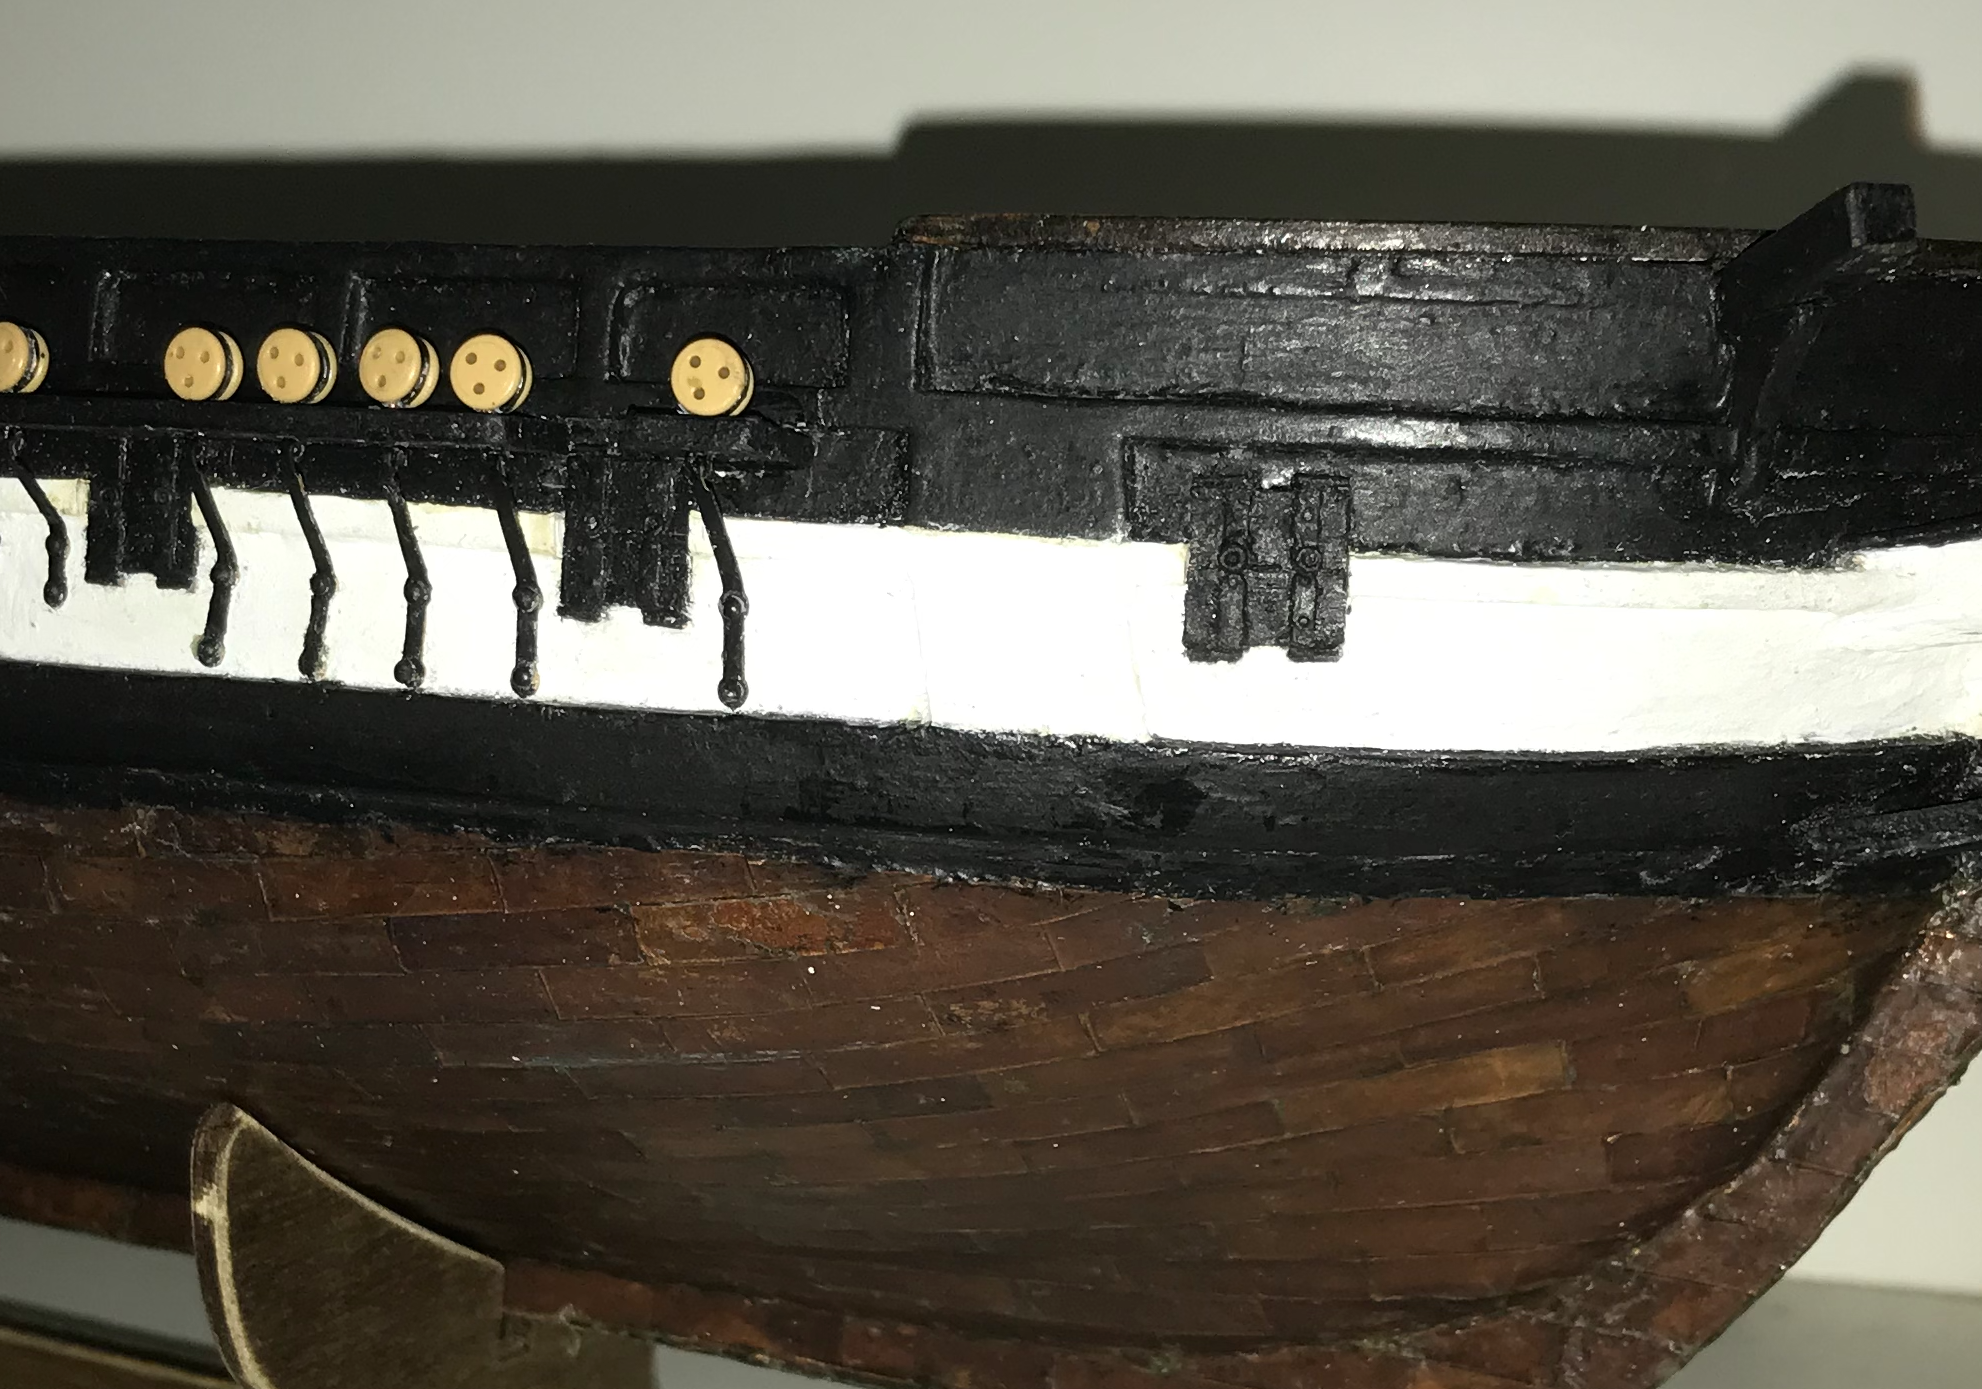
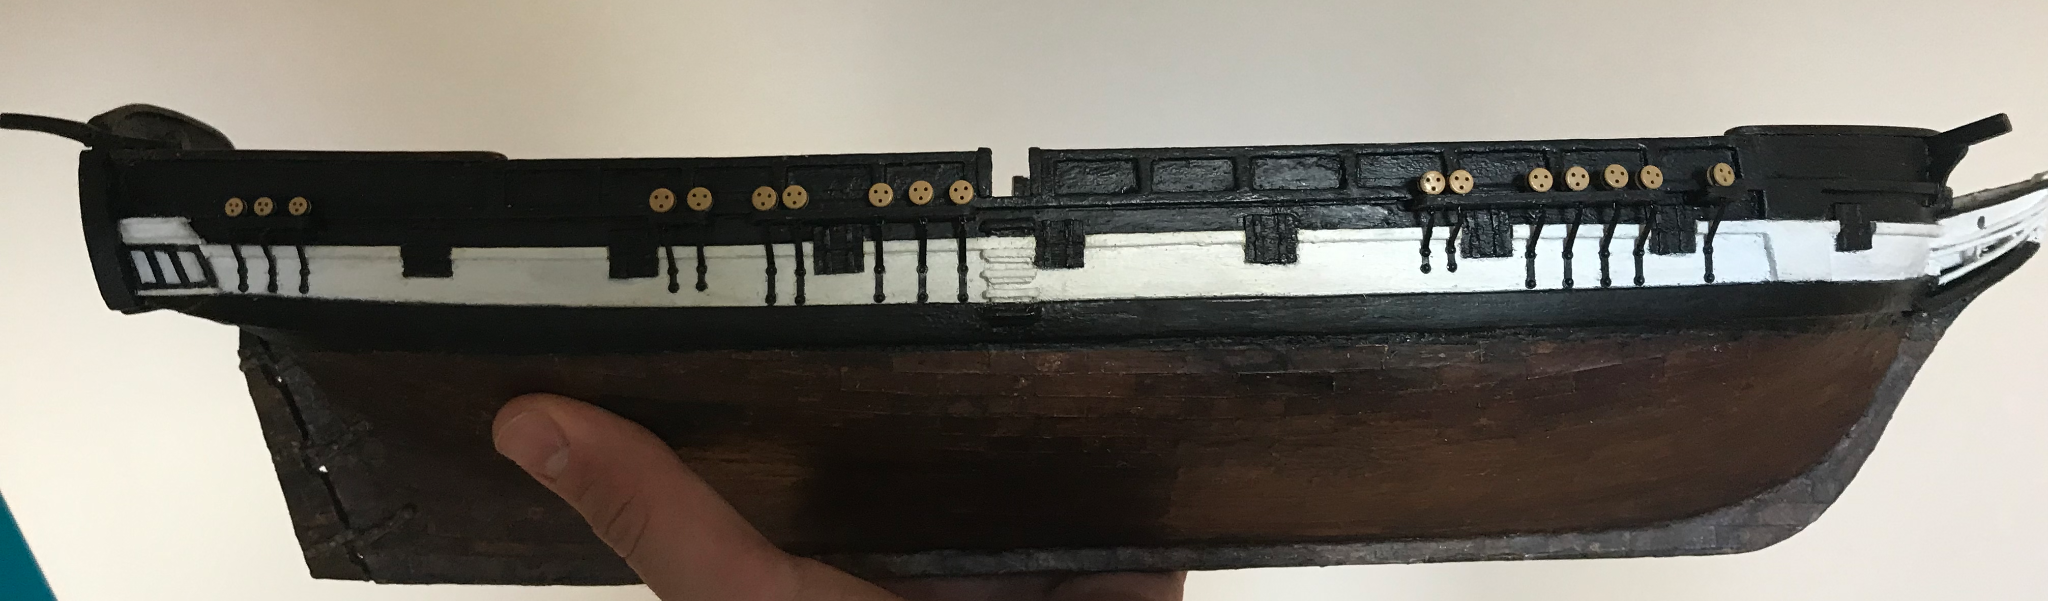
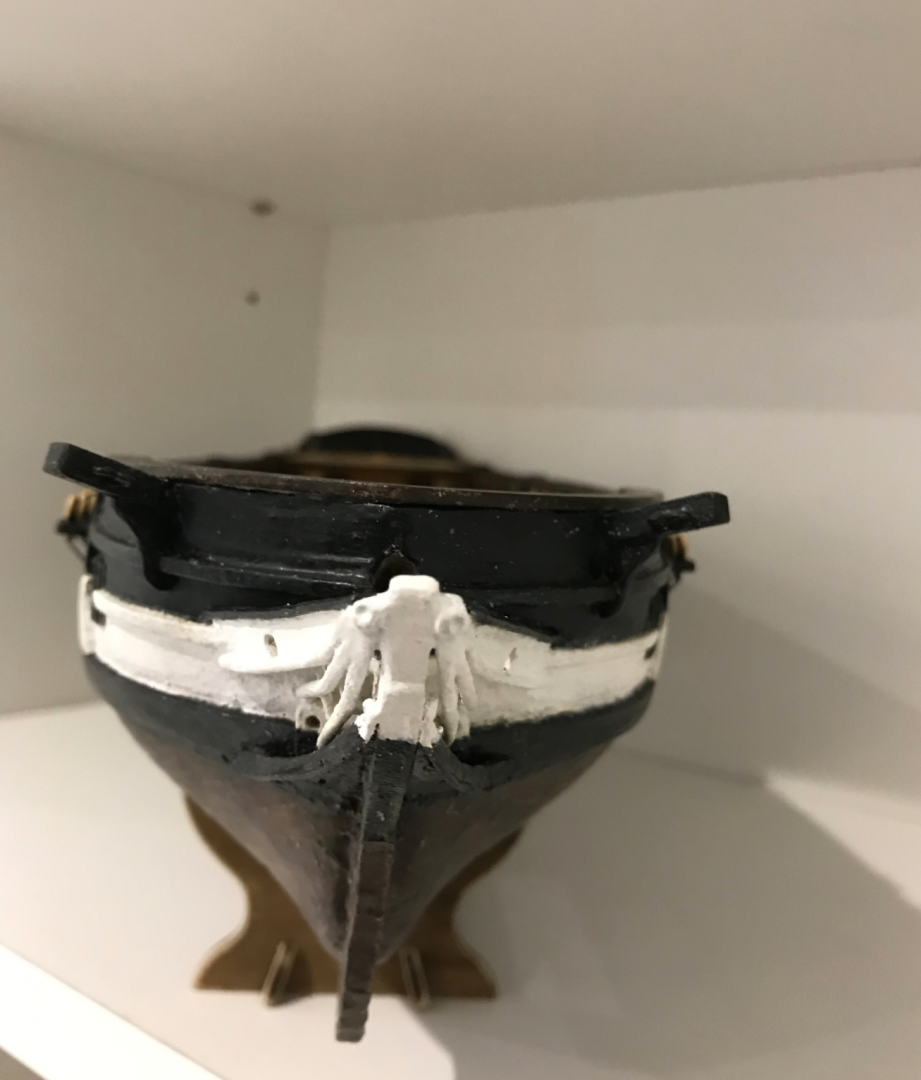
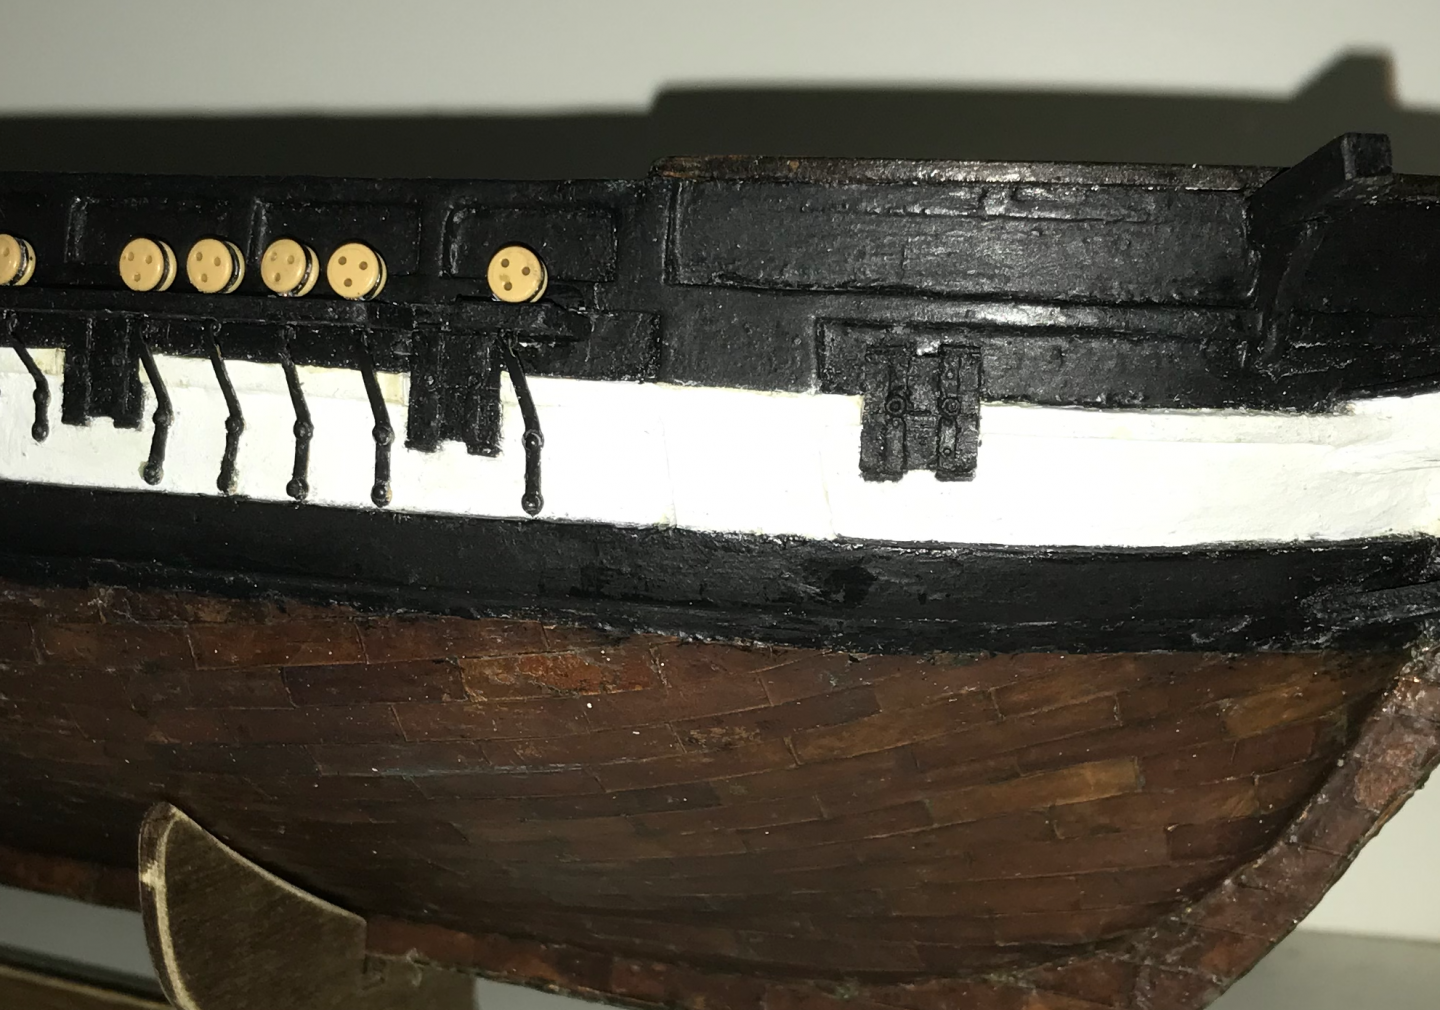
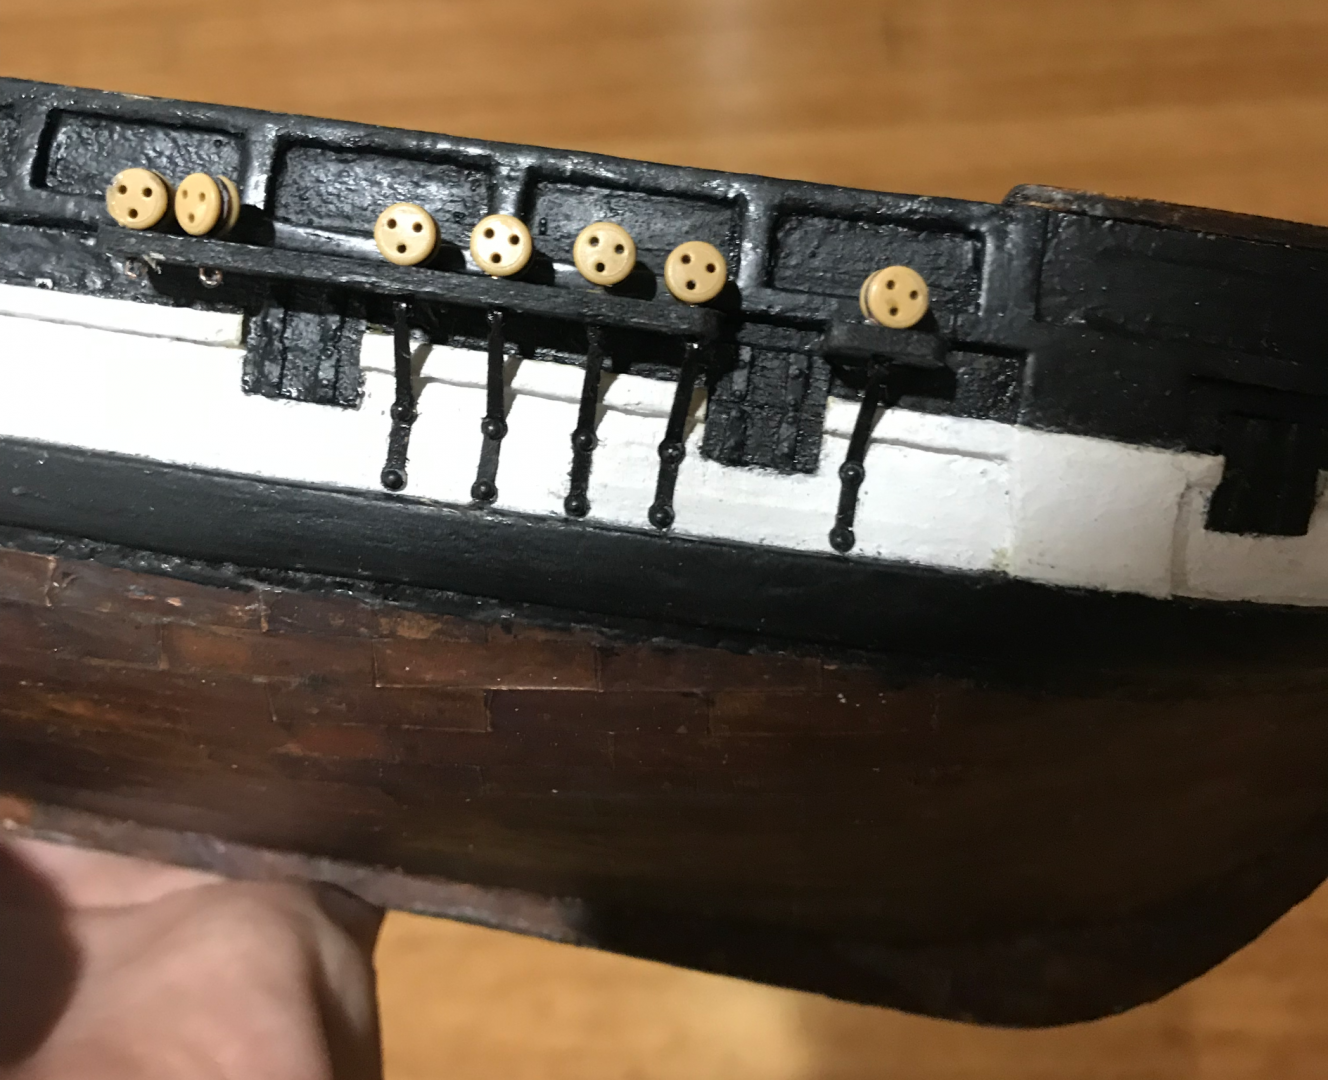
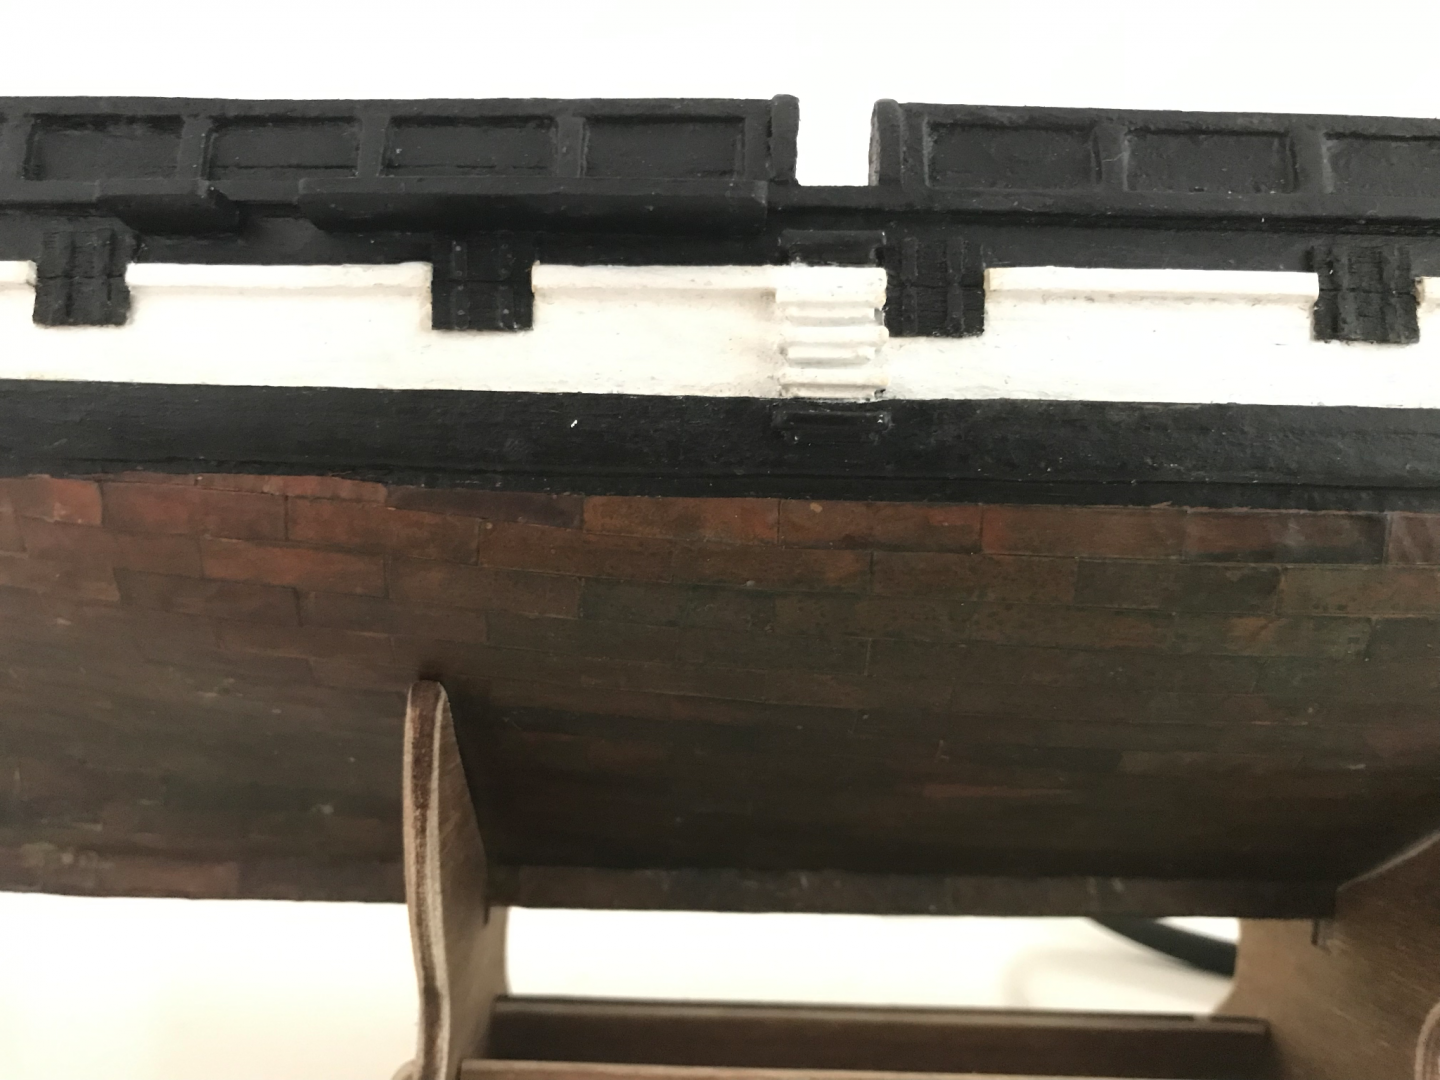
After looking at the belaying pins, I decided that their heads were a bit too round and they looked a bit too crowded on the forecastle so I have ordered some new ones. Turns out I wasn’t okay with the plastic large deadeyes in the kit and also ordered some more of those. Fun times ahead, redoing the deadeyes for the third time. During this waiting period, I took the time to make a few other tweaks that I’d been thinking about. First, I gave the bow another go with diluted paint, which did turn out a bit better, I think it’ll be okay once the figurehead is on, but I might try and sand it back again. at some point I went back to the gunports as well and added small bits of 0.5 mm wire to mimic the actual hinges and some chain links to mimic the loops that would hold the gunports open And finally, after some measurements from anatomy of the ship, it seems like using 6 mm dowels for all of the masts may be a little unrealistic. I've ordered some larger 8 mm dowels for the main and fore masts and some extra 5 mm dowel for the mizzen mast. I've made some appropriate adjustments to the mast steps to accomodate this, but may need to do some filling for the mizzen mast, I'll see how I go, that's a little ways off

-
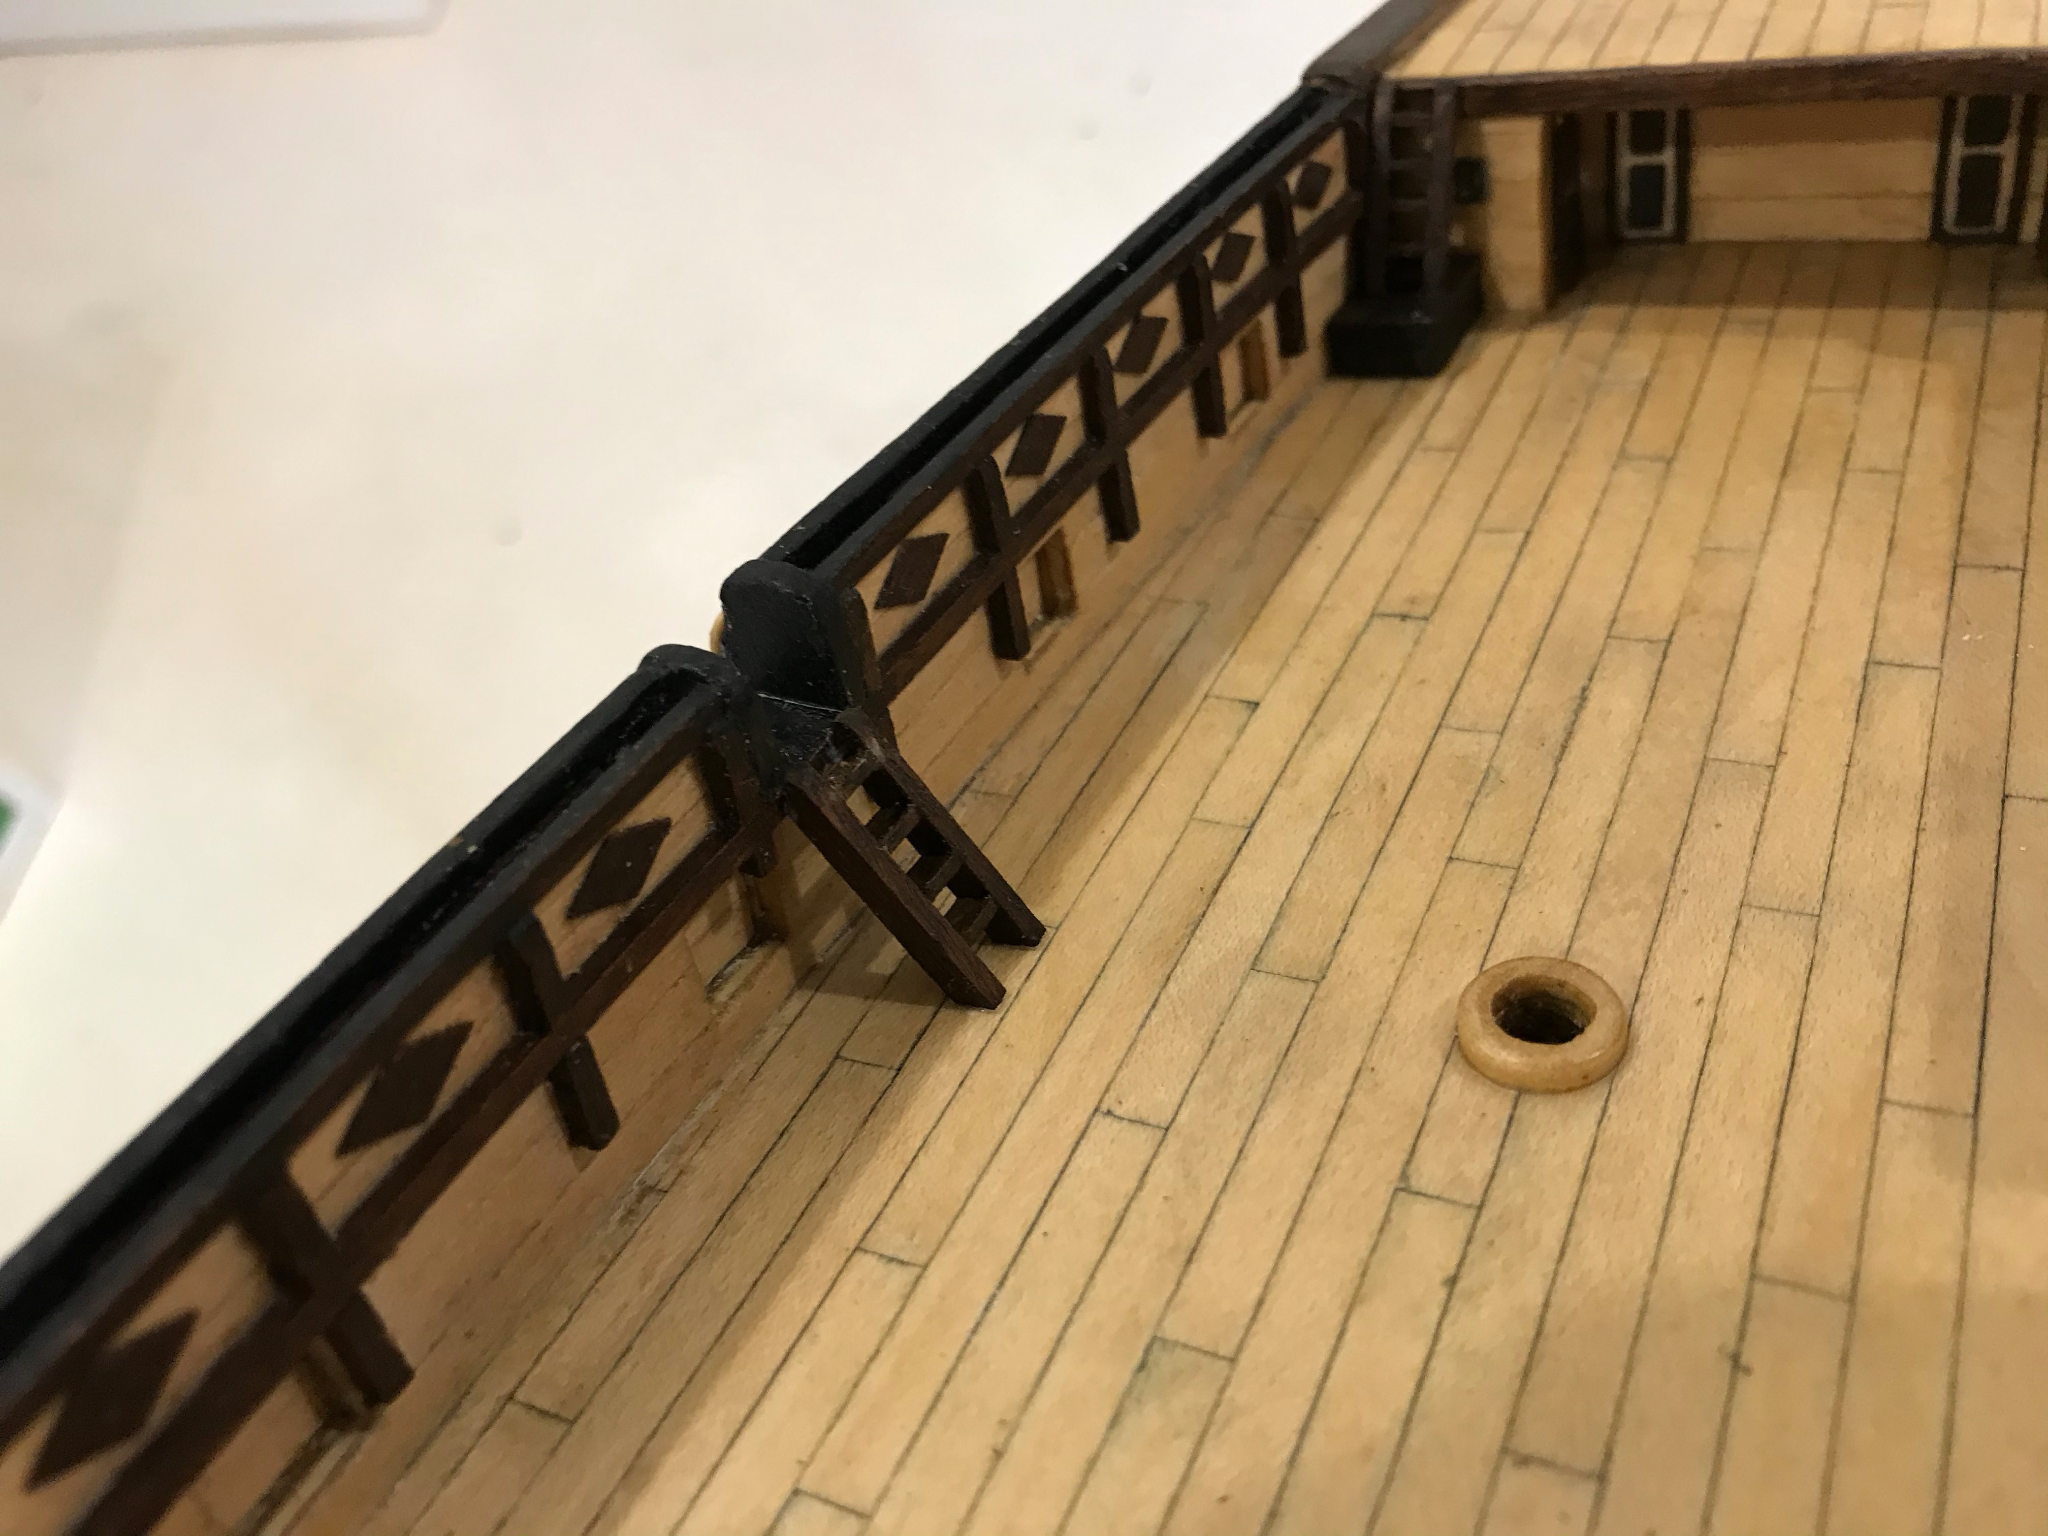
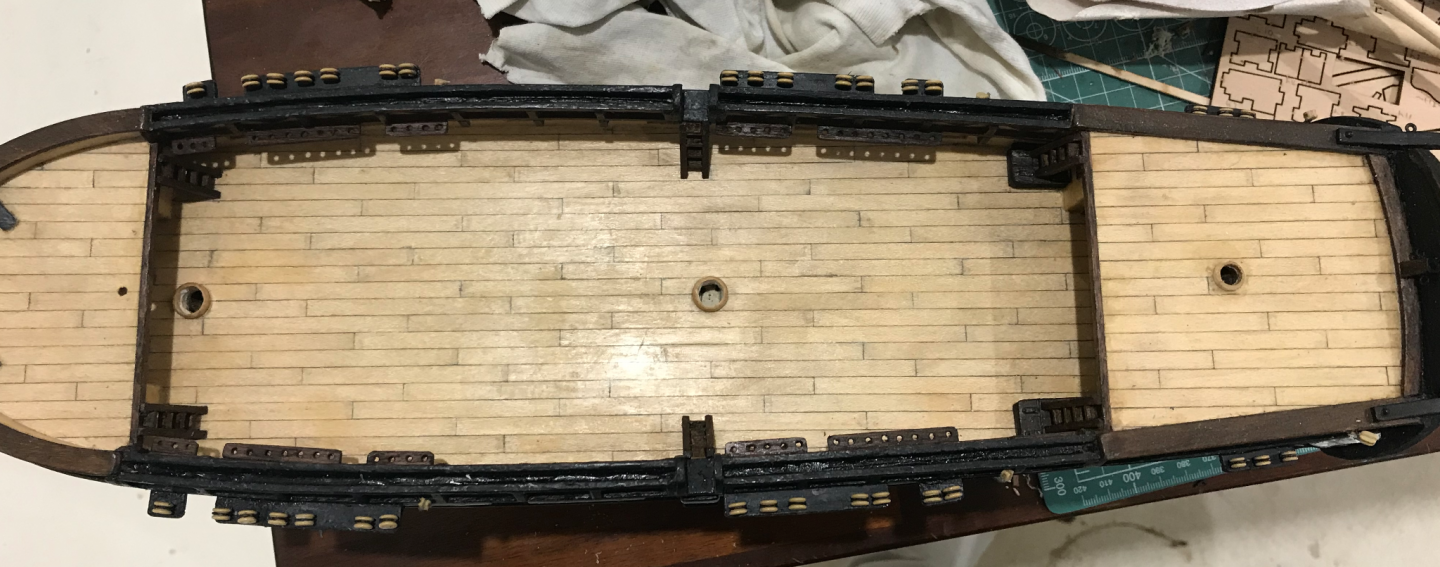
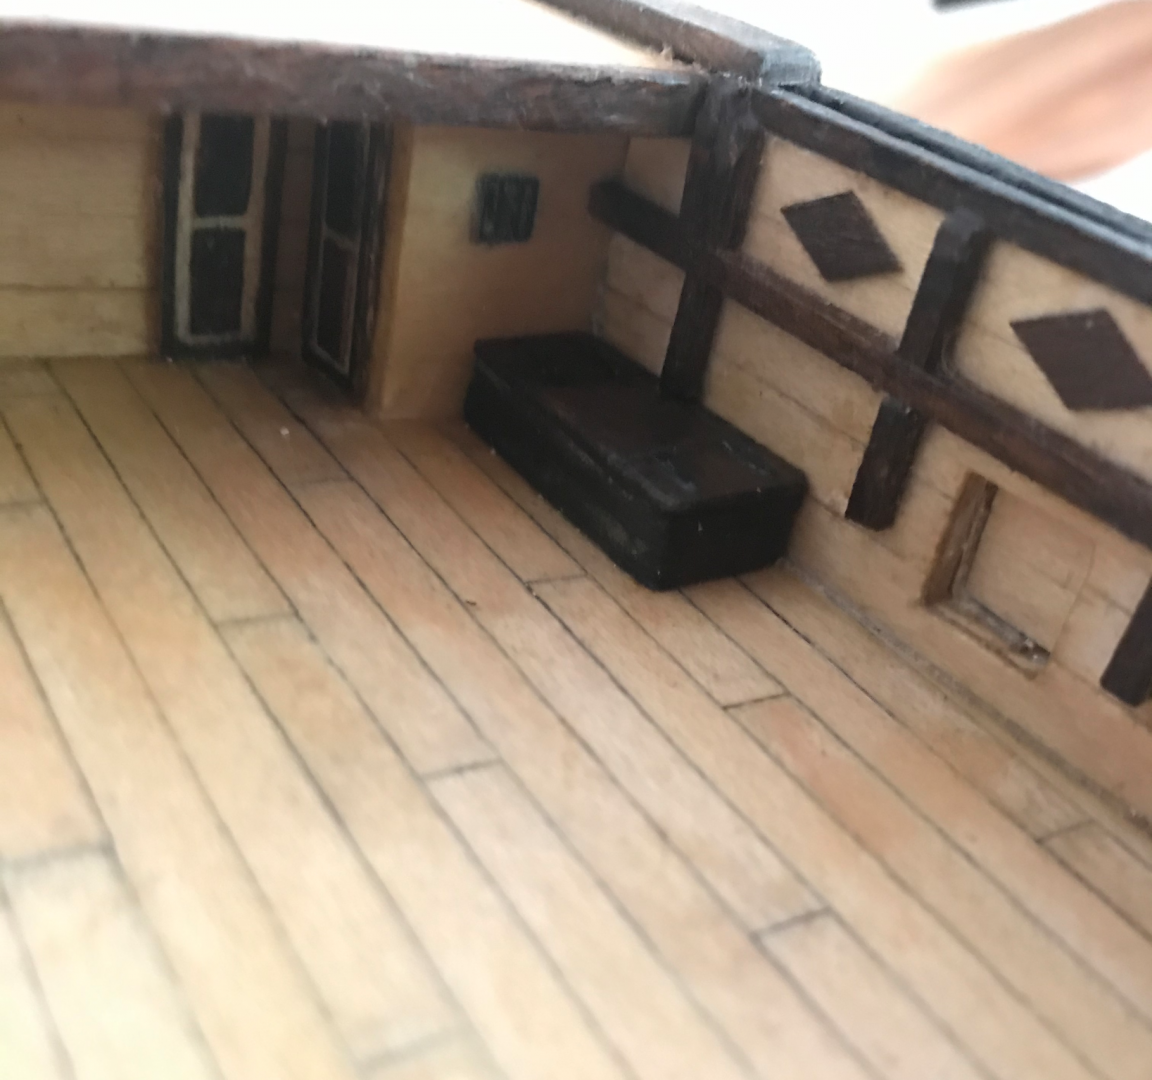
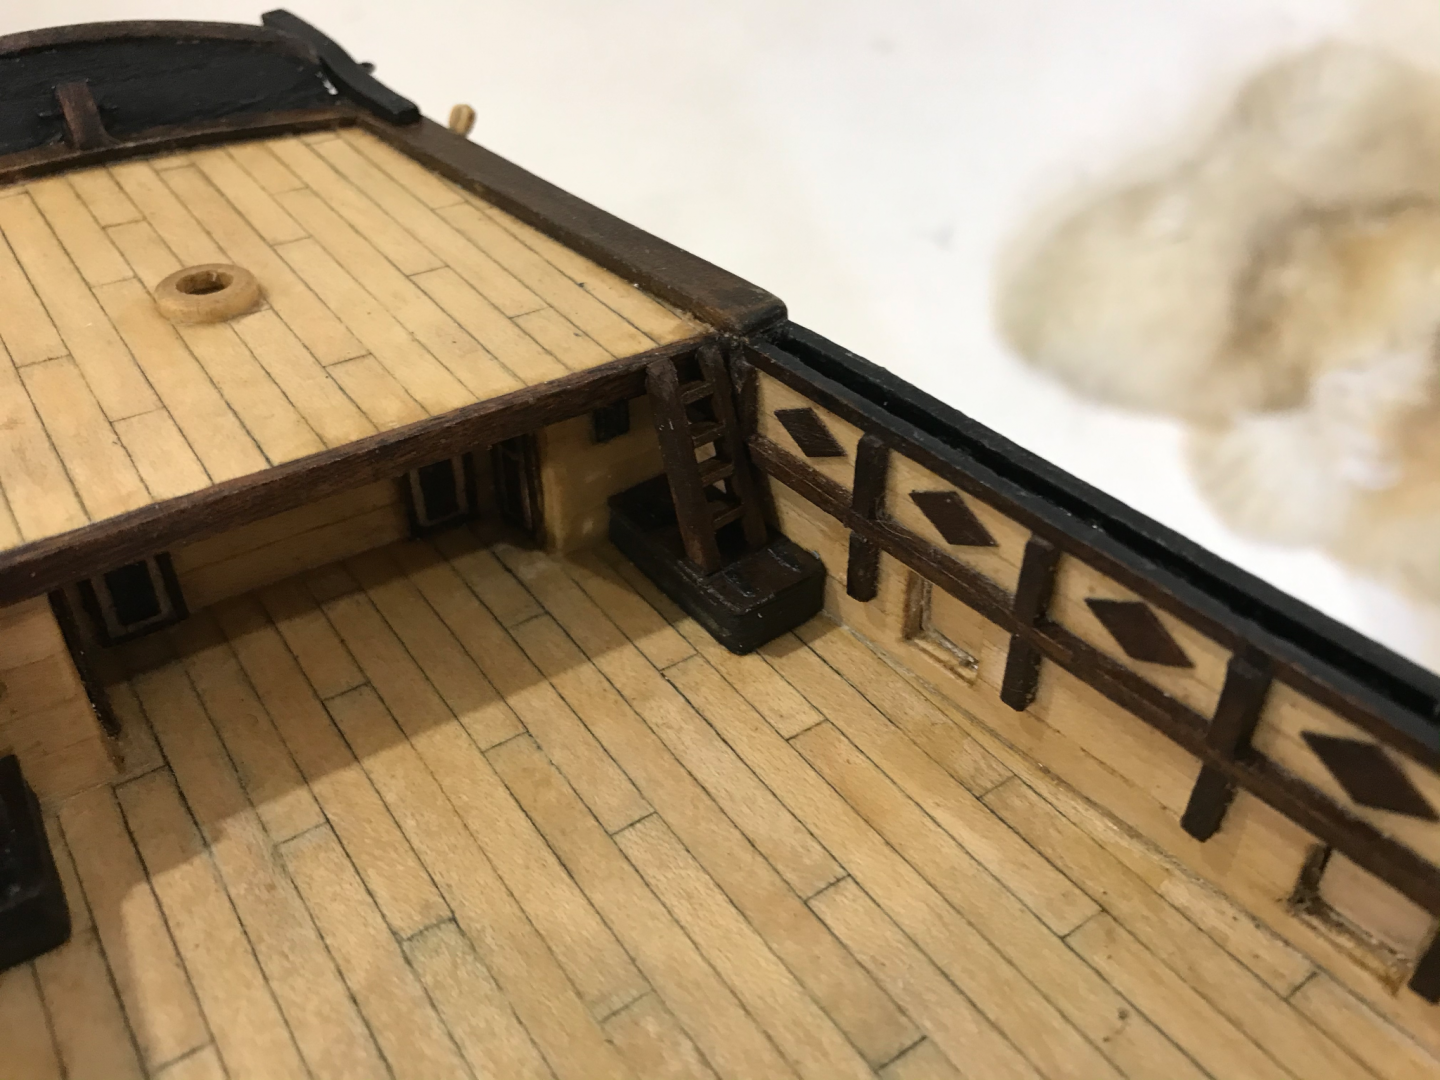
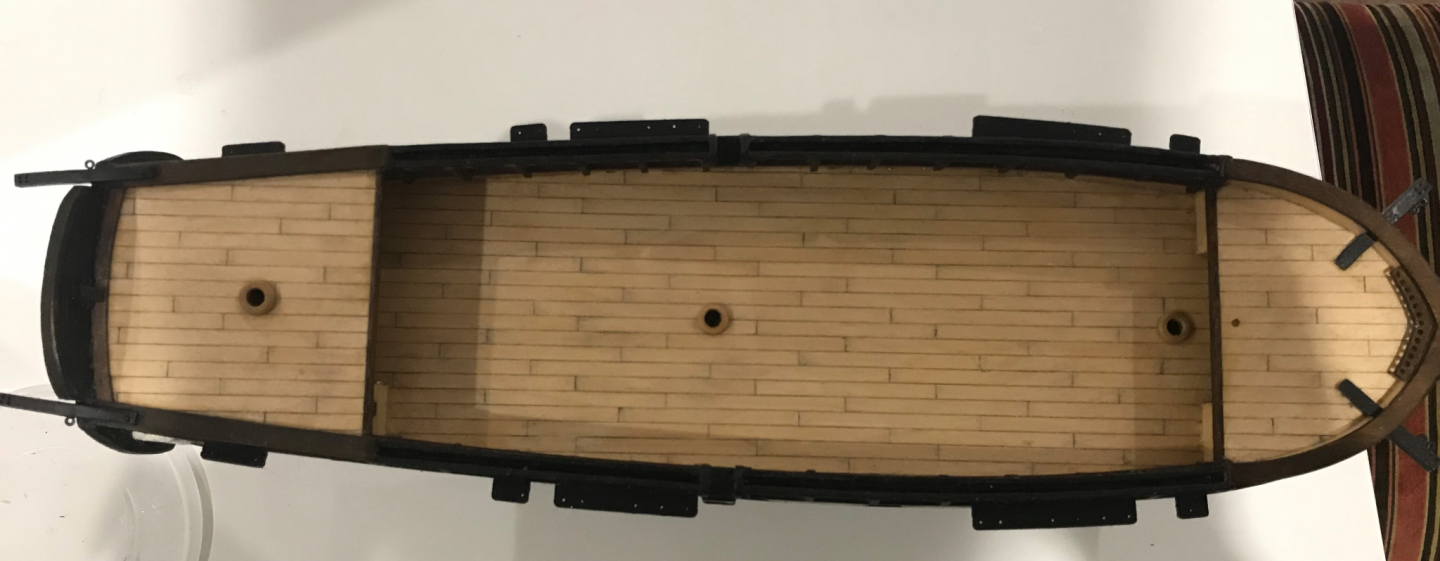
Now onto the fun stuff. First up were the flag lockers. I have no idea why the lid on the kit version of these lockers was so comically oversized, so I made it mostly from scratch. I also used some of the gunport hinges that I didn’t use on the aft-most ports to give them some proper hinges. Then I chose to replace the brass ladders with wooden ones. This is something I committed myself to early in the build, but I didn’t quite comprehend how fiddly it would be. I used leftover 5 x 2 mm sapele from the Albatros (cut back to 3 x 2) and some 3 x 1 mm limewood for the rungs. The sapele did not hold the glue very well and it took a few tries, but I’m pretty happy with the result.


-
Argh, I know your pain. On my first boat I brushed glue all over one of the planks. It was a small launch boat so the internal planks were visible and it was just impossible to stain right. There is no real solution, maybe try scraping it with a sharp blade. More stain is just going to make the contrast more stark. Alternatively you could try mixing some varnish with some stain, thats what I ended up doing and it did hide it a bit.
-
There's also this

-
Ah whoops, @Keith Black's response must not have loaded for me
-
Those are the spreaders I think. They point out from the bowsprit It looks like they should be able to hook on some eyebolts on the bowsprit, it seems like the rigging diagrams are a little tricky to follow though

-
The instructions on this one lack a bit of foresight. It would be easier to have cut the planking to leave a hole, which could then be widened to allow the bowsprit to fit in. There is a hole in the false keel where it is supposed to go. They don't really tell you that though. Good luck! The bowsprit on the Beagle is quite impressive and will add a lot
-
The blocks are fine, they are essentially just like wooden blocks in shape but happen to be plastic. My main concern with them is more the material, I'm worried that it will just cheapen the whole model as they are very obviously plastic. I think the deadeyes are fine, they work similar to the way you are describing. After sleeping on it, I've come to the conclusion that it would always bug me if I did not replace them. It will only get more difficult to make this change as more blocks are added. Thank you for the comments. Looks like it's back to wire bending for me...
-
Hey there, I'm just wondering what everyone's thoughts on plastic blocks and deadeyes are? I'm currently building the Beagle by OcCre and am debating replacing the plastic blocks and deadeyes with wooden ones. This might be a little pricy and would mean undoing a lot of work as I've already added all the plastic deadeyes to the channels. Is it worth replacing them or should I just live with it? Is there anything that can be done to improve plastic deadeyes? They are quite glossy, could I coat them in some matte coating?
-
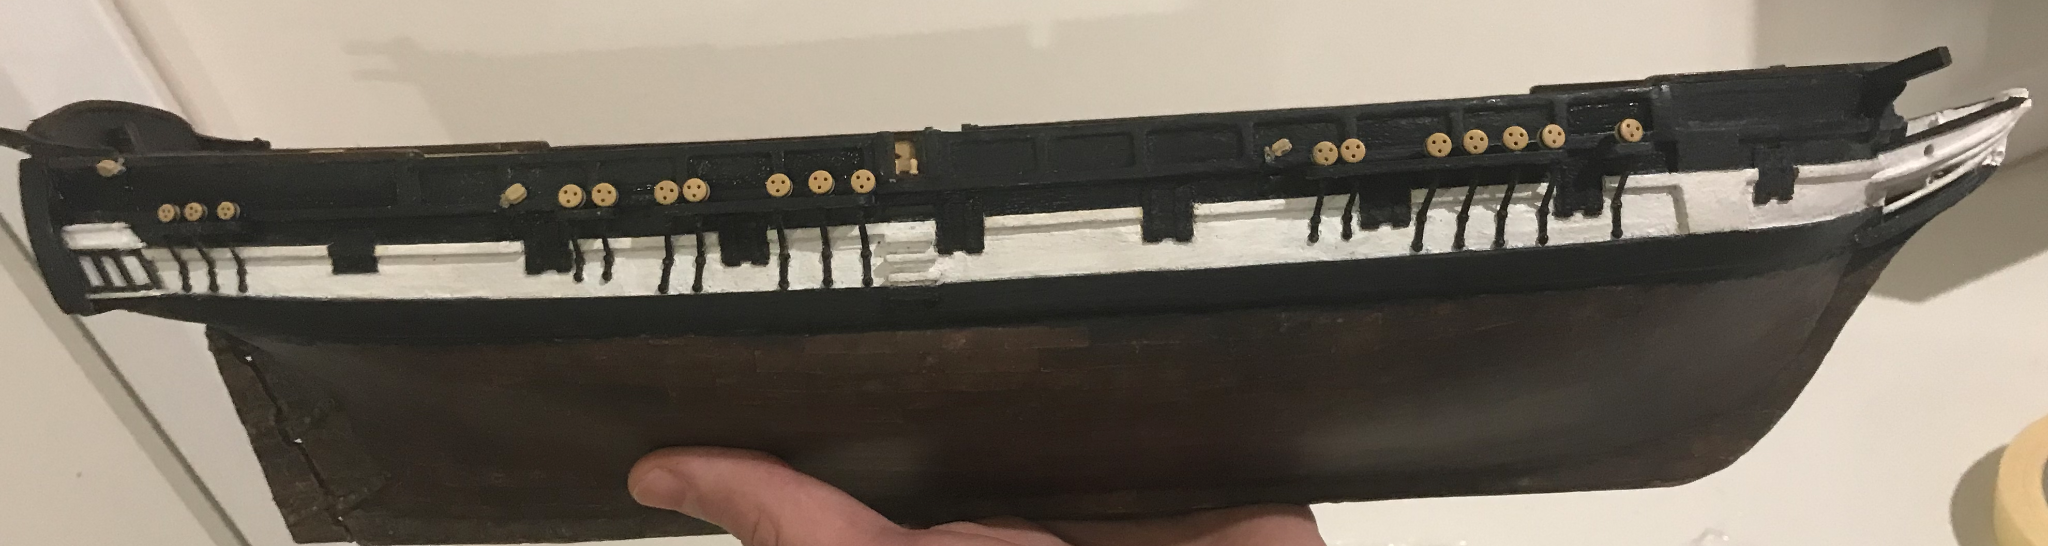
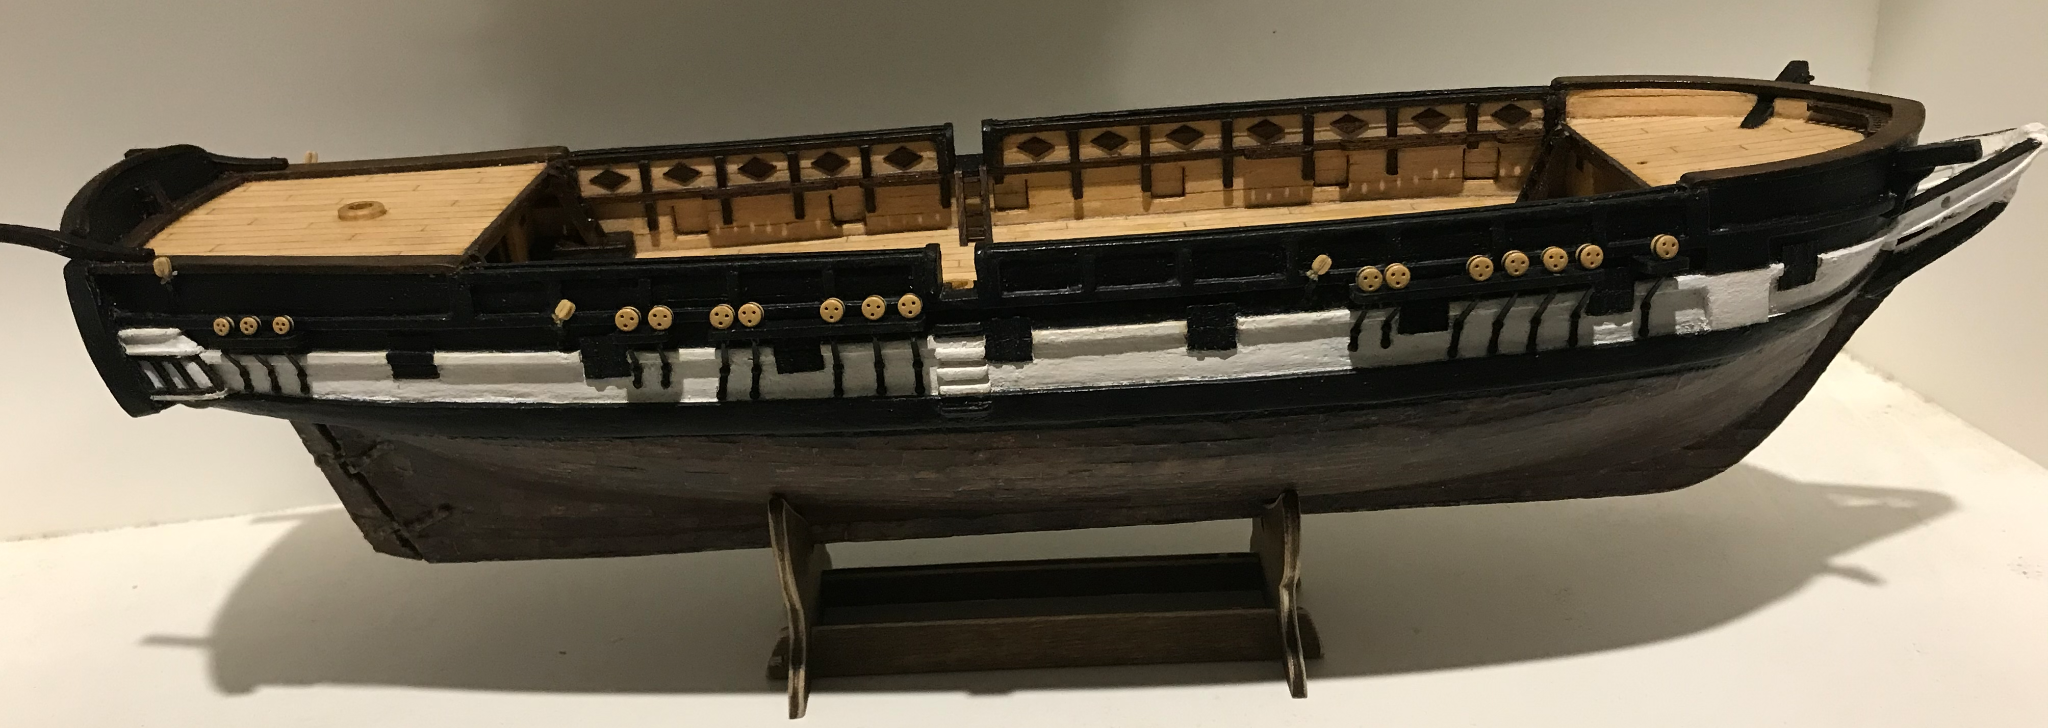
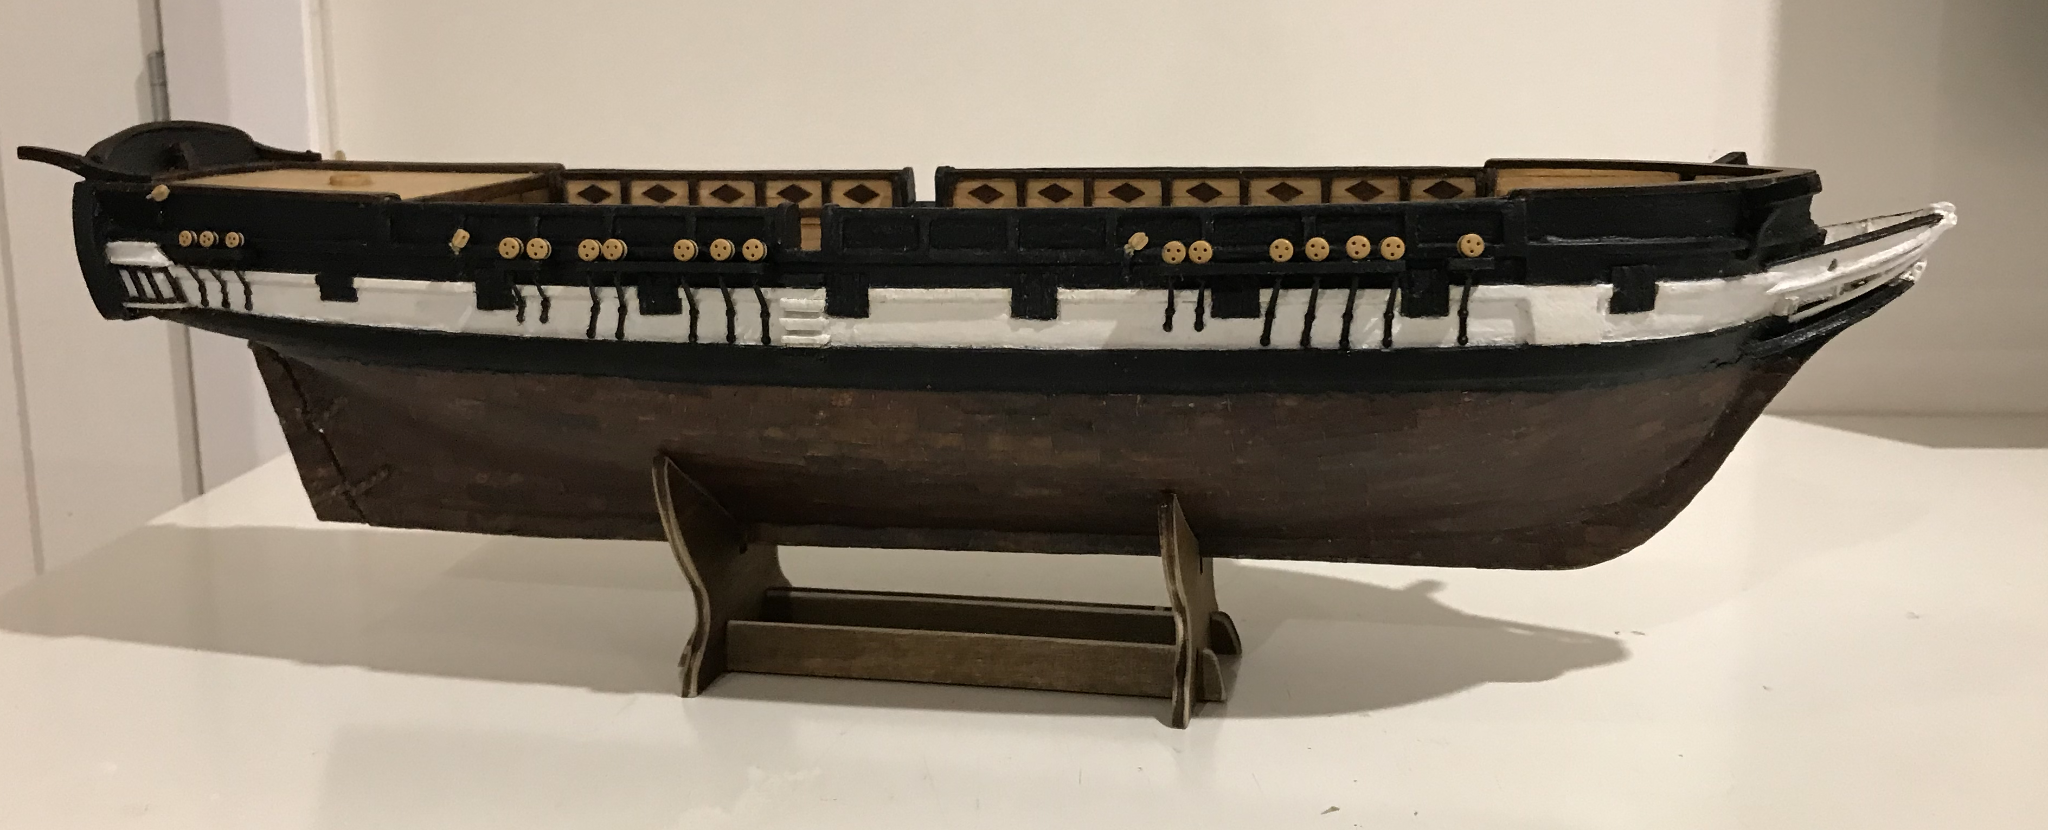
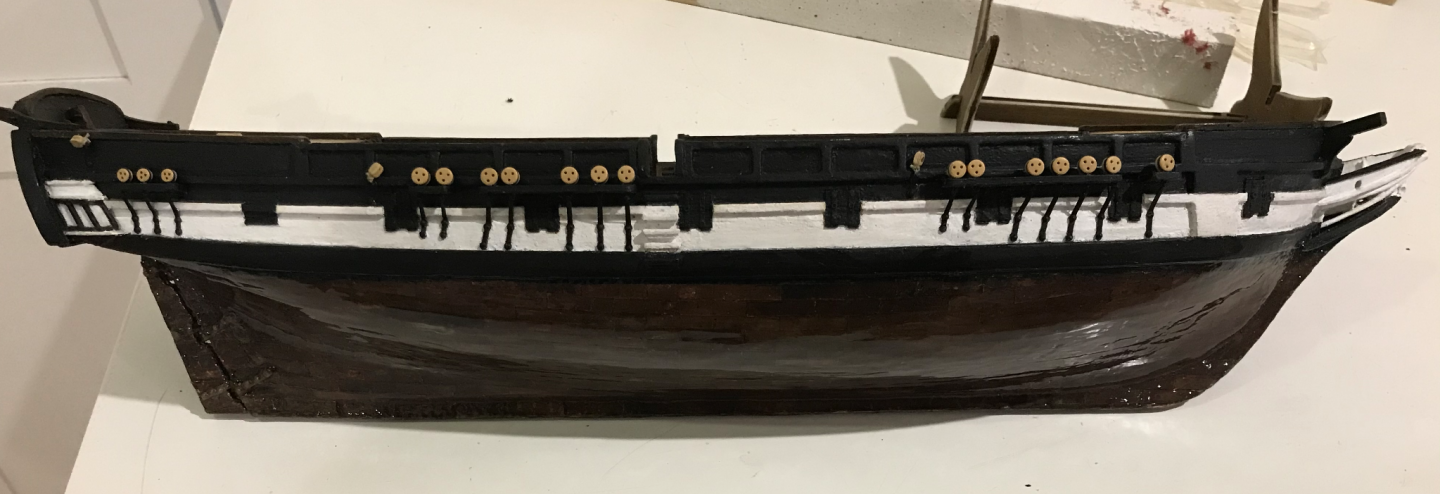
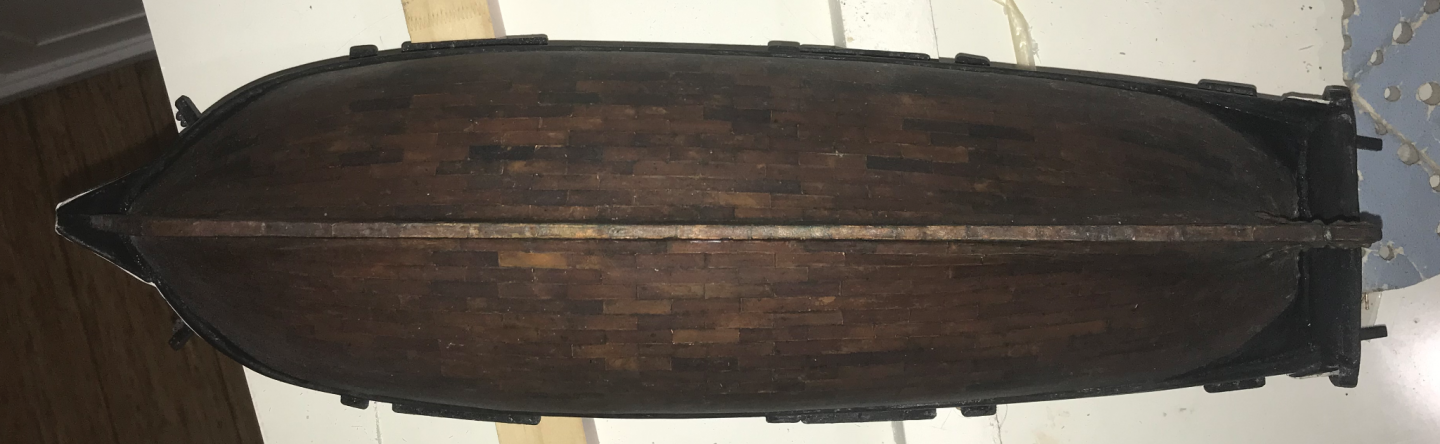
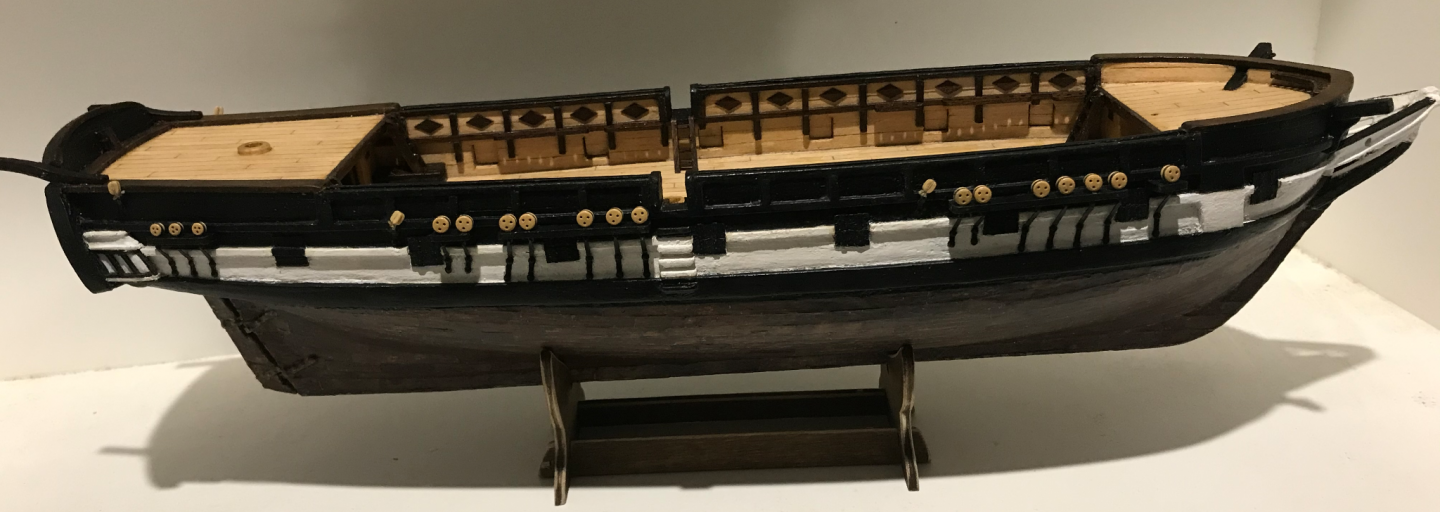
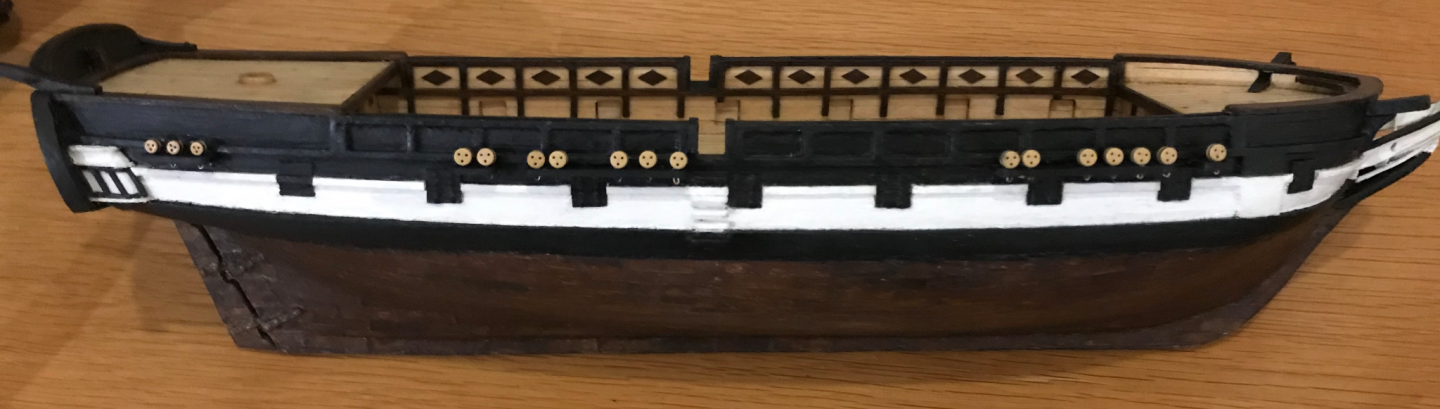
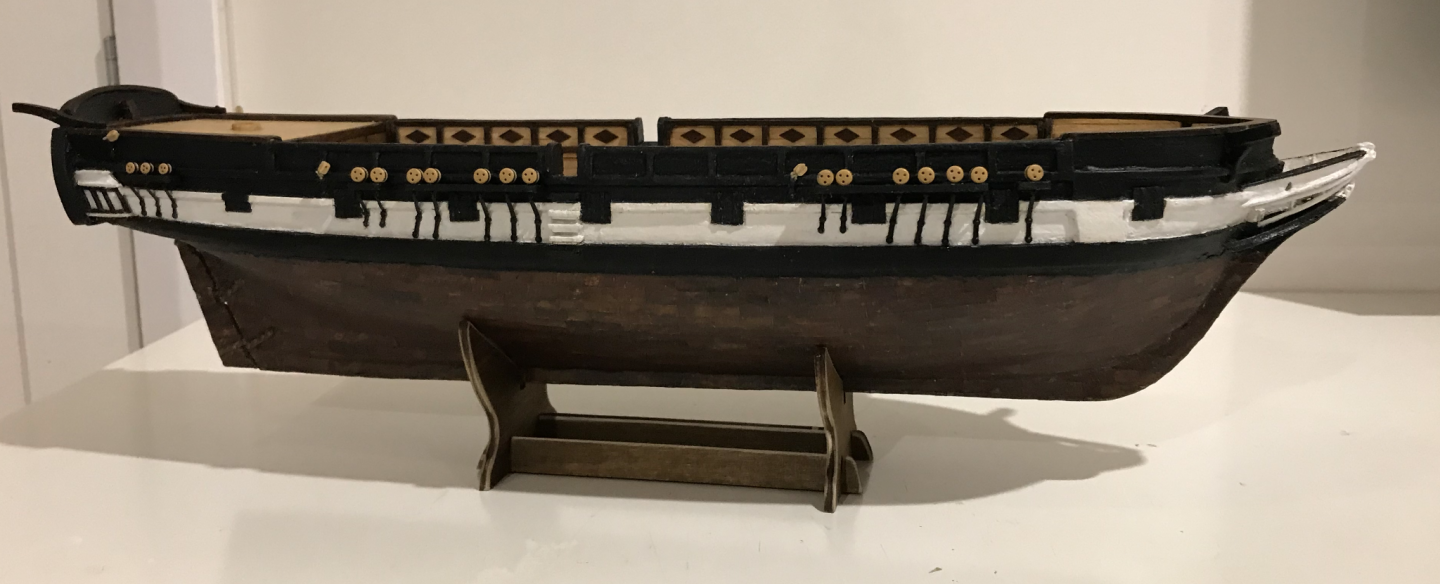
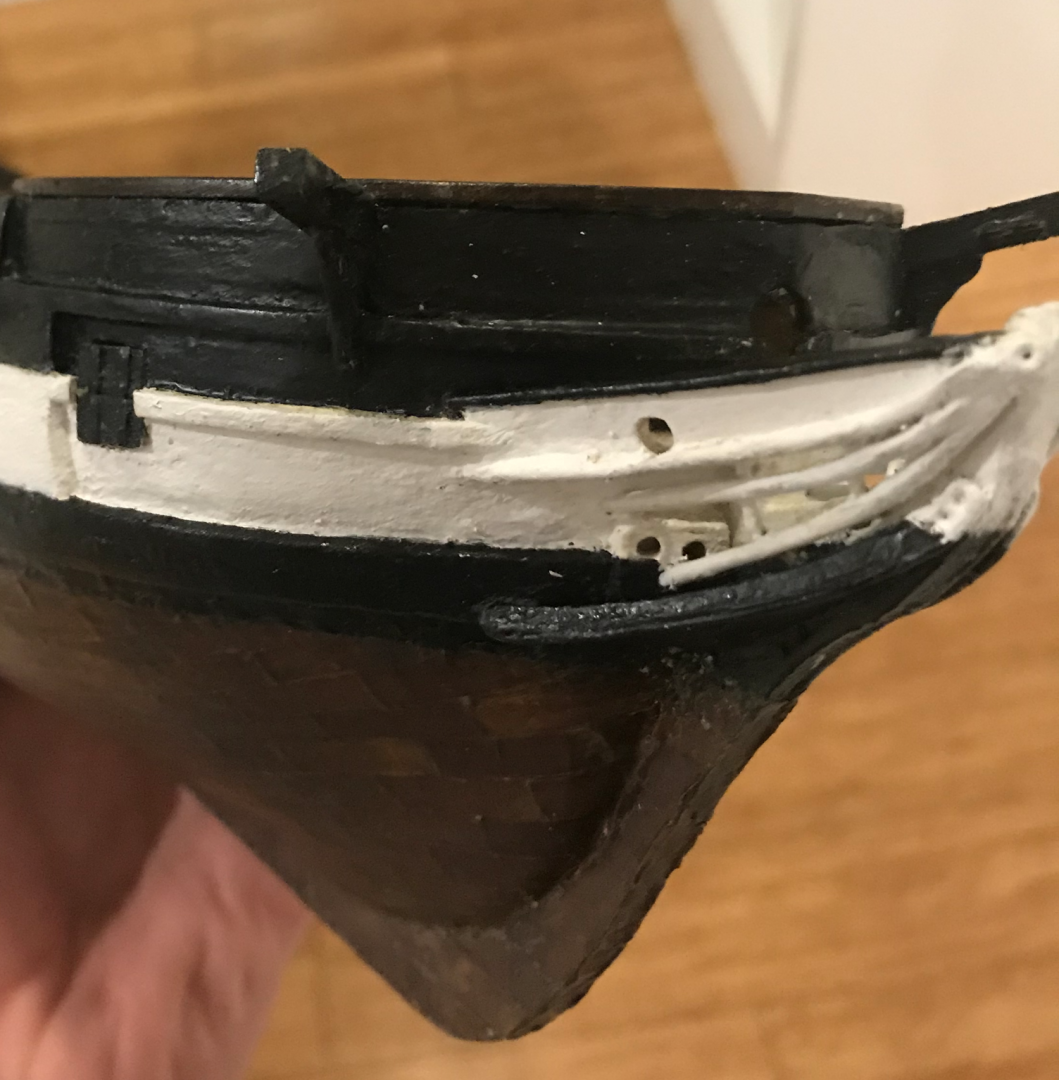
So now the deadeyes, OcCre has made the chainwales on this one very easy. The pieces come with the holes already laser cut, so all you need to do is glue on a strip next to the laser cut part and widen the holes. I wanted to blacken the brass wire that goes around the deadeyes. I used my homemade blackening solution from my Bounty’s Launch build and left the brass pieces in for way too long. I think the solution has lost some of its strength, maybe as the ammonia has evaporated, so I might need to make up a new batch for when I blacken the chain. Anyway, the brass went all brittle and was practically unusable. Instead, I went to buy replacement wire, but couldn’t find brass in the same size so just used copper. The copper is a lot softer than the brass but worked well enough. They couldn’t be blackened as they had a protective coating, so I painted them instead. The round nosed pliers came in really handy for bending the wire. The deadeyes are a little out of scale, I think. From AOTS, they look a bit smaller, and I did measure them to confirm this. There are two reasons why I chose not to replace them. First, by the time I discovered this issue, I was so sick of re-doing things, especially with regards to the deadeyes. Second, there are two sizes of deadeyes in the kit, one for the mizzen shrouds and futtock shrouds and another for the main and foremast shrouds. It thought that if I were to keep up this ratio, the futtock and mizzen deadeyes would be too small. Anyway, I think it looks all right. Then I started to nail on the deadeye straps, which are a really nicely cut piece in the kit. This was very fiddly at first, but I got into a rhythm. There is an issue with the kit instructions regarding the chainwales as many who are building this kit have realised. The 5-deadeye chainwale for the mainmast is the wrong way around in the instructions, it should be flipped upside down compared to the instructions like this. I’m not sure how this mistake got through. I suspect, it’s because the kit is slightly different to the prototype on the box, which is different to AOTS. I think the parts were made according to AOTS, but when they made the instructions, they tried to copy the prototype, which has 2 straps next to the stairs, then a gap for the gunport and then the 3 straps. Anyway, I was pretty happy with this, until I read a comment by @Keith Black describing how the straps should angle with the shrouds as they move further away from the mast. This makes sense now, I kind of ignored the angling shown in the picture in AOTS, as I didn’t really know why they had done it as it looked very random as they attempted to angle around the gunports. Once I started to angle them myself, I realised that they could all be made to angle properly without having to keep the ones close to the gunports straight. First, I had to remove most of the nails and do some filling and painting to hide the mistakes. To get the angling right, I used a dowel for the masts and marked the height of the shrouds from the plans. Then I tied some thread at this height and inserted the dowel into the mast step. Then the thread could be used to mark the angle for the straps. So, this is what it looks like now… I guess now we wait until the shrouds go on to know whether the angling is actually right And with that, the hull was complete. This log is now up to date and any posts from now are happening in real time. I'm having some fun (and some frustration) with the deck furniture at the moment. Still putting off those hammocks...

-
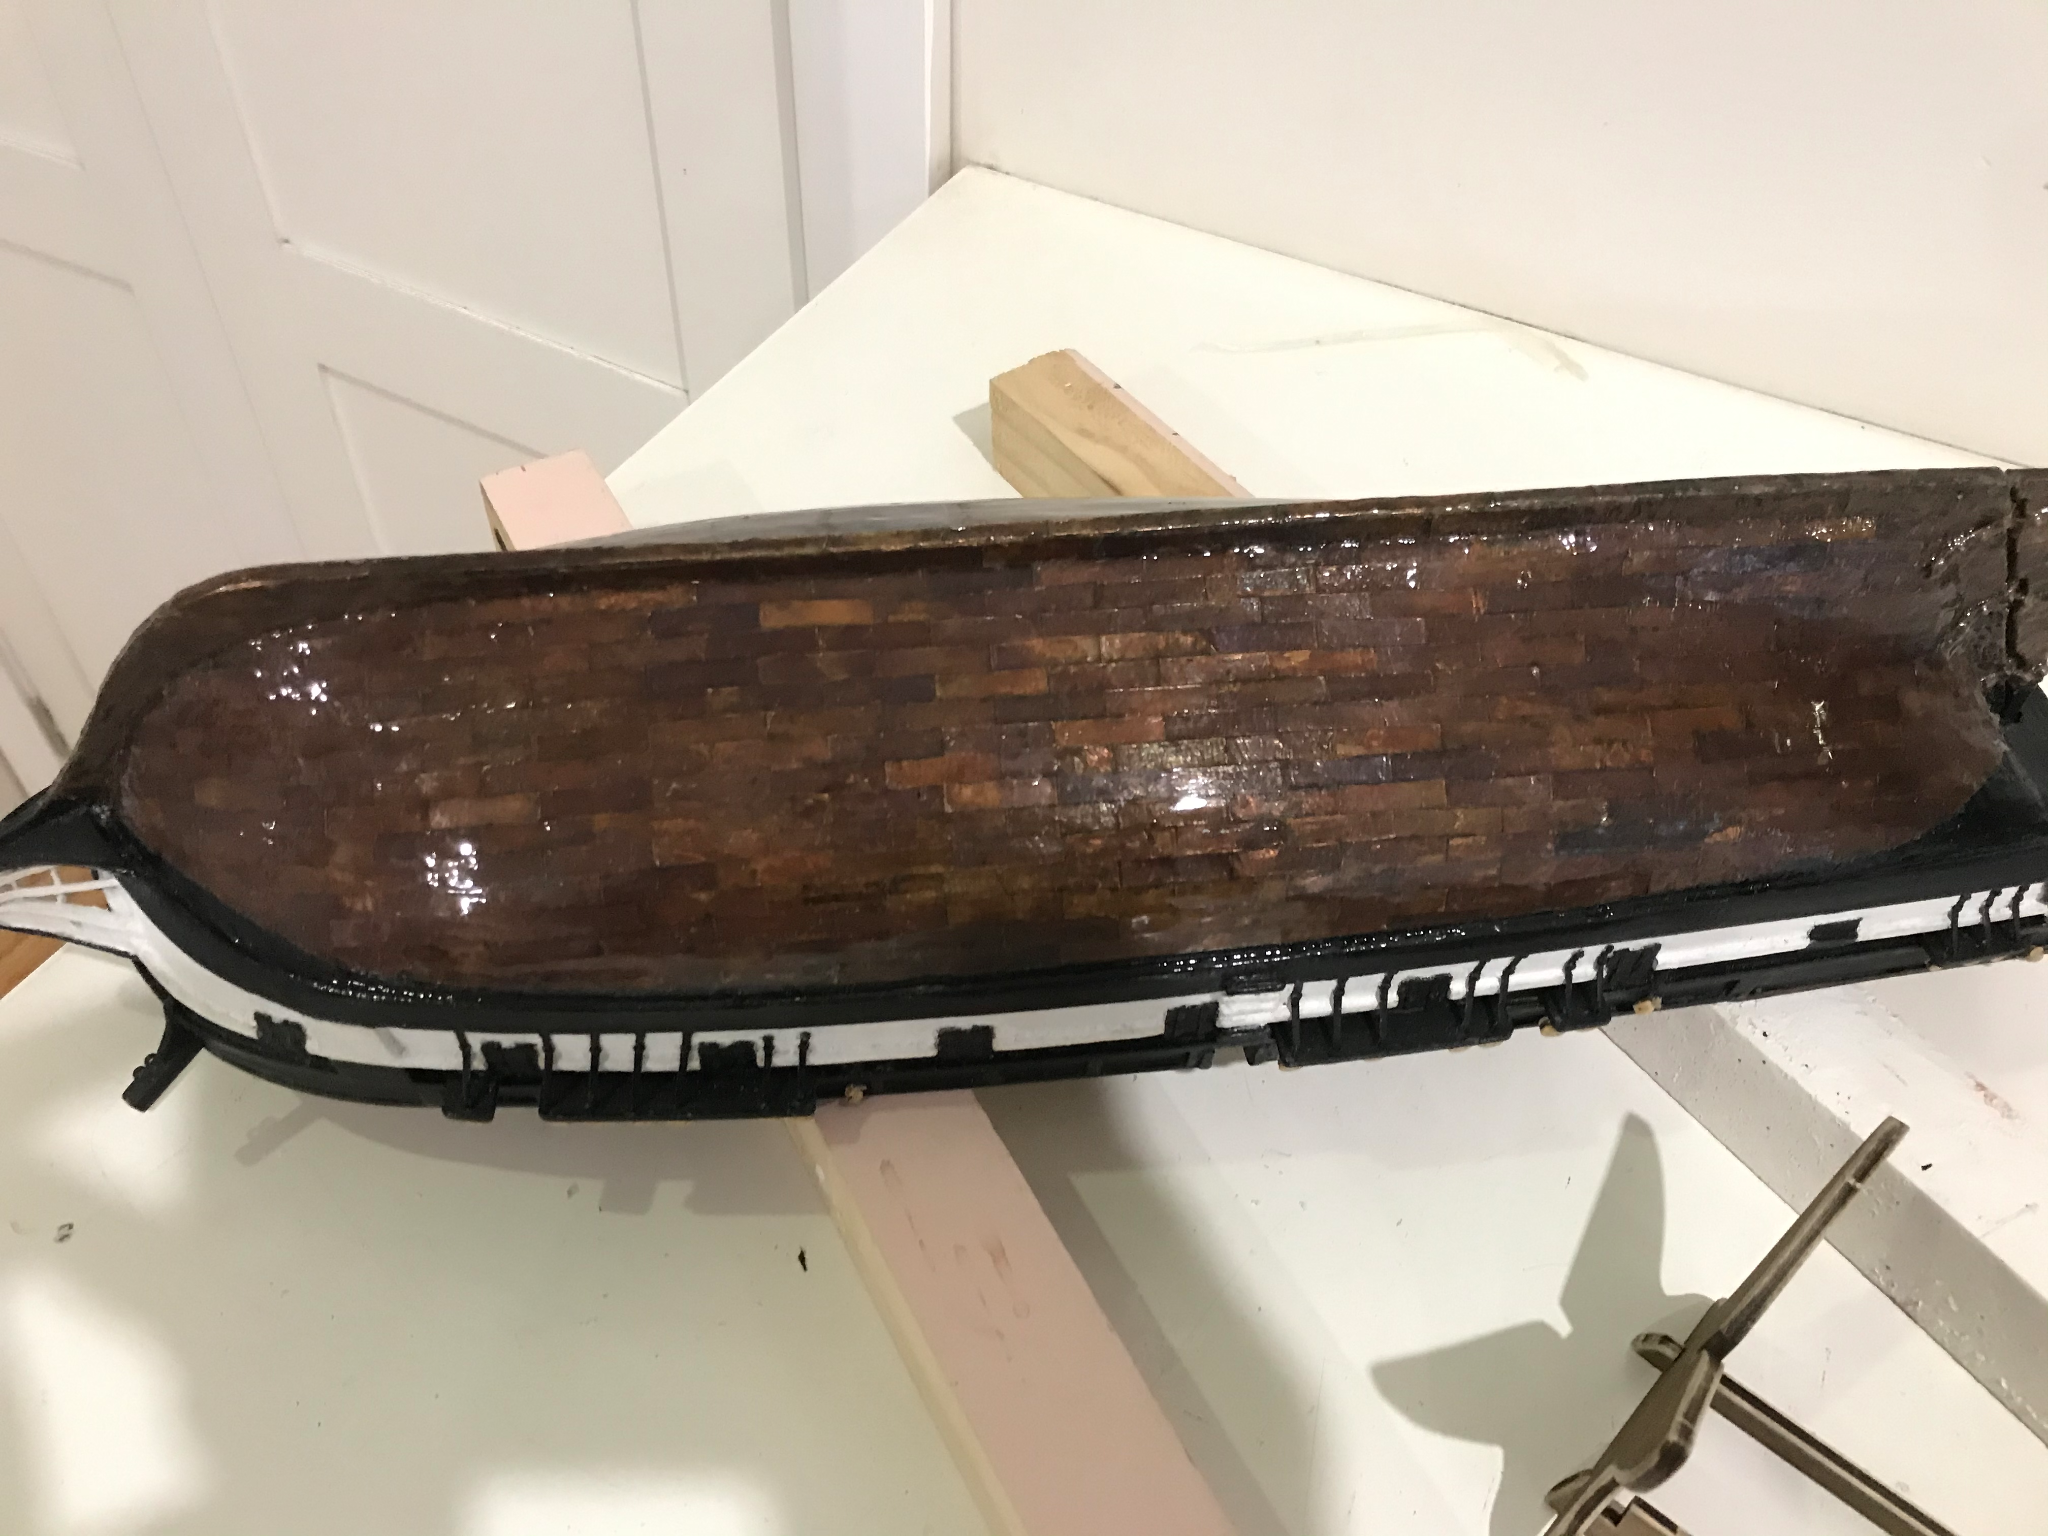
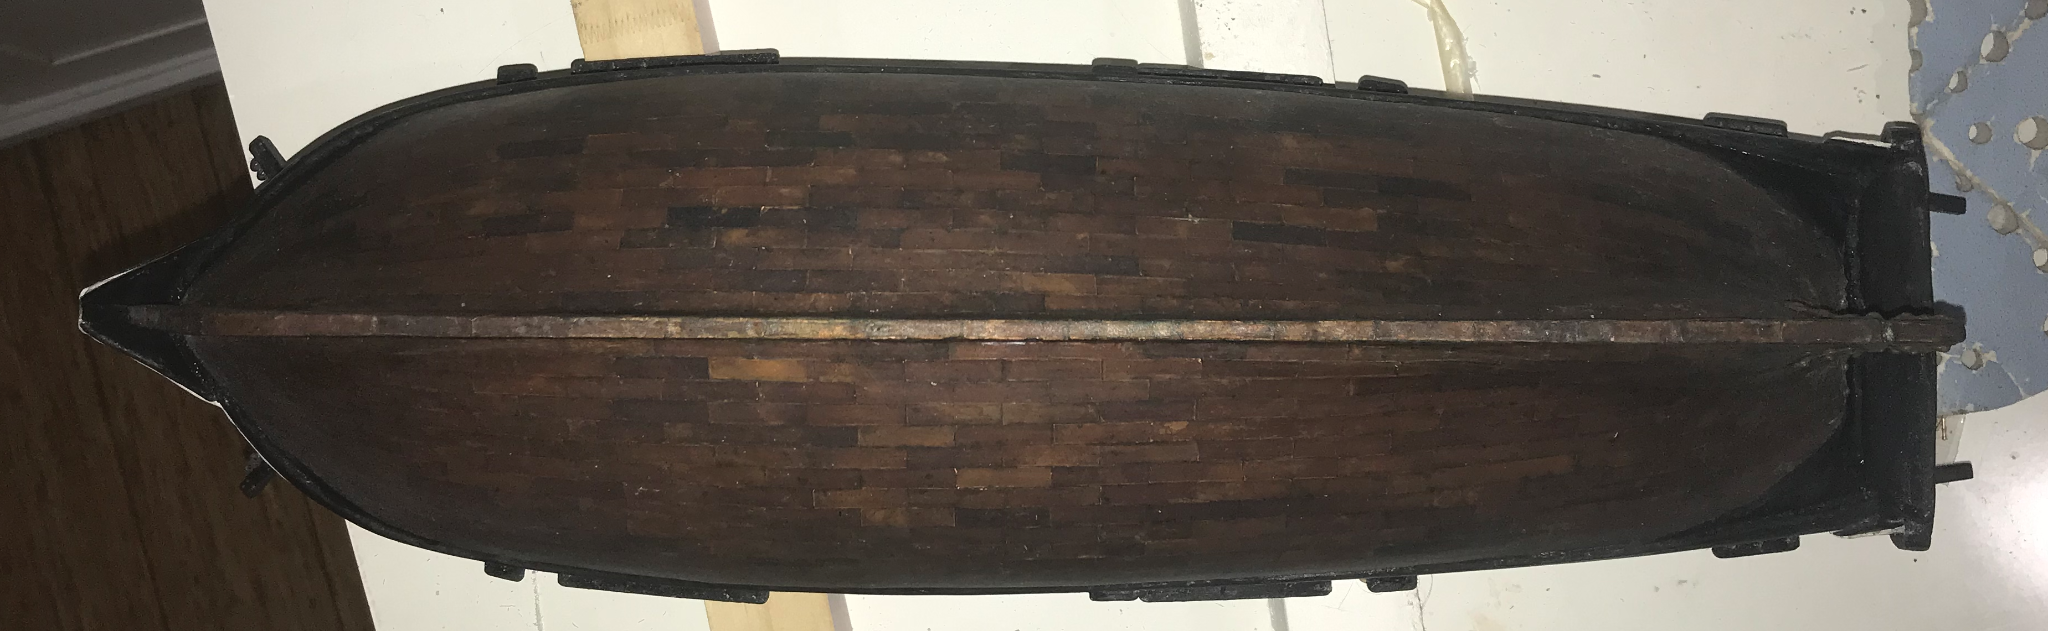
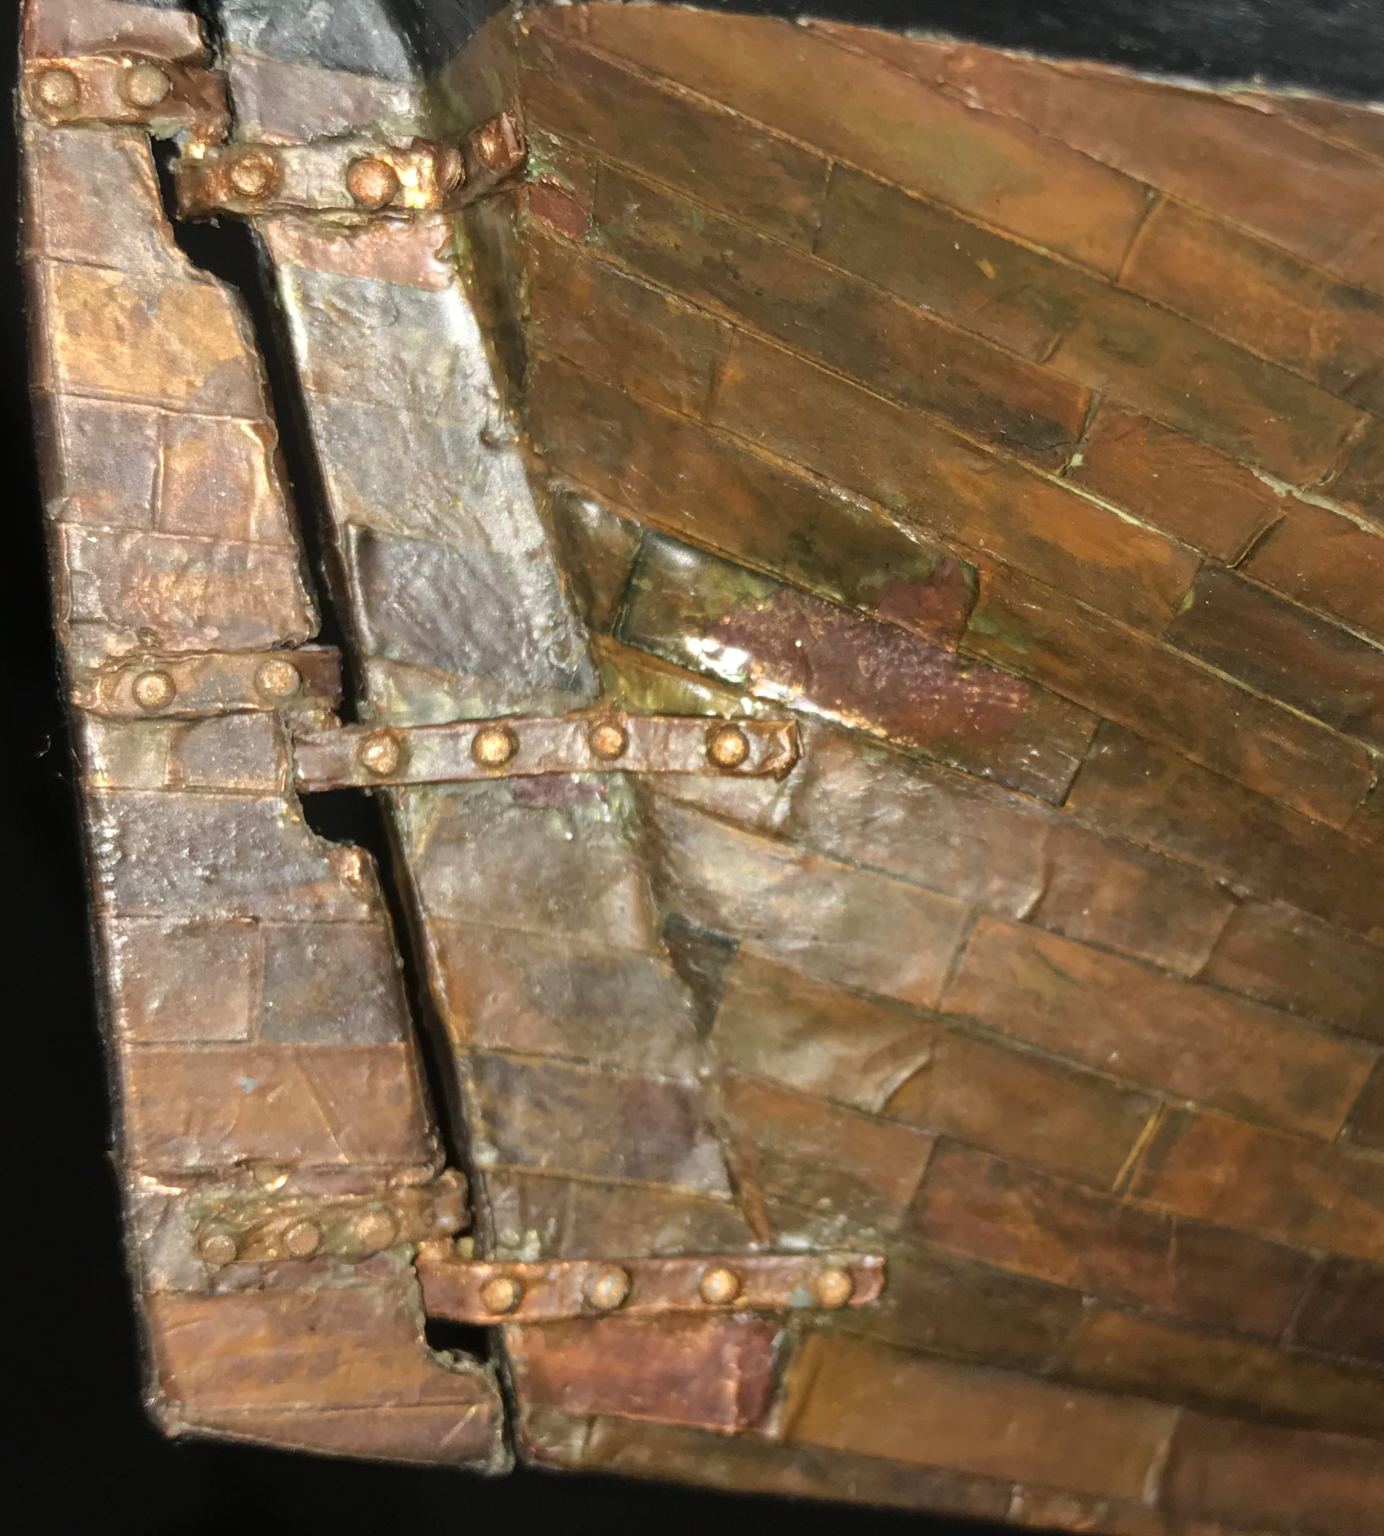
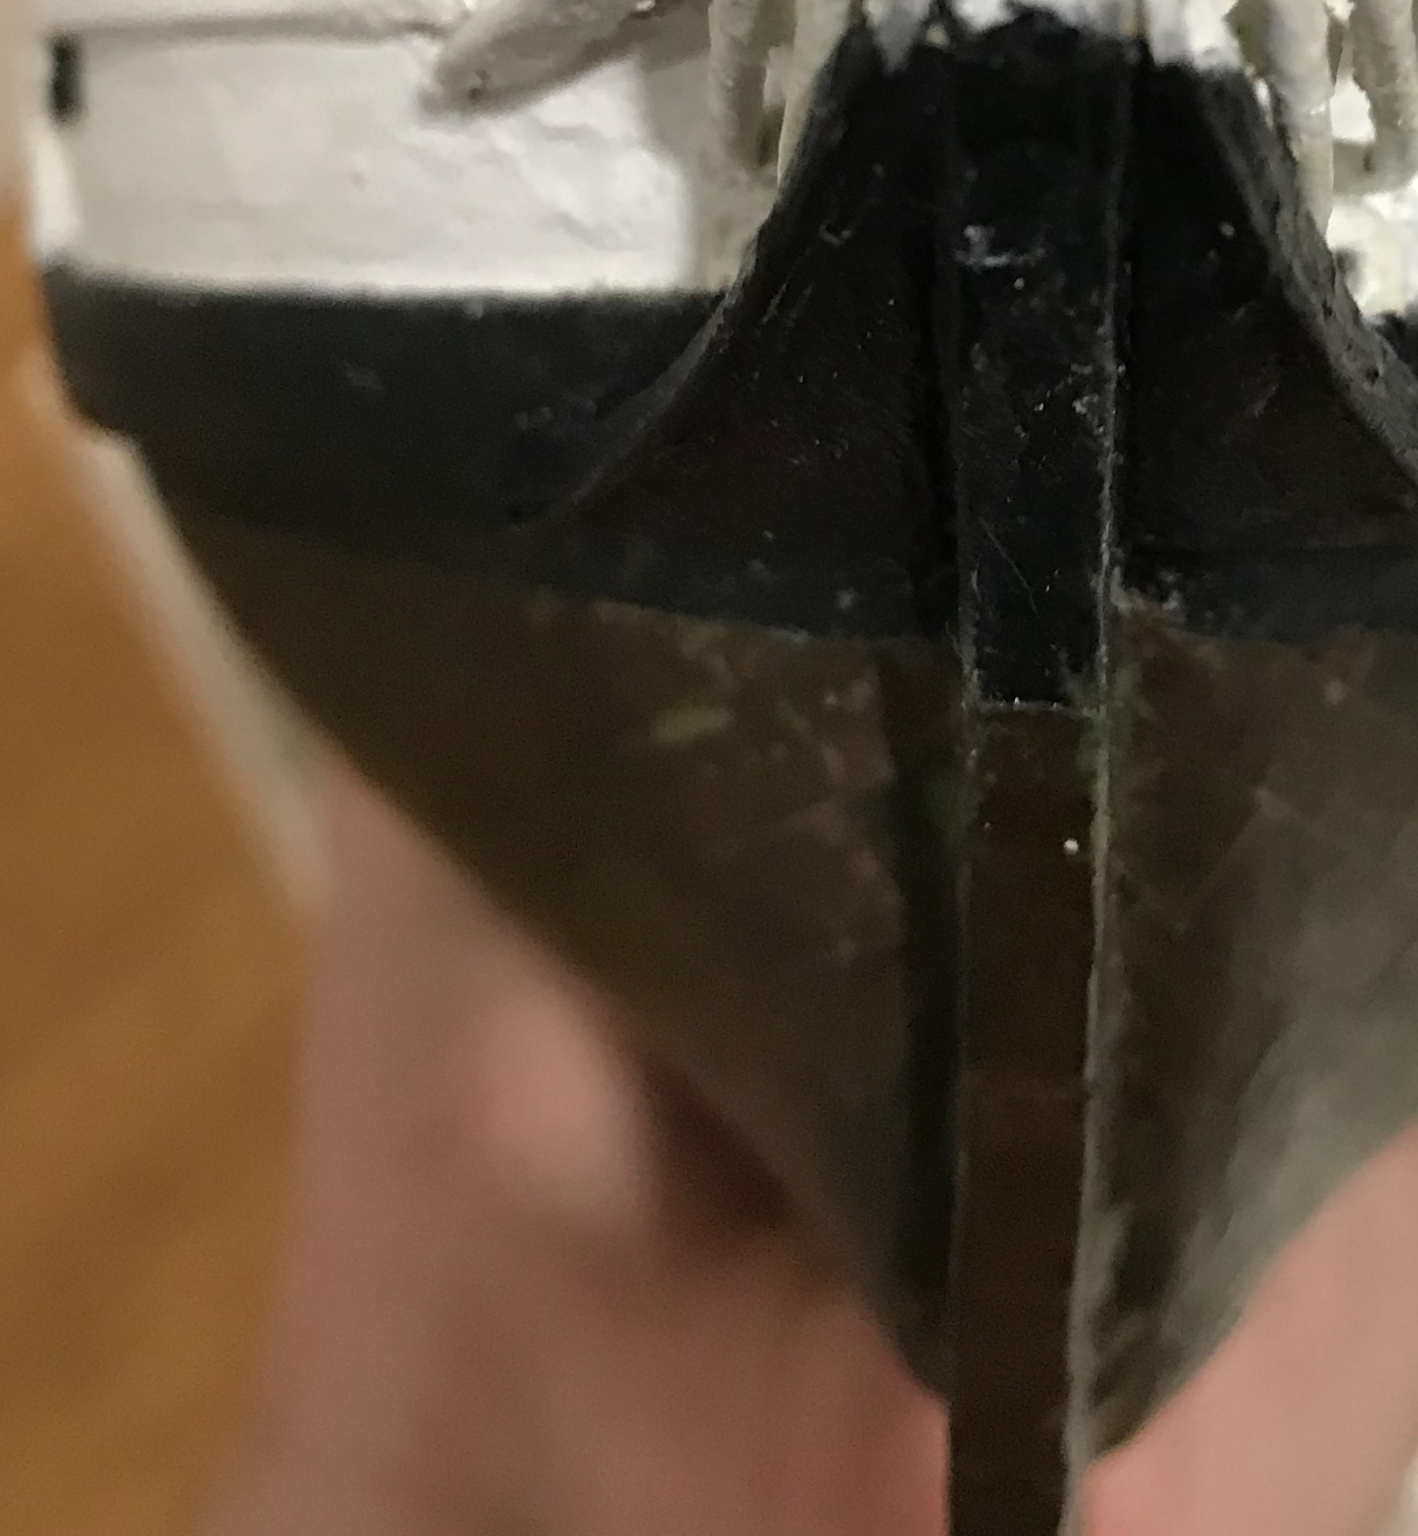
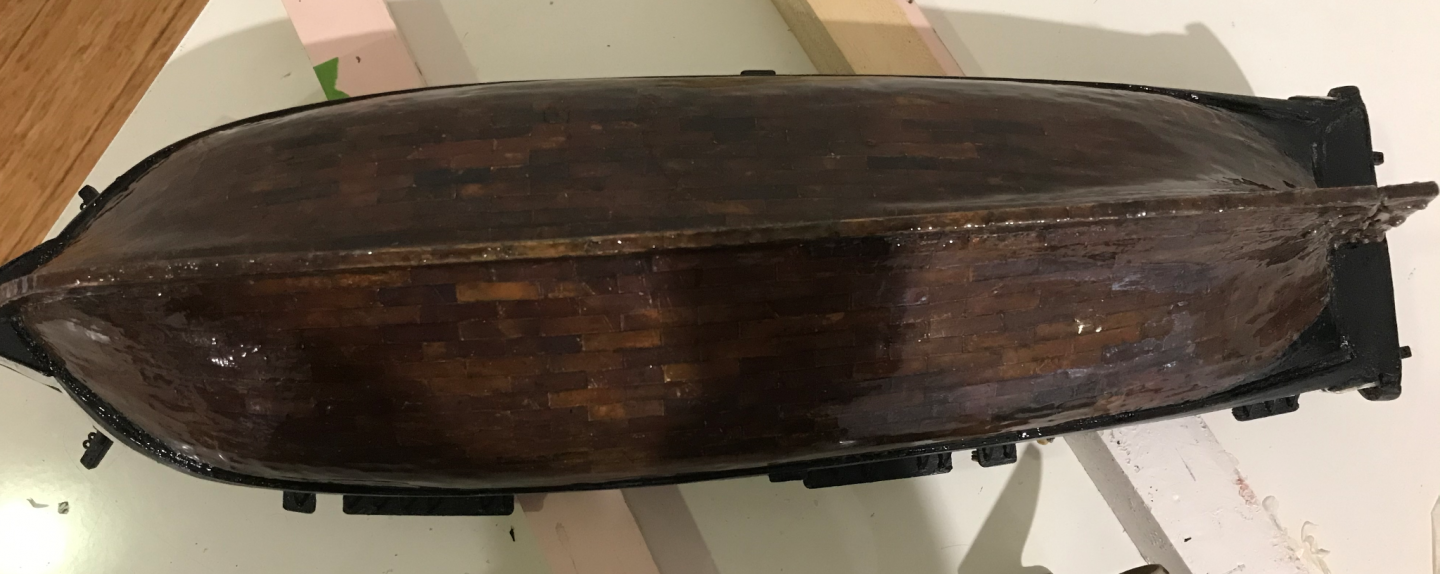
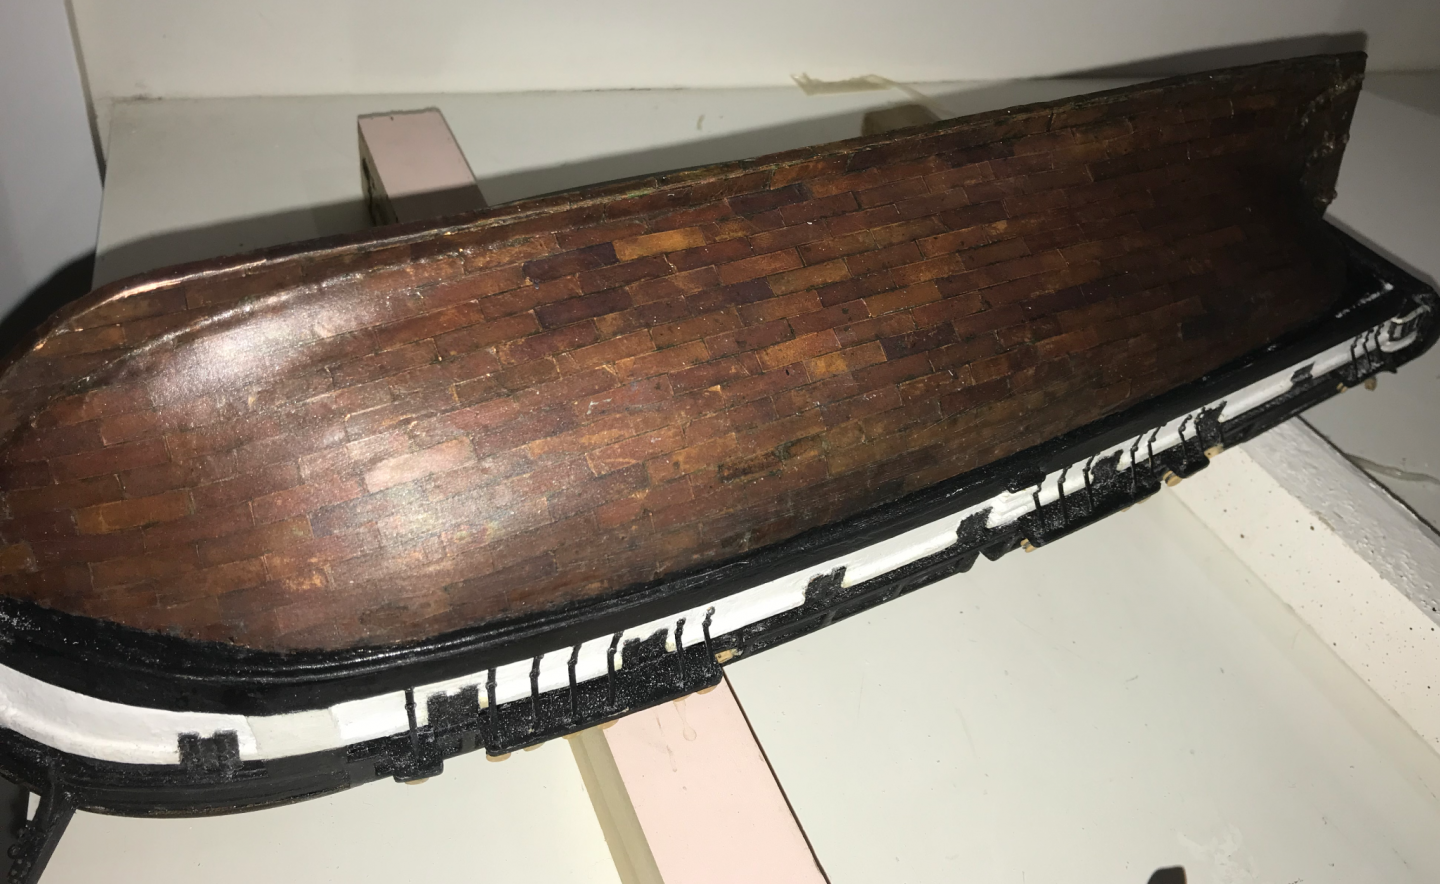
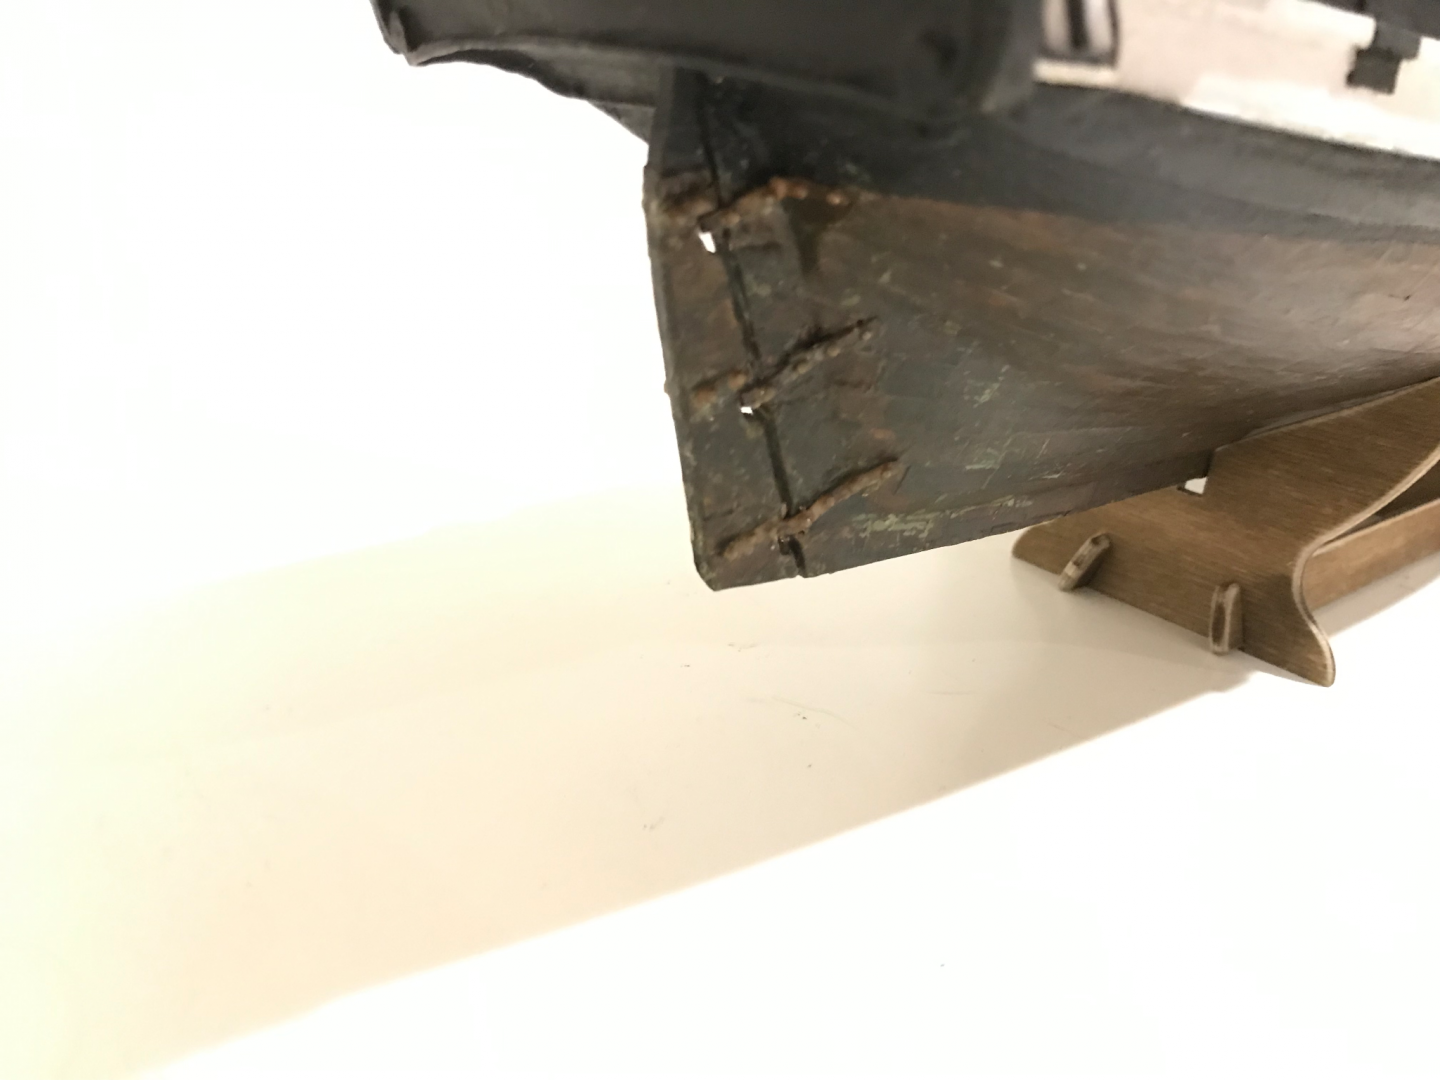
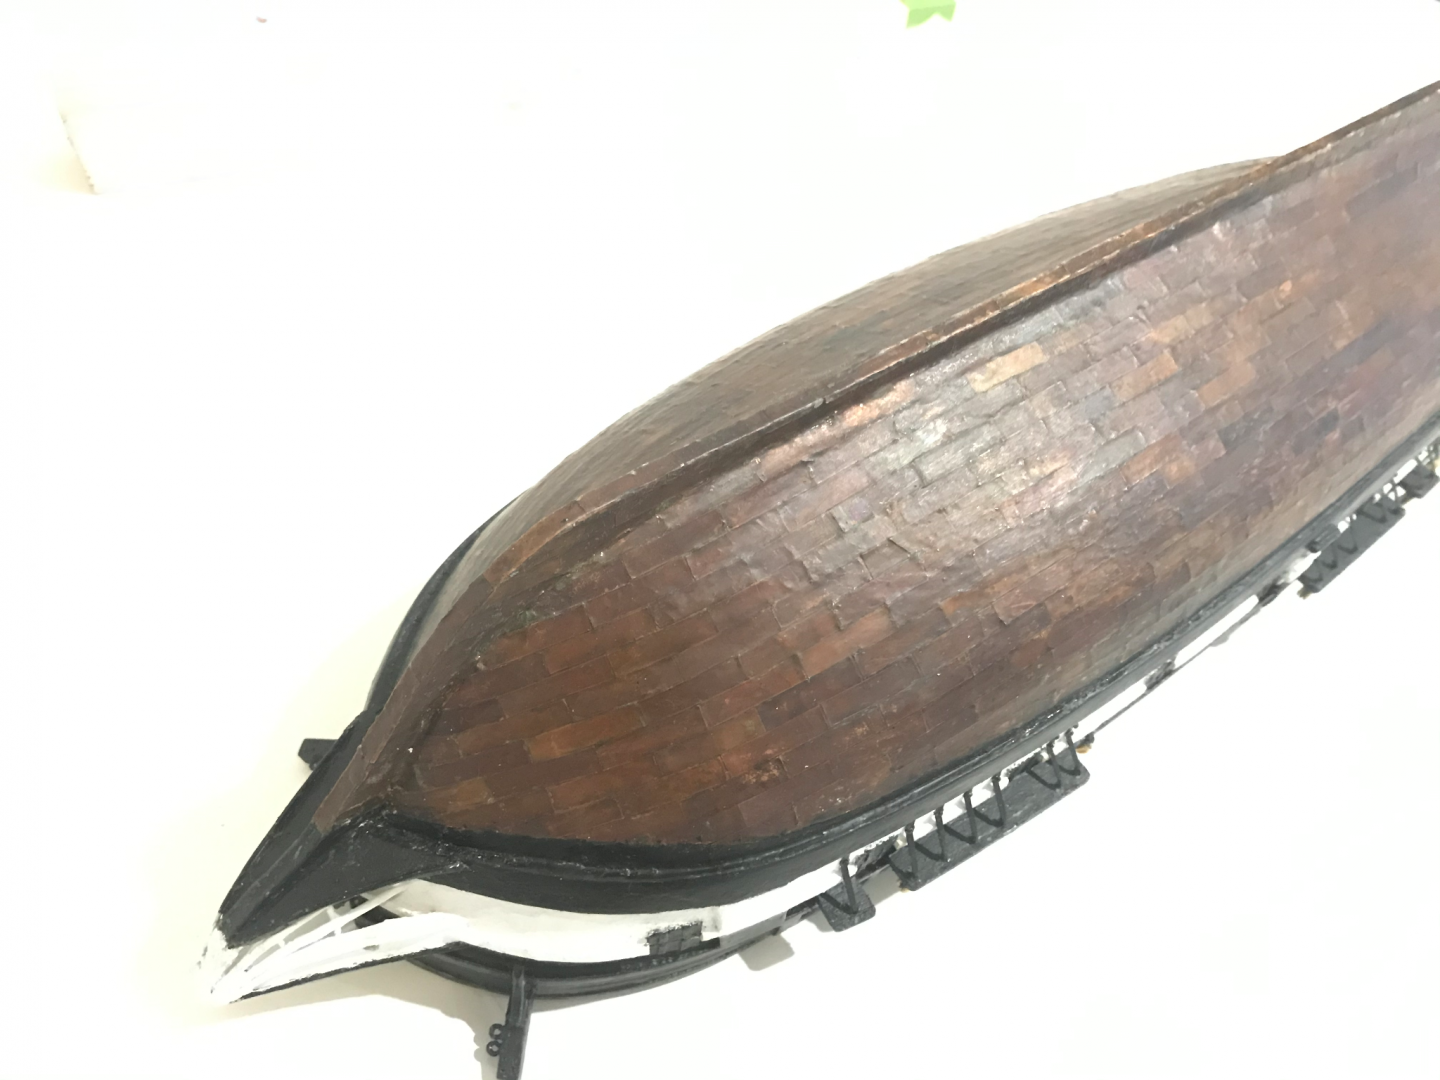
Okay, so here is where the varnish started to go a bit wrong. The thing that really got me to make the change was the appearance of blue-green spots in the varnish seen here. The varnish had been gradually turning darker and greener over time and I think it is because to wood varnish did not properly seal the copper. As a result, the copper was able to oxidise and cause colour spots in the varnish. I suppose anyone could have told me that sealing copper with wood varnish was a bad idea, but some mistakes we just end up making anyway. The second major thing was the flaking and bubbling of the varnish. I used a pretty thick coat and because the varnish did not stick to the copper very well, it was easy to form bubbles. These bubbles could break off and leave dips in the finish. From attempt 1 at the rudder, note the damaged spot just above the middle gudgeon and below the top gudgeon. I tried to cover these in more varnish, but that often made things worse and led to more bubbles. These factors led me to conclude that the only solution was to strip the varnish from the copper and seal it with a proper copper sealant. I don't know if this exact product is available overseas, but I'm sure there'd be something similar. I really wish I had found this earlier. The stripping process was quite traumatic, and I was very reluctant to take photos. First, some of the patina was lost in the removal of the varnish, which meant some plates had to be replaced. Second, the varnish stripper was quite runny and caused some serious damage to the paint (it’s a paint and varnish stripper). The border between the white paint and the black wale had to be almost totally re-done. The copper sealant was very glossy, but quick drying, meaning that many coats could be added quickly. I could tell that this was a much better adherent to the copper, and it was very difficult to cause the same flaking seen in the wood varnish. To remove the glossiness, I wiped a very light coat of the matte varnish over the copper. To do this, I just dipped a tissue in the varnish and gently wiped it over, avoiding thick build-ups or streaks. Here is the end result While there are a few bumps, this is more a result of the copper laying not being perfect and sanding it smooth would involve losing patina. Anyway, I'm pretty happy with this and have learnt a lot for coppering hulls in the future. One technique that I think might be easier that I haven't tried, would be to press the plate lines into a long strip of copper tape without cutting through. These strips could then be used to cover the whole hull without using individual plates. This would be much quicker and might give a better effect. I haven't tried it, but might give it a go if and when I ever get to the Victory (got a few boats I'd like to do before that though).


-
When I only knew a little bit about the imperial system, I knew it was based on 12 for conversions and things, which I could respect, because 12 is objectively a better number than 10 when you want to divide things. But then as I was working on my first kit, the bounty’s launch from model shipways (American), I was exposed to that darker side of the imperial system. Does 1/16th or 3/32 of an inch mean anything to anyone?
-
I still have 30 cm of 1 mm (3 rods), I just had another look, I will not need that much, maybe my kit just had a bit more, I'm not sure, I can't think of anywhere where I may have saved brass. If I'm missing something, I still have my 0.8... aluminium that I used for the scroll. (it's in some imperial unit🤮). Might have another go with the paint, thank you. Also, no offence to people who do use imperial, I am just not a fan
-
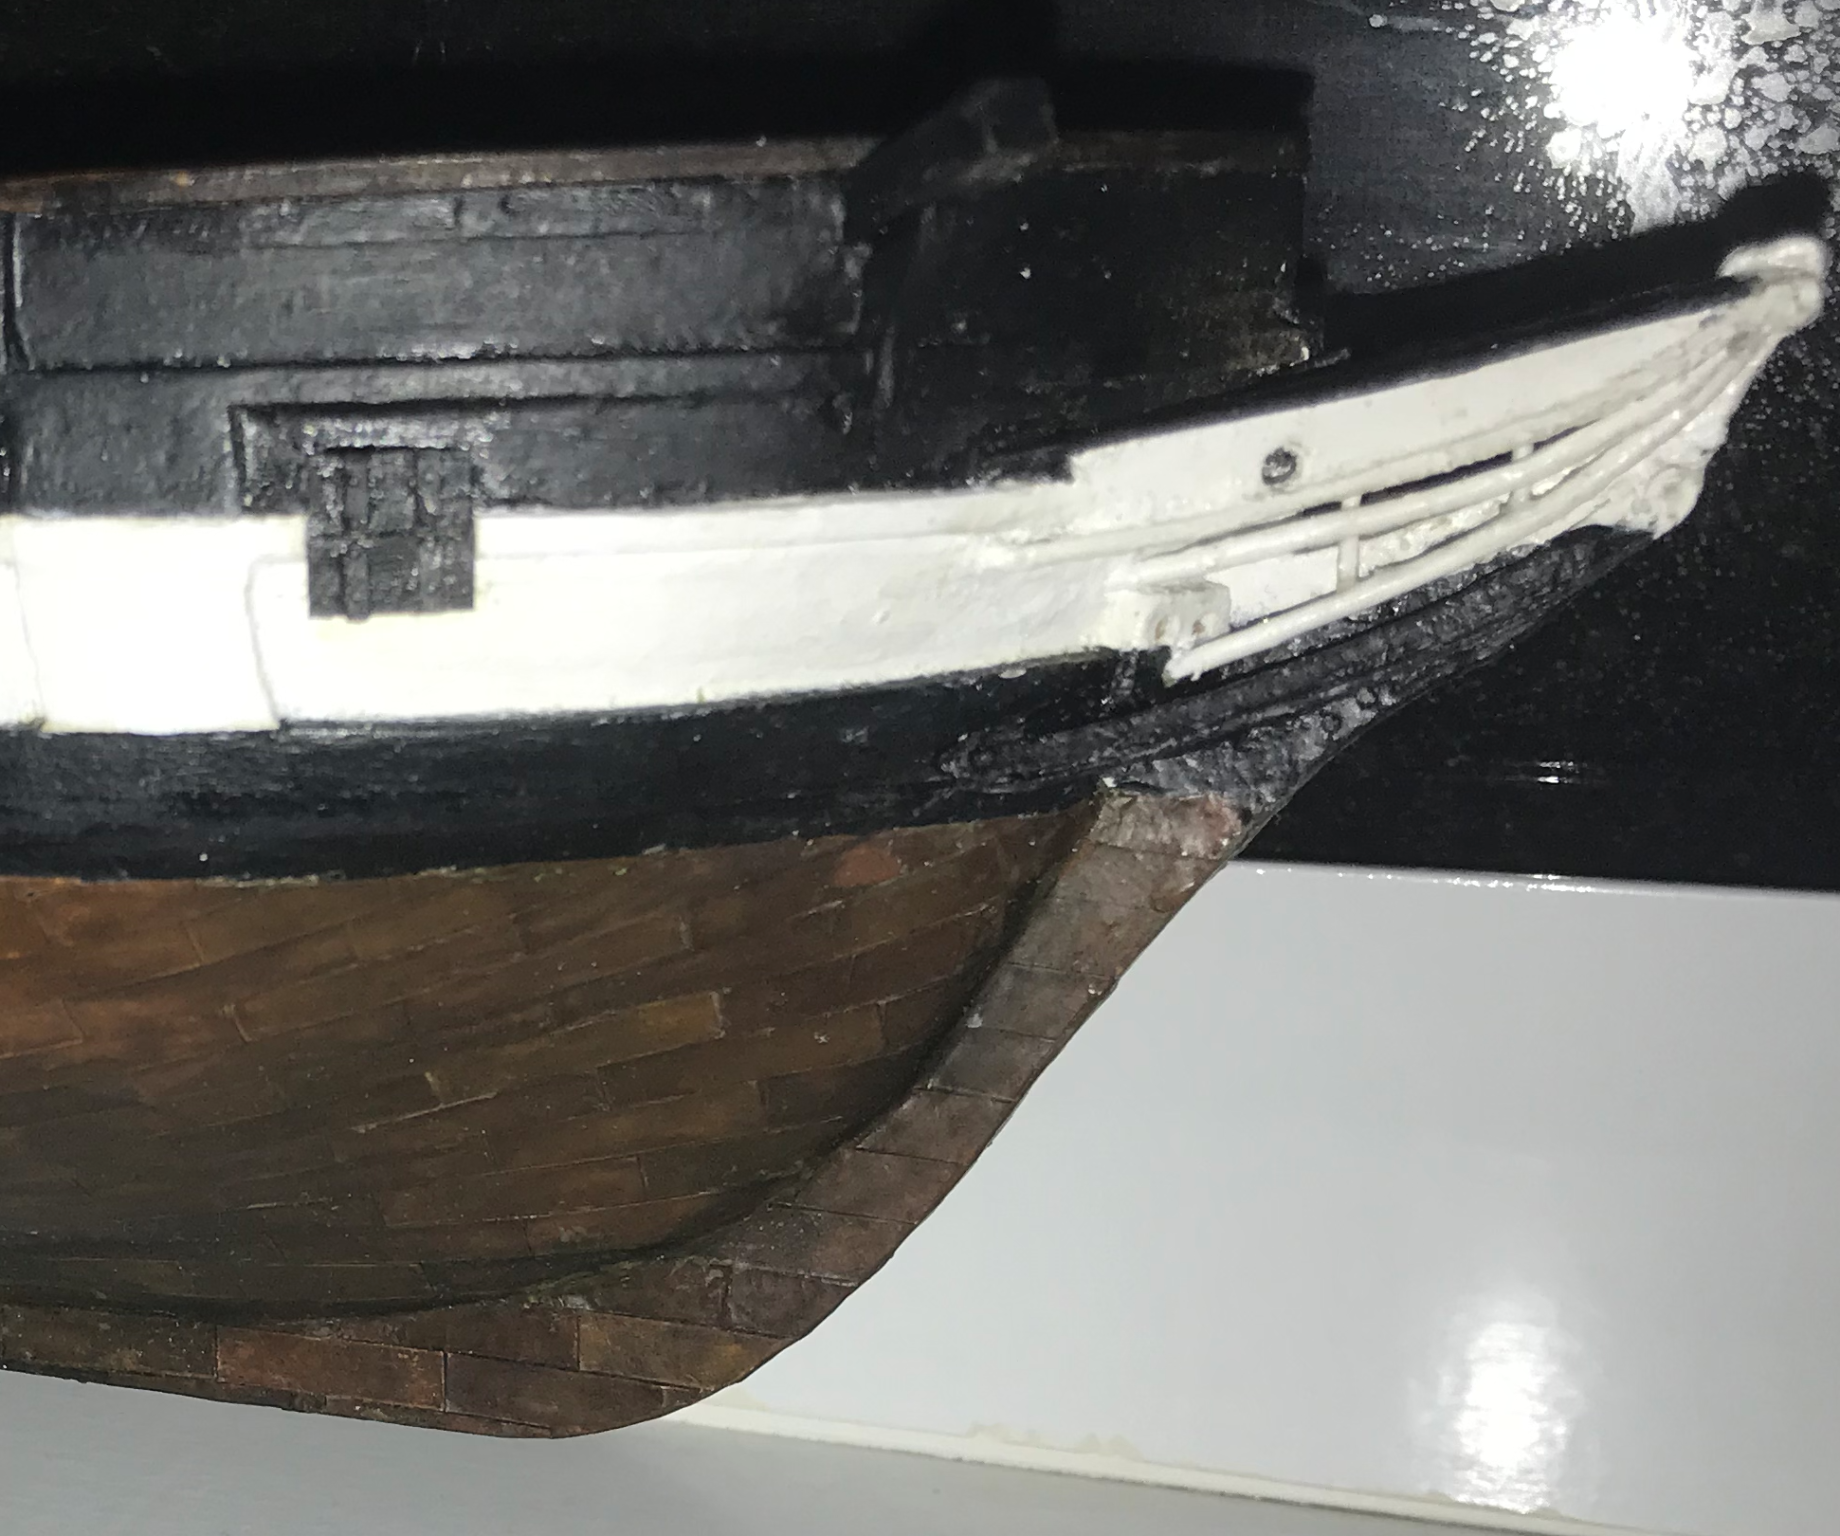
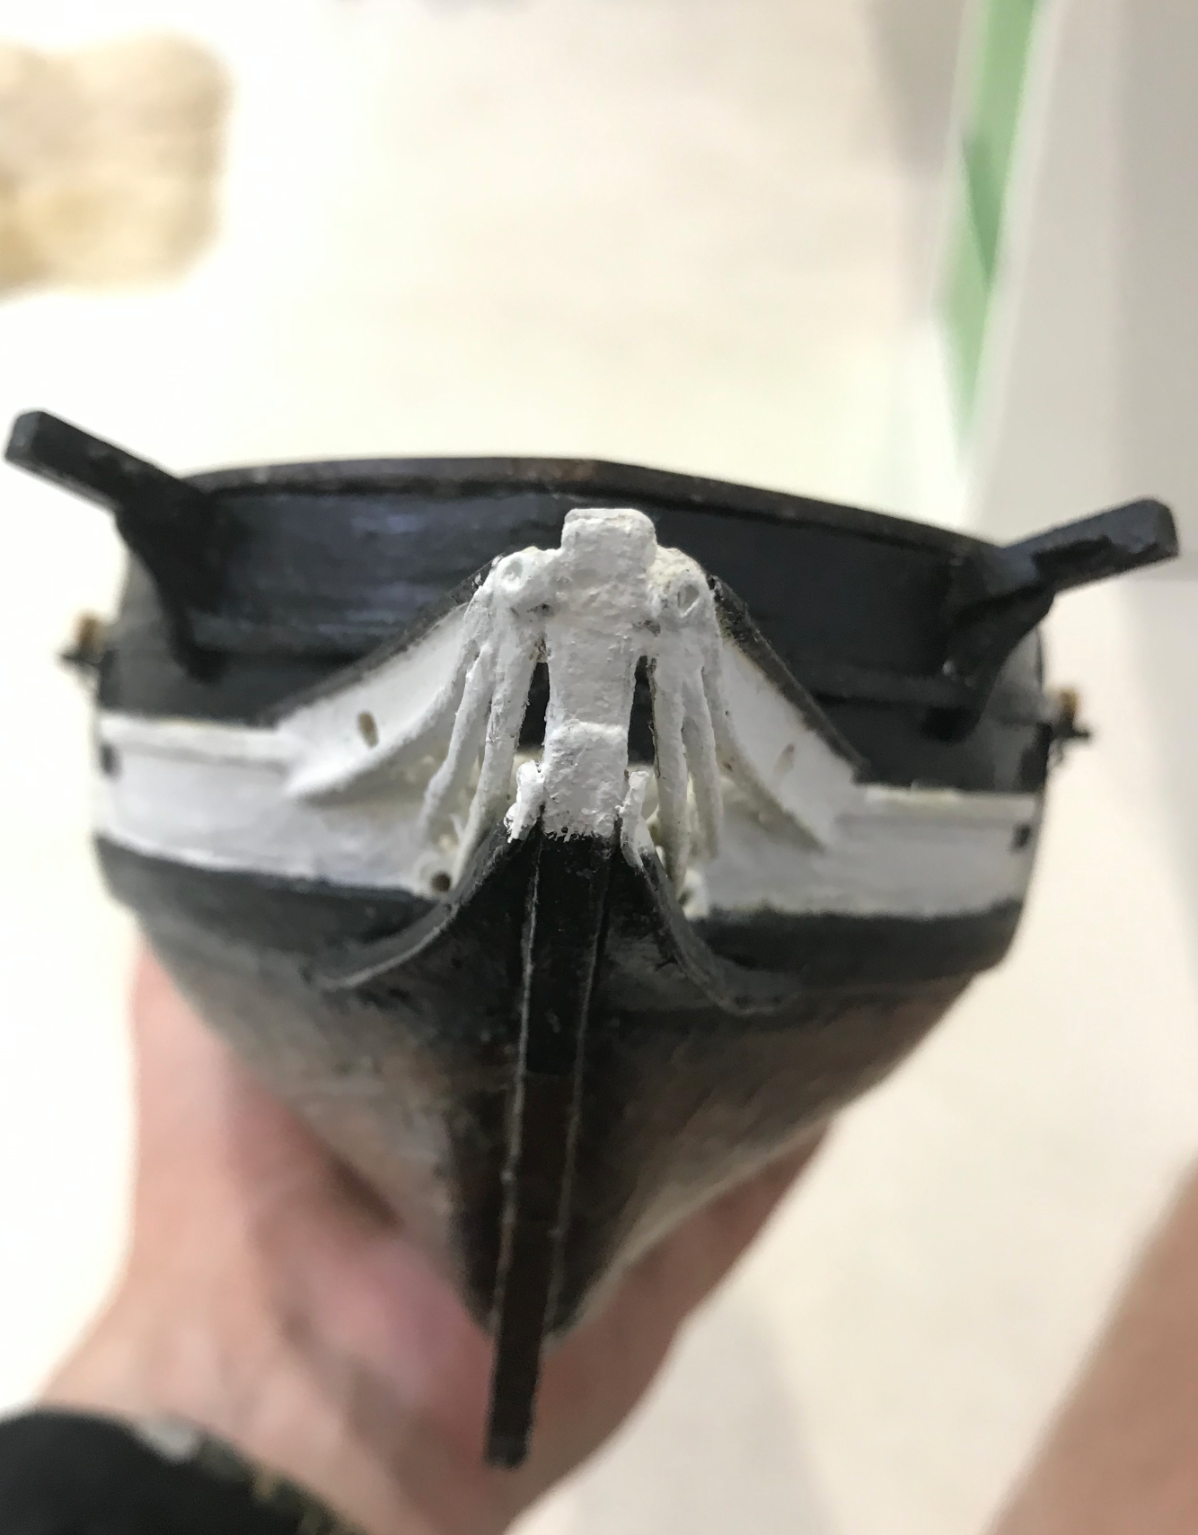
Sorry for the break between posts, just been dealing with a hectic couple of weeks and haven’t had much time for boat related things. It took some fiddling, but I did eventually get the bow details the way I wanted. I added another scroll at the bottom Also, there is a little confusion between the photo instructions, videos and materials list regarding the sizes of the wire you’re supposed to use. The videos indicate that they should all be 1 mm, but the parts list says some of them should be 1.5 mm. I went with the parts list as I figured this would be the best way to avoid running out of material. I also used some filling putty to connect the rails to the boat and make it look a bit more like one piece. As with all my metal work so far, it started out a little scruffy, but I’ve been working on slowly tidying it with a Dremel and a blade.


-
Hey Maliba, my guess is that it would be easier to make the ladders out of wood than re-do the brass ones. I thought the brass ones looked a little flimsy anyway and am currently working on some wooden ones. It's a bit fiddly but would be easier than having to cut some brass, wood is a bit more forgiving with the glue and cutting.
-
Hi Keith, thank you for your very kind comments, it means a lot
-
Also, AOTS has ropes tying off to anchor points at the base of the foremast. These are not present in the kit, so the lack of these could be contributing to how crowded the pin rack behind the windlass appears to be. If there’s space you could add some eyebolts around the fore mast (similar to the main mast) to tie off some of the ropes.
-
Okay, looking at the instructions again, 6 tie off to belaying pins (J33, J33, J34, J35, J36 and J102), with 8 that tie off somewhere on the posts (J41, J41, J50, J54, J81, J81) I'm not sure where exactly the 2 J73s tie off to, may need to check the videos, but it could be the posts as well.
-
I think 6 should be enough, some of them may tie off to the post. AOTS may have additional rigging not included in the instructions (I'm not really sure at the moment though), but if you do the rigging as per the instructions, 6 should be enough.