HOLIDAY DONATION DRIVE - SUPPORT MSW - DO YOUR PART TO KEEP THIS GREAT FORUM GOING! (Only 24 donations so far out of 49,000 members - C'mon guys!)
×

LucienL
-
Posts
122 -
Joined
-
Last visited
Content Type
Profiles
Forums
Gallery
Events
Everything posted by LucienL
-
 I think 6 should be enough, some of them may tie off to the post. AOTS may have additional rigging not included in the instructions (I'm not really sure at the moment though), but if you do the rigging as per the instructions, 6 should be enough.
 -
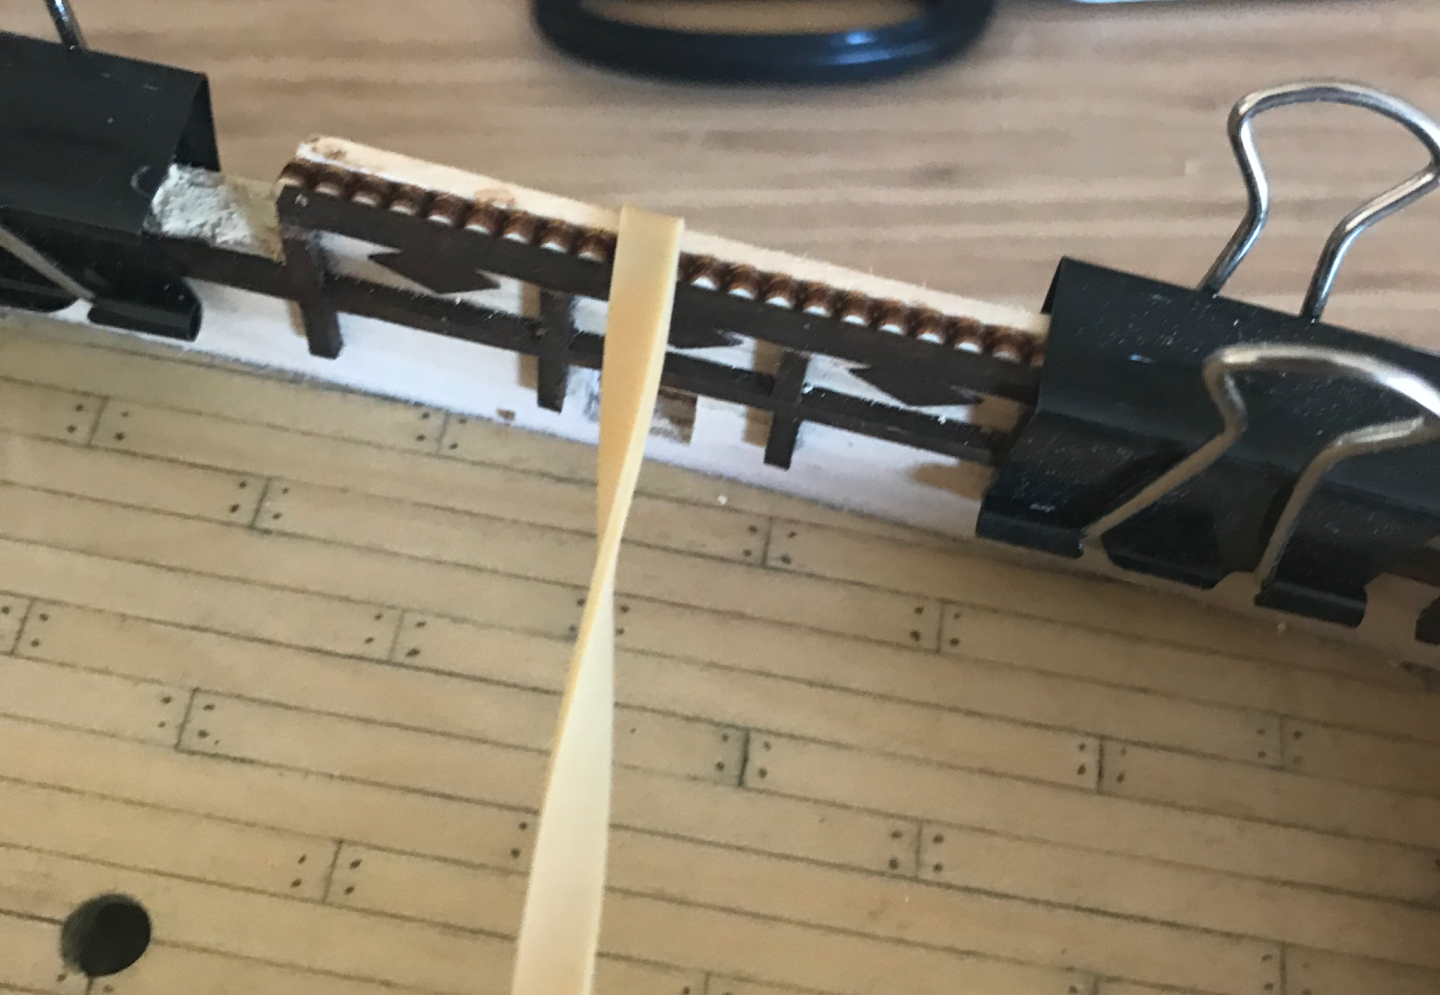
In both anatomy of the ship and the OcCre instructions, rigging needs to be tied off there, so you need something to do that with. It could have been pin racks and they just haven't included it in the diagram. Have a look at figure I4/1 in anatomy of the ship, something has to go behind the windlass that is definitely not shown in the anatomy of the ship diagram. It might be hidden by the mast in this diagram, I think that the pin rack should go in the middle of the two posts running behind the mast. The rigging page of the instructions has it right, I think the photo instructions are probably wrong, there should be two pins on the sides of the posts and two between, that should give you the correct dimensions

-
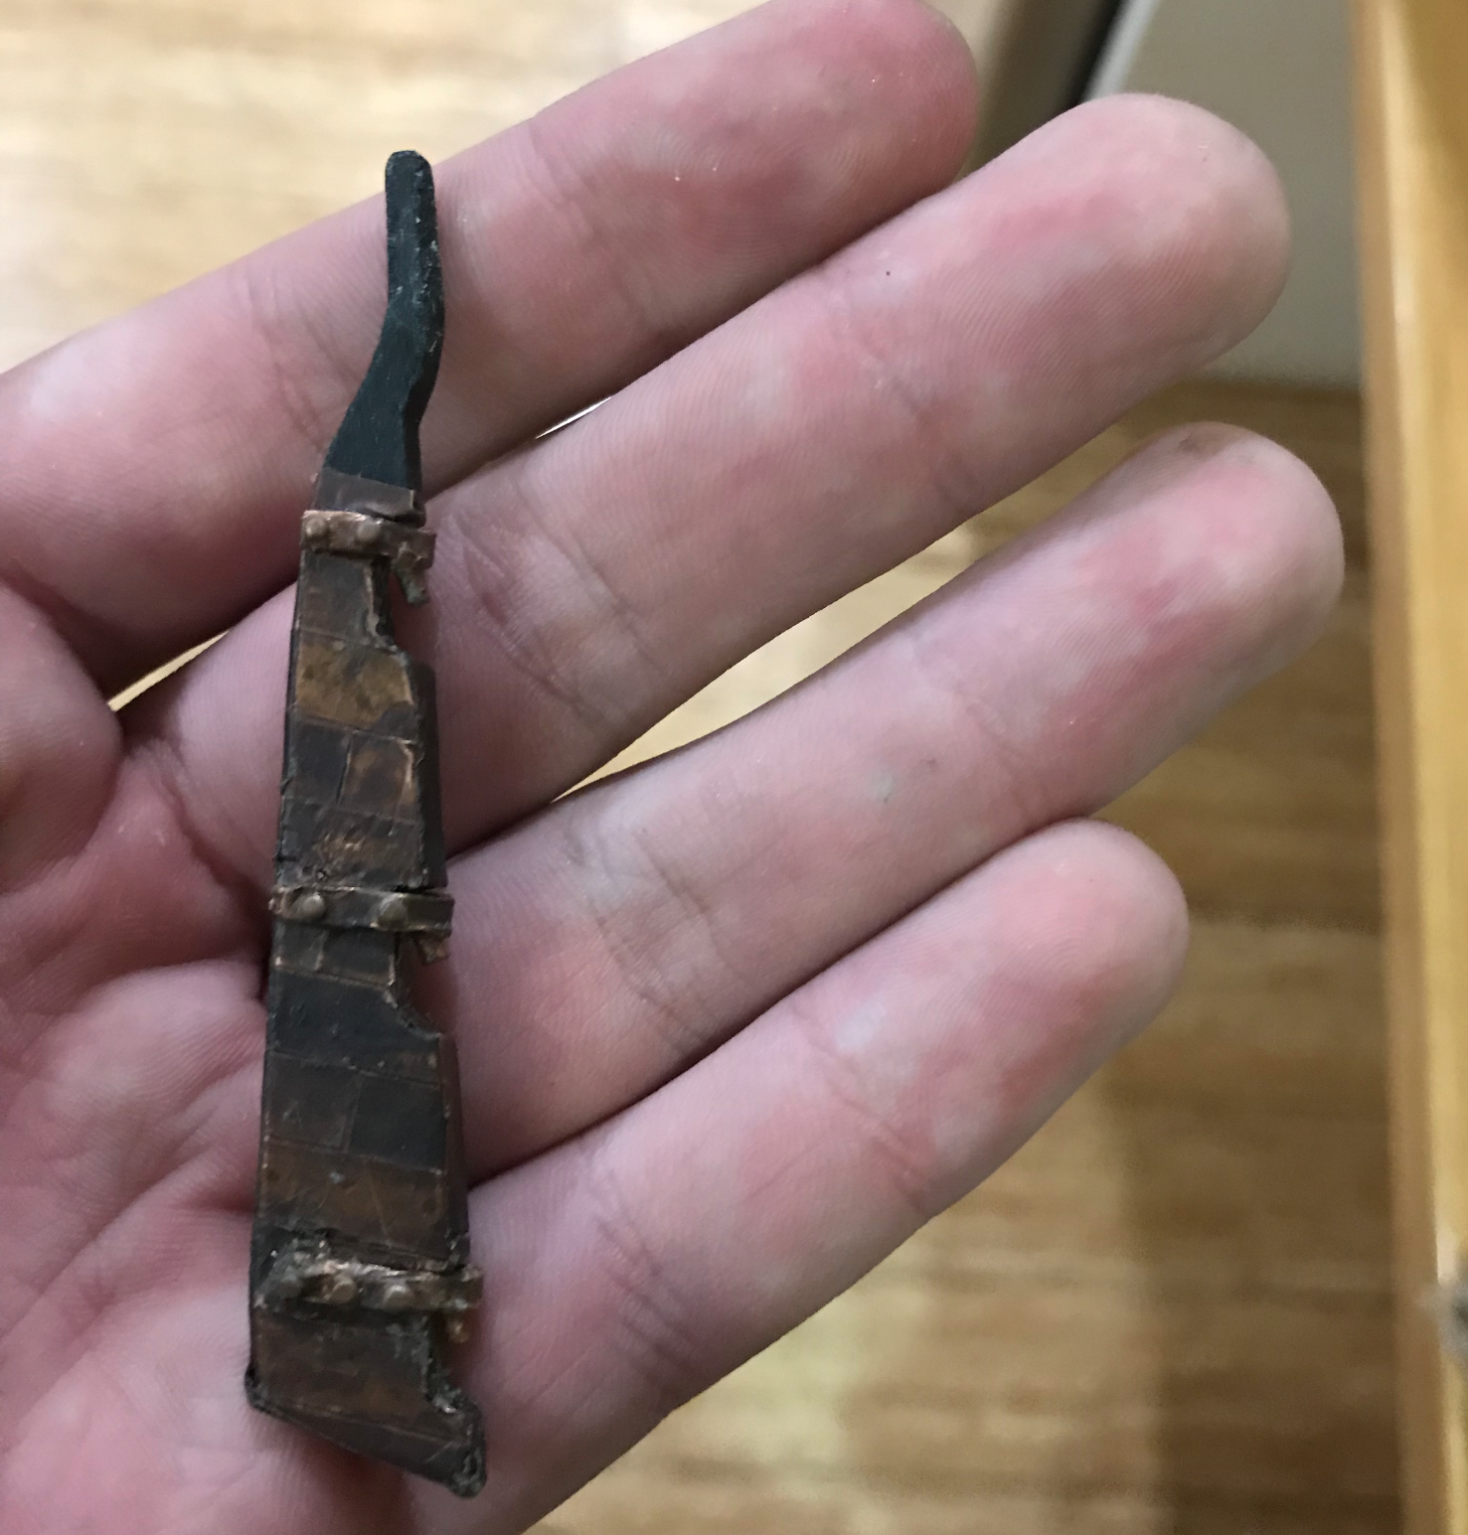
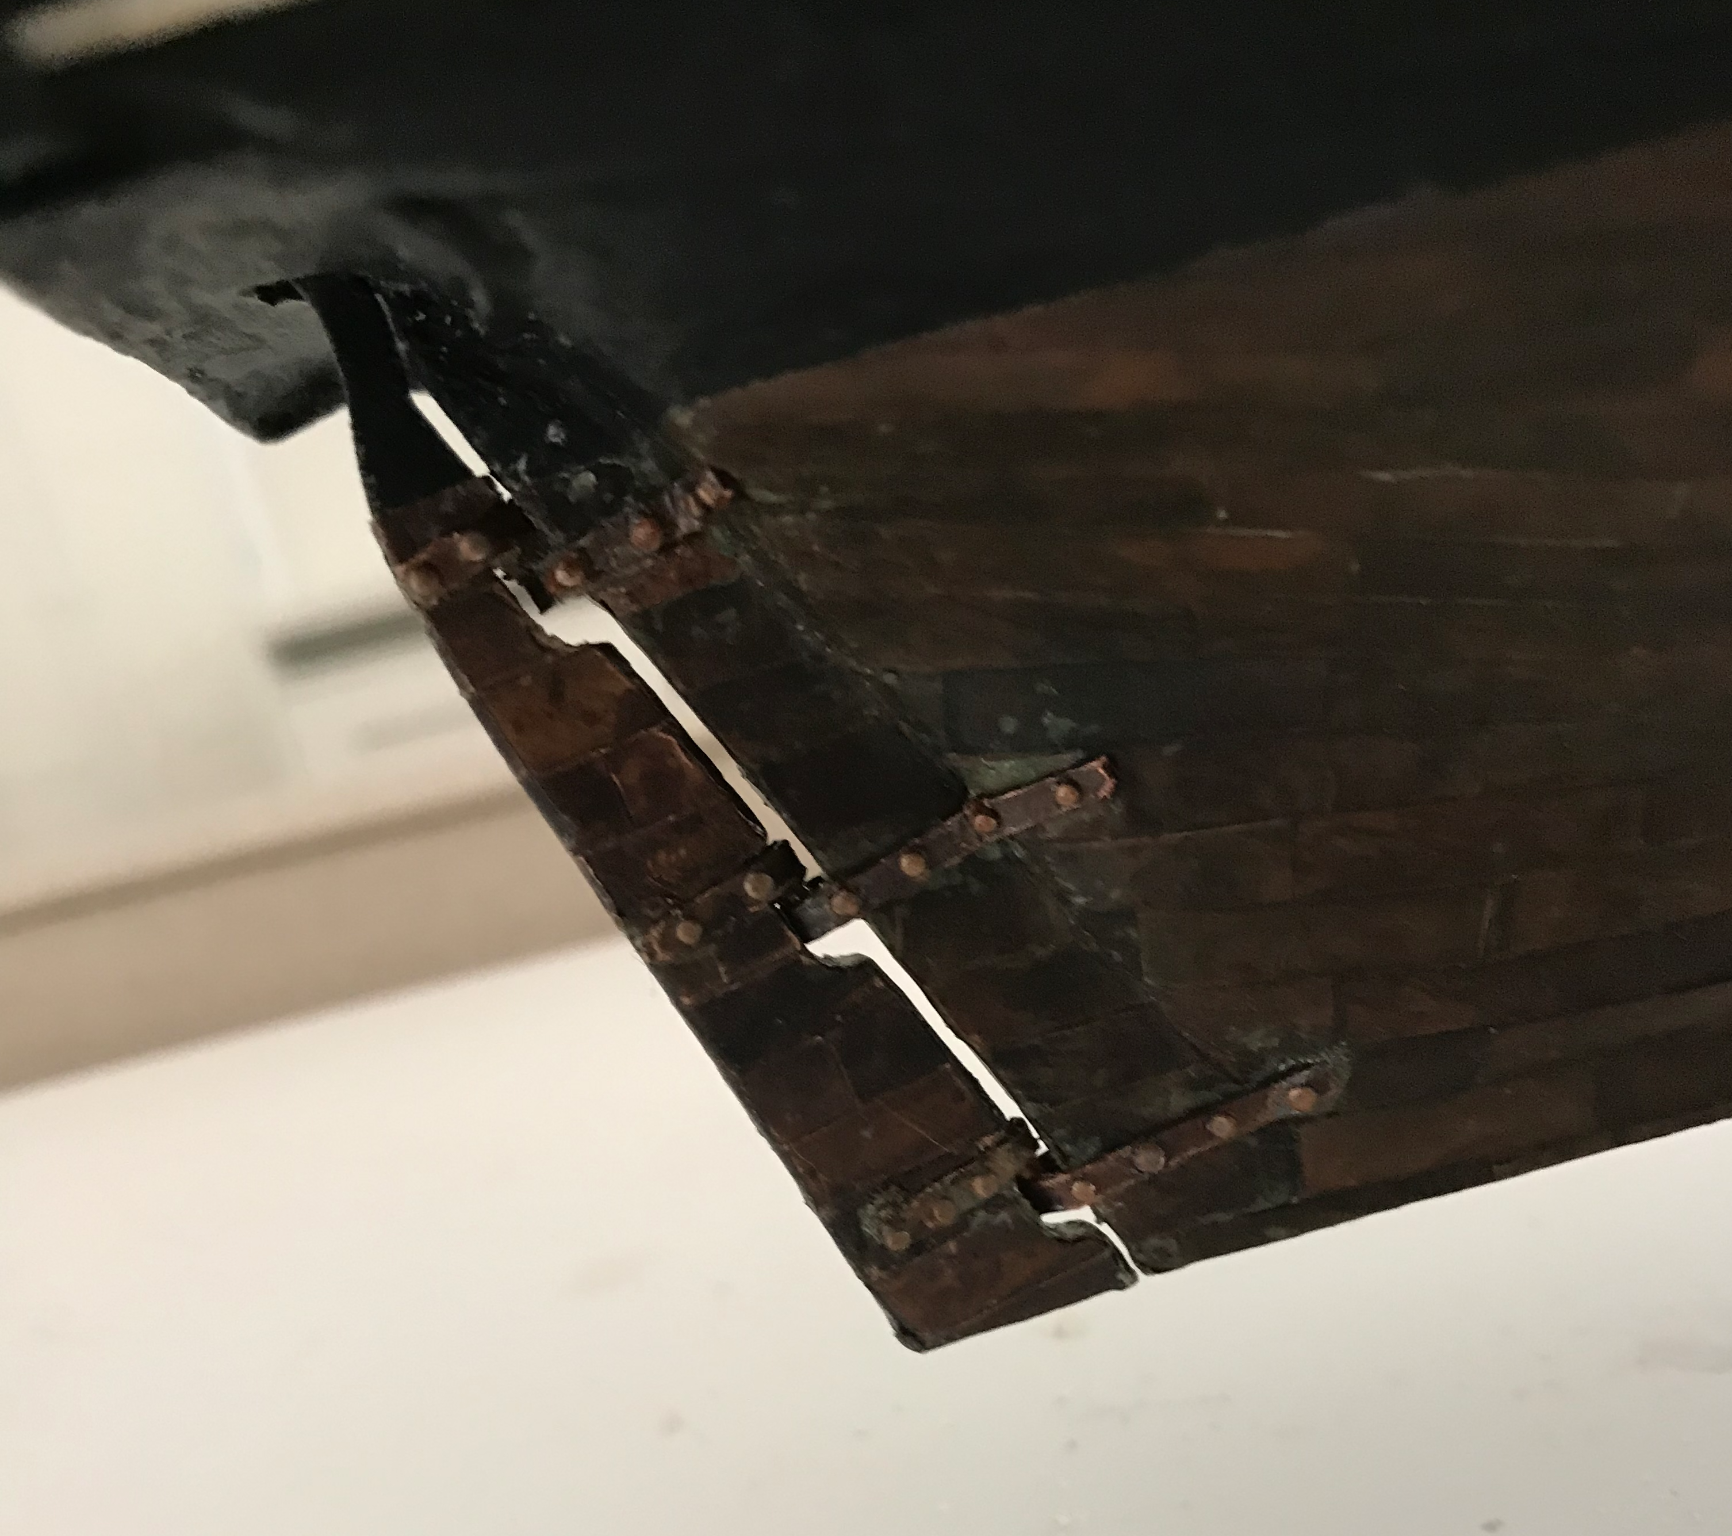
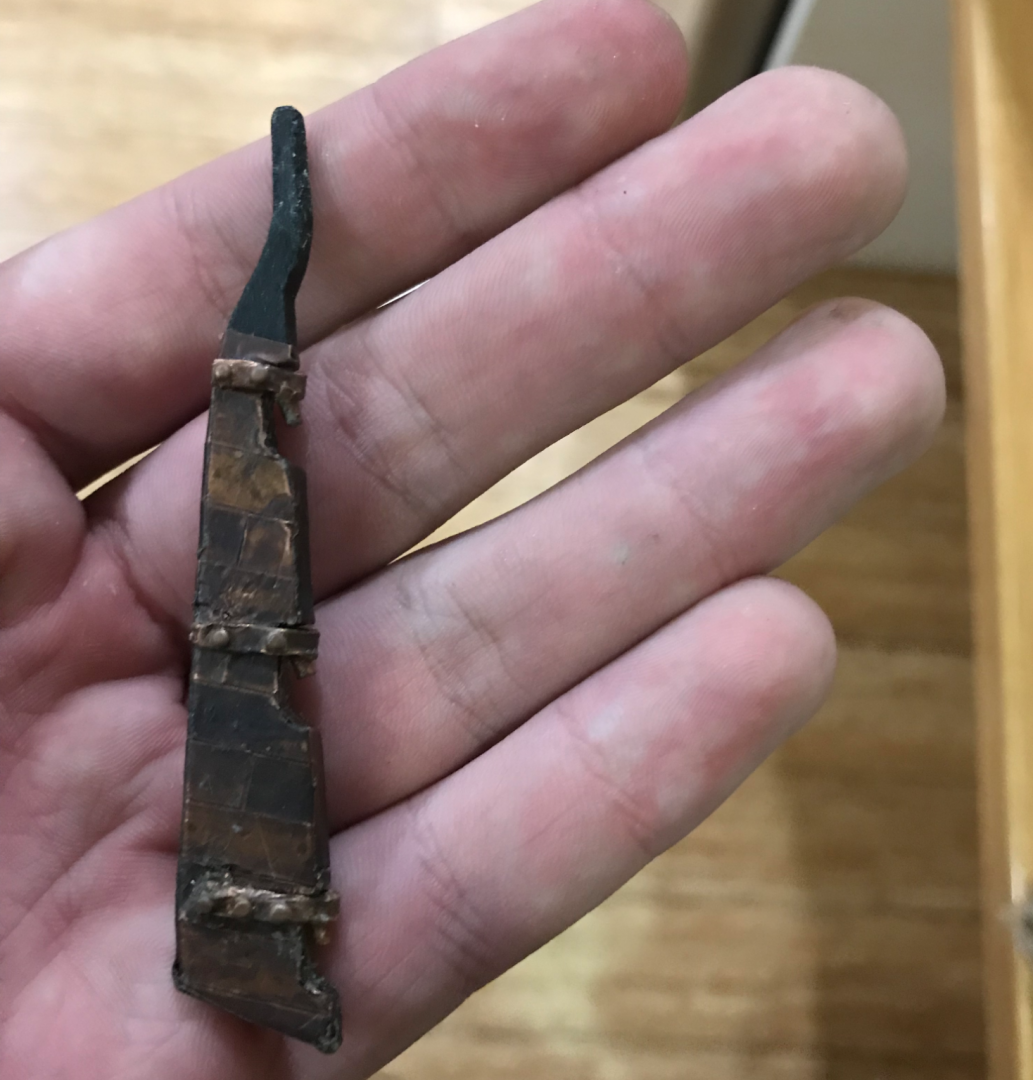
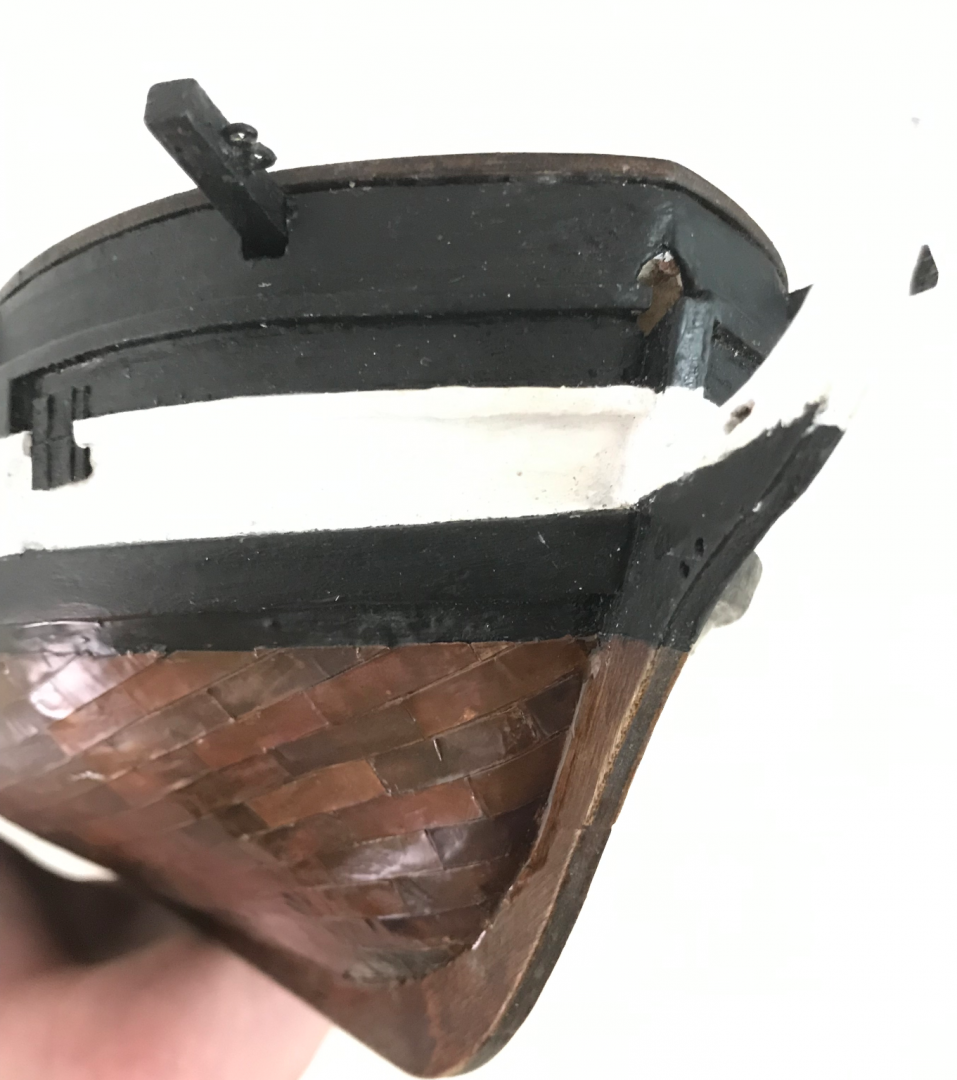
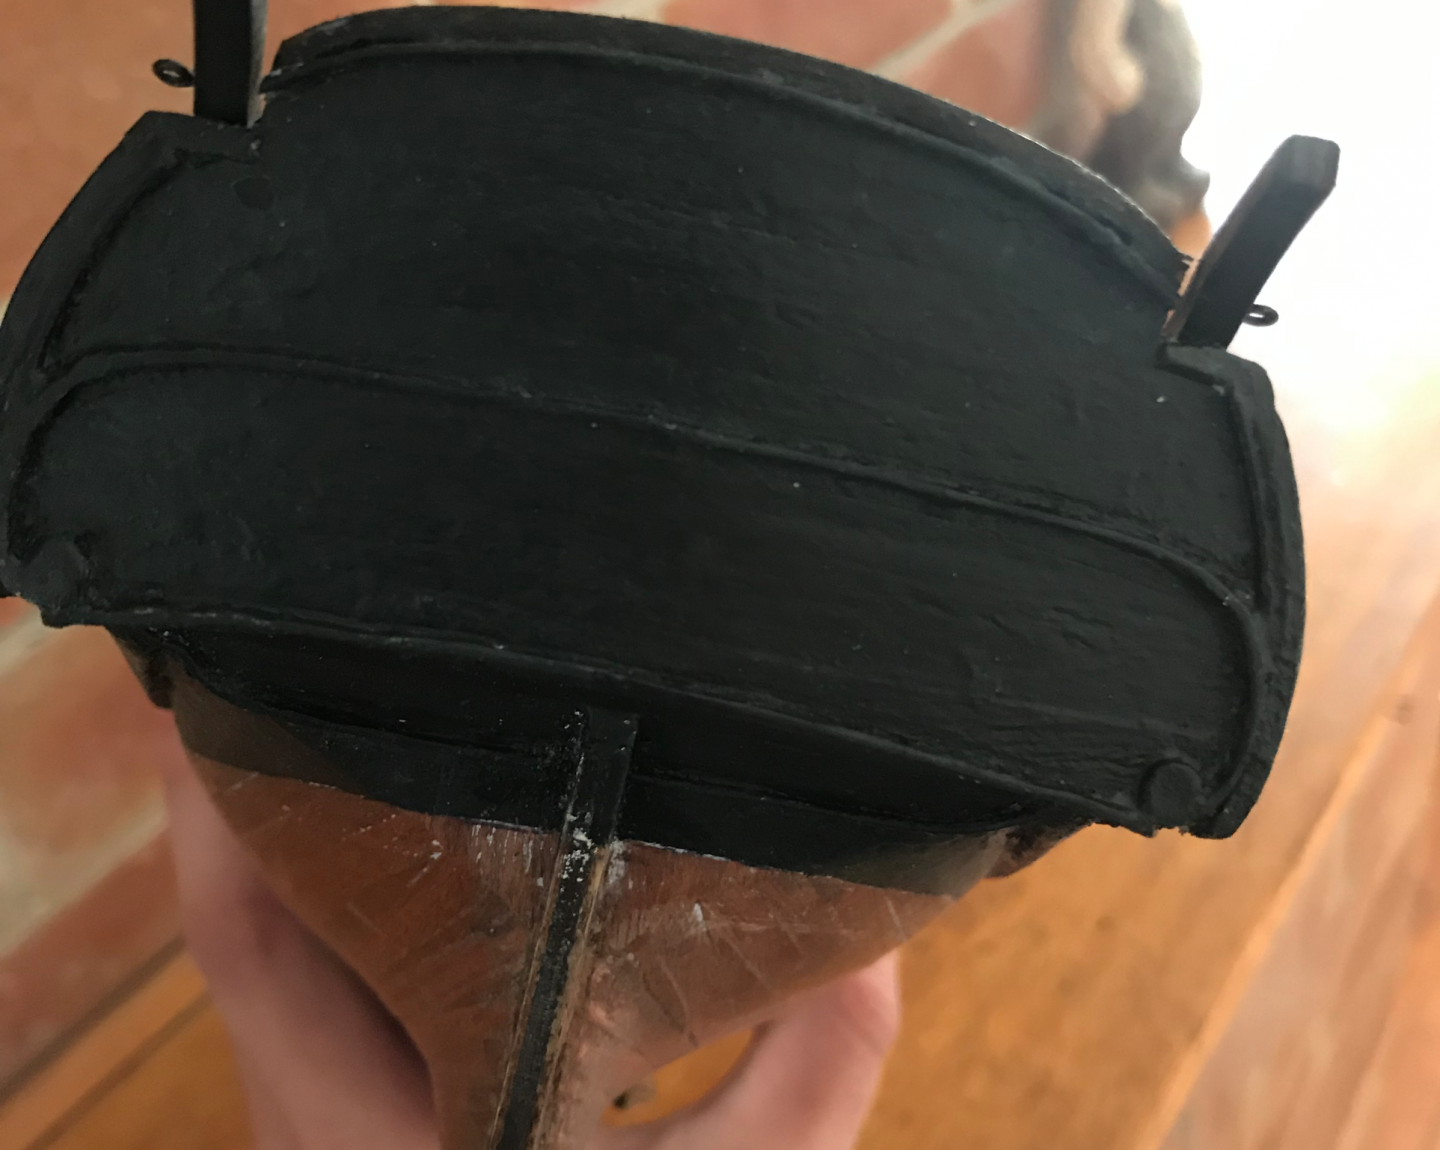
Hello everyone, and welcome to another episode of me slowly losing my sanity, today we will be talking about the rudder. I ground down the pintles and gudgeons provided to make the scale a little better and also drilled a few extra holes. Then after a very long night I was able to assemble the rudder hinges and attach them to the boat. This is where things go wrong… First and most obviously, this should not have been after the copper had been varnished. Drilling into the hull caused some of the varnish to flake as it did not cling to the copper properly. Second, while the hinges here do run parallel pretty well, they are not perpendicular to the sternpost as they should be. After some more painful back and forth, I decided that this was unacceptable and re-did it…another long night While this did correct the angling issue (mostly), the varnish flaking got worse (foreshadowing). Anyway, then I decided to ignore this little area of the boat and work on the bow.


-
Thanks AJohnson, it definitely adds a lot of time to the build, the experimentation was quite time consuming, but I feel it was worth it.
-
I’m very tempted to re-do mine now. Issue is, with the gun ports it’s impossible to angle them all, meaning that some will still have to be straight, and I’m not sure I like the look of that
-
Yeah I think the 5 needs to be closest to the entrance. That’s how I did it in mine. The instructions are a bit weird on this one. The prototype on the picture on the box looks right, but it’s different to the anatomy of the ship. I think the provided channels are the same as anatomy of the ship, but the instructions try and get you to follow how they’ve done it on the prototype which leads to some issues.
-
Thanks Techtonic! It did get a bit worse after this, but I’m still happy with it
-
Nice boats, they are very cute
-
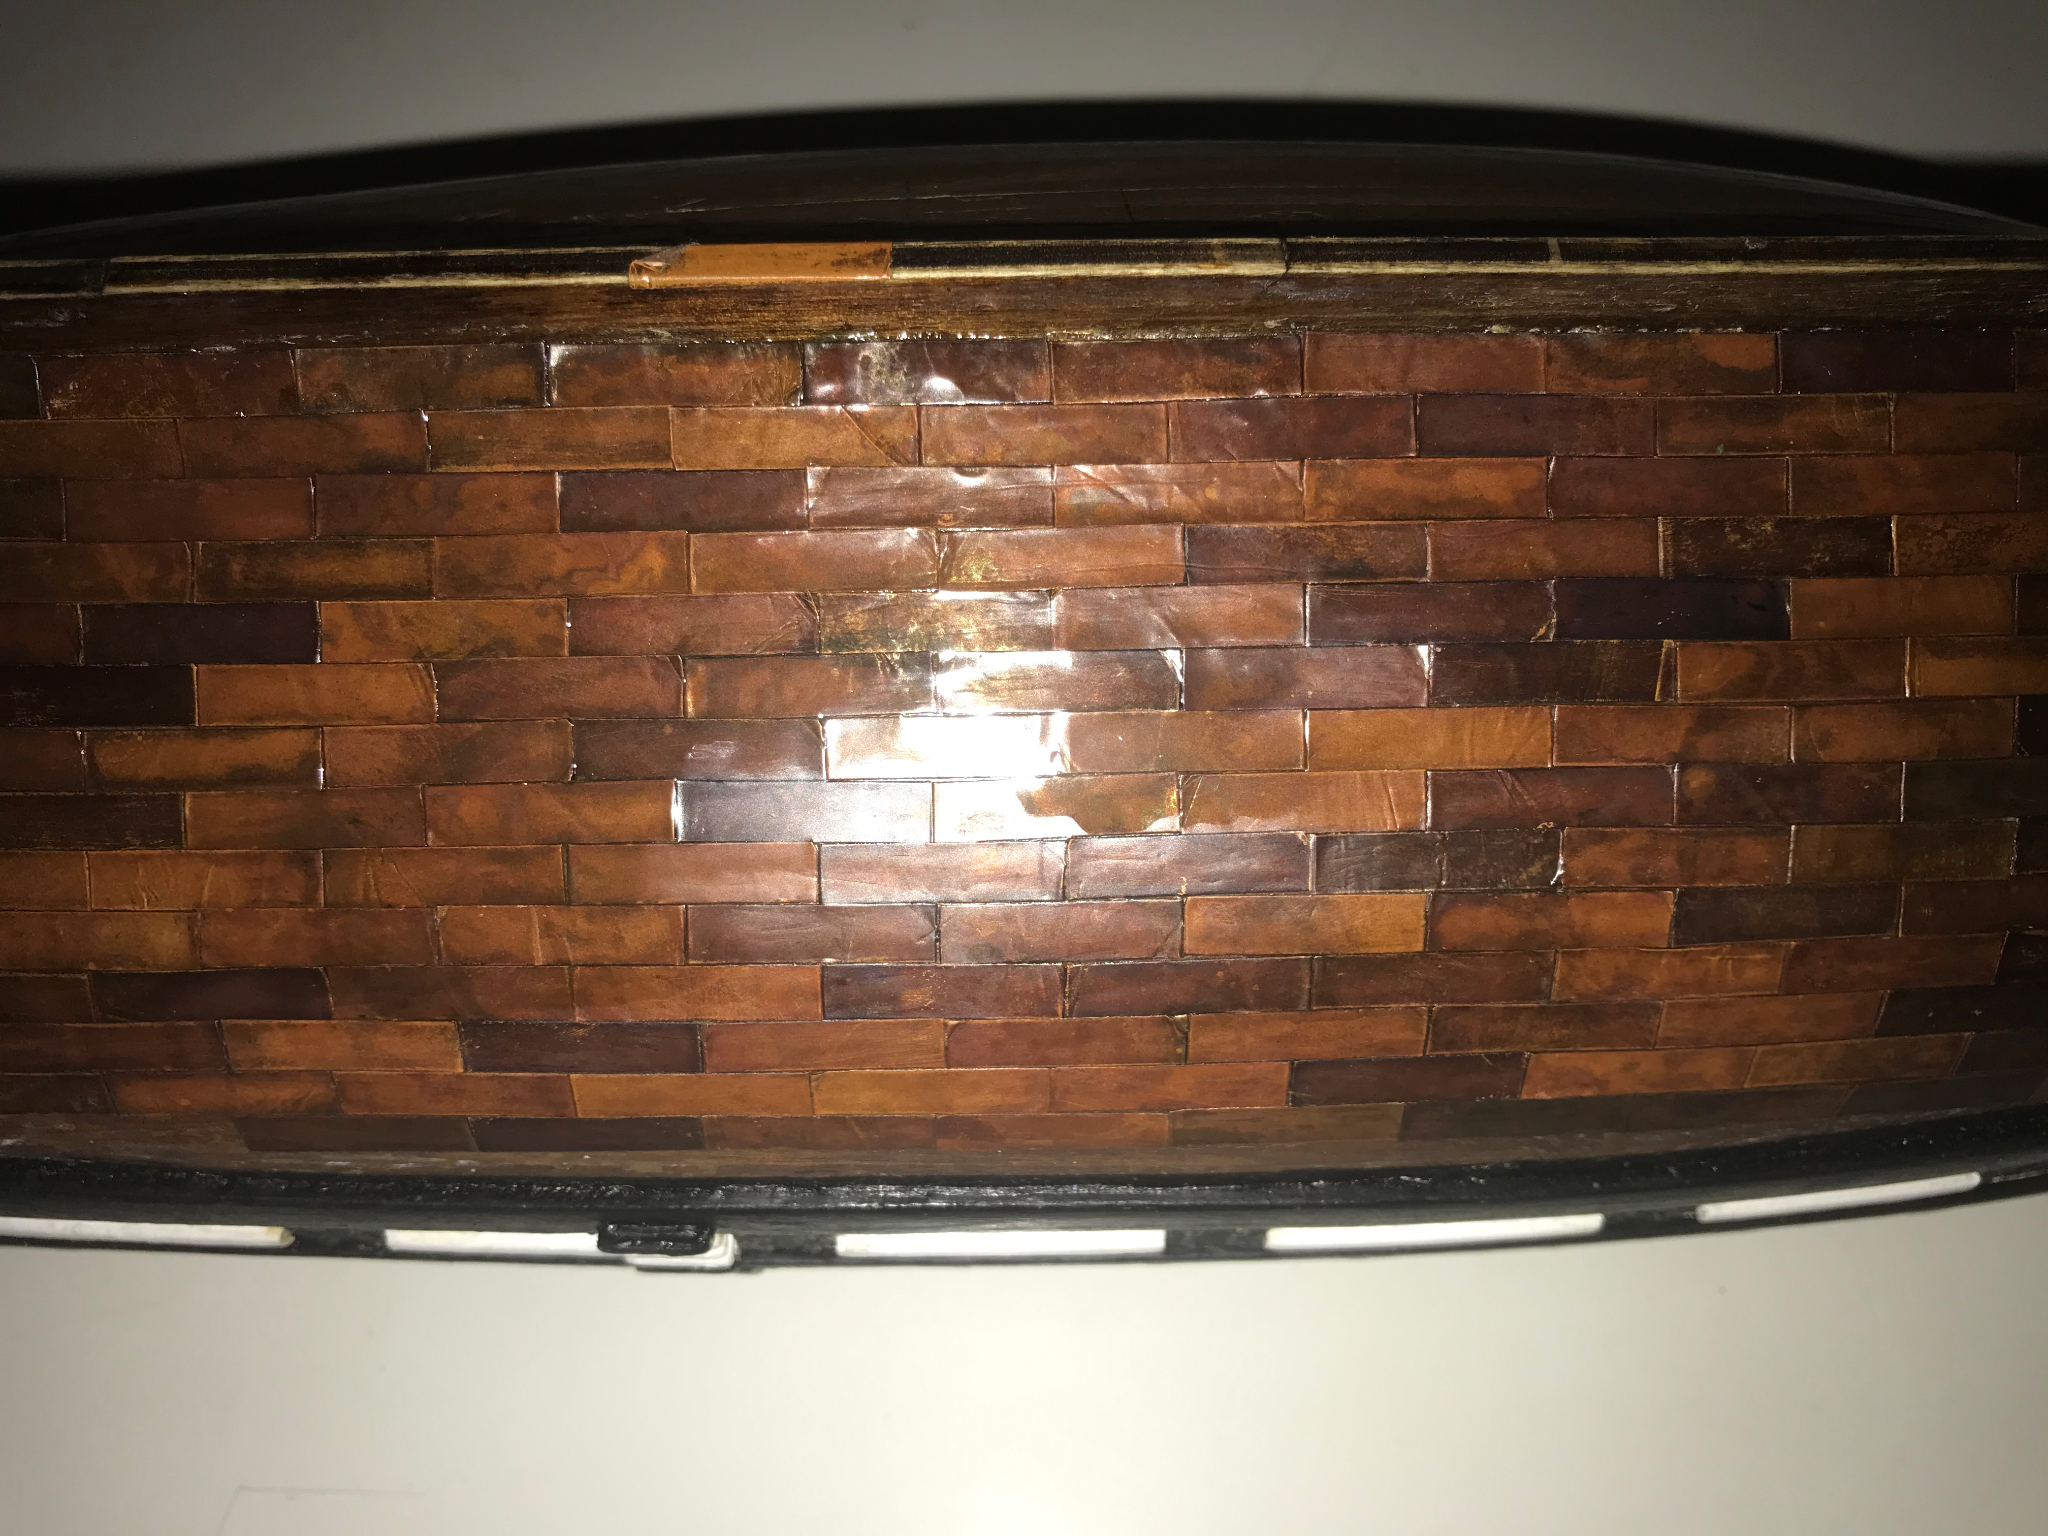
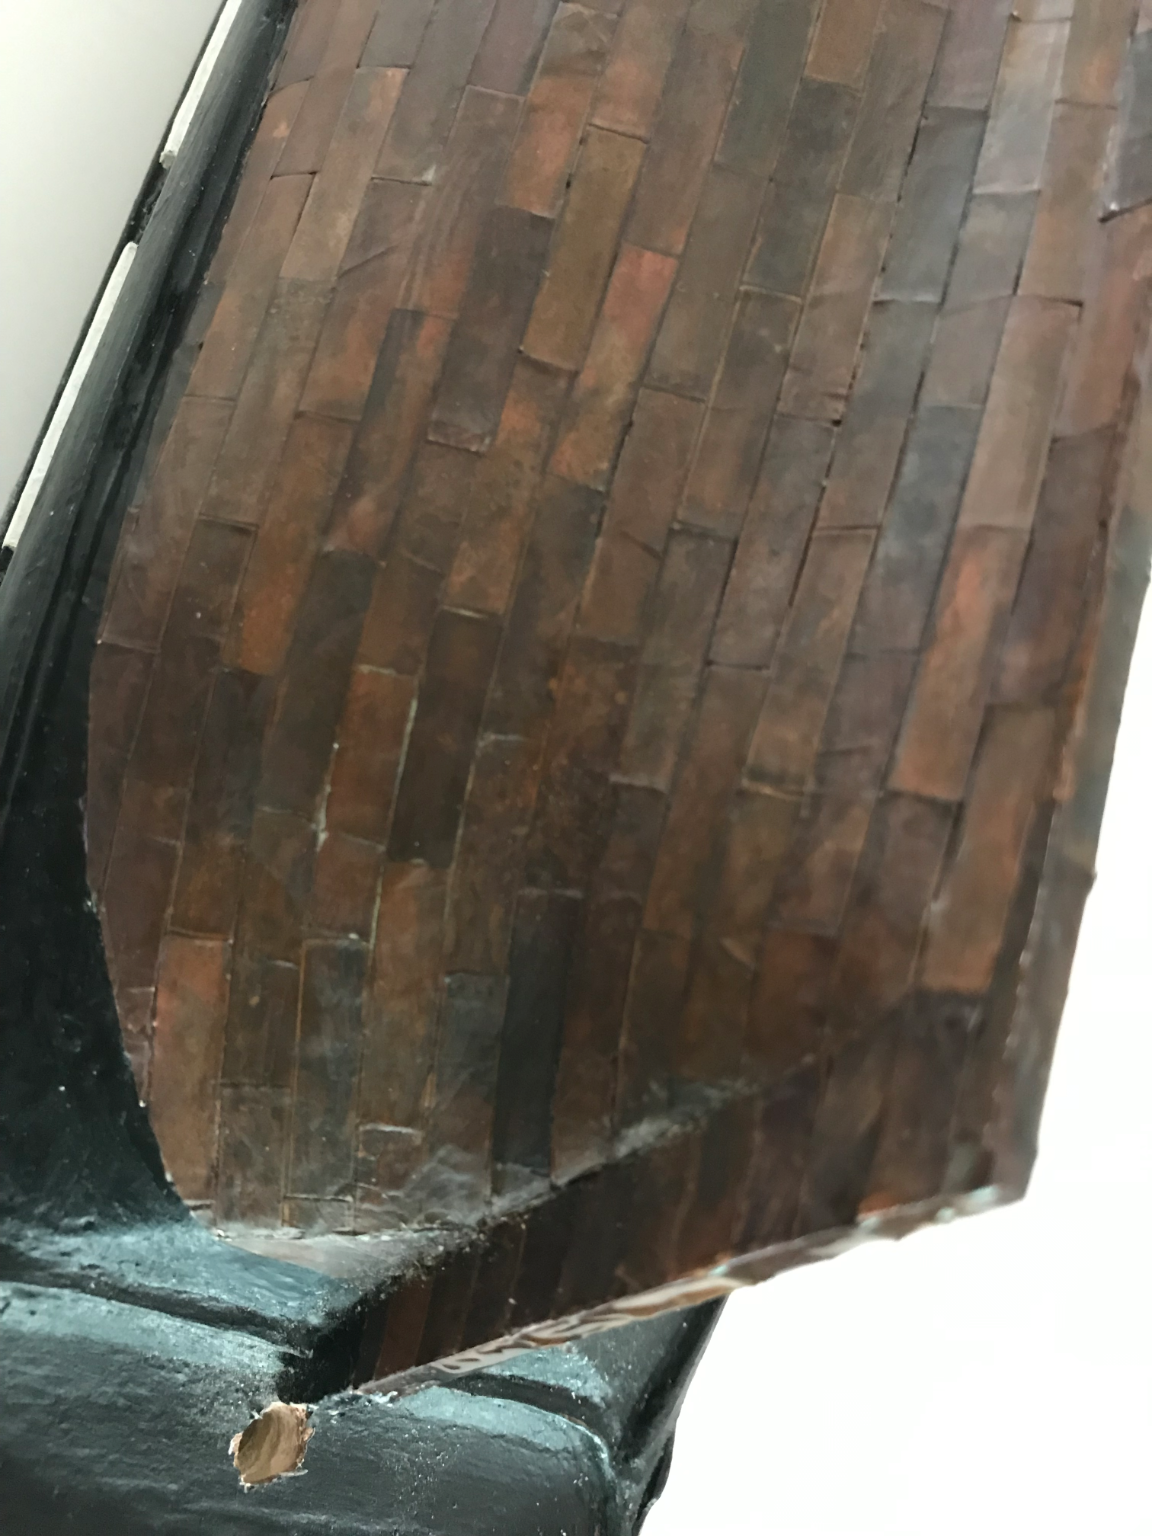
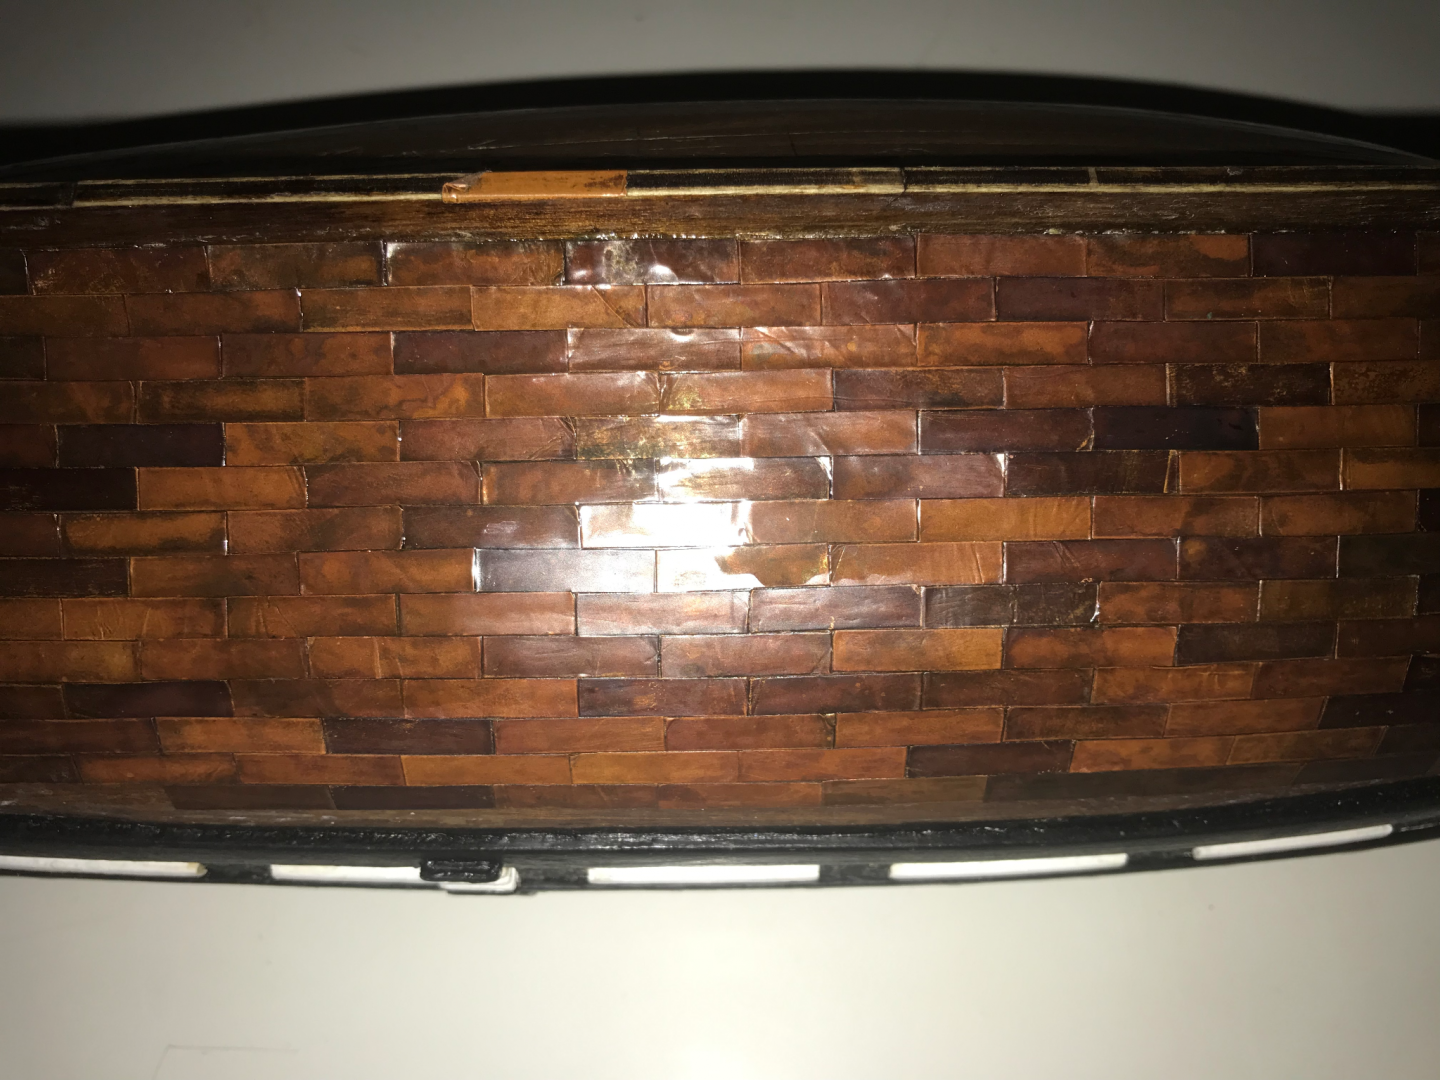
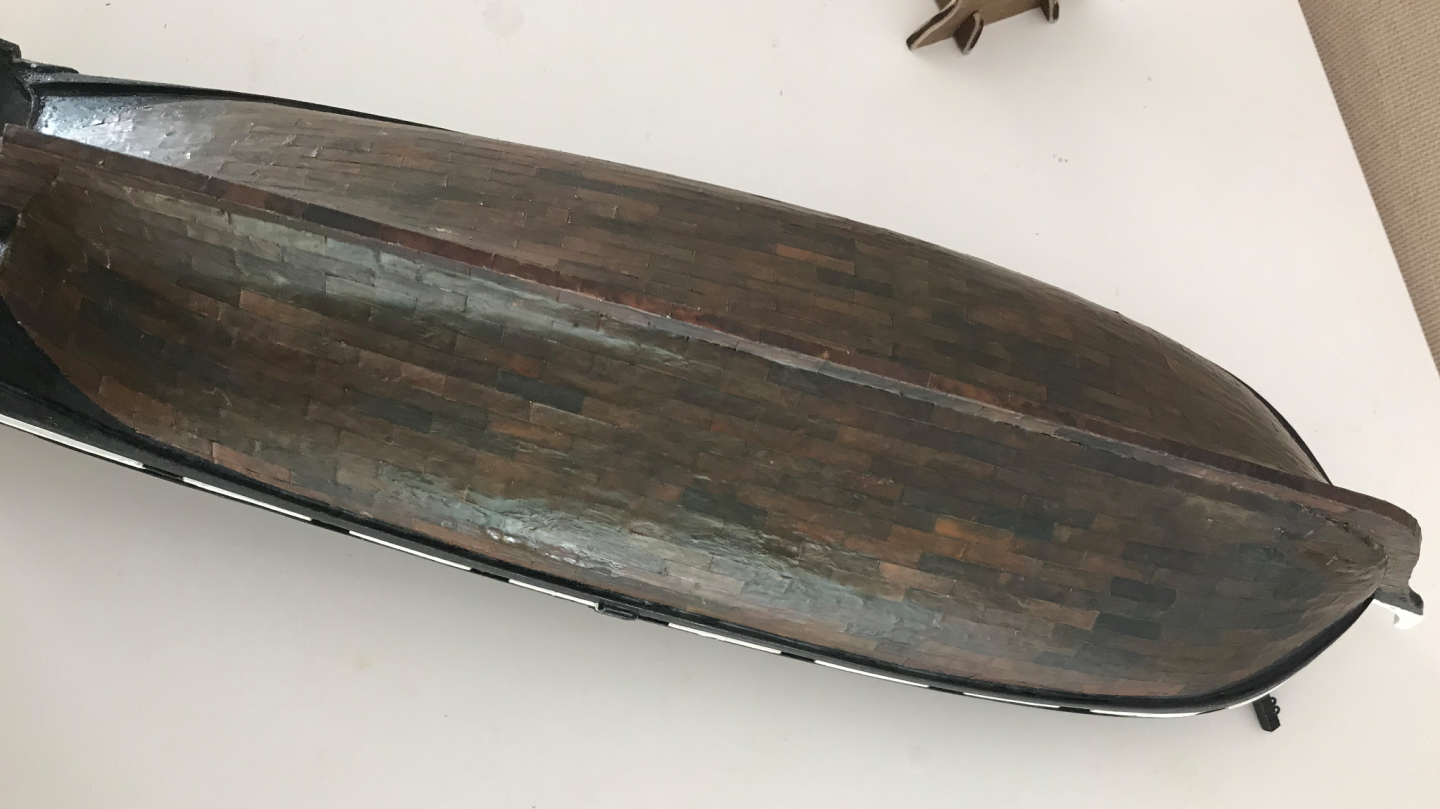
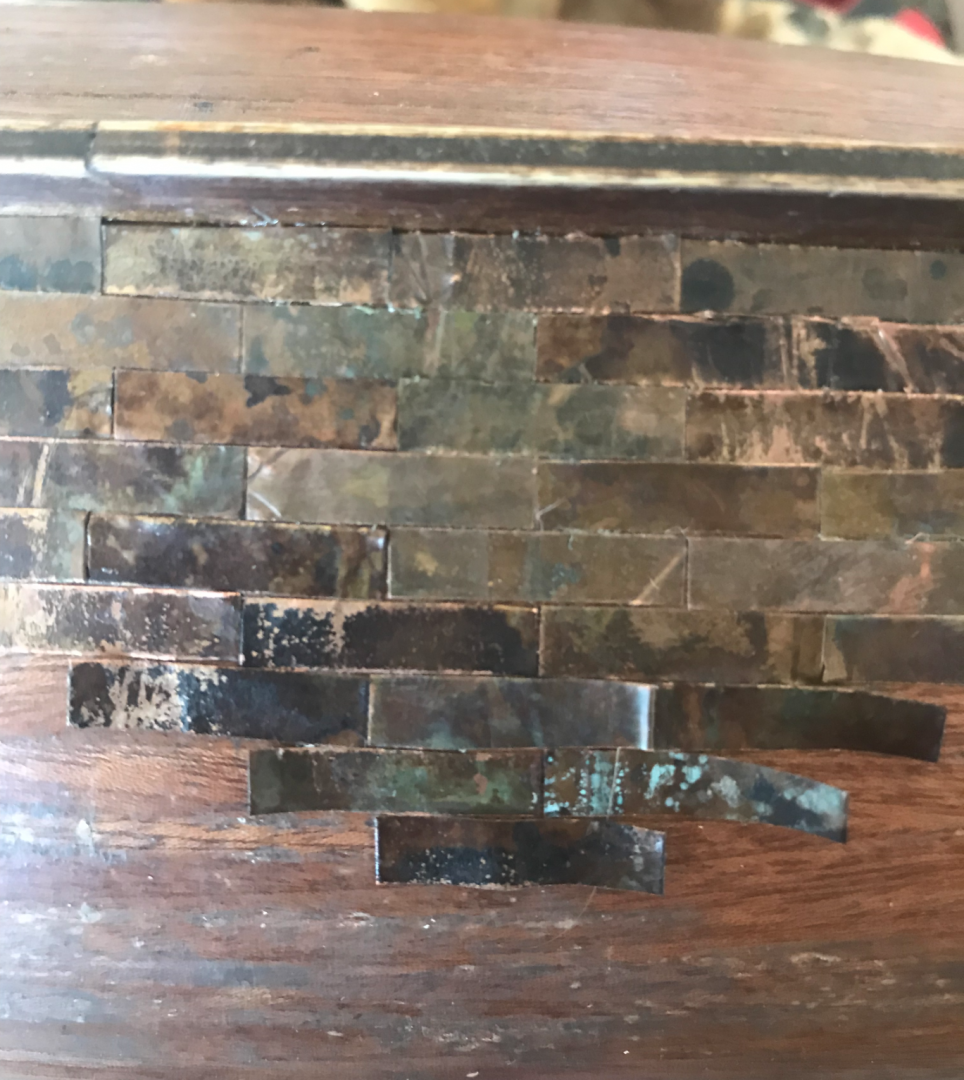
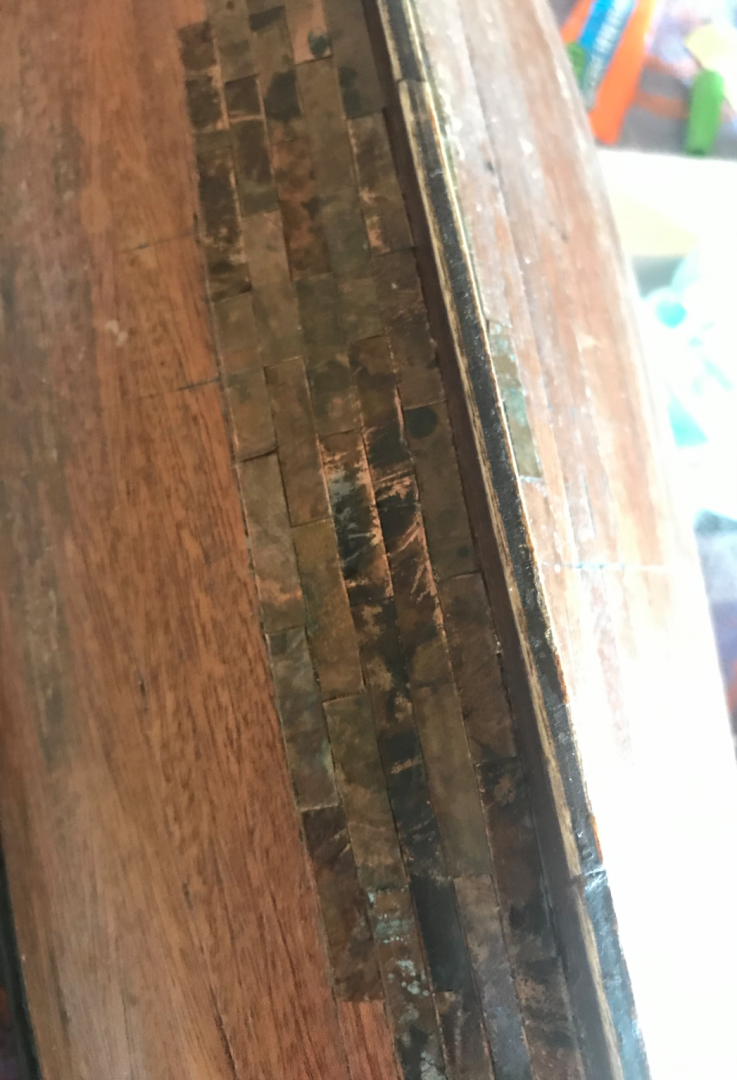
Okay, so now attempt 2 at the coppering. I bought liver of sulfur in the gel form from a jewellery store online. The gel form is better as it doesn’t lose potency quickly like the solid form does. https://koodak.com.au/products/liver-of-sulphur-for-silver-copper-brass?variant=30180608397. There are some very useful tutorials online on how to use the stuff and what to be careful about, I’ll outline the main points. I added about 3 mL of the gel to a cup of boiling water from a kettle (not rolling or bubbling just steaming). It's good to let the water cool a bit before adding the gel. If you boil the liver of sulfur, you get toxic sulfur dioxide, so be careful. The hotter the water is, the quicker and deeper the patina will develop. I tried colder water, but it ended up more purple than brown. You have to be quick to get the copper done quickly as the water will cool and the strips dipped later will be a different colour to the ones dipped earlier. Then I stuck the copper in for a couple of seconds, as soon as there was a colour change (again, you need to be quick, a second too long will make it too dark), I took it out and stuck it in a bicarbonate bath. The bicarb bath is meant to halt the reaction, but it might change colour after it dries a bit. I went through a few trials at different temperatures and leaving the copper in for different times to get the colour I wanted. I set up a bit of an assembly line, with the copper strips and then a rectangular container with the liver of sulfur solution. Then I stuck in maybe 3 or 4 strips, by the time the last one was in, the first one was ready to take out. Then I had the bicarb bath and stuck them in straight away. It doesn't matter how long they stay in the bicarb bath; they will still change colour when they are taken out. After the plates were on the ship, I lightly buffed it with some fine steel wool to make it a bit more orange again (careful to not turn up the corners of the plates). One side was a little too dark and the steel wool made it similar to the other side. This was my first batch of plates and it did come out a bit too dark and purple, I think I left it in for a little longer than the other side. Anyway, it looked different after some varnish. Please note, this is a mistake, do not repeat what I have done. The varnish is not a good sealer for the copper (this photo the varnish is still wet). I'll show in a couple of posts, but there were many problems with using wood varnish to seal the copper. The liver of sulfur does not dull the plates and the patina is still shiny, so it does need some kind of dull coating to look accurate at scale. In terms of actually cutting the plates and placing them, all I can say is; have a sharp blade, be patient and don't be unwilling to take plates off if they are wrong. Anyway, time for photos now...


-
Hahaha, no, I’m sure it breaks the same way. I just found the glass to be more effective if you can get a shard with a decent edge. I did try with a razor blade, but didn’t get the same results. Maybe my blade was too blunt, it does need to be quite sharp to work and smashing some glass gives you lots of cheap little disposable blades.
-
To get rid of the smudging, I’ve found that a good way is to use a shard of glass. Go out and smash a glass jar with a hammer and use one of the shards to scrape your deck. It makes it very clean without destroying the grain of the wood or taking off the caulking. An eraser could just make the smudging worse, it doesn’t work great on wood. You could also try methylated spirits or acetone.
-
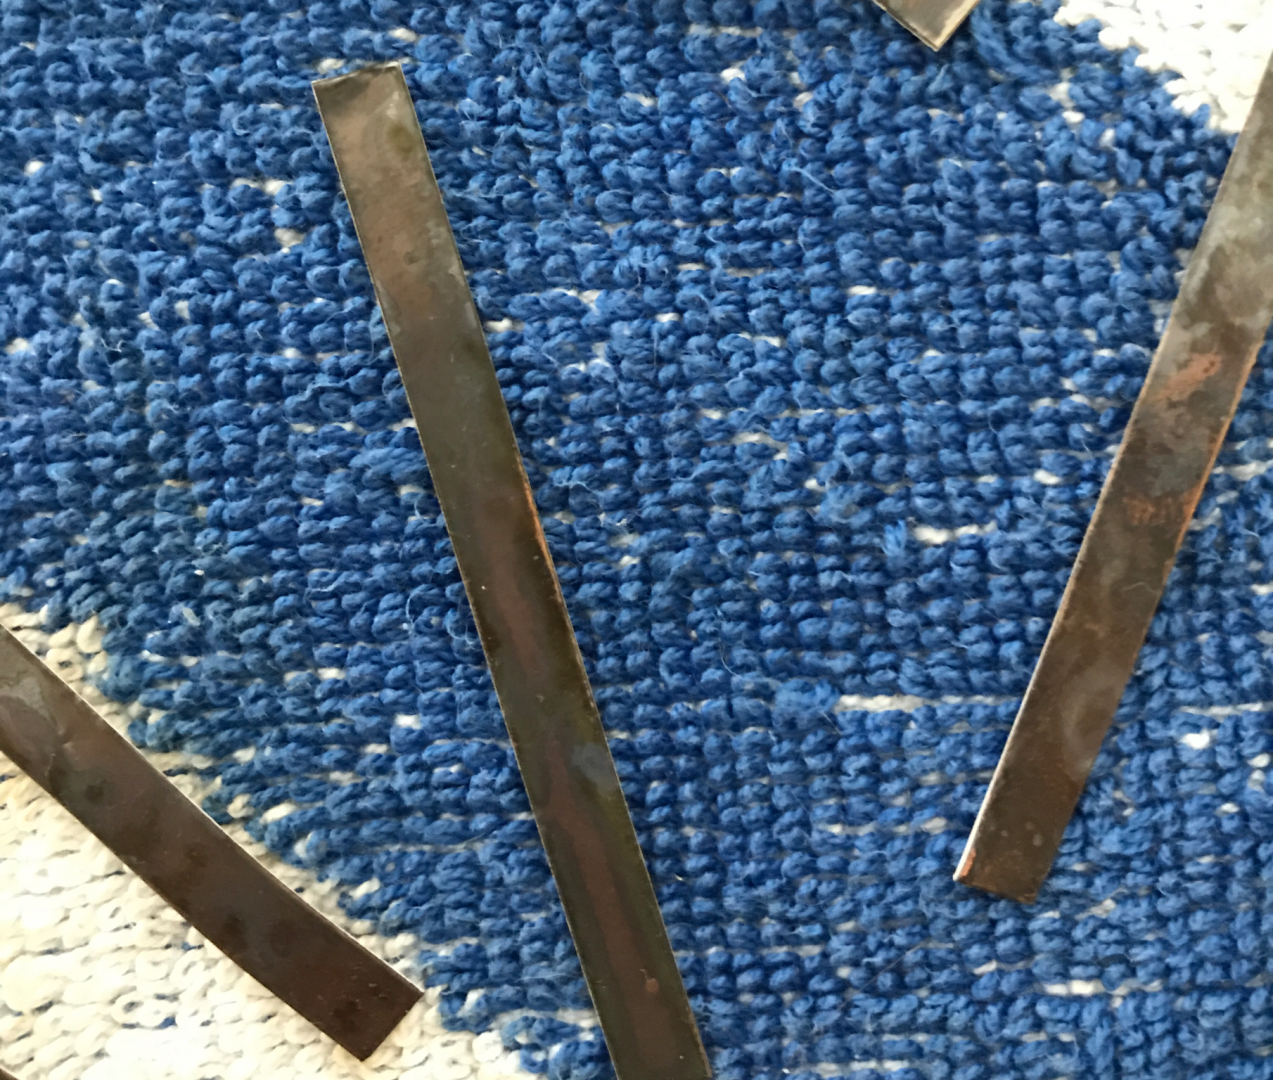
Okay, so now I’ll talk about my first coppering attempt, which did not go that well. First, choosing material; I initially was unsure about using copper tape as I was worried it would be too thin and not sticky enough. I was hoping to just find a thin sheet of copper, which I would then use to cut the plates out of. Eventually I found a wide copper tape from an electronics supply store. I then attempted to patina them with ammonia fumes. To do this, I suspended small pieces of the tape over a container of the liquid ammonia. I put a lid on the container and allowed the fumes to darken the copper. This gave an extremely inconsistent patina ranging from almost black to blue-green. This may be what some people are looking for, but I wanted a dark brown patina. I am sceptical that the plates would have been installed shiny on the Beagle. This was a time before rapid transport of materials and the plates would have been unlikely to remain clean and un-oxidised on their journey. Someone who knows better may be able to correct me, but this is just my feeling. Also, more importantly, I did not think that the shiny copper plates would have fit aesthetically with the Beagle as a working boat. I feel it better suits a large first rate ship of the line than a somewhat ill-equipped survey ship from an unpopular line of naval ships. Also, cutting the plates out of this copper tape was very difficult. It was a constant challenge to get them all cut to the same width and evenly. This also resulted in a lot of handling and a loss of patina. Some of the plates were glued on using contact glue as the ageing process caused the paper backing to fall off and the glue to lose its strength. Once I realised that I was unhappy with this, it was back to the drawing board. I had also tried bicarb soda to age it (which did nothing) and a copper carbonate and ammonia blackening solution (which also did not give the desired effect). I did some more research on patinas and came to the conclusion, that to get the patina I really wanted, I needed to use what the professionals use, which is liver of sulfur. I also bought some 5 mm wide copper tape from an electronics store so I wouldn’t have to cut the plates out of large copper pieces.
-
The stones on you sir for attempting this as your first model... It looks incredible so far. With the coppering, if you want a penny brown look, liver of sulfur is the way to go. The patina is affected by how much the copper has been handled and any glue will block it. I'd guess that's why you're better off ageing it before installation. Although on the other hand, when you install the aged plates, you do lose some patina. This would look better than having finger prints and glue spots totally blocking the patina from even developing.
-
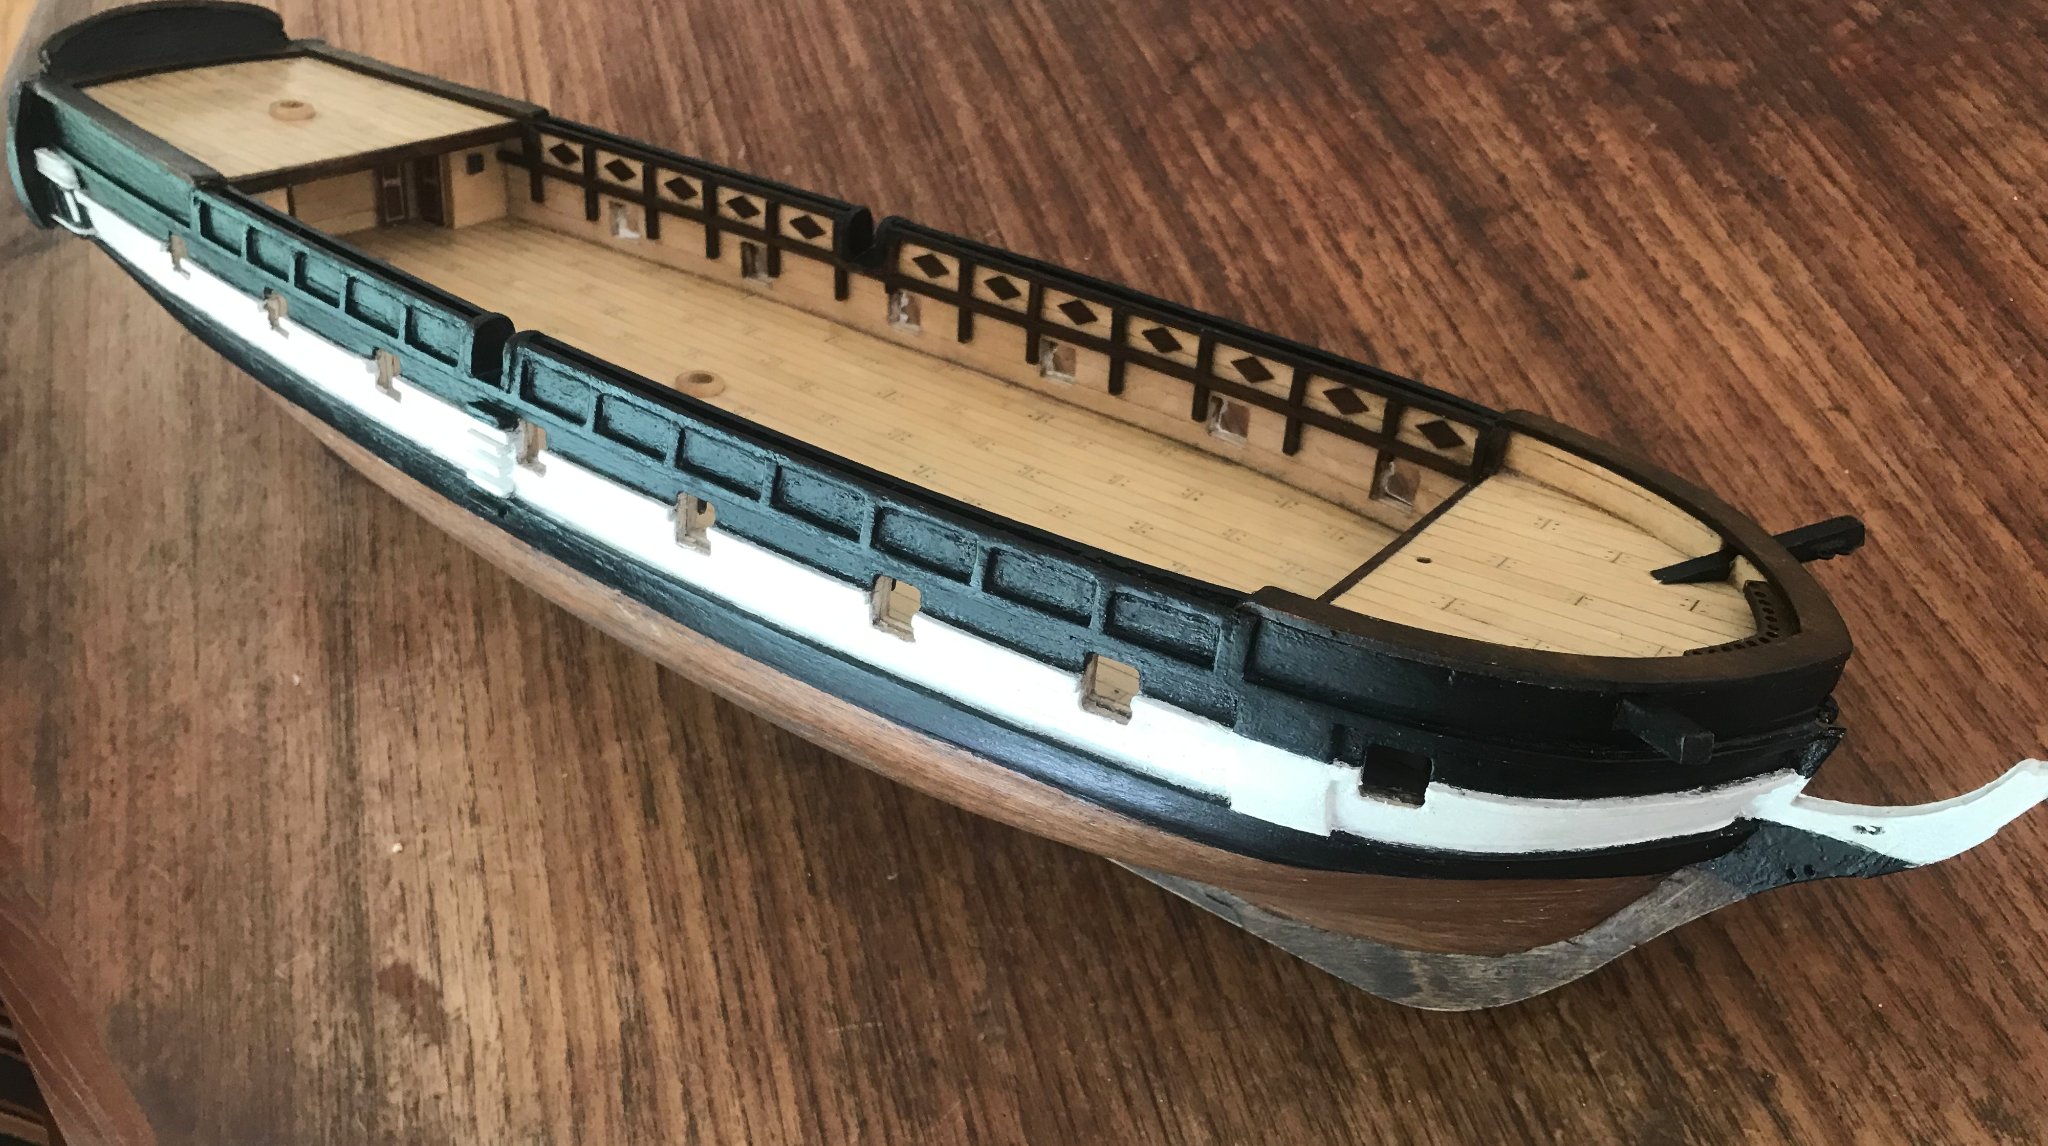
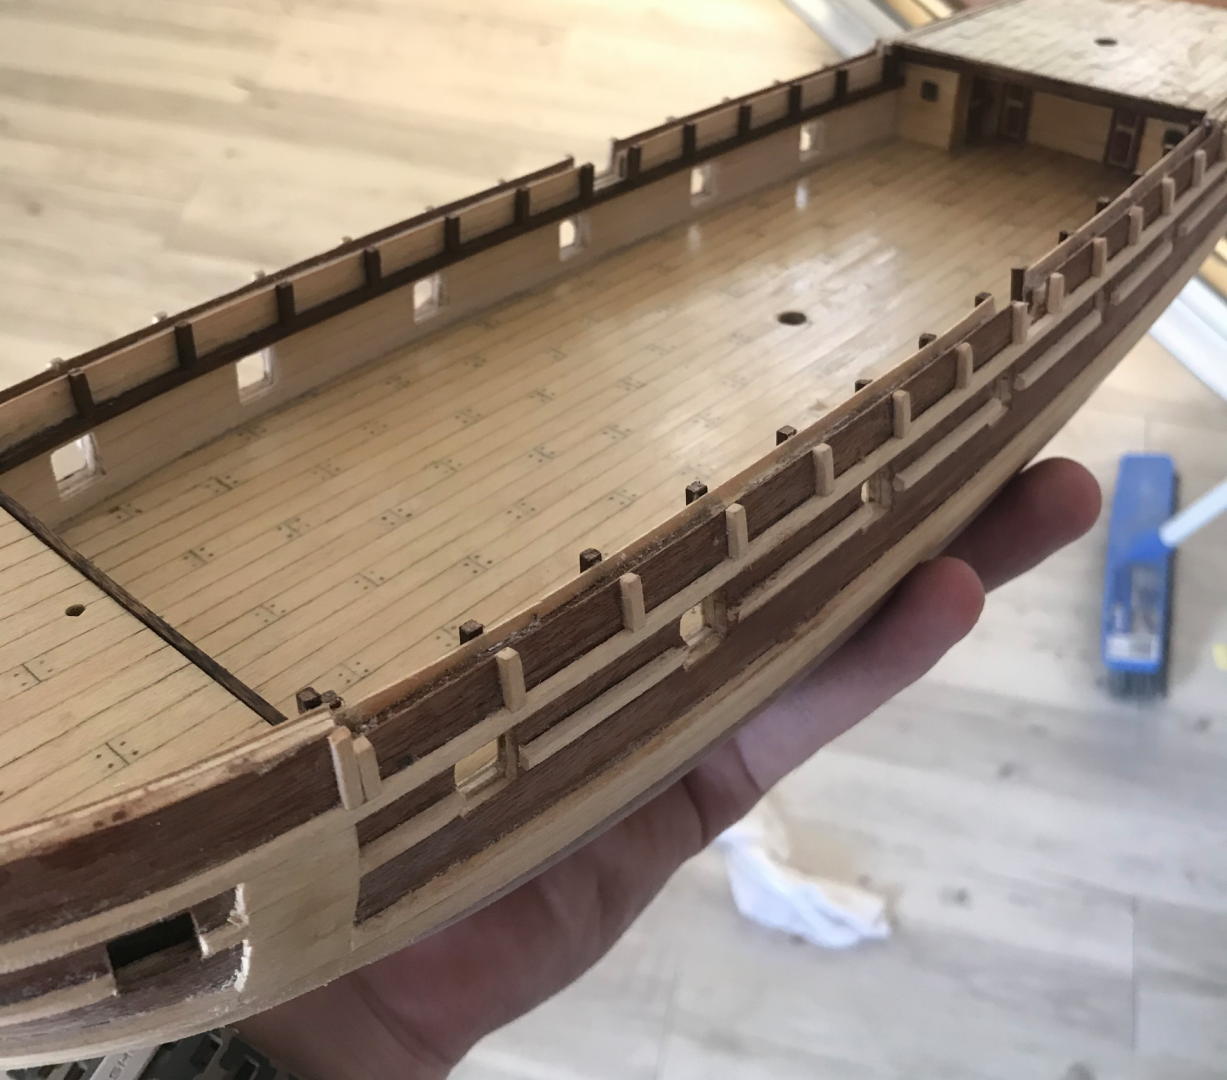
Also, a couple of other touching up things; I cleaned up the transom again, I think this is where I left it. And of course; the deck. I finally removed those pencil nails. I stripped the deck again and scraped the pencil marks off with a blade. I like it much better this way. I'll have to try simulating nails more accurately in a later build (most likely the Endeavour).
-
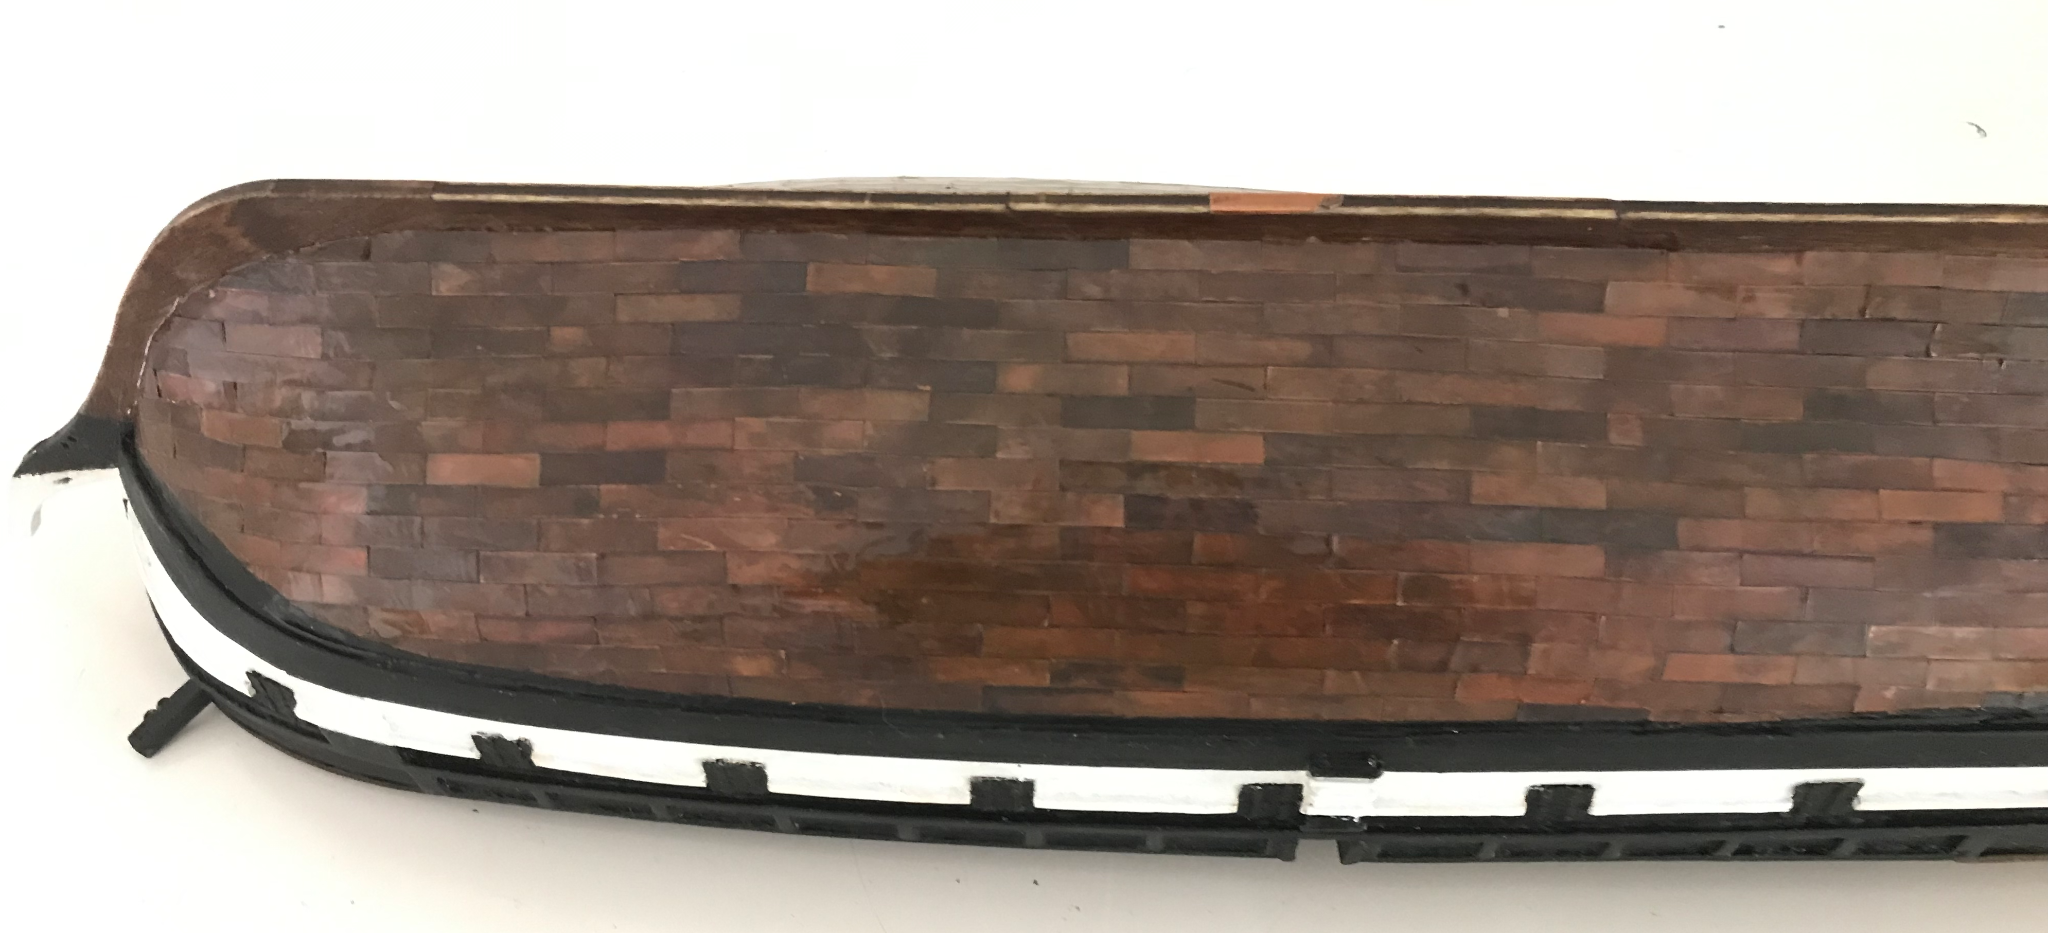
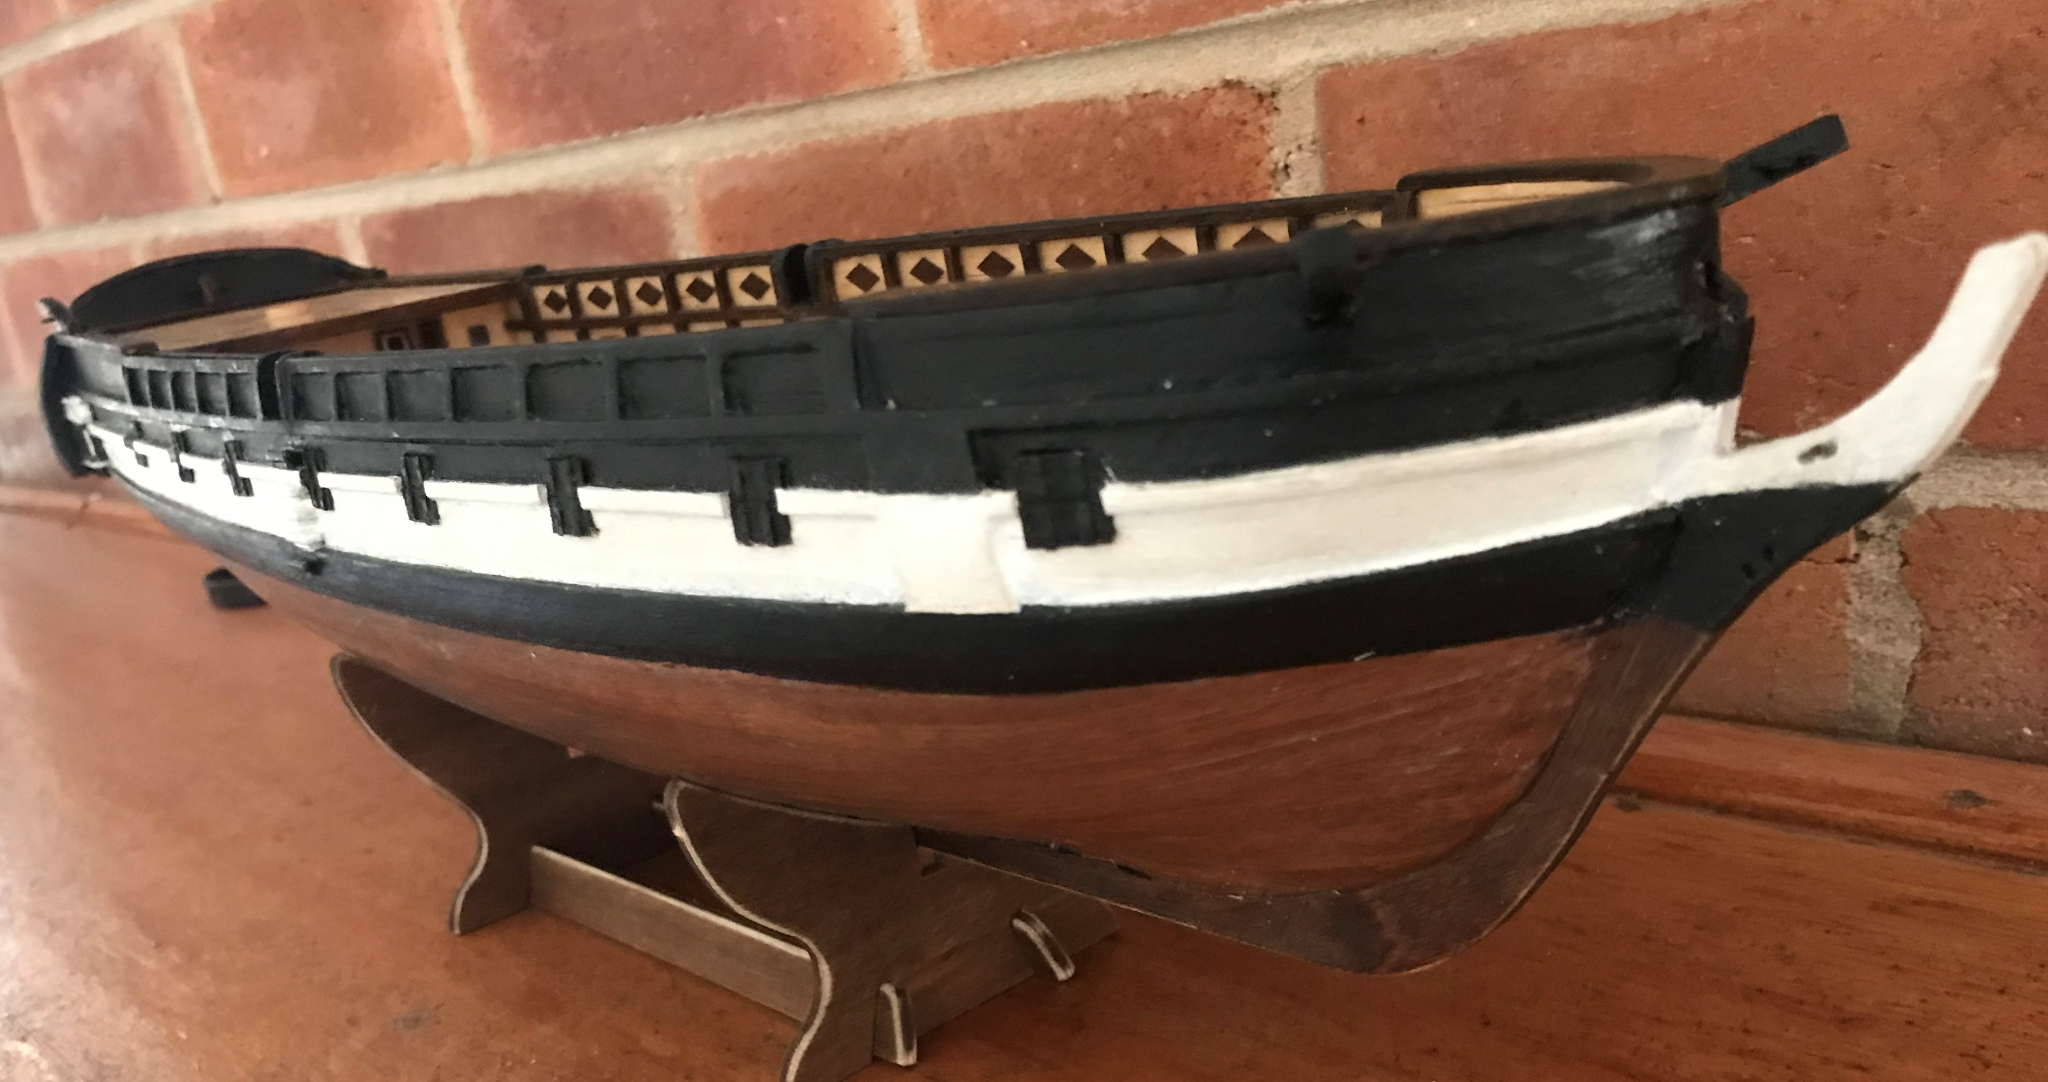
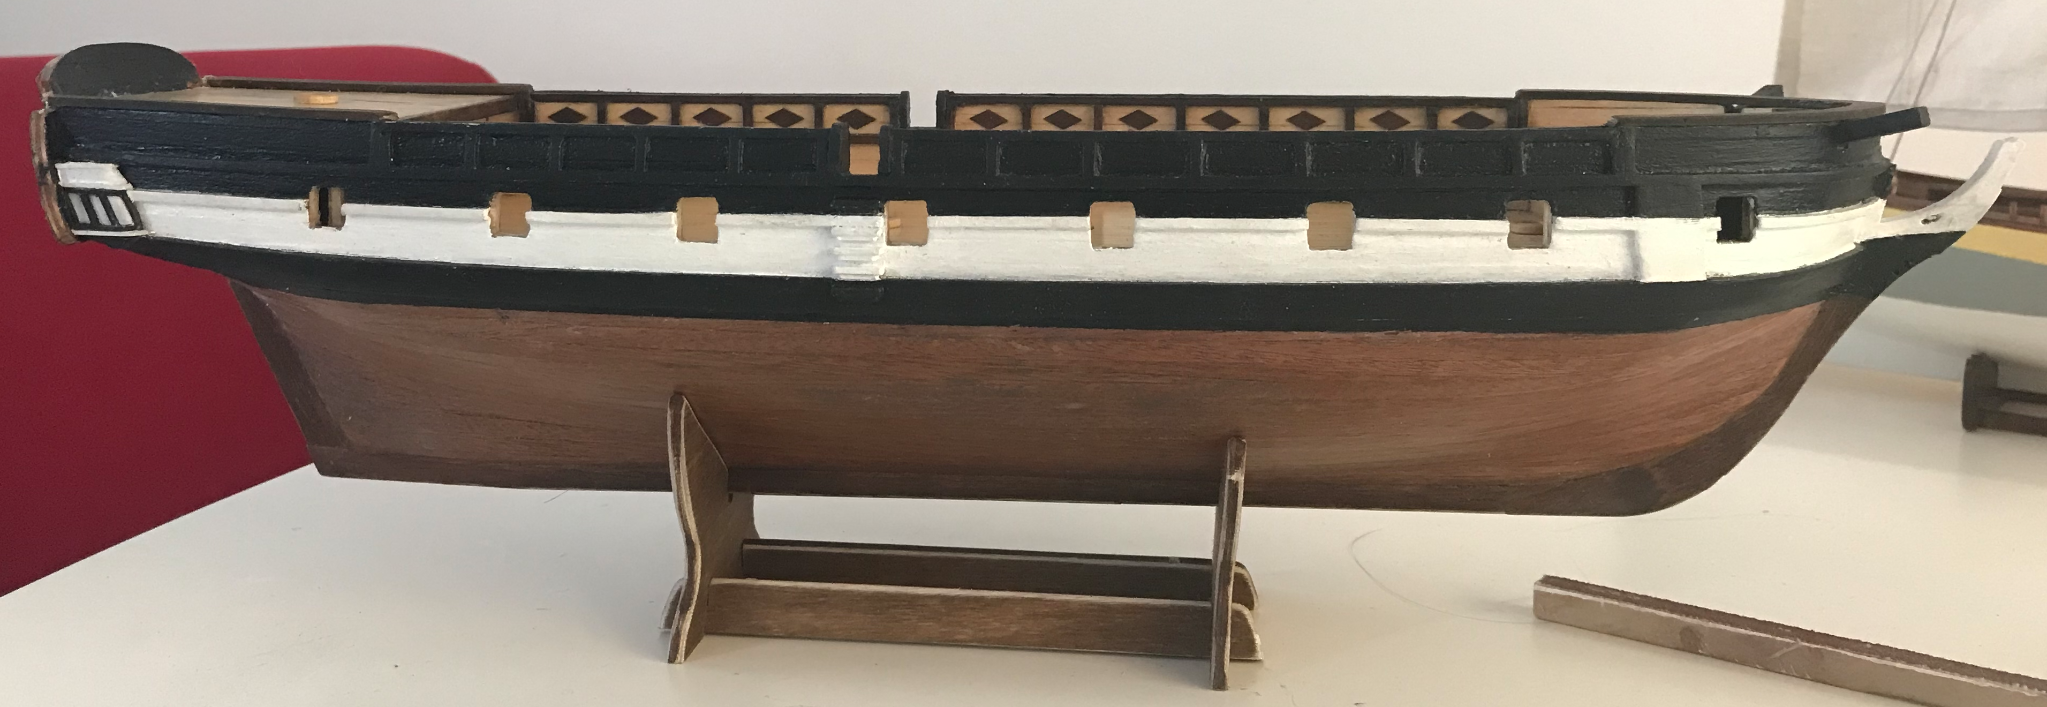
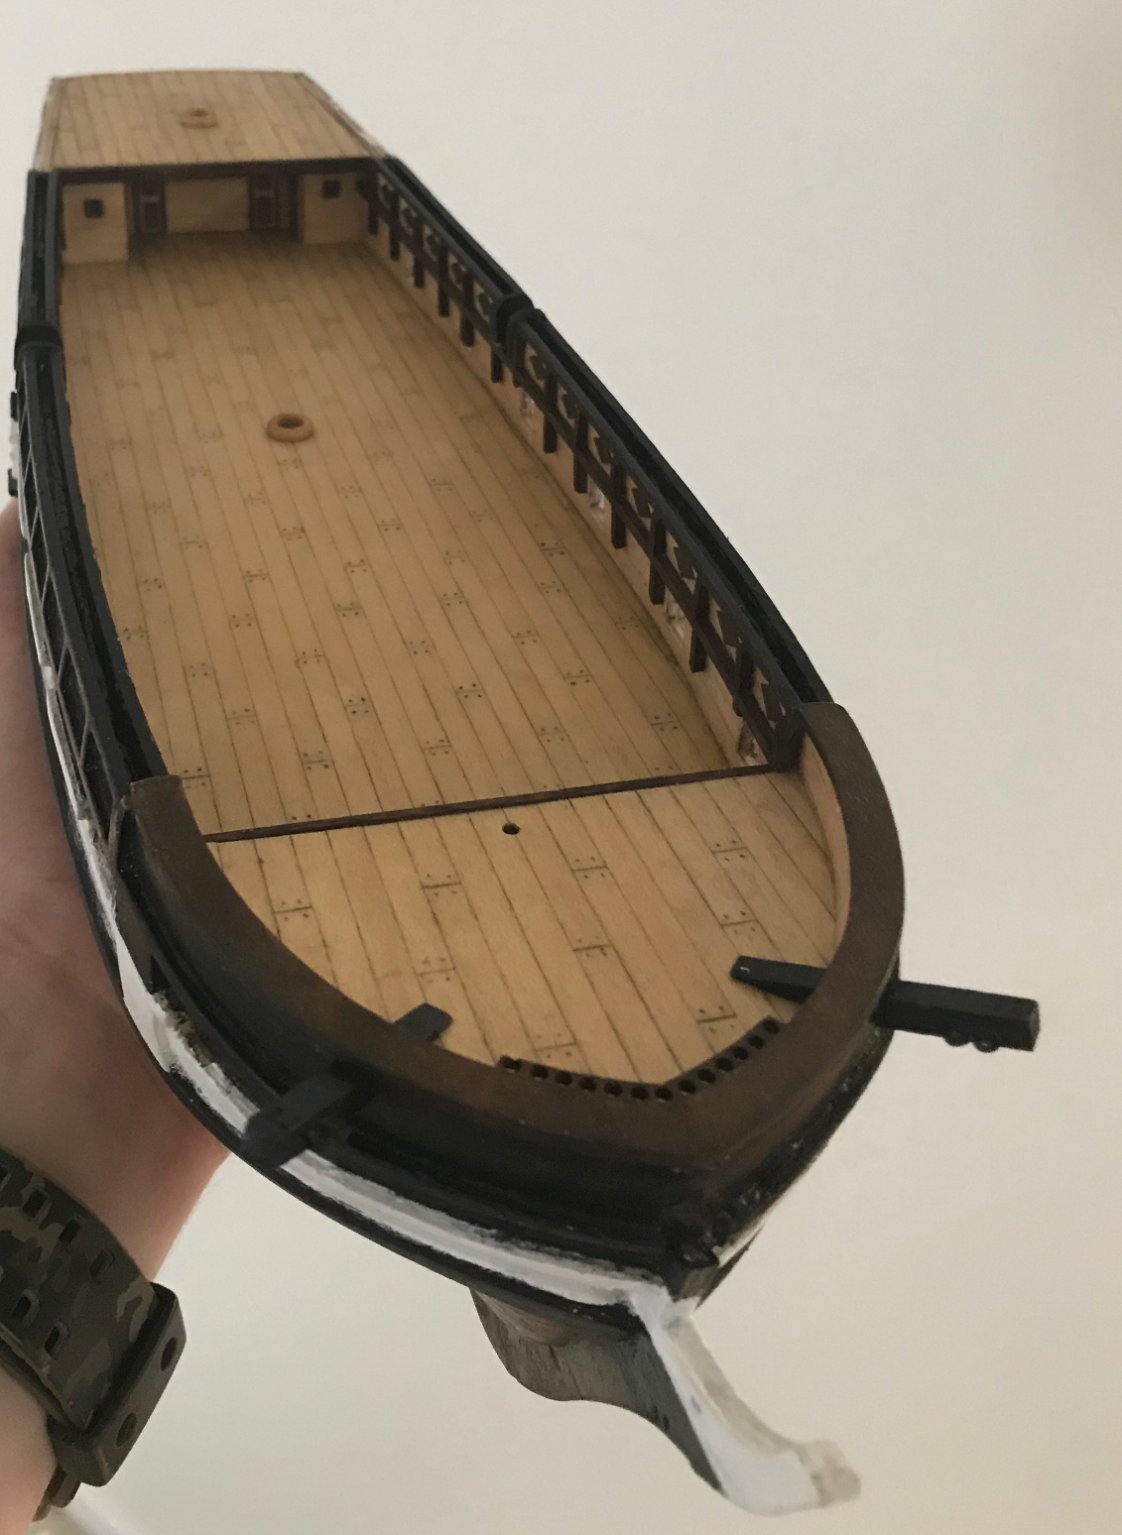
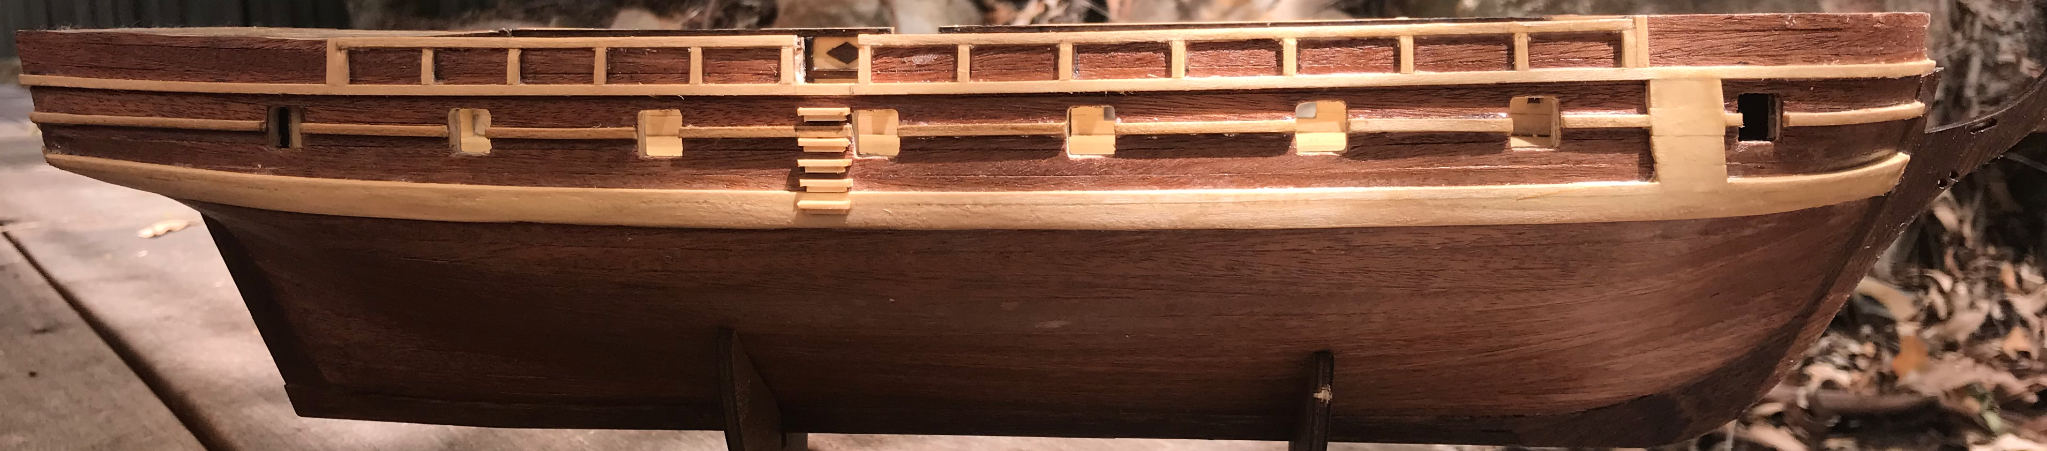
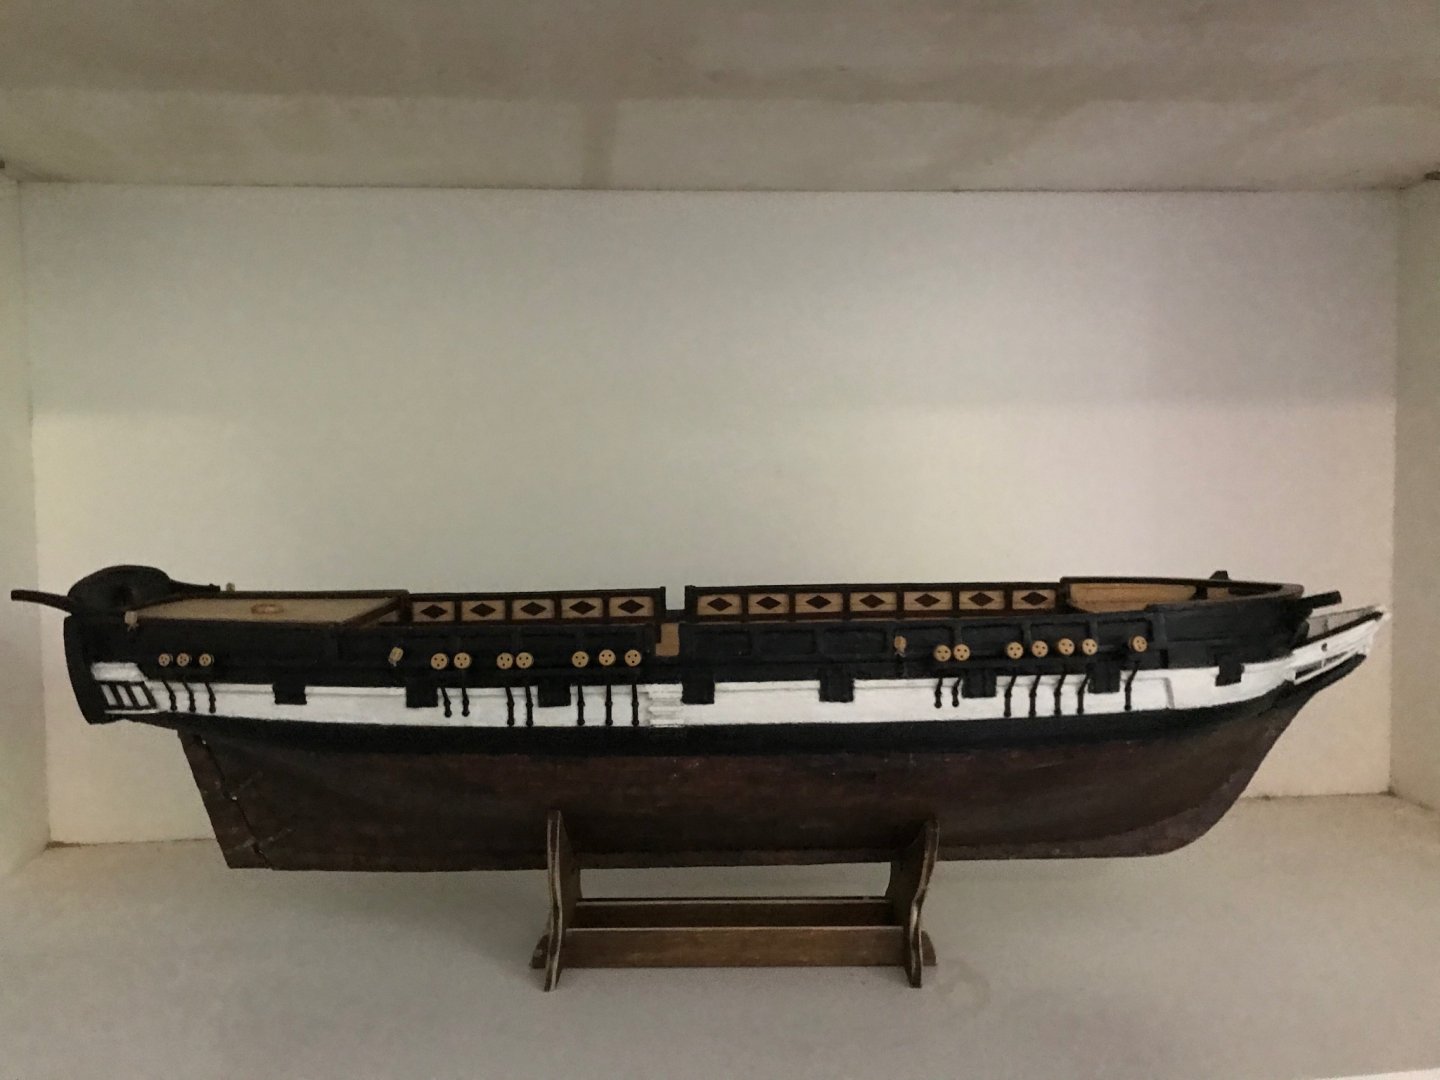
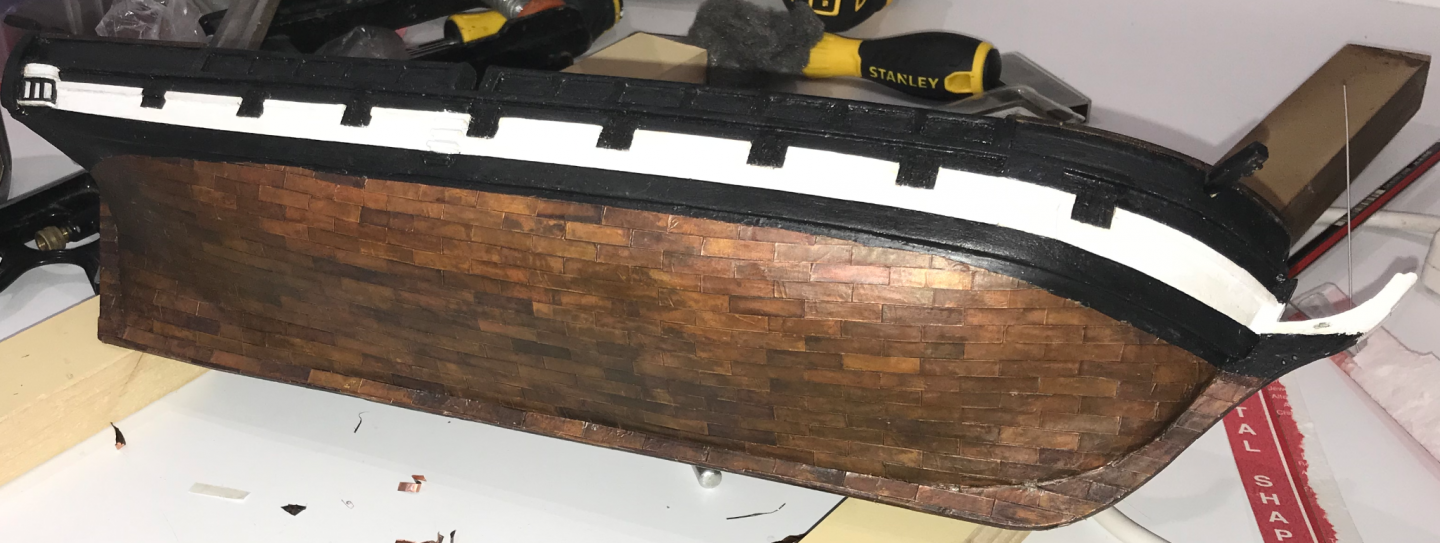
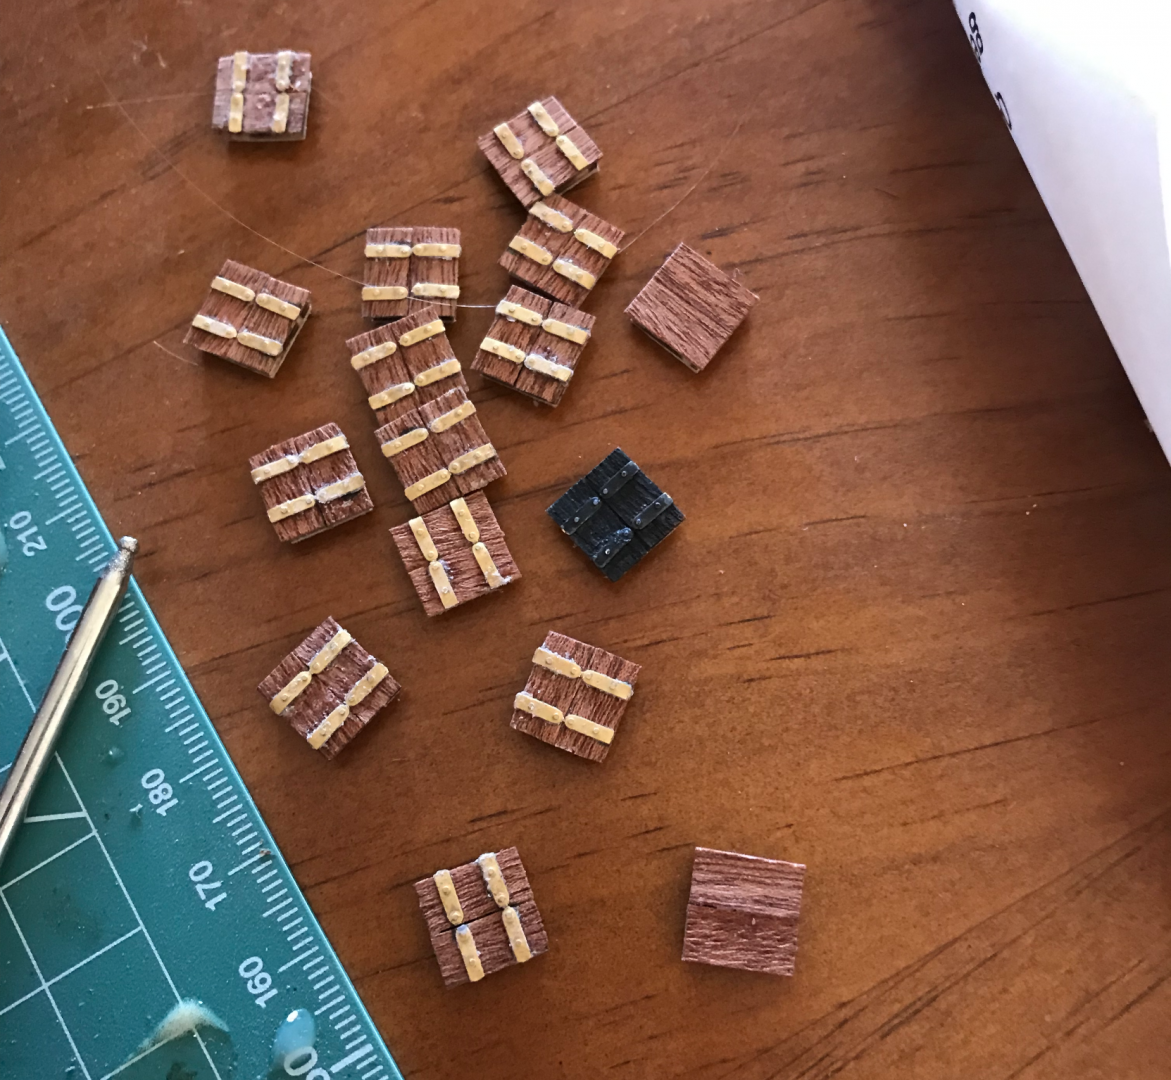
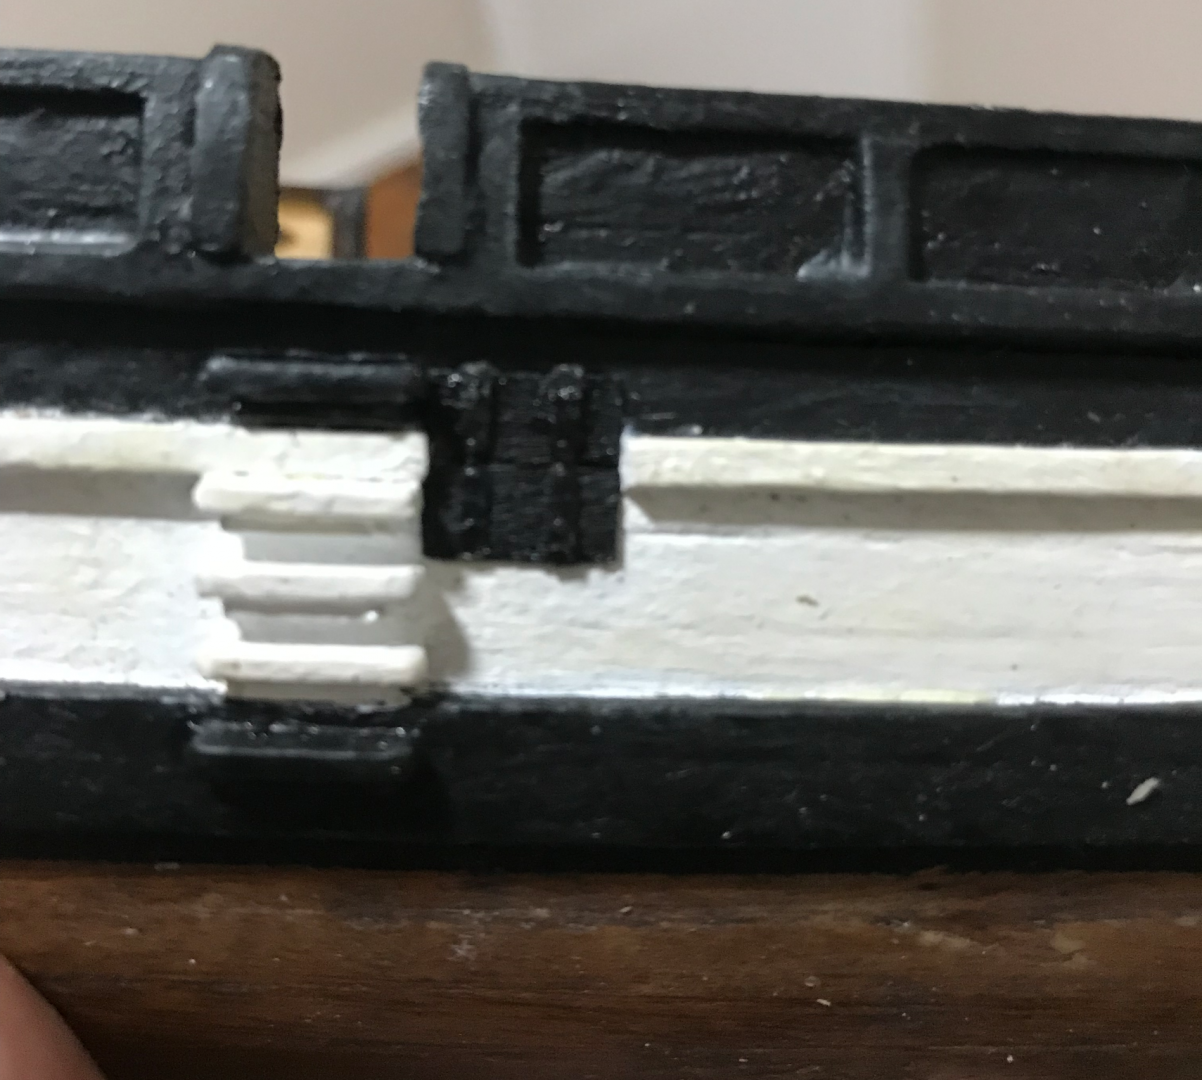
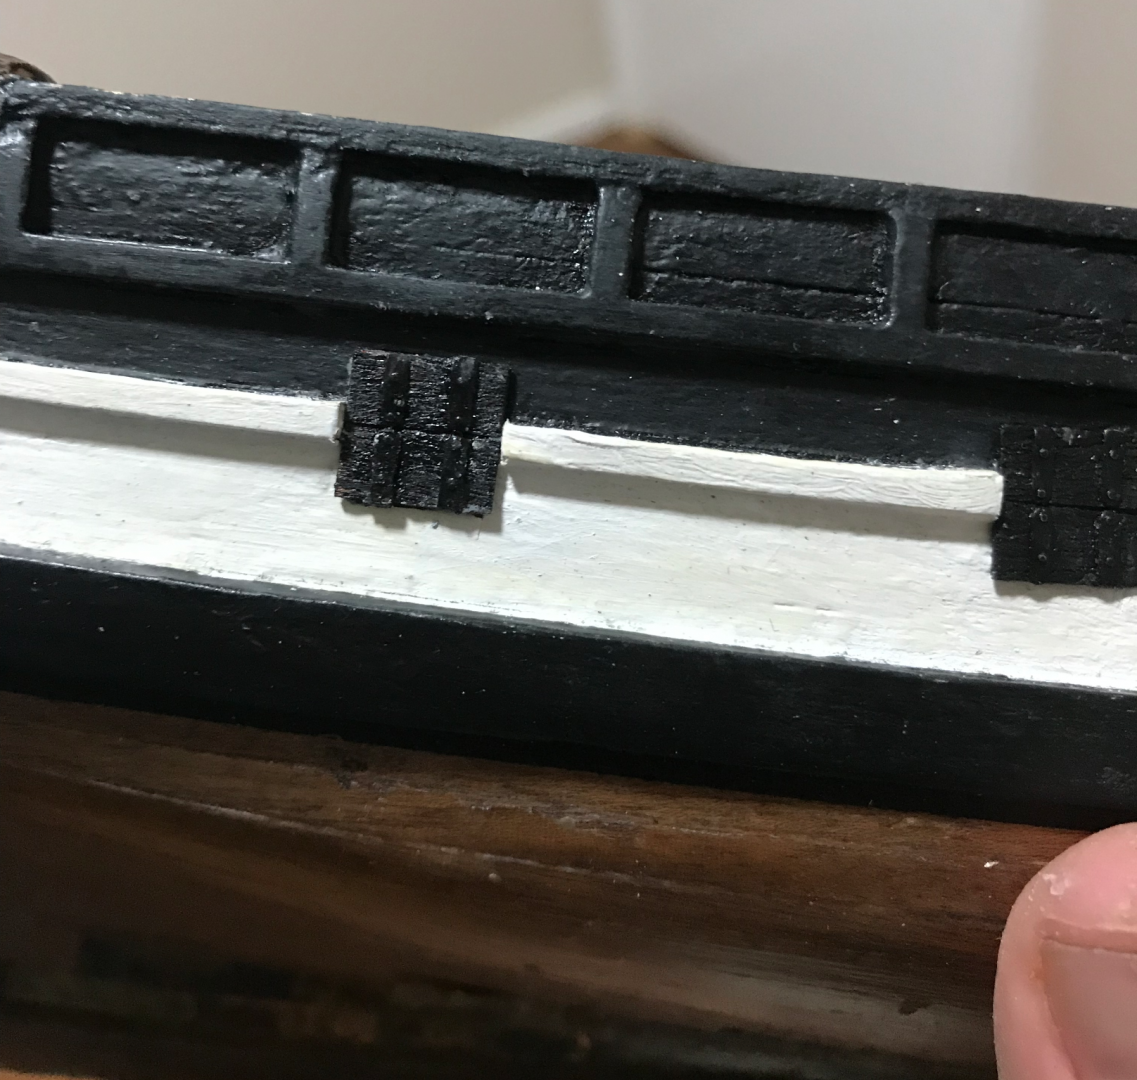
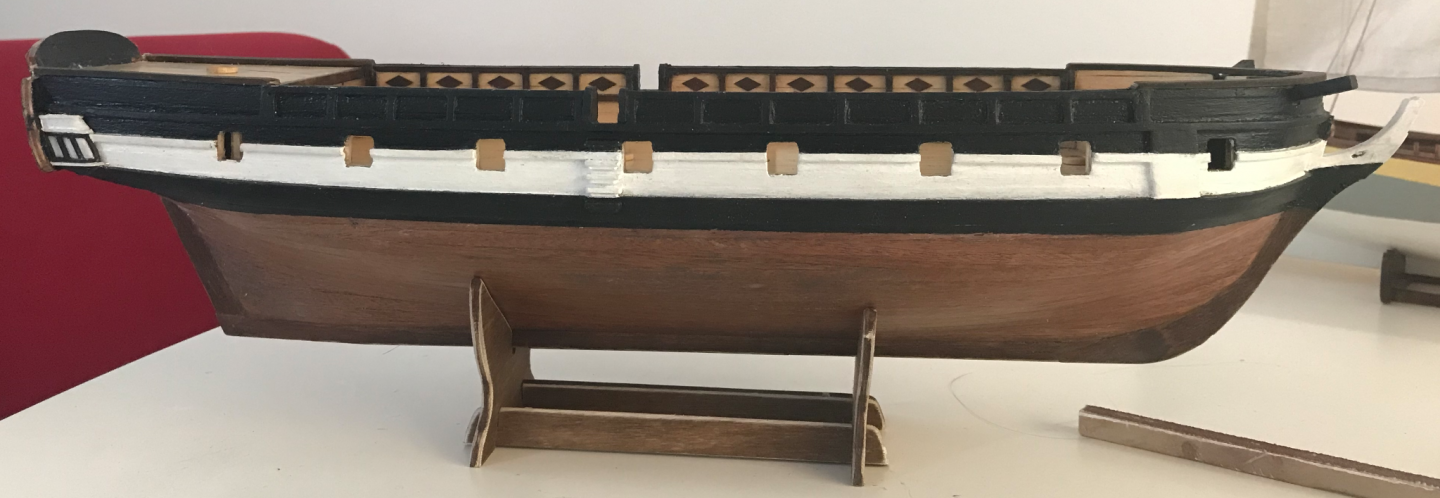
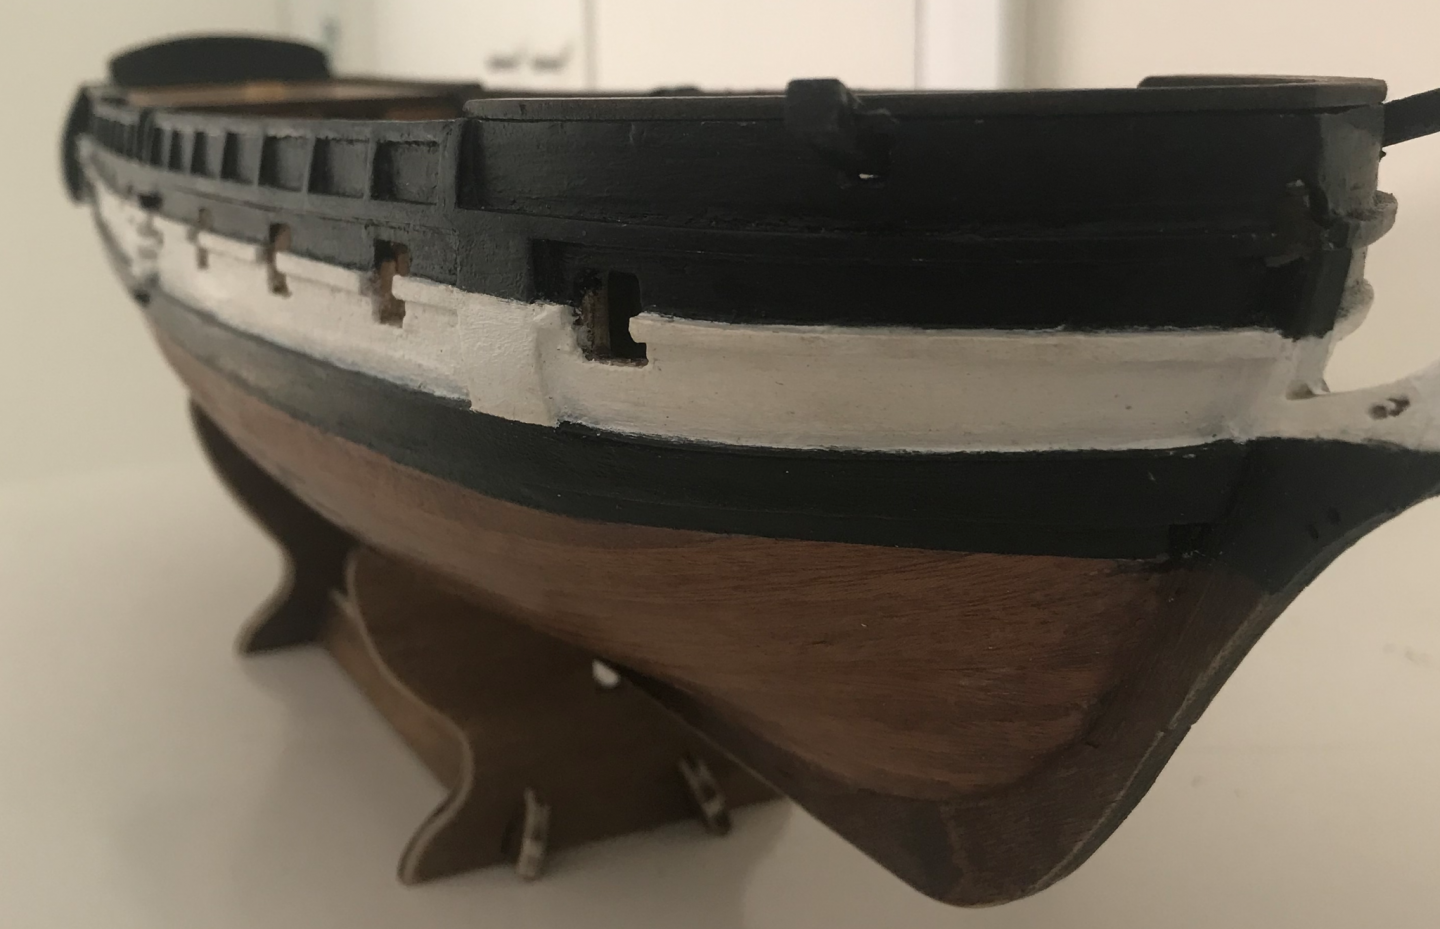
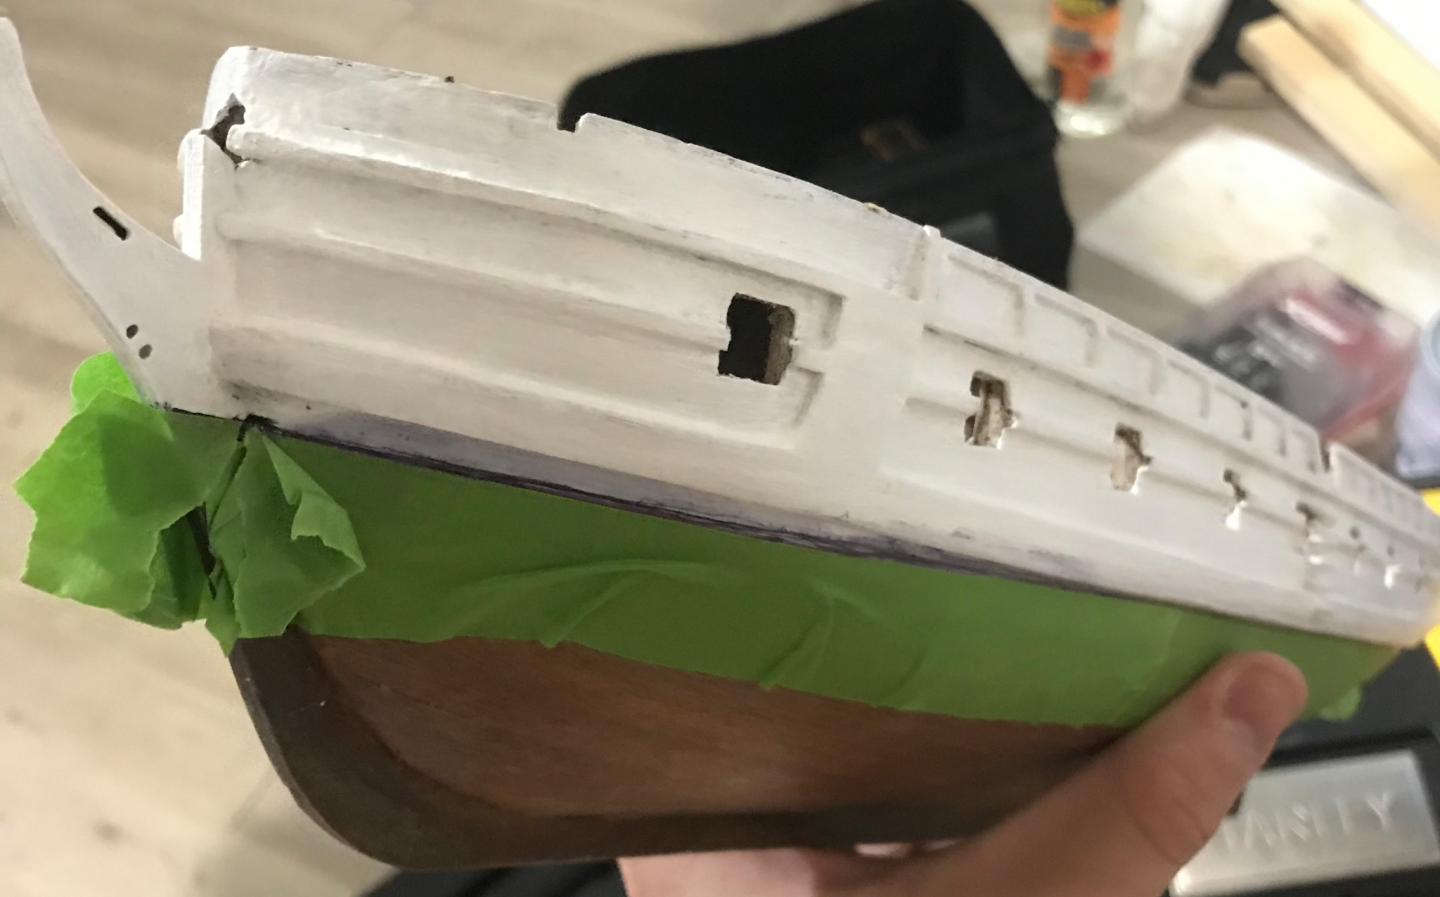
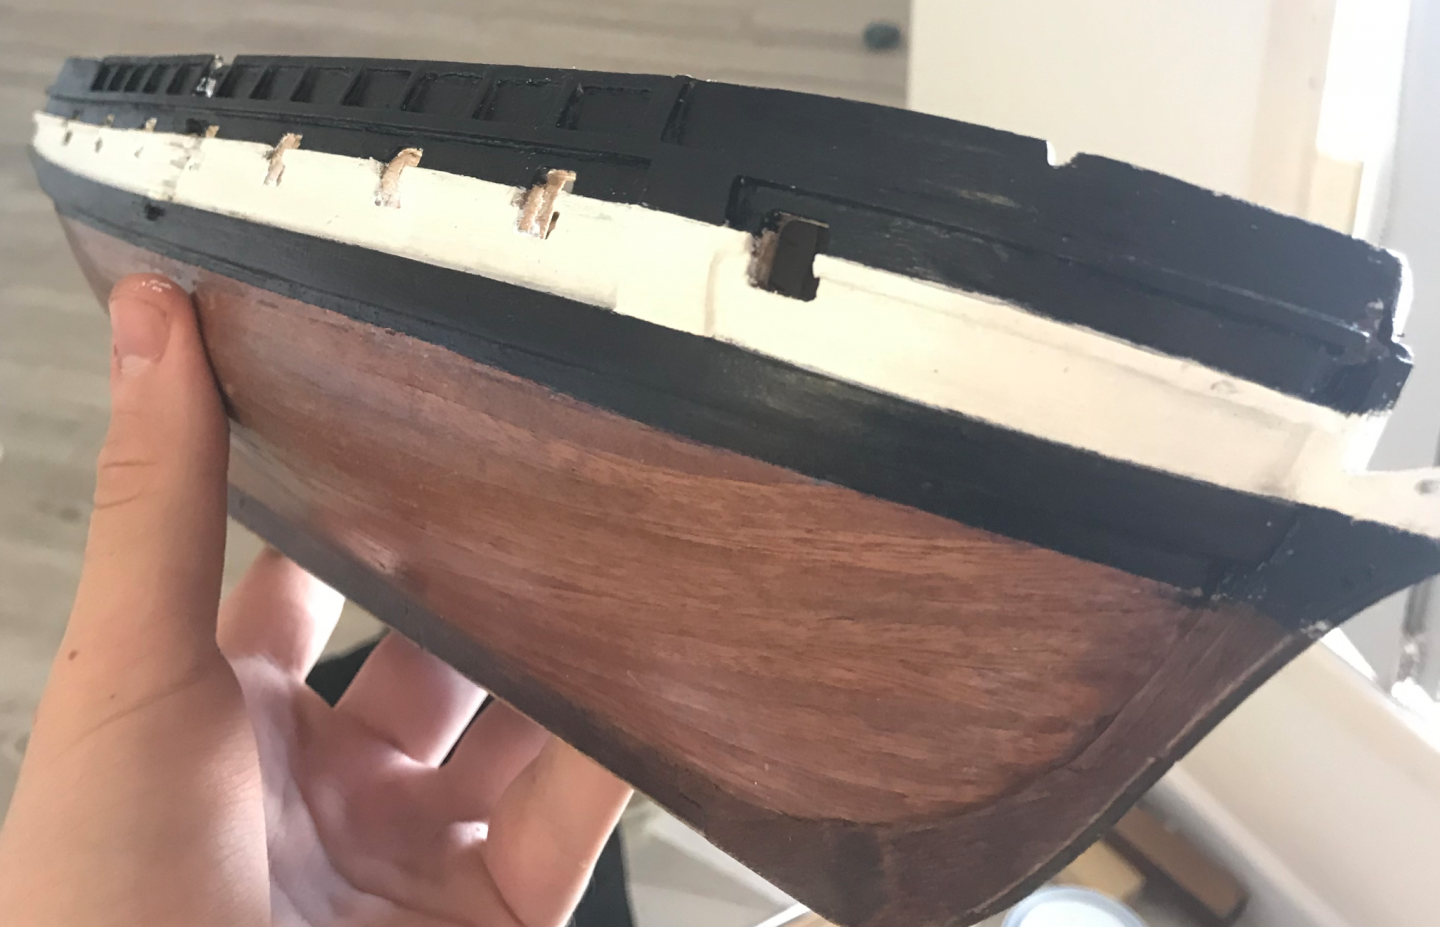
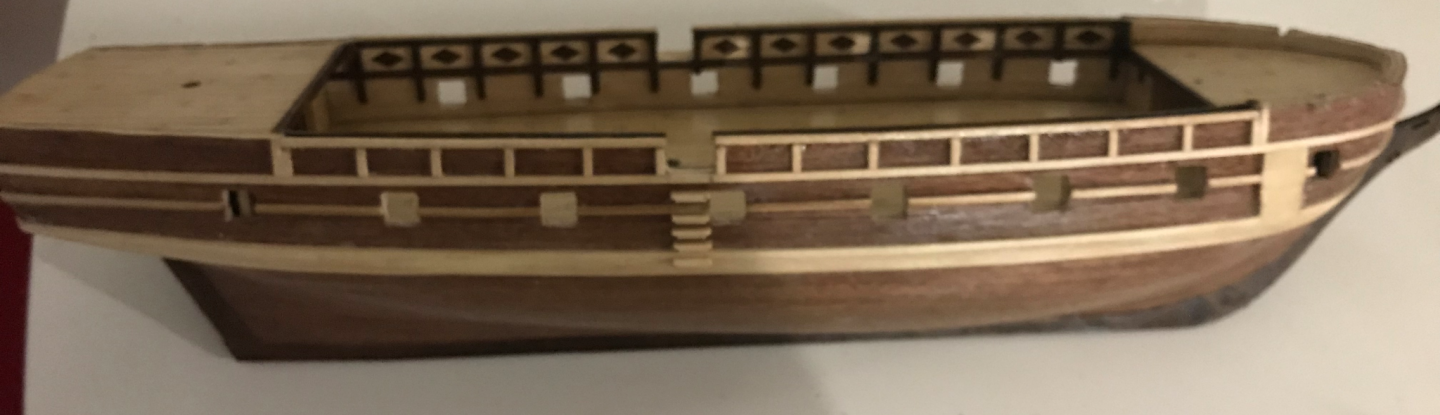
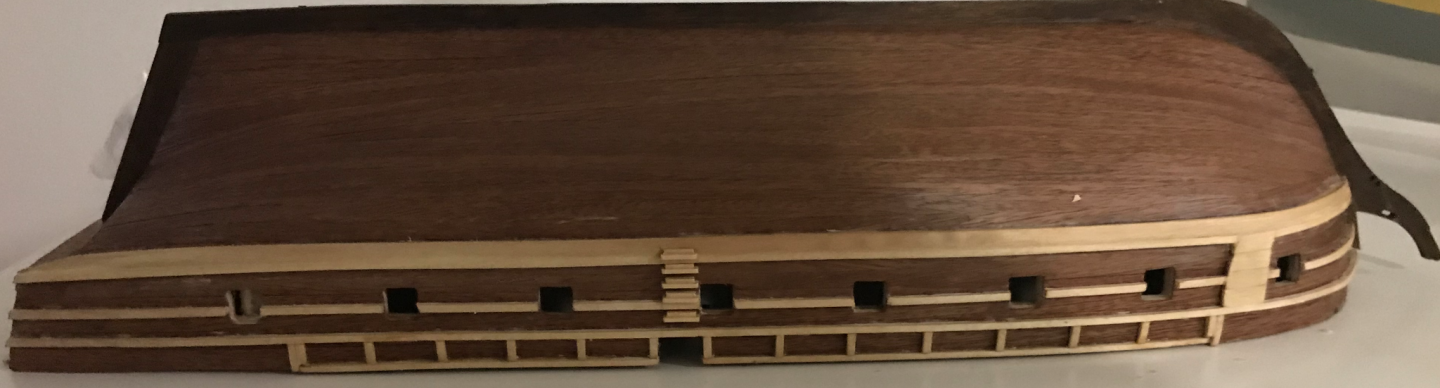
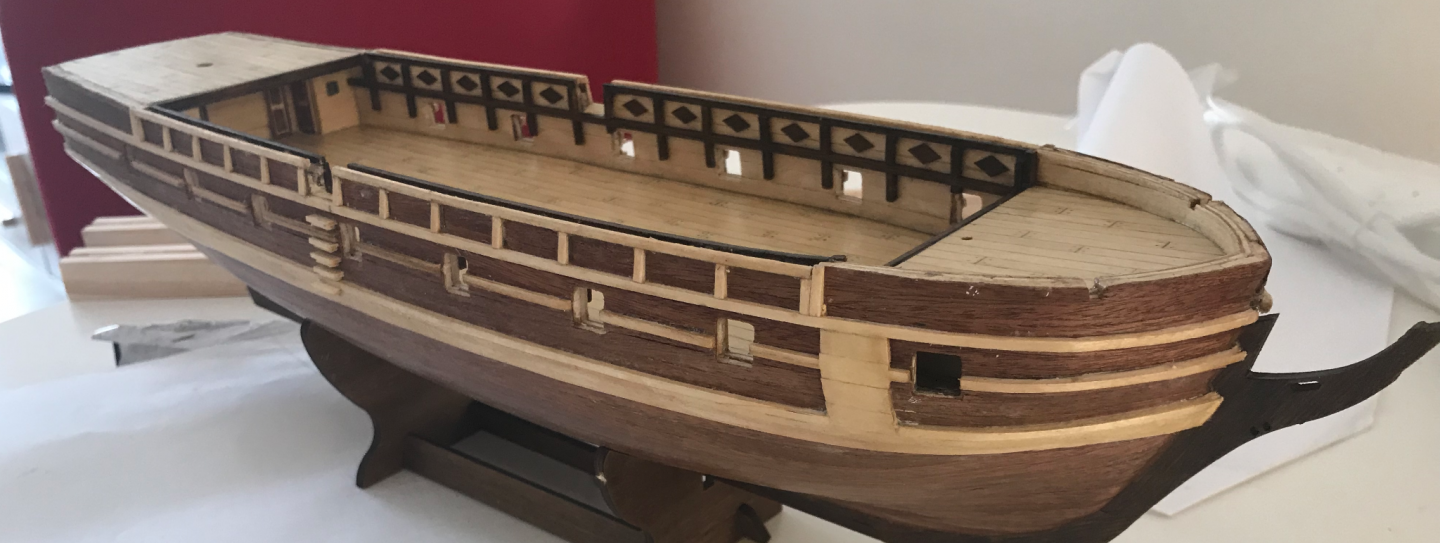
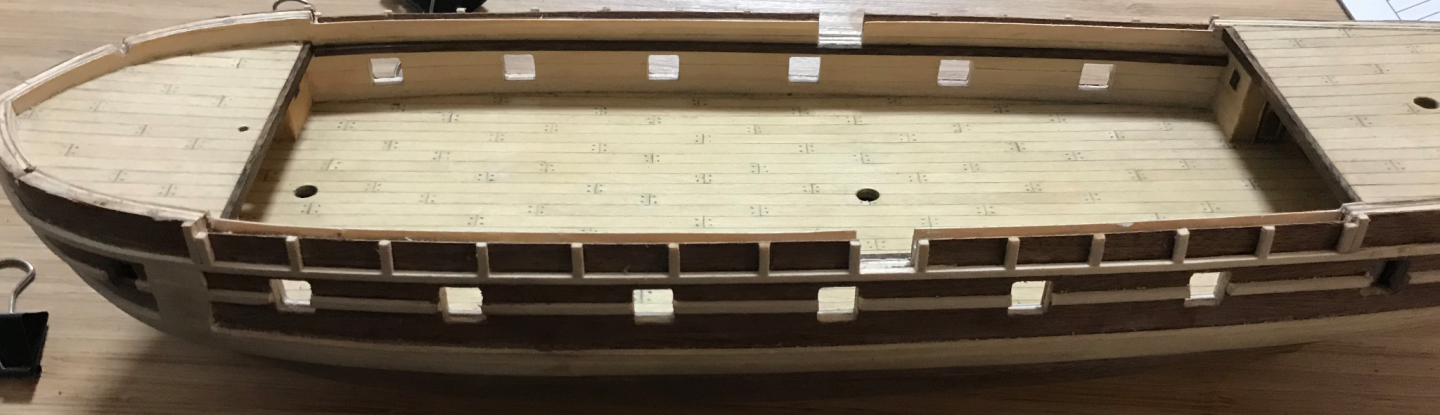
The gunports were another fun little job. To ensure that no gaps were left, I lined the gunports with a small overhang as seen in the below photo. This meant that they would appear to fit snugly even if the port was a little too wide The 2 aft most ports were not functional and were planked over but marked according to anatomy of the ship. These 2 ports are visible below and didn’t have hinges. I saved the hinges from these ports for use in the flag lockers. Here are all the ports nice and snug, I had to cut the rubbing strakes a little to allow for the larger gunports The planked over gunports had their rubbing strakes extended.


-
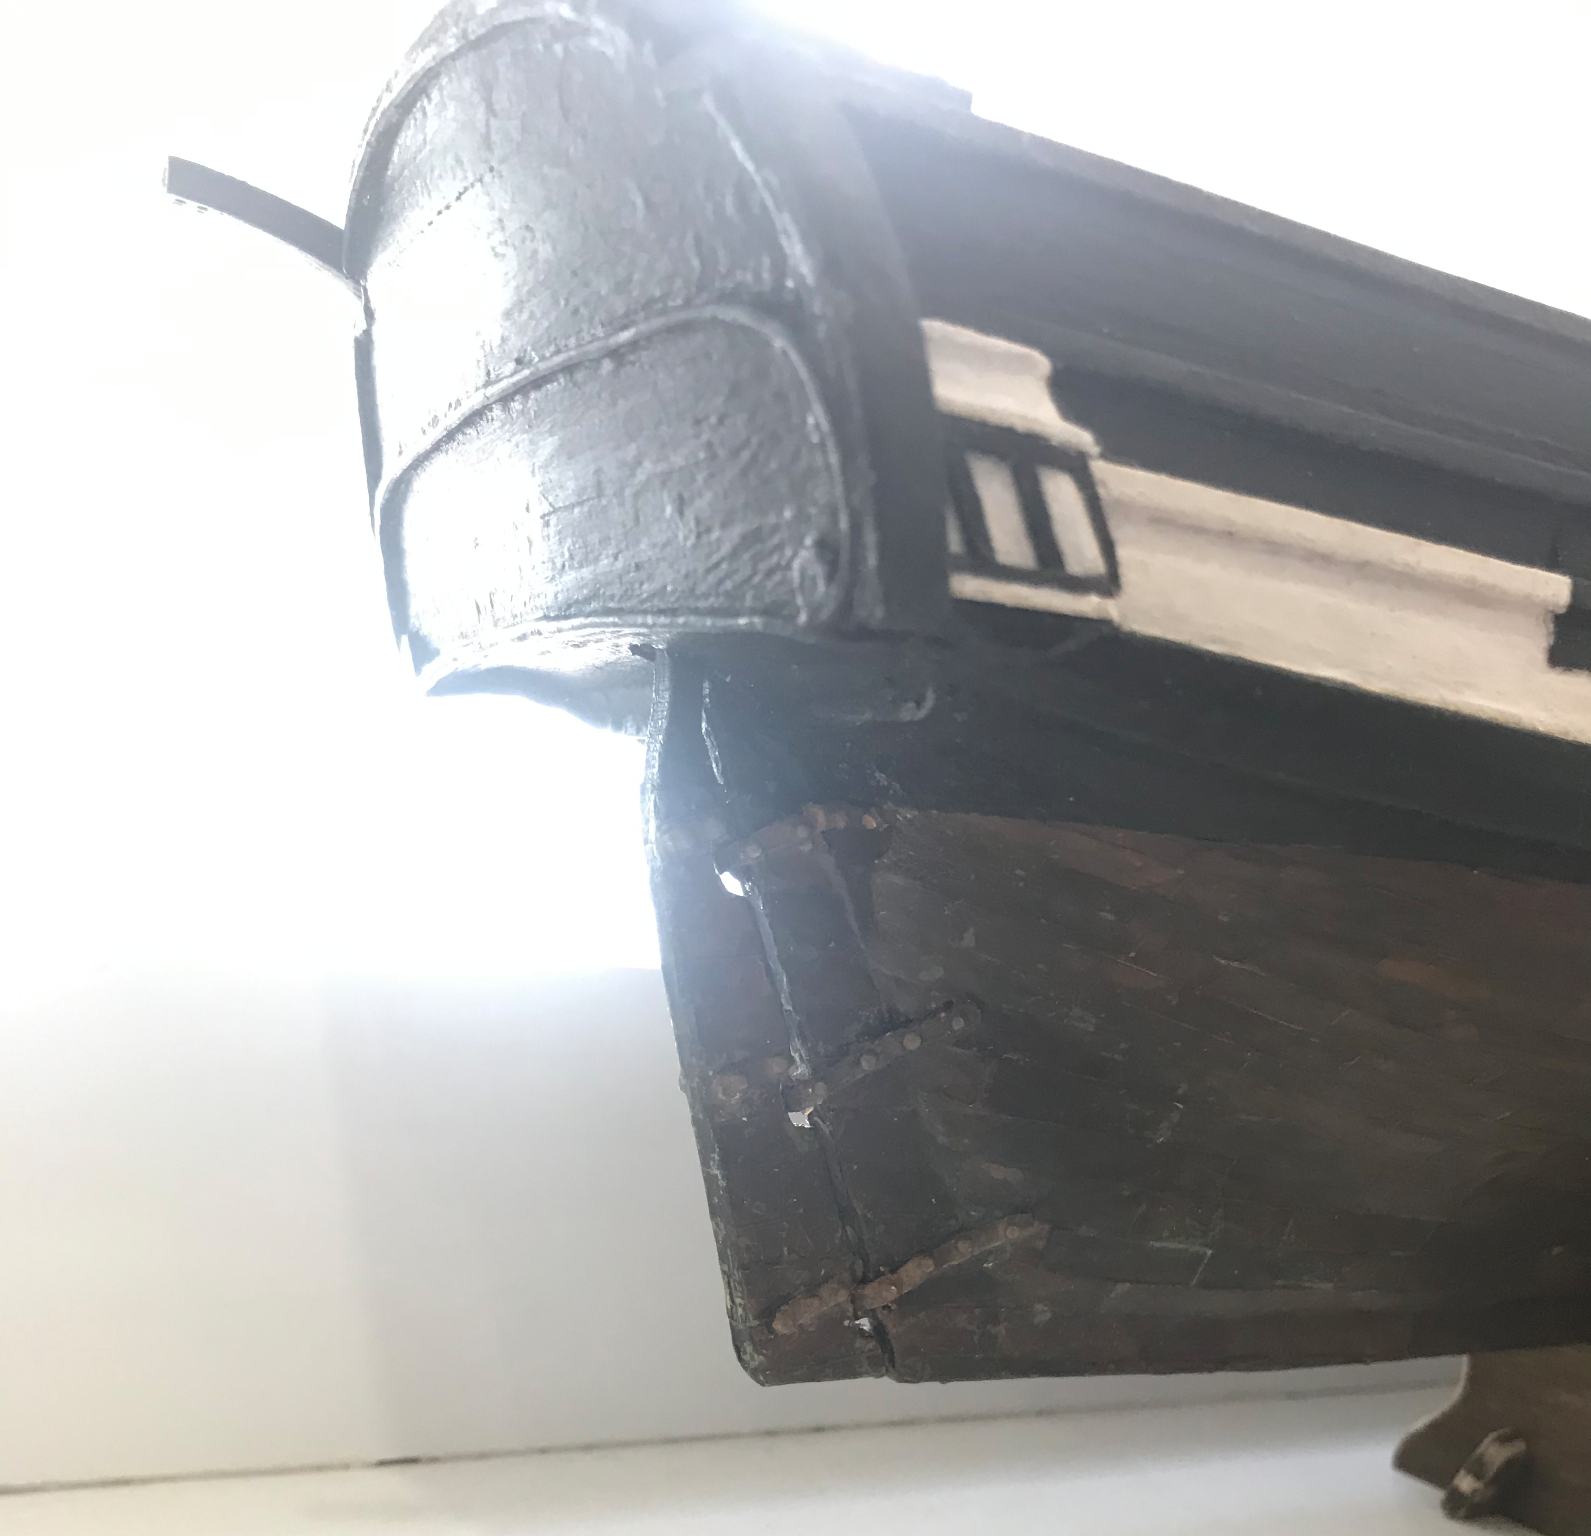
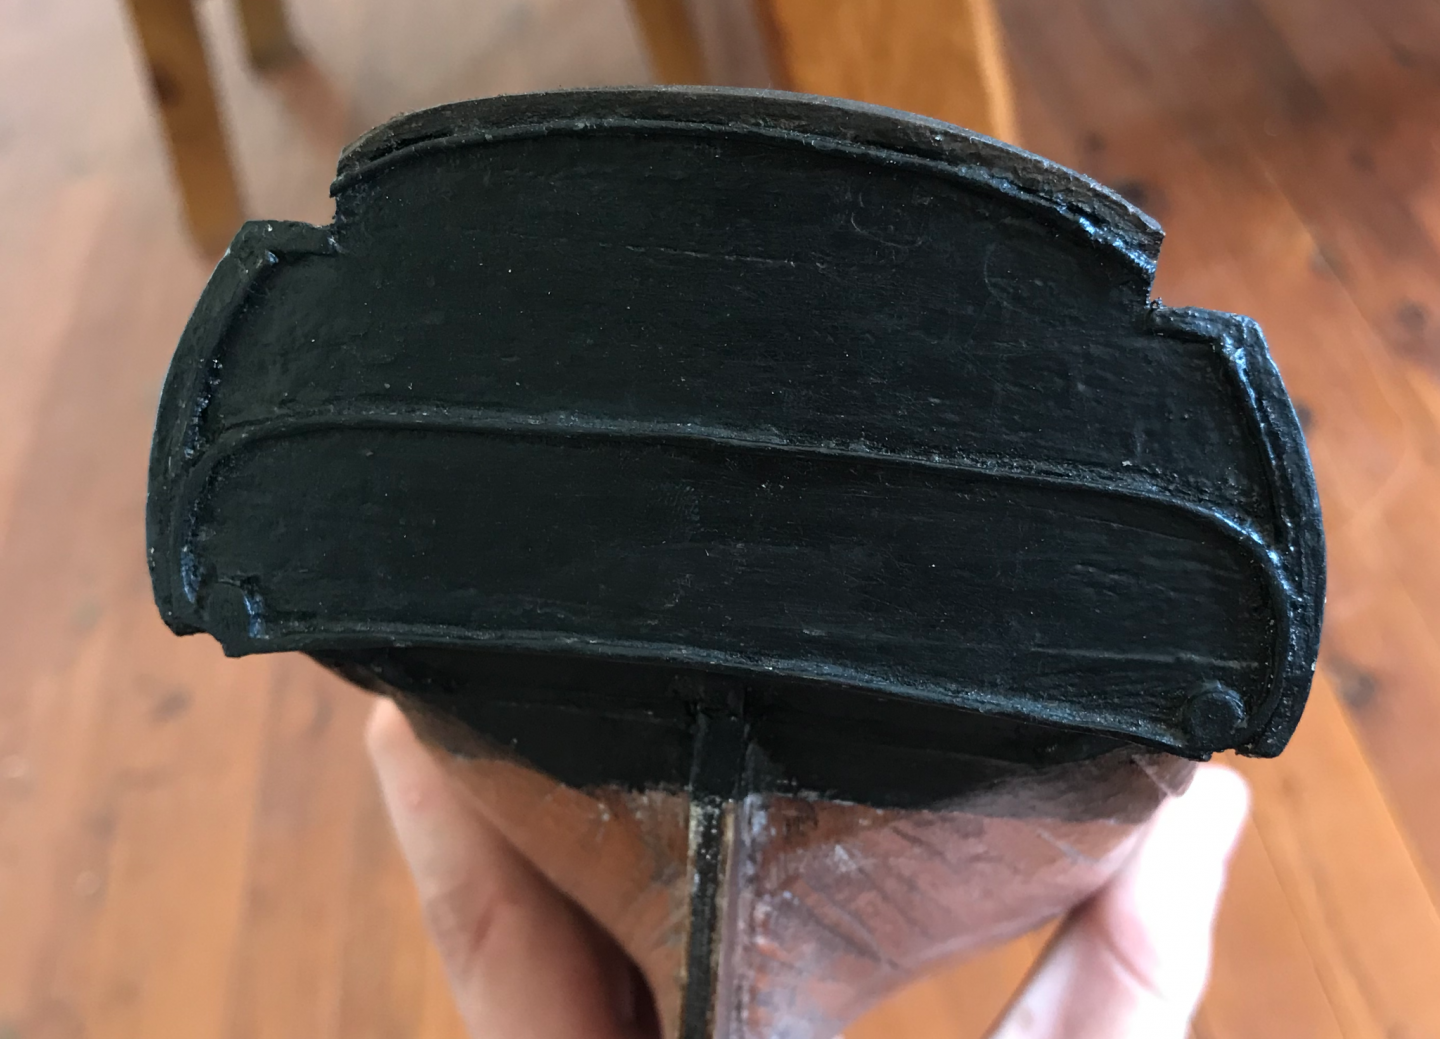
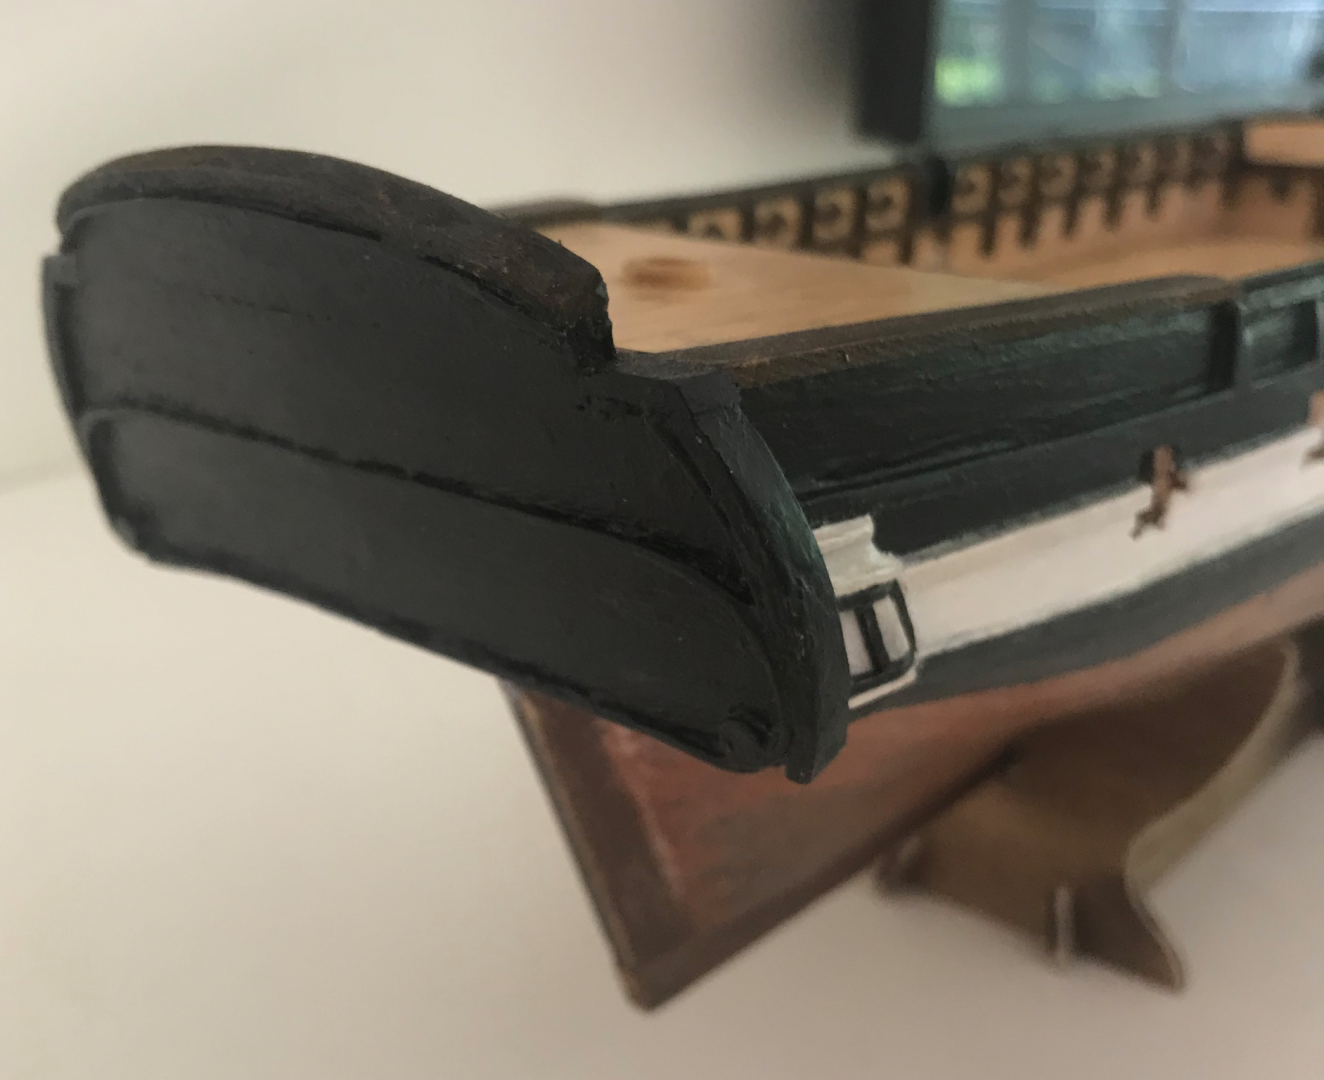
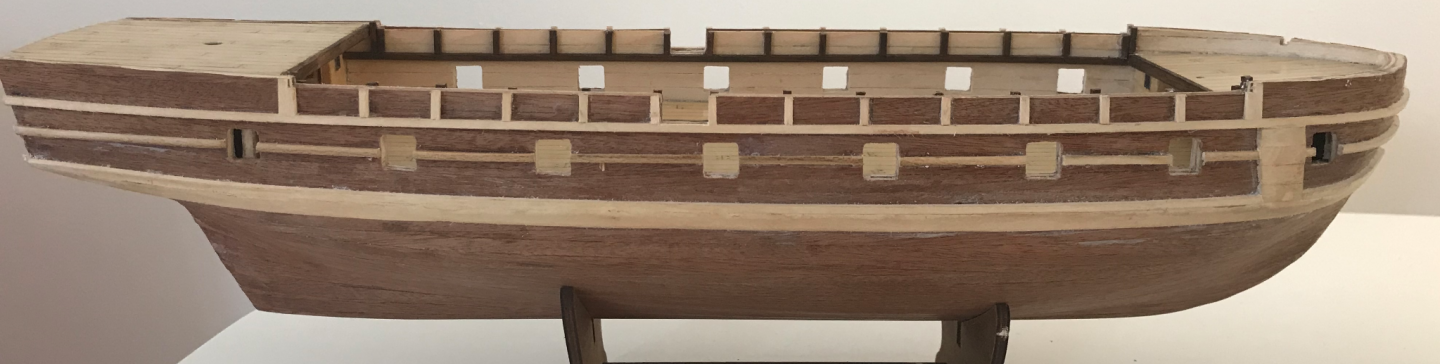
The metalwork on the transom was one of the more difficult parts of the build so far. I was a bit messy with the CA glue at first and continued to clean it up for a while. I planked both sides of the transom after bending so that the planking would still be visible on the poop deck. The top rail was a bit of a challenge as it almost needed to bend in two directions Here is my first scrappy attempt at the decorations, you can see a lot of the CA glue residue as I kept taking it off and bending it again to get it right. I've realised now that it is good to have some soft-nosed pliers for this work as well as the flat nosed ones for bending and straightening respectively. I think I was hoping that the CA glue would hold the brass in a bend, which was a mistake. I think it would be better to make sure that the brass piece was fully bent to shape before gluing on. I also varnished the paint to make it dull again It might be difficult to see, but the varnish did make the white look a bit dirty and yellow Here are the davits Also, I re-did the doors using the oak stain and also a little bit neater than the old ones And this is the transom after some more tidying up


-
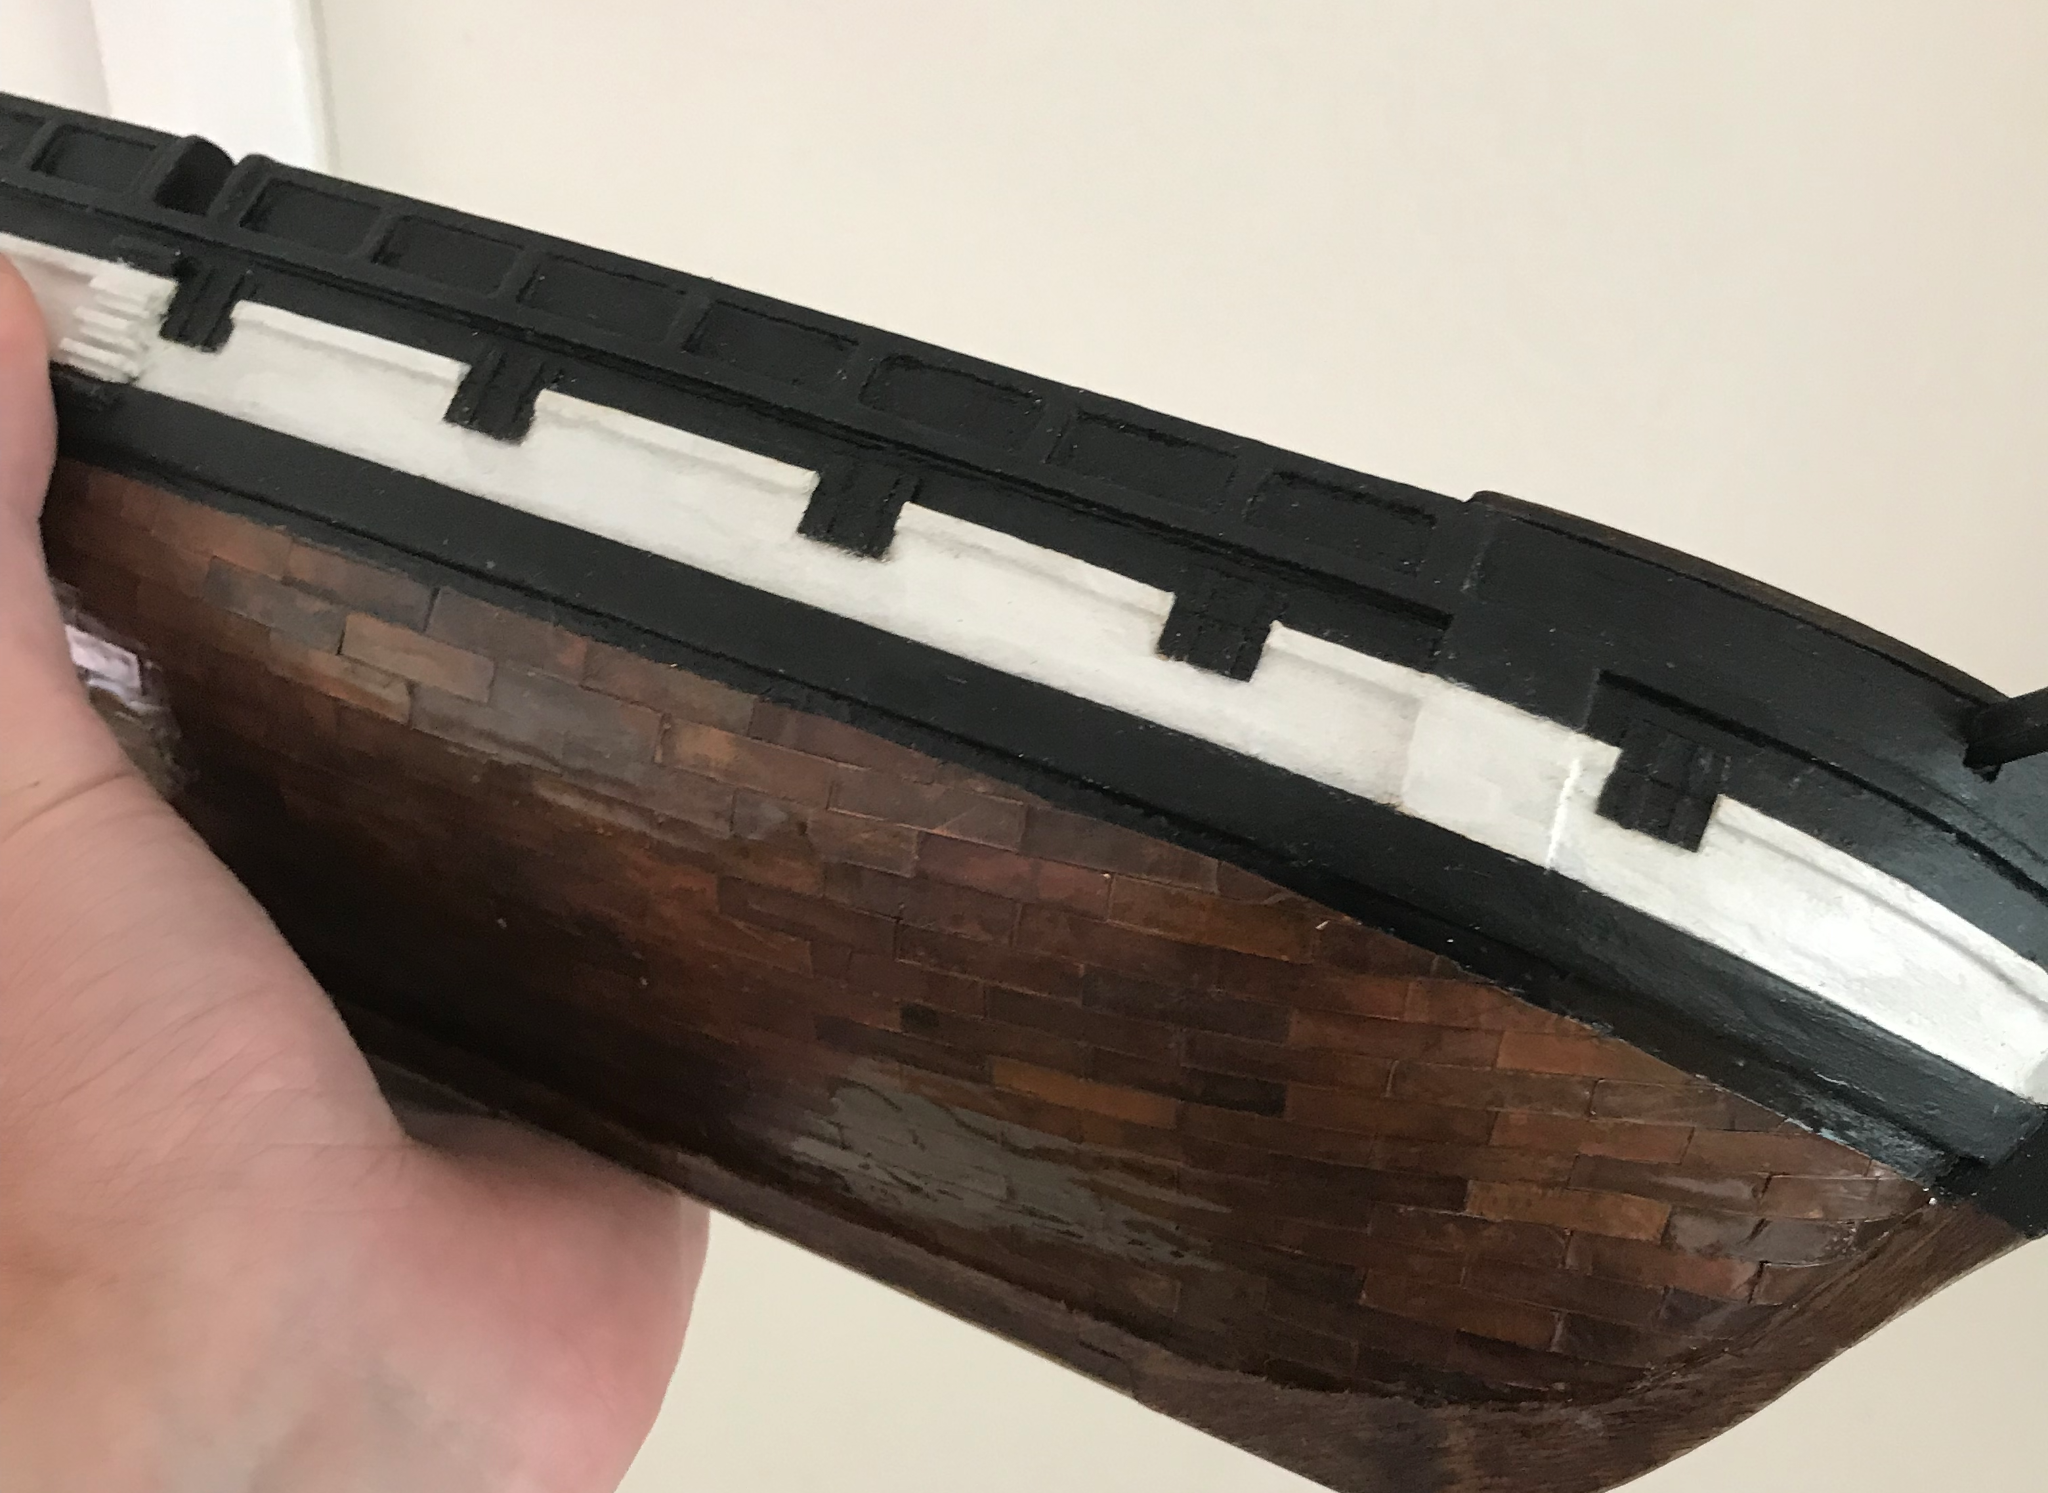
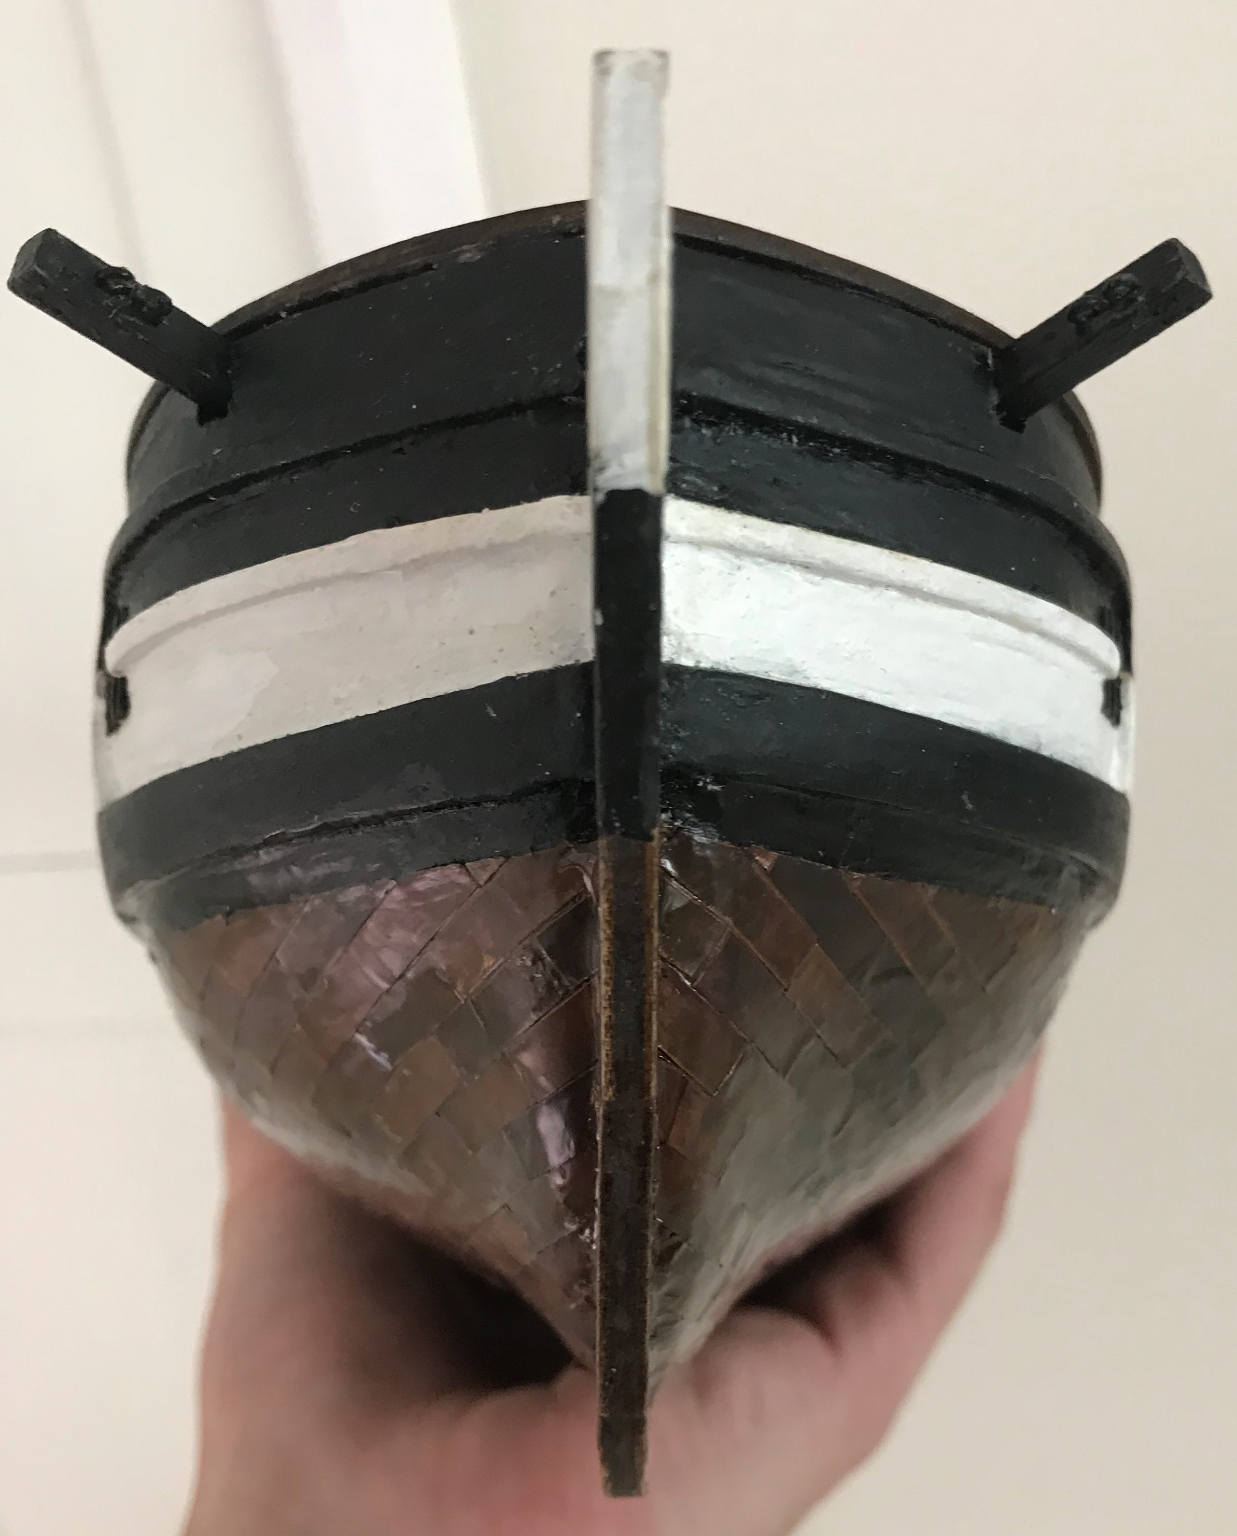
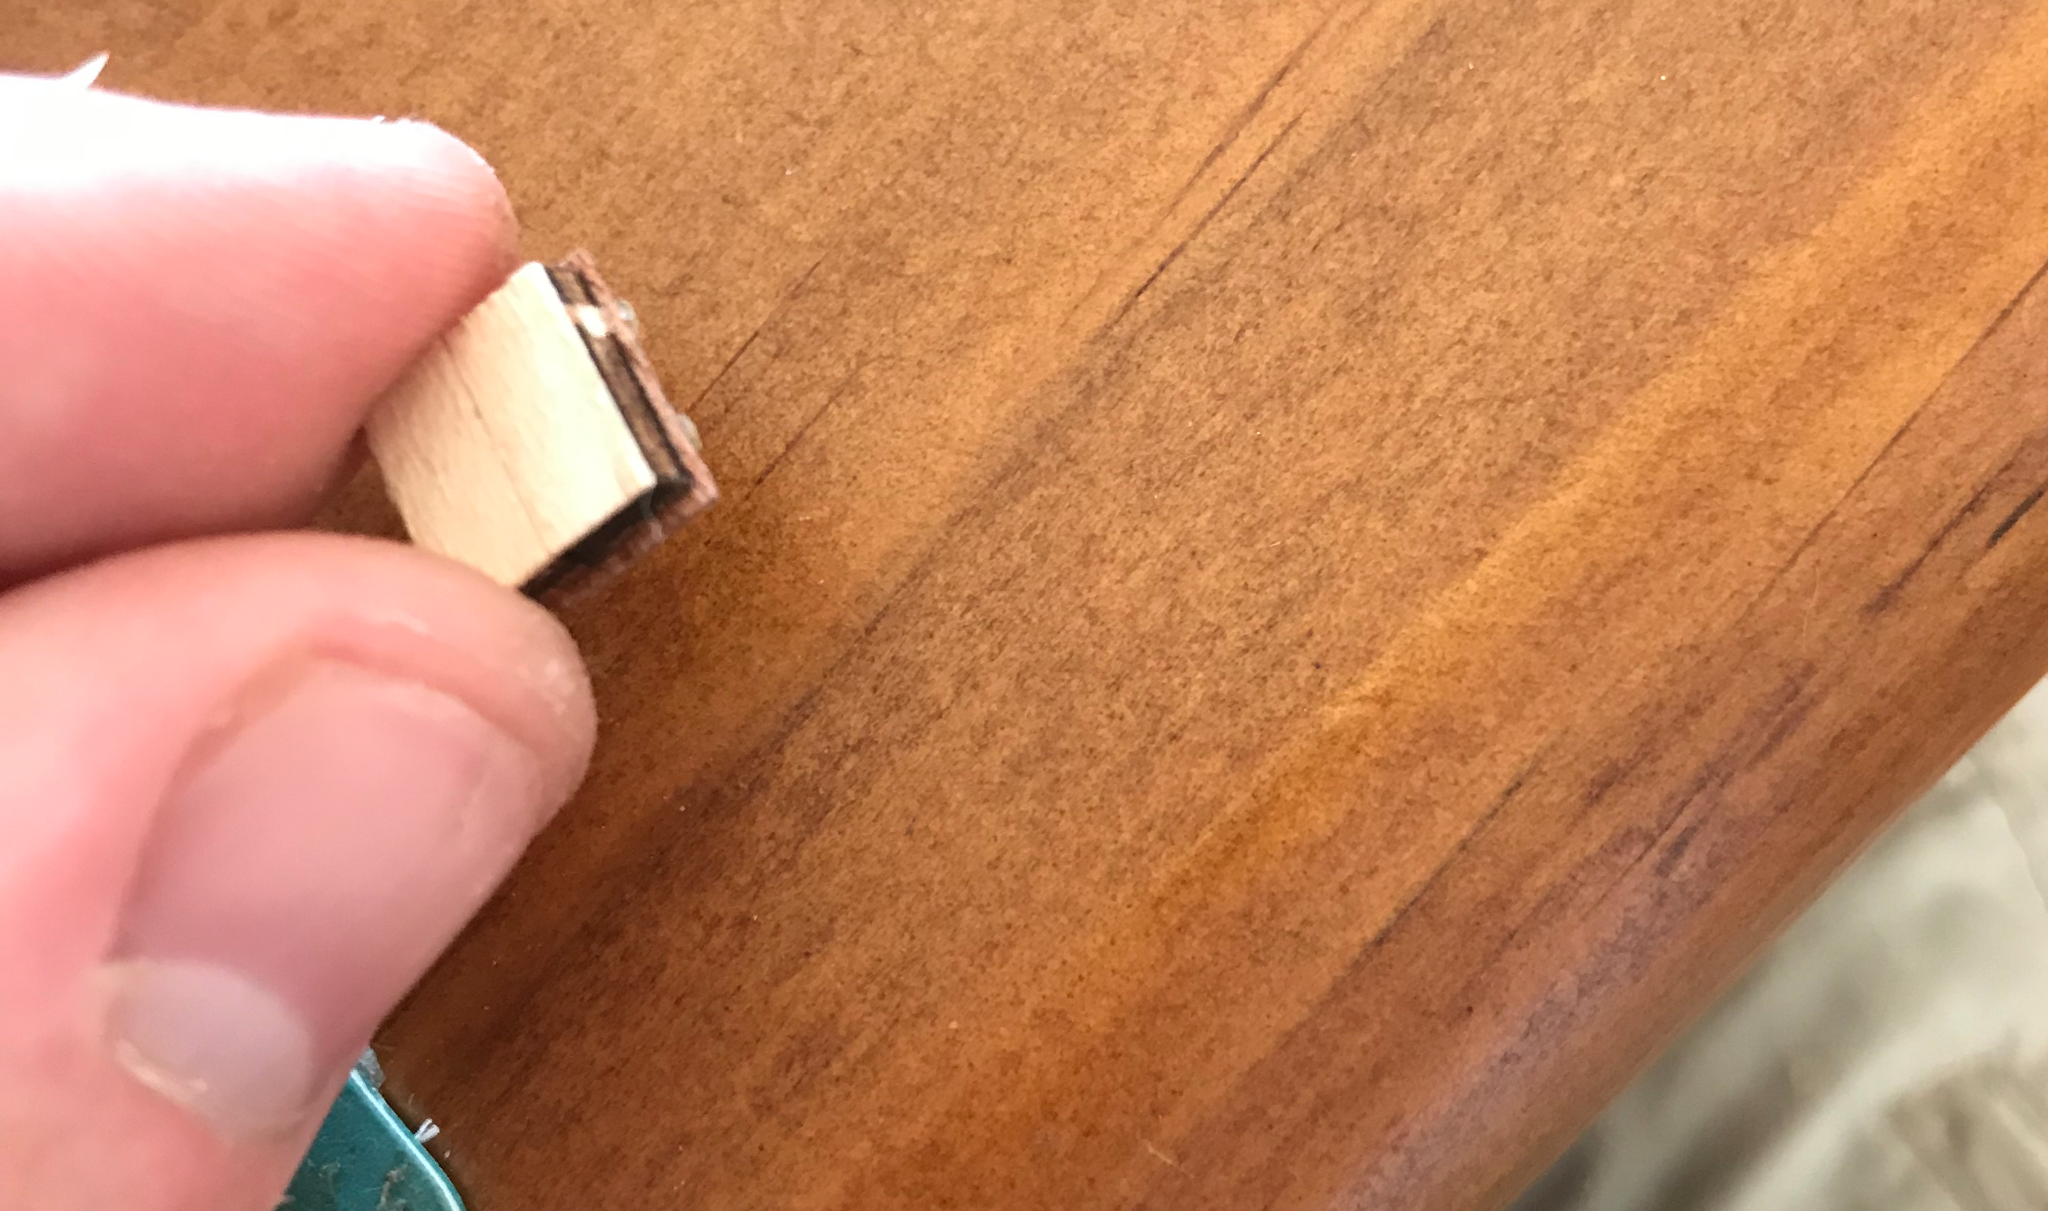
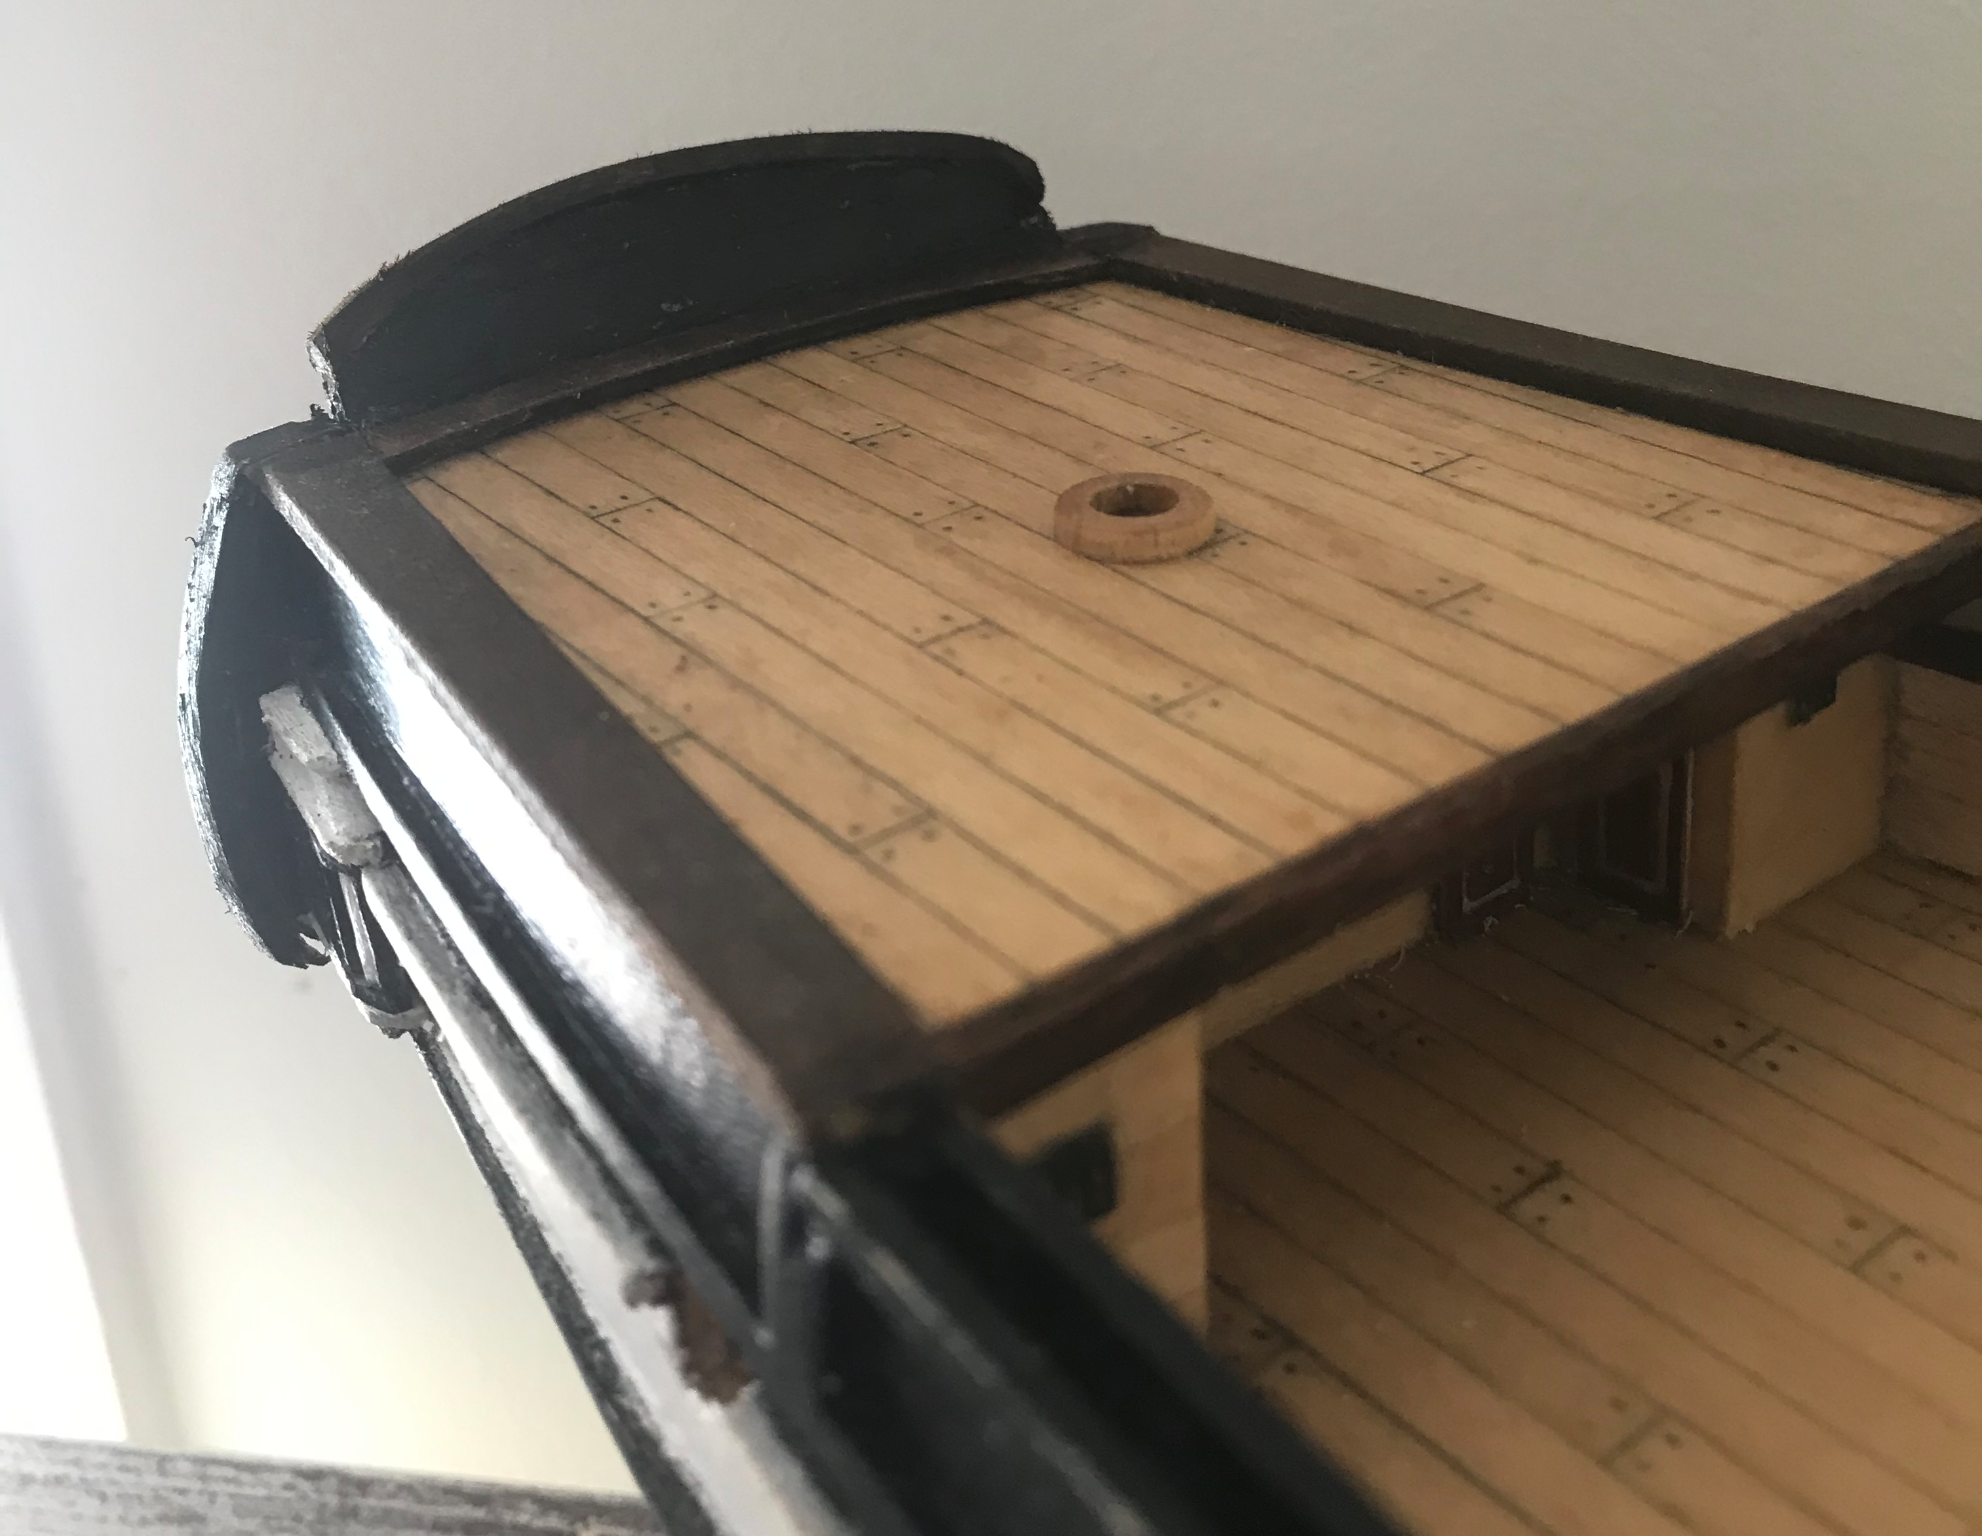
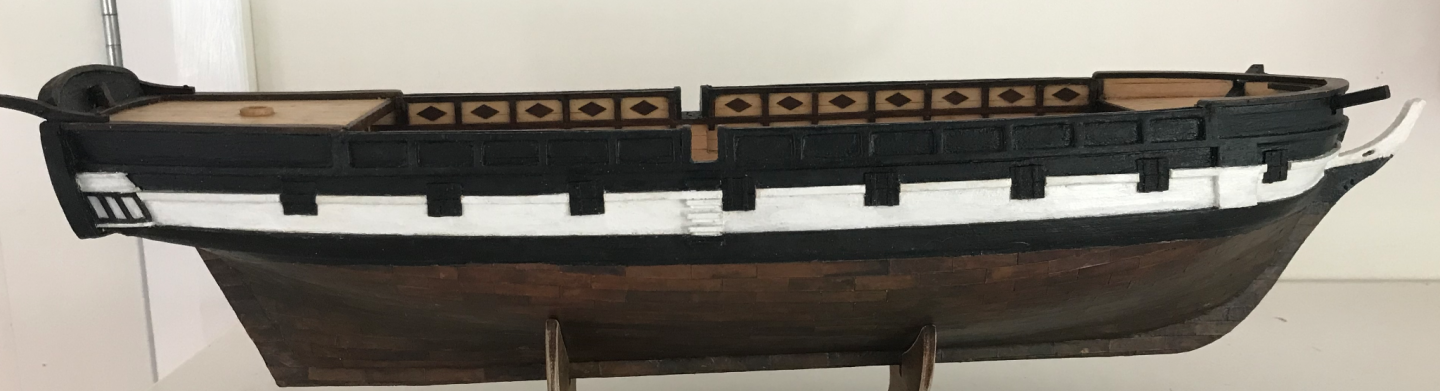
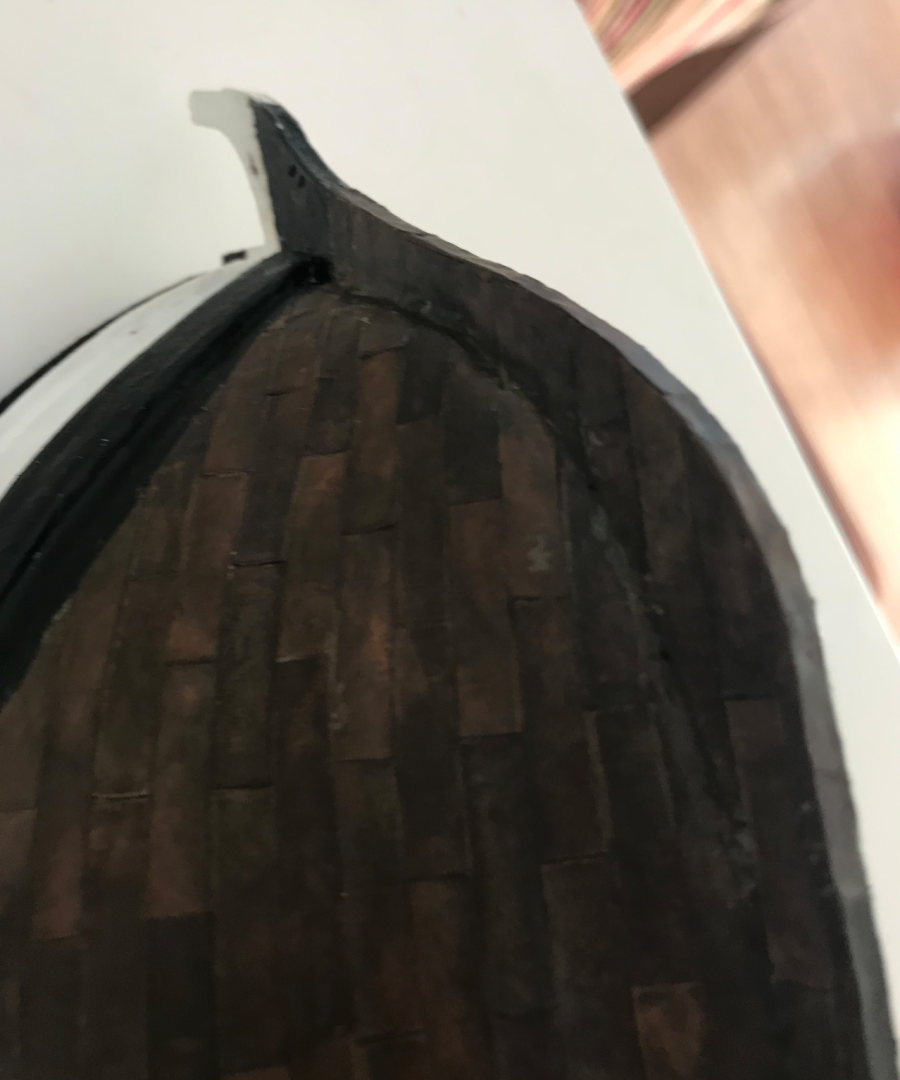
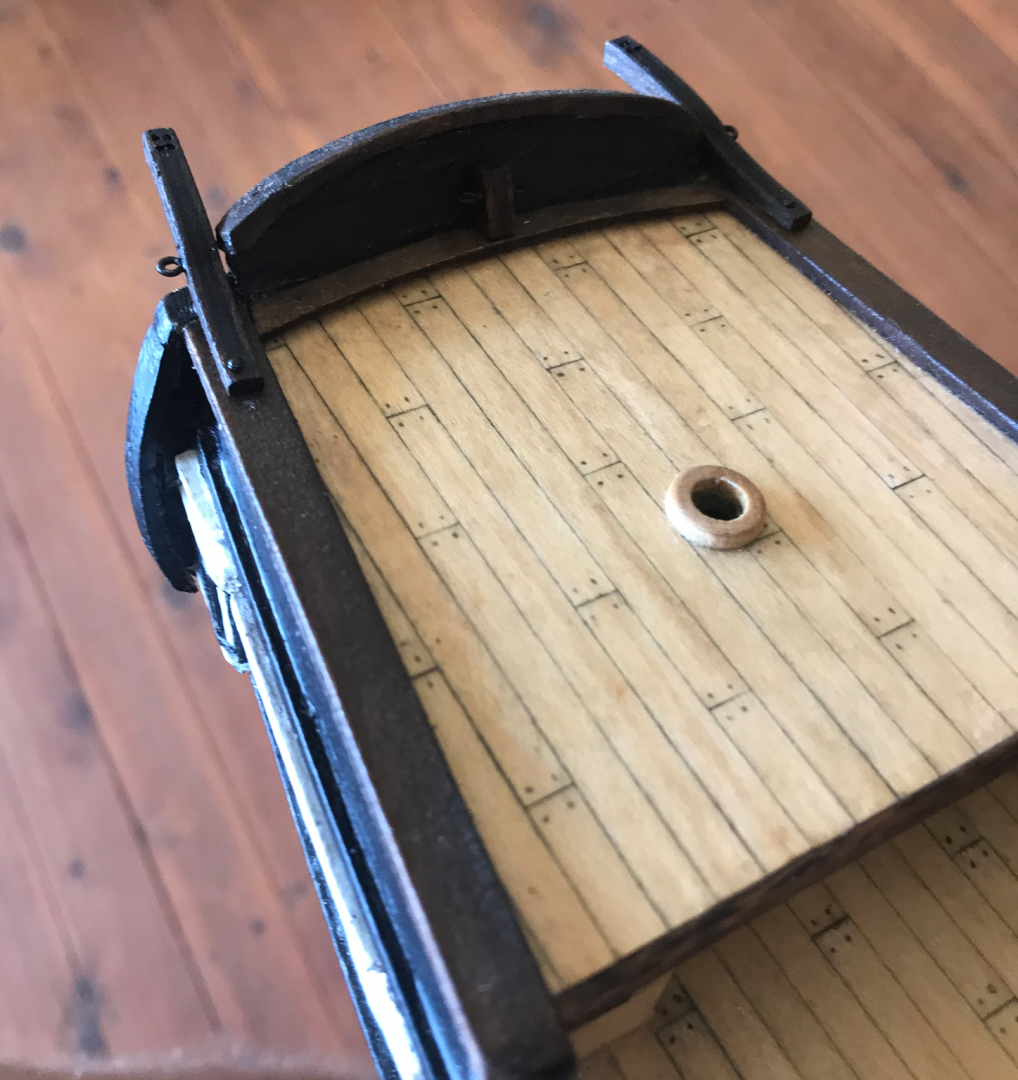
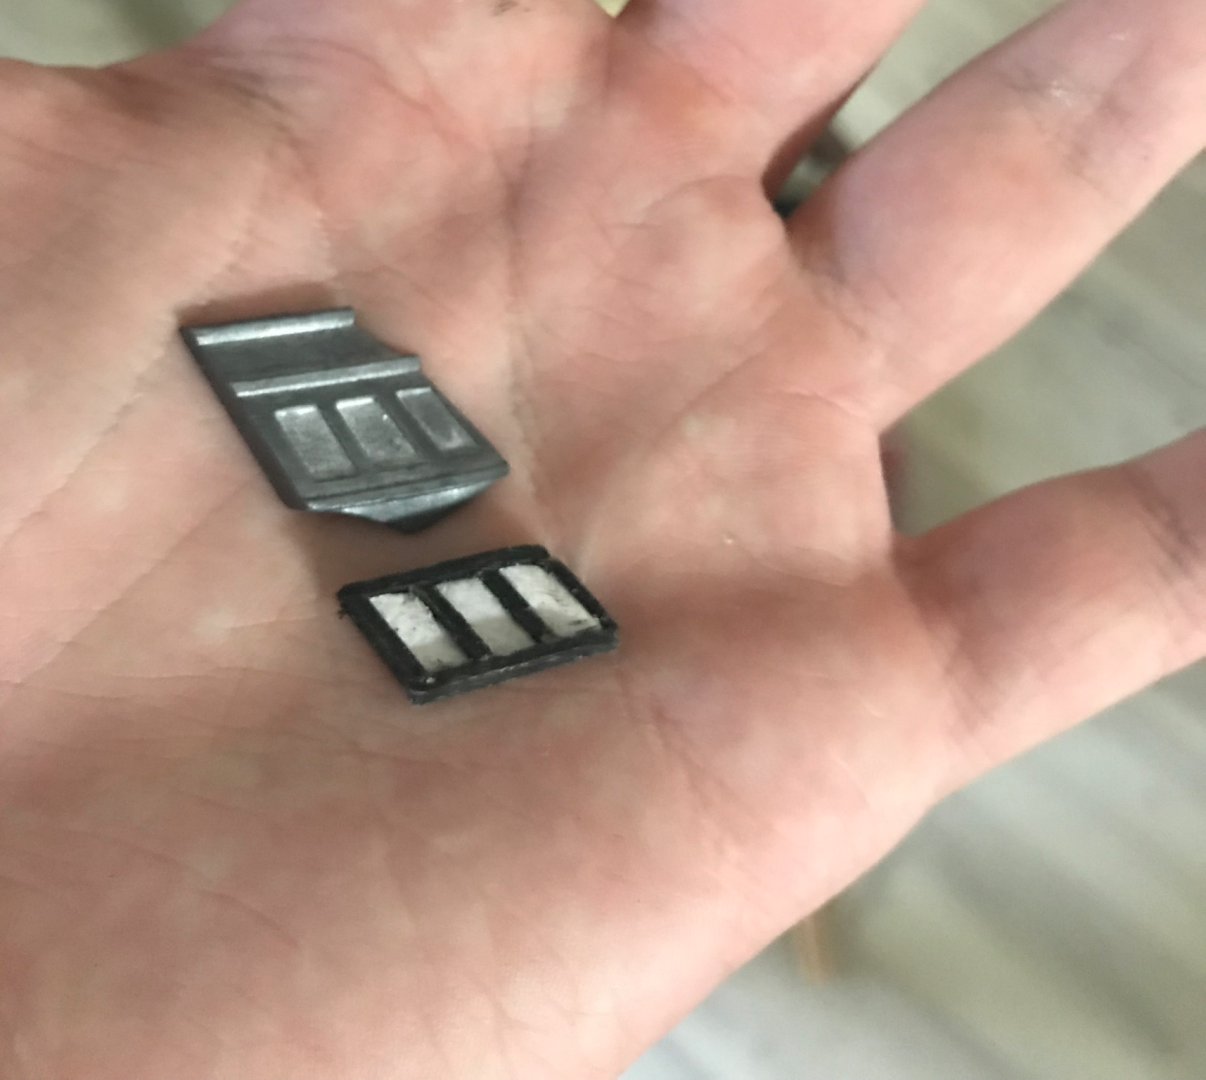
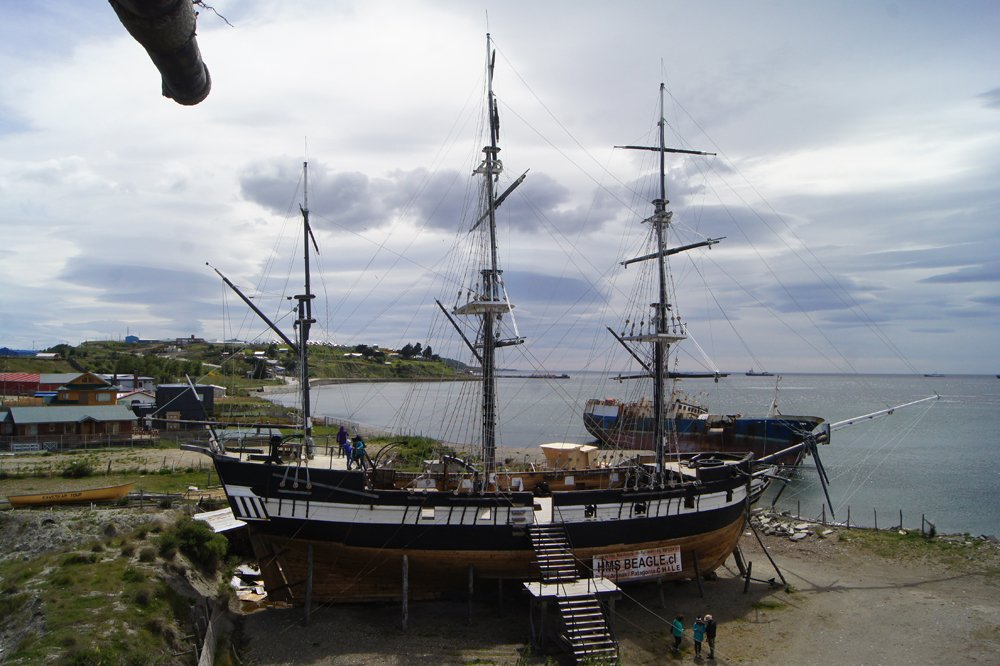
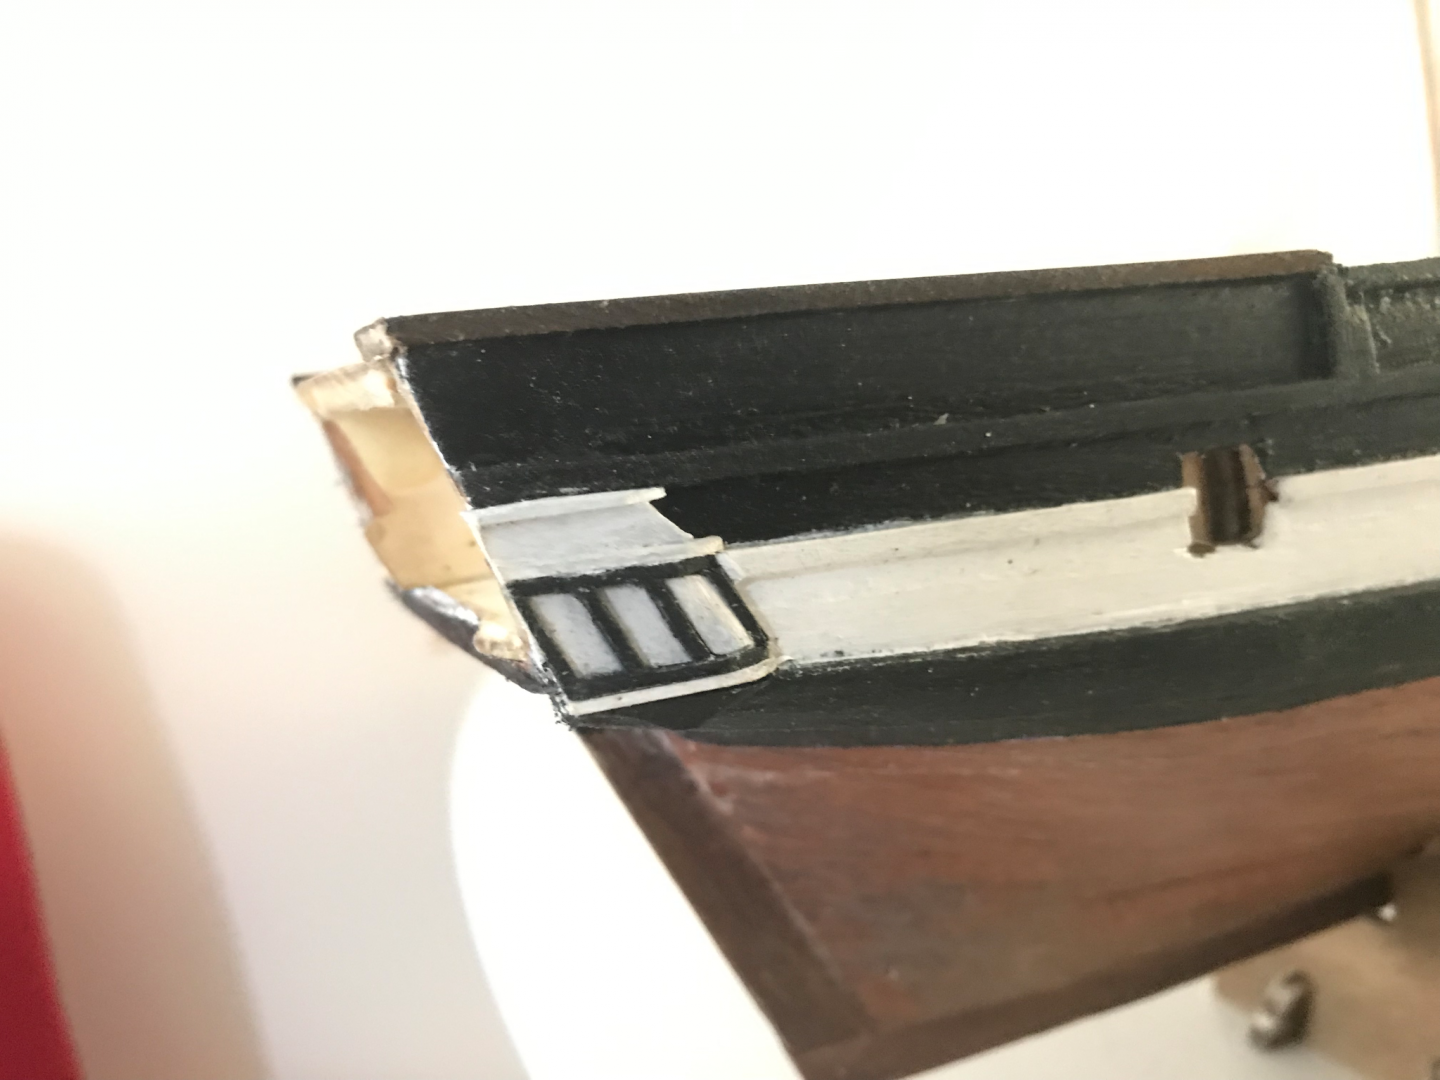
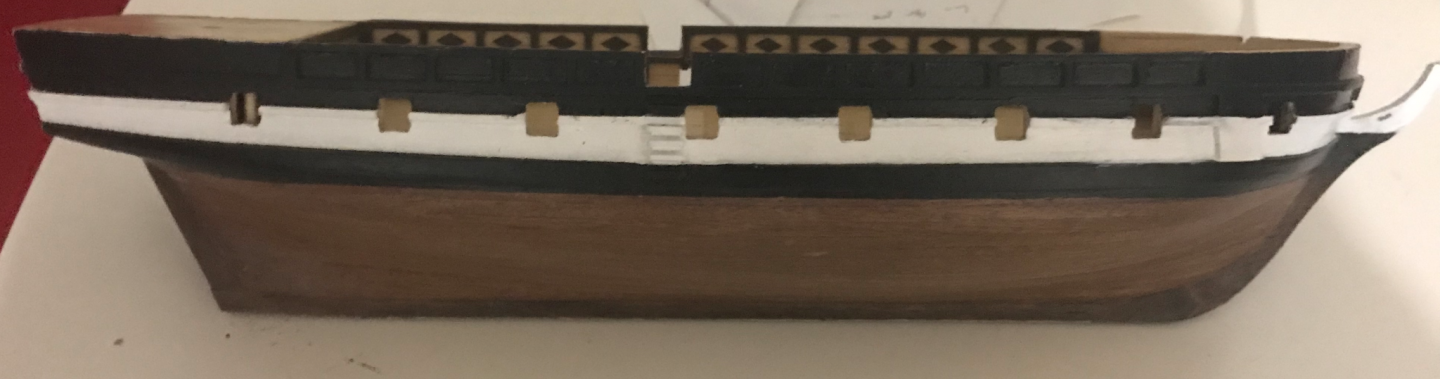
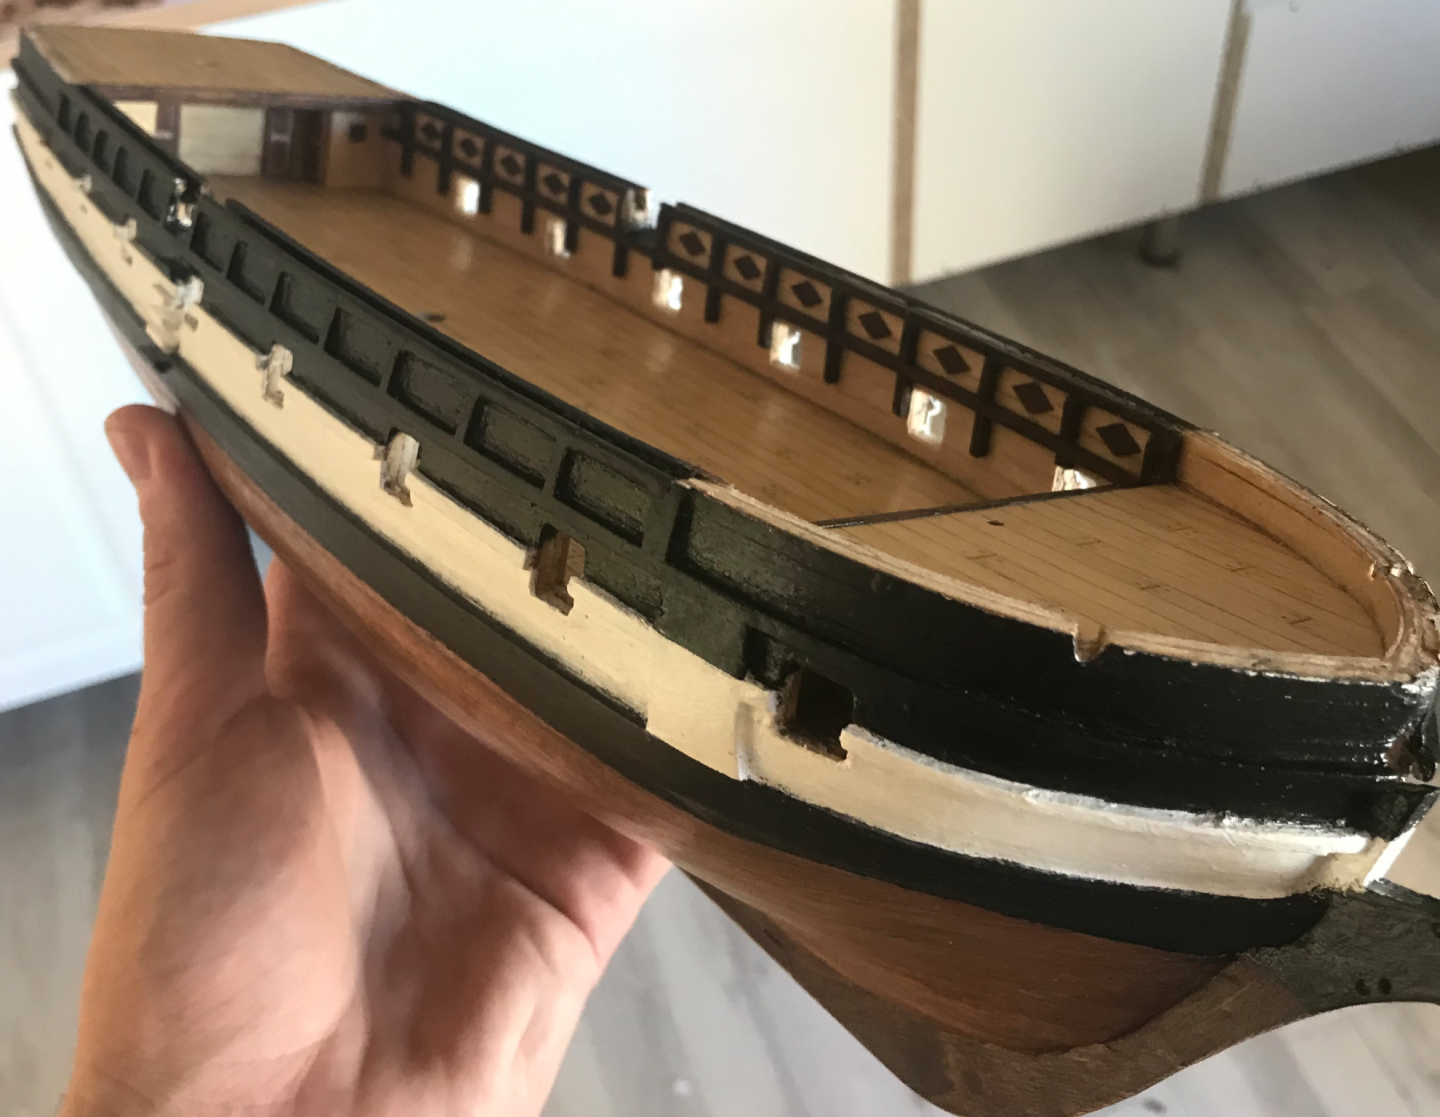
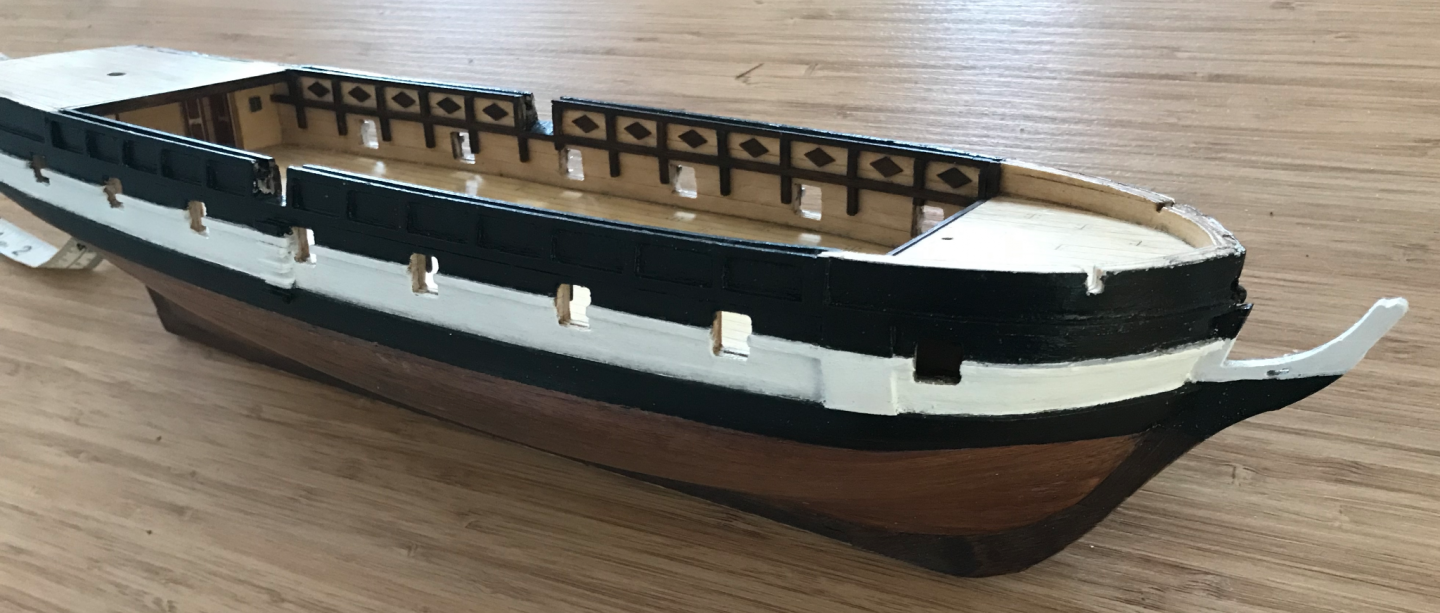
Then I just did some of the smaller things that help to make the hull look more finished including the gunwales, catheads, pin rack and mast steps. I also wanted to make my own wooden false quarter galleys to replace the metal ones. First, because I didn’t think my painting would be as crisp on the metal ones and second, because it would make it easier to fit in with the thicker wales. I made them out of some 3 by 1 mm strips. The white bits are 2 mm thick (two strips on top of each other) and the black bits are 3 mm thick. The white has been inspired by the replica. The sketch in the anatomy of the ship shows blue windows. I am not sure if this is to suggest they would have been painted blue or that they would have been actual windows. The former seems unlikely as that doesn’t really fit and the latter is definitely not true. These were ‘false’ quarter galleys meaning that they were not actual windows and were purely decorative. Therefore, I think the replica in Chile has got it right and that’s what I went with. (thanks Eric, for the photos) The bottom wavy bit is just a 1 mm strip cut using the metal quarter galley as a template and stuck on top of the wale


-
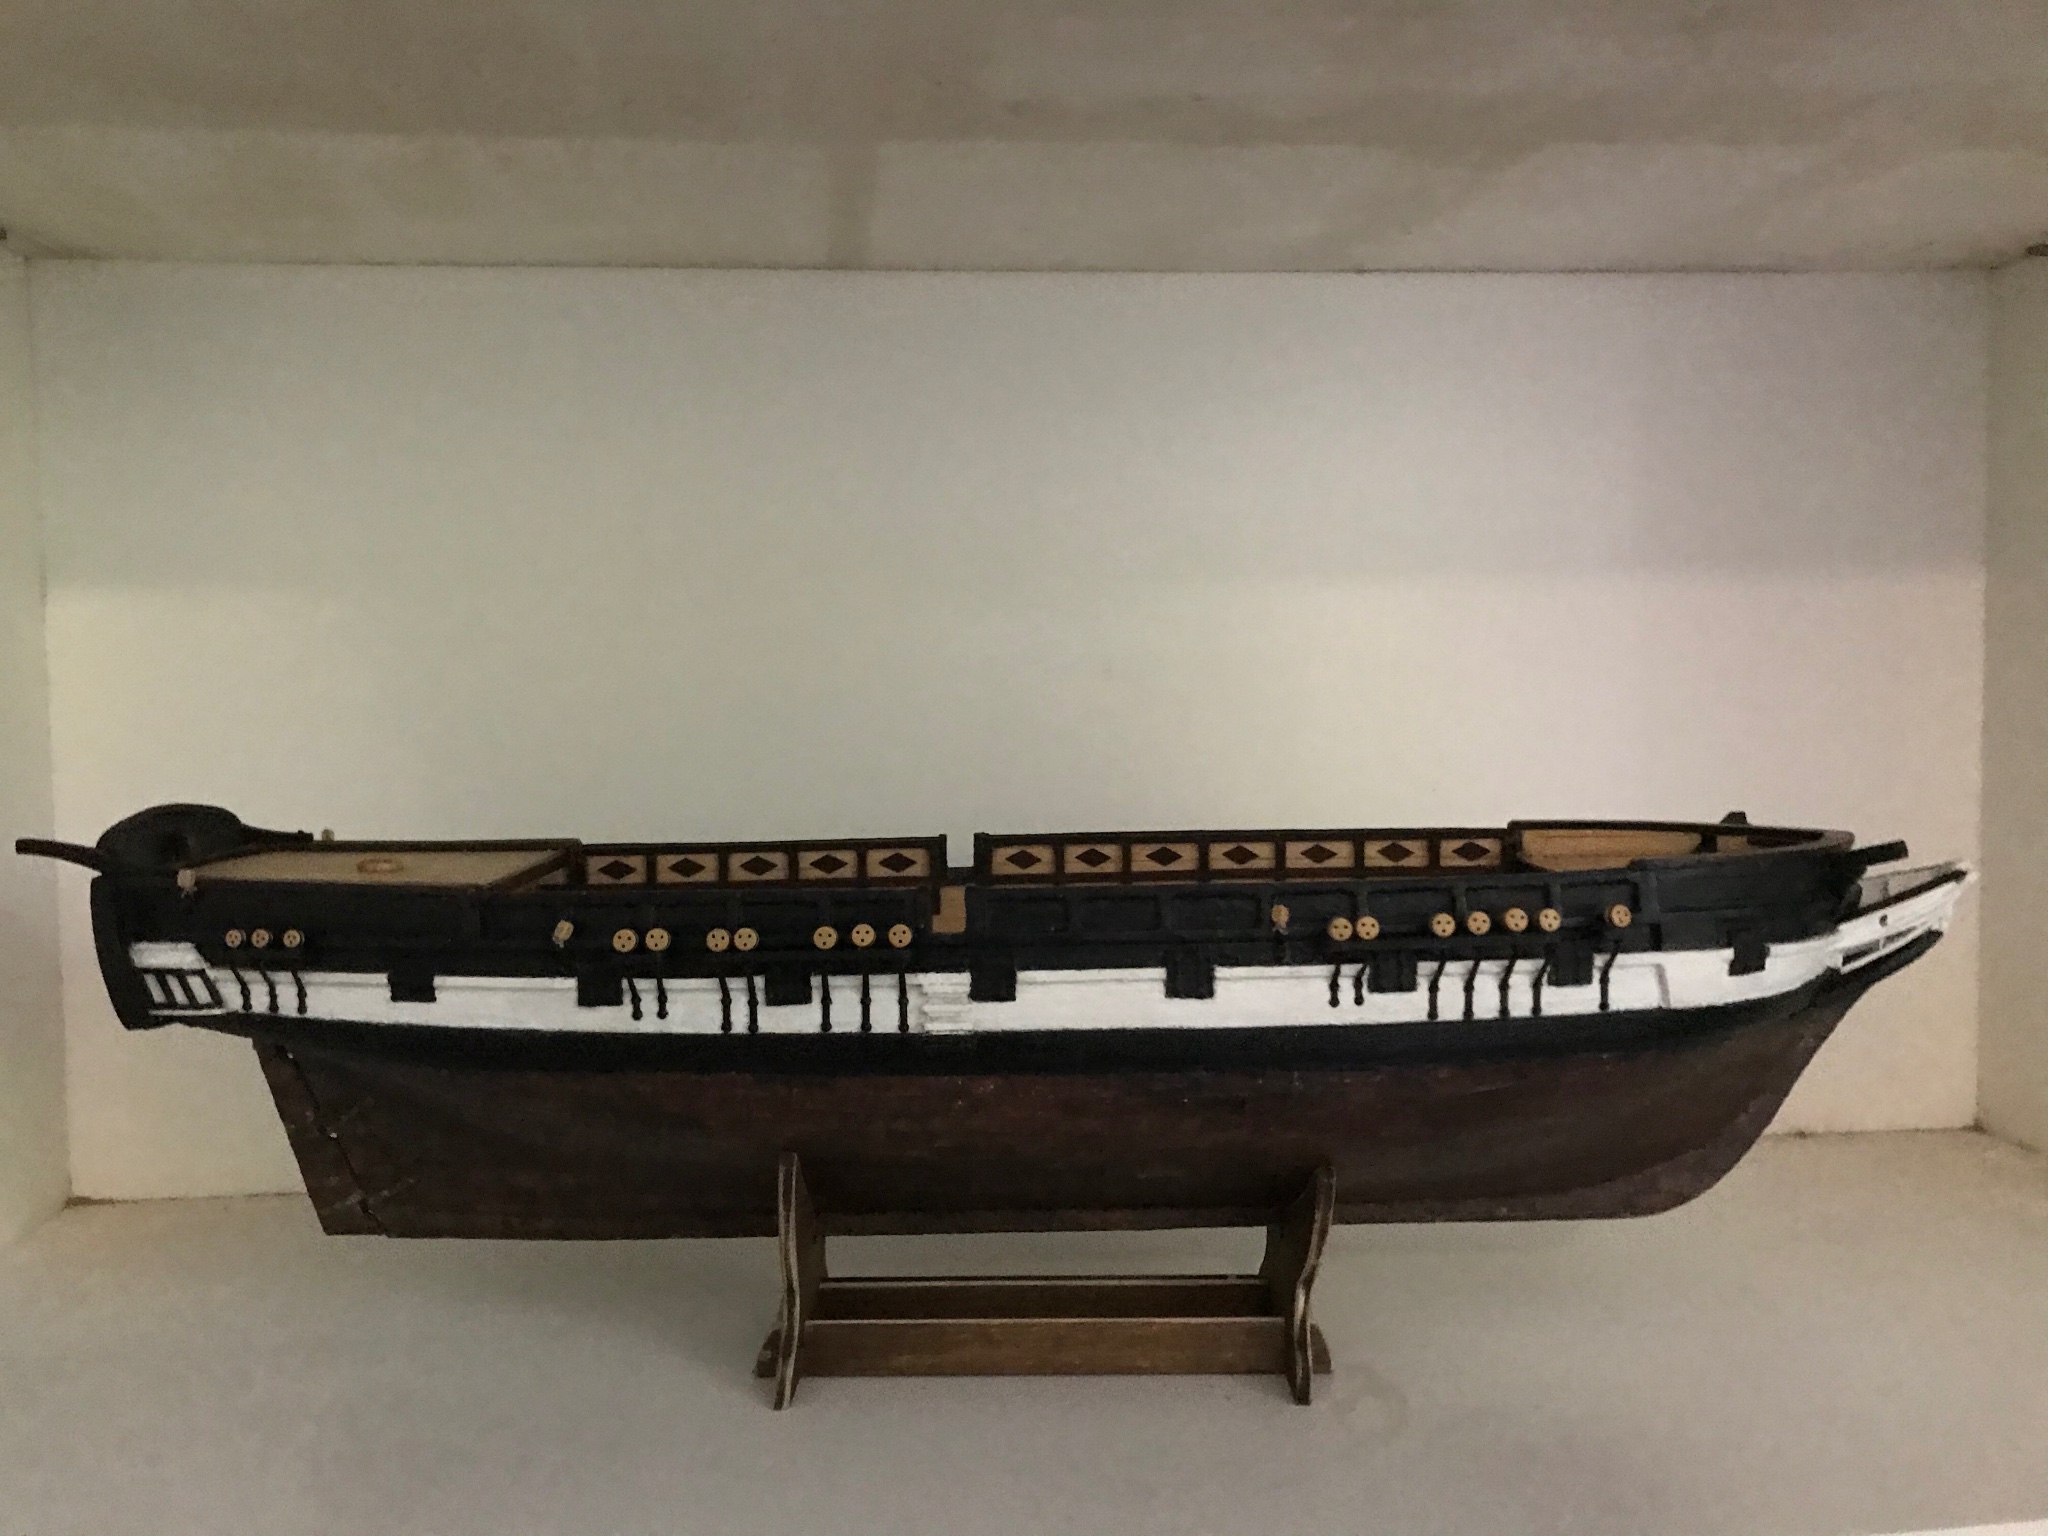
Okay, so, painting, argh, so many things I would do differently. First of all, the water line was a real challenge for me. I eventually got it, but the pencil really struggled to mark the varnished hull. I used a white undercoat as a primer. It was very runny and I should have used it more lightly, but oh well. It turned out all right after some scraping with a blade. Okay and then the actual paint. So, I didn’t realise that the paint I was using was actually glossy, so that was a bit annoying. I decided to varnish it with the matt varnish to protect the paint and also bring back the dullness. This is a bit later, so no photos of that in this post, but it did kind of work. The black turned out well, but the white went a bit yellow. I eventually re-painted the white parts with a flat wall paint sample pot, but that’s also a bit later. Definitely don't paint white on black like the instructions suggest. You will have to do a lot of white coats to cover the black. Also, getting the lines where white meets black to be clean and tidy was a real struggle. It is very difficult to get tidy lines with masking tape, it’s a good starting point, but is still a little messy. I used a very small brush to very gently paint around the lines and a blade to scrape off spill over while the paint was still wet. This was an ongoing process and I continued to do this through later stages as well. Unfortunately, due to an accident later on, I had to re-do most of my painting, but we’ll get to that.

-
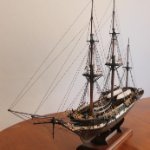
HMS Beagle by Krupi - OcCre - 1:60
LucienL replied to Krupi's topic in - Kit build logs for subjects built from 1801 - 1850
Also, would the plates even be shiny by the time they were installed? There are some photos of a very shiny cutty sark today, but would this have been the case when transportation and storage of plates was a little bit slower and less air tight? -
HMS Beagle by Krupi - OcCre - 1:60
LucienL replied to Krupi's topic in - Kit build logs for subjects built from 1801 - 1850
Oh cool, that's probably the most historically accurate way to do it. I have tried the baking soda (bicarb) method, I found that it is very slow and very uneven at what it does. You may have more success than me, but I found that it does pretty much nothing. I have also tried ammonia fumes, which also wasn't great and not really what I was looking for. Eventually I used liver of sulfur, which is what professional jewellers use to patina silver and copper, there are some great tutorials online. The gel form is best as the solid form will go off very quickly. You can get it from jeweller supply stores or order it online. https://koodak.com.au/products/liver-of-sulphur-for-silver-copper-brass?variant=30180608397 I added about 3 mL of the gel to a cup of boiling water from a kettle (not rolling or bubbling just steaming). It's good to let the water cool a bit before adding the gel. If you boil the liver of sulfur, you get toxic sulfur dioxide, so be careful. The hotter the water is, the quicker and deeper your patina will develop. I tried colder water, but it ended up more purple than brown. You have to be quick to get the copper done quickly as the water will cool and the strips dipped later will be a different colour to the ones dipped earlier. Don't try to heat it up again, that could go badly. Then you stick the copper in for a couple of seconds, as soon as you see a colour change (again, you need to be quick, a second too long will make it too dark), take it out and stick it in a bicarbonate bath. The bicarb bath is meant to halt the reaction, but it might change colour when you take it out and let it dry. I went through a few trials at different temperatures and leaving the copper in for different times to get the colour I wanted. It's also good to set up a bit of an assembly line, have your copper strips and then a rectangular container with the liver of sulfur solution. Then just stick in maybe 3 or 4 strips, by the time the last one is in, the first one is ready to take out. Then have your bicarb solution and just put them in there. It doesn't matter how long they stay in the bicarb bath, they will still change colour when they are taken out. Maybe wipe them down a bit when you do take them out to prevent the bicarb from crystallising on the copper After the plates are on the ship, I lightly buffed it with some fine steel wool to make it a bit more orange again (careful to not turn up the corners of the plates). You don't have to do this if you are happy with the colour. On my ship, one side was a little too dark and the steel wool made it similar to the other side. Then, seal the copper with a clear copper and brass protector (available from hardware stores). This will make it really glossy. The other thing is that the liver of sulfur patina is still shiny, so it needs to be dulled. If you can find a matt copper protector then that could work, but I'm not sure if they exist. I used a matt wood varnish on top of the sealed copper, but with a very light coat, I just wiped it on with a paper towel. If you put too much of the matt varnish on, it can get streaky and start to drip. You have to be careful with sanding, as you could easily catch the corners of your plates and sand off the patina, which makes it a bit challenging to get a flat even coat. The matt varnish will make it look darker and hide the purple sheen that might develop in the patina. Hope that helps -
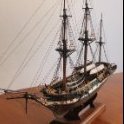
HMS Beagle by Krupi - OcCre - 1:60
LucienL replied to Krupi's topic in - Kit build logs for subjects built from 1801 - 1850
Hey Krupi, this is looking great so far. I'm also building the Beagle and also realised that the wooden lumpy things were meant to be hammocks. I think you've made the right call, it'll look more authentic without them. I also see you're coppering the hull as well. I've recently finished coppering and might have some tips if you're interested. I went for a more brown patina, so it might not be relevant if you're going for a bluer colour.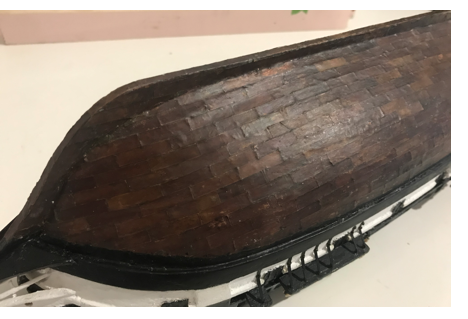
-
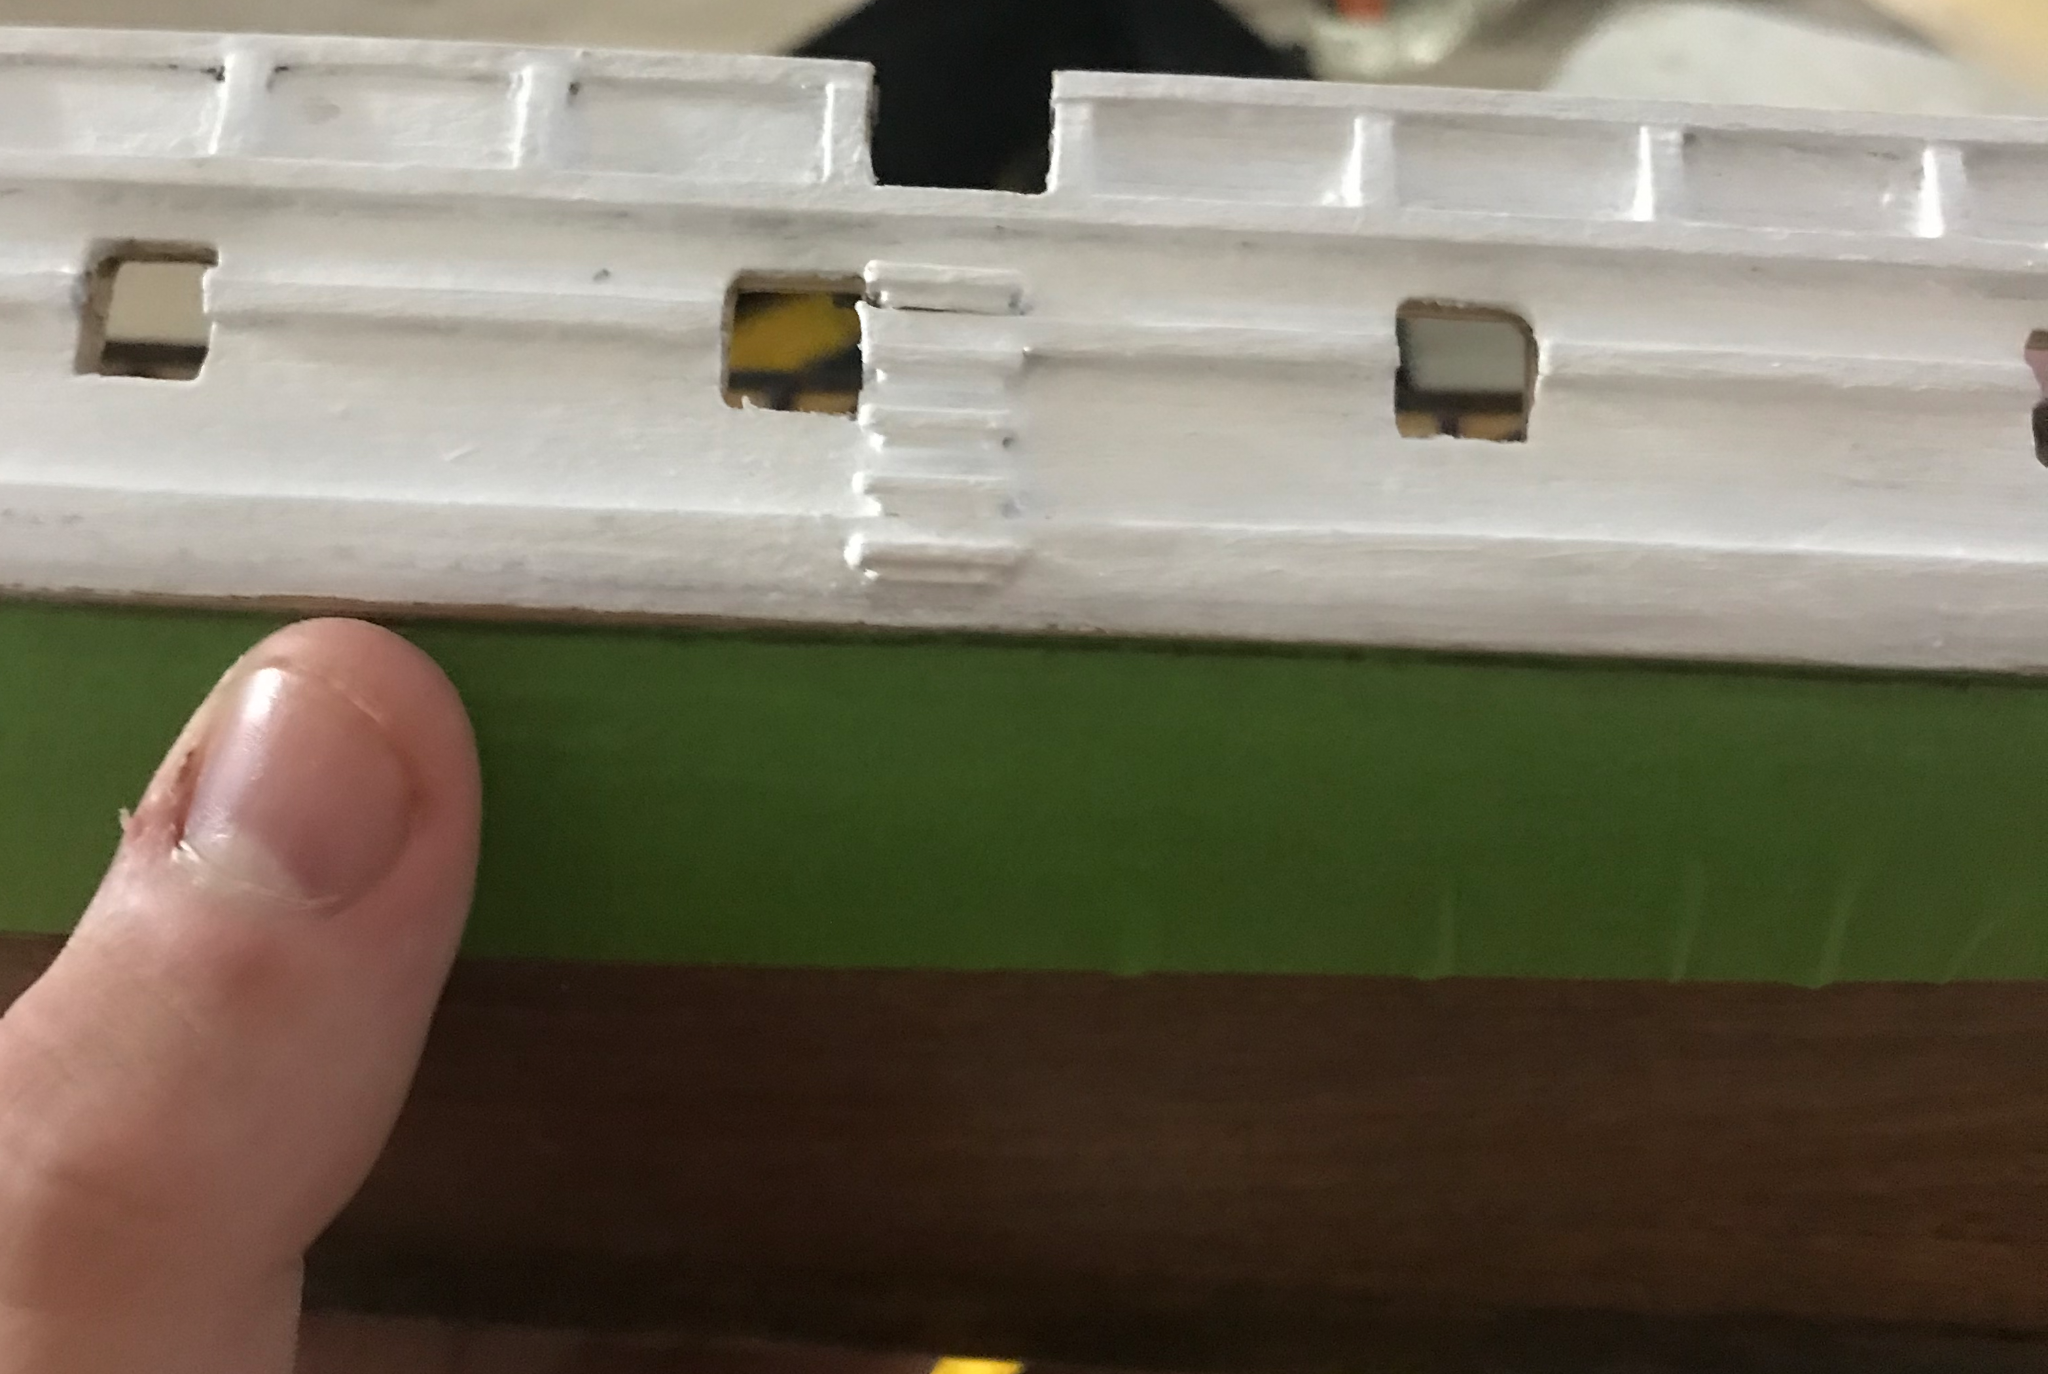
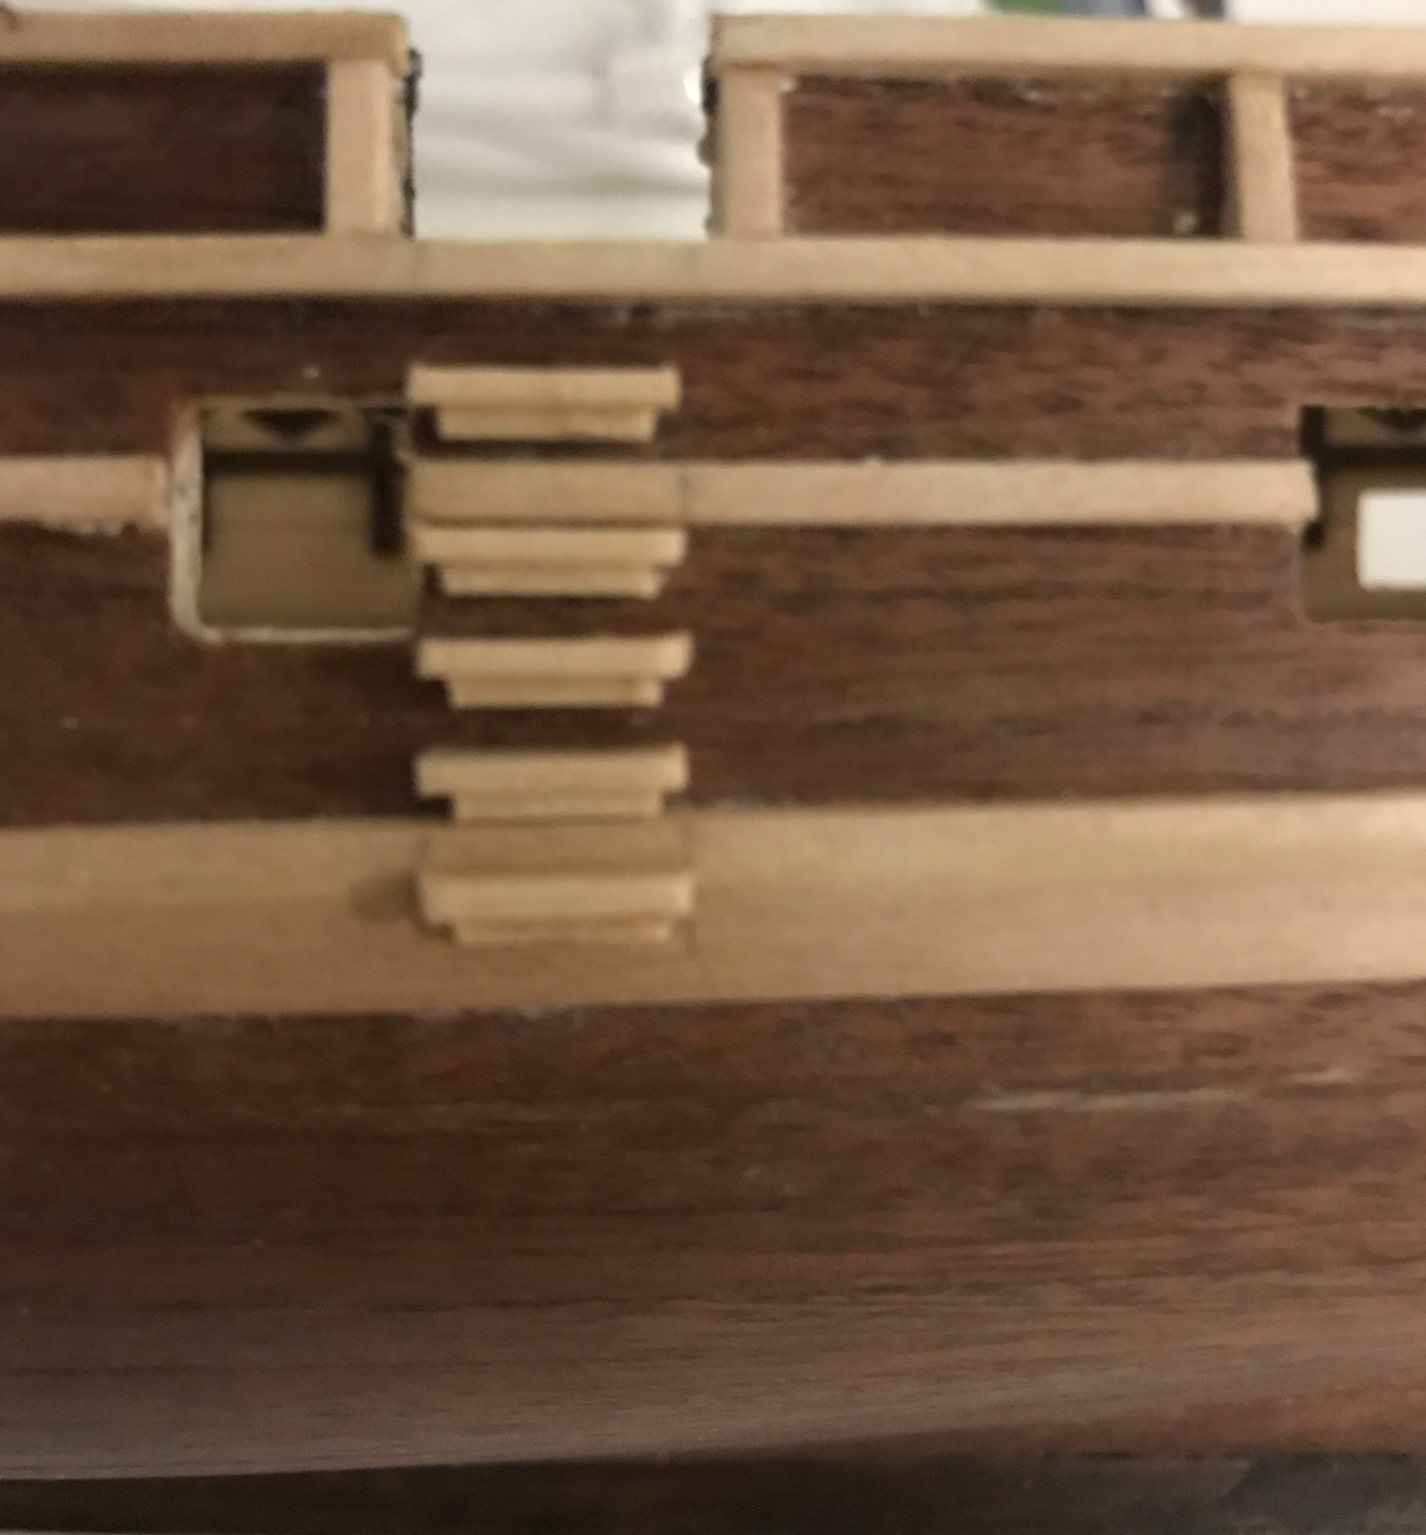
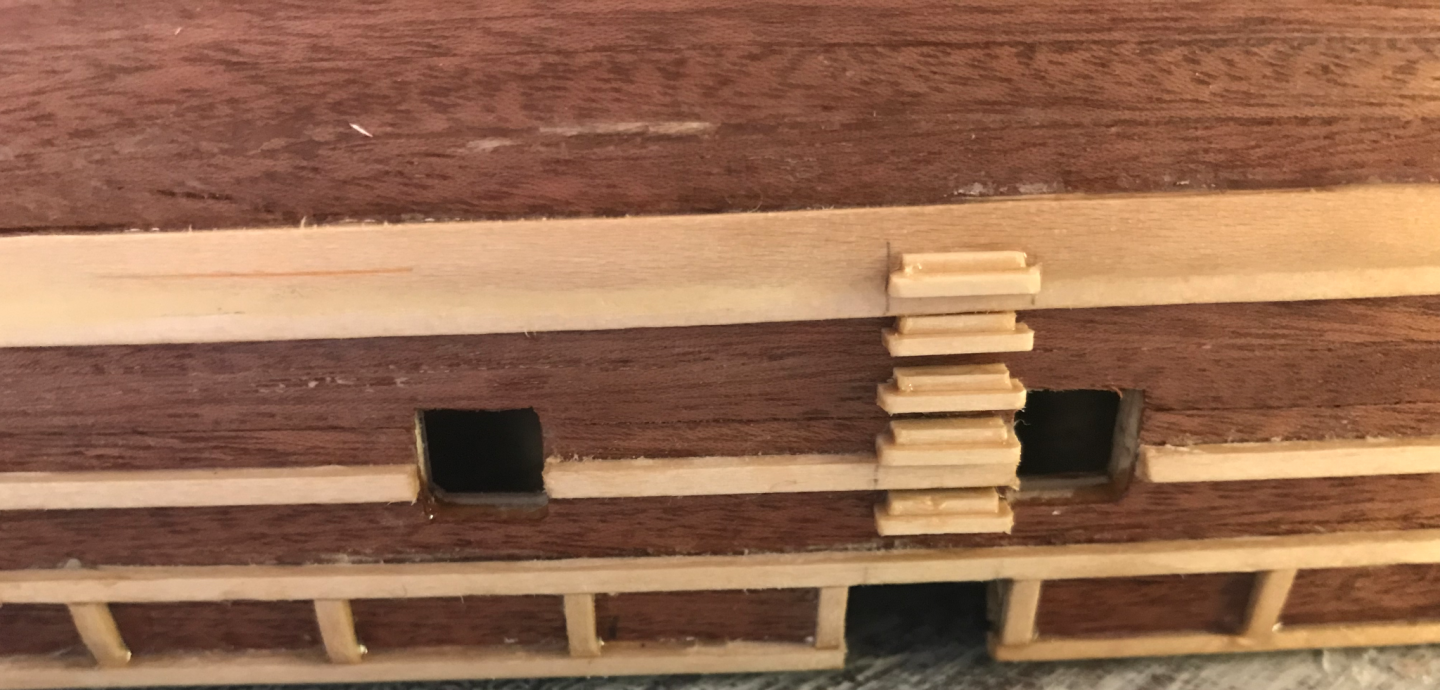
Thanks Pete and Tom for your comments. I glued on the keel using some slow drying wood glue with a bit of CA glue to hold it in place. This went fine, I used a bit of filling putty in some places to close the gaps between the hull and the keel pieces. This was coppered so it actually doesn’t matter that much, but at the time I still wanted it to look good. Then I made up some steps using some 1 mm material. I had to buy extra wood strips for the extra small boats that I will be building so I used that, but I think there would be enough 1 mm material provided in the kit to make up some steps, they’re not included in the instructions but are in most replicas/sketches/plans whatever. The plans would suggest that they had three layers, I tried this with some thinner material, but it just looked too crowded and messy. 2 layers of the 1 mm stuff looks good, I think. I can’t get the spacing quite right as the rubbing strakes are probably too thick, but I’ve seen that on some other ships, spacing of the steps has been adjusted in a similar way to accommodate rubbing strakes, so there is some precedent even if they would have been evenly spaced on the beagle. I think the steps come out 3 mm on the hull and the one on the wale comes out 2 mm from memory. And then after some cleaning and dusting, I could varnish the boat. The matte varnish really brings it to life, I was really happy with it at this stage and took a lot of photos. And here's one of the boat outside


-
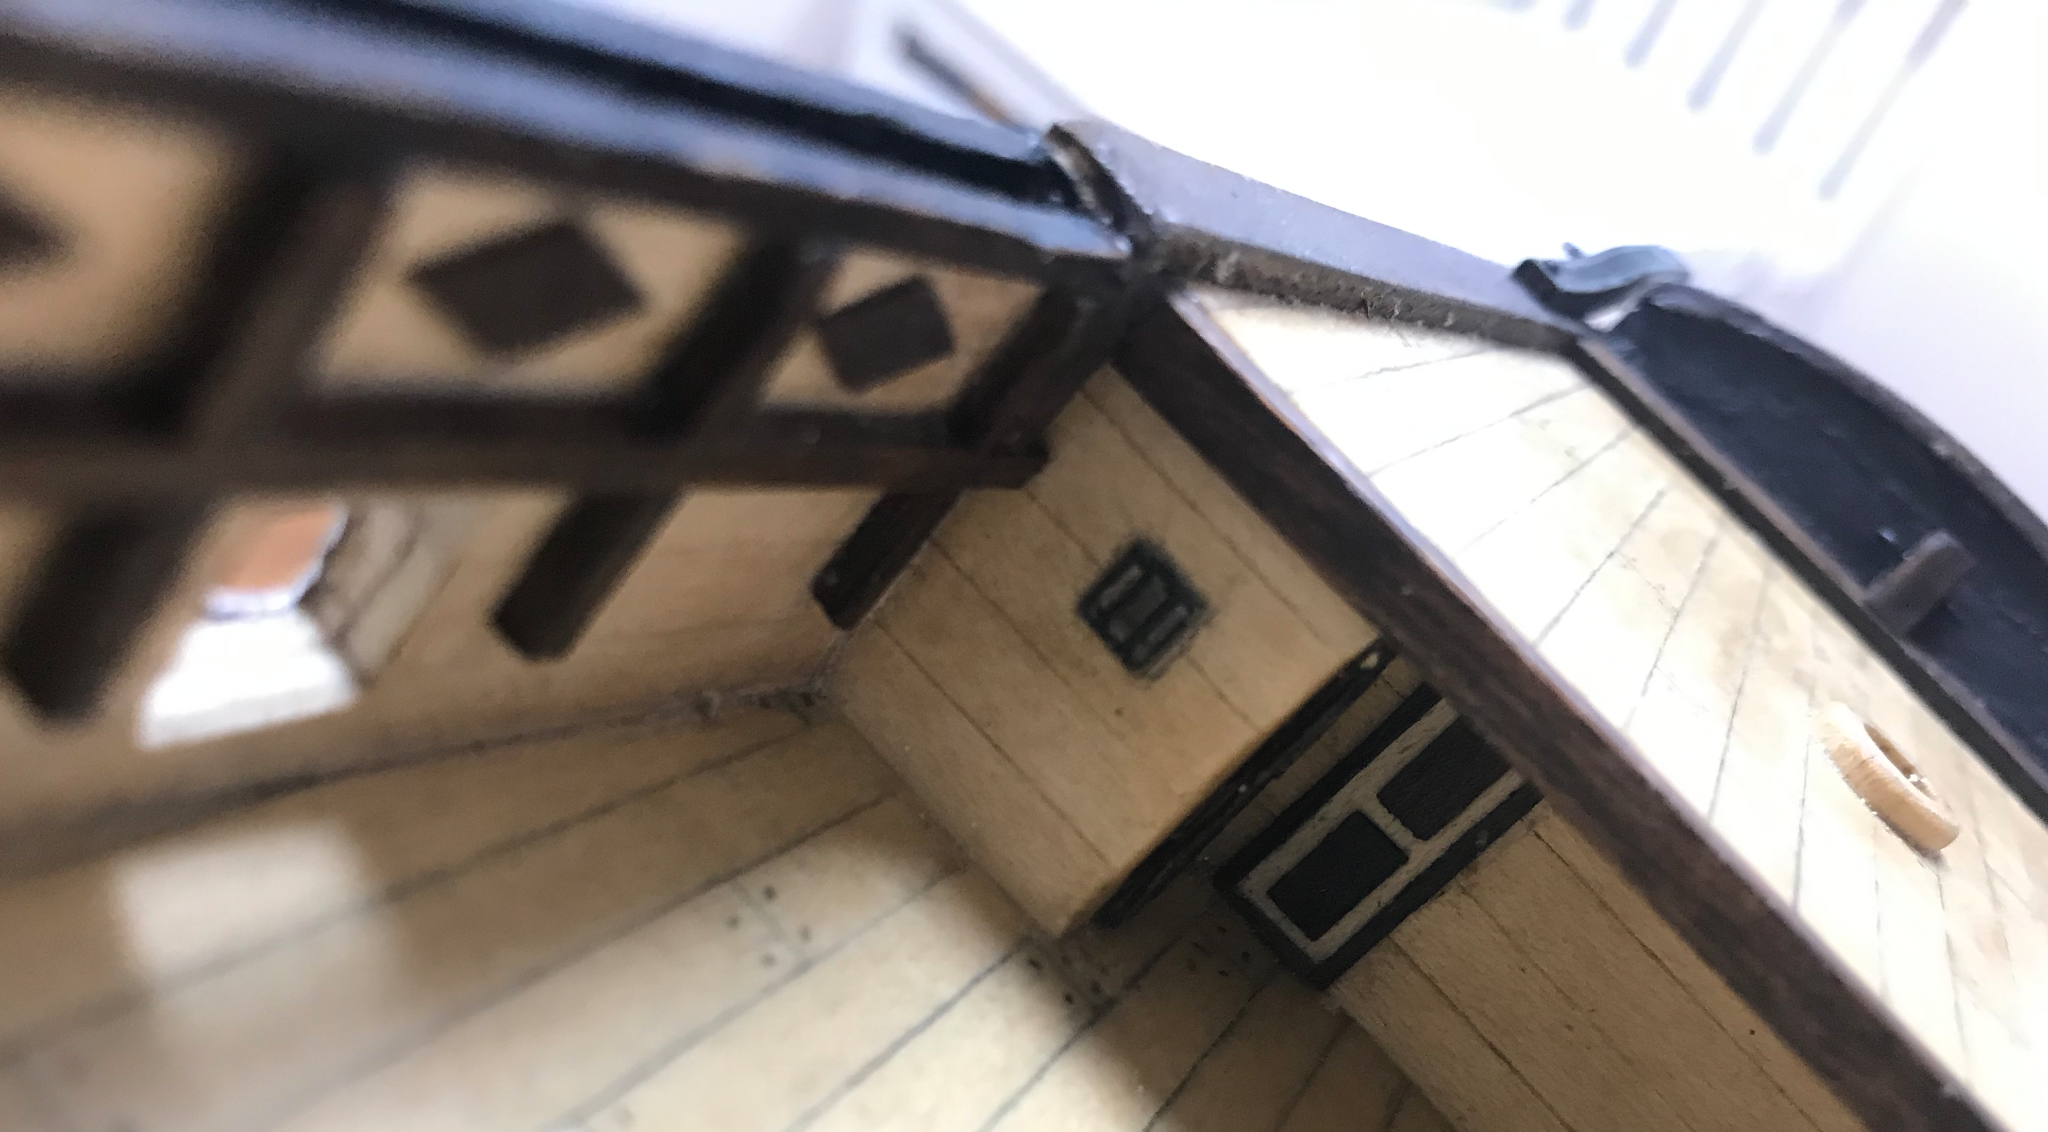
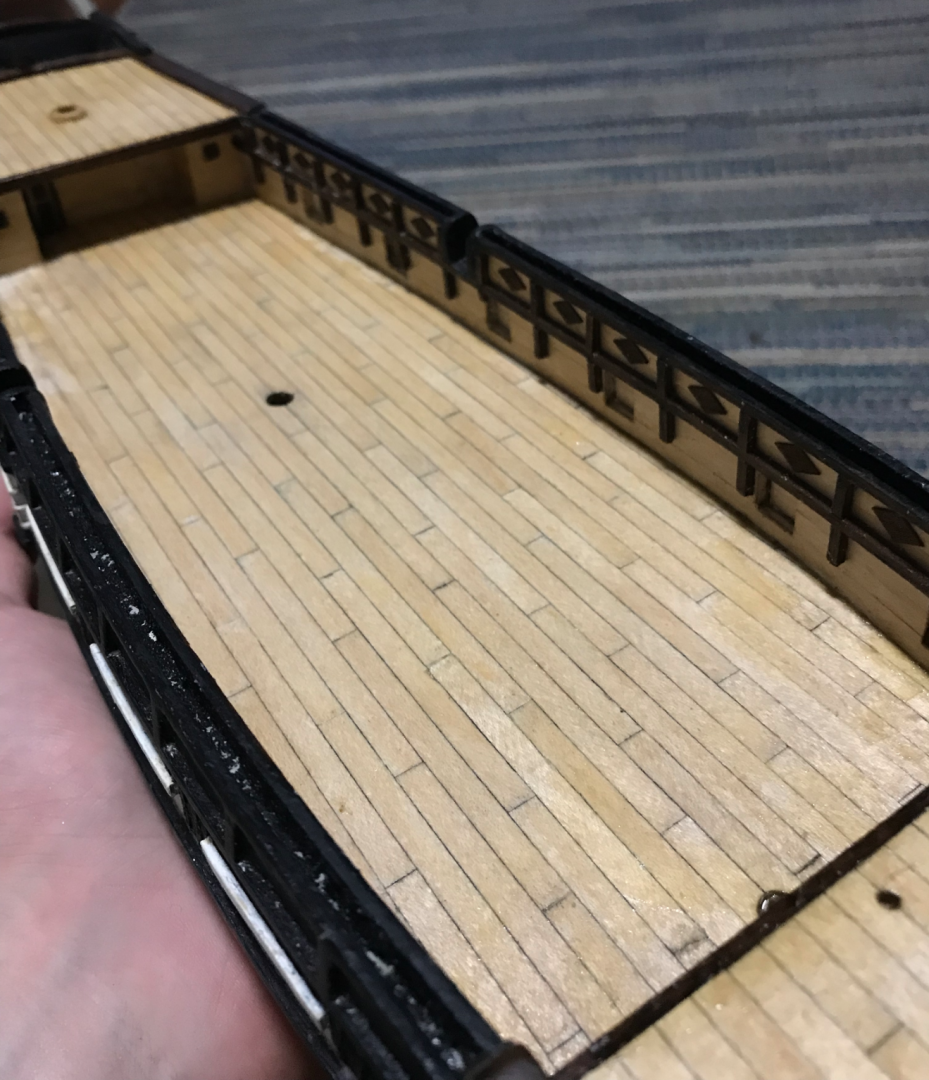
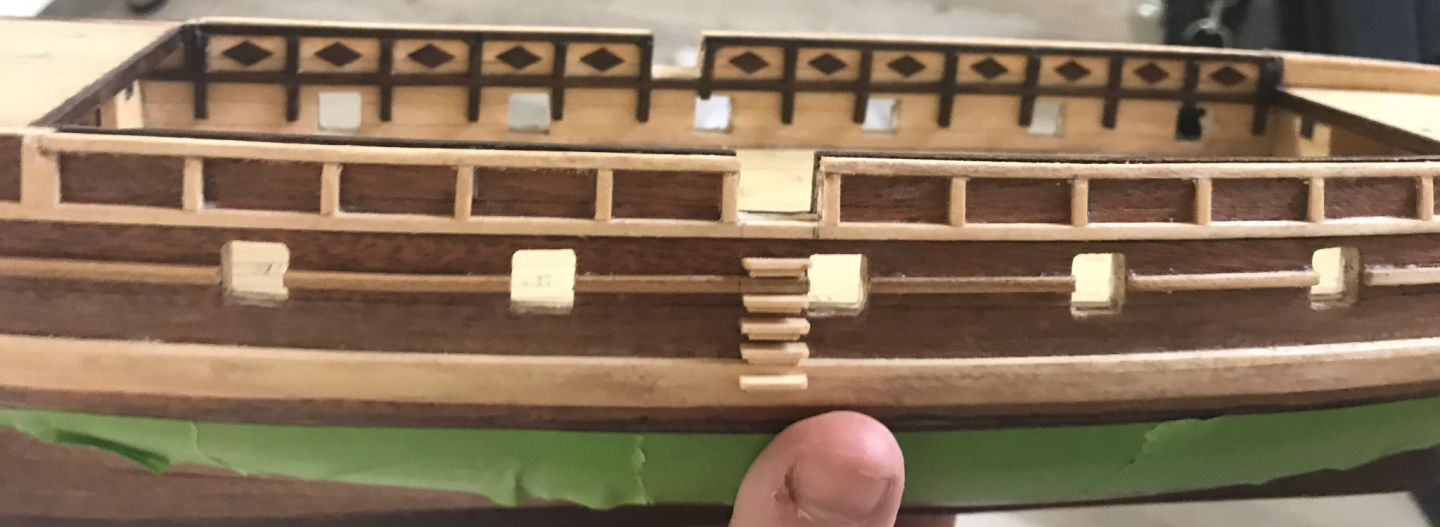
I decided to stain the internal hammock rail decorations with a fairly strong oak stain, which as I’ve mentioned before is just because I like the look, not because it is more accurate. This was also a really fun part of the build. The little bits look really good and are pretty enjoyable if a bit time consuming. I also put the top rail on. The instructions suggest you do this after painting, but as I will not be using the provided wooden hammocks, I didn’t see any reason why I couldn’t do them now. The soft limewood was easy to bend into shape and hold with CA glue but the sapele was much more difficult. It’s a much harder and springier wood. It looks quite messy here because I used some filling putty to close the gap between the top rail and the strips of the hammock rail. This was maybe unnecessary as the paint would have sealed the gap pretty well anyway. Here are the diamonds, which took some time to line up just right. As a way of committing myself to folding the hammocks from fabric, I used the provided wooden hammocks as a spacer piece to bend the sapele. No going back now, they were completely destroyed when I tried to take them out. I’m going to have to fold 120 tiny fabric hammocks and I still haven’t done it yet so I can’t promise that it turns out all right. I do think I would have been unhappy with the wooden ones though. And here is a very dusty final photo for this stage


-
Ah man, I guess if you did want to do it you could glue another 5 mm plank just below it, that would give you the same thickness but the spacing might not be right. It does cause some potential difficulties with the false quarter galleys (little metal window things at the back) so just be aware of that if you are going to do it. I ended up making the quarter galleys out of wood with some extra material so I could get them to be the right shape.