JimHawkins
-
Posts
14 -
Joined
-
Last visited
Recent Profile Visitors
165 profile views


-
 daynesy reacted to a post in a topic:
HMS Endeavour’s Longboat by Jim Hawkins - FINISHED - Artesania Latina - 1:50
daynesy reacted to a post in a topic:
HMS Endeavour’s Longboat by Jim Hawkins - FINISHED - Artesania Latina - 1:50
-
jpalmer1970 reacted to a post in a topic:
HMS Endeavour’s Longboat by Jim Hawkins - FINISHED - Artesania Latina - 1:50
-
GrandpaPhil reacted to a post in a topic:
HMS Endeavour’s Longboat by Jim Hawkins - FINISHED - Artesania Latina - 1:50
-
SweepHall reacted to a post in a topic:
HMS Endeavour’s Longboat by Jim Hawkins - FINISHED - Artesania Latina - 1:50
-
 Thanks a lot Chris 👍
 -
ccoyle reacted to a post in a topic:
HMS Endeavour’s Longboat by Jim Hawkins - FINISHED - Artesania Latina - 1:50
-
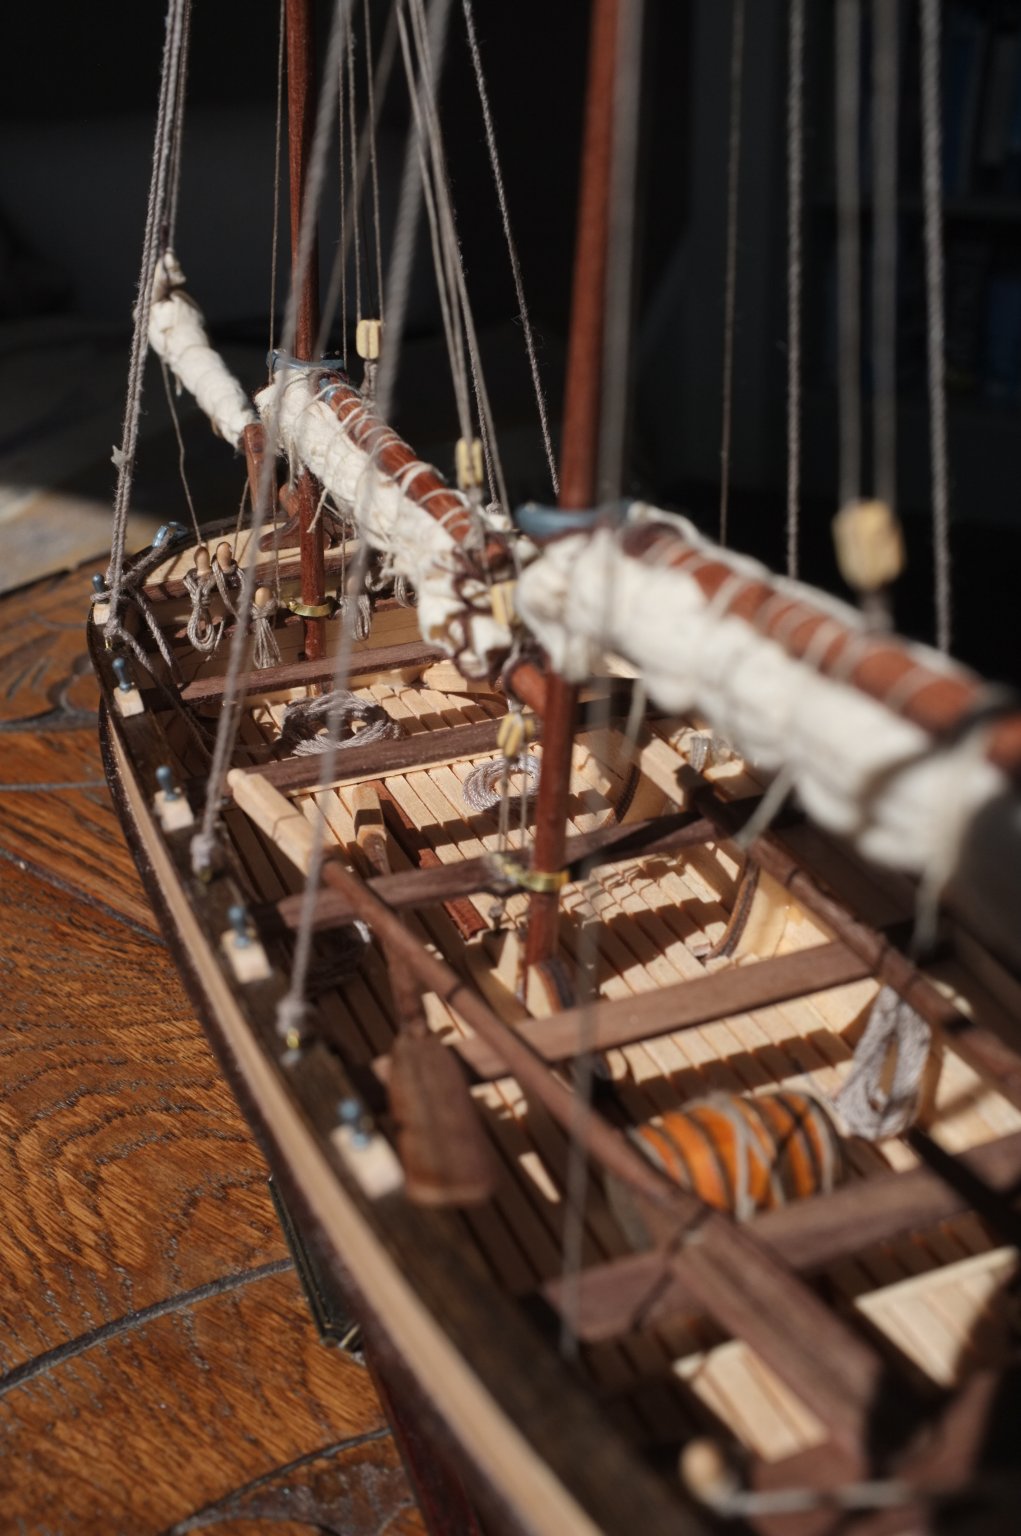
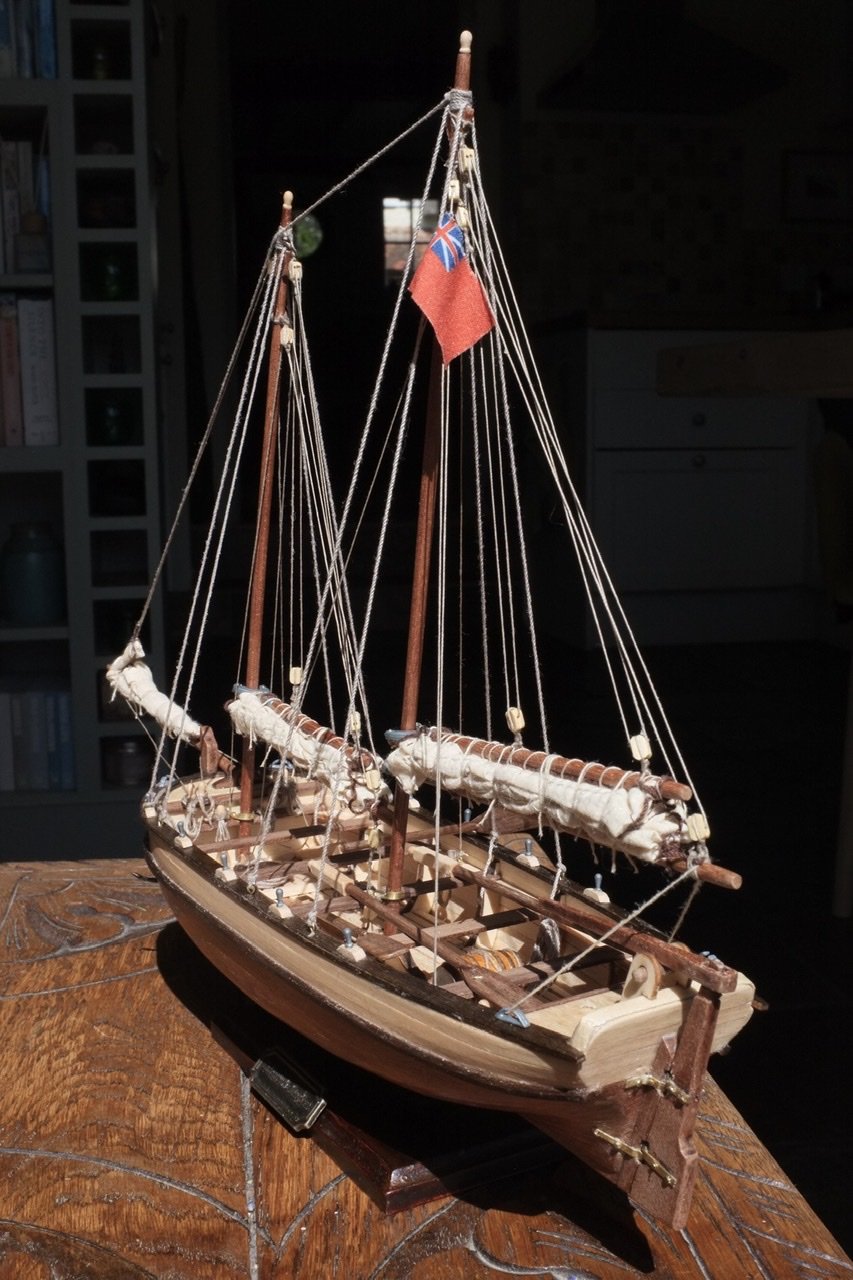
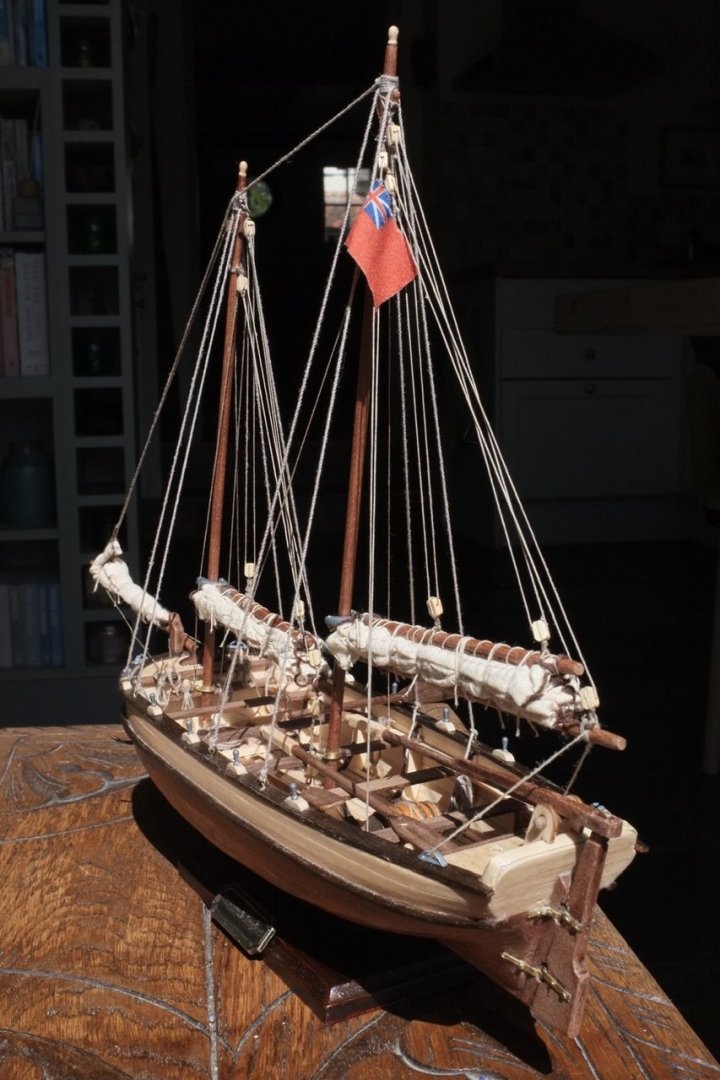
Hi, I think I’m finished now so here are a few pictures. There were a couple of things I figured out along the way that I was tempted to go back and change but I think I’ll leave that for the next one 🙂.

- 14 replies
-
- 5
-
-
- artesania latina
- endeavour longboat
- (and 1 more)
-
ColFitz reacted to a post in a topic:
HMS Endeavour’s Longboat by Jim Hawkins - FINISHED - Artesania Latina - 1:50
-
Ryland Craze reacted to a post in a topic:
HMS Endeavour’s Longboat by Jim Hawkins - FINISHED - Artesania Latina - 1:50
-
I’ve been finding the rigging interesting but am reasonably happy with it now. I haven’t really mastered tying the blocks to the masts and booms and so on. I tried using a fish hook knot but that didn’t work that well and I tried a number of other ideas and none are entirely satisfactory. I’ve ended up with some Heath Robinson solutions that involve glue which I was hoping to avoid. I tried to find some information about how to do this here and elsewhere but they all seemed to imply that you need to tie the ropes onto the blocks using thinner rope. I can’t remember the technical term but there wasn’t any thinner rope in the kit and I wondered if that only applies to bigger blocks than these. Anyway, any pointers there would be appreciated. I’m not sure Whether I will redo some of them but I guess that would depend on what is involved. Try not to look to closely at mine I’ve got the sails on now too and I soaked them in tea to make them look a bit more used and that worked nicely but then when I rigged the boat I couldn’t convince myself that I liked the look of them. They somehow don’t seem to have any weight and that makes it just look a bit wrong. In the end I thought I’d try and go for furled sails. I’ve been looking at loads of pictures of furled sails on the internet and this is where I am currently. I was just curious to see what people thought of how I’ve done this? Ignore all the loose ends.

- 14 replies
-
- 2
-
-
- artesania latina
- endeavour longboat
- (and 1 more)
-
JimHawkins changed their profile photo
-
Ryland Craze reacted to a post in a topic:
HMS Endeavour’s Longboat by Jim Hawkins - FINISHED - Artesania Latina - 1:50
-
Ryland Craze reacted to a post in a topic:
HMS Endeavour’s Longboat by Jim Hawkins - FINISHED - Artesania Latina - 1:50
-
Ryland Craze reacted to a post in a topic:
HMS Endeavour’s Longboat by Jim Hawkins - FINISHED - Artesania Latina - 1:50
-
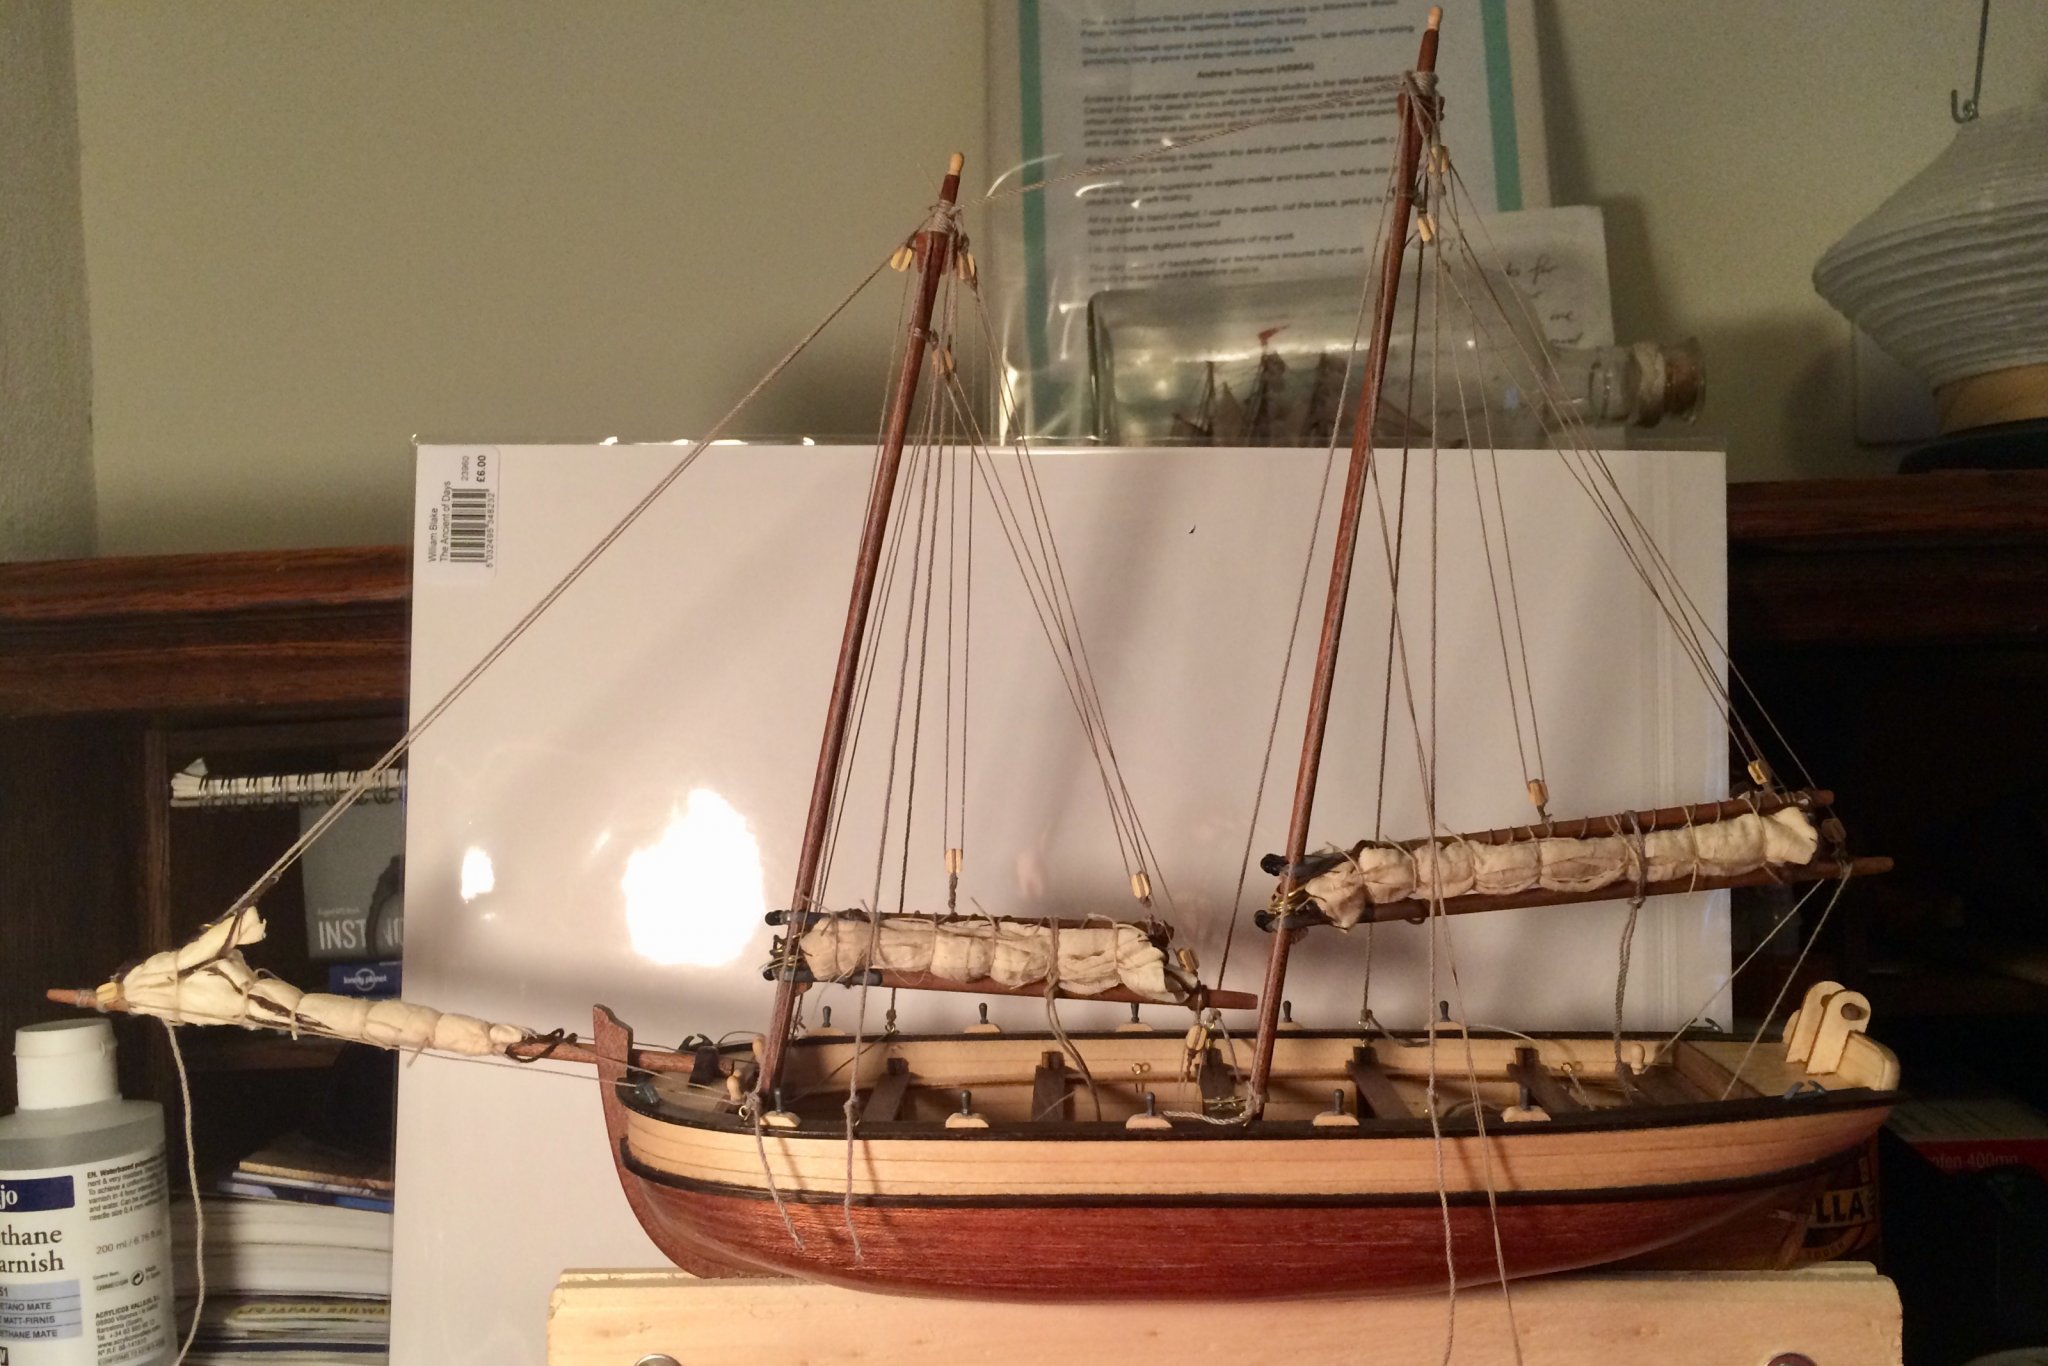
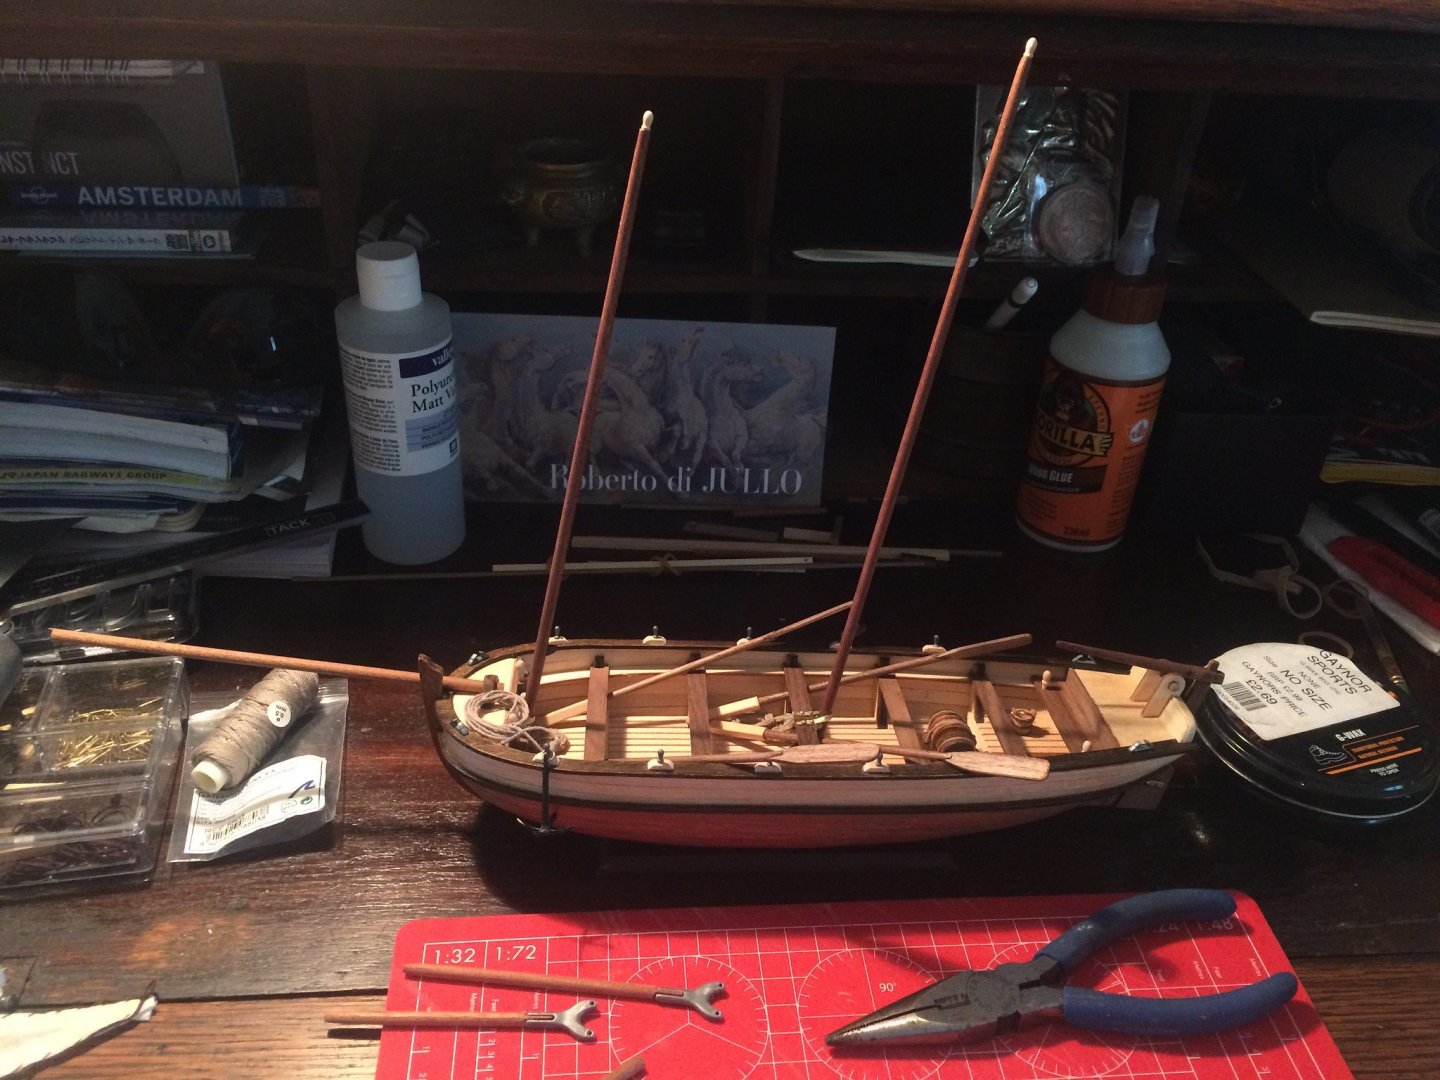
Masts on, gaffs and booms prepared. The latter were a bit fiddly the first time but got the hang of it after that. I found it best to cut a little bit less wood off and then sand to fit to the metal parts. I didn’t find the instructions great for getting the masts in position but the positioning is kind of limited by the way the masts fit into the holes for this so I think it looks ok. It seemed to look like this on the box and in the instructions. I must admit I hadn’t realised that masts are angled backwards a bit. Is that common? I’d always assumed they were vertical (perpendicular to the deck)? So that’s pretty much up to date now. Currently working on the rigging and will post again when I’ve made a bit more progress. Slow going as it’s been really hot and the rigging is pretty fiddly!
- 14 replies
-
- 1
-
-
- artesania latina
- endeavour longboat
- (and 1 more)
-
Rudder was next. This was quite tricky. It wasn’t the right length but luckily I‘d read about that so just trimmed it to size. There also didn’t appear to be any axles for the hinges. I ended up using two of the brass pins for planking but as you can see in the picture that didn’t look too great so I took it apart and made some axles from the leftover brass rod that was in the kit. That worked ok but then I realised I wasn’t happy with the tiller sticking up like that so I had to take it apart again and unstick the tiller (which was a tad stressful as I thought I was going to break it) but got there in the end. I have also filed down the sharp edges on the hinges now but have decided to leave the rudder off for now and put it on again when I’ve done most of the other stuff.

- 14 replies
-
- 2
-
-
- artesania latina
- endeavour longboat
- (and 1 more)
-
Oars were completed next. No major issues here apart from where the blade slots into the shaft. This was a bit tricky but cutting more V-shaped notches (rather than square) was easier and sanding the oar blade to fit into these gave a neat fit. That’s probably what you are supposed to do but it wasn’t clear from the instructions so thought that was worth mentioning. I was starting to feel that I was making some good progress at this point and it was tempting to just leave it as a rowing boat. I guess it would have been used like that too as I’m assuming the masts would have been removed when it was stored on deck of the Endeavour?

- 14 replies
-
- 2
-
-
- artesania latina
- endeavour longboat
- (and 1 more)
-
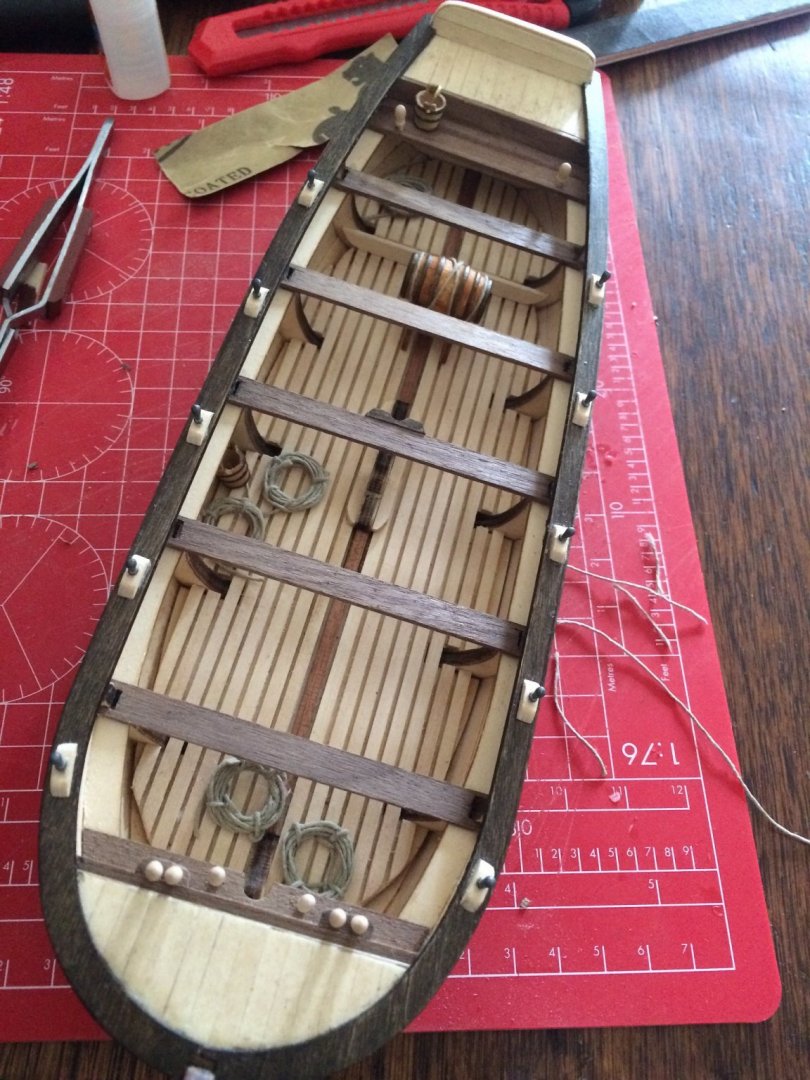
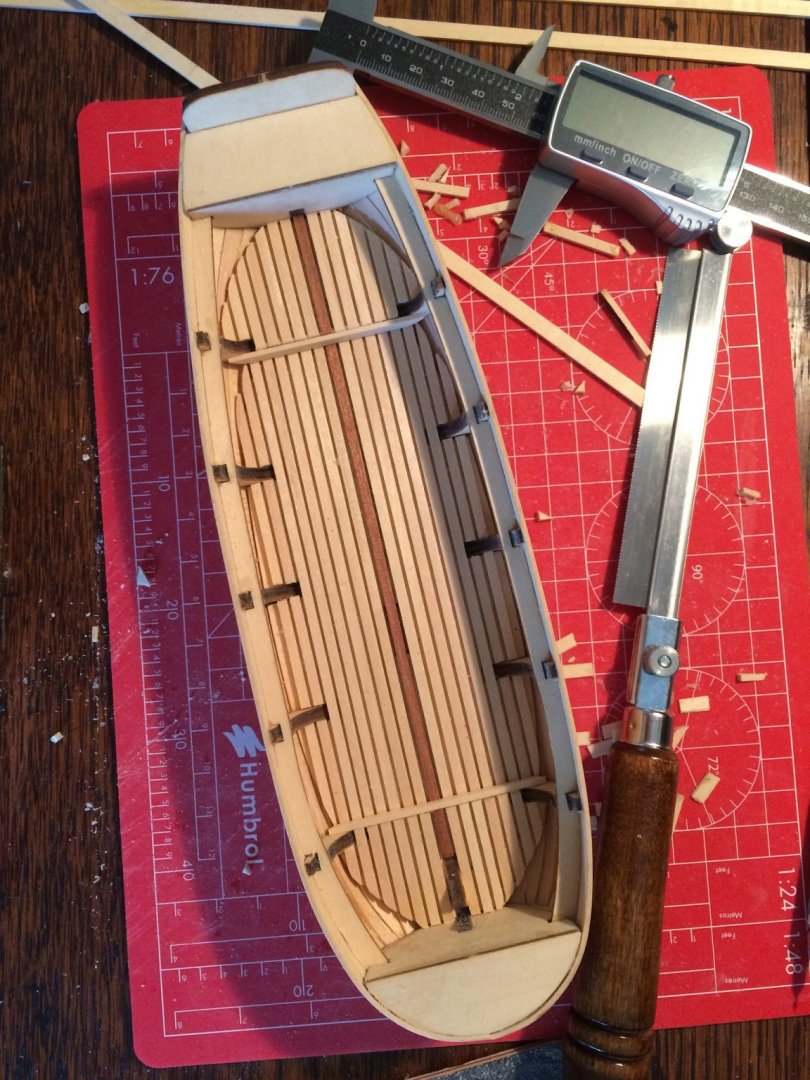
I fitted the benches next which was a bit tricky but worked out how to do that ok eventually - I had some trouble cutting the bits out of the ends to fit around the bulkheads. How have other people done that. I’d saw down the two sides of the intended notch but then had to somehow snap out the last edge without splitting the wood. I scored it to do that but wondered if there might be a better way? I soaked and fitted the strips around the hull (where the light and dark wood meet). Gluing these on was a bit tricky as the PVA didn’t stick too well over the varnished wood. I probably should have done this before varnishing? In the end I had to resort to super glue and clamps to get that to stay in place. The gunwales went on OK although this also highlighted some earlier imperfections - slight twists in the hull meant the fit was a bit off. I coloured both of these bits using an umber Windsor & Newton promarker. This was a tip I had picked up on this forum - definitely seemed preferable to the bitumen mentioned in the instructions and came out quite nicely. The last picture shows how it looked after boarding the various areas near the front and back of the boat, installing the oarlocks, barrel, buckets, and coiling the ropes all as described in the instructions. No major issues and quite fun doing all of these little bits.
- 14 replies
-
- 2
-
-
- artesania latina
- endeavour longboat
- (and 1 more)
-
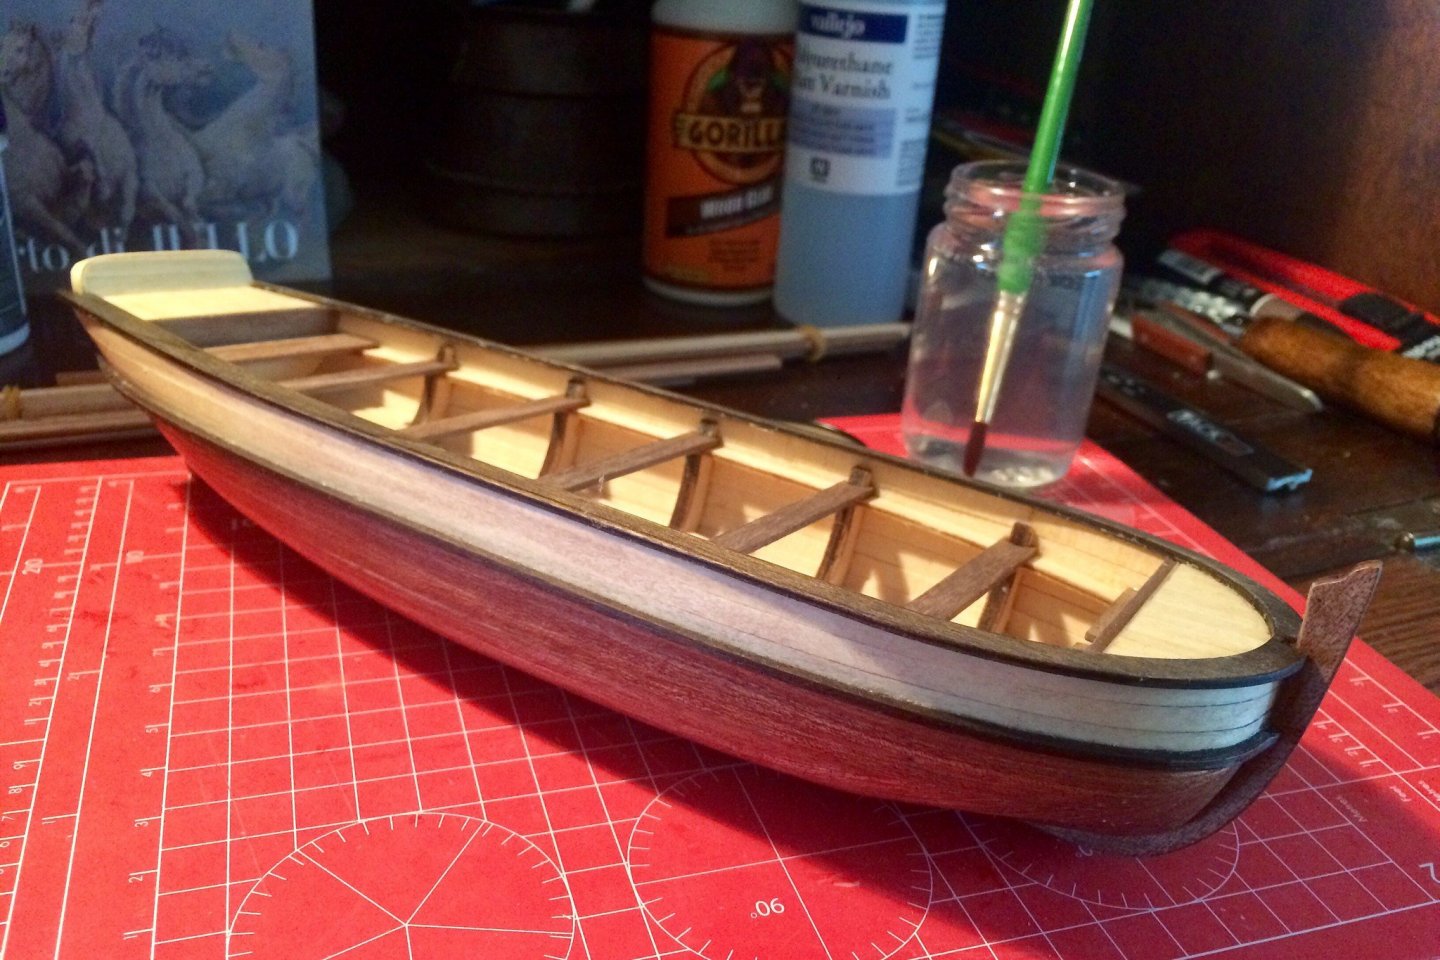
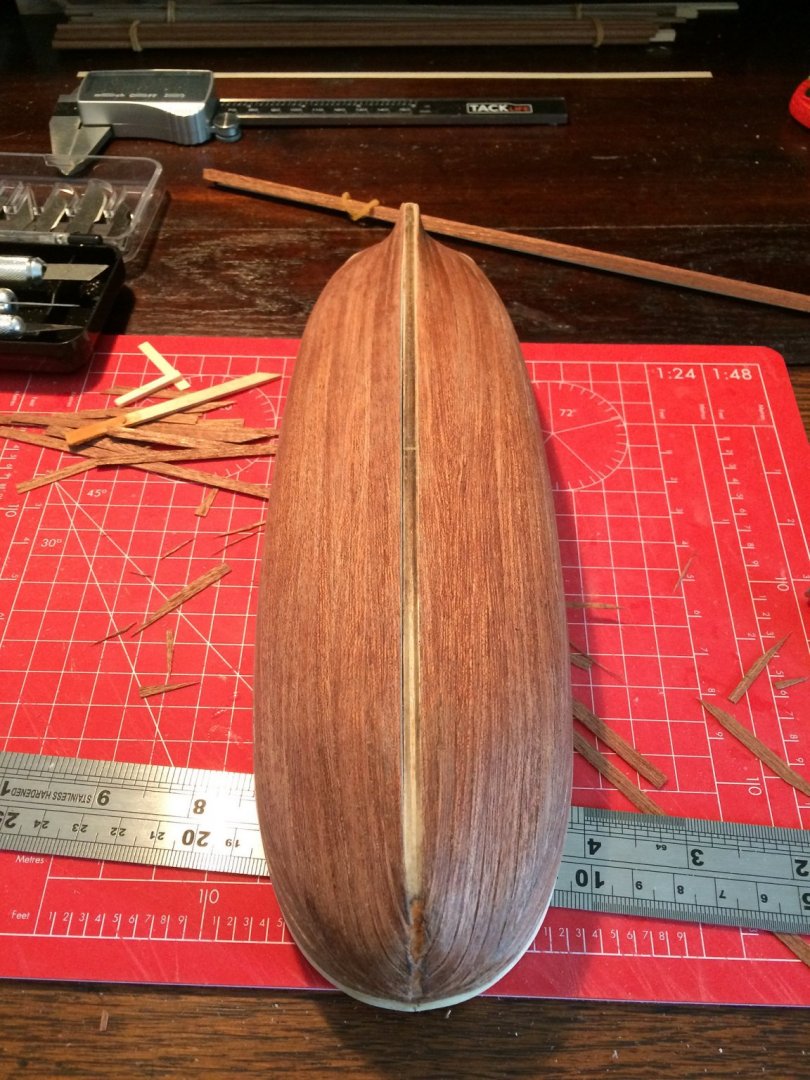
Next up was installation of the keel. It didn’t fit too well at the bow (probably due to my sub-standard prep work) but a bit of sanding fixed that. I forgot to sand off the part numbers on the keel (it would have been better if they hadn’t put them there in the first place) but I don’t think anyone will notice in the end. I opted for Vallejo matte polyurethane varnish after much deliberation. The photos show how this turned out after 5 coats with finer sanding between each coat (300 to 1500grit) and a final buff. I thought it looked pretty good at this point. It didn’t hide all of the mistakes but not too bad I thought.
- 14 replies
-
- 3
-
-
- artesania latina
- endeavour longboat
- (and 1 more)
-
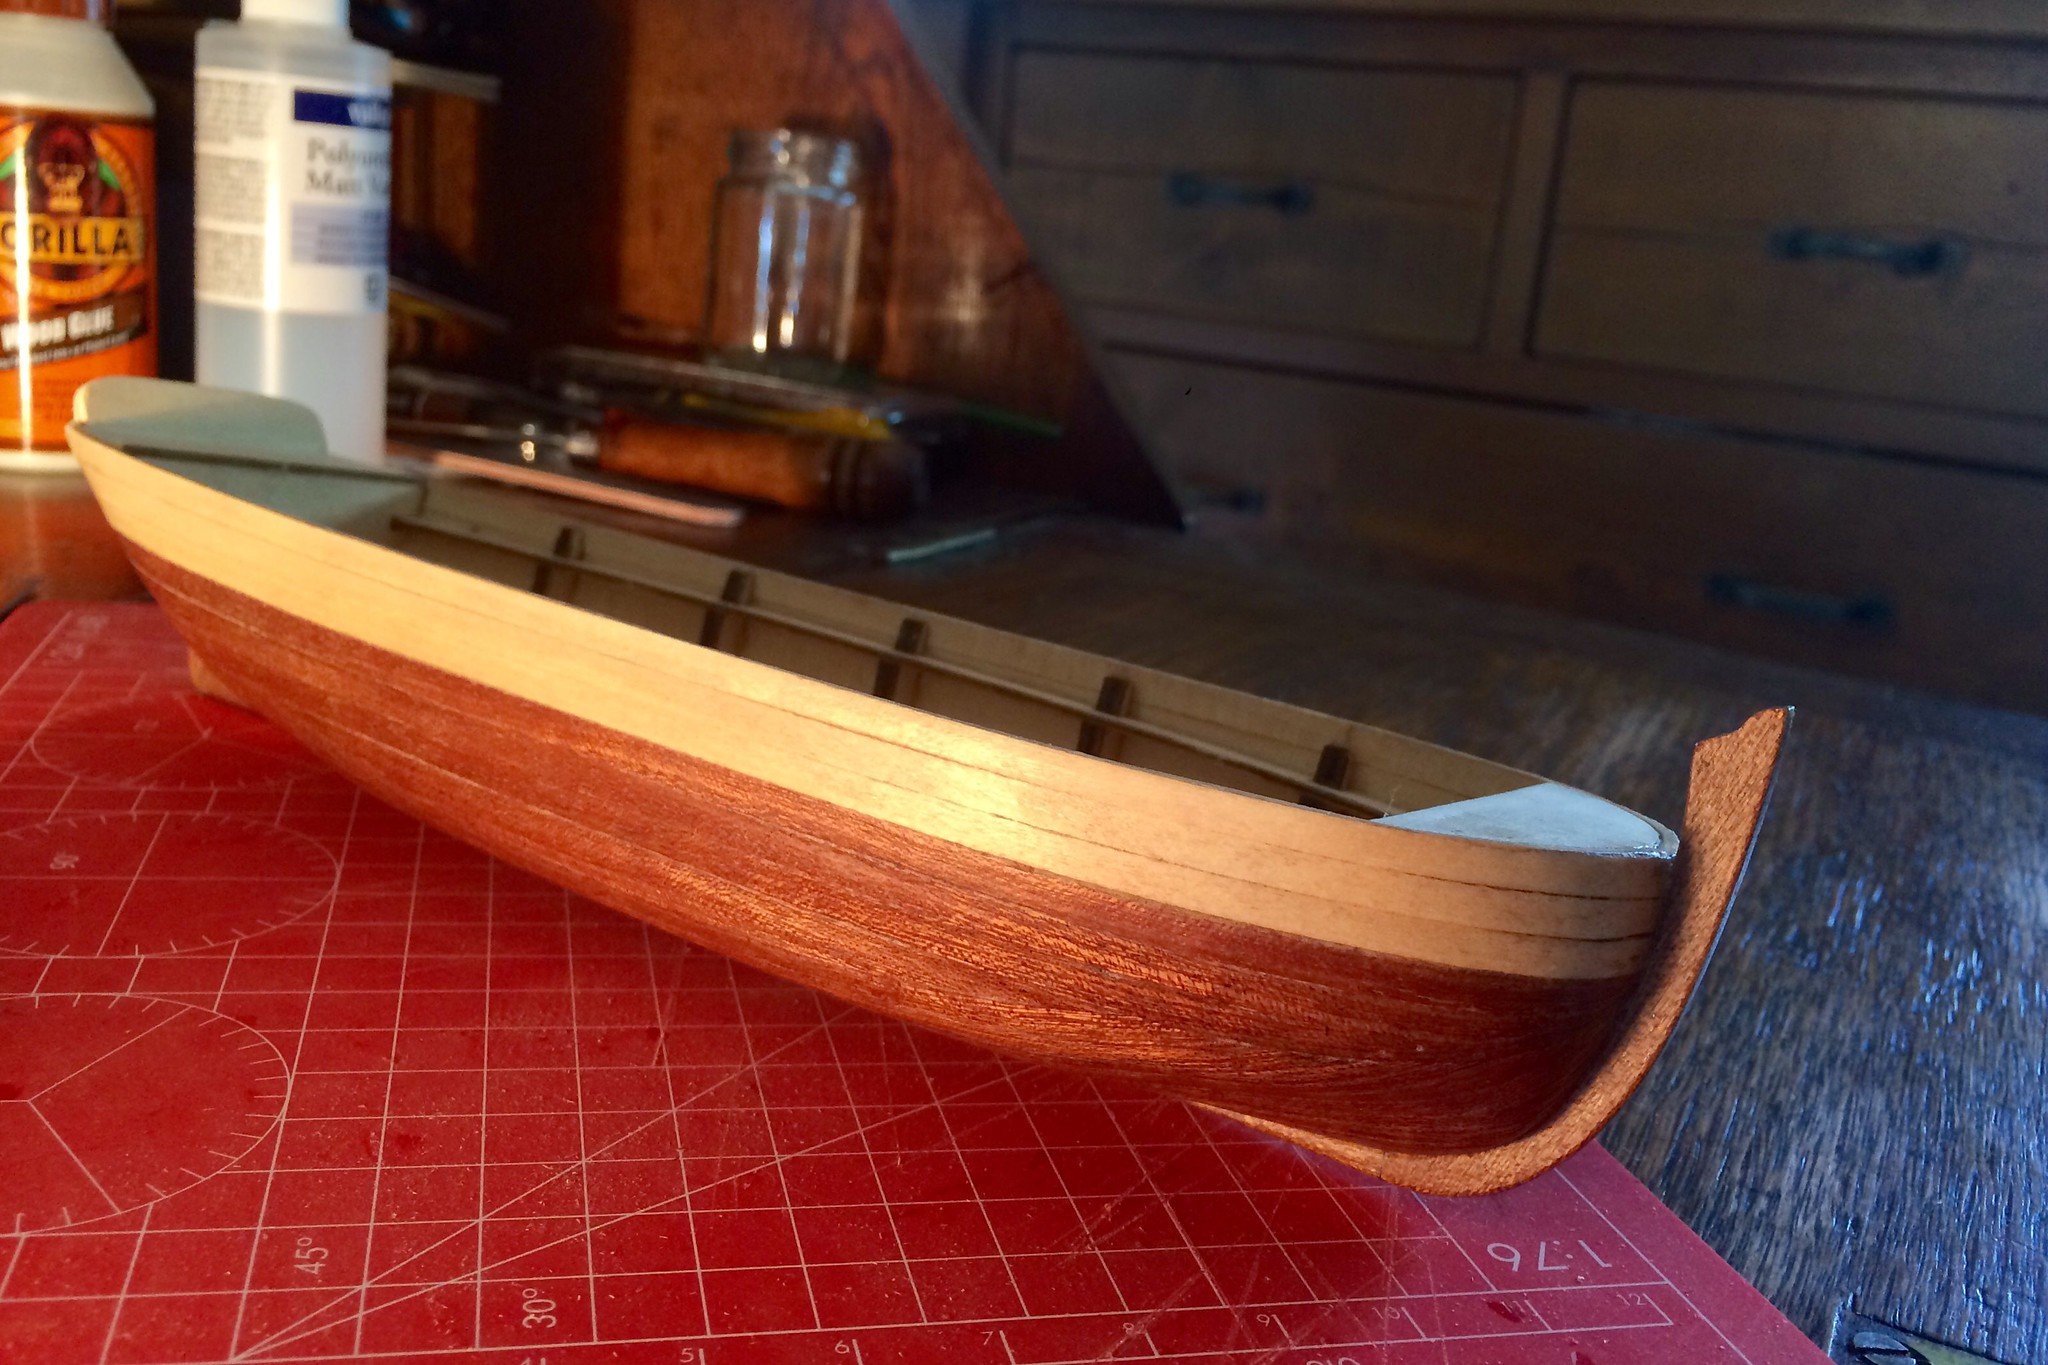
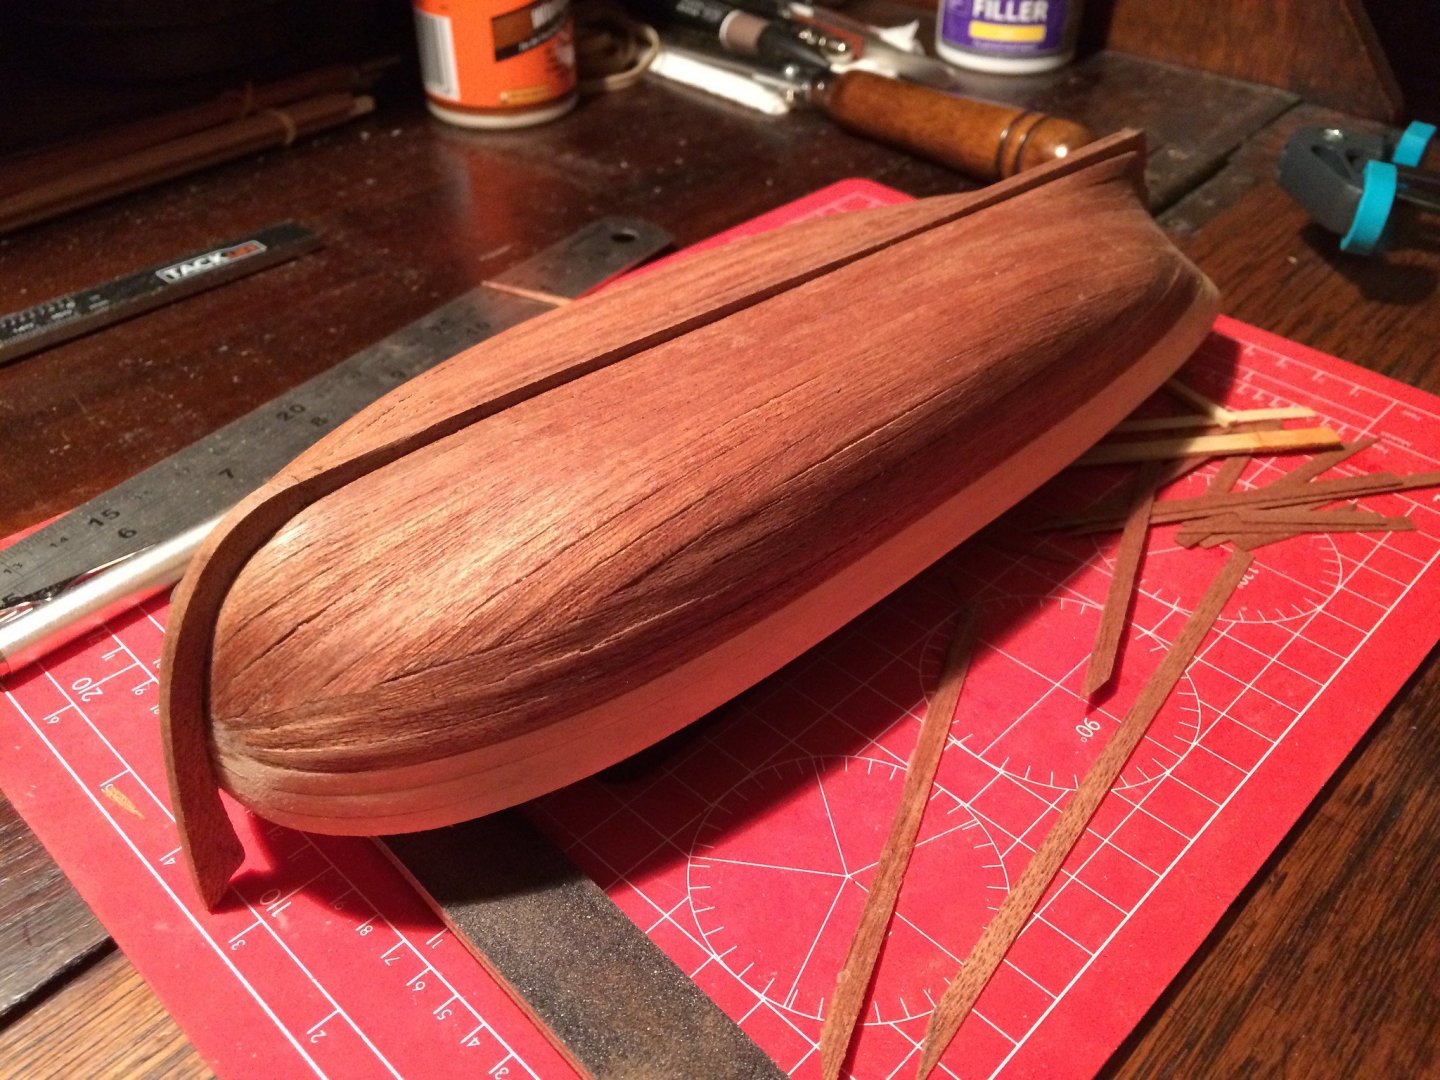
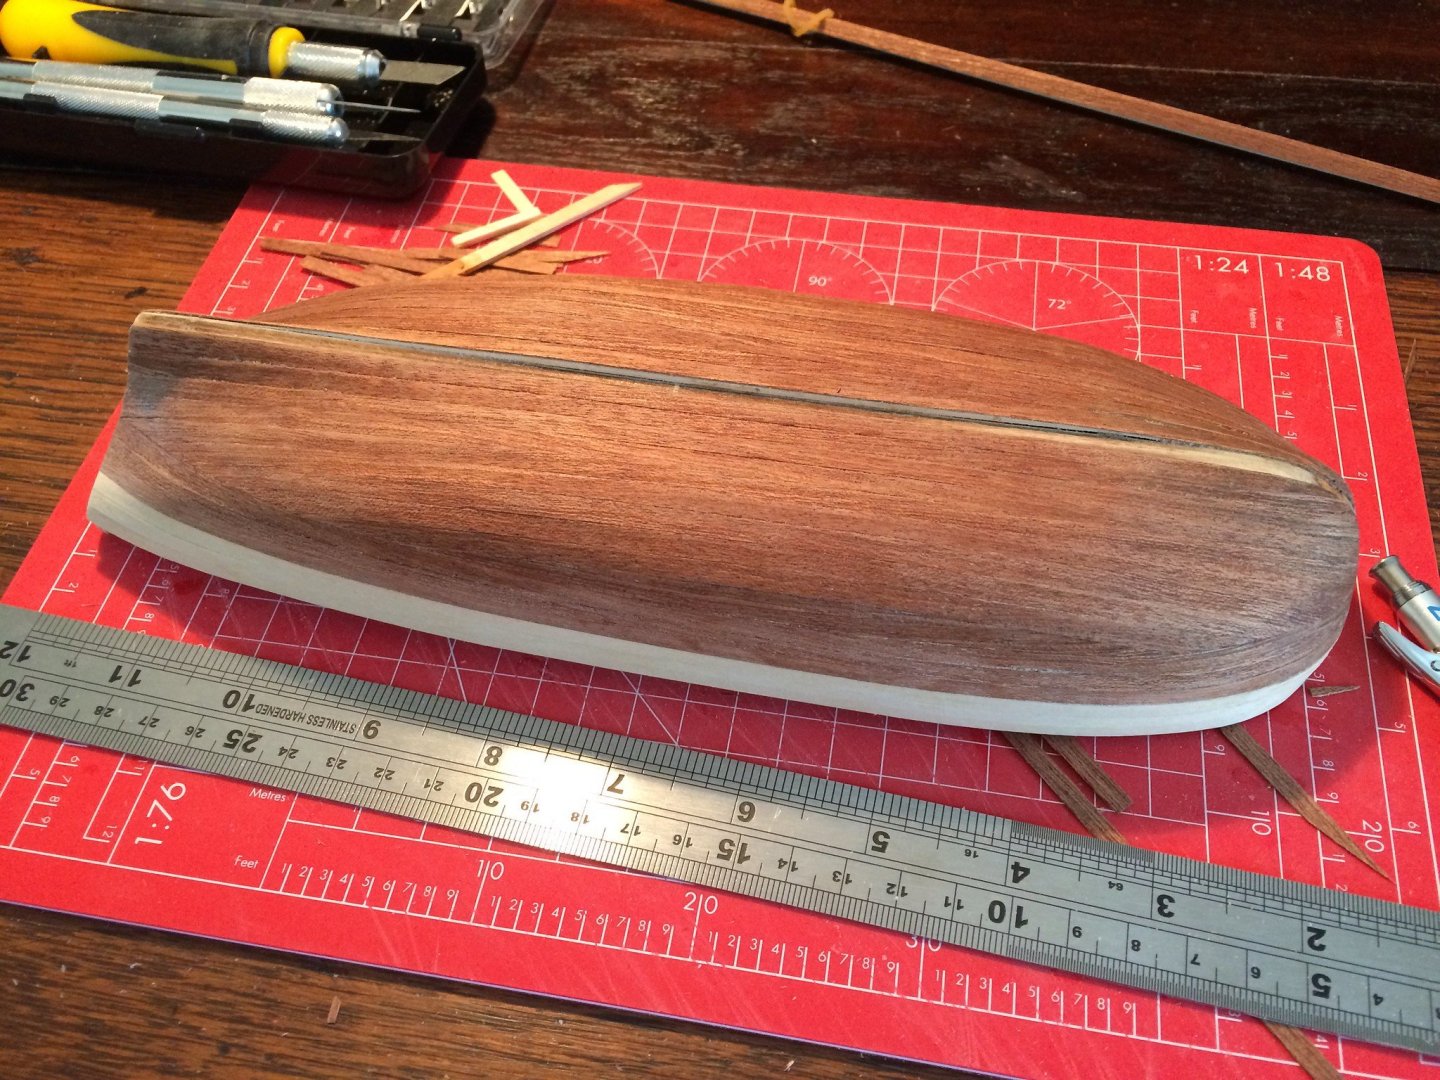
I tackled the outer plank layer at this point and was pleasantly surprised at how much easier they were to bend (being so much thinner). They were quite brittle though so you have to be a bit careful when cutting them and sanding the edges. Overall though I found this bit easier than I had been expecting. Most likely because I had a better idea of what I was doing after the first layer. I tried tapering some of the planks at the bow a bit (not sure if that worked terribly well or not), used wedges instead of bending too much, and tried to avoid making such sharp-ended holes (with mixed success). You can see the sequence of events below and the finished hull. Again, I’d appreciate any constructive critique. What did I do wrong? What could have been done better?


- 14 replies
-
- 2
-
-
- artesania latina
- endeavour longboat
- (and 1 more)
-
Still not being able to face more planking I opted to do the decking instead. This was relatively easy although quite a lot of fiddling about is required. Fairly drama free though - I bought a razor saw for this bit (see photo) . Very useful! Due to my forming mishaps I also noticed that the front bulkhead didn’t sit flush with the planks of the hull and that looked a bit rubbish. I fixed this later by planking the bulkhead but I should have done that at this point as it was a lot easier to get to here...
- 14 replies
-
- 2
-
-
- artesania latina
- endeavour longboat
- (and 1 more)
-
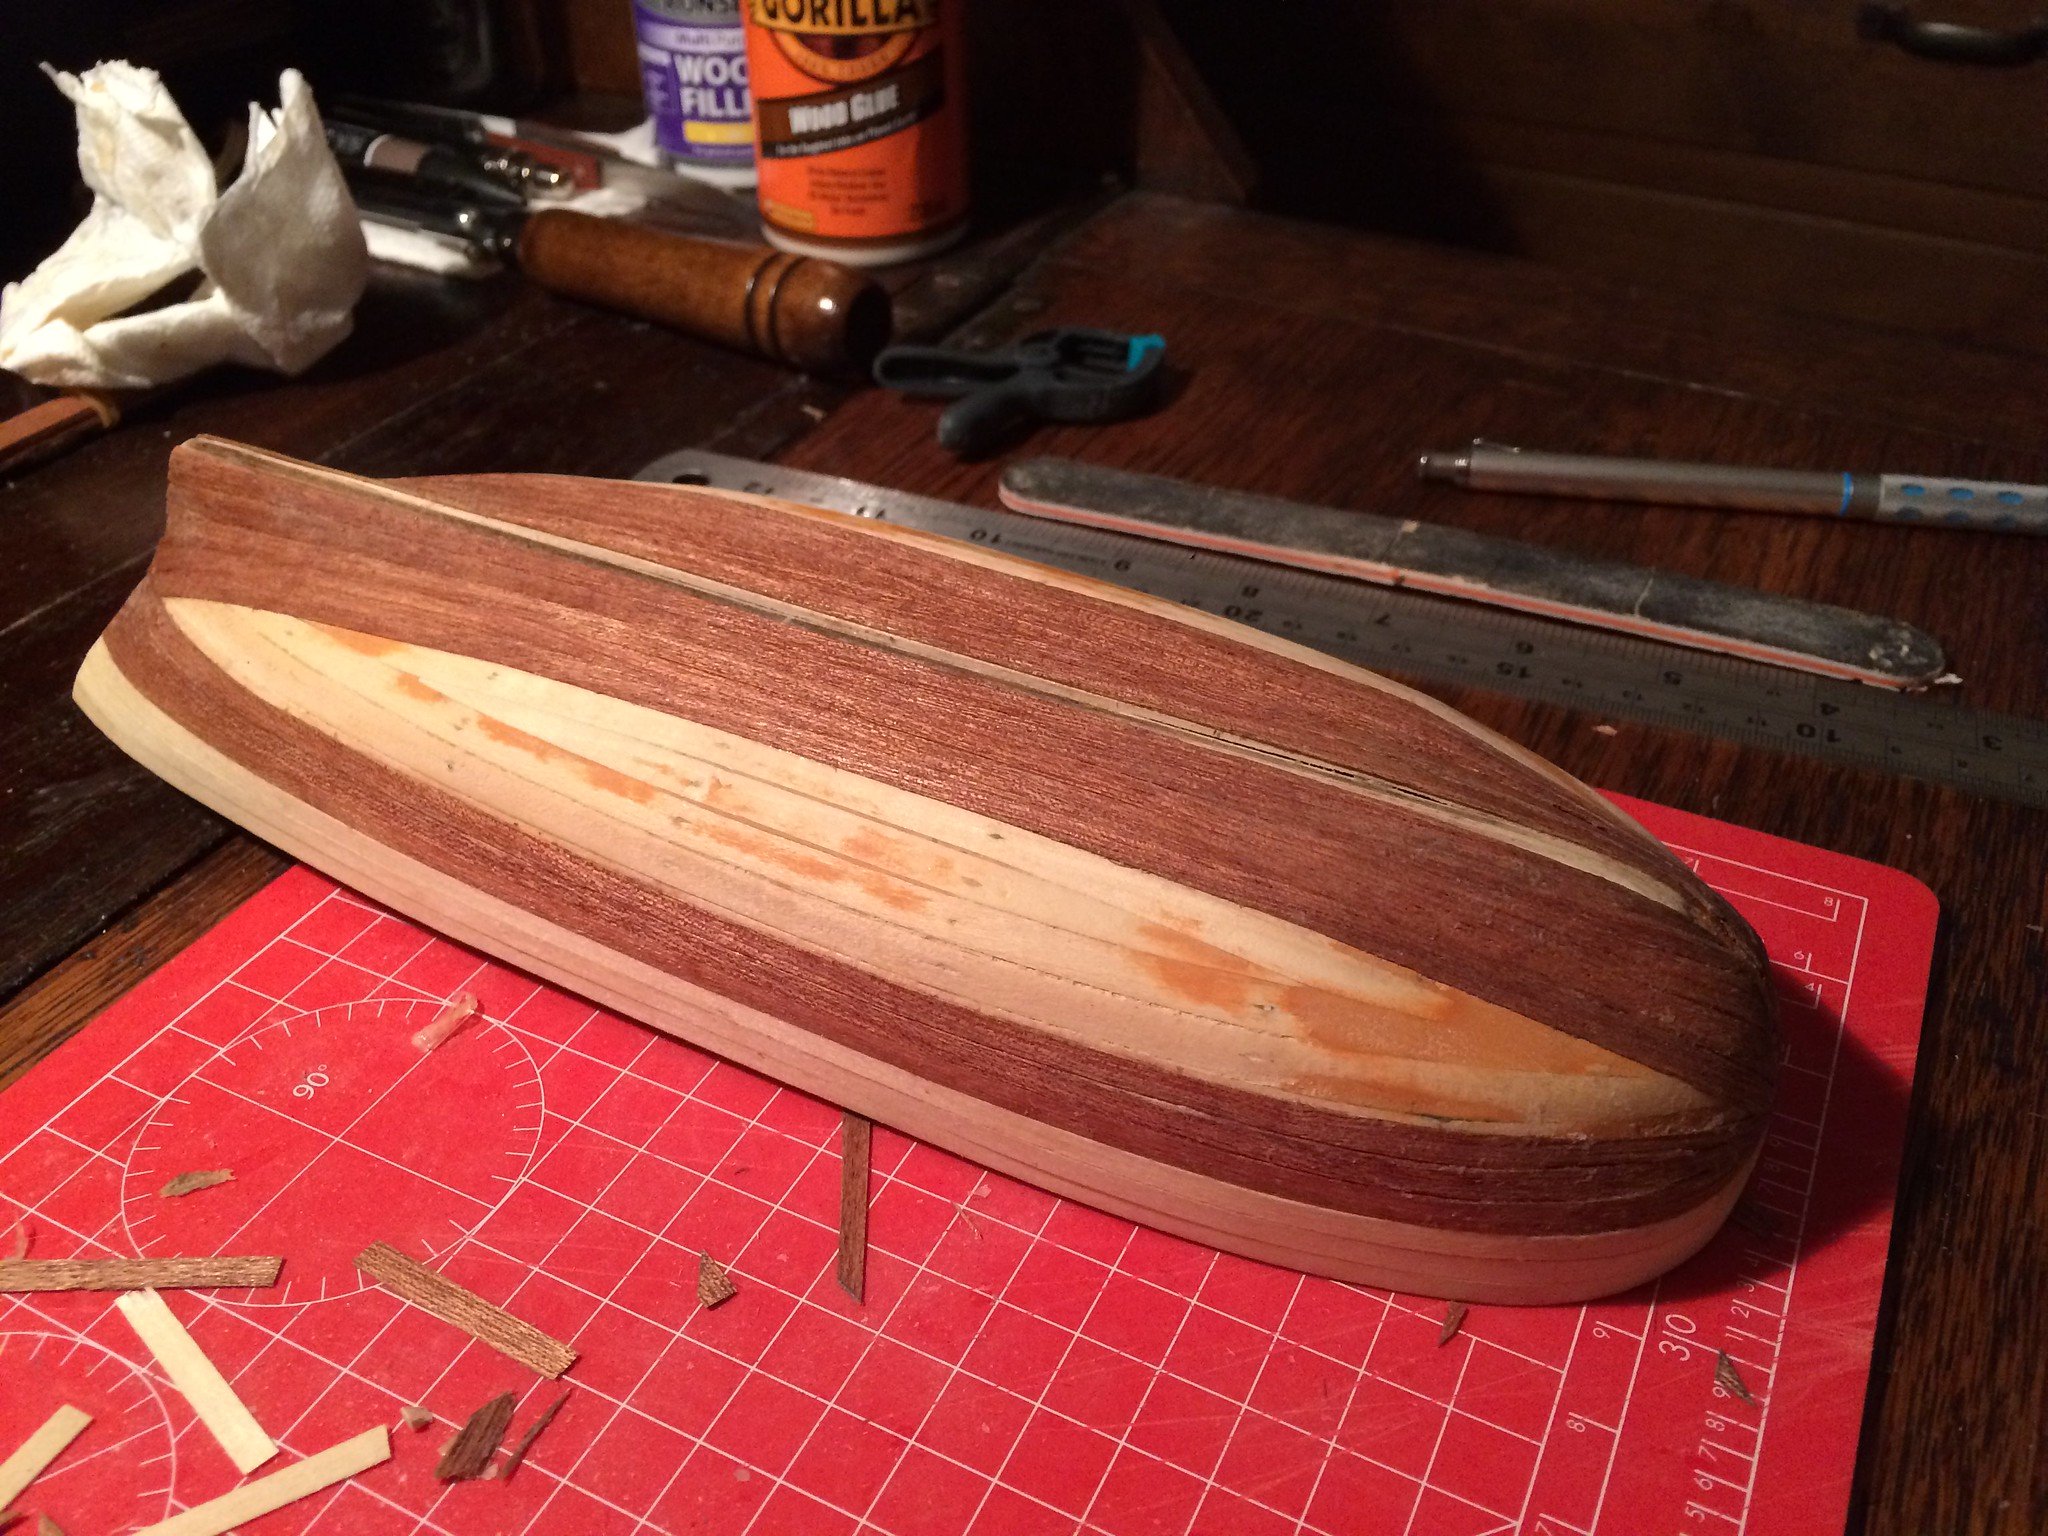
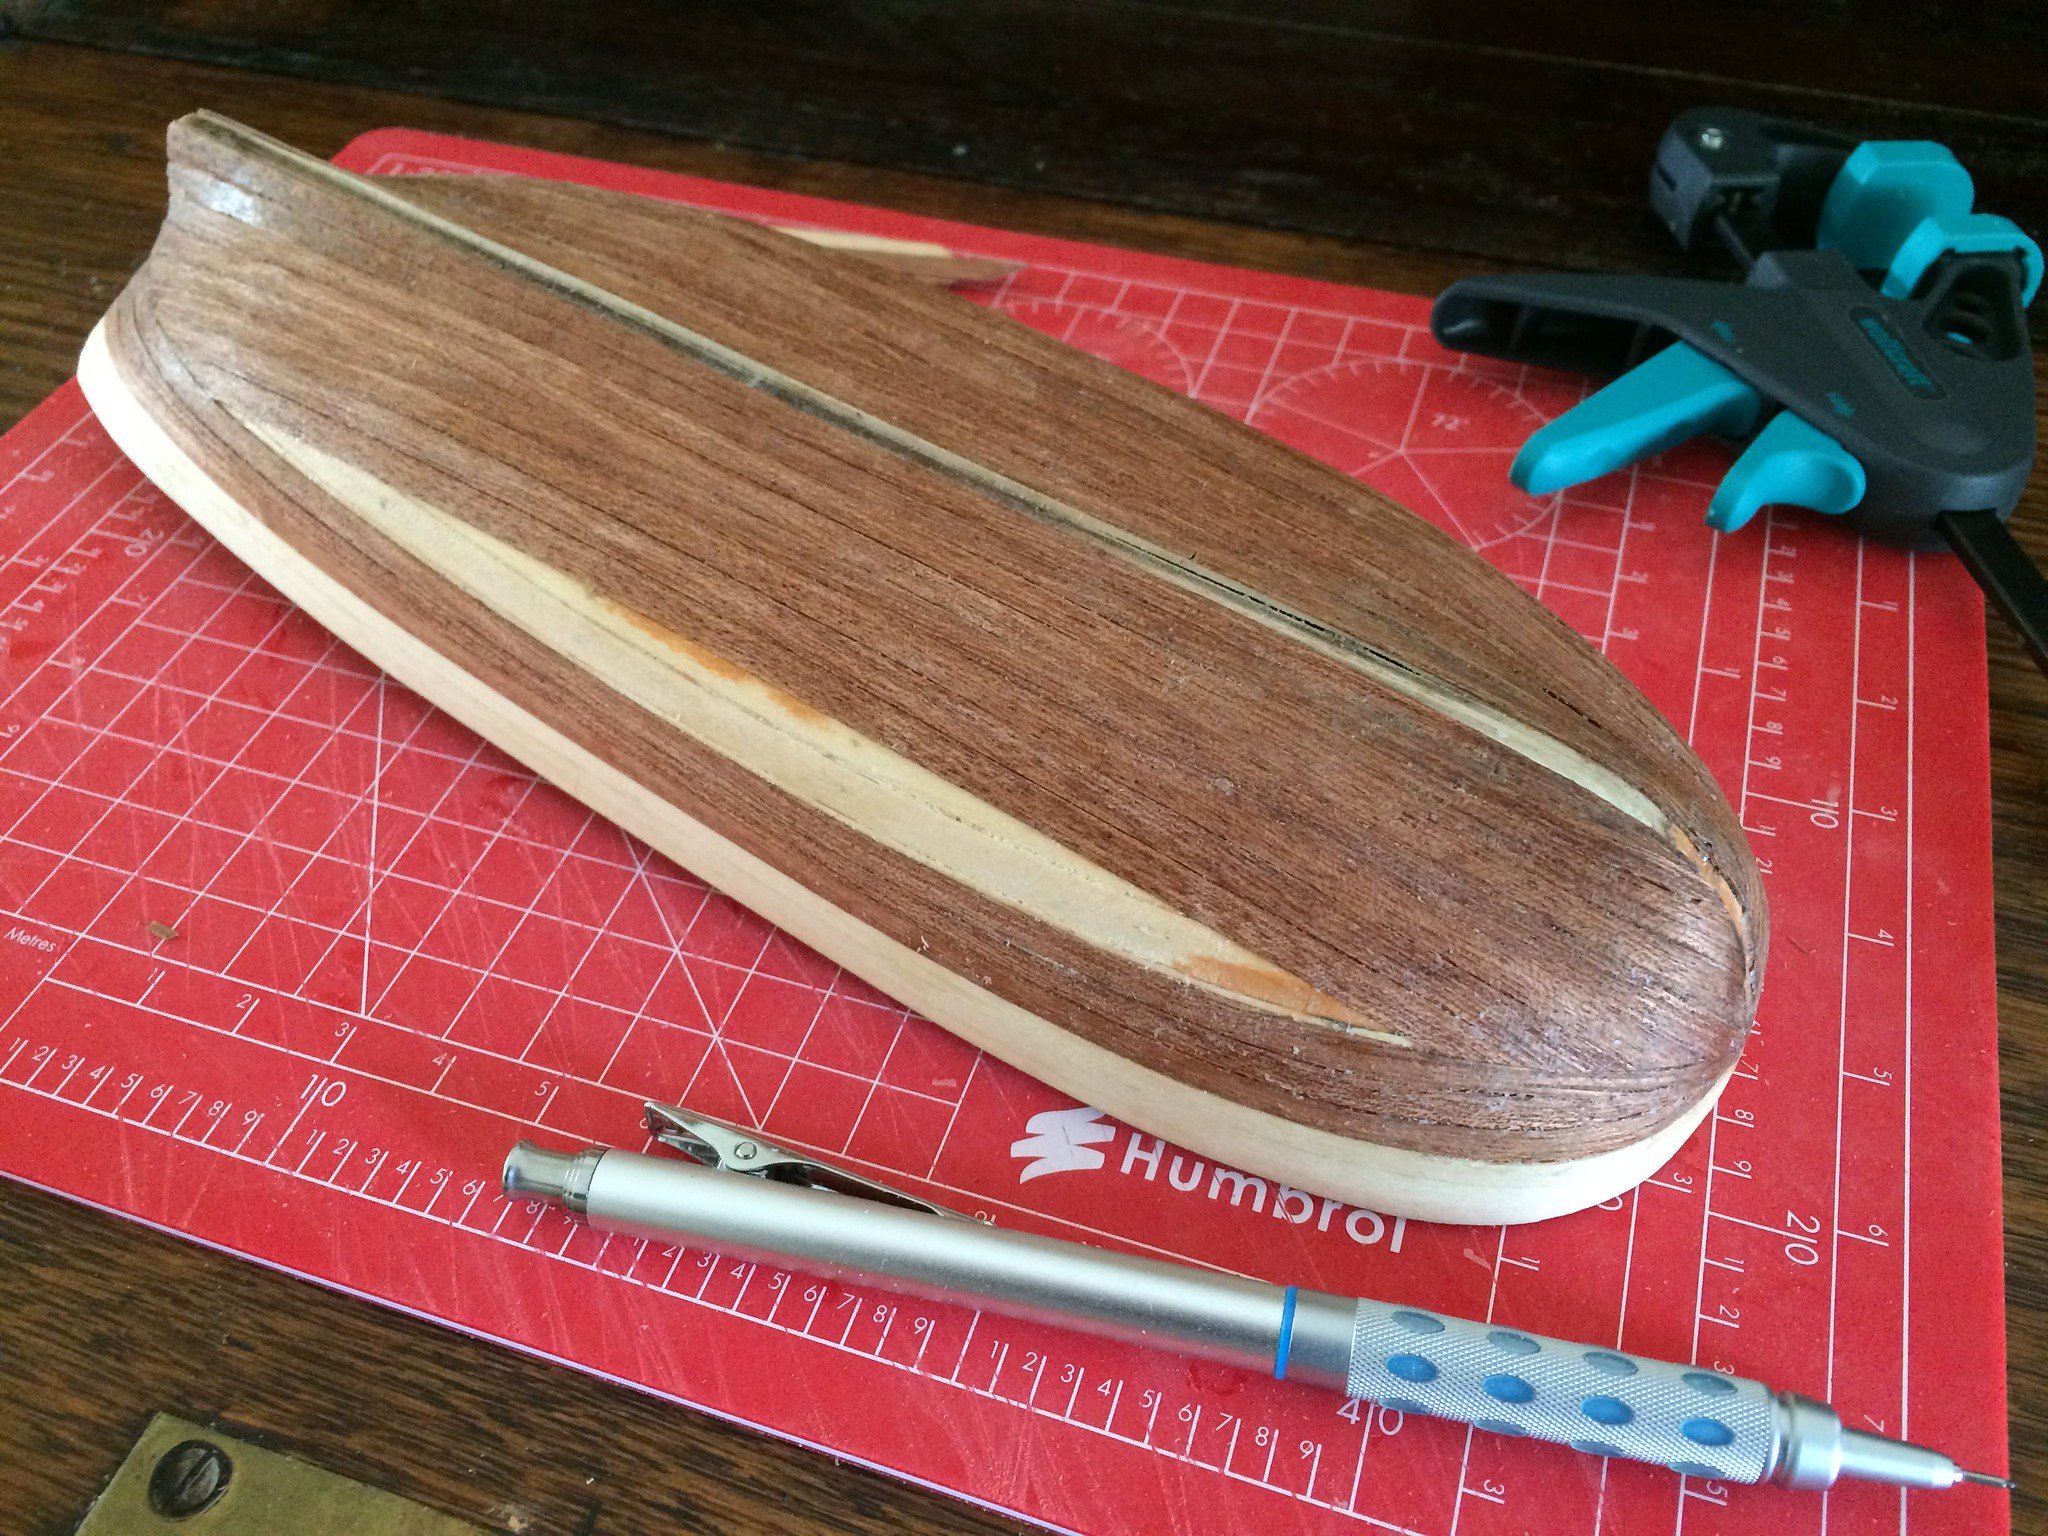
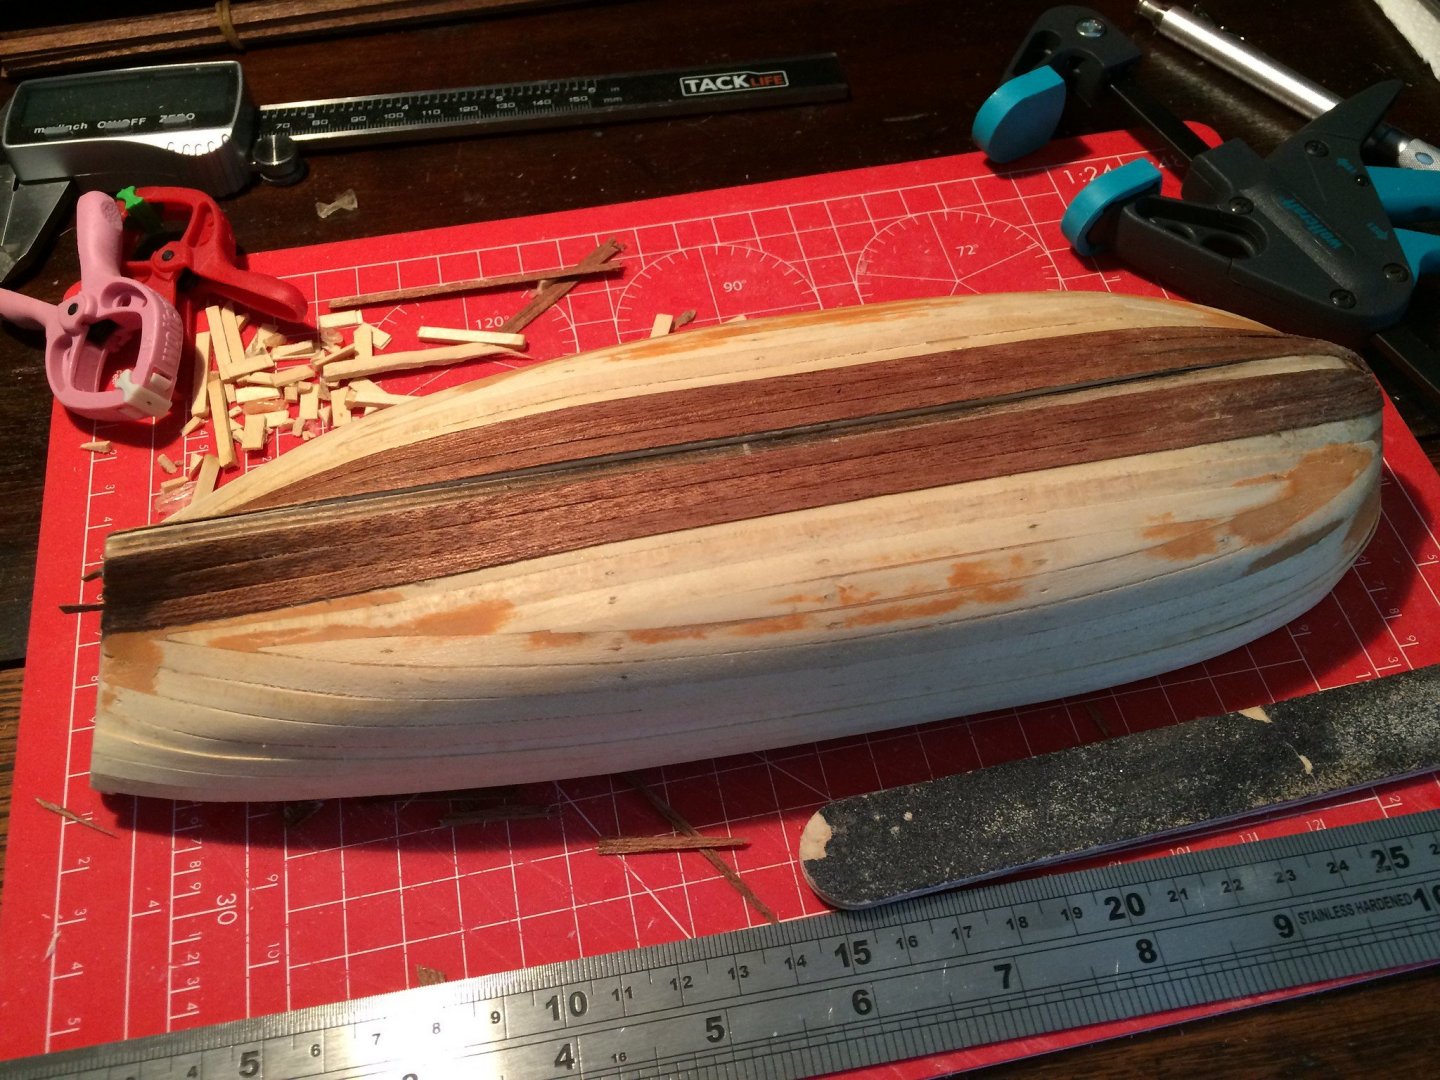
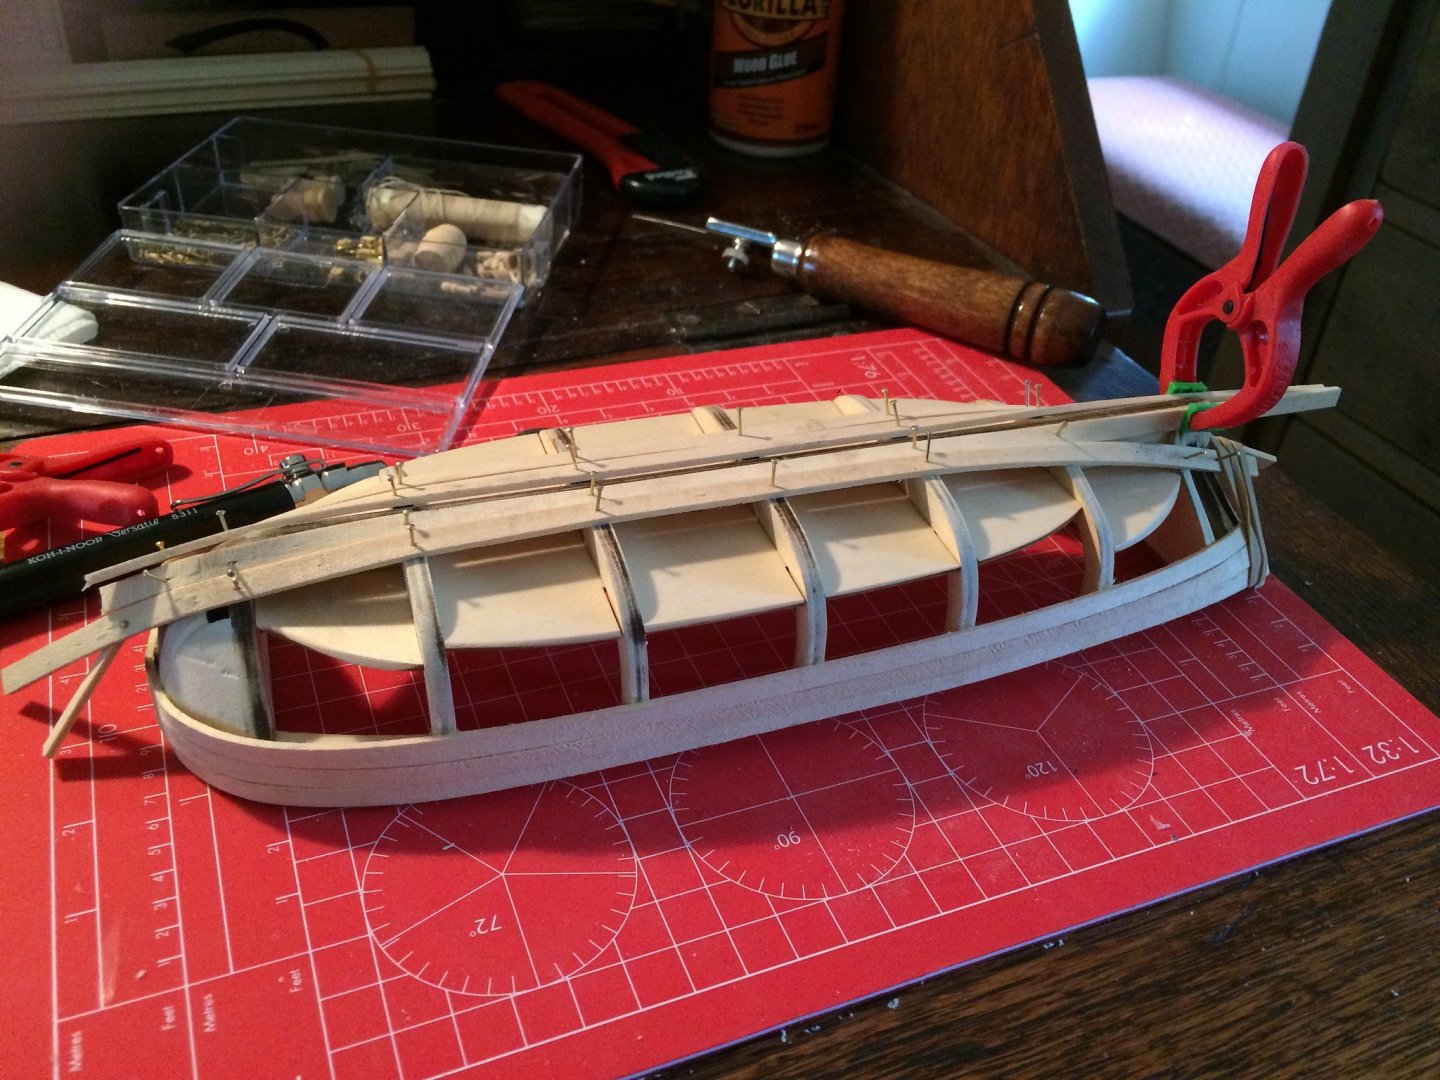
This is what I ended up with after finishing the first layer of planks. I used a bit of filler (interestingly RonSeal natural filler is orange!) to correct some of the worst bits. I ended up with some planks sort of overlapping a bit (I think that’s referred to as clinker planking?) due to my rubbish efforts at shaping the ribs up front but was able to sand and fill my way to a reasonable finish. I’ve added a shot showing the bow too as I found that this wasn’t shown very often and was the bit I found hardest. Any pointers as to what I could have done better here would be appreciated but it wasn’t too terrible for a first attempt I didn’t think. The thought of doing the top plank layer was a bit concerning as I realised that I wouldn’t be able to hide mistakes as easily so I had a bit of a break again at this point. Actually that was a real learning point for me. Work slow and take your time and try and get things right first time. Fixing things afterwards is quite tricky sometimes.


- 14 replies
-
- 2
-
-
- artesania latina
- endeavour longboat
- (and 1 more)
-
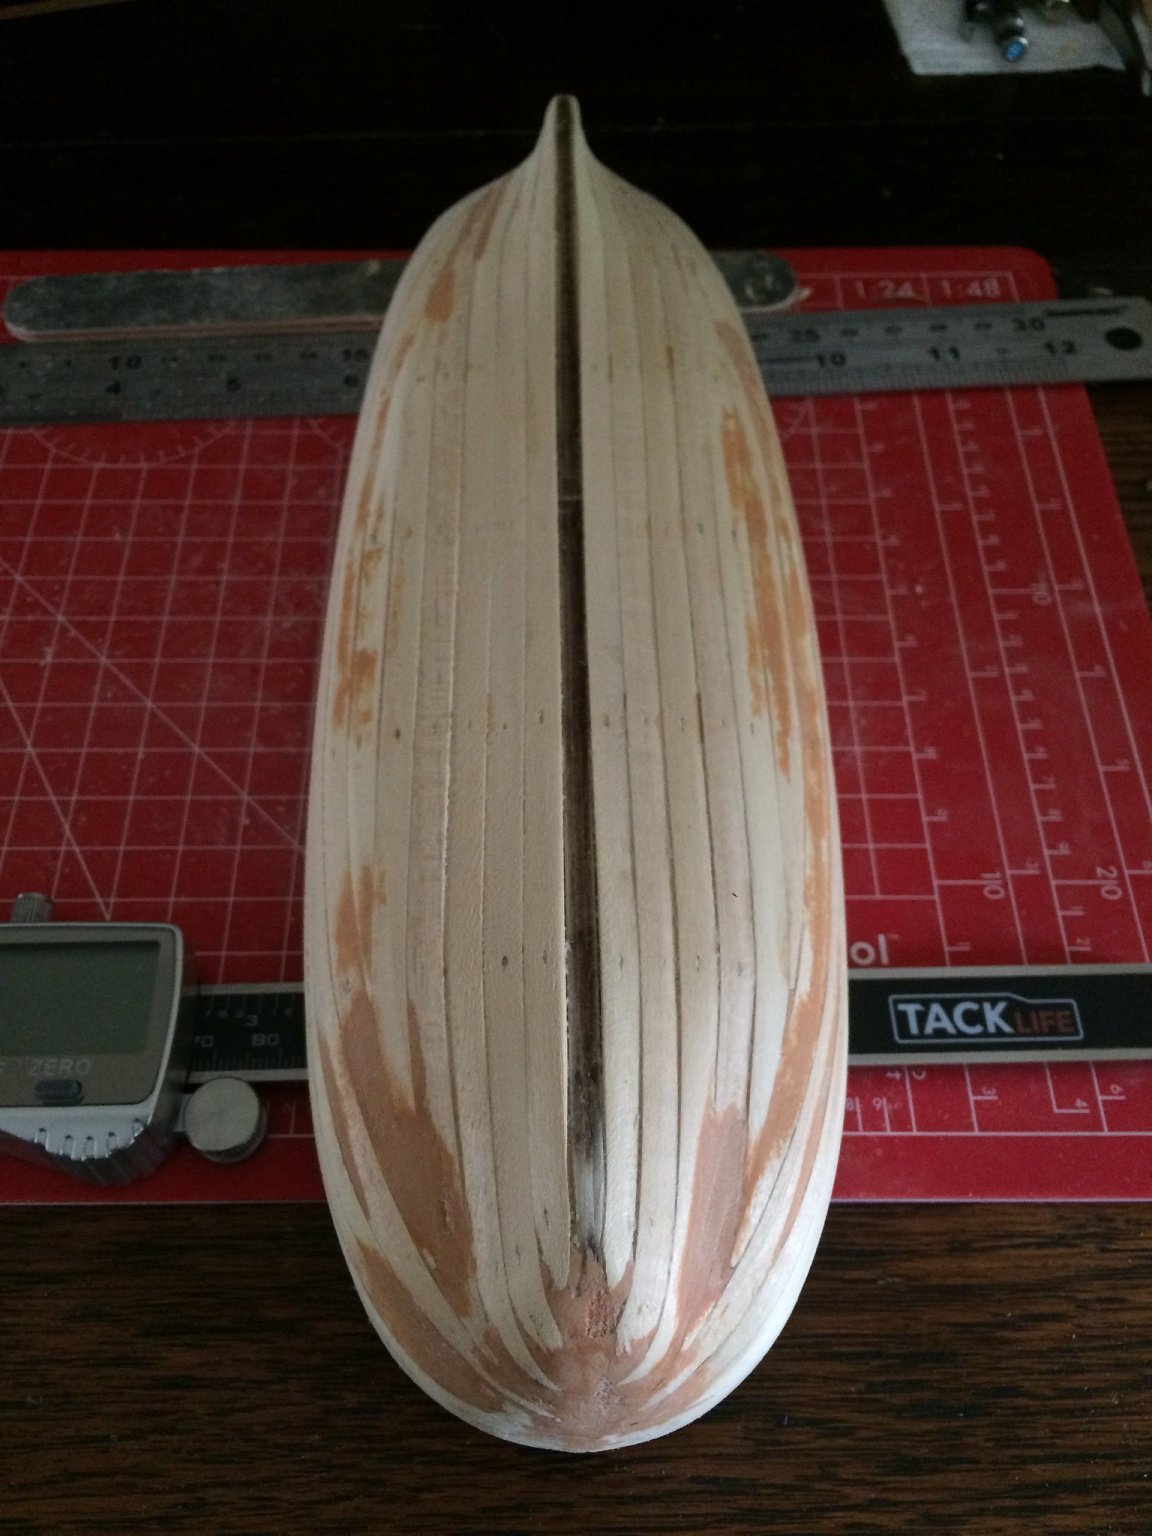
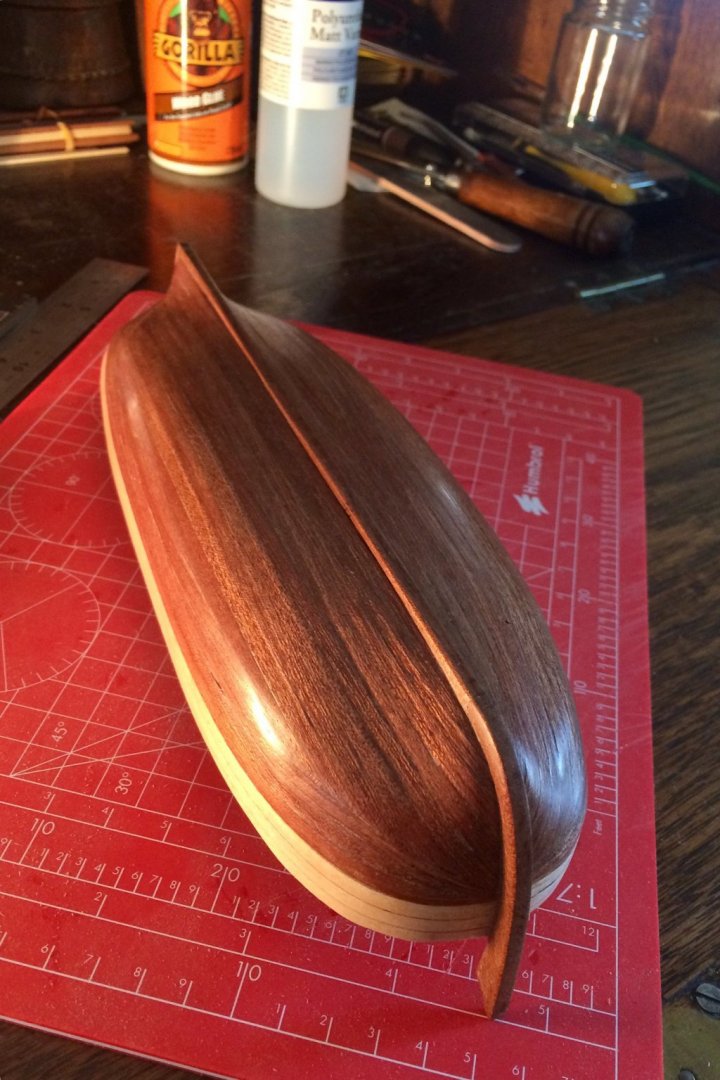
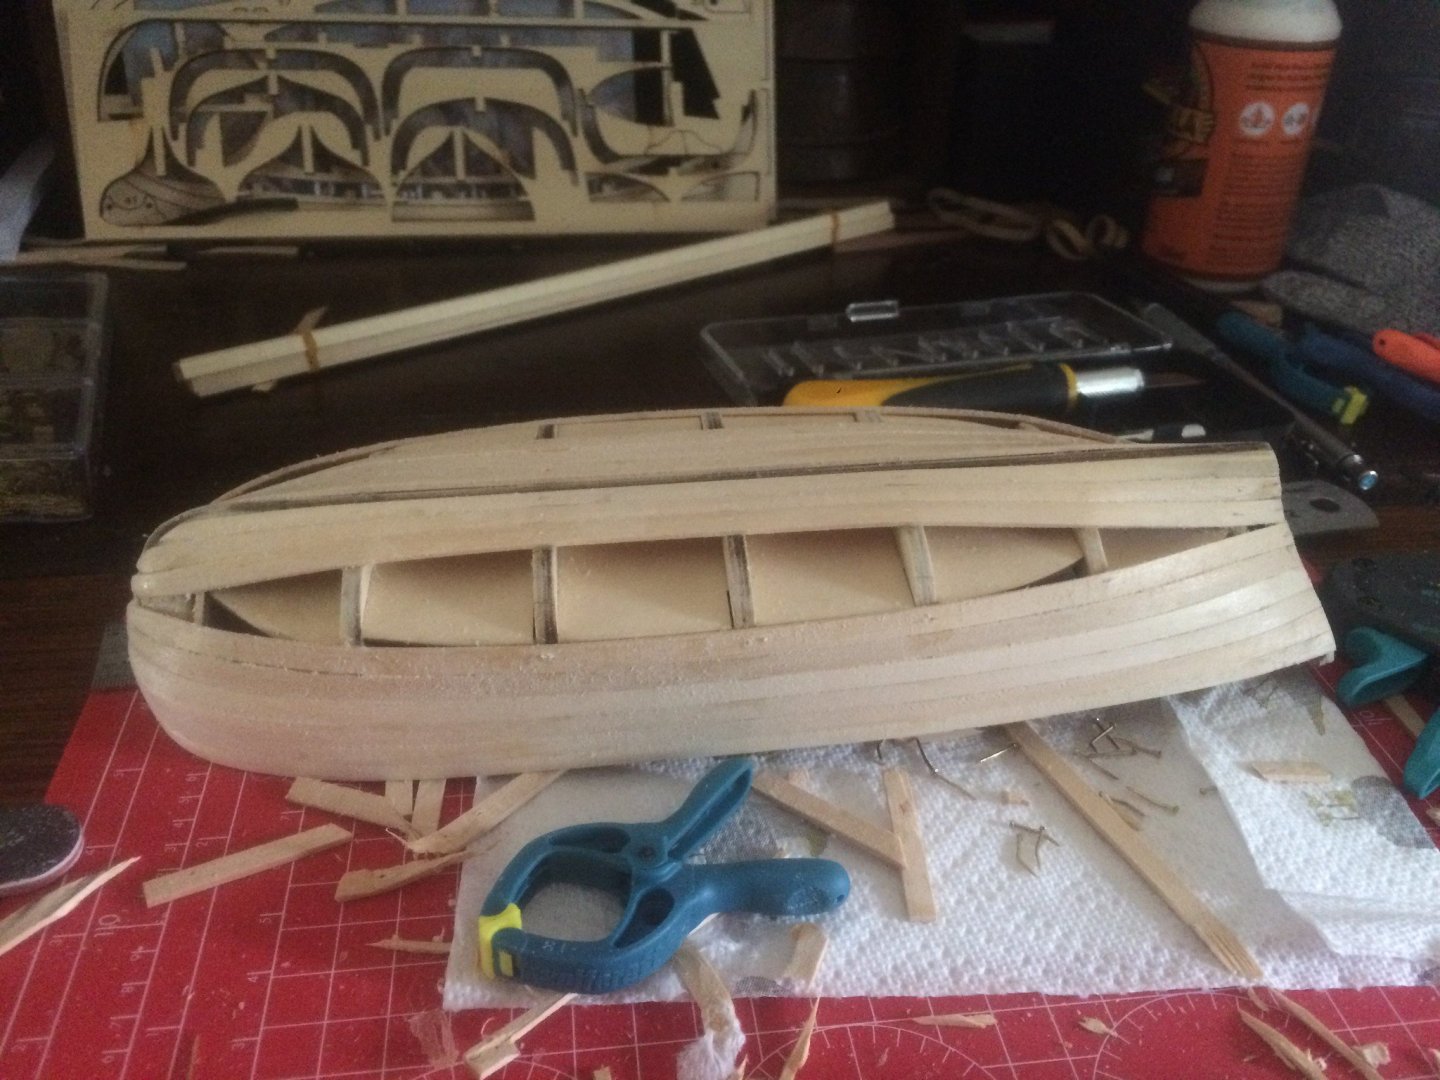
I then started the planking in the keel region. I was a bit confused here as some people seem to plank right over the bottom and install the keel over this, others glue the keel on and plank around it, and others leave a gap and plank around this. The latter option is what they said in the instructions so I decided to do that. I must admit I found this bit quite tricky as you have to make some choices. Really bend the planks quite a bit and avoid using any wedges to fill in gaps at the ends or use wedges (at the stern mainly). I opted for the very bendy option and it seemed to work ok but once again I was left wondering what a real boat builder would do as they would probably be the thing to try? I also now found that my forming (shaping and sanding of the rib bits) wasn’t so great as I tried to get the planks around the bow right. At first I had them curving up too much at the front and had to rip them off and start again. I also found clamping very tricky in this region so used the small pins in the kit to hold the planks in place (I would recommend getting some sort of pin pusher as I didn’t and this was tricky and hurt my thumb!). There were a few times where I thought I was going to break something too but I was pleasantly surprised at how strong the hull becomes quite quickly. Anyway as you can see I fudged the bows a bit but figured that as this was an underlayer I could probably get away with it. The other thing I struggled a bit with at this point was whether to plank more from the keel upwards or from the gunwales downward? I hope that makes sense? You can see what I did going from the 2nd to 3rd stage below. The thing I wondered about here was how sharp a plank would a boat builder realistically shape to fill in these gaps? You can see that I ended up with a hole with very sharp ends. I wasn’t sure how to decide what was best or most realistic here so any info on that aspect would be interesting to hear...
-
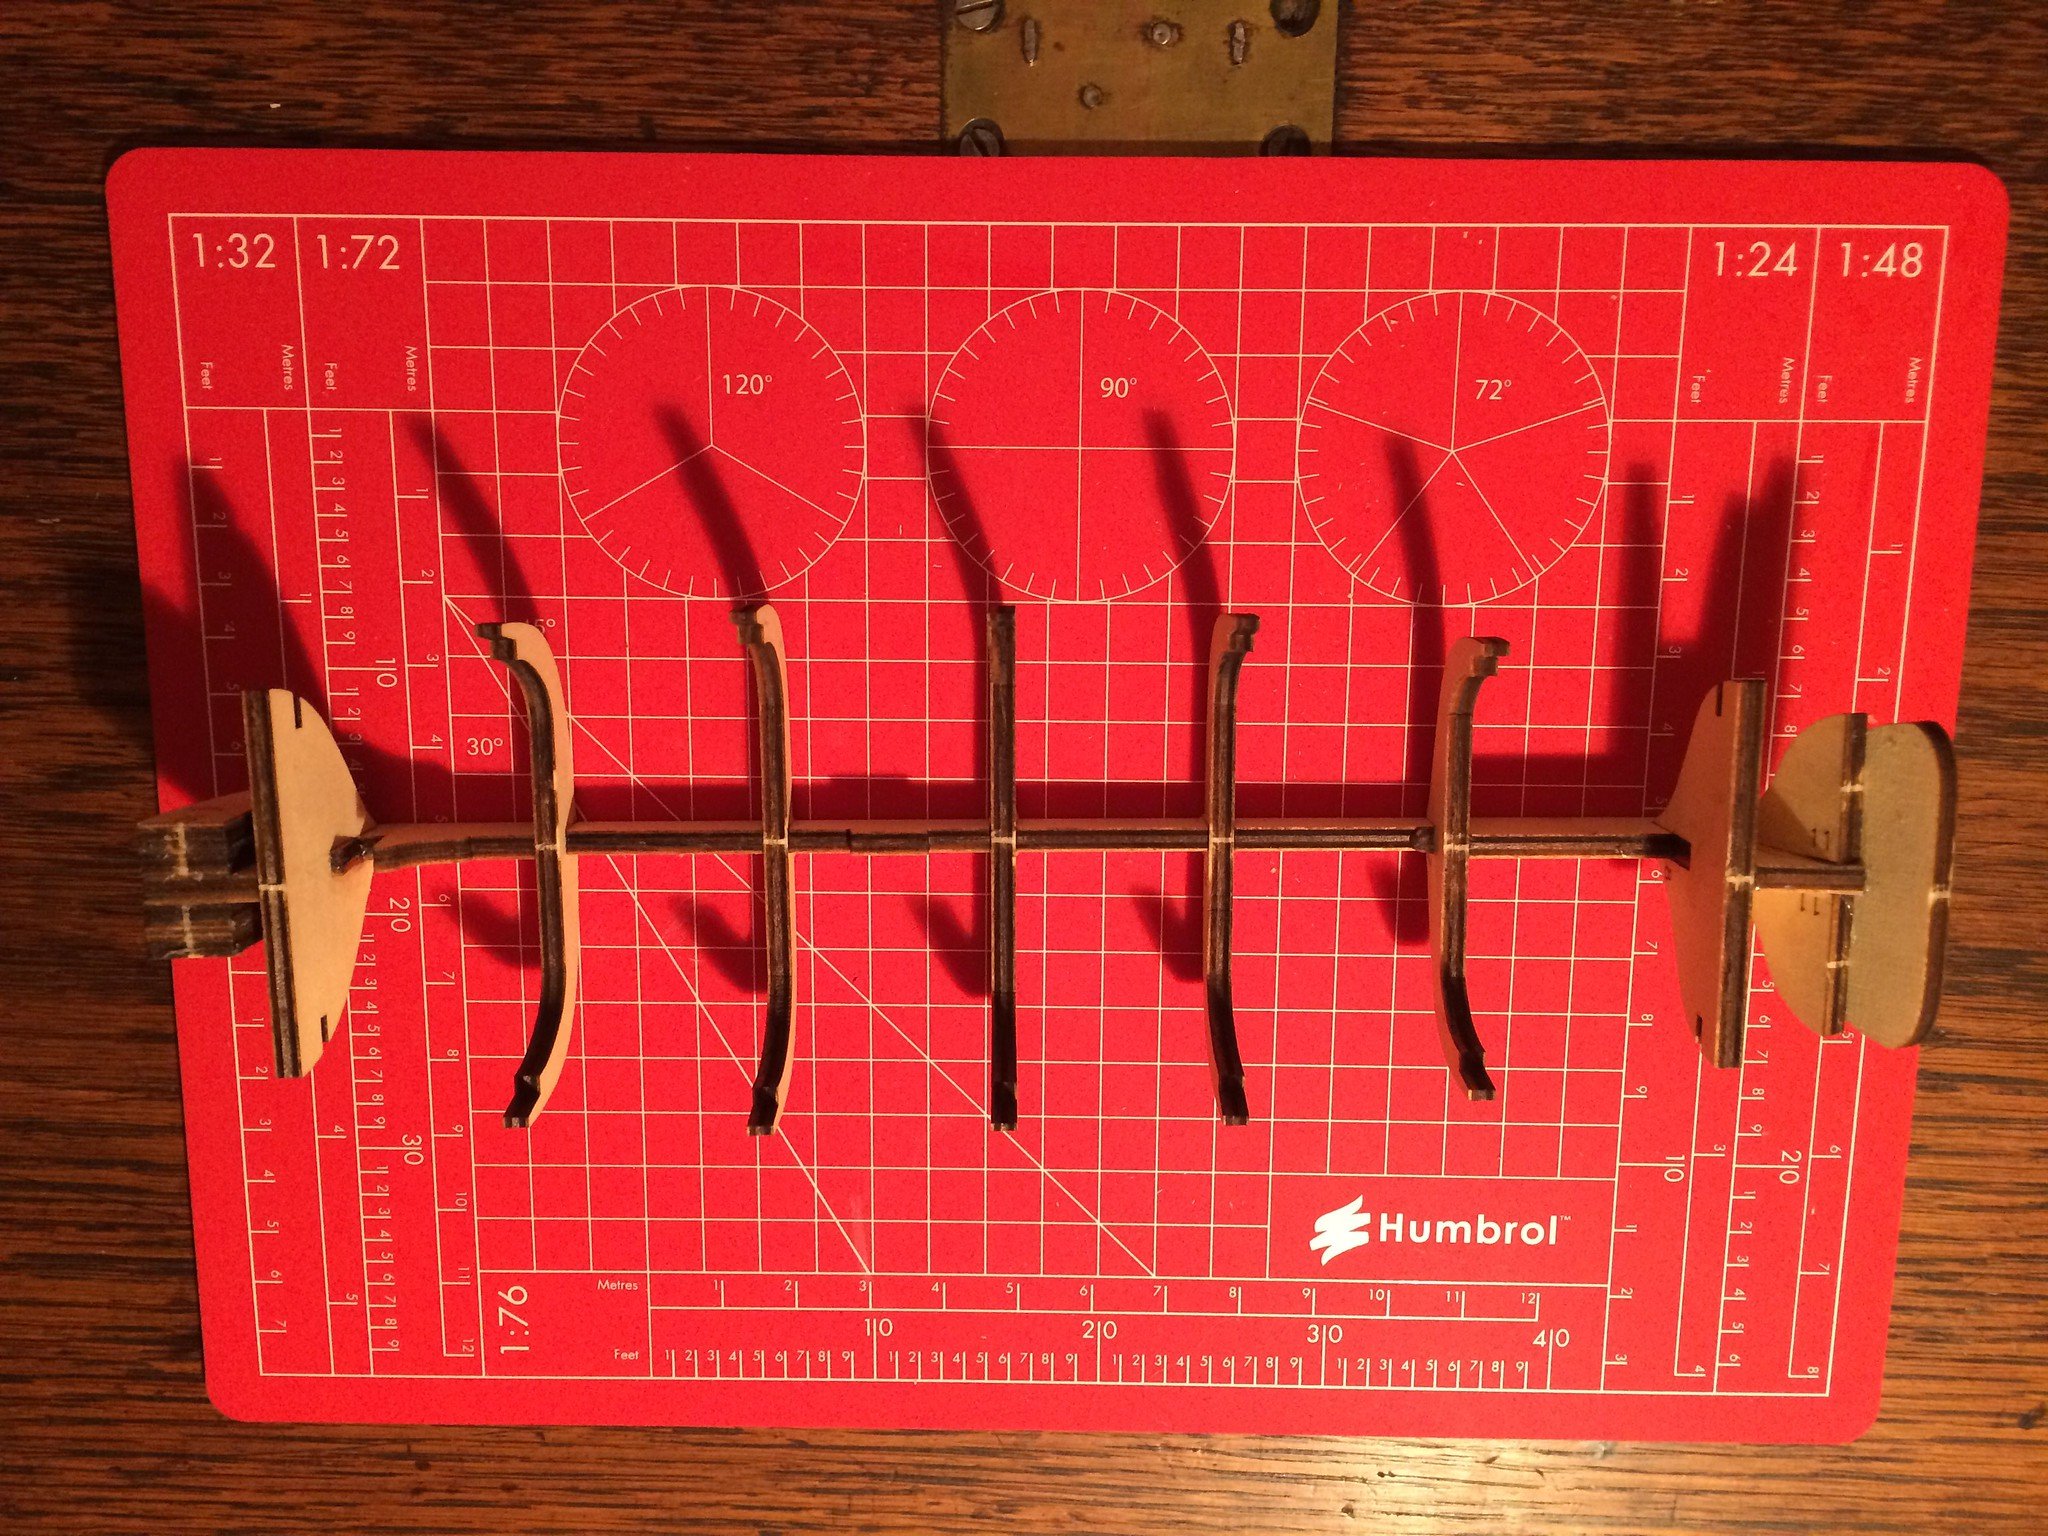
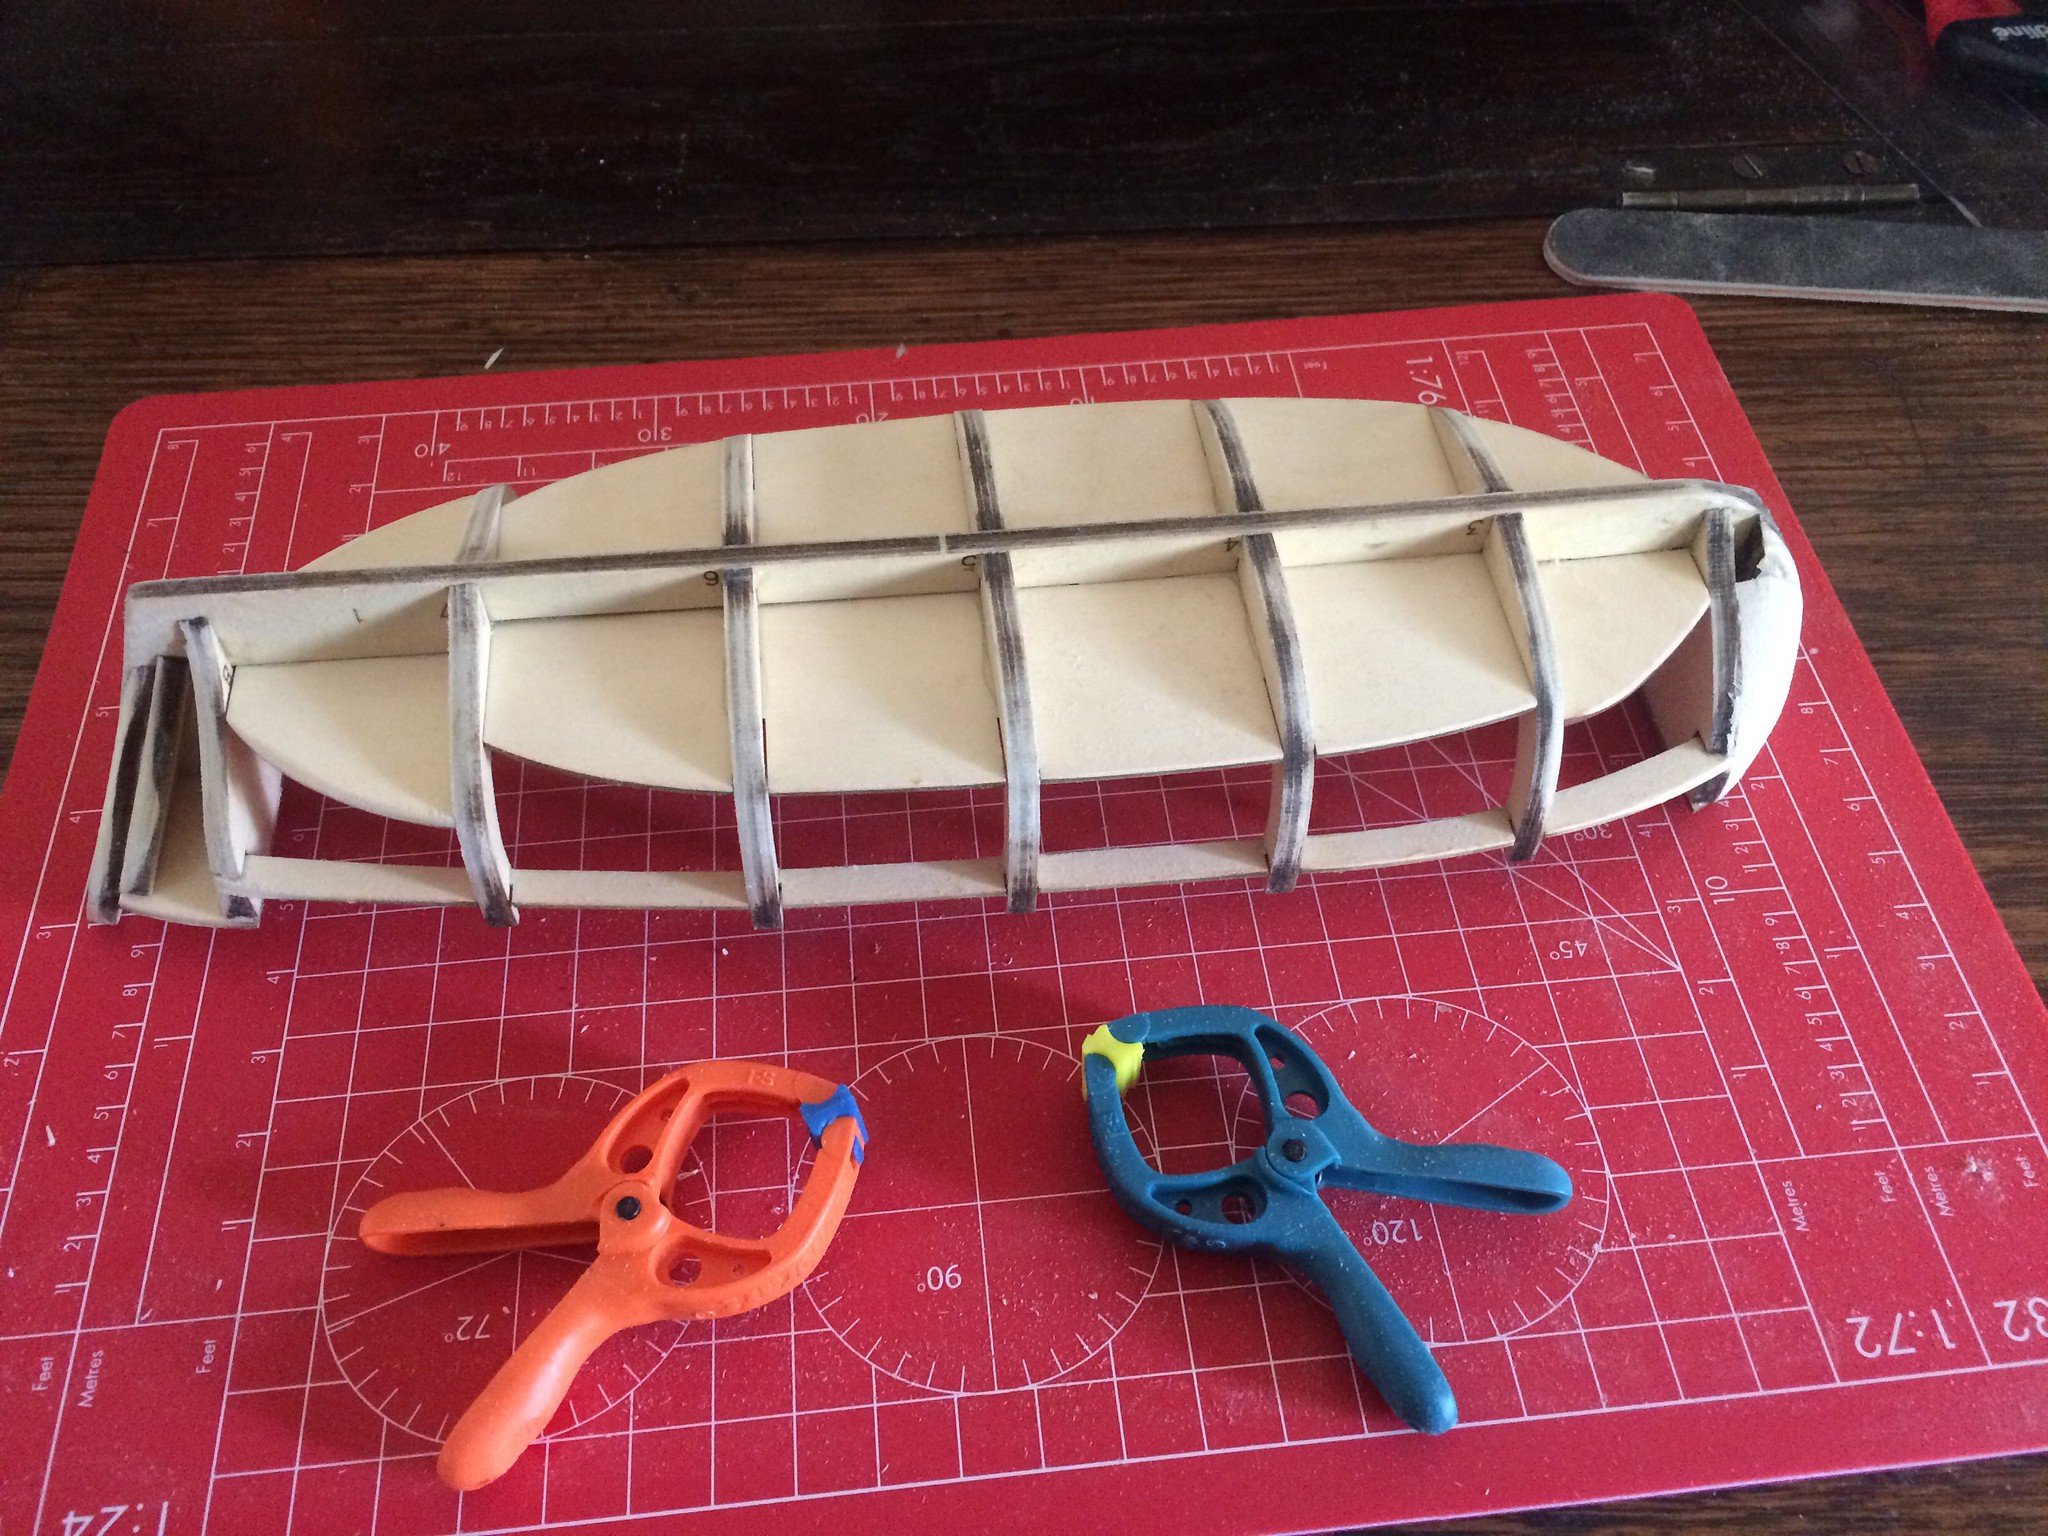
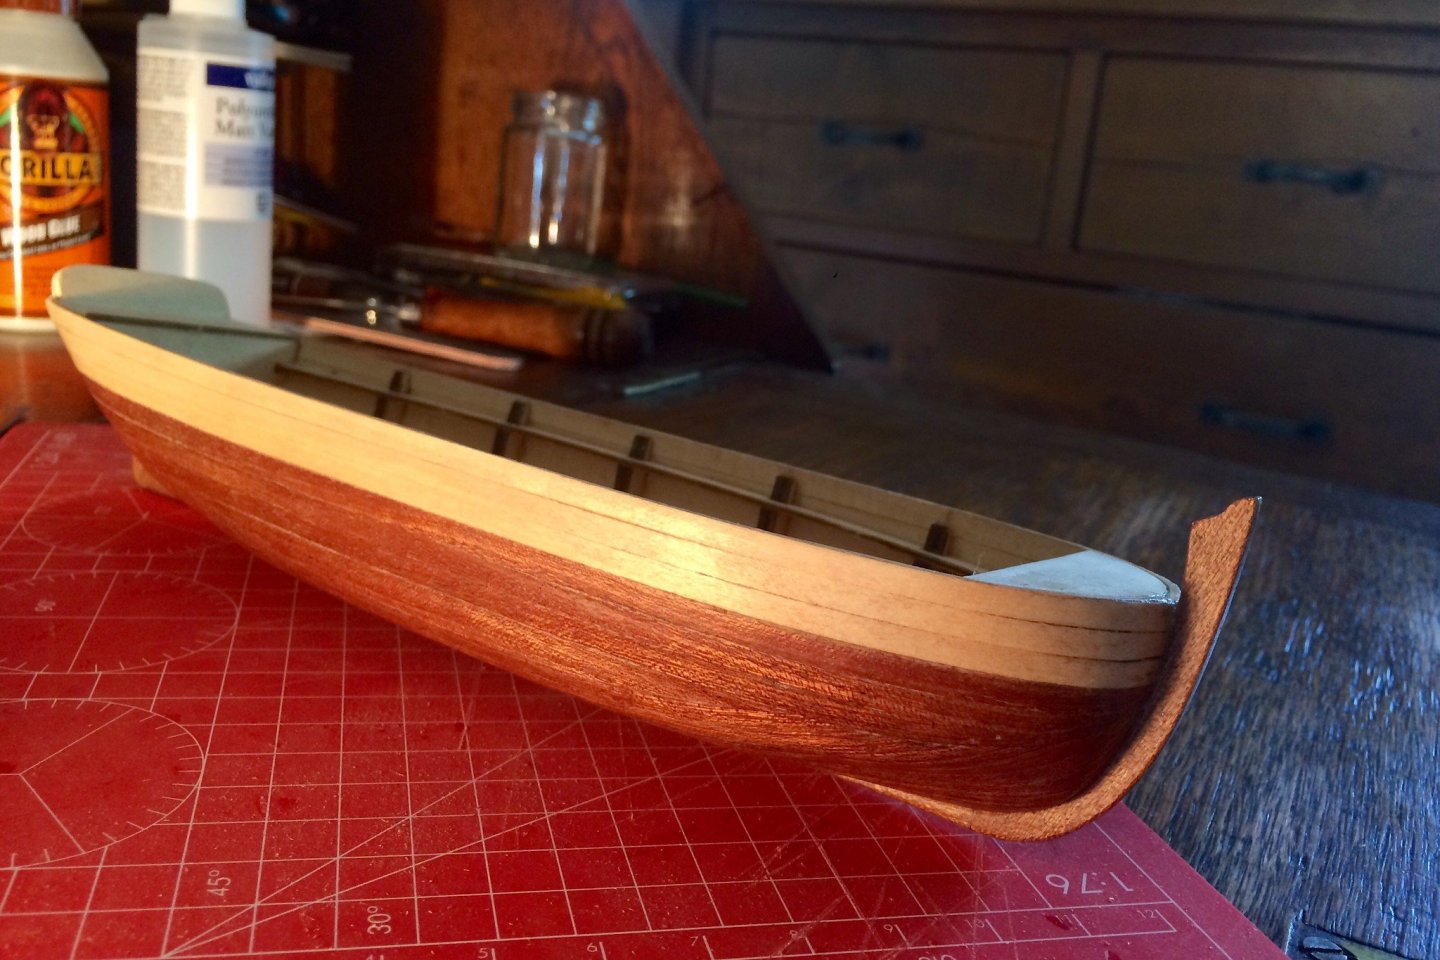
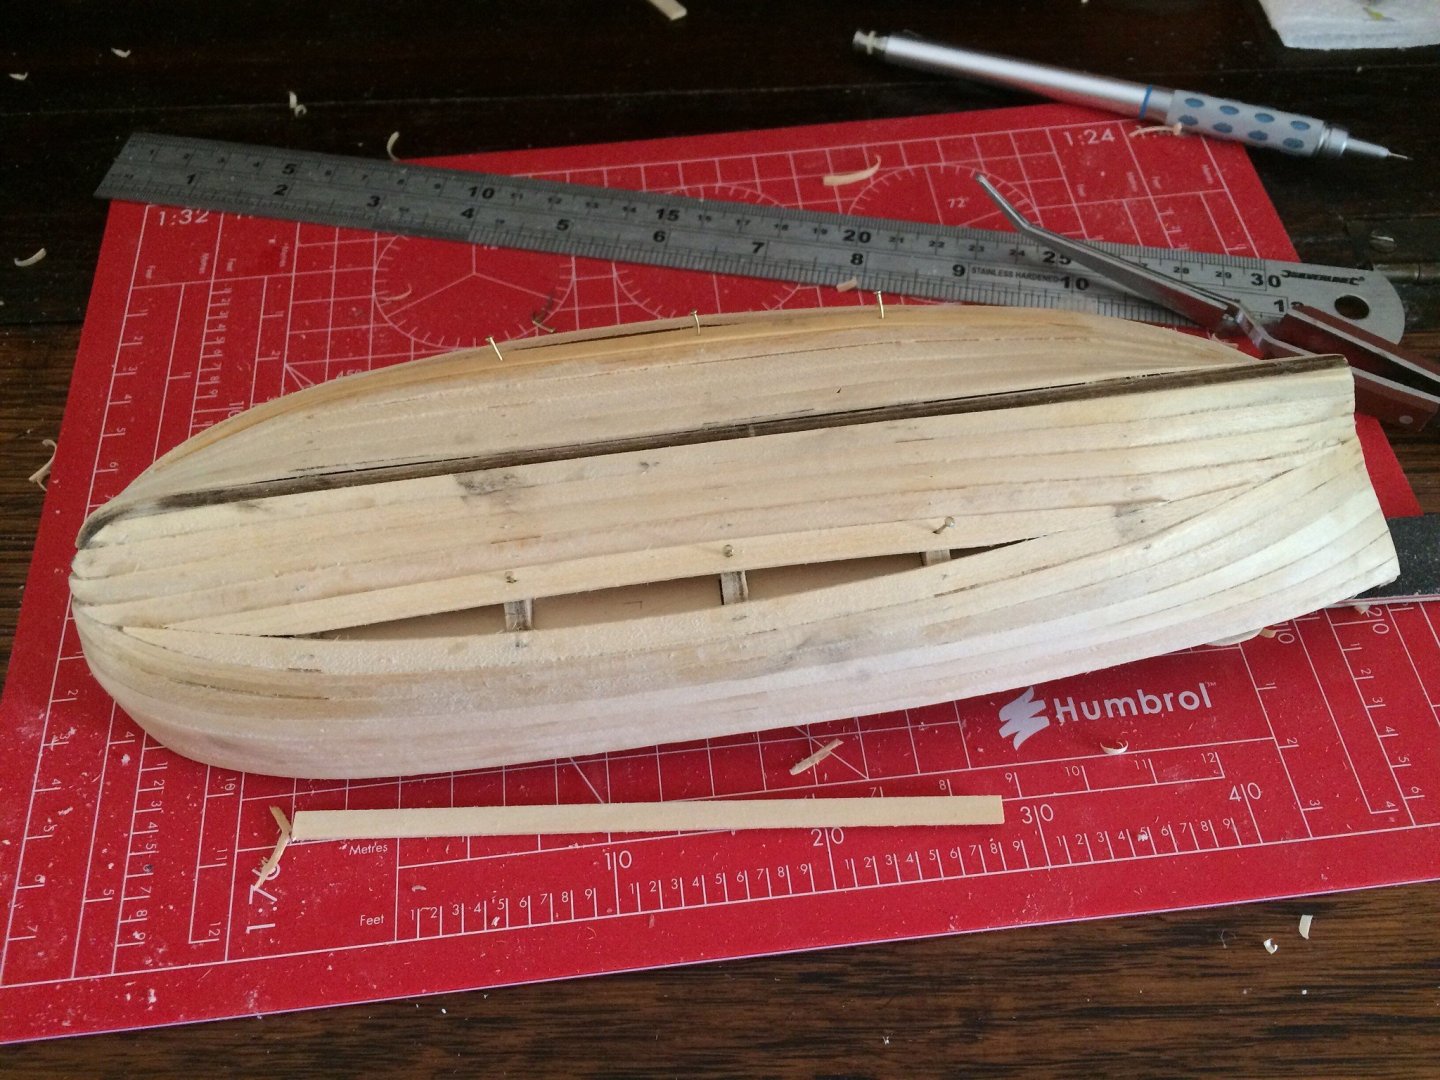
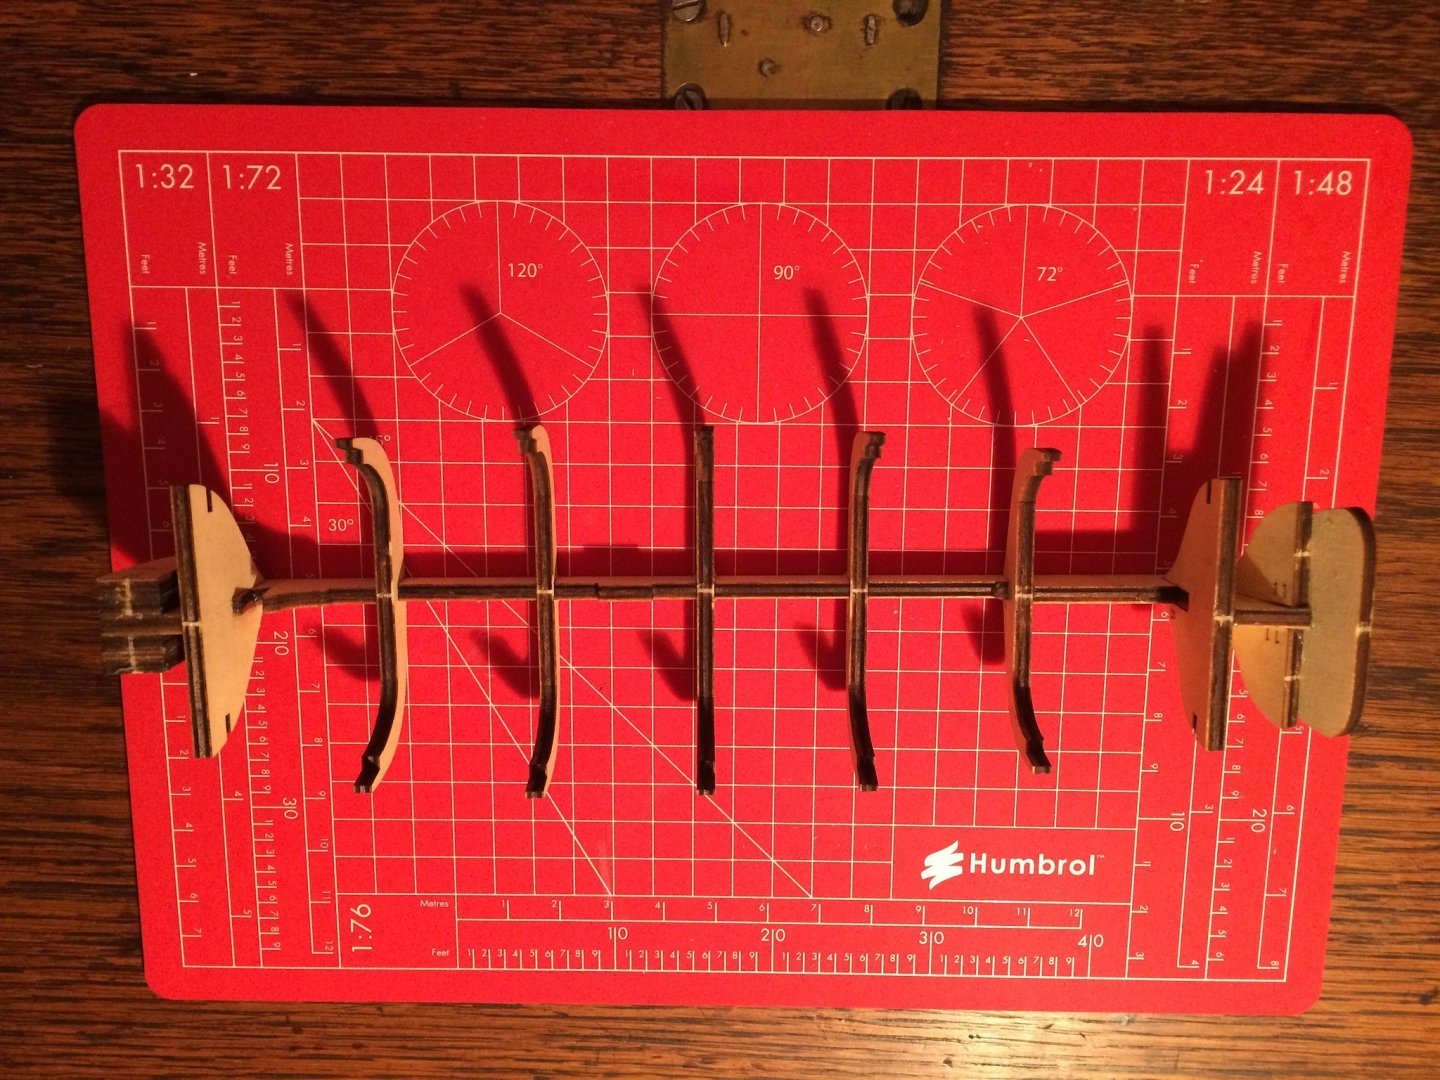
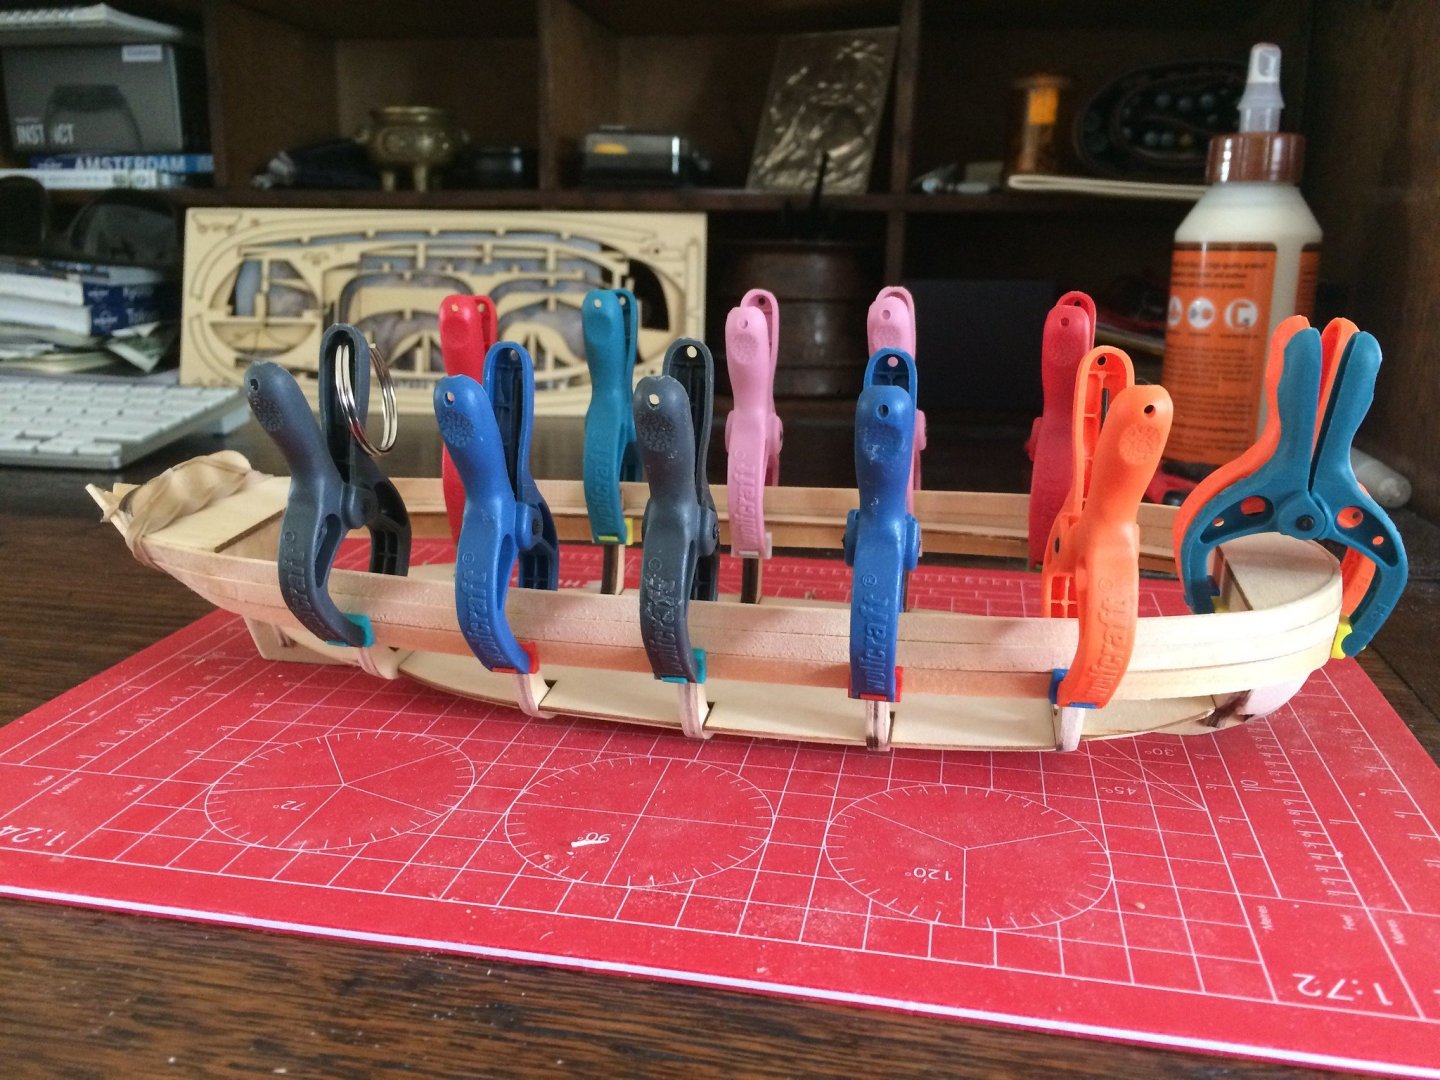
Hi folks, this is my first post so hopefully I won’t break too many rules straight off the bat! I decided to have a go at building a model boat (I figured a boat made more sense that starting on a ship) and I came across Artesania Latina’s longboat from the Endeavour and quite liked the look of it. It was a bit daunting opening the box to find a bunch of planks and sticks so I didn’t actually start it for a while but being locked down for a few months got me going eventually. I’ve been lurking around here for a while after finding some really useful info here and read quite a few of the build logs before and during my build. I’m getting towards the end now but not quite there yet so figured I would show some progress so far. I realise that this kit has been done quite a bit but I thought if I highlighted some of the things that I found particularly challenging (and some solutions) then other people in the same boat (sorry!) might find it useful. The first 3 pictures show the early stages. Some points I think are worth highlighting: getting the base skeleton square is important and I didn’t really realise this at the beginning. Fortunately I got it quite square by eye but I should have spent more time and done this a bit more rigorously. I only read about this later on. I read about how you have to shape all the ribs (not sure if that is the right term?) so that they receive the planks squarely. It’s definitely worth reading more about this and different ways to approach this. I didn’t do enough of this and whilst I thought I had done a good job it turned out I hadn’t. If you haven’t done this before it’s difficult to appreciate this step. It has a big impact on how the planks flow around the hull and how they come together at the bow and stern. It’s a good idea to try and get some appreciation for this. I read some posts about using balsa fillers between the ribs to provide a fuller shape to form the hull around and this does help but shaping this is not entirely straightforward either. the 3rd picture shows the start of the planking. I didn’t have any tools before this build either so that has been interesting working out what to use. I have to say these cheap little wolf craft clamps were really handy! I followed the approach of a number of people who’s build logs I read and soaked the planks in water for half an hour or so and then shaped them around the hull formers and clamped them in position while they dried. This is when I had my first question. You can do as I did and just clamp the planks without any trimming and these seems to work fine but I noticed that some people taper the planks at the bow. Is one method more realistic than the other? I used Gorilla wood glue to secure the planks and was well impressed with that. so far so good...

- 14 replies
-
- 2
-
-
- artesania latina
- endeavour longboat
- (and 1 more)