.jpg.2c2c29e54623bd7b752bc2cdab599665.jpg)
Danstream
-
Posts
755 -
Joined
-
Last visited
Content Type
Profiles
Forums
Gallery
Events
Everything posted by Danstream
-
.thumb.jpg.c459ce4140b54c12eddb8eedfd446df3.jpg) Yes, old style, but I have seen spectacular results with furry sticks. You might search, f.i., for the works of Paul Coudeyrette if you like. (I do not even mention that I am living in the home town of Rembrandt). I think that using a combination of selected rattle cans, dry brushing and accent dyes you can still do a lot. For metallic heat discoloration, you might consider Tamiya powders designed for that (blue, red and dark palettes). I have seen videos where Gunze metallic paint can be laid down very well by a flat brush. In addition, there are no glossy parts (or really few) on an engine, mostly are matt or satin conversion coatings or protective coatings. Non-glossy finishes are much more forgiving. If you desire a glossier finish, you might consider starting with a matter finish and then glossy it up with a transparent layer from a rattle can. I continue watching and I wish you even more good luck. 😉 Dan
Yes, old style, but I have seen spectacular results with furry sticks. You might search, f.i., for the works of Paul Coudeyrette if you like. (I do not even mention that I am living in the home town of Rembrandt). I think that using a combination of selected rattle cans, dry brushing and accent dyes you can still do a lot. For metallic heat discoloration, you might consider Tamiya powders designed for that (blue, red and dark palettes). I have seen videos where Gunze metallic paint can be laid down very well by a flat brush. In addition, there are no glossy parts (or really few) on an engine, mostly are matt or satin conversion coatings or protective coatings. Non-glossy finishes are much more forgiving. If you desire a glossier finish, you might consider starting with a matter finish and then glossy it up with a transparent layer from a rattle can. I continue watching and I wish you even more good luck. 😉 Dan -
It might be quite fun spraying the different shades of colors and it just needs to convey the impression of that complex machine. I remember the distinctive howling of the J-79 when the Italian Starfighters were a common seen. Good luck with the engine. Cheers, Dan
-
Good job on the cockpit, it looks good and the seat with all that harness looks great. Dan PS - Eventually, have you put some documents in the magazine holders?
-
F-86F-30 Sabre by Javlin - FINISHED - Kinetic - 1/32
Danstream replied to Javlin's topic in Non-ship/categorised builds
Very good progress, you can see already its shape. Cockpit looks great. Dan -
One of the most aesthetically beautiful aircraft in a senior scale, I will be also following, if you don't mind. Great start with the cockpit. Side walls with magazines look spot on. Kind regards, Dan
-
A-26B Invader by Javlin - ICM - 1/48 - PLASTIC - MTO 1945
Danstream replied to Javlin's topic in Non-ship/categorised builds
I will be following with interest the Fiat CR-42 when you will decide to start it. I am considering to get it as well. Cheers, Dan -
F-86F-30 Sabre by Javlin - FINISHED - Kinetic - 1/32
Danstream replied to Javlin's topic in Non-ship/categorised builds
One of the most graceful plane ever built, I will follow your 1/32 build. He must have seen some MiG-15 around? -
A-26B Invader by Javlin - ICM - 1/48 - PLASTIC - MTO 1945
Danstream replied to Javlin's topic in Non-ship/categorised builds
I found this compact aircraft always very cool. I remember having built the old 1/72 Airfix kit when I was a teenager. Great interior and very convincing natural metal finish. I like the clean finish too (there must be few moments in their life when airplanes are not dirty). From your words, I infer that the ICM kit is quite good, surely it is an imposing build. Congrats, Dan -
Hi, I have been far from the forum the last days and today I see that you completed them! Well done, despite the limitations of the kits, as you said, they look the part. Not easy kits, we have seen that, but you did a good job! Congrats, Dan
-
Your car looks terrific. I have never done car models, but your built it is making me thinking. I am sure that if you take a B/W picture of it, you can disguise your model for the real thing. Congrats, Dan
-
Very nice work. It will be a head turner when finished. Dan
-
Good repair on the diagonals of the boom. I agree with your decision to go on OOB ... life is too short ... 😁 By the way, the tubes of the Revell one looks thinner. Cheers, Dan
-
You got quite a challenge here. I agree with you for not sacrificing another kit just to get the boom out of it. I know that some modelers source two kits to get at the end only one model, but I do not like this, perhaps I lived too long in Holland and I developed a sense for avoiding wasting things. Another possibility could be to look for Evergreen half round rods, which I know they have in their catalogue, to complete the the half rods of the Revell boom. However I recognize that this might be a rather difficult one, because you have to be lucky to find the right diameter and then anyway you will have to go through a lot of sanding to hide the joints. Then there is what Ken suggested, i.e. try to scratch it from brass rods. In this case, you would have the opportunity to build it with the appropriate diameter. Should I try it, I would try to build it like the Italeri parts, building first the soldering jigs trimmed on the Italeri parts. But this would be really a challenge for me. I wouldn't know if I would be successful in soldering truss nodes where 3 or 4 rod ends are coming together. These difficulties are one of the reasons which kept me away from building a model of this machine, which I like a lot. In fact, when I was a kid, one of my favorite TV series which I tremendously loved and which I still remember was 'Whirlbirds' which was broadcasted in Italy, where I grew up, in the mid 60s, duly dubbed in italian, of course 😁. https://www.imdb.com/title/tt0050077/?ref_=ext_shr_lnk In conclusion, unfortunately, I do not have any better idea to suggest at this moment, and for the Revell kit, I am stuck with building it OOB. Kind regards, Dan
-
Thank you for your words. Actually, the engine lacks some important details, but it was fun to work with and it gave me the opportunity to try some new things with the metallic acrylic. Thanks Gary, I am glad you like the result. The underside turned out OK thanks to the oil washing and also to the marbling pre-shading, It was nice to try these techniques that make uniform surfaces more interesting. Greetings to all, to the next build, Dan
-
OK, nice job with the instrument columns. Dan
-
@Old Collingwood, thanks for your note, I know little about Soviet planes (I did some readings within the frame of this build) but as you said, it looks the part sufficiently also in my view. @popeye the sailor, thank you Denis very much for your super kind words, happy that you find the camo style appropriate! Kind regards, Dan
-
Caught up and following you mate. Dan.
-
Thanks to @ccoyle, @lmagna, @Egilman, @king derelict, @CDW, @GrandpaPhil, @Canute for your kind comments and thanks for all the 'likes'. Thinking of what could be next. Cheers, Dan.
- 109 replies
-
- 10
-

-

-
Thank you for trying to find a positive side to it! 😉
-
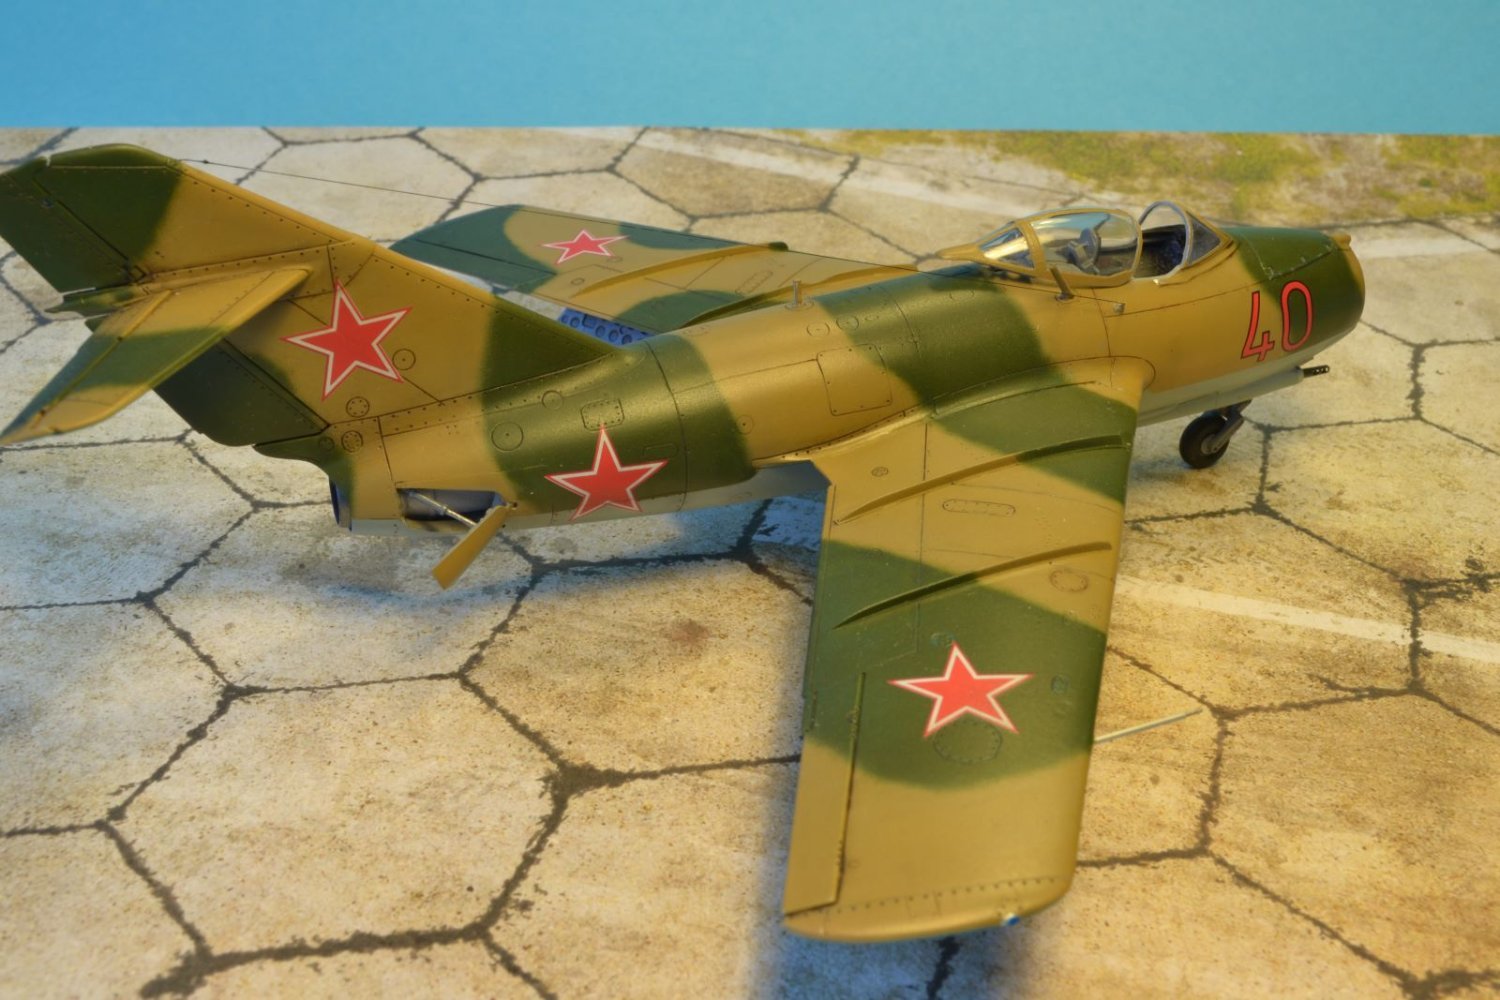
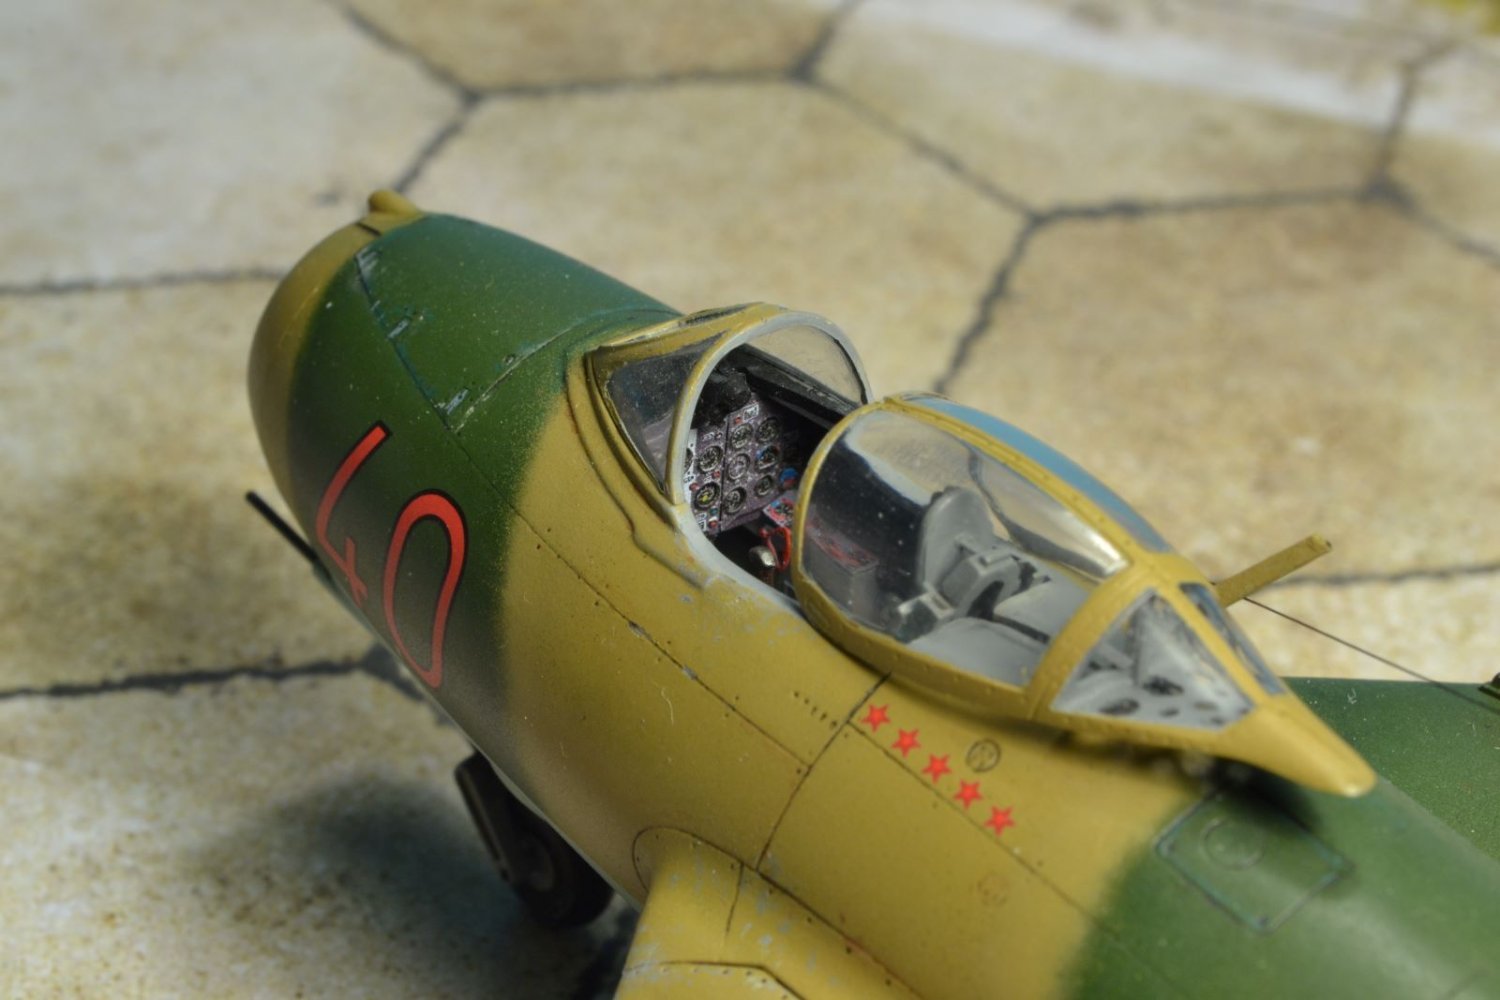
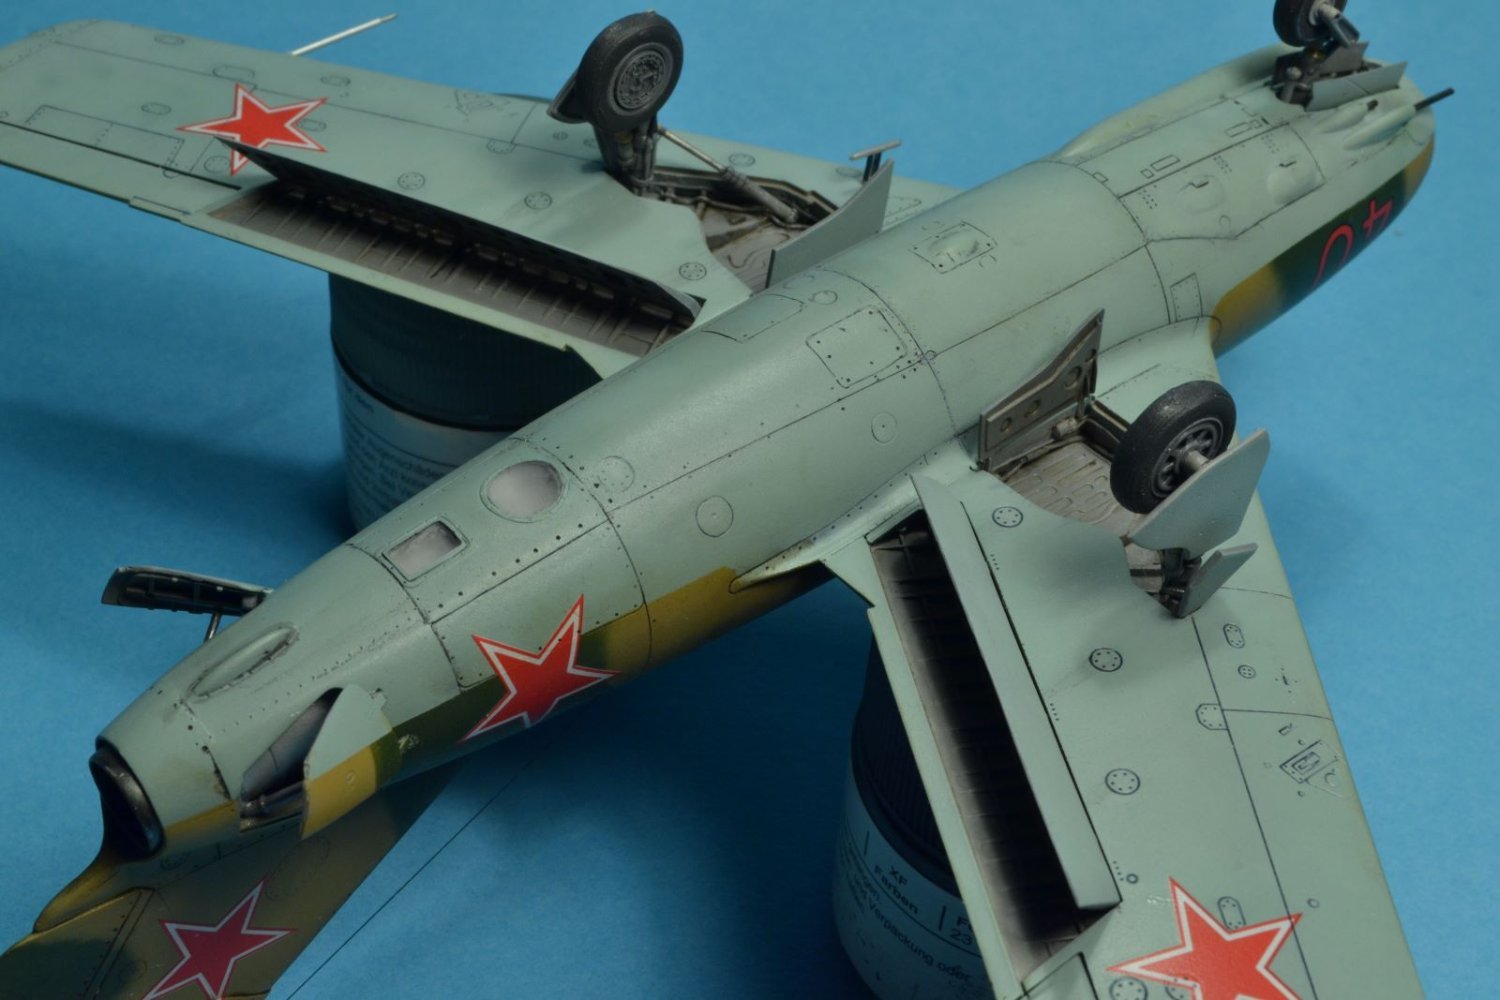
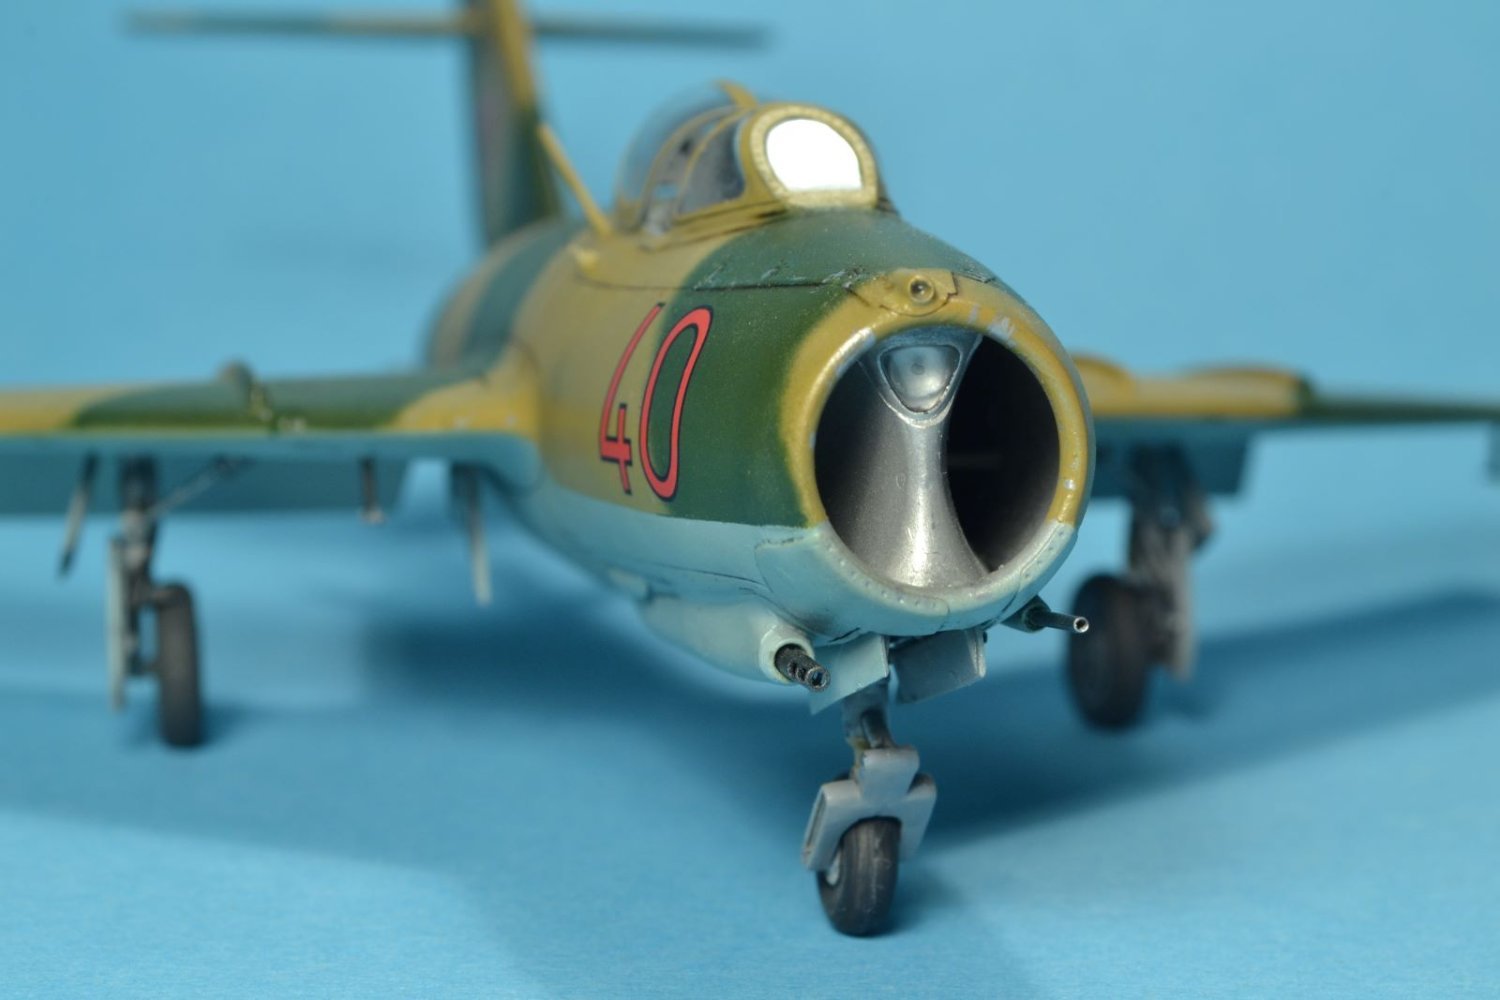
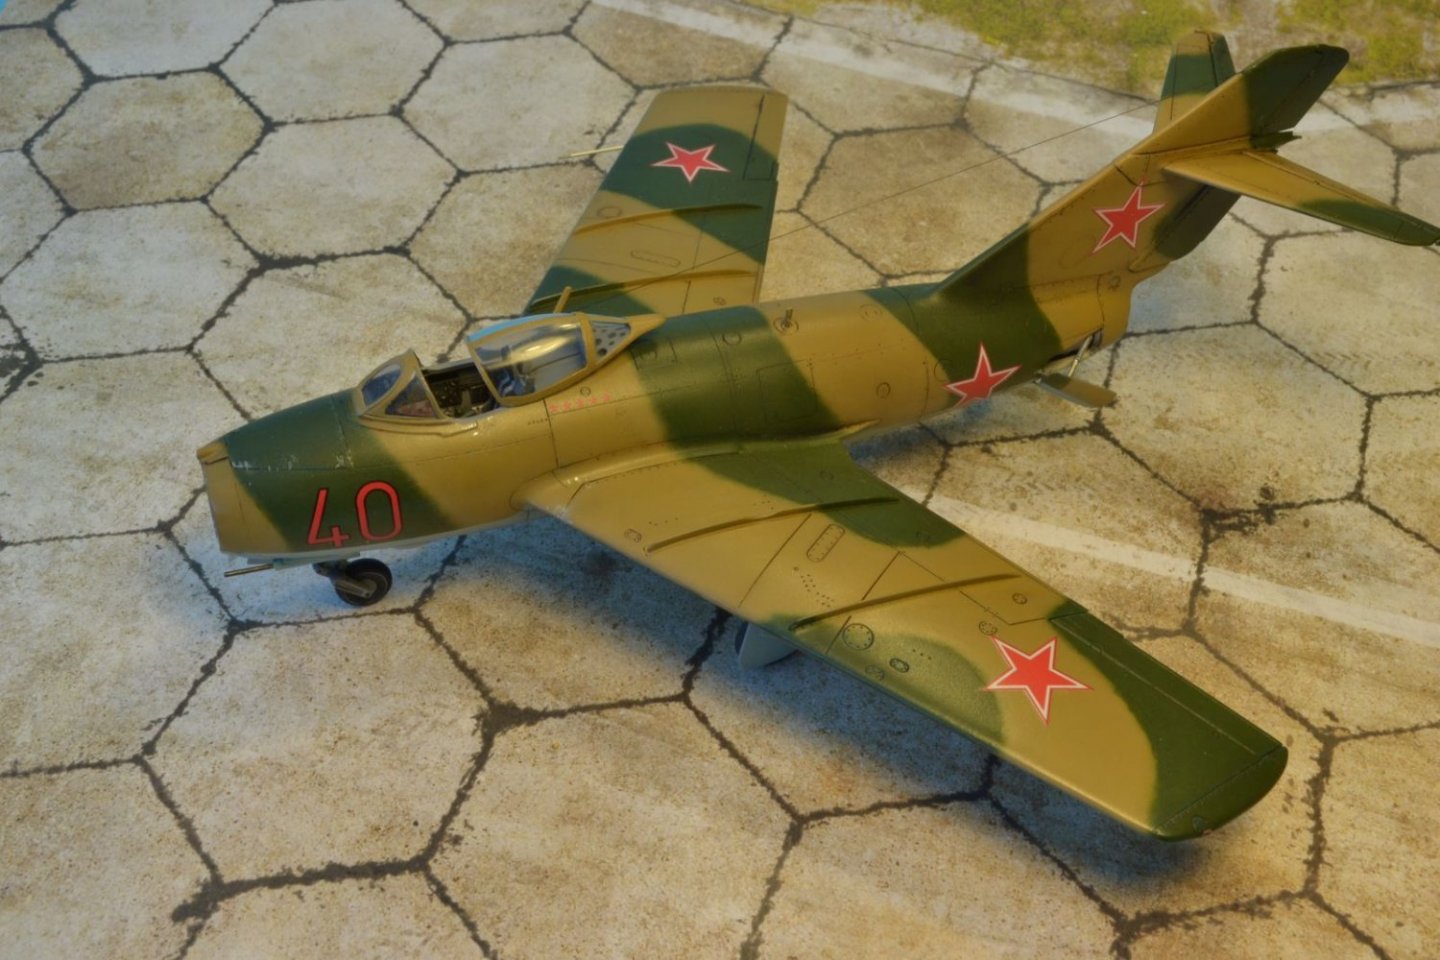
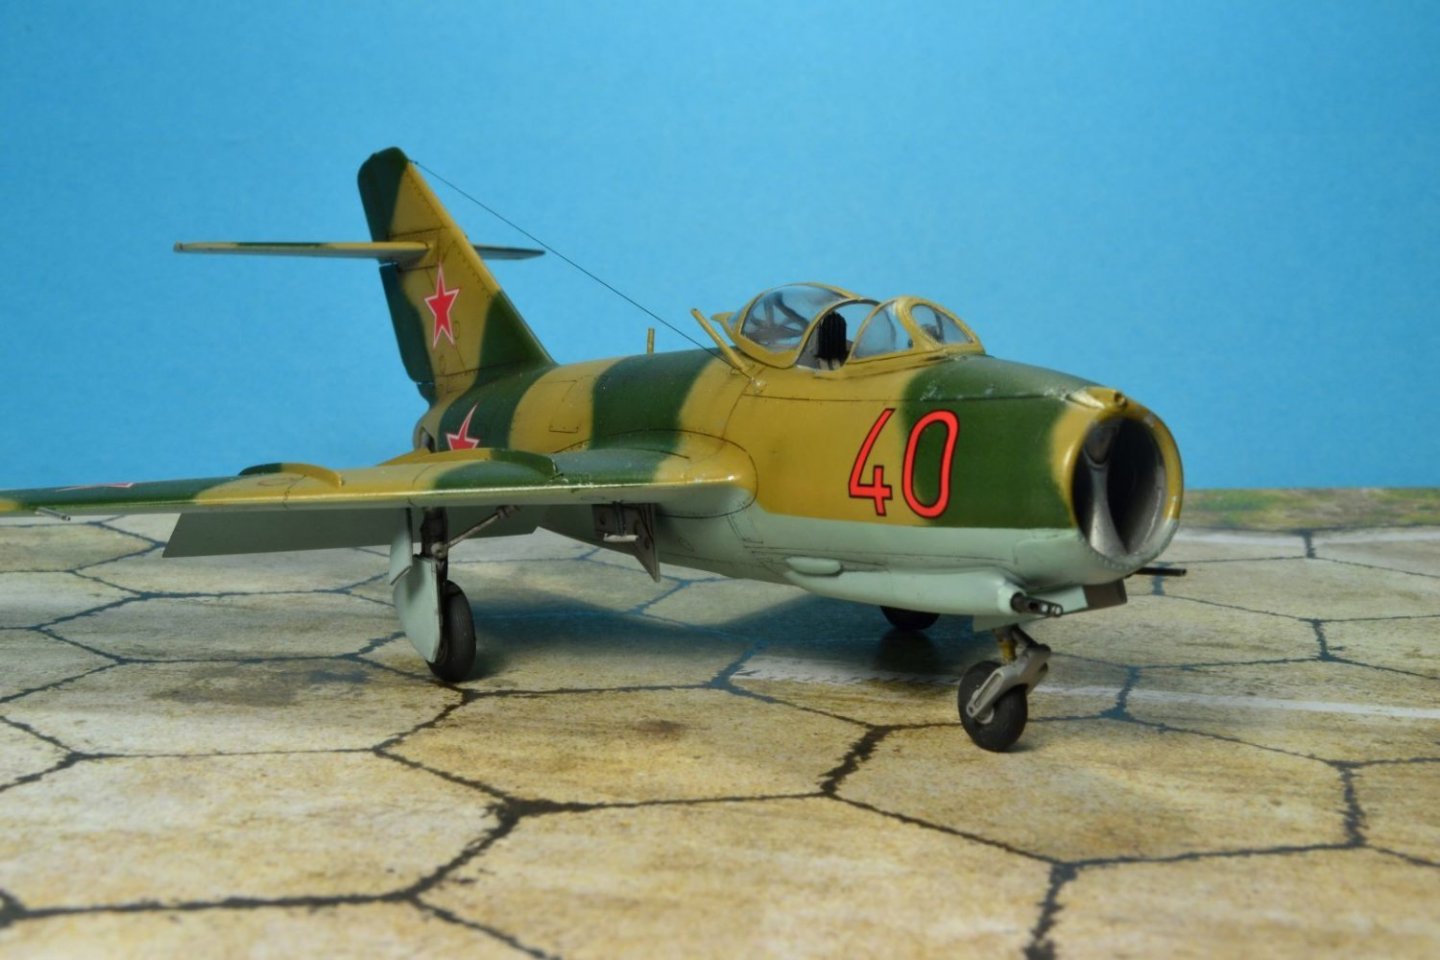
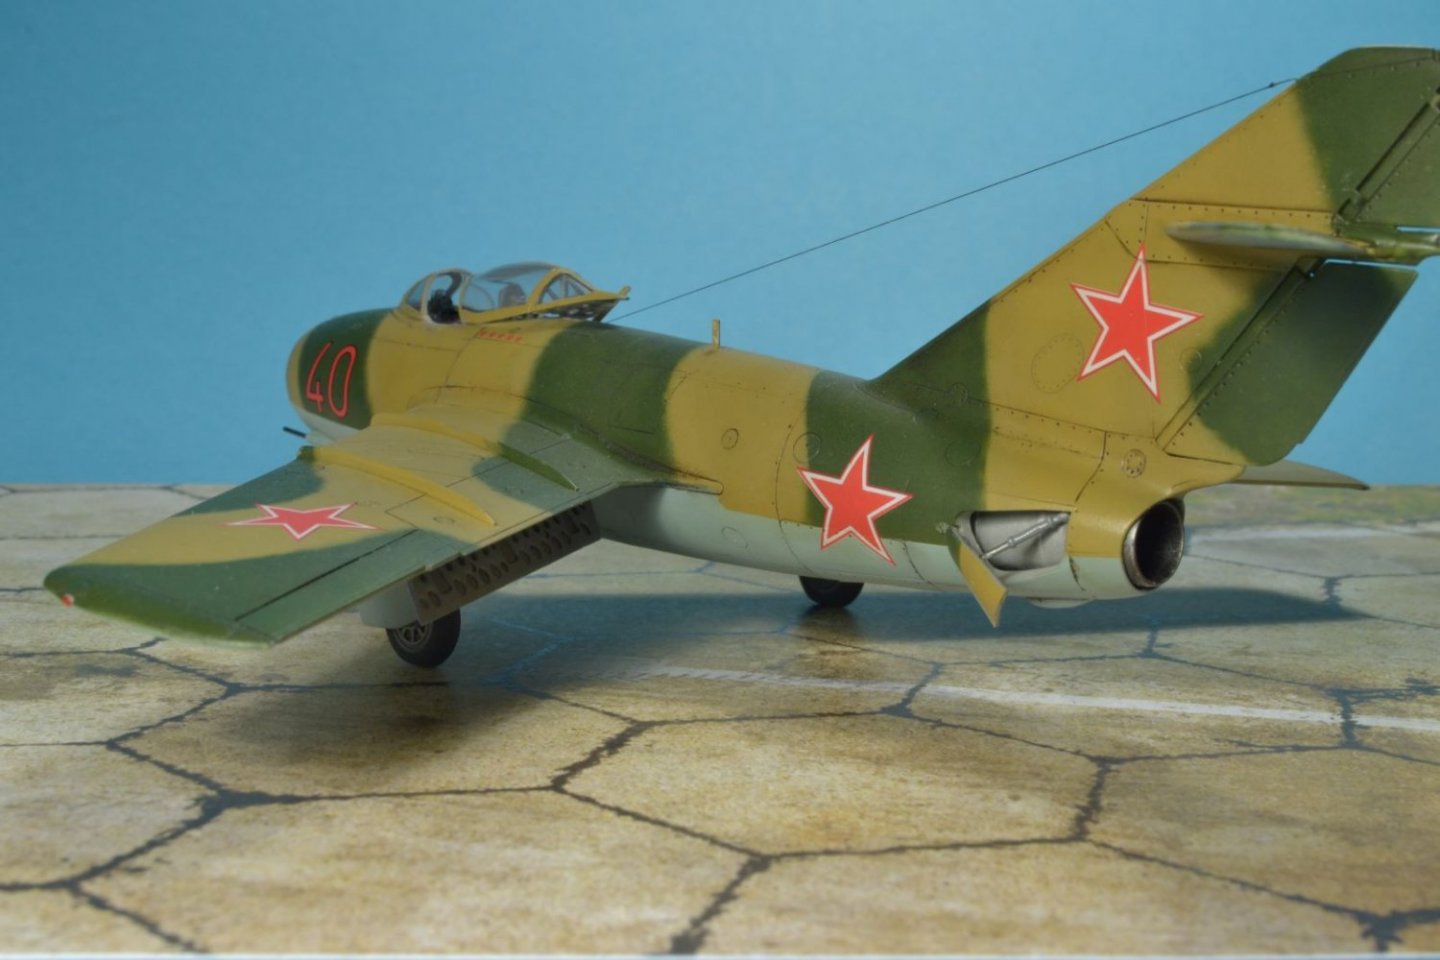
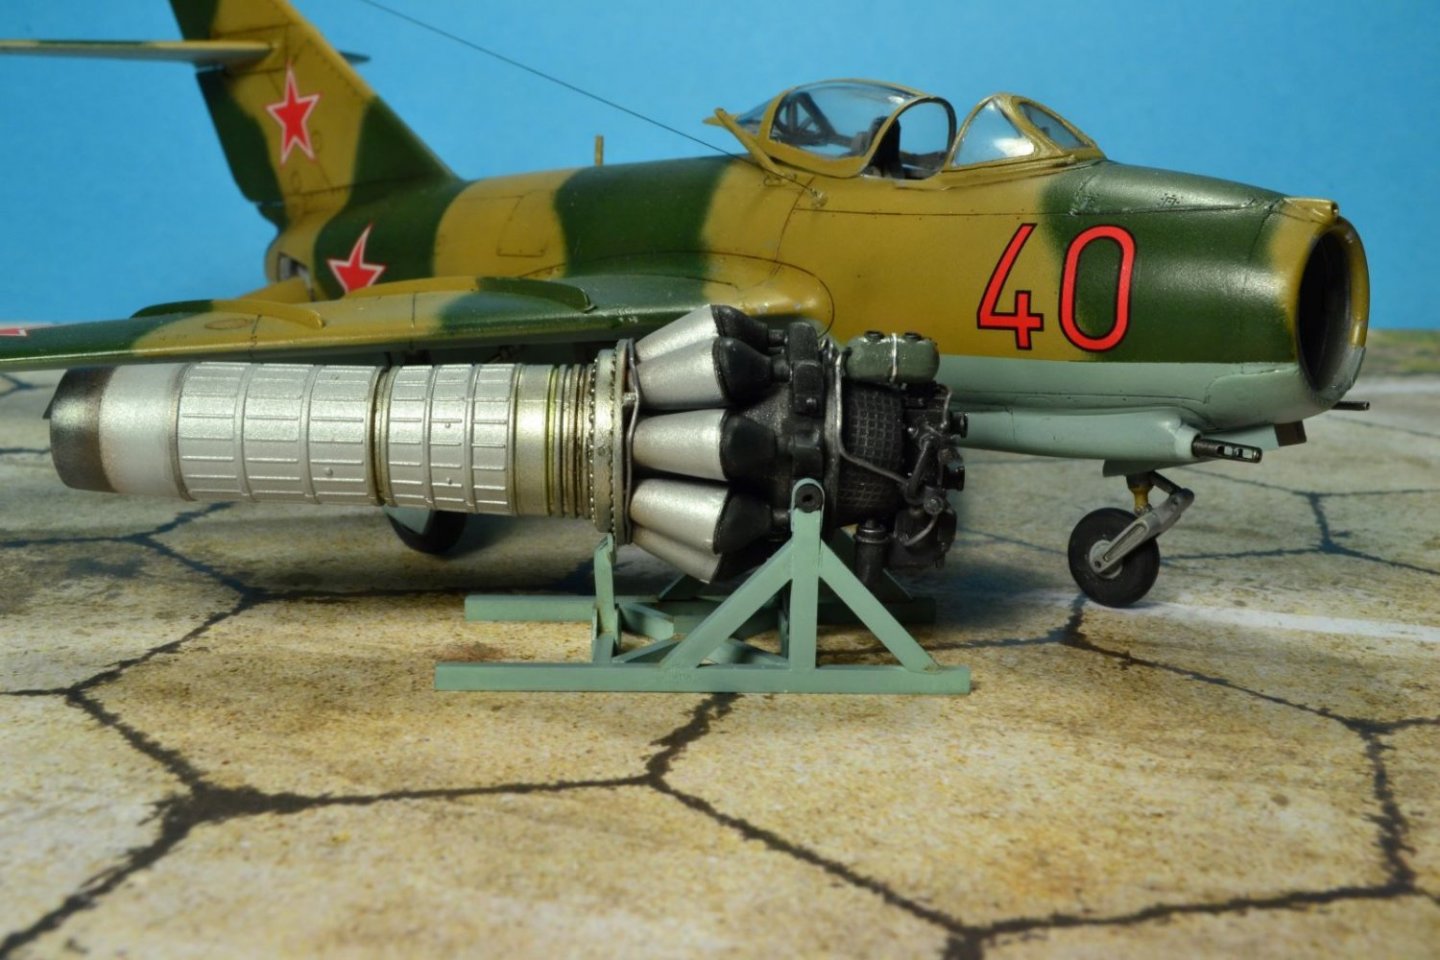
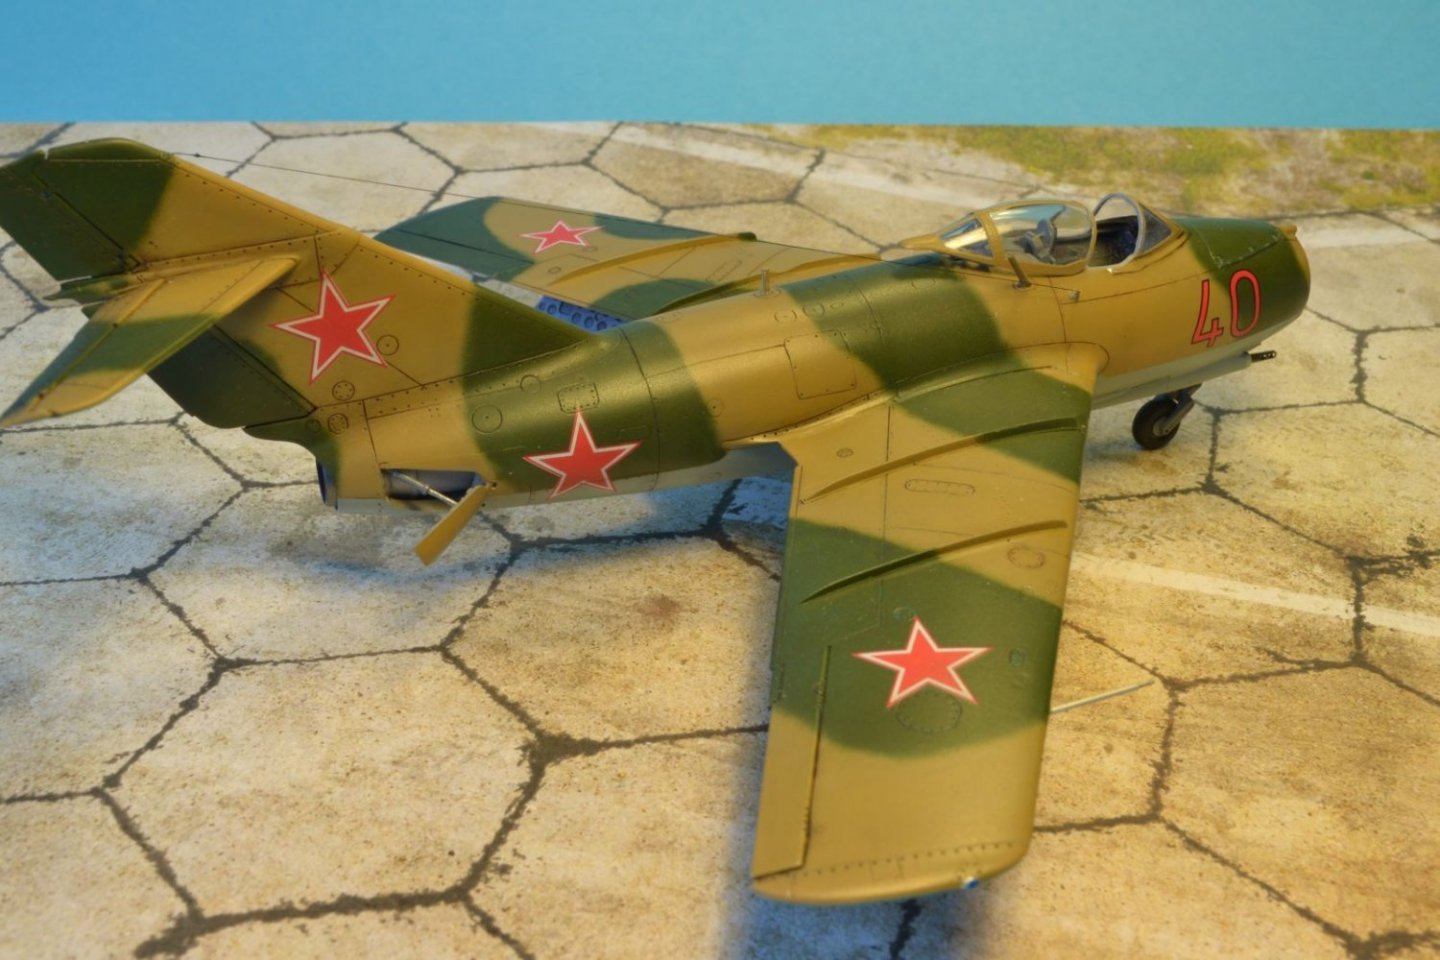
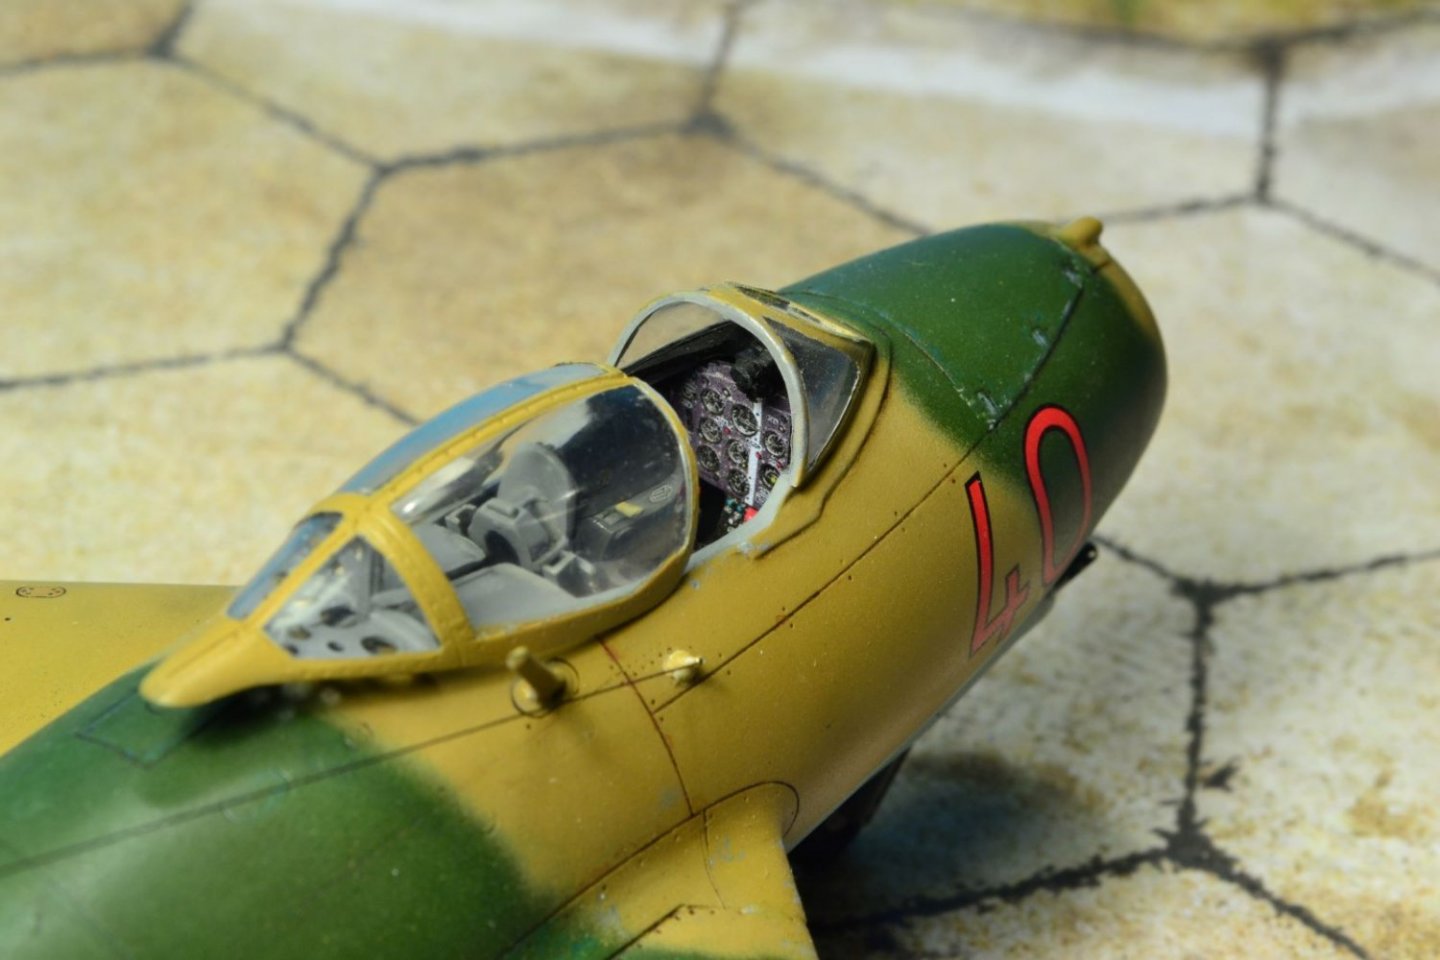
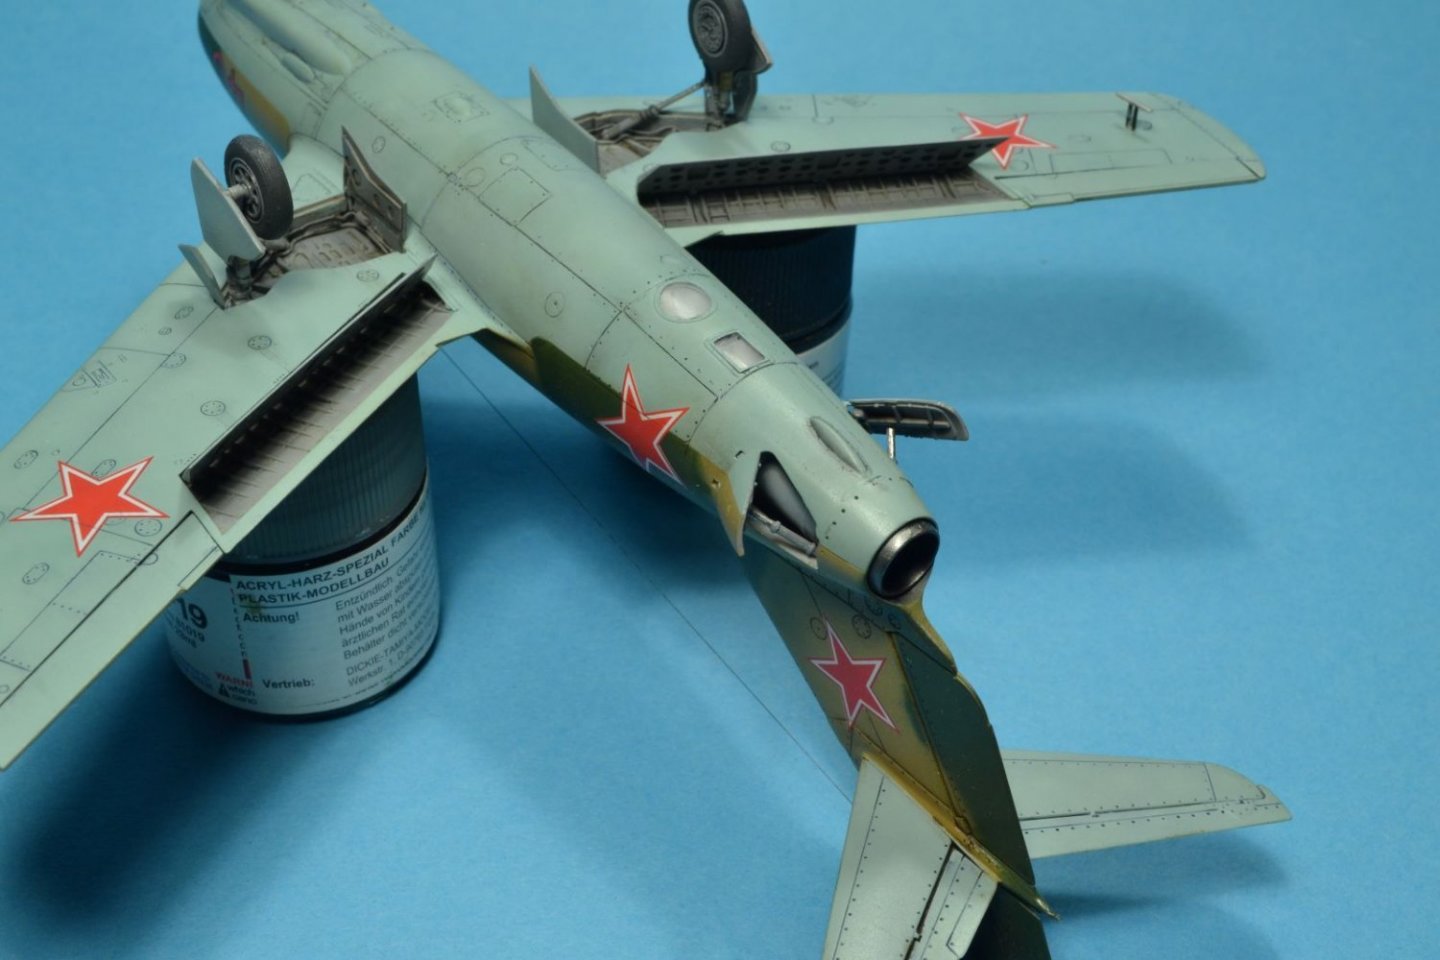
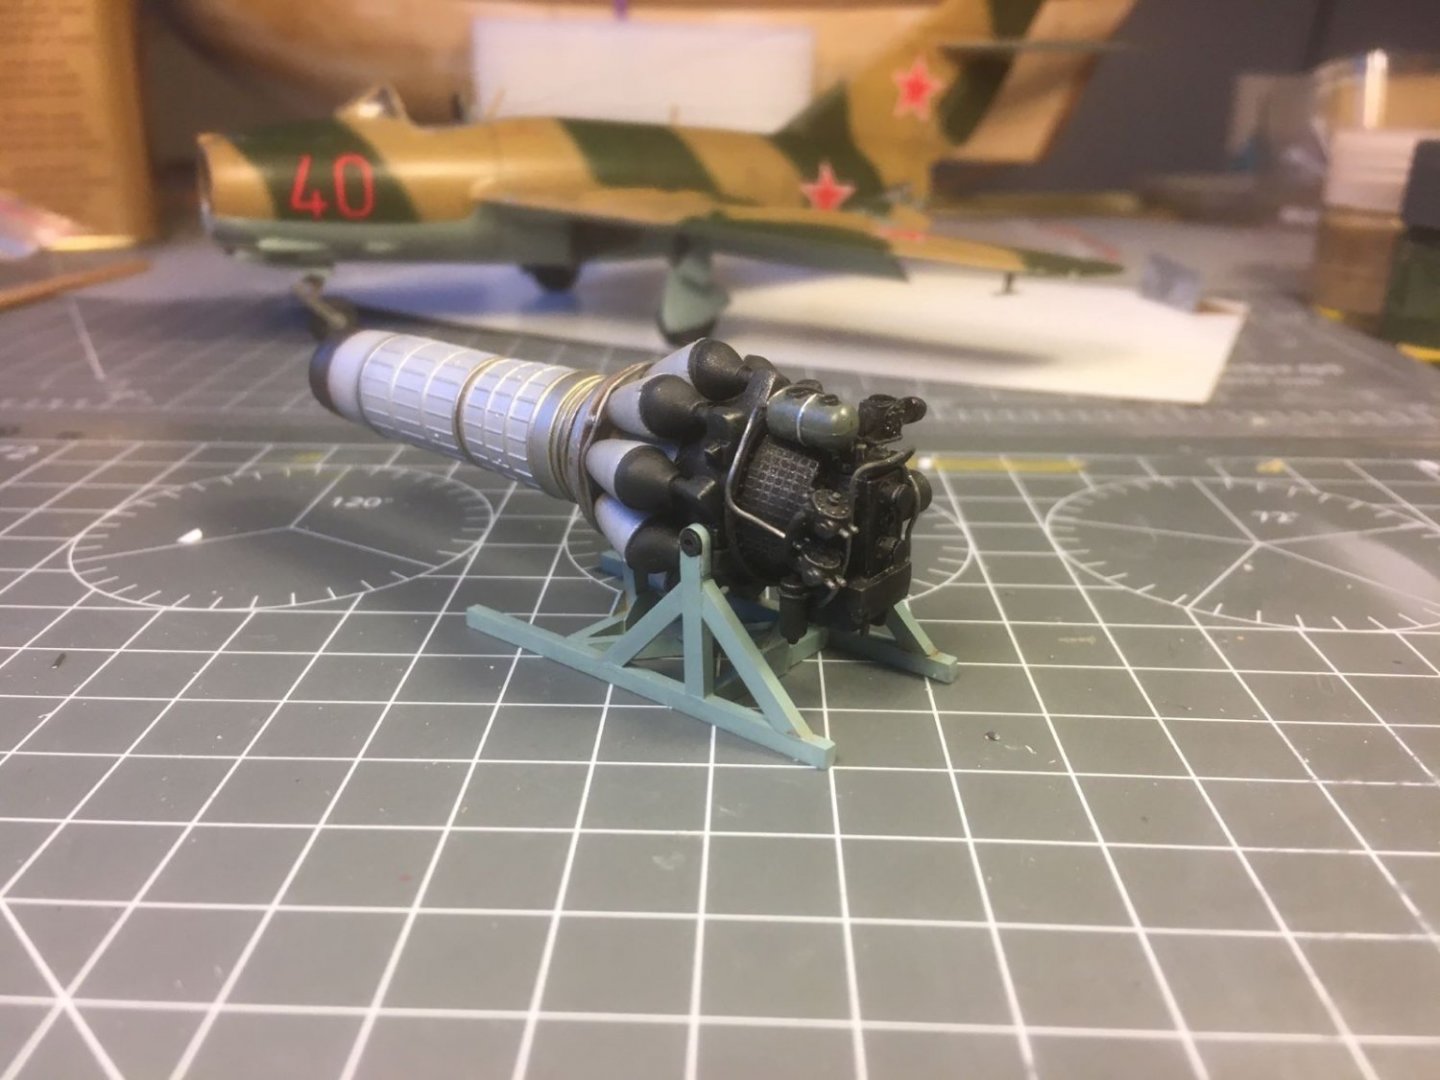
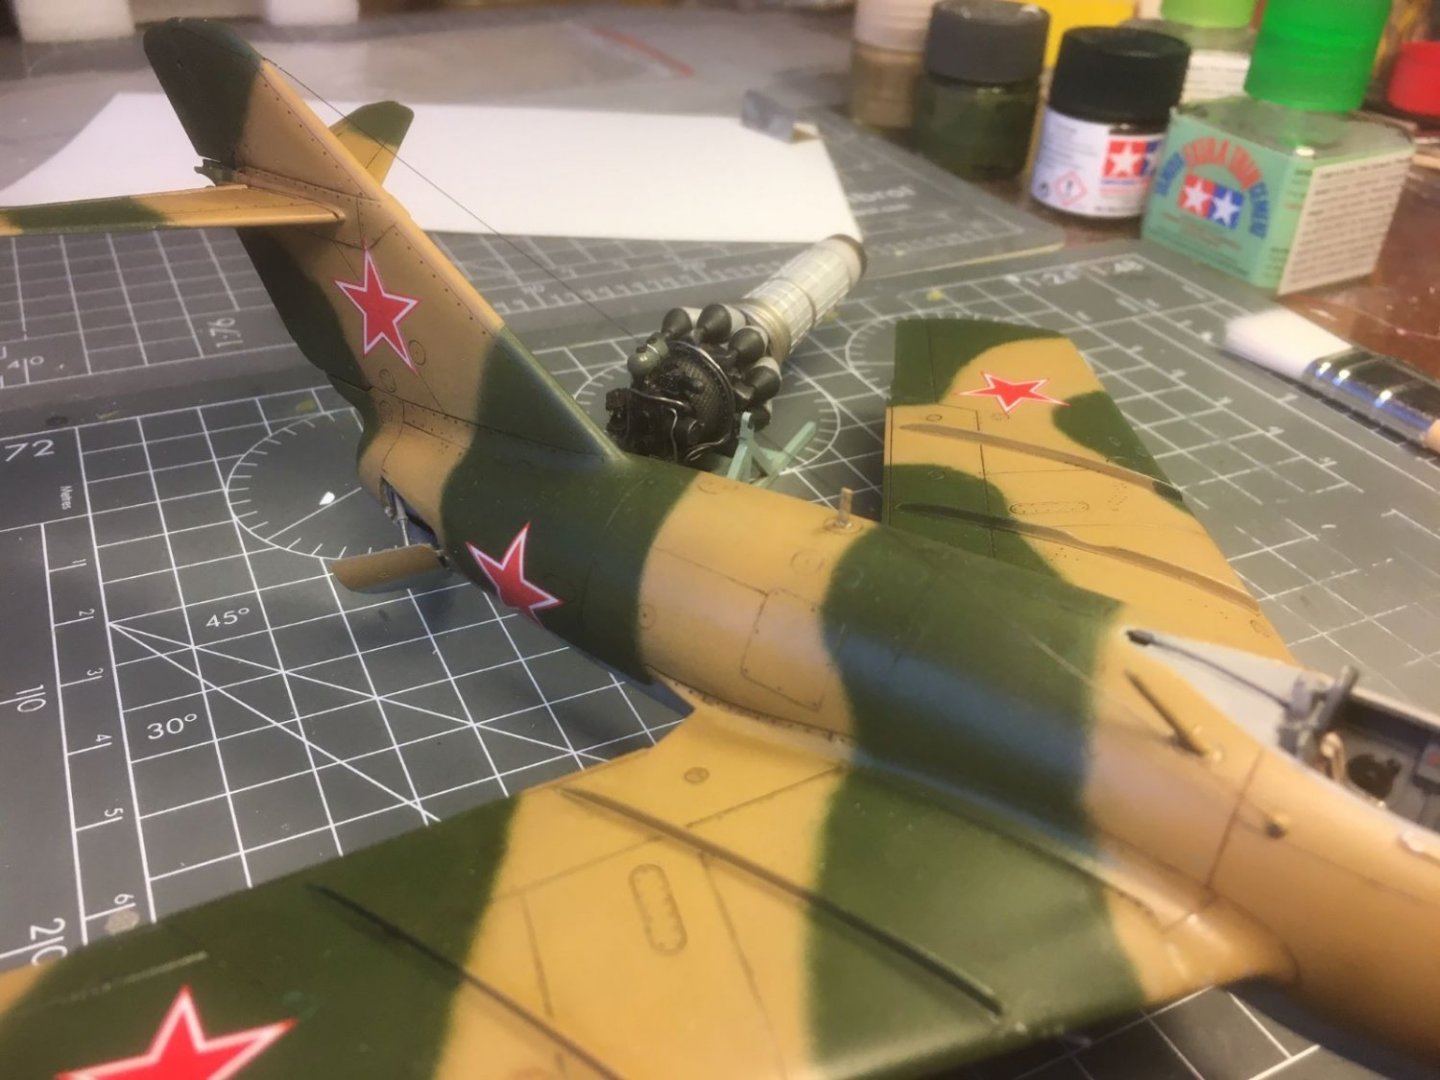
Mikoyan-Gurevich MIG 15 Bis Red 40 - Nikolay Shkodin, 1953 (Trumpeter 1:48) Hereinafter the pictures of my completed model of this Soviet fighter. The build presented few fitting issues, but at the end I am pleased with the result. I chose not to install the jet engine inside the rear fuselage and to display it next to the aircraft. I used aftermarket seatbelt, instrument panel and resin main wheels for increased detailing. The Jet engine Klimov-vk1 is fairly reproduced for this scale and, as said, I display it on a scratch build static stand. The model was finished with Tamiya acrylic colors mixes and Vallejo metallic for the metallic finished parts. I tried the camouflage bands by spraying them free-hand to obtain feathered demarcations. However, perhaps the effect that I obtained is a bit out of scale. I obtained the 2 x 23 mm gun muzzles by aluminium tubes, while the muzzle of the 37 mm cannon is an Eduard replacement. I modified the oversimplified pilot seat to better reproduce the type used at the time of this aircraft. The panel lines were obtained by oil colors washes. Other small stains were made with watercolor pencils. I found this aircraft rather interesting to build and I hope you like my final pictures. The complete build log is reported in the above pages. I would like to thanks all those that followed my long build and especially those that have provided comments and suggestions. Best regards, Dan


- 109 replies
-
- 21
-
-
-

-
Hi all, being domestic commitments for the festivities over, these are the really last pictures of the last missing bits. The engine was completed and put on its finished stand: Clearly, there is no claim for accuracy, being the added wiring and tubing is just an over simplification and its purpose was just to convey the impression of the real thing. Finally, the wire aerial, although it is barely visible in this picture: Next, canopy and final pictures. Thanks for following, Dan.
- 109 replies
-
- 12
-
-
@king derelict thanks for your clarification about the stand. I am glad that you find it adequately reproducing something realistic, I will pose it next to the aircraft. Best regards, Dan.
-
Tiger 1 by Javlin - RFM - 1/35 - Early Version
Danstream replied to Javlin's topic in Non-ship/categorised builds
As said in an another post of yours, this interior looks very nice. Greetings, Dan.