.jpg.2c2c29e54623bd7b752bc2cdab599665.jpg)
Danstream
-
Posts
755 -
Joined
-
Last visited
Content Type
Profiles
Forums
Gallery
Events
Everything posted by Danstream
-
.thumb.jpg.c459ce4140b54c12eddb8eedfd446df3.jpg) Very nicely done, Craig. It is an imposing and complicated aircraft, you have done a great job. Also the three tone camo does not look too easy. Love the sharp looking canopy. Kind regards, Dan
Very nicely done, Craig. It is an imposing and complicated aircraft, you have done a great job. Also the three tone camo does not look too easy. Love the sharp looking canopy. Kind regards, Dan -
Bristol Beaufort by AJohnson - FINISHED - Airfix - 1:72
Danstream replied to AJohnson's topic in Non-ship/categorised builds
As already said by others, the matt finish came out very nice and the transparent parts look busy and tidy. It is a lovely model. Best regards, Dan -
Martin B-26B Marauder by CDW - FINISHED - Airfix - 1:72 Scale
Danstream replied to CDW's topic in Non-ship/categorised builds
I have followed your build in silence from the back row. Time to comment it, you got a remarkable result from this old lady. Best regards, Dan -
Thanks for your appreciation and compliments, Mike! I am glad that you like my job. Sorry for my late reply, I am just back from my trip to Italy and going through my mail backlog and the progresses of this site. I will reconnect with people of this blog soon. Best regards, Dan
-
Very nice, clean and accurately done. Very nice subject. Congrats, Dan
-
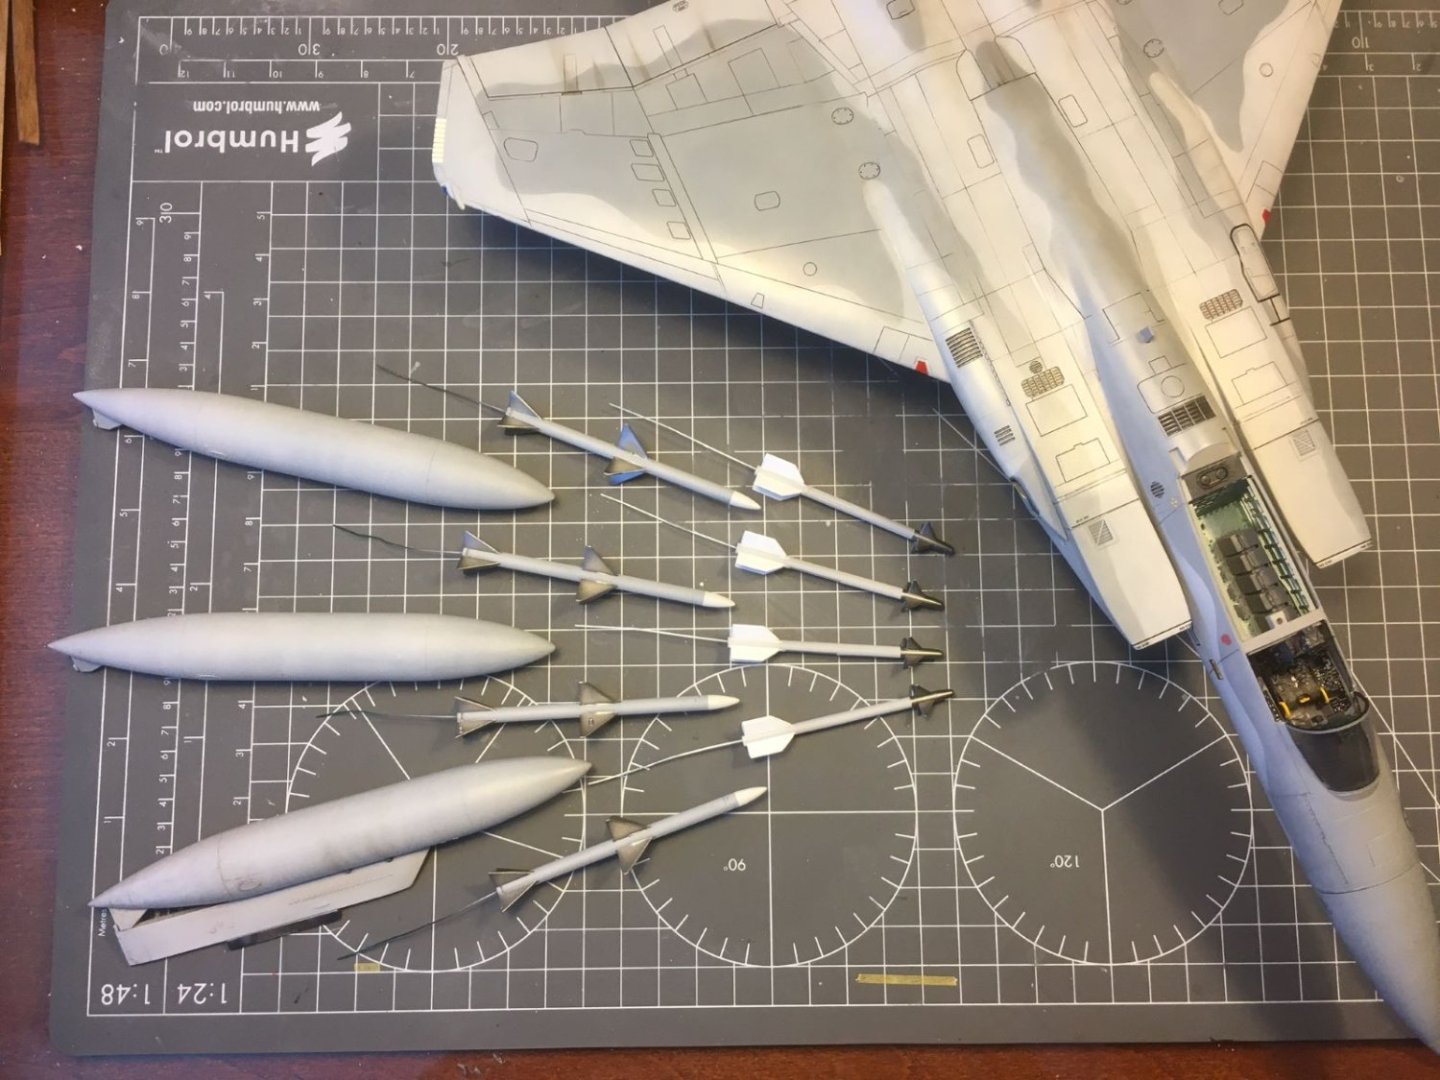
Hi all, very small progress, but I would like to post something before my summer break. I am taking a couple of weeks leave to drive to south Europe and visit family. So for a while I will not post but I will learn of the progress of your builds. I painted all the external loads according to schemes which I think should match the period of the livery of the plane. This is the present state of affairs: I still need to add the numerous colored bands to the missile bodies, but that should not take long. I have not decided whether I will paint them or use decal stripes. After that, these and the last things need to be put together in the final stretch. Happy modeling and enjoy the summer, for those on this side of the planet, for the others have a good time anyway. Dan
- 137 replies
-
- 11
-

-
As said by others, it looks like a real thing. 👍 Dan
-
As Canute said, the green-blue color is pretty common for modern jets, see f.i.: https://commons.wikimedia.org/wiki/File:Cockpit_of_Sukhoi_Su-27_(4).jpg Never trust color callings of kit's instructions without at least a sanity check. Kind regards, Dan
-
F-86F-30 Sabre by Egilman - Kinetic - 1/32nd scale
Danstream replied to Egilman's topic in Non-ship/categorised builds
Unless the numbering system for sandpaper is different across the pond, I fear that 320 grit might be way too coarse. I wouldn't go any less that at least 600 and using it wet. Maybe you have different experience, but you can make some tries before committing the obtained result. Kind regards, Dan -
Hi Gary, thank you, I am happy for your appraisal. Hope to post something soon, kind regards, Dan
-
Impressive model display and beautiful cabinets! 👍 Dan
-
This is also valid for me. I have fun in building, painting and reading about the plane and the model, but once done, I hardly look at them any more. Actually, my latest models are in permanent loan with my LHS. He is happy so he can show them as examples of what can be done with the stuff he sells and I am happy because I do not clutter shelfs with them. Also for this reason, I keep a very limited stash and I build only the ones that I really like and that mostly I buy on the spot. At any rate, anybody has his own way to enjoy the hobby and in the moment you do not have fun anymore, you should stop with no remorses and do other things that in that moment you feel are better for you 😉. Kind regards, Dan
-
You got a clean, sharp looking, head turner model there. A very complex, multi-colors scheme that looks very well done which, as I said above and in the title, it is a beauty. Well done! Dan PS: I am also impressed by the short time that you needed to build this model. Compared to my glacial pace you are extremely fast. 👍
-
F-86F-30 Sabre by Egilman - Kinetic - 1/32nd scale
Danstream replied to Egilman's topic in Non-ship/categorised builds
As you prompted, I am firing my opinion here. It looks like a realistic structural bare aluminium finish. As Mark said in a post above, it has the look of a used airframe which, in many cases, I prefer to the buffed shiny finish mostly used for displays, because I like the machines that are there to do a 'work' (but this my opinion). In the picture from 3/4 from the tail, where you see the fuselage shortened by perspective, I can see the texture variation made by the panels and the image of fuselage which is softly reflected into the upper wing, all things which I find realistic. As you used to say, go onwards and make justice to one of the most graceful airframe ever designed. 👍 Cheers, Dan -
Chris, please note that from now on I will not refer any longer to the fact that this is a card model. For me, this is a proper good scale model irrespective of which is the material it is made of (although this still amazes me 🙂). Great progress on your model, I love the struts and the wires arrangement (which is typical of a 'sesquiplane'). Kind regards, Dan
- 98 replies
-
- 14
-
-
Hi Denis, German aircraft had the interior painted in the factories with RLM 02 (and IP on some was RLM 66) until Nov 1941. After that date, everything visible from the cockpit windows was painted with RLM 66, which is a dark grey. The rest of airframe remained RLM 02. This is the basic guideline, of course if you google the topic you find also endless discussions about that. That's right, the Stuka did not built up at a fast rate its diving speed, indeed it was a (hopeless) slow aircraft because it was very draggy. Of course the diving brakes also contributed their part to slow the dive. Apparently it was 'at ease' with very steep dive angles. Lou, the Stuka was fitted with an automatic diving recovery system that pulled-up the plane if and when the pilot was blackened-out. For more information about diving speeds and altitudes, see for example: https://www.fighter-planes.com/info/ju87.htm In period footages taken from the cockpit, I saw the pilot firing few bursts during the dive probably to get some clue about how to aim the plane from the tracer bullets (but this is an supposition of mine). The design of the ailerons and of the flaps was a Junker trademark of that time. For example, the Ju-52 had the same design. I suppose that it had some advantage in simplifying the design of the wing structure, but surely was not efficient to reduce the drag. In fact it disappeared with faster airplanes. Probably it was even dangerous for promoting flutter phenomena. There is one thing I always wondered about the Stuka diving maneuver and it is about the accommodation of the gunner in the back. Differently from the pilot who had a proper seat, the gunner sat on a sort of 'picnic chair' with no backrest or headrest (he had a sort of leather strap across his back) and enjoyed the ride facing backwards, I guess it must have been quite an unforgettable experience. Several years ago, I built the old (and good) 1/24 Airfix kit to find that this ugly guy had its own deadly sort of 'beauty'. Sorry for having hijacked your post Denis, I hope you didn't mind. Cheers, Dan
-
Thank you Ken! Great that you like it! Although at slow pace, I am progressing. Never built before, I find this aircraft one of the coolest so far (have I already said that?). Dan
-
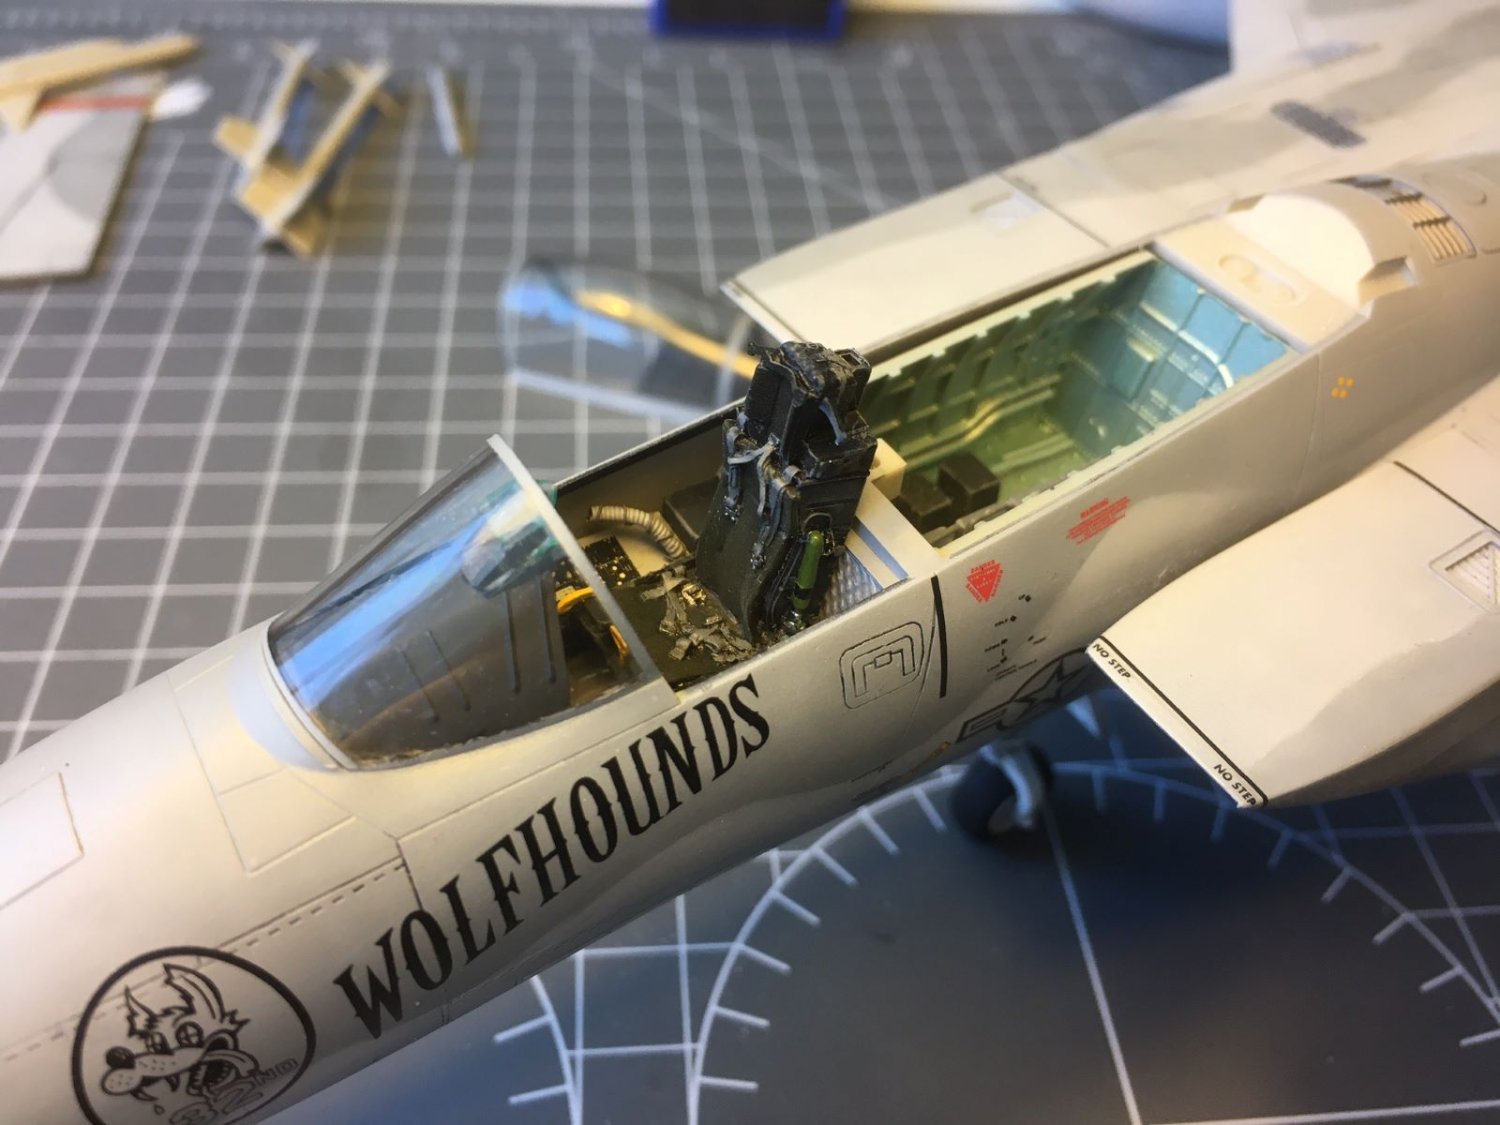
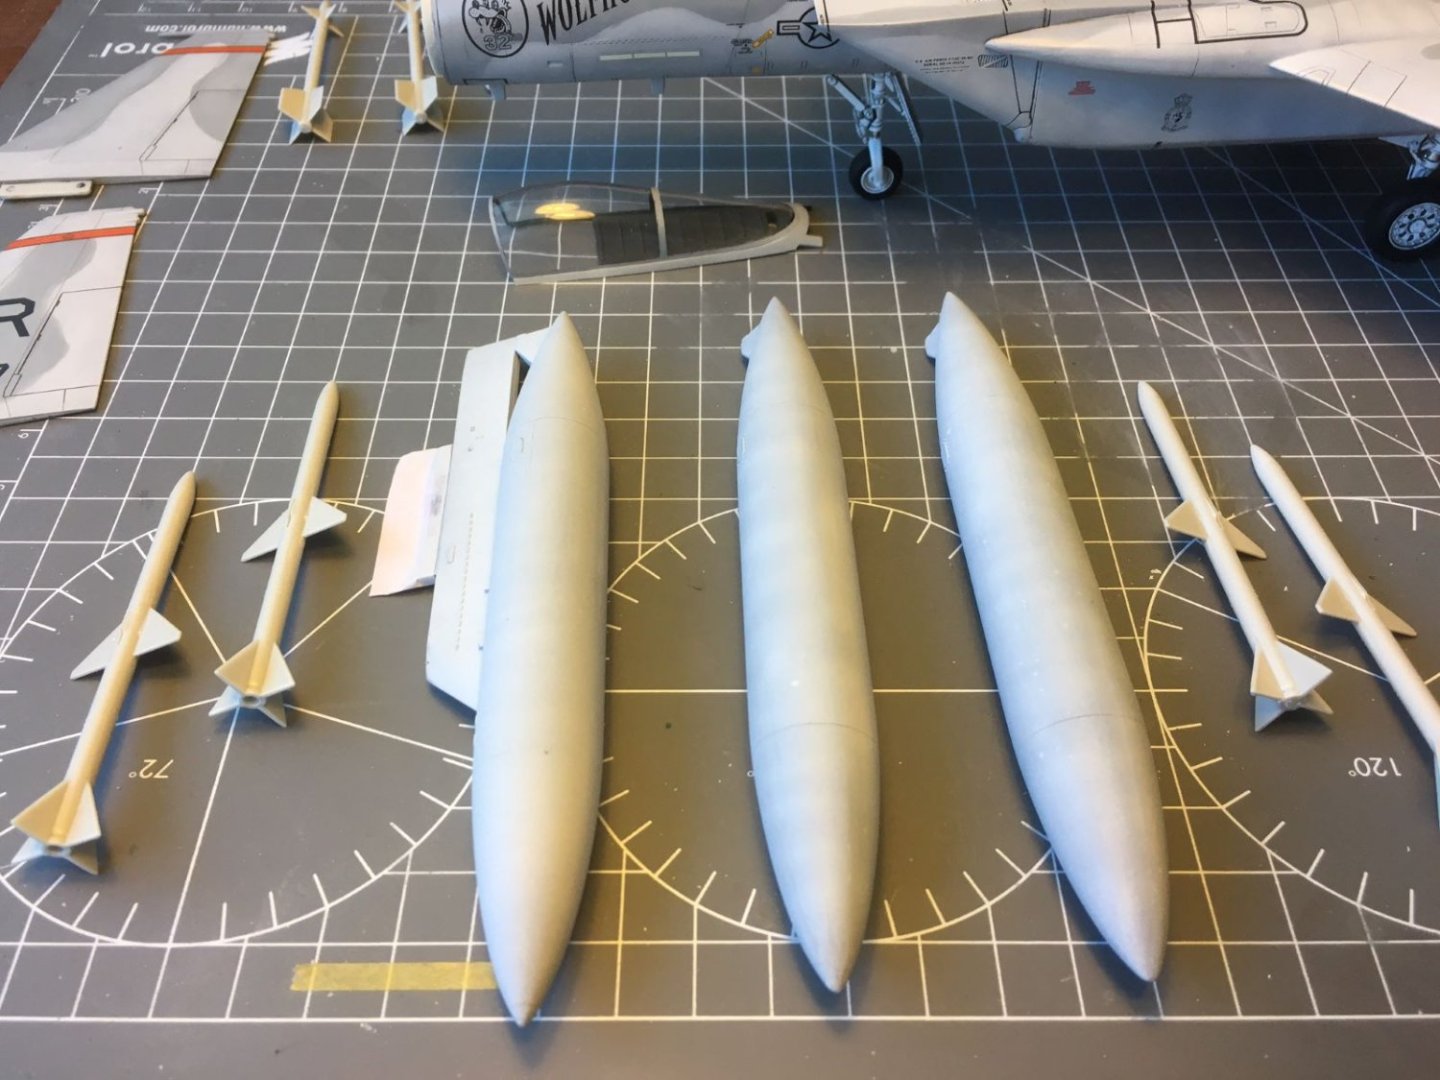
Hi, following Denis' suggestion, I went a bit on with my build. I must admit that I find this phase of preparing the large fuel tanks a bit boring and also finishing the many missiles is not very exciting. I should have thought earlier to close the slots that are there to hold the tanks so to omit them and display the airframe in its sleek and beautiful shape. Too late for that, these are the tanks now after the usual black followed by several layers of paint: Transparent clear and matt are still missing. I will not weather them much, because I do not want them to catch too much attention. Meanwhile, I brush painted the pilot's seat which is a QB resin replacement. This is the only aftermarket used for this build, if we exclude the new decals. This is the most prominent piece that will be visible through the closed canopy glass and I wanted it to look cooler than the simplified part supplied with the kit. I painted it with Tamiya acrylic paints, Vallejo metallic for the buckles and the I sealed everything with a light coat of clear matt. Finally, the cockpit is now complete: That's all for now, thanks for your interest, Dan


- 137 replies
-
- 19
-
-

-
I am sorry reading that. I have the same issue, I always wear compression socks and take anticoagulants during long haul flights. Unfortunately, sitting long hours in the office and at the hobby desk is not a good thing 😒. I try to make breaks and take my dog for long walks almost every day. I am not modeling these days, my models languish on the desk, but I prefer to walk in the sun, when I can. Take care, Dan
-
She is really a beauty. Are you planning any final transparent layer? kind regards, Dan
-
F-86F-30 Sabre by Egilman - Kinetic - 1/32nd scale
Danstream replied to Egilman's topic in Non-ship/categorised builds
It looks very good EG, reflectivity is very credible. Surface details are awesome, I can even see some waviness of stressed skin, am I right? Best regards, Dan -
Aermacchi MB 339A by SigEp Ziggy - Italeri - 1/72
Danstream replied to SigEp Ziggy's topic in Non-ship/categorised builds
Good progress on this graceful plane. In Italy, this jet was quite popular being used as military jet trainer and by the aerobatic team of the Italian Air Force (Frecce Tricolori). One comment/suggestion: please reduce the thickness of the air intake walls, from the picture where your hands hold the wings the walls look very thick. Best regards, Dan -
Yes, these circular sectors are weights to bring the center of mass of the elevator on top of the hinge line. This is one measure to avoid flutter or aerodynamic coupling between vibration of the tail and the elevator. Tabs are on the trailing edge of the elevator. Nice splinter camo, by the way. Dan
-
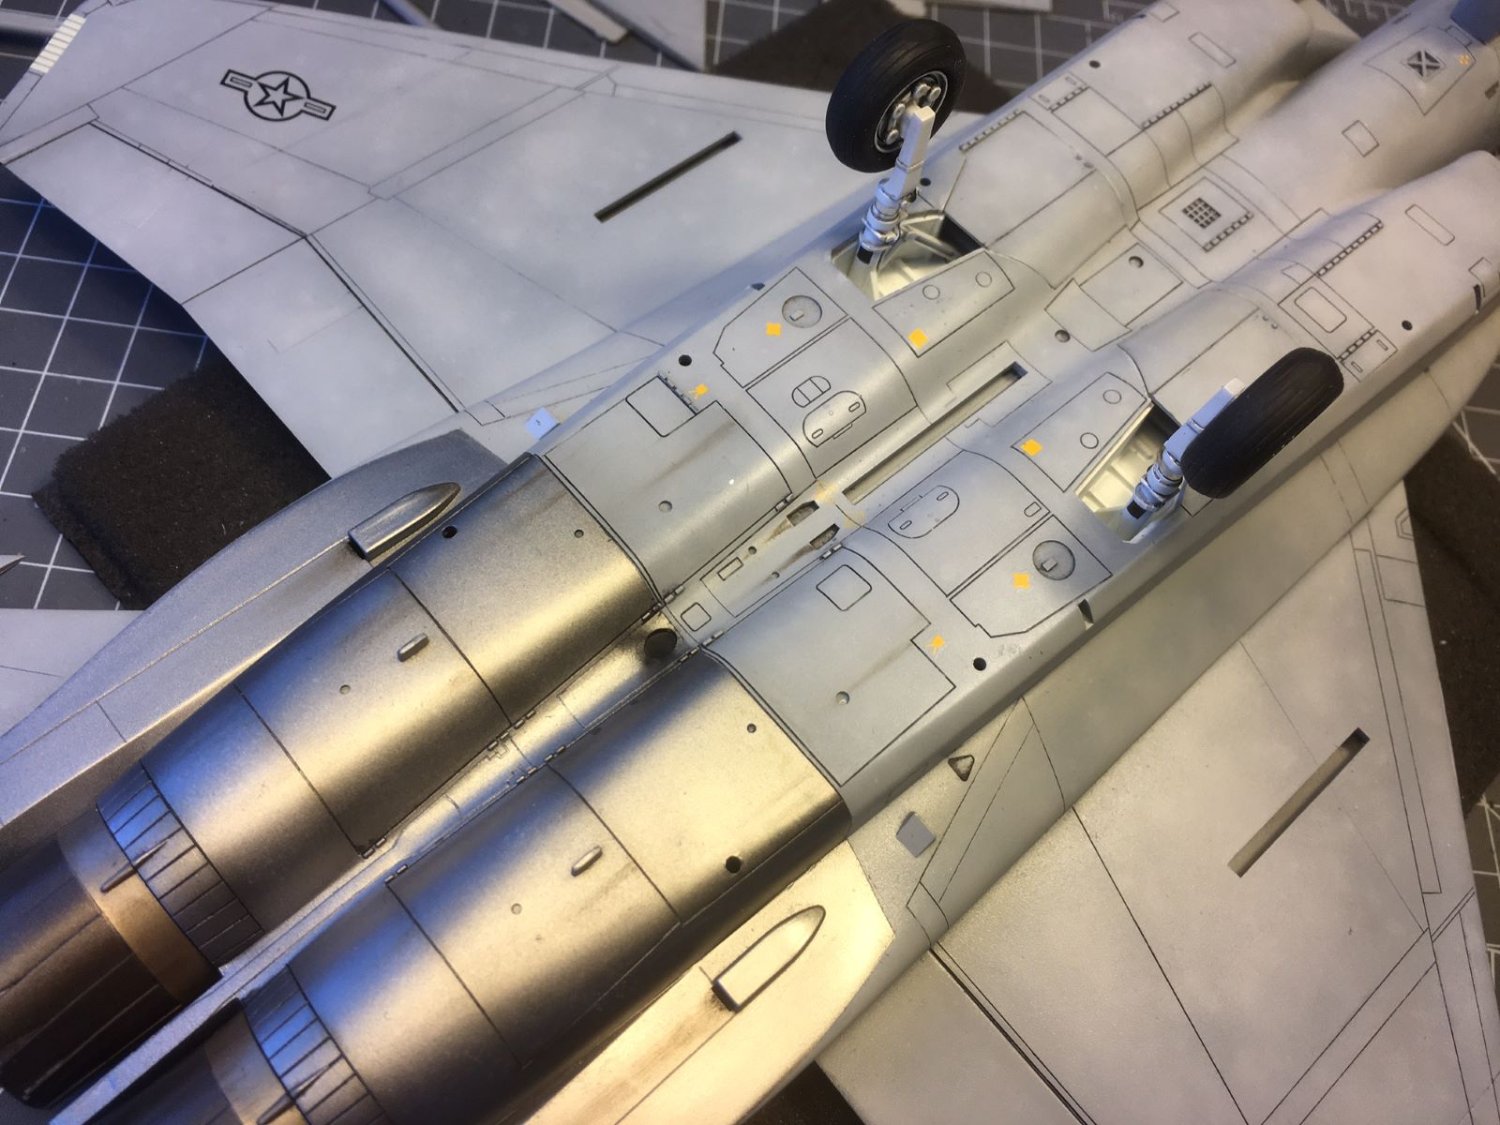
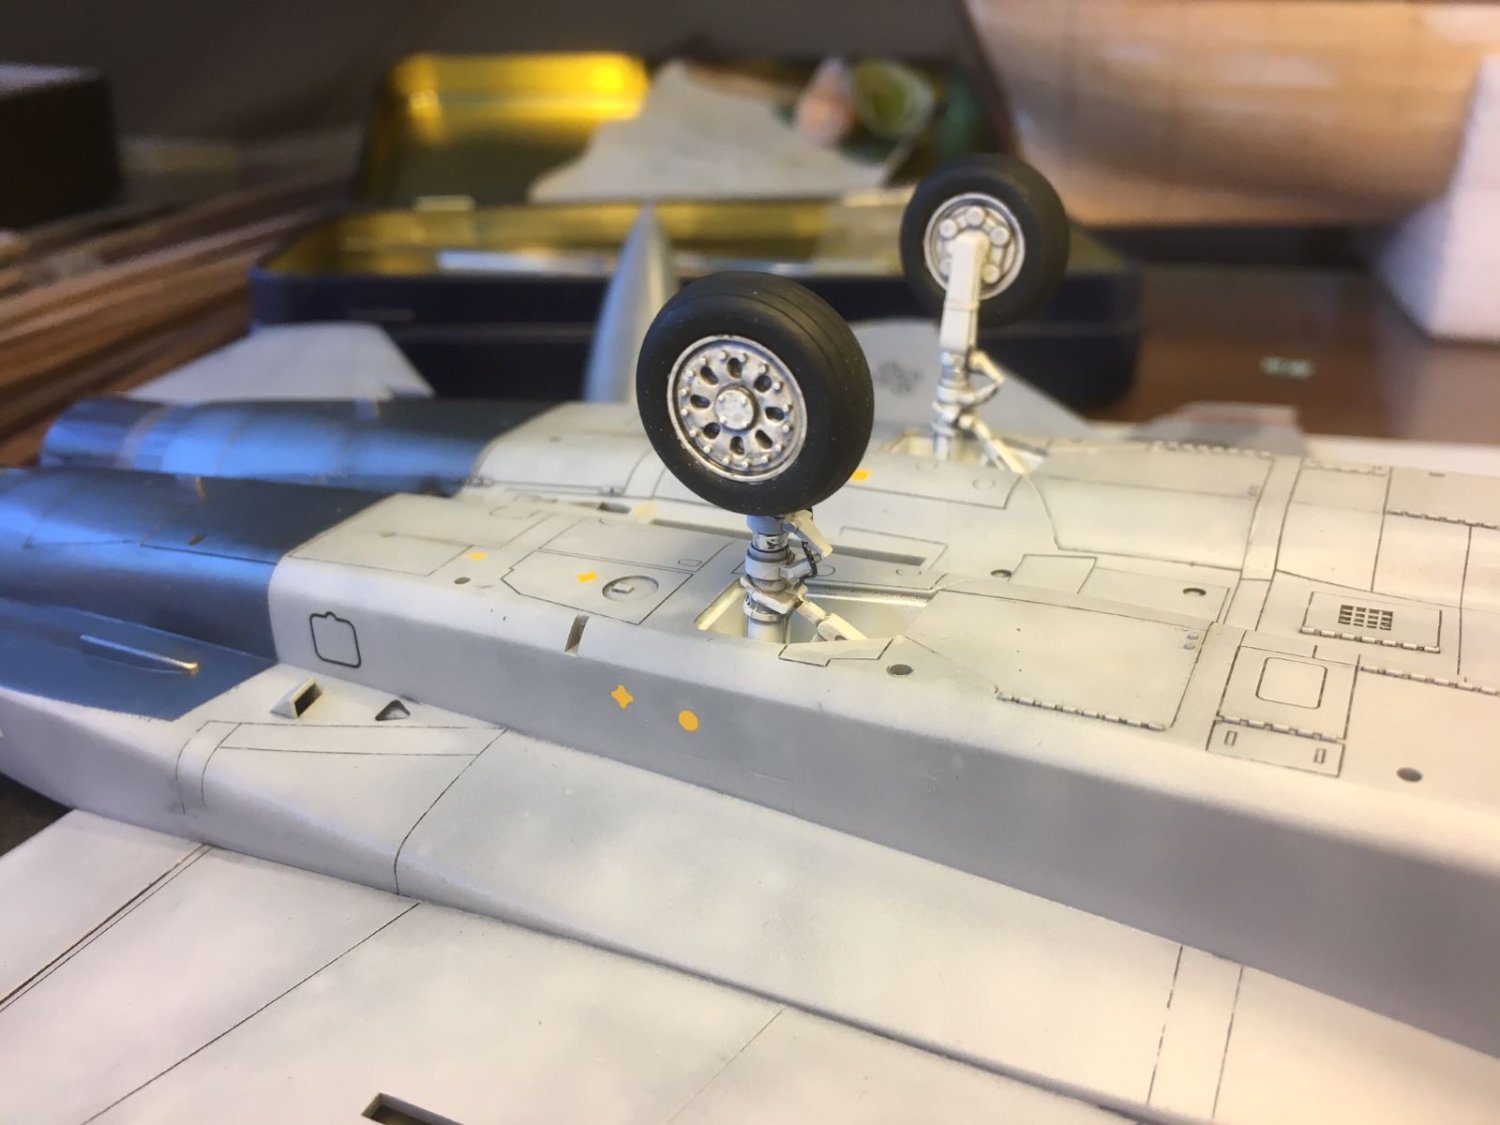
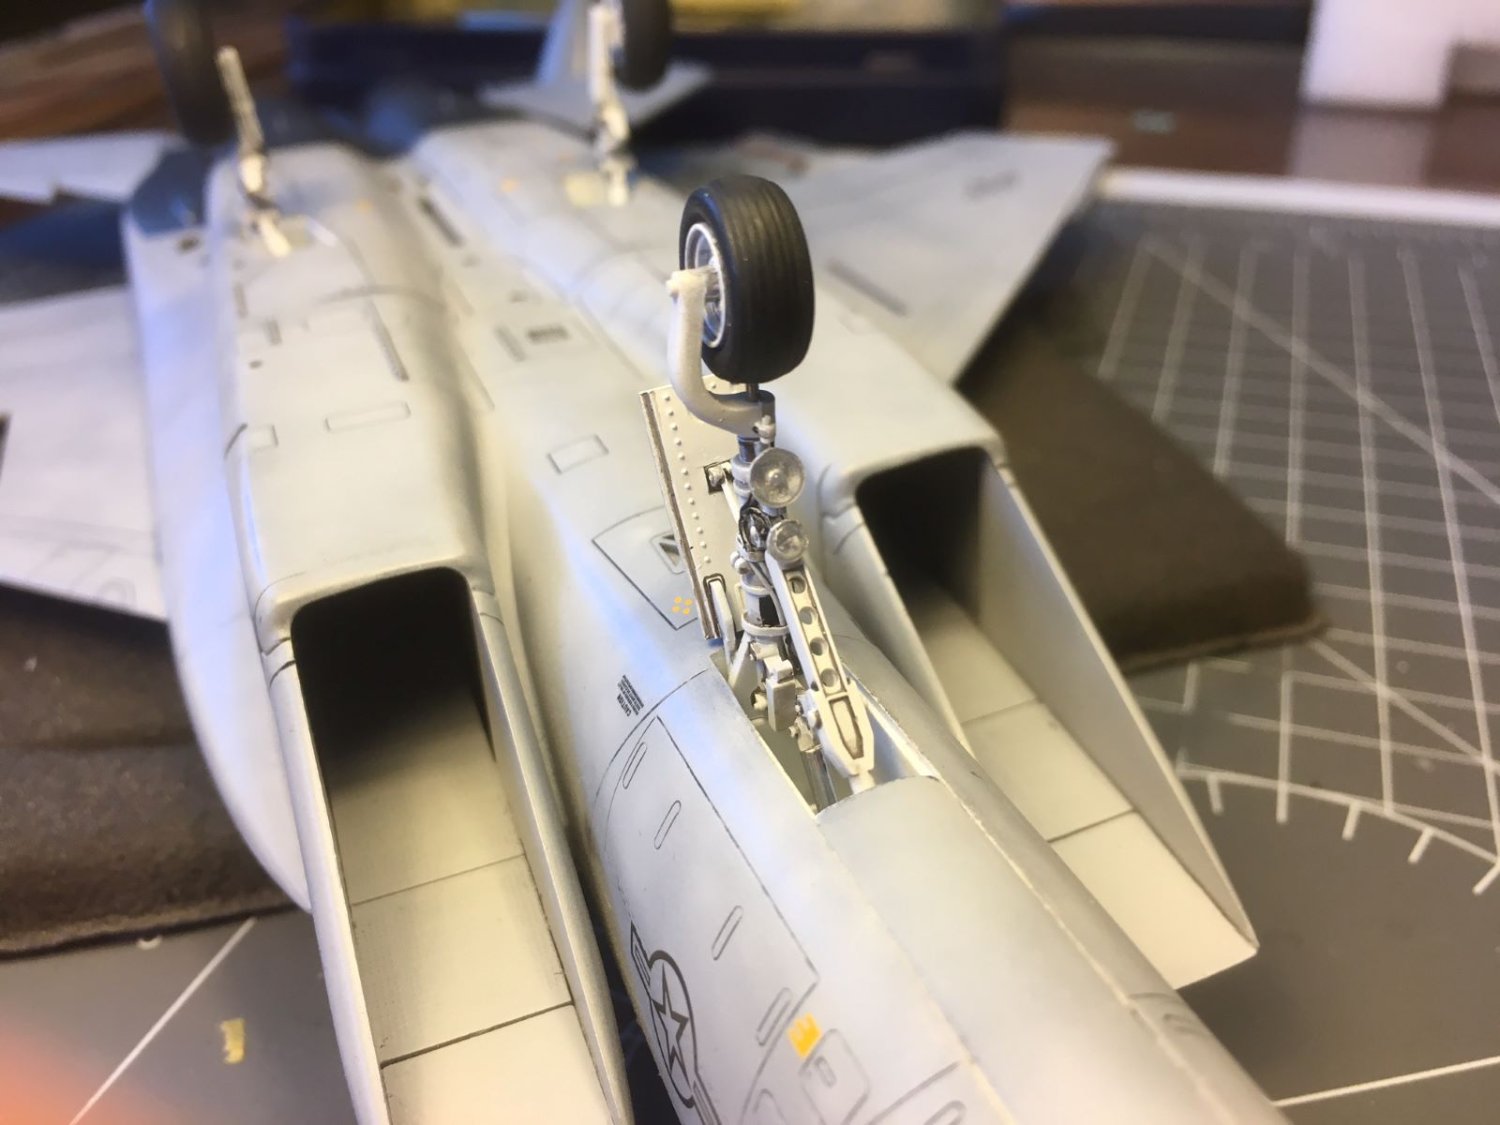
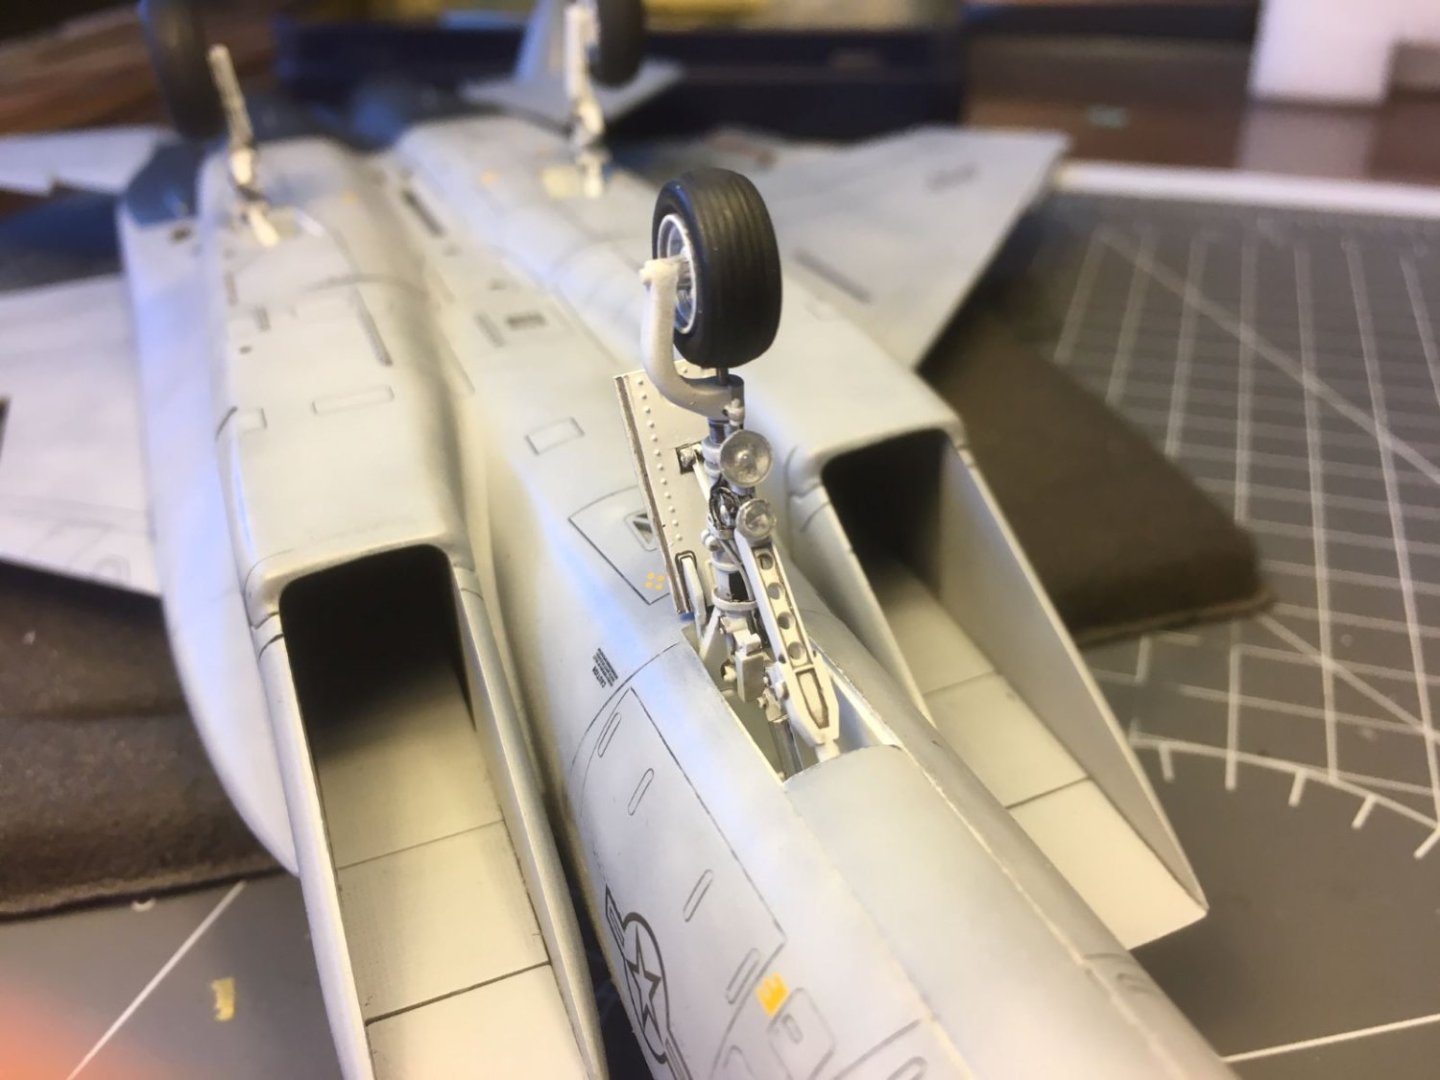
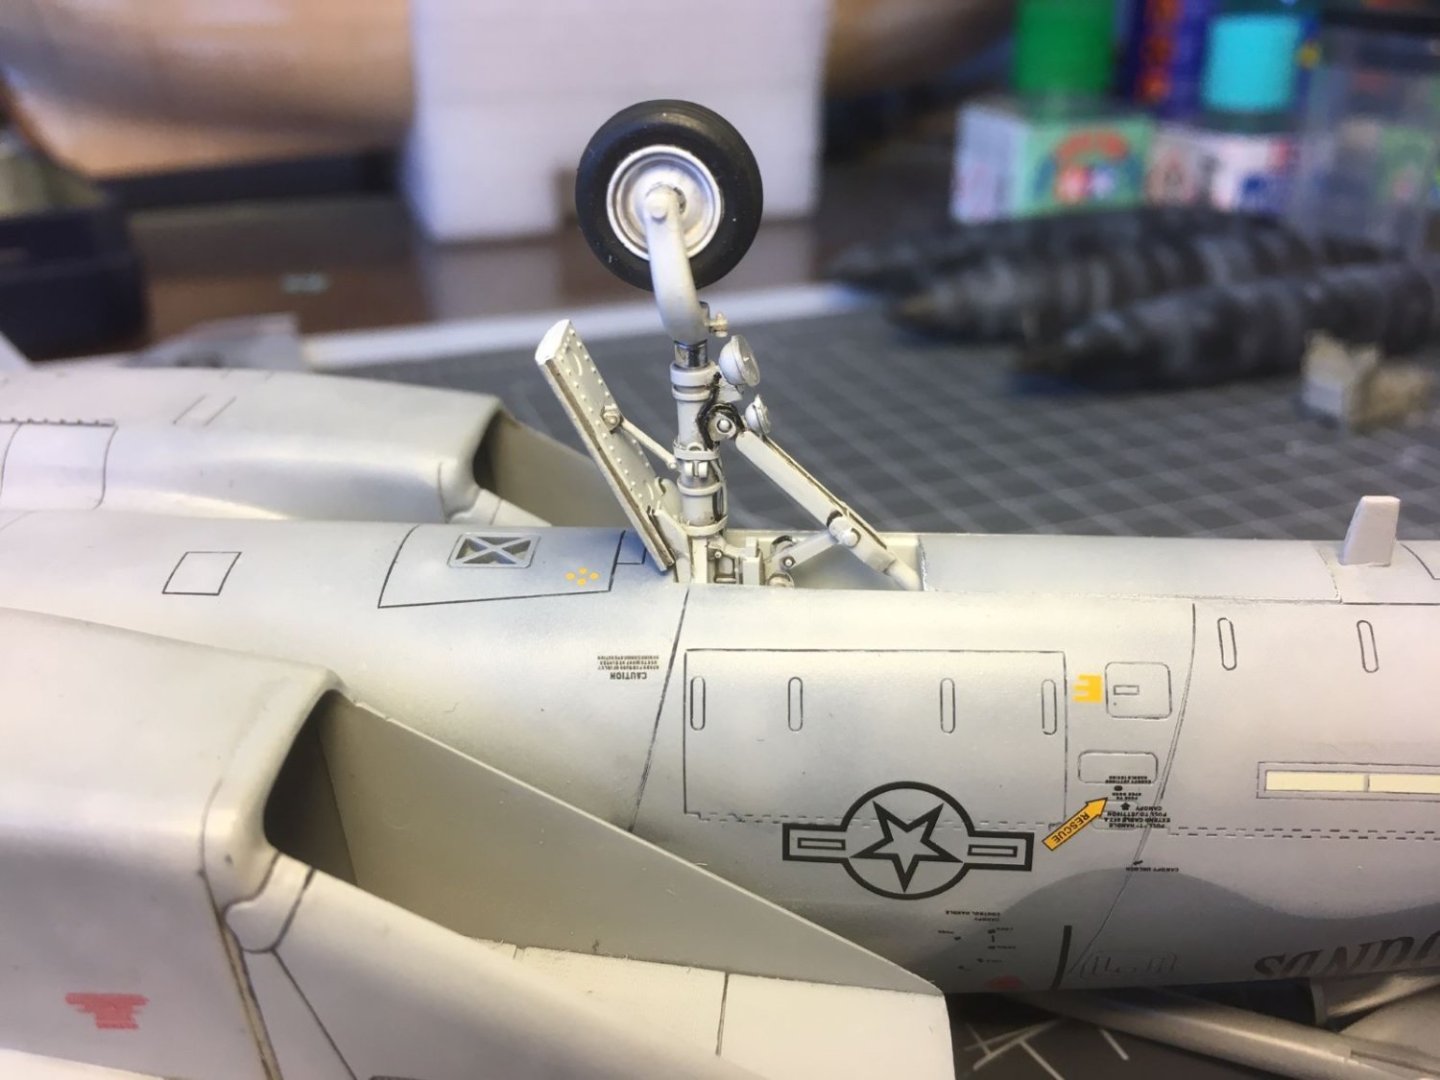
Thanks Javlin and thanks for the 'like's. Small bit and pieces take very long, hence, just small progress at the time. Added black smoke puffs of the starter exhaust on the belly and LG pieces now permanently mounted: Main LG: Nose wheel: Back to tanks and missiles. Kind regards, Dan


- 137 replies
-
- 18
-
-