

.jpg.2c2c29e54623bd7b752bc2cdab599665.jpg)
Danstream
-
Posts
747 -
Joined
-
Last visited
Content Type
Profiles
Forums
Gallery
Events
Everything posted by Danstream
-
.thumb.jpg.c459ce4140b54c12eddb8eedfd446df3.jpg) I have just seen the last pictures of your finished Arado. It looks great, you built an impressive model very carefully detailed and finished. You implemented a rather high degree of weathering, but that looks quite credible. Well done, especially thinking that you are new to this genre. Best regards, Dan
I have just seen the last pictures of your finished Arado. It looks great, you built an impressive model very carefully detailed and finished. You implemented a rather high degree of weathering, but that looks quite credible. Well done, especially thinking that you are new to this genre. Best regards, Dan -
Very nice build, painting job looks great. Best regards, Dan
-
Glad that you recovered so well the number decals. As you said, the finish looks like a piano, simply beautiful. Cheers, Dan
-
Bristol Bulldog by Danstream - Airfix - 1/48 - PLASTIC
Danstream replied to Danstream's topic in Non-ship/categorised builds
Thank you Gary, for your nice comment. Indeed, it was a bit of a work to paint all the various finishes, but it paid off. Regards, Dan -
Bristol Bulldog by Danstream - Airfix - 1/48 - PLASTIC
Danstream replied to Danstream's topic in Non-ship/categorised builds
A very short post with only one picture just to show the repaired tail skid (as I said, I replaced the bent part with a piece of brass tube): To answer to Andy, @realworkingsailor, this picture shows also one of the fin flash decals that are now glued on. Due a trip abroad, I will have this build on hold for a while. Enjoy your hobbies and see you in a couple of weeks, Dan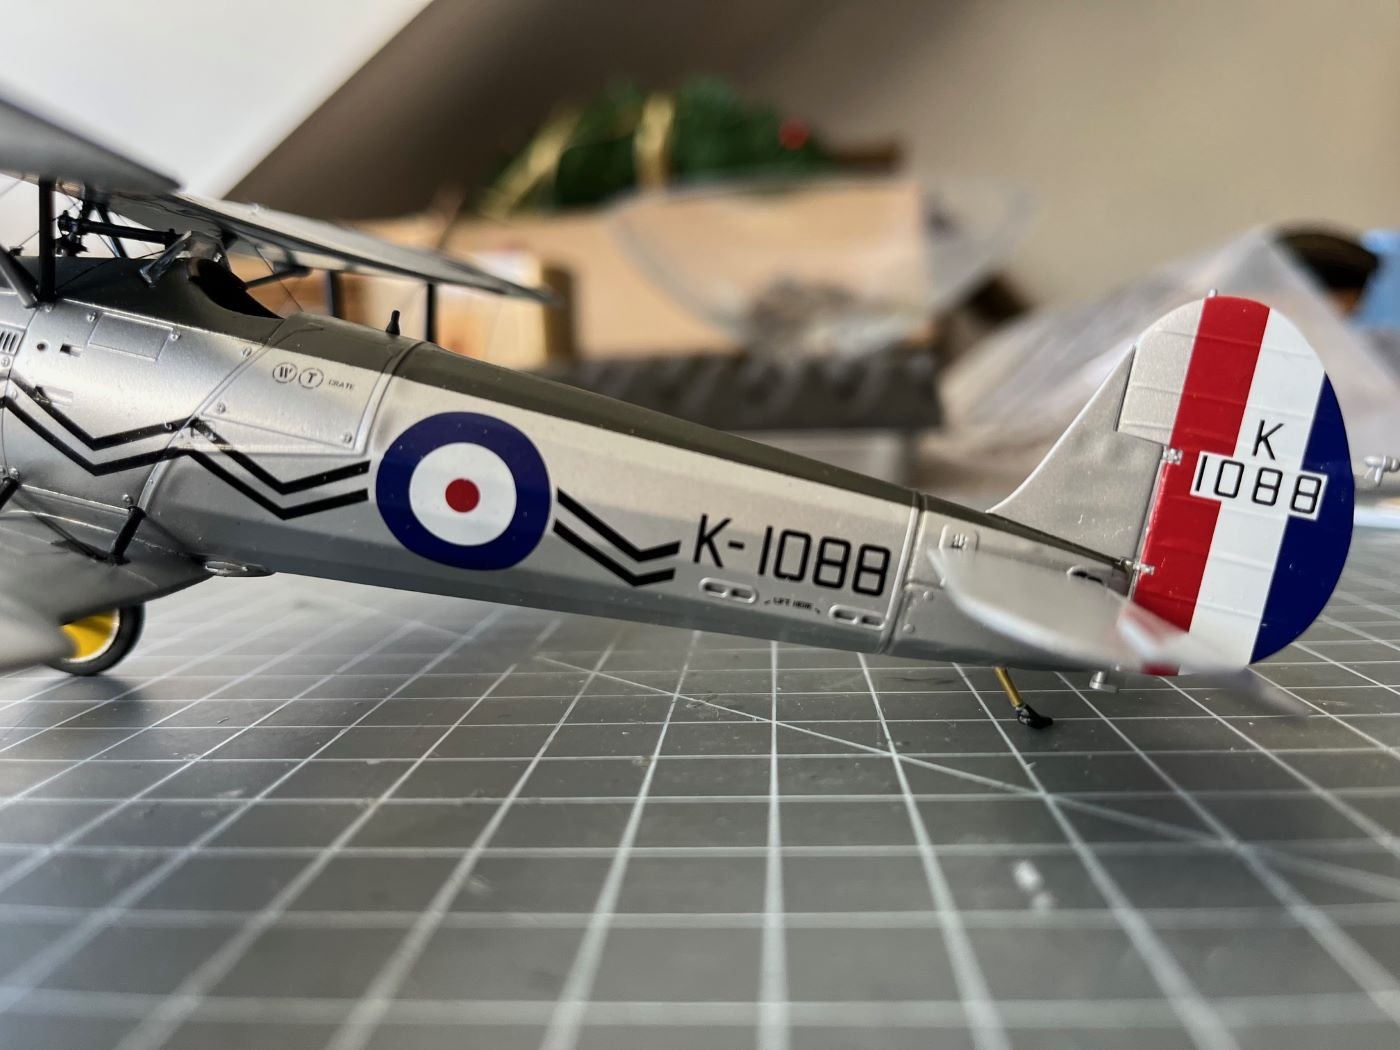
-
Bristol Bulldog by Danstream - Airfix - 1/48 - PLASTIC
Danstream replied to Danstream's topic in Non-ship/categorised builds
In fact, this is why I need to repair it asap before I finish the build. Cheers, Dan -
Bristol Bulldog by Danstream - Airfix - 1/48 - PLASTIC
Danstream replied to Danstream's topic in Non-ship/categorised builds
Thanks Andy! Indeed, it is very easy to damage the finish and the more you go on with the build, the more difficult is to repair it. It was an interesting building experience. For the fin flash there are two options, one is a complete three colors decal for the complete rudder, the second is to leave to the modeler to paint the three bands and then just add the identification letters and numbers. At this point, I am a bit tired of this model, so I am going for the quicker former one. Cheers, Dan -
Bristol Bulldog by Danstream - Airfix - 1/48 - PLASTIC
Danstream replied to Danstream's topic in Non-ship/categorised builds
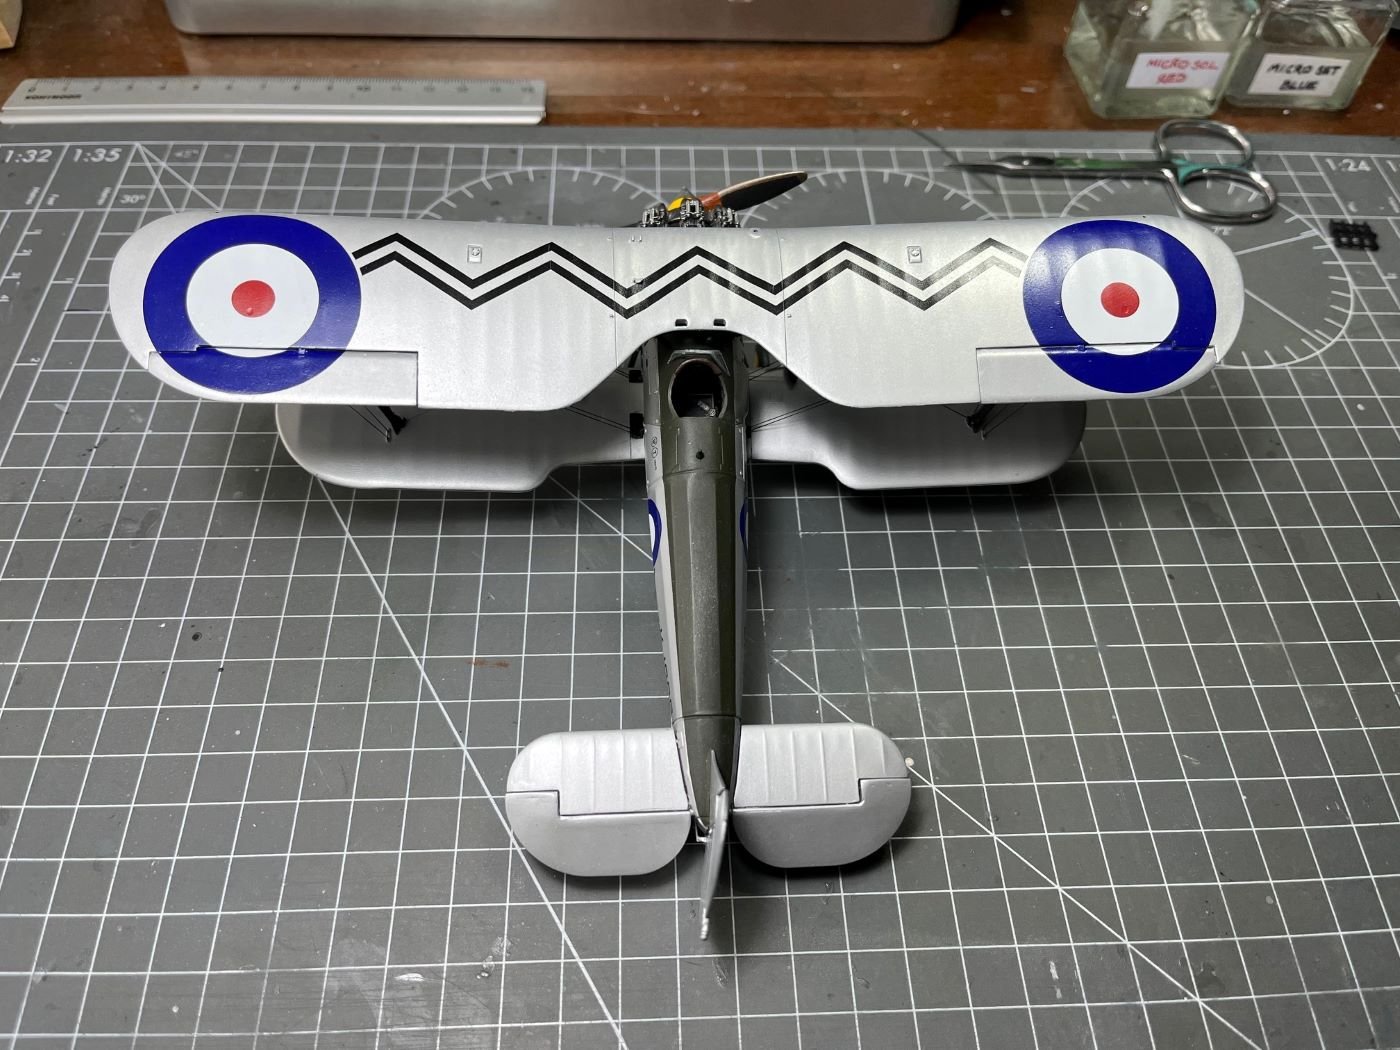
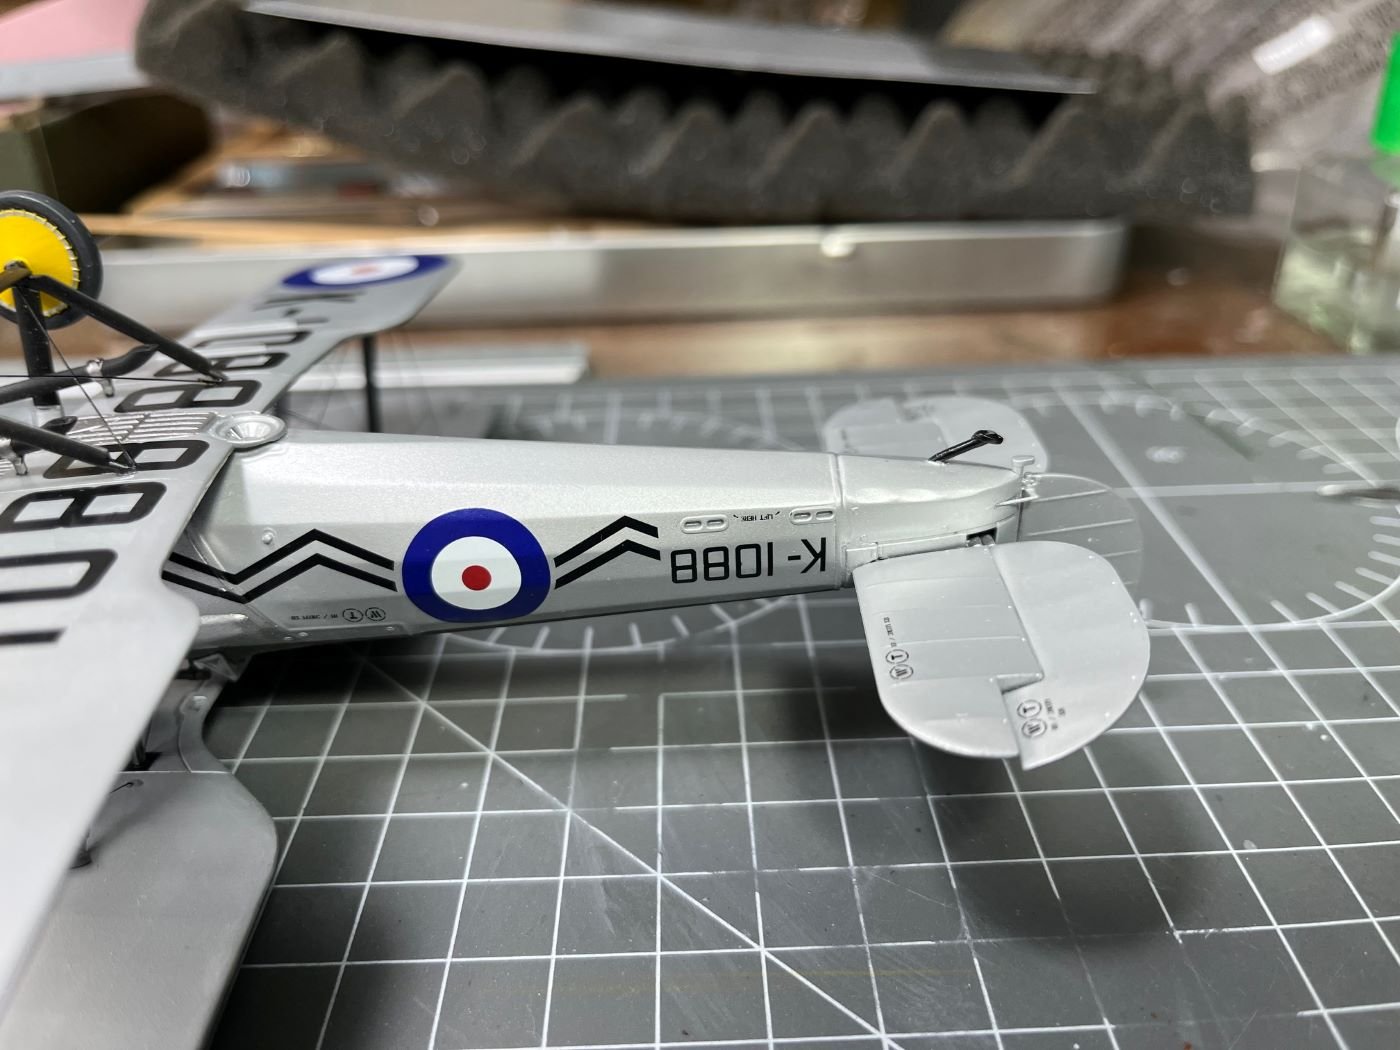
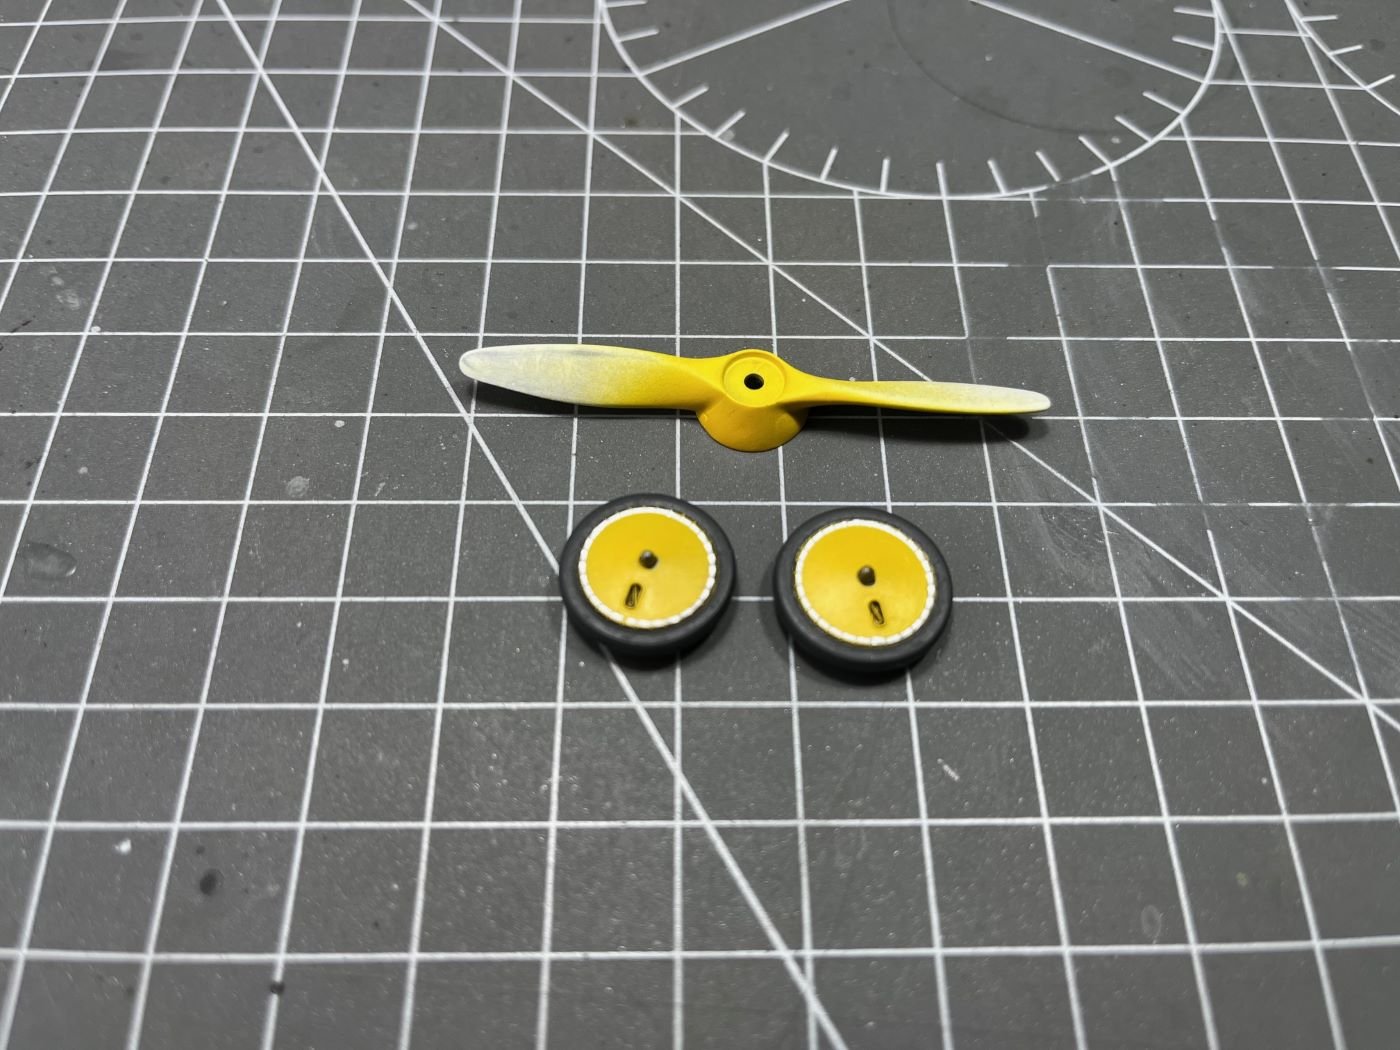
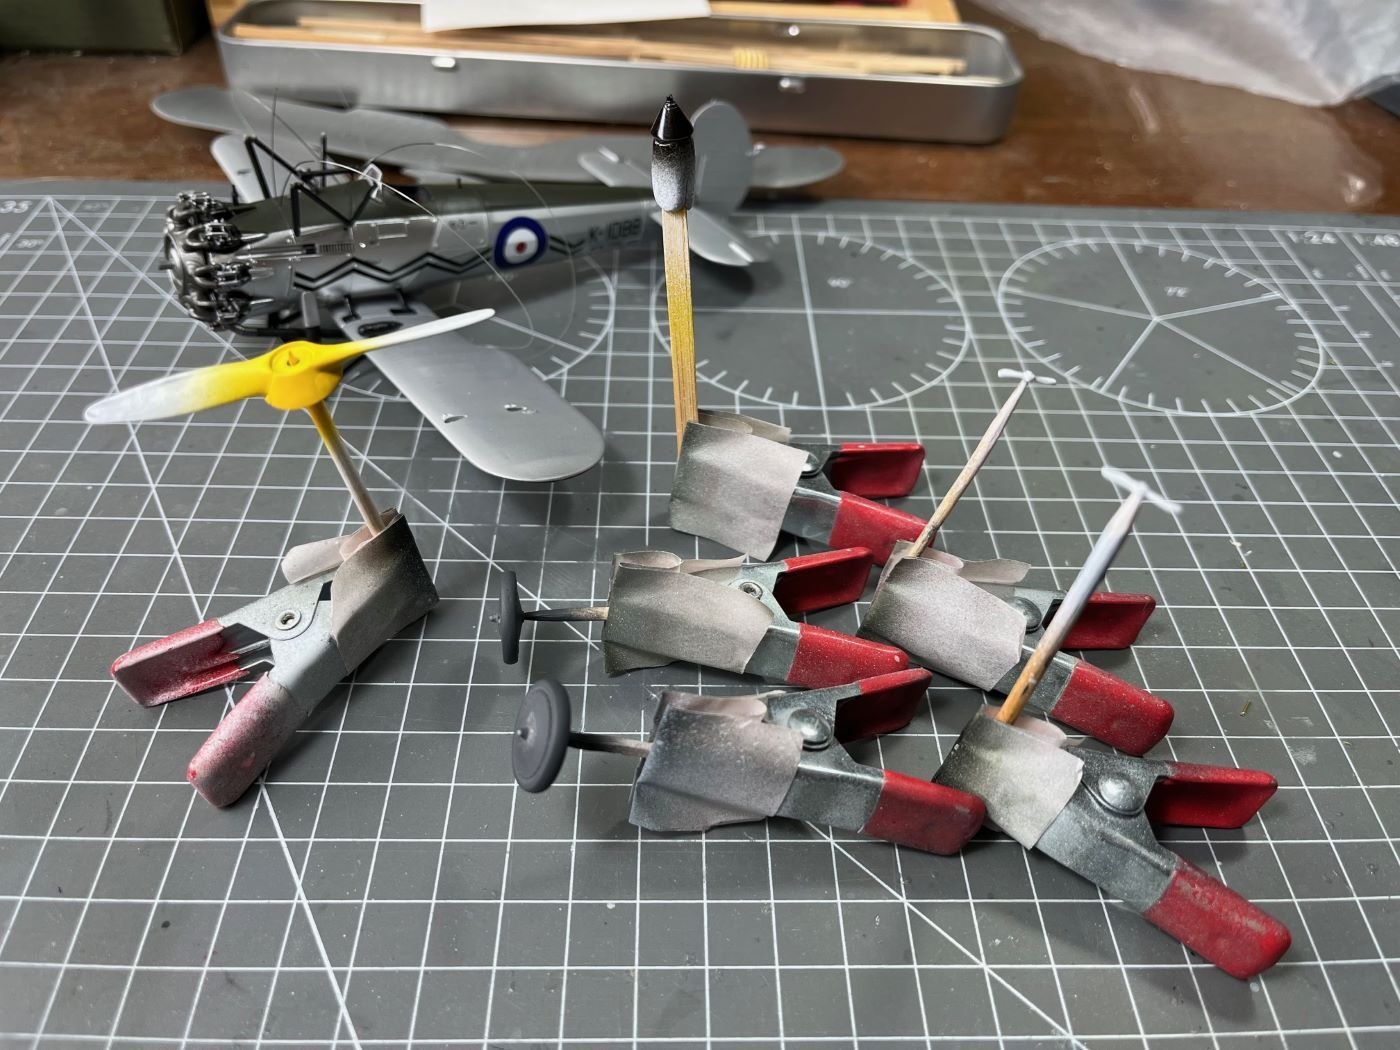
Hi, thanks for the notes and the 'like's! I am now completing the application of the decals that, as I said earlier, are of very good quality. Some of them are really large and some care is necessary to avoid folds and bubbles. The lower side is completed: What is still missing on this side is the small rack with the bombs and the transparent cover of the ventral light. The upper side: Here a number of small items needs to be completed. Once well cured, I think of sealing these decals with X-22. The propeller was painted following pictures found on the web along with the small propellers of the power generators: Wood grain was sketched with an oil brown color. Unfortunately, handling the model, I found the the tail skid was bent. This might be due to the not so good plastic material that has poor mechanical qualities and get easily yielded. A small surgery will be necessary to replace the plastic part with a brass tube. All these final bits take a lot of time for me and I have to put extra care for not messing up things at this stage. That is all for now, probably the next post will be the final one. Best regards, Dan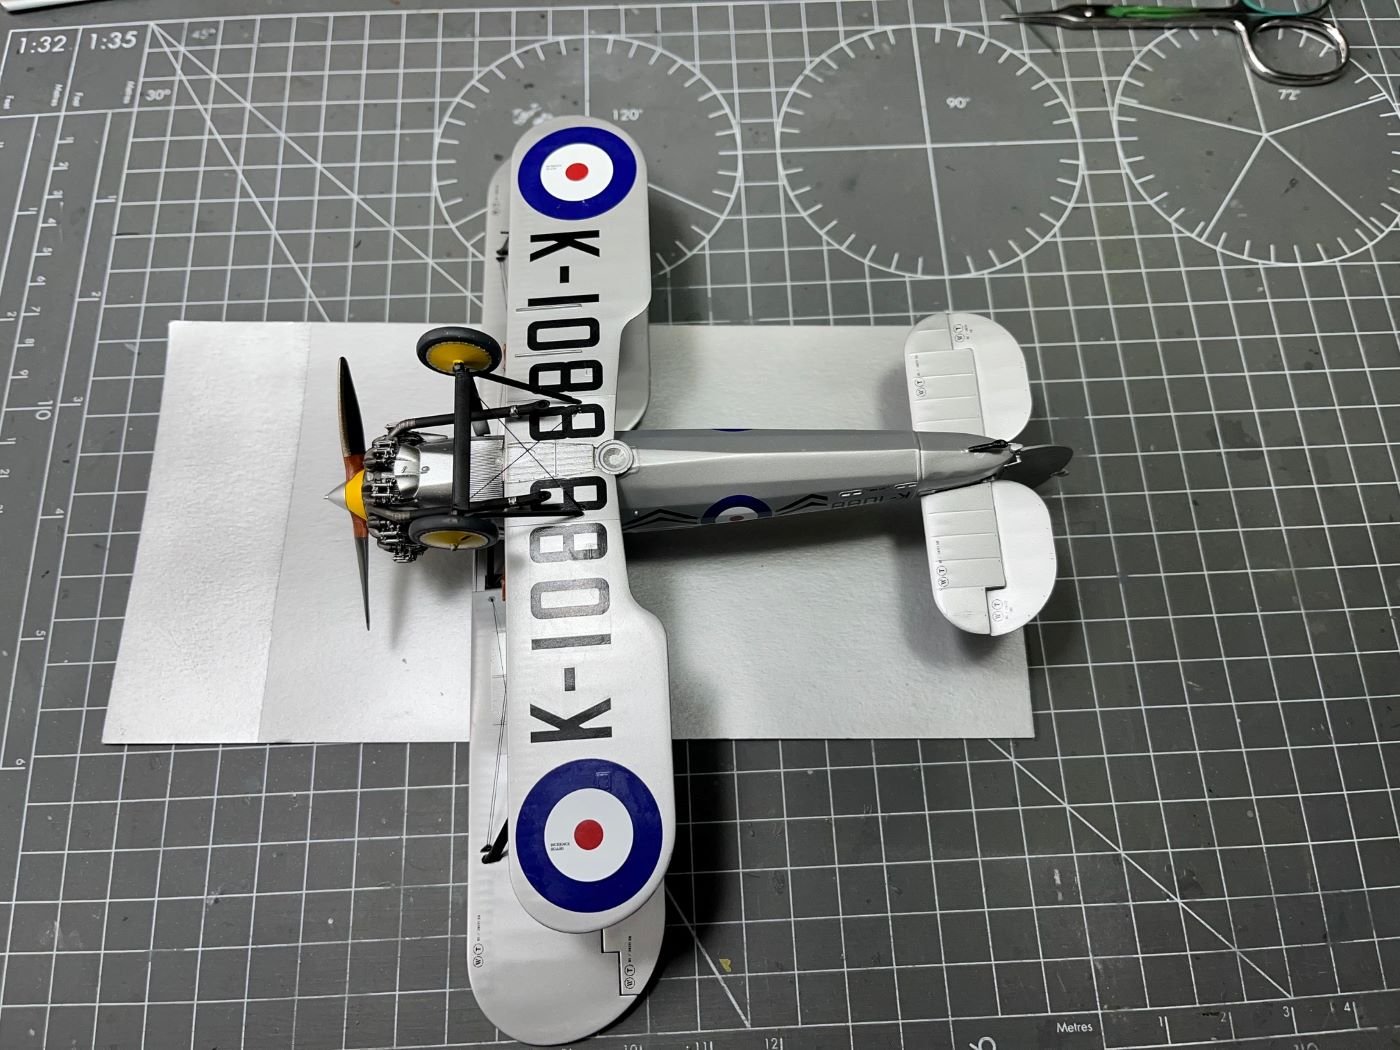
- 40 replies
-
- 16
-

-

-
VTOL(s) by yvesvidal - FINISHED - 1/48th - PLASTIC
Danstream replied to yvesvidal's topic in Non-ship/categorised builds
Thanks for your answer. Surely the French engineers made extensive testing to support their design. This is the norm. As a side note, I just mention that a symmetric section is also able to produce lift when it is at an angle with the flow. A symmetric section would have been much easier to be build in a controlled way. I think that with an annular wing, the lift is not just the integration of the local forces of the sections, but also the synergy that the tube produces as a whole when at an angle of attack. It goes without saying that when the plane is vertical, it must entirely rely on the trust of the engine to stay aloft. Best regards, Dan -
Bristol Bulldog by Danstream - Airfix - 1/48 - PLASTIC
Danstream replied to Danstream's topic in Non-ship/categorised builds
Thank you Rob, happy that you like it. Cheers, Dan -
I am glad that you are back with another awesome model. Best regards, Dan
-
VTOL(s) by yvesvidal - FINISHED - 1/48th - PLASTIC
Danstream replied to yvesvidal's topic in Non-ship/categorised builds
Awesome thematic collection, Yves. Perhaps, my preferred is the French Coleoptere. I am amazed by the fact that it flew and somebody could control it. BTW, you wrote that the annular wing had a variable section along the circumference; is this documented or is a deduction of yours? Best regards, Dan -
That is a nice metallic finish! I could comb myself looking into it 😉. Dan
-
Very neat and awesome model! Cheers, Dan
-
Bristol Bulldog by Danstream - Airfix - 1/48 - PLASTIC
Danstream replied to Danstream's topic in Non-ship/categorised builds
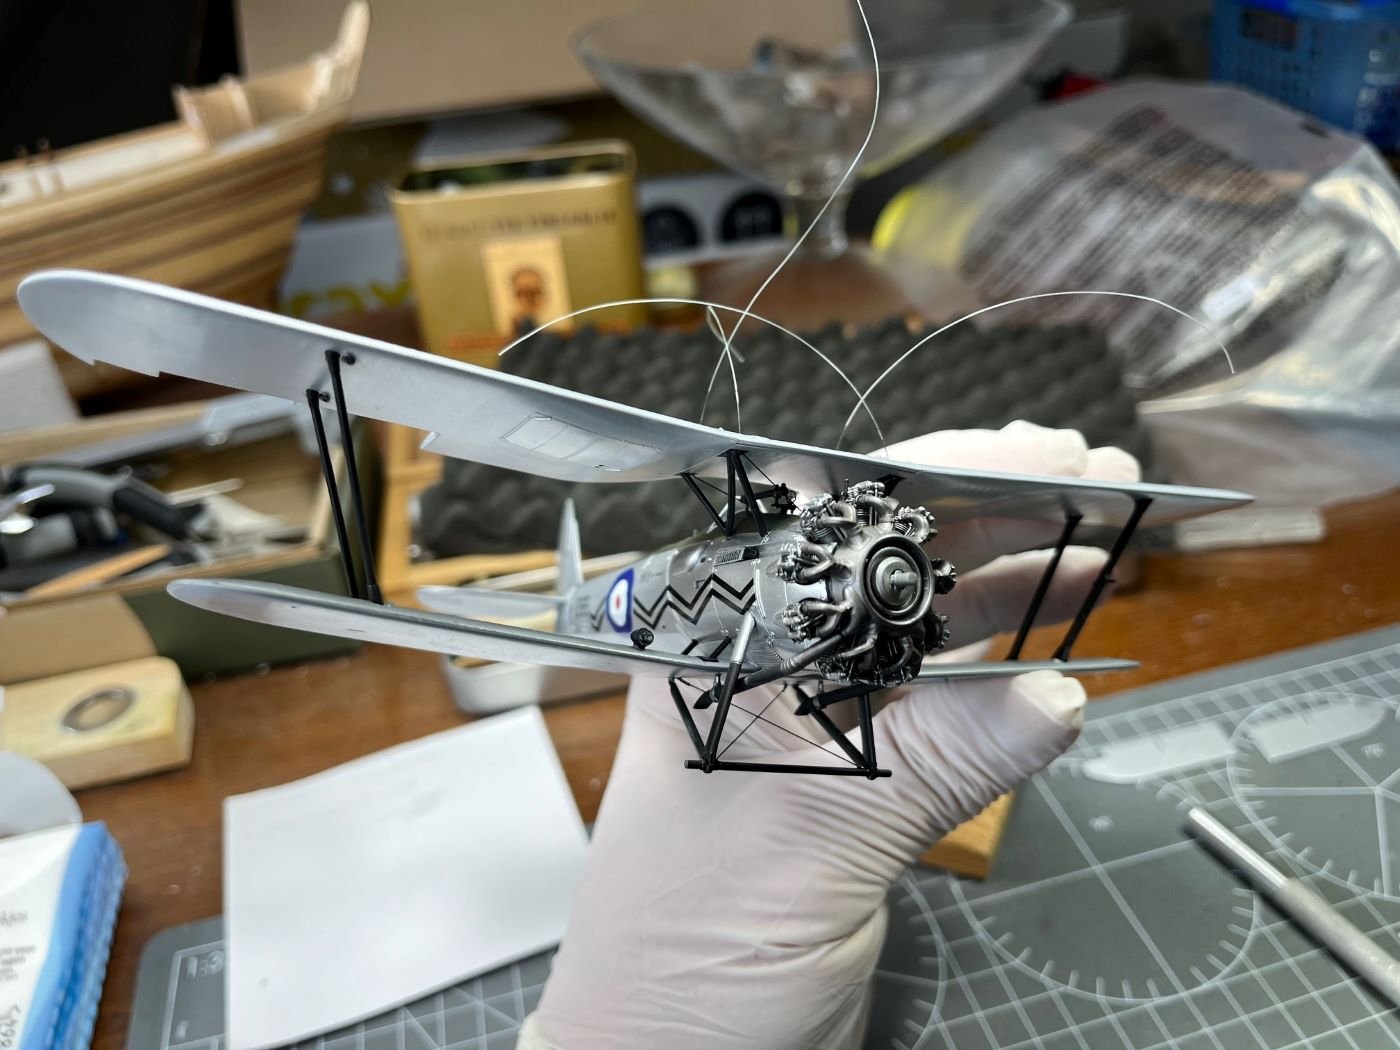
Thanks Gary for your appreciation. Indeed, when I have to apply some pressure to hold firmly the model, a latex glove helps a lot not to leave marks on the paint, especially when dealing with metallic paints. Thanks Alan, it is true that rigging a biplane takes some time and patience. I had to break it down in several sessions to make it more bearable. But, in the end, there is some sense of satisfaction when it is completed. Best regards, Dan -
Bristol Bulldog by Danstream - Airfix - 1/48 - PLASTIC
Danstream replied to Danstream's topic in Non-ship/categorised builds
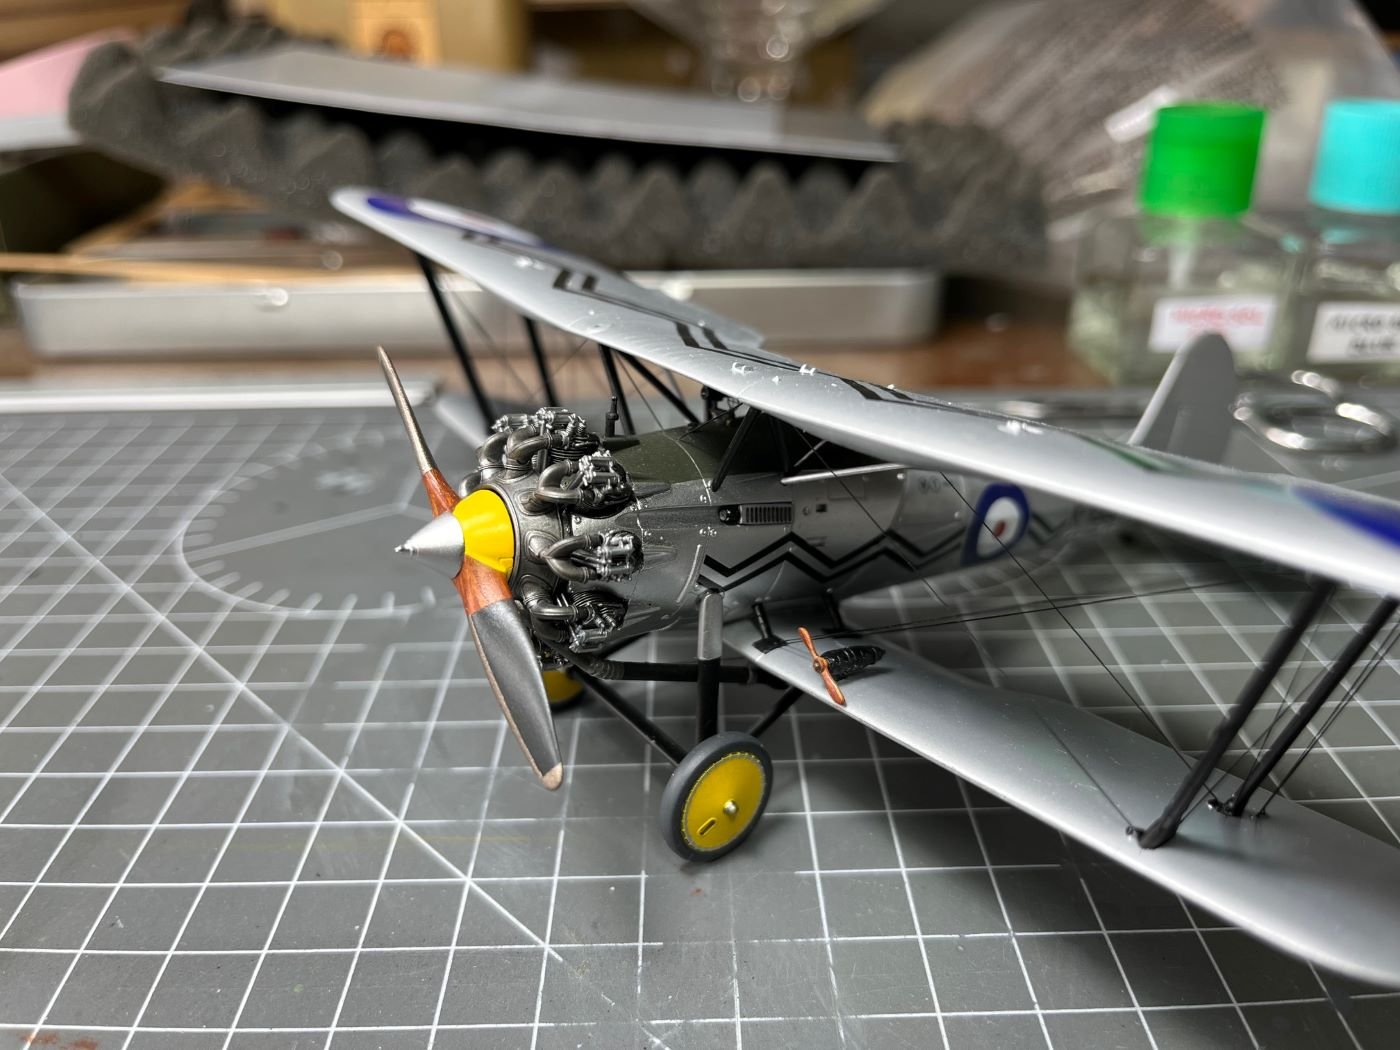
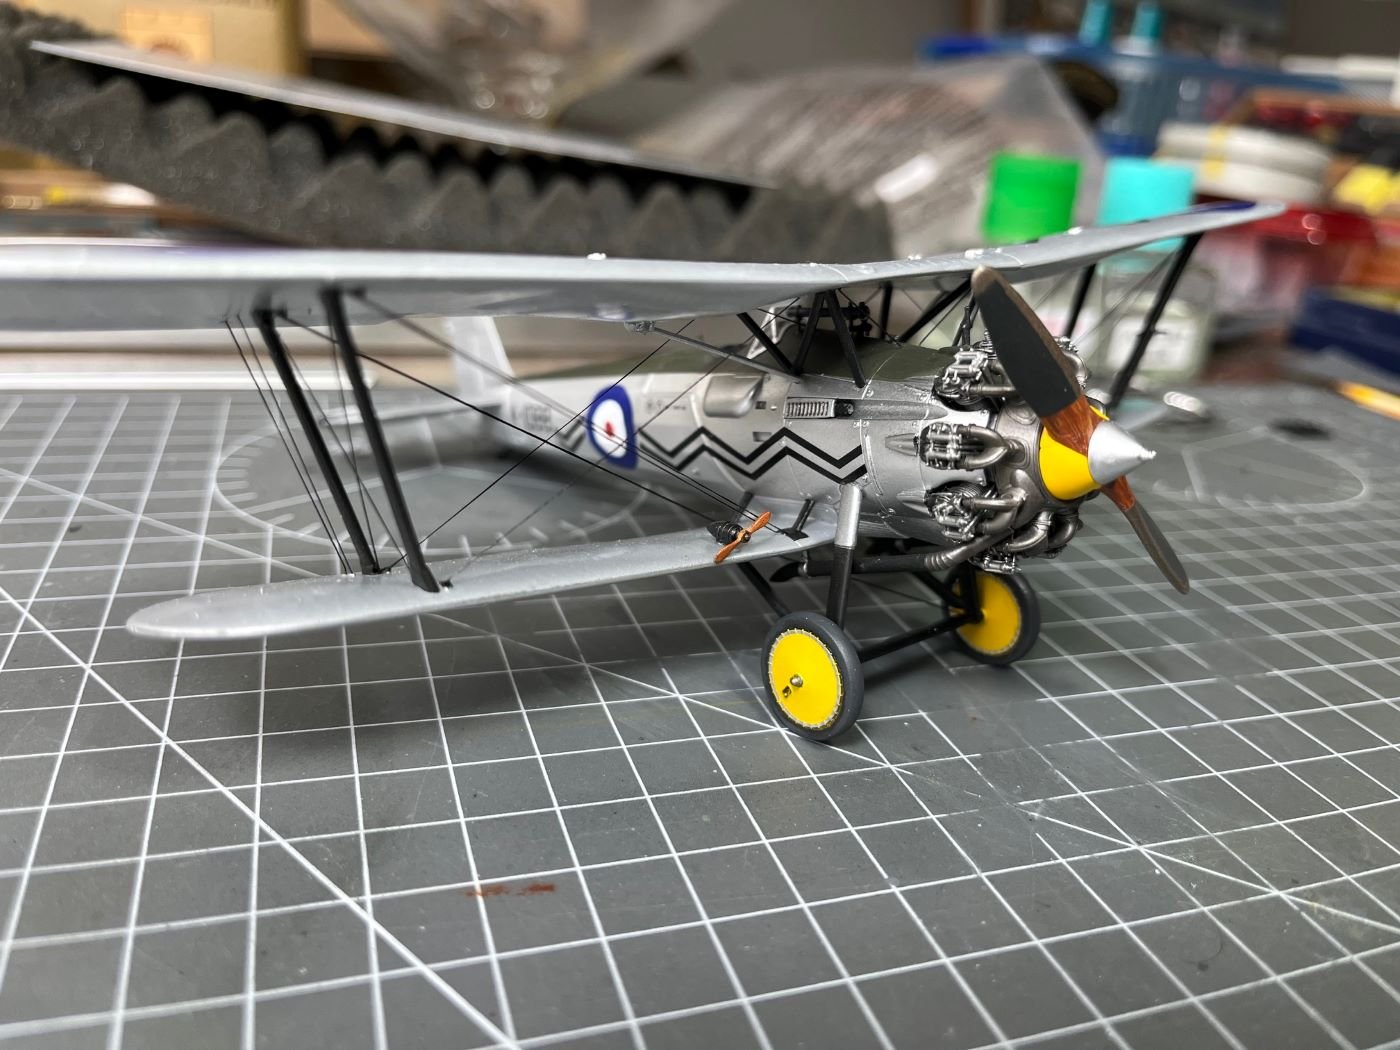
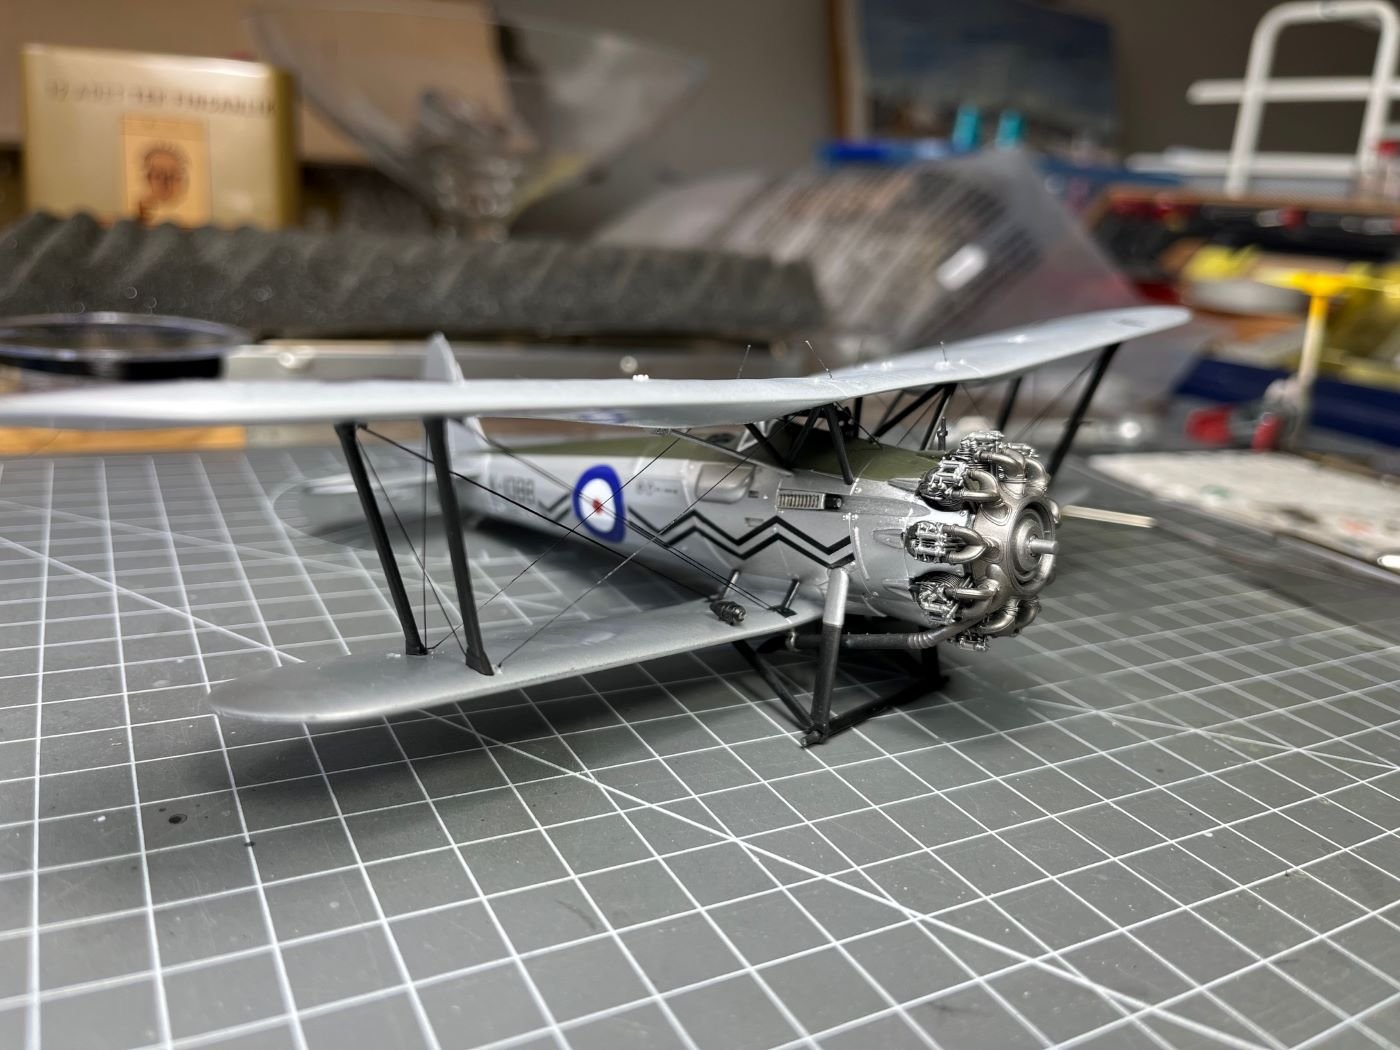
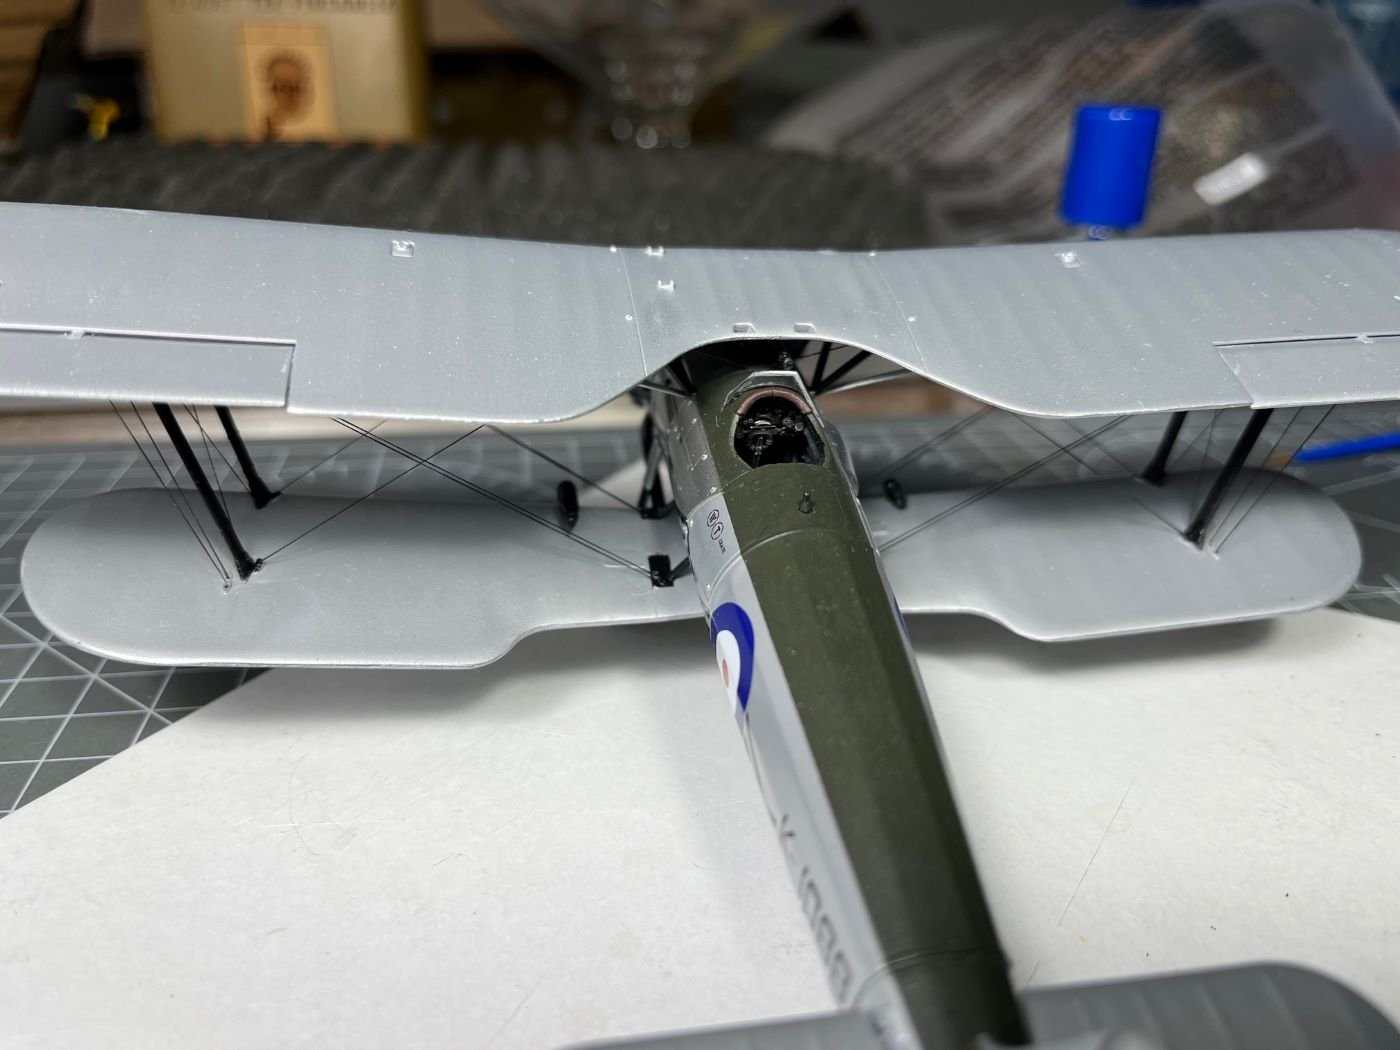
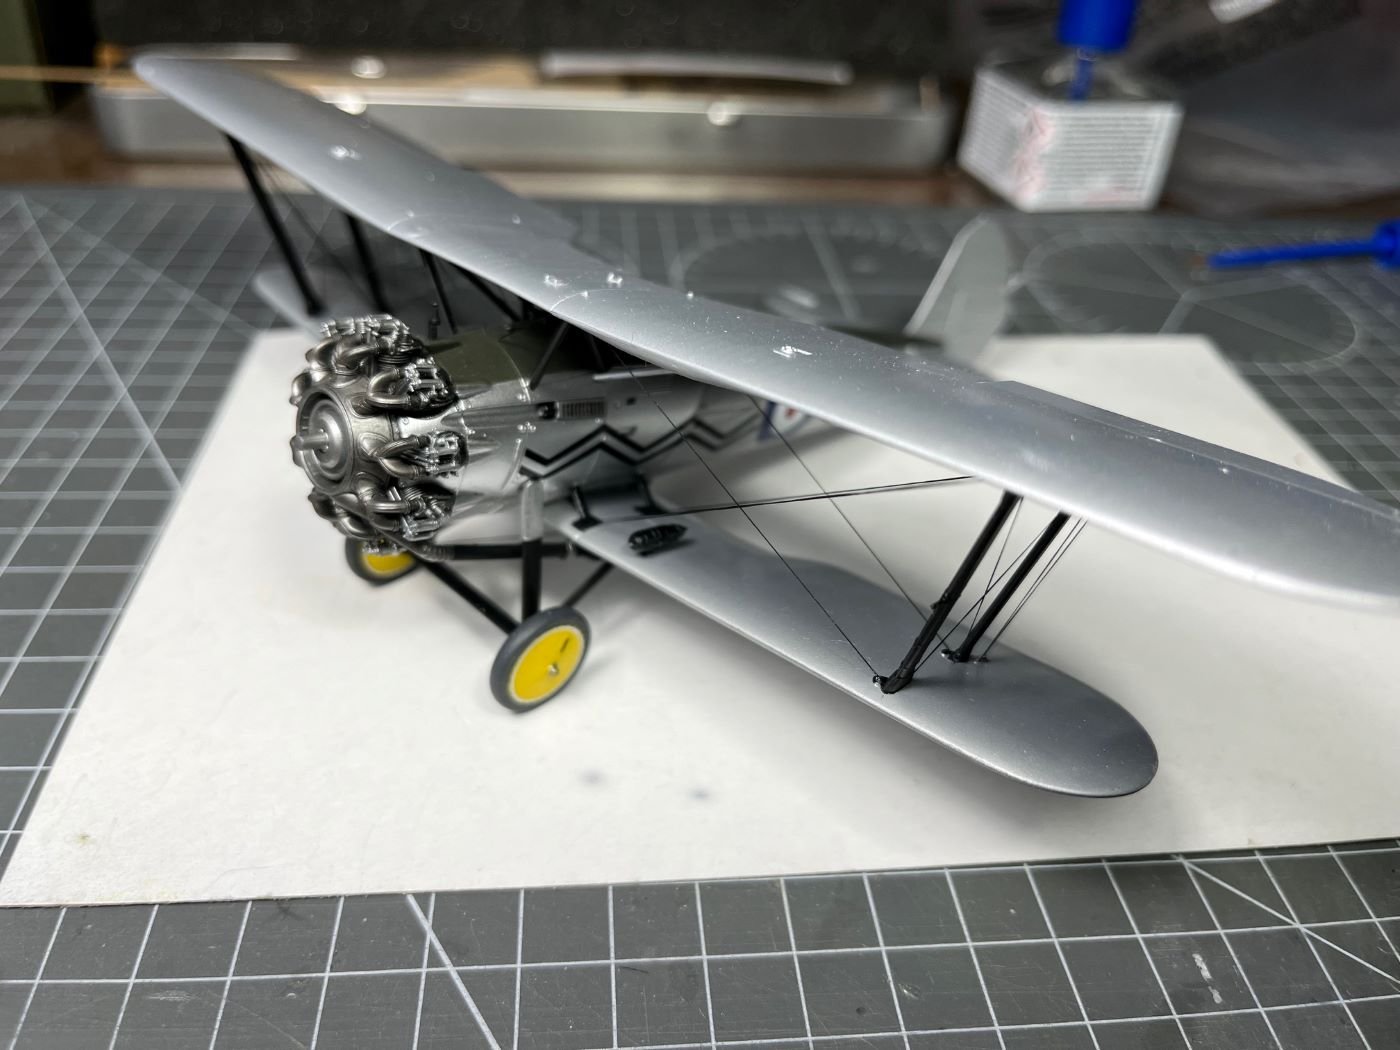
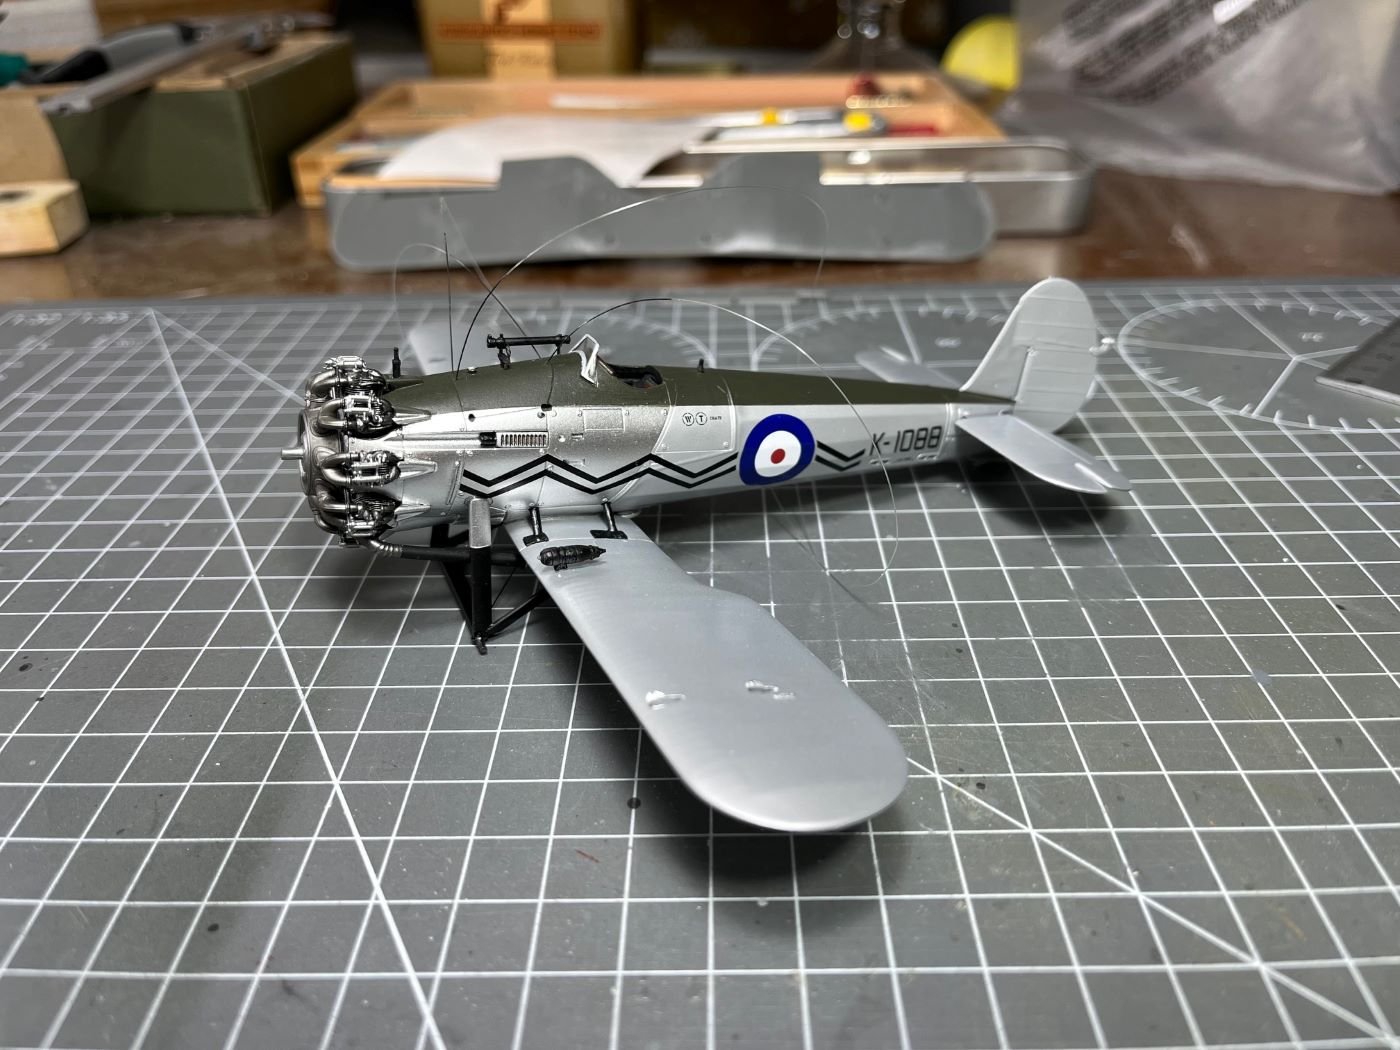
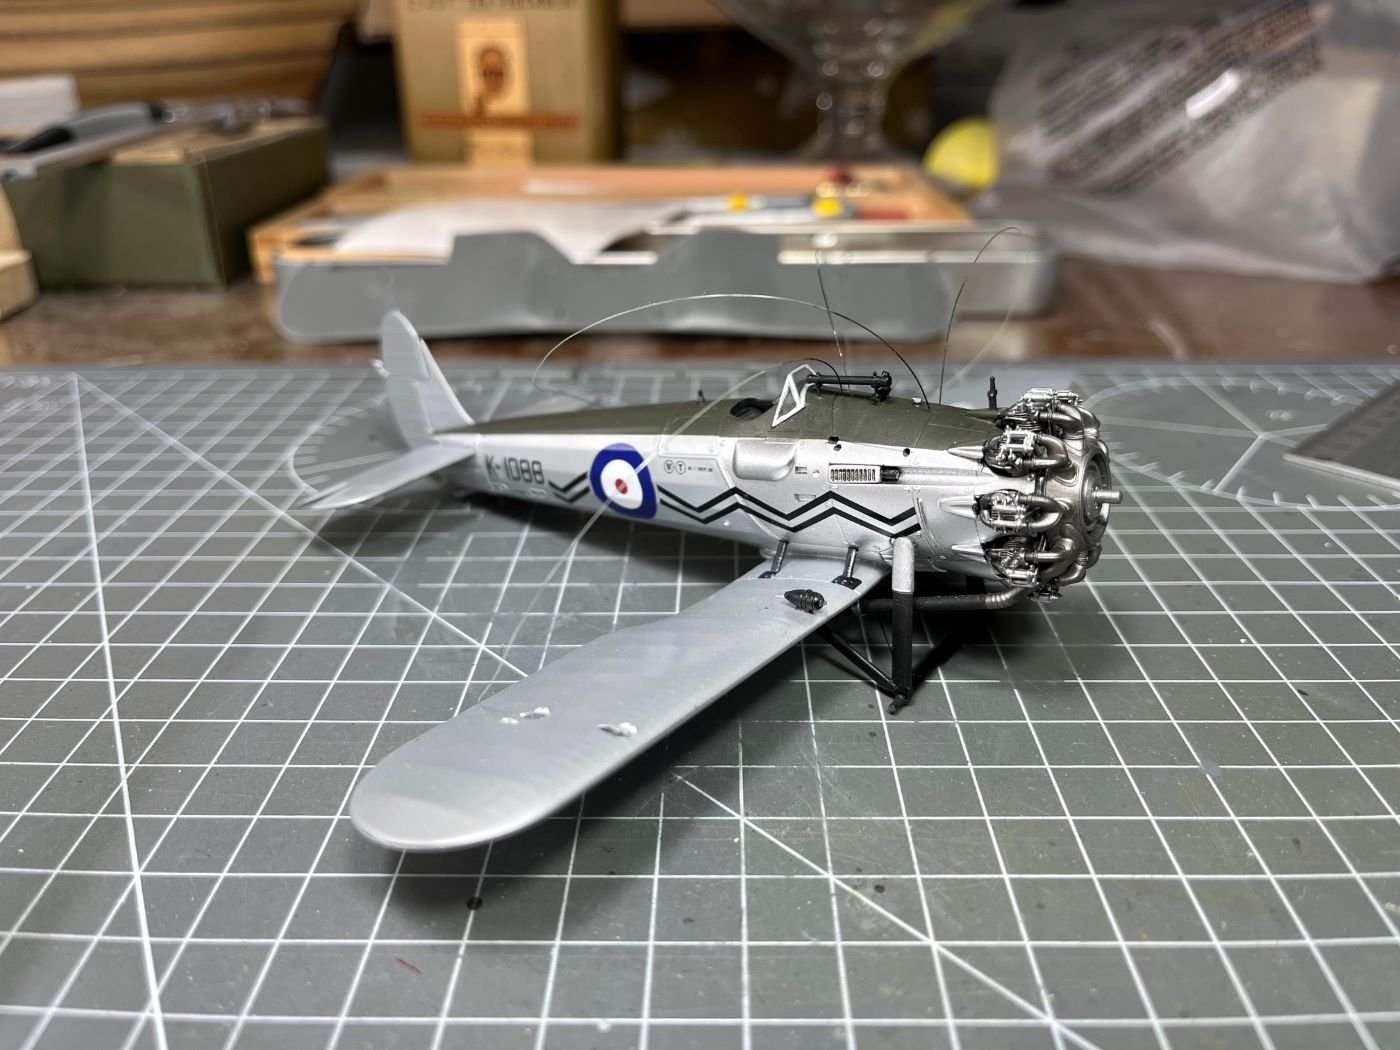
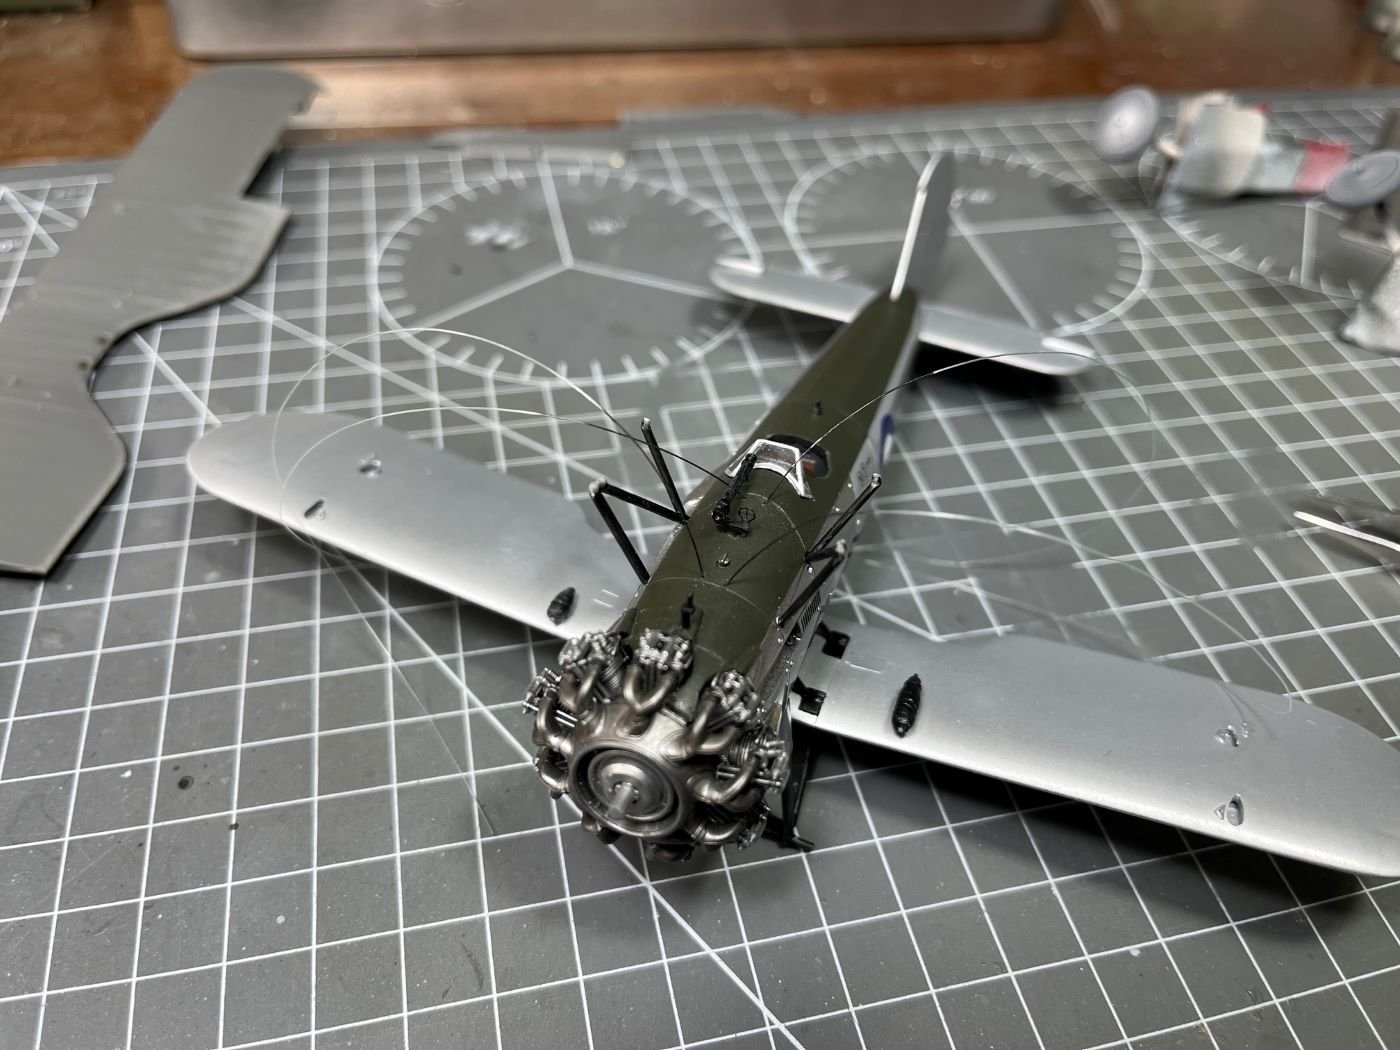
Hi, I went on with rigging my biplane after having decided to use an elastic thread for that. This was a first for me and I went through a learning curve with the application of this stuff. Practically, that means that the last wires are more cleanly glued that the former ones. I will have to live with that. Some of them are going through the top wing, as shown below. After some fights, the rigging is completed and the top wing is sanded and eventually painted: And now, this is how my Bulldog is resting on its own wheels: As a conclusion, I can definitively say that I will have enough with biplanes for quite some time. Now the remaining work should be downhill (I know, I should never say that in advance). Best regards, Dan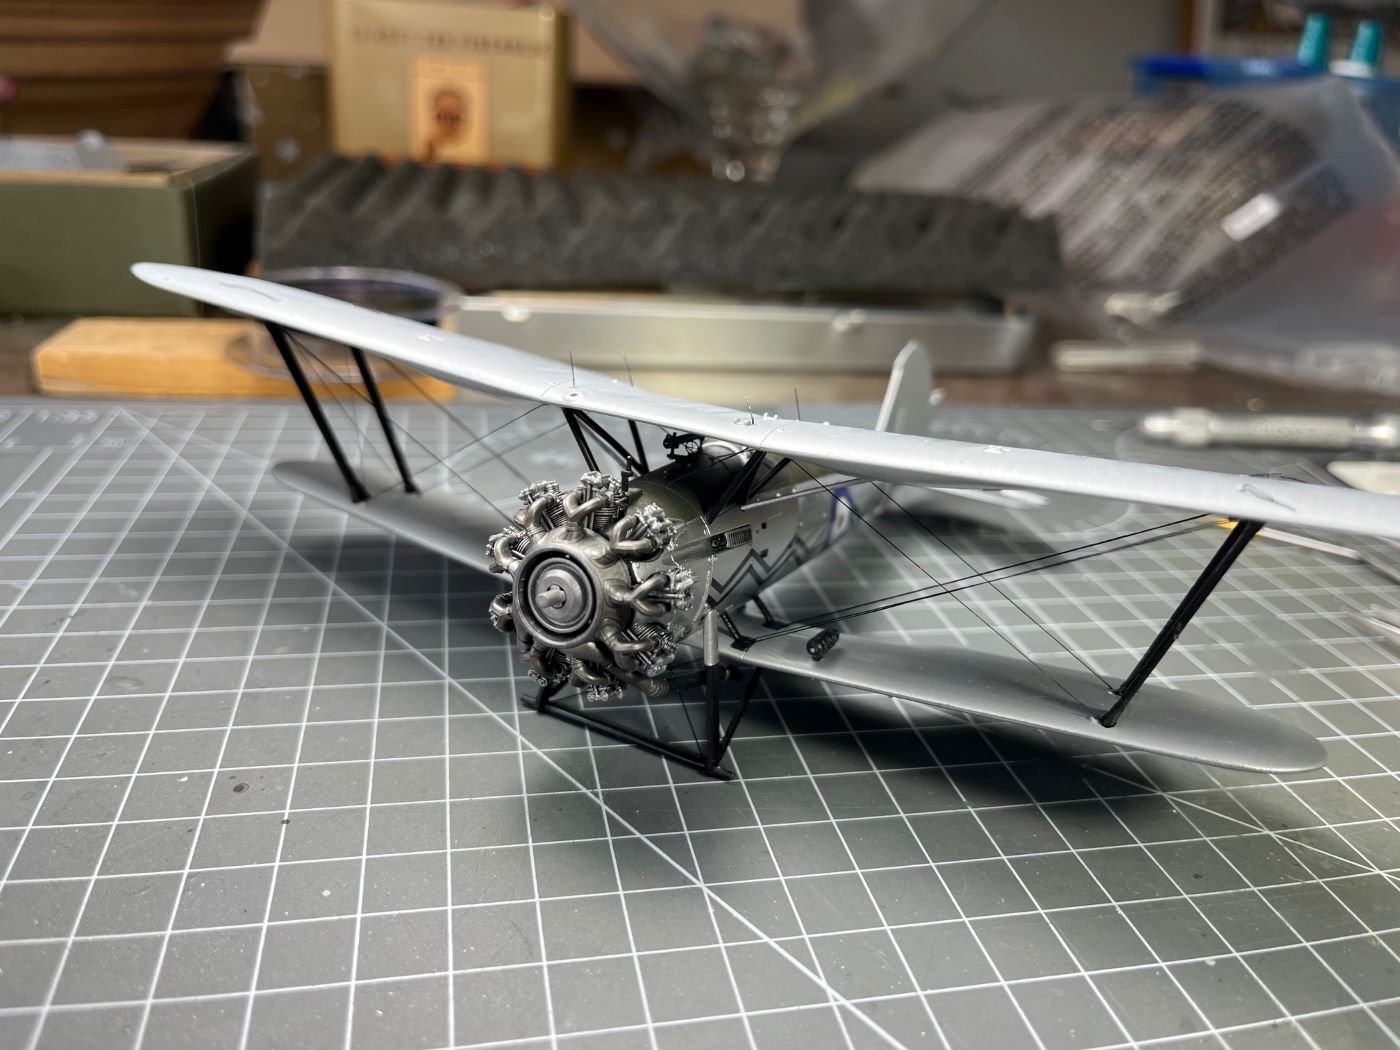
- 40 replies
-
- 14
-
-
-
Bristol Bulldog by Danstream - Airfix - 1/48 - PLASTIC
Danstream replied to Danstream's topic in Non-ship/categorised builds
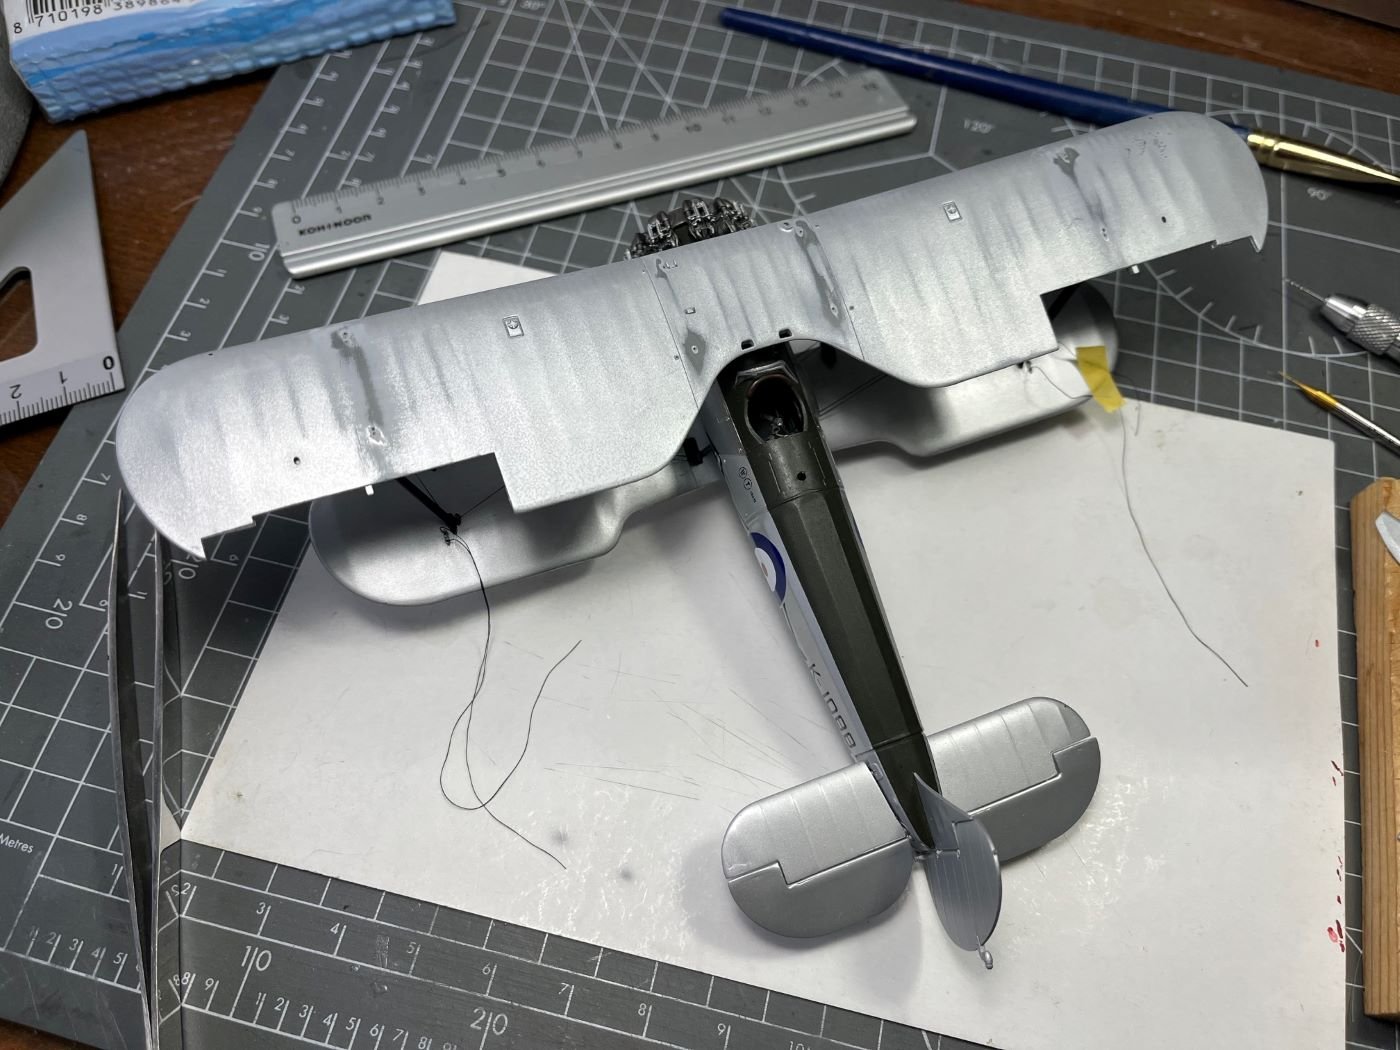
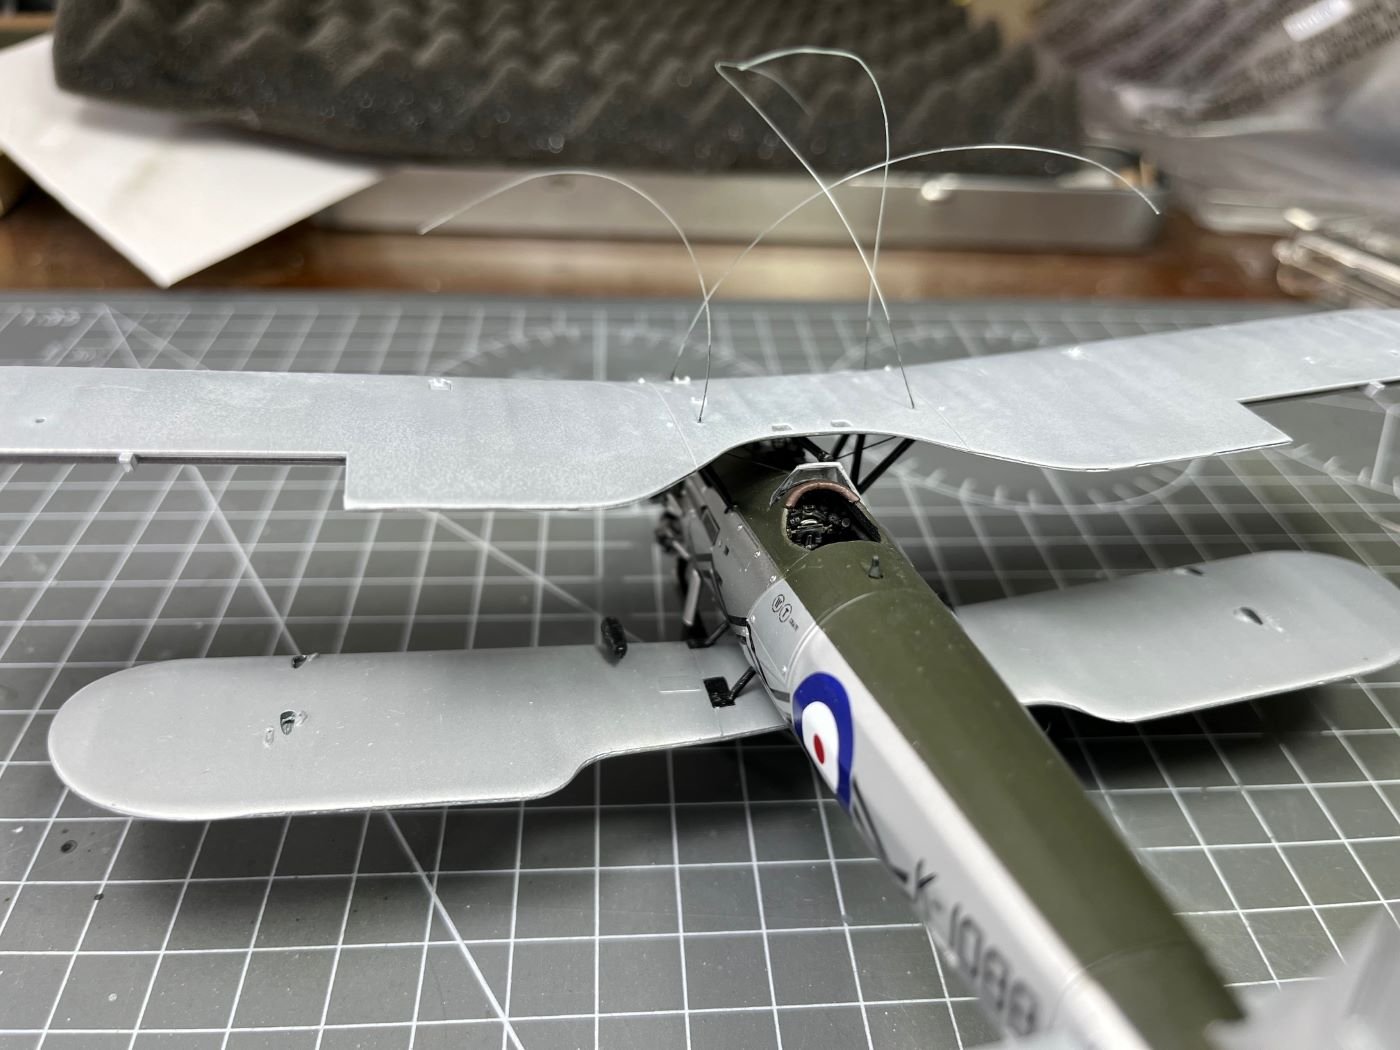
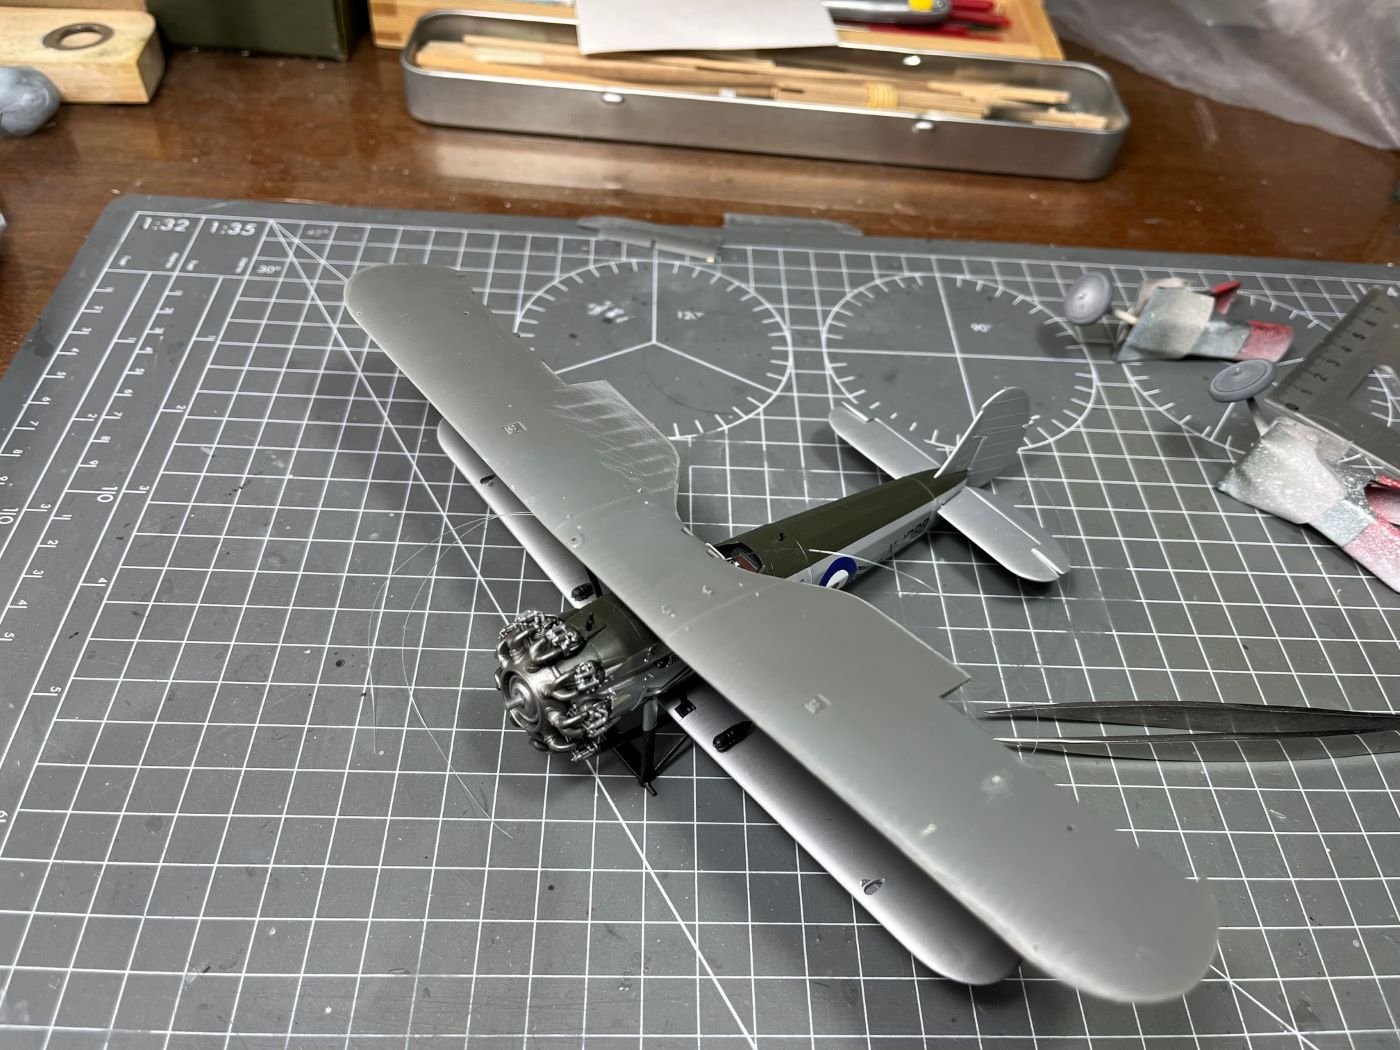
Hi all, I am proceeding slowly ahead and I finished in all details the lower side of the upper wing: The upper wing is then installed on the cabane struts and the wires are passed through the wing and tensioned. Now we have finally a proper biplane: Actually, the fishing line that I used here to make the rigging wires, contributes to the stiffness of the assembly. For the other rigging wires, though, I am considering using an elastic thread. Then, also the other interplane struts are installed: Thanks to the precision of the kit parts, the biplane assembly was trouble free and seems quite sturdy and well aligned. Meanwhile, the wheels are completed: The aluminum rim of the wheels is made with decals provided with the kits. Next, I am proceeding with the interplane rigging which I guess will take a while. Best regards, Dan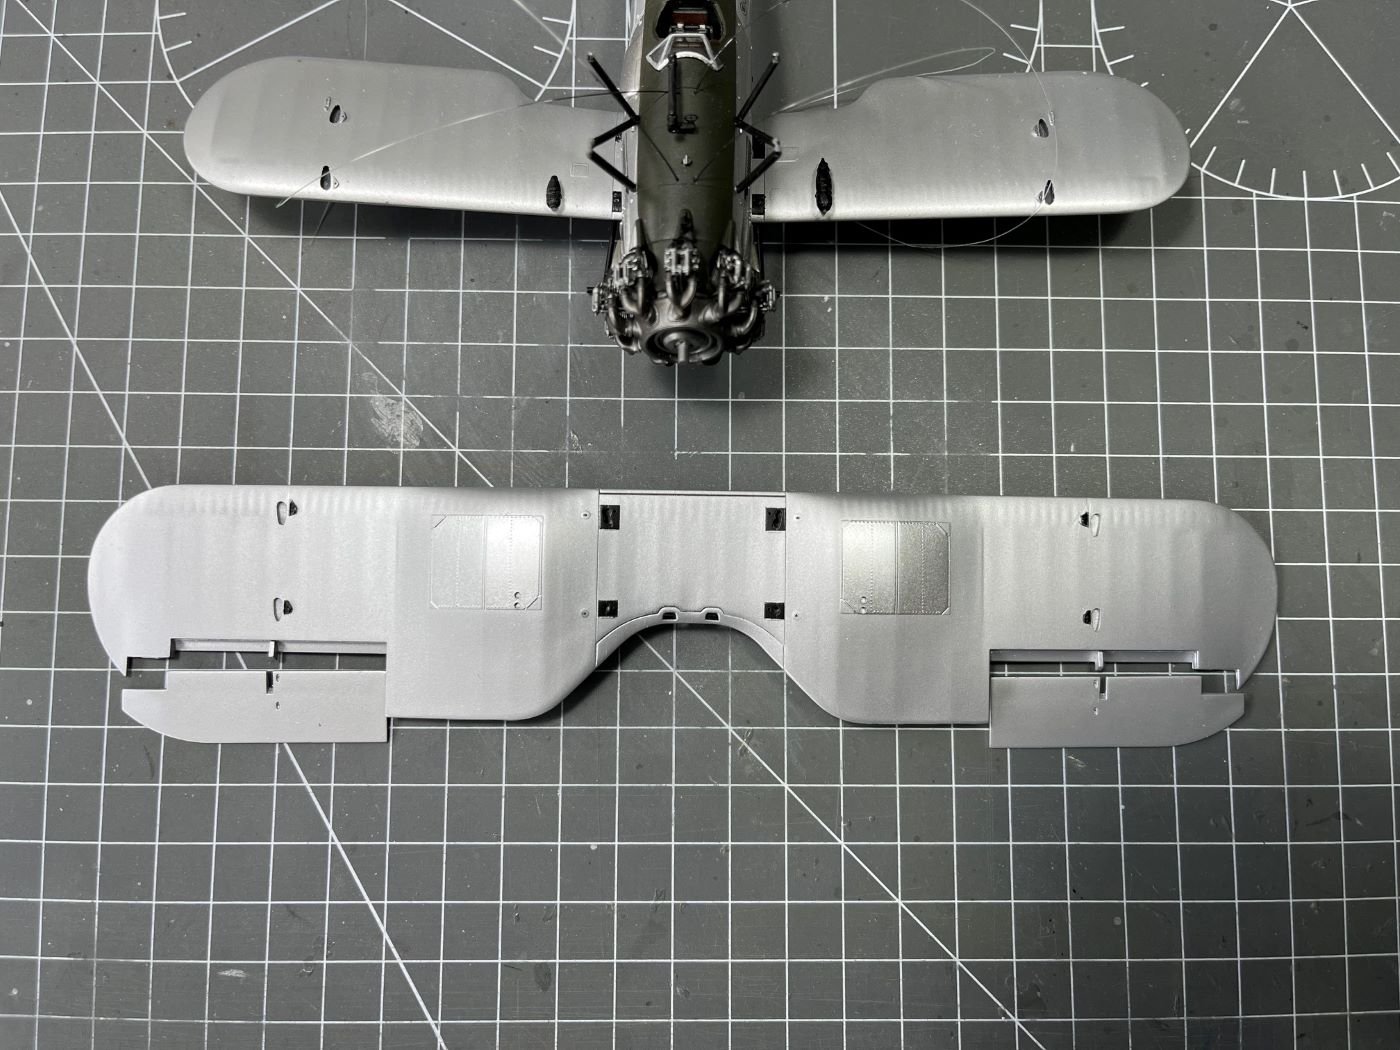

- 40 replies
-
- 15
-
-
Lotus 72D by gsdpic - FINISHED - Tamiya - 1/12 - PLASTIC
Danstream replied to gsdpic's topic in Non-ship/categorised builds
Beautiful car and model! Dan -
Bristol Bulldog by Danstream - Airfix - 1/48 - PLASTIC
Danstream replied to Danstream's topic in Non-ship/categorised builds
Hi, few more small steps with my Bulldog, which as said earlier requires an approach where patience is the key. Few steps forward might implies also some steps backwards to correct mishaps on finished parts caused by the gluing of new ones. For example, this is a picture of the type of masking required to correct a blemish on the already painted green spine: Before going onwards, I decided to complete the decaling of the fuselage sides and seal the decals with X-22 clear: I also glued on the small windscreen piece which required several iterations. Here the problem was that the space left between the transparent part and the coaming is very narrow and the glue was sucked by capillarity into the gap. Fortunately, I had decided to use PVA glue (Kristal Clear) so that I was able to remove the messed windscreen, clean the parts and repeat the application until I got a reasonable result. Then, the cabane struts were finally glued in place: To check their alignment, I dry fitted the huge main wing which will be painted next: The main wing looks a bit wonky now, but I will adjust its final position by tensioning the cables that I will pass through it. I also started to work on some few remaining small items that require the application of several colors to finish them: That's all for now, best regards, Dan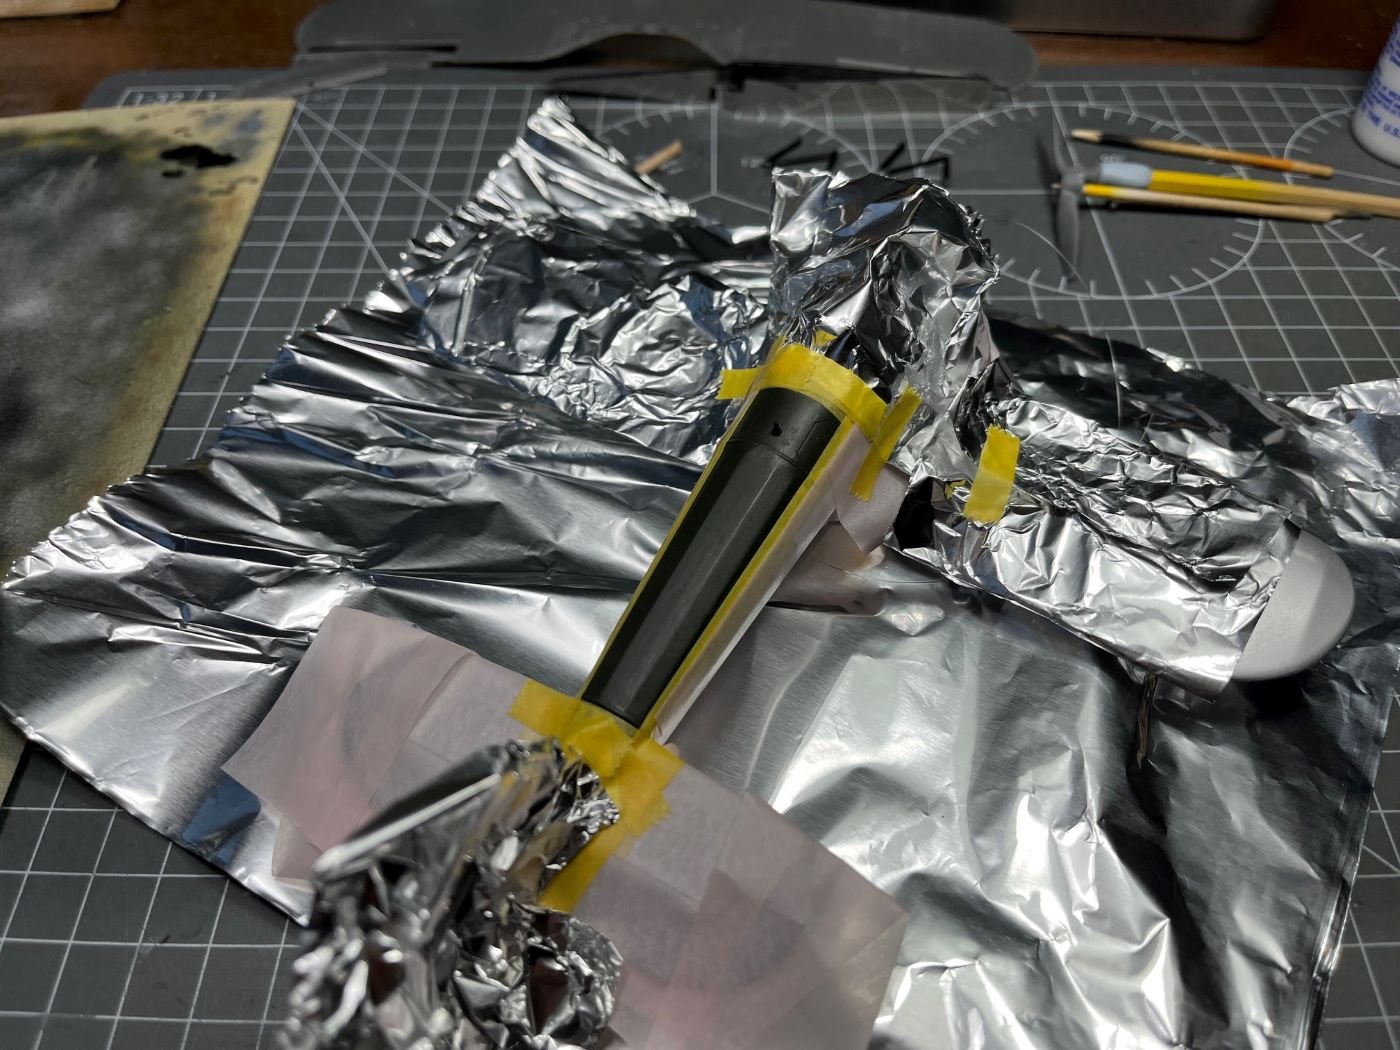
- 40 replies
-
- 12
-
-
Bristol Bulldog by Danstream - Airfix - 1/48 - PLASTIC
Danstream replied to Danstream's topic in Non-ship/categorised builds
Hi Mike, thanks for your feedback! Indeed, as I wrote in one of the early posts, this model obliged me to follow a less straightforward build sequence due to its configuration. In this case, what I did is: - Spray the portions finished with the aluminium dope; coat with X-22 gloss for protection; mask these parts; - Spray the cowlings with chrome silver; coat with X-22 gloss for protection; - Mask the the area for the matt green and spray the anti-glare green (note that I usually add some drops of X-22 to Tamiya matt paints, how much? I go by eye, say for ten parts of matt paint, 3 parts of gloss (*)). At this point, when I remove the last masking, the surfaces have the right final finishes. However, as I said in my posts, I had few times the need to repair here and there the paints and this adds more complication with additional partial masking, etc. This is the point where I am at present. Now, before putting on the top wing, I will complete the decals for the fuselage and the lower wing and I will seal the decals with additional X-22. This might require to mask the green area, but without the the top wing and the rigging in place, this should not be a major problem. Note: sealing the decals might not be strictly necessary if I don't apply panel liners or oil colors, which might be well the case for this build, I have not made up my mind yet. Then the top wing, already painted, will follow and necessary touch-ups (these will be necessary because of the way I will rig it, i.e. some of the wires will go through the wing and will be glued from above; then some local sanding and painting will hide the wire attachments). Decals and top coat will follow. In a sketchy way, this is the plan. I don't claim that this is the best way, but it is what I have in mind. (*) I always since ever add some X-22 to Tamiya matt paints because these have otherwise a chalky finish and they become slightly more robust to touch and wear. Best regards, Dan -
Bristol Bulldog by Danstream - Airfix - 1/48 - PLASTIC
Danstream replied to Danstream's topic in Non-ship/categorised builds
Hi, I started to prepare all those small items that are going to be placed on the top of the fuselage. Because of their small dimensions, this revealed to be a non trivial job. Some details are a bit soft, like the crosshair reticle, f.i., but this is to be expected for such small parts. I am going to replace the reticle piece with some spare P.E. that I happened to have while the mounting brackets will be remade with small brass tube. The new parts are here posed in place: I glued them in place and painted them black. Again, I spoiled the green and aluminum several times and I had to repaint them accordingly. At the end, this is how they look like: Eventually, I was pleased with the new parts. Now I urge to put in place the cabane struts as soon as possible so that they can somehow protect these delicate items from being accidentally knocked off. That's all for now, Best regards, Dan


- 40 replies
-
- 13
-
-
-
Bristol Bulldog by Danstream - Airfix - 1/48 - PLASTIC
Danstream replied to Danstream's topic in Non-ship/categorised builds
Dear all, I went on, as said in small steps and also paying attention to the build sequence which differs from what is standard for me. For example, I already had to put on some decals that otherwise would have been difficult to position at a later stage. After that, I tackled the landing gear struts and the long exhaust pipes that required some adaptation to fit the new gas collector outlets: Then, I rigged the landing gear struts: For that, I used a monofilament fishing tread which was glued in place with CA glue. One end of the tread went through the axle so that it could be easily tensioned before gluing it. I also had some collateral damages, when I discovered that some glue mysteriously migrated to the underside of the starboard wing. As seen above, some sanding was necessary to smooth out again the surface. Here, the tread attachments were finished off and the wing was repaired. The Bulldog now can rest on its legs: By the way, I must note that the quality of the decals is very good with no carrier film visible. They also respond very well to the Microscale liquids. That is all for now, thanks for following, best regards, Dan


- 40 replies
-
- 15
-
-
I didn't comment this build before, but I am catching up now. This is a great representation of a Fokker DVII, very carefully assembled as usual and which hardly gives away its paper-made nature. I love how you molded the louvres of the cowlings. I made a WnW model several years ago and I got to love this plane. Congratulations, Dan
-
Bristol Bulldog by Danstream - Airfix - 1/48 - PLASTIC
Danstream replied to Danstream's topic in Non-ship/categorised builds
Could you address me to where? I don't remember a build of yours with these schemes. -
Bristol Bulldog by Danstream - Airfix - 1/48 - PLASTIC
Danstream replied to Danstream's topic in Non-ship/categorised builds
Well, I have not yet decided which version will I choose, but surely a very colorful one. Thanks for dropping by, Dan
