.jpg.2c2c29e54623bd7b752bc2cdab599665.jpg)
Danstream
-
Posts
755 -
Joined
-
Last visited
Content Type
Profiles
Forums
Gallery
Events
Everything posted by Danstream
-
.thumb.jpg.c459ce4140b54c12eddb8eedfd446df3.jpg) Lovely model and beautiful presentation. As said, there is a lot to like: the careful assebly, the great finish, the rigging, the propeller, the many details, etc. Are you aiming at muting the large decals? In that case, I might see your point. Have you tried to play a bit with post-processing the picture? I would like to see one of them turned into B/W or, better, to sepia. Congrats, Dan
Lovely model and beautiful presentation. As said, there is a lot to like: the careful assebly, the great finish, the rigging, the propeller, the many details, etc. Are you aiming at muting the large decals? In that case, I might see your point. Have you tried to play a bit with post-processing the picture? I would like to see one of them turned into B/W or, better, to sepia. Congrats, Dan -
Hi Chris, let me add to what already said on this subject, having had the same problem and, luckily, a very satisfactory solution of it. I do not think that you activity of making models had anything to do with the insurgence of a cataract (although I rekonise that you used the sentence ironically). Among causes, we have: genetics, ageing and degradation due to UV exposure. I had all of these (I spent in my youth lot of time in sunny places without any sunglasses protections). Said that, the surgery resolved the problem brilliantly and I could see the world with new eyes (literally).
-
Beautiful model. The green finish is spectacular and the rigging gives that busy look which is typical of these biplanes, I love it. Cheers, Dan
-
Thanks Gary, I appreciate your comment. Dan
-
Nice job on this great looking plane. I hate to say it now, but the insignias of the 'fasci's are unfortunately all upside down (including the colored one below the cockpit). If that doesn't bother you, I would suggest to leave them like that (it could even have an associated ideological meaning, if you wish). Greetings, Dan
-
F4U-1A Corsair by DocRob - FINISHED - Tamiya - 1/32
Danstream replied to DocRob's topic in Non-ship/categorised builds
Great looking radial! Dan -
F4U-1A Corsair by DocRob - FINISHED - Tamiya - 1/32
Danstream replied to DocRob's topic in Non-ship/categorised builds
Great work on painting the cockpit, greetings, Dan -
Nice Mossie and great pair, Andrew. Cheers, Dan
-
Intresting subject, one of the sleekest Italian planes. PS there is a spelling typo in the name of the title, the correct name is 'Reggiane' 😉
-
Thanks Edward, much appreciated 🙂
-
Thank you Mike, glad that you like my model! Cheers, Dan
-
Hi Jan. thank you for visiting my build. Where are you located in the Netherlands? From one of your posts I deduced you are in the area around Soesterberg. I live in the vicinity of Leiden. Due to other commitments, I will not build other models for a while, but surely I will be back. 😉 Greetings, Dan
-
Thank you gentlemen! Your company was very much appreciated.
-
It was an enjoyable model to build and to experiment with. I appreciated your support along with your comments. Warm greetings, Dan
-
Thank you Andrew, much appreciated. Dan
-
Thank you gentlemen for your comments, I am glad you like it. It was good to have you following. 👍 To the next build, Dan
-
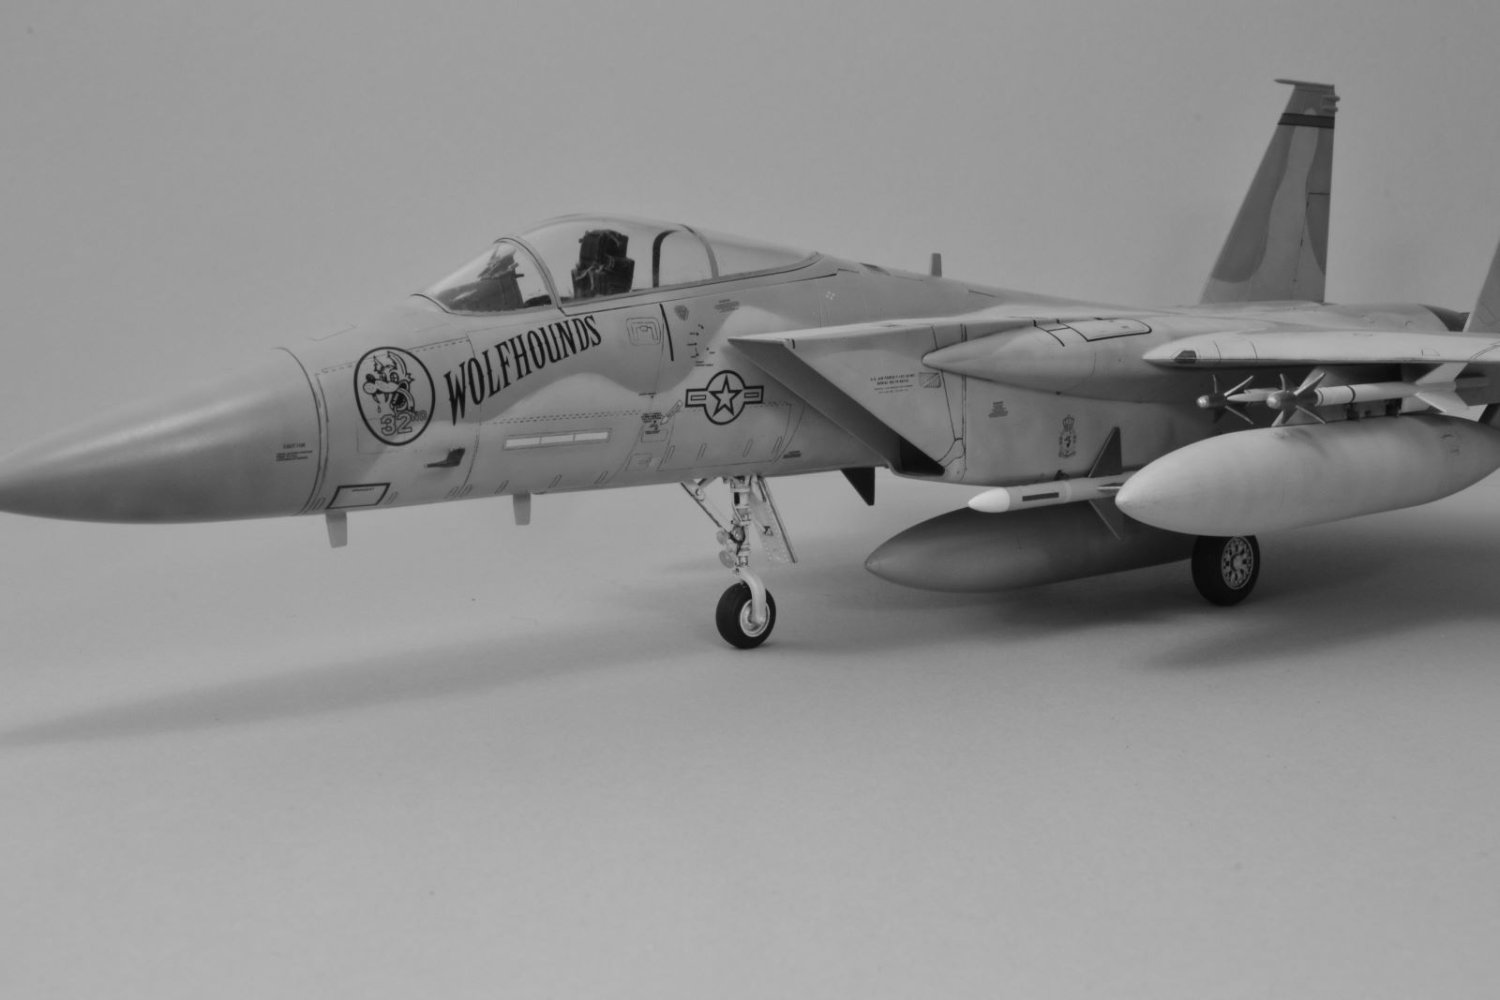
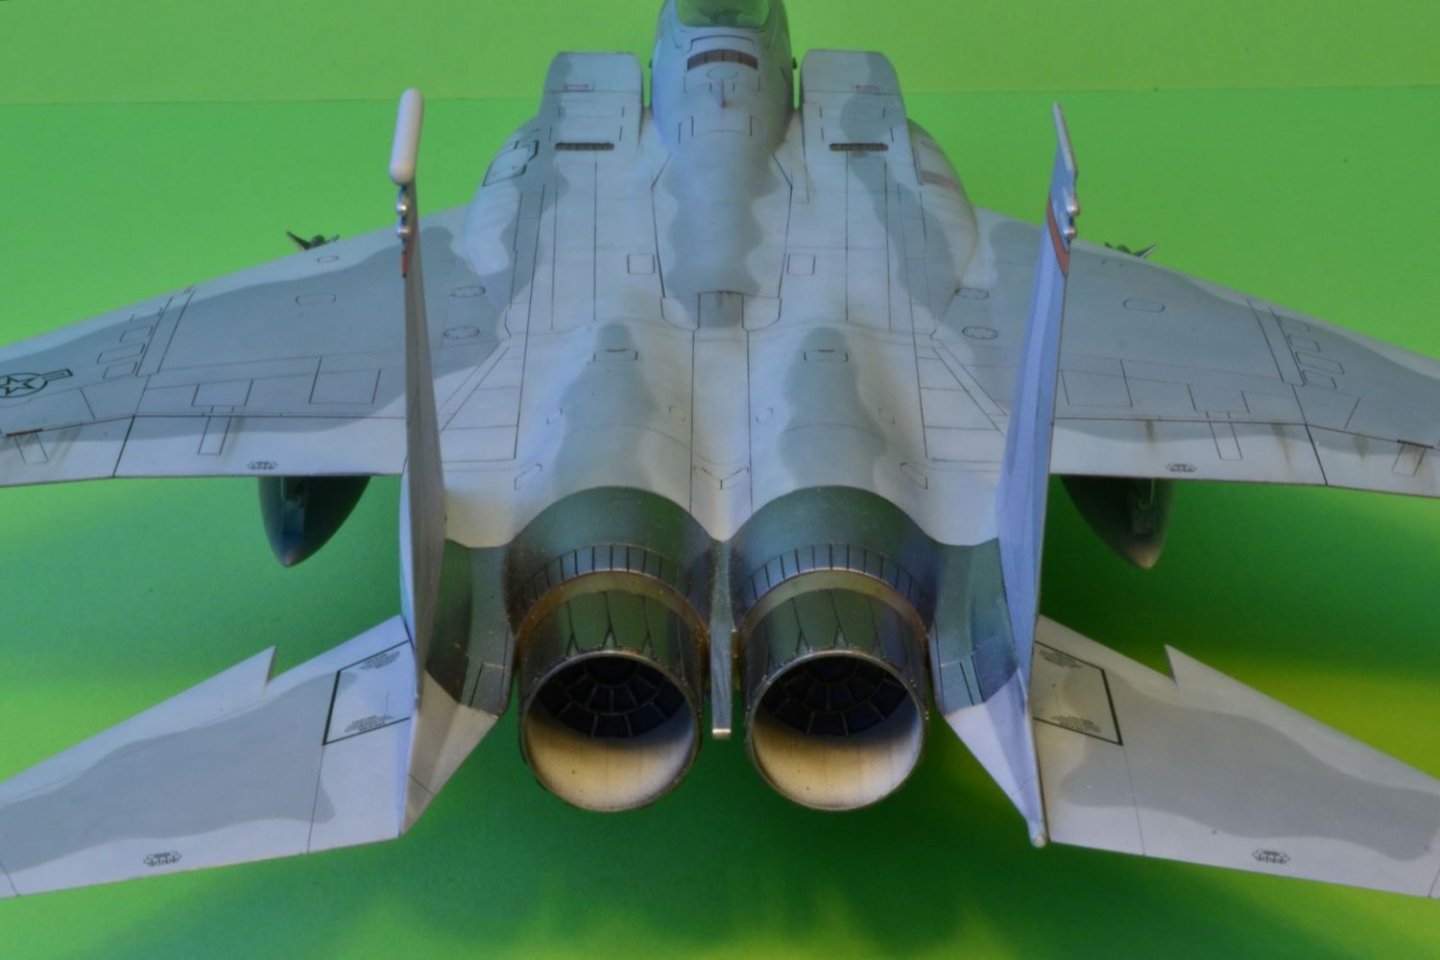
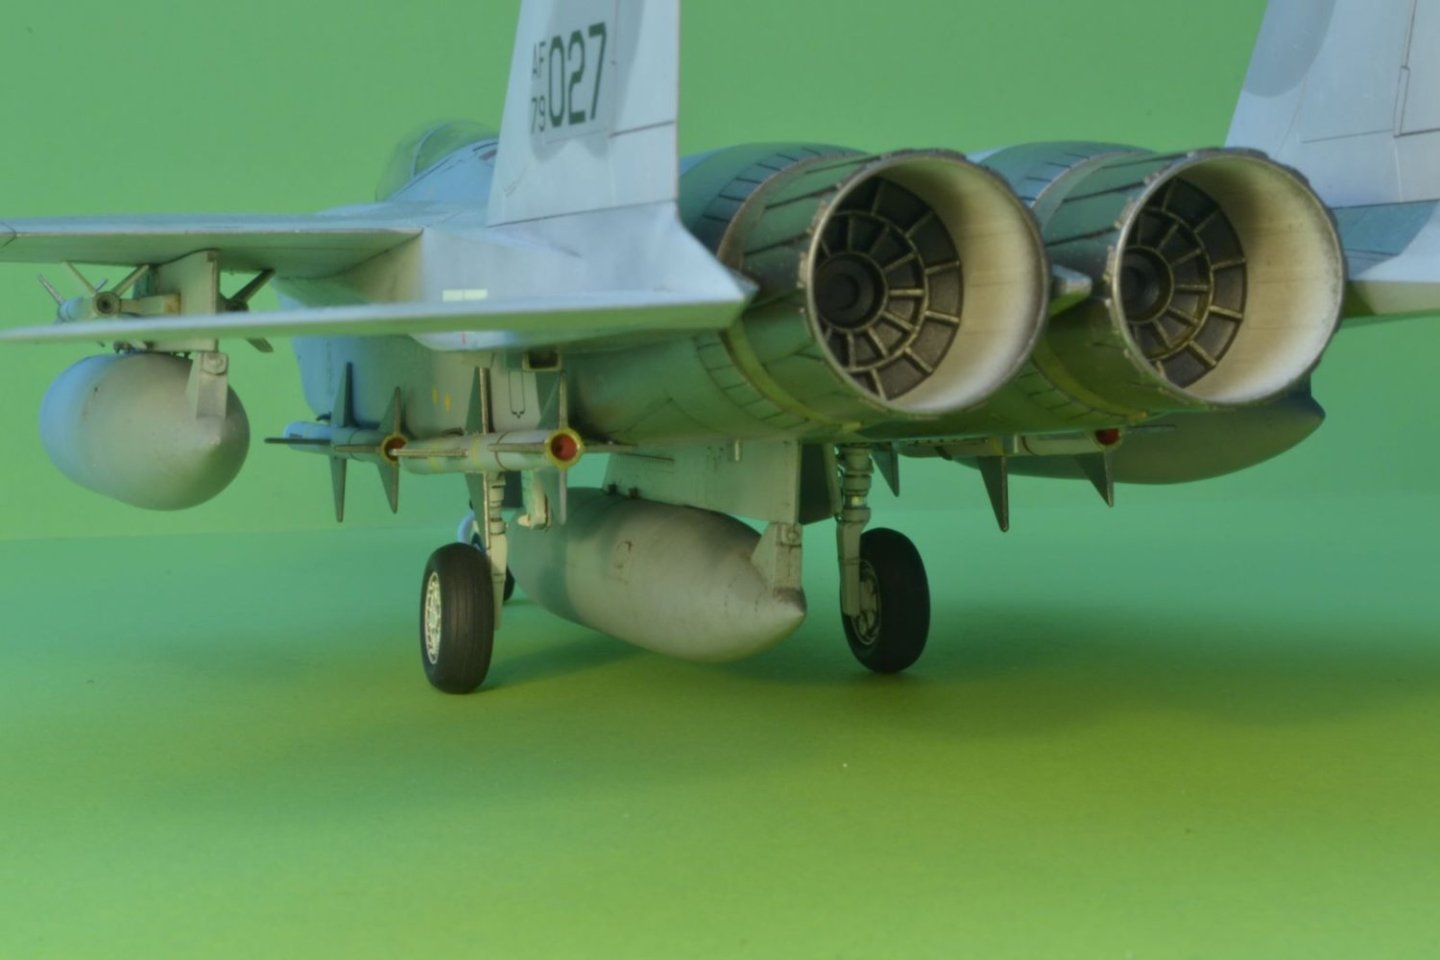
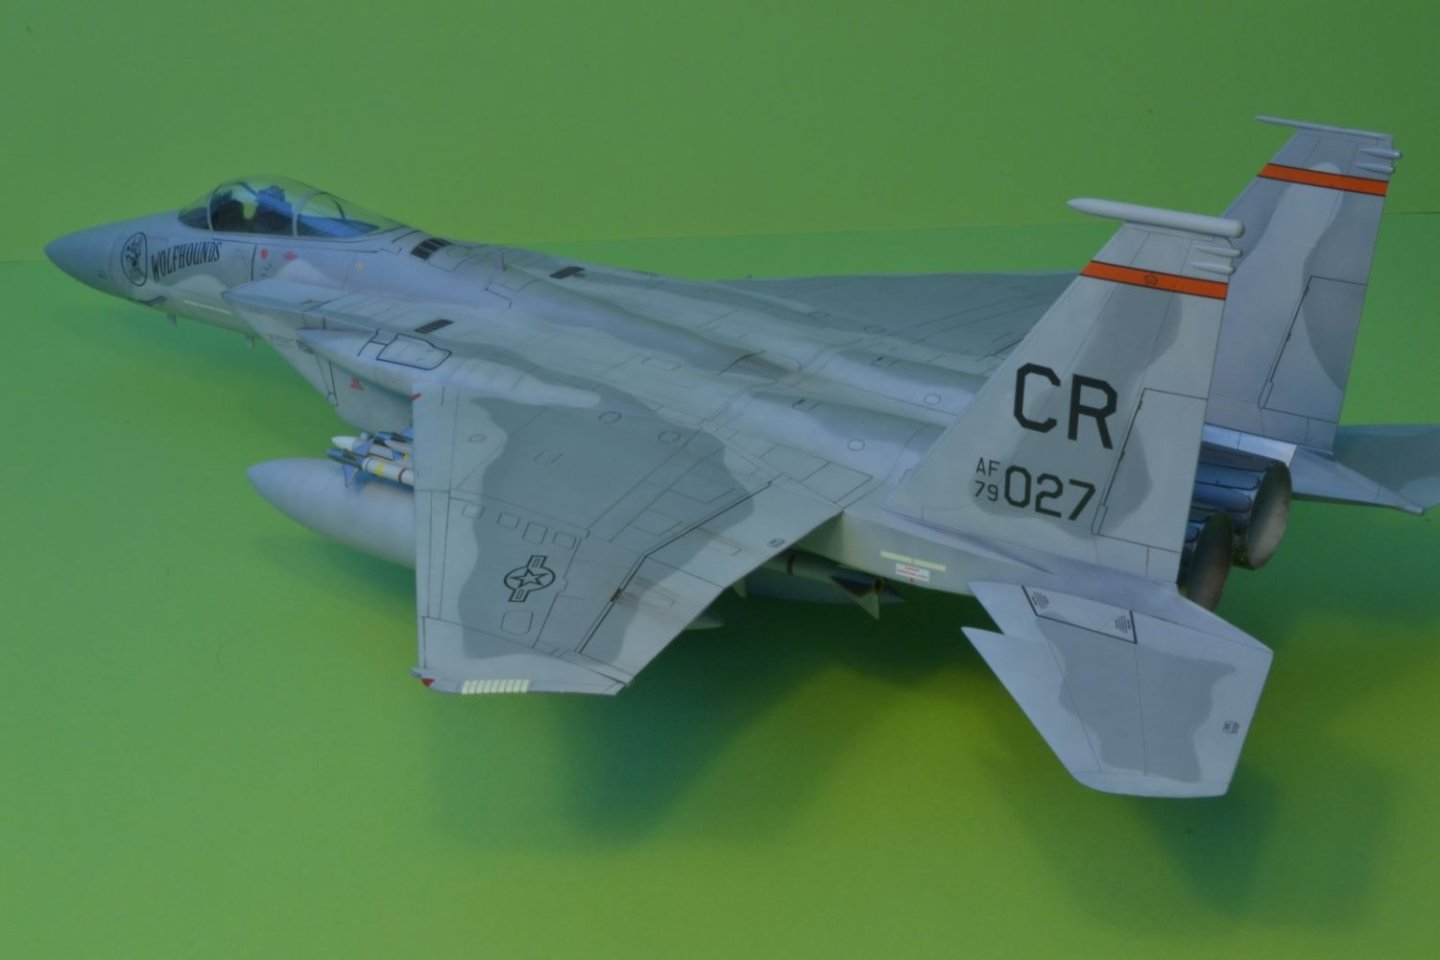
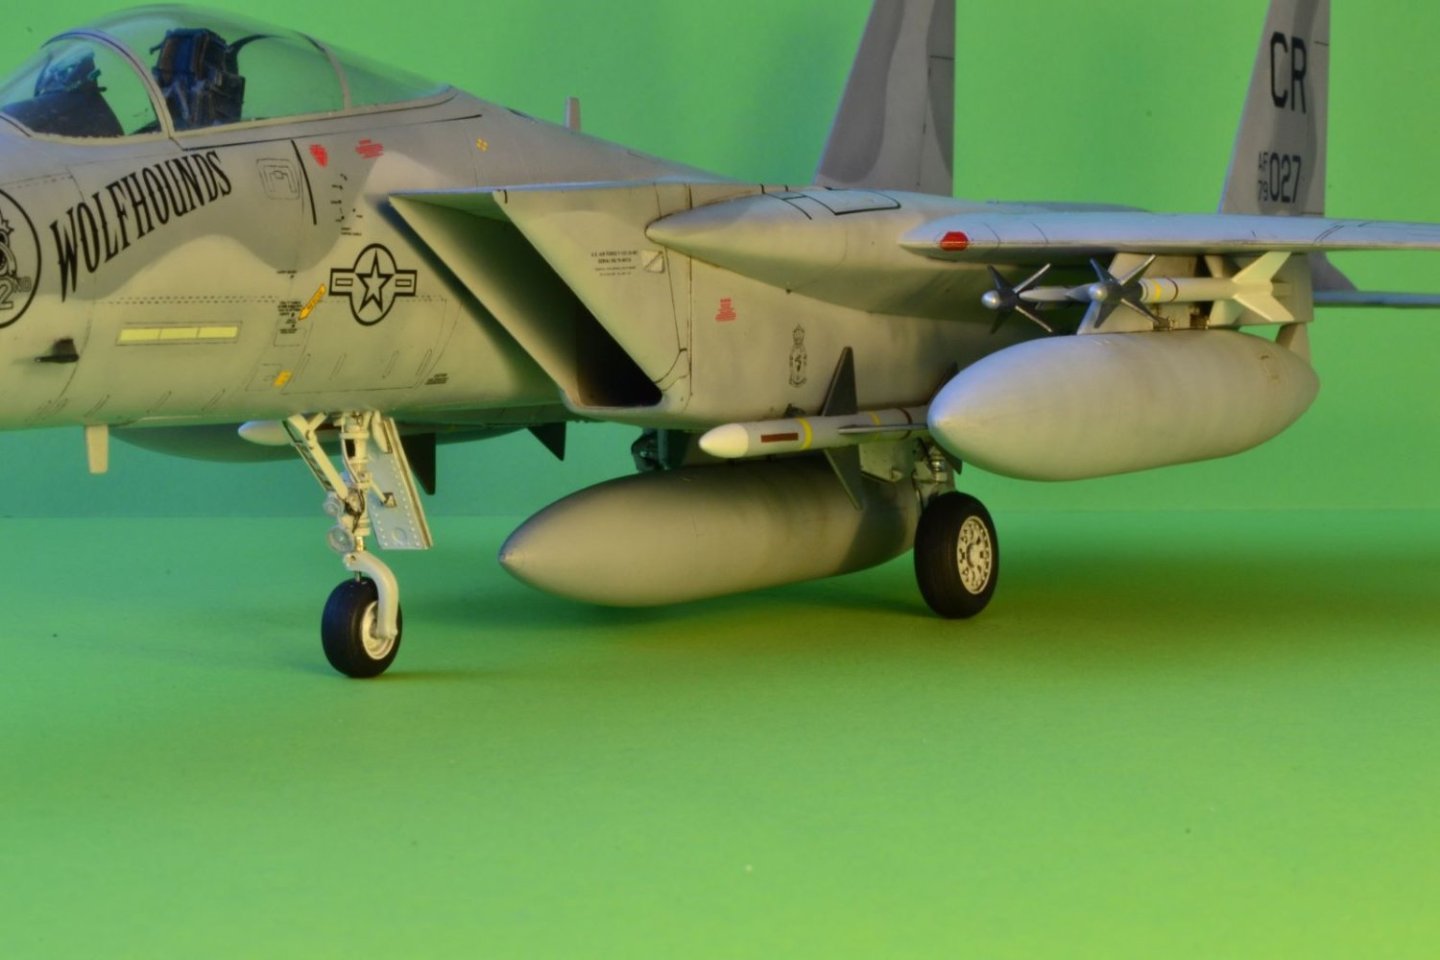
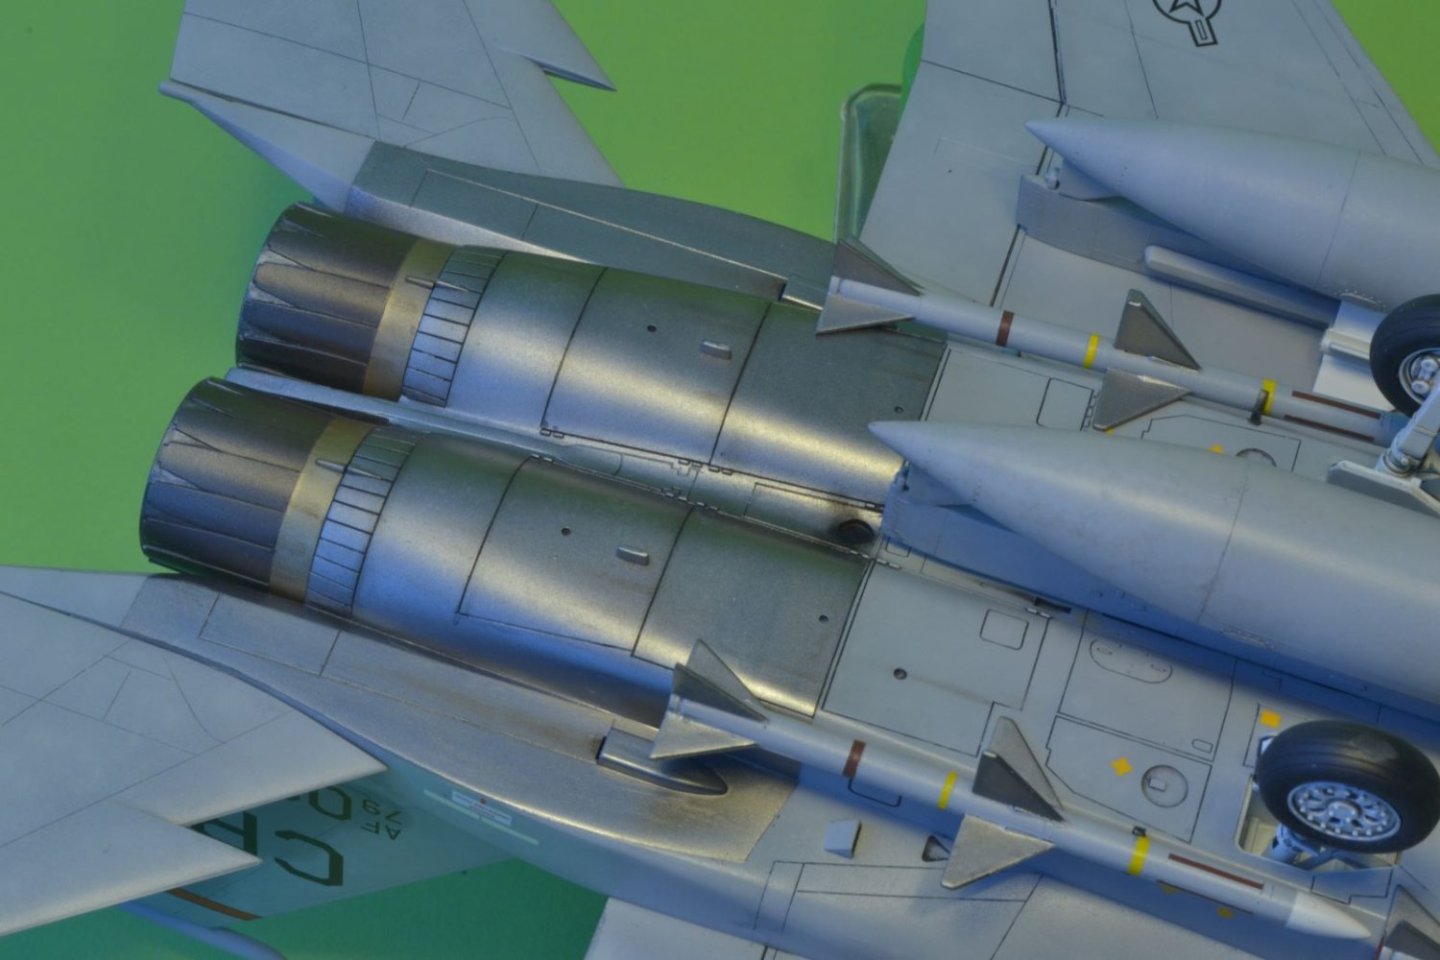
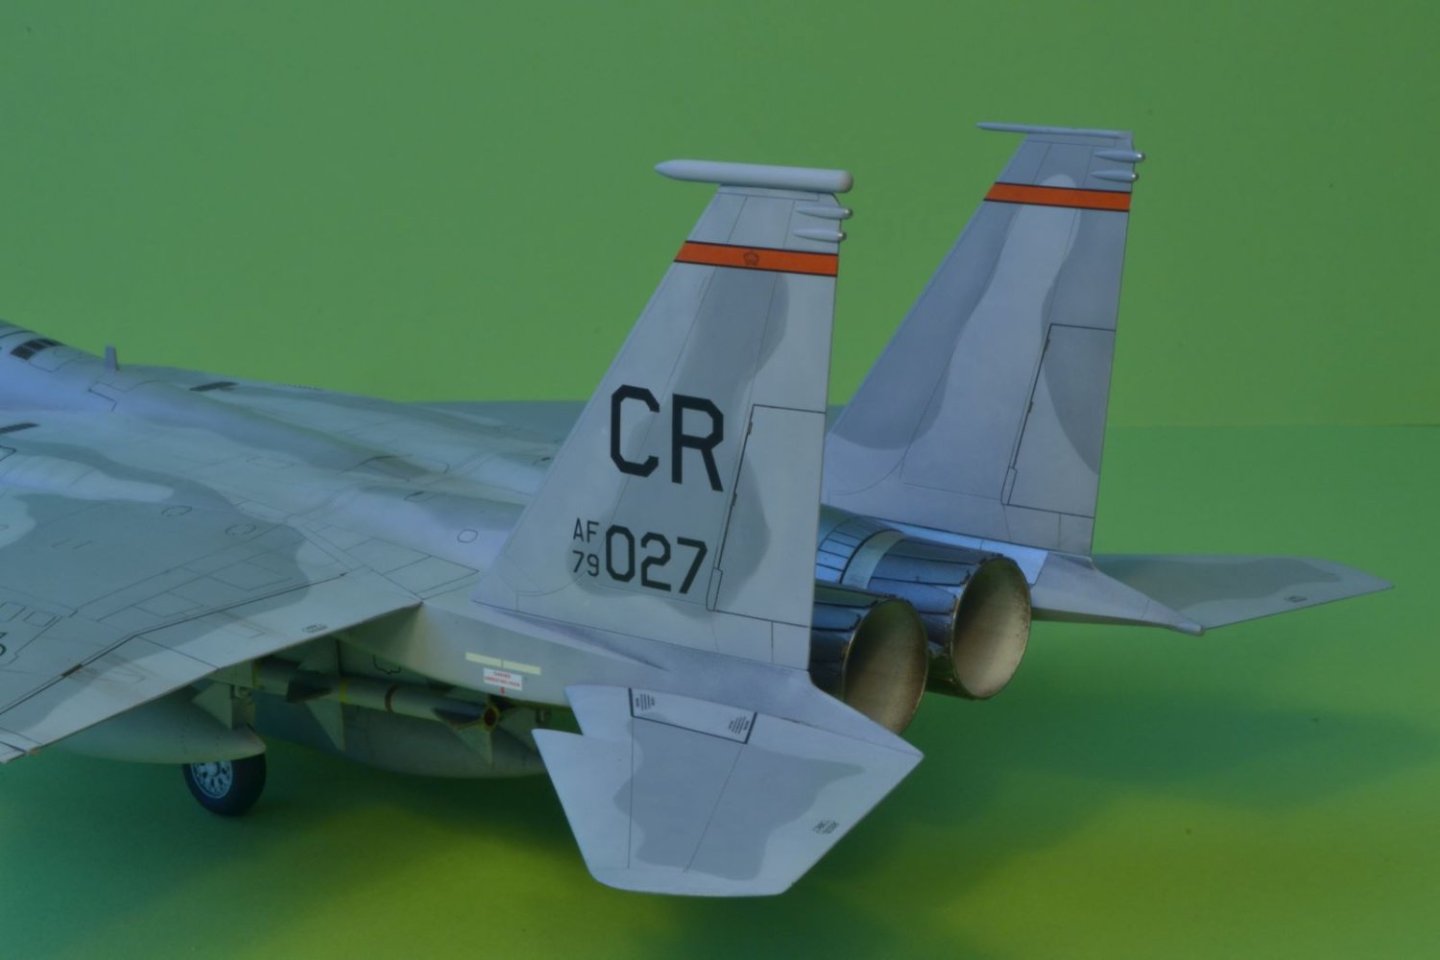
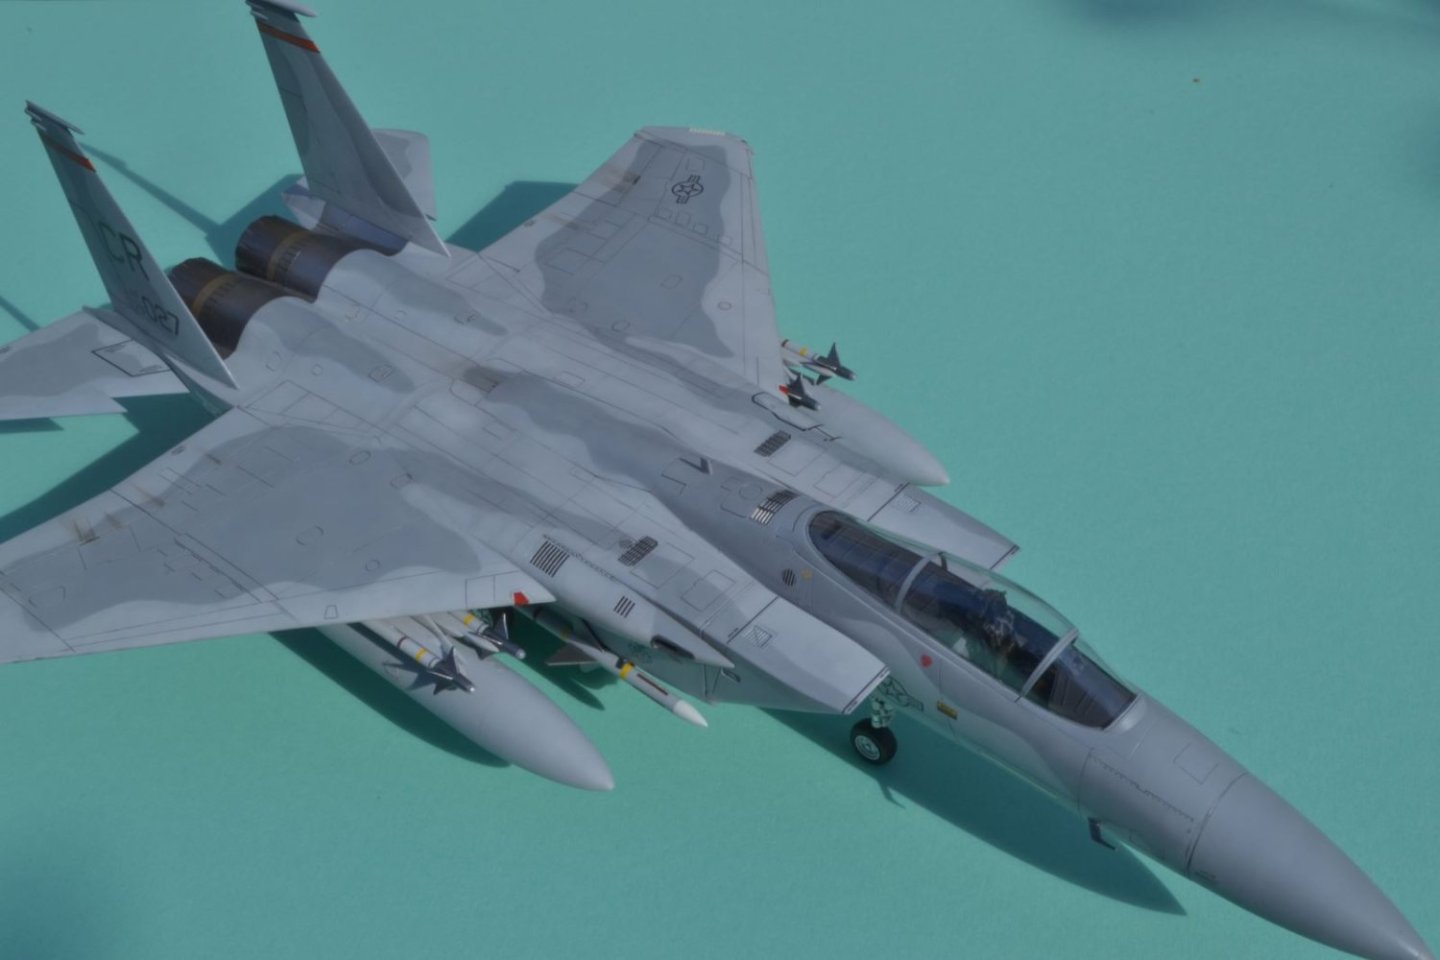
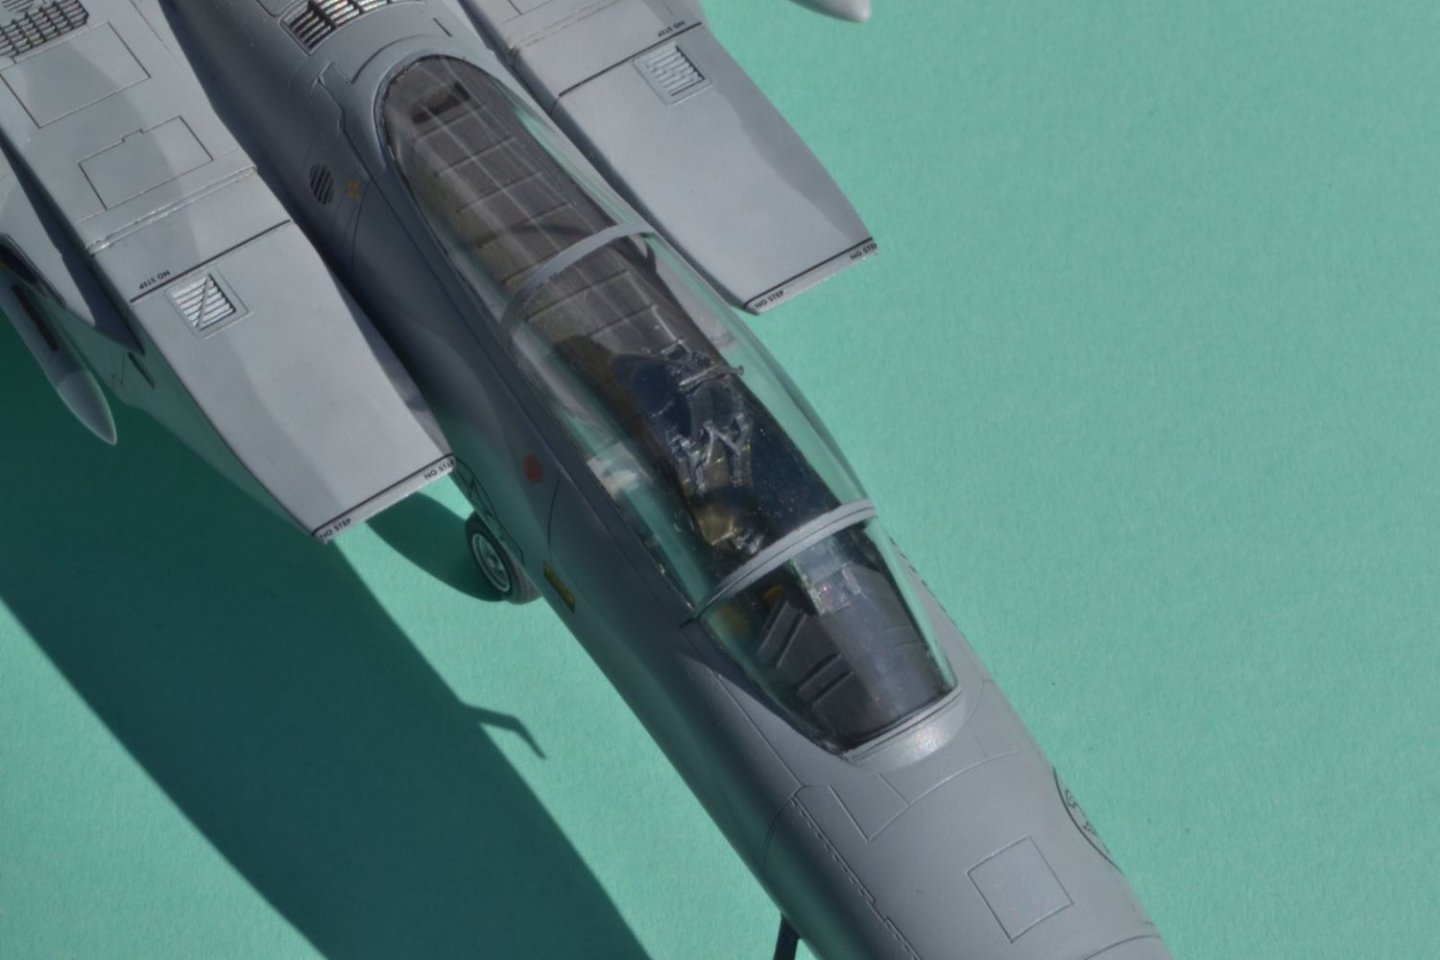
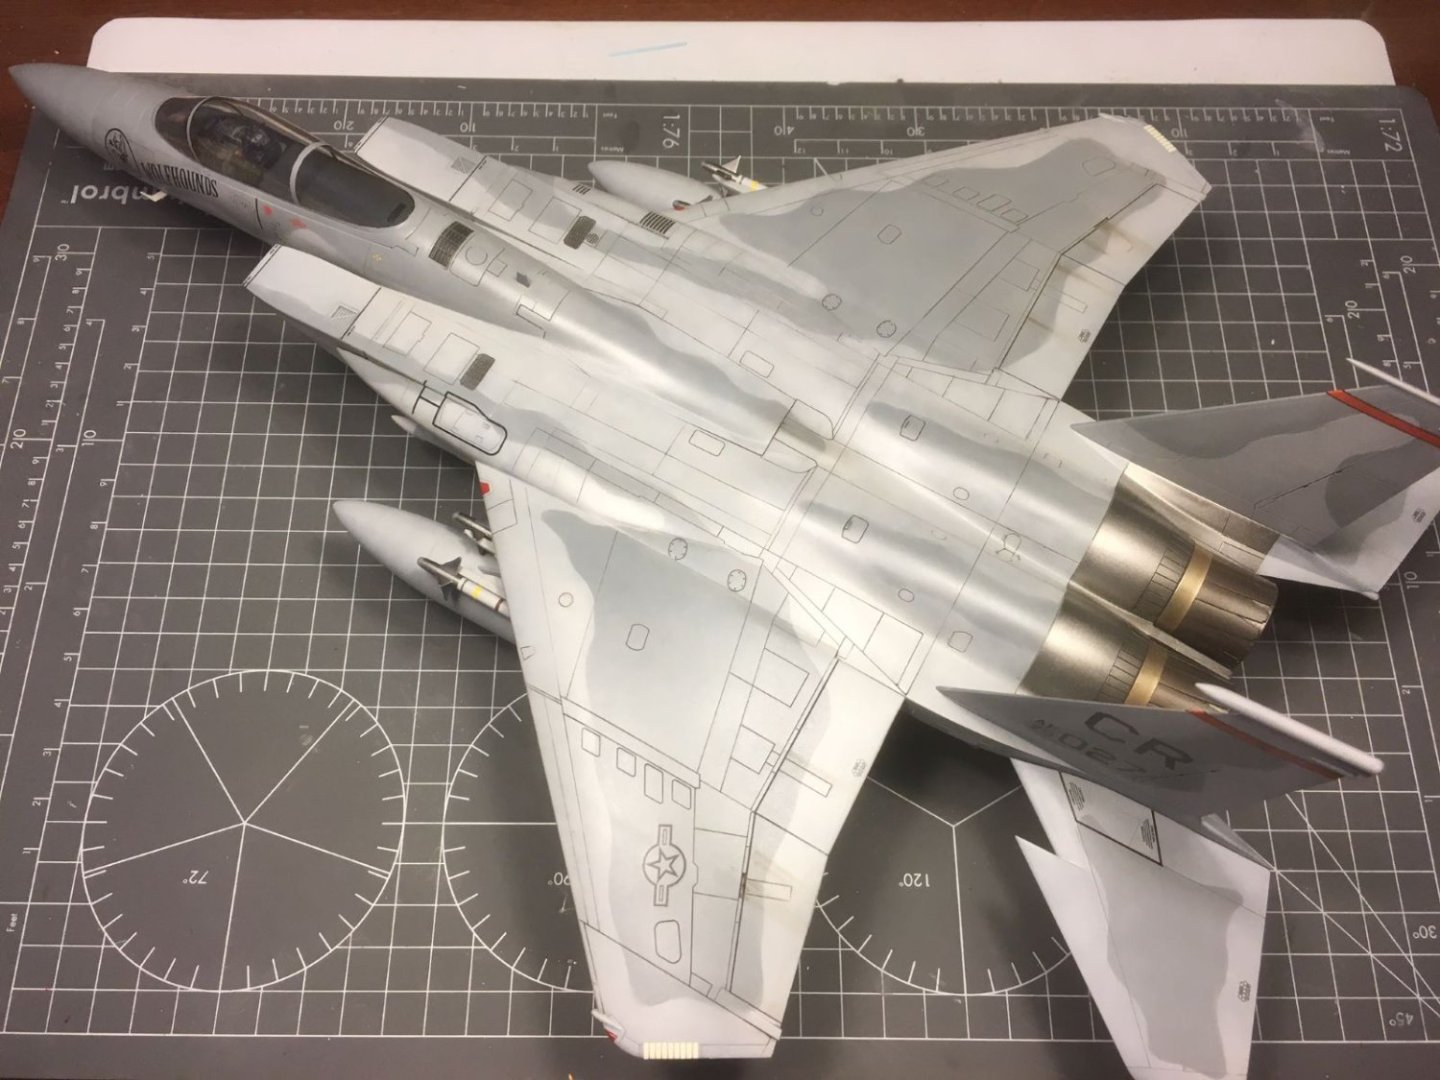
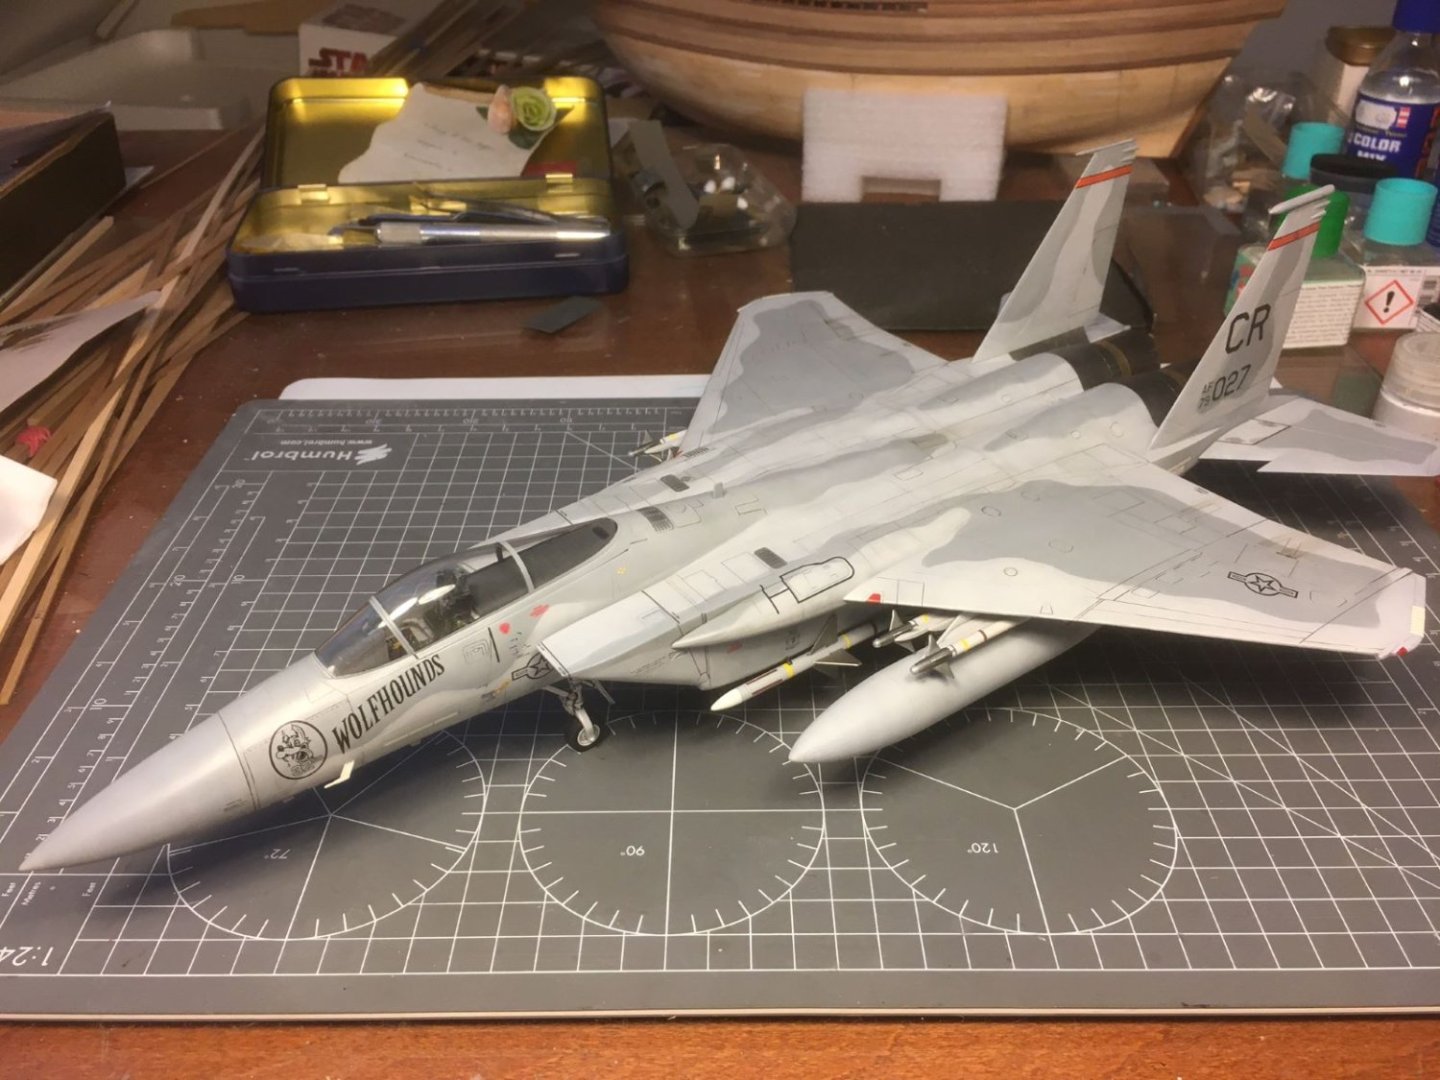
McDonnel Douglas F-15 C 'Eagle' Tamiya 1:48 32nd TFS 'Wolfhounds' USAFE, Soesterberg (NL), 1992 Dear all, this is the last instalment with the final photographs of my F-15 model. As it can be seen by the build log attached above, it was a rather long build, as it is usual for me. I chose the markings of the The 32nd TFS that came to the Netherlands (Soesterberg AB) in the early 50's. The color scheme depicts one of these Eagles as it appeared in ca. 1991. The model kit is the old Tamiya 1/48 scale which I bought in 1991 and I built it mainly OOB with the few exceptions listed below. I used the following materials and aftermarkets: Tamiya acrylics for most of the surfaces; Vallejo Metallic for the nozzles and the panels around the engines; Eduard resin ejection seat; Dutch Decal decalsheet for the Wolfhounds markings. The Tamiya kit is old with some shortcomings, but it is still an enjoyable one and it builds into an impressive model. I did not used aftermarket accessories (beside the seat) and I chose to build it all closed up. I used the jet nozzle parts provided with the kit trying to add interest by using various metallic shades only. The model was painted with gray mixes on top of a black basing with white marbling and it was finished with a not fully mat finish. The panel lines were accented by using oil colors diluted with white spirit. The various stains and trails were also made with brushed oil colors. The metallic panels on the lower side were weathered with oils and shades of Tamiya smoke and clear yellow. The fins sport the orange banners with the crowns which are the symbols and colors of the royal family of the Netherlands. To show the real shades of the camouflage colors, which is meant to reproduce the 'Compass Ghost Scheme', I took some pictures under the natural sun light. Another picture under sun light showing the closed cockpit with the Eduard ejection seat: The pictures were taken with a Nikon camera D3100 set on its aperture priority mode. To conclude, I really enjoyed building this awesome and powerful jet fighter which I had never built before. I would like to thank all those that followed my long build and that provided suggestions, comments and appreciations. Again, any comment and suggestion that you might have are appreciated. Best regards, Dan
_resiz.thumb.JPG.a4e0bde6ee1f19a75eec19e178bea339.JPG)
resiz.thumb.JPG.ffcd9b34a41c3b674ba59393faf5a866.JPG)

_resiz.thumb.JPG.cb729f2d149fc16e7a8f317b782a7c79.JPG)
_resiz.thumb.JPG.4793ca51dce6c27cec92aad0300603d1.JPG)

_resiz.thumb.JPG.040cc17ed15a0ee187569358cdf74b33.JPG)

- 137 replies
-
- 15
-

-

-
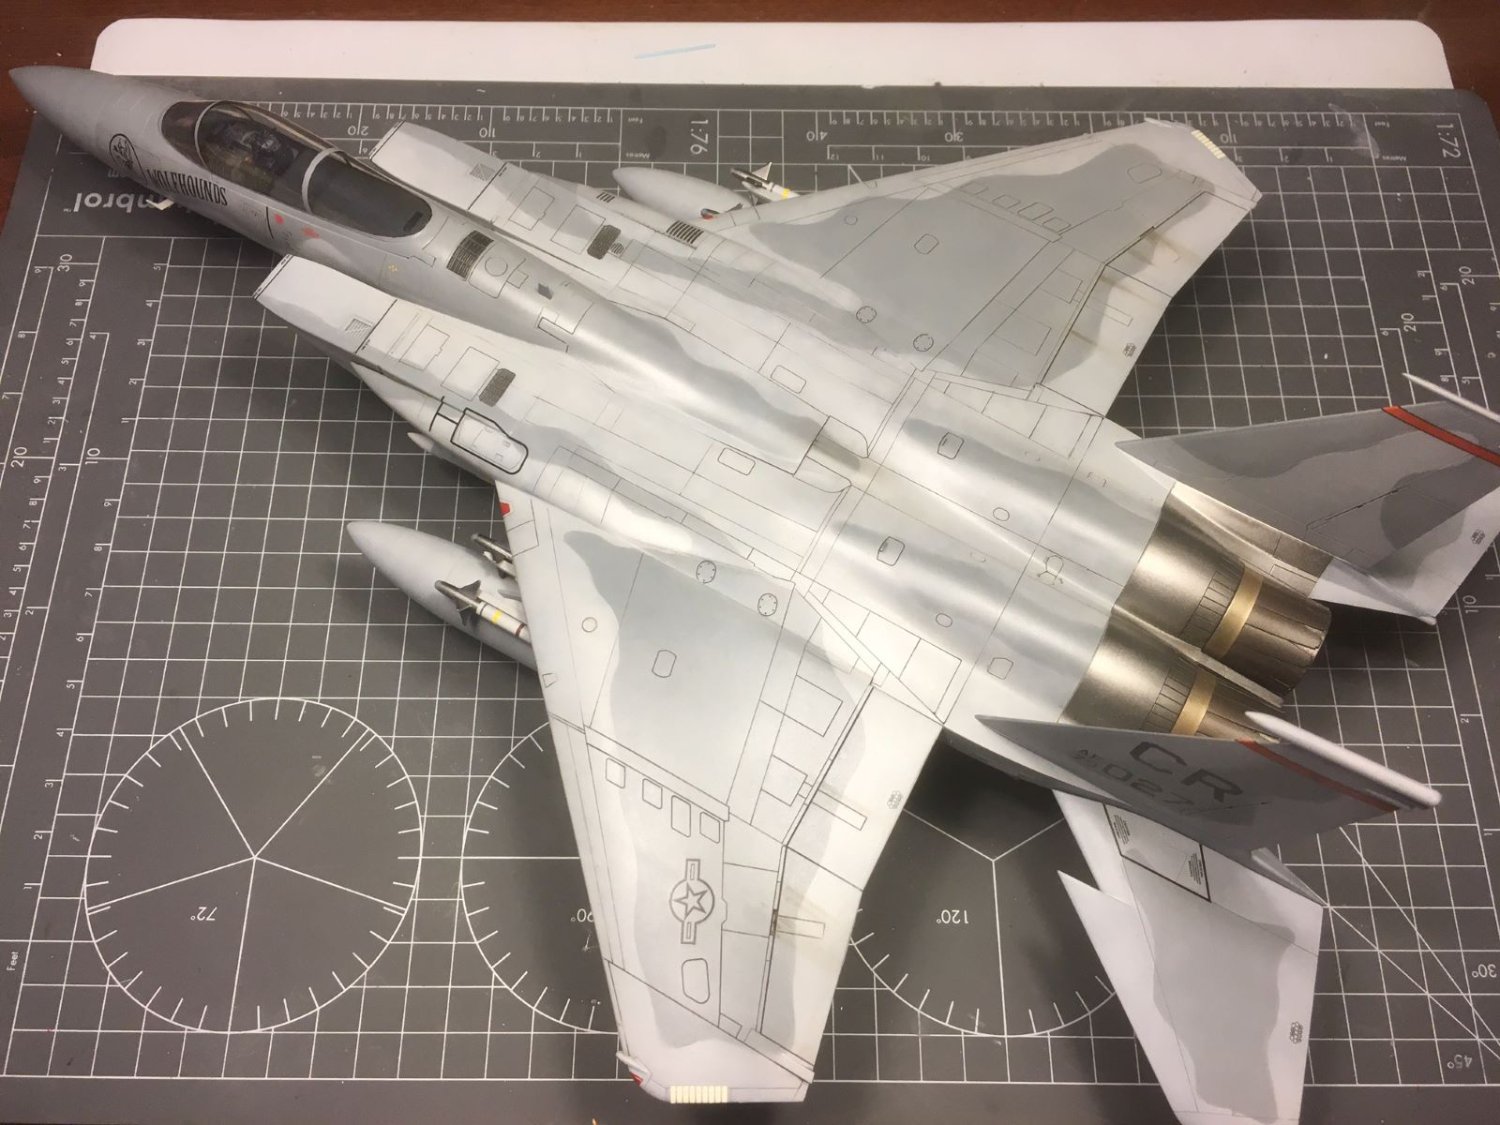
Hi all, please find a small addendum to my last instalment because I just managed to put on all the remaining parts. I have only to paint few small details, glue permanently the canopy and the vertical surfaces and I can call my Eagle finished. This is how she looks now: Next instalment will be the final one with pictures properly done with my camera. Thanks for visiting, see you soon, Dan
- 137 replies
-
- 12
-
-
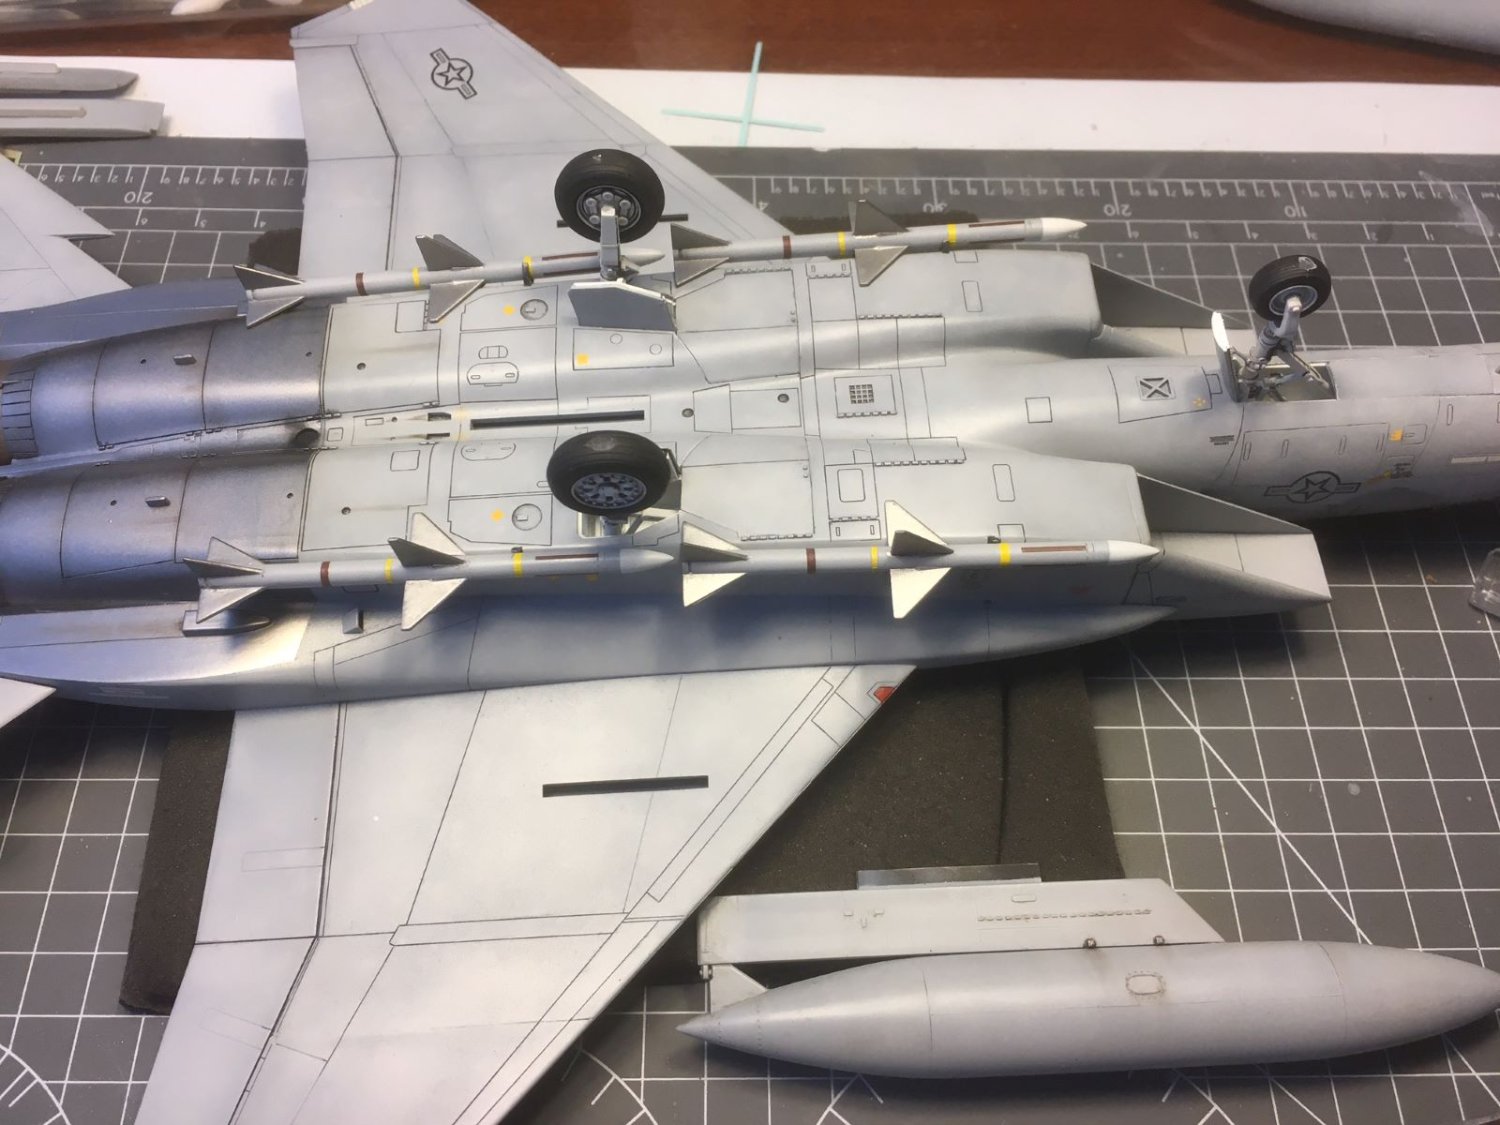
Thank you very much Ken for your reply, I am glad you find them acceptable. As far as the gyros on the tips of the Sidewinders, I noticed these details although I did not figure out that the small wheels at the corners where gyros (I presume they are span by the relative airflow). However, the prospect of masking and painting 4 x 4 = 16 small squares at the corner of each fin did not appeal me greatly. Hence, I plainly omitted them (shame on me). I hope I will be forgiven 😌. Kind regards, Dan
-
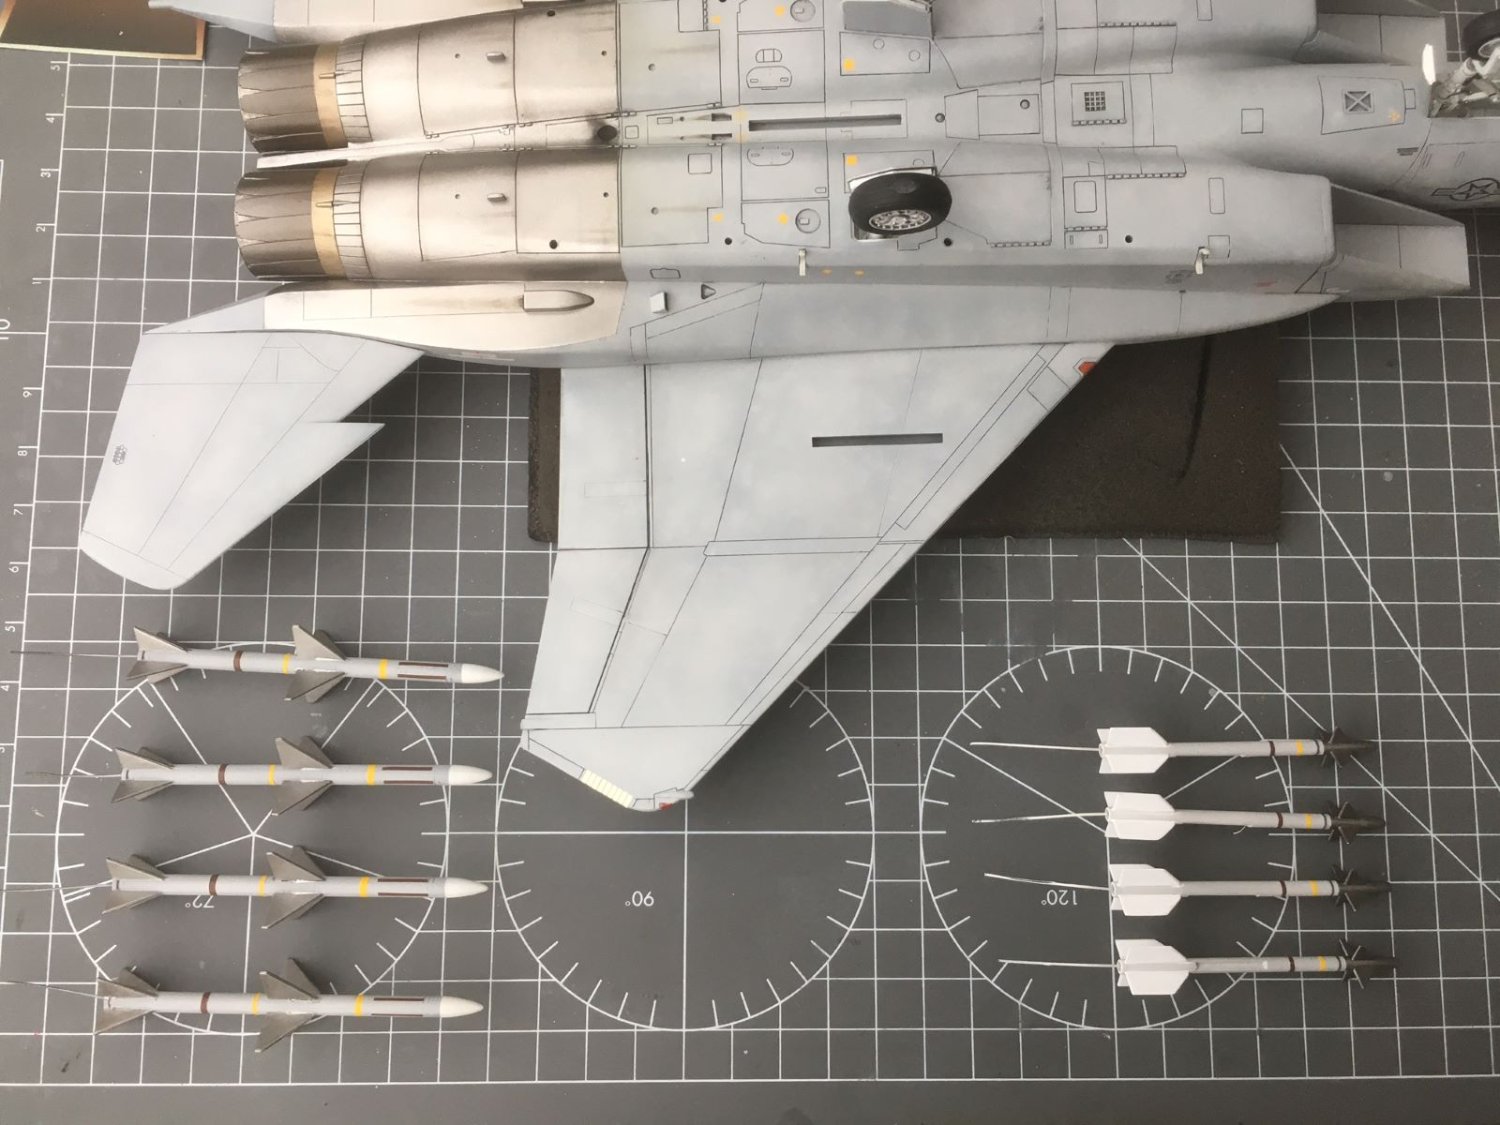
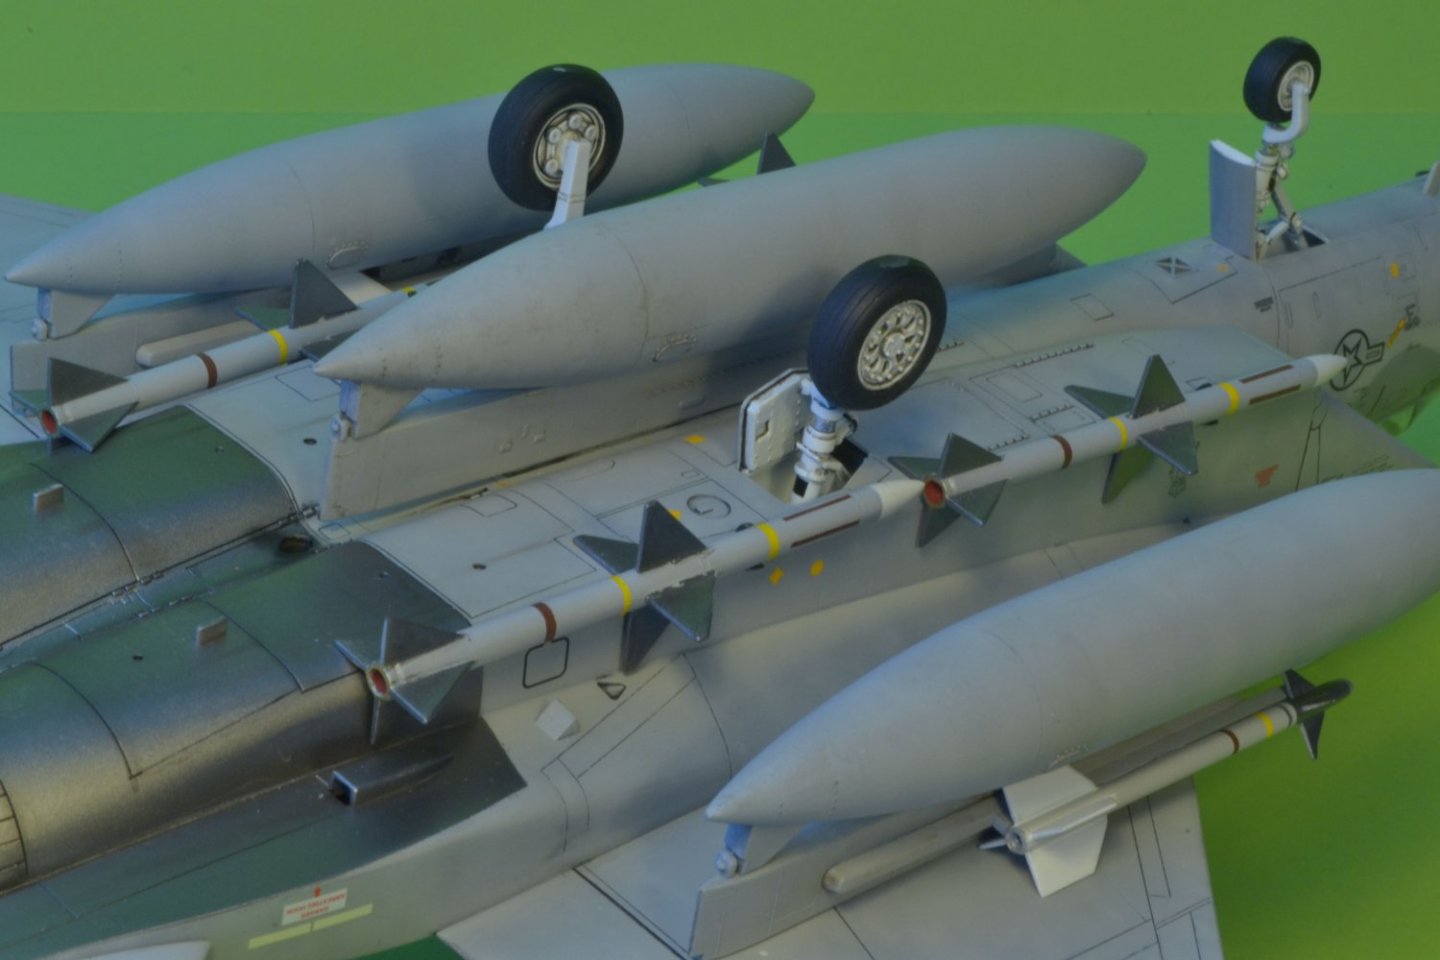
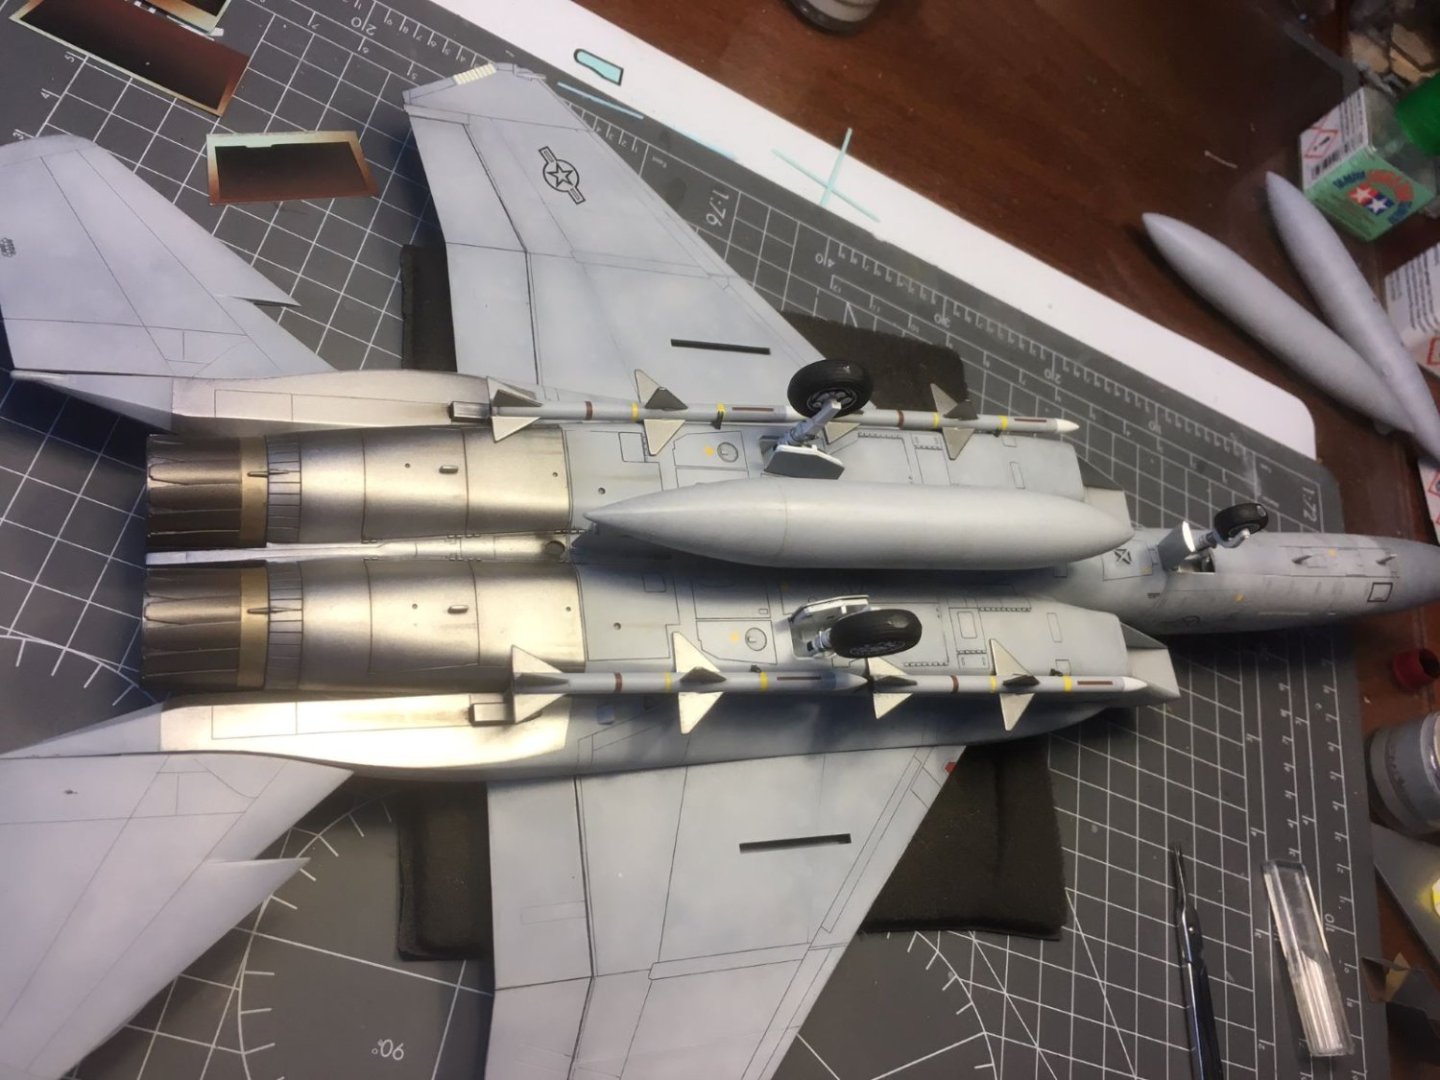
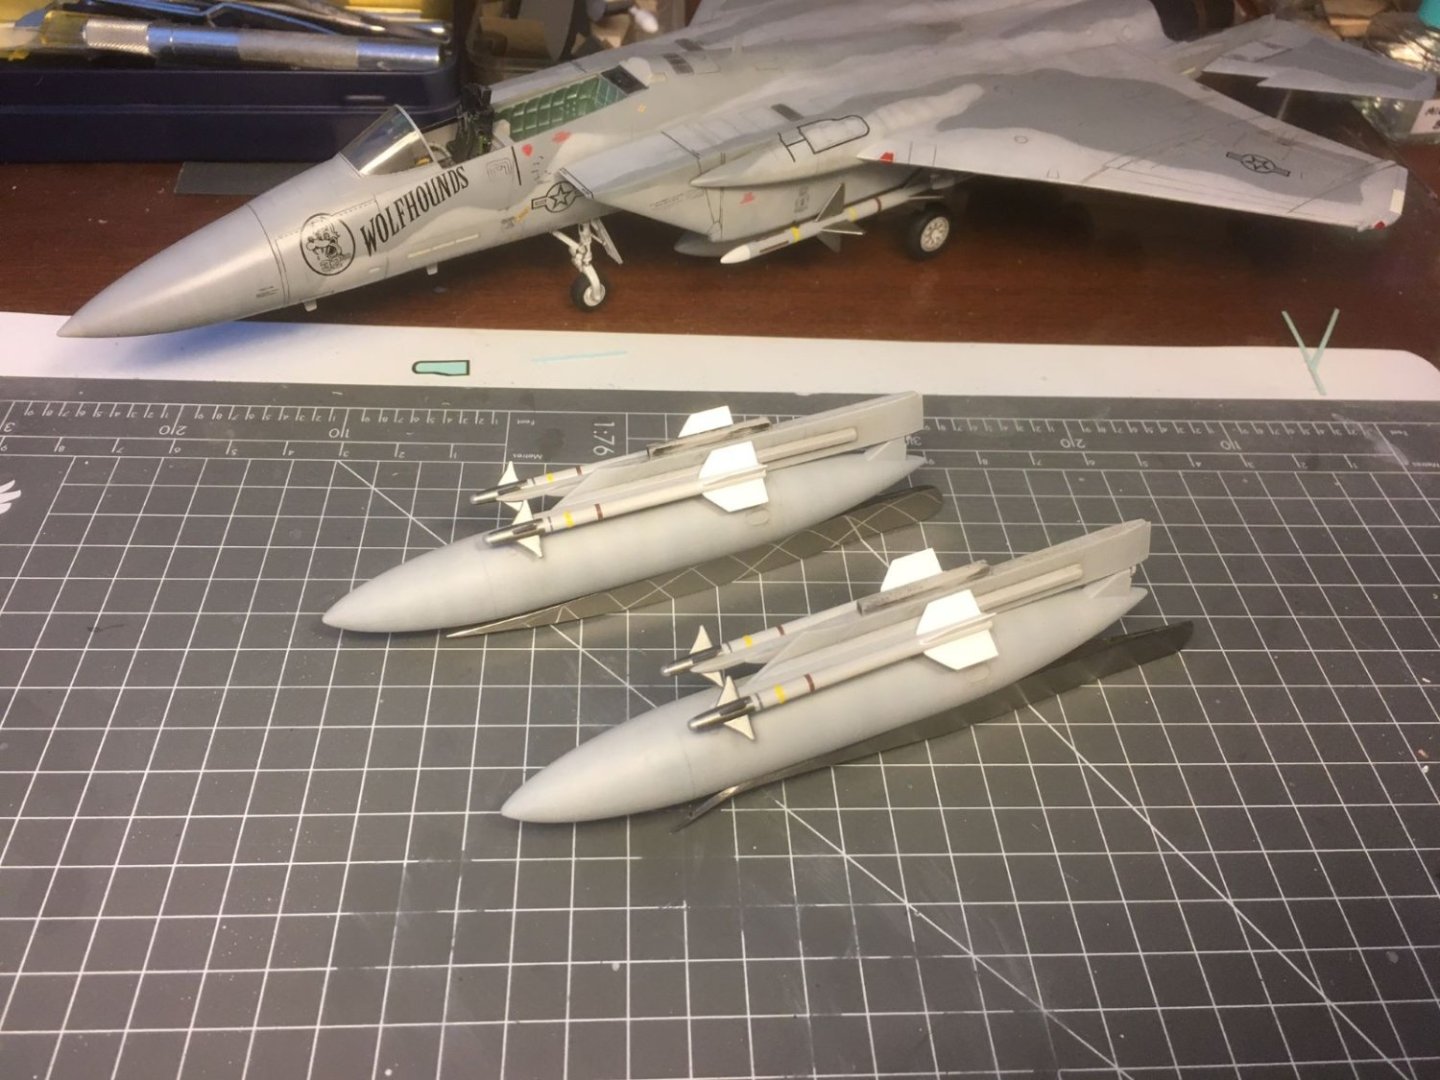
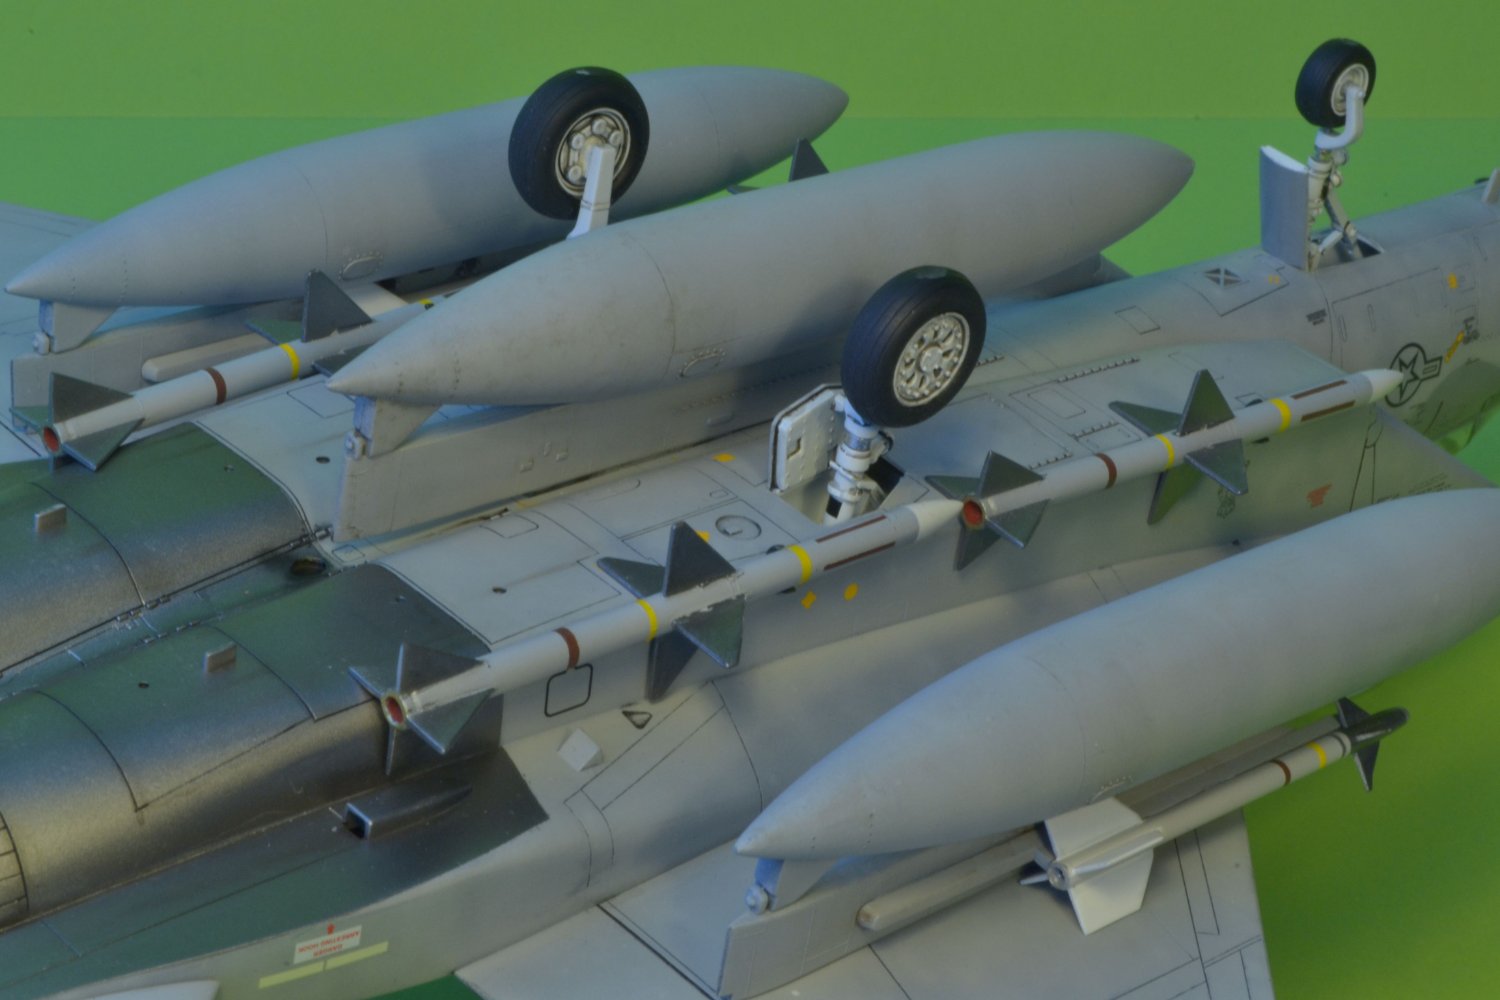
Hi, I am back to the F-15 model trying to get the last bits done. The missiles are basically completed with the various stripes as seen in pictures. Various colors have different meanings, I chose a combination which I hope makes sense. I have done the stripes cutting them from scrap decals. While I had a yellow and grey decals, the brown was obtained by painting brown a piece of white decal. The work was quite tedious and they are not the best which can be seen around (f.i. the fins are very thick, but I did not feel like replacing them with thin scratch built ones) and this is how they look when installed: Next to it, the large center-line tank can be seen. I added few shadows brushed with a black oil color. Then, with the tank mounted in place: Meanwhile, the pods carrying the sidewinders and the other tanks have been prepared, ready to be installed: Only few steps are now missing, comments or suggestions are welcome, Best regards, Dan


- 137 replies
-
- 10
-
-
F-86F-30 Sabre by Egilman - Kinetic - 1/32nd scale
Danstream replied to Egilman's topic in Non-ship/categorised builds
The Sabre looks very good. Keep posting. I am following, although sometimes in a silent mode. Dan -
Hi Mike, @Egilman already provided a viable solution 👍. In my case, I use drops (thouch-ups) of Vallejo masking fluid. After painting, the canopy can then be displaced easily by inserting a blade between the canopy and the sills and the remaining residuals can be easily peeled off. Clearly, in many cases a canopy that fits well provides a very practical way of protecting the cockpit. I do the same with LG doors when they have a good fit with the wheel bays. Kind regards and good luck with your Buffalo, Dan

_resiz.JPG.0af0dbe742ff2e156289acb05c865a9b.JPG)
resiz.JPG.6e83a6f670afc6513d18ba5e1eeaadf5.JPG)

_resiz.JPG.27ab7c77bf8e6e4543f59857d8bba13c.JPG)
_resiz.JPG.c9067b4d6519f10e8e27568886bcebcf.JPG)


_resiz.JPG.339f268dbf23e8b17eb156444a7336bf.JPG)