

.jpg.2c2c29e54623bd7b752bc2cdab599665.jpg)
Danstream
-
Posts
755 -
Joined
-
Last visited
Content Type
Profiles
Forums
Gallery
Events
Everything posted by Danstream
-
.thumb.jpg.c459ce4140b54c12eddb8eedfd446df3.jpg) Just in case you want to get them, the Vallejo paints we are talking about here, are not from the lines quoted above. They are from their specific metallic paint line (called 'Metal Color'), the bottles can be seen in one of my pictures.
Just in case you want to get them, the Vallejo paints we are talking about here, are not from the lines quoted above. They are from their specific metallic paint line (called 'Metal Color'), the bottles can be seen in one of my pictures. -
Thank you Alan for your comment. Indeed, I like these paints. They are acrylic paints with an amazingly fine pigments. There are other good products around which are lacquer or enamel based, but I never tried them and I am satisfied with these acrylics. These are some examples of how they perform when used as NMF: Their good points are that they do not smell much, they dry quickly and they are quite resistant to masking tape once well cured. I usually apply them on a black (Tamiya) coat, but you can change the color to get different nuances of the same paint. They need to be applied in very thin layers, therefore any imperfection of the substrate will show up. As I said, I do not use their specific Vallejo black base paint, but perhaps it is a good idea to get their Vallejo airbrush thinner. Although they are ready to be used out of the bottle, sometimes I add few drops of their thinner. The thinner is also useful to clean the airbrush or to prime the airbrush before loading the paint. Good luck, Dan

- 137 replies
-
- 13
-

-

-
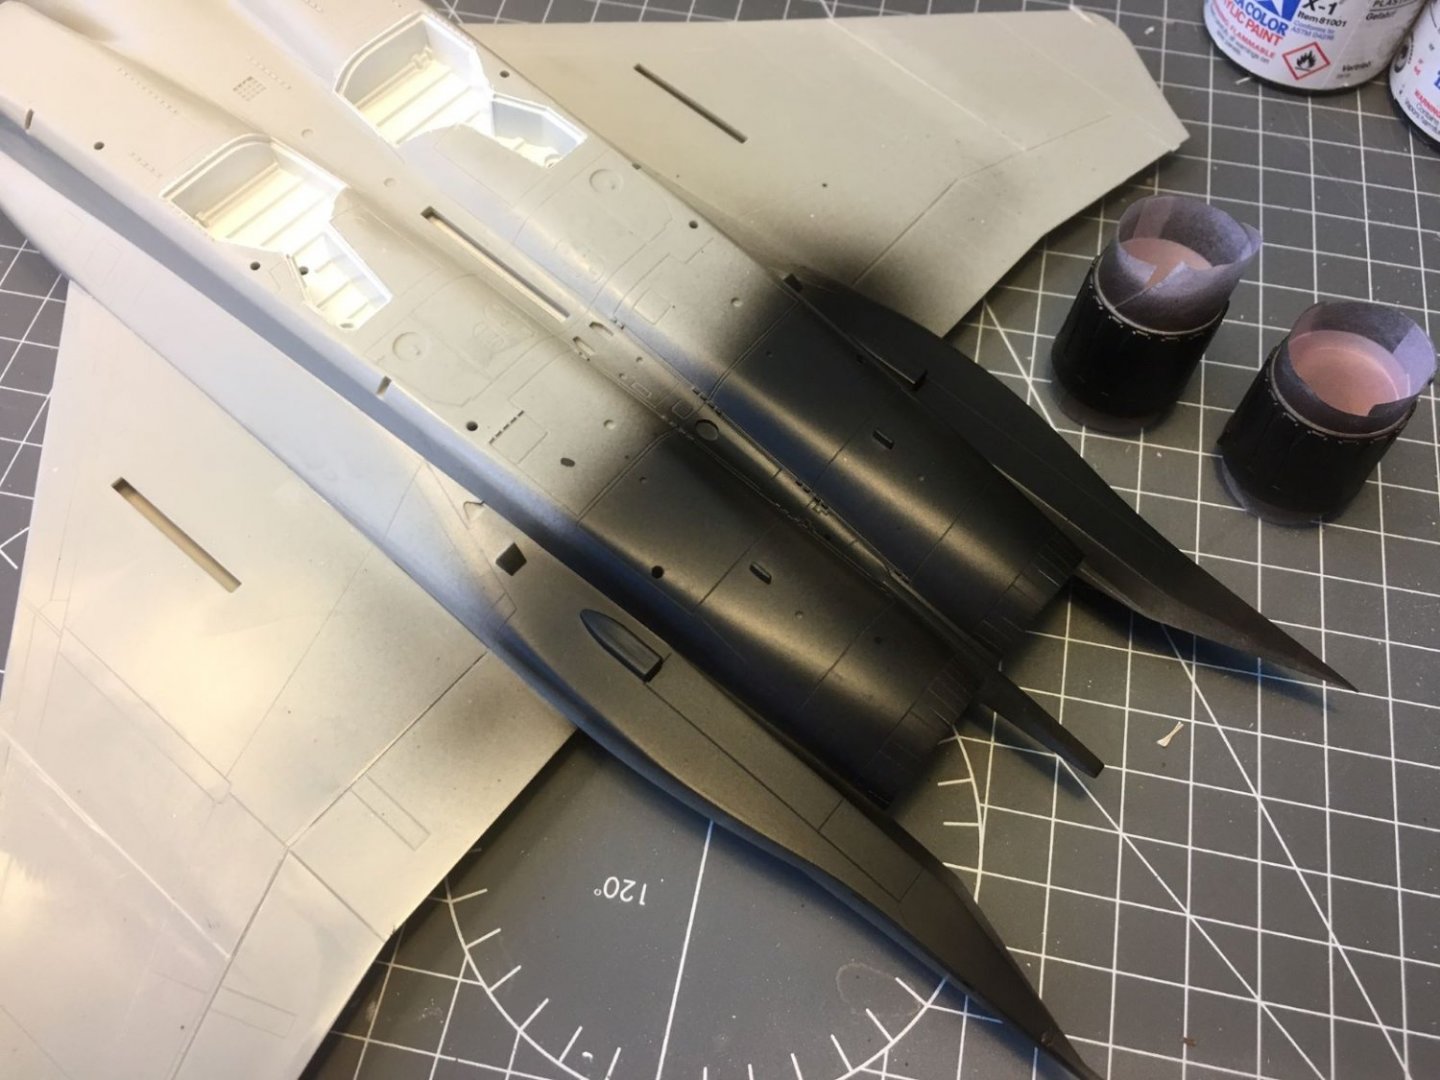
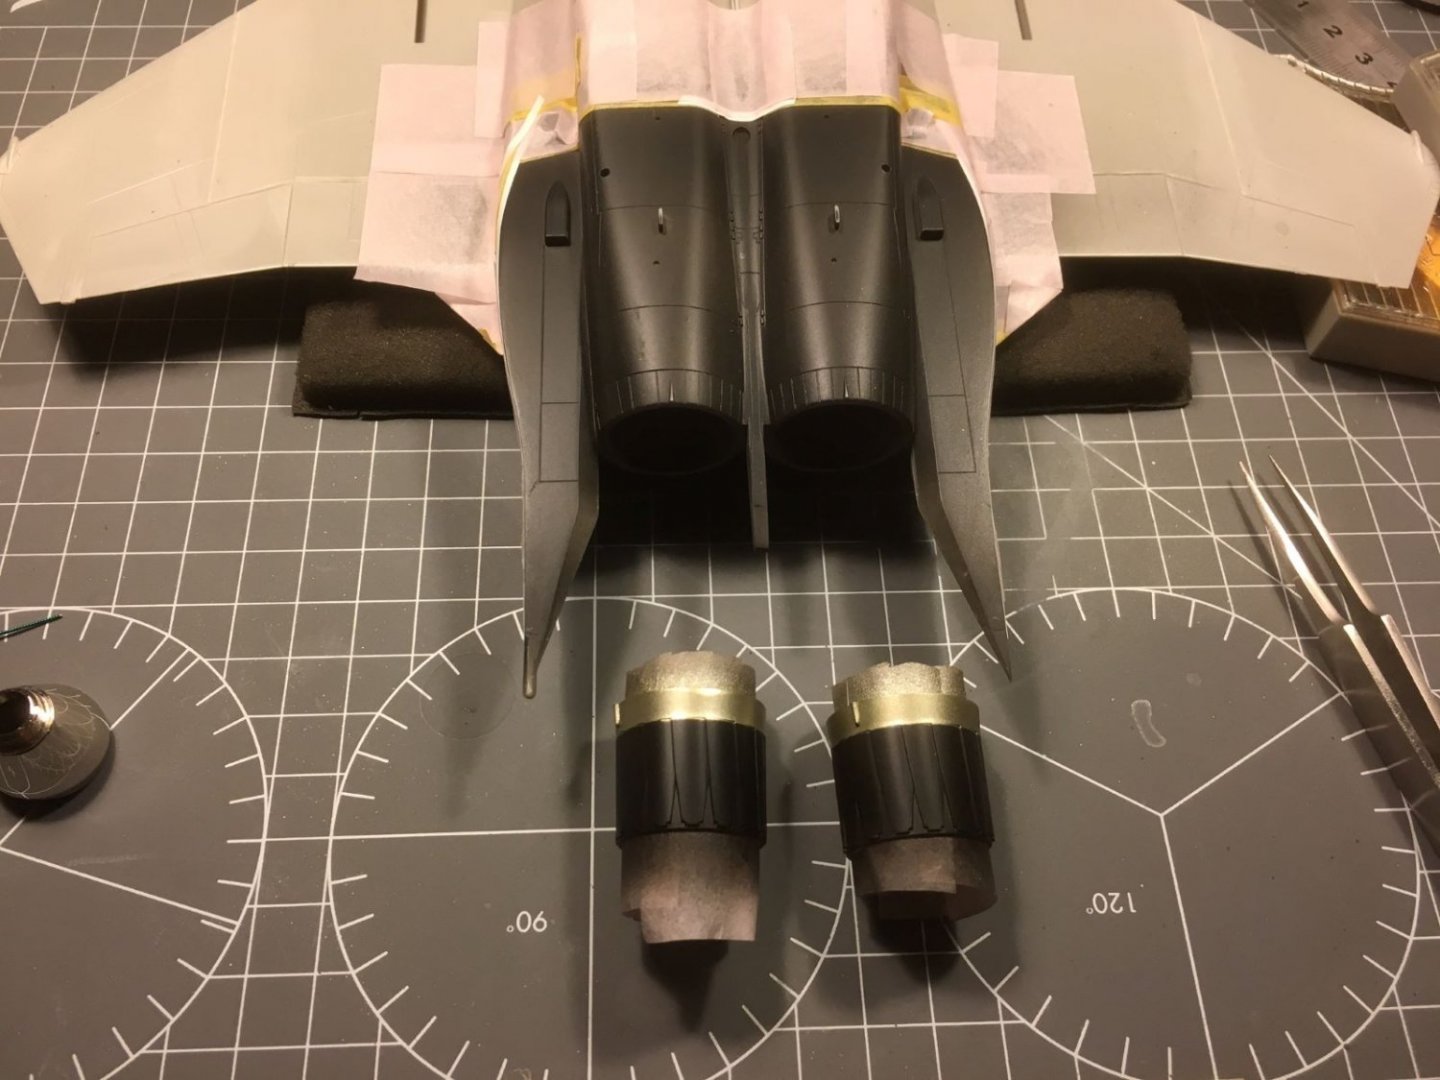
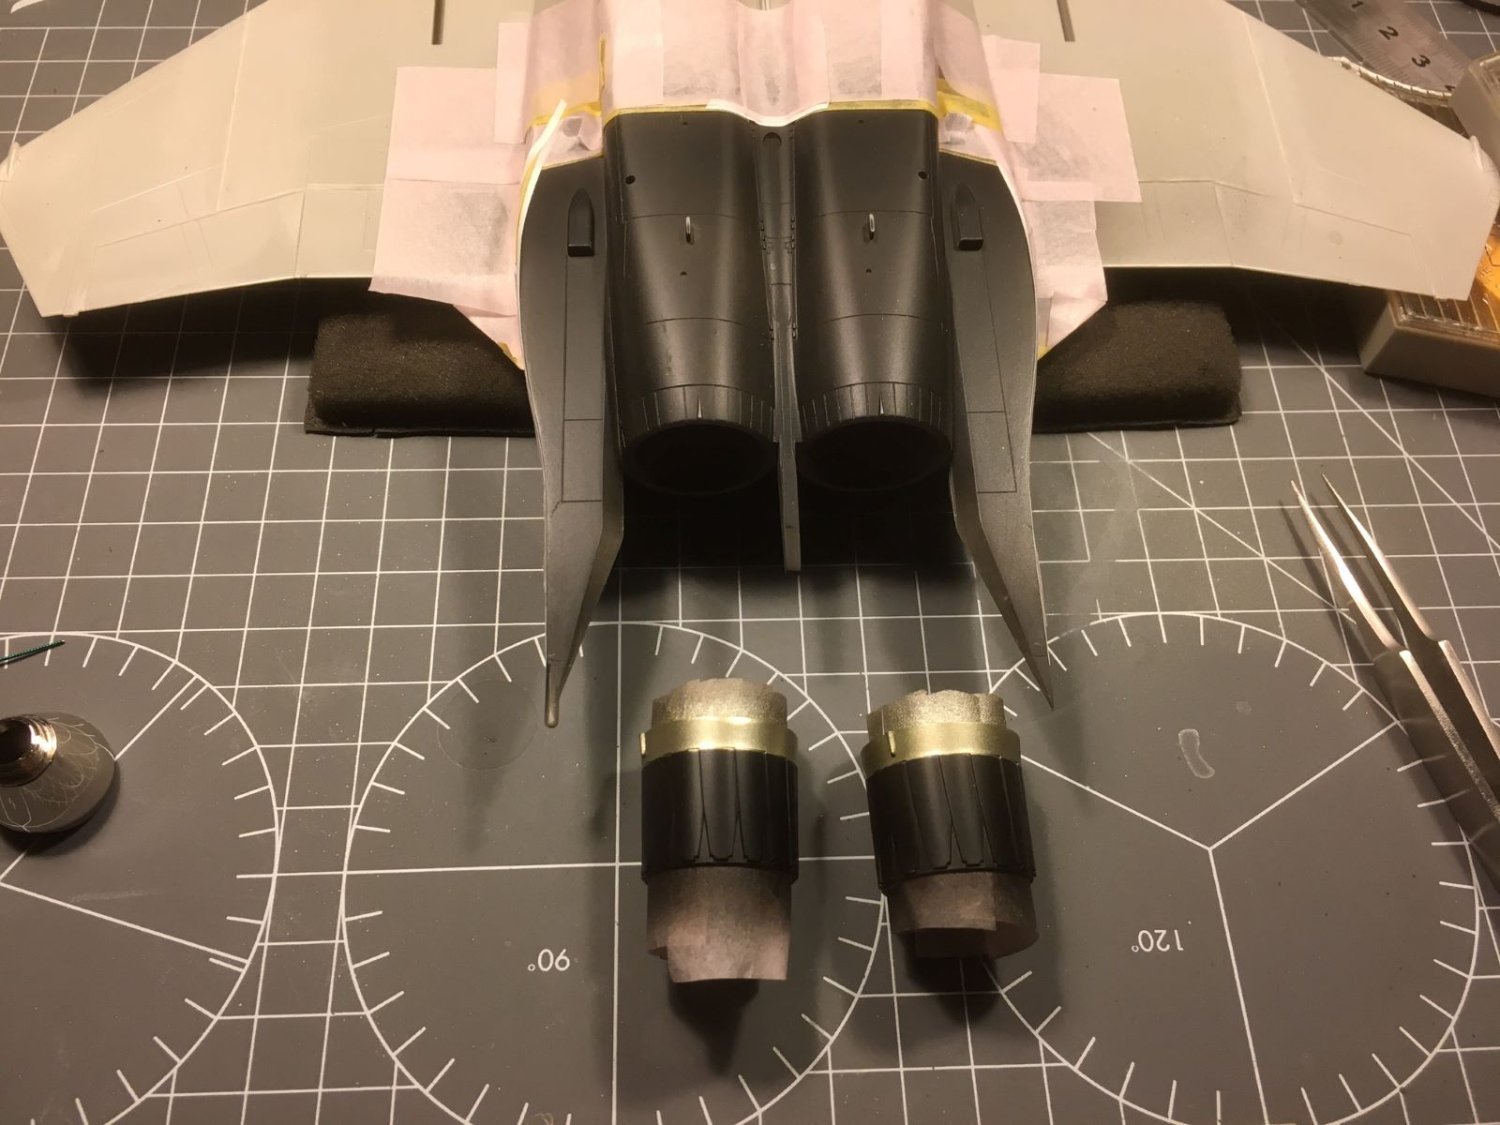
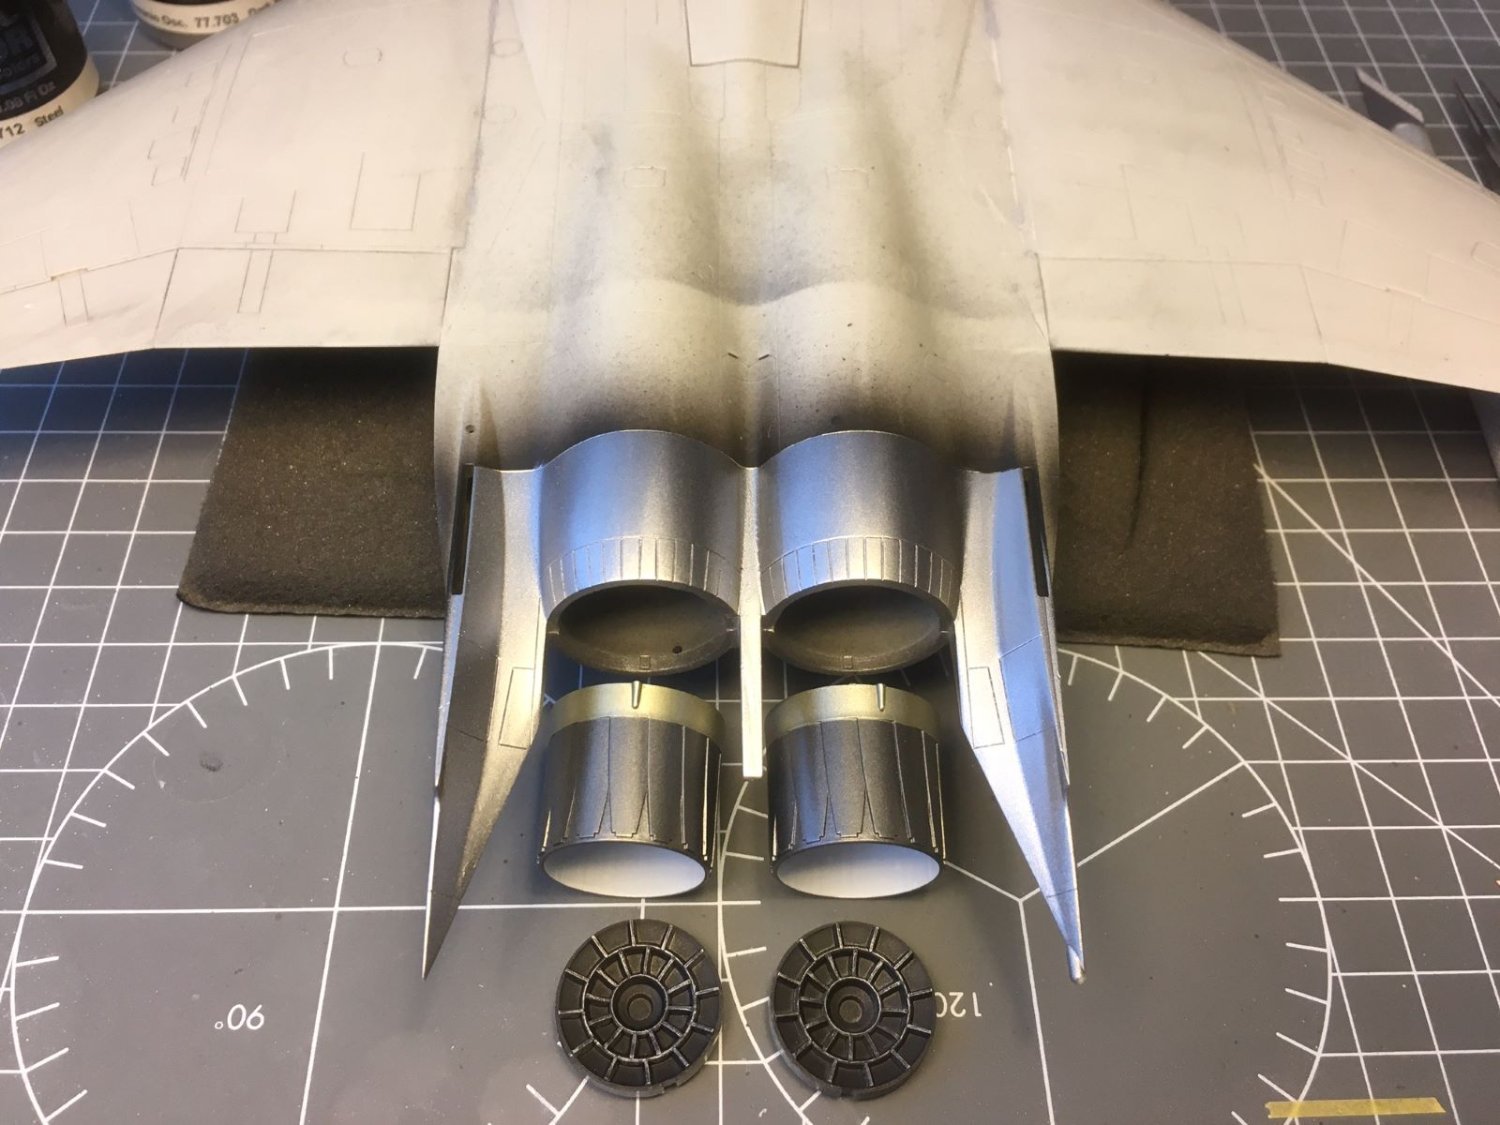
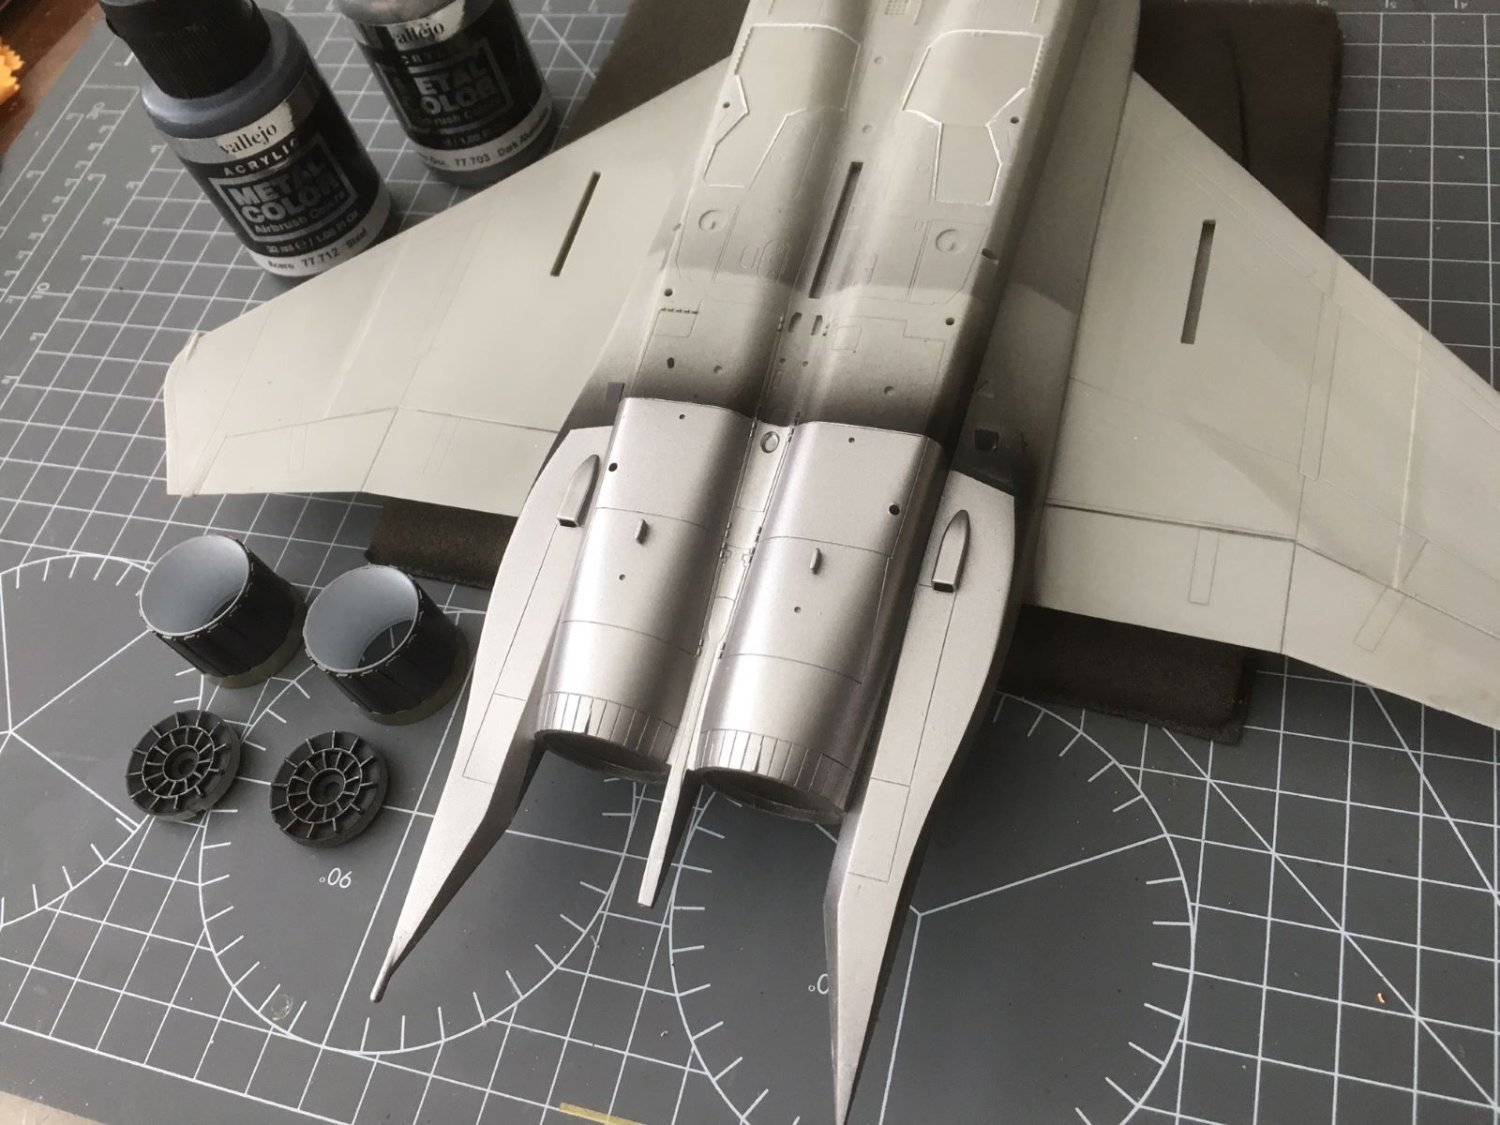
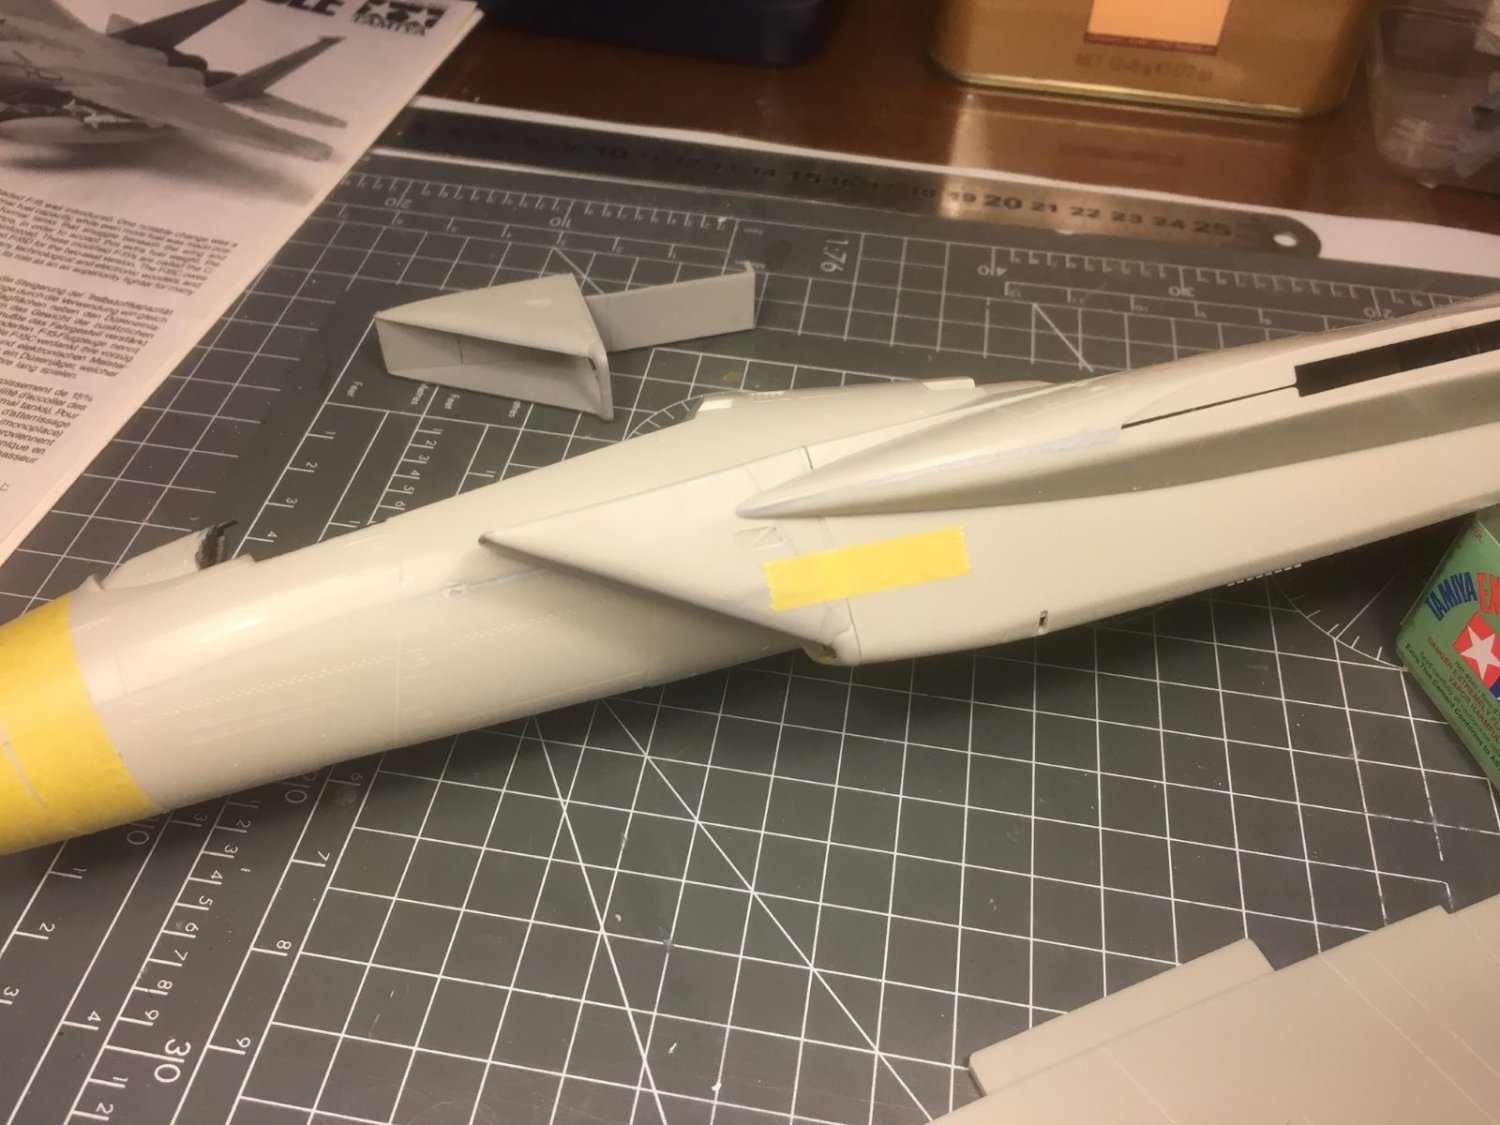
Hi all, in the last days, I worked on the seams between wings and body. It involved scraping the proud steps, filling, sanding and scribing the lost panel lines. This took quite some time at my usual glacial pace. At any rate, it was done: Painting could now commence. I had to decide about the sequence of spraying the various paints because of the metallic finish of the panels that enclose the jet pipes. Finally, I decided to start with these panels that later on will have to be masked. I started with a black layer which I made mixing flat and gloss Tamiya black paints, followed by a light wet sanding. This should give a sort of satin finish which should be transferred also to the metallic paint. Meanwhile, I also painted the wheel wells with a satin white. I prepared the jet nozzles as well. Seen the limitations of the kit (and my added errors) I thought it was not worthwhile to procure aftermarket items for those and I used the simplified parts coming with the kit. I delimitated with tape the metallic areas to be sprayed to avoid that later on I will have to paint the camouflage over the metallic paint. In pictures found on the web, I could note several variations for the finish of the metallic panels which probably are the result of different degree of wear and aging. For NMF, I like to use Vallejo metallic acrylic paints and they come with a selection of shades from which I picked the one called 'dark aluminium' which seems to suit the color found on pictures for not excessively aged planes. These acrylics, spray quite well, provided that you use mist layers and avoid to let the paint pool on the surface. For the nozzle petals, I used a darker tone called 'steel'. The goldish band was a mix of 'dark aluminium' and 'gold'. Now, I will let the parts to rest for a while before applying some sort of weathering and a final transparent protective layer. That's all for now, best regards, Dan


- 137 replies
-
- 13
-
-
F-86F-30 Sabre by Egilman - Kinetic - 1/32nd scale
Danstream replied to Egilman's topic in Non-ship/categorised builds
I am getting curioser and curioser about your work ... Cheers, Dan -
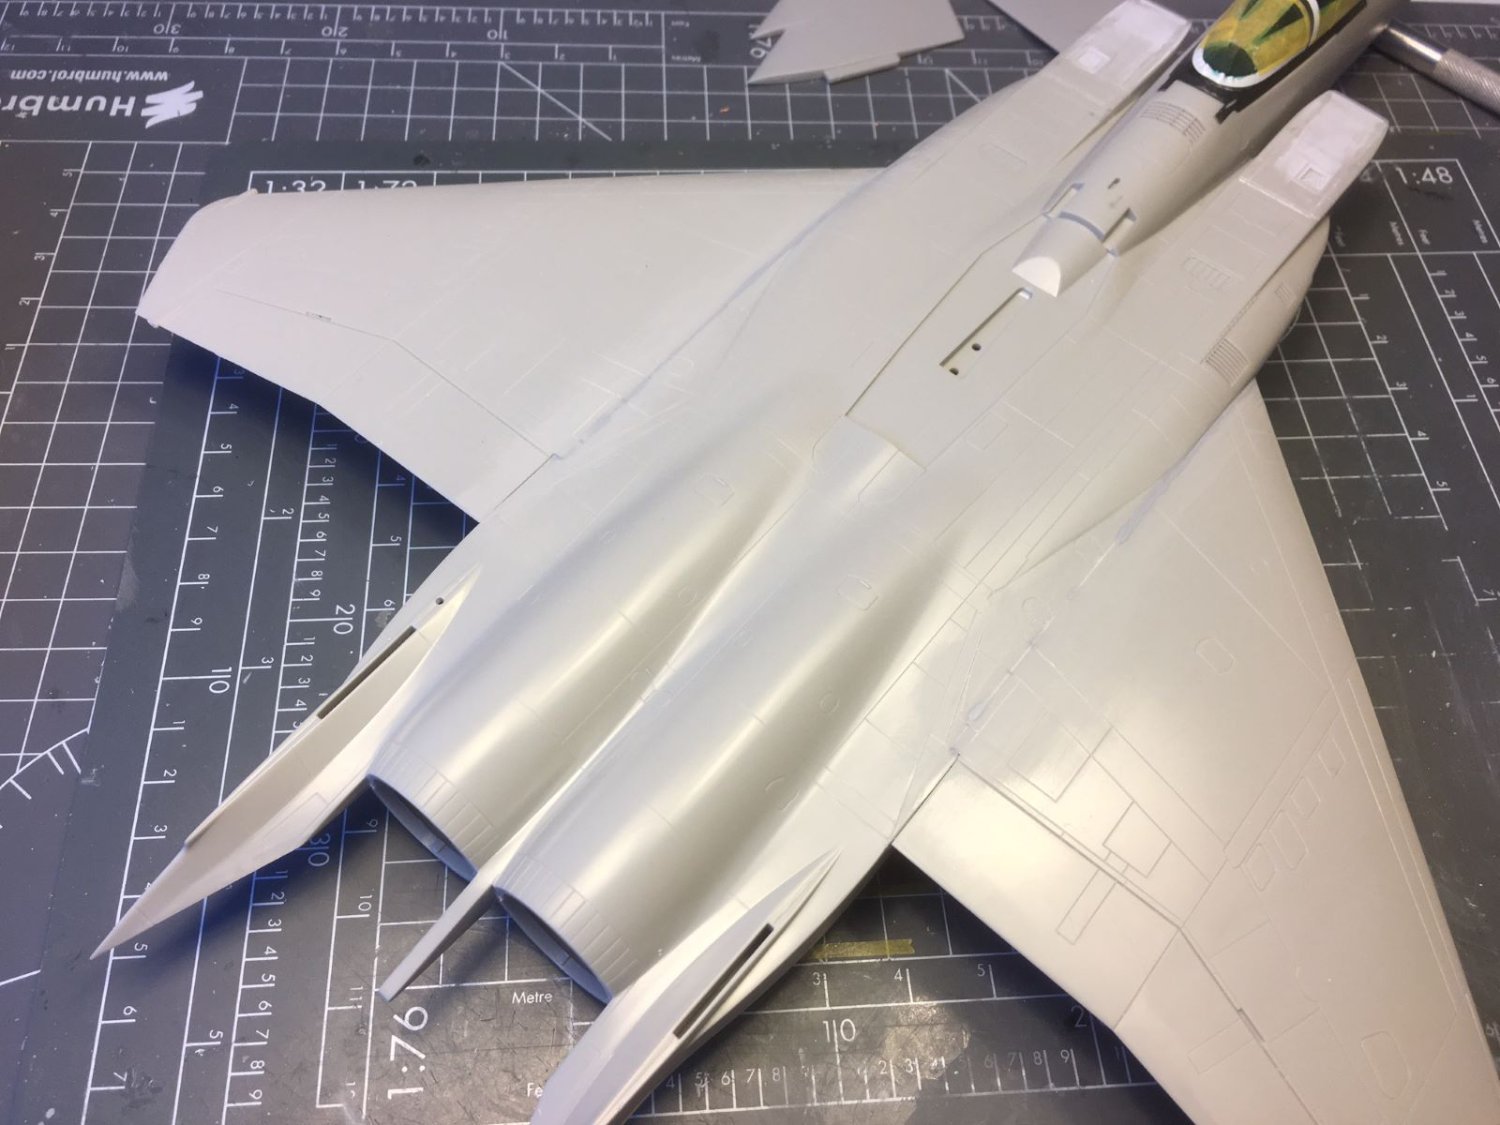
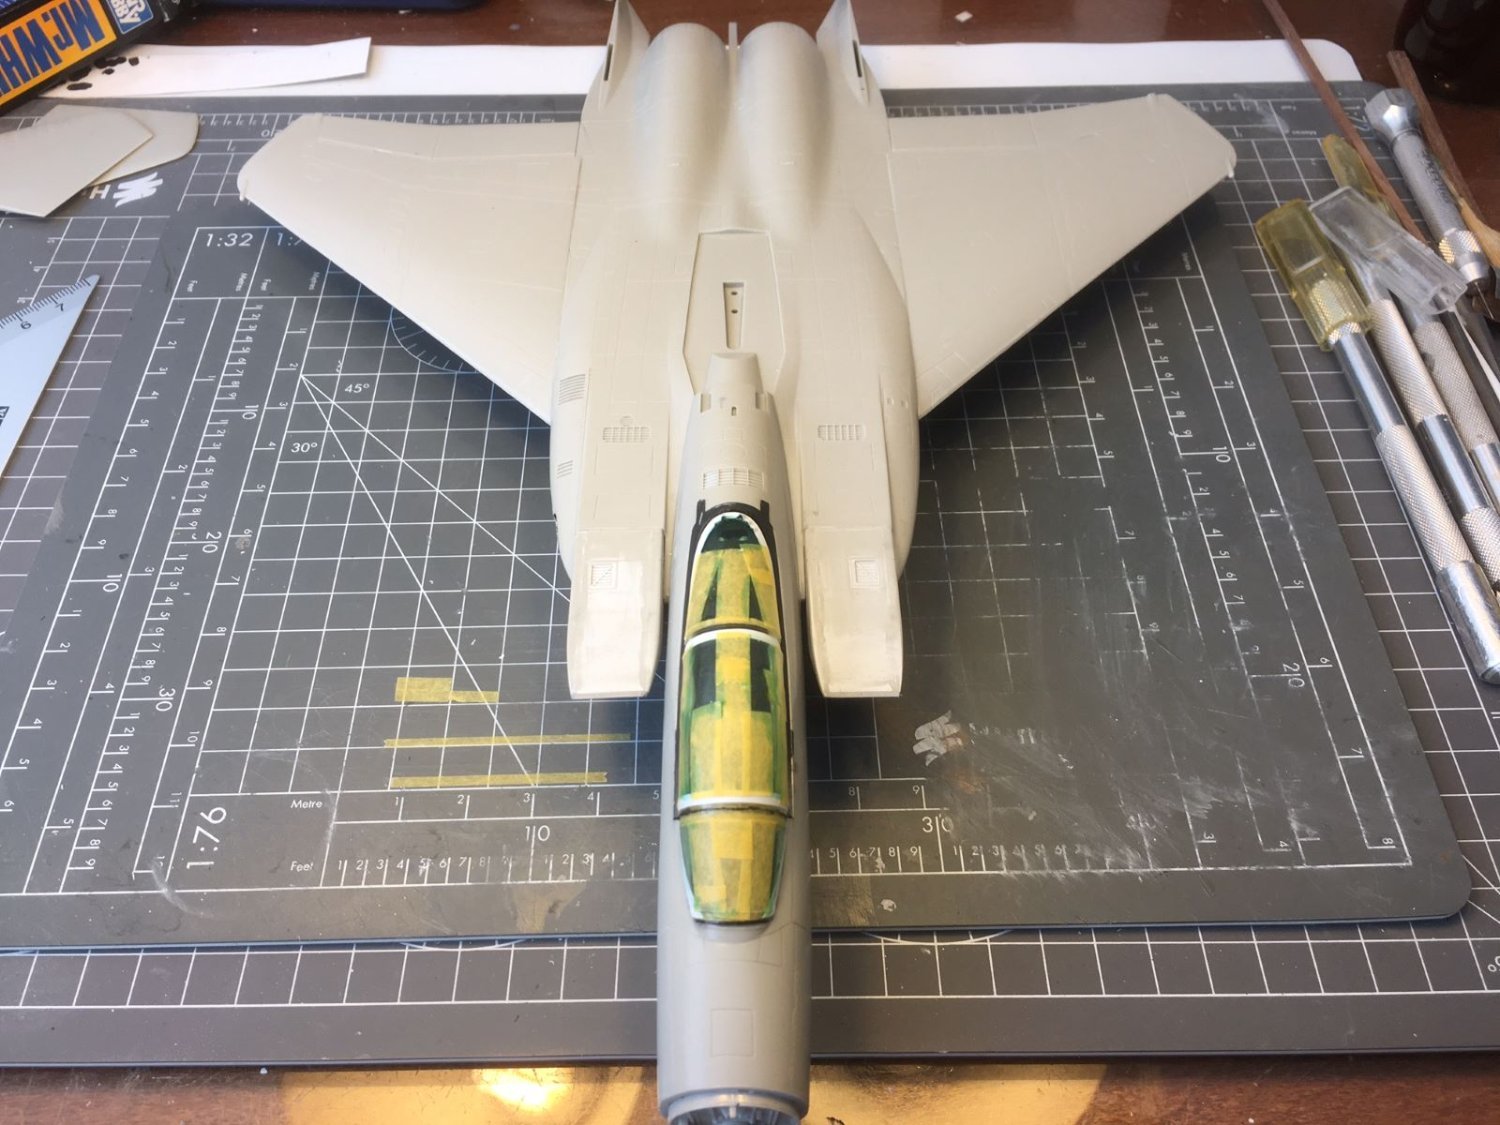
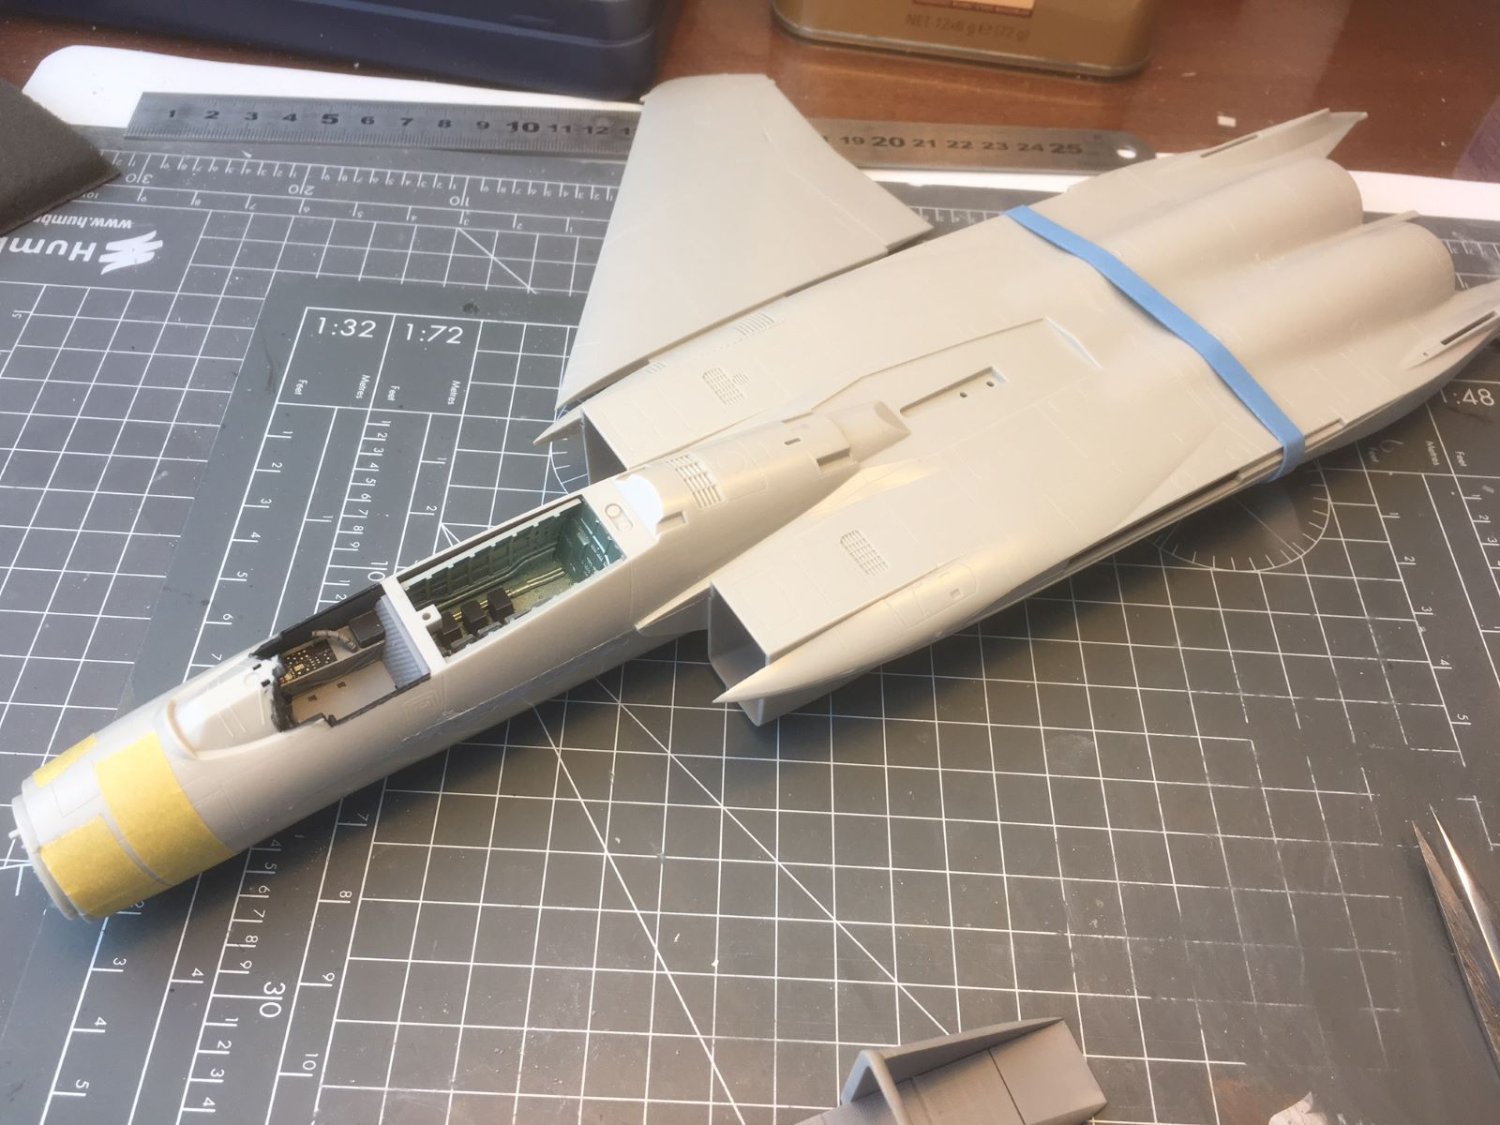
Going on with this build, masking commenced: and finished: Wings on: The large gross wing area of the F-15 is now clearly noticeable. Unfortunately, the upper surfaces of the wing parts do not line flush with the upper fuselage, leaving a step along the junction (its shadow can be seen along the junction on the left hand of the posted picture). Some work is therefore required. Cheers, Dan


-
F-86F-30 Sabre by Egilman - Kinetic - 1/32nd scale
Danstream replied to Egilman's topic in Non-ship/categorised builds
Interesting comparison giving a feeling for the numbers. However, compression inside a cylinder processes a fixed amount of gases at the time, compression along a jet compressor processes a continuous flow of gases. The two processes involve different degree of difficulties the latter one having quite a high degree of technological and design difficulties 🙂- 585 replies
-
- 10
-
-
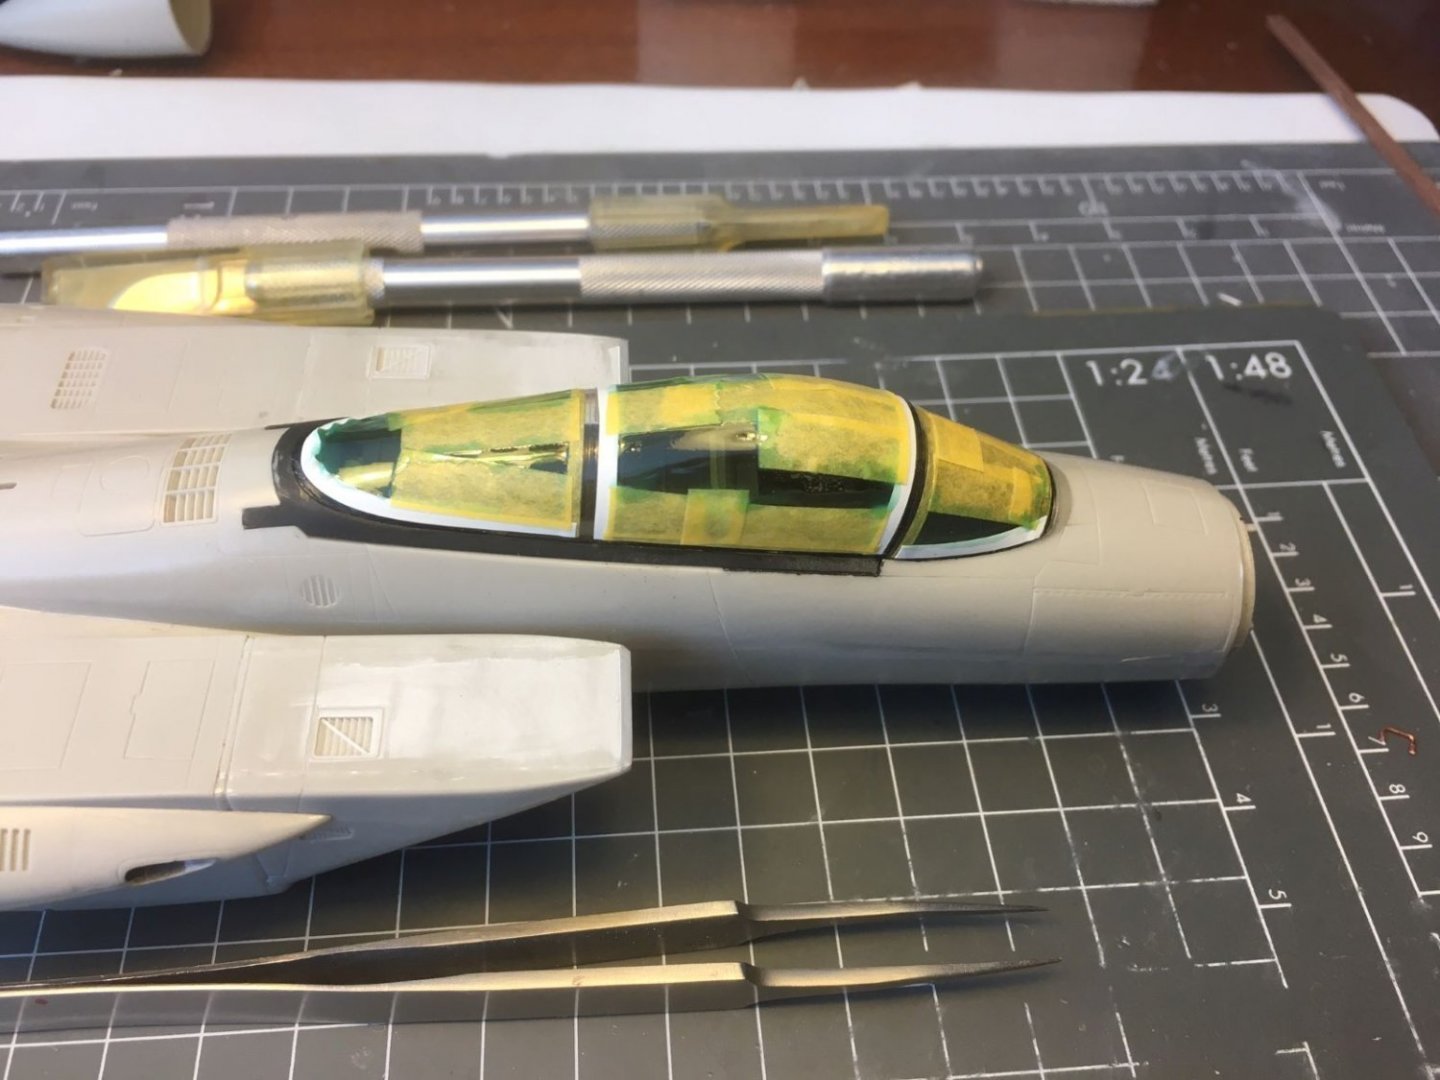
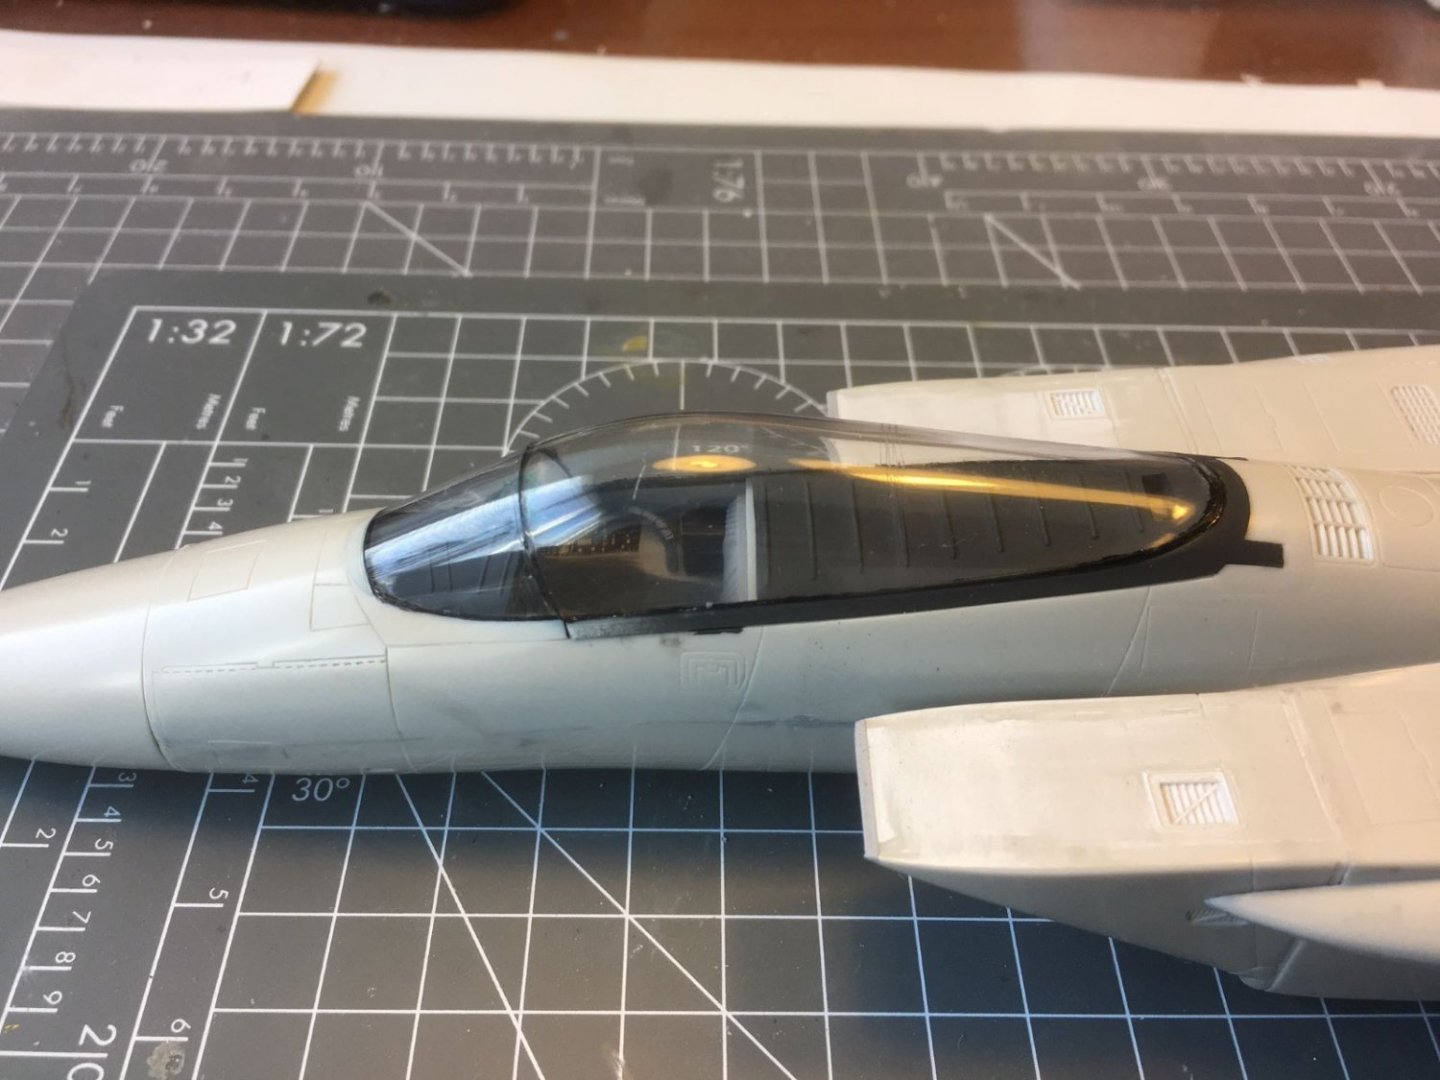
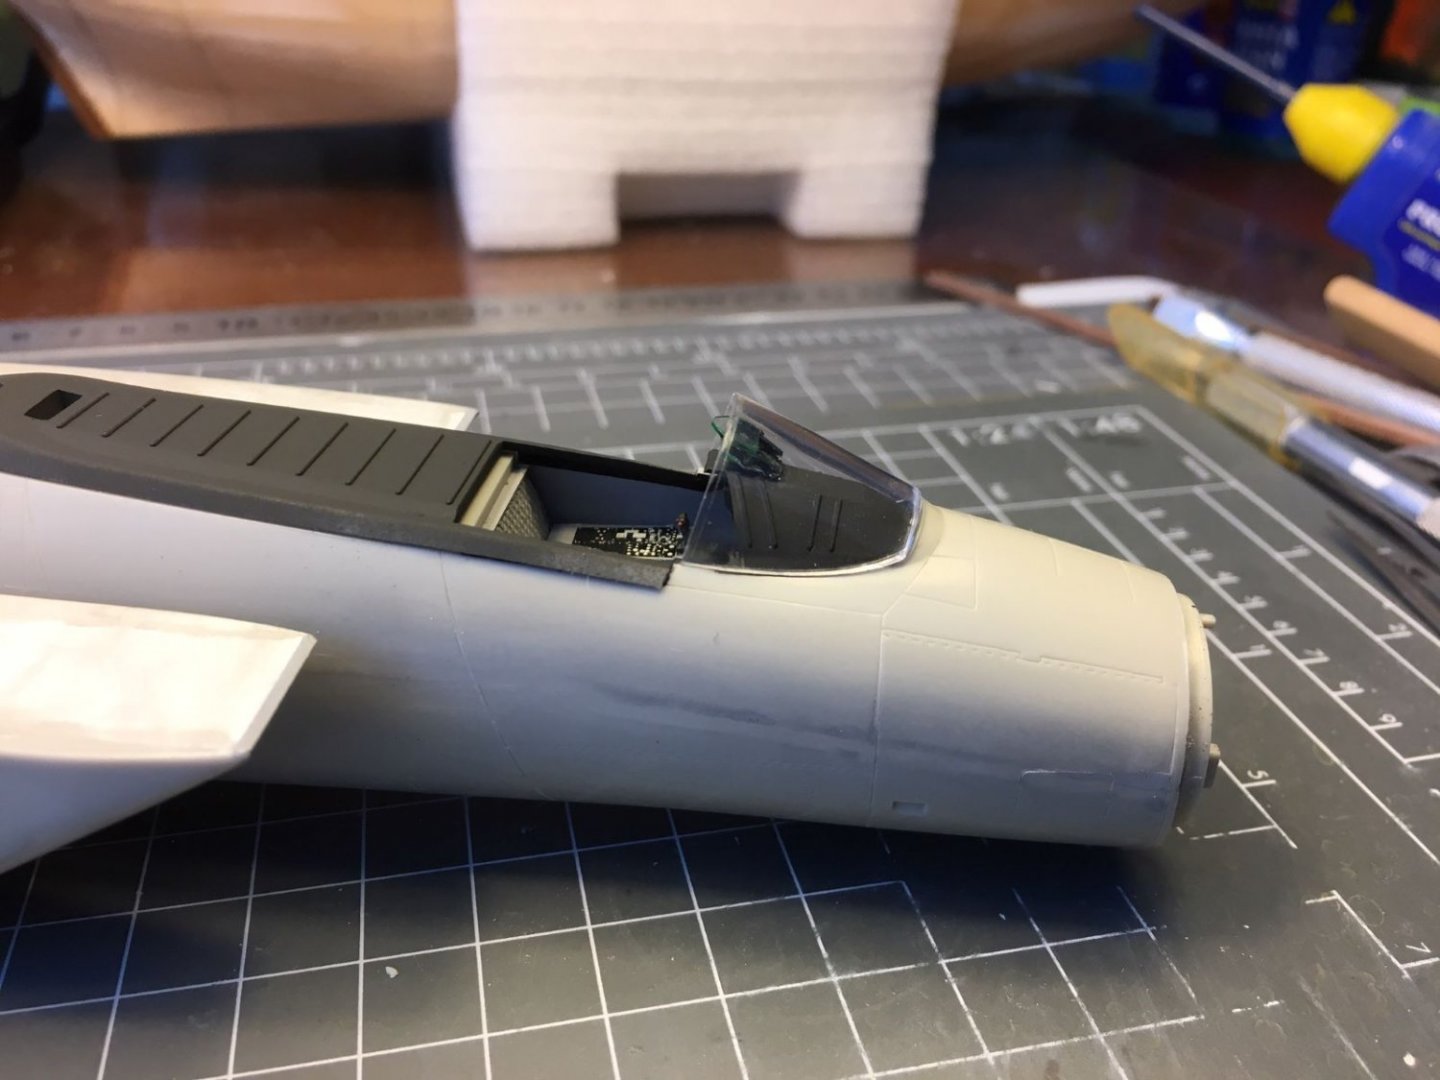
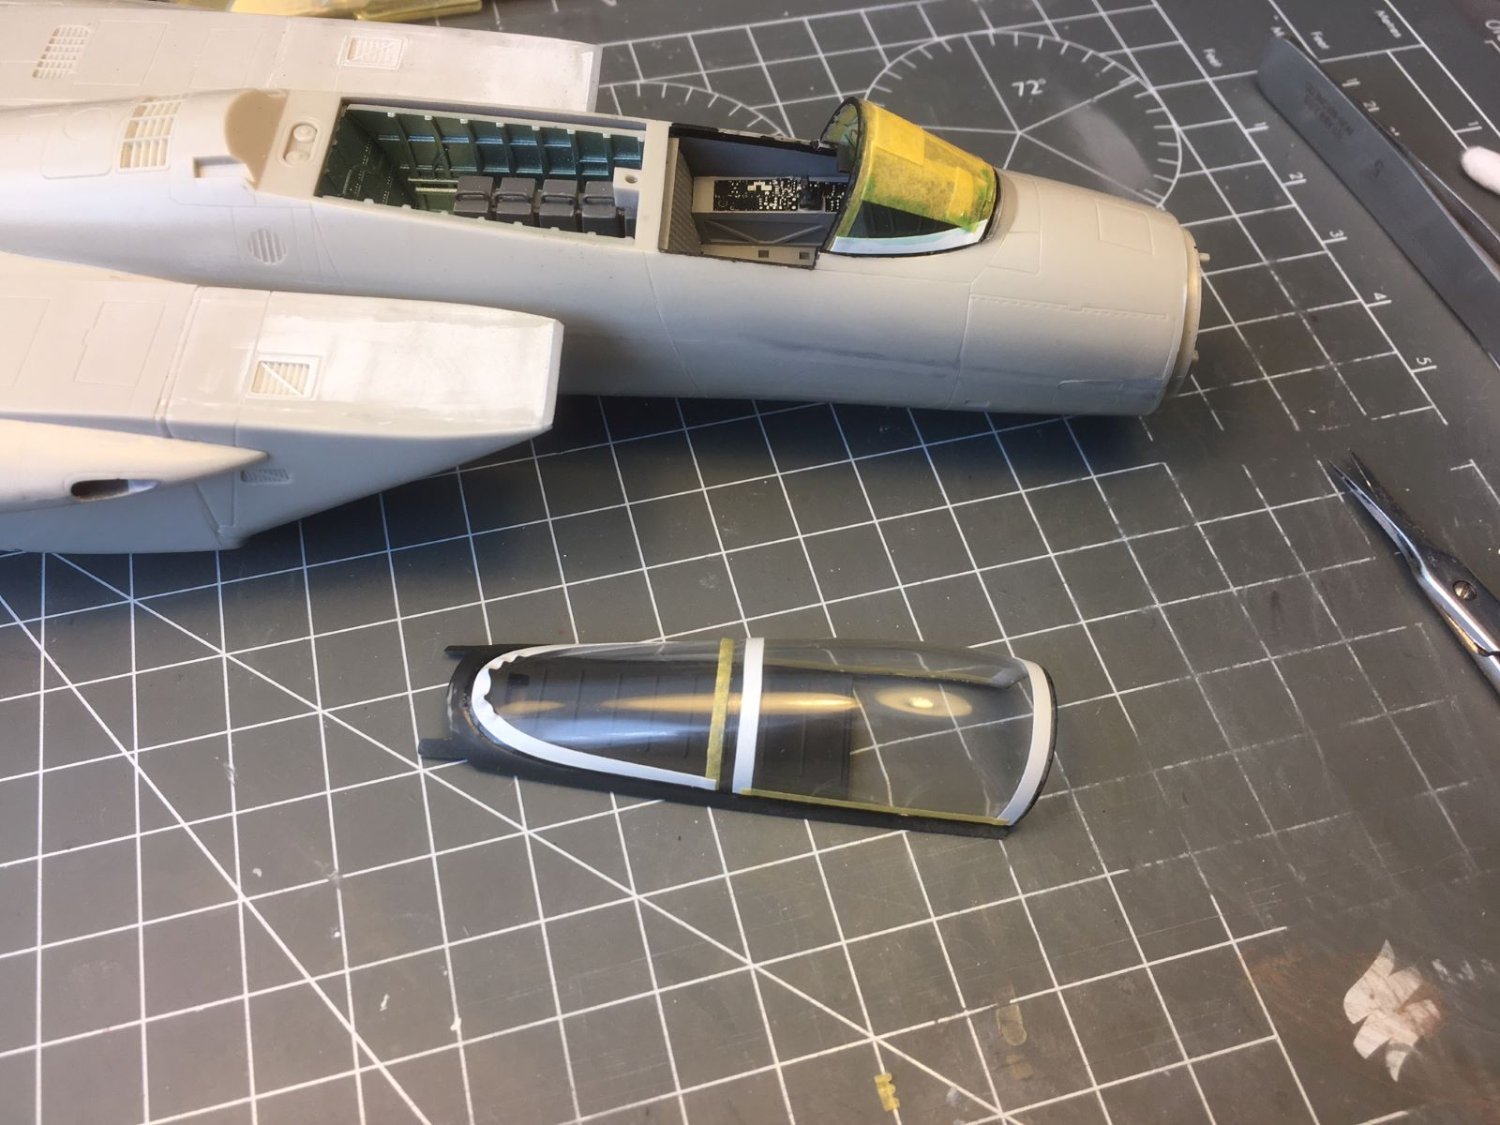
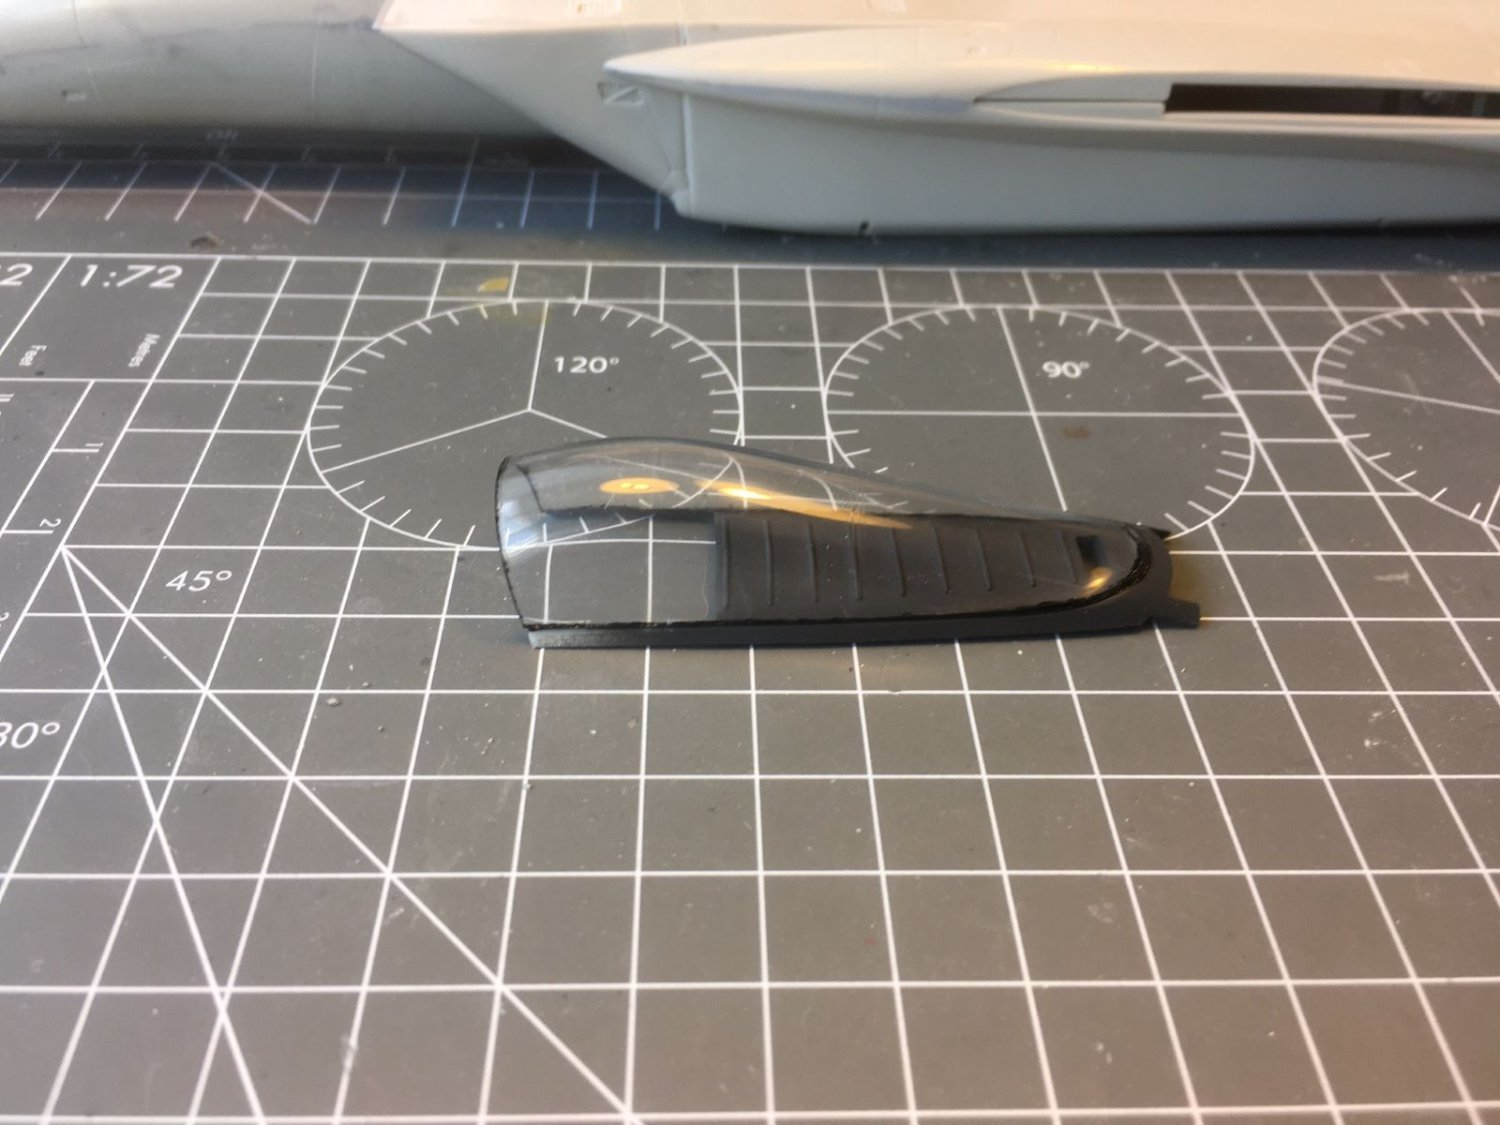
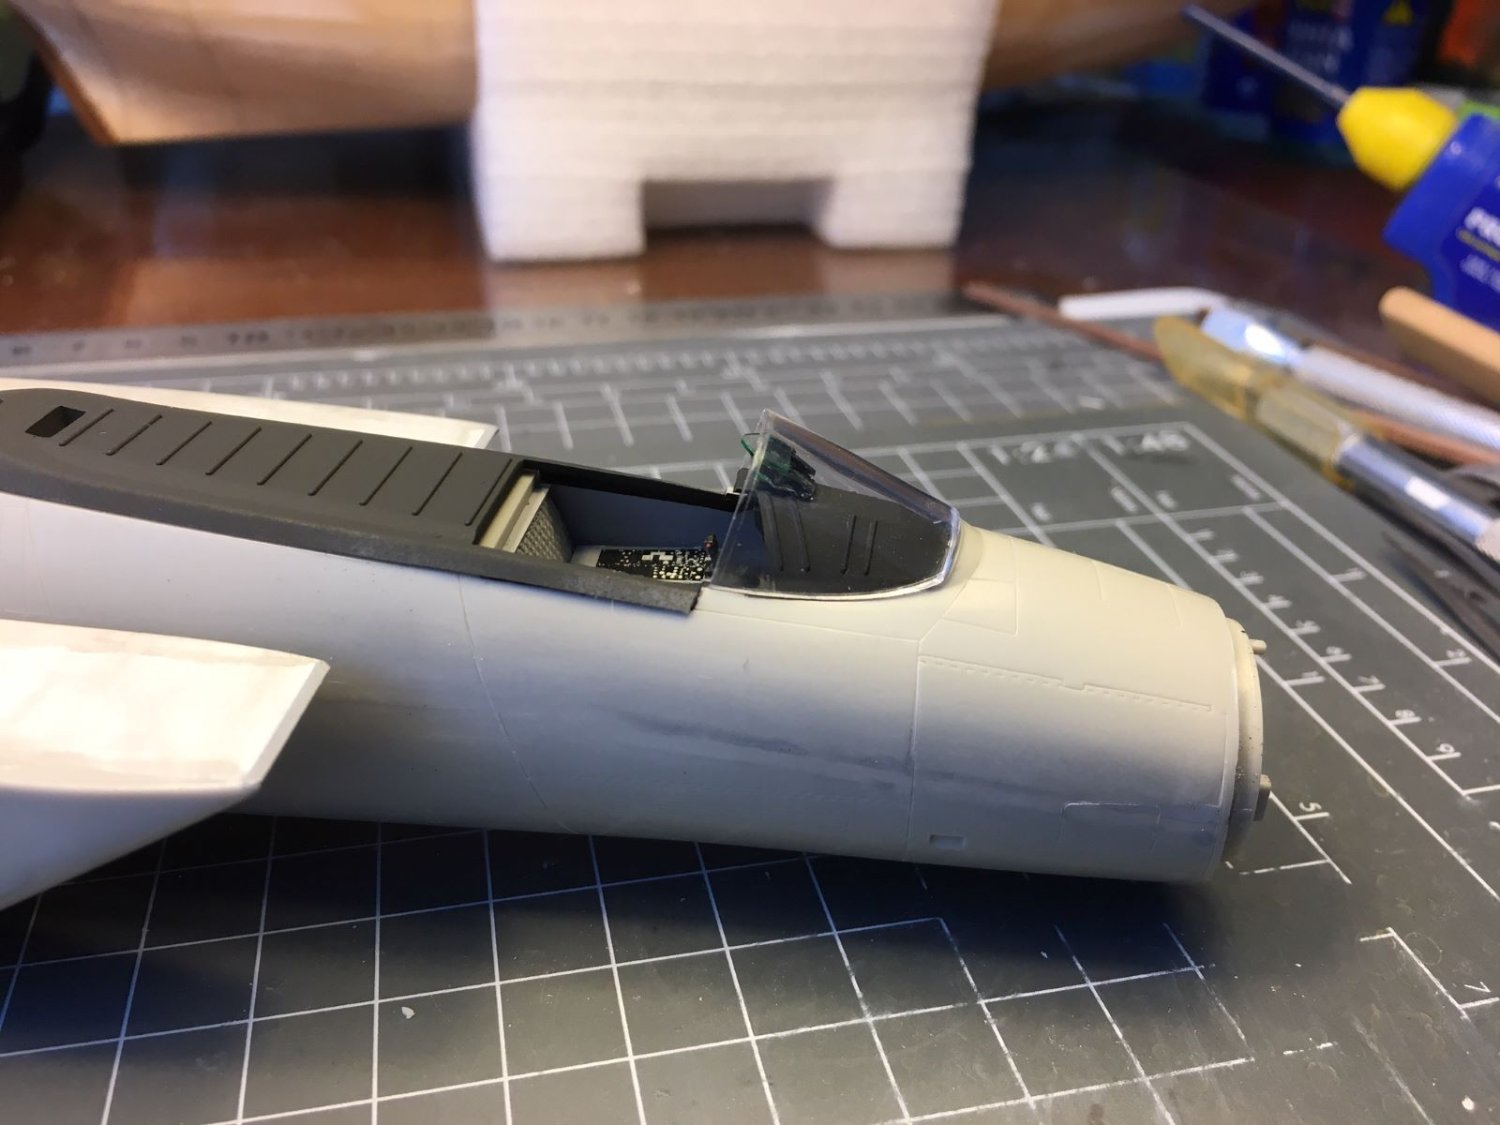
Just a small addendum, I polished the large canopy, painted its edges black and then I glued it to its frame. Quite delicate an operation which fortunately went without issues. I glued also the windscreen piece to the fuselage and this is how it looks with the complete canopy posed in place. Masking will follow. Best regards, Dan

- 137 replies
-
- 10
-
-
Hi Denis, thank you for your note. Your finished F-15 looks as an impressive model. I will be glad if mine will look the same. I think I will display mine like yours, all retracted and closed canopy. Yes, I have the possibility to display the nose cone open, but the radar is pretty basic, so there is little to be seen in there and I prefer to see the unbroken lines of the the fuselage. About the air intakes, a sore subject for me, it is not that the tops can be exchanged but rather the entire assemblies. If you see some of the pictures of my log, I prepared these assemblies just to swap them at the last moment while gluing them. Beside the top grilles, at least in the model, they look pretty the same. In fact, as you know, on the real aircraft, these intakes can slide and rotate up and down changing the angle of the attack with the air, so no position keys are present in their lateral surfaces. "if a part can be assembled in an incorrect position, sooner or later someone will do it" 😵, next time I will pencil big R and L signs on these parts, as I was used to do in the past. For the moment, I am trying not to look at them and just go on ignoring them. King regards, Dan
-
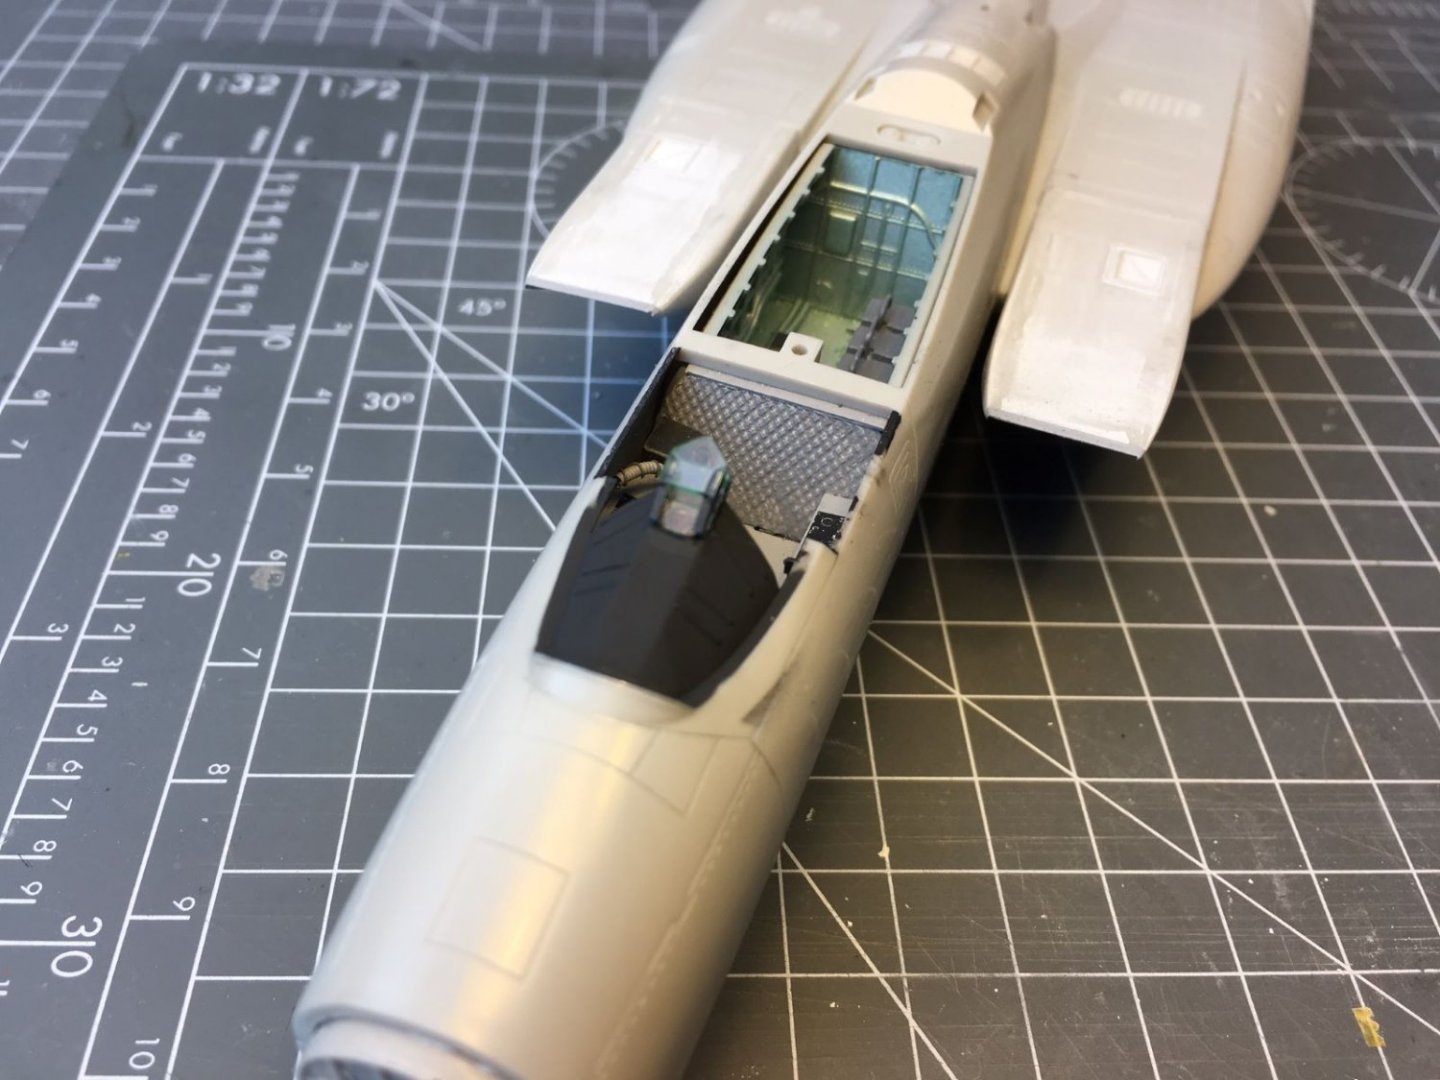
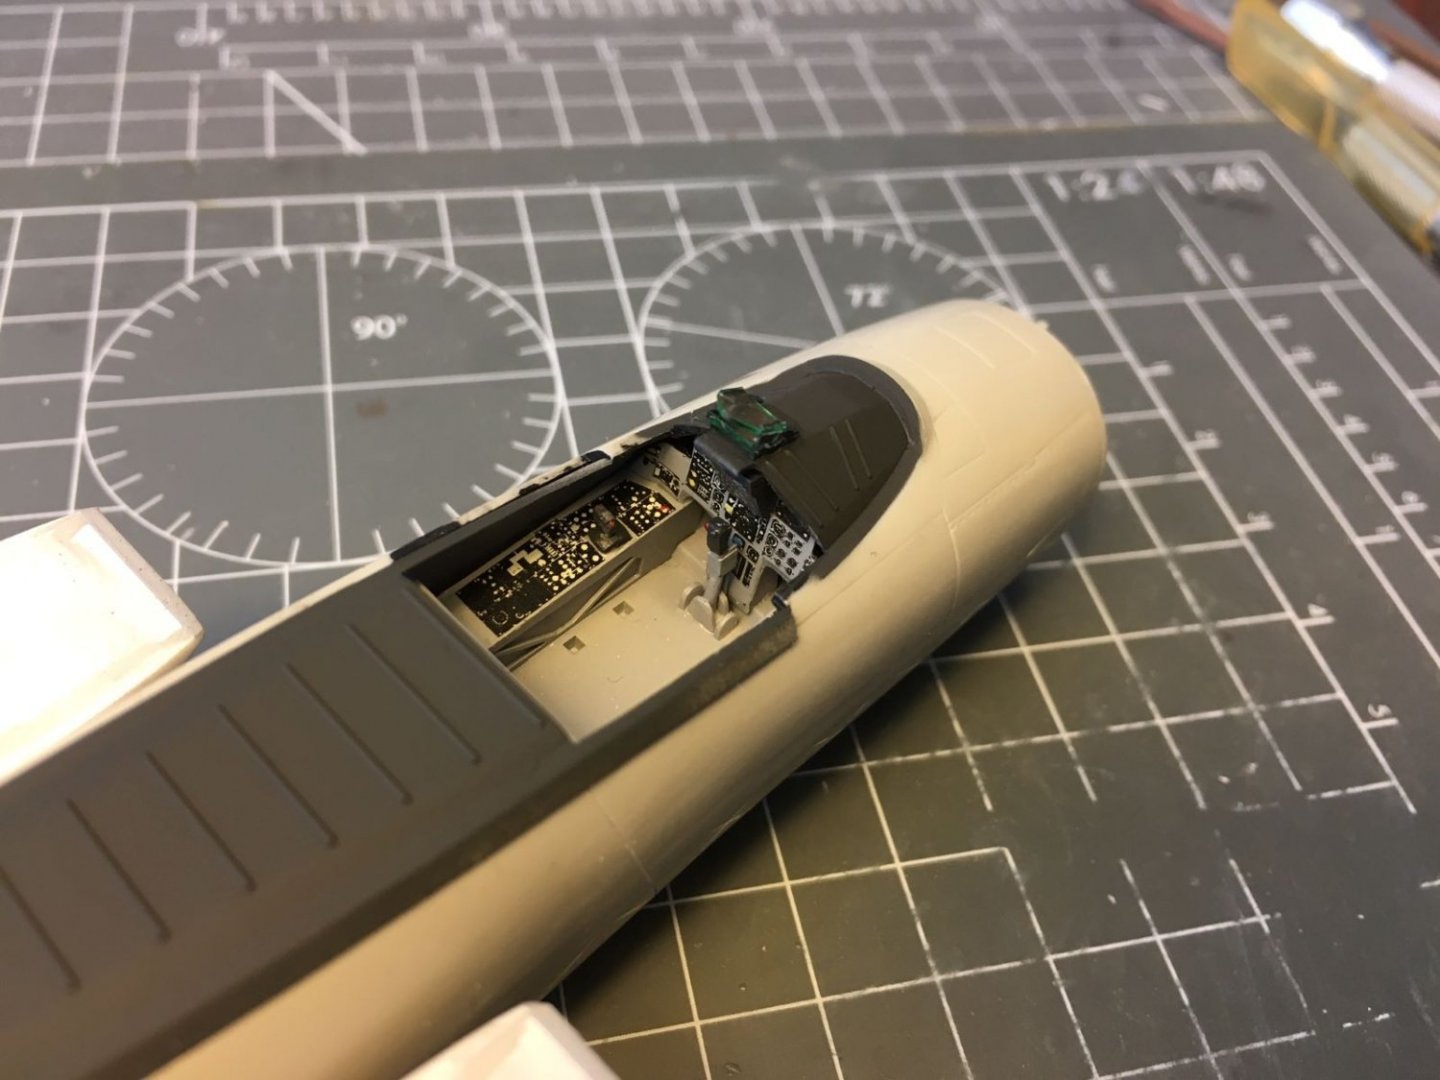
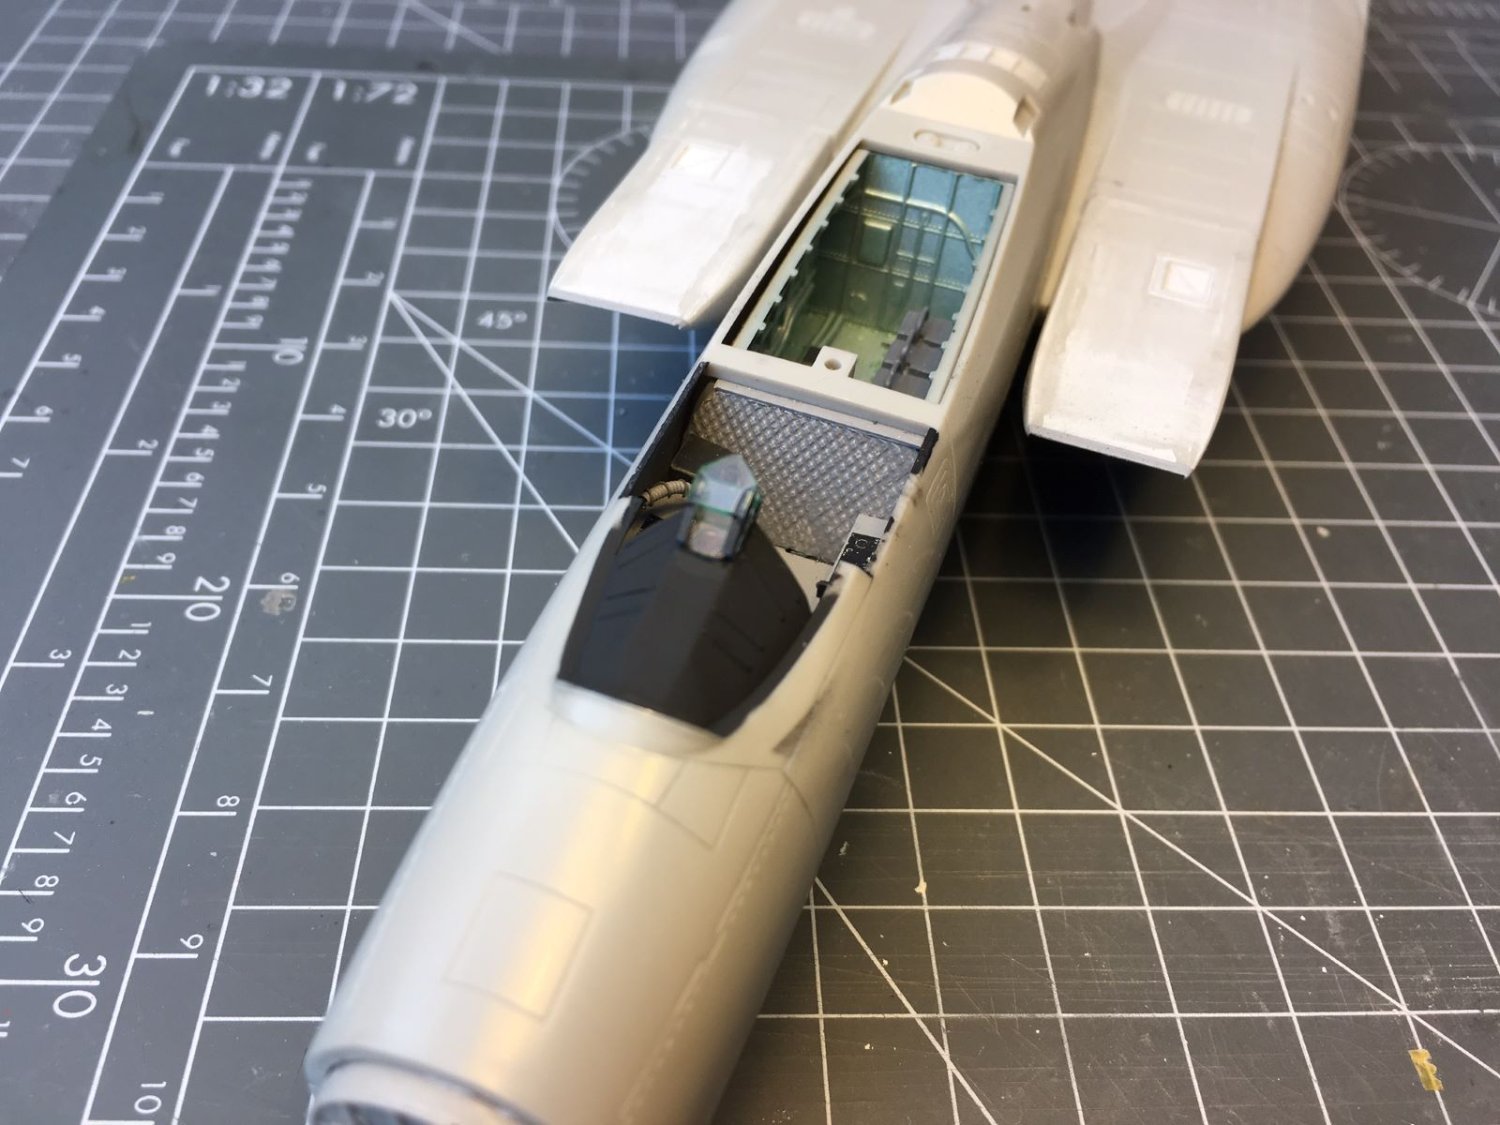
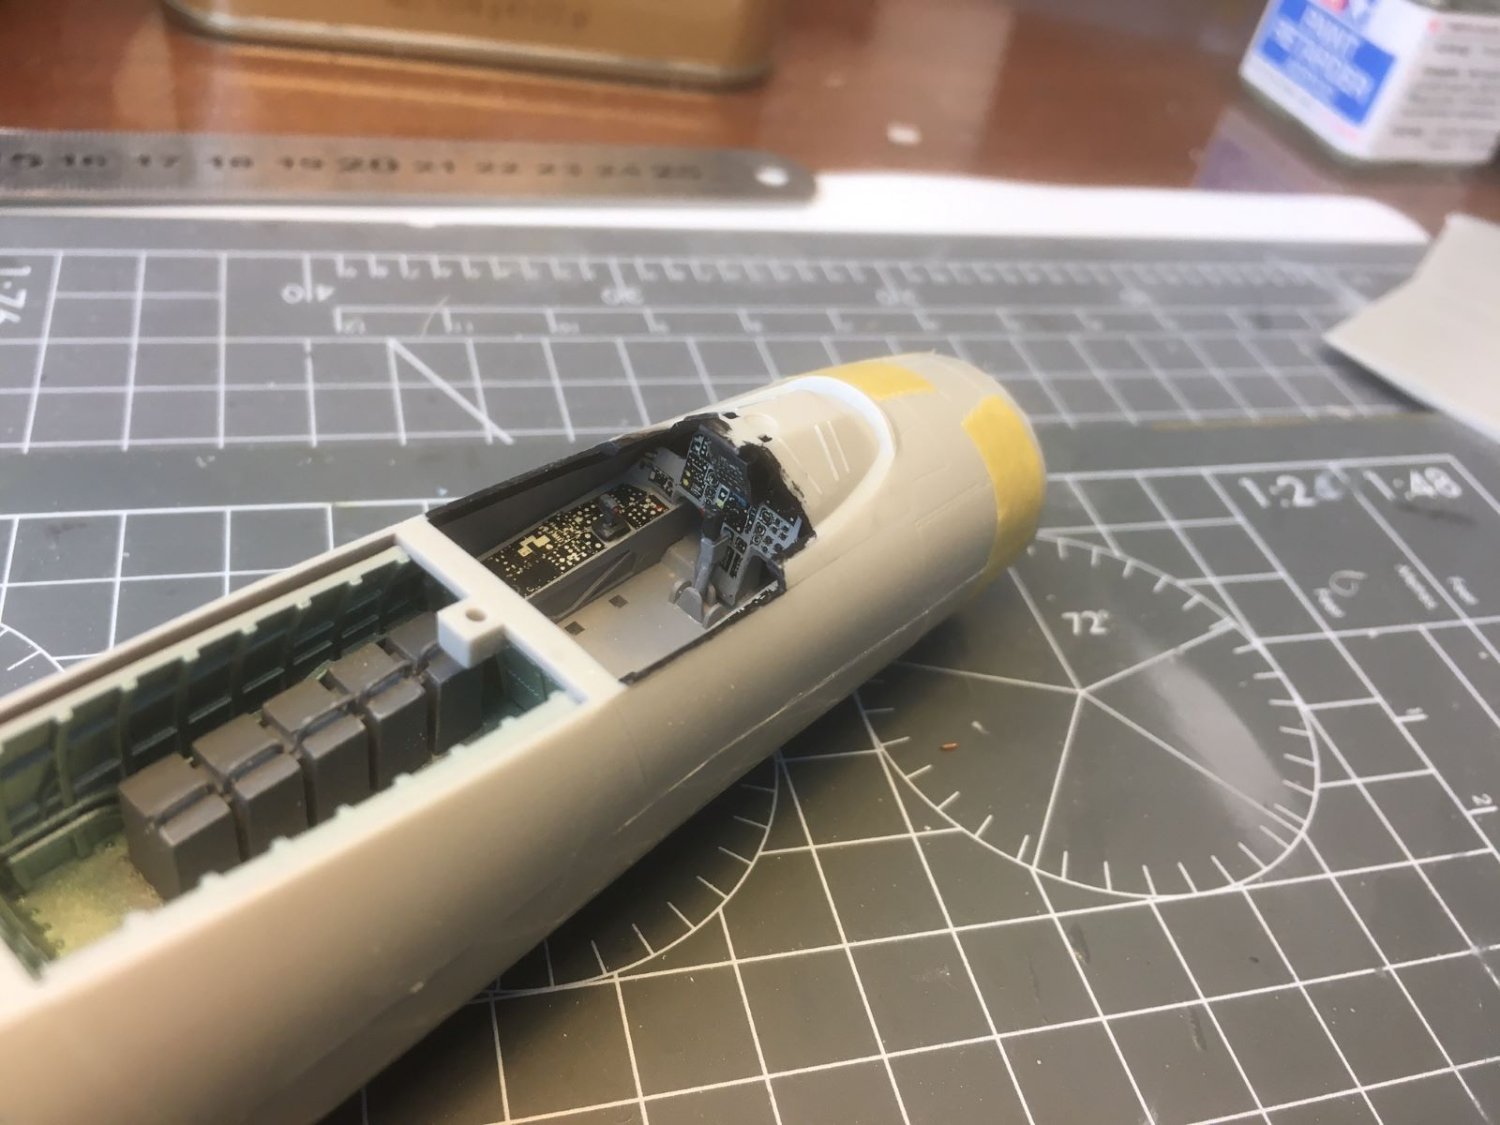
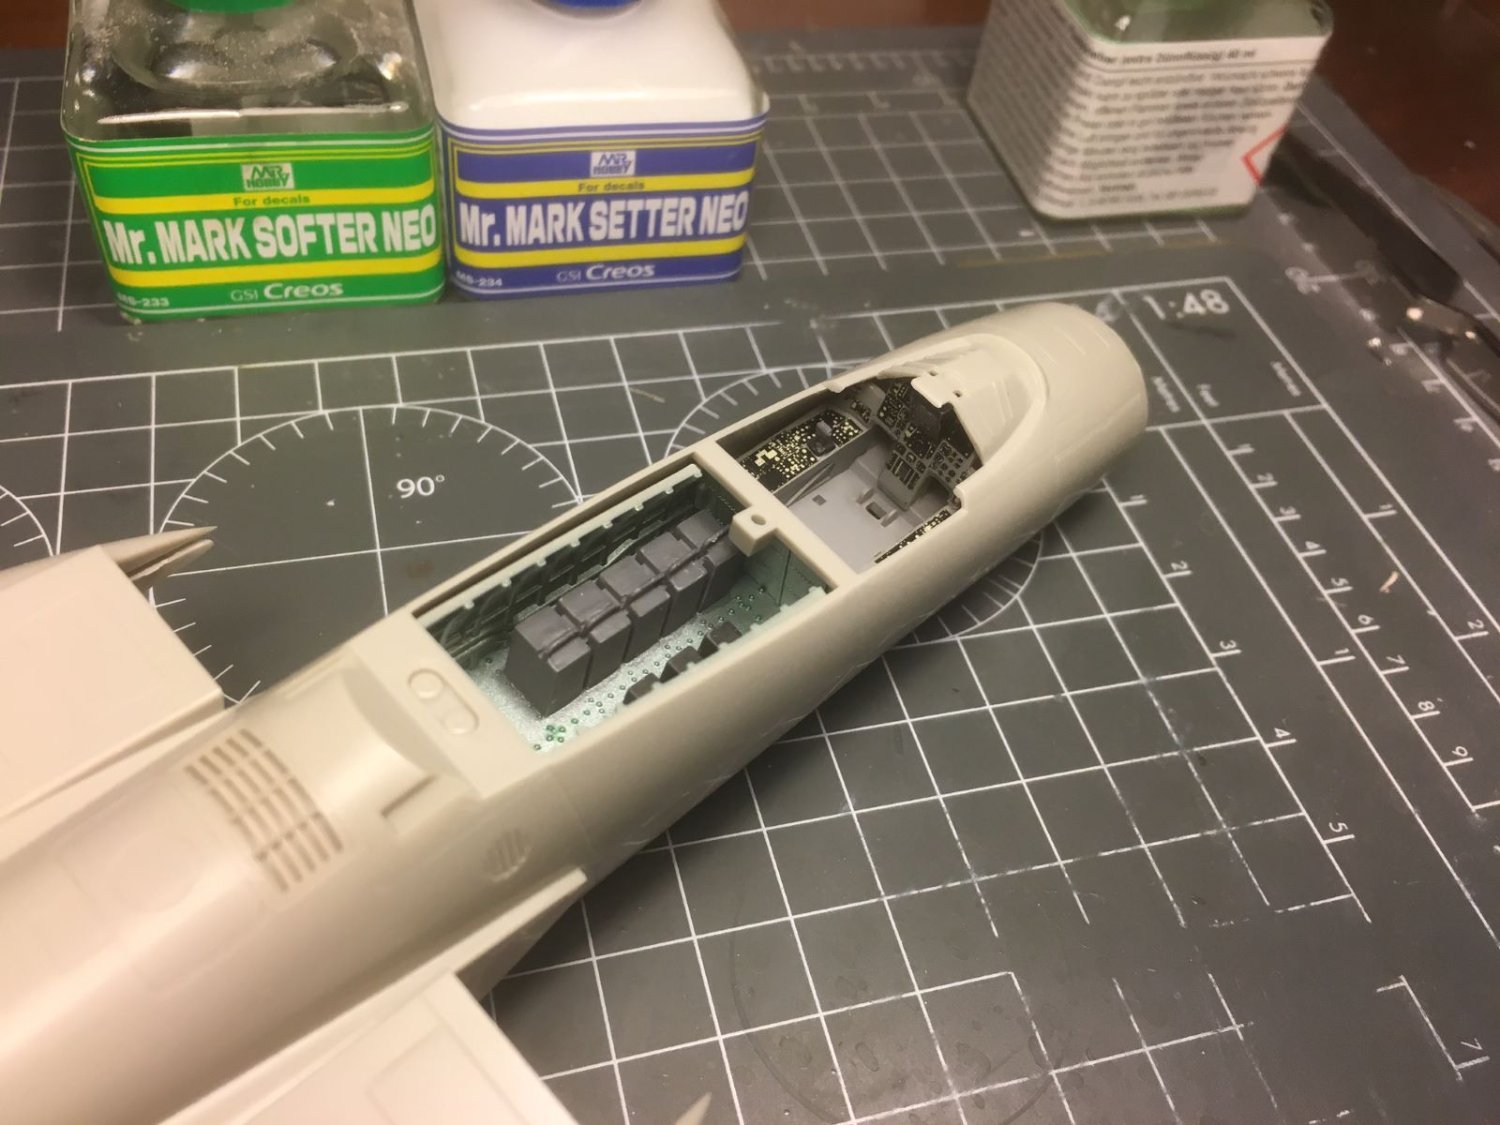
After a break, I am back with my build with some small progress. The large air intakes were finally glued in place, with some gaps to be addressed. Anyway, the first look is quite impressive. Then I worked on the HUD which is composed by two transparent parts. The frame that holds the transparent plates is a bit simplified, but it looks the part. The lenses of the optics are rendered with a circular imprint on the coaming which I filled with Tamiya Clear Red paint. The picture shows the first transparent part. To mute the reflections of the plastic edges, I painted the edges with Tamiya Clear Green. Here you can see the first big booboo I made in the assembly: The air intakes are swapped, right with left, and the grilles molded on top are now on the outer sides instead of being on the sides closer to the fuselage. I hate when that happens and my first reaction was to bin the model. After cooling down, I decided to give it another chance anyway and to ignore the sore mishap. Next picture shows the completed HUD with its edges treated as above. I also sprayed a final coat of black on the coaming. A view of the cockpit with the canopy frame in place. If I leave the canopy closed, the avionics bay will be totally invisible. I will decide about how to pose the canopy later. Finally, a picture with the windscreen transparent tested in place: That's all for now, thanks for watching, Dan

- 137 replies
-
- 11
-
-
Question About Glue for Plastic
Danstream replied to Gregory's topic in Modeling tools and Workshop Equipment
As Egilman said. Remaining with styrene, although less frequently, I use also Revell Contacta Professional. Its slightly more viscous with lower capillarity, and it might be used conveniently for larger areas. Dan. -
Chilly? As long as it is sunny and dry, weather is fine, ideal for doing things outdoor 🙂
-
F-86F-30 Sabre by Javlin - FINISHED - Kinetic - 1/32
Danstream replied to Javlin's topic in Non-ship/categorised builds
Hi Javlin, it seems that you have tamed this build. From the latest pictures posted by you, your F-86 looks pretty good. NMF and decals/stencils are also very good. I cannot distinguish any blemish on the metallic finish. Unfortunately, I was late in suggesting a sheen steel finish for the machine gun panel. Now, with decals placed close to it, probably it would be very risky to try to correct it. But even with the present finish, it looks as a good model, so I do not recommend any correction for it. Waiting to see the conclusion, best regards, Dan PS: didn't this type have an anti-glare panel in front of the windscreen? -
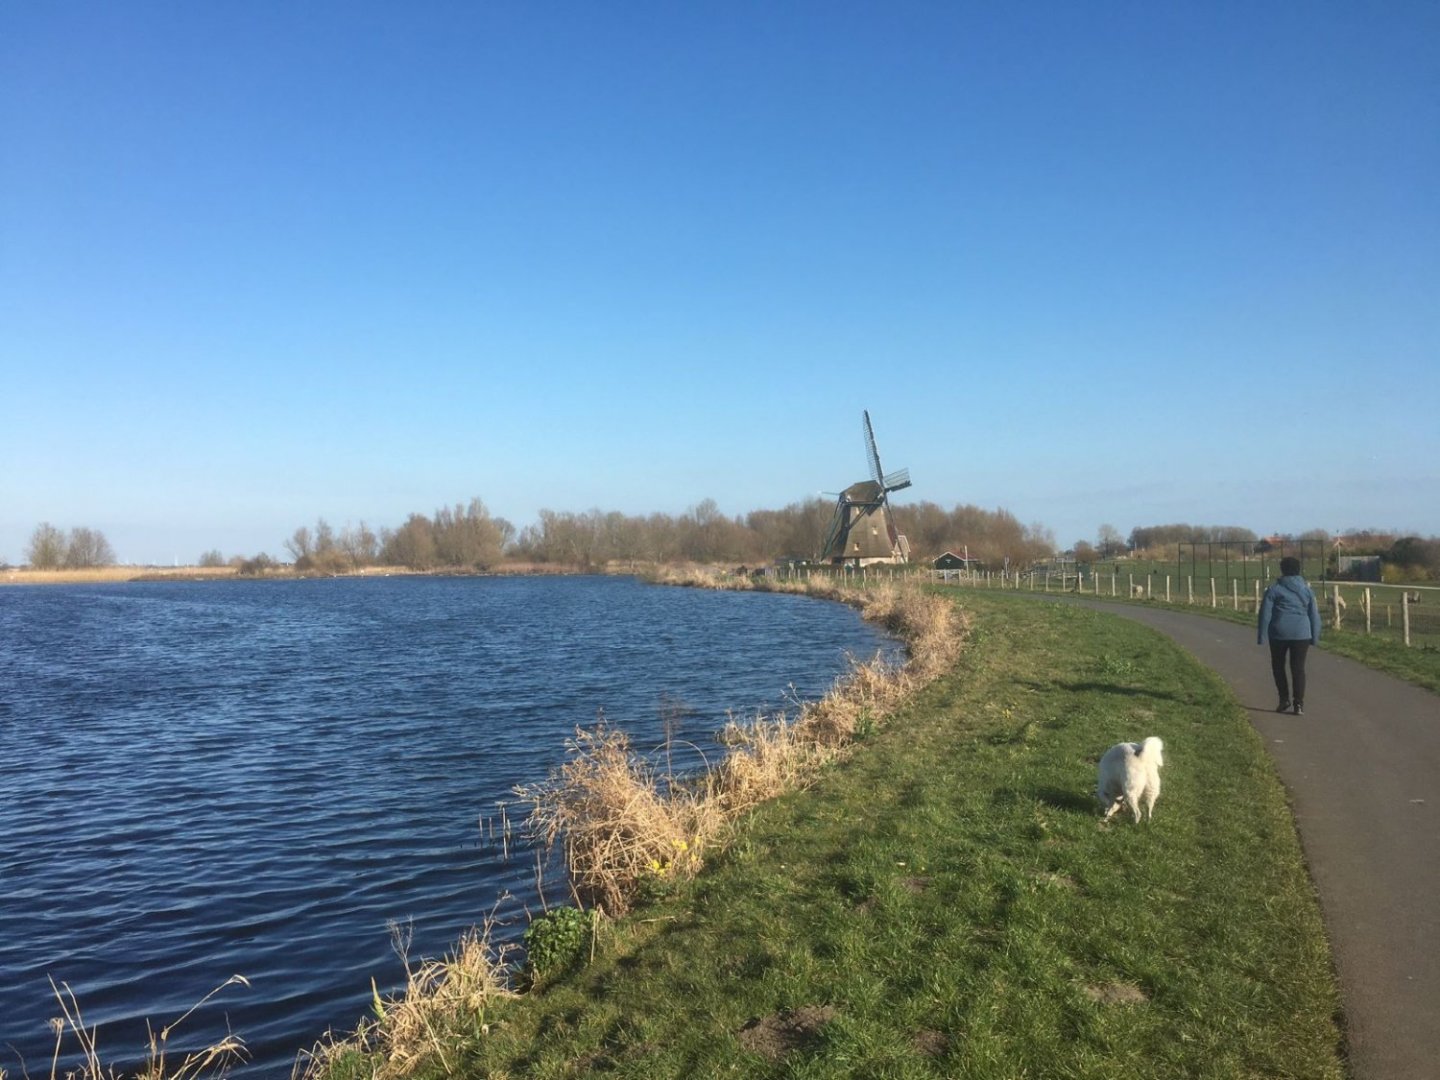
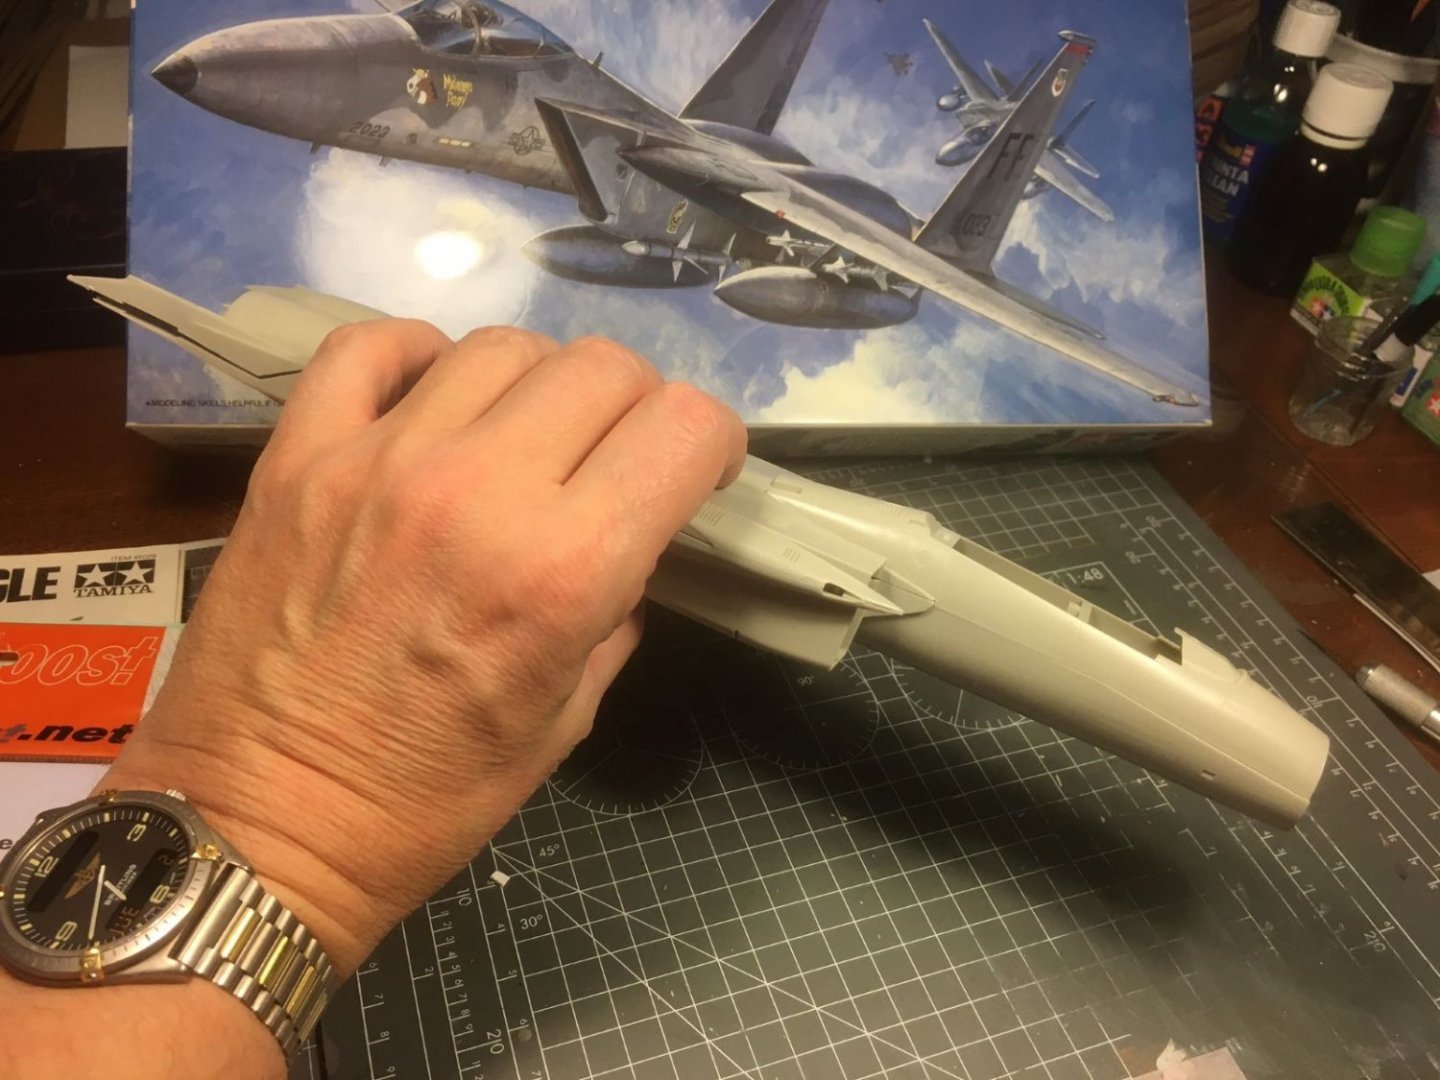
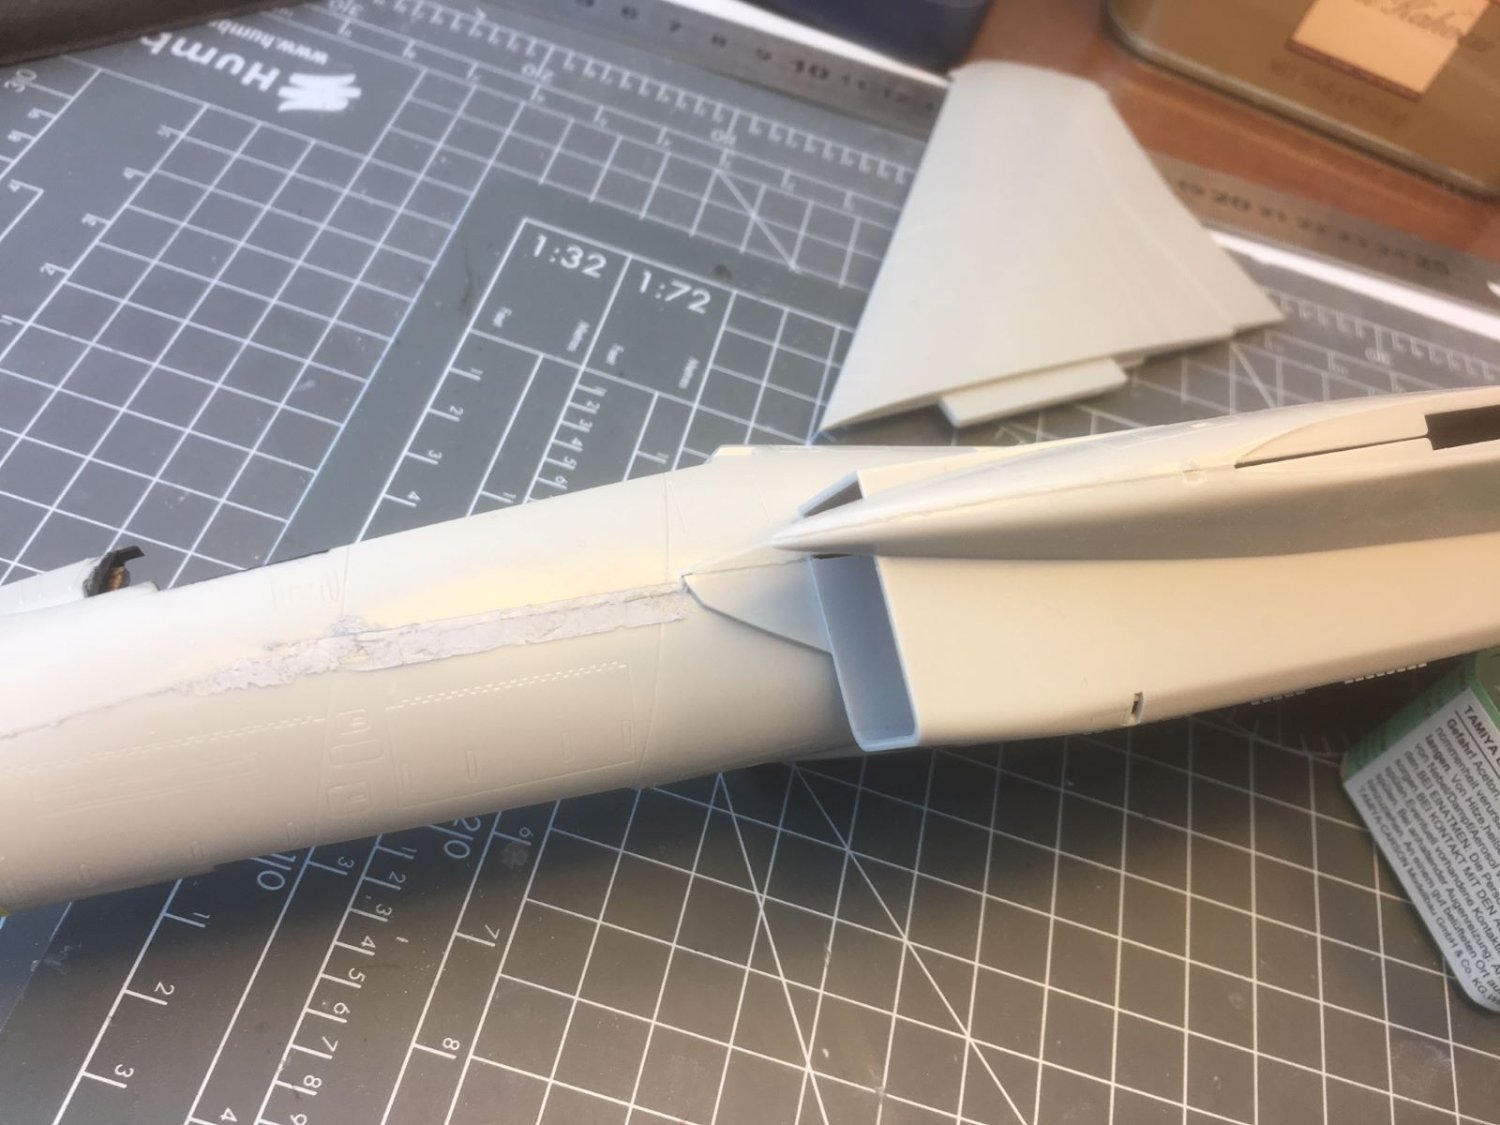
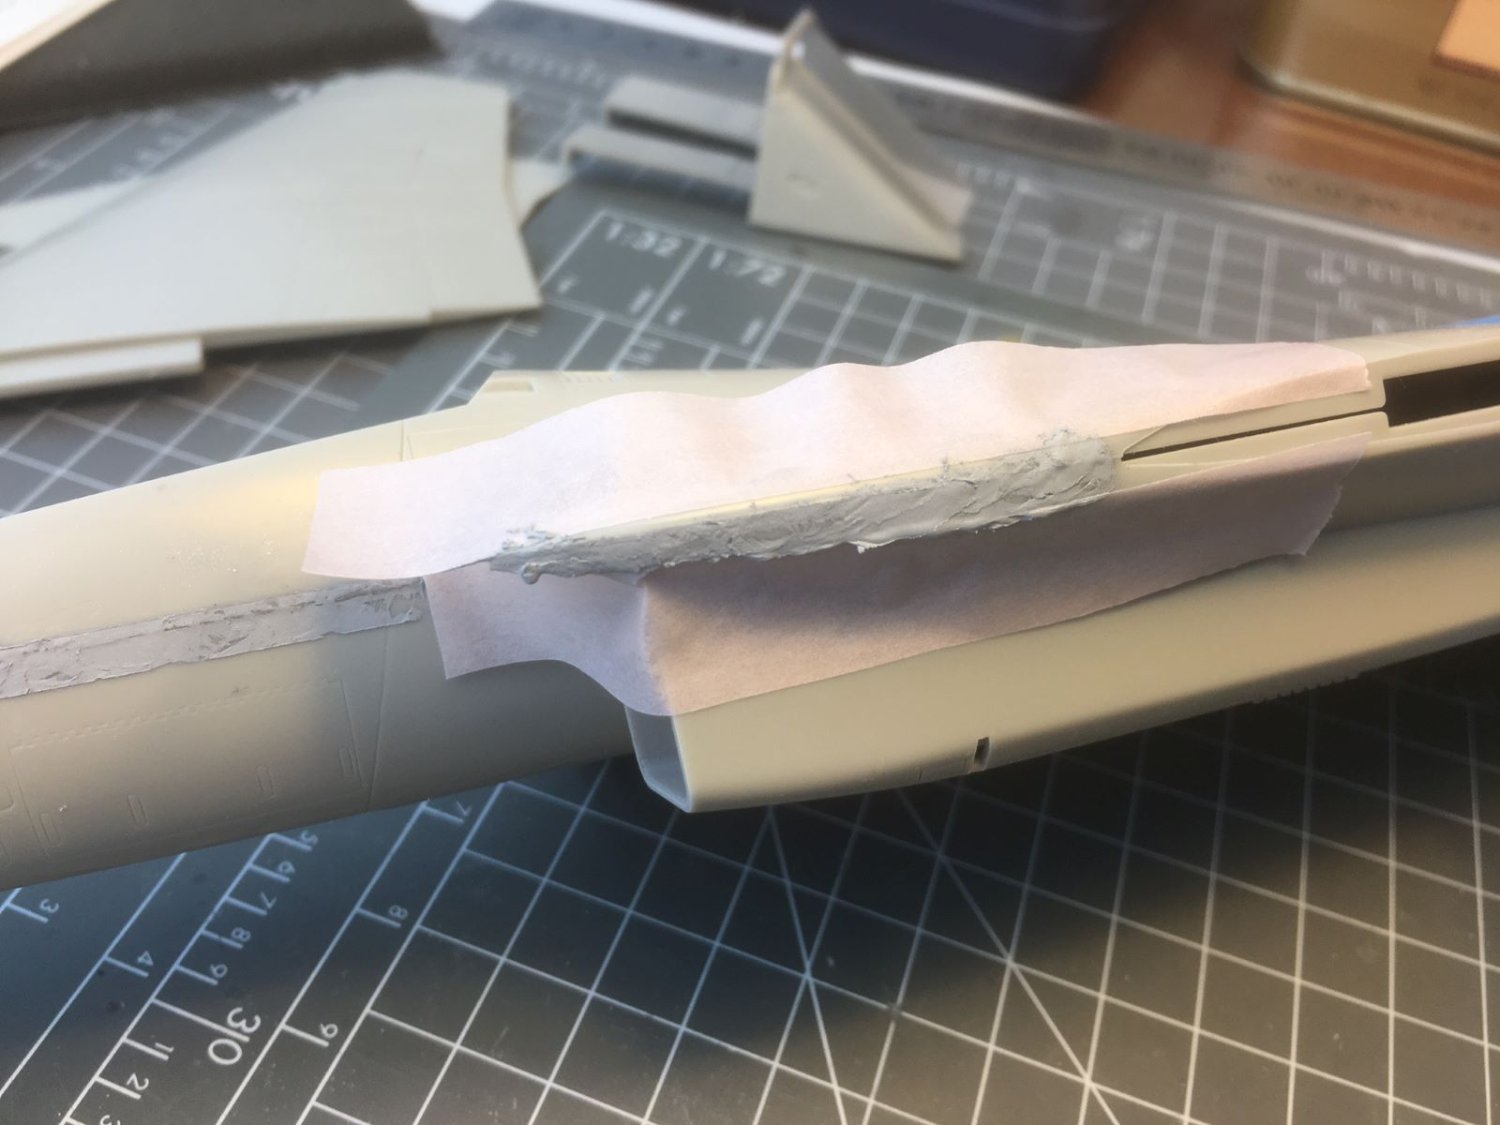
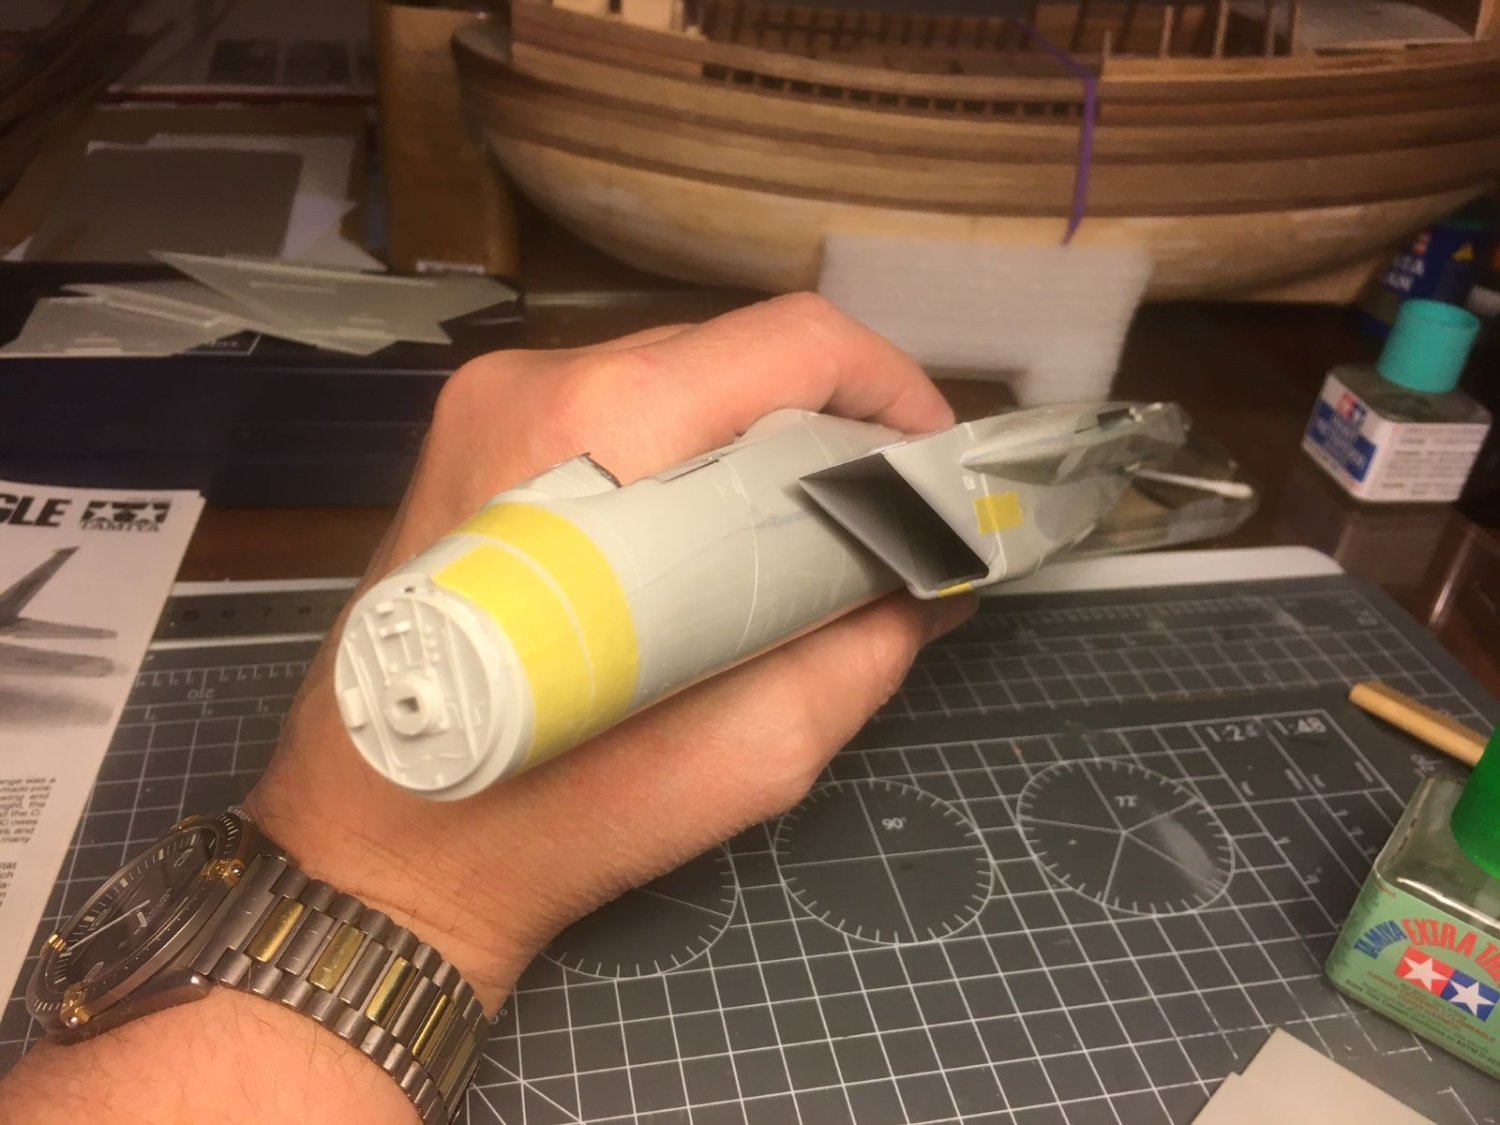
Hi all, I reached the first milestone, the fuselage was buttoned up: I placed the right wing piece next to it to show once more the large dimensions of this model. The cockpit received few dabs of color (some red, blue and yellow) and this is how it looks now inside the fuselage: Once completed with a proper seat, I believe it will make its part. Now, closing fuselage revealed some joint lines to be addressed. Contrary to what reported in the instructions, I think this could better be done before installing the air intakes: The one on the wing root glove is actually a step, so some material has to be removed and some filler has to be added in order to get a smooth curved surface. I apply here the filler protecting the adjacent details with a tape: After sanding, polishing and rescribing the lost lines, and after dry fitting the air intake, this is the final result (although not very clear in the picture): I think that the intakes, which are a very prominent feature of the F-15 configuration, will look eventually fine: A lot of sanding and adjustment that went also in the intakes were worth to obtain a sharp and clean upper lip: All the other joints need to be treated the same way, so I will be busy with that for a while. Next, wings will be glued on. To get some dynamism to these huge pieces of plastic, I am thinking of cutting and lowering the flaps by few notches even if, probably, aircraft on ground always keep their flaps retracted. A concluding note out of context: spring equinox is approaching, and we are having beautiful sunny days here in Holland. I am including below a picture of a Dutch landscape taken today while walking with my wife and my dog: You might note the level of the water slightly higher than the fields. Typical Holland. Best regards, Dan


- 137 replies
-
- 14
-
-

-
I think the experiment can be declared successfully concluded. Dan
-
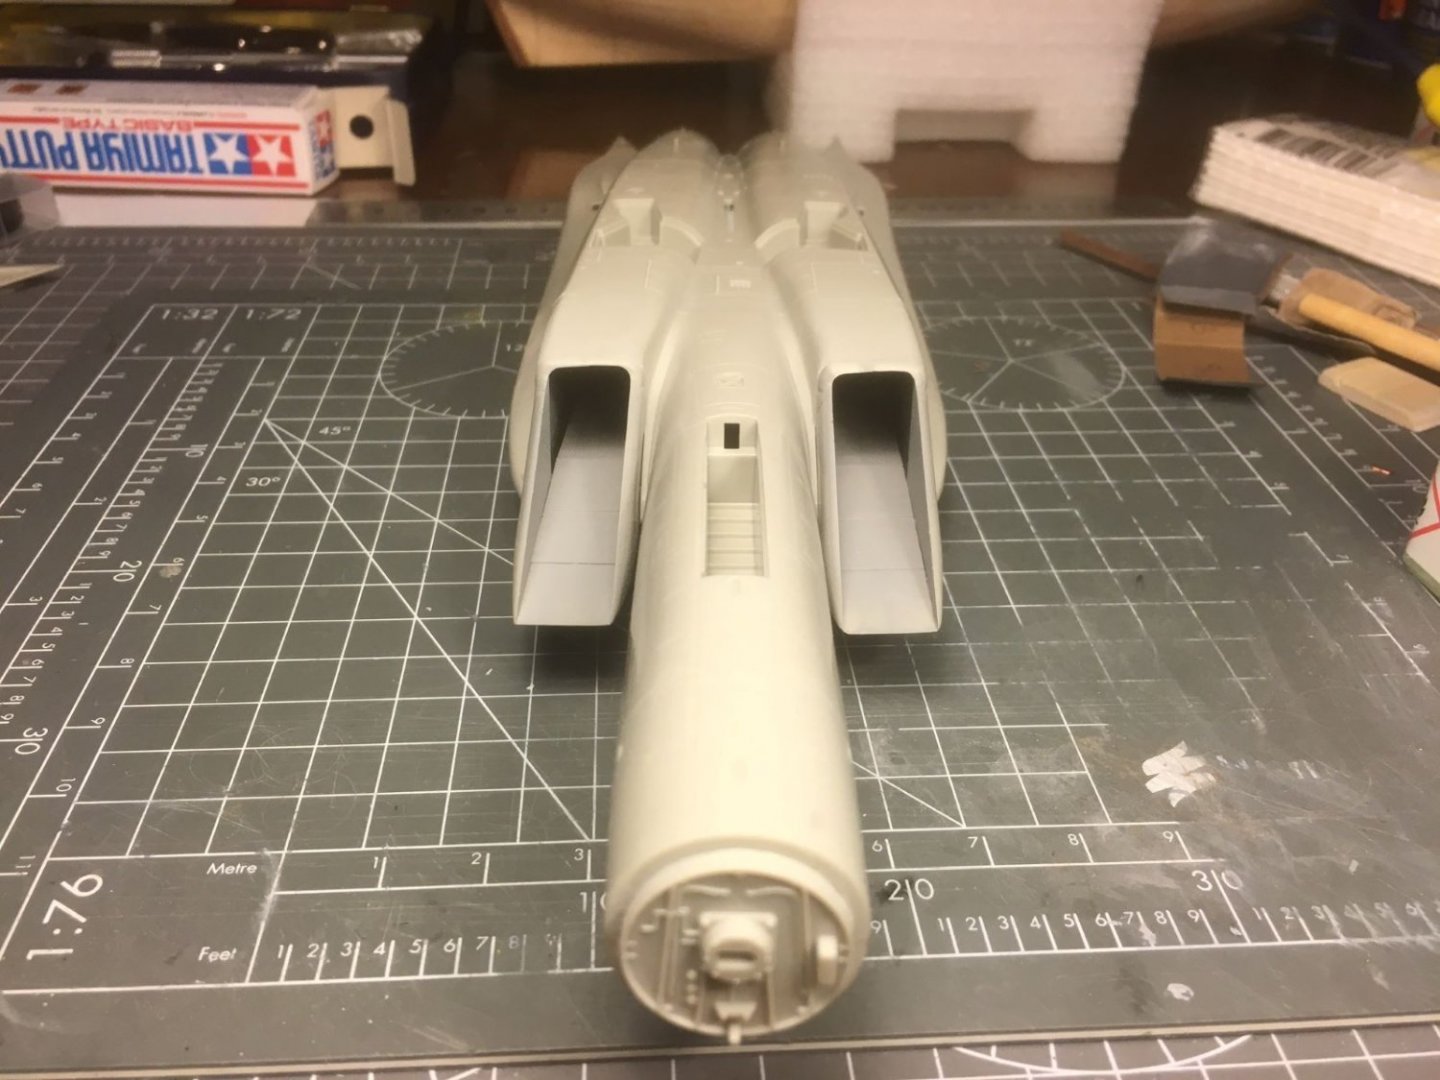
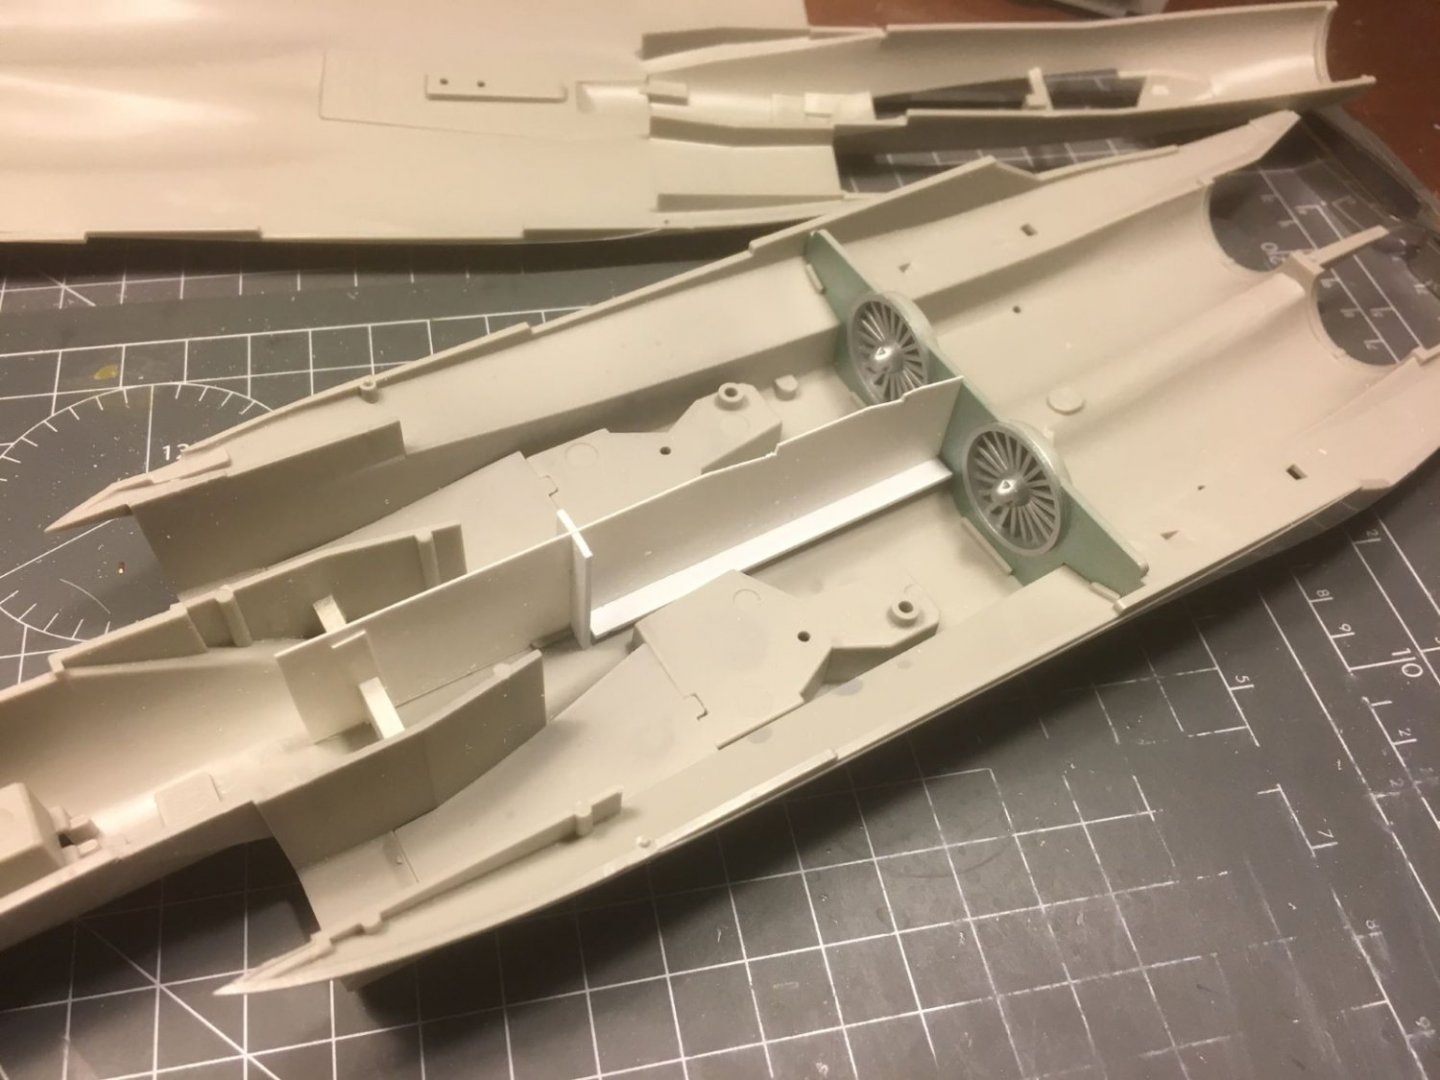
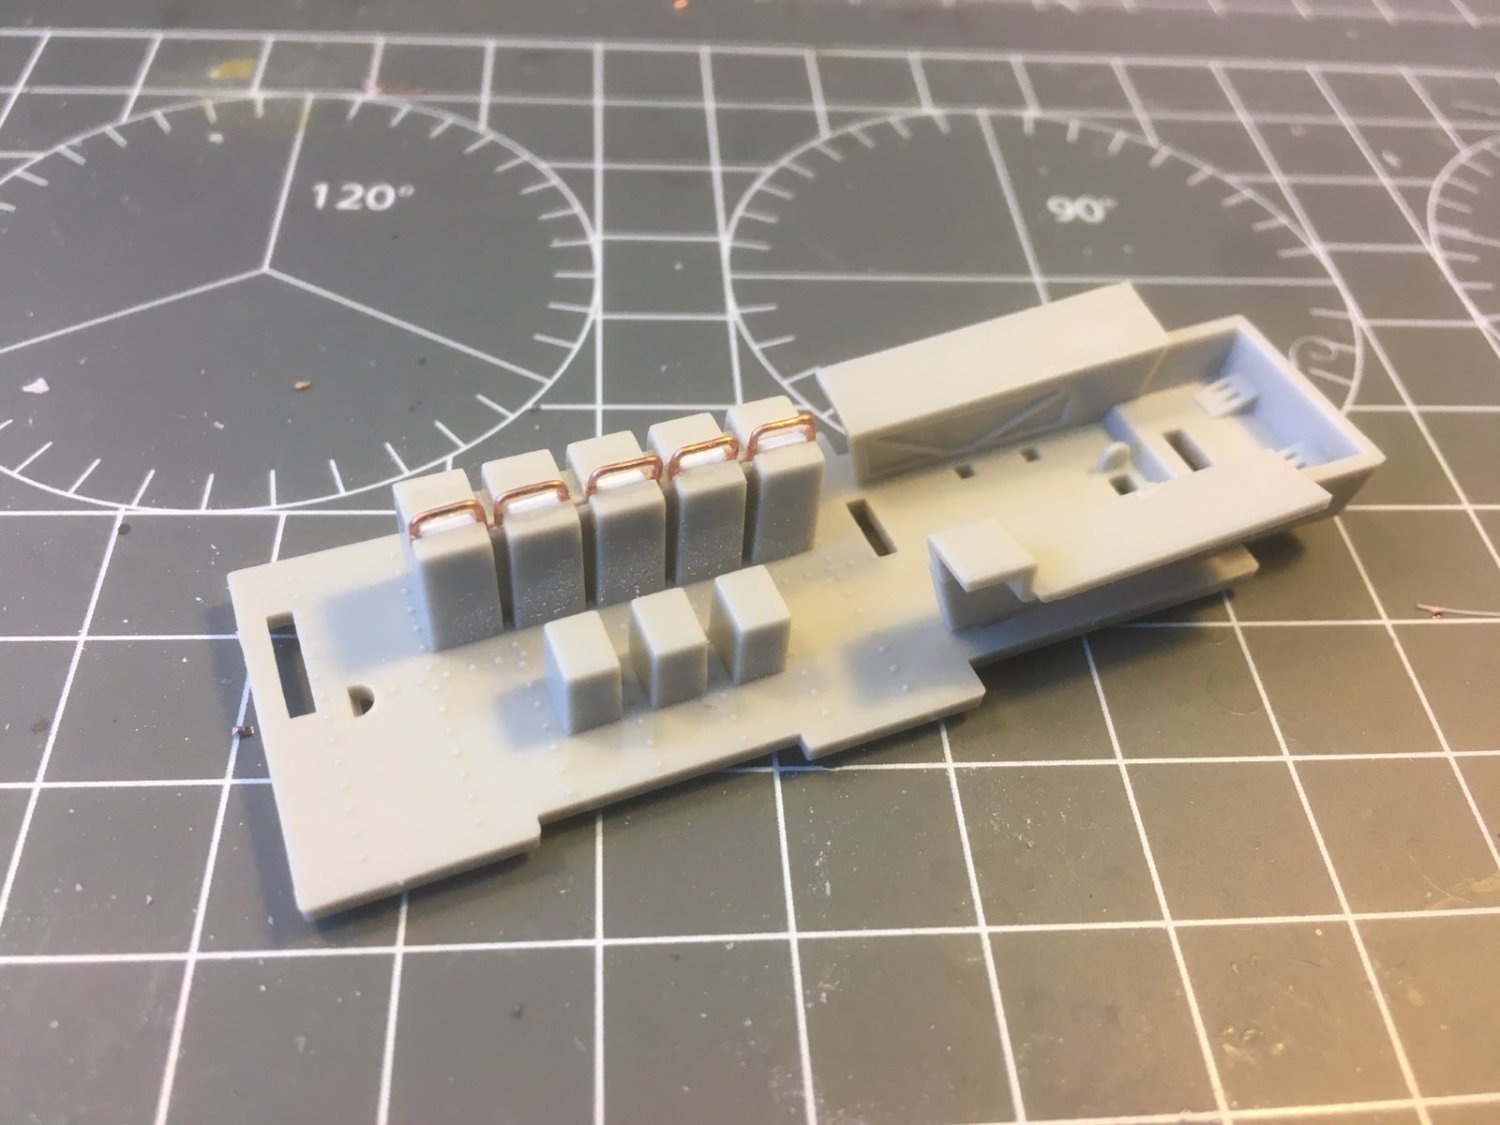
Hi all, I made few little progress of my build. The fuselage is like a big empty plastic box, hence I thought it was necessary to add at least a sect in the middle to avoid that one could see light which enters one of the air intakes from the other one: Mean while I finished the cockpit with few additions as the control column and the oxygen hose and sealed everything with a coat of matt varnish (the oxygen hose was obtained from a piece of guitar string): This what I could get using the provided decals which were unfortunately a bit yellowed. Probably, it will be acceptable with a closed canopy. Next I will finally close the fuselage halves. Thanks for following, Dan

- 137 replies
-
- 13
-
-
Mercedes 300 SL by kpnuts 1/16 italari
Danstream replied to kpnuts's topic in Non-ship/categorised builds
Great model and great paintwork as usual. Could you maybe tell us a bit about the paint you use for the bodywork? Is the chrome coming with the kit parts or is applied by you? Thank you and congrats, Dan -
It replicates well the clad aluminium tone and the reflectivity is also good. A non-polished/buffed cladded aluminium panel appears to have that kind of reflectivity. It will look even better when all those rivets are not around and you have proper panel lines moulded on the surface. I guess the Future layer offers also a protection against handling. I wonder if Future allows the use of panel line accent inks too. Good progress, Dan
-
Renault RE20 by kpnuts - Italari - 1/12 - PLASTIC
Danstream replied to kpnuts's topic in Completed non-ship models
Great model! Great details and prefect finish. Well done, Dan -
This model is gorgeous! The glossy finish of the red paint looks like the real thing. Congrats, Dan
-
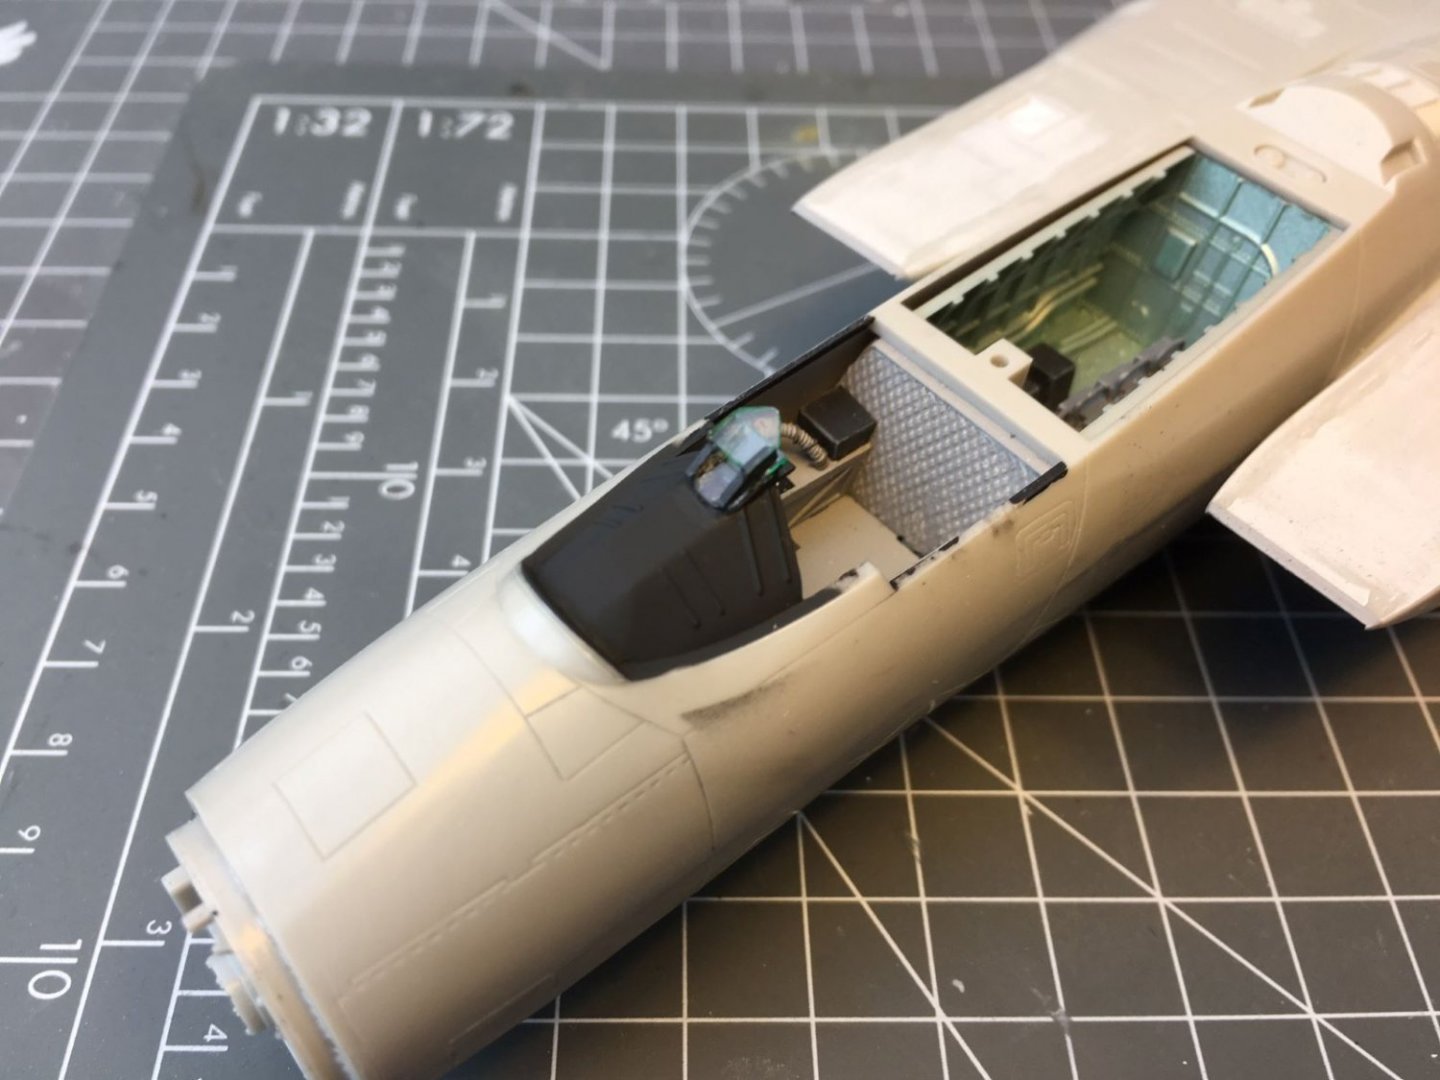
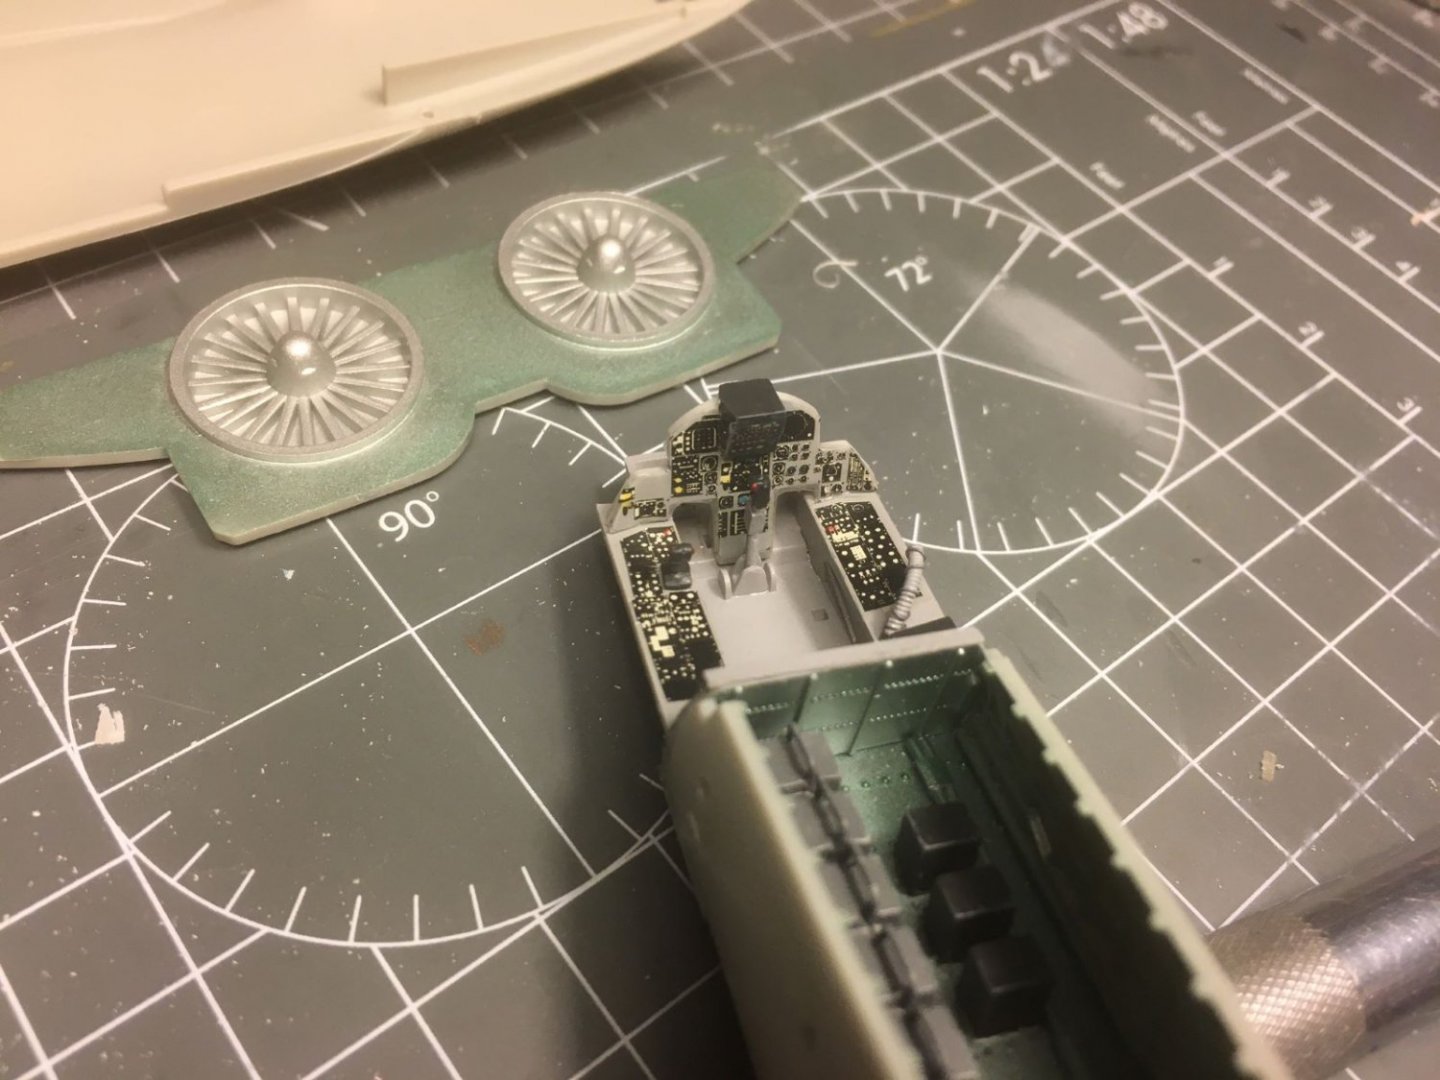
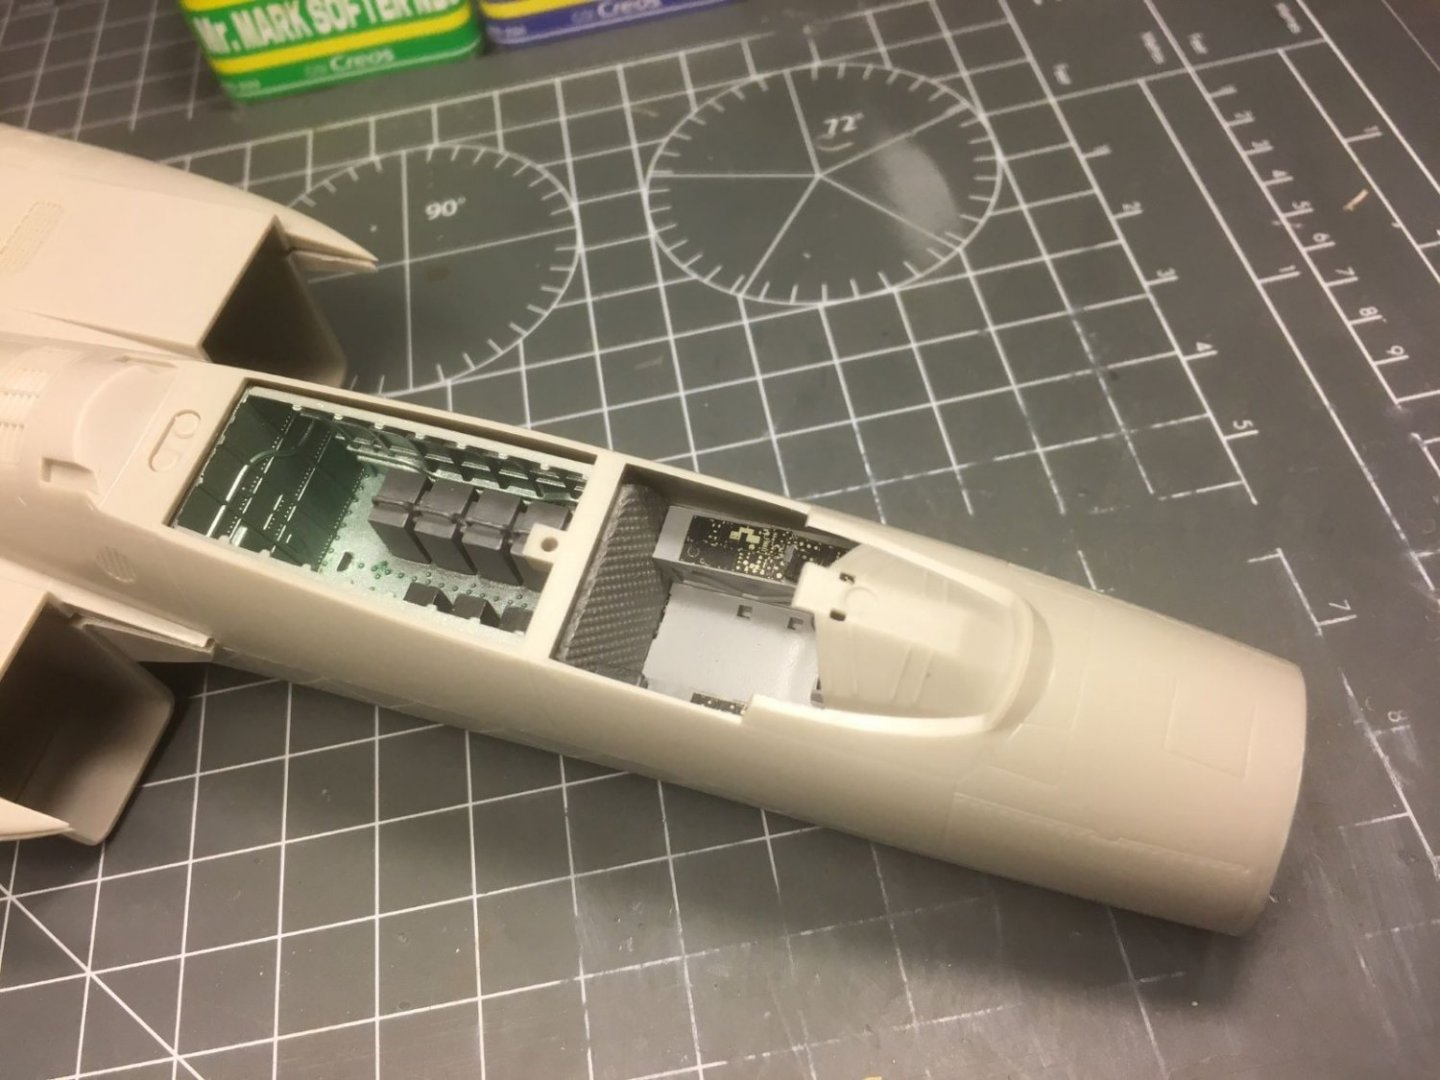
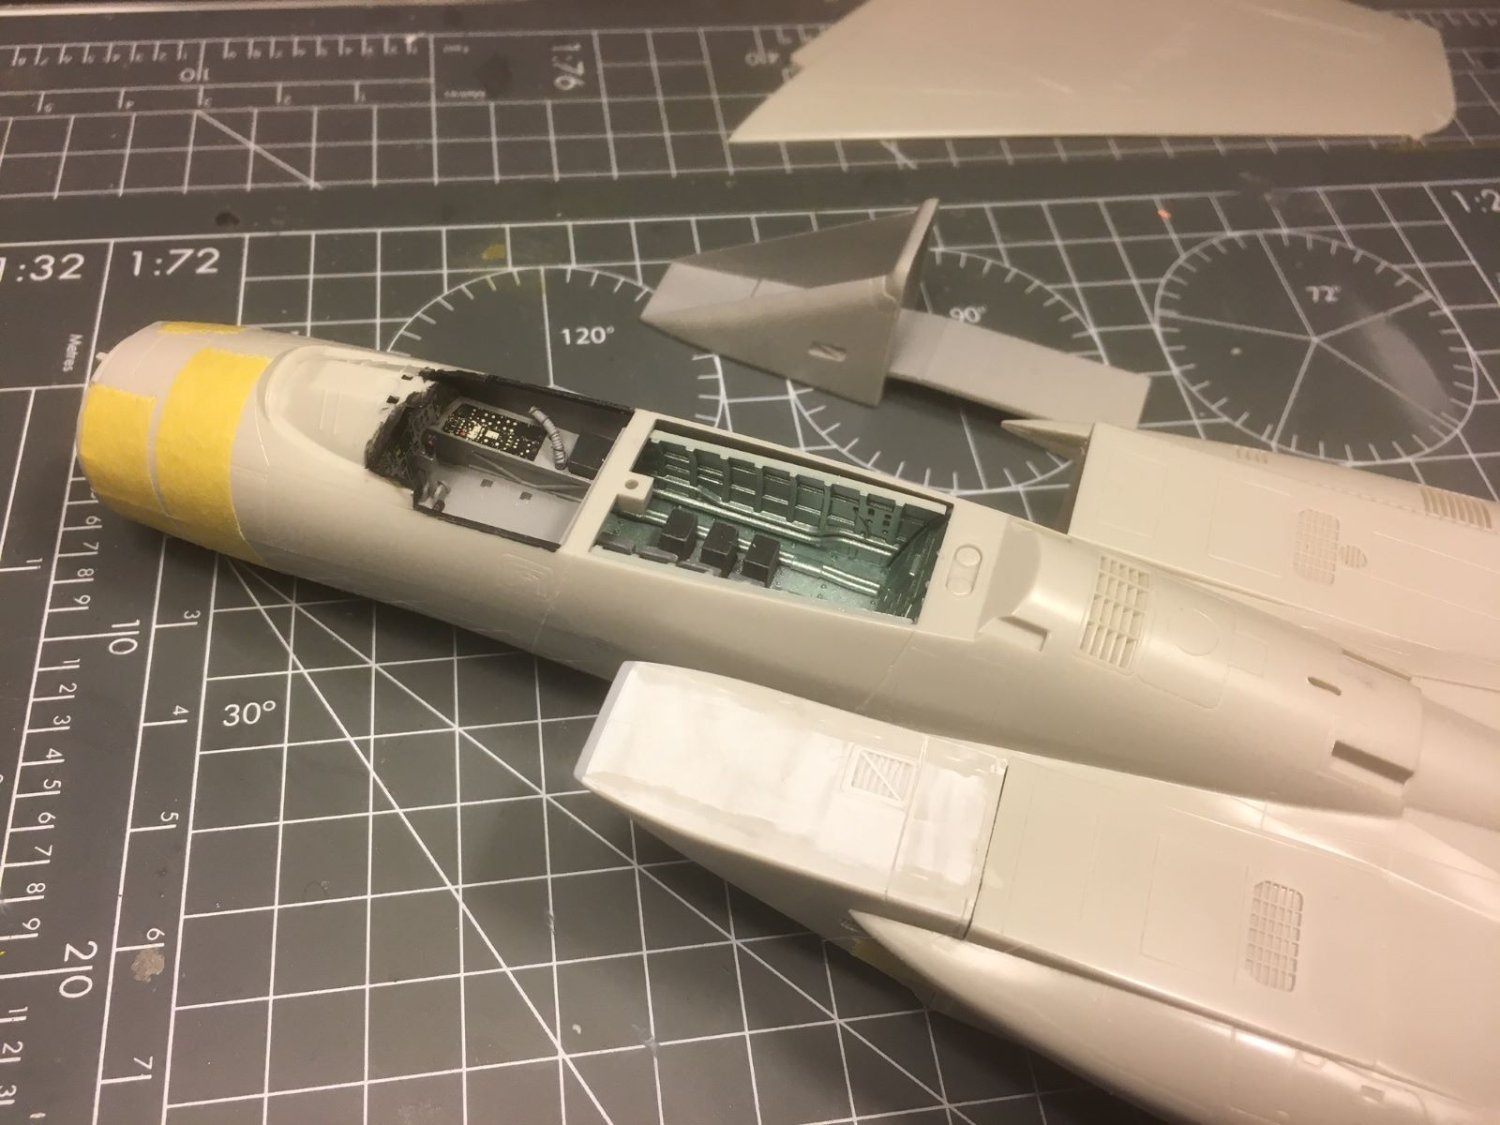
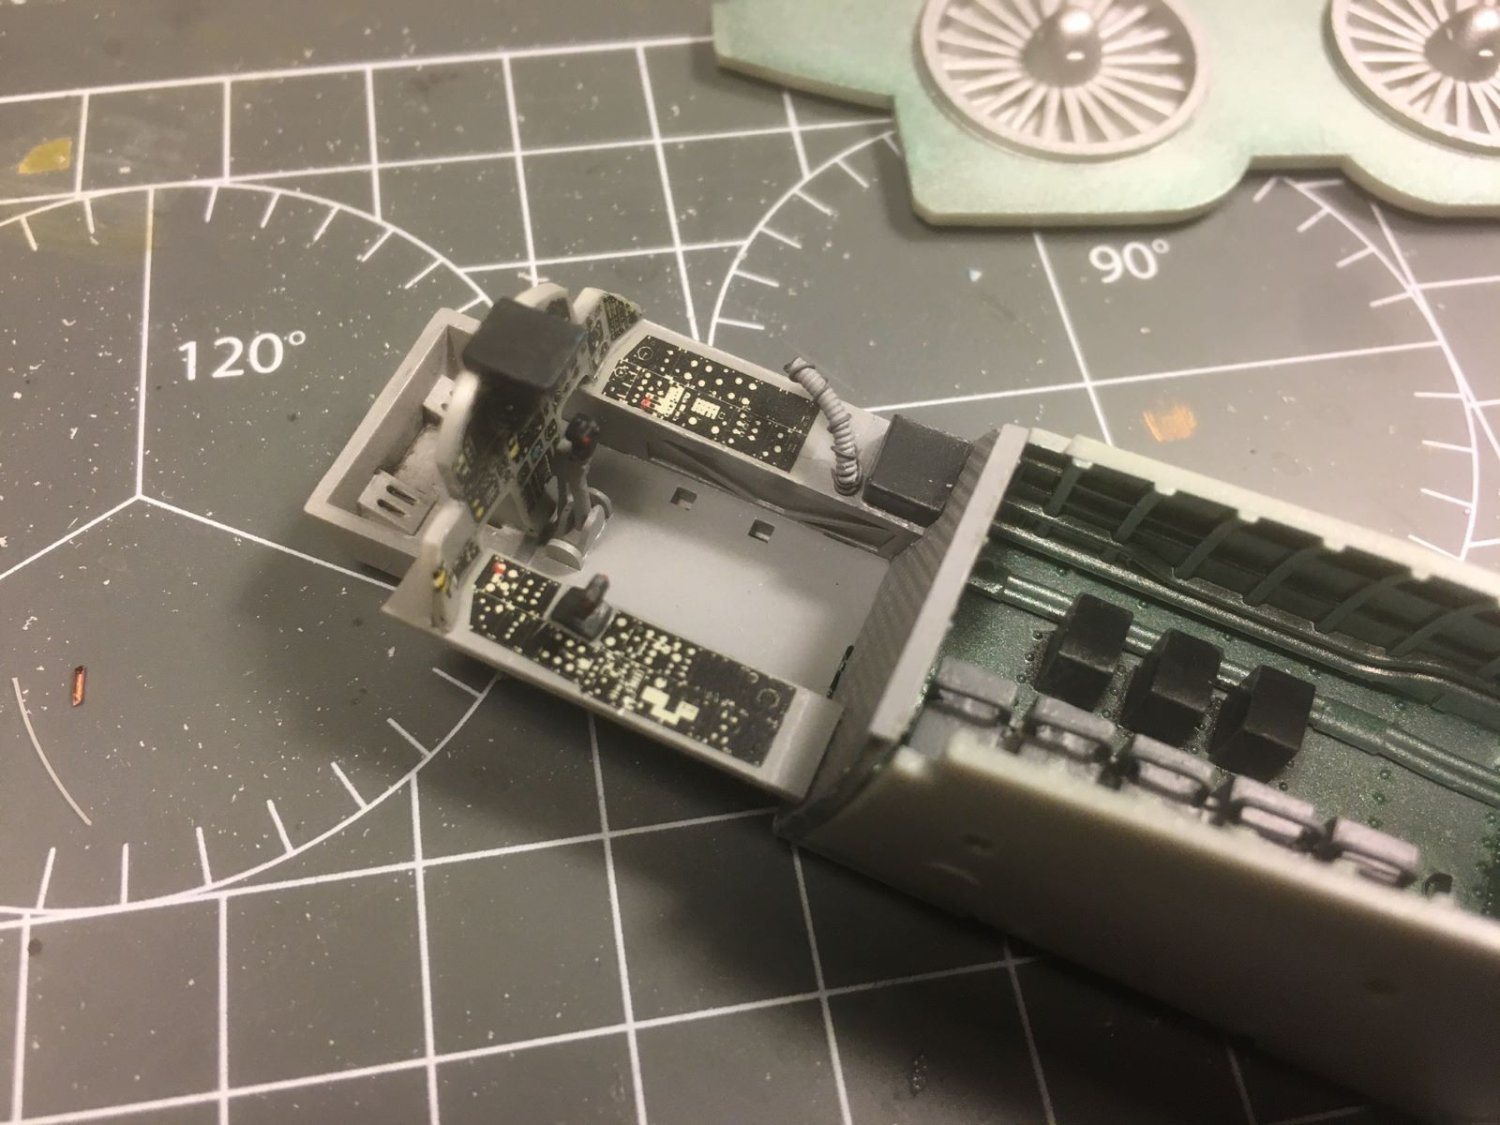
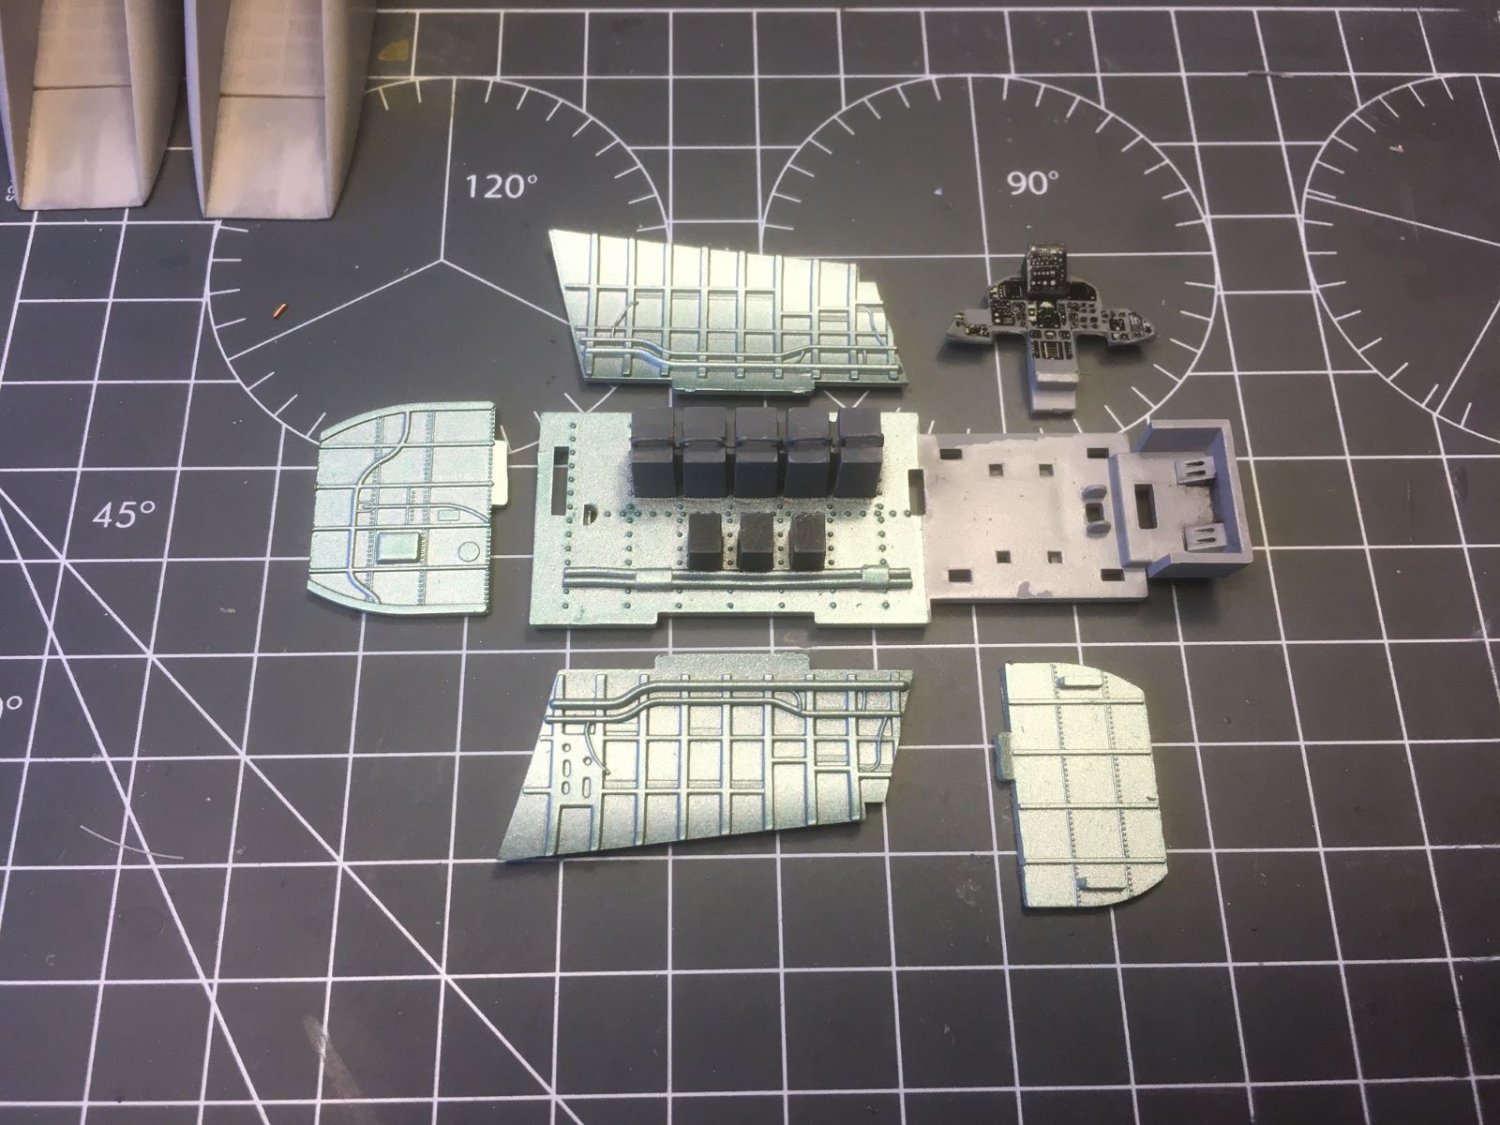
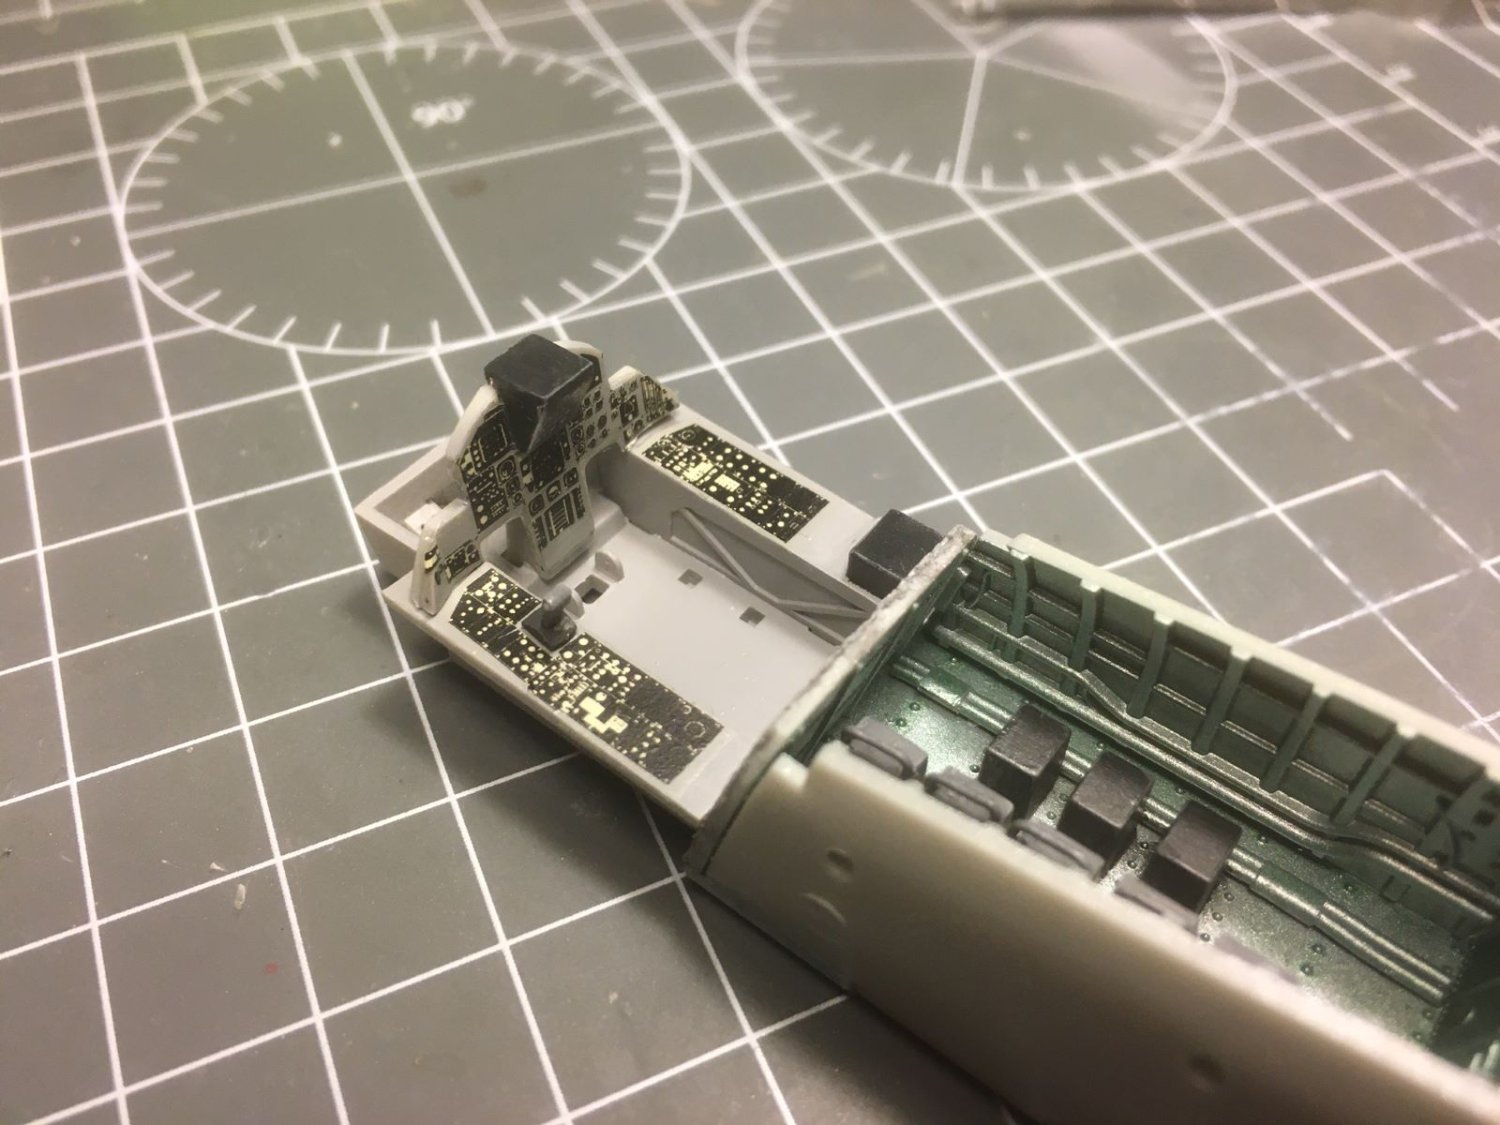
Hi all, went on with the cockpit and the avionics bay. The latter had to be painted with a metallic blue-gray the exact hue of which seems to be quite elusive. From pictures, it changes according to the illumination conditions. At any rate, I made a mix of Tamiya paints which looks satisfactory to me. The instrument panel and the lateral consoles are decorated with the original decals of the kit. The interior of the cockpit was sprayed with Tamiya Sky-Grey XF-19. This is how the avionics bay (known as 'bay 5') looks like after assembling: This is the cockpit finally assembled. Clearly, this kit, as already said. is a thing of the past, and the cockpit is not comparable with the products of today, but the decals eventually make their part and I will try to live with that. This is how it will appear once inside the fuselage: I will add only very few additional details and then I will conclude the interiors with a final transparent coat to obtain a consistent satin finish. That's all for now, best regards, Dan


- 137 replies
-
- 13
-
-
When I built this kit as a kid, it looked awesome cool. It was the first 1/32 kit for me and the first that I completely brush painted (RAF grey/green camouflage with invasion stripes). Now of course it looks different. Nevertheless, it is going to be an interesting experiment and a trip down memory lane. Looking forward to seeing more, 👍 Dan
-
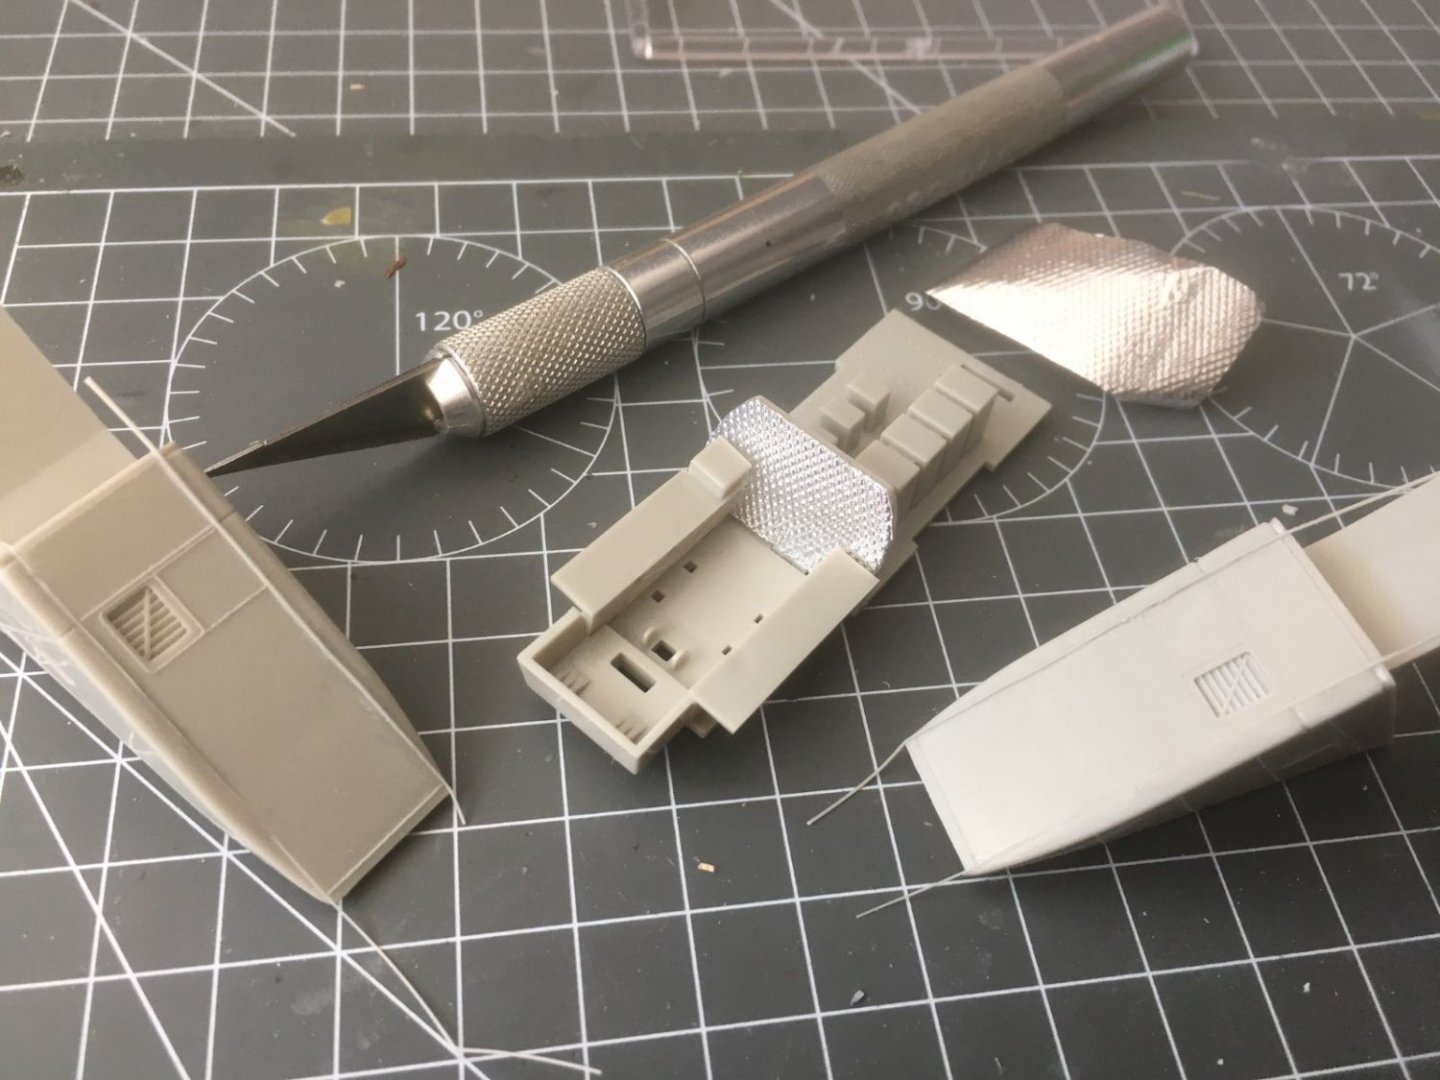
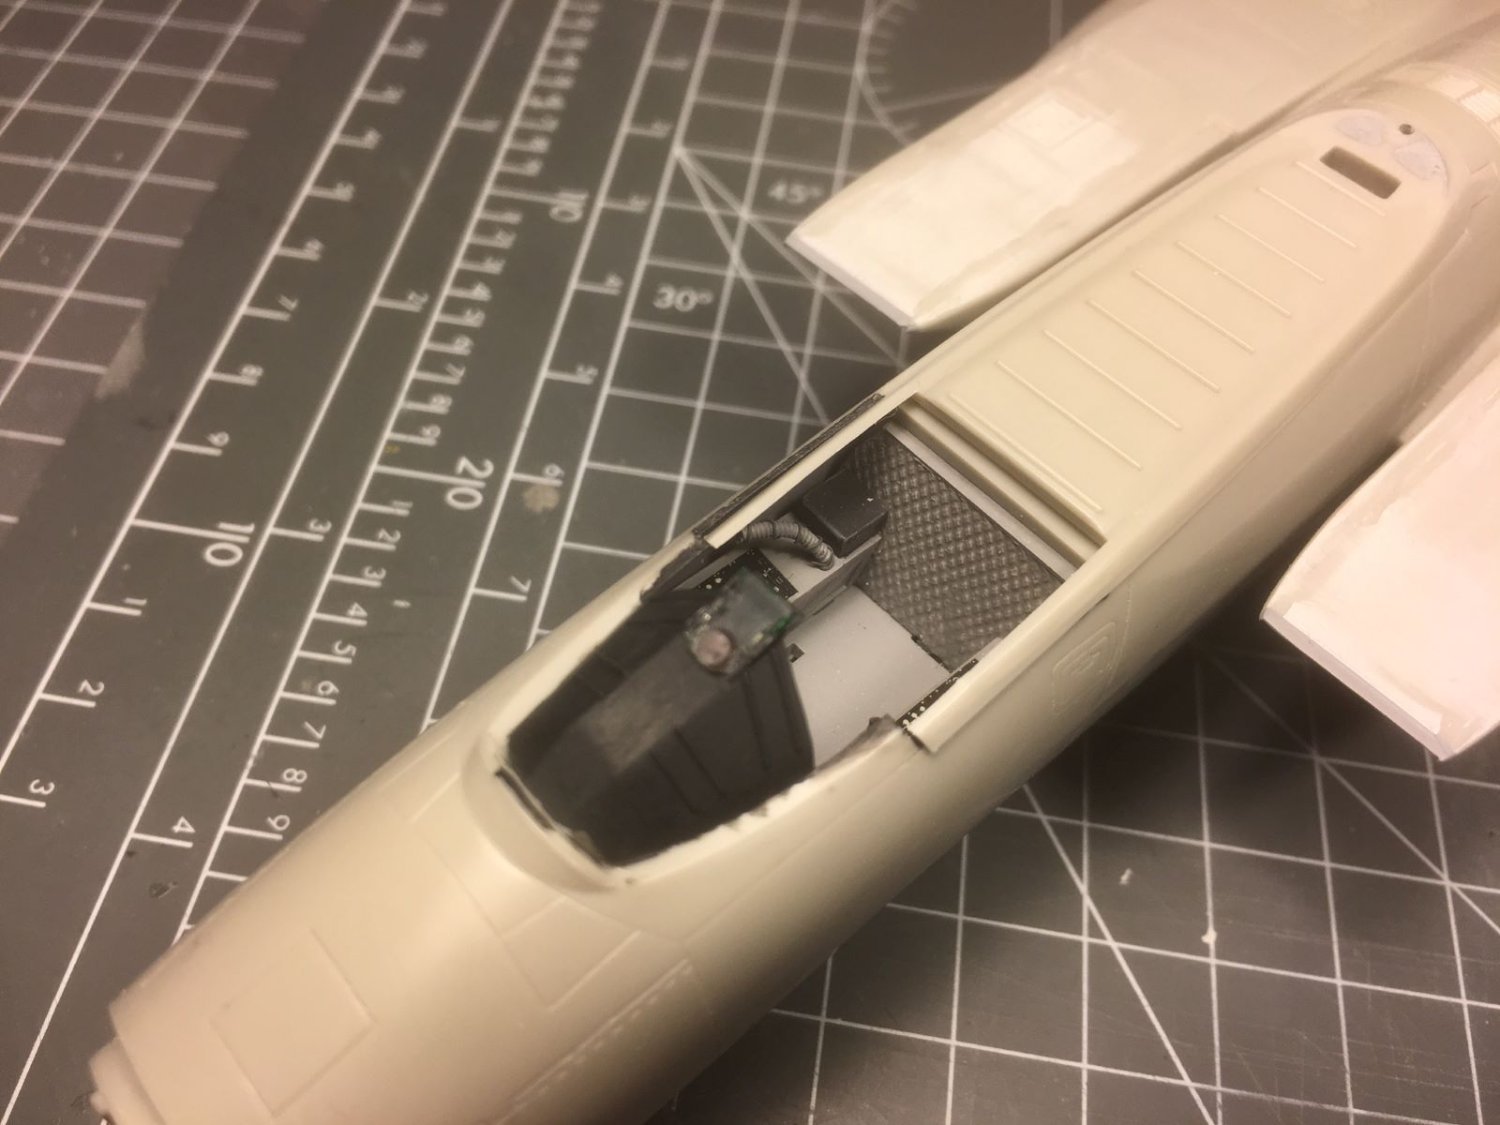
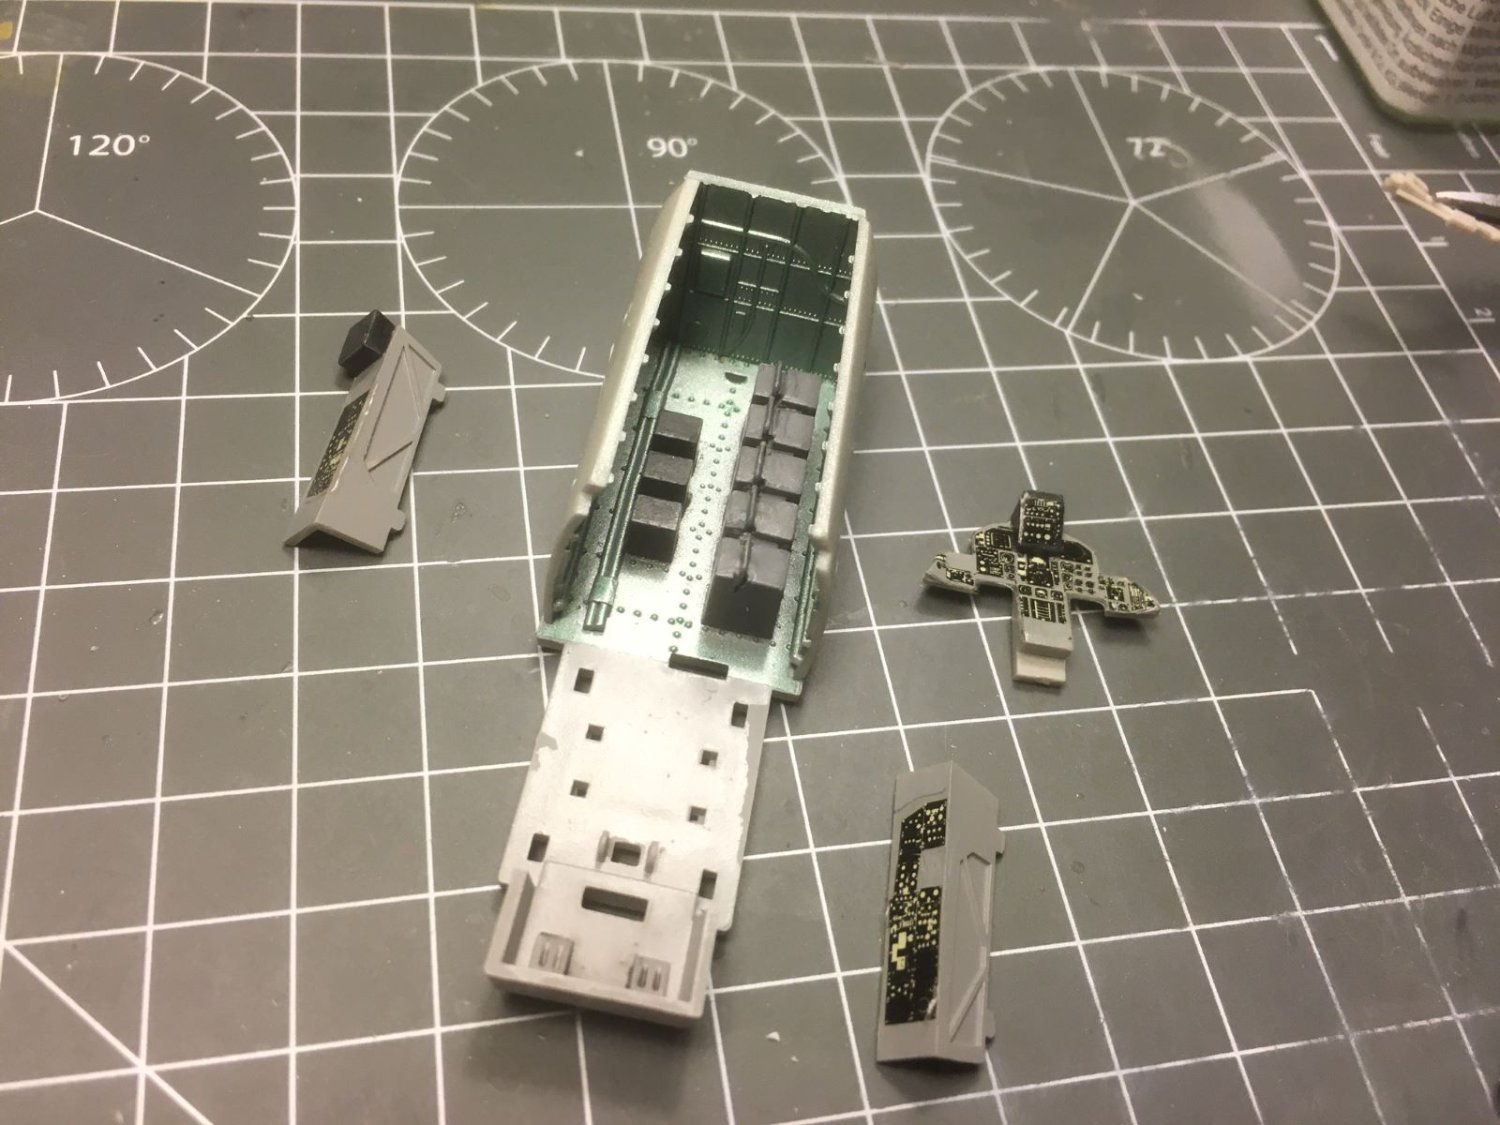
Hi all, during the week-end I managed to spend few hours at the hobby desk. Nothing special, I am just preparing few parts to be sprayed together. Although not bad, the kit is not up to the standard of modern Tamiya shake and bake kits, that means that you have to spent some time in preparing the parts, filling extractor marks, etc. The plastic is quite brittle and might crack instead of cleanly be sliced by the hobby knife. I started to assemble the large characteristic box-shaped air intakes, and the junctions of the vertical with horizontal walls needed to be filled with stretched sprue. The surface details are mostly negative, but on some parts are positive, hence some scribing work will be necessary after sanding. I made the quilted sound blanked by a piece of aluminium foil the pattern of which was embossed with the grip of my hobby knife being the original moulded on the bulkhead too flat and marred by an extraction mark. The avionics bay is totally fictitious, but I will not spend time on it because it will not be very visible. I am just adding the handles to the boxes and few other small things. As I said, nothing special to show for now, best regards, Dan

- 137 replies
-
- 10
-
-
Thanks for your messages. It will be good having you watching over my shoulder in building this, by now, iconic powerful aircraft. I am sure we will have plenty of opportunities to digress about it. Hope to be up to expressed expectations 😉. See you soon, Dan PS - Chris, thanks for having better finalised the title.
-
Dear all, after an interval, during which I restarted also building my model ship, I would like now to share with you a build of a most noticeable aircraft, the McDonnel Douglas F-15 in its version A (or C). After my last build posted here, my interest with red star aircraft recently dropped and I think that I will not feel like building another one for quite a while. This kit is not what one can define a 'state of the art' kit, having being issued as a 'C' version by Tamiya back in 1991 and being, in turn, a re-boxing of an F-15A kit which was previously released in 1988. This is my oldest kit, which I bought indeed around 1991, when I felt like restarting the hobby. However, it remained untouched until now and its time to be built has finally arrived. I do not trust the included decals that look thick and rather yellowed, therefore I sourced new decals that depict one of the aircraft based at Soesterberg, here in the Netherlands starting from 1980. These machines were version 'A' so I will try to retrofit the kit to its original version. Once I open the box, I was confronted with the sheer size of this aircraft. This was of course known to me, having also visited the museum at Soesterberg where one on these F-15 is displayed, but it is always kind of surprising when you have the 1/48 model directly on your table. The model, although quite old, still shows a nice level of detail of its external surfaces, while it is lacking of accuracy as far as the interior is concerned. Therefore, I will concentrate more on the external finish leaving the cockpit with only minimum improvements, i.e. the ones that will be visible from a closed canopy. This is all for the moment, best regards, Dan
resiz.thumb.JPG.e50026db2238647671c0261b59f24189.JPG)
- 137 replies
-
- 14
-
-
Exceptional results, I would say! Especially the exhaust area looks very convincingly heat scorched. I guess you take pictures with a flash light? With a less harsh light results might appear even better. Well done, Dan


resiz.JPG.14ba87a8de5ae634173f612cd22c992a.JPG)
