marsalv
-
Posts
617 -
Joined
-
Last visited
Content Type
Profiles
Forums
Gallery
Events
Everything posted by marsalv
-
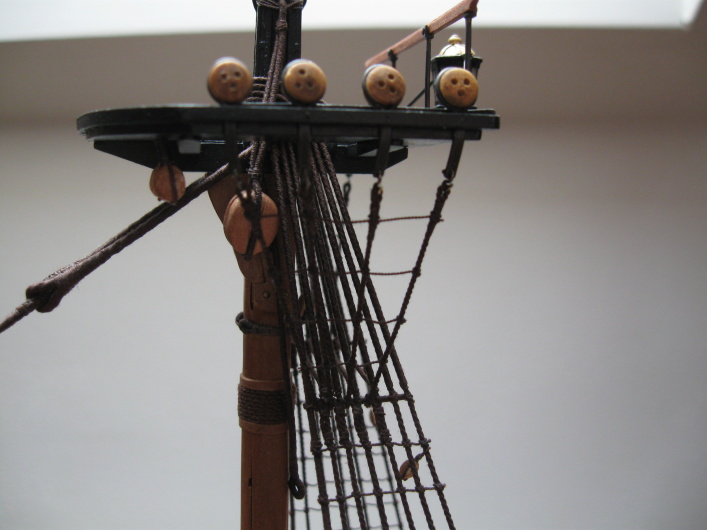
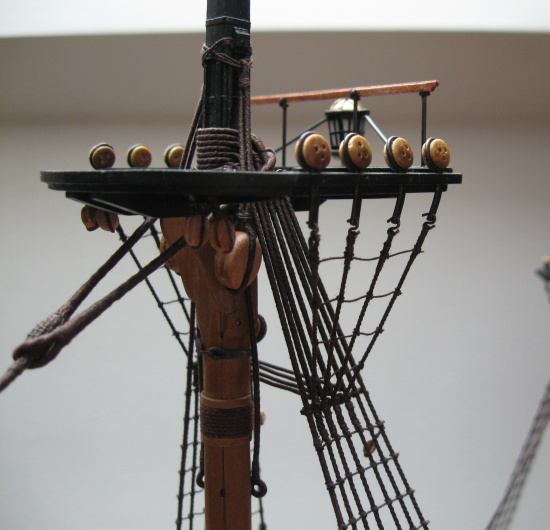
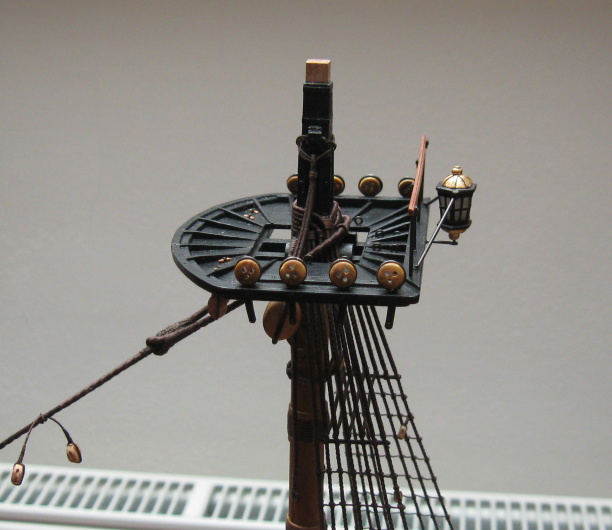
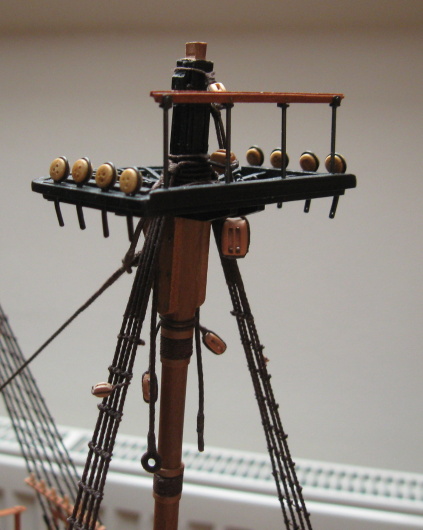
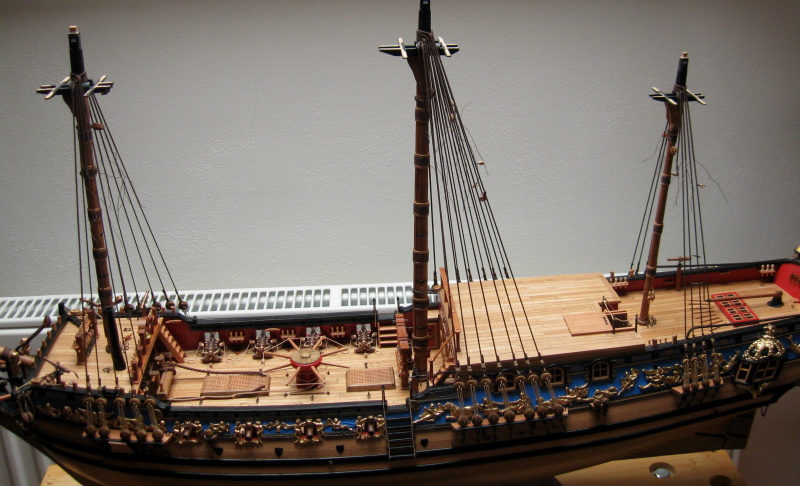
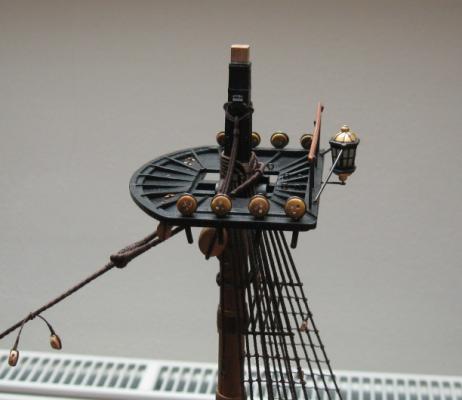
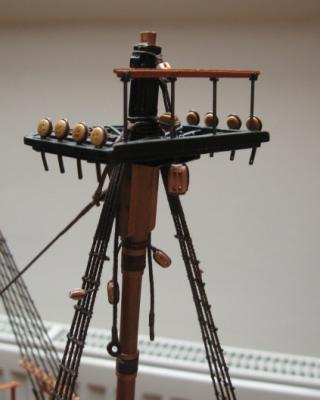
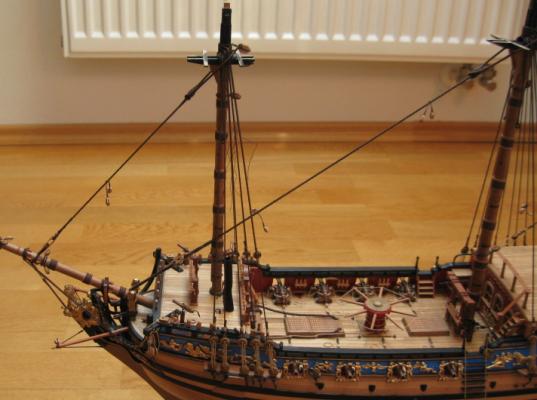
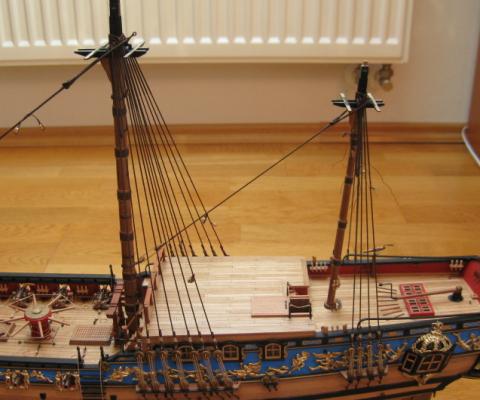
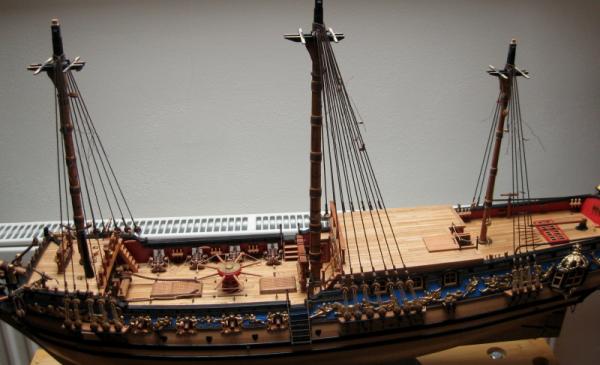
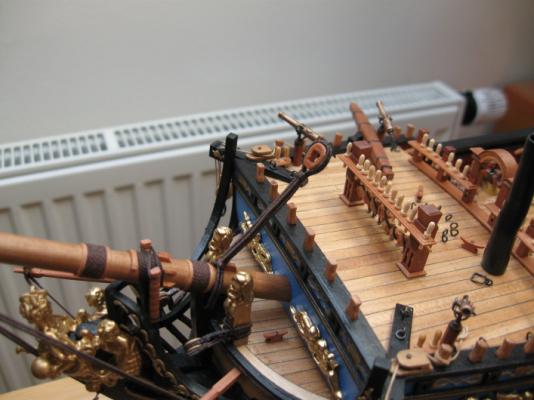
Installation of lower yard jeer tye blocks and top final assembly. Slowly it begins to take shape.
- 206 replies
-
- 6
-

-
- royal caroline
- panart
- (and 1 more)
-
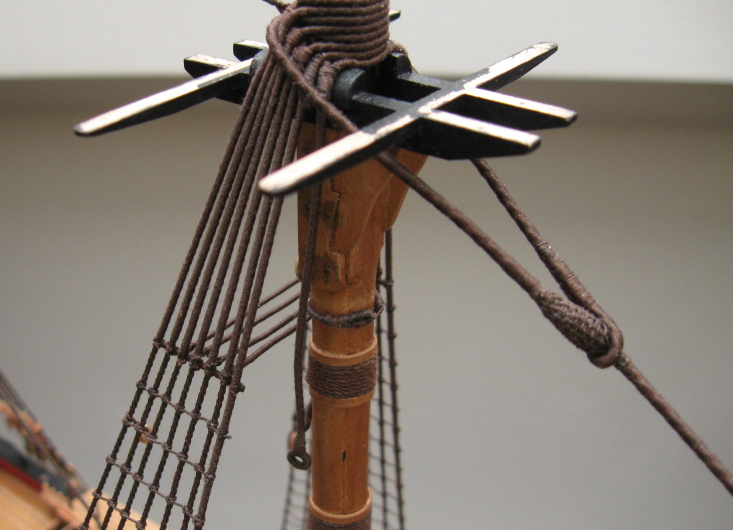
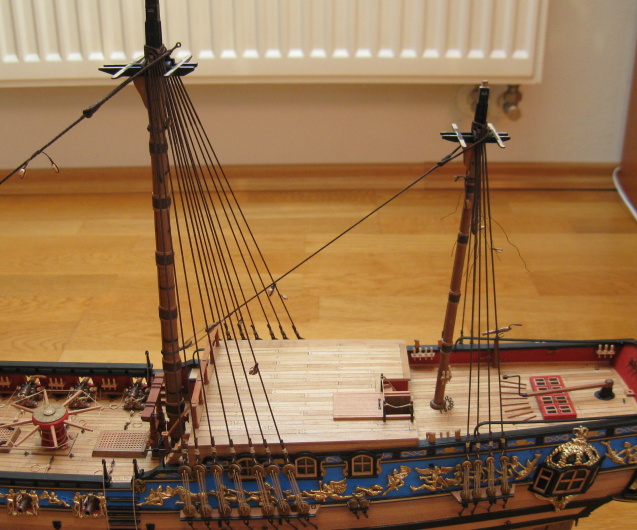
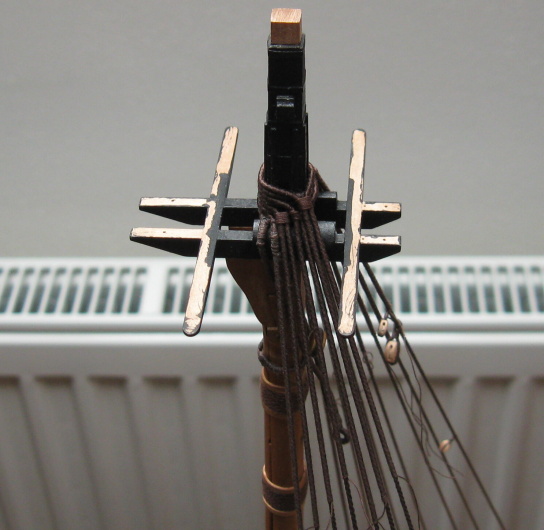
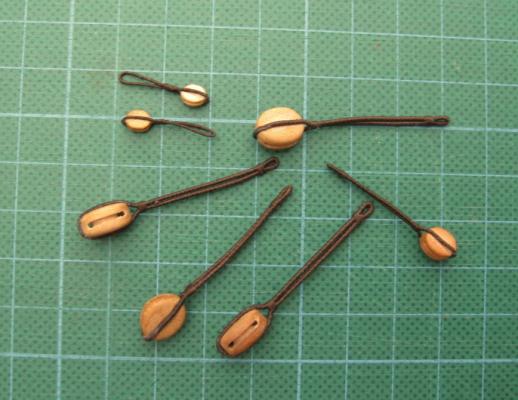
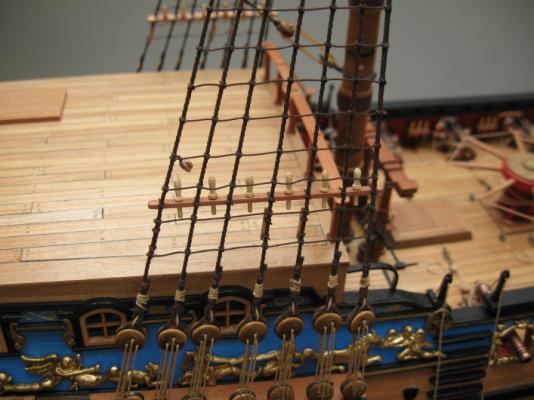
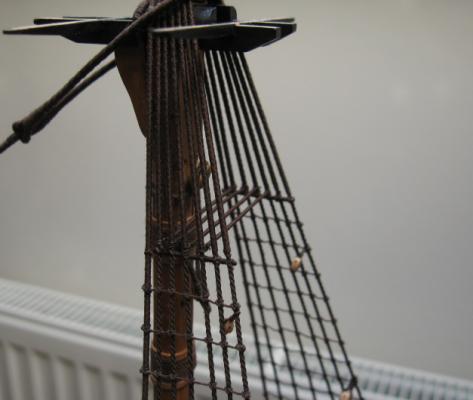
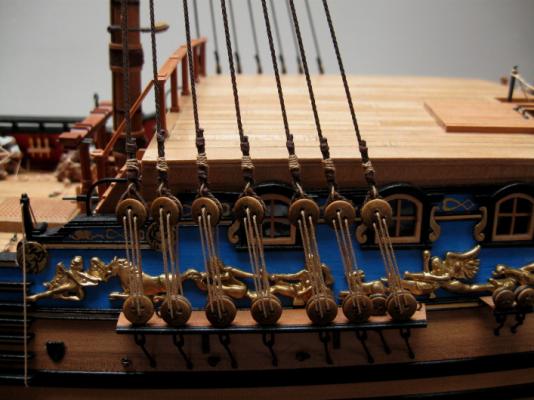
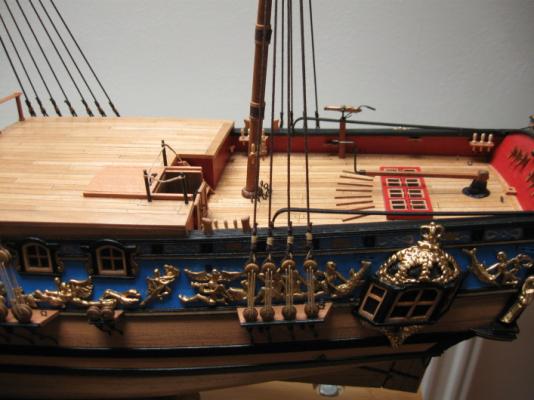
The belaying pins and cleats are installed on the shrouds.


- 206 replies
-
- 6
-
-
- royal caroline
- panart
- (and 1 more)
-
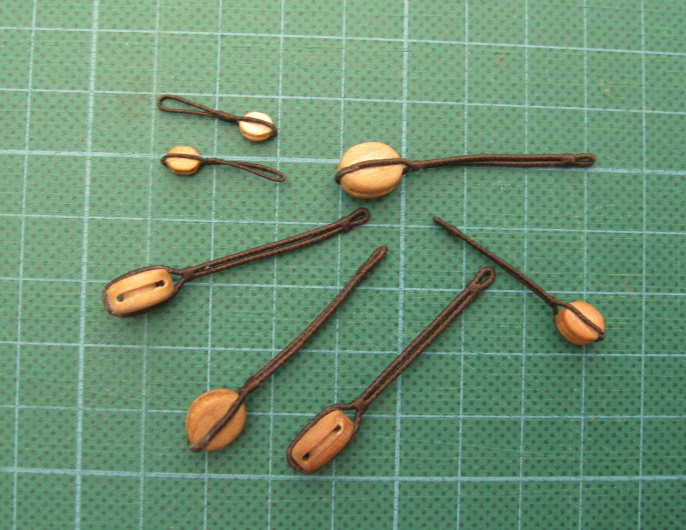
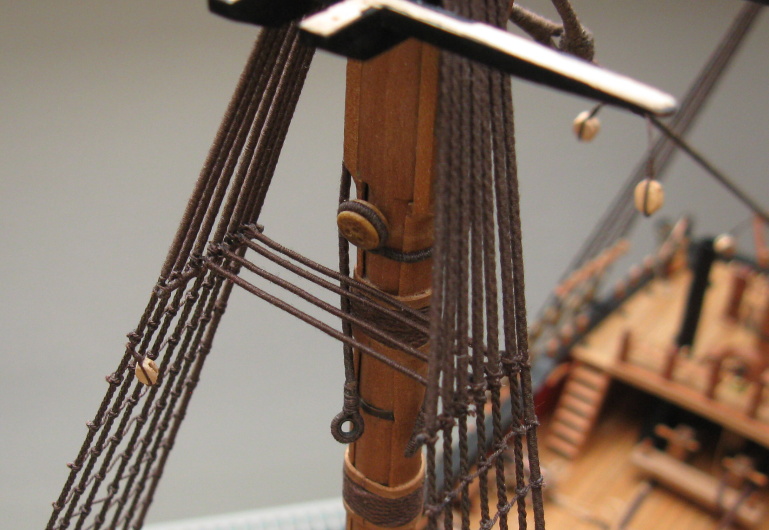
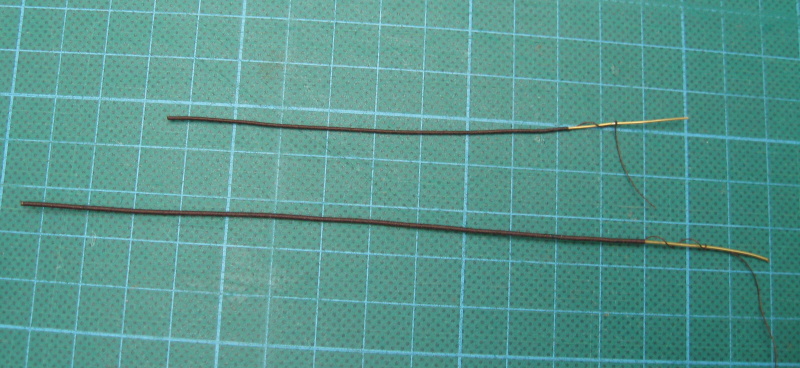
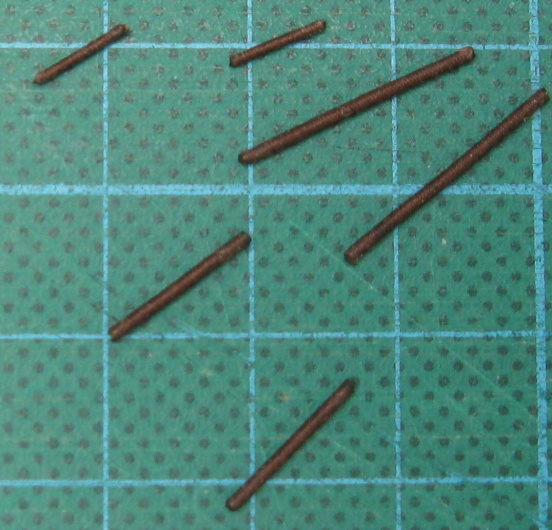
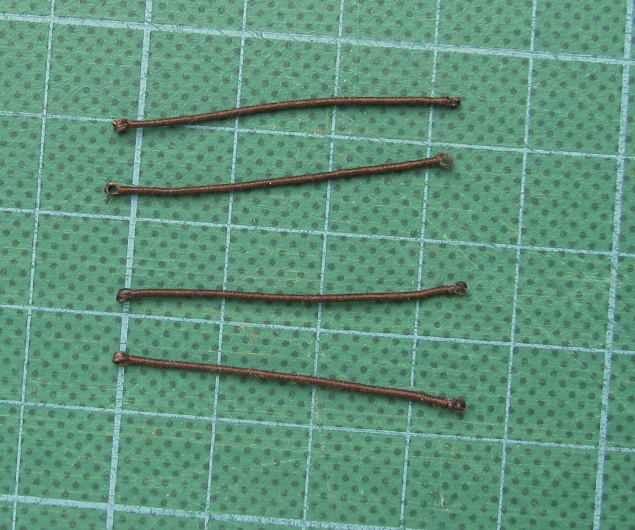
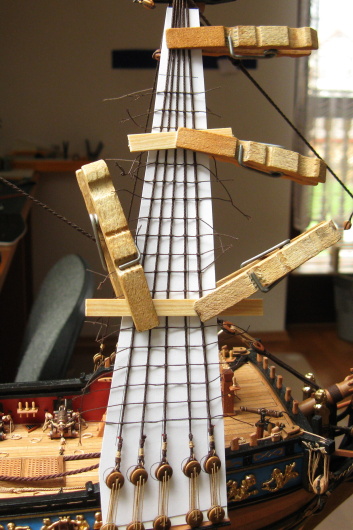
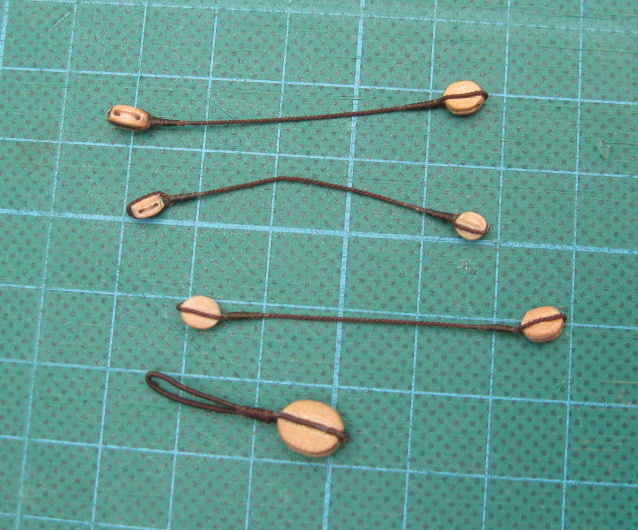
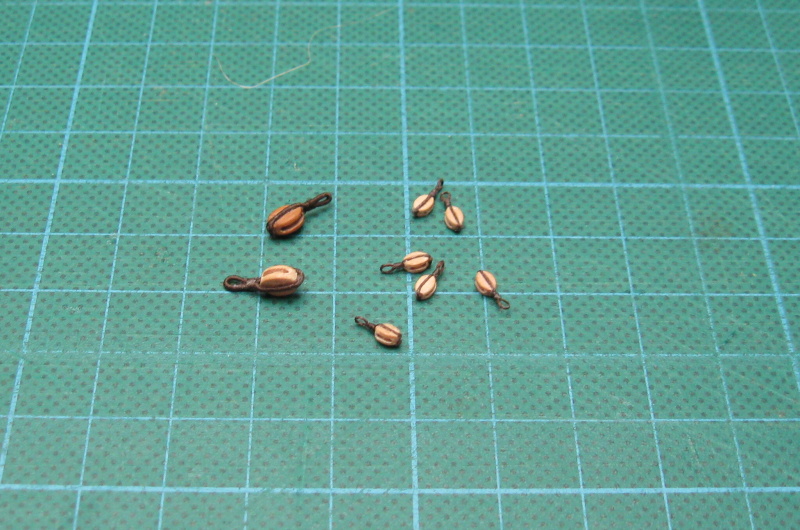
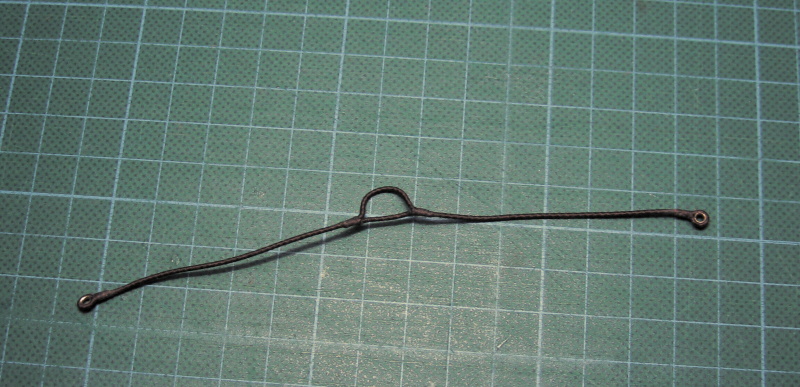
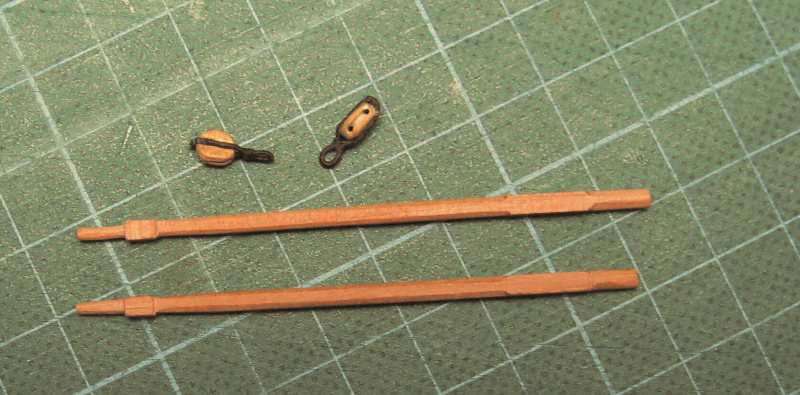
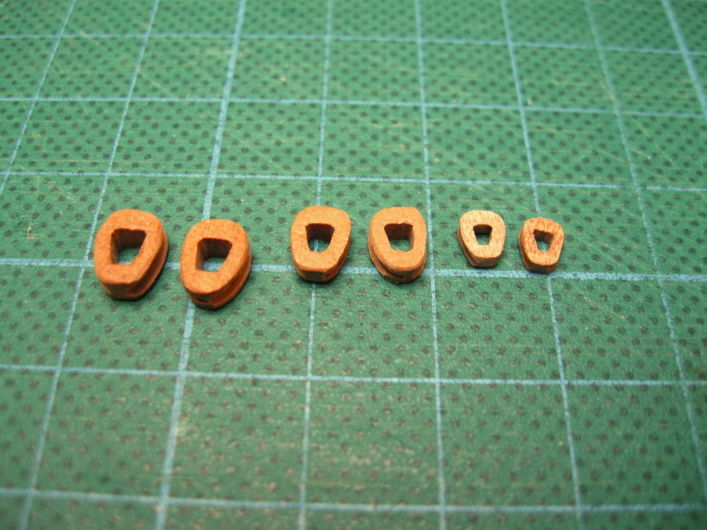
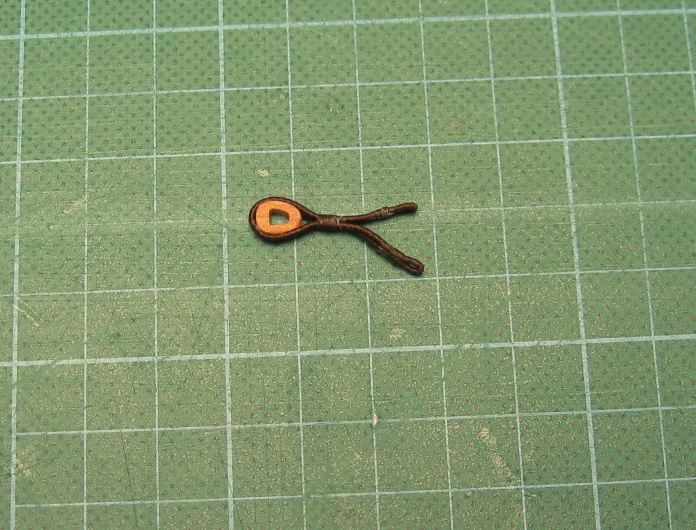
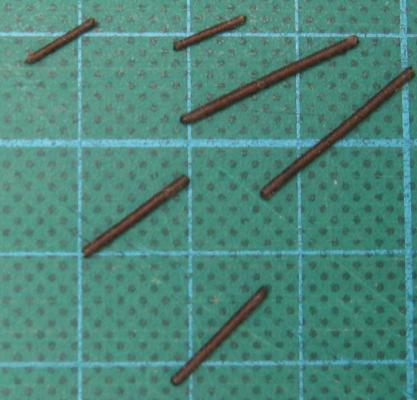
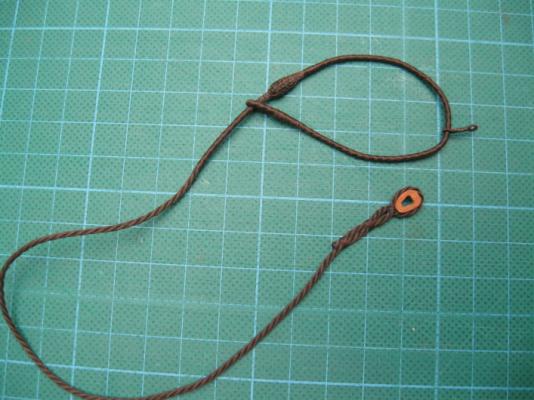
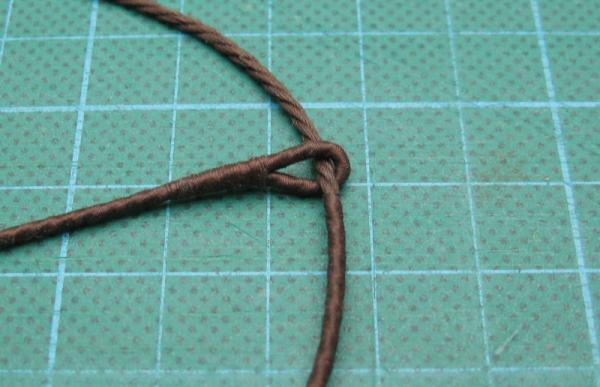
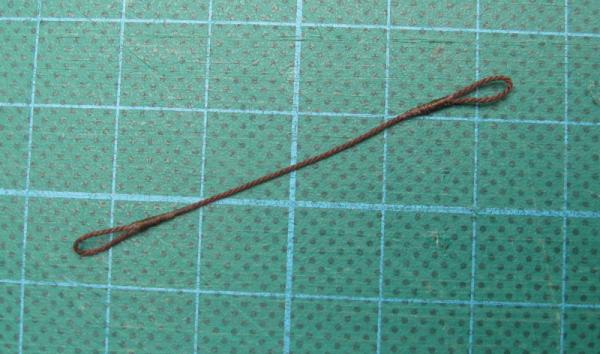
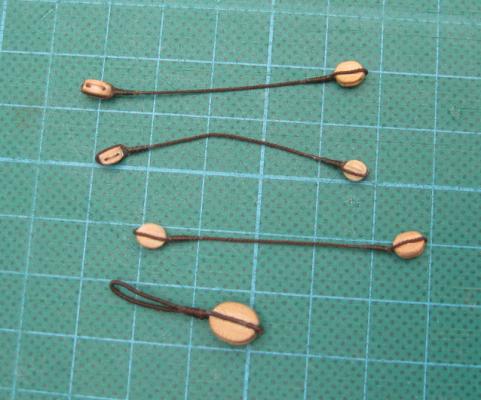
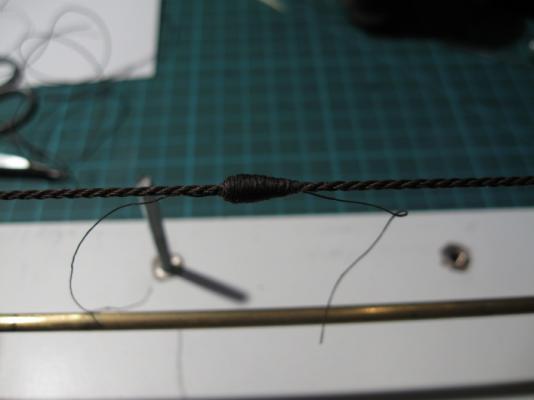
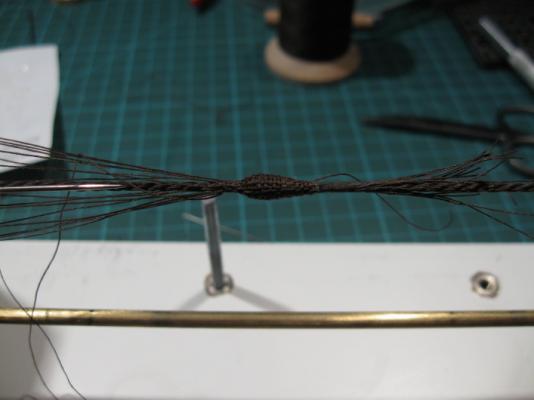
You're partially right. The first two pictures are the futtock staves and third are the catharpins. But the futtock staves don´t run through the end of catharpins. Catharpins are attached to the futtock staves with thread witch is going through loop in the catharpins and about futtock staves.
-
Thanks for nice comments to all . To GuntherMT: The catharpins are made form one thread - see picture tutorial.

- 206 replies
-
- 5
-
-
- royal caroline
- panart
- (and 1 more)
-
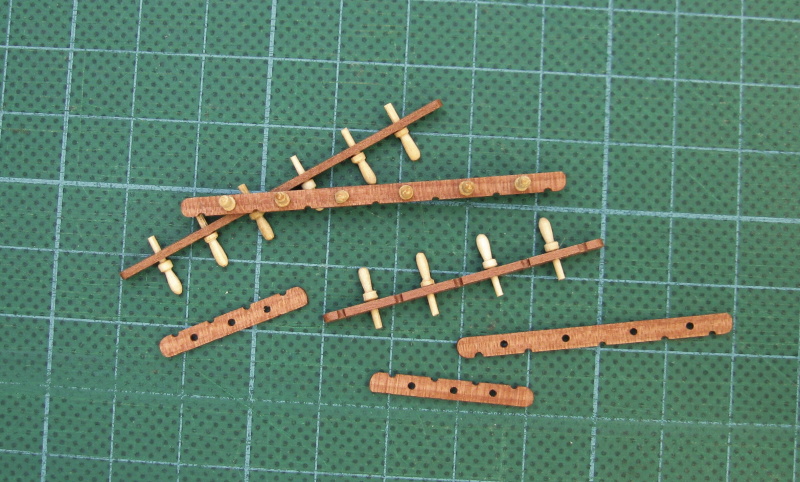
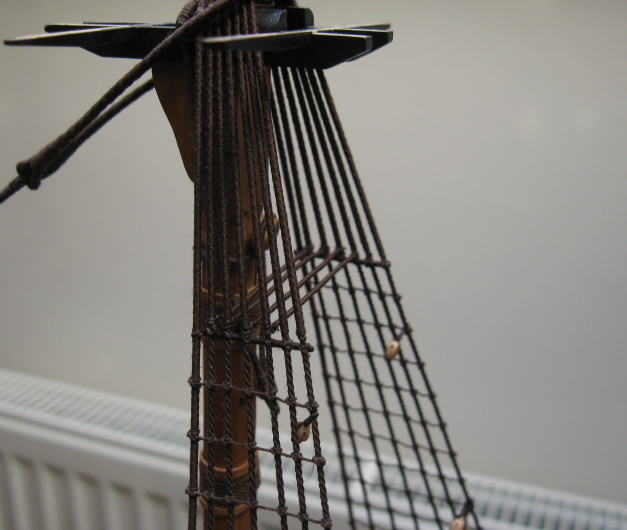
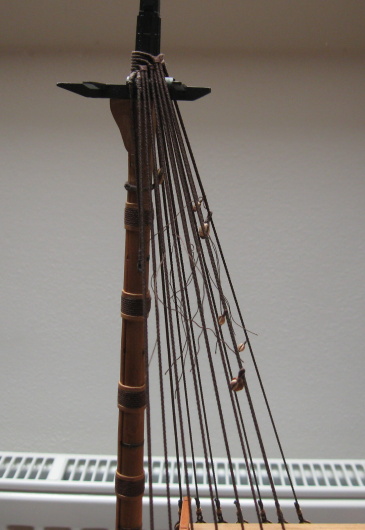
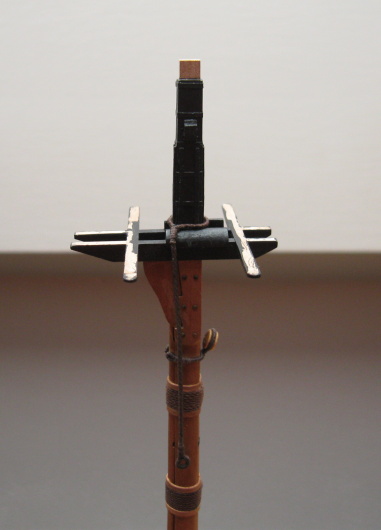
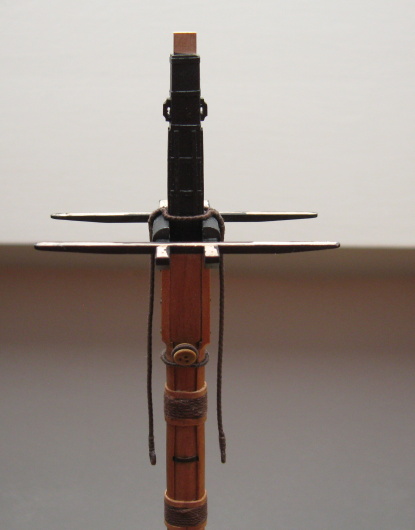
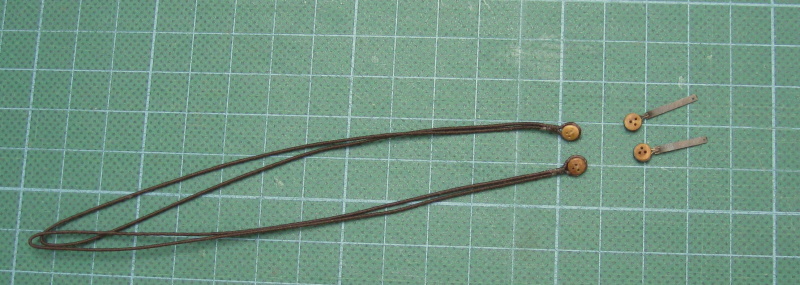
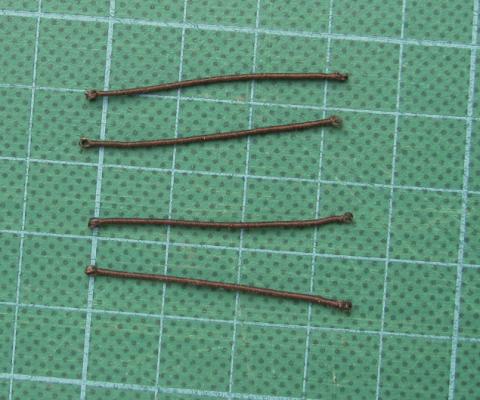
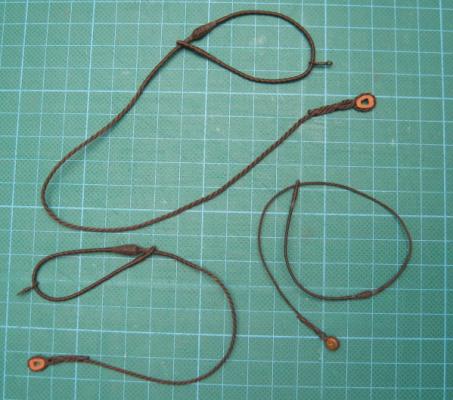
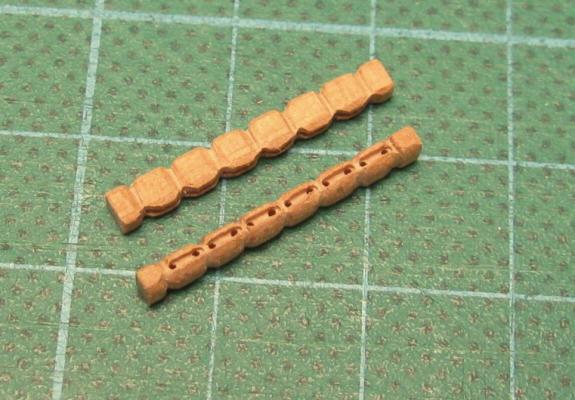
Little progress - futtock staves nad catharpines are installed.
- 206 replies
-
- 4
-
-
- royal caroline
- panart
- (and 1 more)
-
Hi to all, the most useful books for me are the following: - Masting and Rigging of english ships of war - James Lees - Rigging a sixth rate sloop of 1767-1780 - David Antscherl Citation from the second one: "In reality there was an eye spilce in each end of line that was then seized to the end shrouds, and the line clove hitched around each intermediate shroud. For model work, unless you are absolute purist, this can be simplified by omitting eye splices and seizing." It is also my case, I used the clove hitch for all shrouds. The knot is finally fixed with small drop of diluted PVA glue.
-
Hi Alex, beautiful work. Your log is great inspiration for me.
-
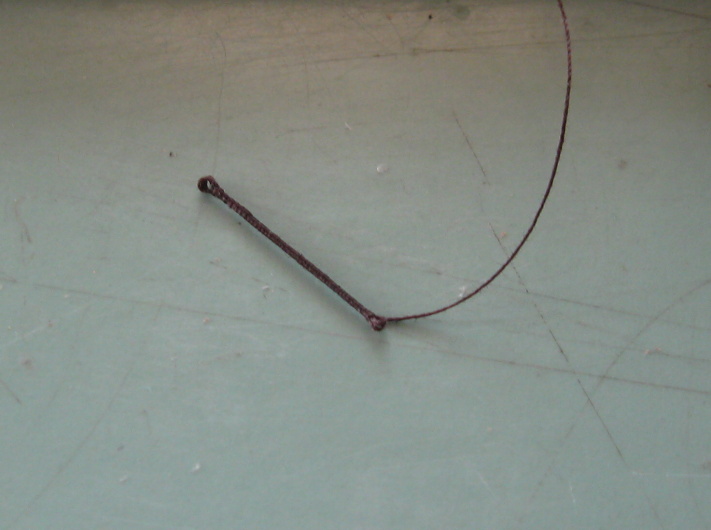
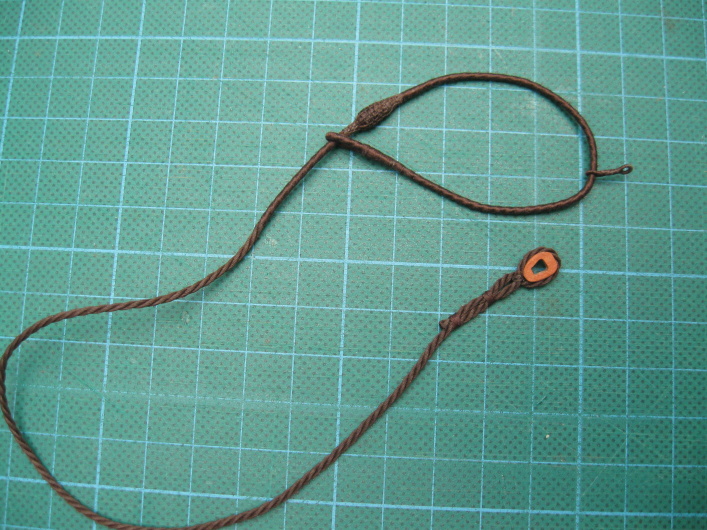
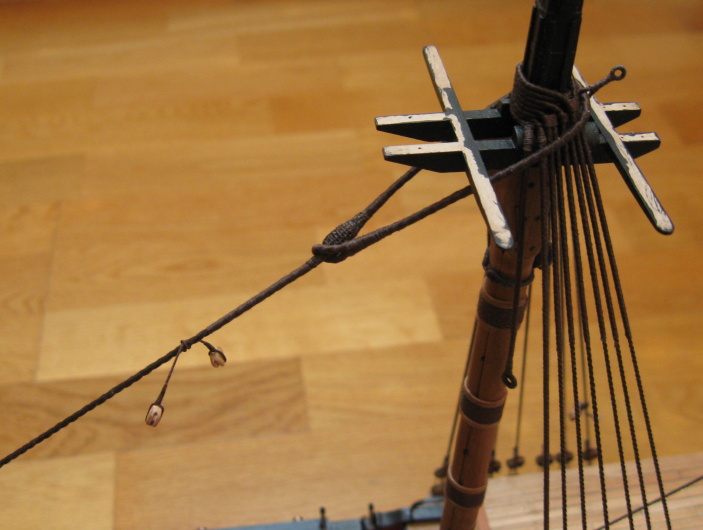
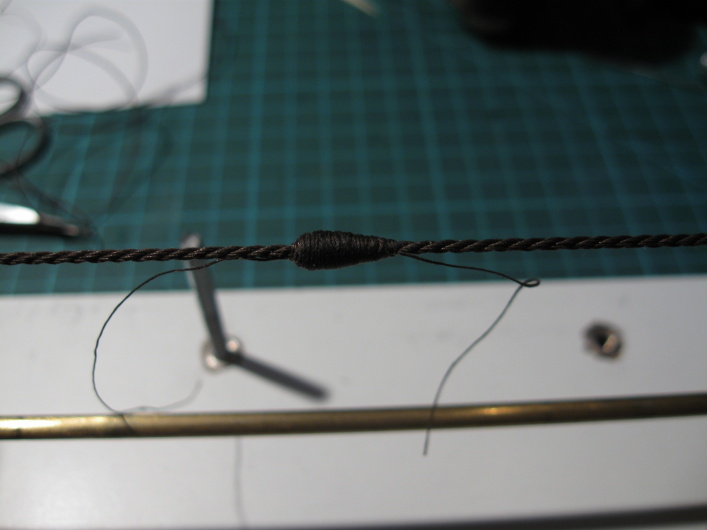
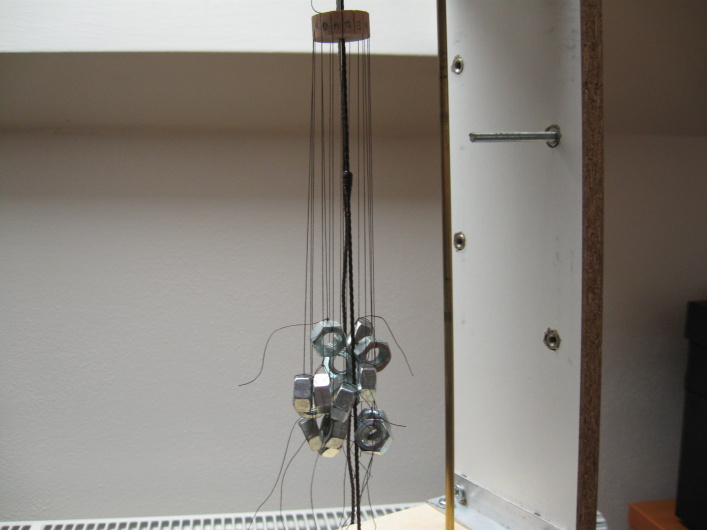
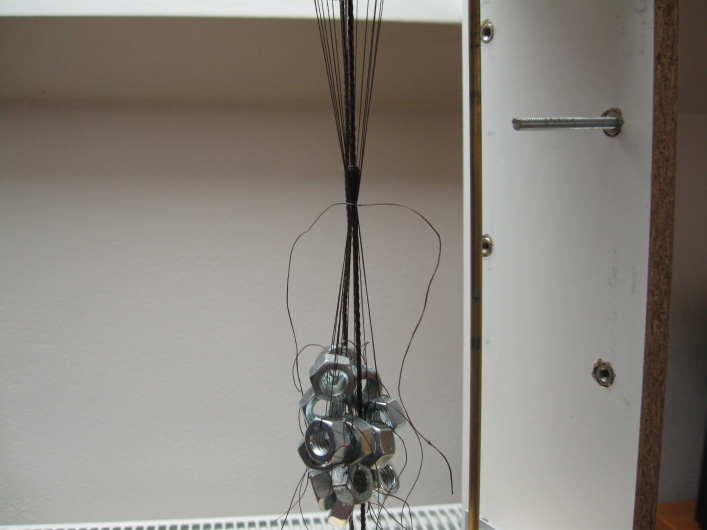
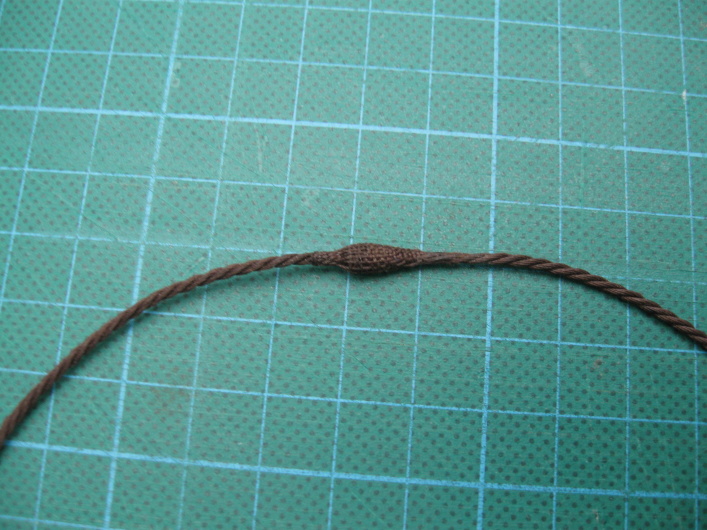
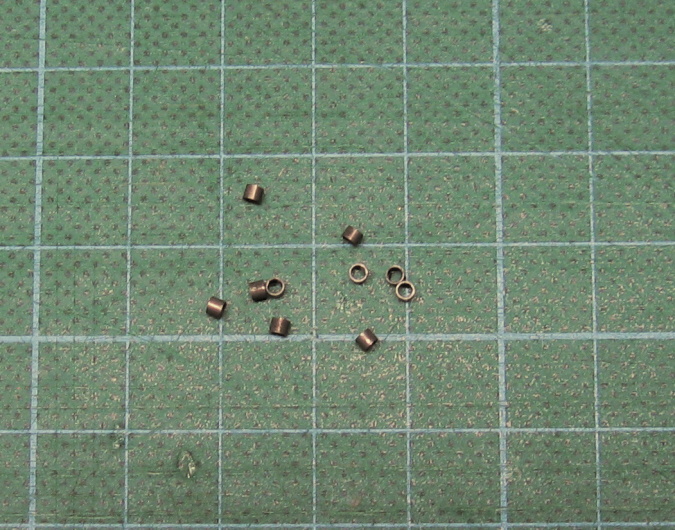
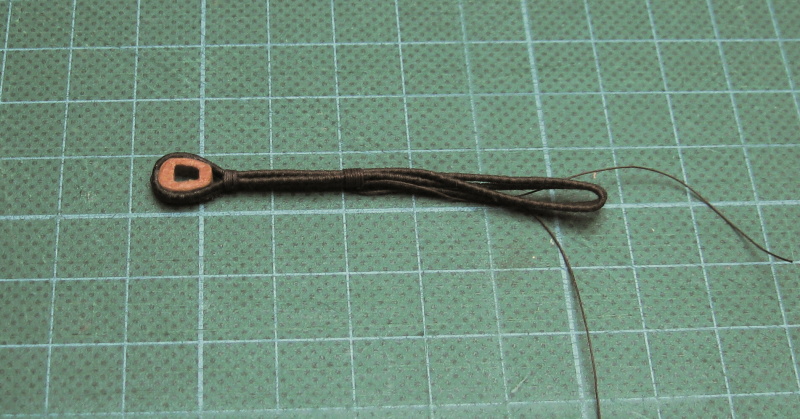
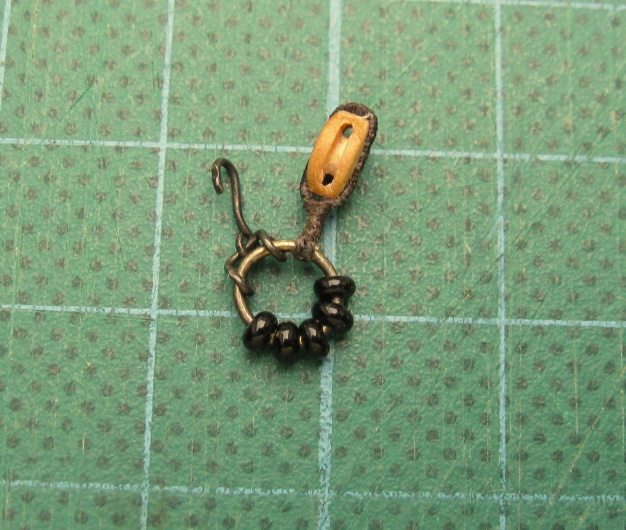
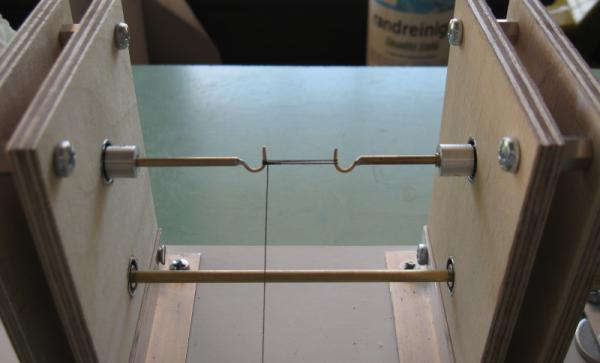
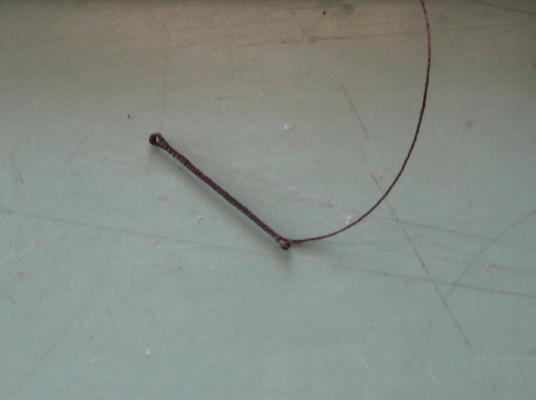
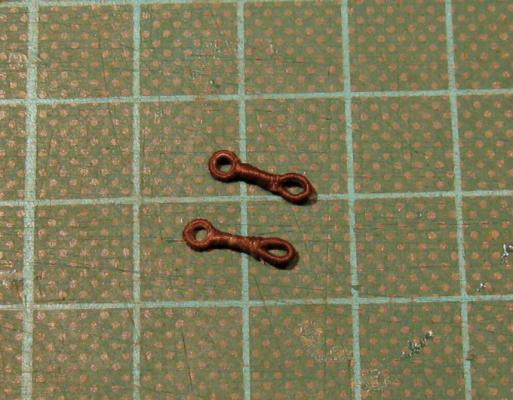
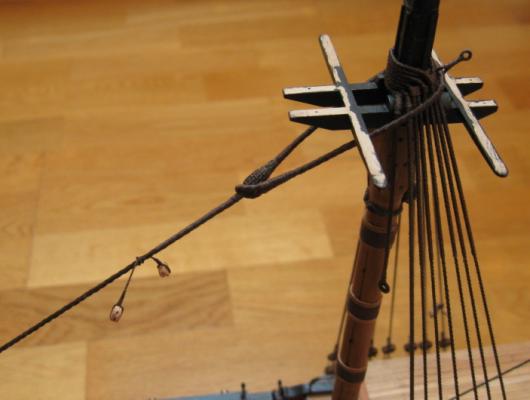
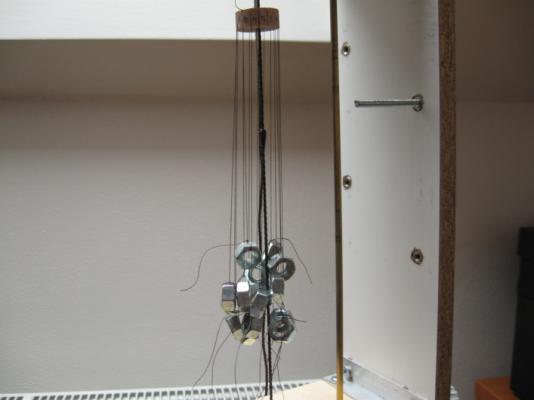
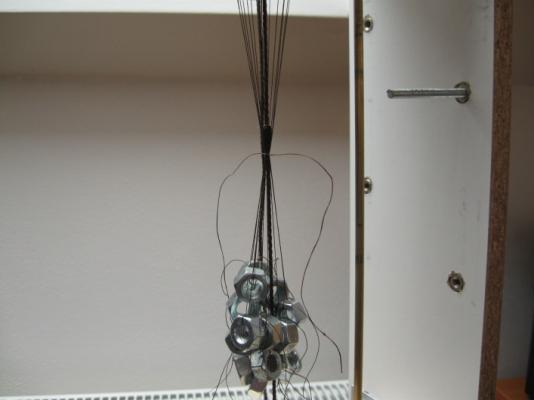
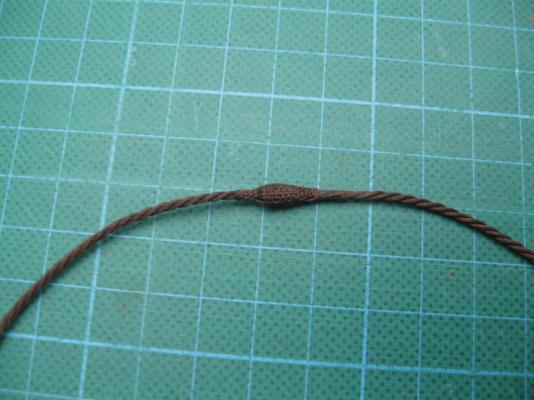
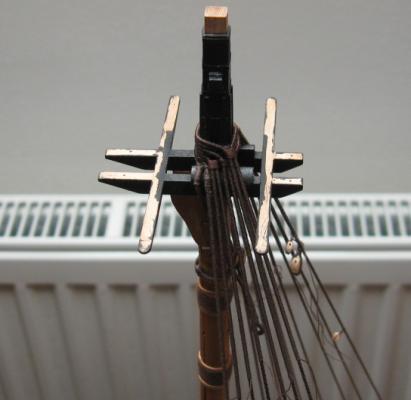
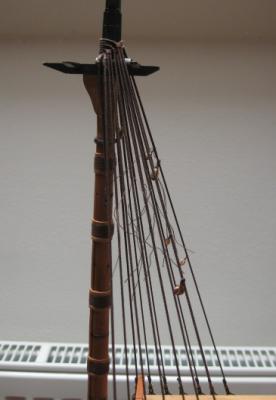
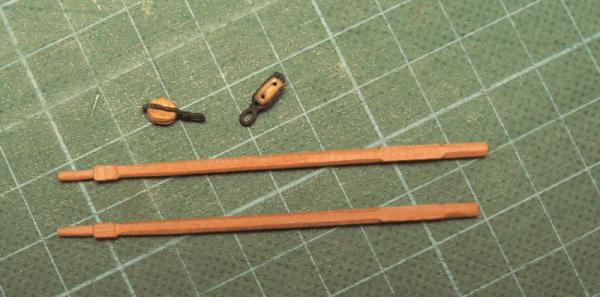
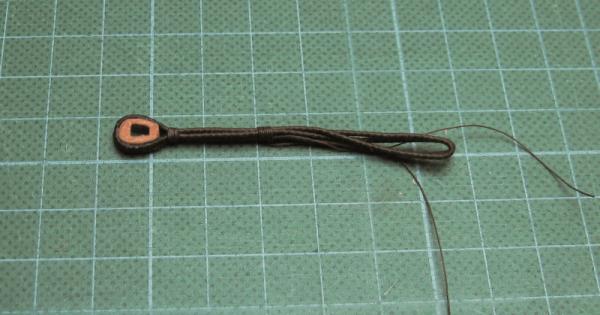
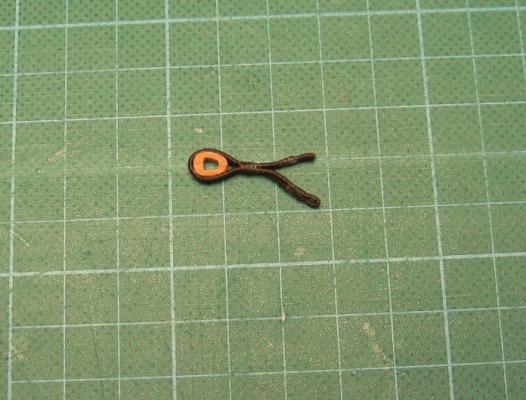
Hi GuntherMT, there is odd number of grooves on the wooden ring, each groove contains one thread. I used a single thread and weaved it around to make a spiral - this is reason why skeleton must contain odd number of thread. If you use even number of thread in skeleton, you can not use a single thread, but you must use a new thread for each row in mouse - this is not good idea.
- 206 replies
-
- 1
-
-
- royal caroline
- panart
- (and 1 more)
-
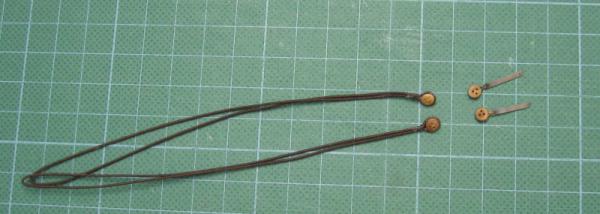
All the ends are secured with diluted PVA glue to the stay. It is very important that the "skeleton" from thread must contain an odd number. Then just drag out another thread throughout the "skeleton", alternately one under, one above thread. It is little difficult and time-consuming work. The stays (and their accessories) is ready and installed on the model.

- 206 replies
-
- 7
-
-
- royal caroline
- panart
- (and 1 more)
-
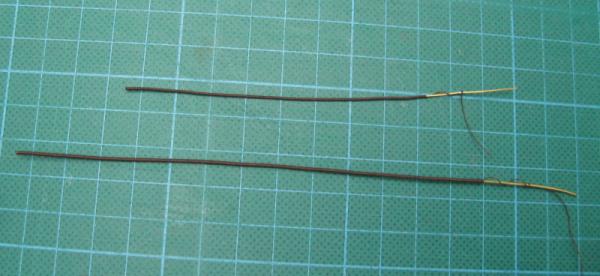
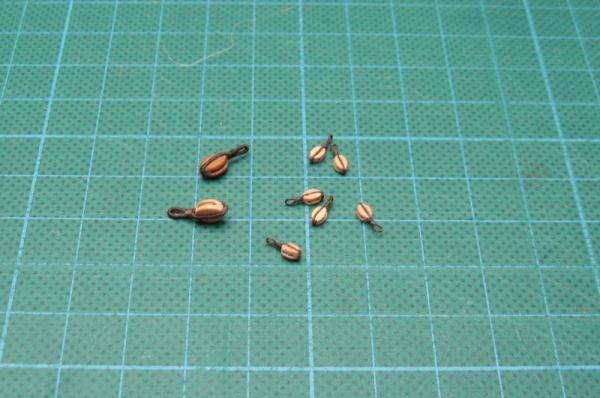
Thanks Bedford. Next part - mouse for the main, fore and mizzen stay.
- 206 replies
-
- 9
-
-
- royal caroline
- panart
- (and 1 more)
-
Very nice work. Proxxon milling maschine is irreplaceable working tool.
-
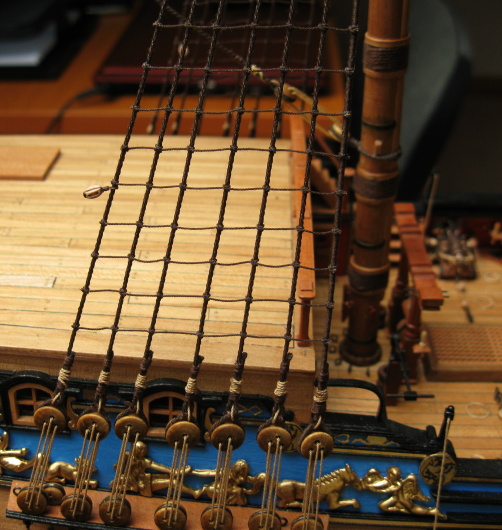
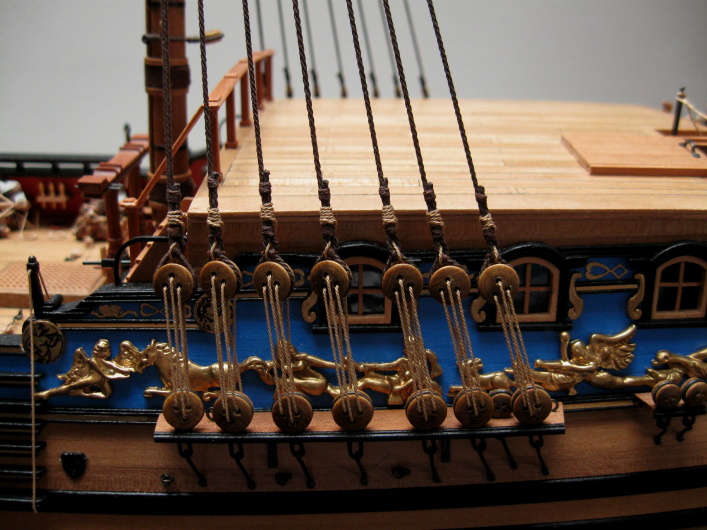
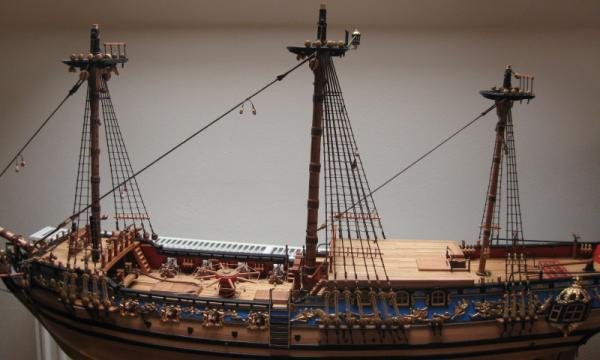
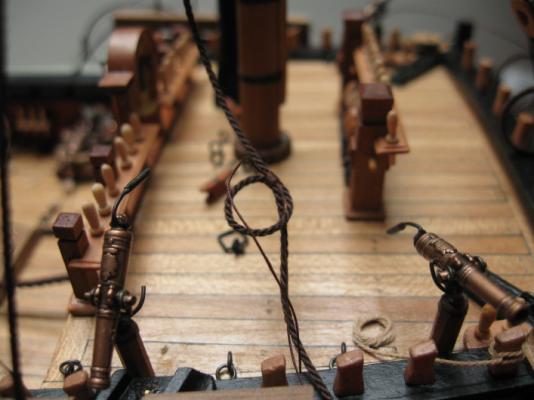
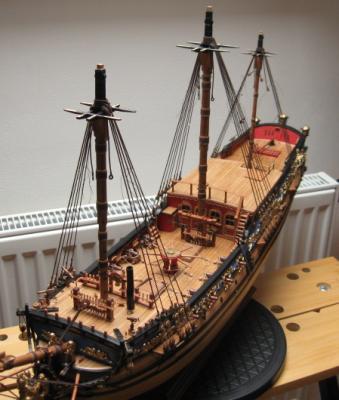
I have finished the shrouds instalation. The used dead eyes are not ideal - groove for the rope is too big and the rope is hidden in the groove. I will try to make my own dead eyes for my next project (Pandora).
- 206 replies
-
- 9
-
-
- royal caroline
- panart
- (and 1 more)
-
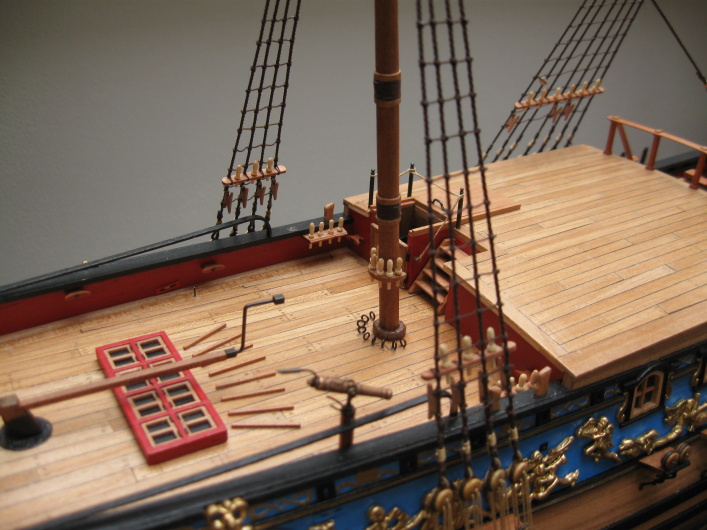
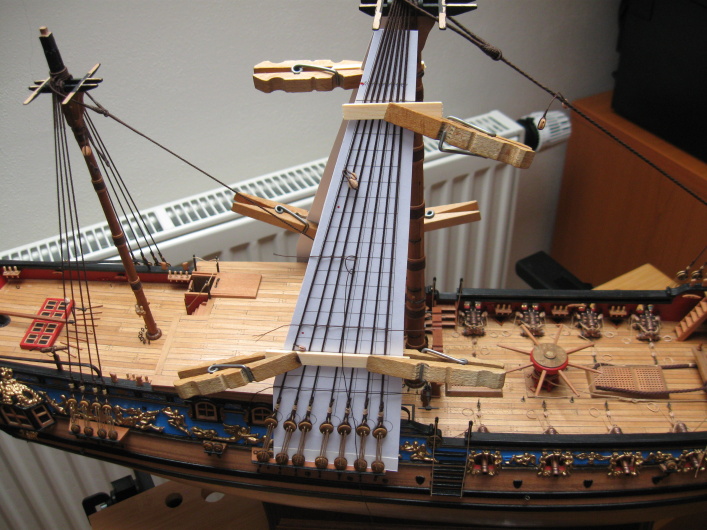
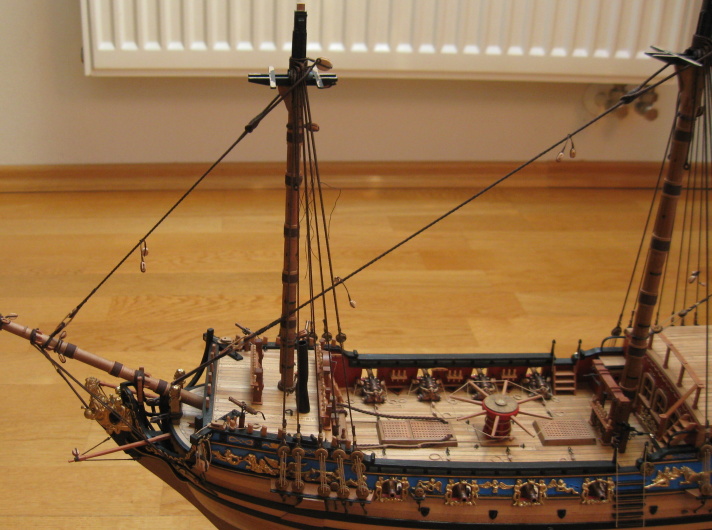
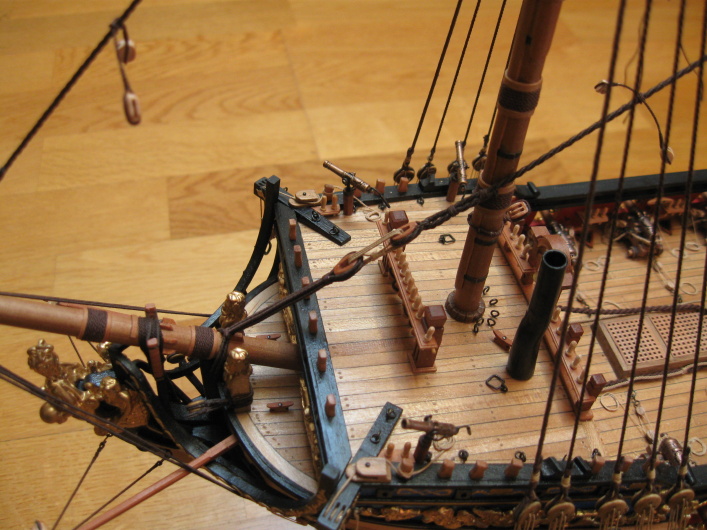
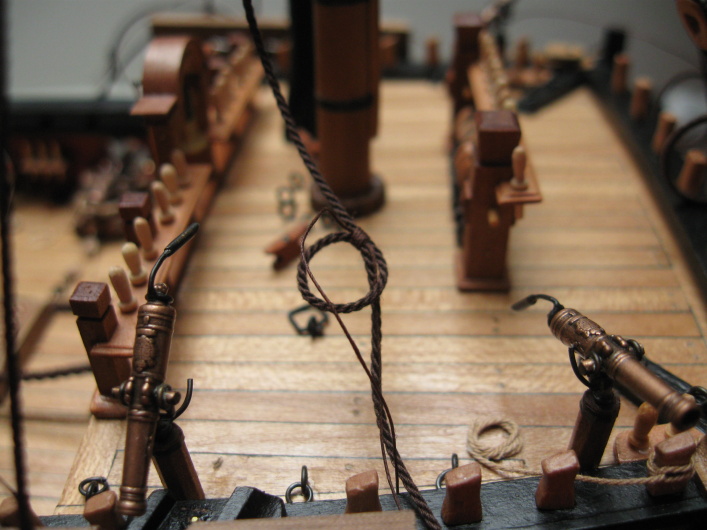
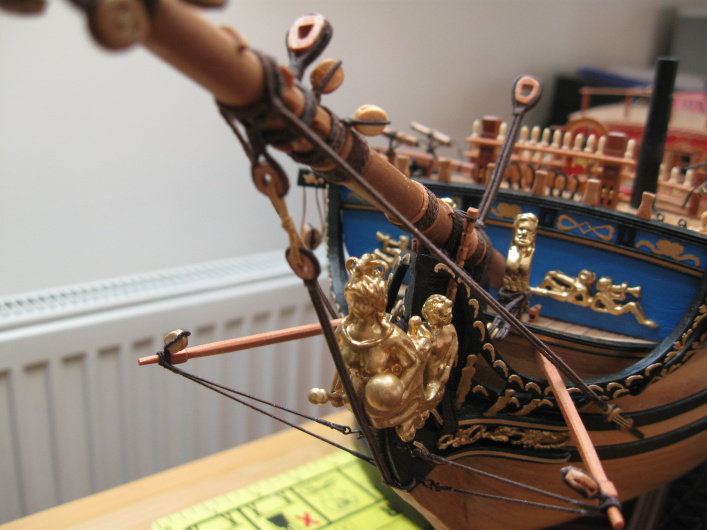
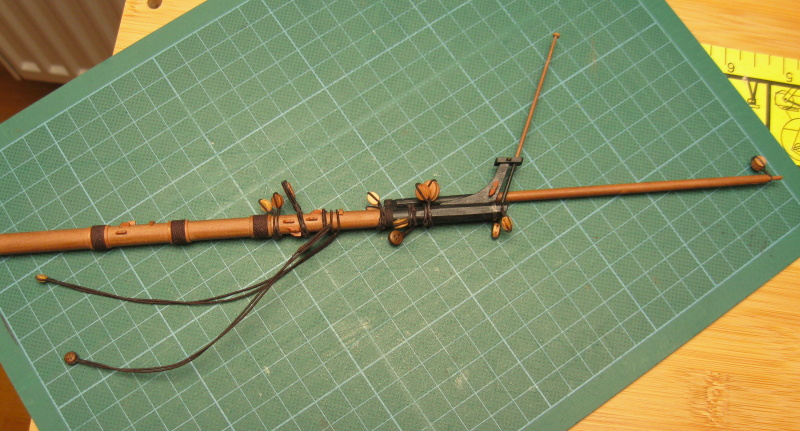
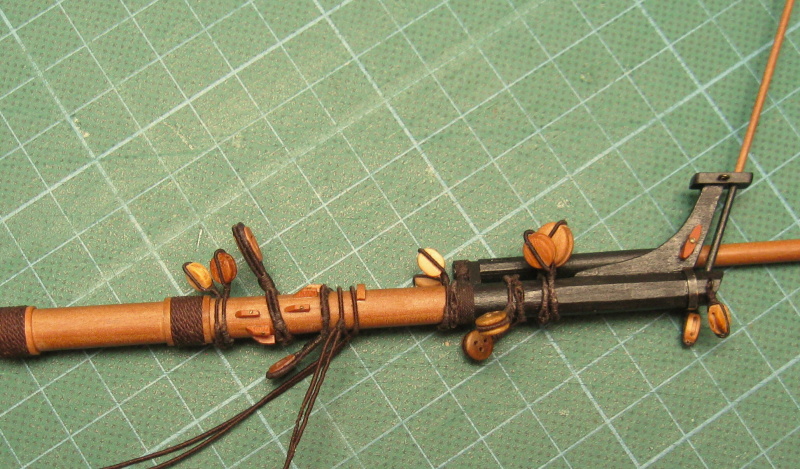
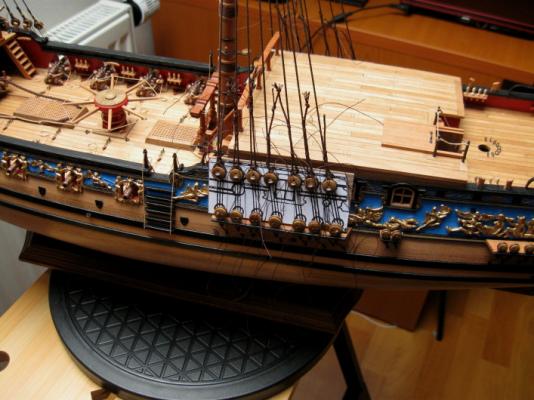
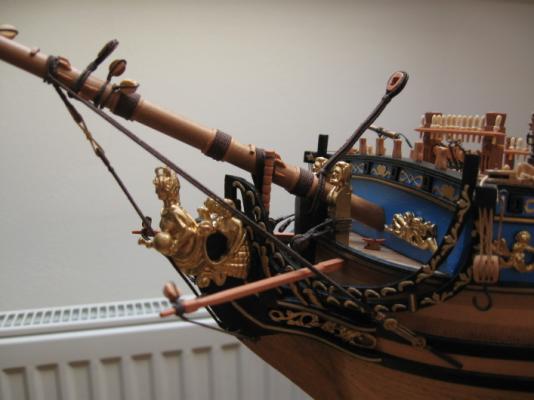
Works on bowsprit rigging are cpmpleted now - bobstay shrouds, bowsprit shrouds, boomkin shrouds) and main stay collar.


- 206 replies
-
- 11
-
-
- royal caroline
- panart
- (and 1 more)
-
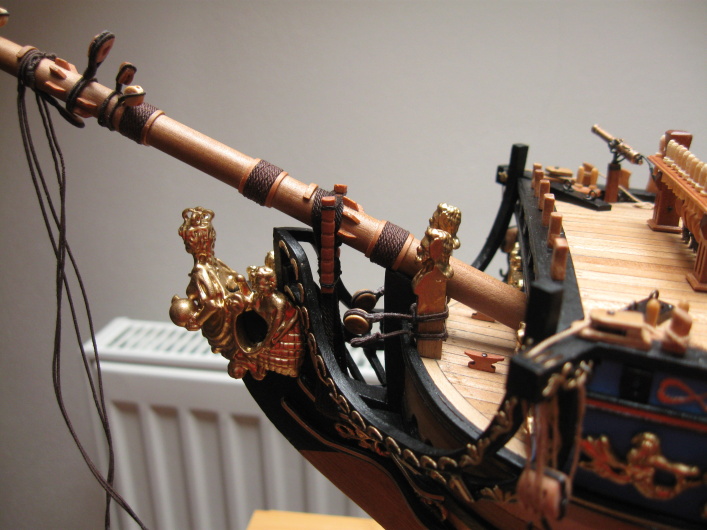
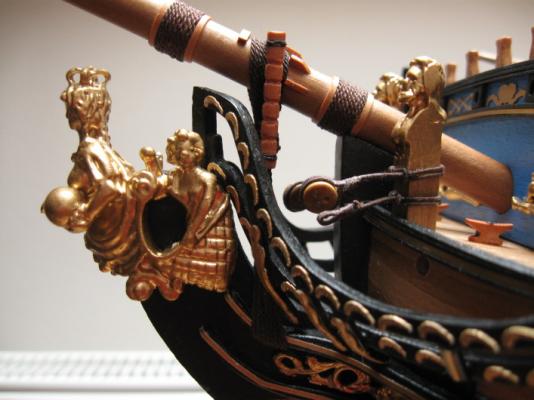
Thanks Nigel . Bowsprit is attached to the hull. A few pictures of the gammoning and rack-blocks. .

- 206 replies
-
- 8
-
-
- royal caroline
- panart
- (and 1 more)
-
Hi Alex, wonderfull . Your log is great inspiration fo my work.
-
Hi again, after a short break I would like finally finished my Royal Caroline. Although most of the parts are already done, there is still a lot of work on the sails and rigging. I started slowly preparing blocks and auxiliary cables on the bowsprit. Jib traveller will be mounted later on bowsprit.


- 206 replies
-
- 10
-
-
- royal caroline
- panart
- (and 1 more)
-
Pandora by marsalv - FINISHED - 1:52
marsalv replied to marsalv's topic in - Build logs for subjects built 1751 - 1800
Hallo Alex, thank you for compliment. As you can see I was very inspired by your Sphynx log . -
Pandora by marsalv - FINISHED - 1:52
marsalv replied to marsalv's topic in - Build logs for subjects built 1751 - 1800
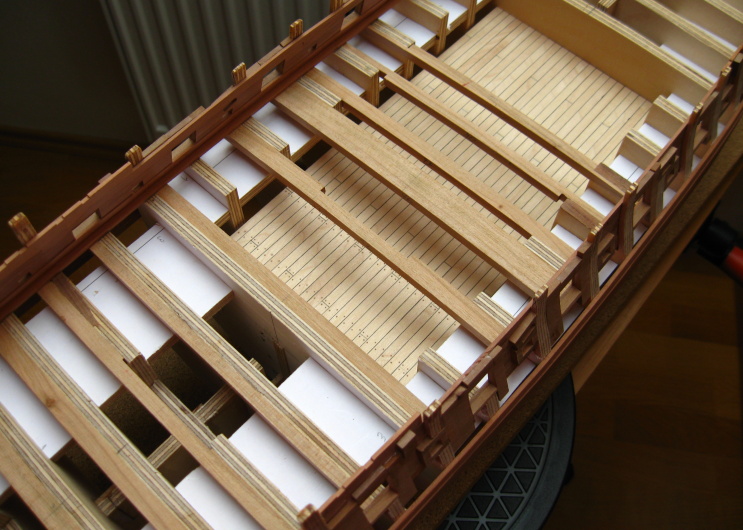
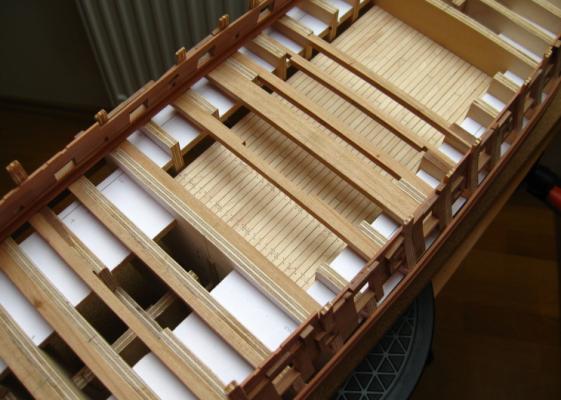
Probably the last work before saving Pandora to hibernate - deck in the officers cabin, gluing the main deck beams.


- 625 replies
-
- 30
-
-
Pandora by marsalv - FINISHED - 1:52
marsalv replied to marsalv's topic in - Build logs for subjects built 1751 - 1800
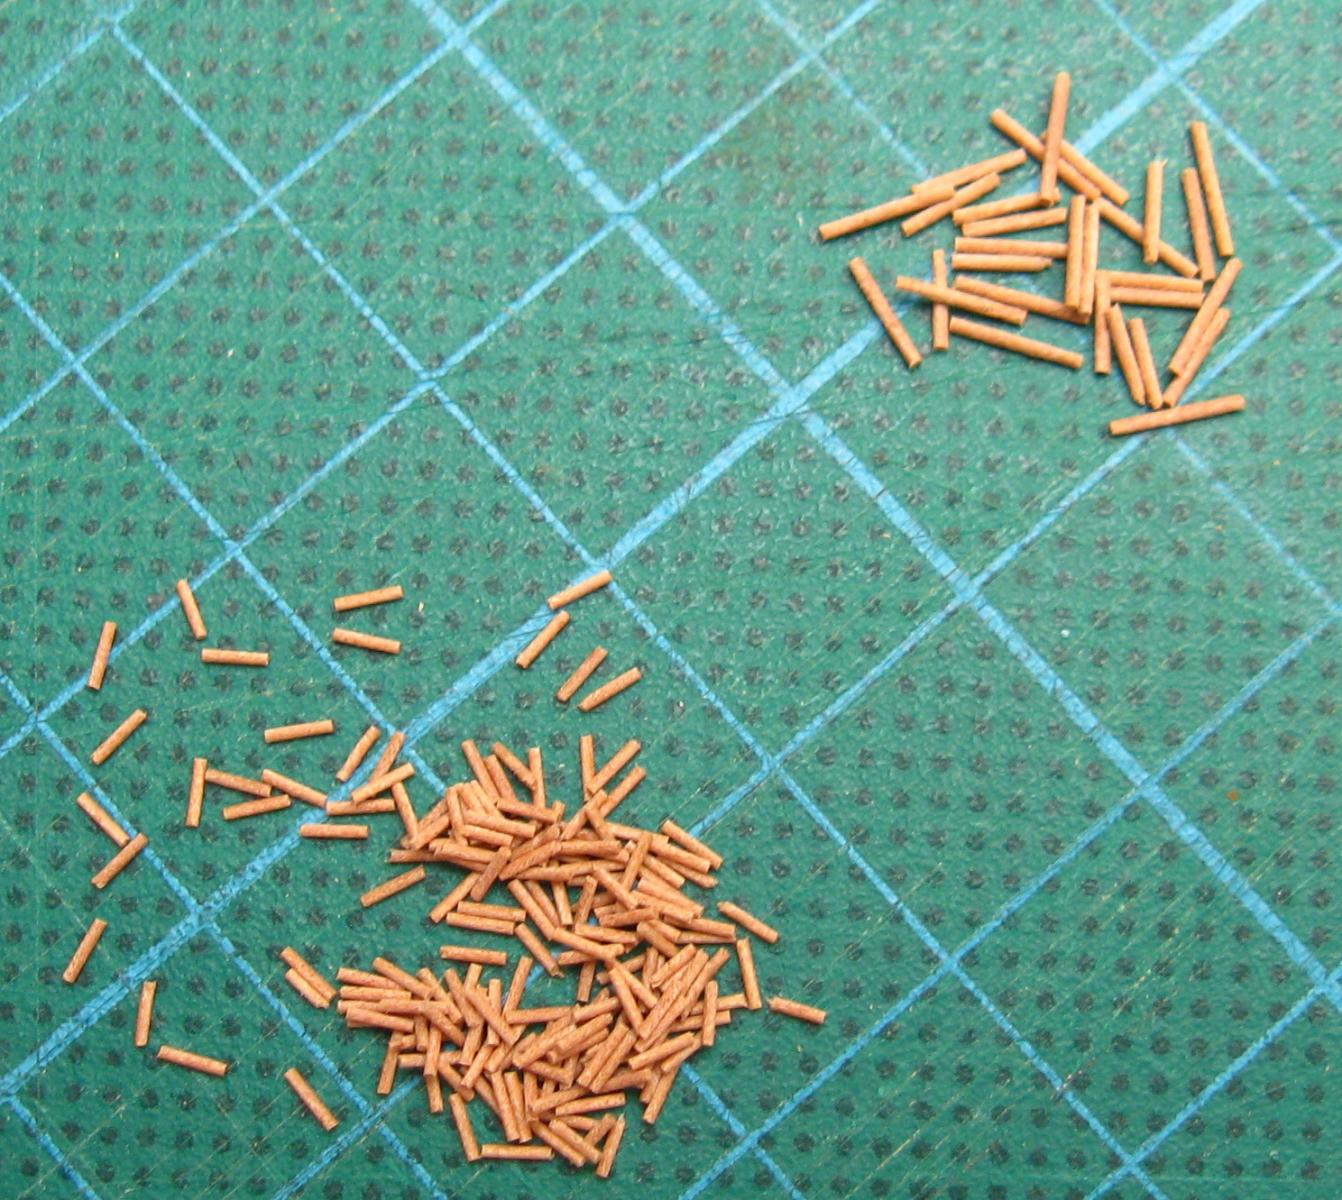
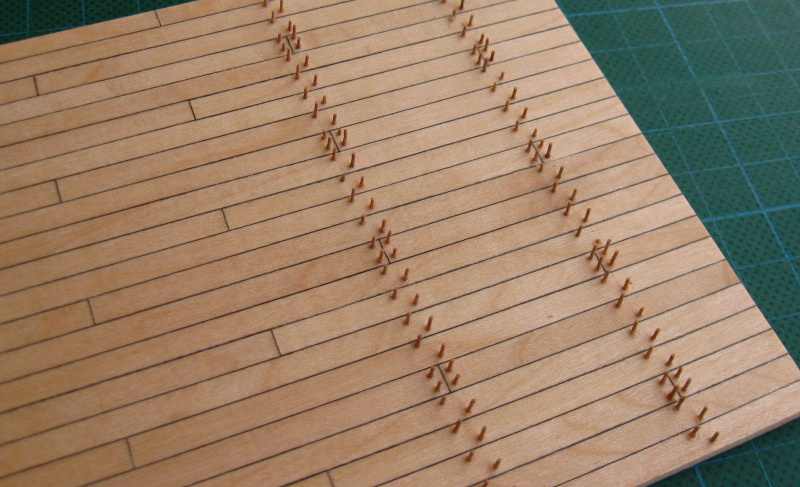
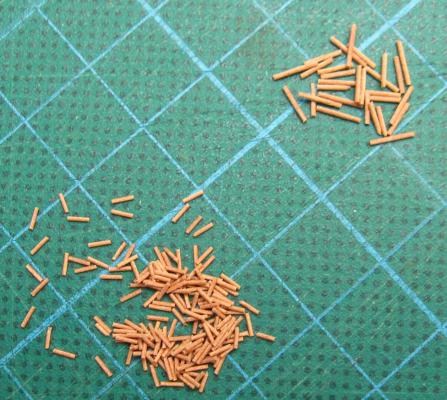
Hi Michael, I will try to answer your qustions (sorry for my bad english). Proxxon drilling maschine has 3 spindle speeds and I use the medium speed. Each treenail is made only with one down/up movement of cutting needle. Sequence is following - down with needle, up with needle, movement wit XY table and again. It´s pretty fast. You must only watch, if you can see treenail in the wood block after drilling. If you see no treenail (black hole), needle is propably blocked with wood and you must clean it. It is also the answer to your third question - treenails MUST stay in wood block. After drilling cover the face side with holes with adhesive tape, carefully cut off the opposite side and then push and remove the treenails from the block. It is easy . -
Pandora by marsalv - FINISHED - 1:52
marsalv replied to marsalv's topic in - Build logs for subjects built 1751 - 1800
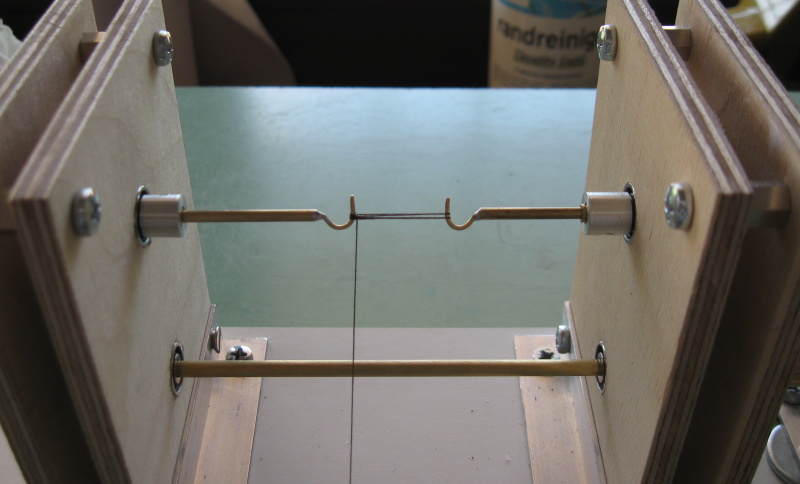
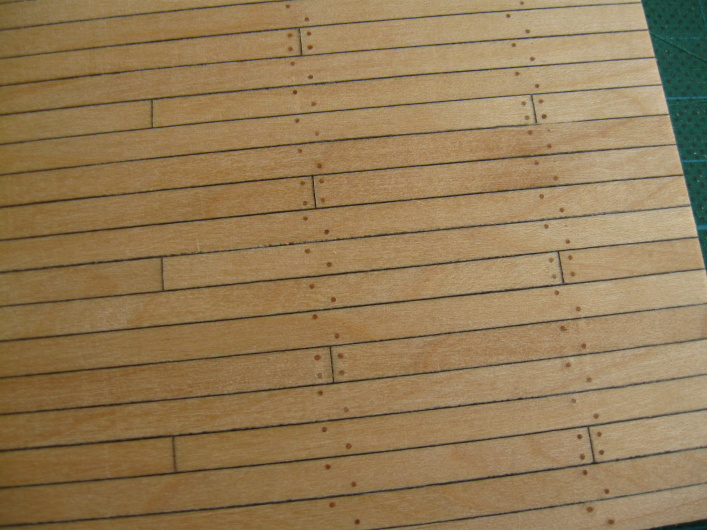
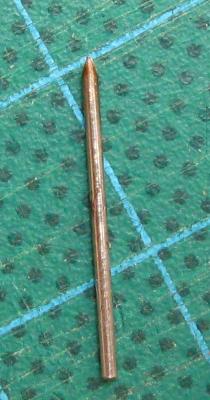
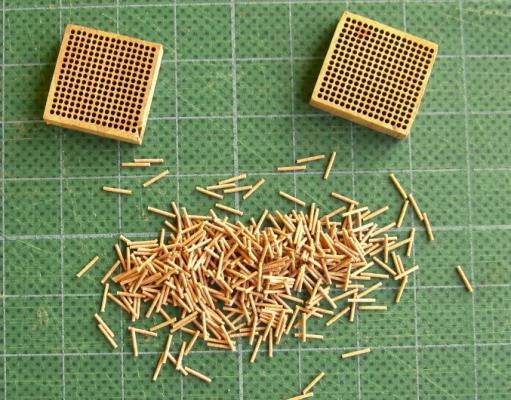
Thank you all for nice comments . I used usual hypodermic needle with diameter 0,8 mm (21G). Needle is carefully ground to the tip - see pictures. As wood is used pear, a necessary condition is that the wood fibers would be parallel to the needle. Is it possible to make treenails with diameter 0,45 mm (needle 0,7 mm 22G). You can see the comparison between 0,55 and 0,45 treenails in the last picture.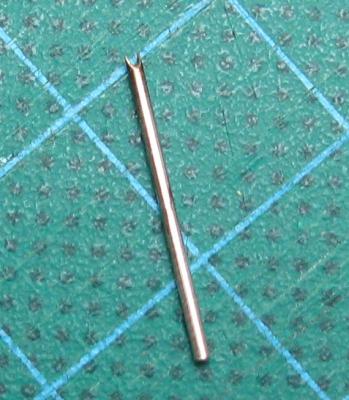
- 625 replies
-
- 23
-
-
Pandora by marsalv - FINISHED - 1:52
marsalv replied to marsalv's topic in - Build logs for subjects built 1751 - 1800
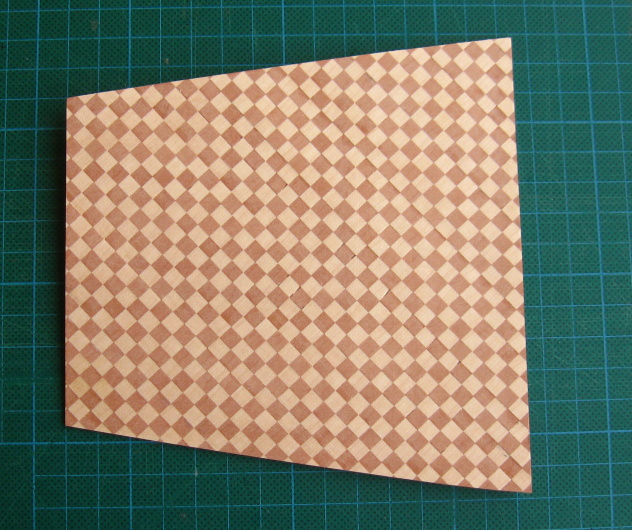
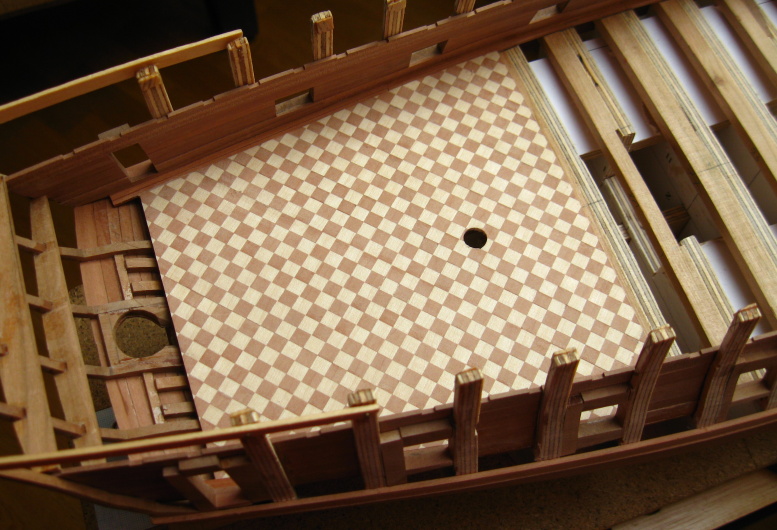
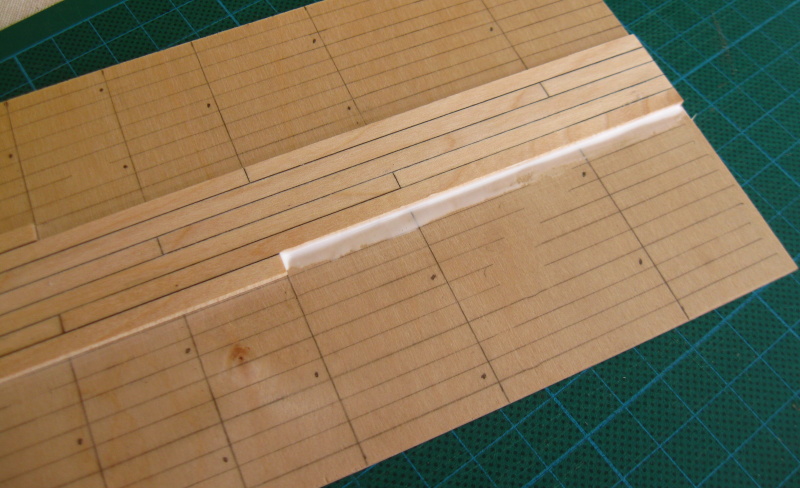
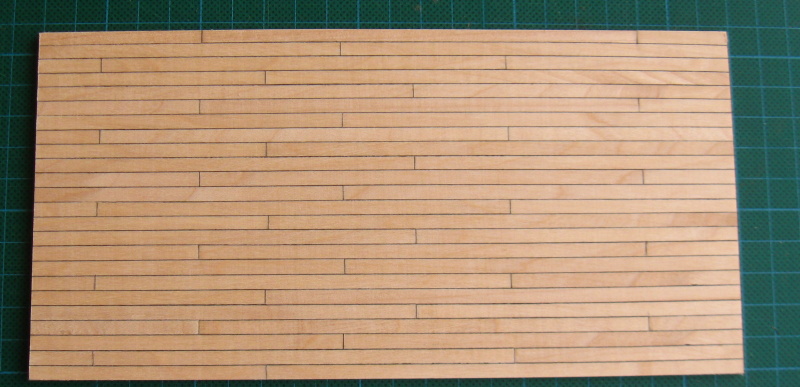
Lower deck - it will not be visible, but I made test how the deck will look with black paper and treenails. I made about 3500 pieces of treenails (diameter 0.55 mm), so I have a sufficient supply for any remaining deck.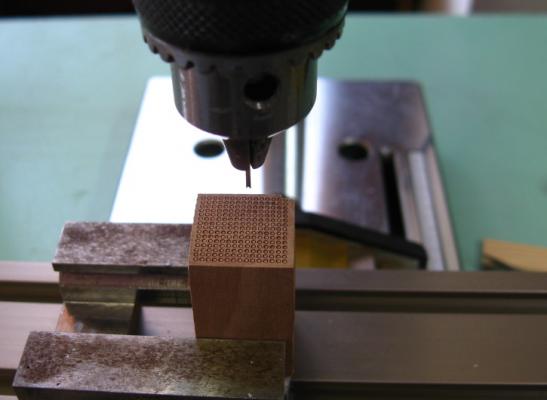


- 625 replies
-
- 25
-
-