MORE HANDBOOKS ARE ON THEIR WAY! We will let you know when they get here.
×


bthoe
-
Posts
72 -
Joined
-
Last visited
Content Type
Profiles
Forums
Gallery
Events
Everything posted by bthoe
-
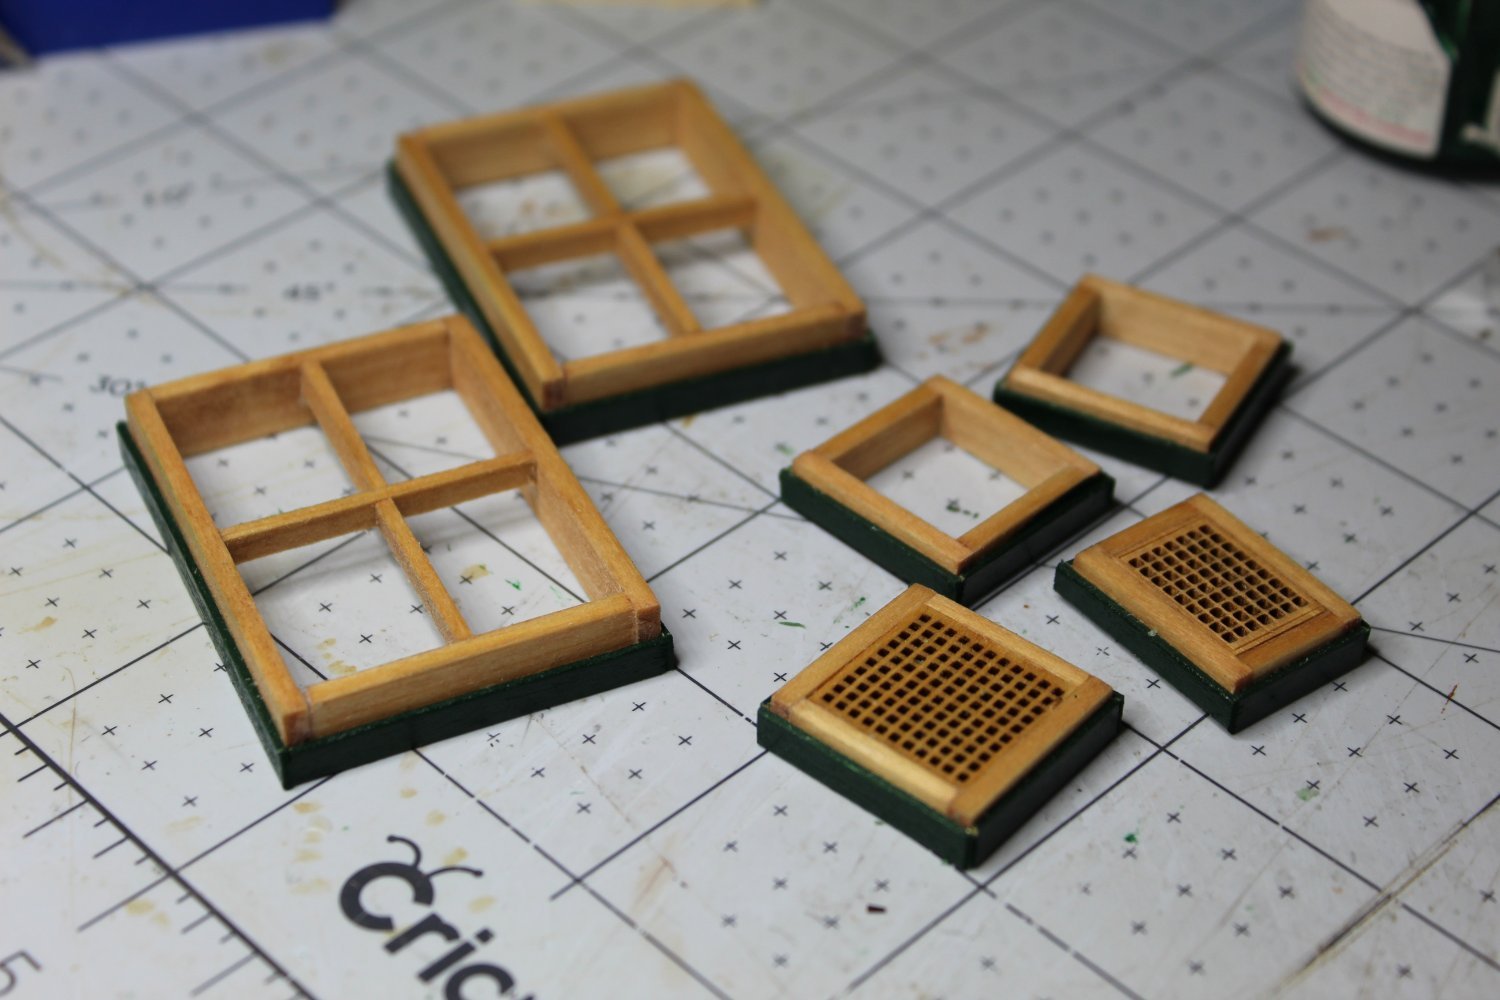
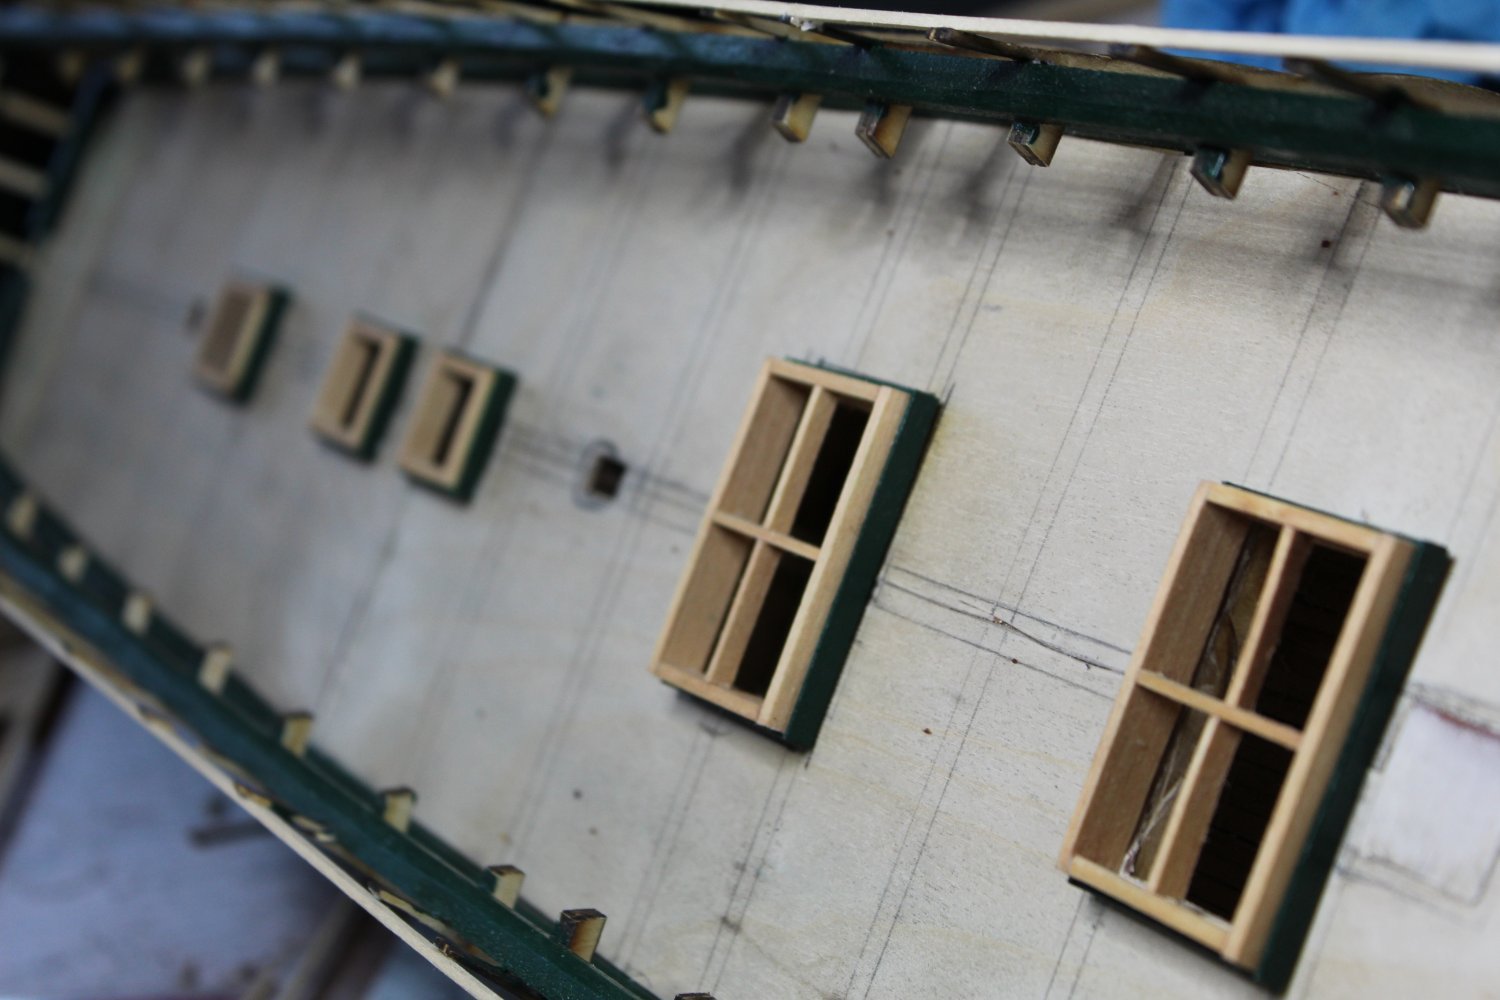
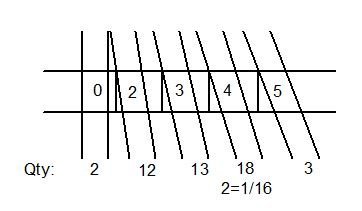
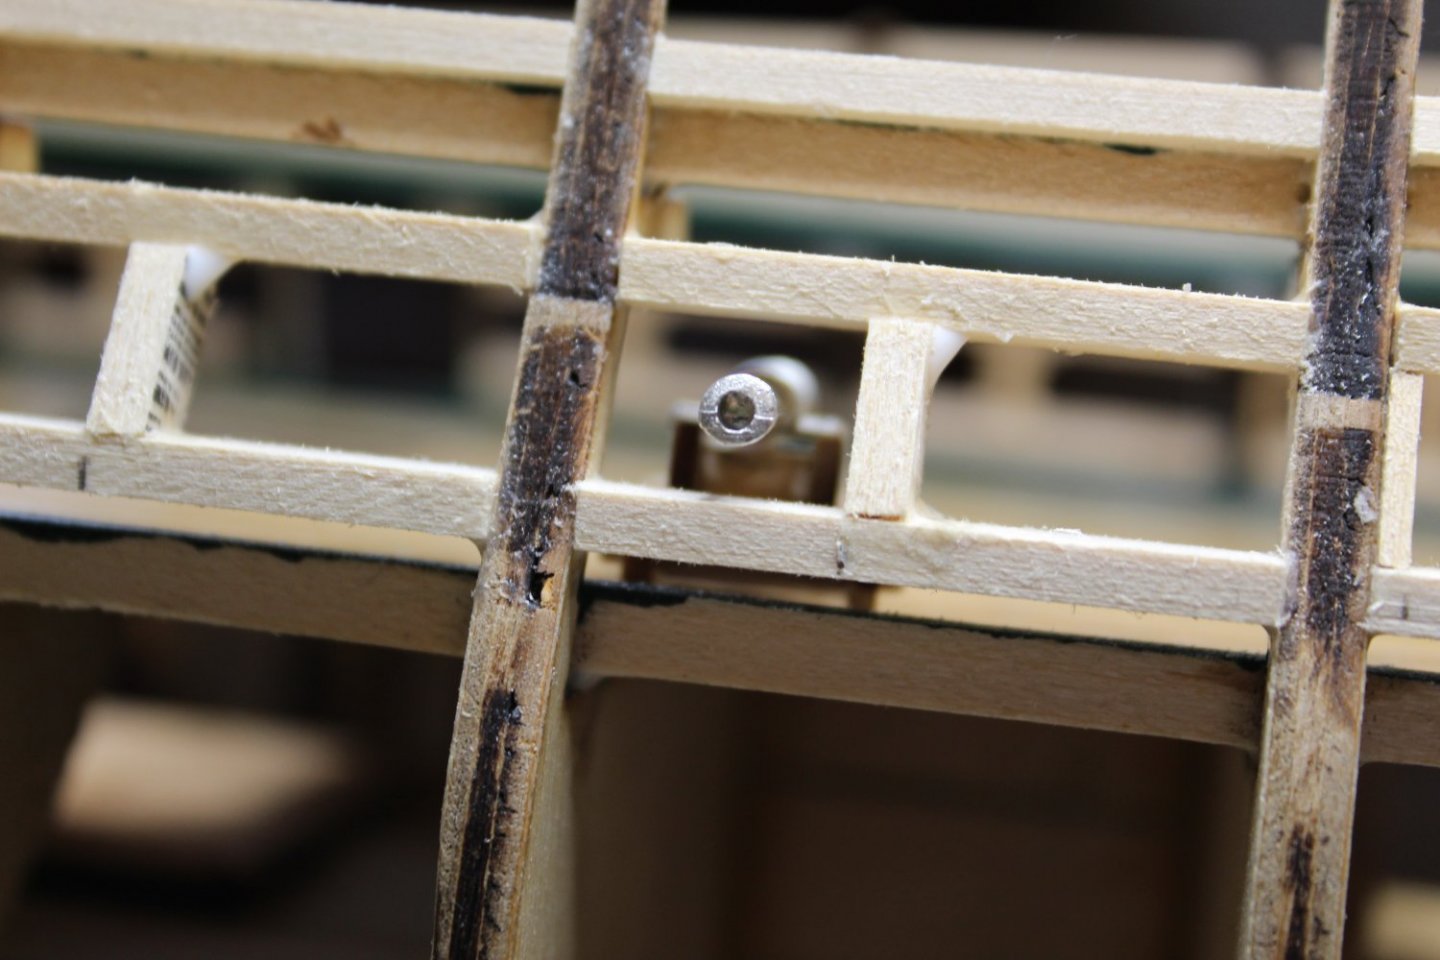
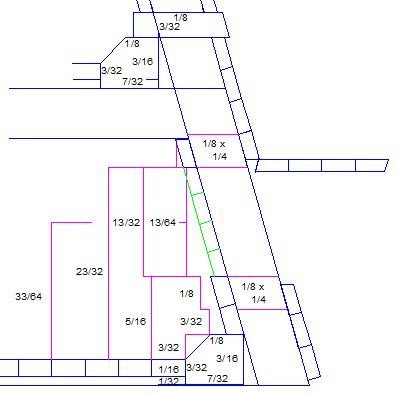
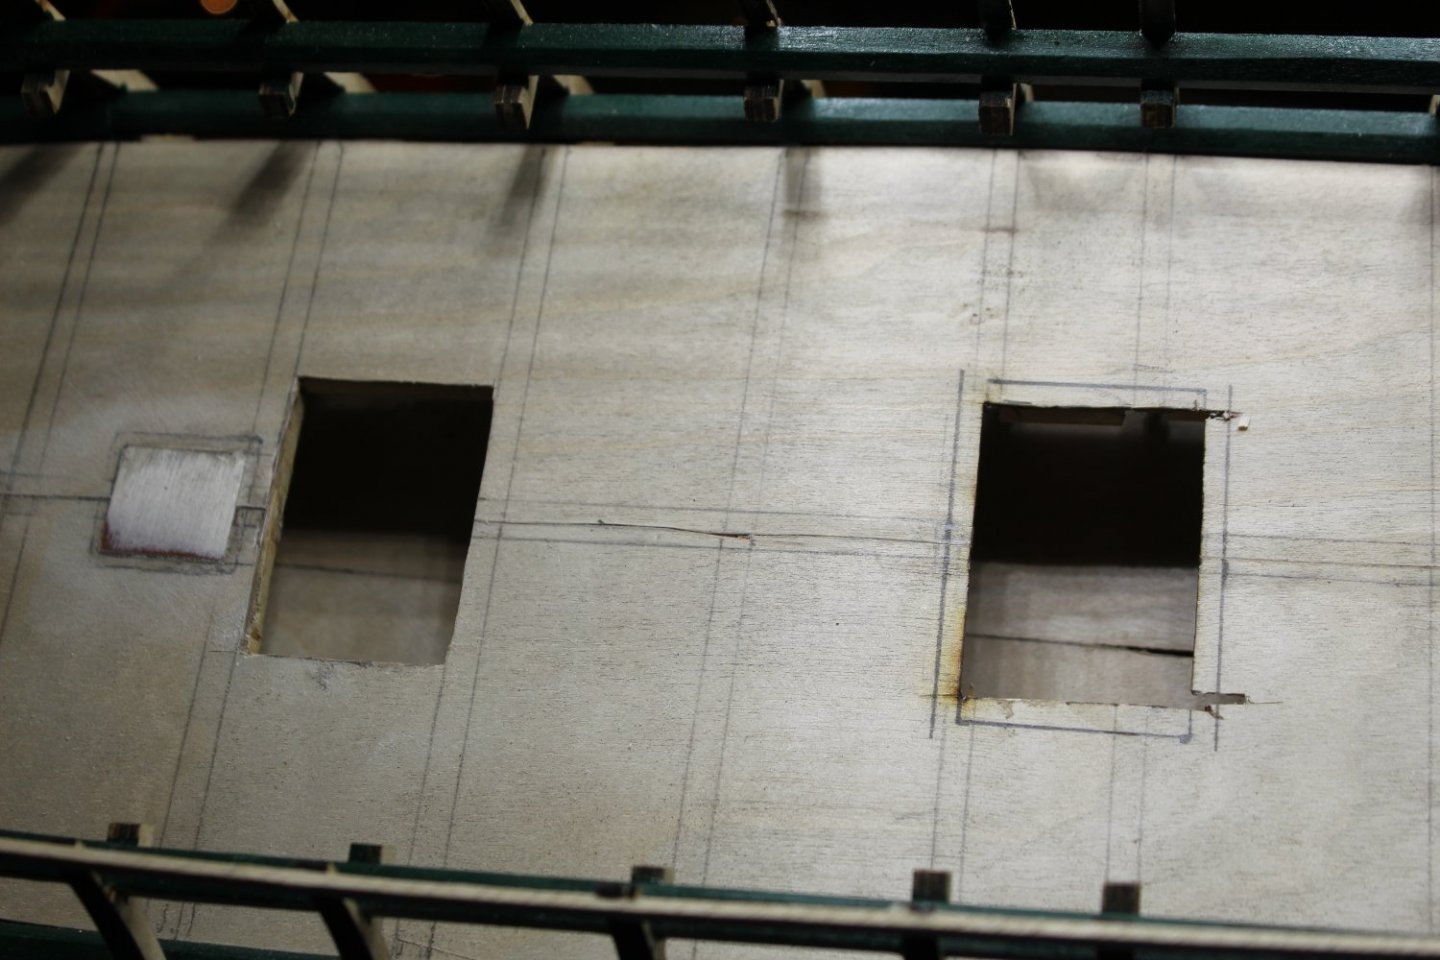
 "In our last episode..." I built the test cannon so that when I framed the gun ports, I could verify that the fit was correct. And then no posts for a month. Sorry about that. Here's how I framed the gun ports. All framing pieces are 1/8 x 1/4. First was the lower sill, and per my drawing above, it is 3/32" above the waterway. So, I used a 3/32" spacer to set the lower sill in place as below. Next, I used a 13/32" spacer on top of the lower sill to set the top sill (same idea as above, I don't have a photo of that). Finally, I cut side frames. To do this, I measured each port to determine how far off of vertical it is. That is, at the bottom, how many 32nds off is it. Then I created the below drawing with 2 horizontal lines 13/32" apart, with 1/4" vertical planks at select 1/32" offsets. This drawing helped me to lay out the side frames. I cut all of these together, and then fit them using spacers where necessary. Then I created a gun port sized spacer to install the other side frame. Finally, the moment of truth...how's the fit?

-
Nice work on the name plate! And you don't have anything to apologize for on those quarter galleries either. Hoping mine will look something like yours when I get there. Again, great work, Jon!
-
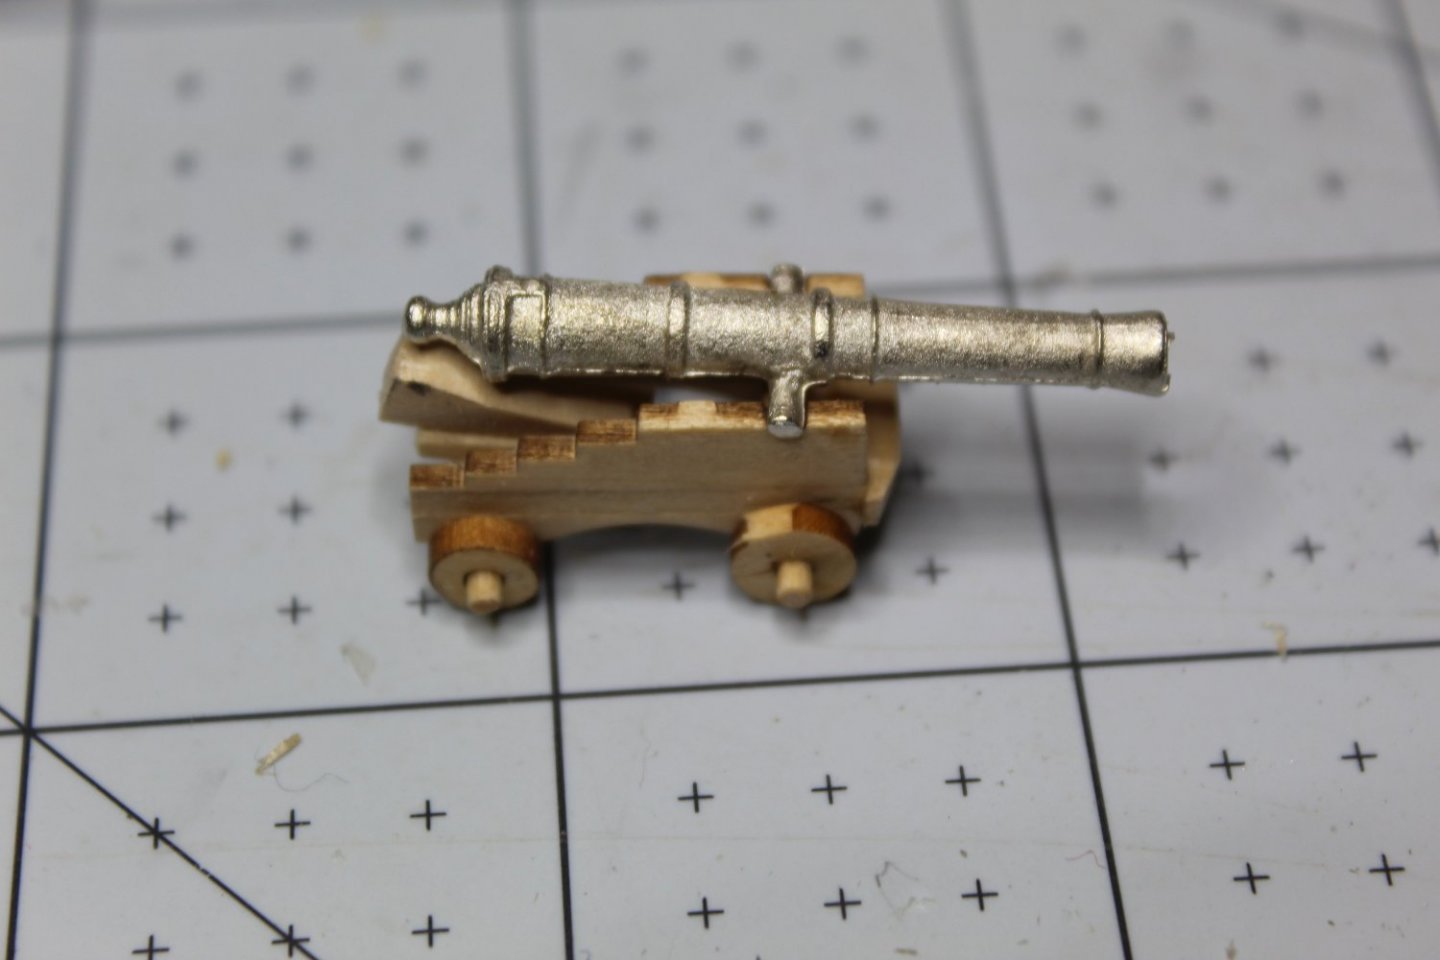
Built the test cannon. Initial measurements look good. Wheels, barrel, and elevating quoin have not been permanently attached.
-
JS, The gun carriage thing started because I noticed that the MS carriage side looked different from the U.S. Navy Plan. That's where I have been these last weeks since my last post - measuring, measuring, measuring. And then comparing and scratching my way-too-thin hair with too many "what the heck..."s muttered under my breath. But that is why I haven't committed it for REAL yet. It may end up being that I will still need to modify the height of the carriage to get it right. Mainly, I wanted to make sure that the gun ports would be ok with my heightened gun deck. Ian, Perhaps they painted the waterways "British Racing Green" to needle the British Captains taken aboard - or to help Constitution catch the British ships!
-
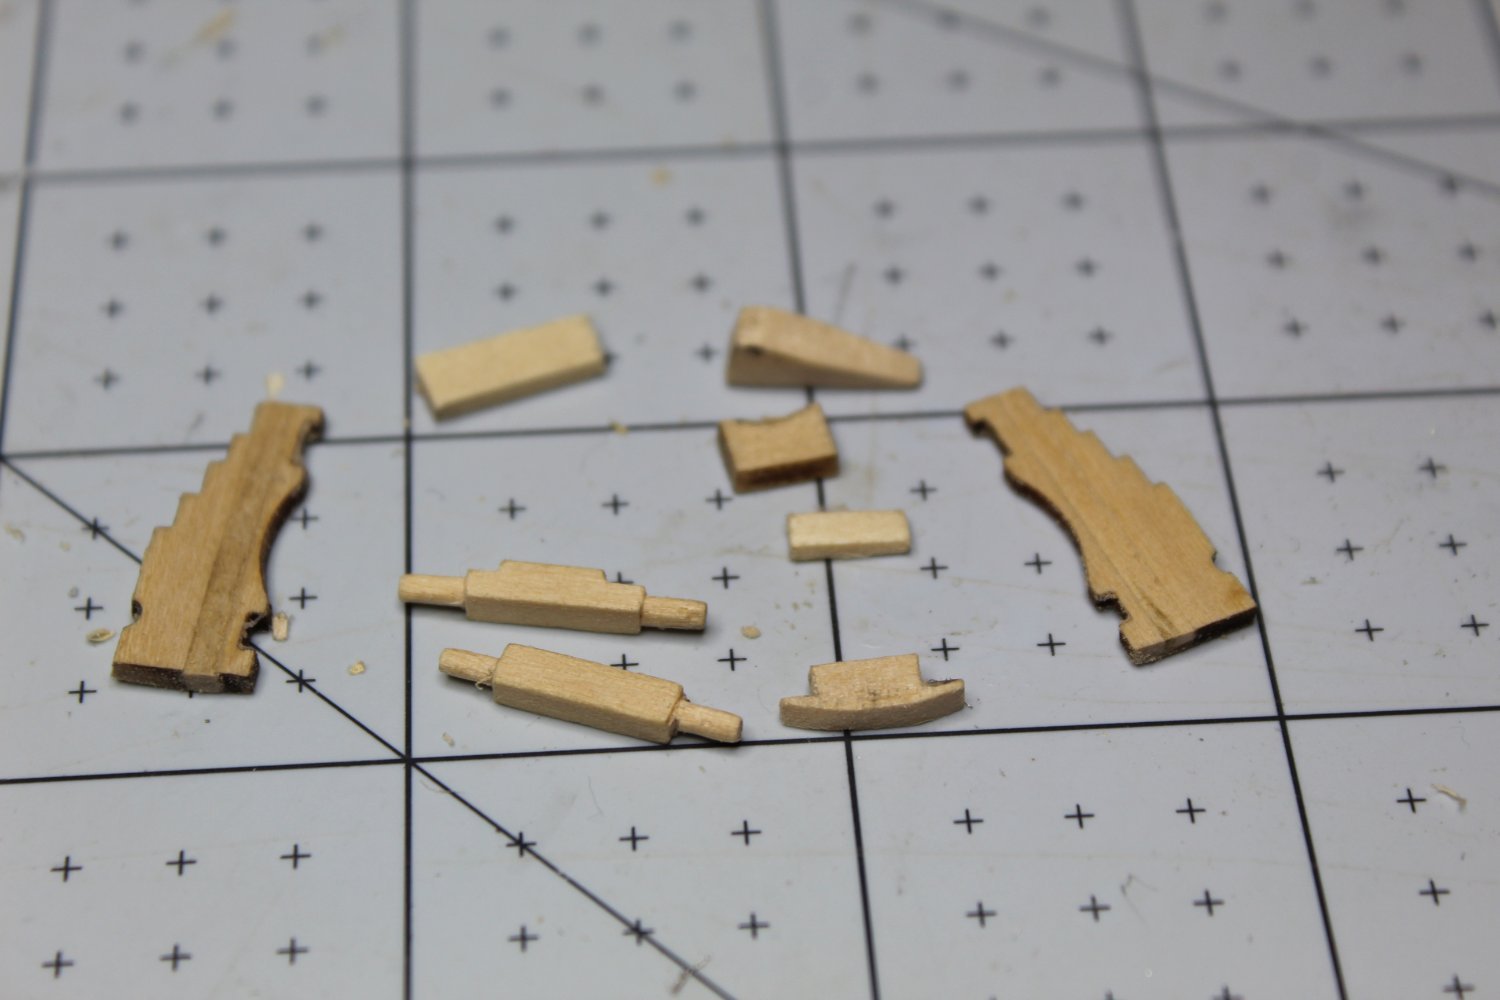
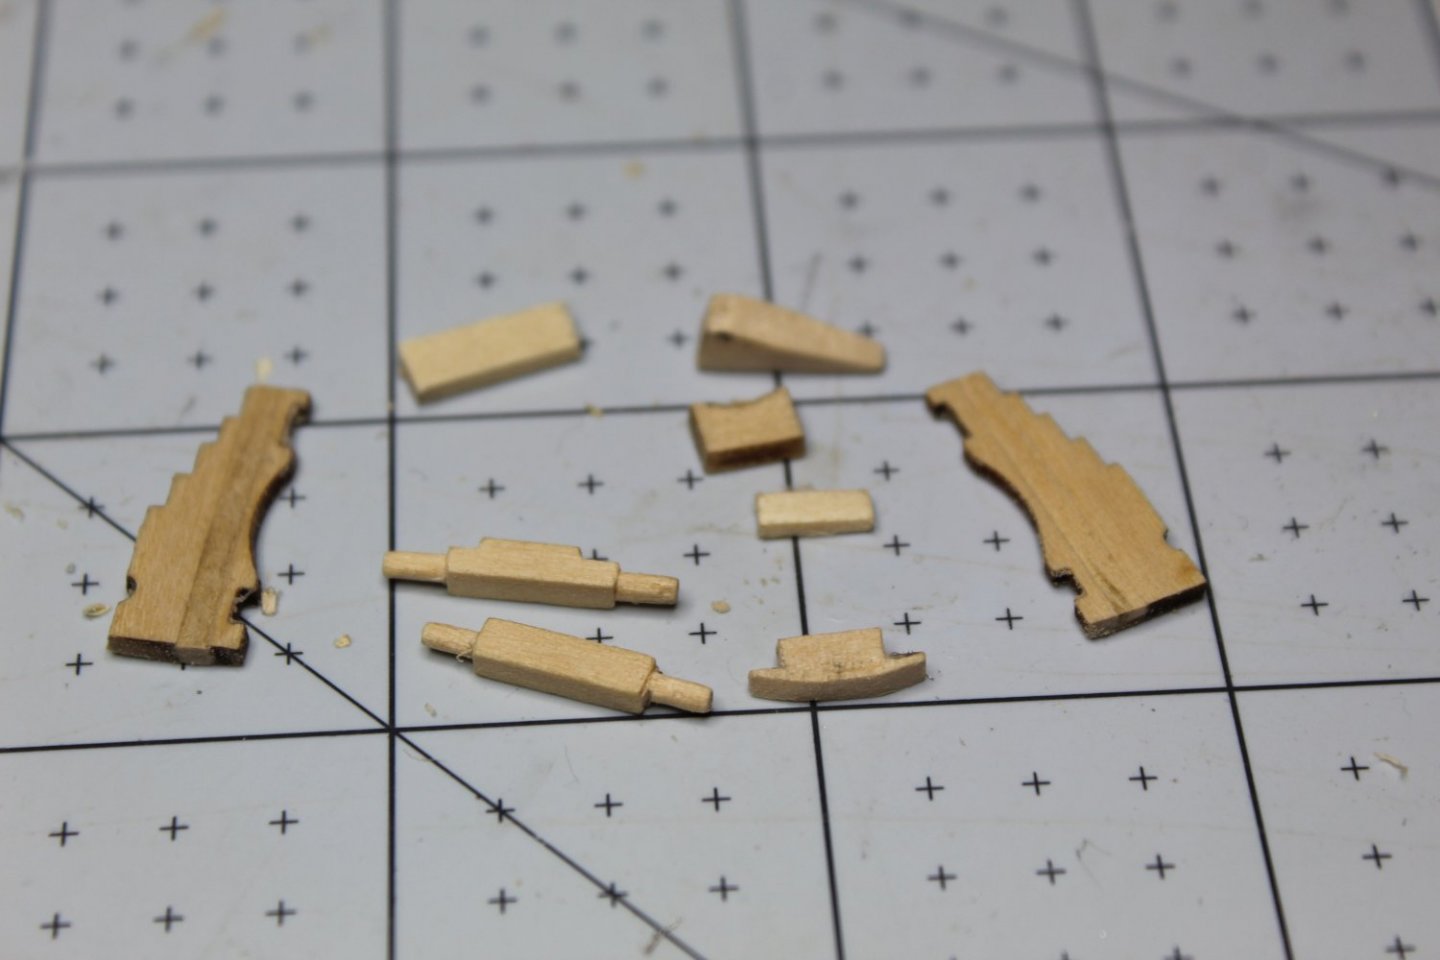
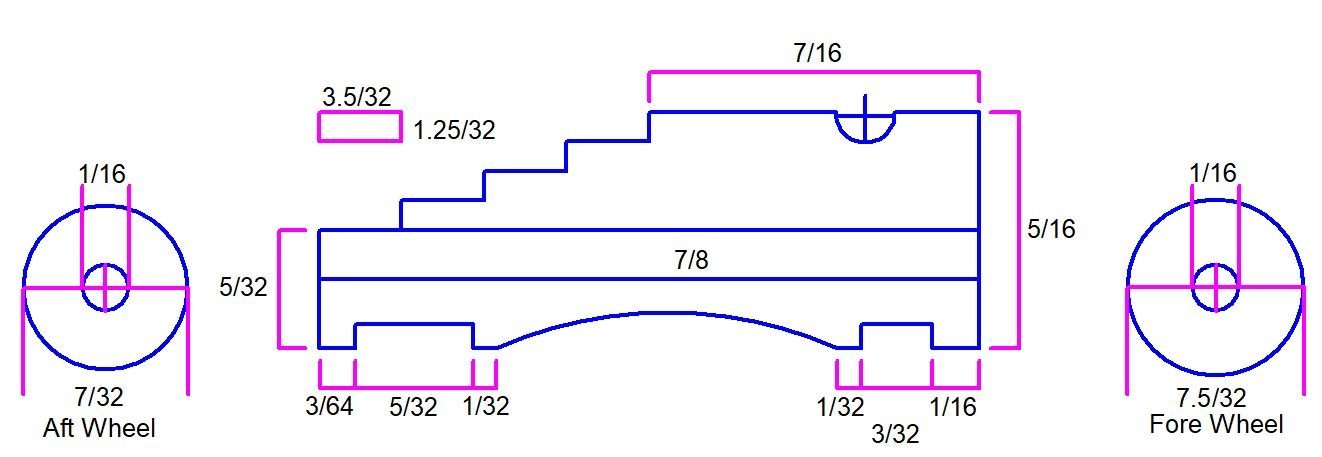
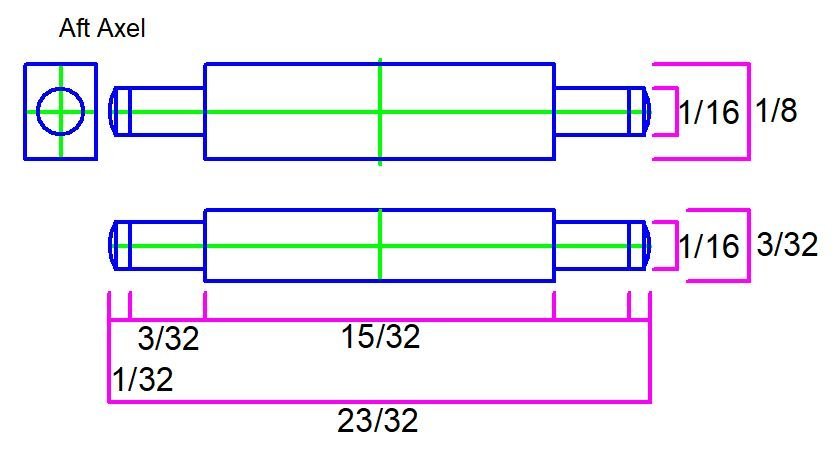
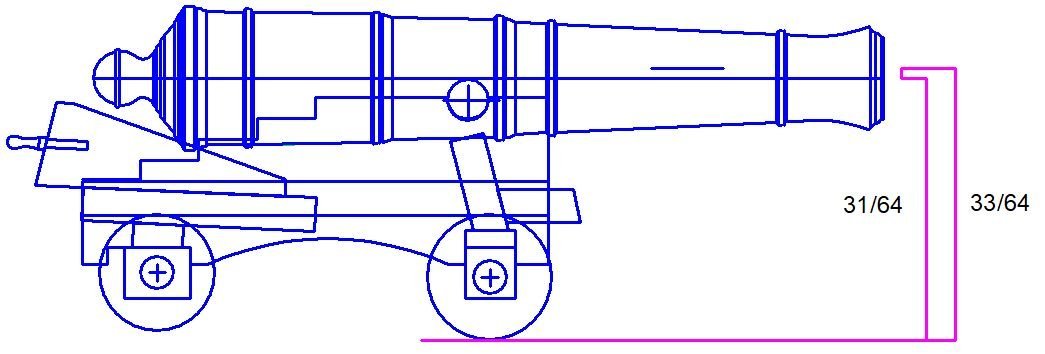
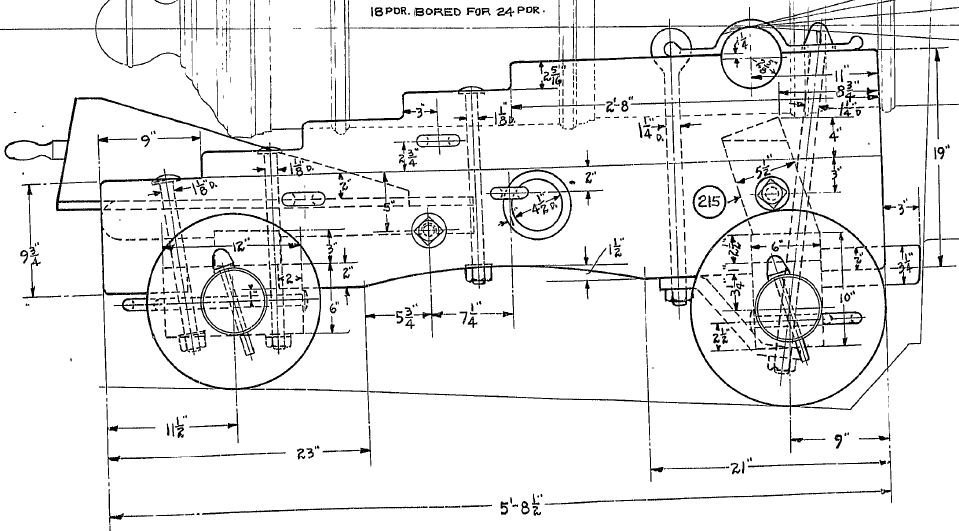
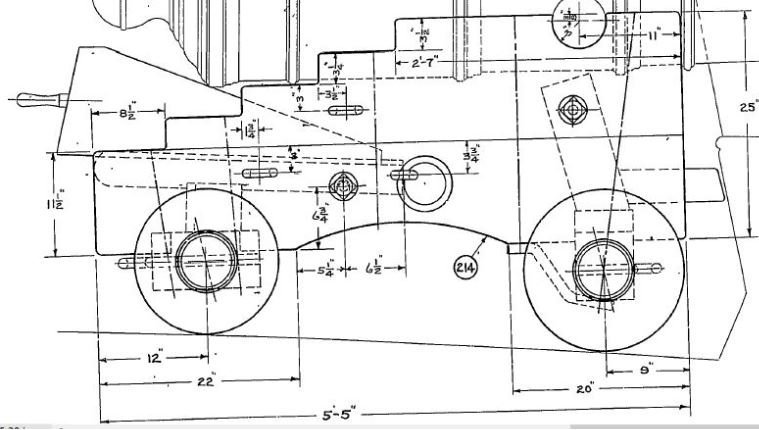
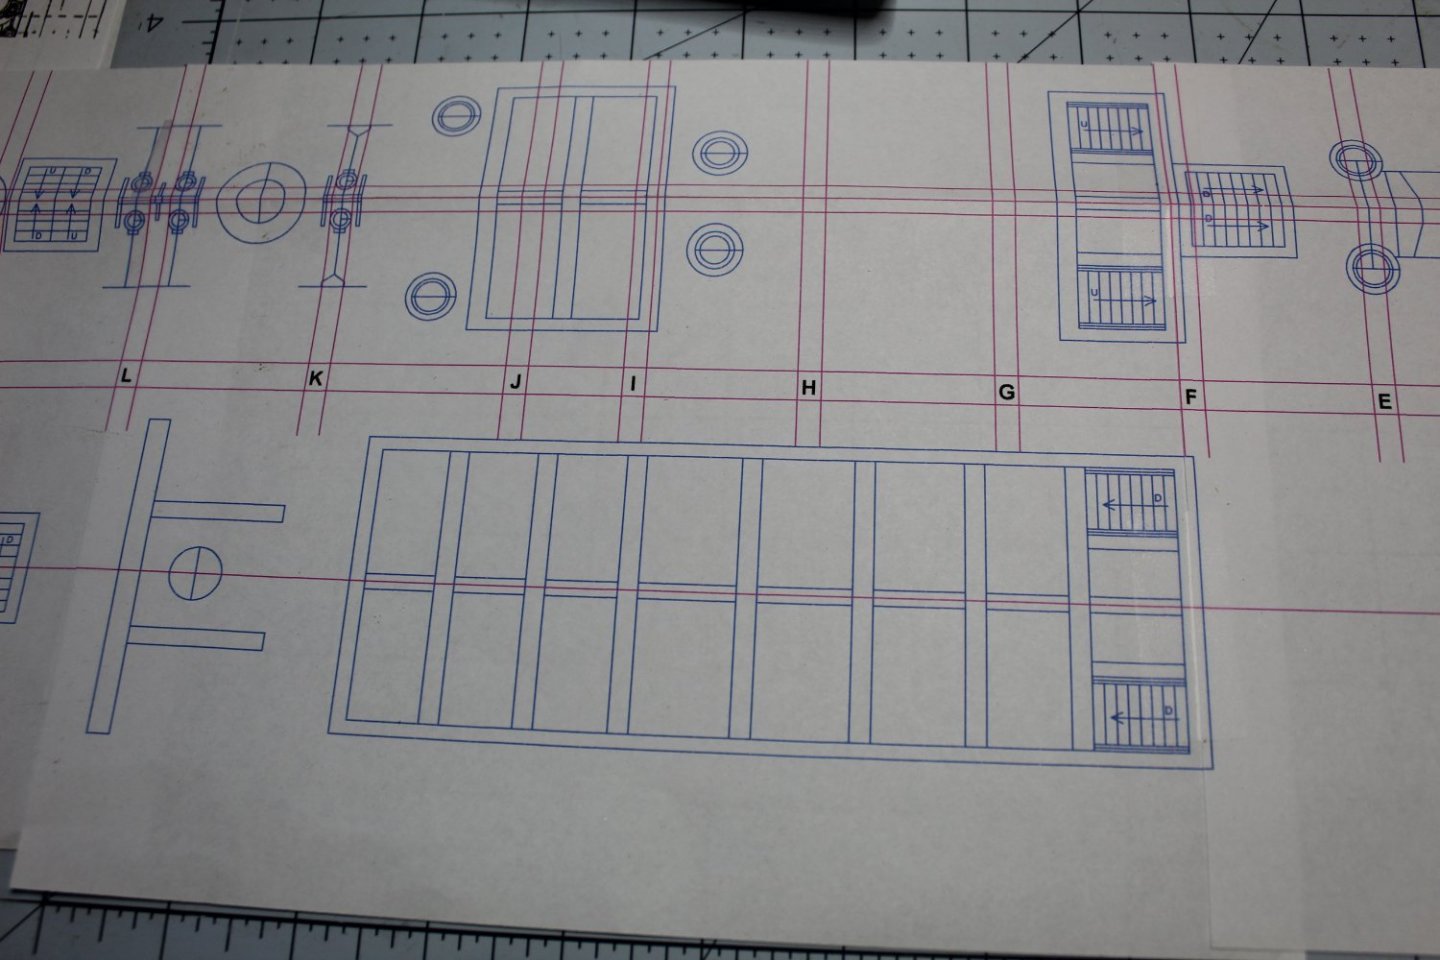
Next, time to lay out the rest of the parts. I don't know about the rest of you, but for me, the lack of a plan - or parts layout - for the gun carriages was unsettling. So I did. First, I took the "real" plans, scaled down to 1/76.8, then rounded to measurements of 1/32 - for me, 64ths are just too small, although you might see measurements of 1/2 32nds when it is something worth mentioning - it can be sanded in w/o extreme accuracy. Then I took my CAD program (DeltaCAD - about $35 - deltacad.com, easy to use) and with the new parts "built" the carriage to see how it looks. You can see it all below. We'll see later how it all goes together "for real". Feel free to use this if you find it helpful. And here they are, put together. At least theoretically, as I haven't actually done it yet . Lastly, my measurements of the bulwarks/gun port. Note that my waterway is 3/16" tall, as it was placed directly on top of the bulkhead before the 1/32" plywood was placed on the bulkhead - I needed it to be 1/32" taller than normal. I'm encouraged that after all that work, the center of the gun port shows to be 33/64" above the deck, and the line showing the center of the gun port on the cannon barrel above is also 33/64". That was not planned! -- Note that none of this has been committed to the model as of yet, so if you see any glaring errors, please point them out! Thanks in advance!

-
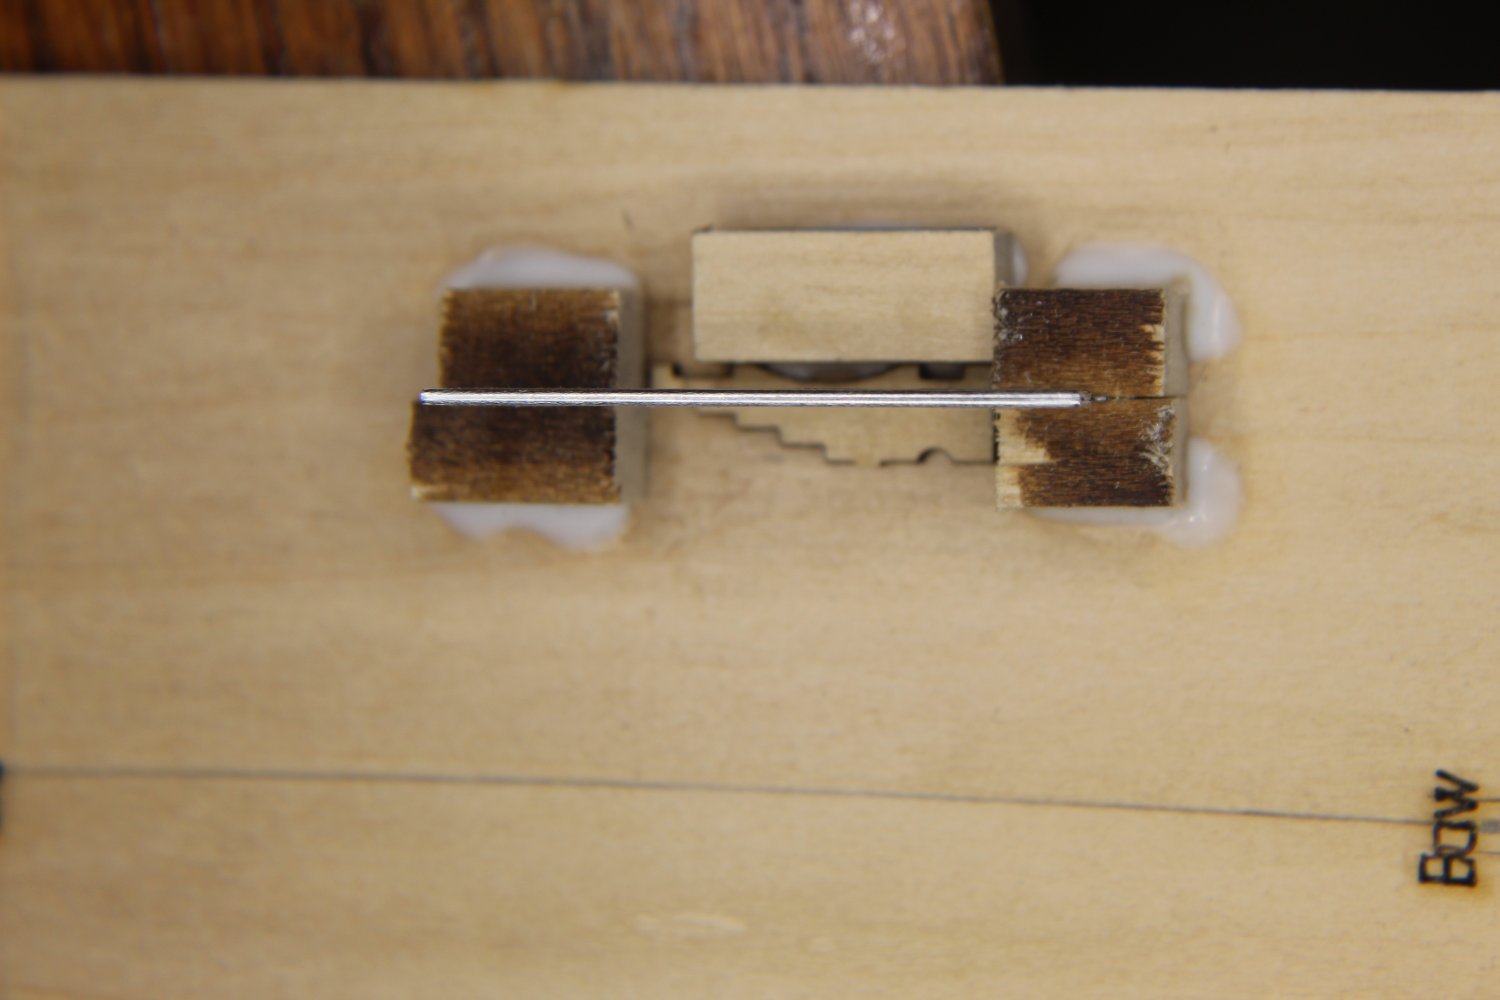
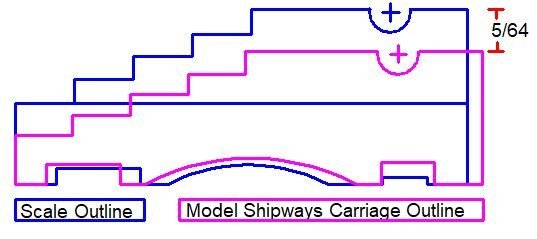
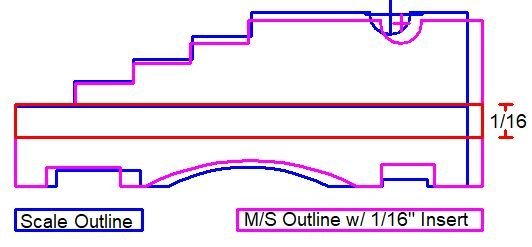
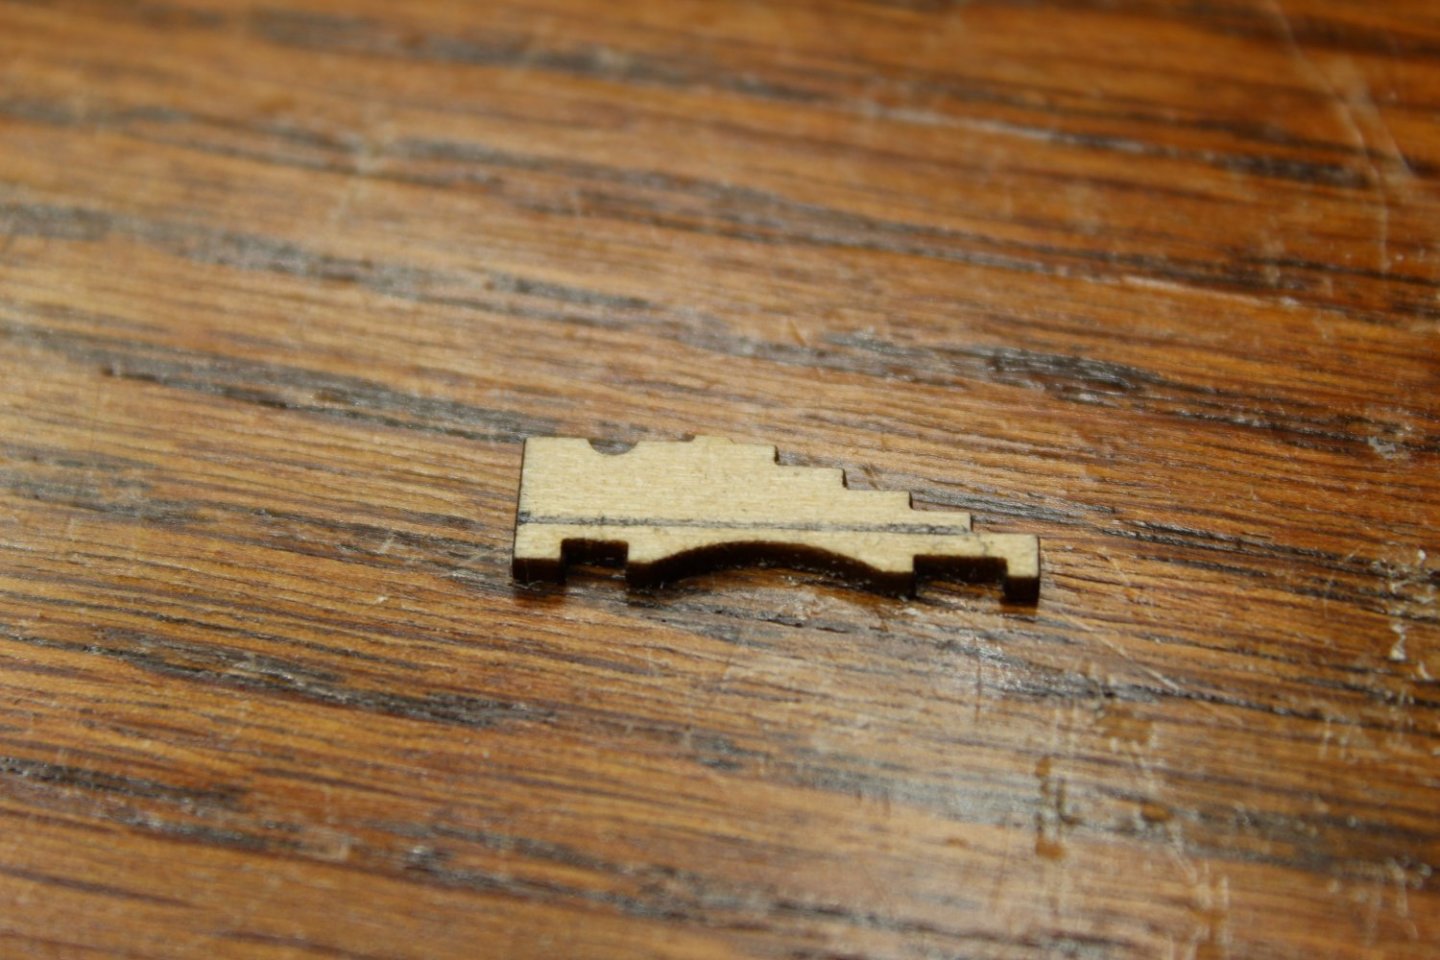
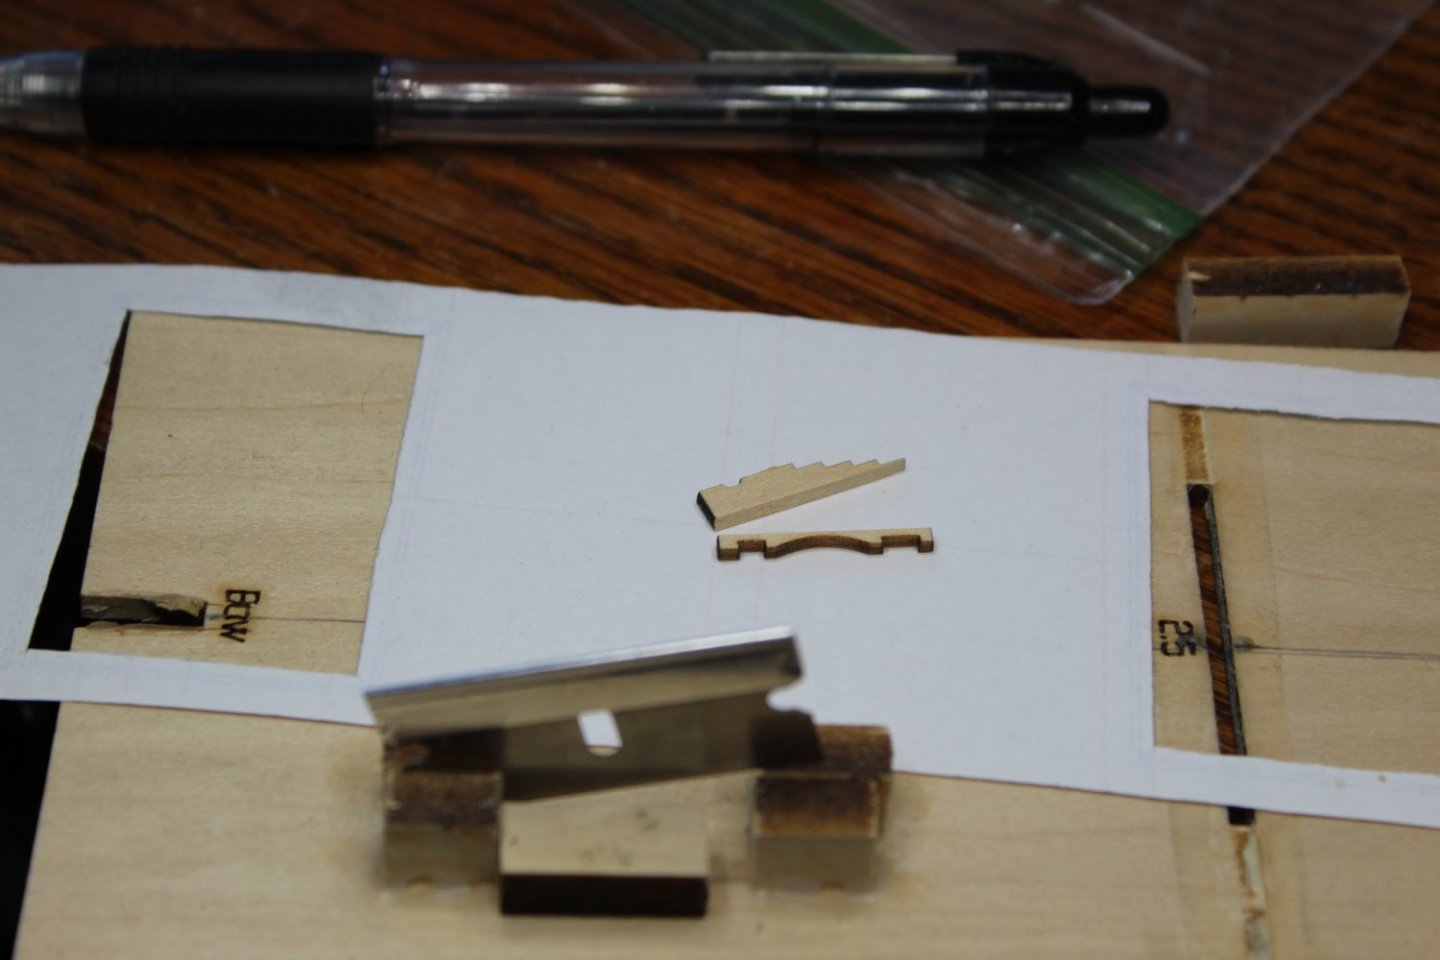
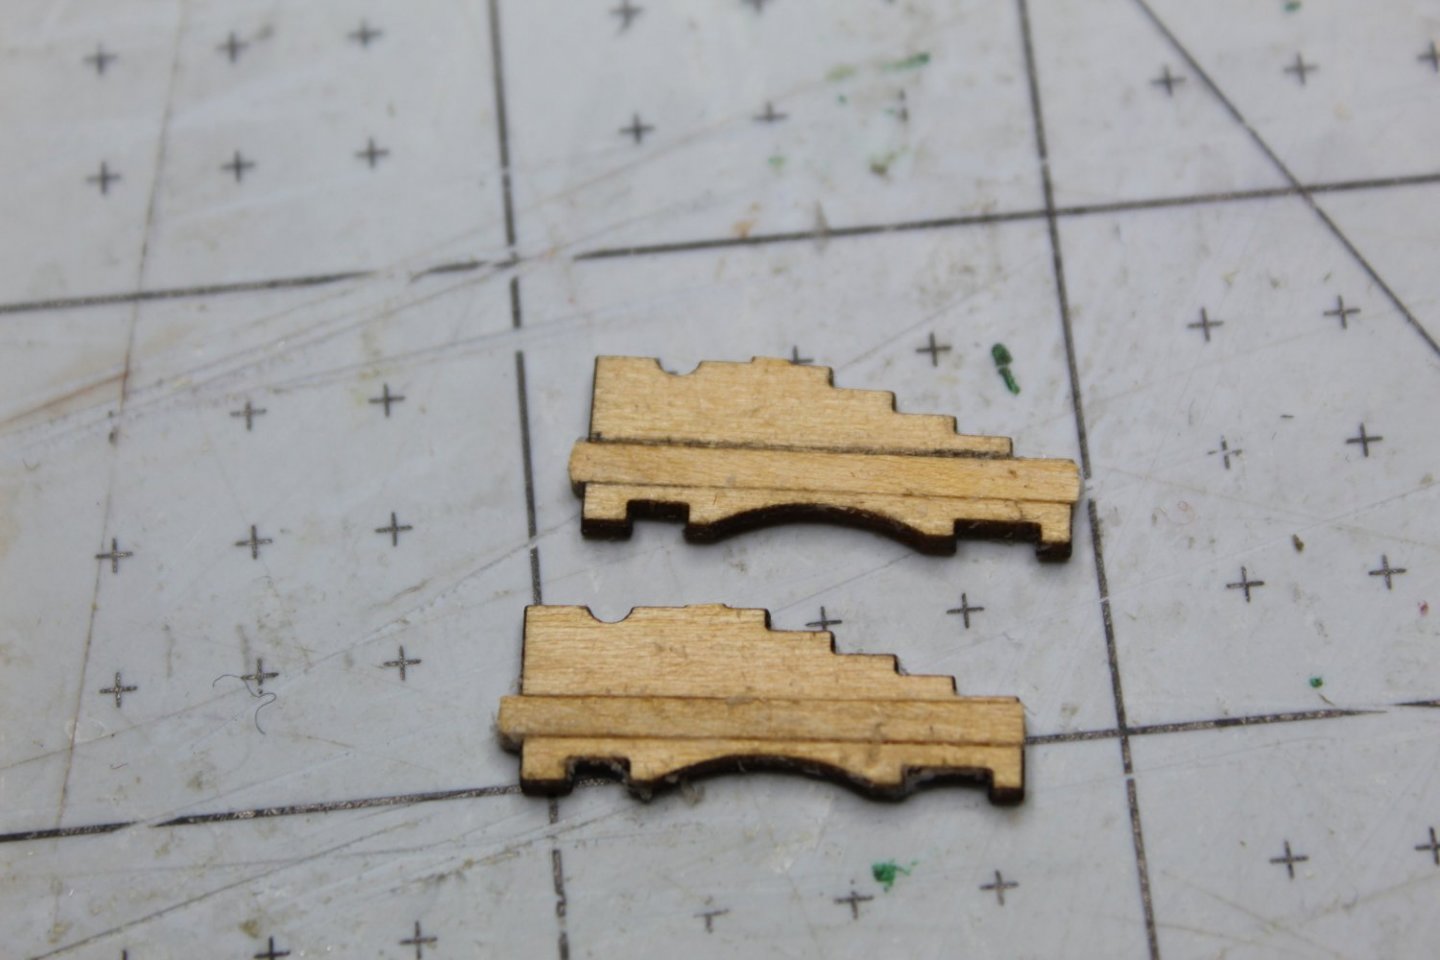
Next, I was thinking I wanted to get the Gun Deck bulwarks planked. So I took measurements of the Gun Deck bulwarks at each bulkhead - all kinds of measurements - and began figuring out the plank thicknesses to make this happen. Then I realized that I couldn't plank the bulwarks without first framing the gun ports and stern windows. And I couldn't do the gun ports without first making a test cannon for checking measurements, etc. And I knew guns and port alignment were giving people headaches. For everyone's reference, I did NOT cut down the bulkhead Gun Deck, but laid the 1/32" plywood right on top of the cutouts, and then laid the 1/16" planking on top of the plywood. From the plans, my Gun Deck is 3/32" higher than what they indicate. Kick in the nerd in me... I started making measurements of the U.S. Navy gun carriage plans, scaled them down to the model scale, then compared them with the gun carriage laser-cut gun carriage pieces. Here's what I found out. The Model Shipways carriages were 5/64" shorter than scale. The rest looked close enough to not worry about. See below: I'll need to modify the carriage sides to make them scale-like in appearance. I was really bothered about why MS would make this apparent mistake, and then I realized that the carriage is identical to the bowchaser carriage contained in the kit - back to the U.S Navy plans. Yep, the bowchaser was an 18-pounder, and its carriage was 6" shorter height-wise than the 24-pounders on the Gun Deck. 6" at scale is - you guessed it - 5/64"! That established, It was time to modify a set of carriage sides to see how they looked. See below for my methodology in making the new carriage sides. The inserted piece is a 1/16" x 1/16" strip.

-
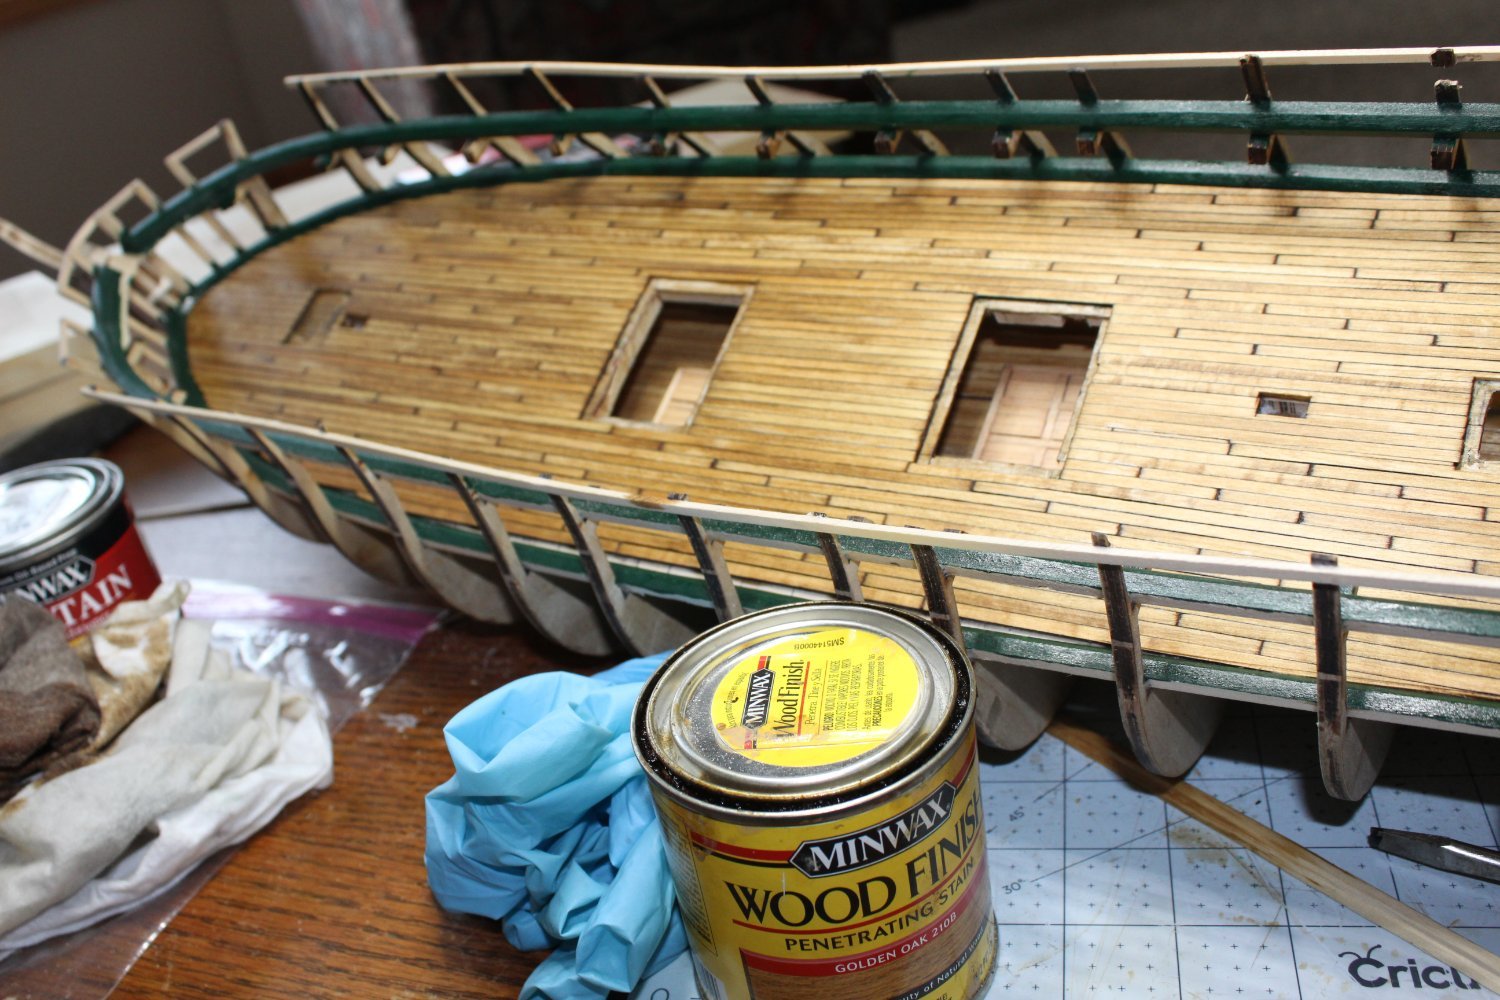
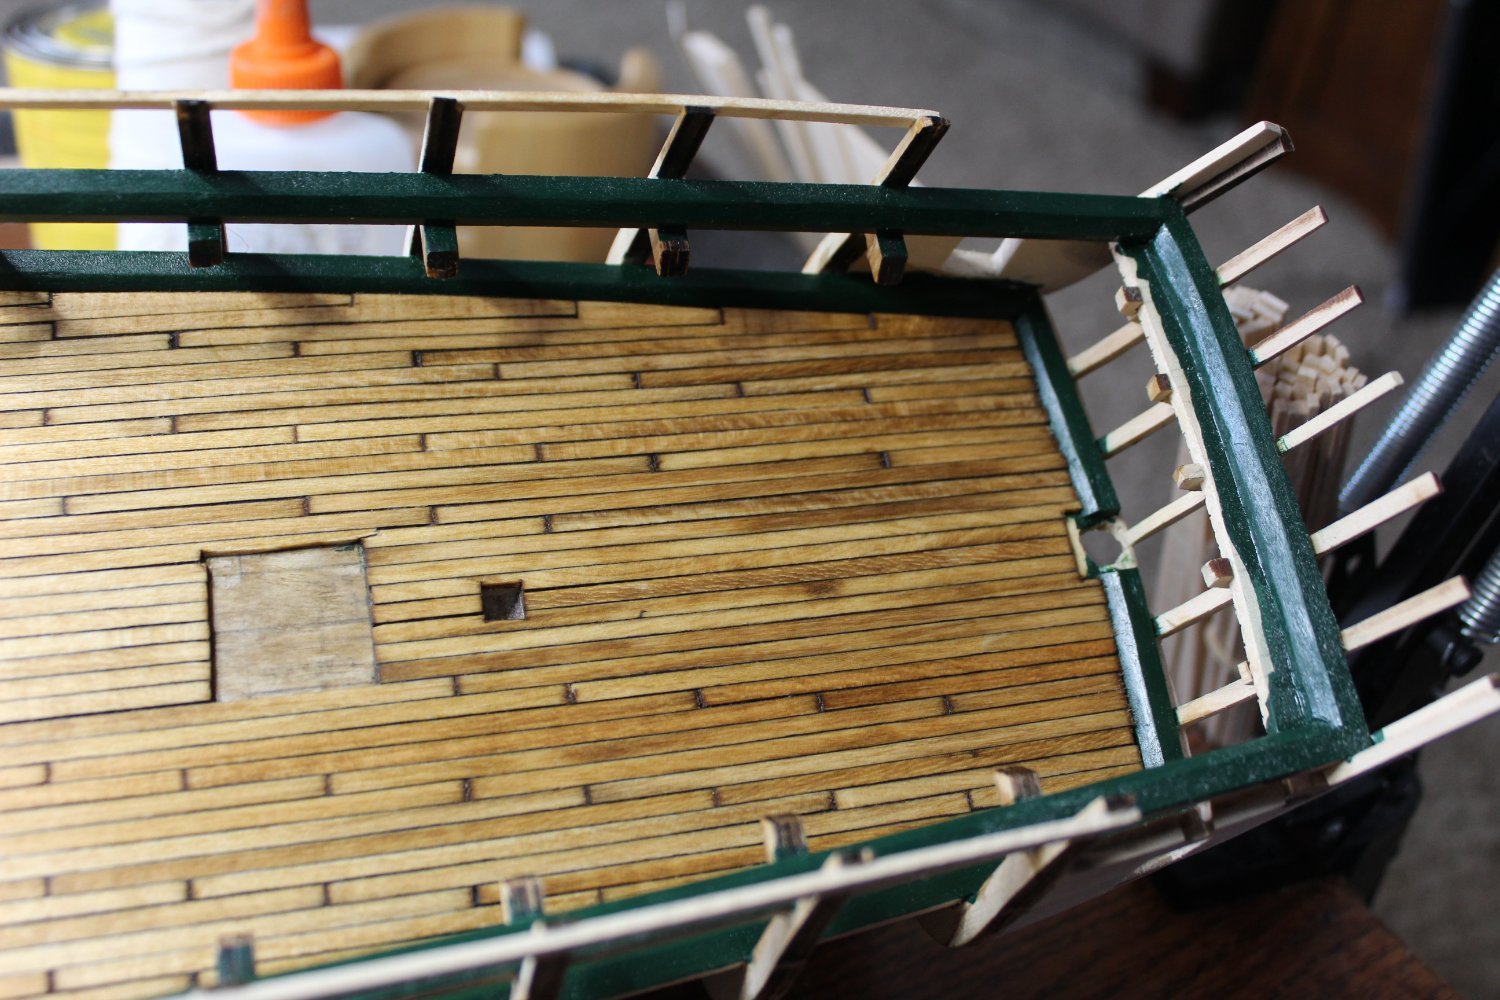
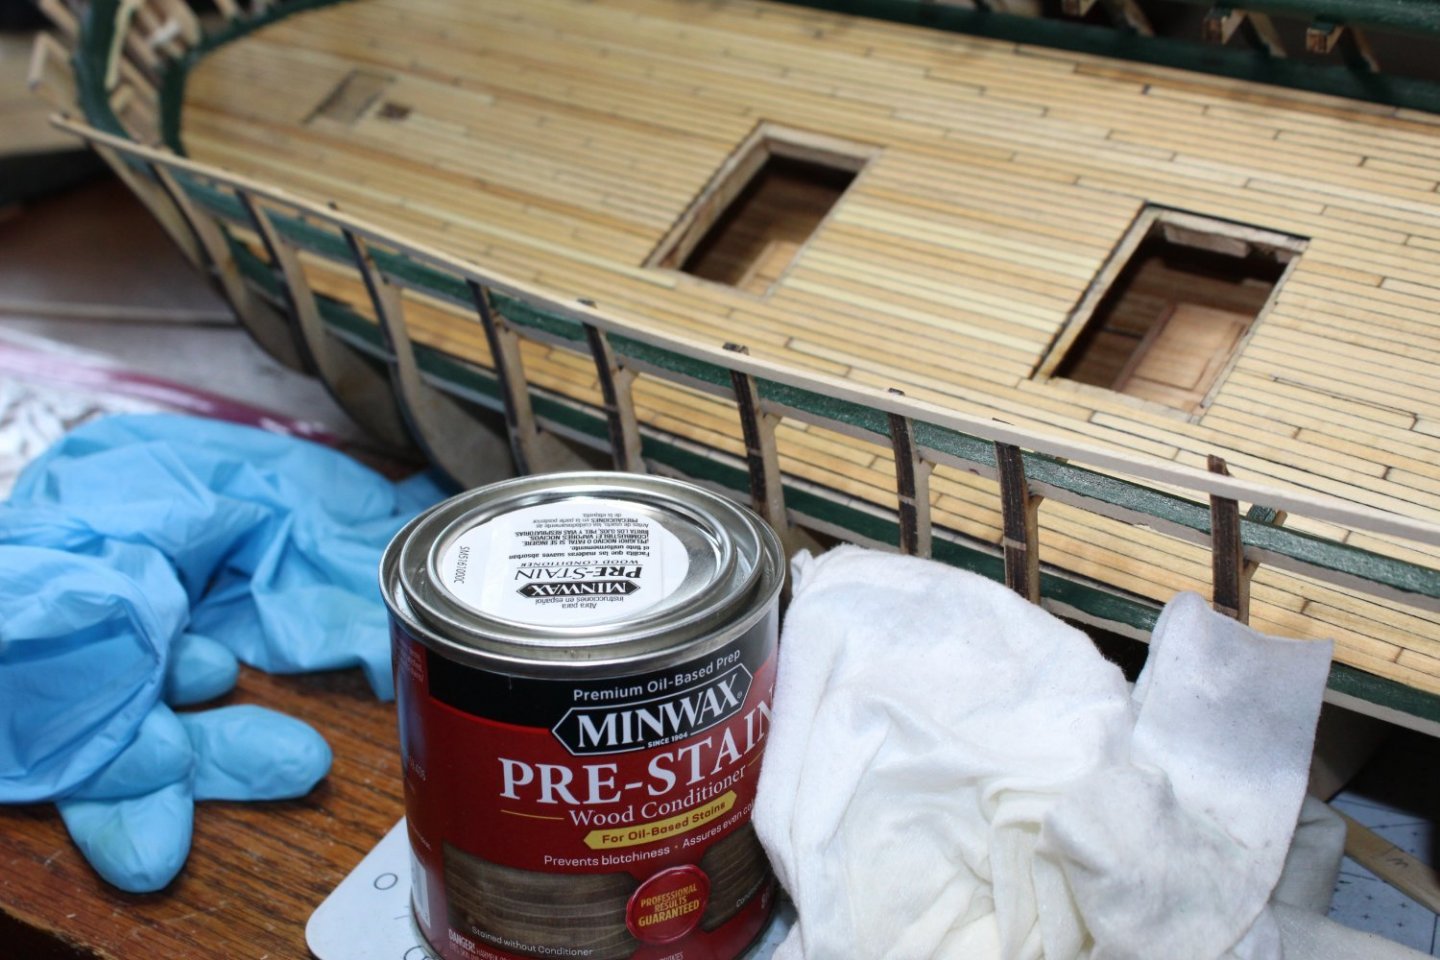
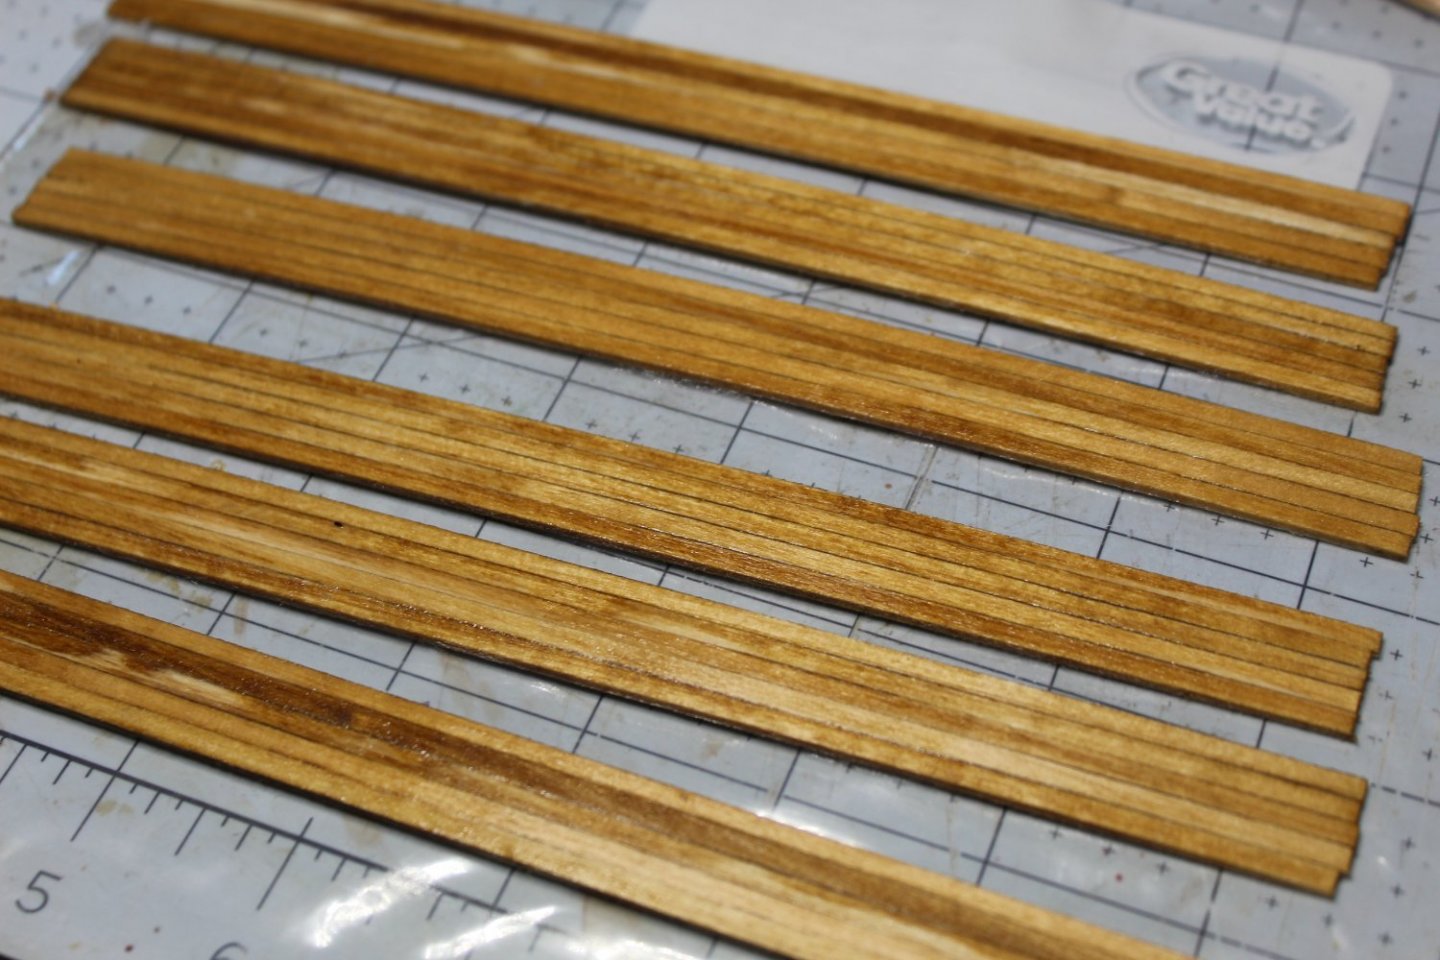
Hi Folks, time for an update. I sanded down the Gun Deck and prepped for staining. I've been using basswood for everything, and I heard that it's best to use pre-stain on basswood. So, I thought I'd give it a try... Afterwards, I applied Golden Oak stain. A couple of things - first, it took the stain much better than without the pre-stain. Also, it really emphasized the plank ends - for the Spar Deck, I'll really need to get those joints tight.


-
Thanks for the likes folks. And yes, Jon, I agree. At first, I was distressed at the lack of consensus as to how things were "back then". But very slowly, I have come to the same conclusion that you have - that the reason for differences is in the eye of the beholder. Or in the case of now vs then, ladders can't be as narrow and as steep as they probably were if the lawsuit-aware tourists are going to be using them! (I did spend 5 weeks on active duty ) I'll continue on as best I can, continuing to see what others like you are doing, choosing what I like or what makes the most sense, but not sweating it if it's not 100% accurate (hope it doesn't cost me my membership in the NRG...). As Henrik said somewhere above, I only need to make myself happy.
-
Thanks Don. The green that I found was Tamiya Color Acrylic X-5 (Green). It was the closest match that I found at the hobby shop.
-
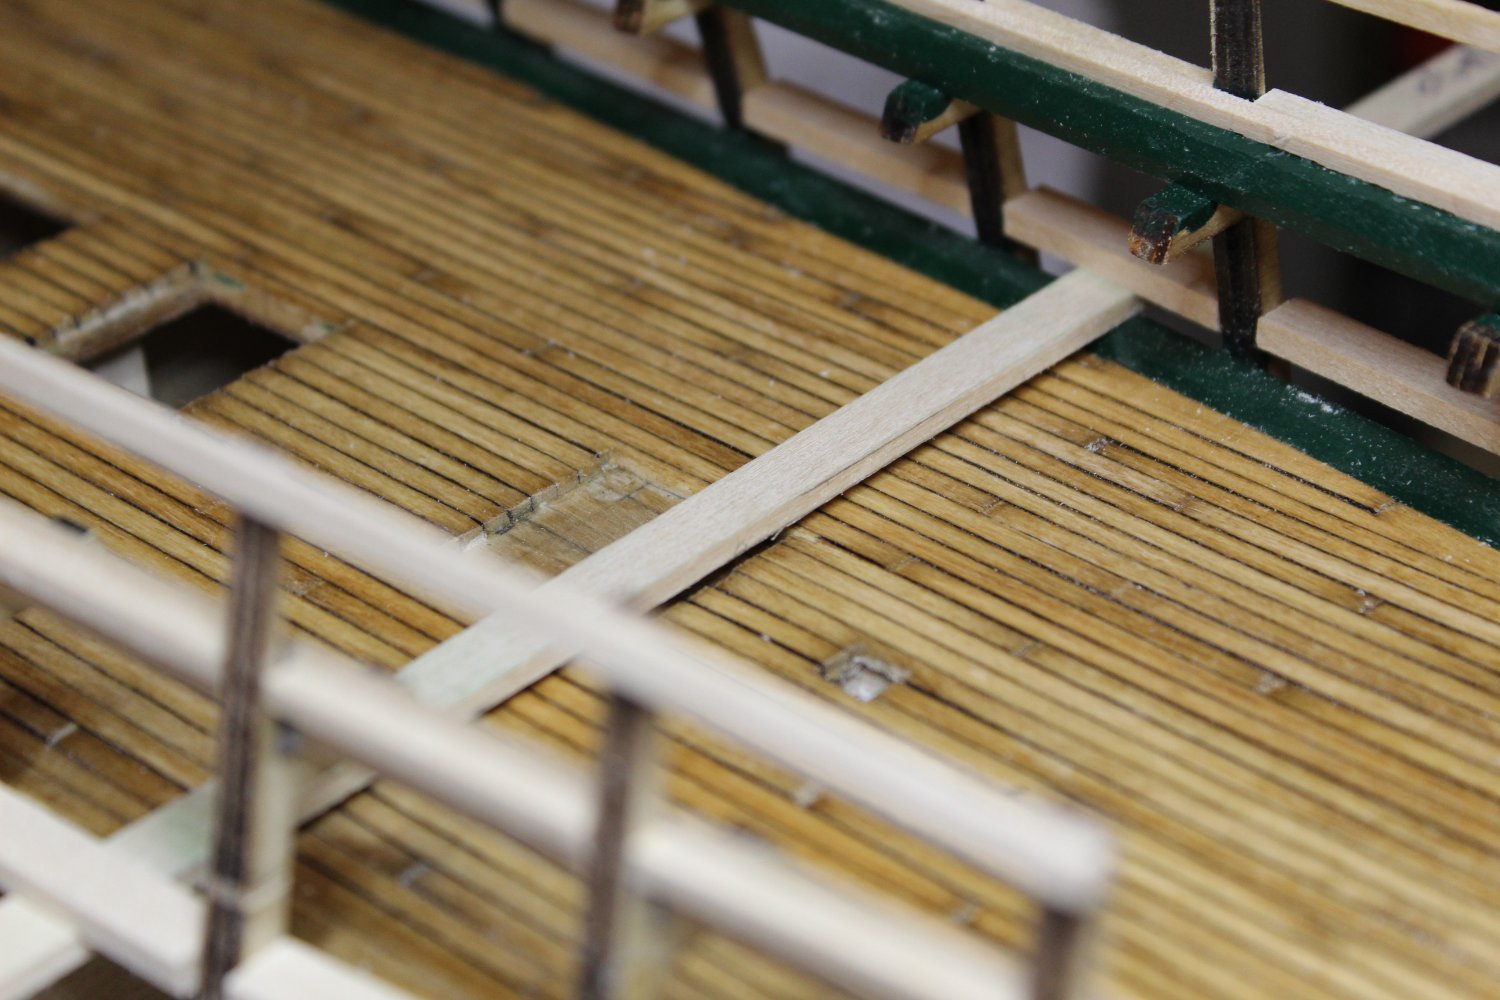
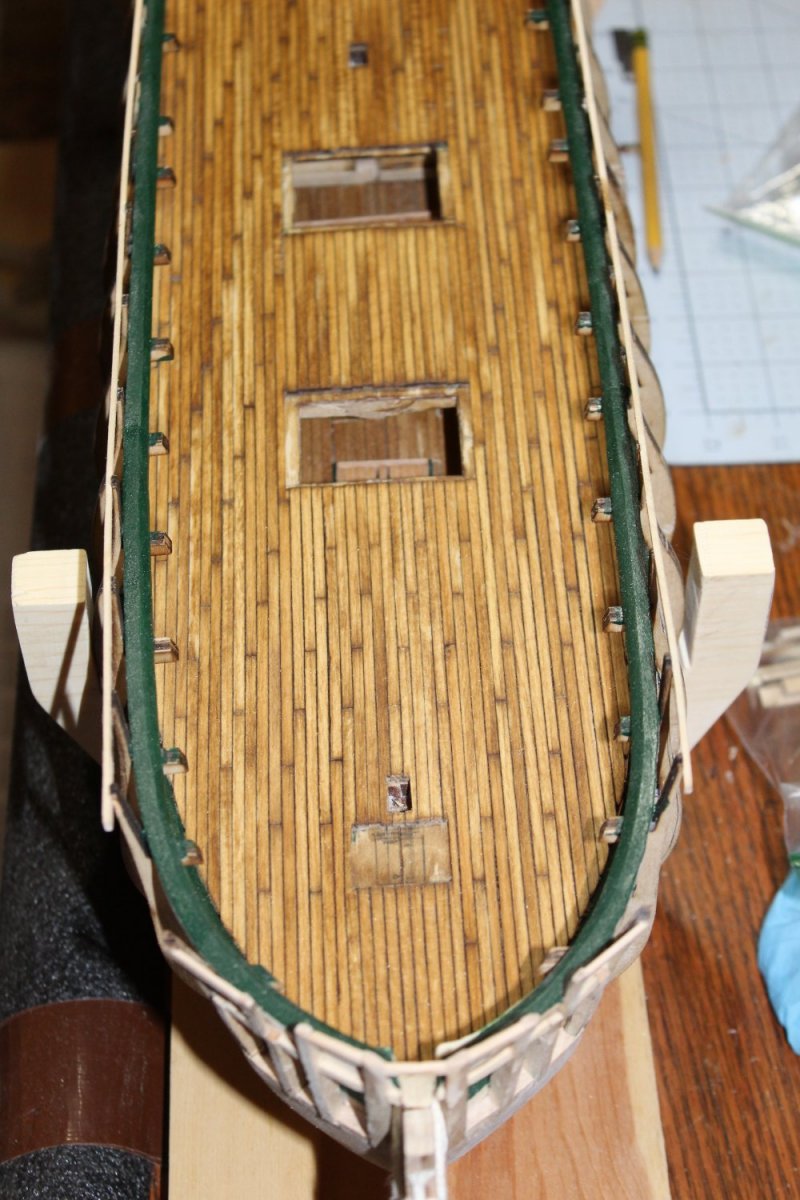
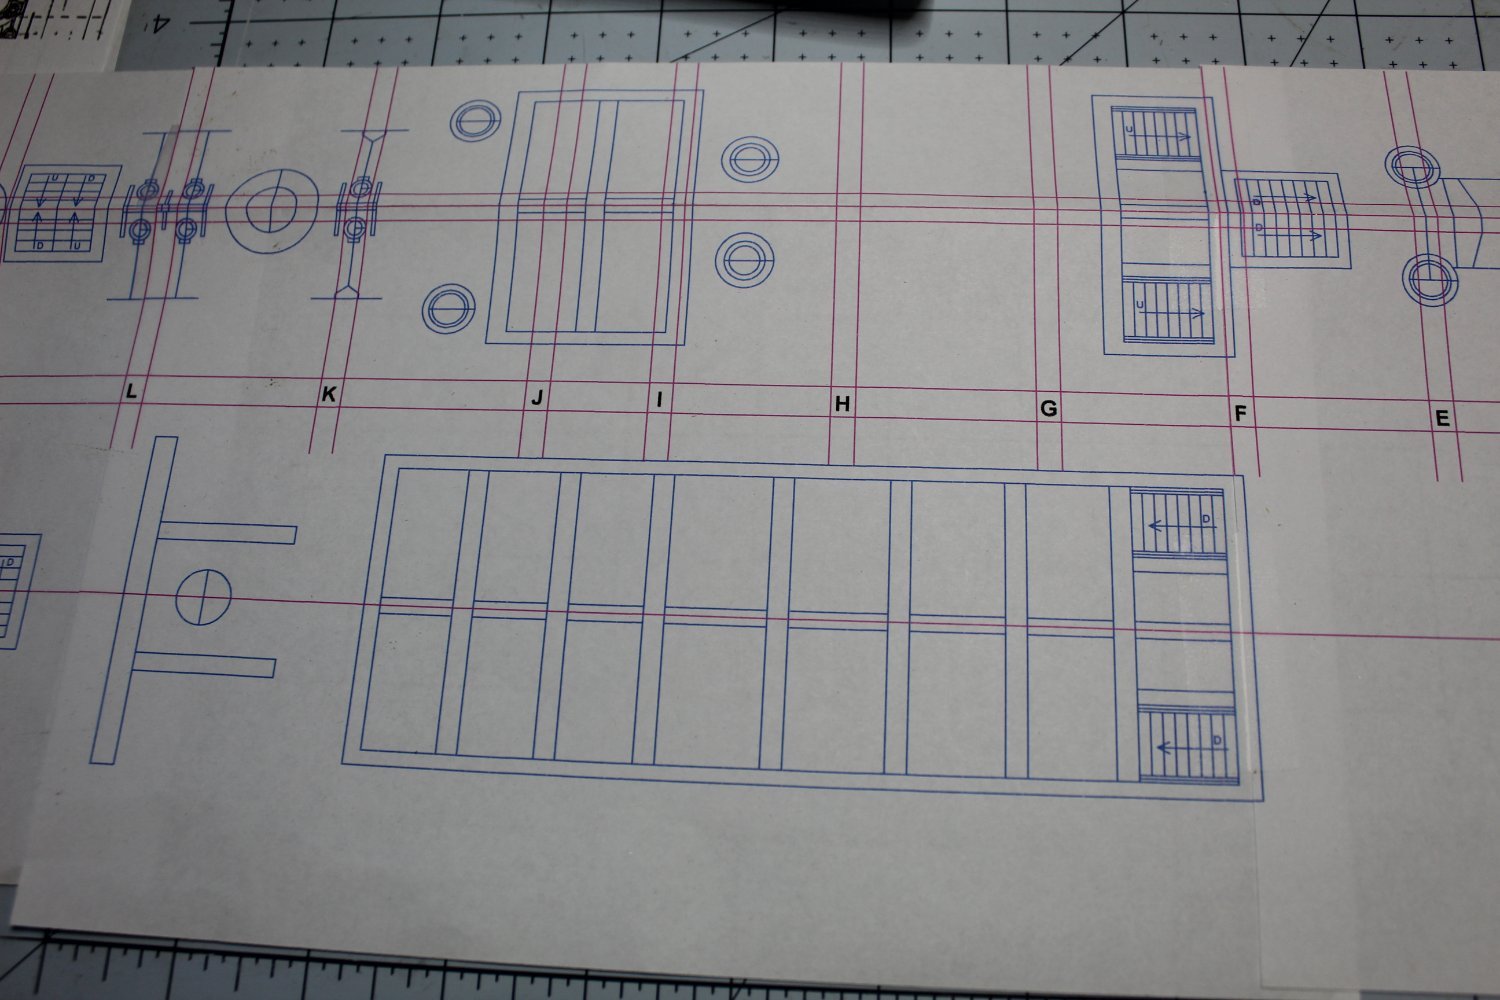
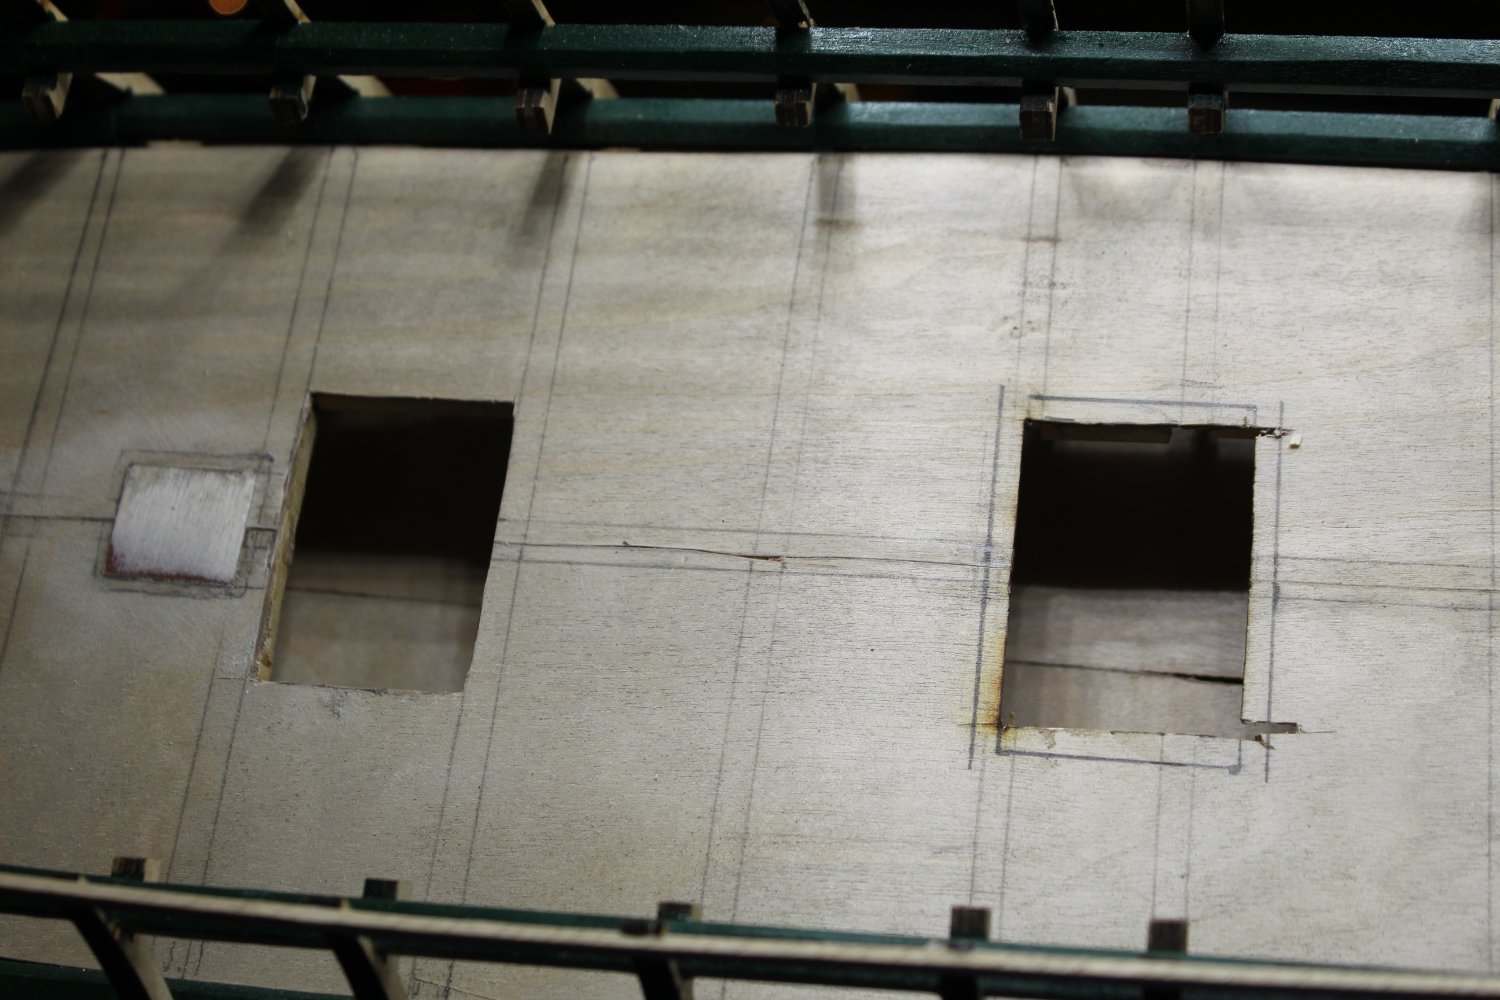
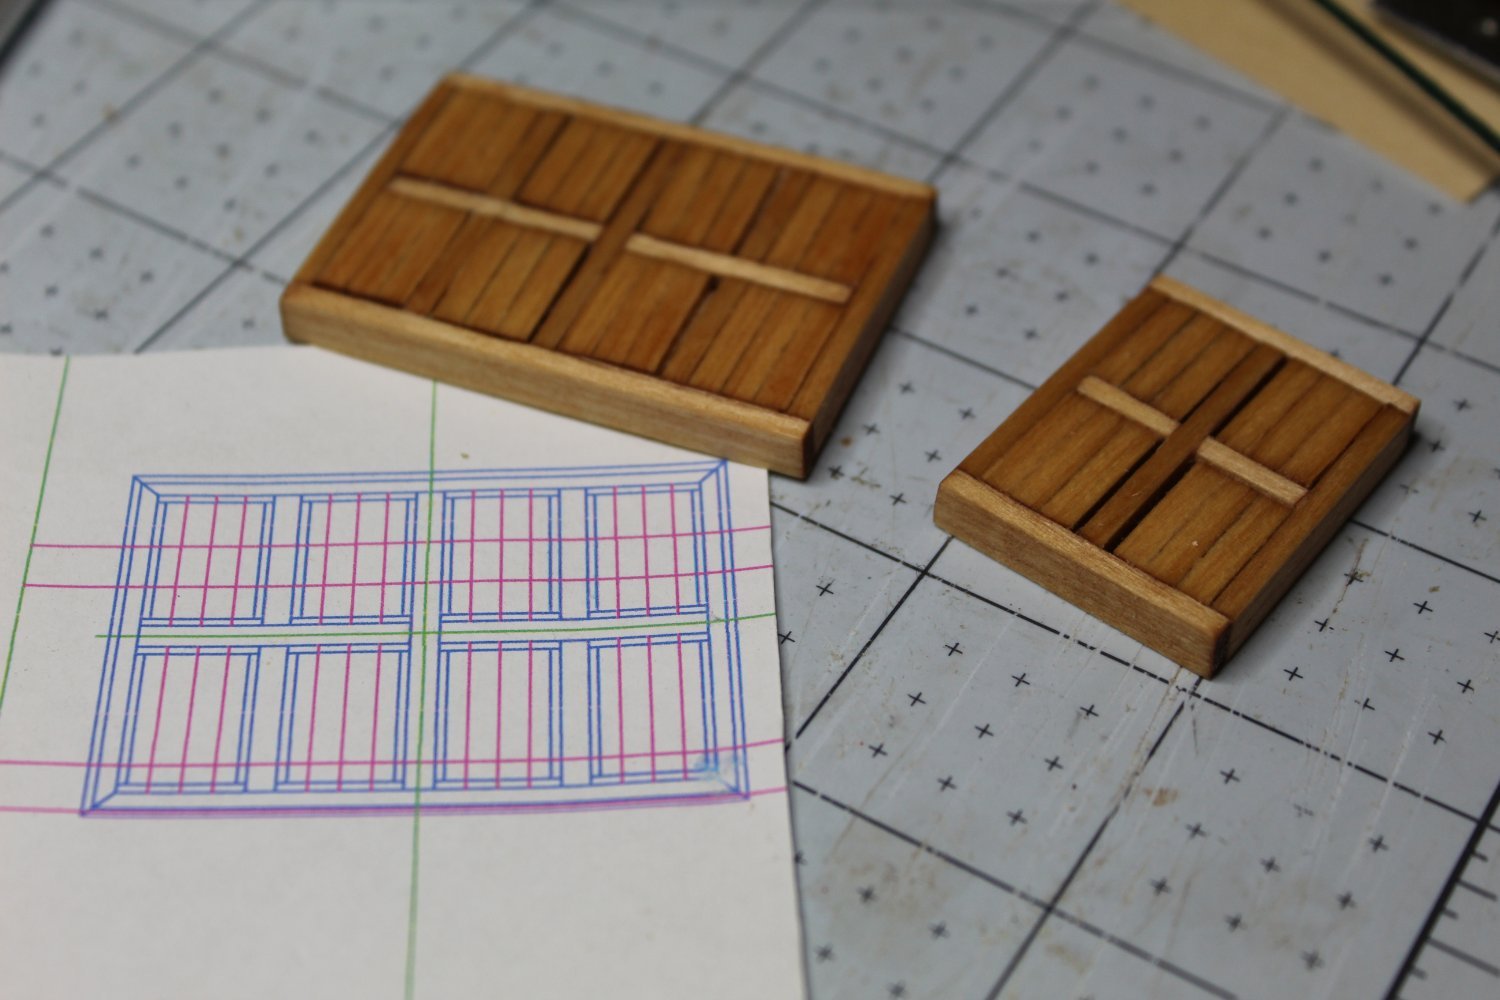
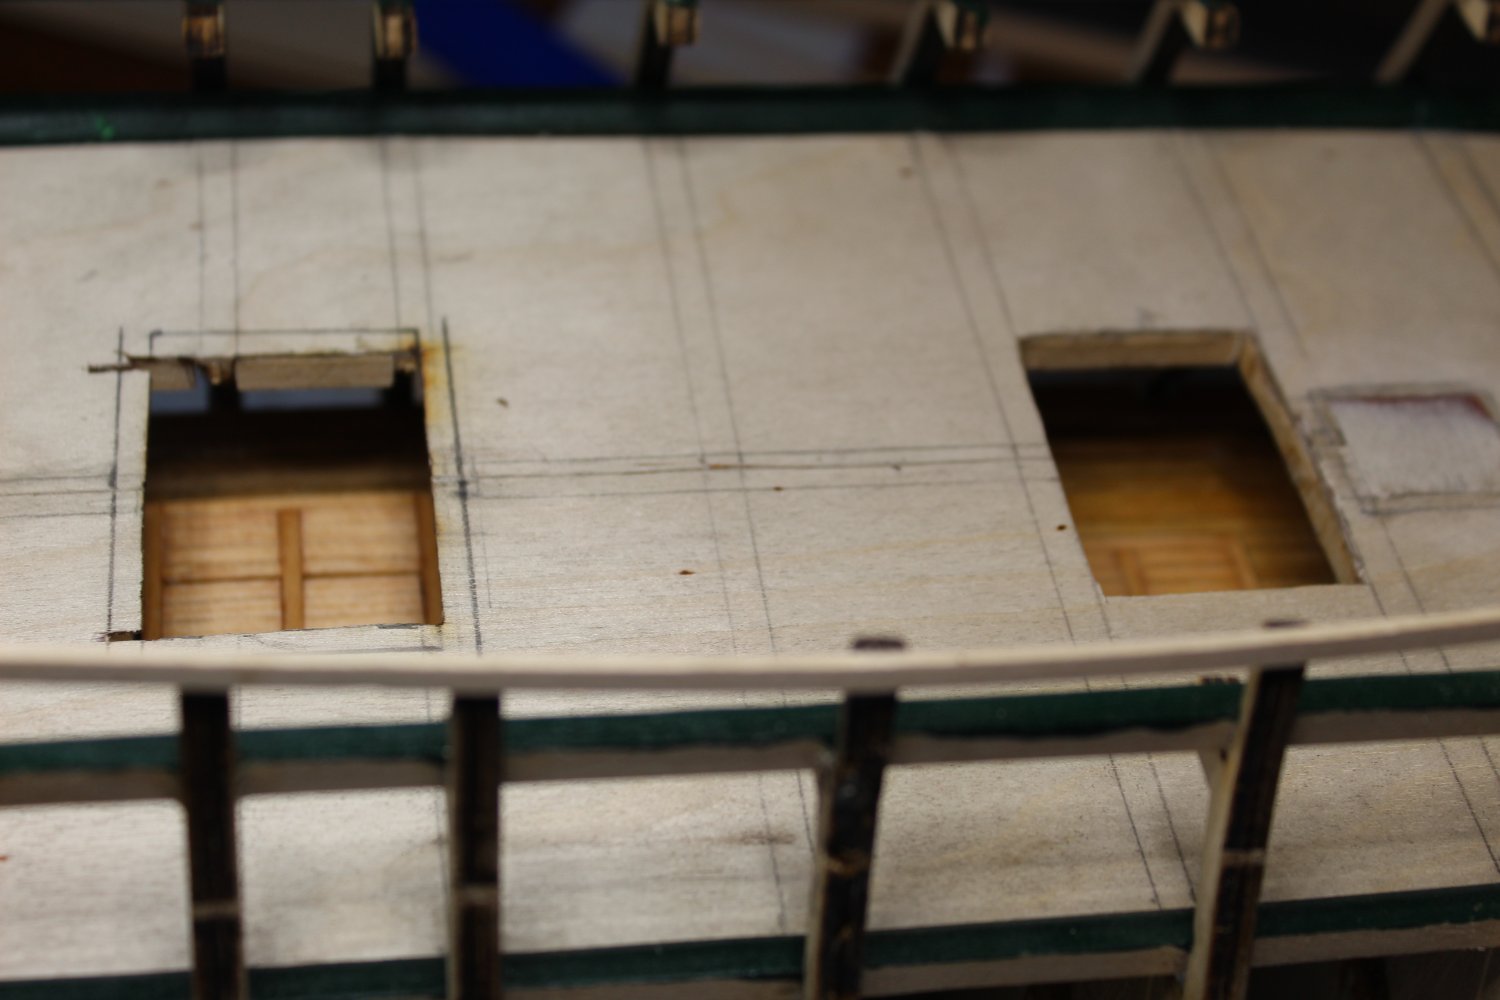
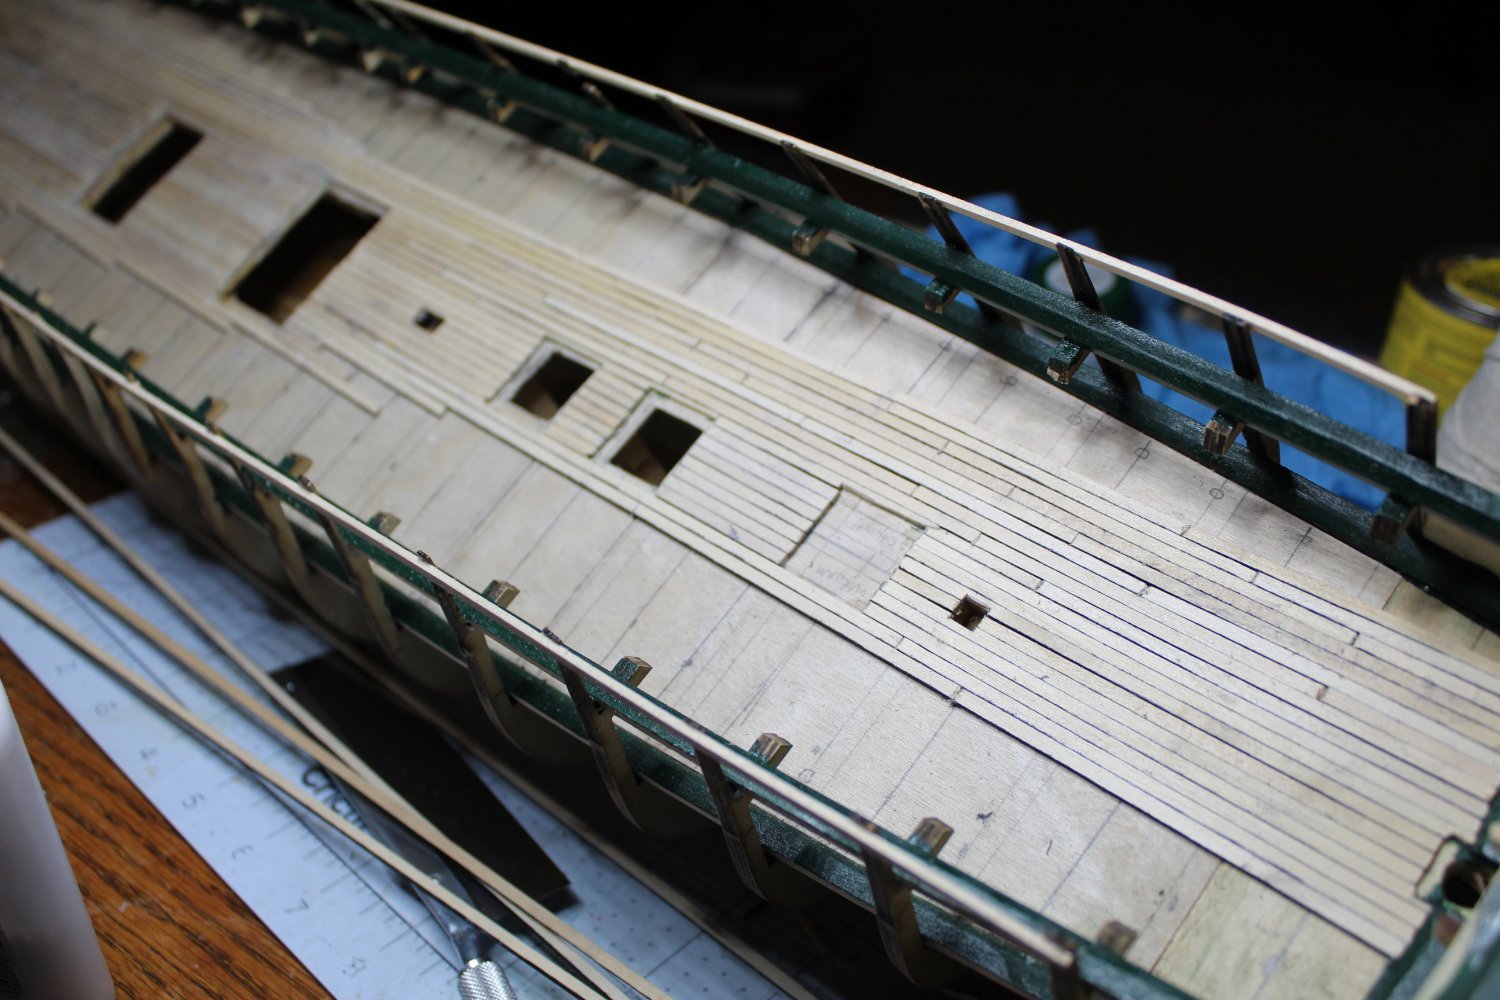
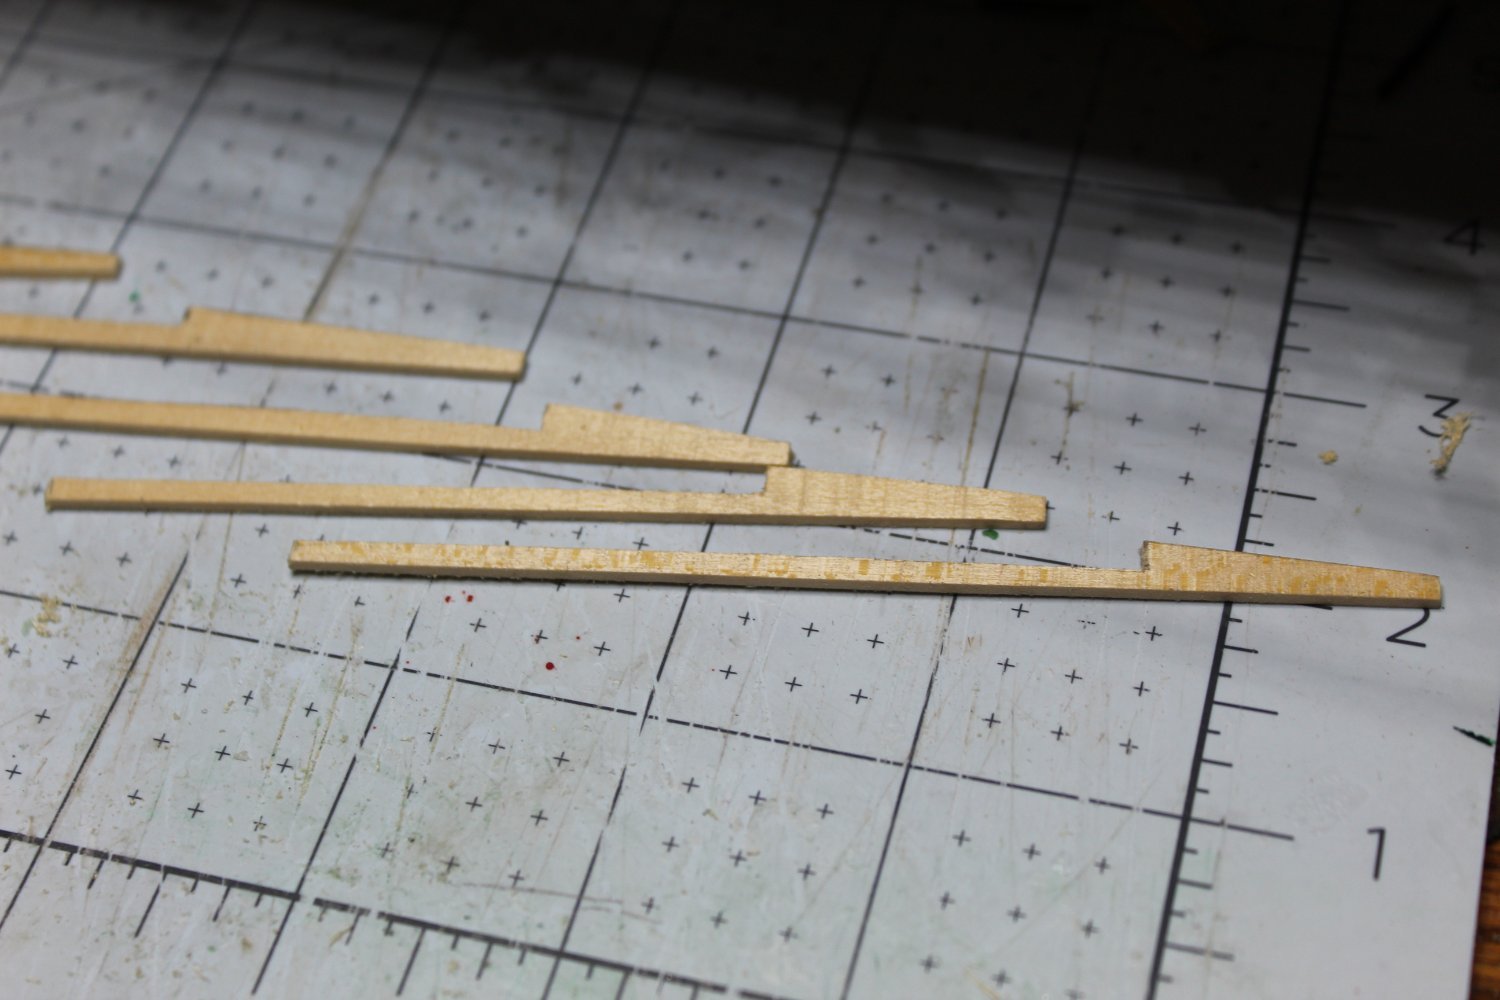
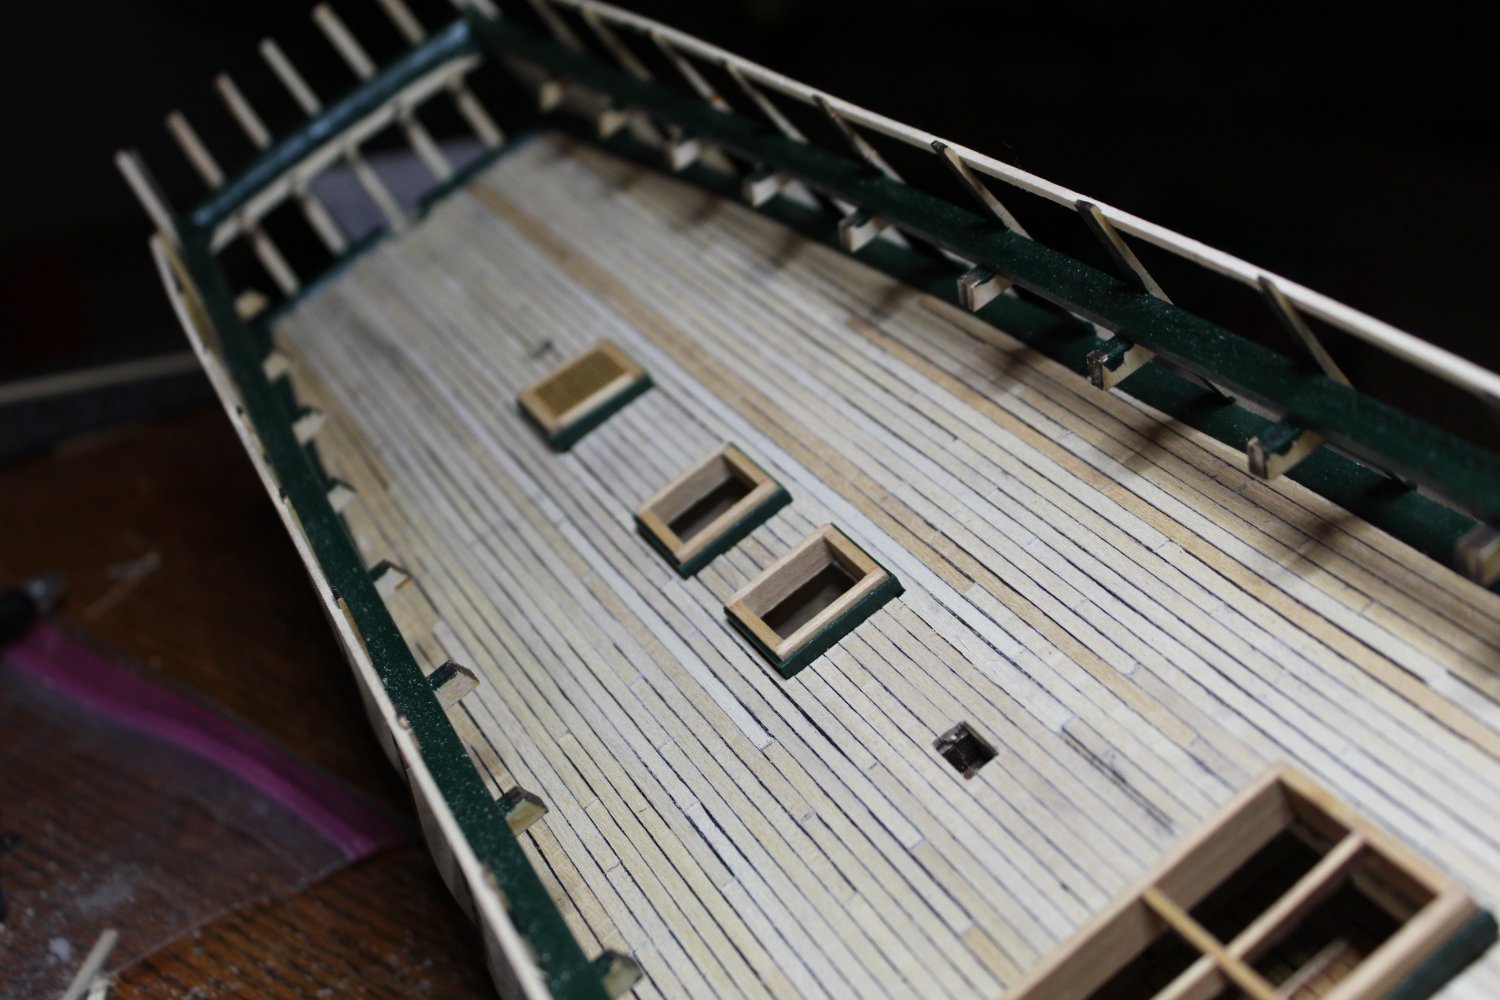
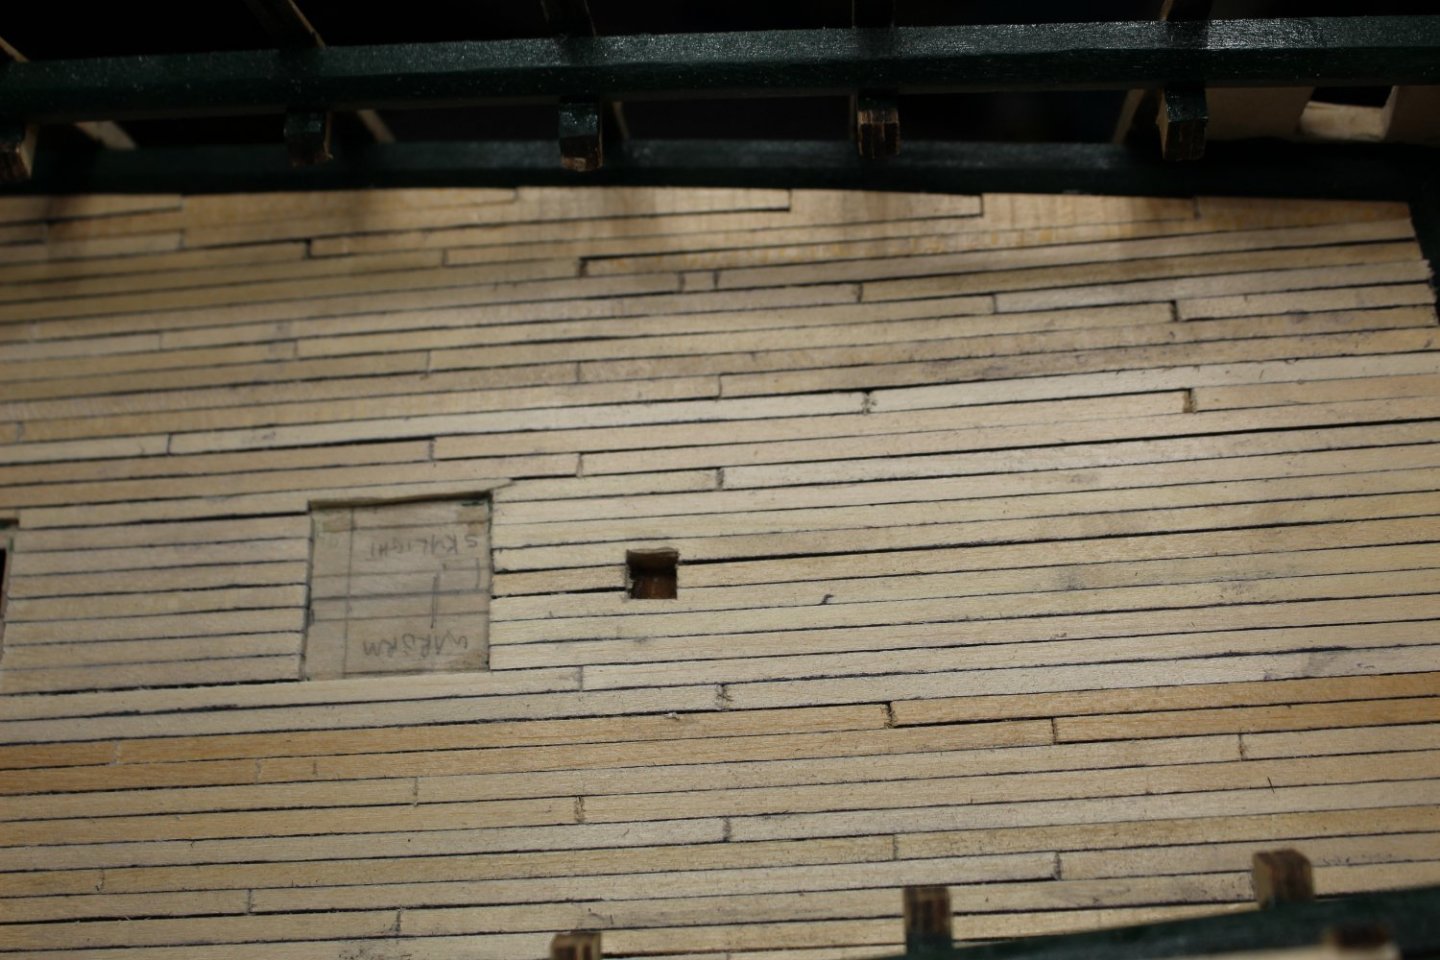
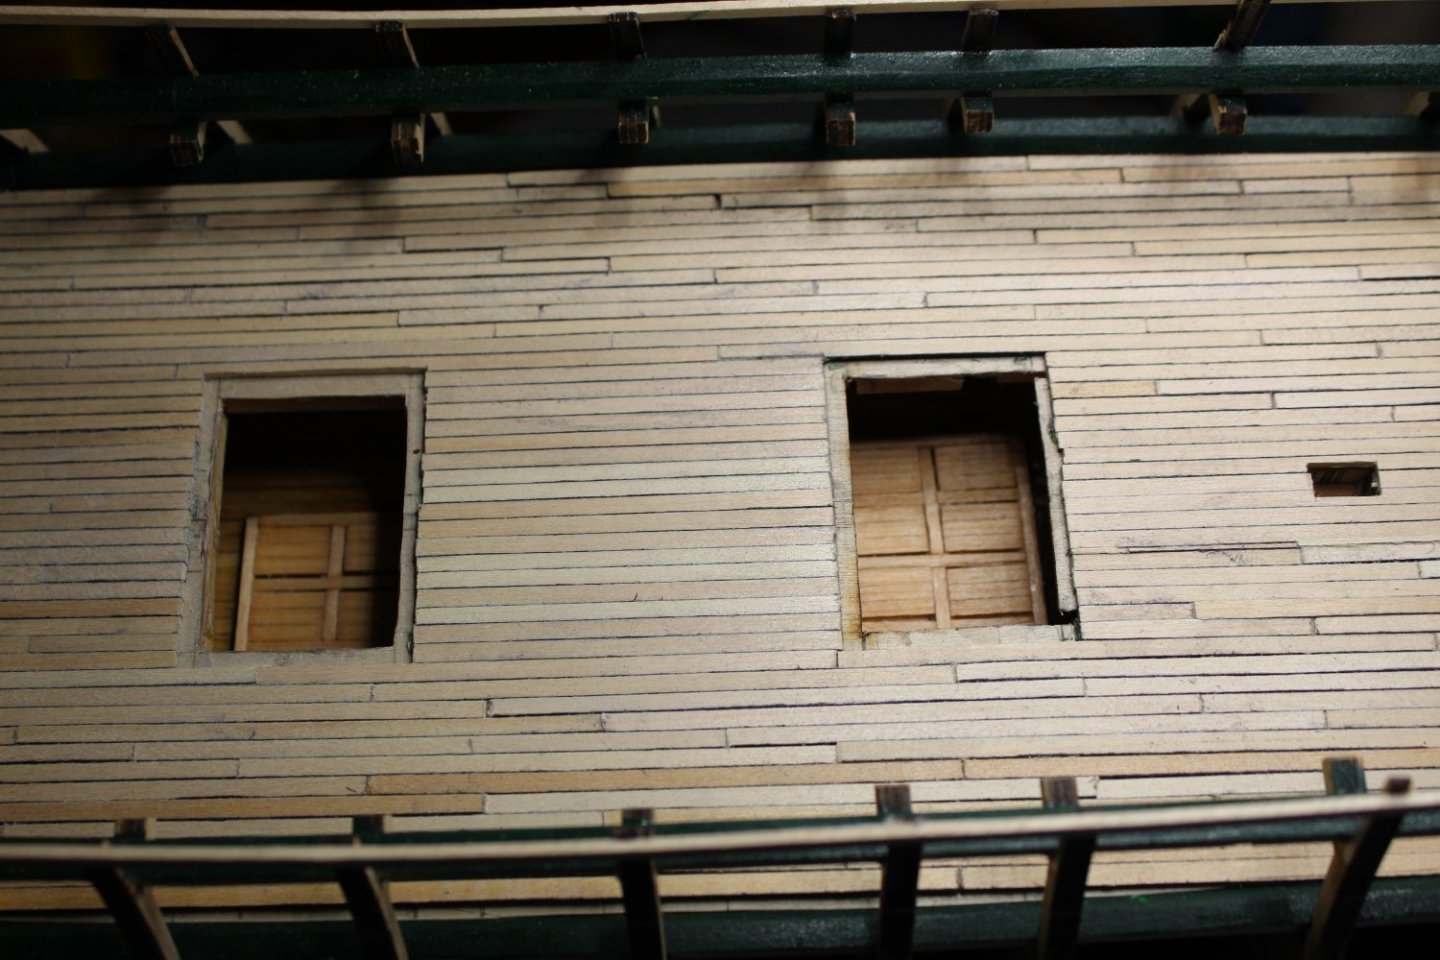
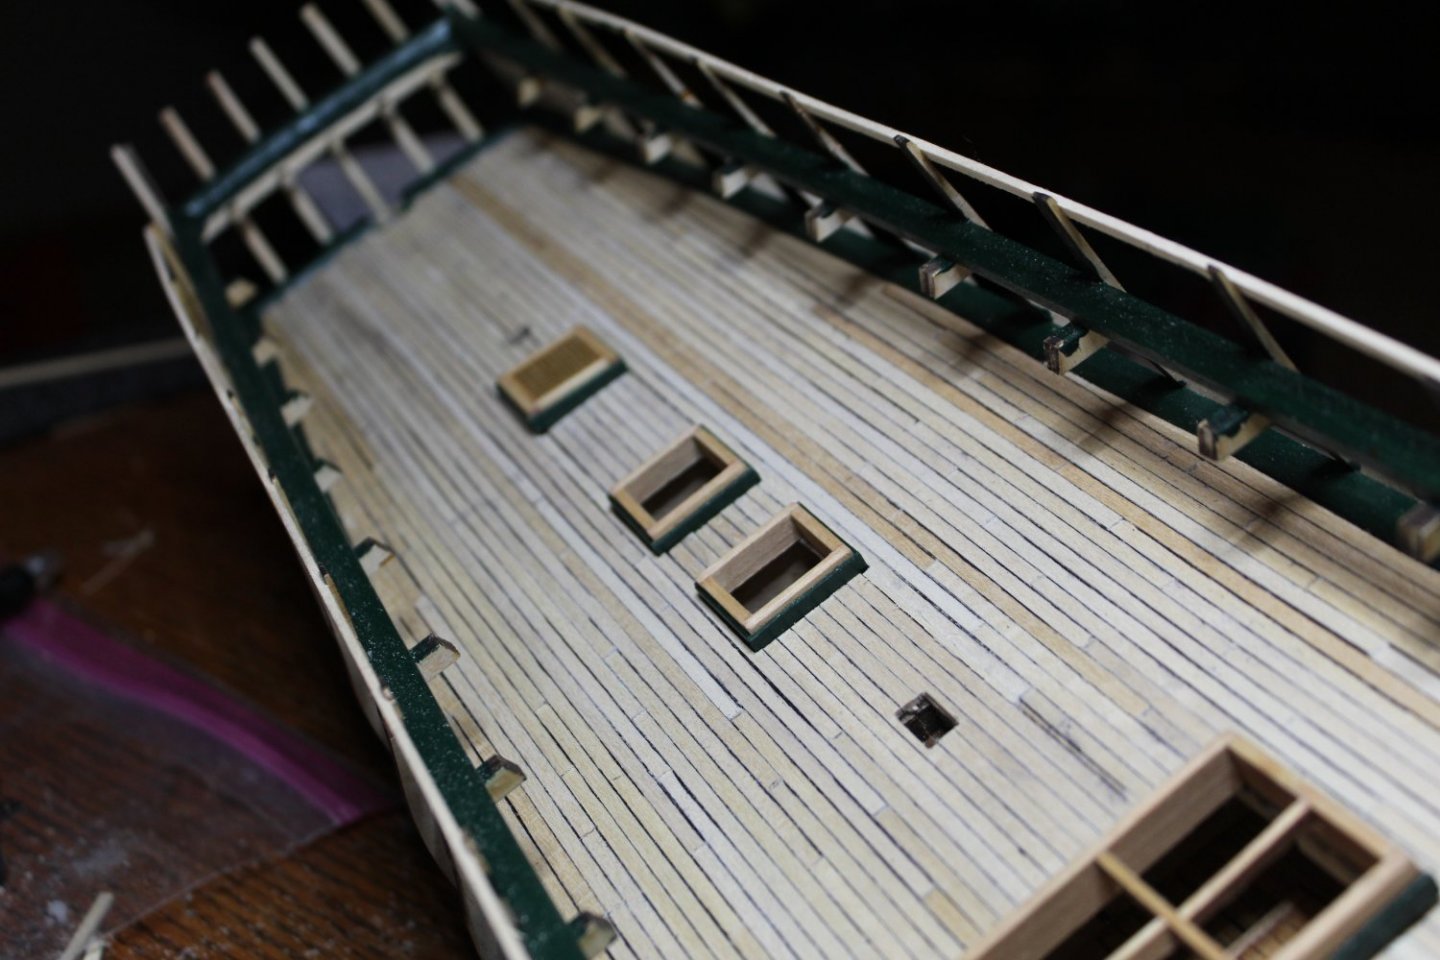
Happy New Year everyone! Since my last post, I have been working on Constitution sporadically. Last week I was on vacation, and spent the bulk of the time in the shop – as a result, I’ve finally made some decent progress. - I got the plywood decking done for the Gun Deck. - I decided to make the Fore and Main Hatches open so I could see to the hatches below in the Berth Deck. - I completed the Berth Deck hatches, and a section of decking that will be visible from above. - I built the Gun Deck Hatches - I planked the Gun Deck. All of the above gave me much-needed practice for when I work on the Spar Deck. Next will come sanding / finishing the Gun Deck planking. Full sail ahead! Initial Plans for Spar- and Gun Decks. Later, I changed the Gun Deck Fore Hatch layout (top) to increase size and relocate the ladders down to Berth Deck. I also will replace the anchor chain bitts with cable bitts, and the Main Mast Fife Rail with a curved one like on the Hull Model. Plywood deck support for Gun Deck Carving out space for ladders Painted waterways Patched stairway in Fore Hatch. This would have been much easier had I done the Berth Deck before covering it with the Gun Deck plywood. I made thin planks so I could fit them through the Fore Hatch. Berth Deck Main Hatch (left) and Fore Hatch View through Gun Deck Main / Fore Hatches. Gun Deck Hatches Hatches set in place prior to planking the deck. Beginning planking. I did not taper the planks on the Gun Deck, so when I got to the edges, I needed to create filler pieces. I will be tapering the Spar Deck planks. And here they are installed against the waterway. Finished planking, ready to sand and finish! Hatches set in place to see what it looks like.


-
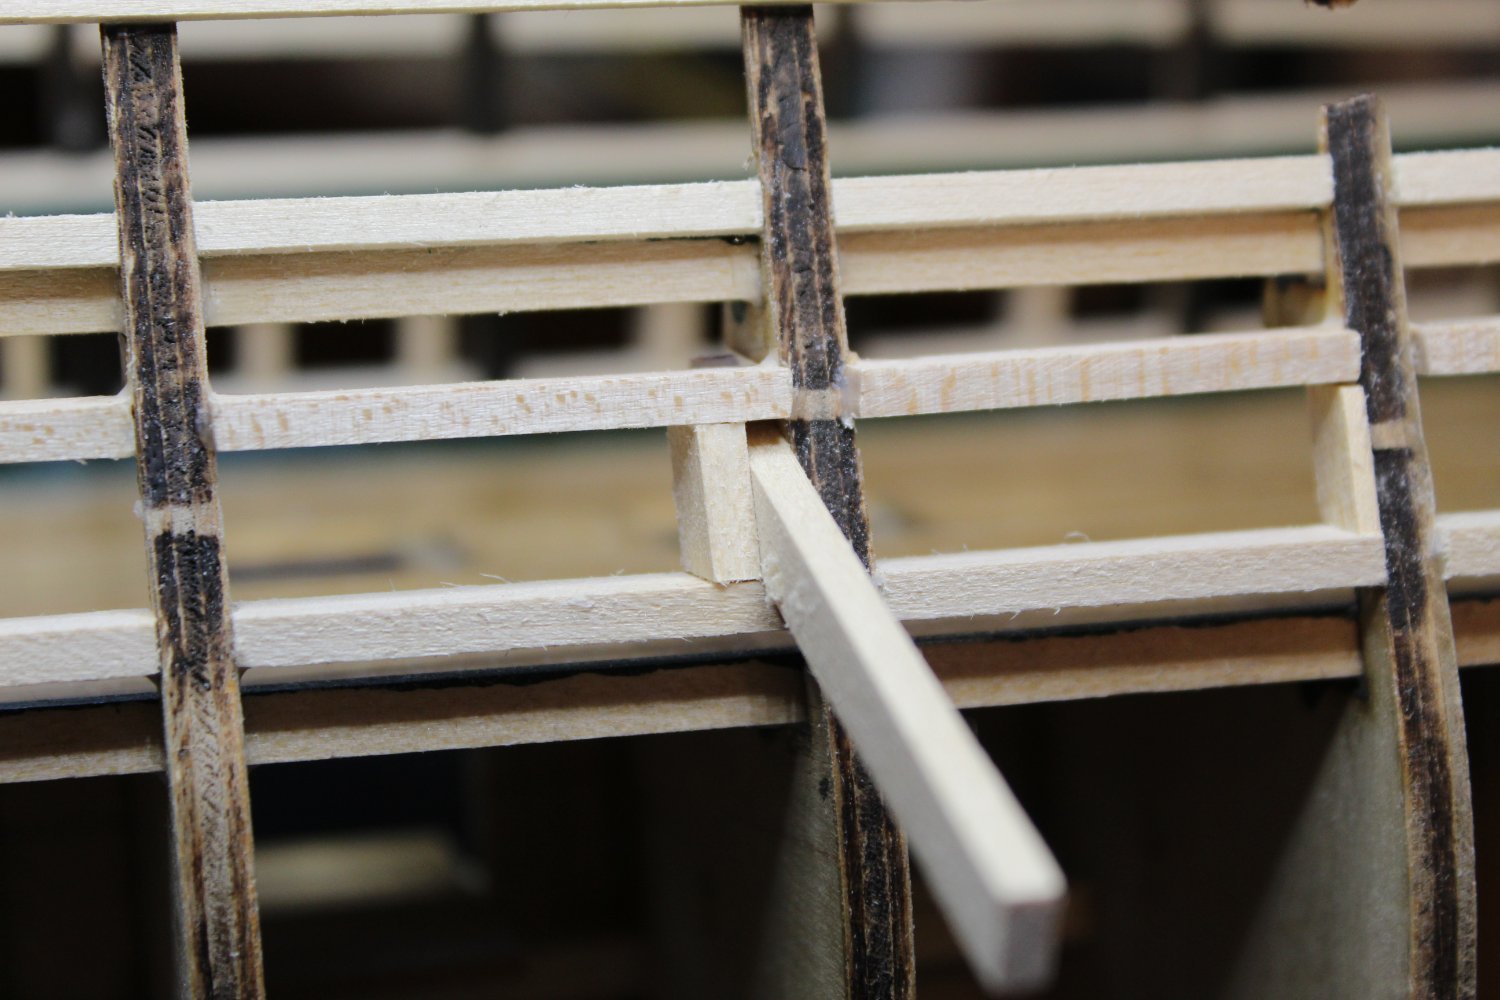
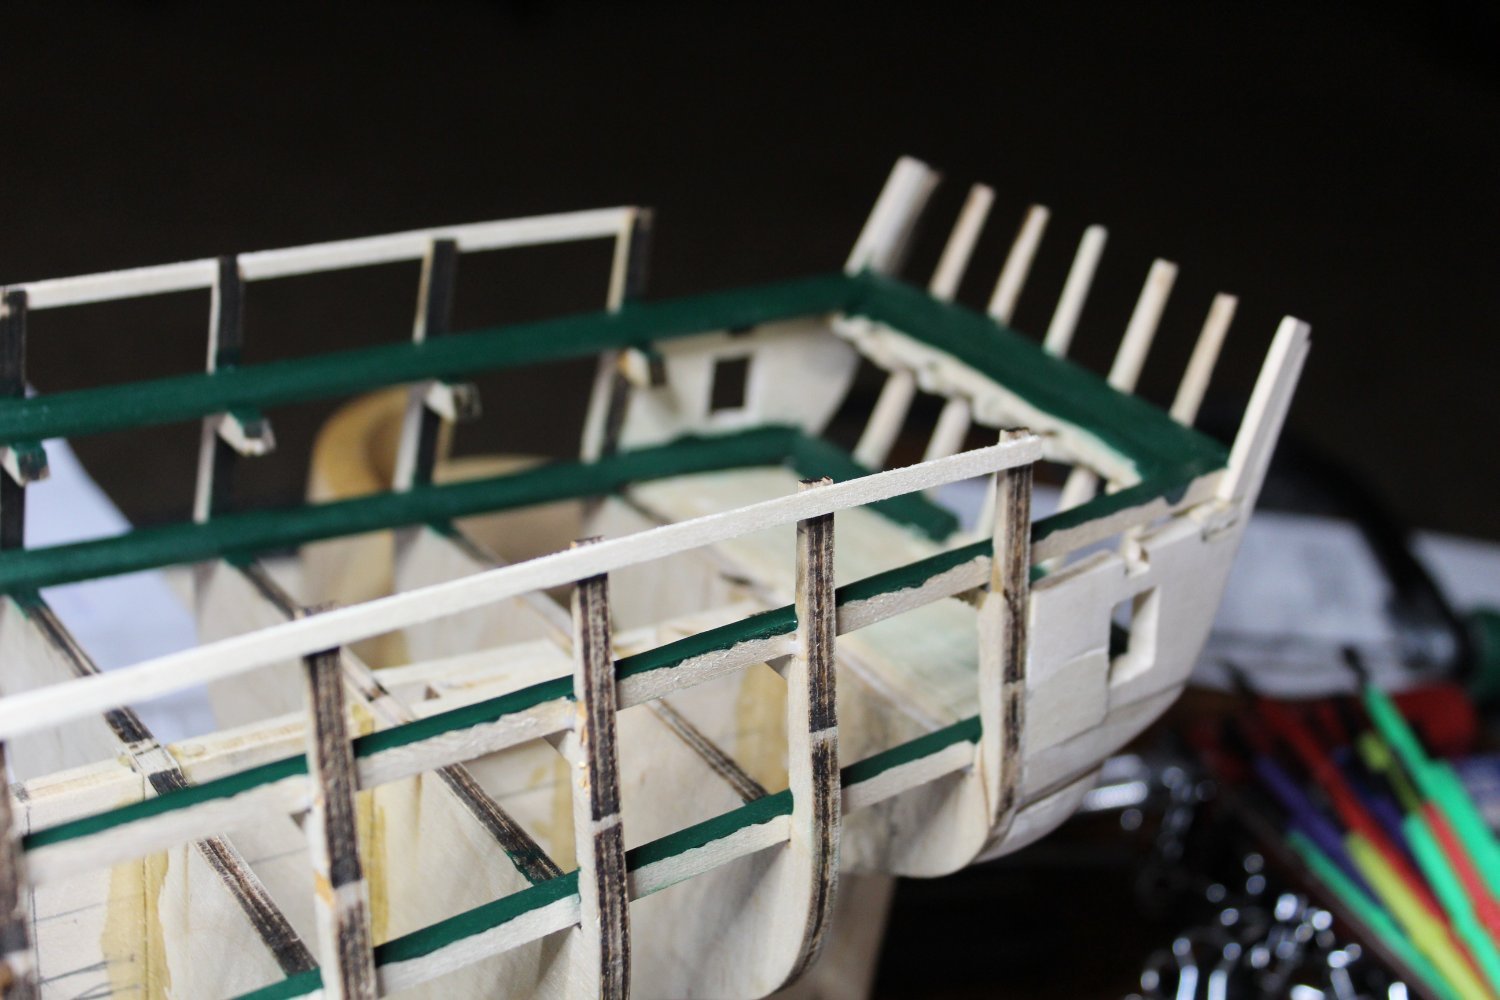
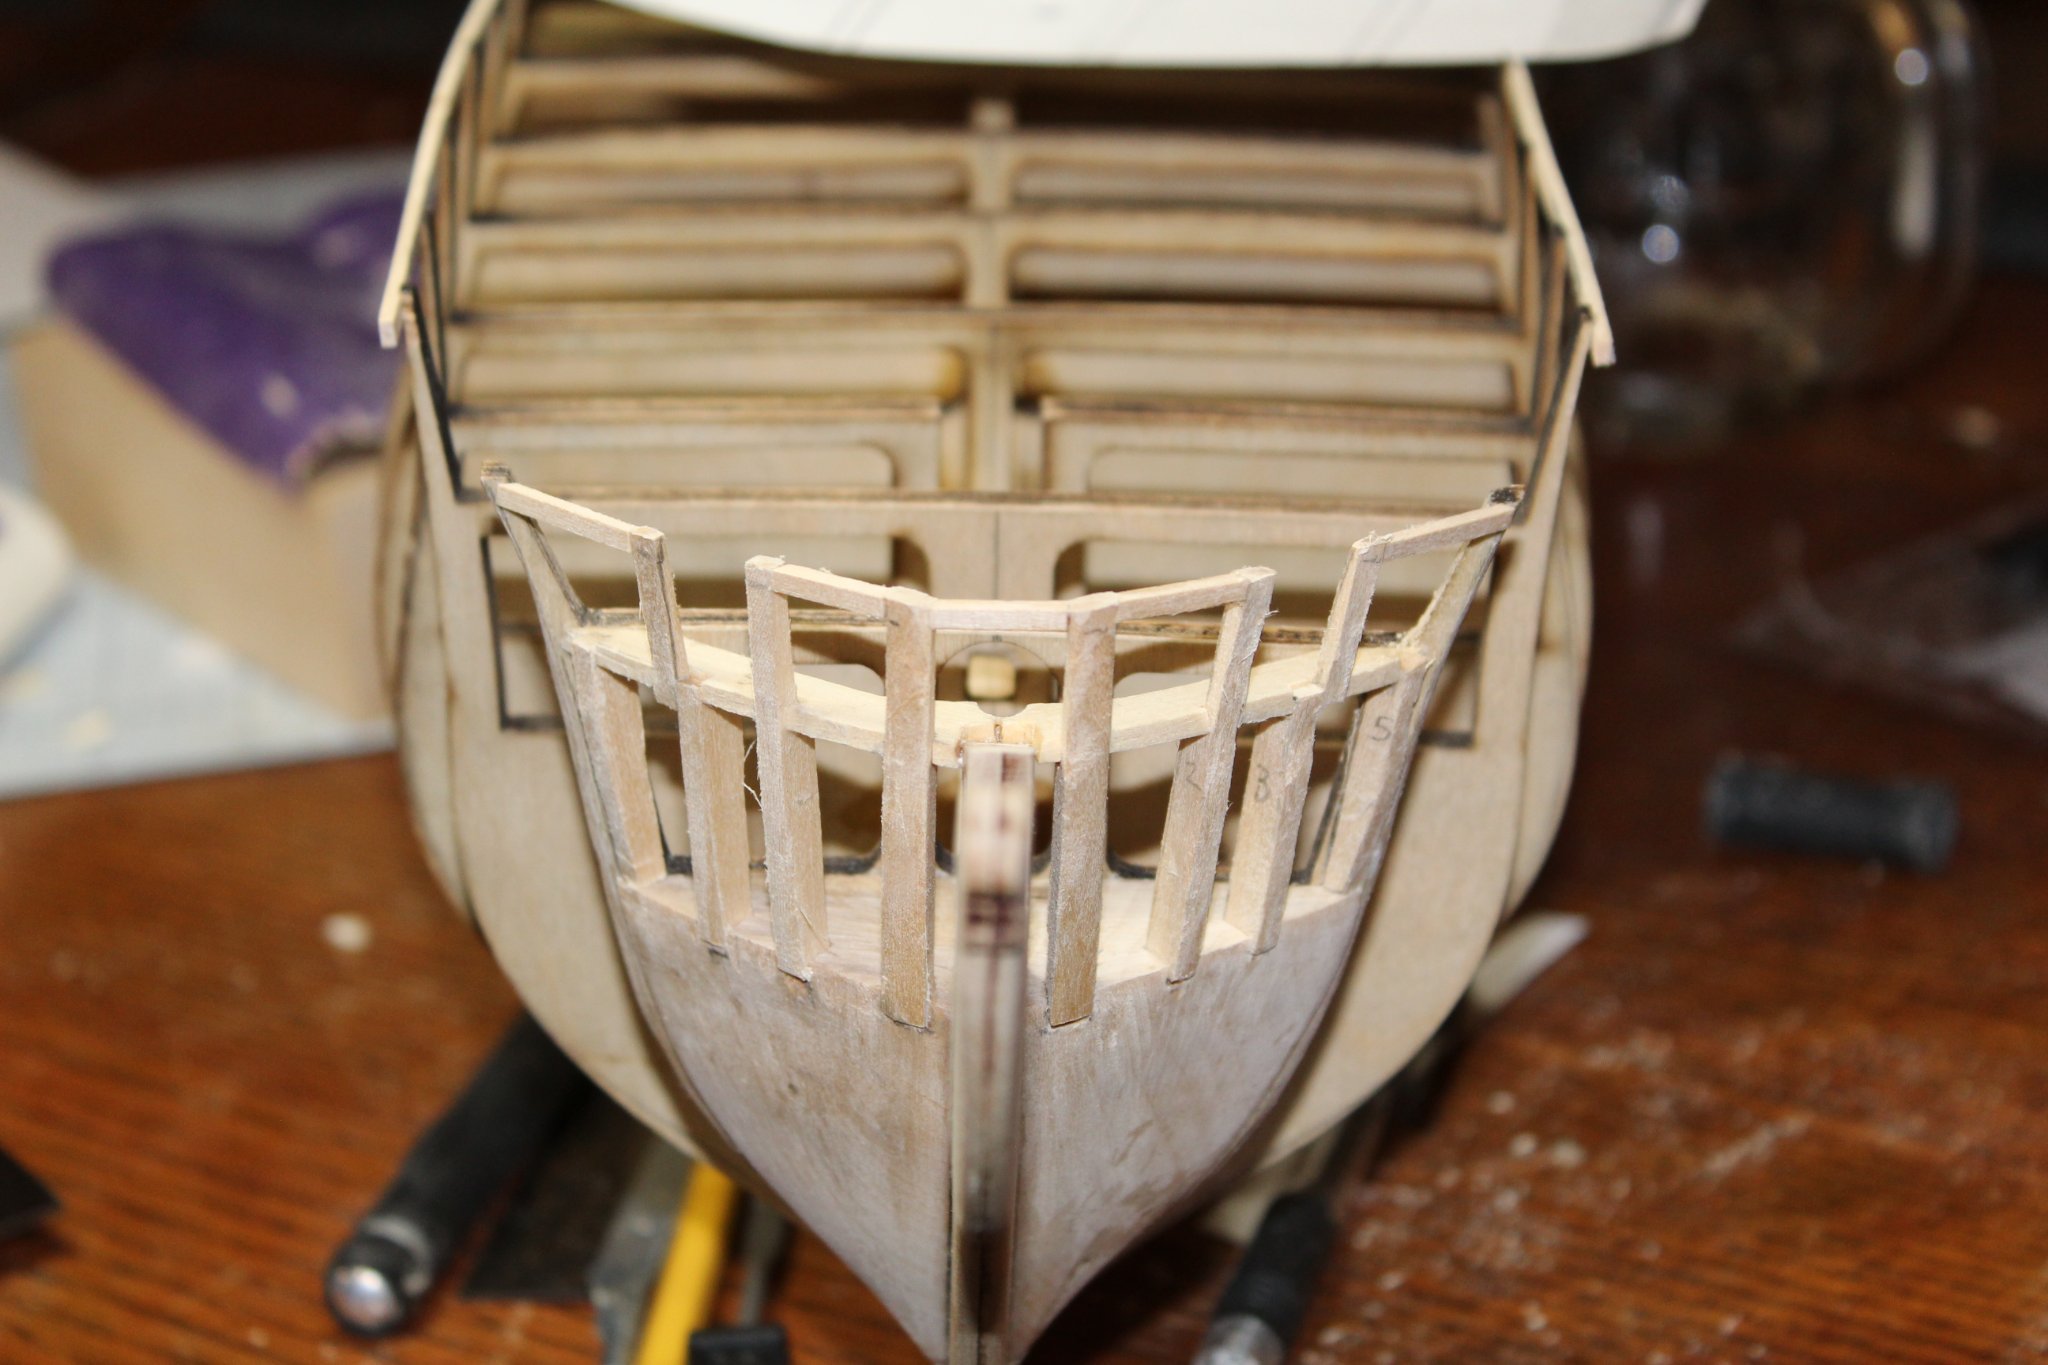
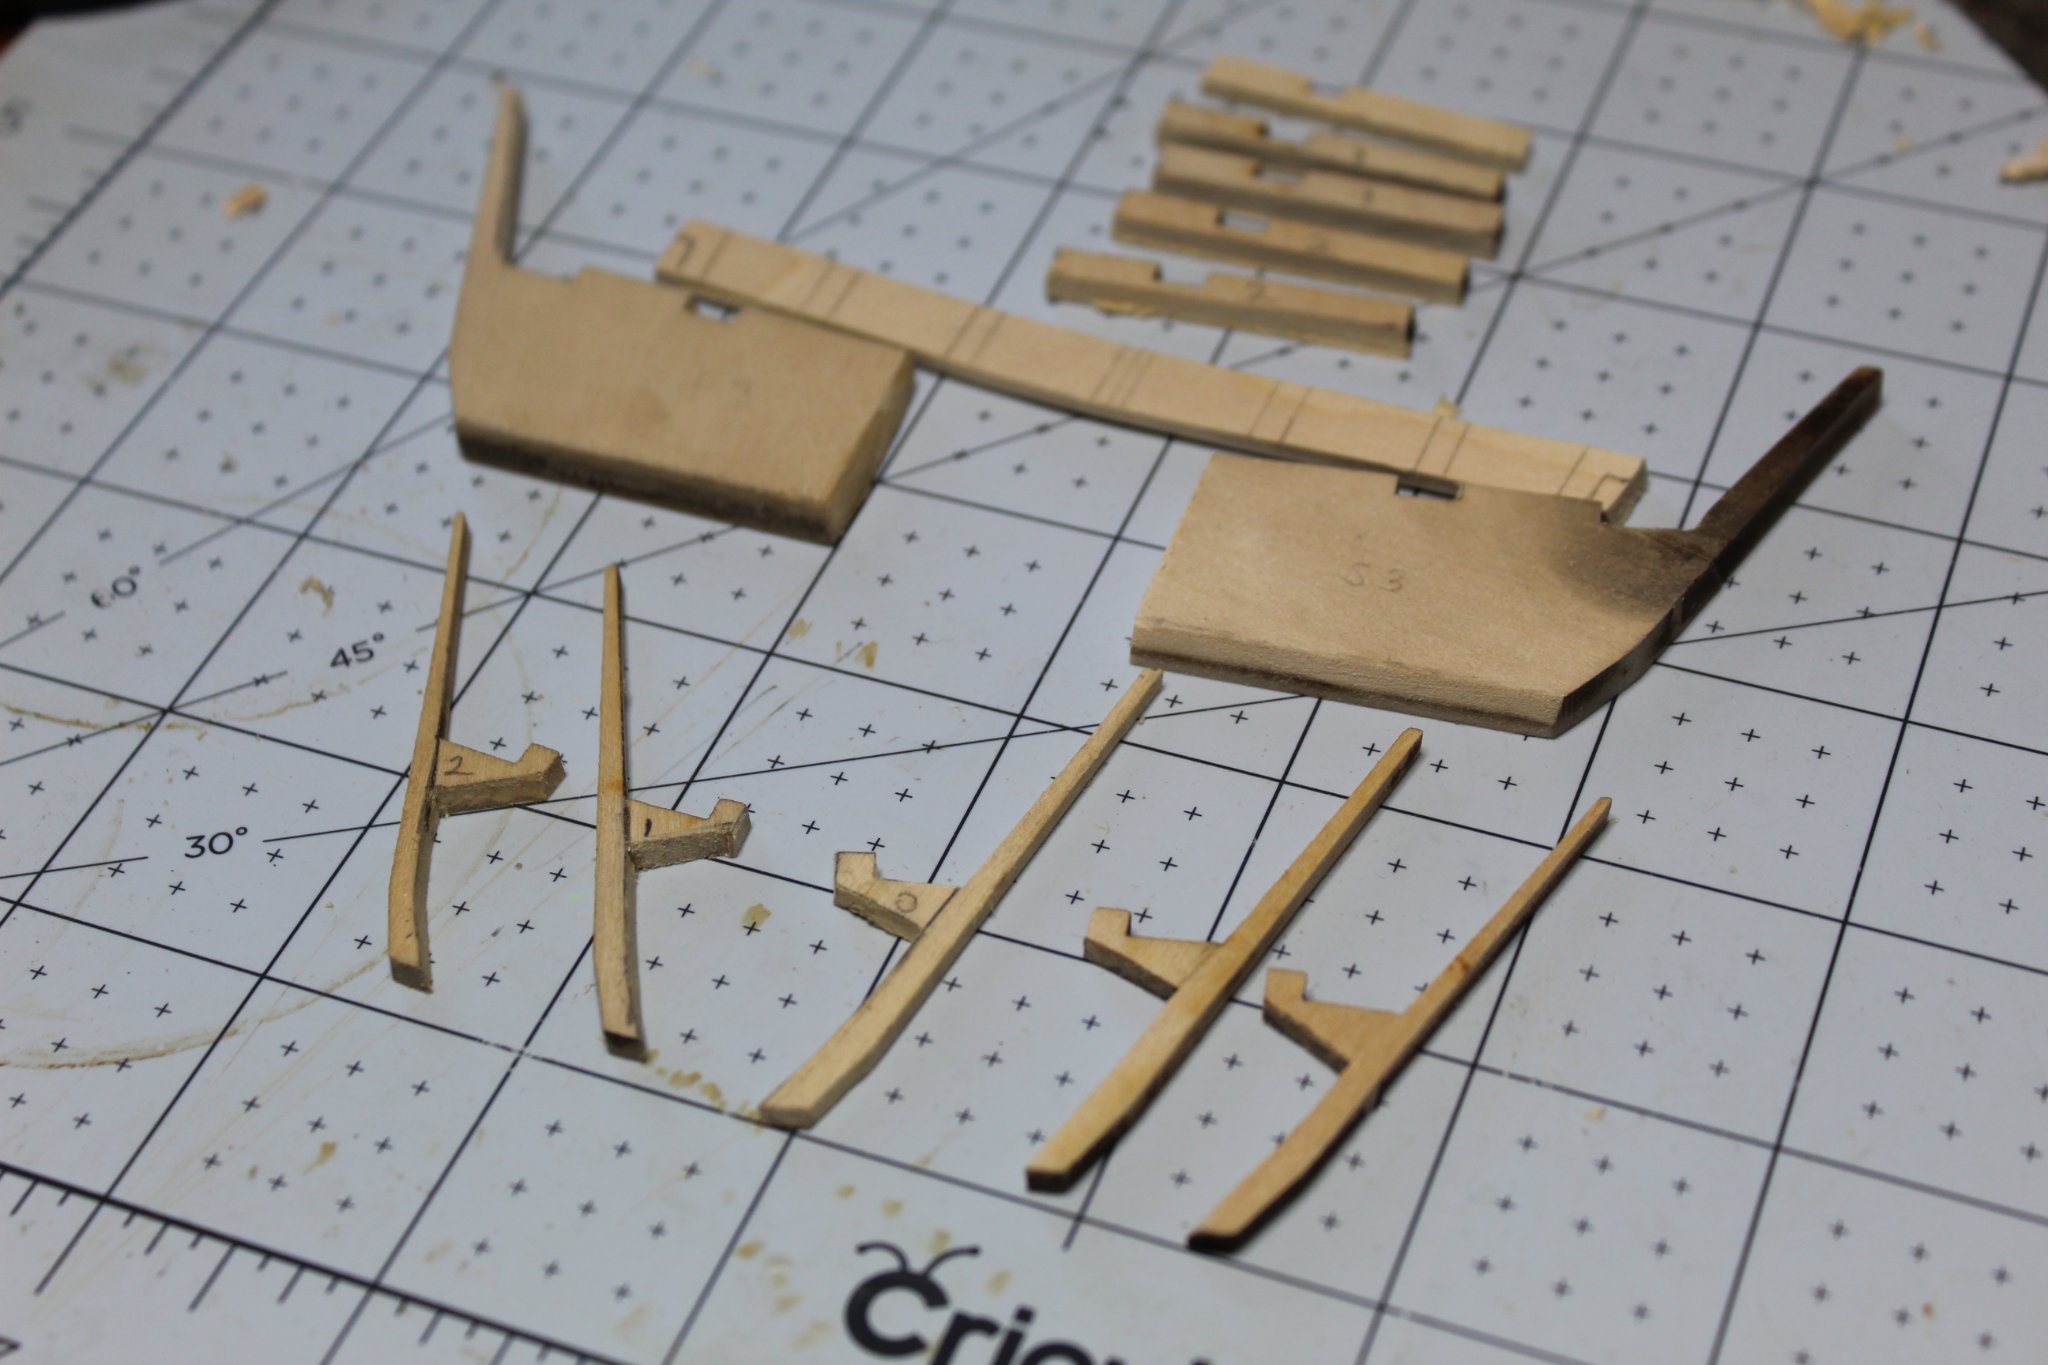
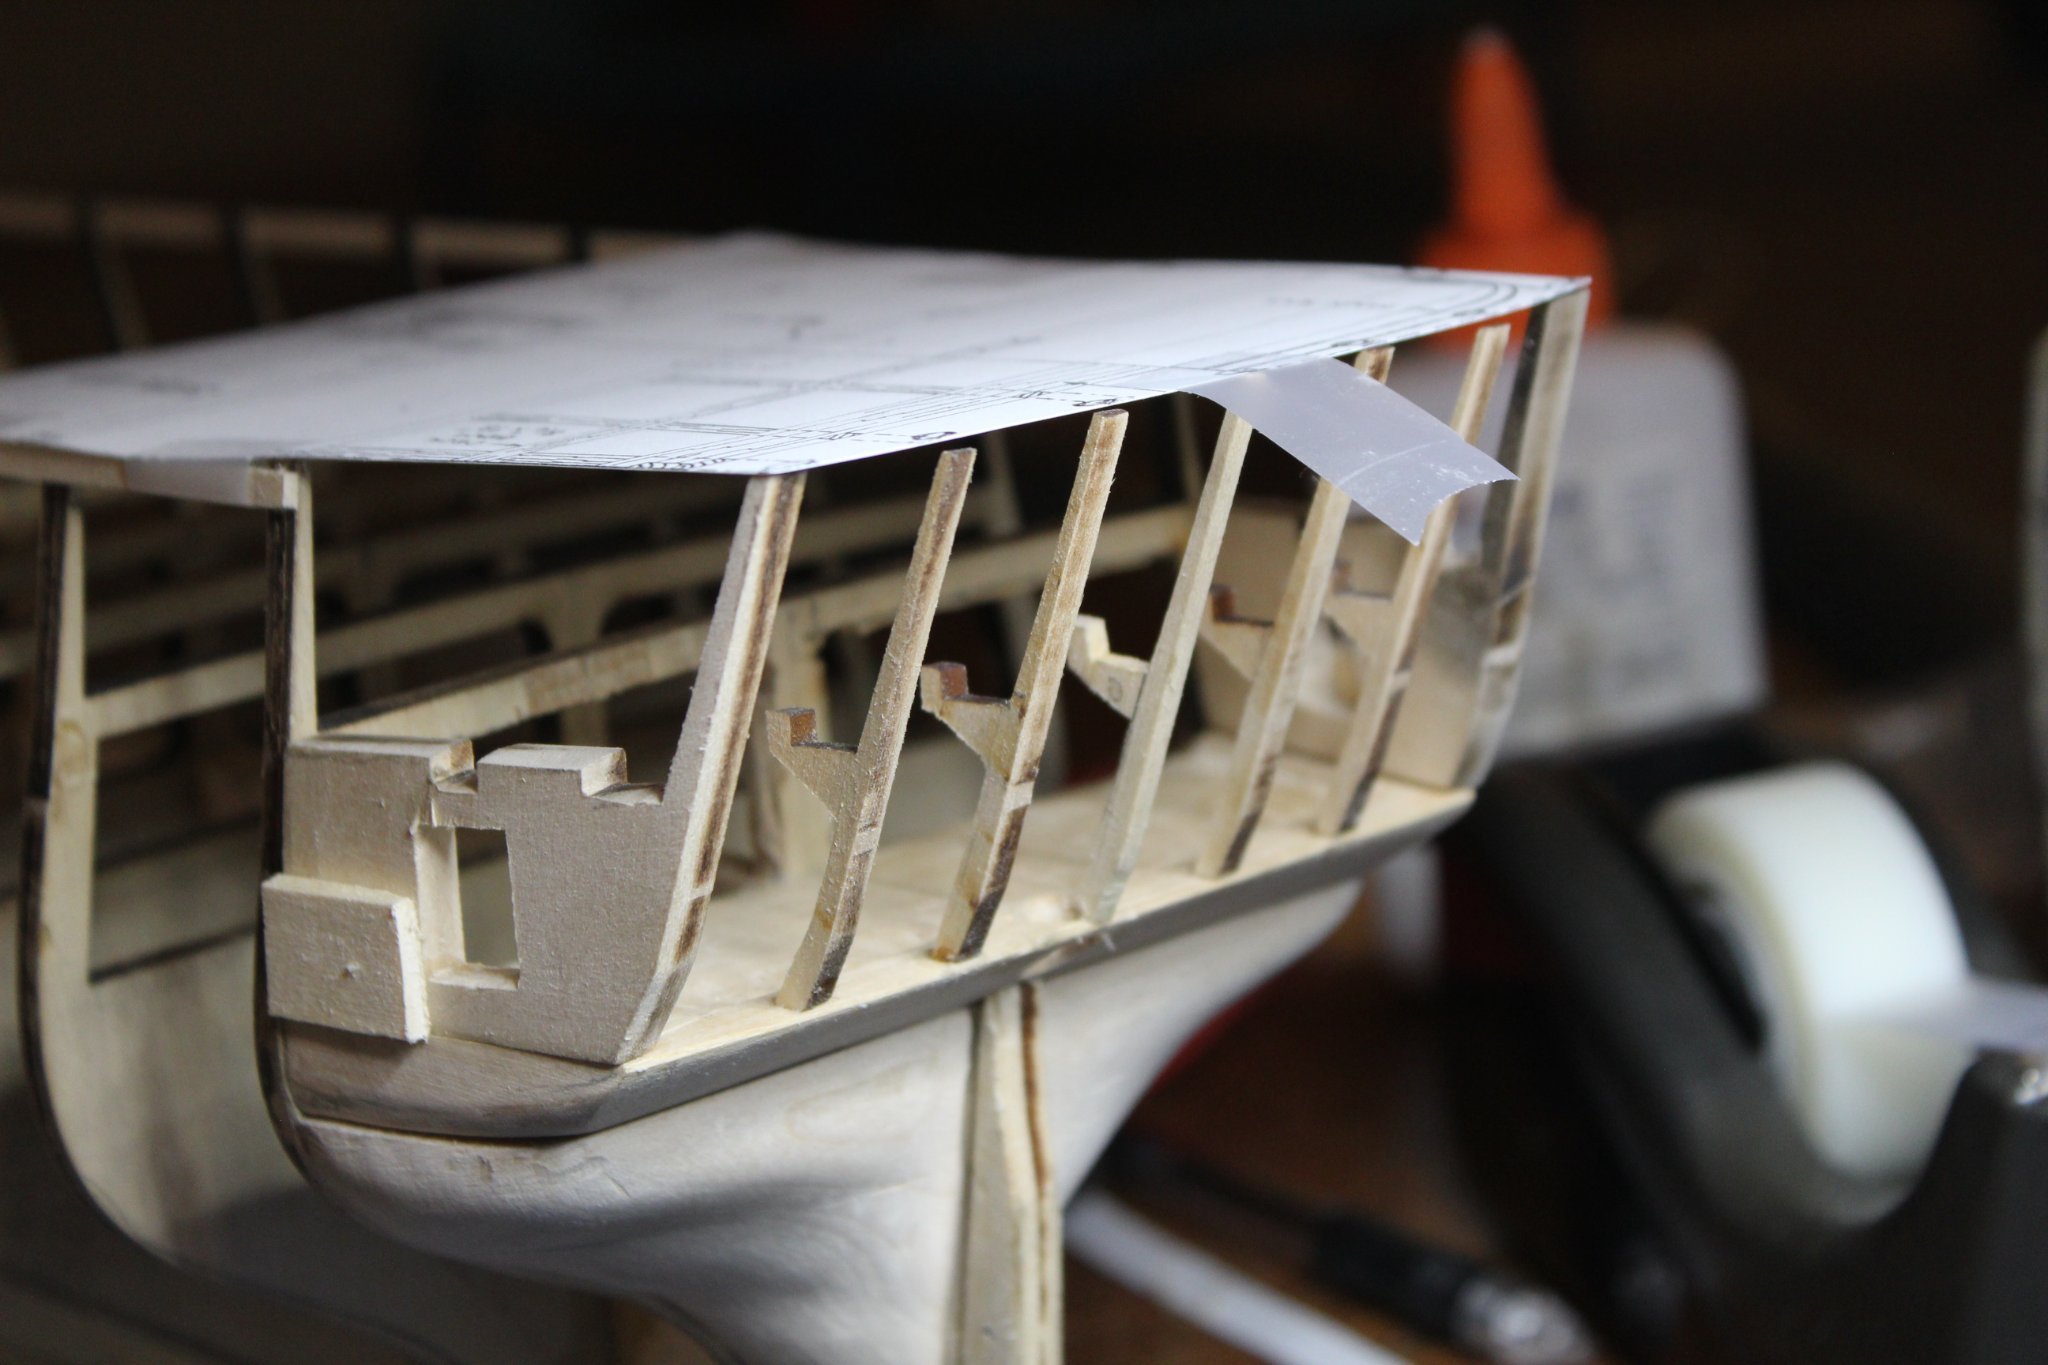
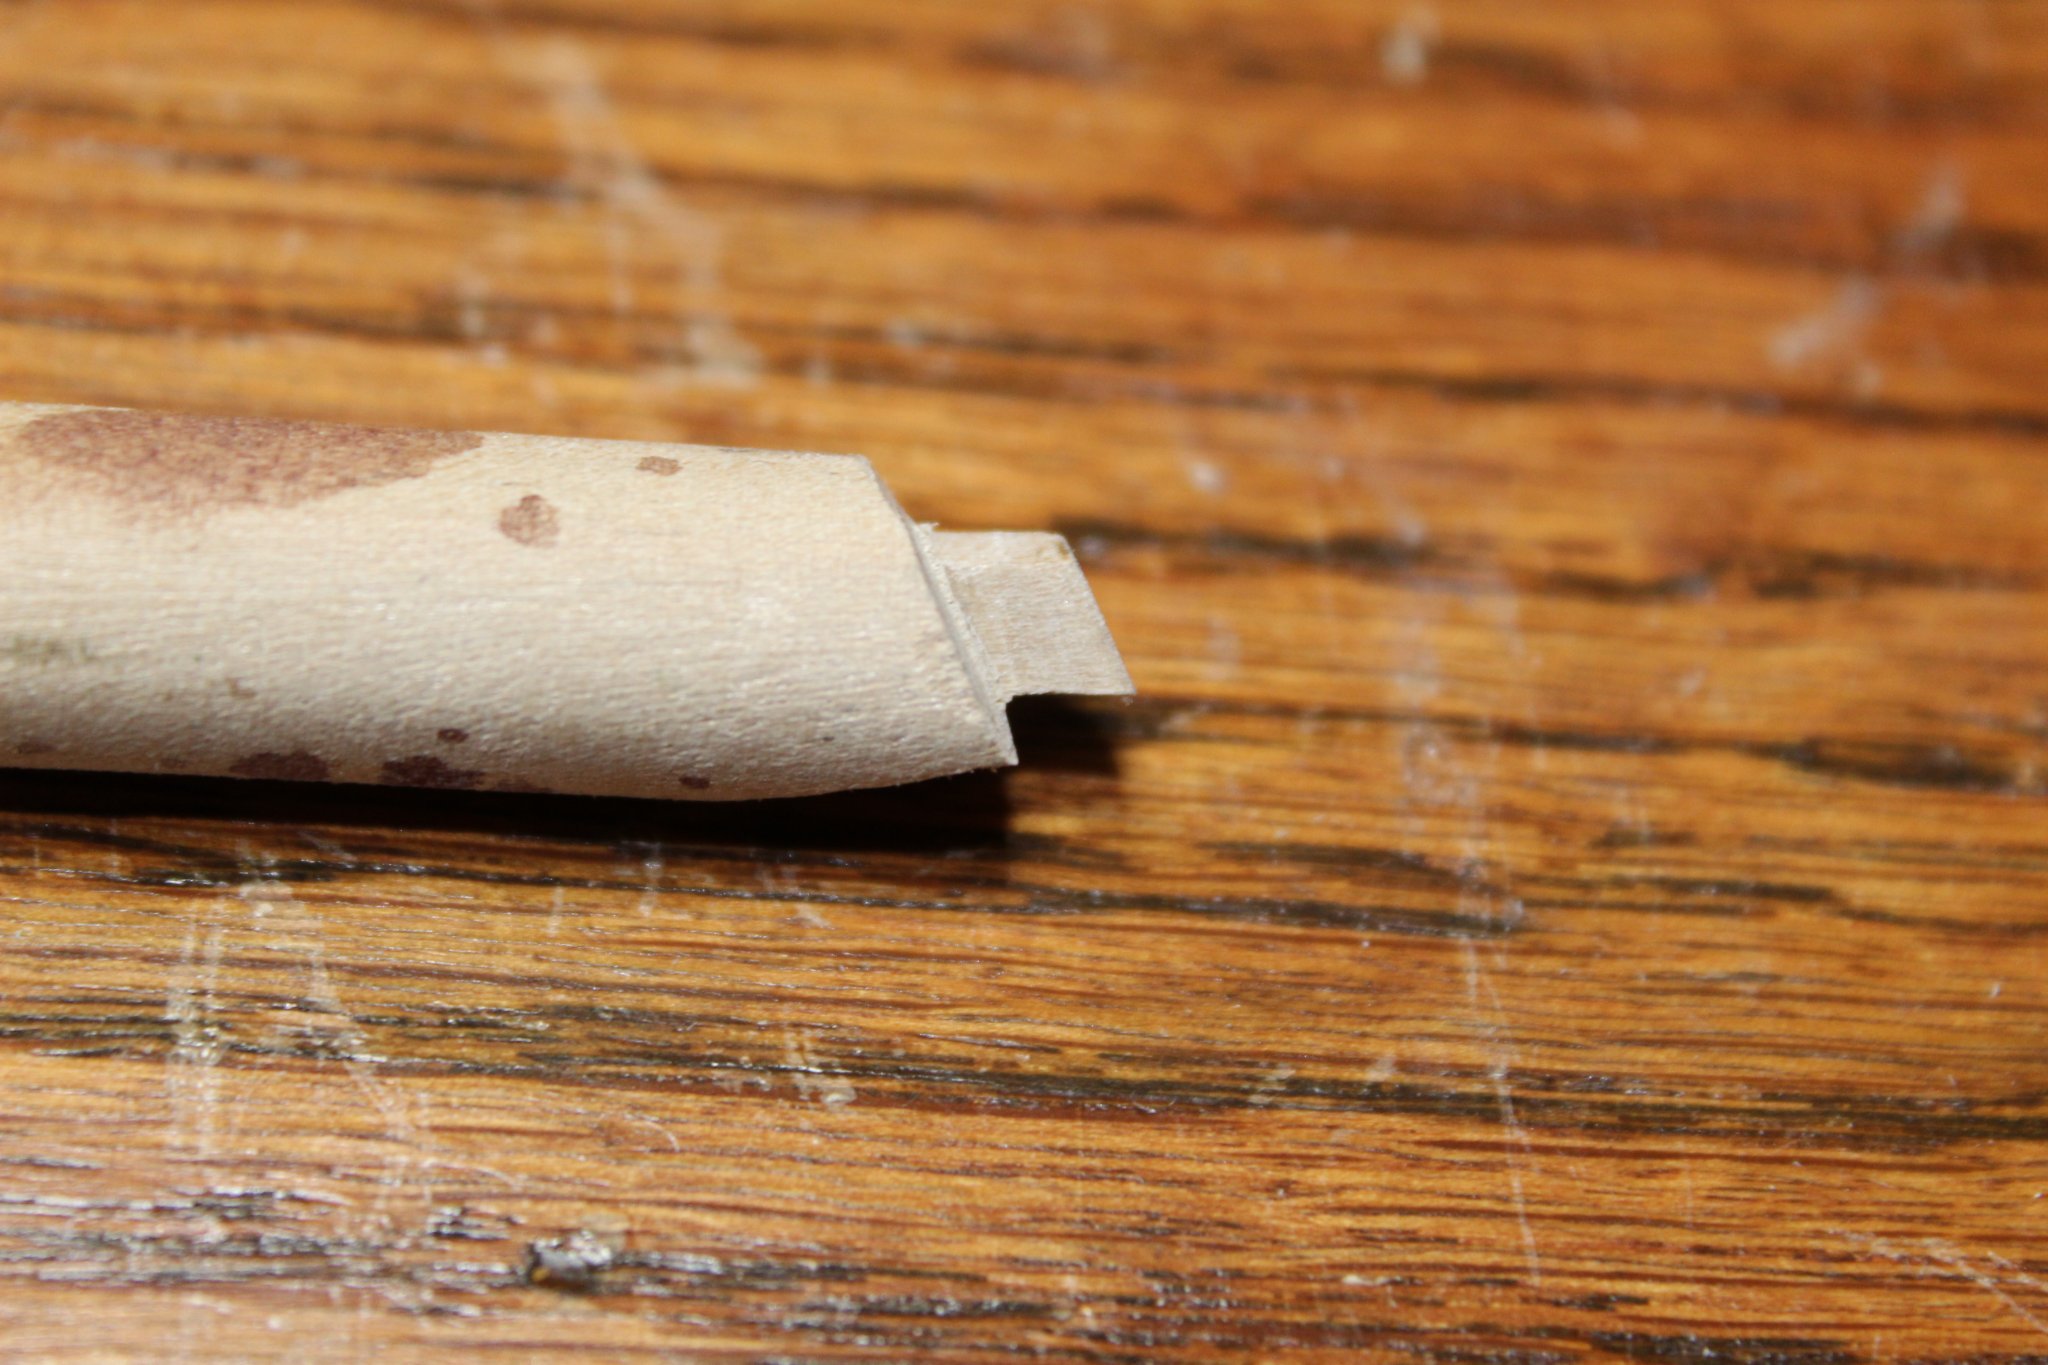
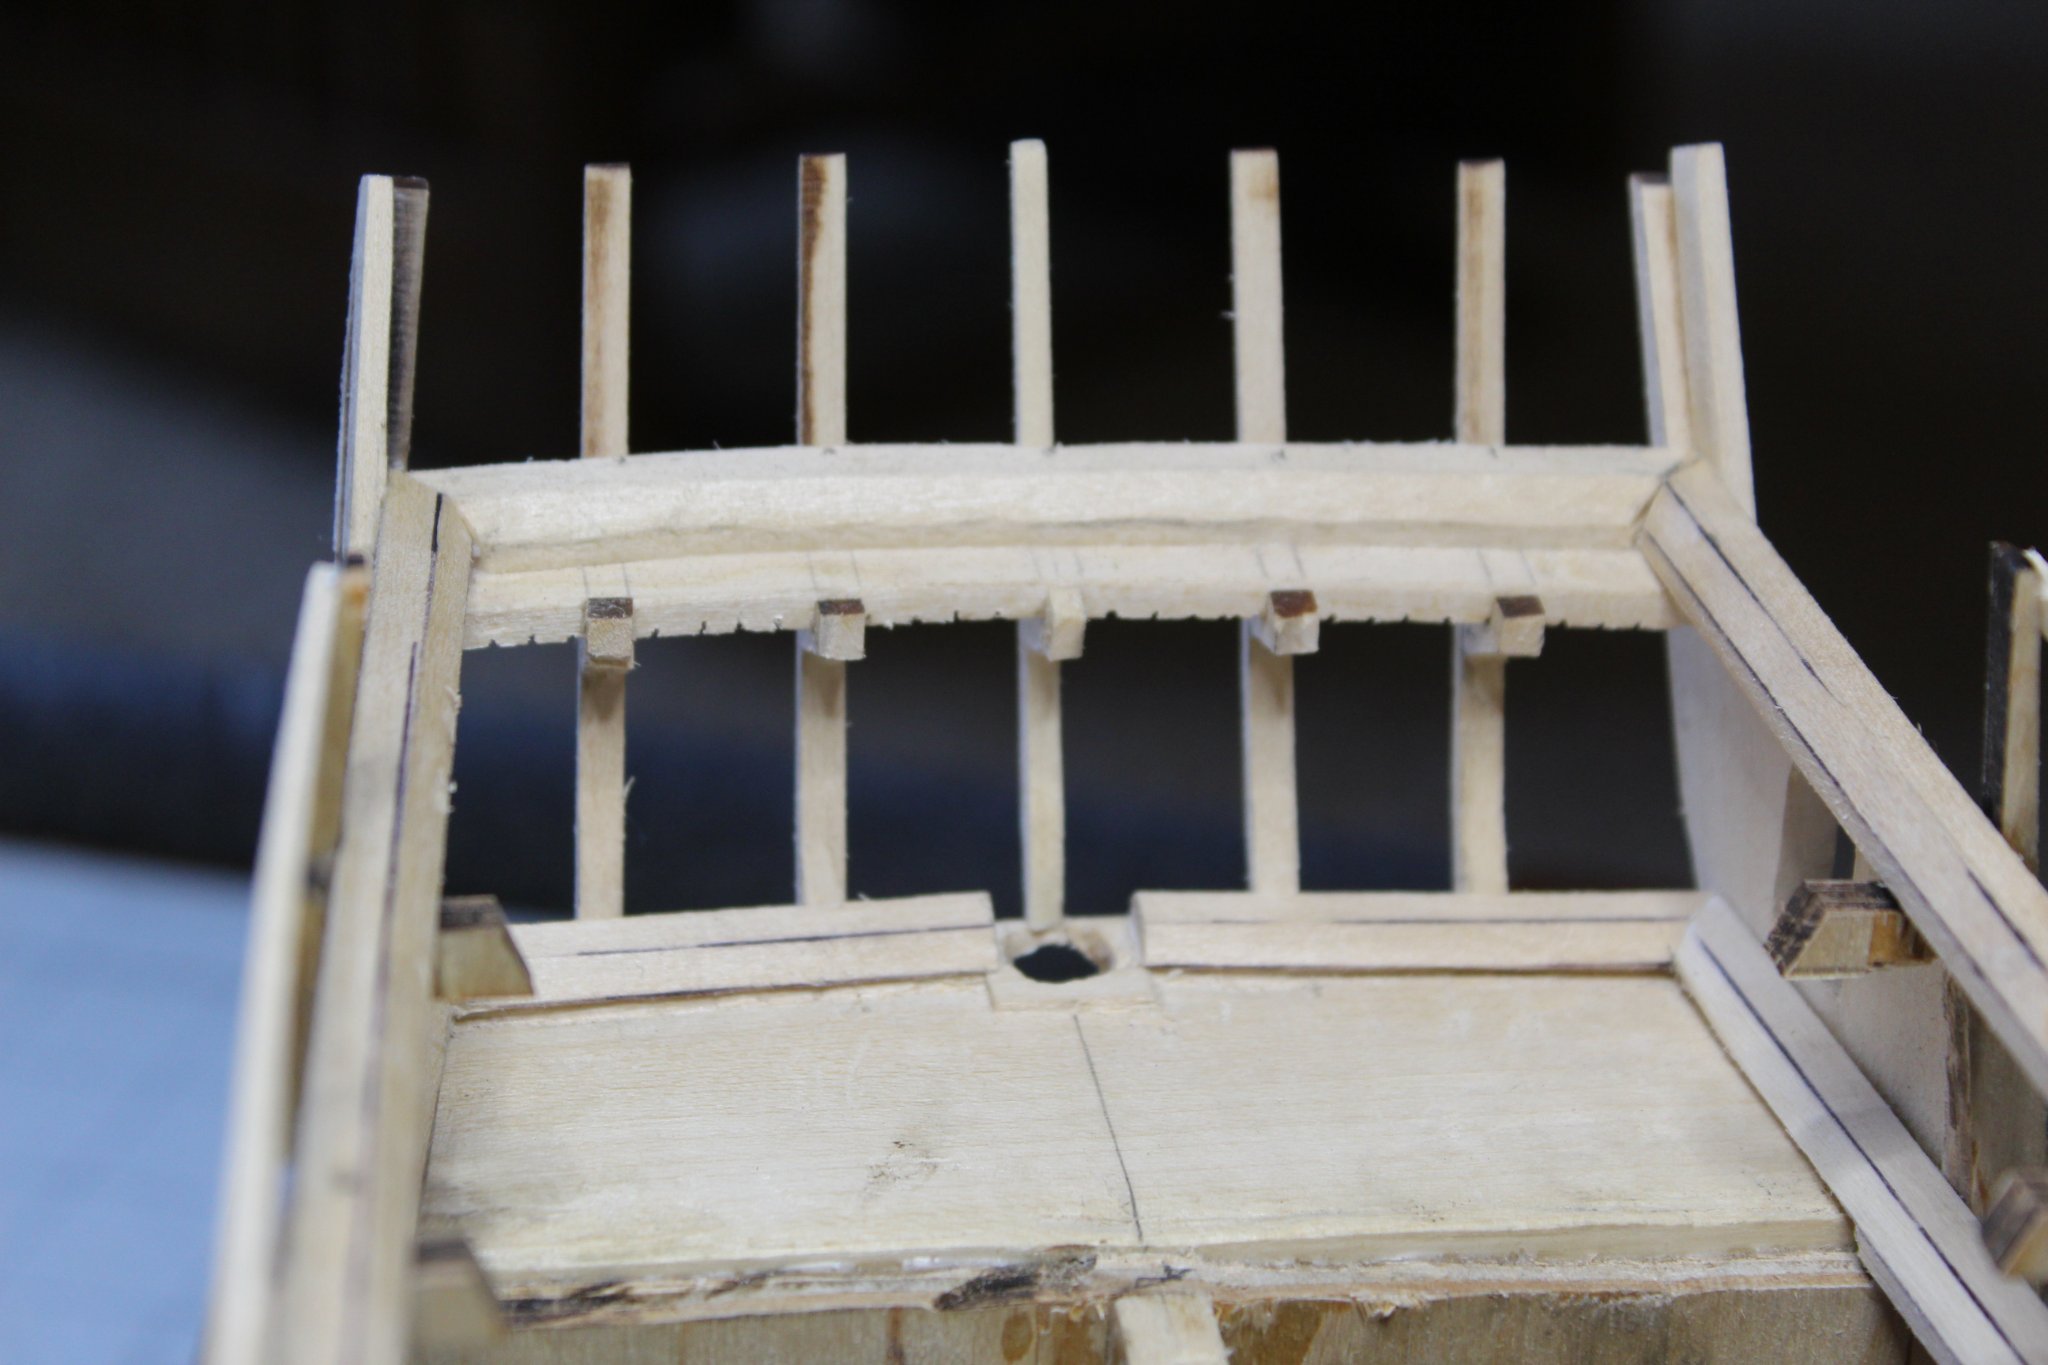
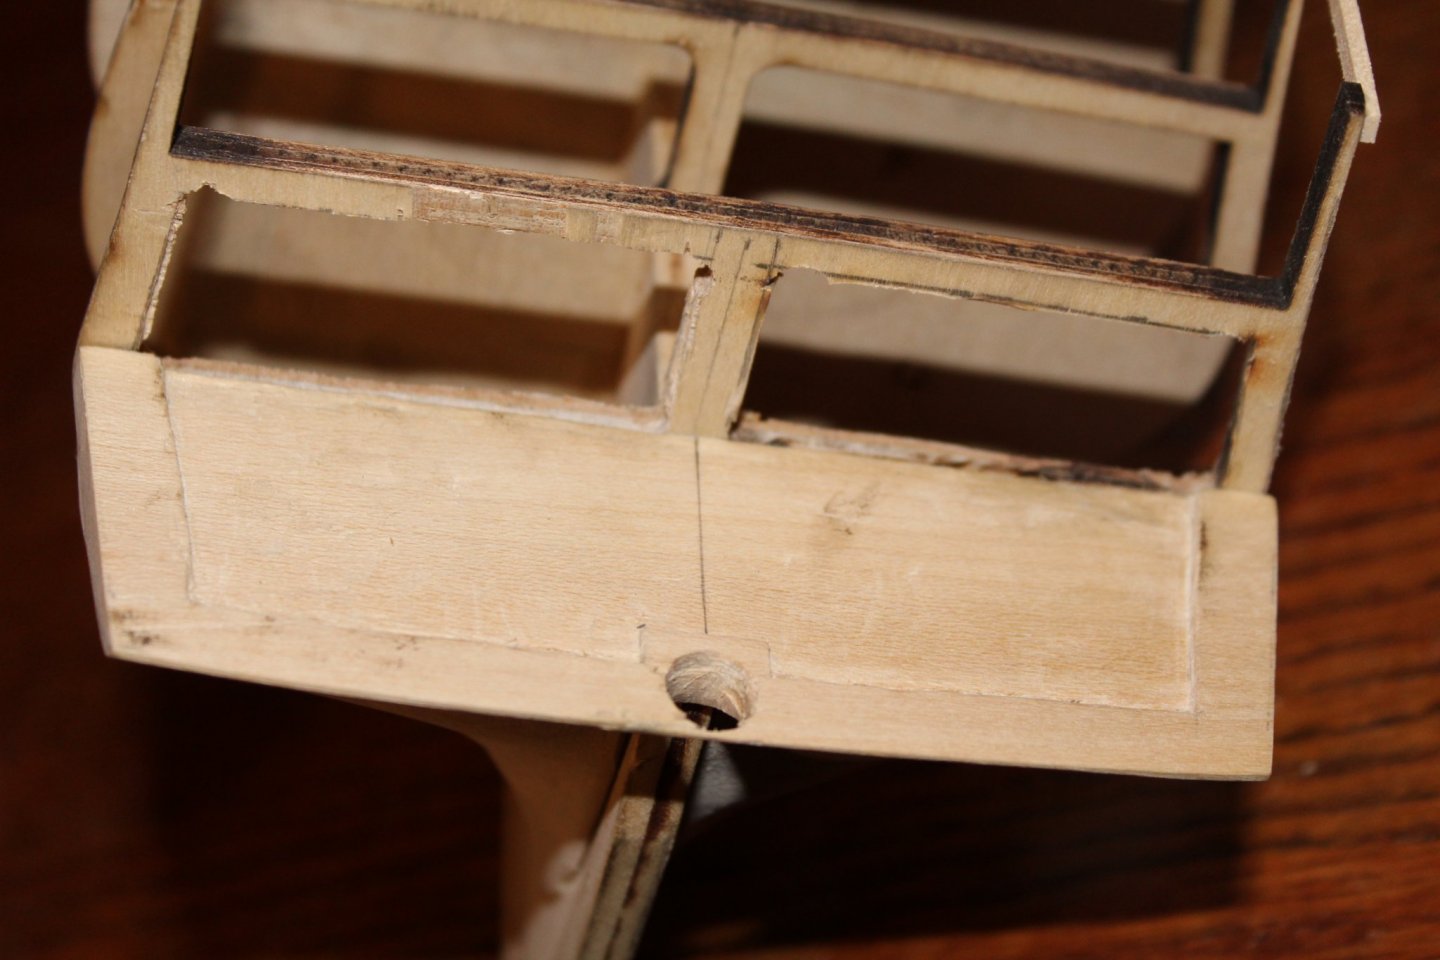
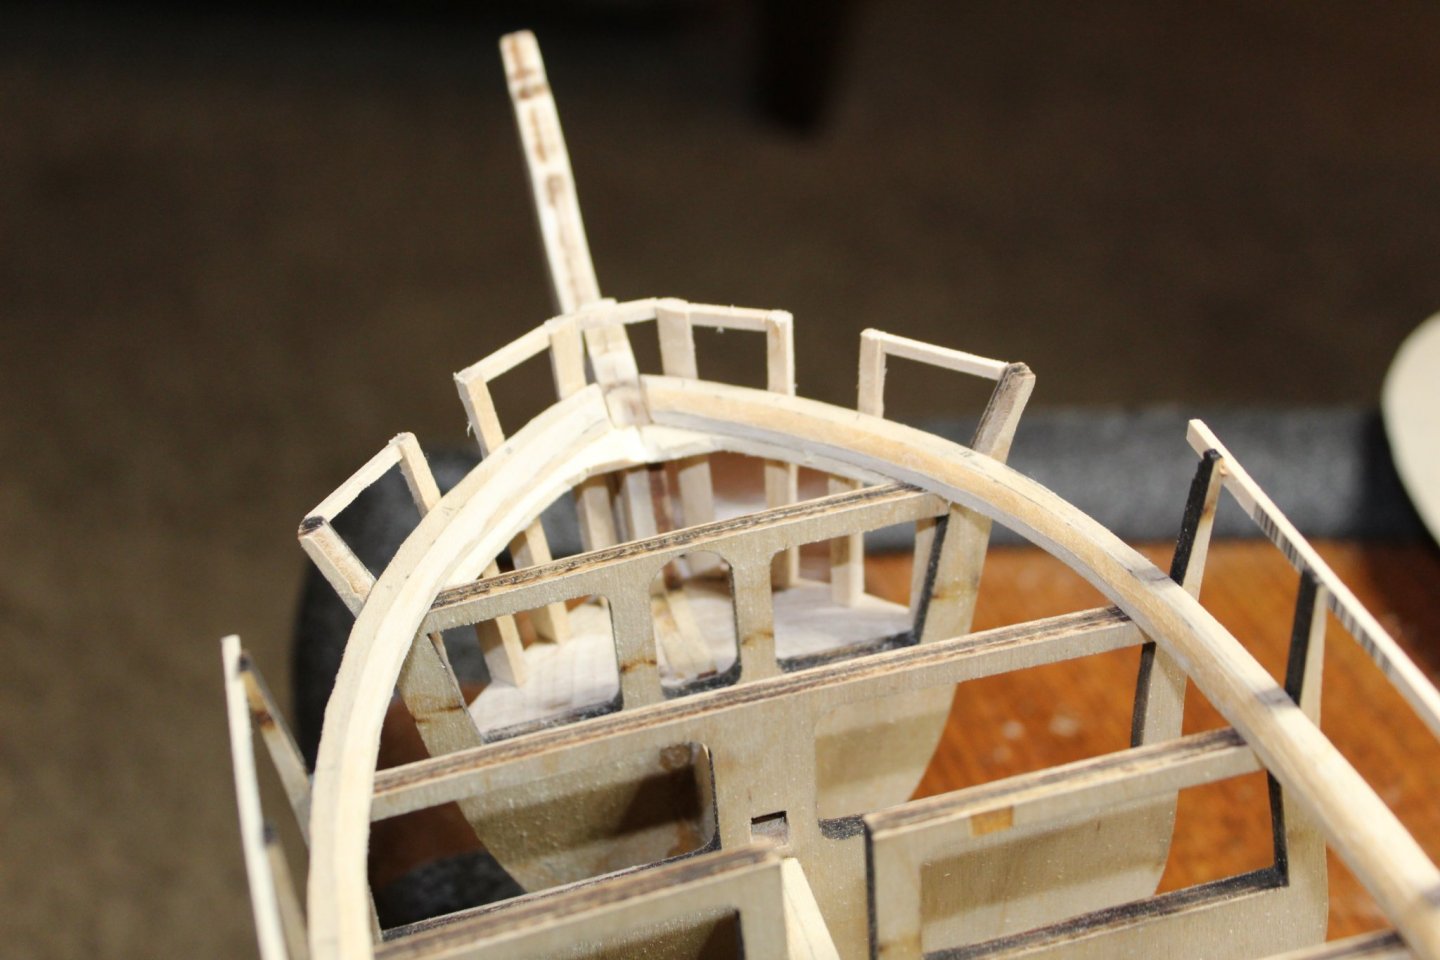
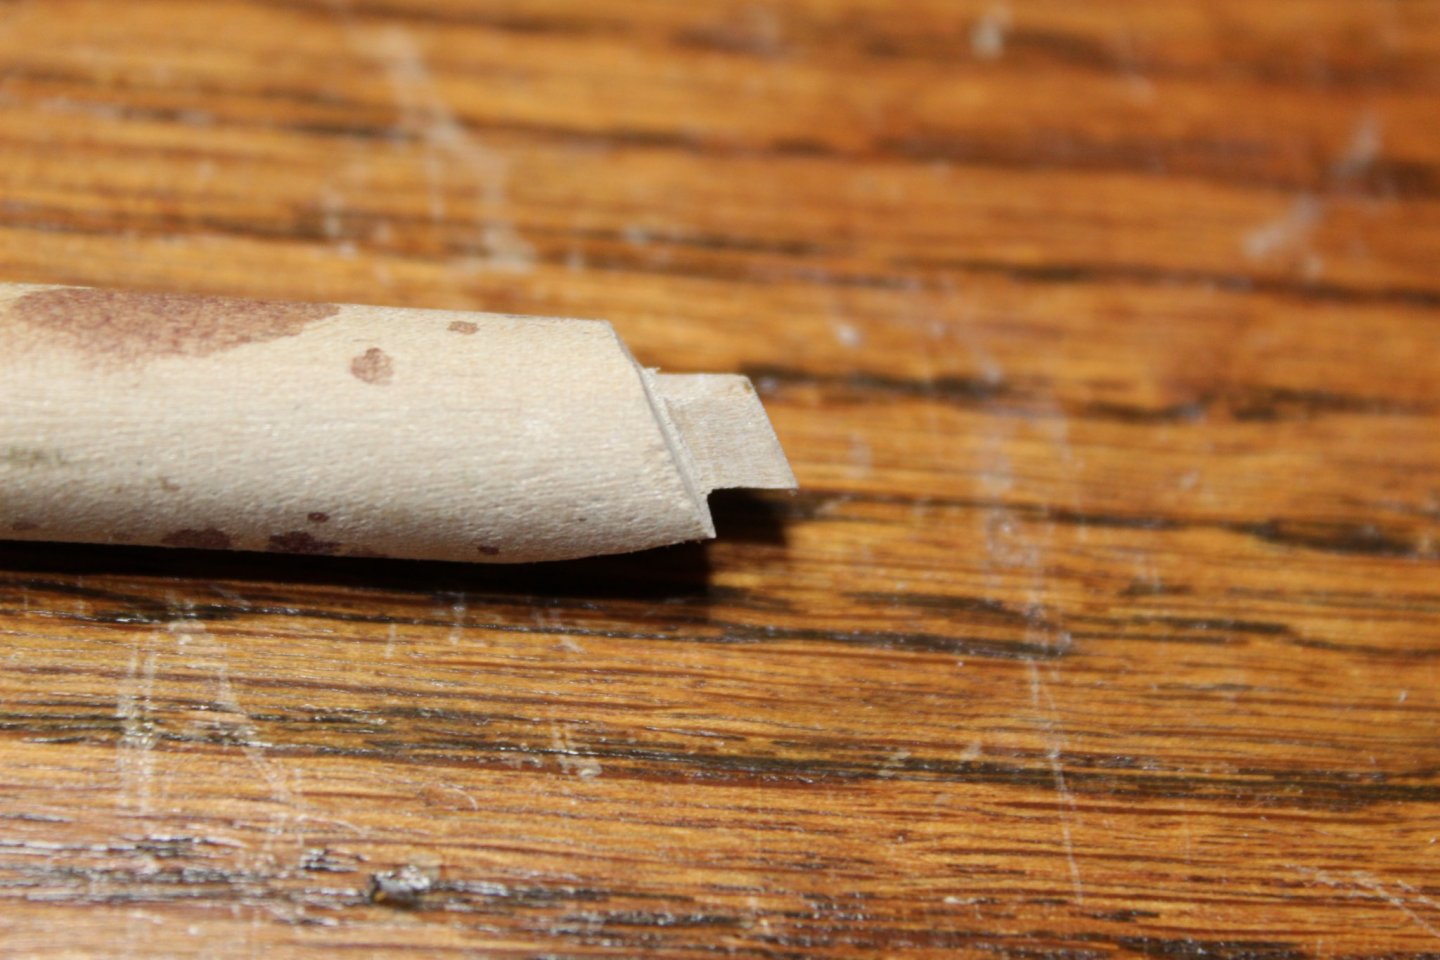
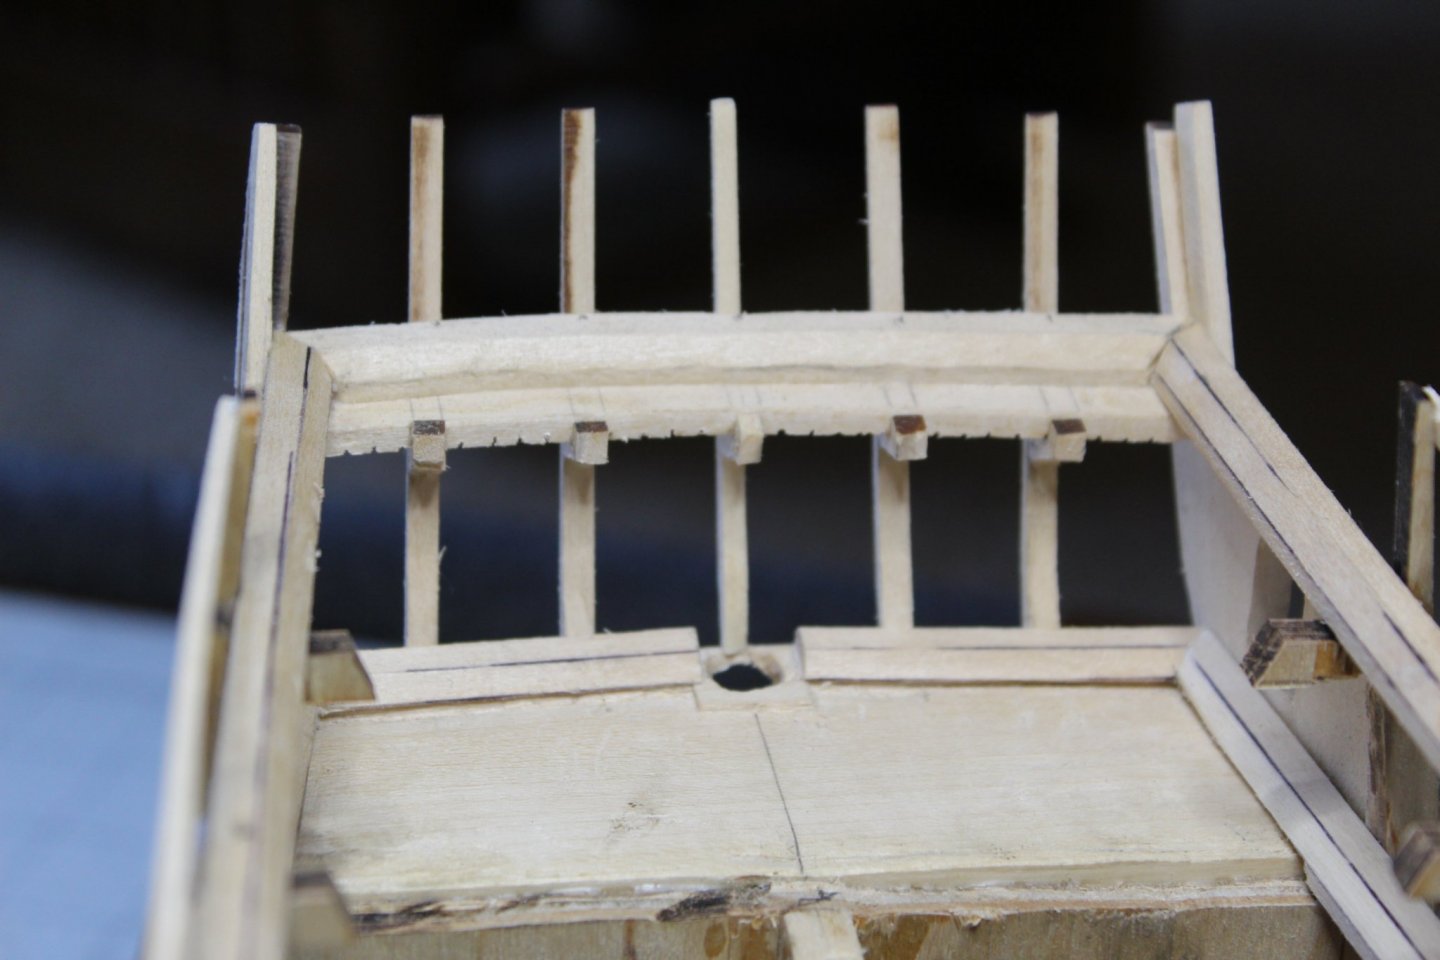
Well, it's been 2 months since my last confession (or post). Forgive me - I'll try to stay more on top of it. Since September, I have - mounted the filler blocks, - framed in the bow and stern (for 6 windows), - as others have done, I tack-glued battens at the top of the frames to prevent breakage. - added the Spar Deck waterway - cut the tenon on the bowsprit and checked fit over-all - cut 1/32 plywood to size for the Spar Deck, and made a copy of the plan for Spar Deck (mainly for hatch openings) - removed the bulkheads above the Gun Deck - added the Gun Deck waterway - purchased a full set of guns for the Gun Deck from Model Expo. One of the bigger departures was to redo the stern counter and to cut out the R bulkhead to allow gun deck planking all of the way into the captain's/commodore's cabins. I'll be building out the walls in the stern Gun Deck as the build continues. Hopefully this long weekend will allow me to cut a 1/32 plywood deck for the Gun Deck, map out where the Gun Deck hatch openings are, and decide how much detailing to do below down into the berth deck. I'm trying to leave as many options open as I can at this point, as I haven't decided yet how much detailing in the hidden places to do. I welcome comments and questions, along with kindly criticism. Photos below of my progress... Counter - note the surface has been shaved down for deck planking to come Counter and Filler Blocks from below Bow Filler Blocks Bow Framing All of the pieces laid out for building the stern framing. Note that before installing, the entryway to the captain's/commodore's heads in the stern galleries were cut. Also the center frame was tapered so as not to interfere with the rudder head. The short pieces at the top will bridge the gap from the stern frames to bulkhead R (but not until after the deck is planked). And here it is, put together. The paper on top was to help with alignment of the frames. Spar Deck waterway installed at bow. Bowsprit tenon - and no, that's not a stain sample - it's proof positive that I've shed blood, sweat and tears - or at least the blood part over this model! Upper bulkheads removed and Gun Deck waterway installed. Also, mast tenon framing in place. Stern showing both waterways. Note opening for rudder head box. The Gun Deck plywood will end at the Counter Block.


-
Henrik, I appreciate your insights. They gave me pause this weekend to really think through how I'm going to build Constitution. I'm still pretty sure that the gun deck will be detailed, but for now I'll be going slow forward. Thank you for the freedom to build her as I see fit. As for being the captain, I don't think it would ever go well for a midshipman to claim to be captain! Cheers,
-
Hey Rob, Thanks a ton for providing this to us - really appreciate it! Bob
-
One thing while I think of it - for all of you who have detailed the gun deck: once it's planked over and hull planking done, is it worth it for what you can see? I mean, besides just knowing in your heart that it's there. It occurred to me that as much as I am leaning towards detailing the gun deck that once everything is finished and the ship is in a case, will it be for nought? I'd like to model the guns as being run out, and so I don't like the looks of the boxed in dummy barrels - I'd at least want to see the front of gun carriages. Also - if the guns are run out, are the gun port covers hinged up out of the way, or are they removed entirely? On the Hull model there are a couple of full gun port lids in place, and that's how the Revell kit displays them. I'd welcome your thoughts. Mid'n 3/c (Ret.) Bob
-
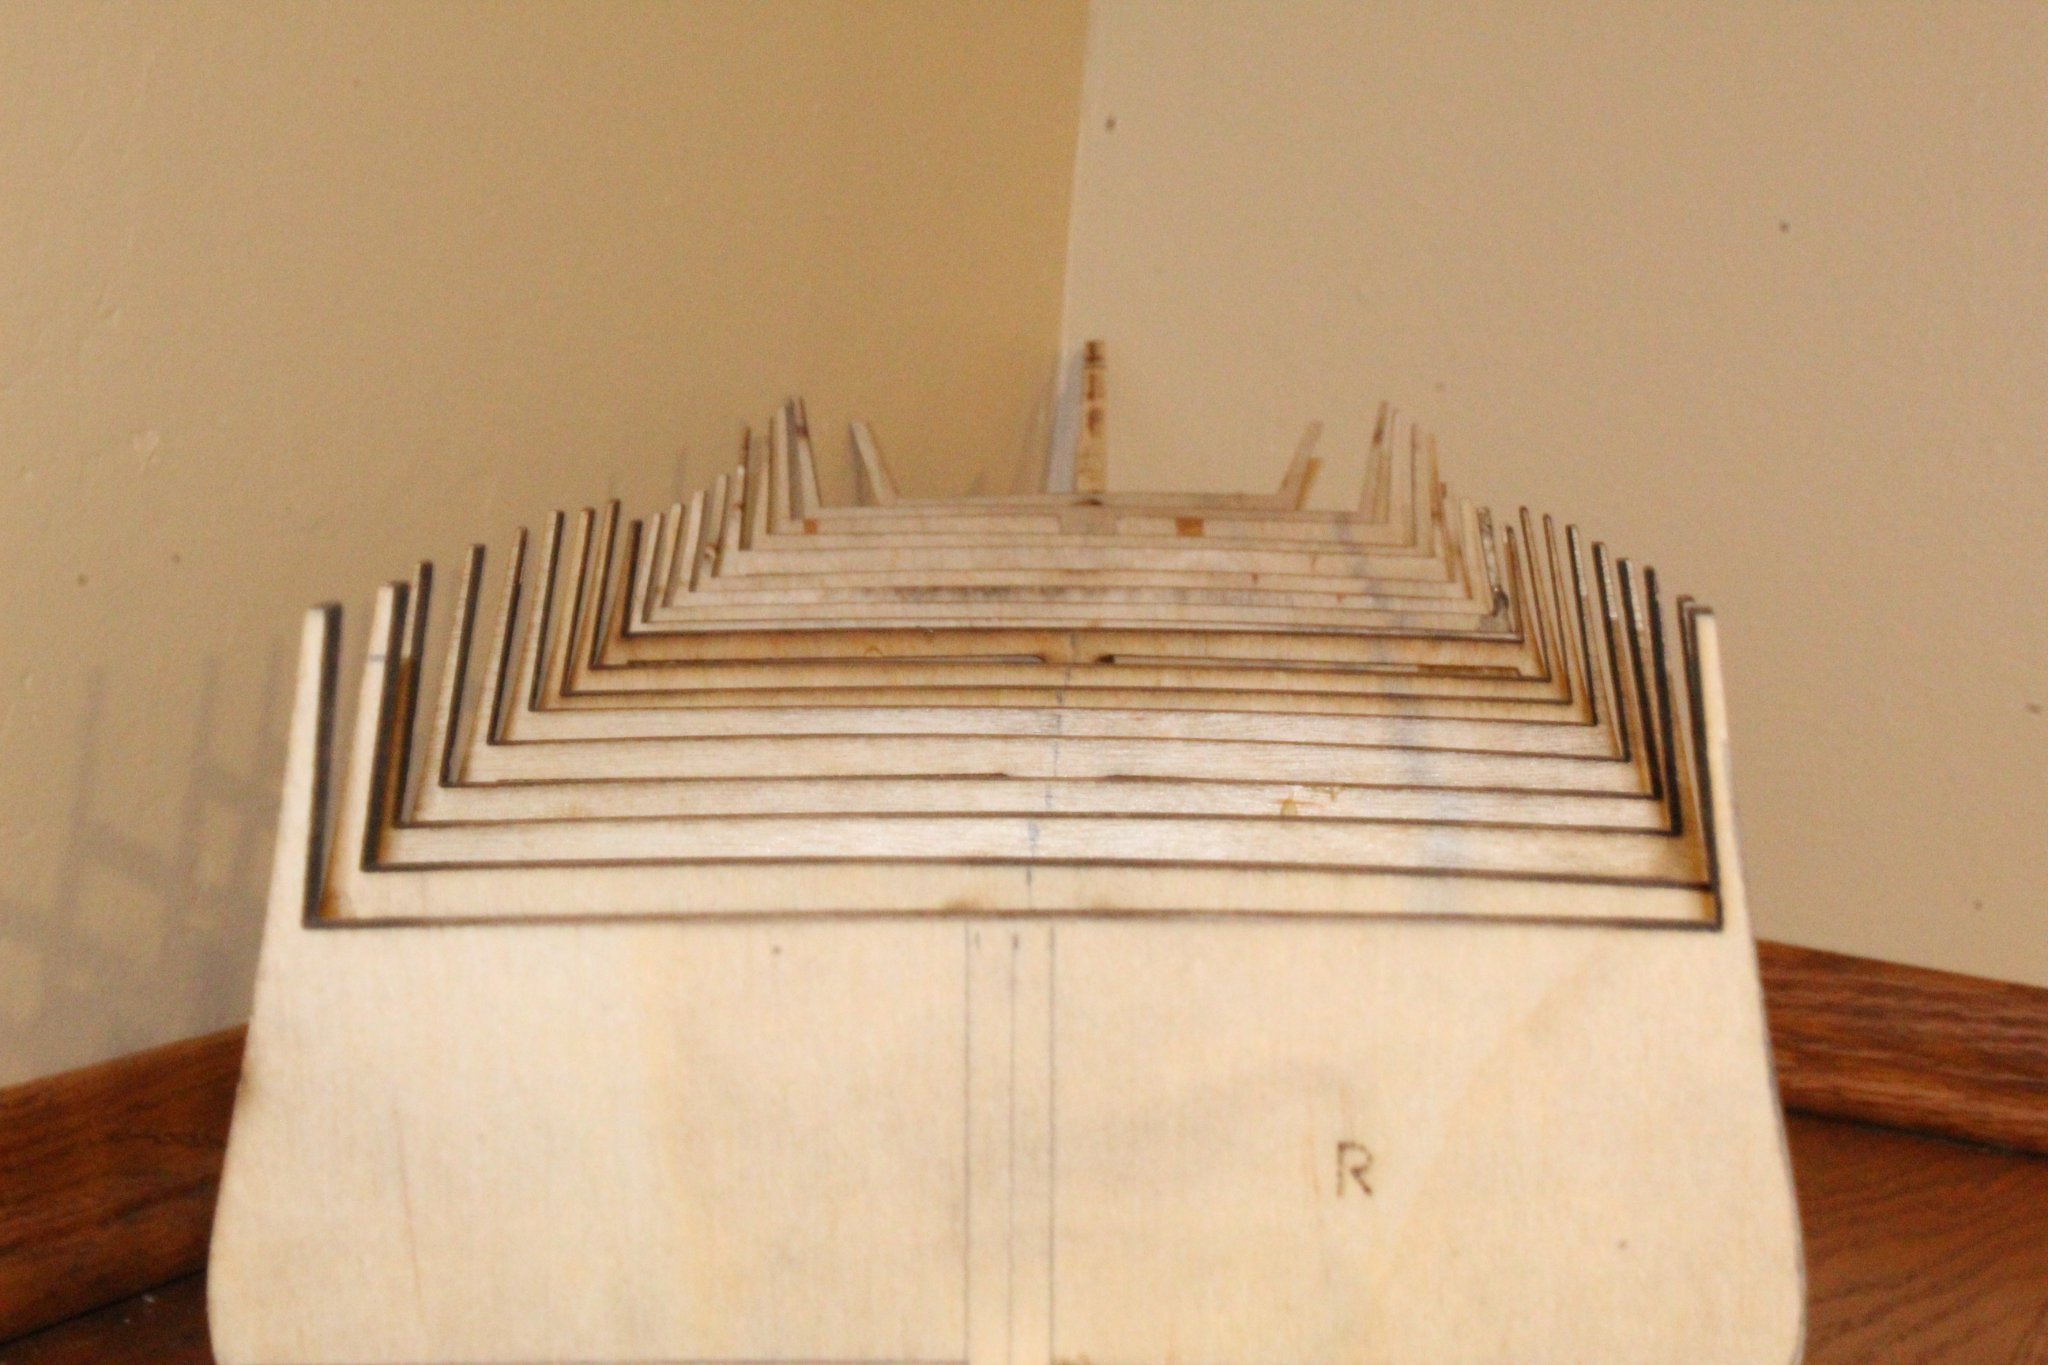
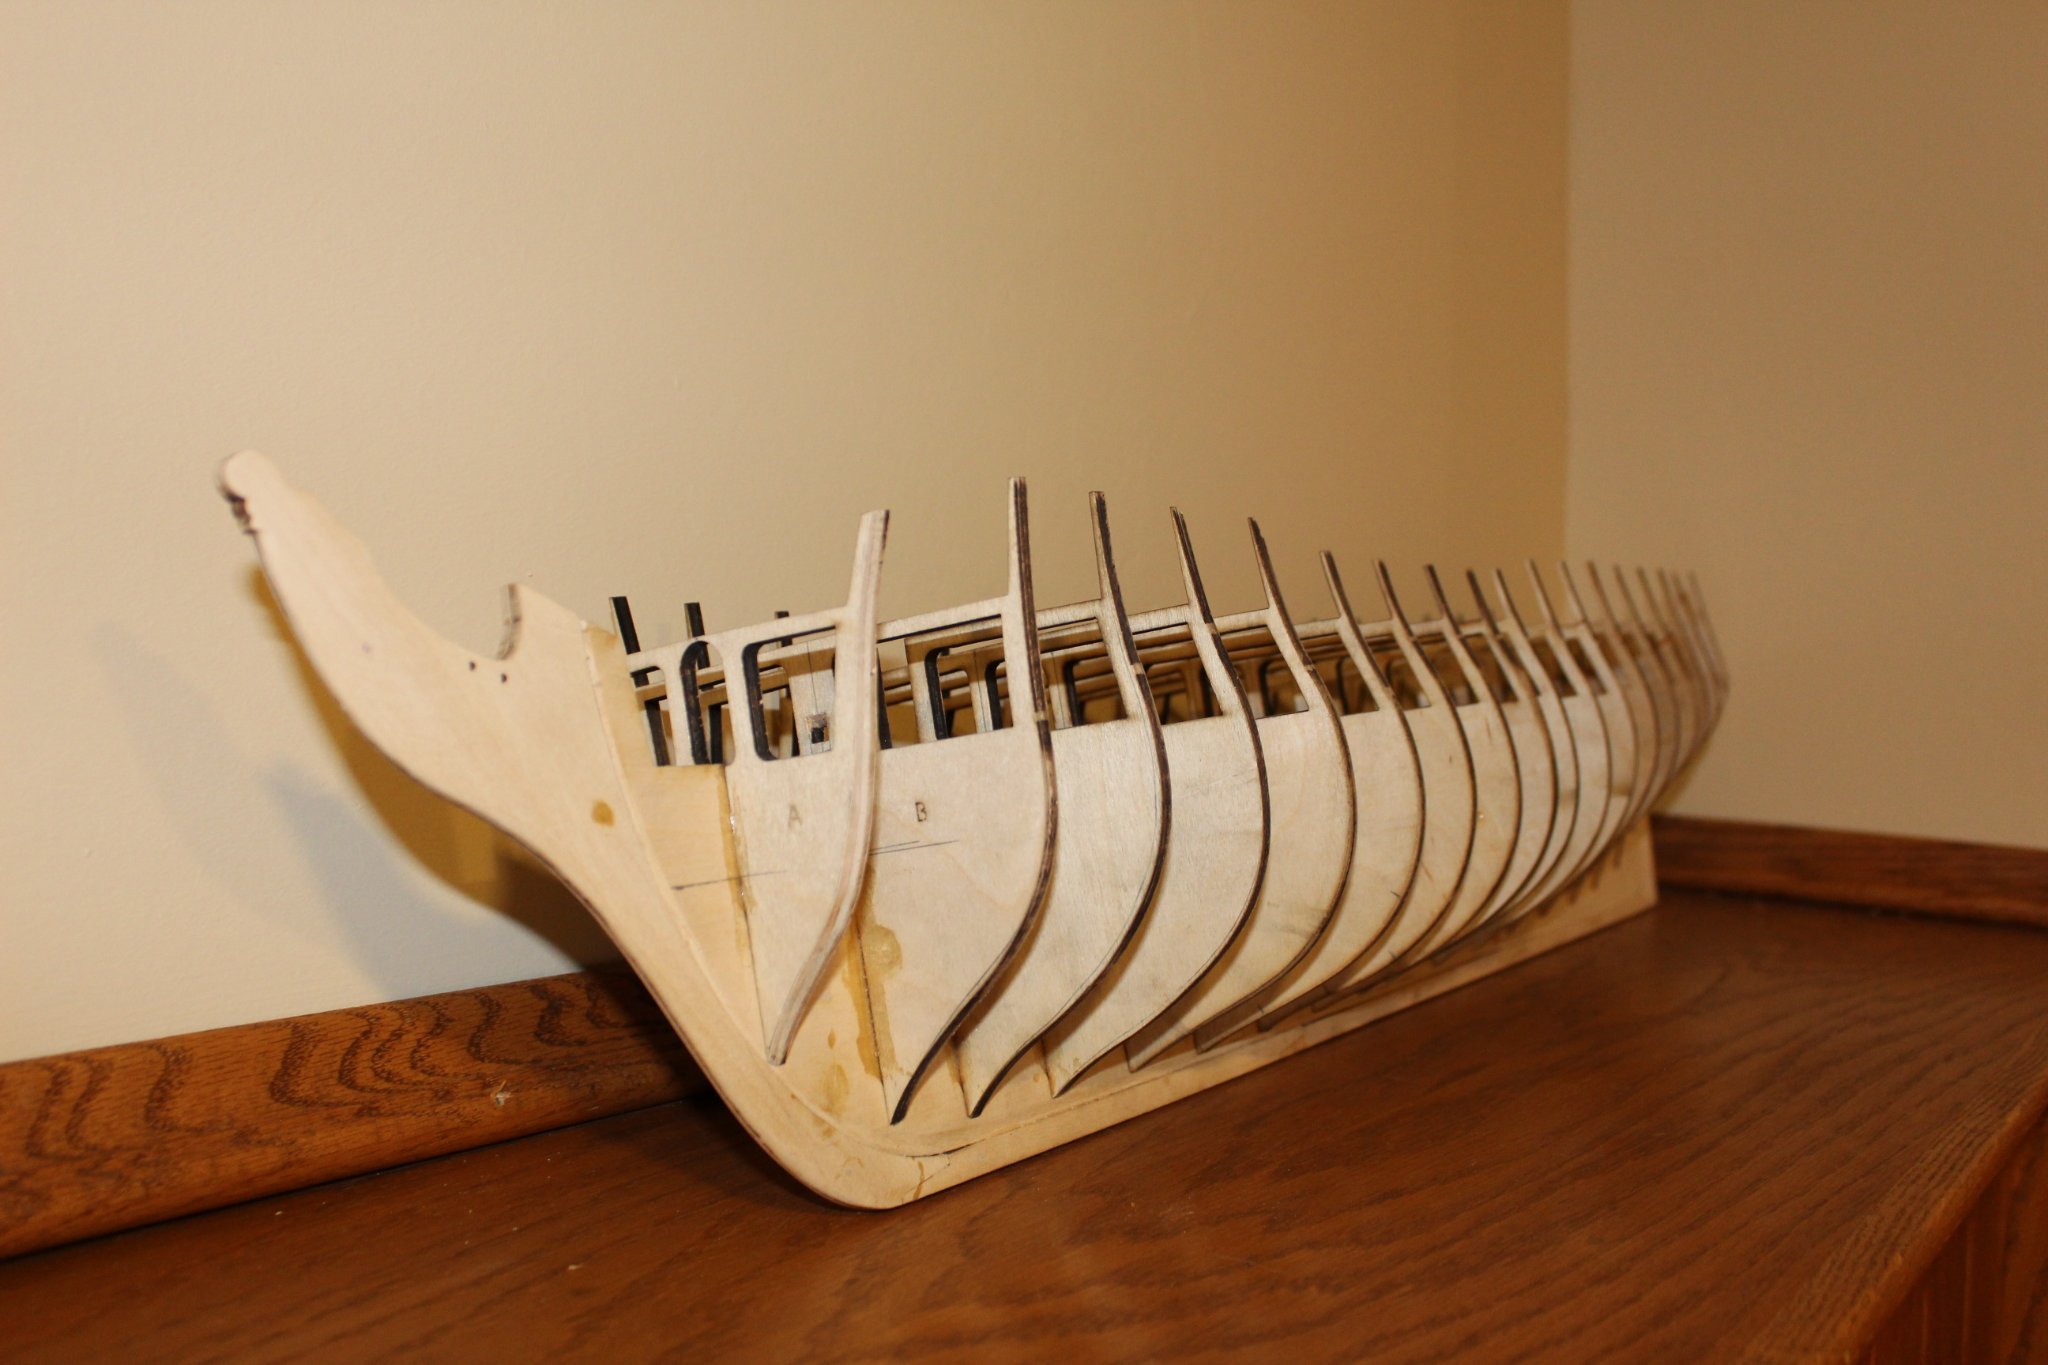
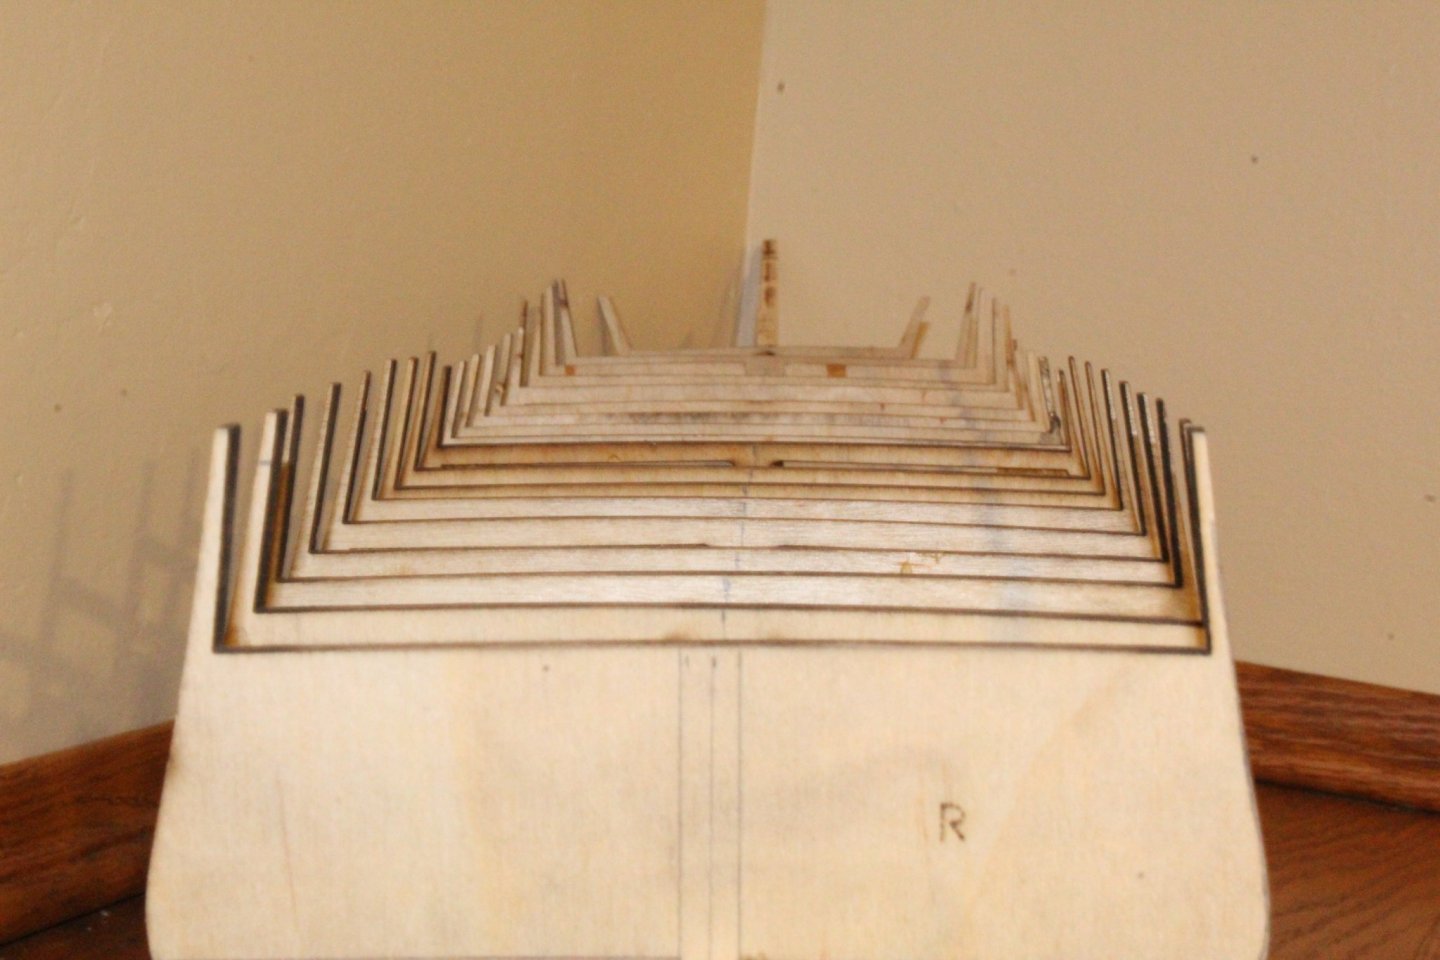
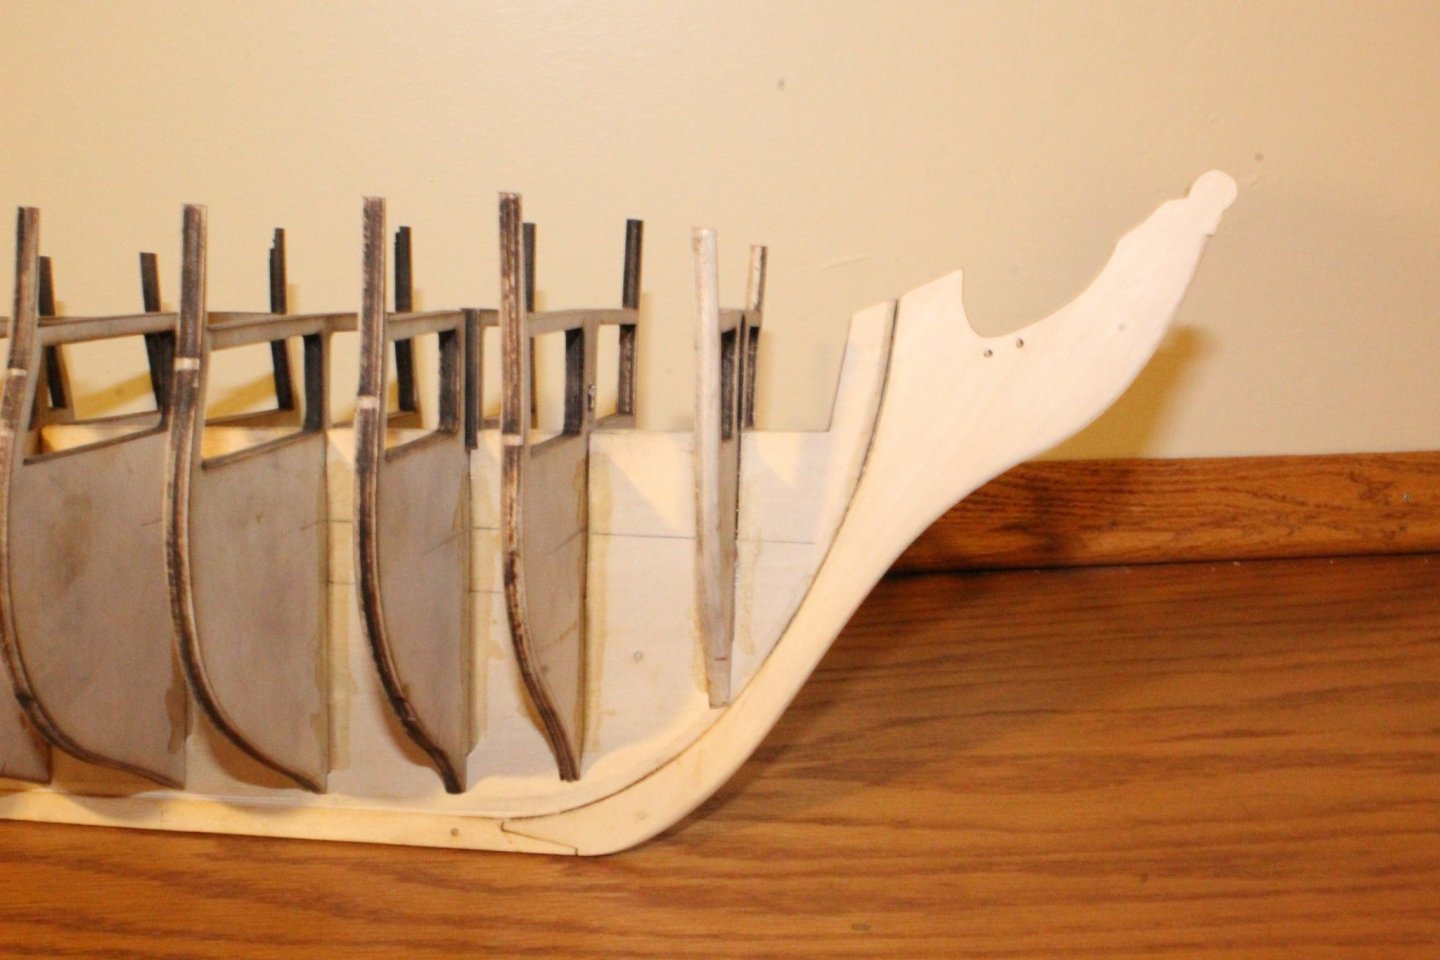
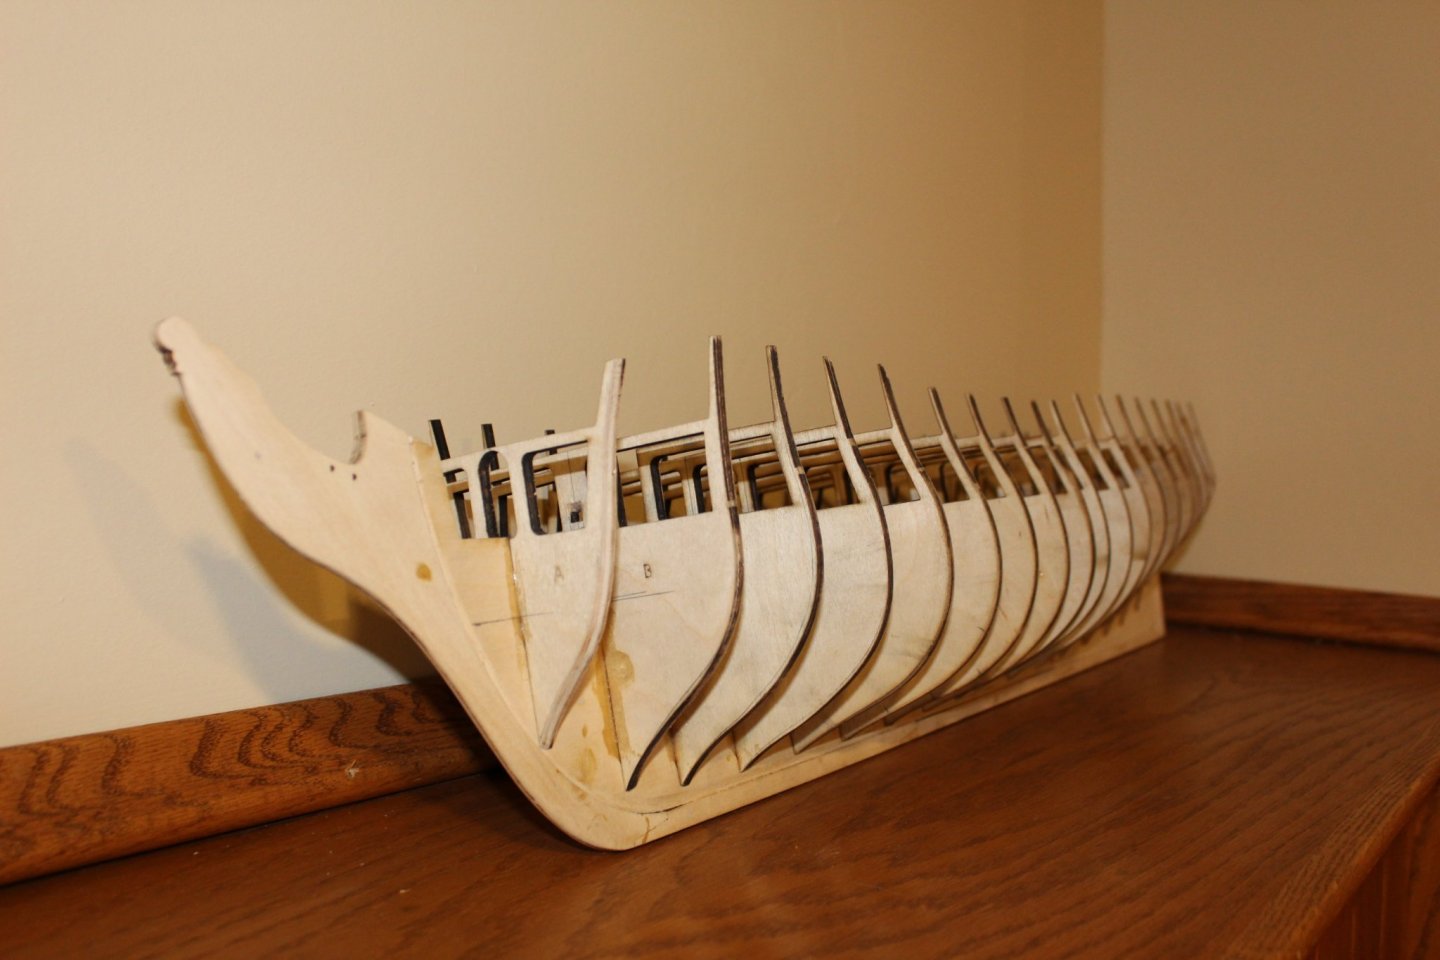
Thanks for the like Gregory. As promised, here are a few photos to show where things are at right now. Forgive the harsh lighting - I'll try to get better at this... You'll notice that I have not faired the frames as of yet, nor have I drilled the hole for the rudder post in the counter. I've heard from others here that no matter what the stern blocks end up like, once they're attached you still end up removing more wood. We'll see how that goes. Next step will be to do "final" cleanup on the stern blocks, then attaching the counter and stern blocks. Then to the bow blocks. Mid'n 3/c (Ret.) Bob
-
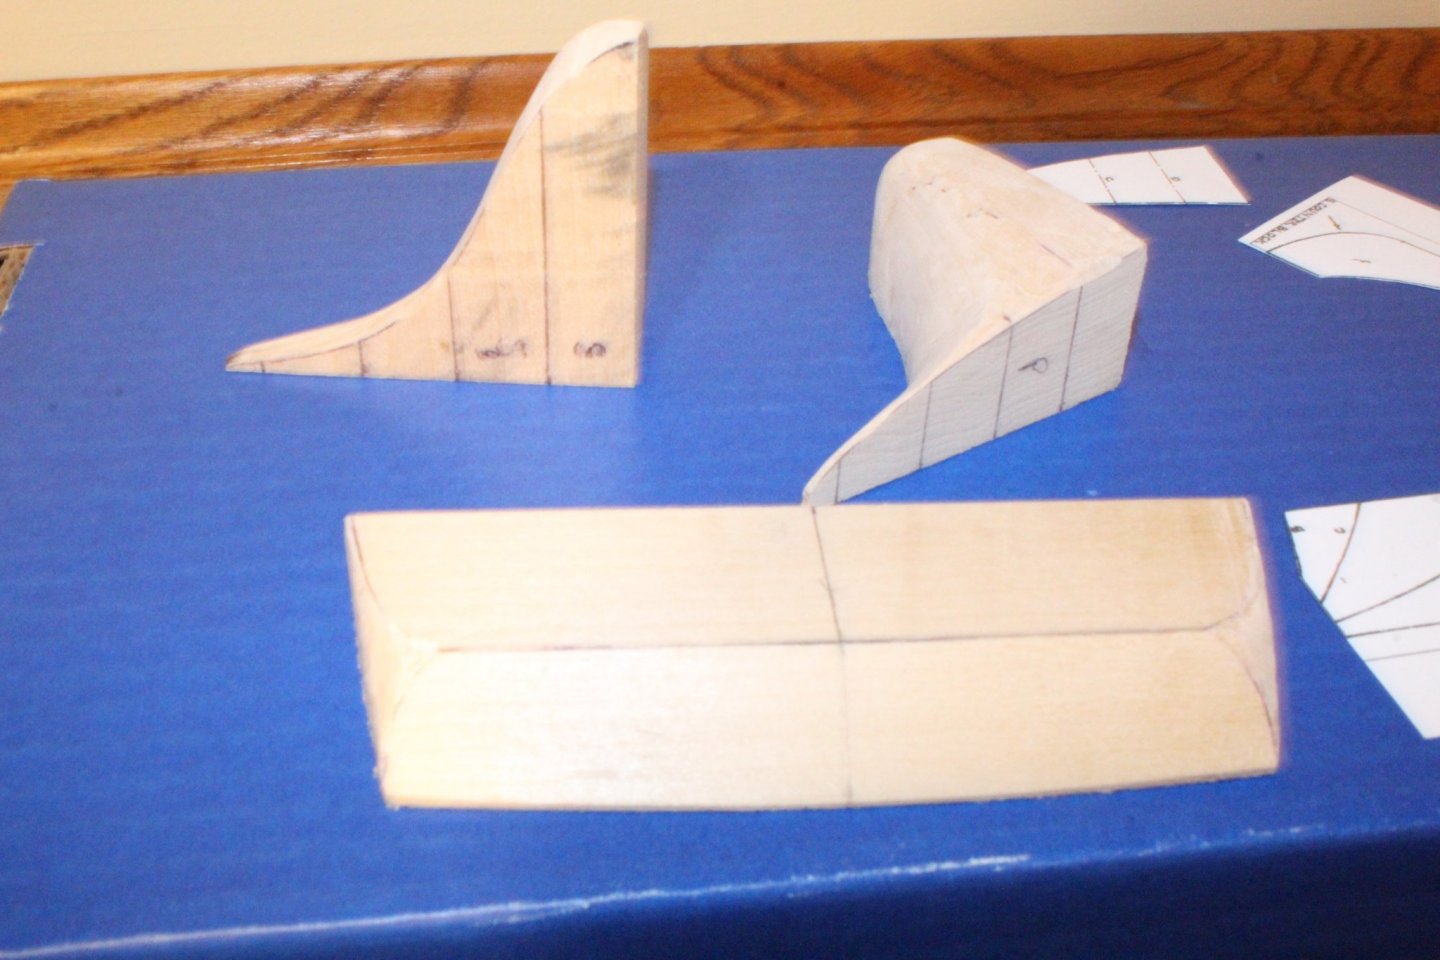
Thanks for the likes ccoyle and scrubbyj427! I'll post an update tonight. I've already gotten as far as gluing the bulkheads to the keel, created the counter, and have begun shaping the stern filler blocks. Midn 3/c (Ret) Bob
-
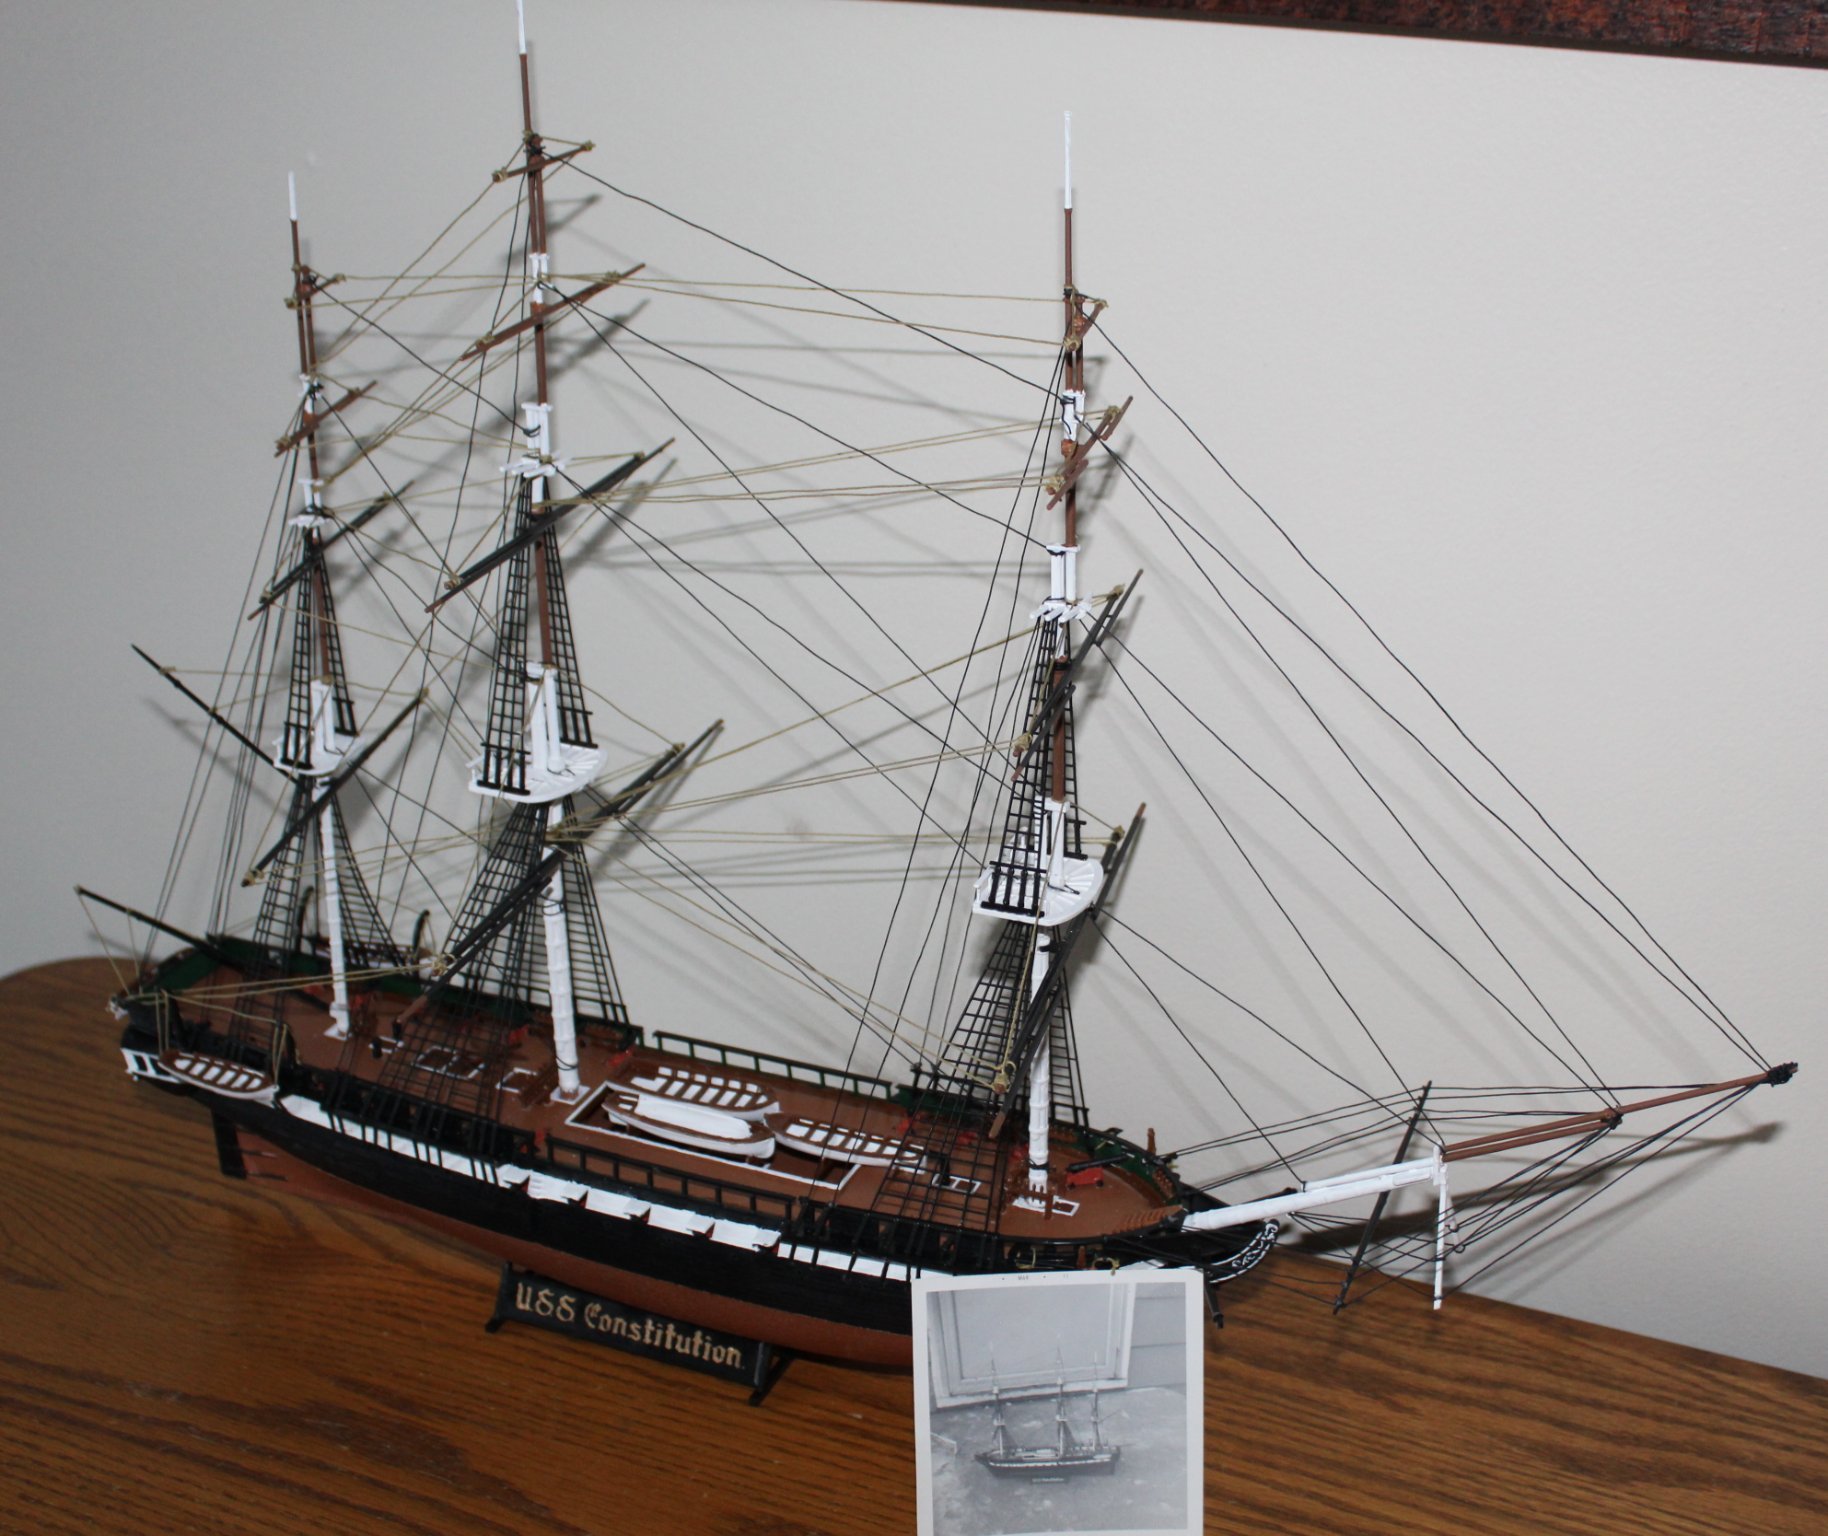
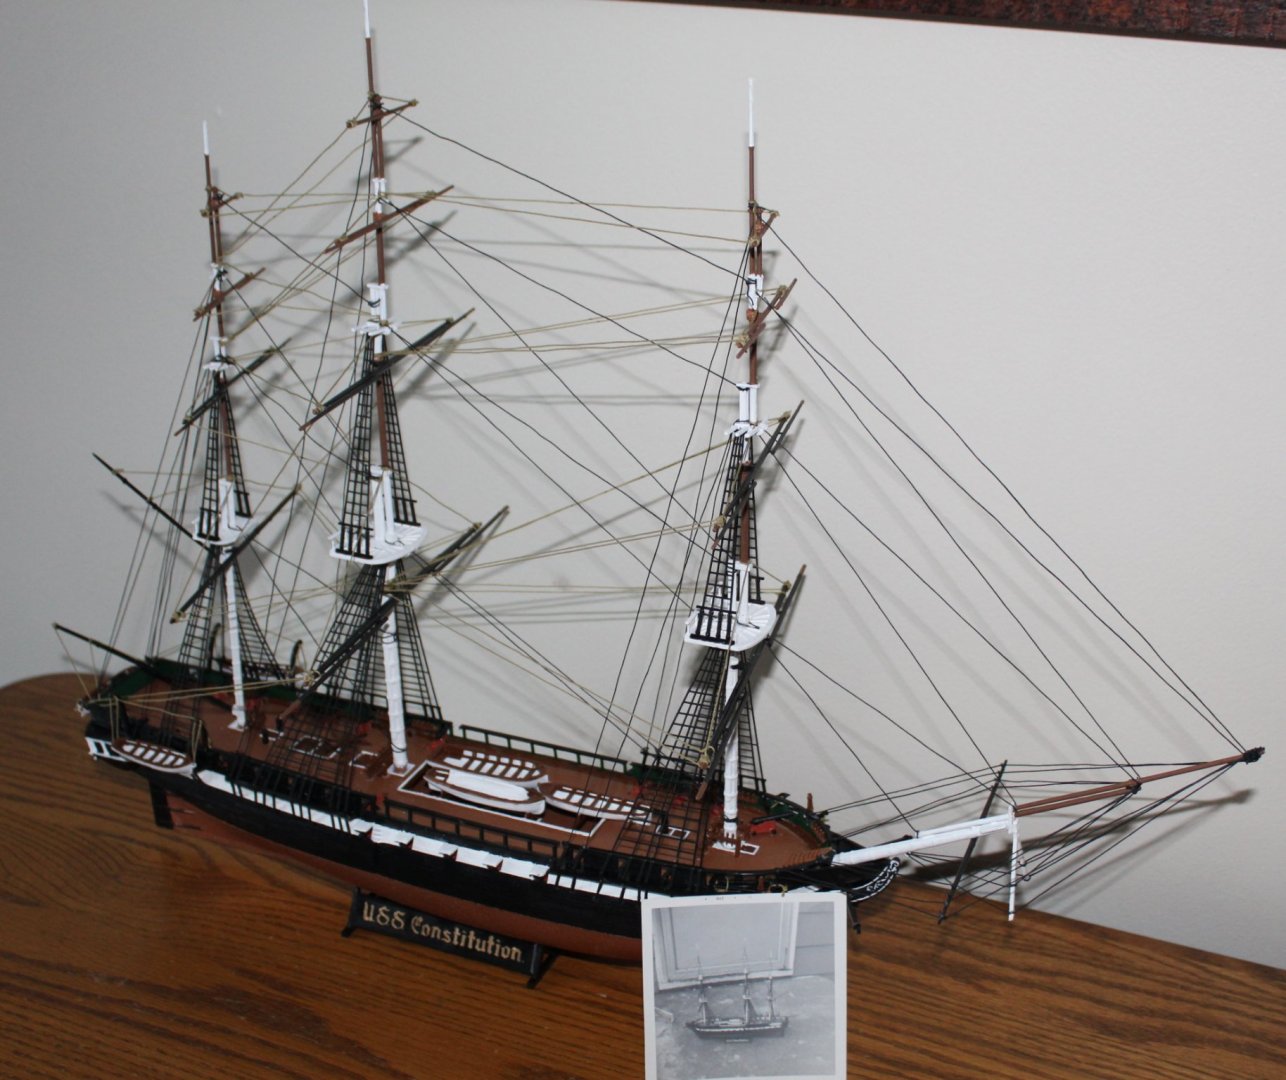
Motivation - My interest in Constitution goes back to when I was 10 years old. My uncle bought me a 22” Revell model of Constitution – it had a record in the box that that described the highlights of Constitution’s history which I nearly wore out while my dad built the ship for me. I don’t know what ever happened to the model, but I have a photo of it completed (see below). Seeing that photo inspired me in 2020 to purchase the kit off of **bay**, and upon finishing it (see below), I began thinking in larger terms – what about a wood ship model? So here I am, 18 months later, having obtained a Model Shipways kit of Constitution, and having taken some time with the Lowell Grand Banks Dory, Norwegian Sailing Pram, and 18th Century Longboat kits to get some basic experience in wood ship modeling under my belt. I have no illusions of matching the outcomes of the model masters I’ve seen on this site, but I won’t hurry the build along. As I turn 60 next month, my thoughts turn to finishing Constitution before I’m done with this world, and who will get it after I’m gone (I love the picture of xken’s son’s family with his – I hope for similar interest from one of my sons…). Details Modeling Constitution from 1812 prior to Guerriere Battle, possibly before “The Great Chase”. - Stern fashioned after Hull, Revell, and Bluejacket models - Billet Head & Trailboards fashioned after Hull, Revell, and Bluejacket models - 30-Gun gun deck – no bow chase/bridle ports - 24-Carronade spar deck + 1 bow chaser - Ships Boats – Captain’s gig & cutters in the davits, undecided about the hatch for now. Model Examples I will follow - Isaac Hull Model (Peabody Essex Museum) - Revell 1:96 Model - Bluejacket Model - Others as depicted on Model Ship World Modeling Resources - Model Ship World builds – many - Model Ship World model techniques - various Books & Papers Resources – this list will grow as the need arises - A Most Fortunate Ship – Martin - All Sails Up and Flying – Eriksen - Anatomy of the Ship – Marquardt - Constitution Close Up – Martin - Constitution Practicum – Hunt - Rigging Period Ship Models – Petersson Plans and Misc Resources - USS Constitution Museum – Modelers Resources - US Navy - Bluejacket Models (undecided) - Historical Paintings – difficult to sort out for accuracy Photographs - A “bazillion” online images and videos One thing that is somewhat discouraging is the number of attempts at this model that have apparently been abandoned. I have no doubt that every one of you who set it aside in the end started out with much enthusiasm as I carry today. Only time will tell. I do have a life beyond modeling - wife, children, and grandchildren. Oh, and work. Therefore you won't see progress moving along at a quick pace. However, if you stick with it, so will I. Looking forward to the ride... Midshipman 3/c (Ret) Bob
-
Looking forward to your continuing this build Jeff! Any time soon? -Bob
-
Jeff, Nice work on your Constitution thus far. I'll be starting my own soon. Hope you don't mind me following along on yours for ideas on how to get past the tough spots 🙂 - Bob
-
Jon, You, and several others are truly inspiring! Thanks for sharing your build log. I'll be starting one soon, and can only hope to do as well. -Bob
-
Rich, You're doing great! I appreciate your documenting so thoroughly. I am about to start my own Constitution project, and yours and others build logs will be my go-to sources for how to proceed when I get stuck. Again, great job! - Bob
-
Great job SkiBee! A few thoughts on your conclusions: I am currently building this model, and am finding that the shortcomings, while frustrating, are perhaps the "next step" in the process of learning model shipbuilding. The Grand Banks Dory was excellent in it's instructions and the parts that were included. The Sailing Pram had enough ambiguity/mistakes/missing pieces that it forces you to really think through the build process and improvise - like the mis-marked bevel lines on the hull planking, the need to bevel the mast to create a square cross section before rounding, mast head drawing vs instructions, and the missing block. I expect that by the time I get to the Constitution, there will be a lot of this. I did ask Model Expo to correct the plank bevel lines or at least include an errata sheet for future sales of the Pram, and they responded that they already have. Best wishes on your future as a shipwright! Your co-apprentice, Bob
- 54 replies
-
- 5
-

-
- norwegian sailing pram
- model shipways
- (and 1 more)