


jct
-
Posts
1,519 -
Joined
-
Last visited
Content Type
Profiles
Forums
Gallery
Events
Posts posted by jct
-
-
Thanks Steve, I understand completely and one can only hope, I'll continue to post pics of the fix as it progresses, but I suspect it will get uglier before is gets better...Hey Popeye, fancy meeting you here
 I appreciate the support
J
-
Hi all,
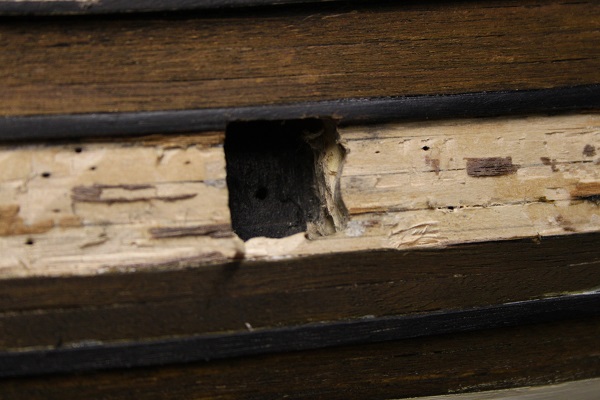
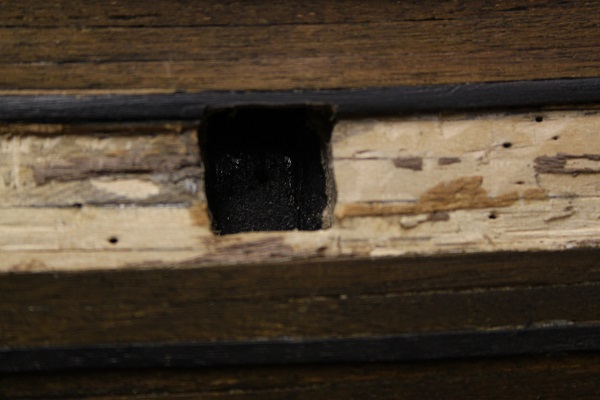
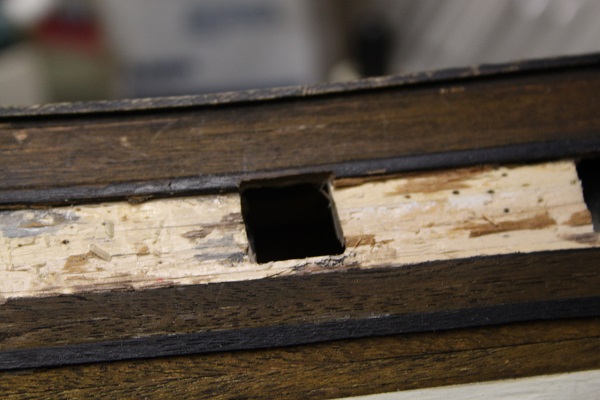
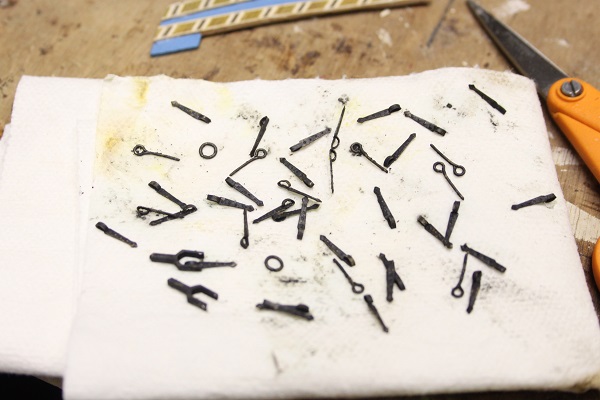
Resizing the port openings for the new frames turned into a disaster. The roto-tool got away more then once , 3 of the kit supplied backing pieces broke away and once set in place the frames showed the openings were anything but true, more filing or chiseling to true them would have left the openings way to large, so I'm backing up.
I've striped of the outer layer of planking and plan to make new wood sleeves to fill the openings then re-plank up to the edges. Pics follow
THX
J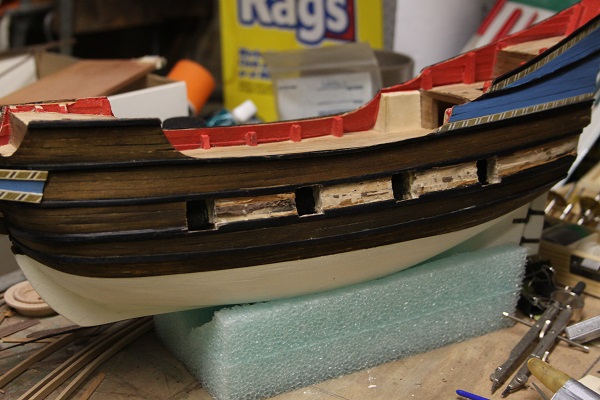
-
-
-
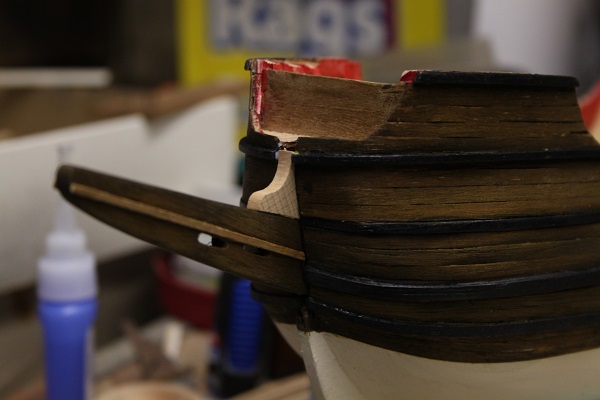
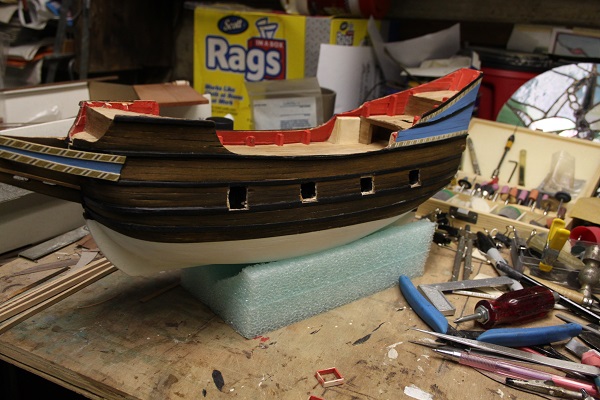
Made some progress on the Half Moon this week end...between snow shoveling excursions!
I got the final rub stark added and all of them blacked out, also finished and installed the rudder, beak and decorative head boards. Those were a pain, getting the angles to match and the boards mounted in the same spot on both sides of the hull.
Also blackened the hardware and made some frames for the gun-ports and resized the openings. The frames will be mounted once I get the new diamond micro files I ordered to finish the resizing, next time I leave the openings in the hull!! Thanks for looking in, pics follow.
THX
J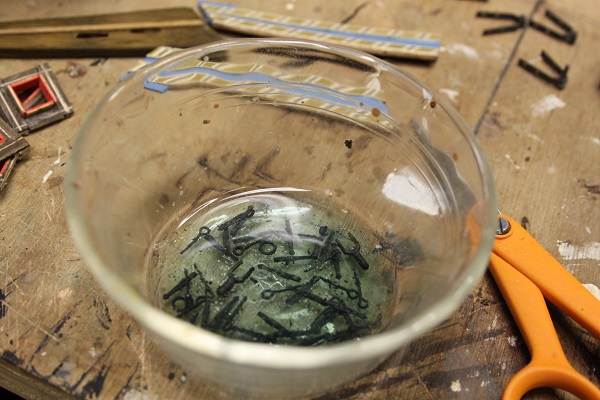

-
-
Thanks Steve,
It is a departure from my original plan, natural wood tones polished with a oil finish, but It does kind of grow on you...I was able lighten it up a bit by rubbing out after the dye had set up...no pics yet, and I'm not sure if the difference will photograph clearly.
THX
J
-
Wow Steve that's a lot of scuppers, does make for an interesting look though. Do you have a way to construct a template to assist with the sizing? It's been my experience that they have a tendency to grow and grow and grow as you take a little here and a little there, after a while scuppers look like gun ports! She is looking good though, your attention to detail shows.
J
-
Hello everyone,
Got some work done on the hull, used a dark brown dye to color match the various types of walnut, they are real close now but very dark. In fact darker then I would like but I think its better the "strips".
I had originally planed to leave the tanganyka above the water line its natural color but while dyeing the upper hull some of the dye ran around to the transom...so all that got dyed too.
Stain may still be added to further even out and add a little depth to the color. The rub starkes are going to be painted black. Some touch up is needed to the water line where dye ran under the tape, that's all for now. As always thanks for your time and attention.
THX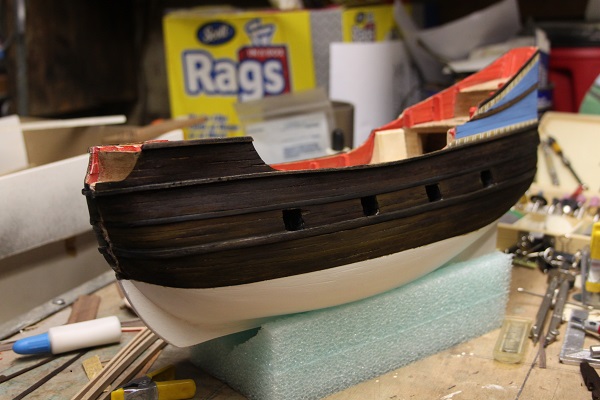

-
I've had real good results using a 50/50 cut of cheap blue bug stuff and distilled water, good paint flow, easy clean up...not to mention cheap
-
THX Steve,
I was hoping to use an oil finish but there is to much difference between the kit supplied walnut and the veneer I used, I'm hoping to dye and then stain to get as much depth as I can. I've been following your build, your scuppers are coming along, good idea grinding done the file.
J
-
I did get the gun ports cut out, but I'm not happy with the look so I'm in the process of scratch building some frames for them. The keel, stem post and rudder have been veneered, essentially all the plywood pieces. The painting of the keel is complete, no pics of the painted keel yet as it is still masked off for the dyeing/staining process.
THX
J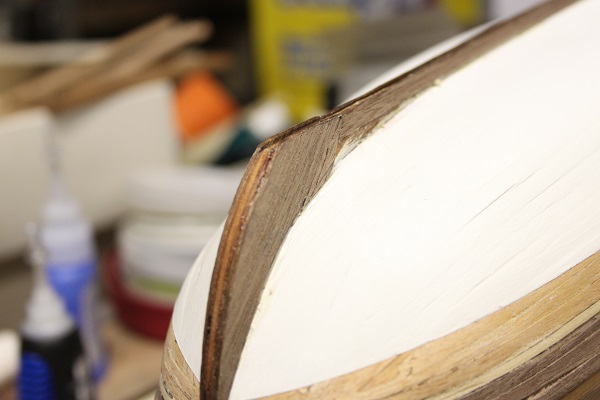
-
Hi Max,
Thanks for your kind comments, I know what you mean, I've still some work to do to get the openings clean and square, I'll post pics when that action is complete. The metal frames do a nice job, I would use them if I had them but I'm trying to do this with a minimum amount of additional expense, and I already had to invest in extra veneer to redo the planking. I'm still not sure if I'm going to "frame" the gun port opening or not. Thanks again for your interest.
J
-
-
Hey Max,
The Half Moon is looking really good, the rigging is coming along nicely. A question...did the metal gun port surrounds come with your kit or did you purchase them separately? Very nice work.
J
-
Hey everyone,
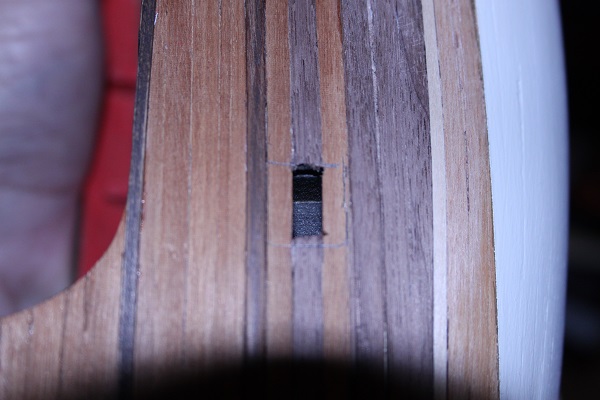
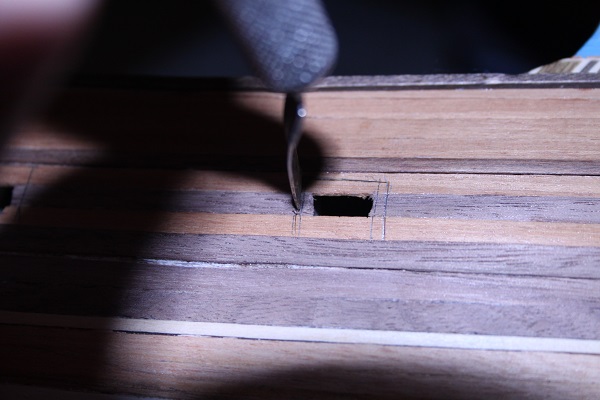
When I did the second planking I didn't worry about covering the openings for the gun ports as I left them in the first planking and figured it would be a simple matter of cutting them open.
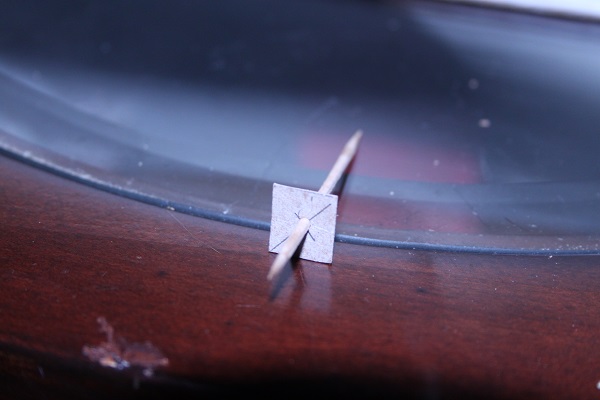
What I discovered is that the planking is very brittle and a clean edge is not a given. I was scratching my head over a way to cleanly cut the gun ports into the planking...thought that if I used a sharp chisel tip I could trace the openings in multiple stab cuts and get a clean edge that way but where to stab???
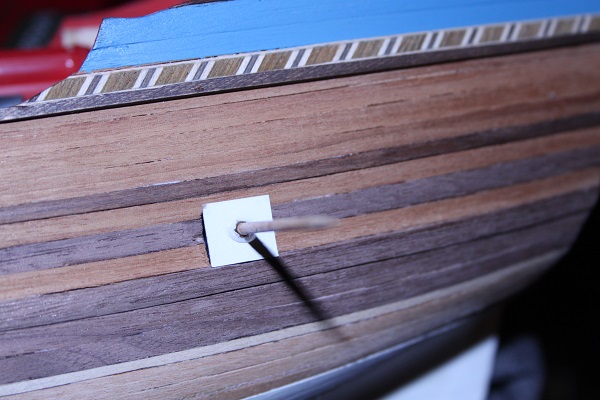
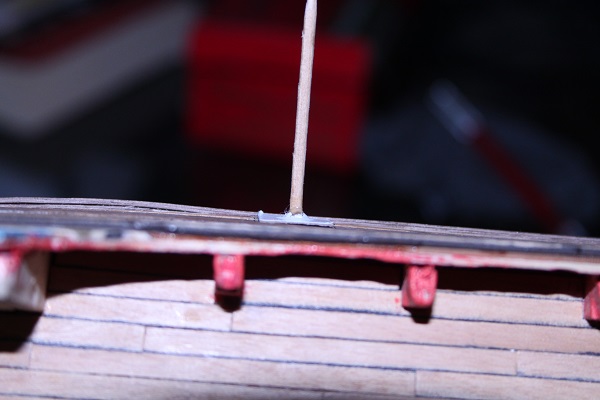
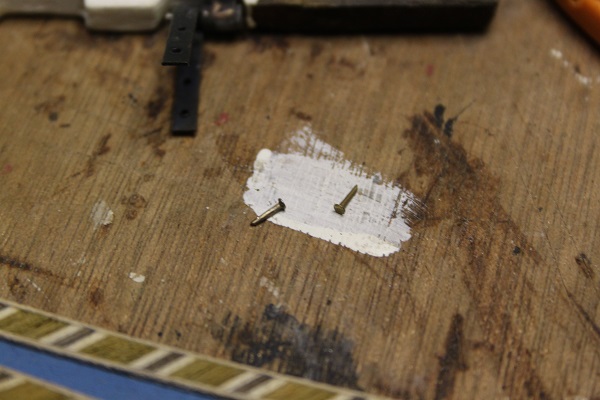
What follows are pics of my solution, I traced one of the port covers on heavy card stock and mounted that on a toothpick. I had already drilled the port backing blocks in the center prior to mounting them in the hull so with the little jig the toothpick is set in the center hole and squared up, the cardboard square slide down, and the port opening traced. Now there are clean pencil lines to trace out with stabbing cuts. I still have to finish the clean out with a sharp #11 blade but the outlines are cut in and the edges should be clean. That's all for now, thanks for your time and interest
J
-
Hi Steve,
THX much, yes I followed the tutorials as closely as I was able, reached out for some help with shaping the garboard as well. The keel and most of the stem post are going to get painted but I'm debating whether to apply veneer to them first. They both took a beating during planking and sanding.
J
-
HI Steve,
She looks really good, ya gotta love tung oil on walnut. Do you plan to use the walnut below the wales or will you switch to something else for contrast?
J
-
THX Max,
I hope to ave the rest of the color added sometime this week, will defiantly post pics as she moves forward.
J
-
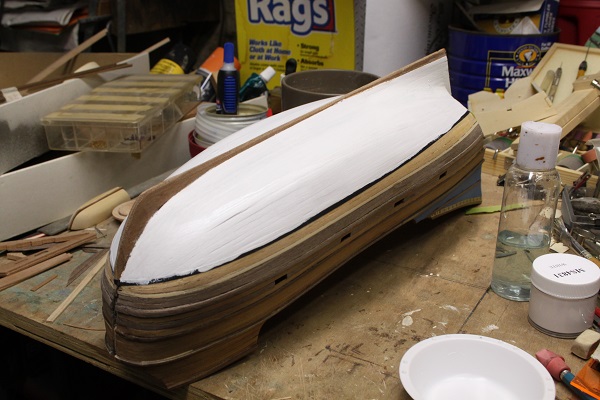
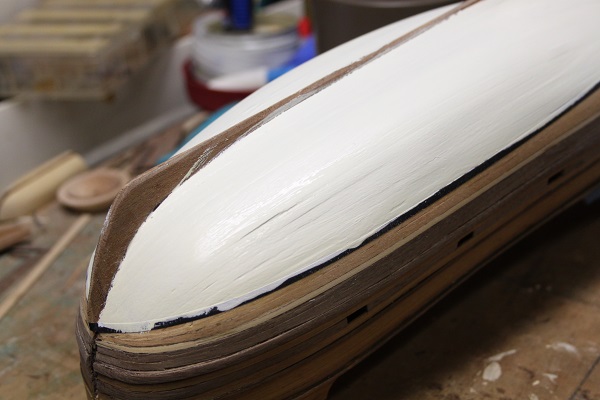
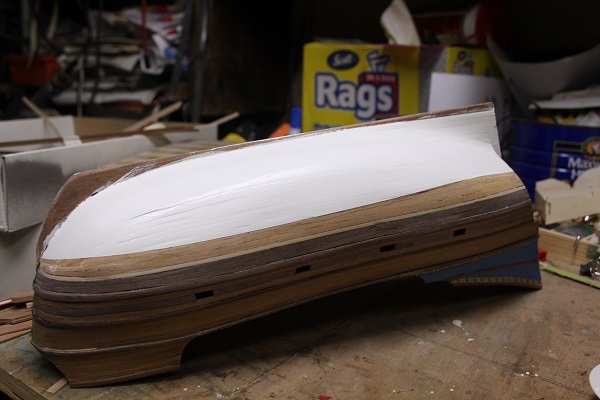
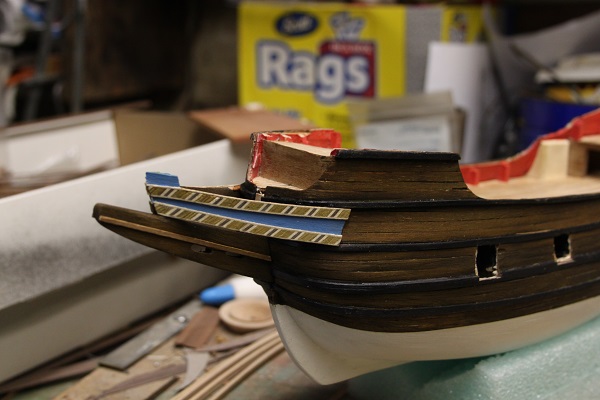
Hello everyone,
I've finally some progress to post. The second planking is complete and sanded out, water line has been masked off and painted with 2 primer coats and two color coats. The "white stuff" is simulated using primarily white acrylic paint with a drop of yellow and brown mixed in.
The rest of the hull will be stained a walnut brown I decided to use an ebony on the rub starkes so they stand out against the darker hull. I'll post more pics as she progresses.
THX for your time and attention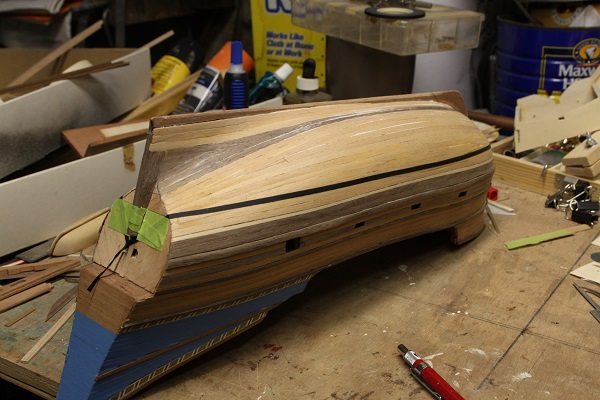

-
-
Hi Steve,
To answer your question I started low and worked up, thinking if I was to end up with a half plank I'd want it under the handrail. Based on the quality of workmanship shown in your photos I think you be able to handle the garboard.
J
-
Hey Steve,
Maybe, It may work better on a double plank hull... I don't know for sure myself. The Moon is progressing though slowly, the planking on the wales went well, but I've been struggling to complete her from the keel up, lots and lots of redo's, why I haven’t posted any new pics in a while. I've only two 5 plank sections of each side left though so hopefully it will in be paint and stain soon.
J
-
Hey Steve,
Sounds like you have a plan, I too find it difficult, on my next build I'm going to try using shorter lengths instead of running a plank down the entire hull, but I'm sure there are challenges there as well. Keep up the good work
J


HALF MOON by jct - FINISHED - Corel
in - Kit build logs for subjects built from 1501 - 1750
Posted
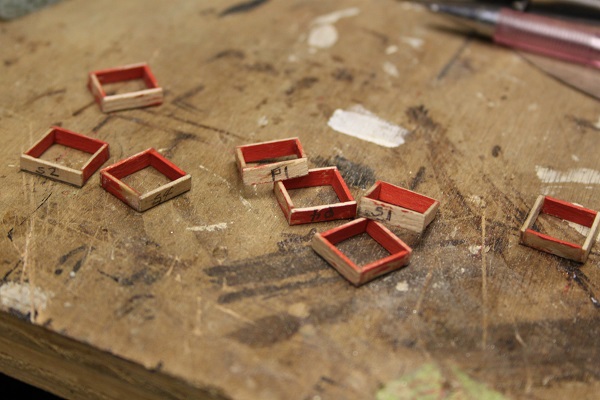
Hello all,
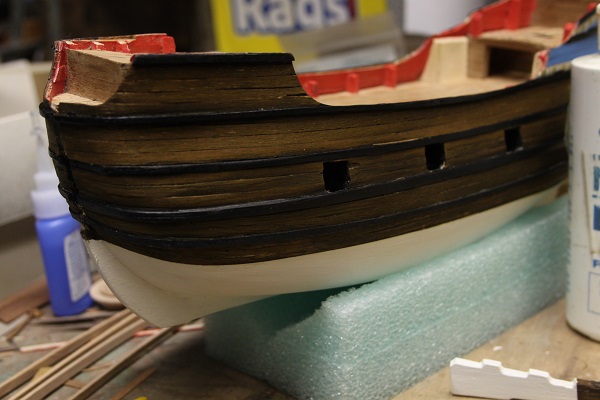
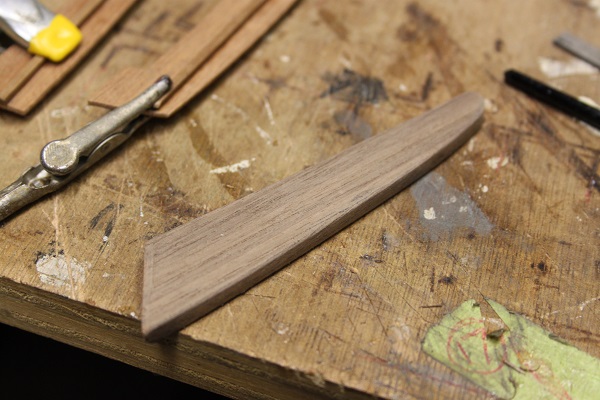
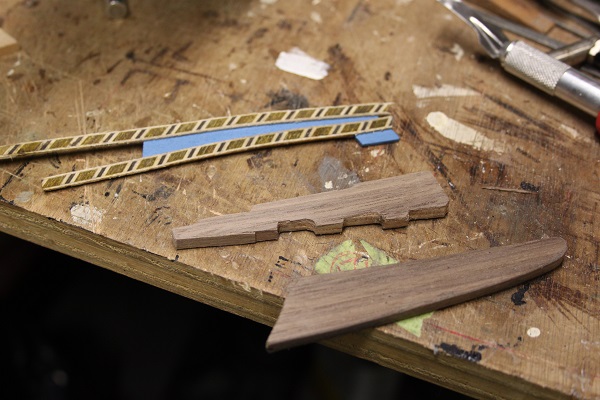
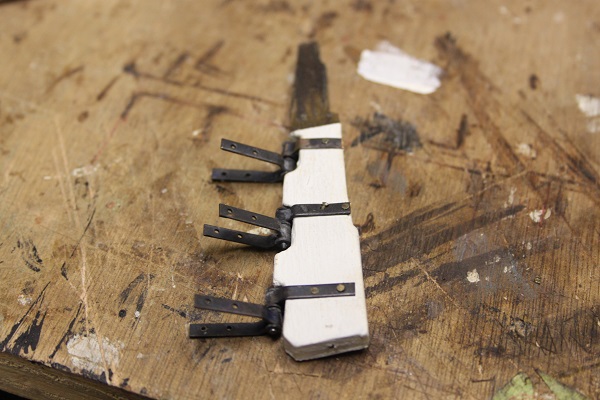
Thought I'd post updates to my HM build, got the new gun ports made and installed. Started by laying them out on some re-saw ceder I had laying around. They were sized to match the kit supplied covers. One side was left long to be trimmed down later...it is glued to the ships center support. The hull openings were cut to accept the resized port sleeves, the new ports were roughed in, sanded flush and filled. Re-planking remains but that is for another day.
THX
J