
HOLIDAY DONATION DRIVE - SUPPORT MSW - DO YOUR PART TO KEEP THIS GREAT FORUM GOING! (Only 13 donations so far - C'mon guys!)
×


jct
-
Posts
1,519 -
Joined
-
Last visited
Content Type
Profiles
Forums
Gallery
Events
Everything posted by jct
-
Hey Phil...thanks for contributing to the log, you are correct there is a strong resemblance in your Freya and the Agilis. The Agilis is 18 inches long and claims to be 1/60th scale...the deck details are different but the overall shape and mast height are very similar. The plans look to be of the same style and the ages of the kits are close too. Let me add that your Freya is an outstanding looking model, very nice workmanship, how have you kept her so clean all these years
- 211 replies
-
- 1
-

-
- agilis
- steingraeber
- (and 1 more)
-
It shows on the plan layout...just afore the main...I'm going for your basic Baltimore Clipper, kinda, sorta, gonna try to make the most of the kit parts and layout...have you looked at the ship's boat yet?? Seems really over large to me, I was gonna try to use it but now I'm not sure...started to fare, lots of plywood delam and broken timberheads, thinking seriously about just cutting them off at the deck and replacing them with square stock. She does seem to bulge out a bit at midship, but it could be the nature of the beast...here's a bulkhead plan for the Harvey and it seems to follow the same lines though a bit more subtly. i do think we could have benefited with an additional bulkhead or 4. Based on what we are seeing, kits from the good old days don't seem to be that good...just old
- 211 replies
-
- 1
-
-
- agilis
- steingraeber
- (and 1 more)
-
Haven't started yet as I'm waiting for the planking, least that's my excuse...may well get into it later today...no sense delaying the inevitable
-
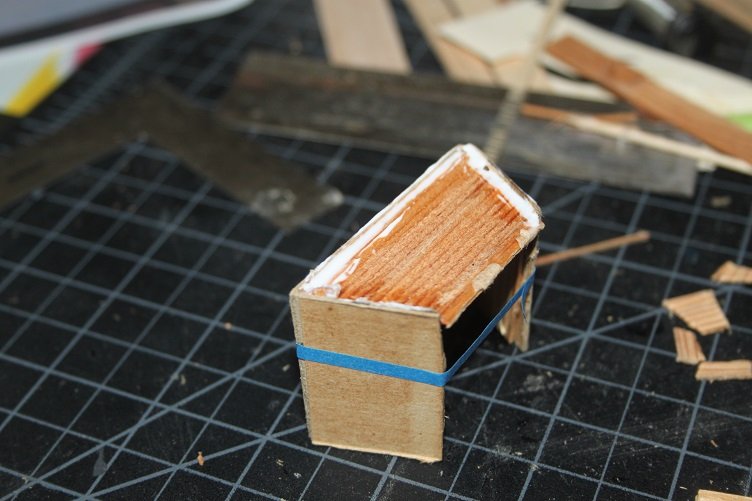
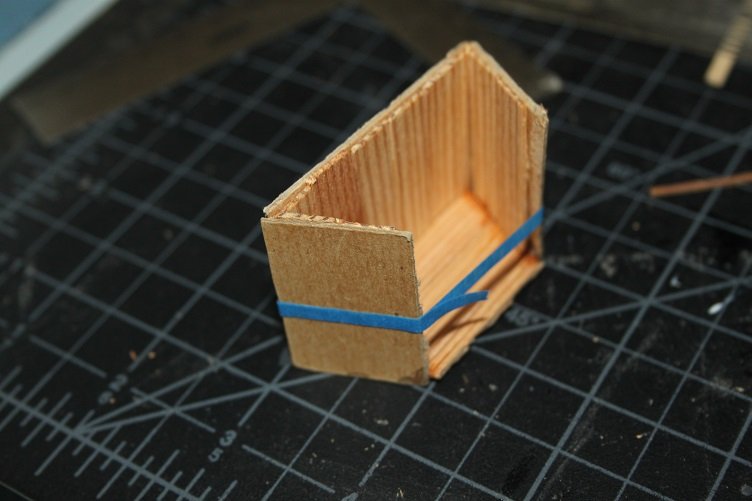
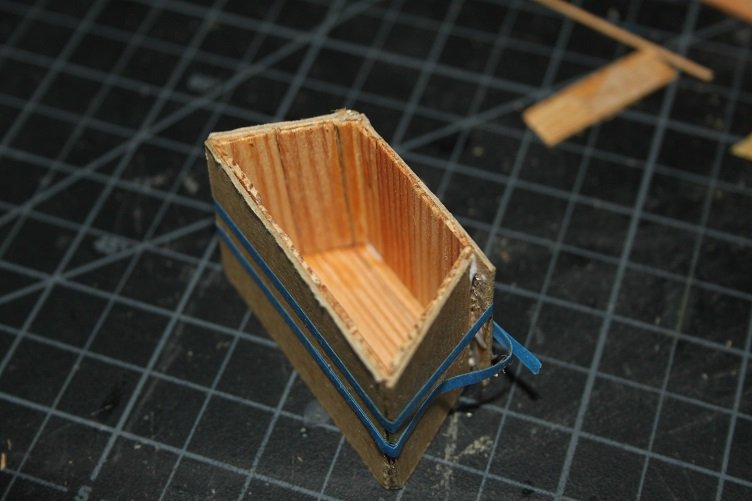
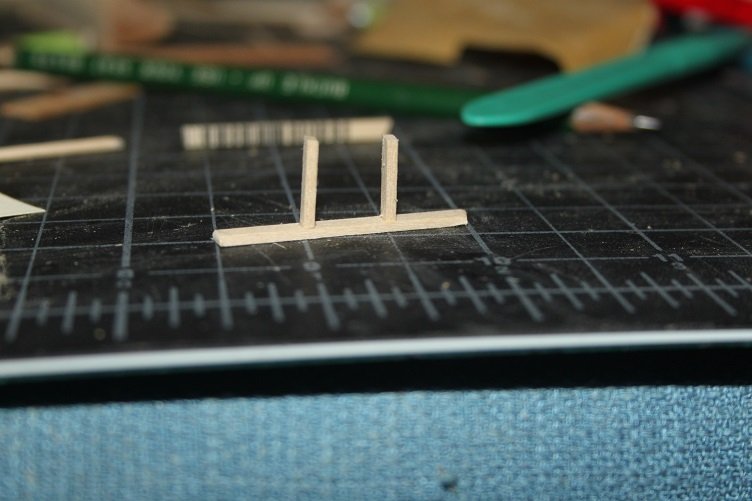
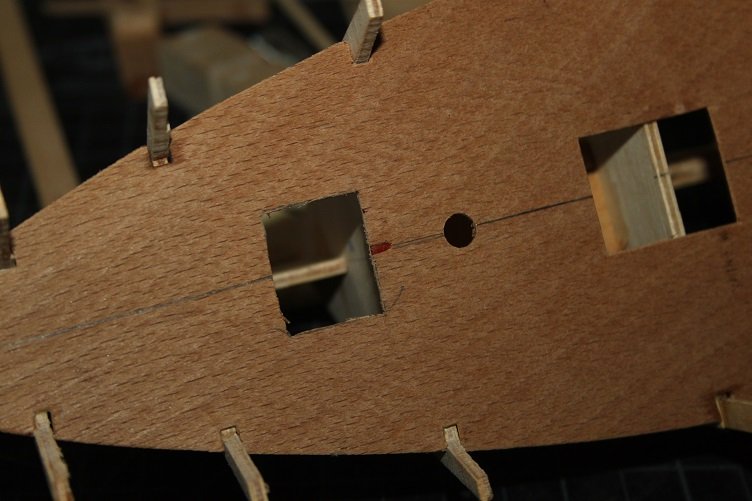
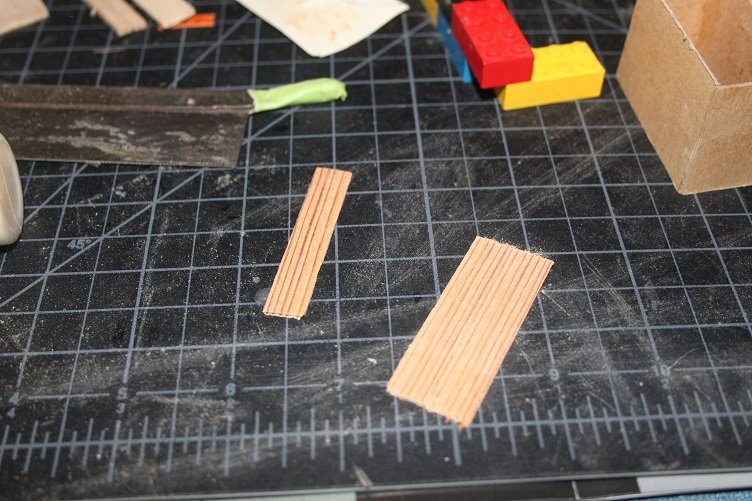
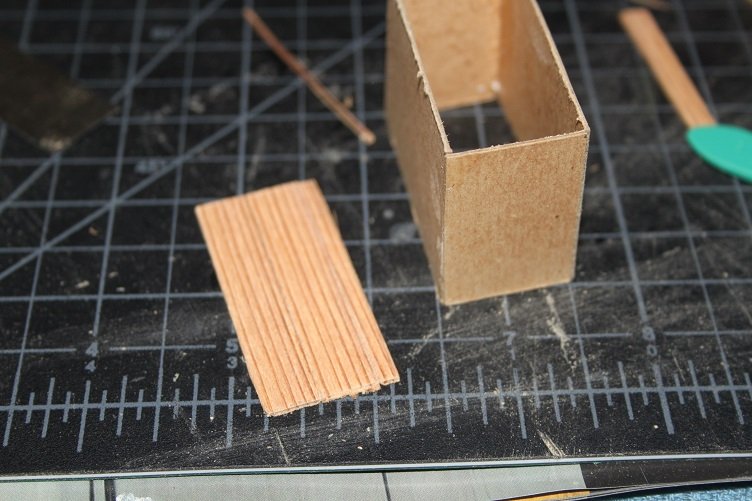
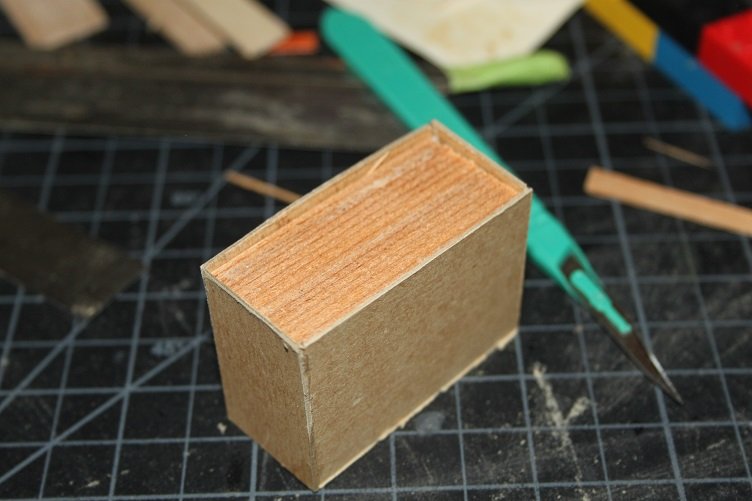
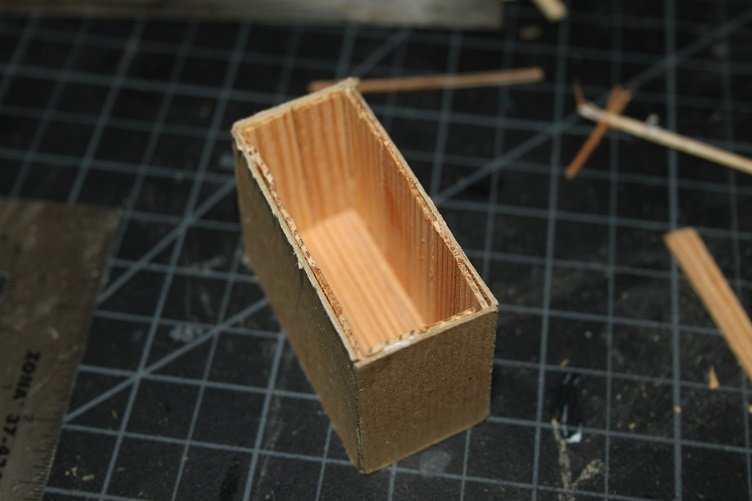
A little more to add today, I'm still waiting for the planking to arrive so I've been able to postpone the faring nitemare Denis expressed above, time enough for that heartburn later. I'm still planning to follow the kit as much as possible but some things are just unacceptable...one of which is the supplied hatchways, least that's what they are supposed to be, just flat pieces of square flat wood! Since I still have the hull open I decided to add a little more detail and open the forward hatchway Started with a hole in the foredeck from there I built a box that would enclose the opening simulated the bulkheads and deck below squaring up building the floor and installing same and planking the bulkheads By now the most observant of you may spot a rather large fubar... I forgot to allow for the narrowing of the bow between the frames...so the forward section was narrowed and the deck reattached and the fwd bulkhead reattached Next a ladder was scratched to allow access below decks The paneling and decking will receive a natural finish and be left bright and the ladder will receive a coat of paint prior to install. Thanks for the likes and comments, that's all for today

- 211 replies
-
- 3
-
-
- agilis
- steingraeber
- (and 1 more)
-
You may still be able to sand a curve into your transom, just add some timber in front to make up the difference. i had planed just to add additional timber heads to the bow and stern at the deck level, not sure how it will work but that’s the plan. are we having fun yet
-
I here ya...I’m still waiting for the hull planking so I’ve just been focusing on the deck furniture. Haven’t started to fare yet...I’ll be posting later today
- 211 replies
-
- 1
-
-
- agilis
- steingraeber
- (and 1 more)
-
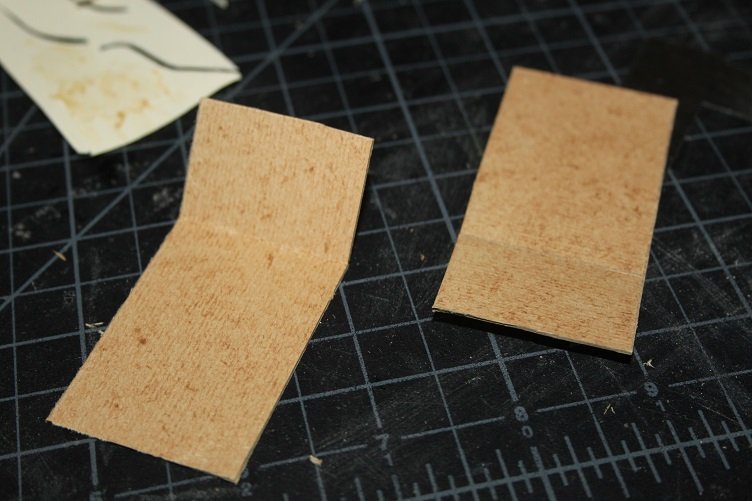
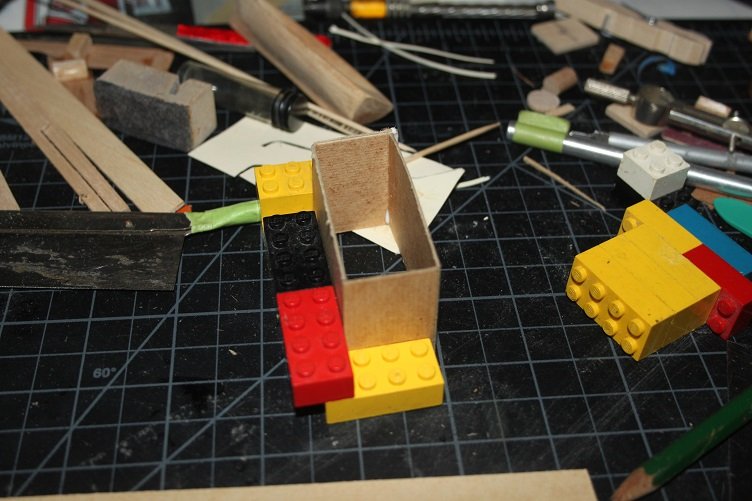
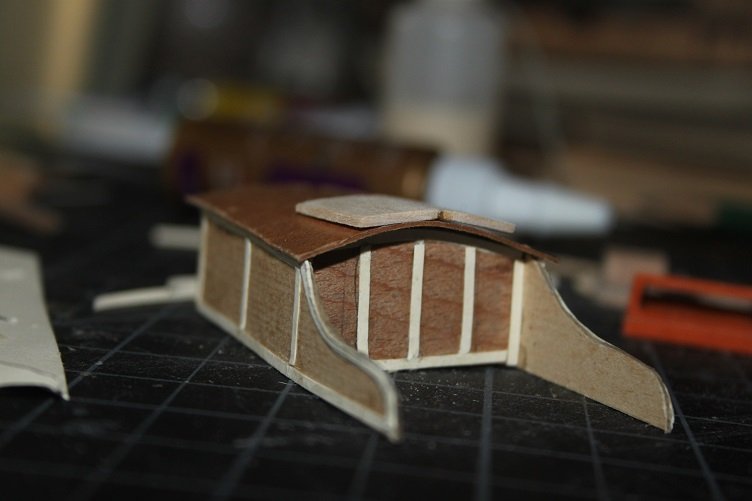
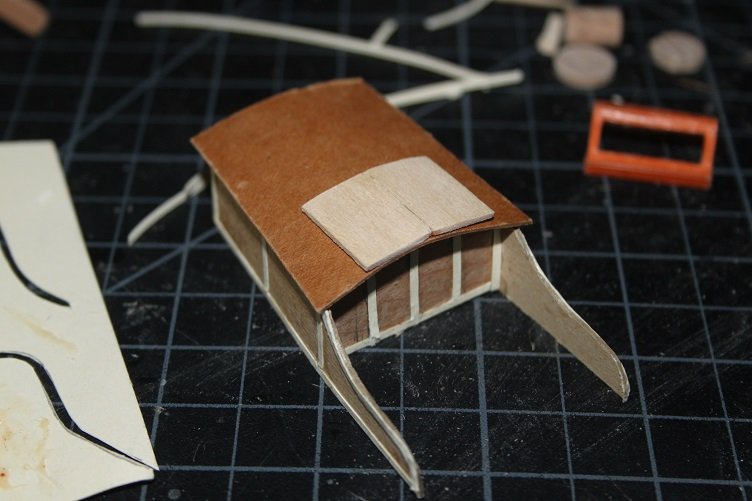
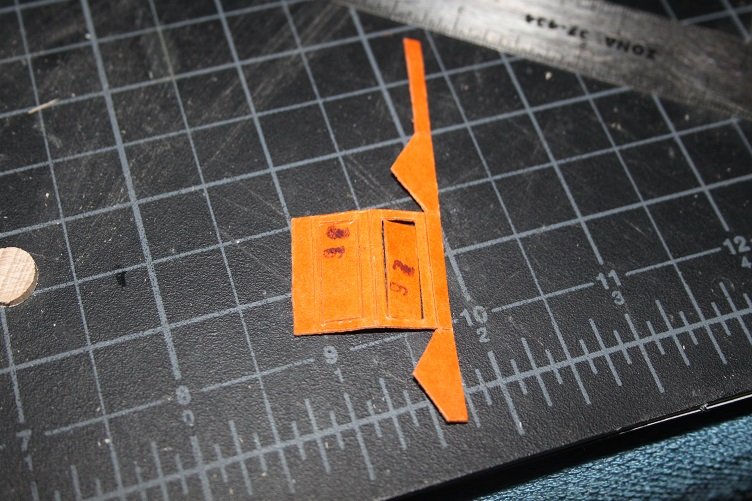
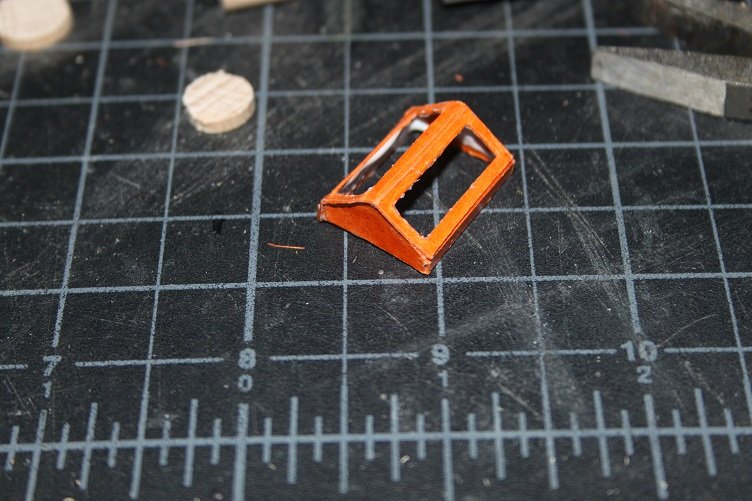
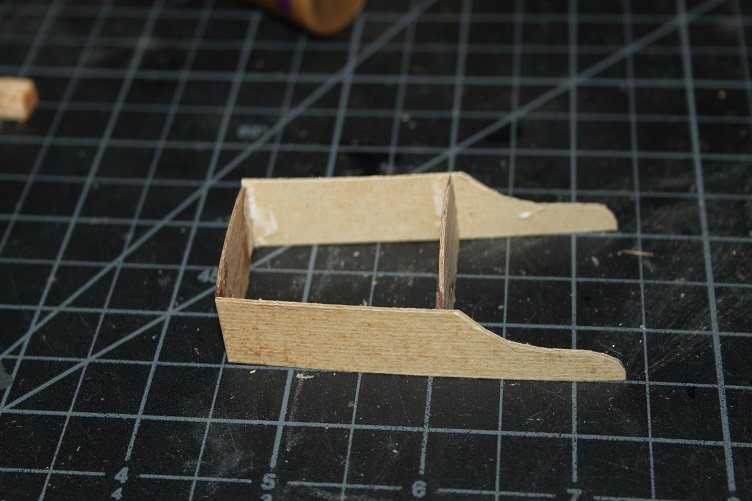
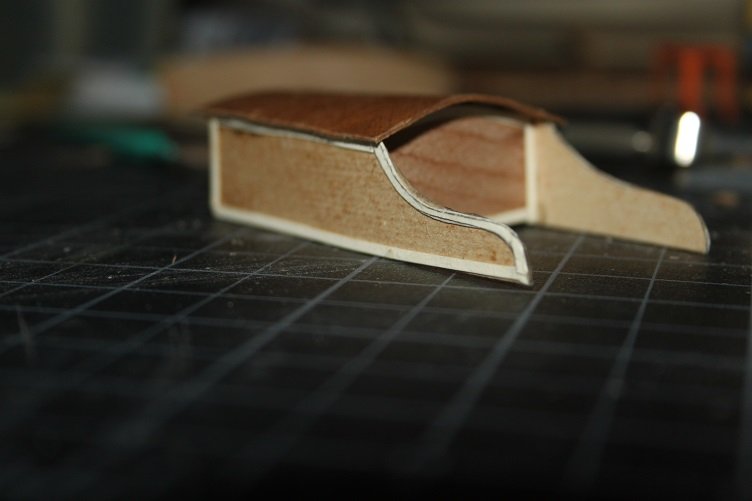
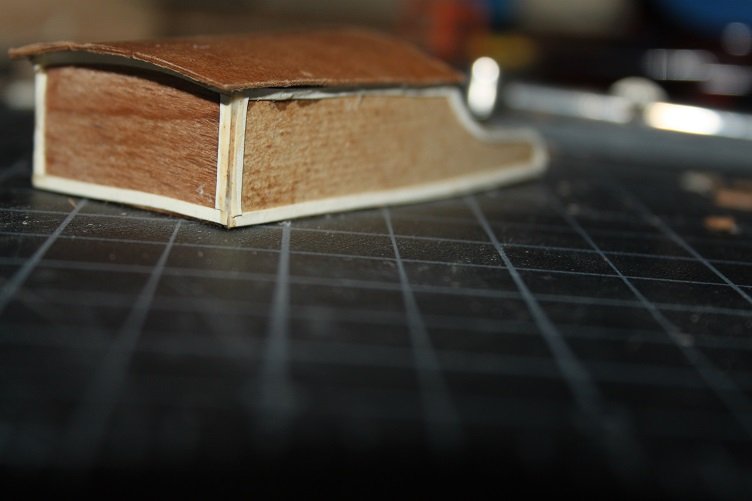
So while waiting for the new planking to arrive I set to work with some of the deck furniture subassemblies The skylight is a kit provided piece...it's made of some kind of coated card, set up like a sheet metal fold out had to lightly score the fold lines and add glue turned out fairly nice...if you forgive the color, maybe it's meant to match the orange wood strips From there I moved on to the main deck house, more a covered access hatch really...it's a mix of wood parts and card, again all kit parts(except the trim) added temporary glue blocks till all 4 sides were set up Then popped them out The roof is an angled piece of reinforced card...I soaked it and camped it to a roll of tape to get the correct curvature and started to add some strips to simulate trim Here she is with all the trim completed and with the access hatch set in place...the hatch still needs a little more refining before it secured to the roof Well that's it for today...still have the capstan, anchors, and ships boat to work on...the planking has shipped, hope it's here soon Thanks for stopping by and for the likes and comments
- 211 replies
-
- 5
-
-
- agilis
- steingraeber
- (and 1 more)
-
I can see why...prices on basswood are a bit nuts for what it is, looked at lime as well but the shipping was more then the material. Ya it might be I'm gonna try to use the decking material and possibly the inner bulwark, so it should not be a total loss
- 211 replies
-
- 2
-
-
- agilis
- steingraeber
- (and 1 more)
-
Understood, actually the only areas that would patina are those exposed to the air, right at the waterline, most likely the rest would stay a deep copper color...think old penny.
-
Seems to be a lot of options available from what I've seen, so are you gonna copper the bottom? I gonna do white stuff, still haven't recovered from coppering the Harriet Lane
-
Thanks for the info and thanks for the wood offer...I'm gonna replace all the kit planking, all to dry and brittle to work with and more trouble then its worth. then again it is a 50 some year old kit...so I guess it should be expected. What is Obechi, don't think I've ever seen any
- 211 replies
-
- 1
-
-
- agilis
- steingraeber
- (and 1 more)
-
Interesting...you could rig her this way...do you know if they were pole or stepped masts?
-
New basswood is on order...gonna focus on deck furniture and the like till it arrives
- 211 replies
-
- 4
-
-
- agilis
- steingraeber
- (and 1 more)
-
Well this turned into a fiasco, this stuff won't cut correctly for anything ...there is such a difference between the hard and soft sections that even with a fence its impossible to get an even cut the stuff just wanders everywhere. May just split some basswood down and plank with that, really wanted to make use of the kit materials though, but it seems they may be too old to be salvageable. Stopping for the day...else Jumbo could end up in the bin
- 211 replies
-
- 2
-
-
- agilis
- steingraeber
- (and 1 more)
-
I took the booklet pic you posted and expanded it...it does clarify some but adds some confusion too! Counts provided are whats in mine According to the booklet: 2x6mm is decking #15 is the cap rail, 2x8mm, 2 count #16 to plank the entire hull, assuming this is the orange stuff as booklet states it's 1x10mm, 25 count #17 between the ribs as the inner bulwark, none found According to the inventory sheets: #20 planking above the waterline, 2x10mm 13 count #21 between the ribs as the inner bulwark, 2x10mm I've a four count of these there are also 4 2x10mm strips half the length of all the others, no clue what these are for The instructions (??) say to, I paraphrase here, to plank the entire hull top to bottom with 1x10mm (this would be the orange stuff) and fill the hull. No mention of any other planking on the hull....it does allude to another layer by stating to fill with wood paste to eliminate the difference between the planking #16 and the basic planking. This combined with the inventory sheet call out, #20 planking above the waterline, leads me to believe its only the top half is double planked, more weirdness I think I'm gonna move forward by planking the entire hull with orange stuff after narrowing it down to 5mm, should be just enough, then punt from there.

- 211 replies
-
- 3
-
-
- agilis
- steingraeber
- (and 1 more)
-
Nice fix...how much did you cut 9 down to make the 9.5? The faring looks good, may try tomorrow but I think the ply is gonna give me grief, are you planing to add bow blocks? I been thinking about them
-
Not yet...It all might take a ride through the saw tomorrow, I'm thinking all of the 10mm wide stuff can come down to 5mm the orange stuff will go fine from there...I can see a fight coming with the hardwood, but we shall see ya the other stuff is very dry...and hard, the stuff just flexed my band saw blade when I tried to resaw it...may have to step up to a thicker blade to see if it will work, As it is the stuff is 2mm thick and wont take a bend worth a damn. Sure wish I knew what it was My thoughts were to use the orange below the waterline...which will get a coat of white stuff and just stain the upper wales...maybe paint the bulwarks, leave a natural deck...haven't decided on the deck furniture yet, but am leaning toward some combination of paint and stain...gonna add a bunch of trim to the deck house and the like,
- 211 replies
-
- 2
-
-
- agilis
- steingraeber
- (and 1 more)
-
I was playing around with the orange wood supplied in the kit and it lays down real well, super flexible. it doesn't look like much faring will be required to use it. The beige wood is another story sacrificed one plank to the gods trying to get it to bend with no joy, may try steaming it...not sure yet what I'm gonna do
- 211 replies
-
- 1
-
-
- agilis
- steingraeber
- (and 1 more)
-
Yep, no didn’t break off, just continuing the “rabbit” up the stem by adding materiel. I just replaced 13 with something shaped like the drawing thanks
- 211 replies
-
- 2
-
-
- agilis
- steingraeber
- (and 1 more)
-
Thx much, I’ll let u know
-
I'm thinking of fancy toothpicks
-
The transom curve wasn't that difficult, just sanded it in after building up the layers,an idea what your gonna do for belaying pins?
-
Hey Denis...I wouldn't drill a new hole just yet...been lockin at Jumbo and there is no stern post provided or mentioned, if you add one ( I plan to) it may well fall in the right spot