
HOLIDAY DONATION DRIVE - SUPPORT MSW - DO YOUR PART TO KEEP THIS GREAT FORUM GOING! (Only 13 donations so far - C'mon guys!)
×


jct
-
Posts
1,519 -
Joined
-
Last visited
Content Type
Profiles
Forums
Gallery
Events
Everything posted by jct
-
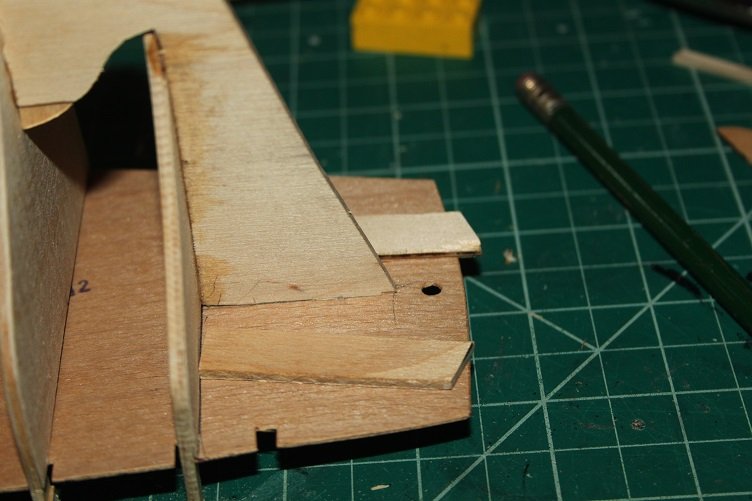
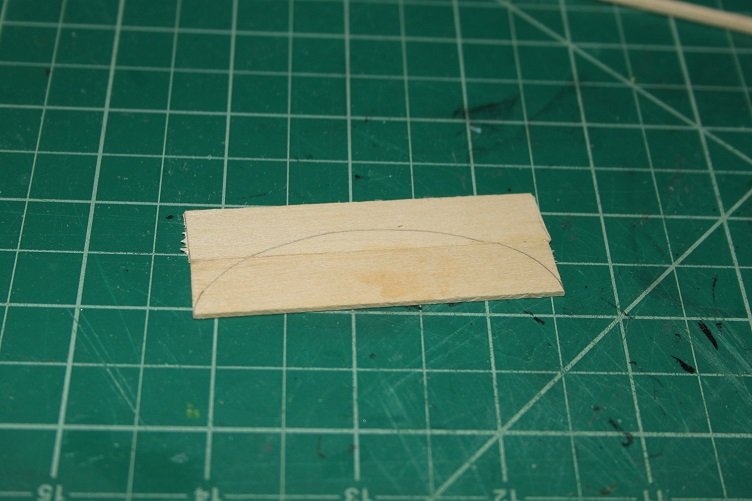
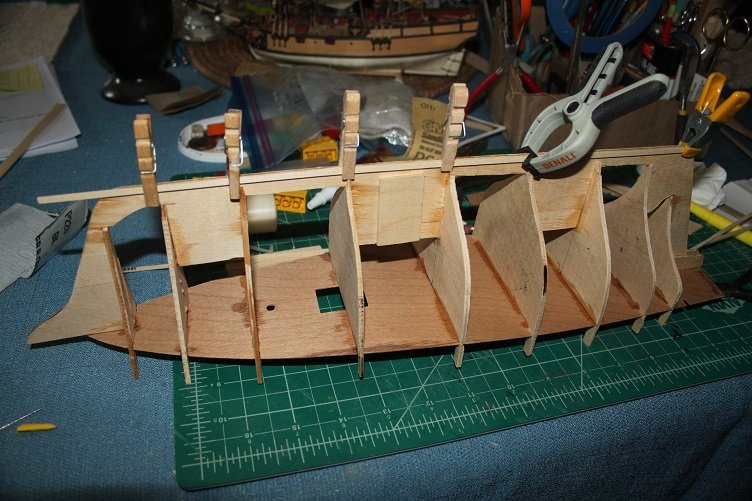
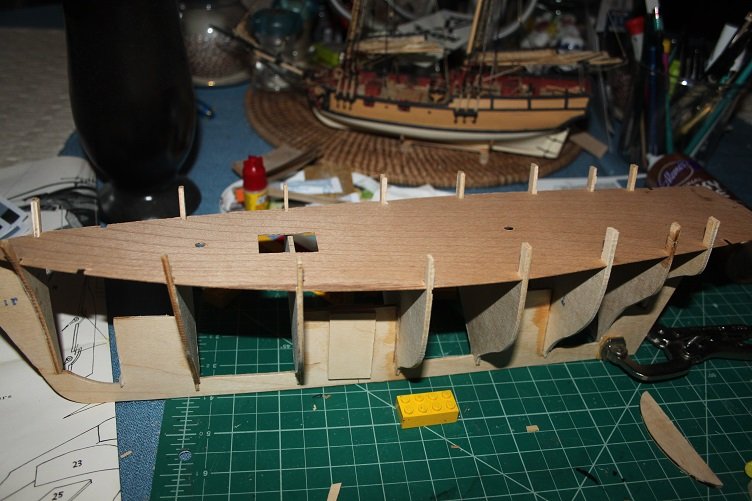
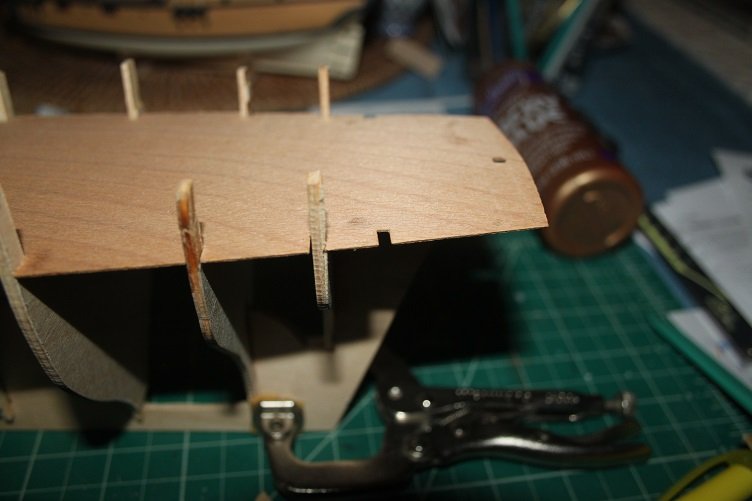
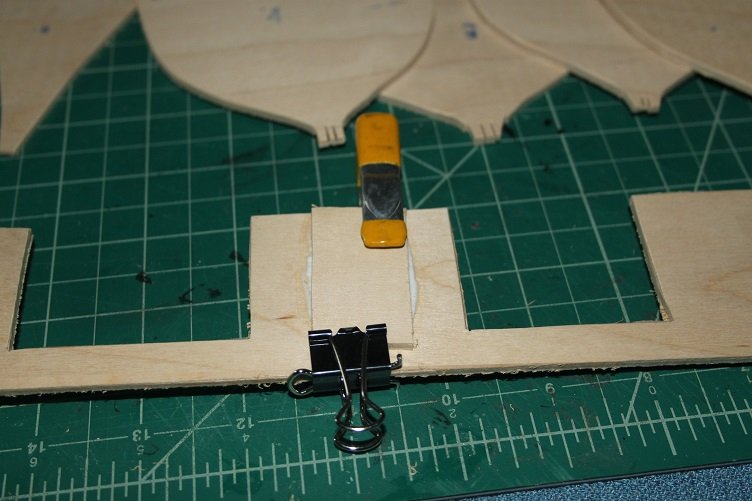
Got a little more done on Jumbo today...I glued the deck plate on with CA and PVA, moving from one frame to the next till it was complete, I was surprised at how well it fit and how much stiffer the entire assembly ended up being. As I mentioned in my last post the stern reinforcing blocks were too short so new ones were cut from some scrap the very rear bulkhead, #10, pretty much disintegrated when it was cut out so a new piece was made from glued up basswood and glued to the end of the new braces the thickness of this piece was then built up with additional layers of wood I want this part plenty strong as all the rear planking will terminate here The kit supplies no keel material nor is it mentioned on the plans, I've been pondering this for a bit and decided on just adding some basswood strips to the false keel...so strips were cut and applied to each side to form the beard line, as opposed to carving it. At the stem more material was added and the stem built out, this will need some serious trimming when it dries completely...but that won't happen today, battery for the rotary tool is on the charger !! Thanks for the likes and comments, and for following along


- 211 replies
-
- 5
-

-
- agilis
- steingraeber
- (and 1 more)
-
Yep that is the Hanna...good call Lou, I've run out of shelf space so she rest on the Dining room table. I'm gonna fiddle with the stern today and see what I can come up with...I'll post the results
- 211 replies
-
- 2
-
-
- agilis
- steingraeber
- (and 1 more)
-
LOL Thanks Lou...They do come in handy....long as you don't step on em
- 211 replies
-
- 2
-
-
- agilis
- steingraeber
- (and 1 more)
-
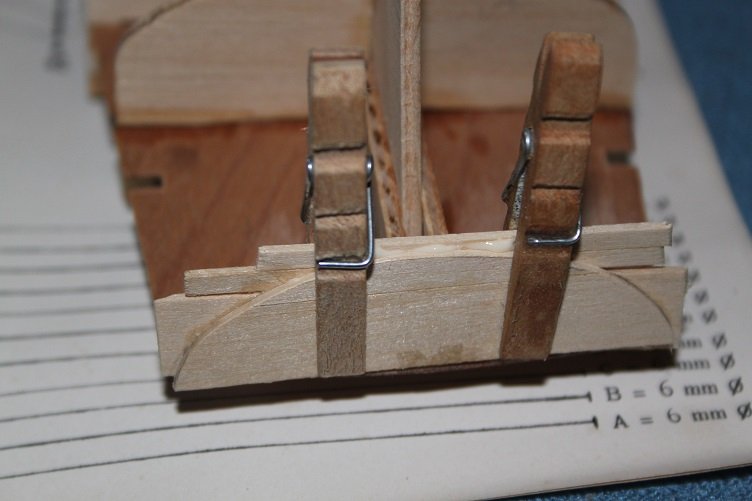
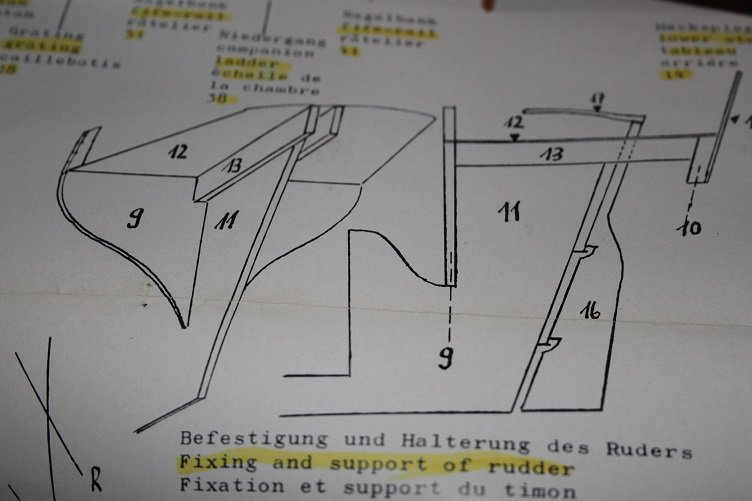
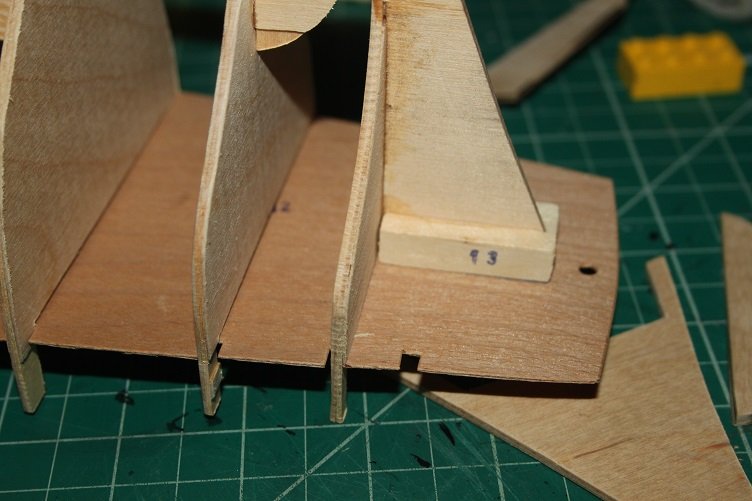
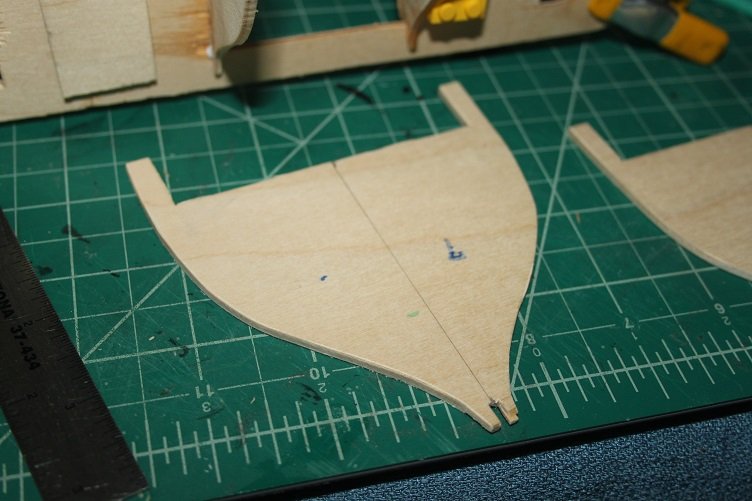
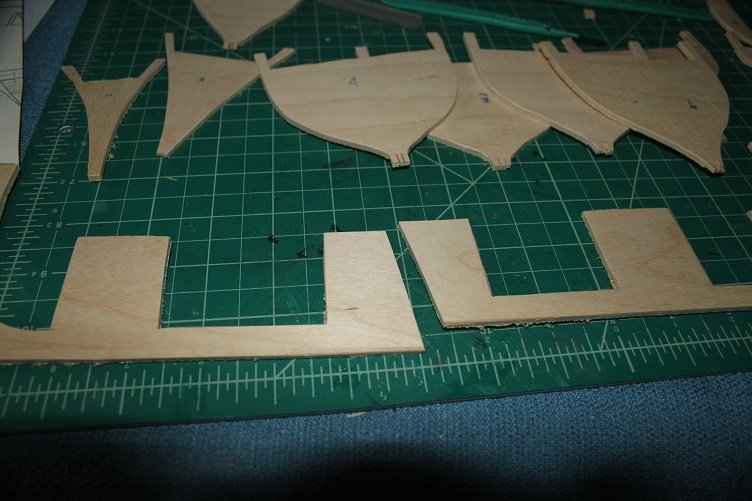
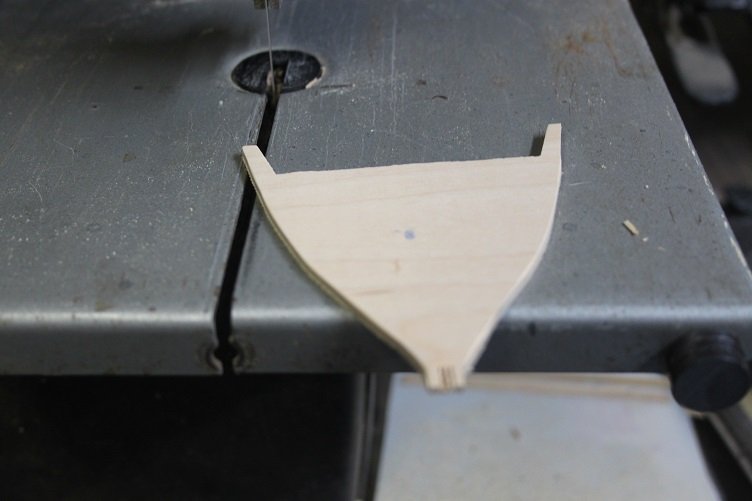
Got a little more done on Jumbo the Clipper today... Got all but the number two bulkhead secured, and test fit the deck plate Number two will have to be massaged into place as it does not align with the keel ledge or the slots in the deck plate everything else seems acceptable (just FAT) , will need a little tweaking, but should not be a big deal I have come across a few issues though You'll notice in the pick above there are a couple extra slots in the deck plate with nothing in them...and there is nothing in the kit or mentioned in the instructions about them...that has me scratching my head. Maybe the stamping was used for multiple kits? you can see in the pic above there is a pretty good drawing of how the stern supports should go... but you can see that the provided parts are a bit off...replacing 13 with longer pieces won't be a problem, lots of stuff in the spares box, but you can see they will interfere with the intended rudder location Seems scratching and modification will be in order...not a prob, just thought I'd be a little deeper into the build before it was required, oh well let the fun commence

- 211 replies
-
- 4
-
-
- agilis
- steingraeber
- (and 1 more)
-
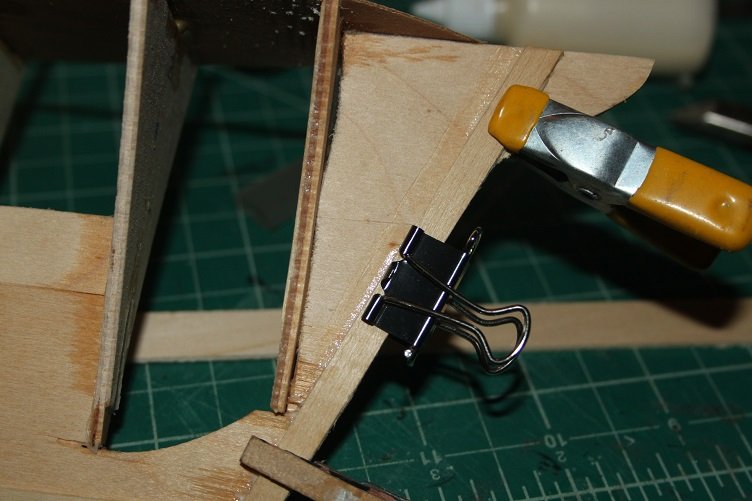
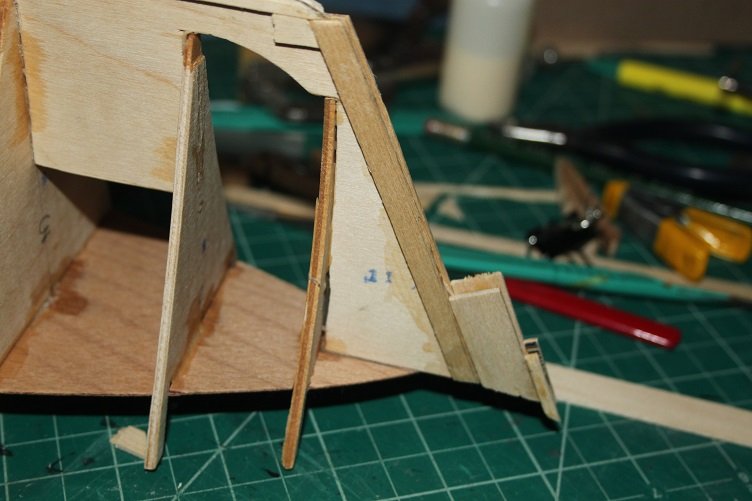
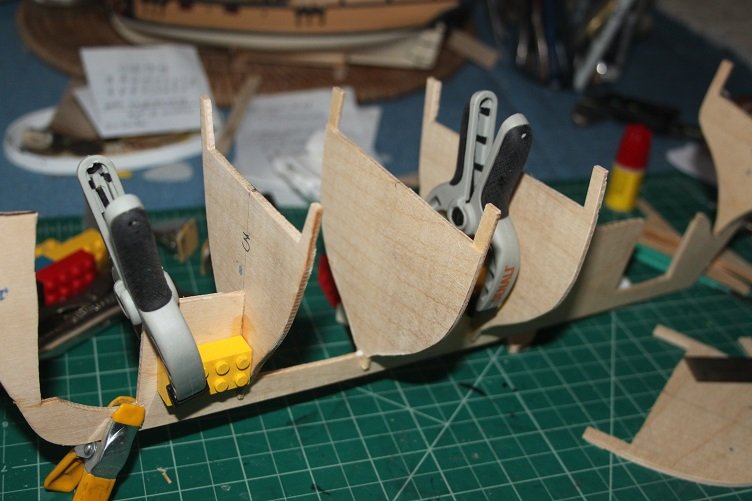
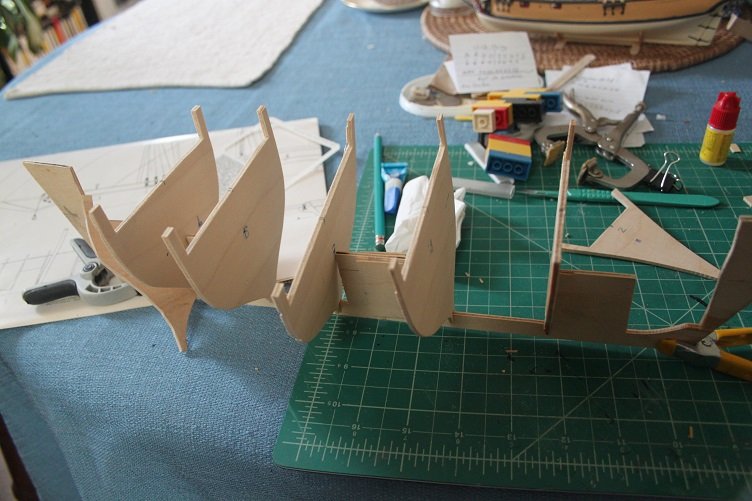
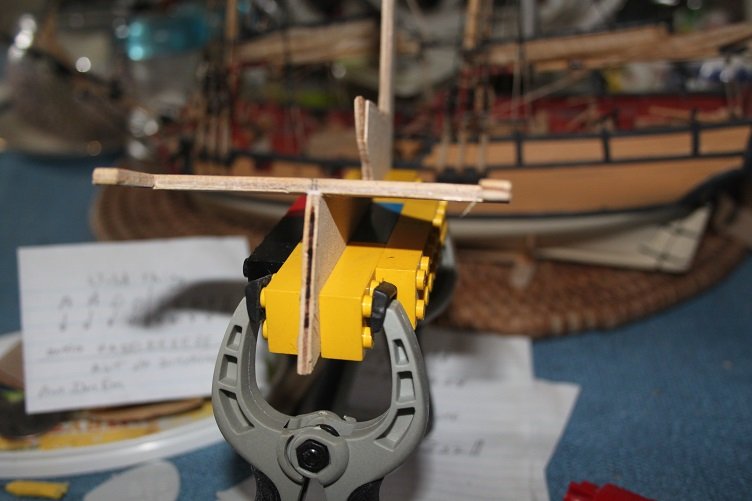
A bit of an update...started mounting the bulkheads. started by finding and marking the center of each While preparing the main backbone/keel i noticed a warp at the stern, so I built up some clamp faces with the venerable legos and clamped it straight prior to gluing in the number 9 bulkhead, hoping it holds square then is just trial fit and glue and clamp square one bulkhead at a time..kinda like watching paint dry... Well that's it for today, gonna watch 500 qualifying latter
- 211 replies
-
- 4
-
-
- agilis
- steingraeber
- (and 1 more)
-
Your way ahead of me...I probably have a good couple hours of sanding to shape the bulkheads/keel
-
I totally agree there...gonna beef up everything...hey did you find anything that resembles a keel in yours?? I'm just gonna drag out one of my old build boards
- 211 replies
-
- 2
-
-
- agilis
- steingraeber
- (and 1 more)
-
Hey Denis...those just mount on top of the keel assembly...per the plans, Thx for the pics, Yep that's the stuff...mine is really orange...thinking it's going to be used for decking on this here boat...after a ride through the saw to reduce them to a more realistic width...everything on this boat is jumbo size
-
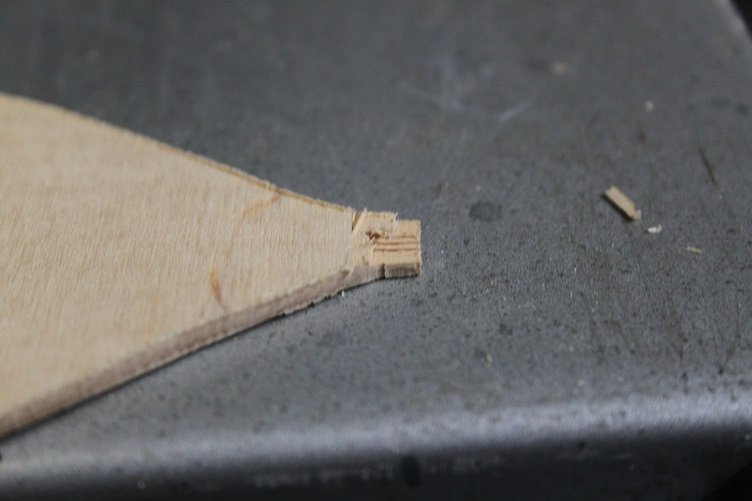
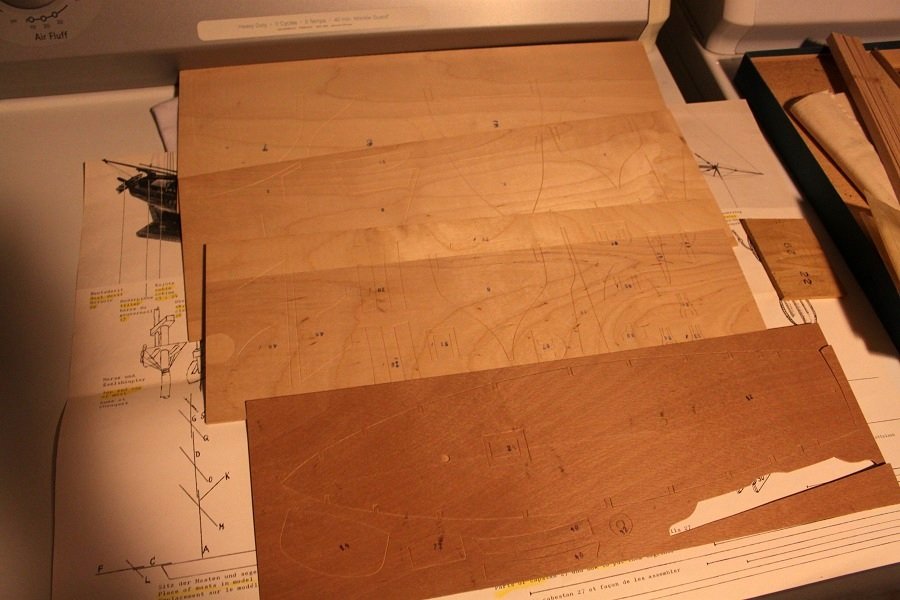
So this a.m. I started cutting the bulkheads and keel from the ply sheets and you can see there is some delamination taking place not as severe as Popeye had on his but damage all the same. I managed to get all the bulkheads cut but the keel gave me a bit of trouble due to its size. My bandsaw only has a nine inch throat so I split the piece in two and proceeded to finish the cuts, They were then glued and clamped back together not to concerned about this at this point as these pieces are going to require a lot of reinforcement before all is said and done, all these pieces are showing chipping at the edges from their ride through the saw, so I think I'm going to coat the very edges with thin ca in an attempt to strengthen them before final shaping on the rotary sander...hoping to minimize any further damage. We will see. well that's all for now, thanks for stopping by J
- 211 replies
-
- 7
-
-
- agilis
- steingraeber
- (and 1 more)
-
Hey Denis...wondering if you could get a pic of the other side of the booklet, I'd like to get a screen capture, the numbers might be useful?
-
👍 thanks,a gentleman and a scholar
-
thanks much...I should be good, with whats in the kit and the spares box I should be good...thanks again
-
Nice progress...I don't have booklet in mine, just the two sided instruction sheet. I'm assuming it doesn't give much info in the identity of wood species??
-
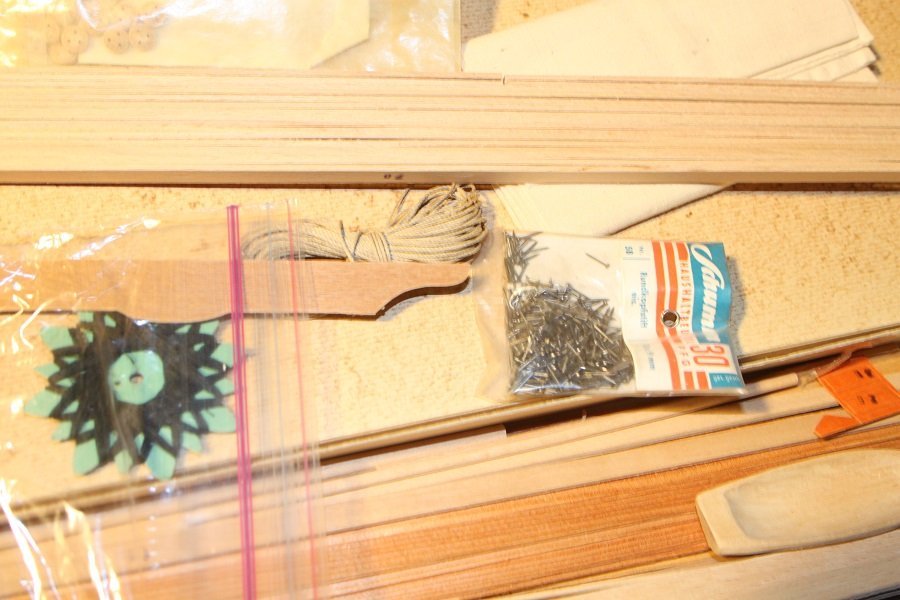
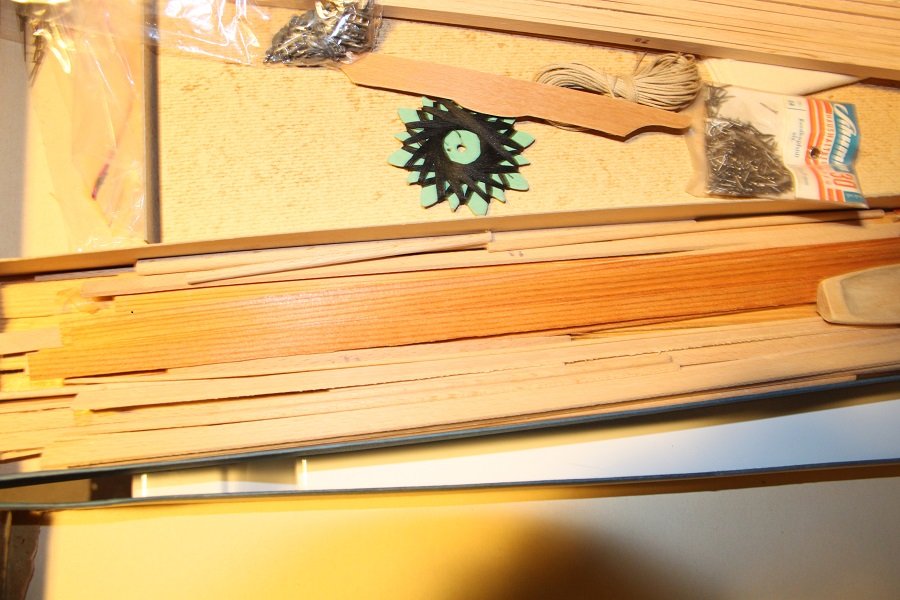
Welcome Bill...hopefully you'll see it finished...I can easily see why a novice could be overwhelmed...the instructions are weak at best. Hey Denis...ya I did some preliminary cuts today...and the ply held up well, the bandsaw is the right choose, when I tried a coping saw on a piece it began to splinter like yours did, the stuff does not like the cross tooth action, that means some on mine will be removed with a scalpel. All my planking seems straight, but it is a bit on the wide side...about a foot and a half in scale, it may all have to take a ride through the saw. Do you have that funky looking orange wood with a prominent grain in your kit? I've no idea what it is, never saw it's like before, got a lot of the world famous beige wood too. All the planking is super wide. You are correct this is gonna be fun, GOOD LUCK
- 211 replies
-
- 6
-
-
- agilis
- steingraeber
- (and 1 more)
-
Never claimed that speelling was my storng point beside I might o meant Chicken Noodle!! I think my ply will be fine made some preliminary cuts today and all seems well...other then the slight warps
-
Hello again Denis...I found it you forgot to mention my daily naps and following my soups on the tube!! My log is up as well, not as far along as you are, wont get to cutting till Friday...I'm hoping for better luck then you've had so far...hope you don't mind I've added a link to your build to my log...see you in the funny pages J
-
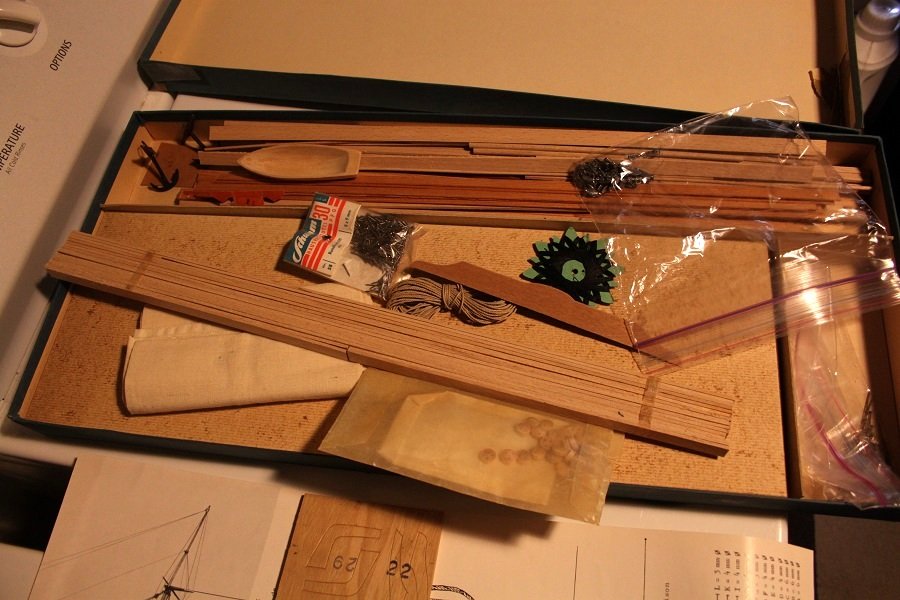
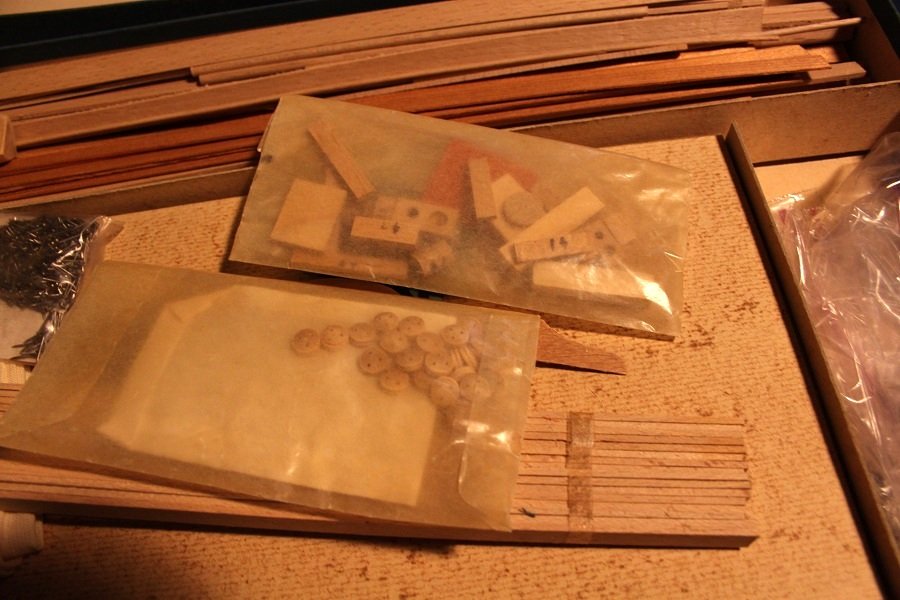
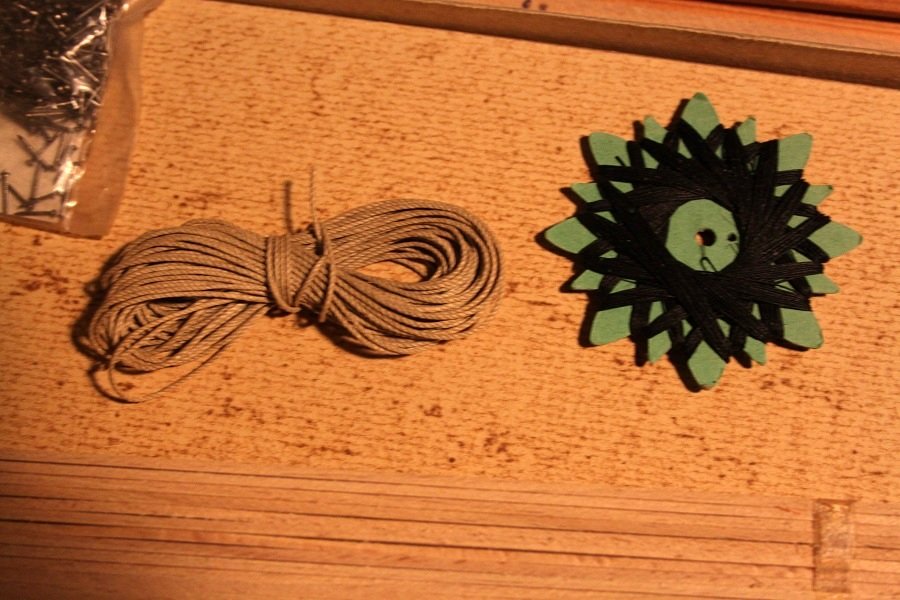
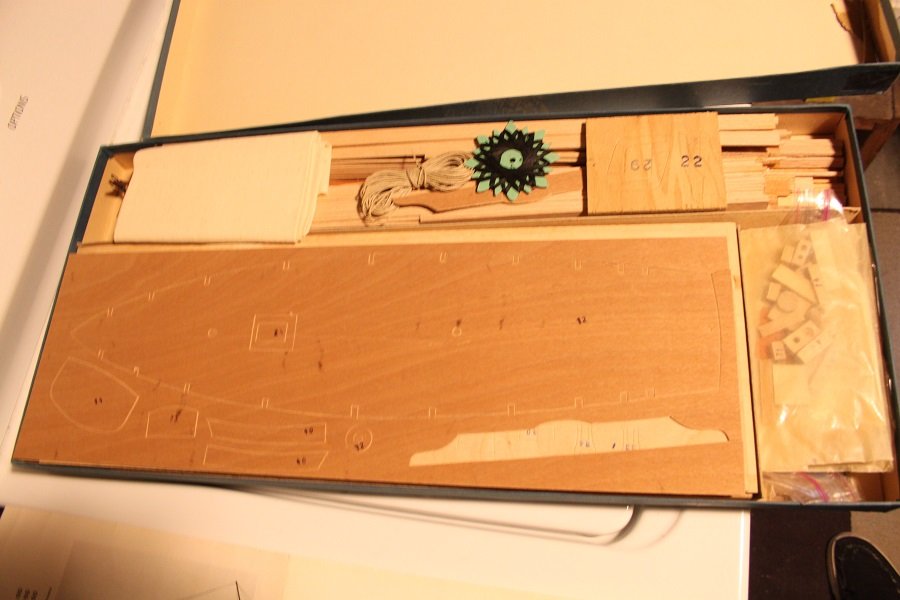
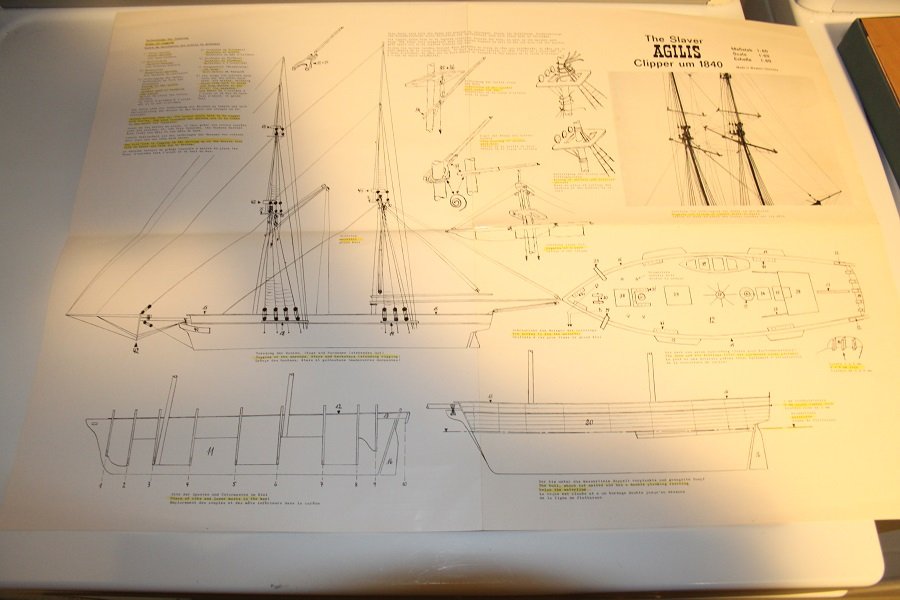
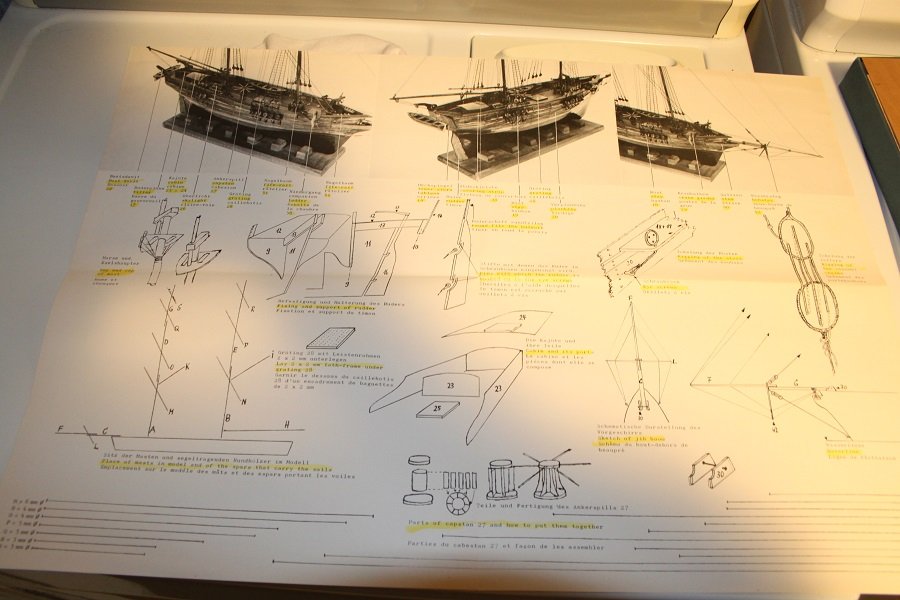
Well hello everyone...it's been a few months since I posted anything here and felt it was high time I got back to it... What prompted this build log was a PM from Popeye, seems he stumbled across a kit that he recalled seeing in my signature, that of the Agilis by Stenographer. This is an older kit...my best guess is late 60's early 70's ( if anyone can cast some light on this please do, I'm sure Denis will appropriate it as much as I would). The instructions are very rudimentary at best, one reason it was still in my stash, that and a reluctance/revulsion for the deplorable subject matter. It seems to be a fictitious vessel. None of my research has yielded anything about this ship. All in all this was probably a quality kit back in the day, no laser cut pats or the like but there is a sheet of stamped pieces but all the bulkheads will require cutting. I know Popeye has already experienced an issue with wood delamination with his kit, I'm keeping my fingers crossed. I plan to use as much of the supplied kit materials as I can....I know Denis has said he may scratch build much for his, so If you have an interest in seeing two different approaches to the same subject I invite you to pull up a chair to this pair of build logs. Below is the link to Popeye log Pics of the kit inventory will follow.


- 211 replies
-
- 6
-
-
- agilis
- steingraeber
- (and 1 more)
-
Thanks gents, she may get cased but not till I get back home, I’ve no glass here to work with. Thanks again
