


jct
-
Posts
1,519 -
Joined
-
Last visited
Content Type
Profiles
Forums
Gallery
Events
Everything posted by jct
-
Hey Sam...welcome glad to have you along for the ride...blame Denis on this one, he started it
- 211 replies
-
- 1
-

-
- agilis
- steingraeber
- (and 1 more)
-
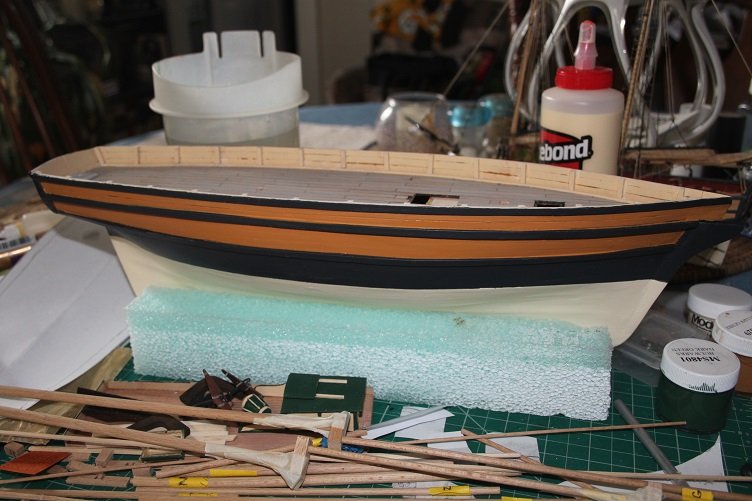
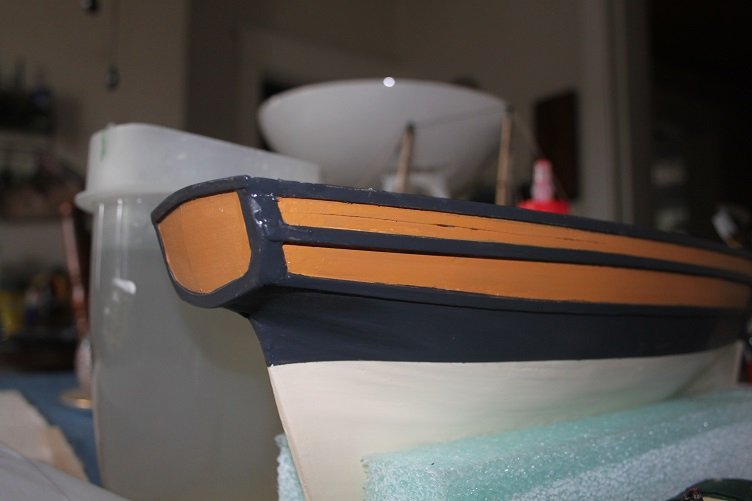
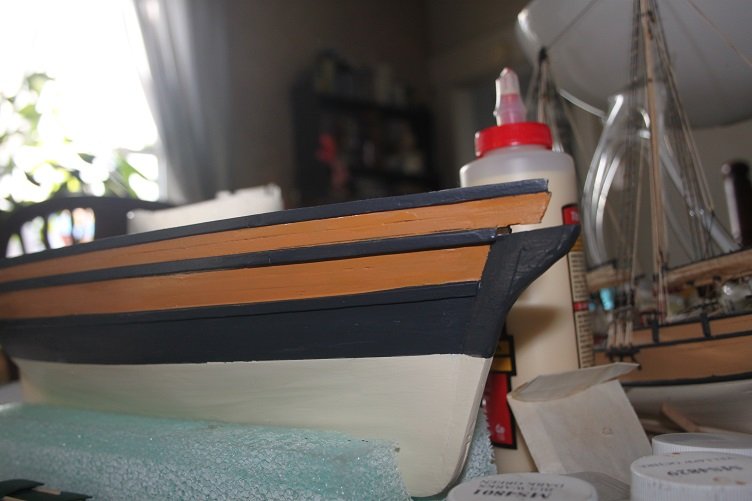
Hello all, thanks for taking the time to hit the like button...got the rail cap made, mounted and painted out, the paper pattern was layed out on some thicker basswood stock, took 9 pieces scarfed together to make the whole cap each piece was cut to fit against both its neighbors to get the joints nice and tight and then painted out... considering repainted the cap in the dark green...think it may tie the main hul and the deck furniture together a little better?

- 211 replies
-
- 7
-
-
- agilis
- steingraeber
- (and 1 more)
-
That definitely made my life easier
-
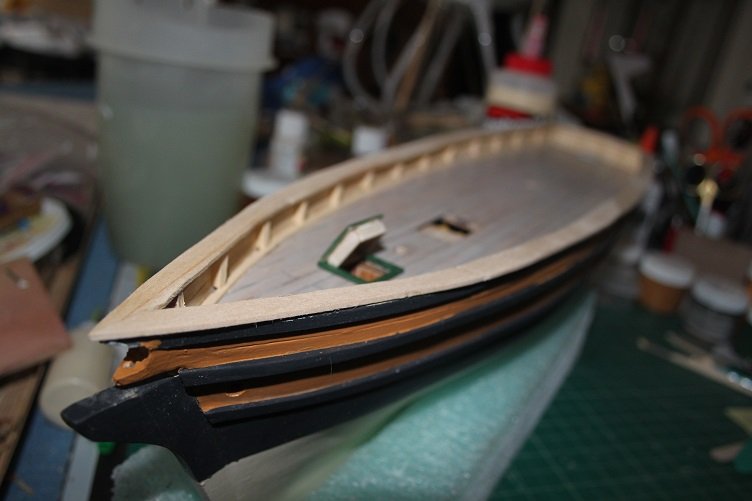
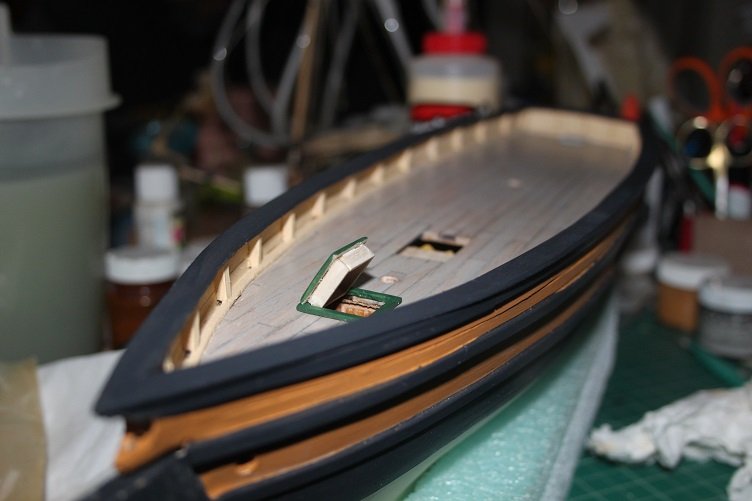
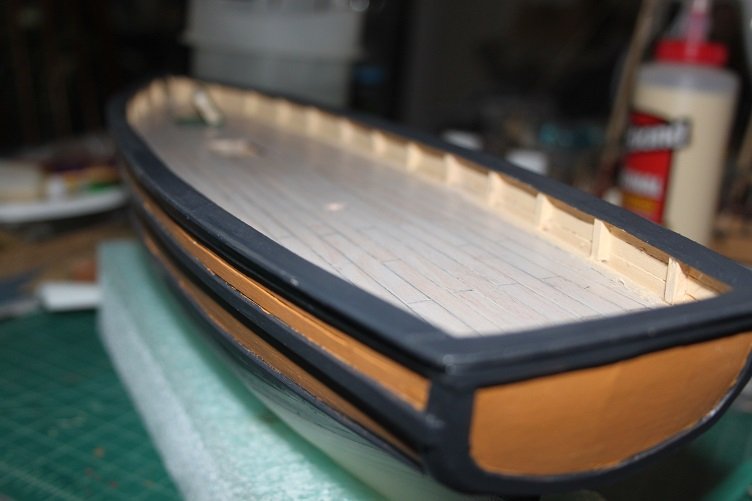
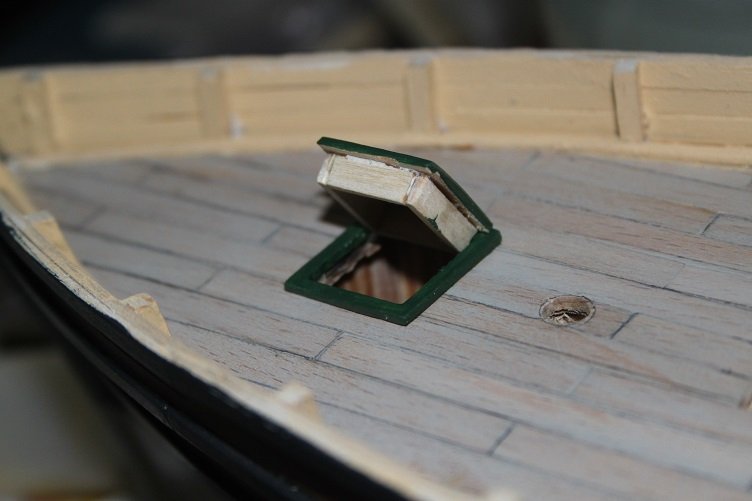
Thanks to all for the likes and comments...I finished the initial companionway and promptly scrapped it when I set it on the deck, it just looked stupid So I set about making a new flush type hatch...stripped off the house and doors to use the original coaming and made hatch side to fit within it then made the hatch cover...it has a slight curve sanded into it, and glued it to the sides and separated the pieces for paint and mounted it on the foredeck made a template for the railings and transferred them to some strip stock, still a bit under the weather so the ride to the bandsaw will wait till I'm up to speed Well that's all for today, thanks again
- 211 replies
-
- 4
-
-
- agilis
- steingraeber
- (and 1 more)
-
Now the real fun begins, are you gonna focus on one or jump back and forth?
-
love your weathering techniques
-
So a brig then, the pair will make an interesting display
- 211 replies
-
- 1
-
-
- agilis
- steingraeber
- (and 1 more)
-
Sure thing, are you going to both yours as schooners?
- 211 replies
-
- 1
-
-
- agilis
- steingraeber
- (and 1 more)
-
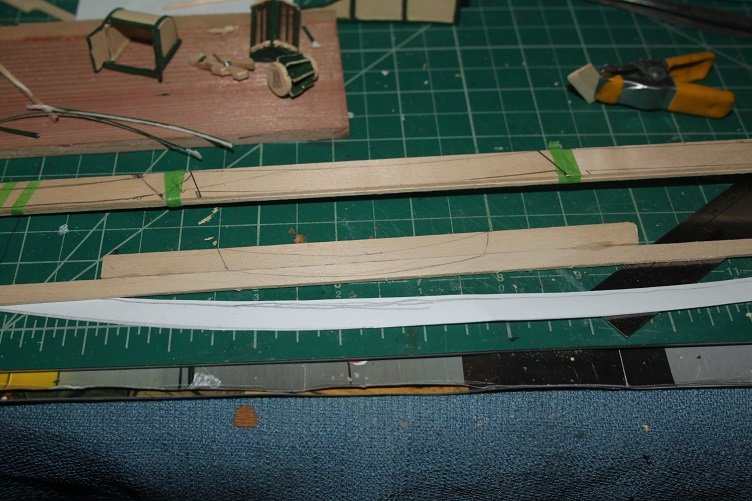
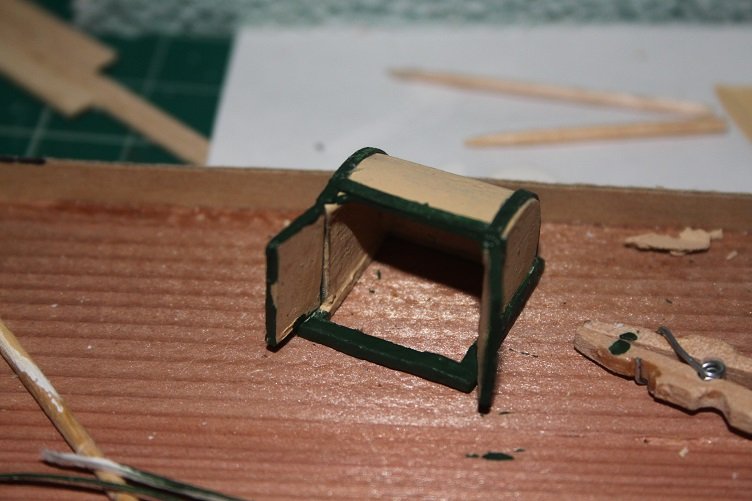
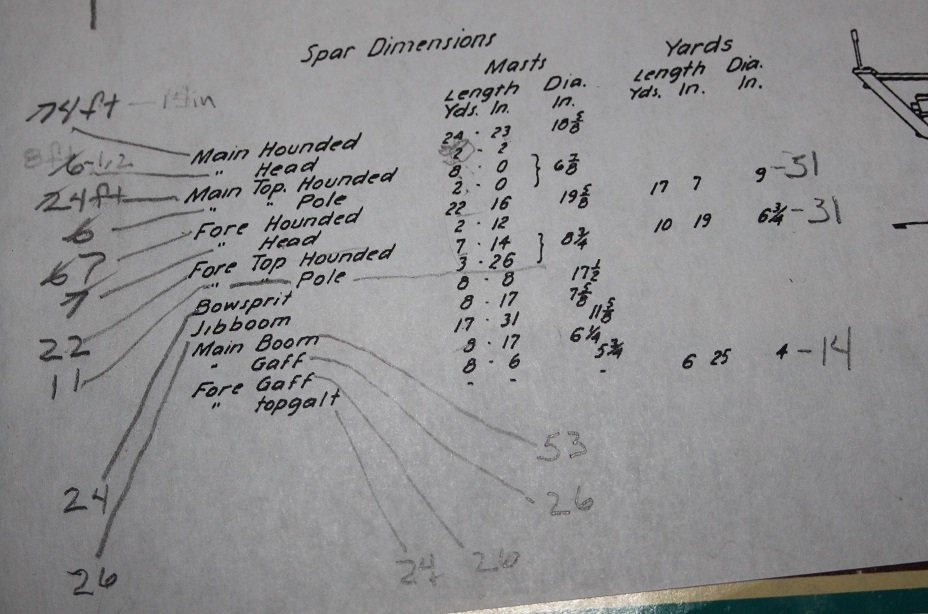
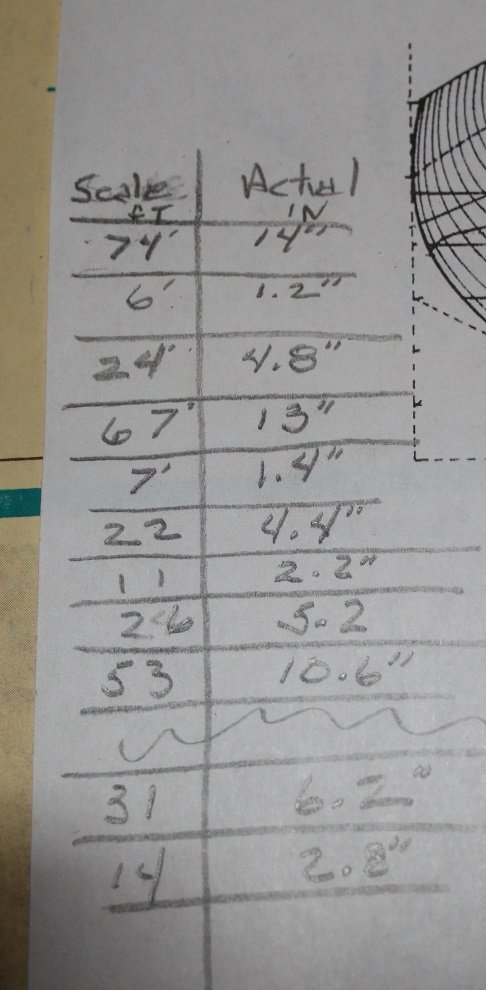
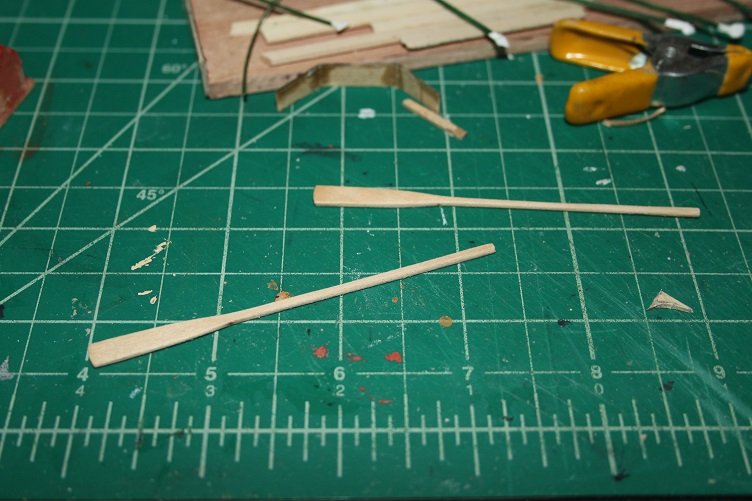
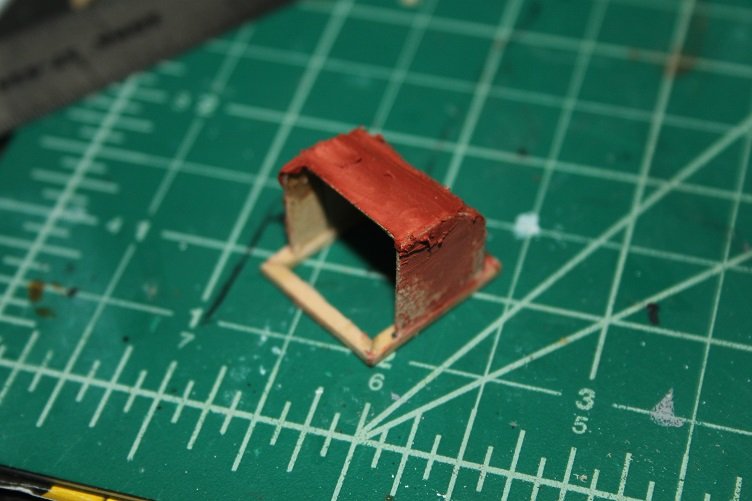
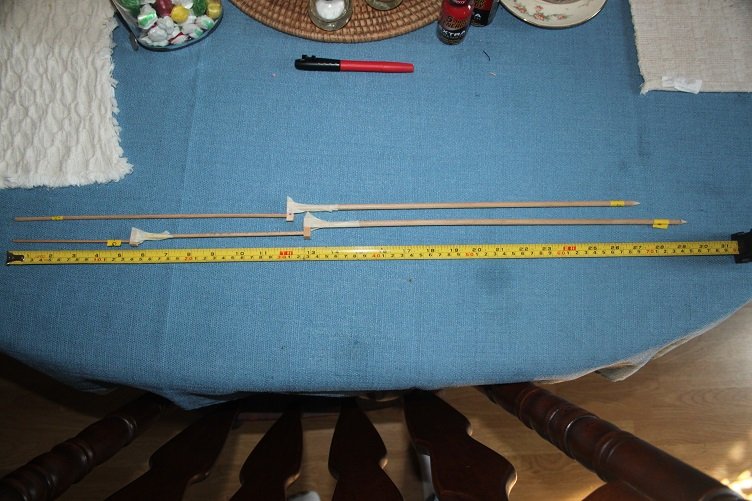
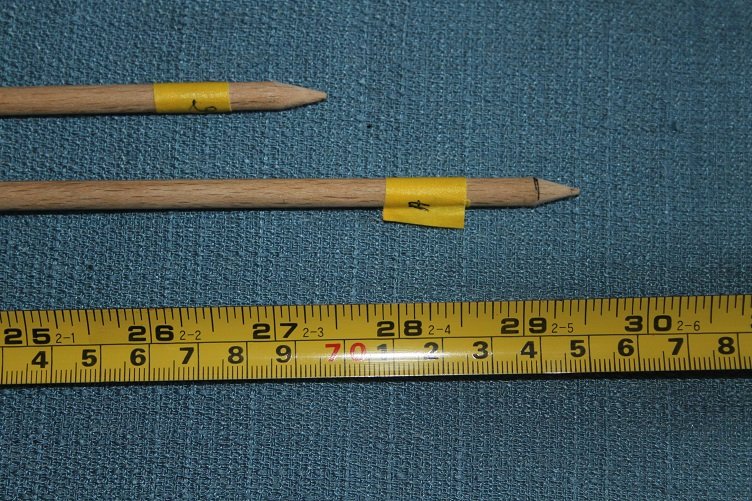
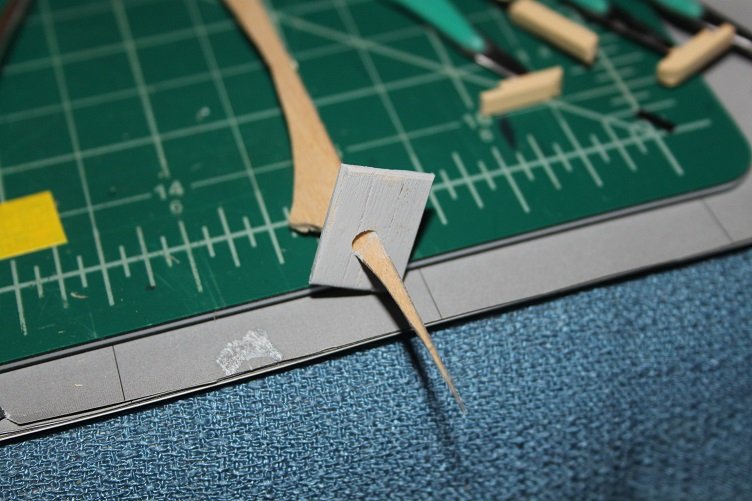
Todays update...first here are the mast and spar numbers I promised, the original numbers came from a plate in The Search for Speed Under Sail of a ship named FLY, she was captured by the British in 1812 for blockade running and renamed HM Schooner Sea Lark, I chose it because the overall deck layout looked very similar to Jumbo, and she was a schooner rig. First thing I did was blow up the page so I could read it, then converted yards and inches to feet once I had those numbers it was a matter of converting them to scale lengths and actual lengths The above chart shows the results...seems she's still gonna have tall rigging, not as high as box stock but still up there...main mast total will be close to 18 inches piddled around with some more small stuff...completed the rudder and oars for the ships boat, just some carving and sanding from plank stock and started work on the forward companionway...sorry I didn't get pics from the very start, you'll see her below in putty and primer, I built it up from card stock with a wood base for coaming, once the general shape was achieved a coat of glazing putty was applied to smooth it all out. It will eventually be painted and trimmed out to match the deck house Well thats all for today, thanks for the likes and comments
- 211 replies
-
- 6
-
-
- agilis
- steingraeber
- (and 1 more)
-
Hey, Denis thanks much, I assembled them to the kit dimensions, way out of scale. I have worked out what I plan to use as finished mast height and yard and boom length. I’ll post the numbers later, as I’m on my phone right now. you've got a little more hull length then me, probably due to the additional rib you added ill not lose more then an inch into the hull as my blocks are mounted flush under the deck, gonna have to trim my sail sticks big time🤪
- 211 replies
-
- 2
-
-
- agilis
- steingraeber
- (and 1 more)
-
Thanks for all the likes and comments...I finally got around to rigging the mast stock together just to check it out and it is way too tall you can see here the main would be about 28 inches tall, thats 142 foot in scale, if assembled per the kit dimensions and instructions, not gonna do that, like Denis I'm leaning toward a topsail schooner, plenty of dowel stock in the kit to do that. I'll have to do some research to get some mast dimensions that are more realistic then the instructions provide, plenty of info in Historic Model Ships, plus Search for Speed Under Sail has a ton of plans with dimensions one could clone. Jumbo/Agilis has scaled out to 86.4 ft long and 24 ft at the beam. I'll be sure to post my numbers once I have them. I also found sometime finish the paint on the main hull Well that's all for now, again thanks for the likes and comments, your attention is much appreciated
- 211 replies
-
- 5
-
-
- agilis
- steingraeber
- (and 1 more)
-
Ditto...I want to get to the point where I paint because I want to not to cover filler!!
-
I don't think it's you...I had the same trouble with the stern resorted to various size and shaped stealers and putty You can call one of um Jumbo II if you like? Seriously, nice work
-
That's cool, that was pretty easy to work with, if you plan to use it
- 211 replies
-
- 2
-
-
- agilis
- steingraeber
- (and 1 more)
-
Huh, ya mine was the same card stock the skylight was stamped from...the metal might be workable, what did you get for the skylight?
- 211 replies
-
- 1
-
-
- agilis
- steingraeber
- (and 1 more)
-
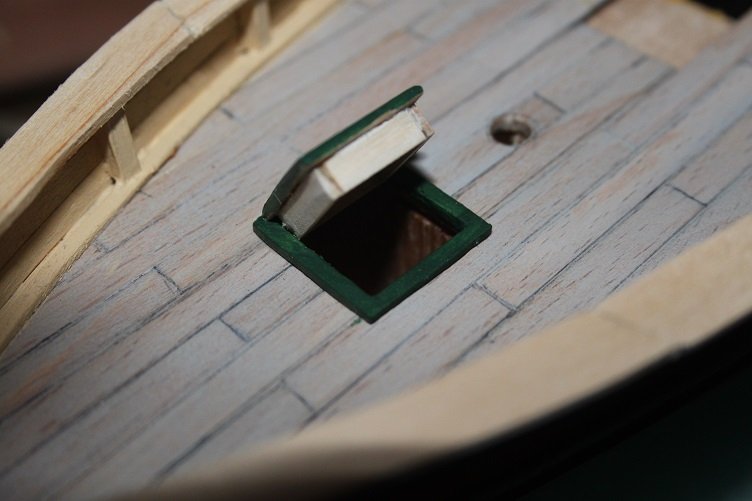
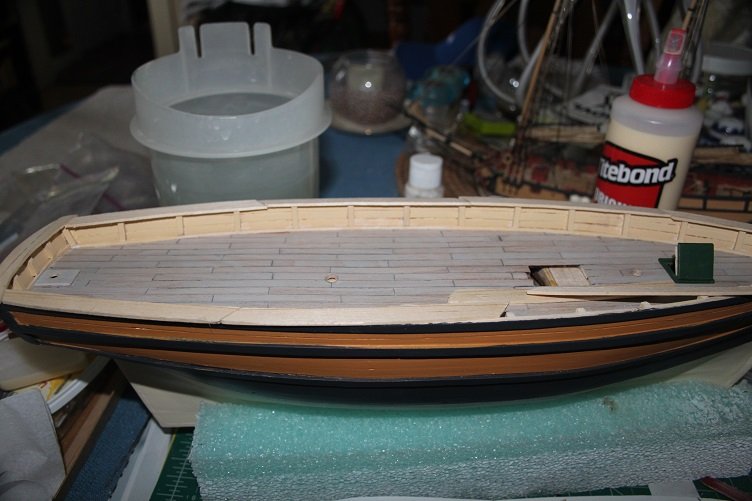
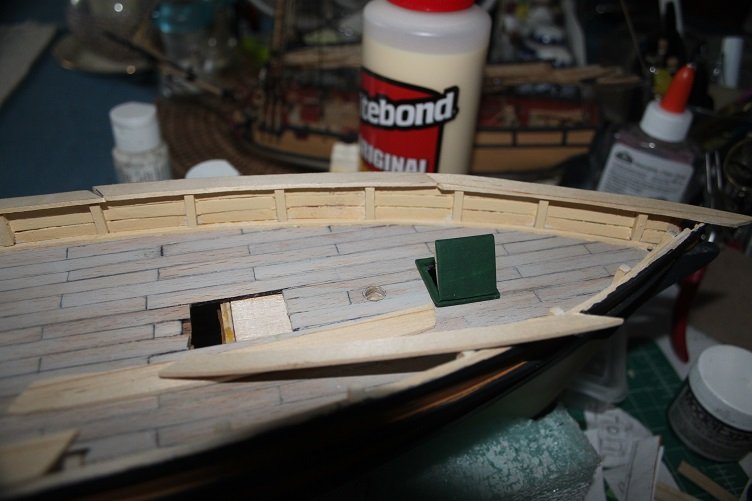
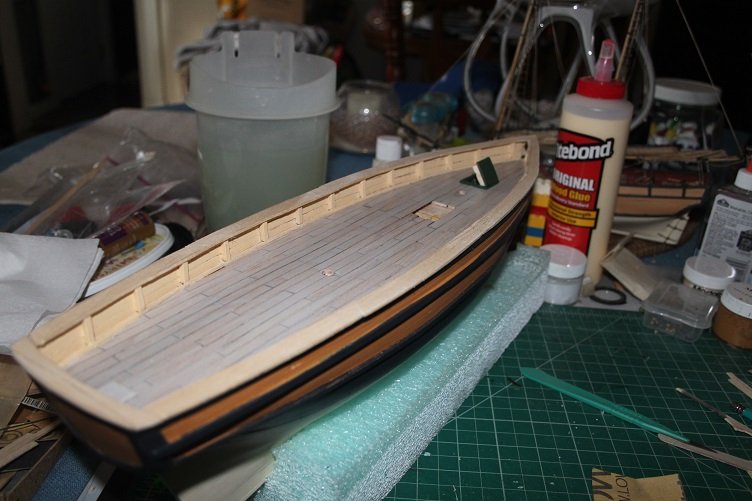
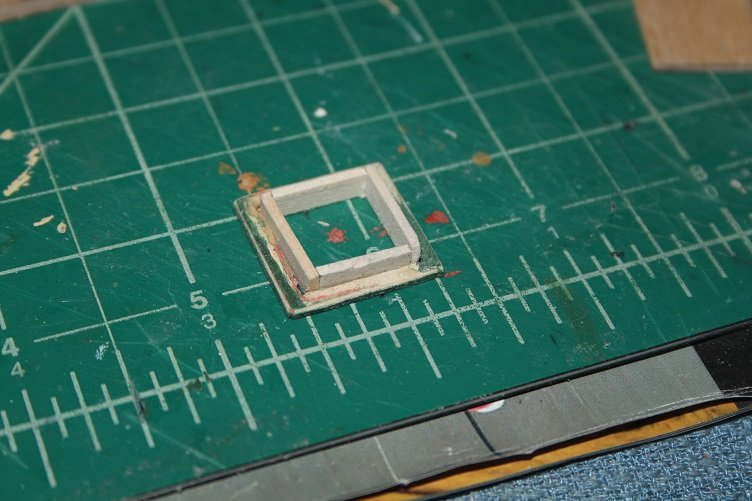
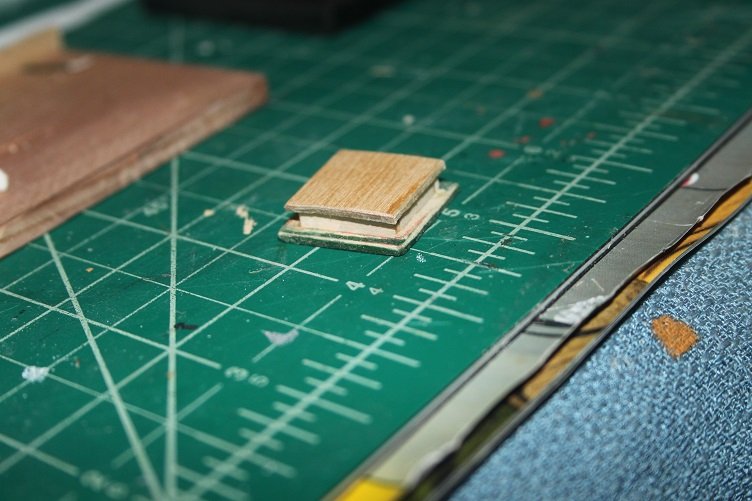
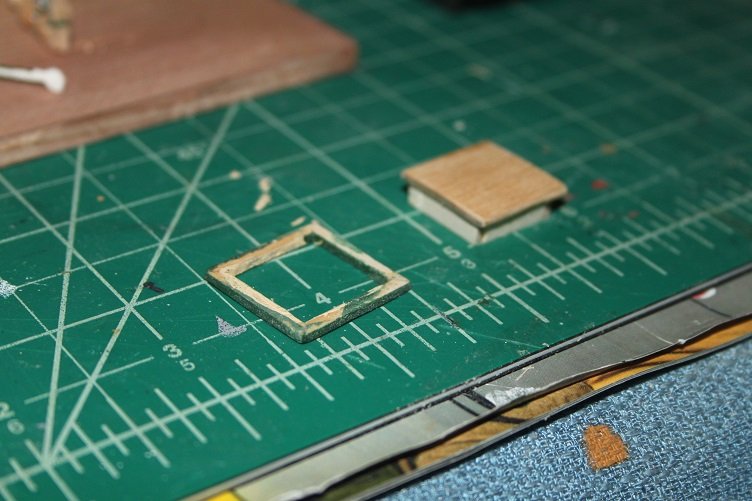
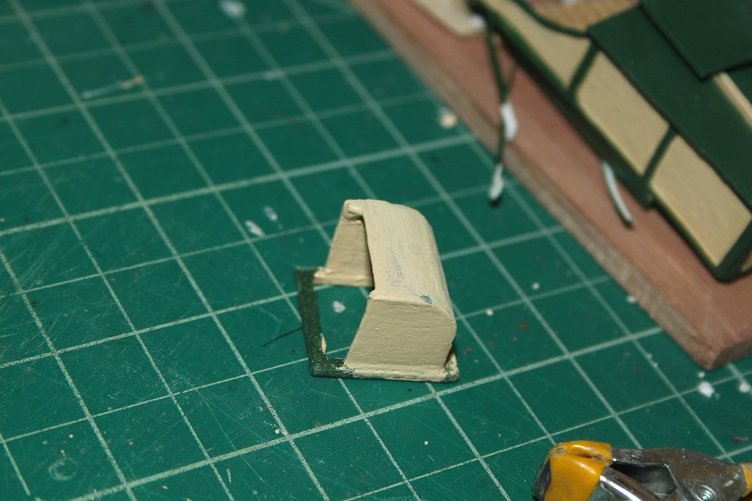
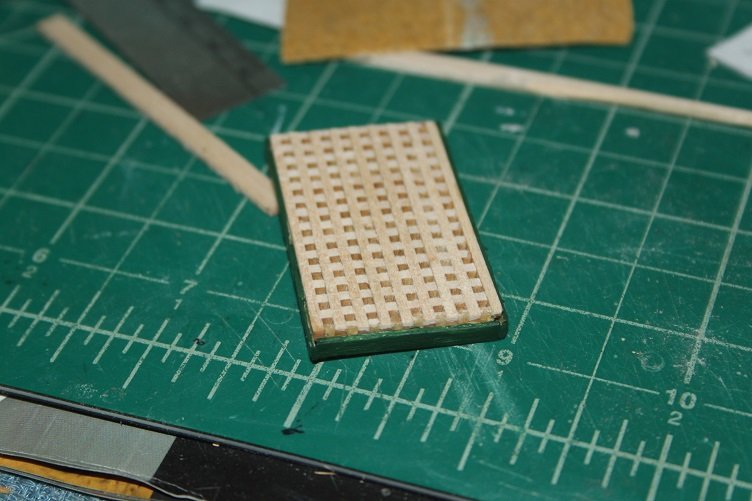
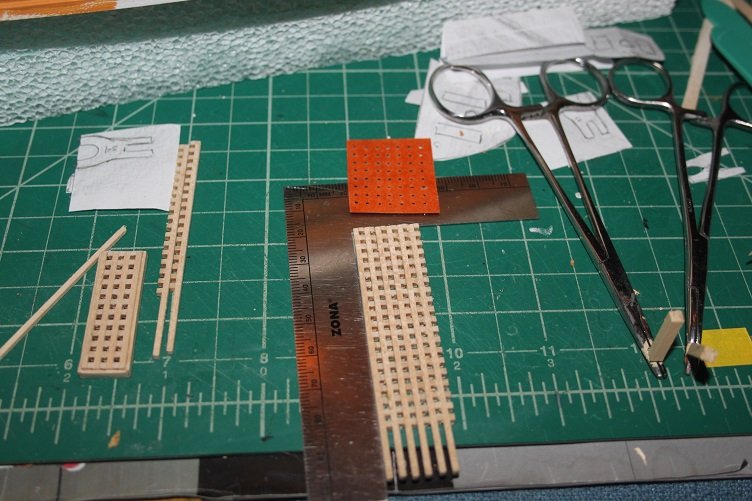
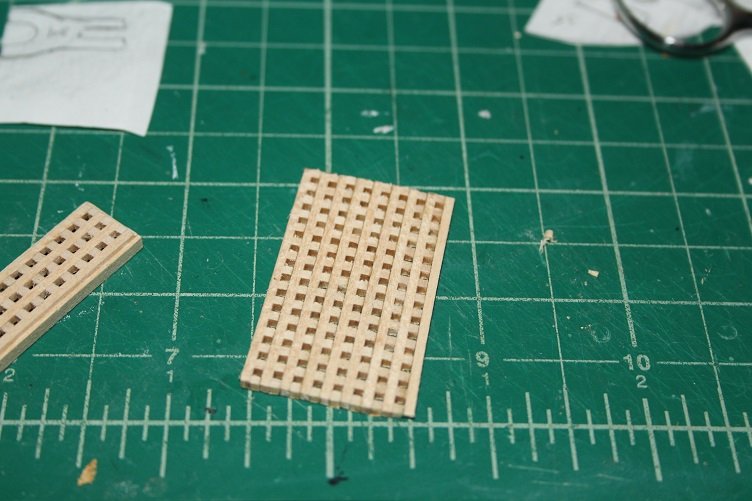
Na not really... I'll be slowing down for sure...no pics of the hull paint as yet, but I've been working on more deck furniture In my opinion, what the kit provide for deck grating needs some improvement just an orange card with hole pocked in it...so i built up some grates using the same technique I used for my Hannah build, for those interested in the build details the link to that build is in my signature. u can see the kit supplied grate above the wood one here it is complete and with the comings applied and painted I made it a little larger then the kit piece, also cobbled together a deck plate to cover the rudder post relocation hole and that's all for today, still havent got to the jigging up the masts to see what I'm gonna do there...maybe tomorrow, more likely next week, under the weather. Thanks for all the likes and comments
- 211 replies
-
- 3
-
-
- agilis
- steingraeber
- (and 1 more)
-
I was a bit apprehensive when I decided to do them on the Hannah but was surprised at how easy they turned out to be in the end, I'm sure they are both gonna look great
-
Leaning that way but not sure yet...gonna rig them up temporarily tomorrow and see what they look like and go from there, she may end up a schooner...thanks much
- 211 replies
-
- 1
-
-
- agilis
- steingraeber
- (and 1 more)
-
could be interesting...furled or full or a combination, lots of options