HOLIDAY DONATION DRIVE - SUPPORT MSW - DO YOUR PART TO KEEP THIS GREAT FORUM GOING! (Only 13 donations so far - C'mon guys!)
×


jct
-
Posts
1,519 -
Joined
-
Last visited
Content Type
Profiles
Forums
Gallery
Events
Everything posted by jct
-
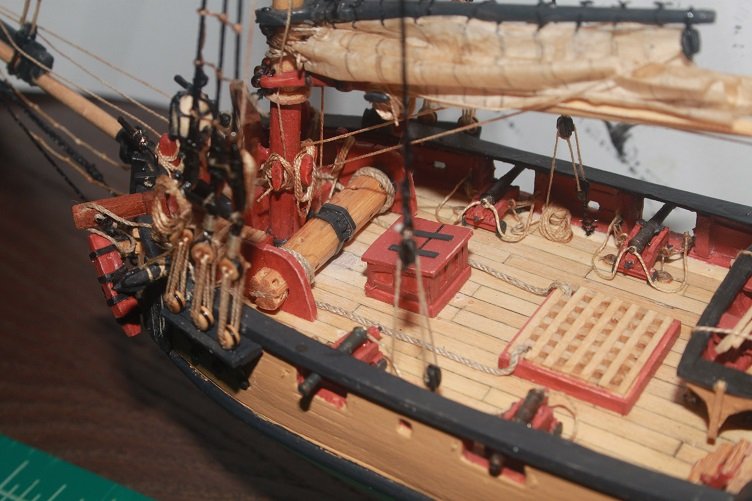
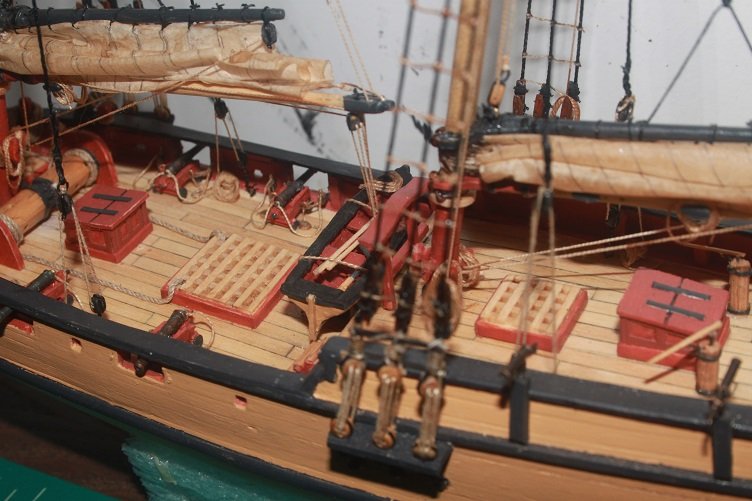
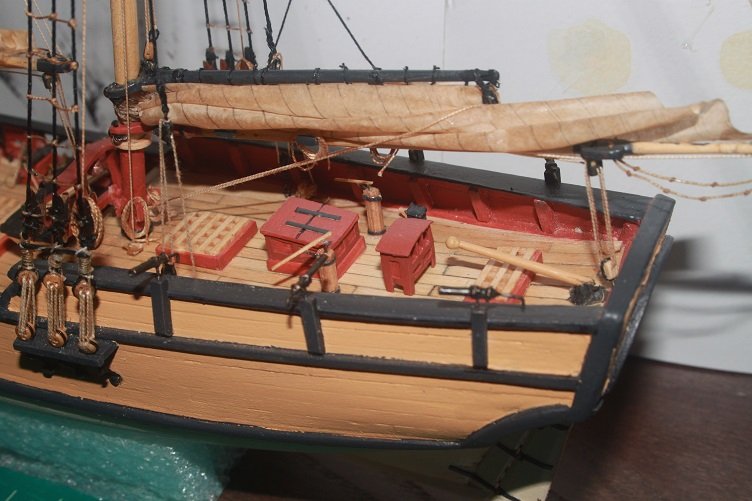
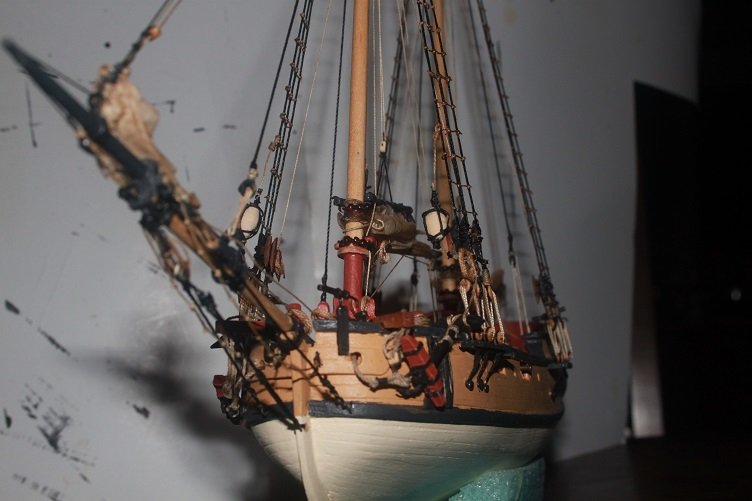
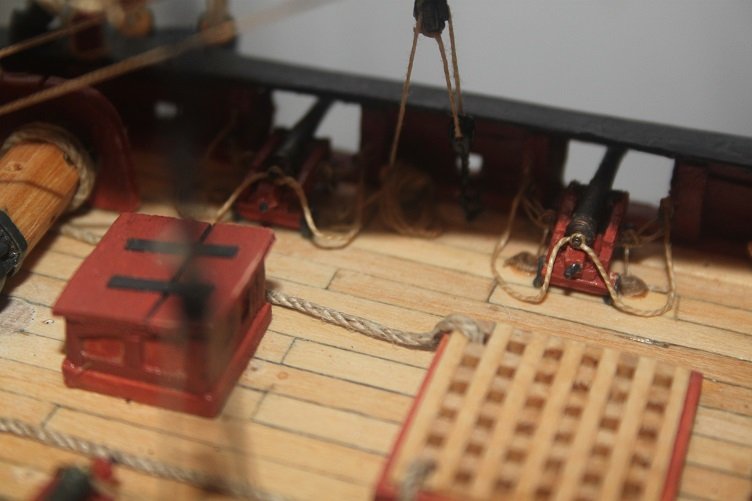
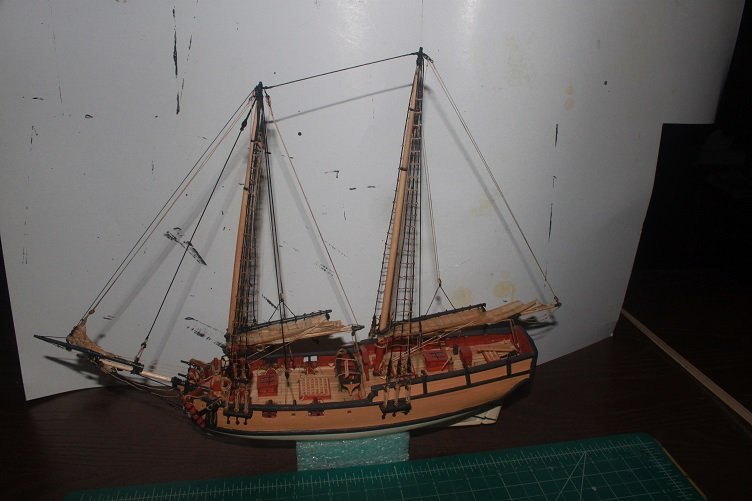
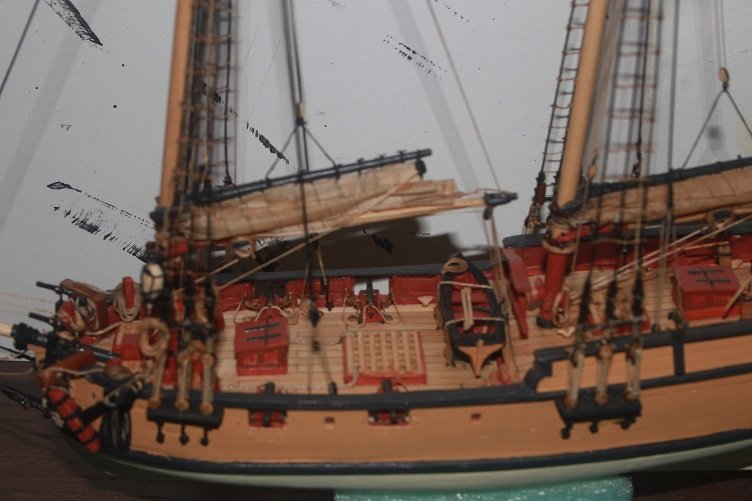
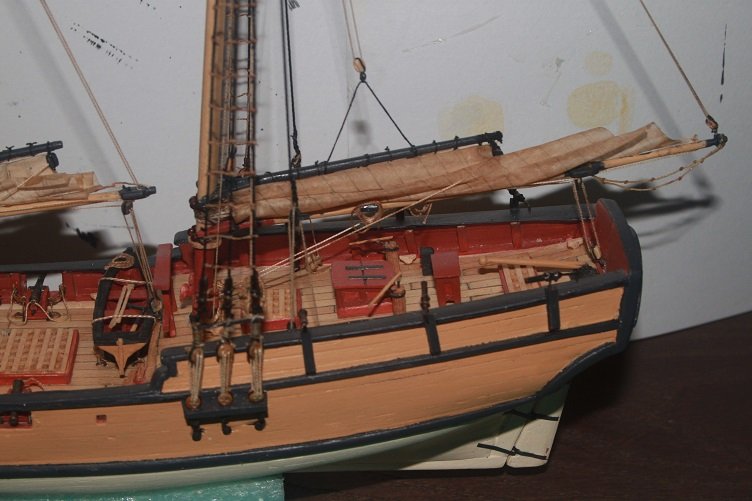
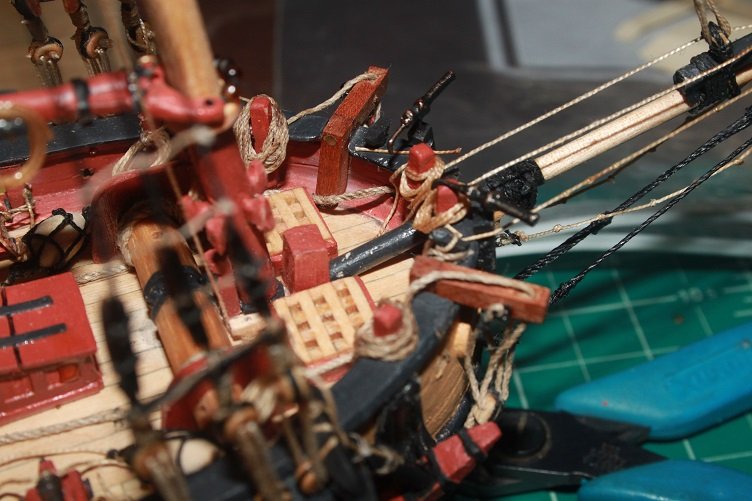
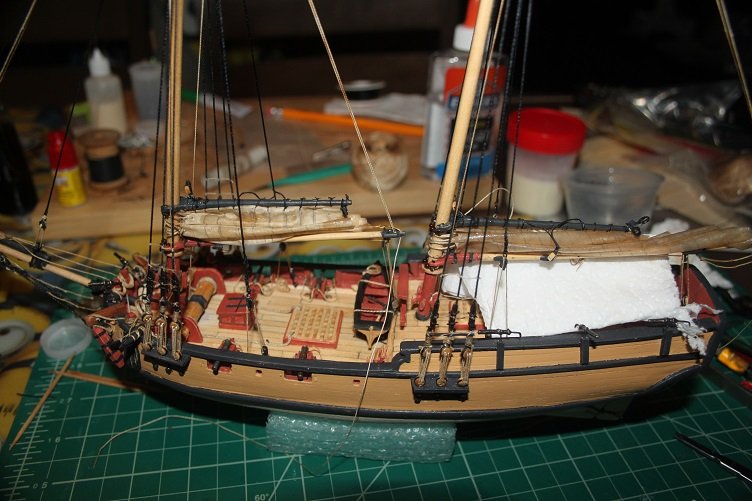
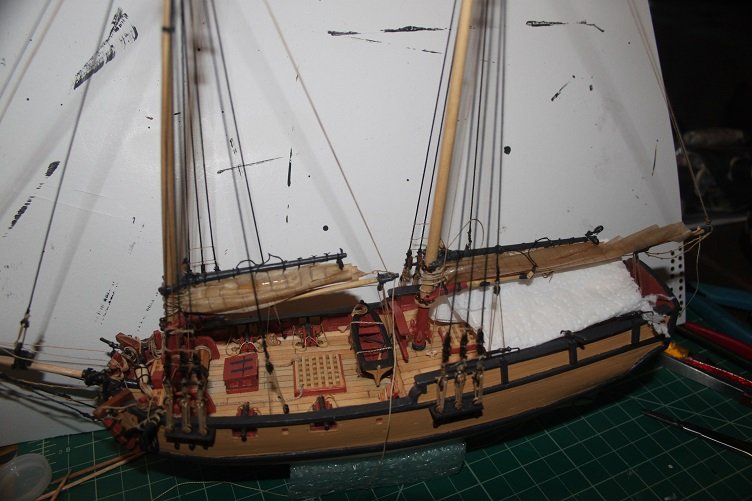
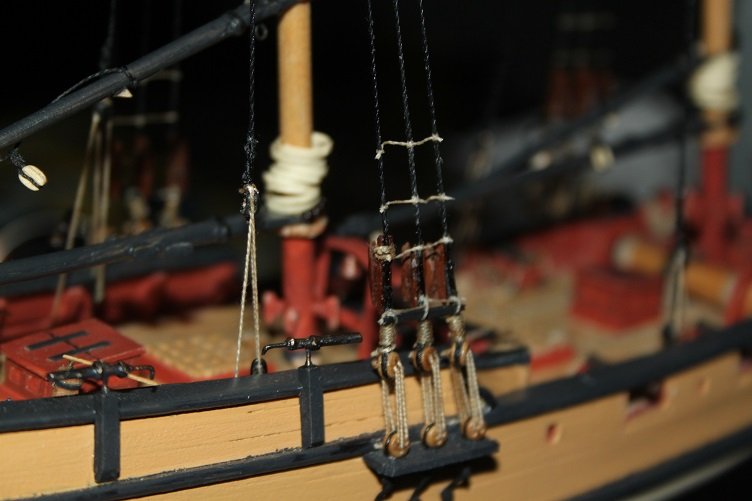
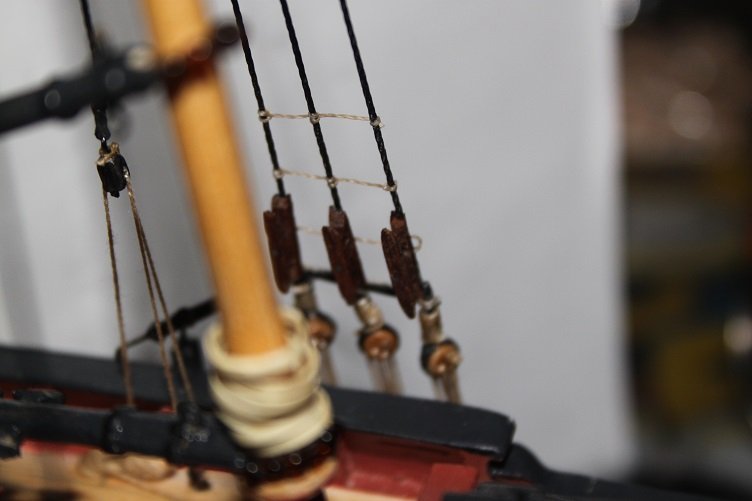
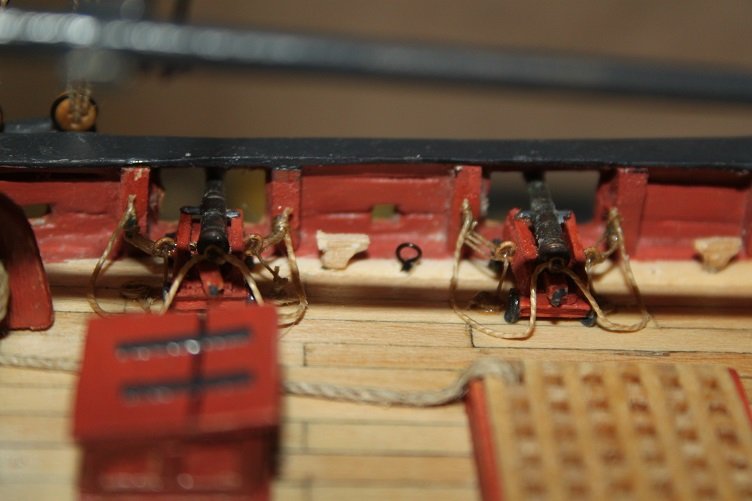
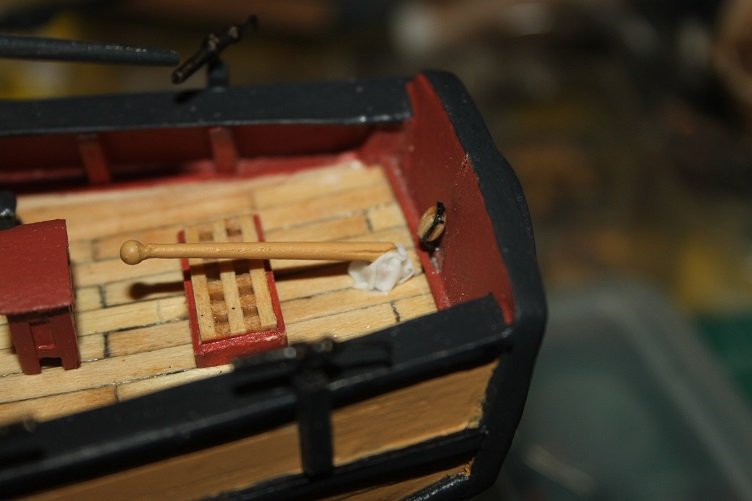
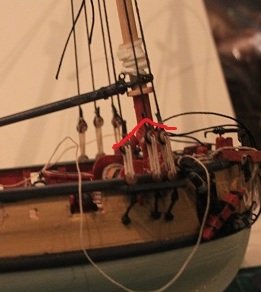
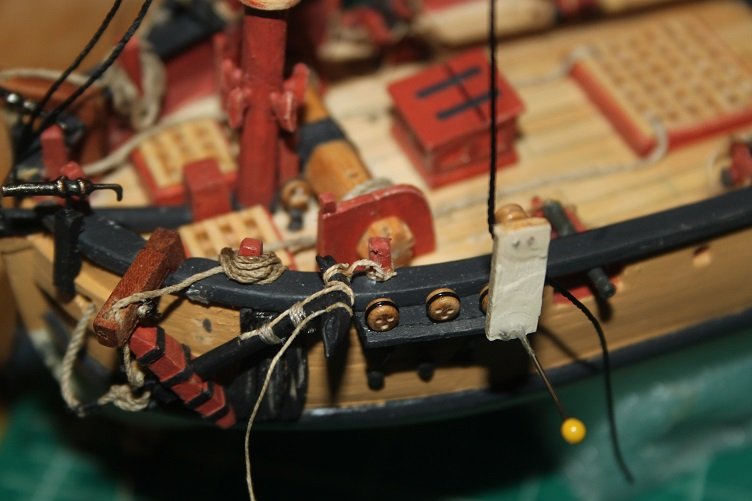
Well the day has arrived...Hannah is complete, my interpretation of her anyway. All the ratlines were finished, I've always had a lot of trouble when the lines get close together near the tops, so a jig was made to keep them separated to better facilitate knot tying Upper mast detail Bow details midships aft shot of stern bows swivel closeup pump closeup 4 pounders fore rigging and just some overall details Thanks to all who have followed along, your support, comments and suggestions are appreciated...THX

-
Hey Denis, thanks much... ya she is getting there, a few more lines and tidying up and she’ll be there, been looking in one your Arizona build, she is looking good, will be a fitting tribute to a great ship
-
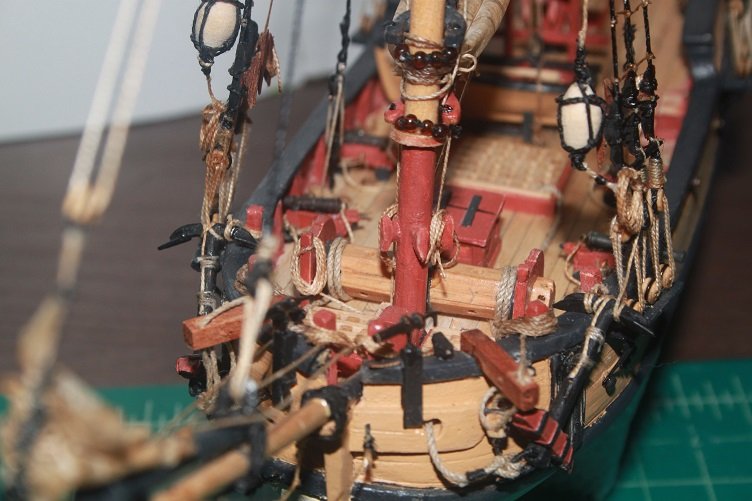
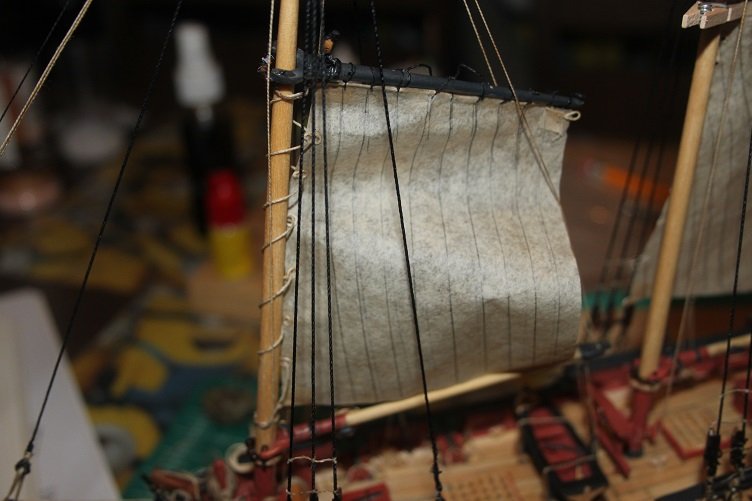
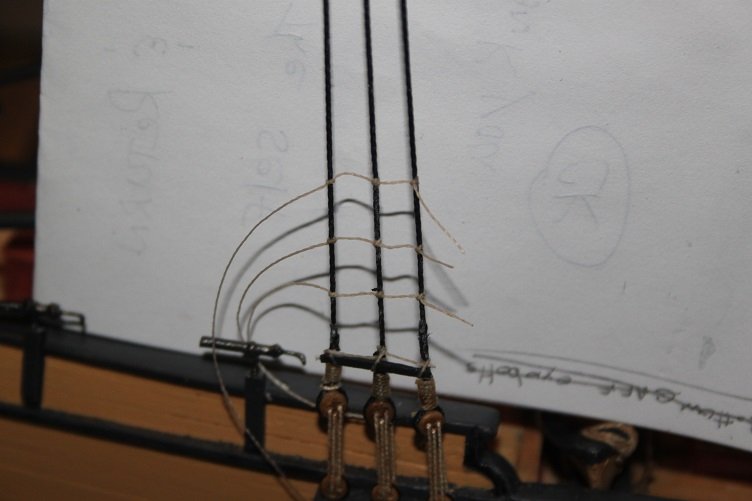
Thx for the likes... this week work focused on the running rigging for the sails, the main an fore sheets were rigged and belayed to cleats previously attached to their respective booms At this point I mixed a solution of pva and coffee both to dilute and darken it, I want the sails darker then they are currently. Each sail was lashed to its mast and saturated till they were malleable at that point they were lowered a little at a time as I worked the folds into the furled mass...this proved to be somewhat fiddly and a bit of a pita, I would refer you to Newton's third law!!! Once everything was in a state I thought looked natural all was left to dry. The remainder of the rigging will be added once all is set. Below are a couple pics of the forward belay that I promised in my last update and that's it for this week, thanks for looking in
-
Thank you much for your kind words sir Thanks you Wallace...looking forward to your build, and my tanks to those who hit the like button
-
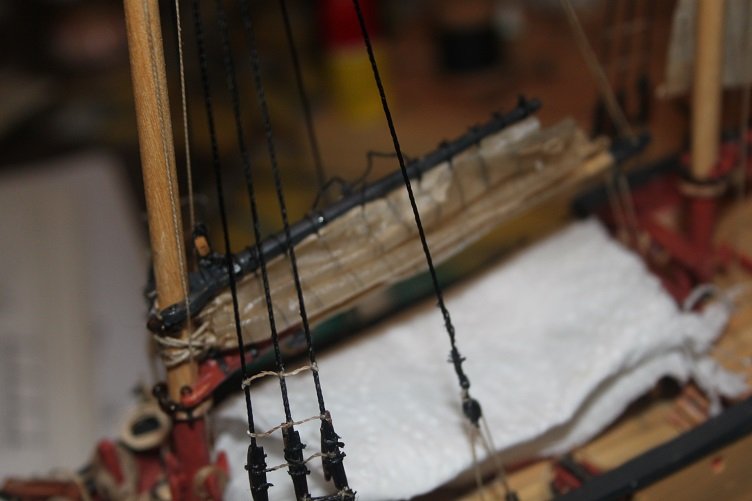
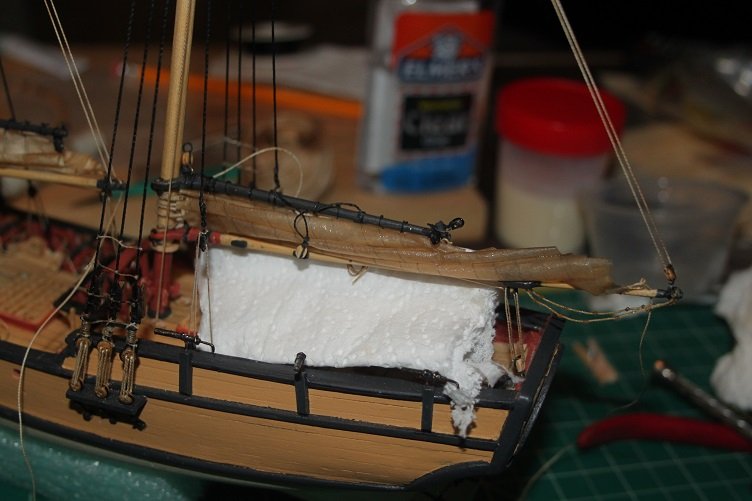
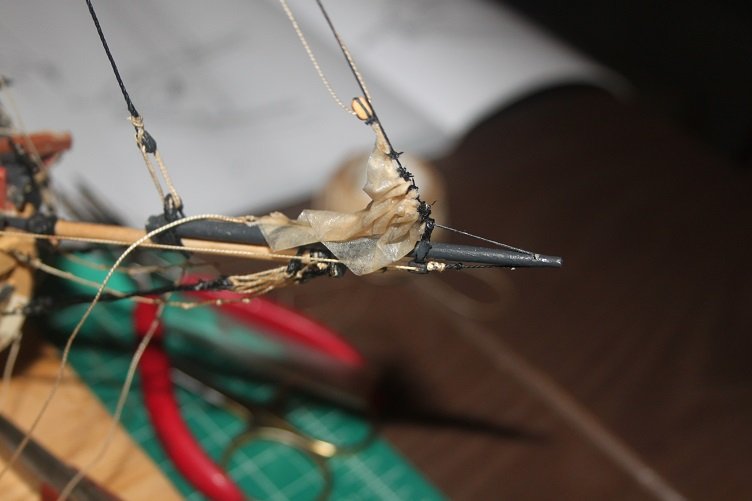
I haven't posted in a while, been being lazy and enjoying the late summer weather...work continued on the sail sections, each had robands attached to the top and the holes for the mast lashing reinforced with thread loops completed sails after the sails were completed I decided to rework the booms. I had originally painted them black like the gaffs, but learned during researching another topic that only the tops were blacked out during this time period, so they were stripped off and refinished The main and fore sails were lashed to their respective gaffs and set aside while I turned my attention to the jib it was lashed directly to the forestay the running rigging for the sail, halyard and sheets, were added with a lot of extra line left to reach their belaying locations. The sail material was then saturated with a diluted pva and worked down the stay until I got a look I was happy with. the sail will lose most of its translucence once the pva dries then I can trim the roband ends, and that's all for this week, I'll get more detailed shots of the running rigging once all sets up and is terminated. Thanks for looking in and following along.
-
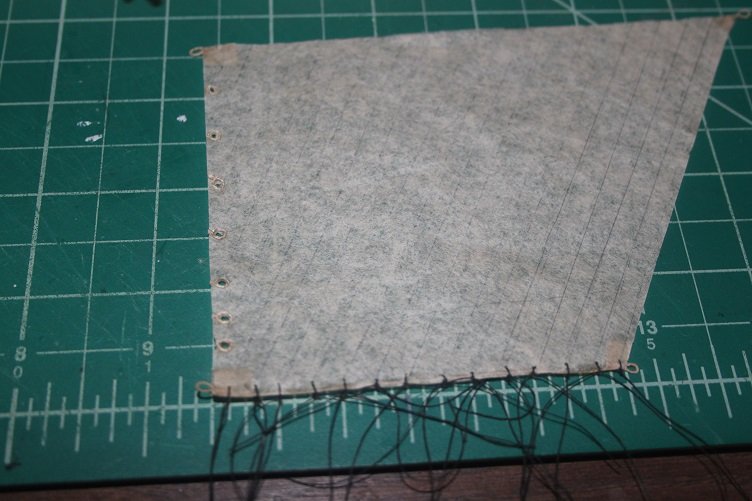
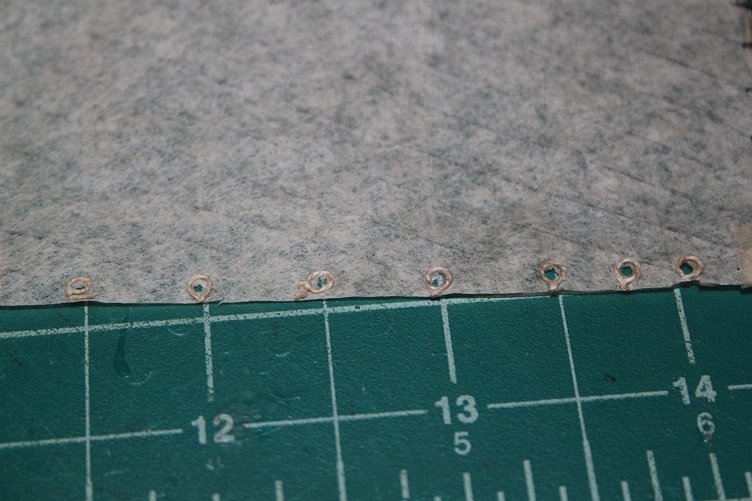
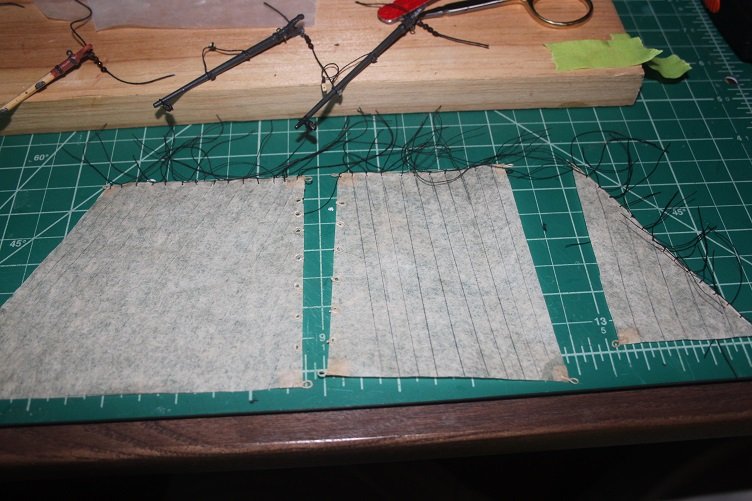
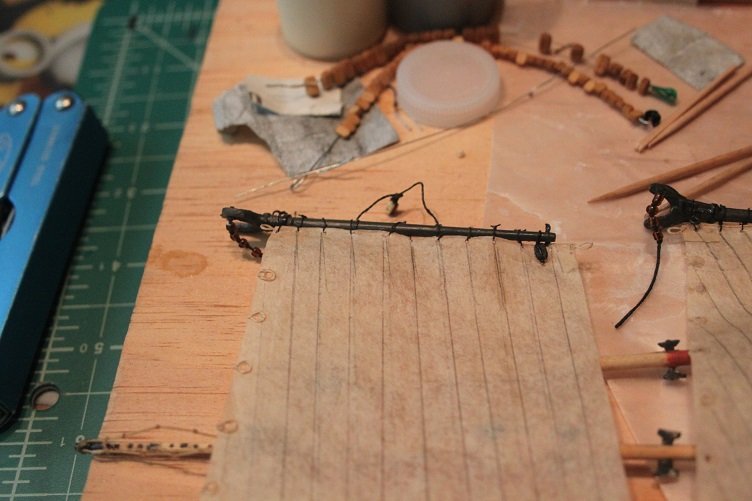
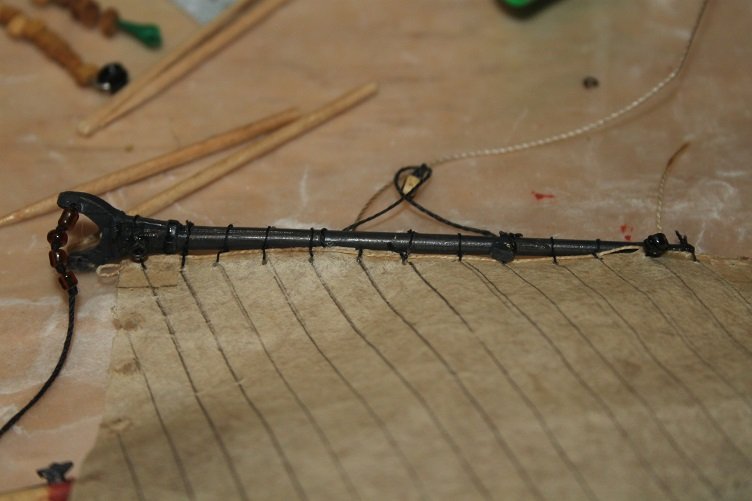
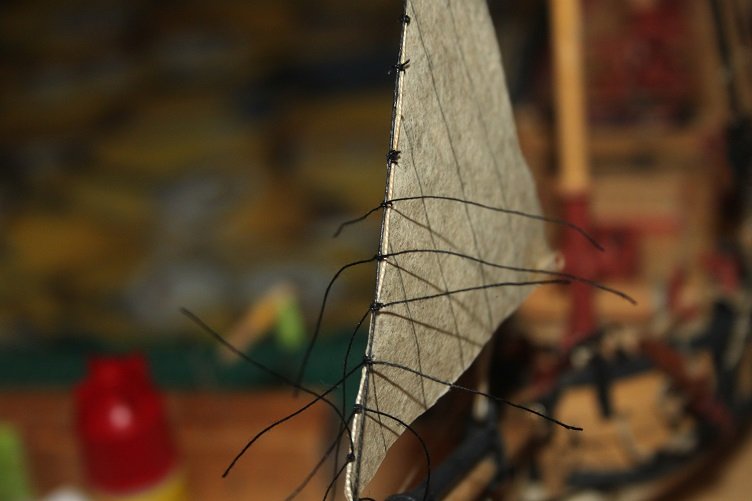
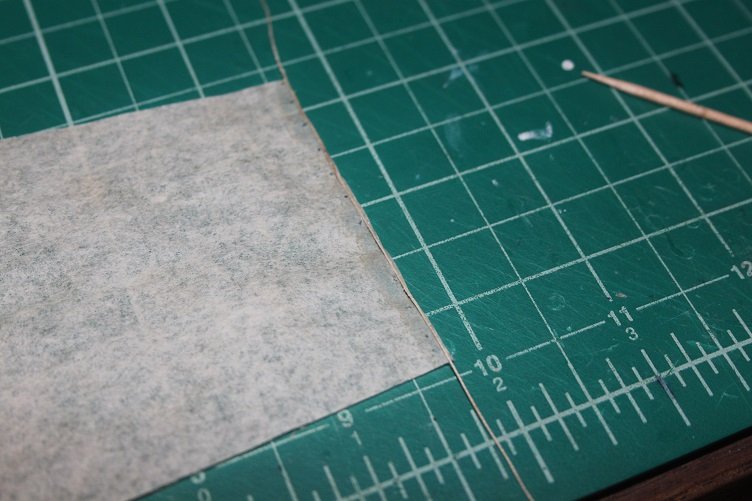
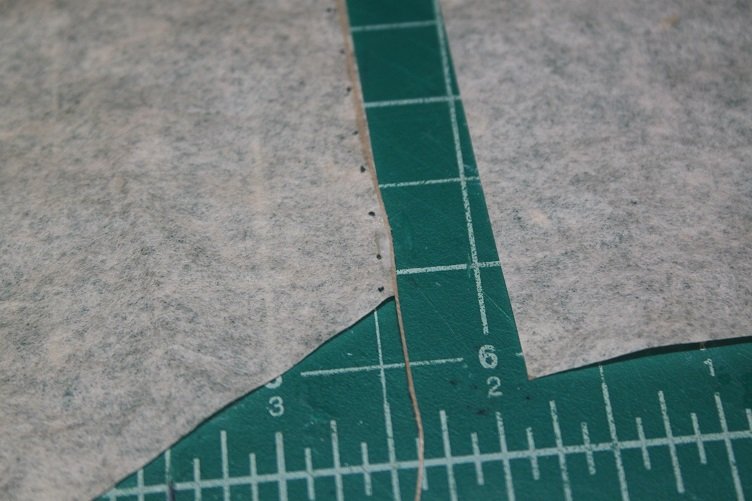
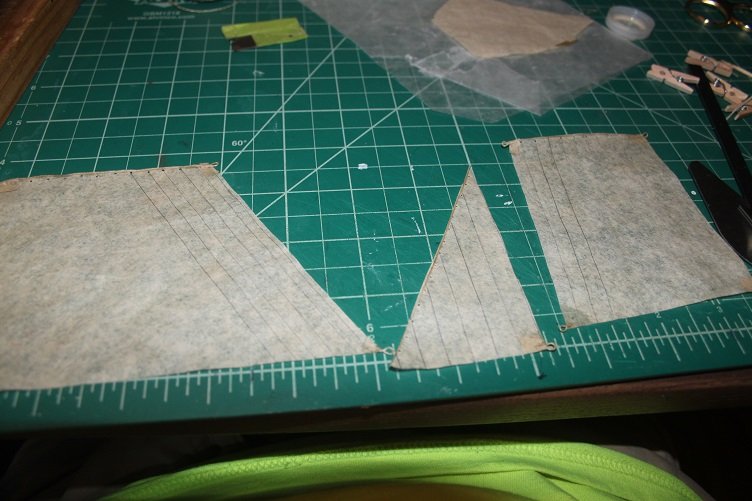
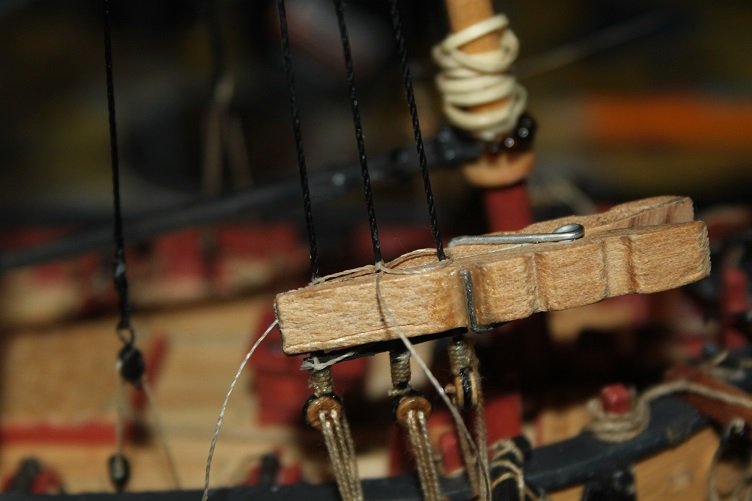
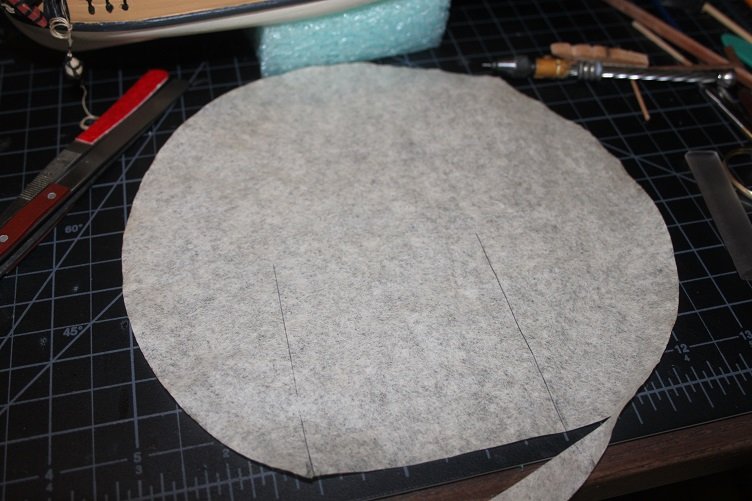
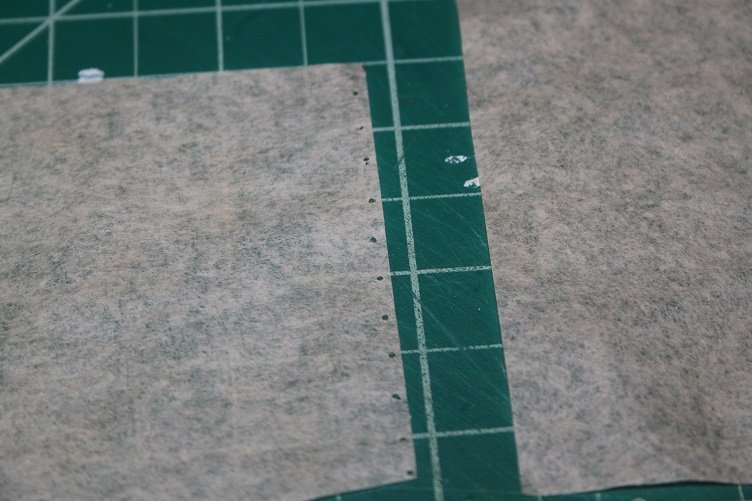
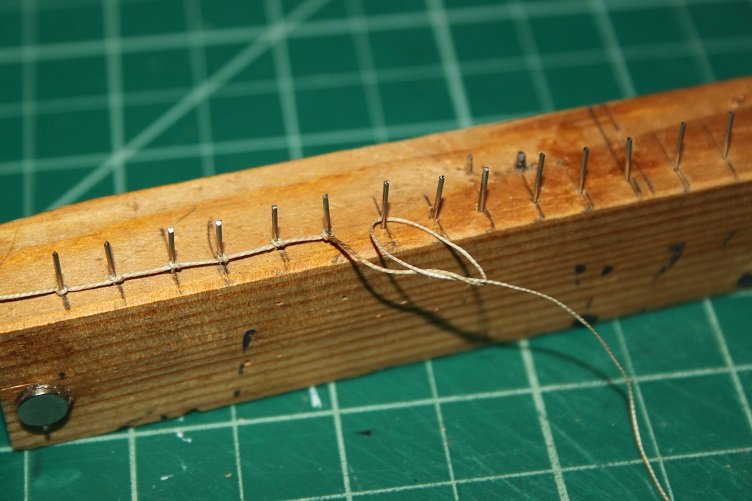
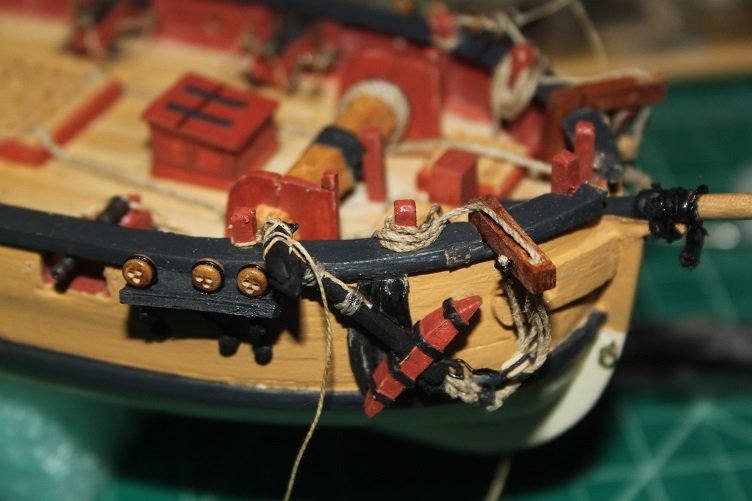
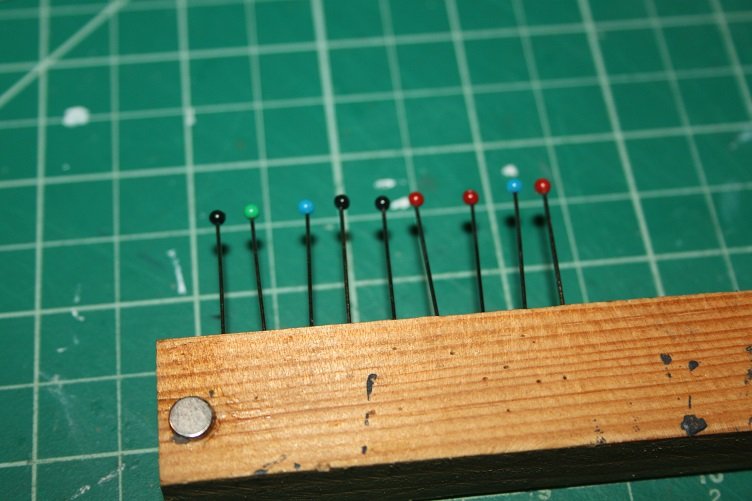
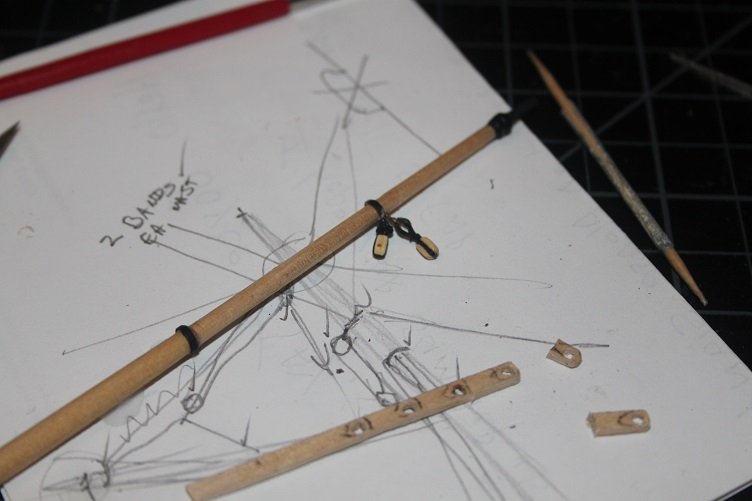
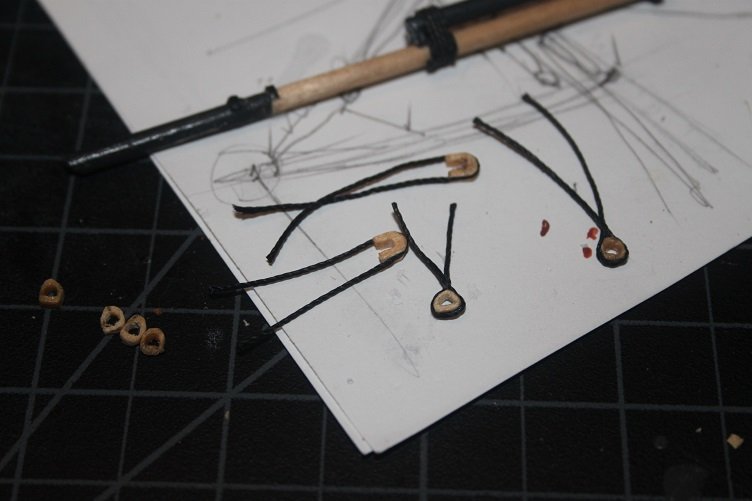
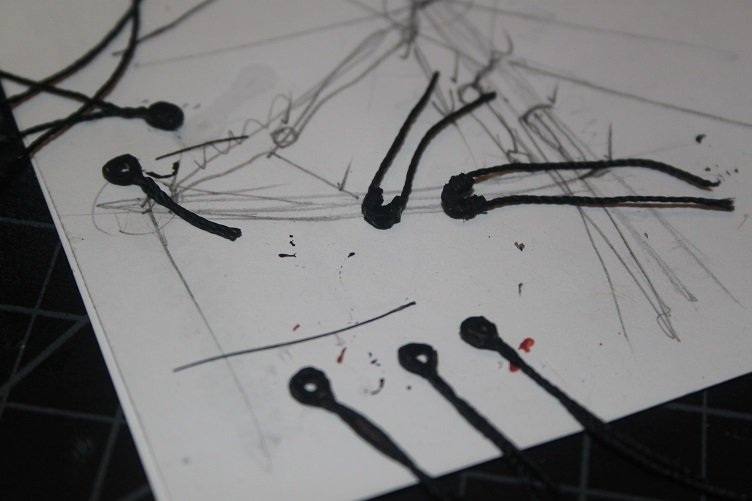
update for the week...thanks for the likes and comments... The Hannah did not carry belaying pins...all lines were belayed to varies cleats, some on deck some on the shrouds, to facilitate attachment of the shroud cleats I attached ratlines up an inch or so. I used a small modified cloths pin as a spacer once three courses were layed up on each set of shrouds the shroud cleats were attached using ca, once set the tops and bottoms were lashed to the shroud I've made the decision to include sails on my interpretation of the Hannah...but I'm going to do them furled, like on the cover of Hahn's book so with that in mind I set about to make sail segments...they wont be full sized as that would lead to too much bulk for the furl to look realistic. I wanted something that I could wet and shape once in place, but would be fairly easy to work with, as sewing is not my strong point I ruled cloth out right away...facial tissue tears to easily...plus I'm still roughing it in the rv...so while making a pot of java one a.m. it dawned on my that the correct medium was right at my finger tips... so I stained a couple of spare coffee filters with what else...coffee, to stain them a light beige shade, and then layed out and cut the sail sections...I'm only doing three, a main, fore and jib. Once the segments were cut holes were punched at the head of each to allow the attachment of the robands, as well a bolt rope was glued to the head to strengthen it, the fore and aft were left without rope to better allow them to fold over on themselves these were set aside to dry and earings and cringles were made for each sail corner which were trimmed and glued in place and again set aside to dry, reinforcement patches were made for each corner and glued on to cover the twisted rope end of each cringle here are the sail segments, you'll notice the sail seams have been penciled on...next the robands will be laced on and each sail made ready for attachment to their respective mast or stay, I plan to remove the mast bands I made and do a simple lash to the mast, I believe it will be more manageable Well that's it for this week, thanks for looking in...see you'll next week

-
Wow Phil...she has really come to life...nice job on the sails, how many finger stabs did you collect along the way
- 355 replies
-
- 4
-

-
- prince de neufchatel
- schooner
- (and 3 more)
-
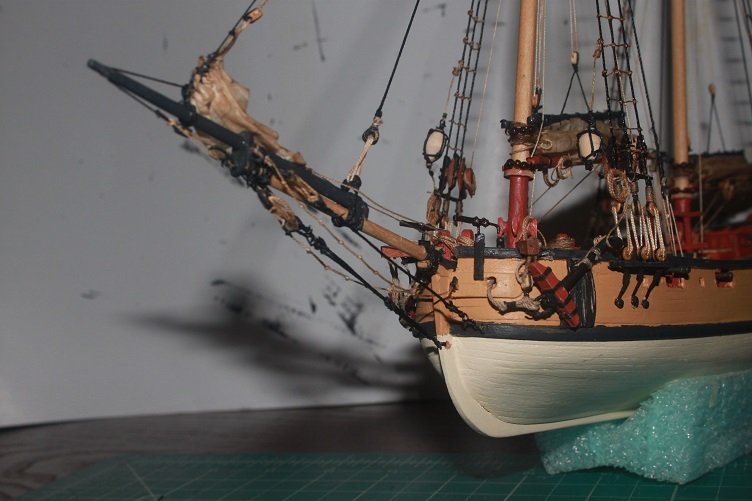
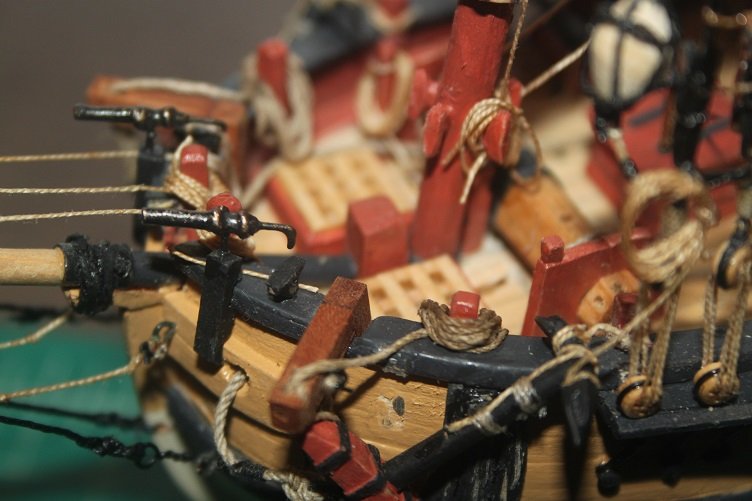
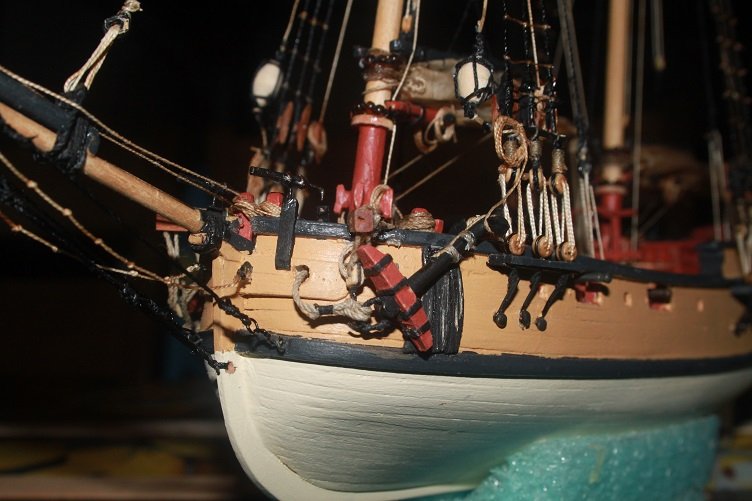
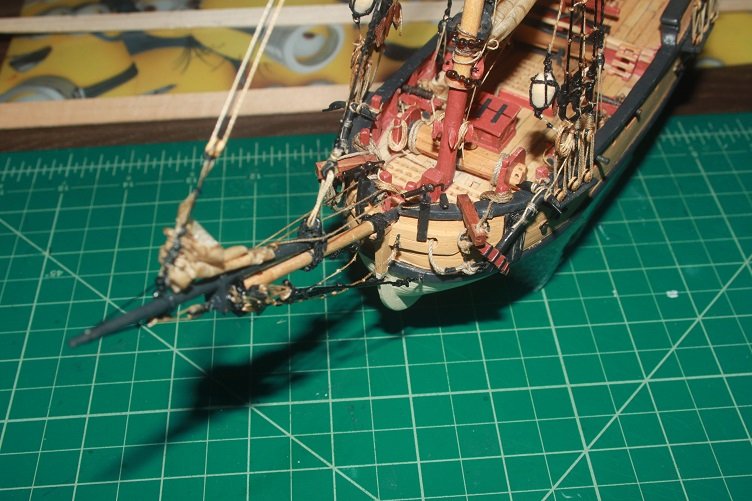
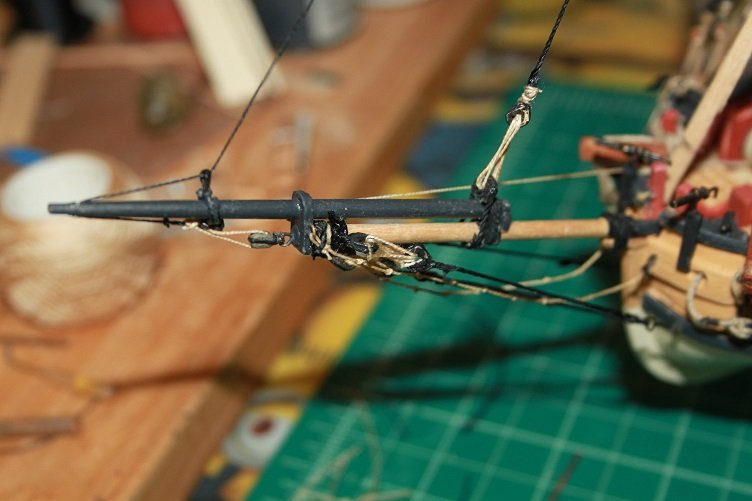
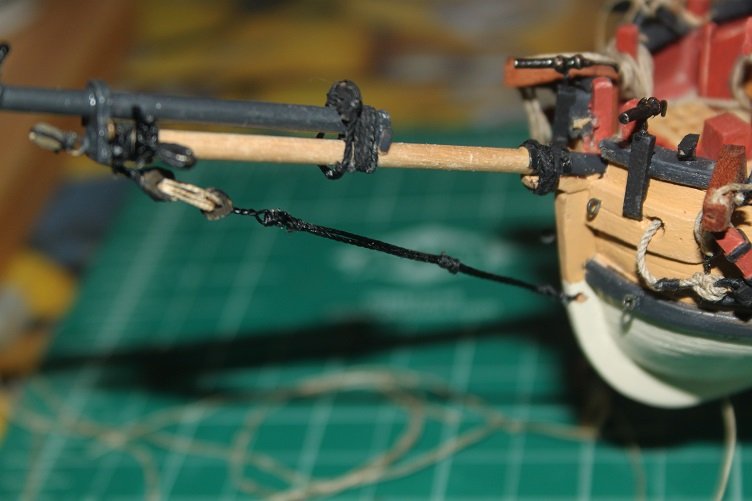
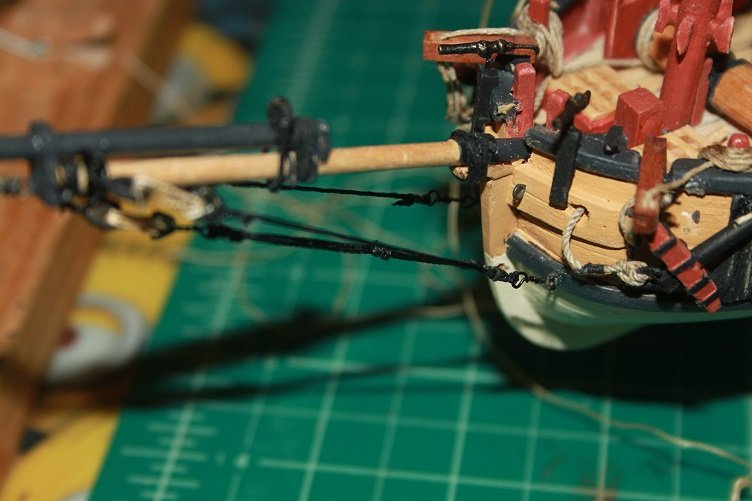
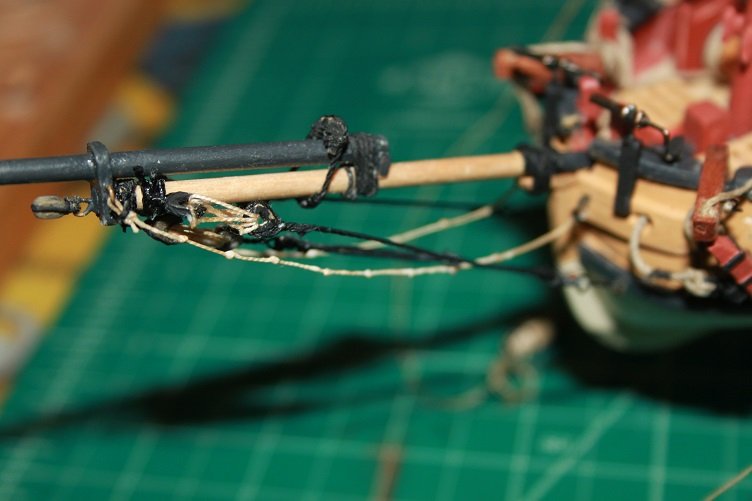
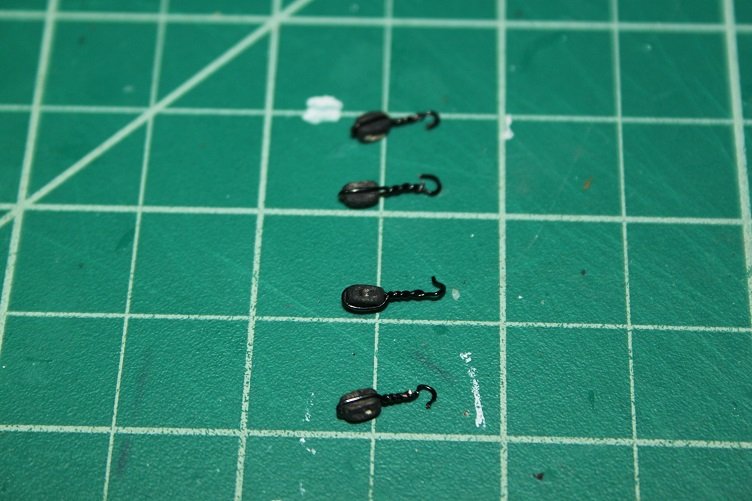
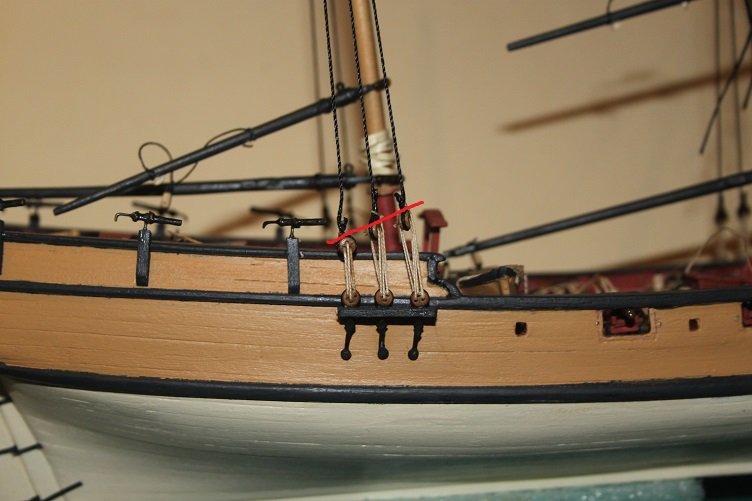
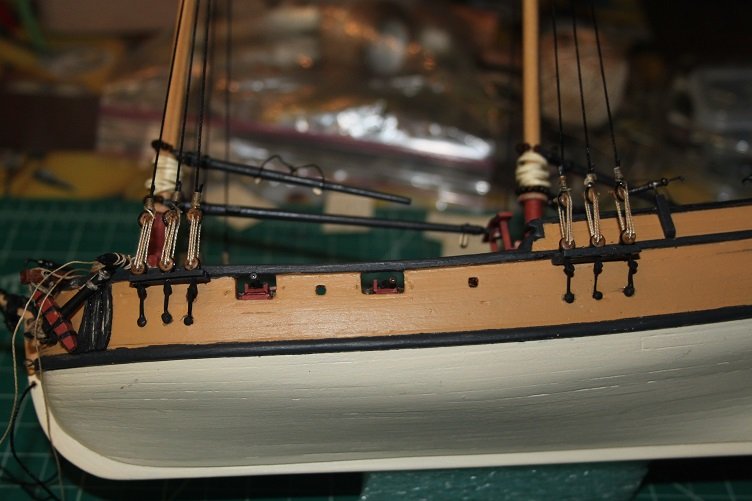
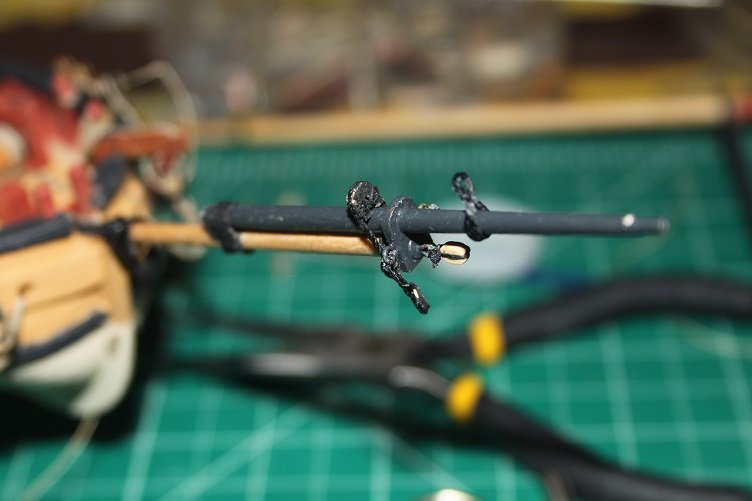
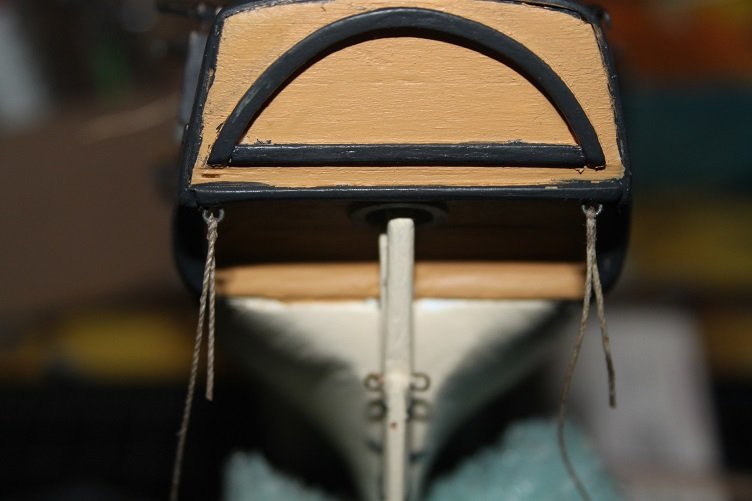
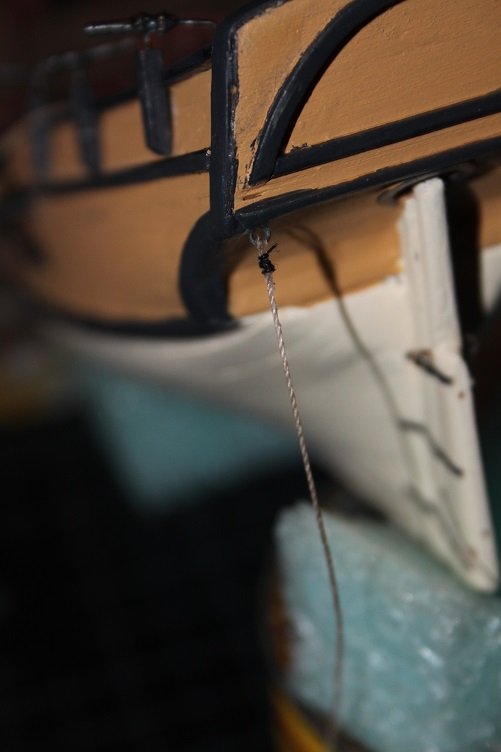
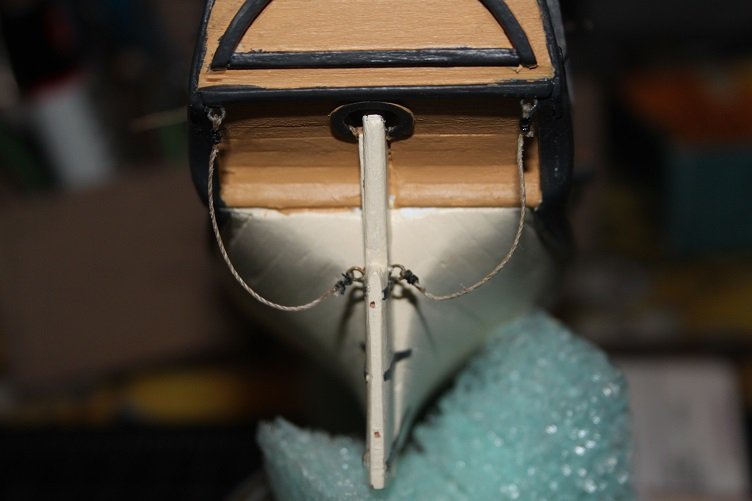
Thx for the likes an comments...this week was focused on the bow rigging started with the bobstay this is the same rigging line I had made for the shrouds...here it is doubled and seized to a closed heart with a lanyard. Made the jib shrouds next...captured another closed heart and some hooks made up of wire complete with sizing and attached with more hearts added the rope walks then attached the fore stay again more harts this time an open and closed the outer job stay is thinner line and run through a traveler on the bow sprite,,,the traveler was made from rigging line hardened with ca this completes the bulk of the bow/jib standing rigging, I'll be returning here to run the lanyards later. Next I started setting up for the main stays. the main lines for these were attached prior to setting the main shrouds, each will require a single block at the end and a hook and block setup for the deck side, as well as a eyebolt and deck cleat to finish out the week I attached the sheer poles and painted them out, and yes I know they are mounted too high...a fubar I'll live with and thats it for this week...more fun with rigging next chapter...


-
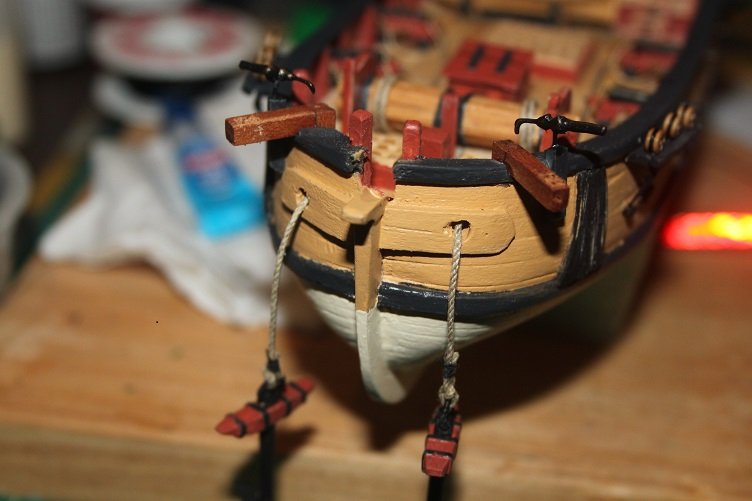
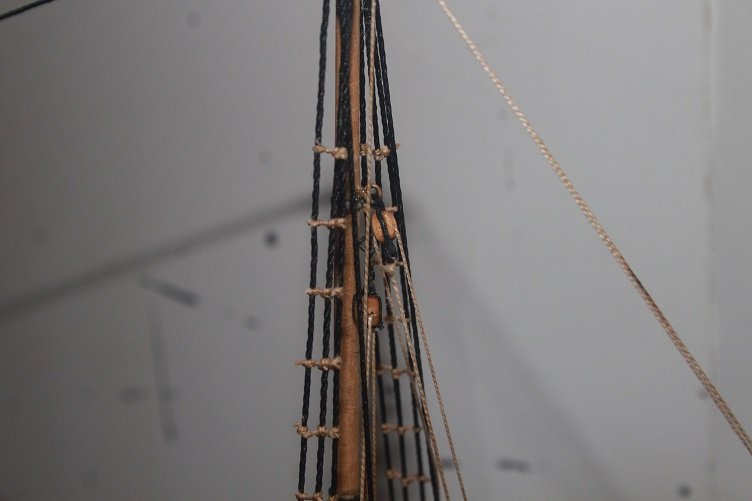
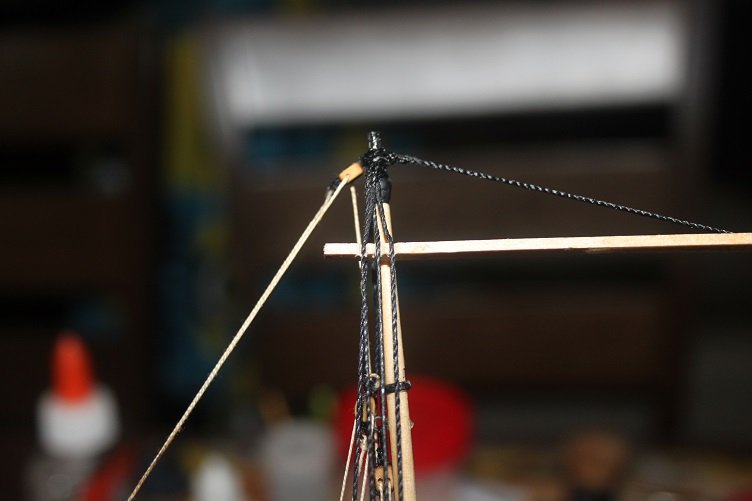
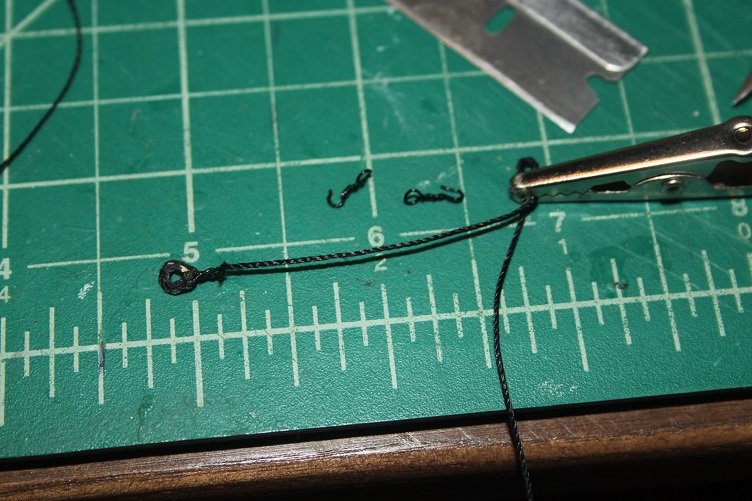
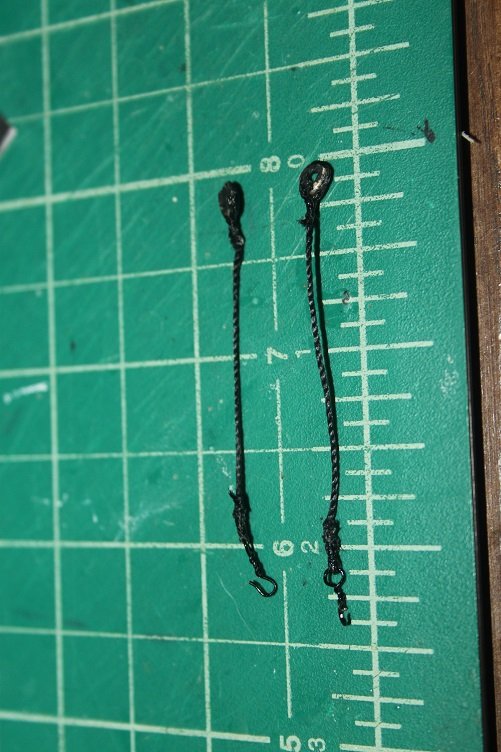
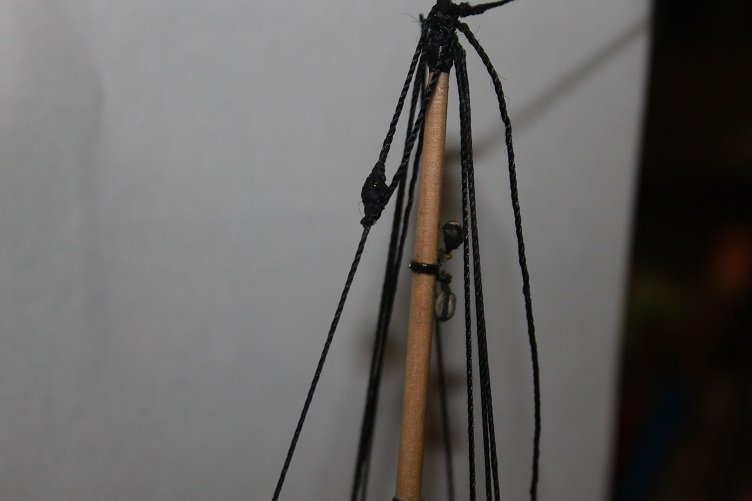
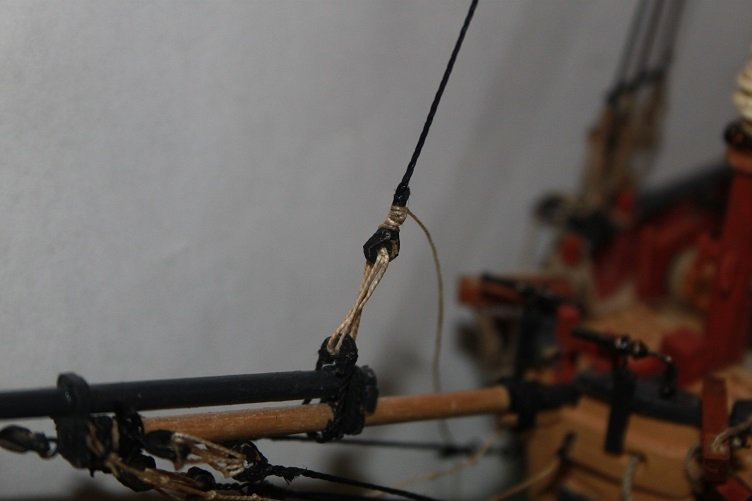
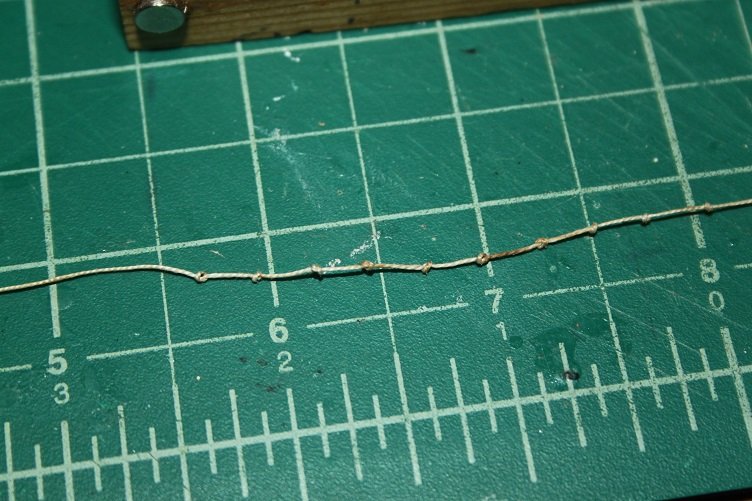
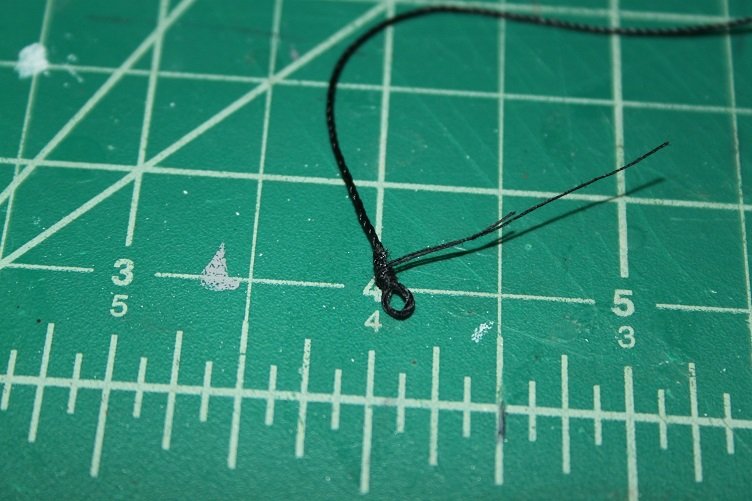
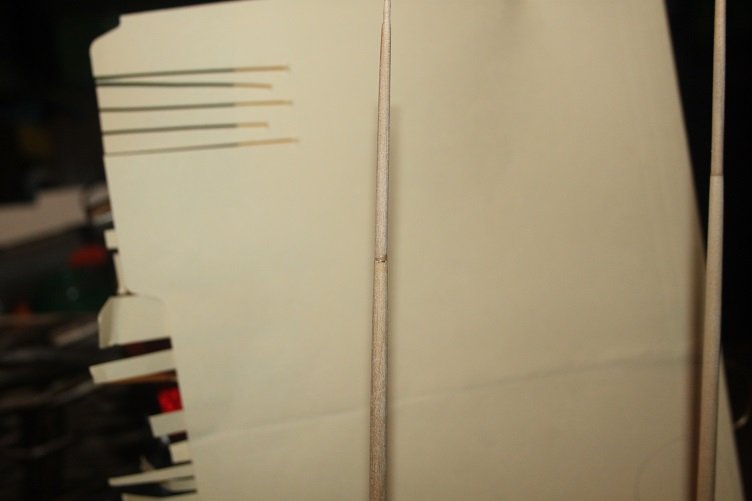
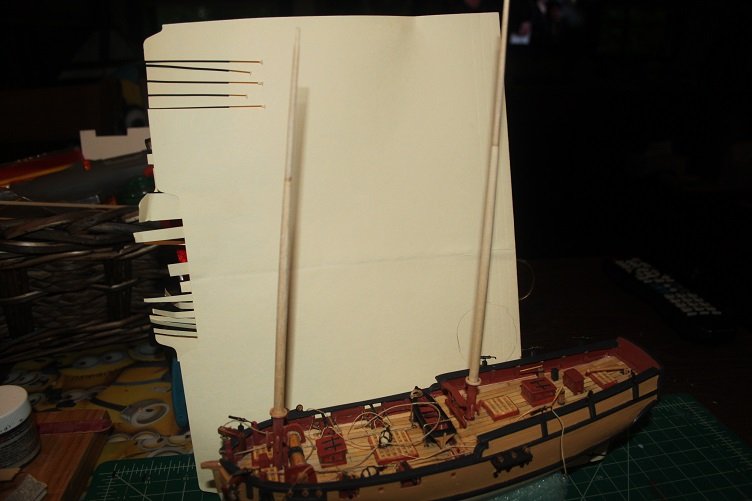
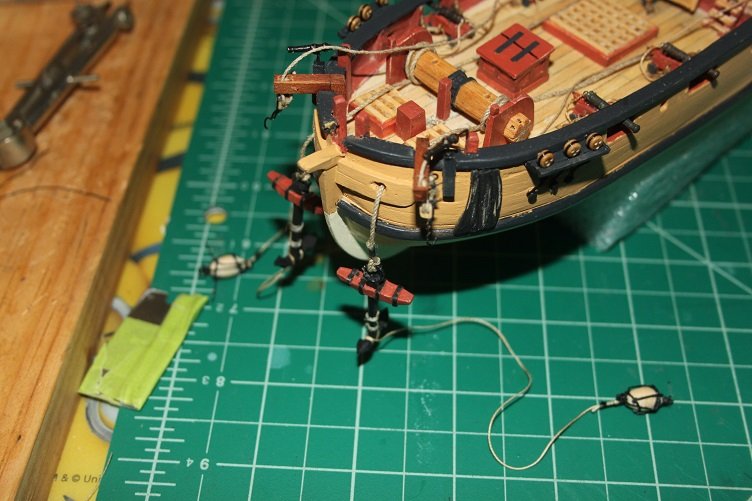
Thanks for the likes... Raised the masts to start...nothing big there so no photos, but they will show up in latter pics, once they were up I turned my attention to the shrouds...I initially started by making a spacing tool... something most you are probably familiar with and layed up the shrouds. Something I always strive to do in my build logs is to include the failures as well as the successes...the shrouds were a resounding failure! You can see in the pics below that the deadeyes were not close to aligning So down they came. I scrapped the original tool and went back to a technique I used on my Half Moon build. I made some spacing cards out of folder, one for each set of shrouds. The deadeye spacing was layed out on each and the eyes themselves attached with stripped floral wire. from there each card was pined to it's respective location and the shroud lines run and attached with ca. you'll notice the sizing in this shot...these are zip sizing, premade and slide up the shroud line prior to attachment of the shroud. This is a technique from Hubert Sicard's Wooden Ship Modeling for Dummies. Though not perfect much better then the first attempt Once the shrouds were up I went back to more little odds and ends...IMHO taking breaks from rigging minimizes the tedium factor. made rudder cloths from facial tissue soaked in diluted pva, painted black when dried made the foot ropes next, they are needed fore and aft...to get the knots equally spaced I made a quick fixture you can see the results here jumped to the forestay next...I've always wanted to do a stay mouse, and this build seemed like an ideal opportunity, started by creating an eye in shroud stock then wrapping line and locking the wraps with ca, sounds simple but was more challenging an a pita then I'd anticipated happy with the results Rigged the anchors... and that's about it for this week...rigging will continue next week, obtw here are the in focus pics of the bow sprite I promised


-
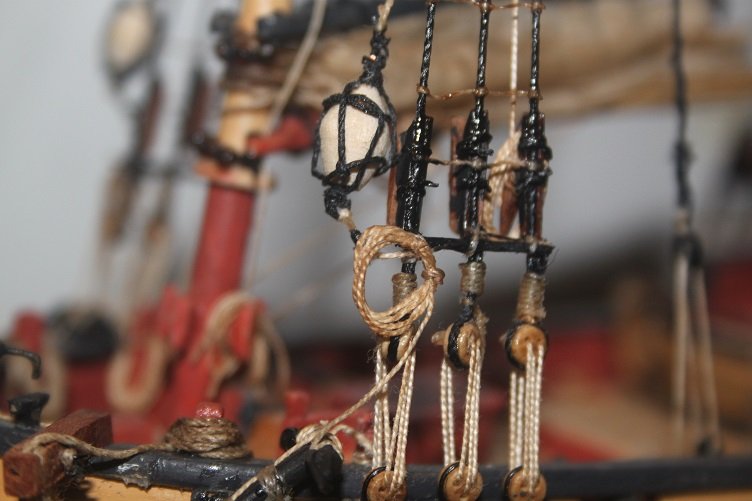
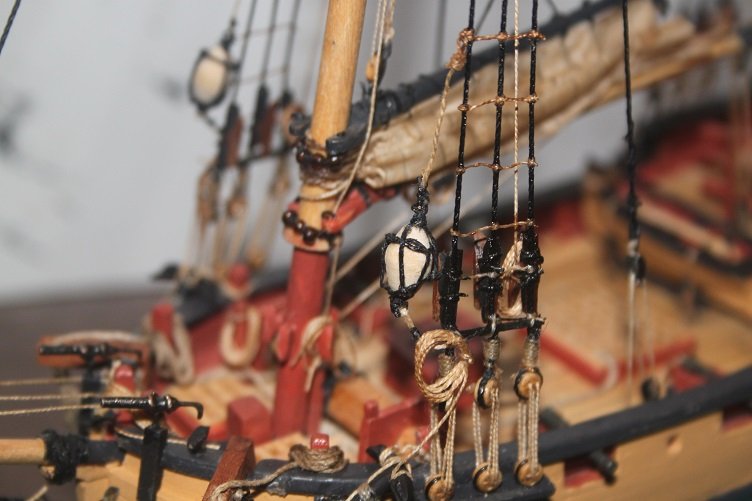
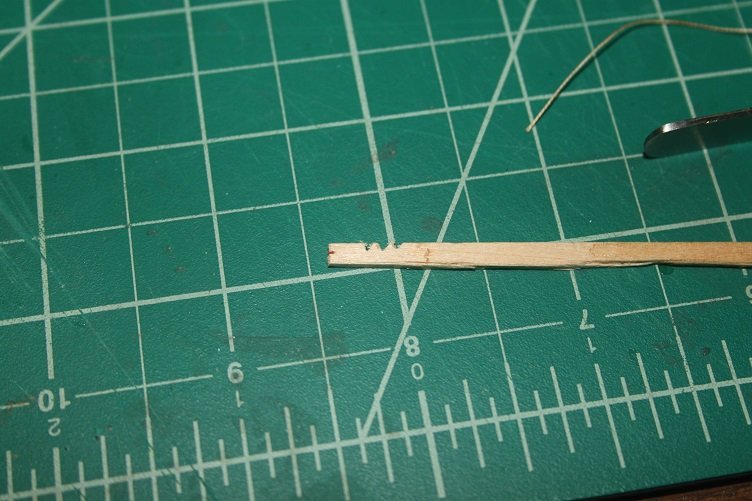
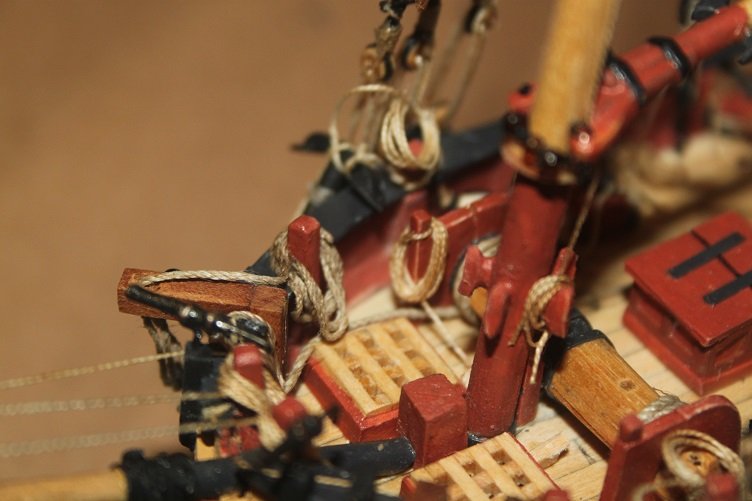
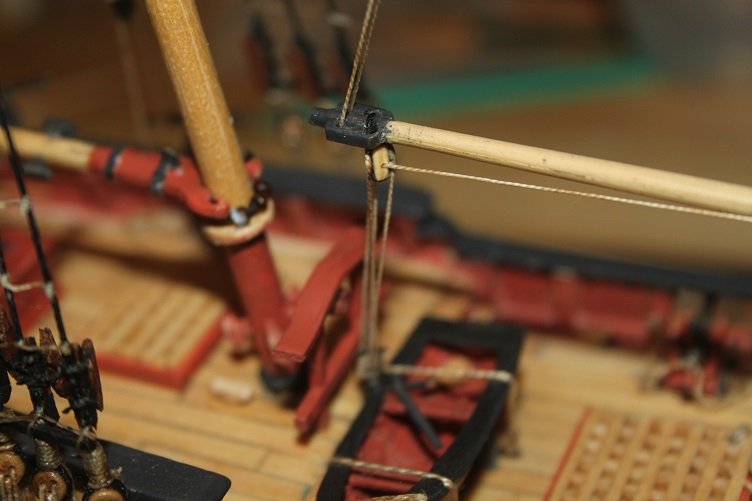
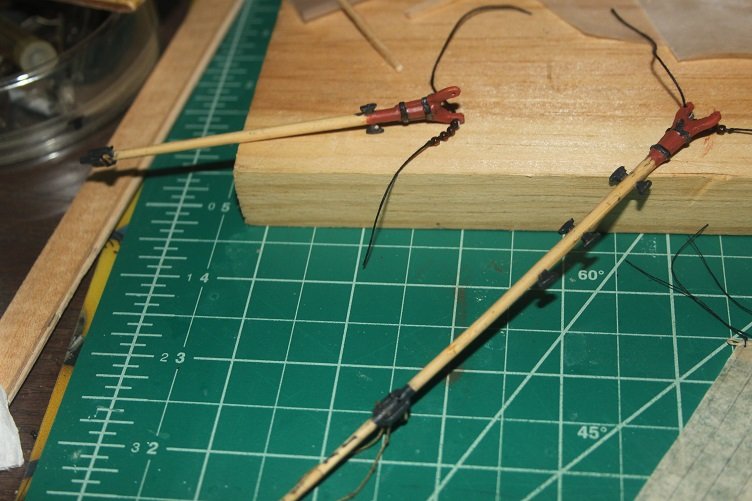
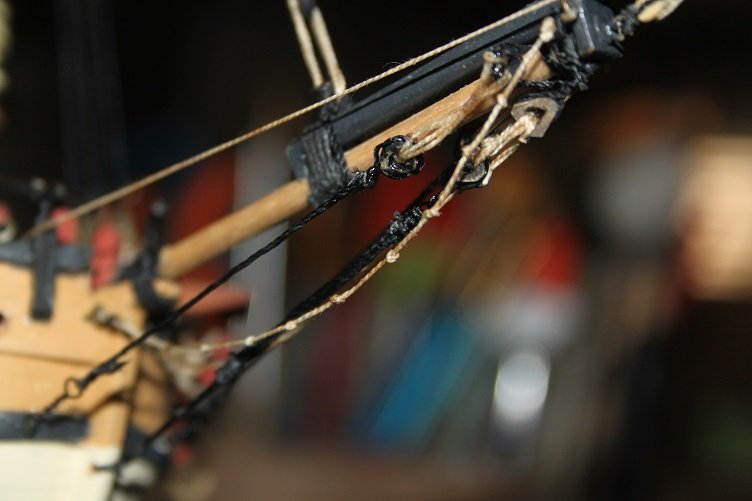
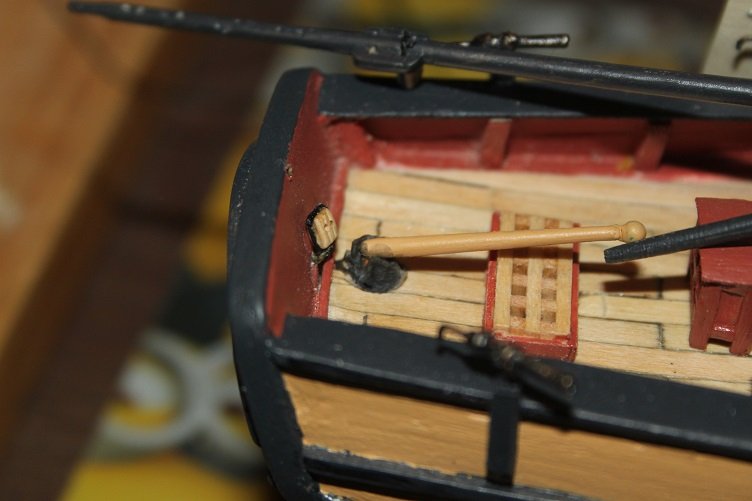
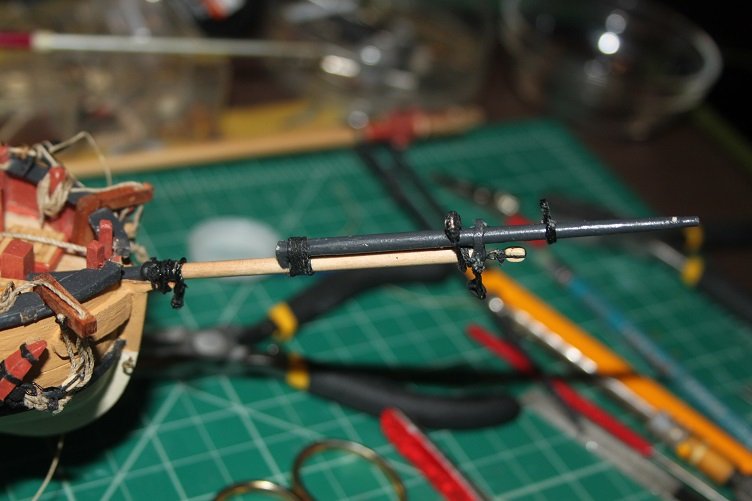
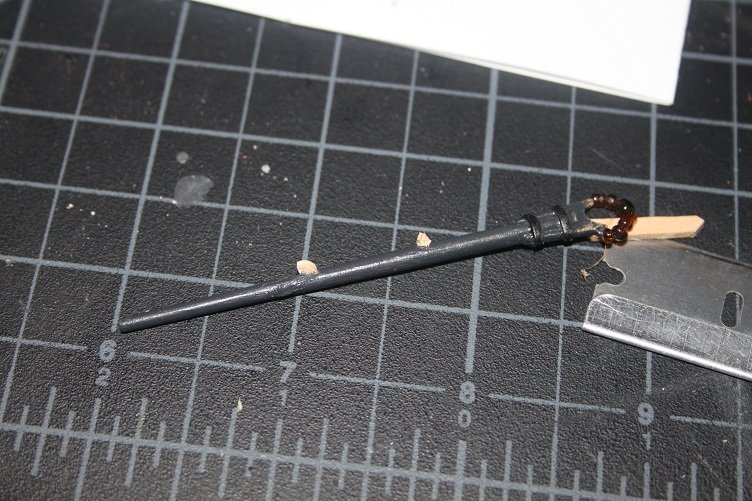
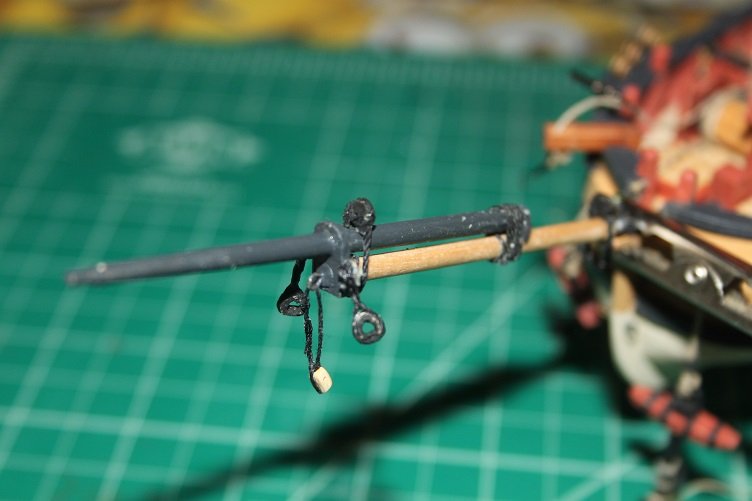
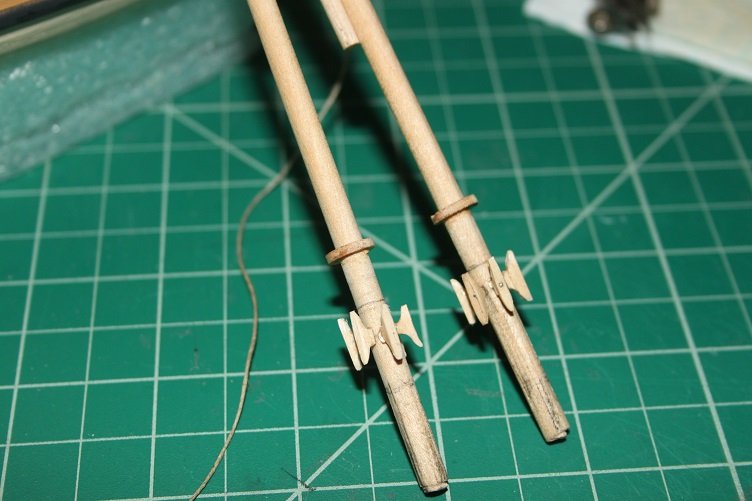
THX to all for the likes...more little details this week... After doing some preliminary fit-up I decided that the main boom was too short so an extension was in order. I prepared the extension by drilling out the center so it would fit over the end on the existing boom end with that complete the sheaves were simulated and the extension glued on once dry the new end was shaped and the old sheave holes filled, sorry no pic here...I managed to delete it somehow, I'll be sure to capture one next week I decided to add preventer lines to the rudder, this detail does not show in any of my reference material, but from what I've read most ships of the day did use some type of system to capture the rudder should it become unshipped...plus it looks cool 😎 first eyes were added to the stern and rudder, then line was added and served at both ends need to get in here and do some touch-up added some single blocks to the mast tops for the gaff lifts...you can see the makings of more closed hearts in the foreground once they were carved I rigged them to mount to the bow sprite I really wanted to stain the wood a dark brown, but with the limited supplies on hand (still living in the RV) I ended up just painting them black I think they look okay, once dry they were rigged to the bow sprite, which was mounted to the bow the gammoning has been completed as well...but that was another lost photo...I'll get more detailed ones later That's it for this week, again thx for the likes and following along
-
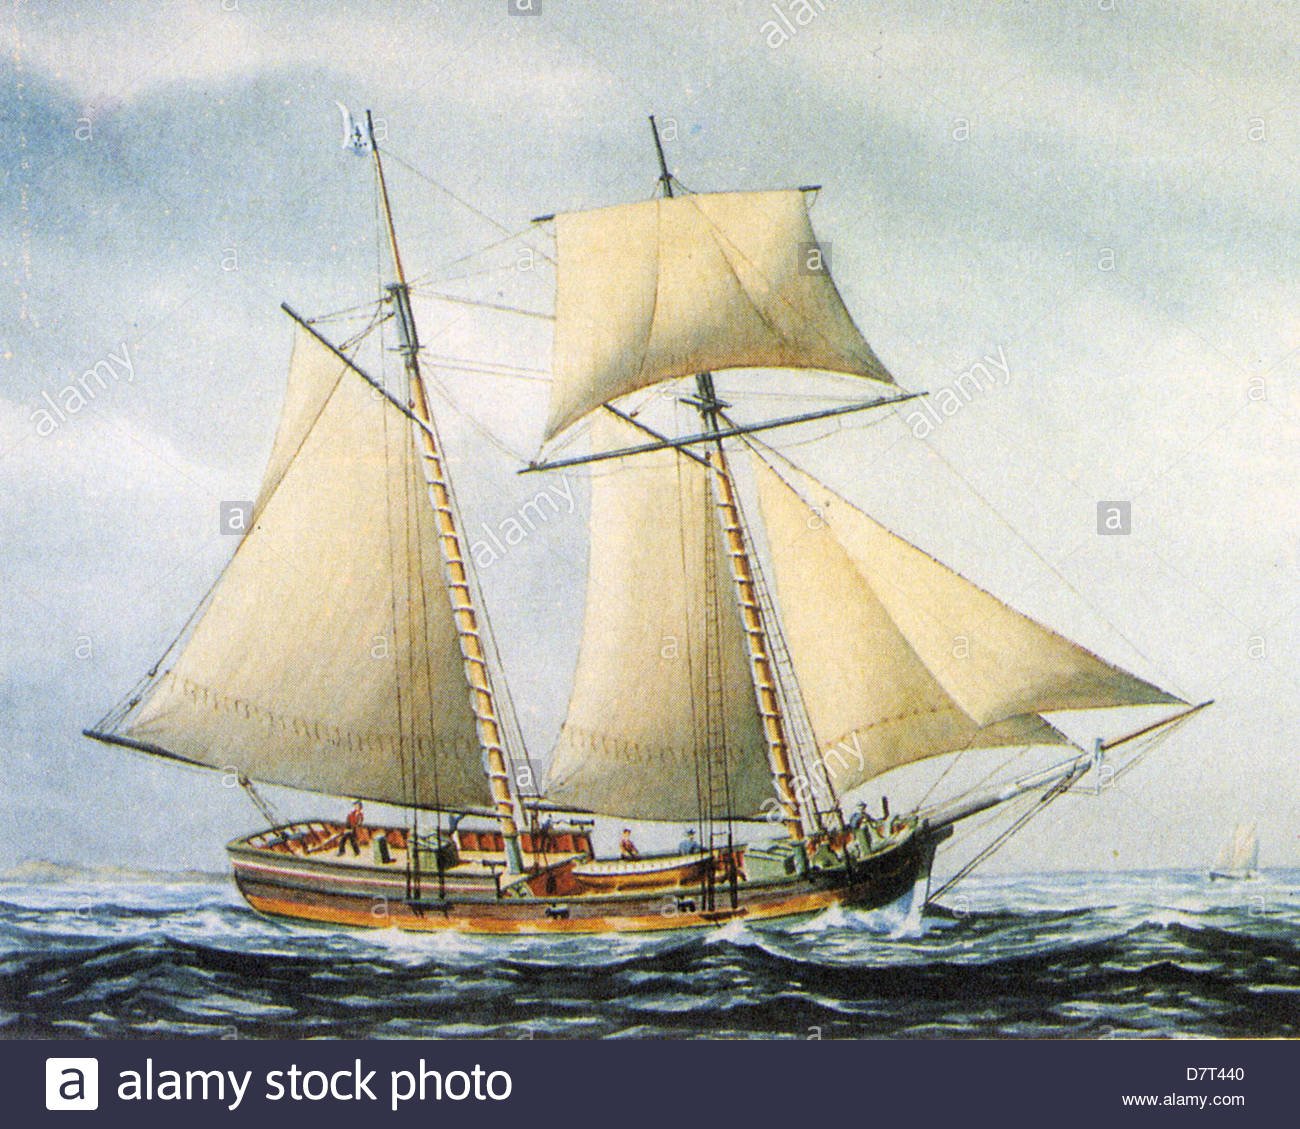
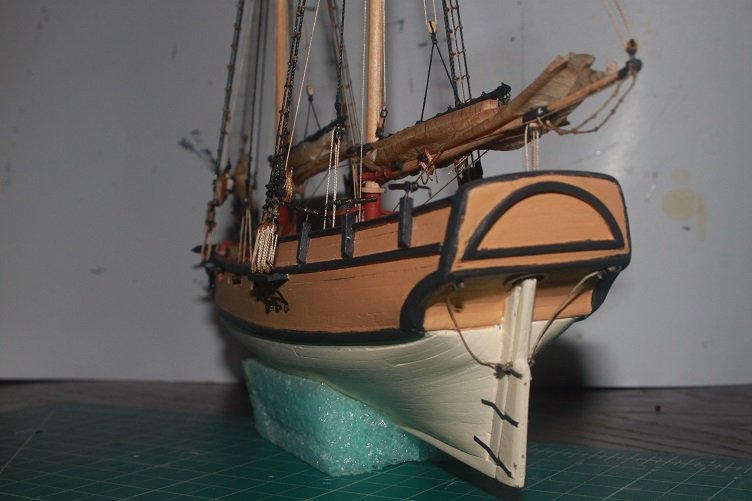
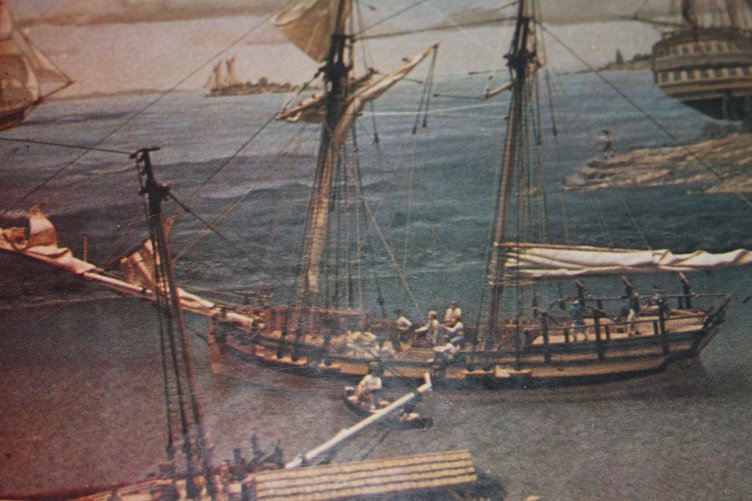
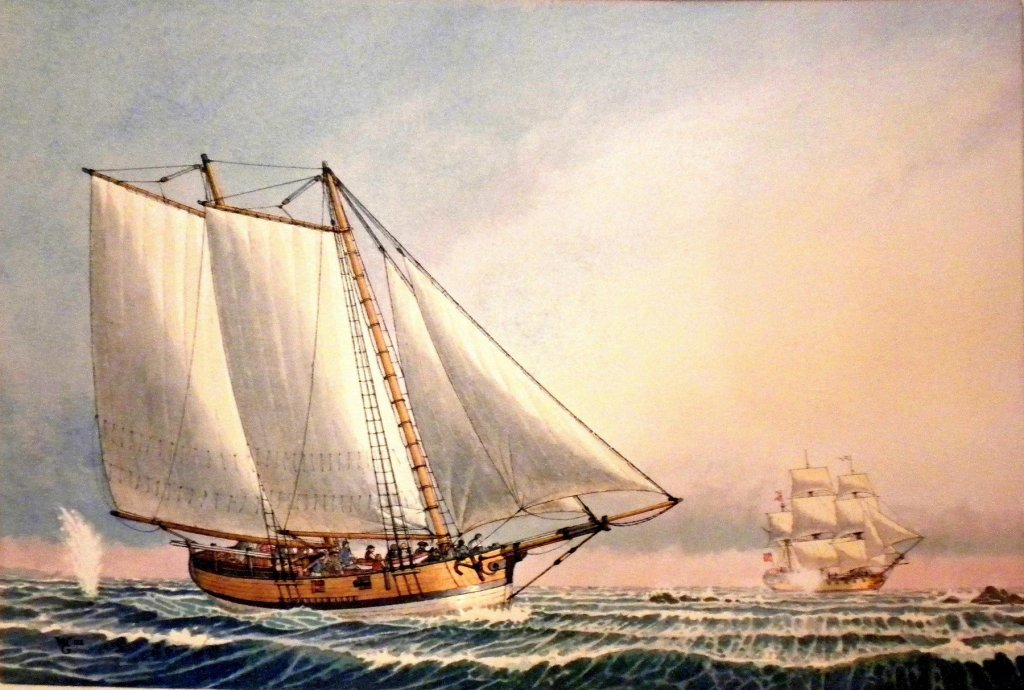
I got cutoff yesterday by a lousy internet connection while I was trying to post a few pics. Here are the paintings I’ve used as reference throughout the build Of the two it’s the second that appeals to me the most, thus the mast configuration change thanks for the likes J

-
Thanks for the likes...last update of the week...prepped the booms an gaffs for paint scratched a block for the bow sprite and jib boom tried my hand at making hearts...open and closed may have to work up more these are a little rough and finally reworked the masts...I was gonna build this with top sails but decided to go with gaff rigging


-
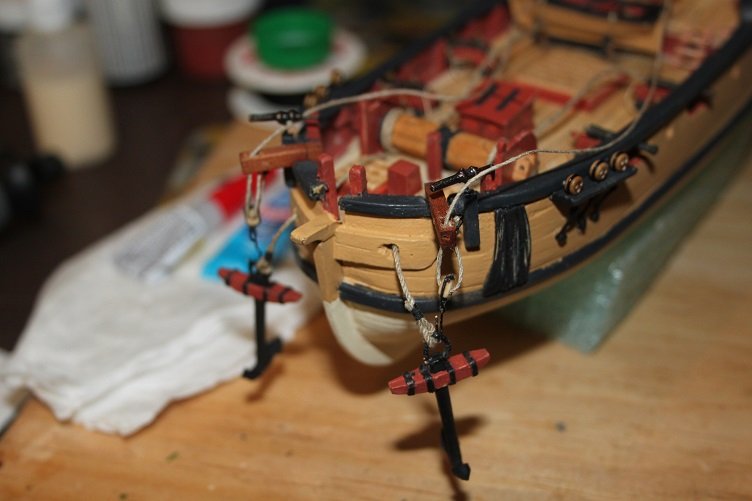
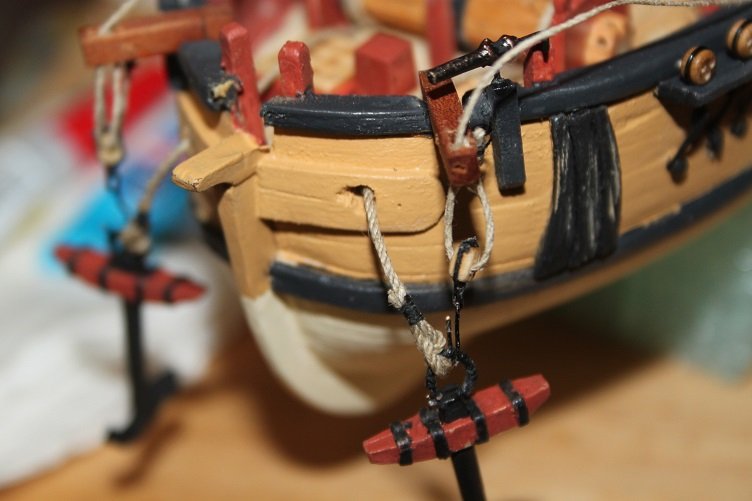
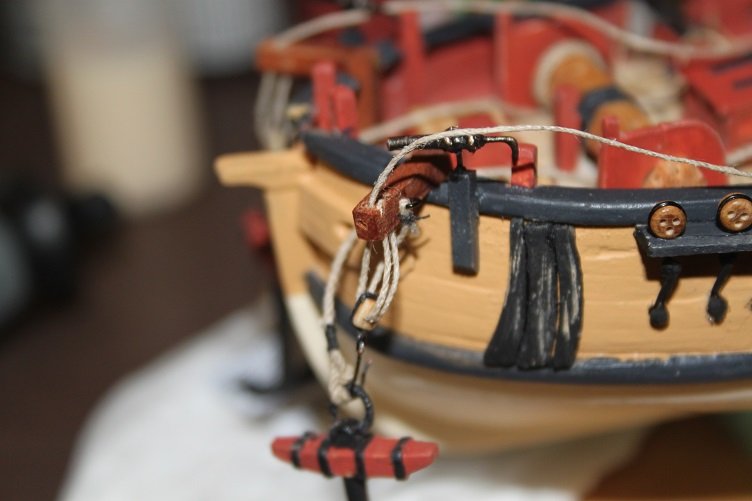
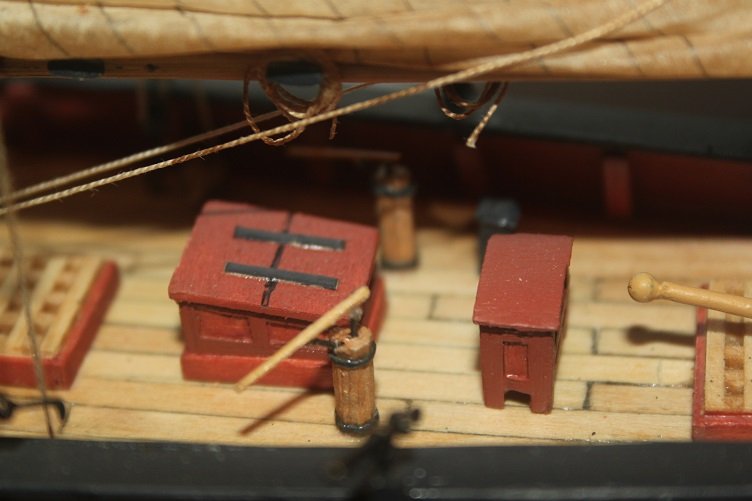
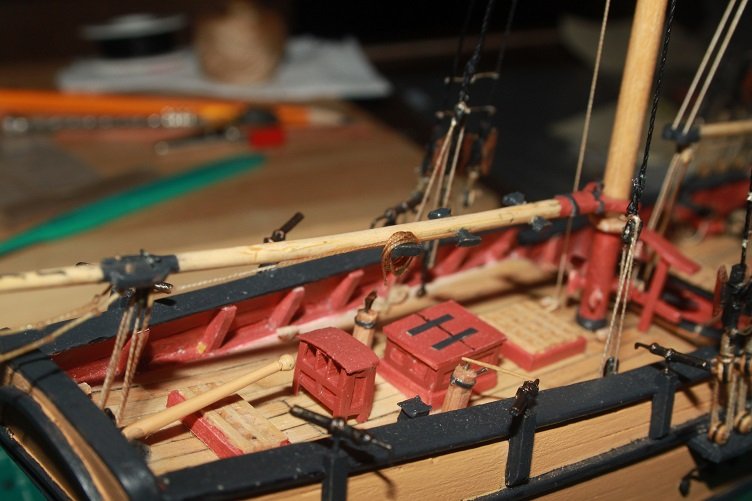
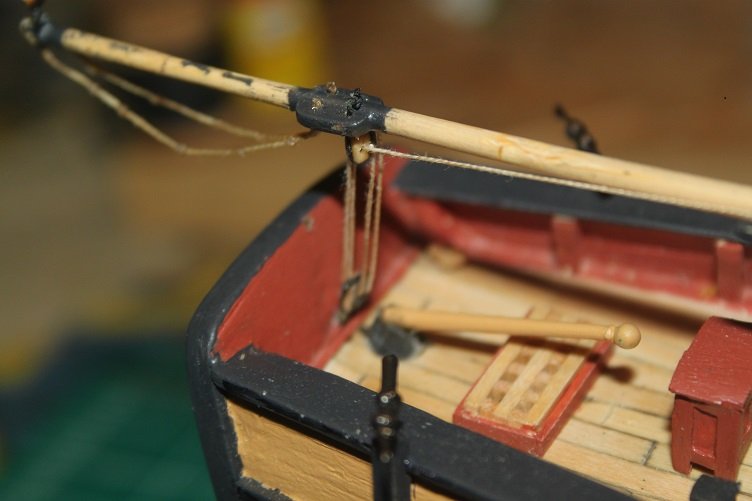
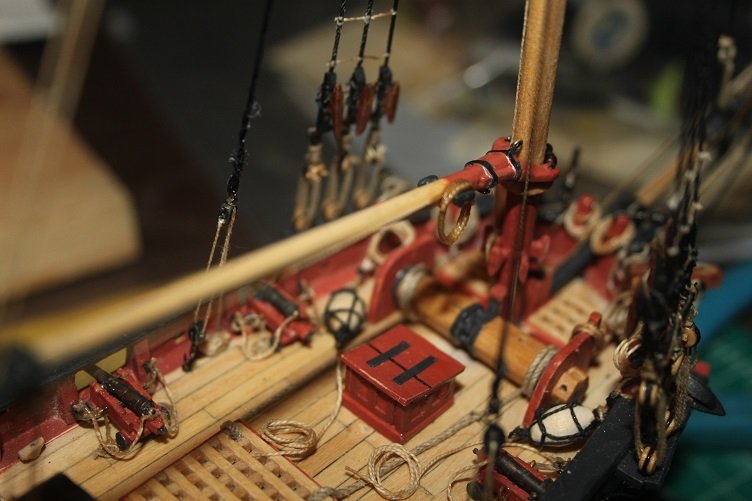
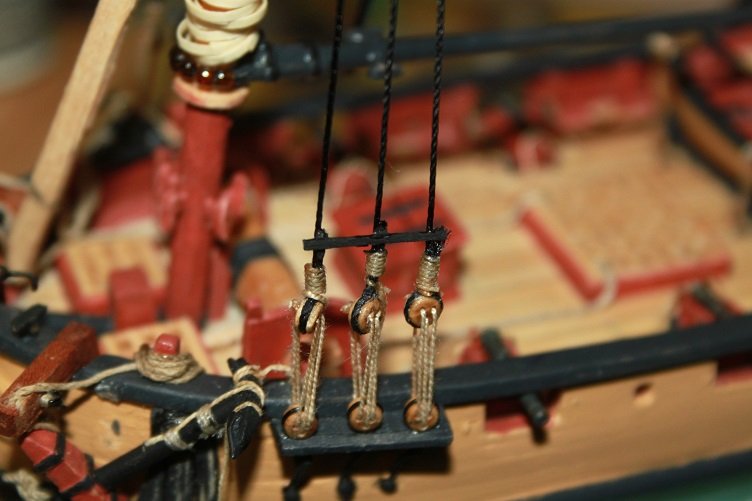
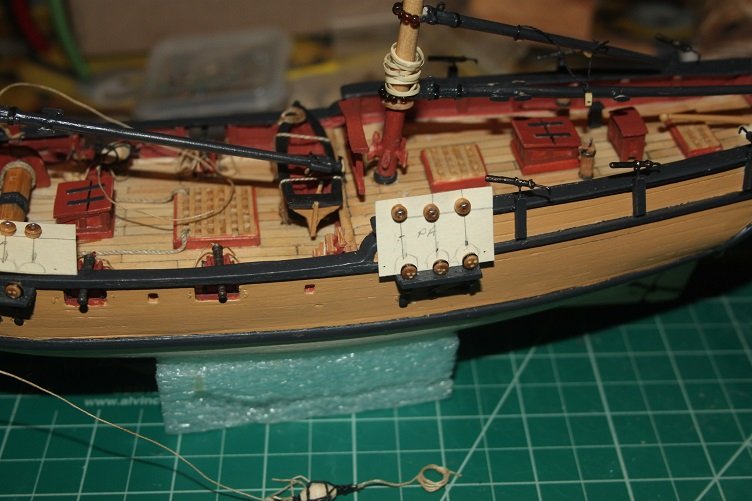
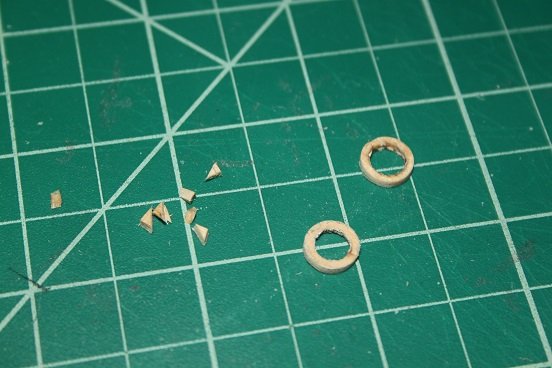
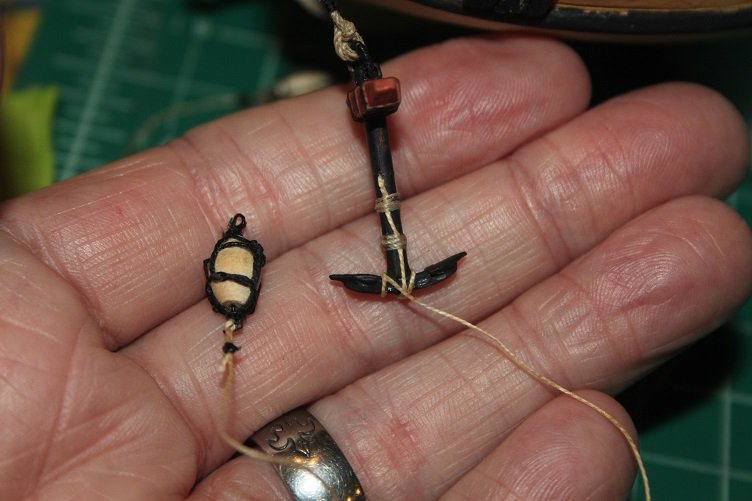
Thanks for the comments and hitting the like button...another update Spent more time on the little details, harnessed and rigged the anchor buoys and lashed them to the anchors line still needs attached to the free ends, all the excess line will be coiled when the anchors are fixed. Made a couple mast tables for the mast booms and sail rings the boom rests are basswood and the rings are paper stock shaped around the knife handle and glued with pva...these were dipped in poly to stiffen them once they dried. Mounted the boom tables and fitted the cleats, made last week, to the masts and that's it for today...think I'll start detailing the booms and yards next...I've got to decide how I want to rig this build...as a pure schooner or as a top sail schooner, seems either could be correct, leaning toward the former, we'll see...

-
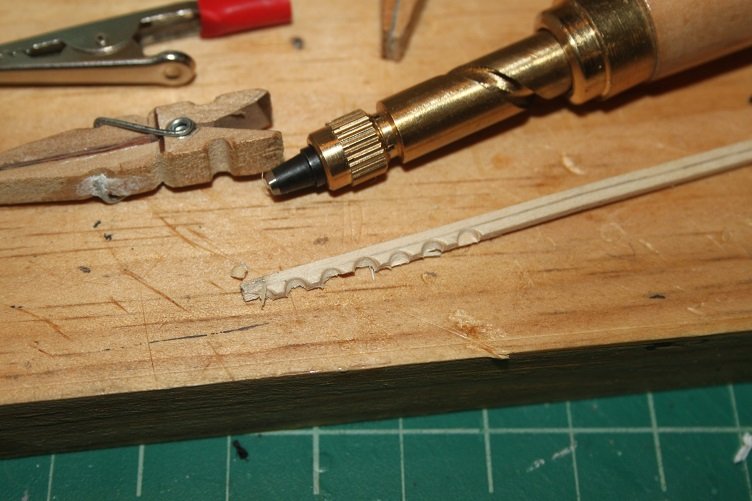
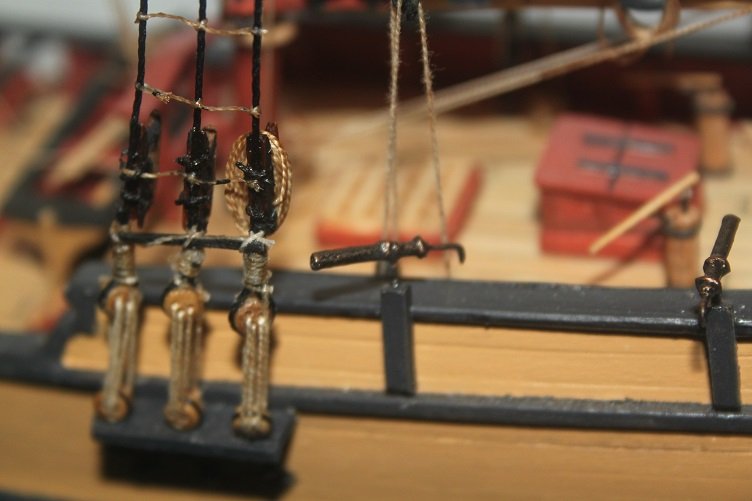
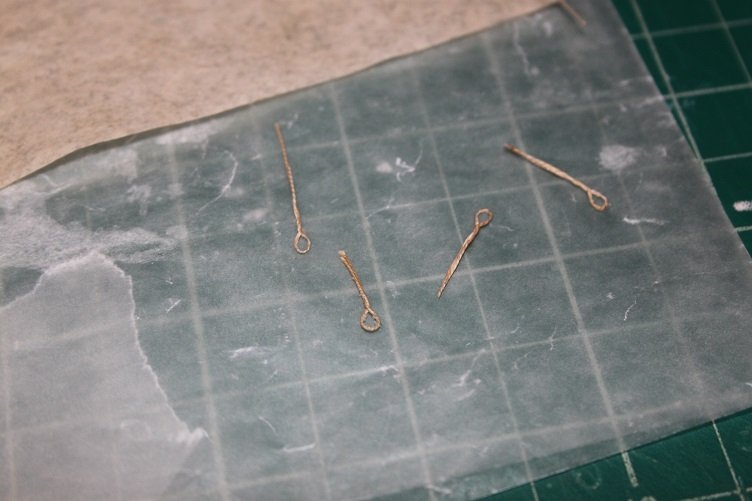
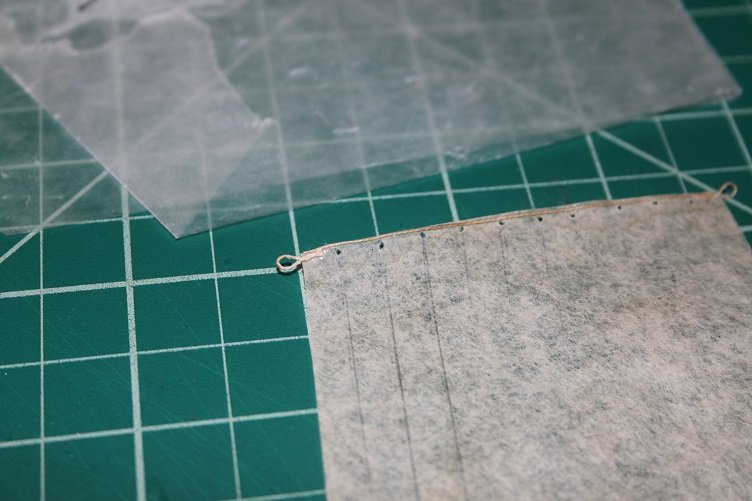
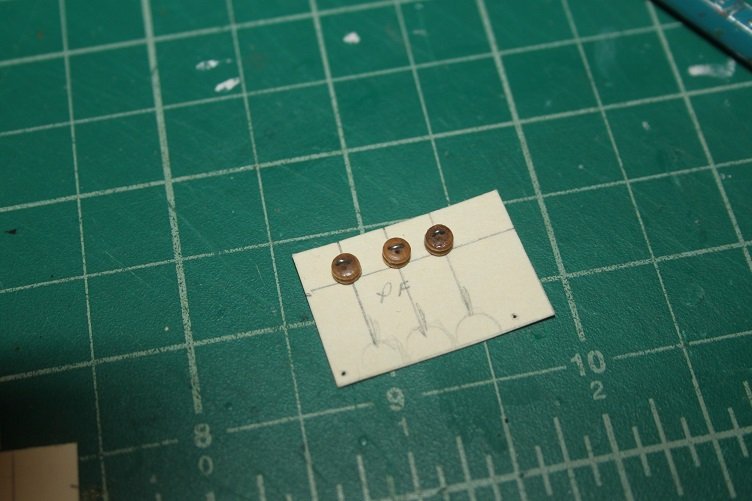
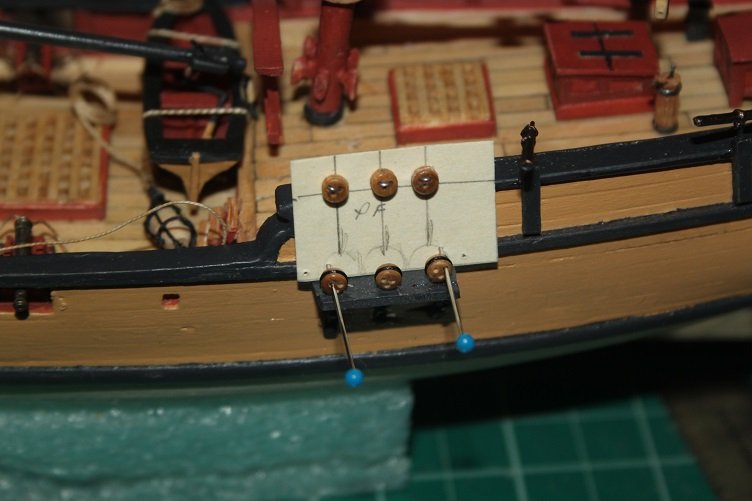
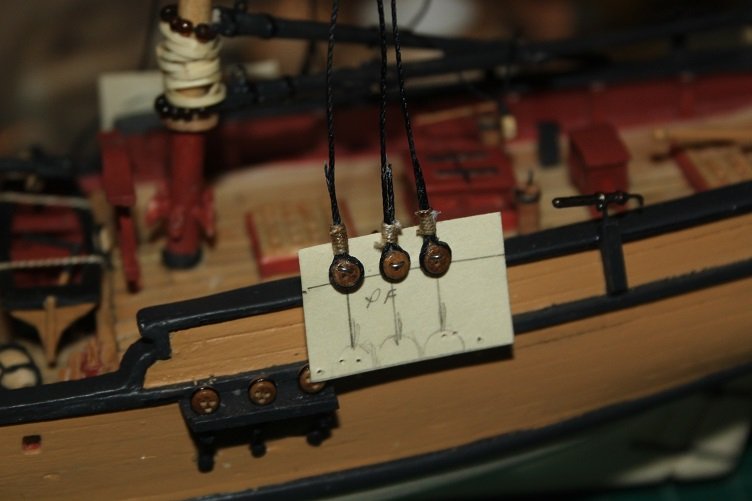
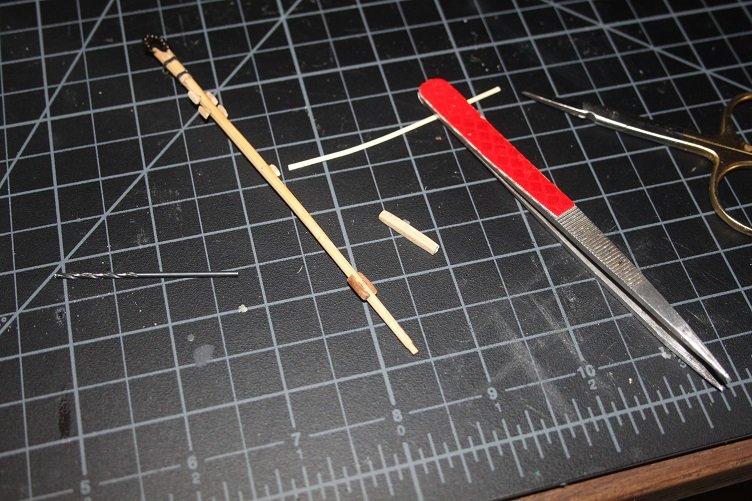
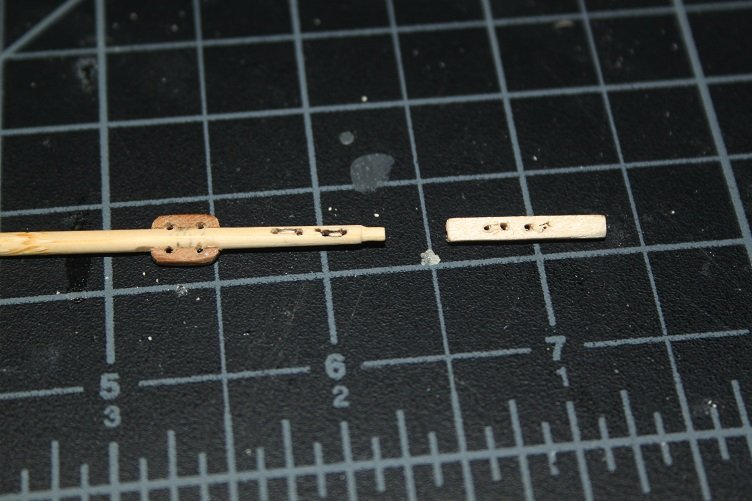
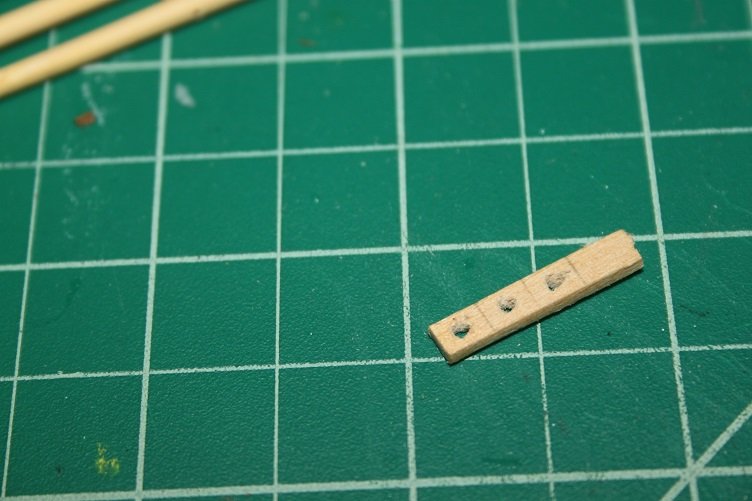
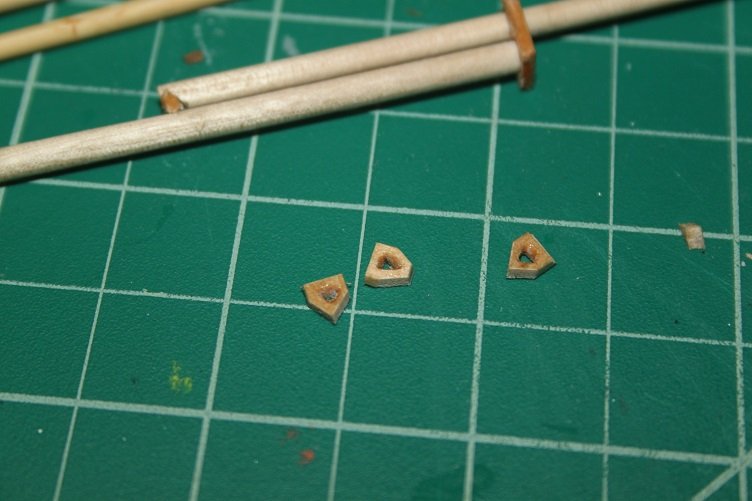
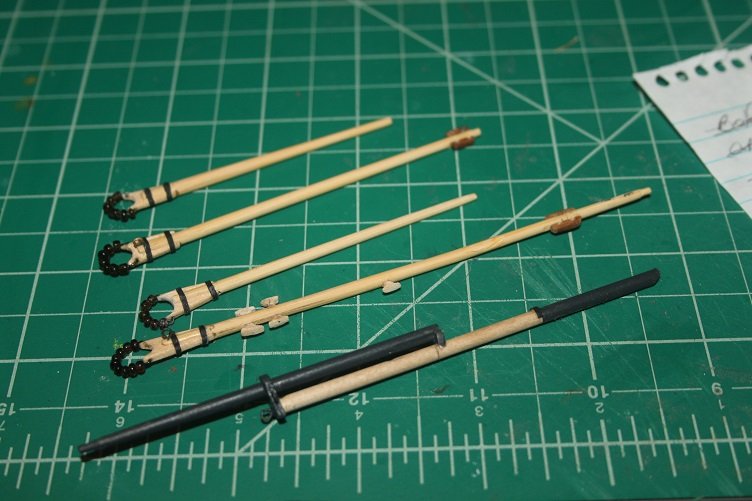
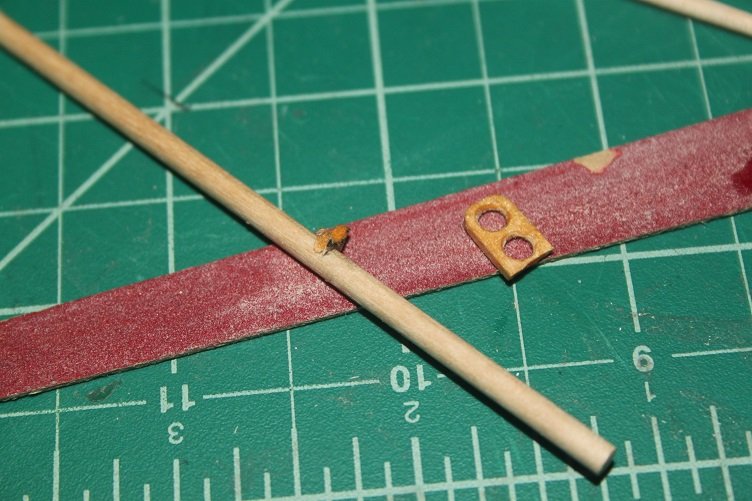
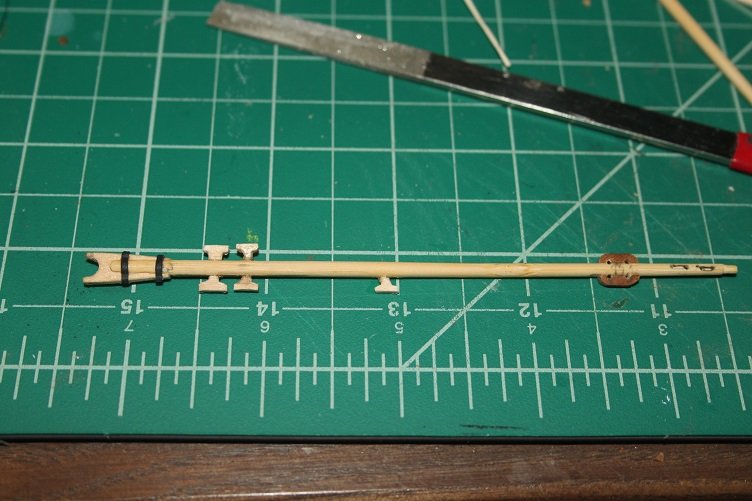
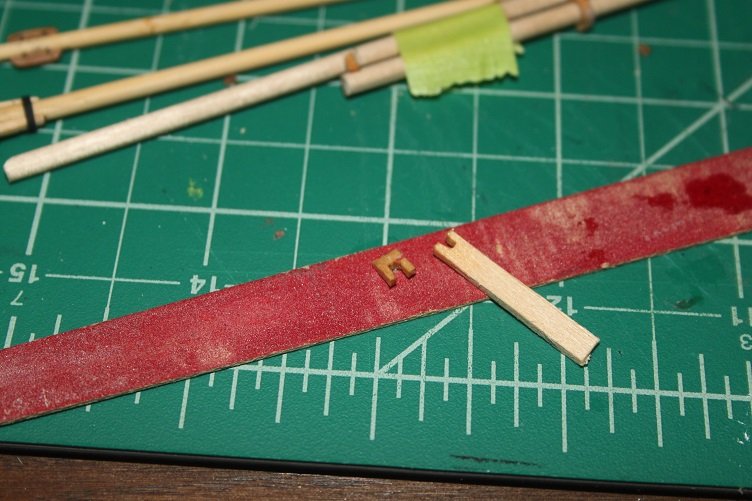
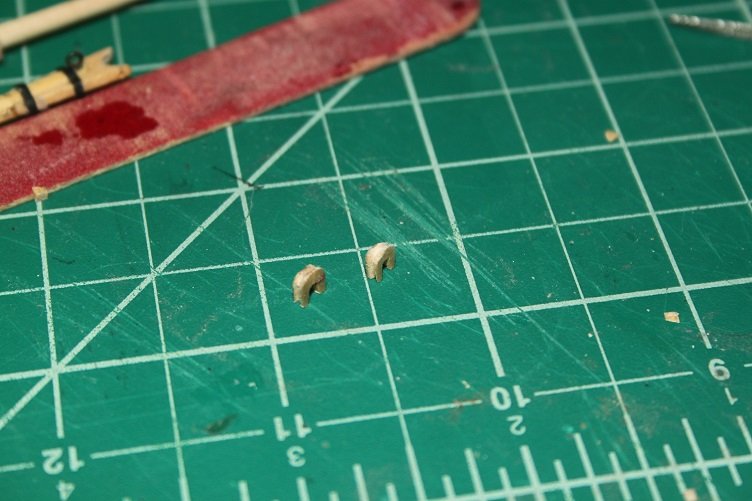
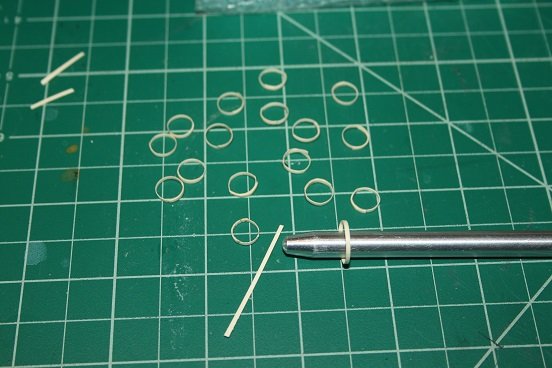
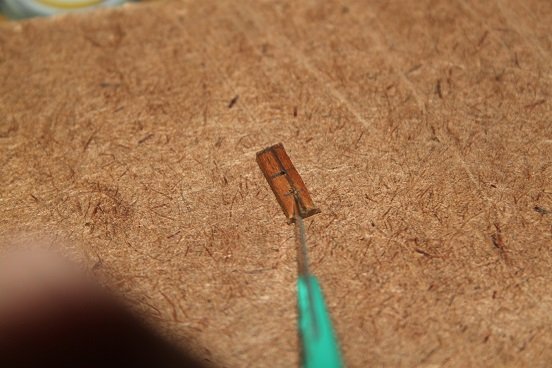
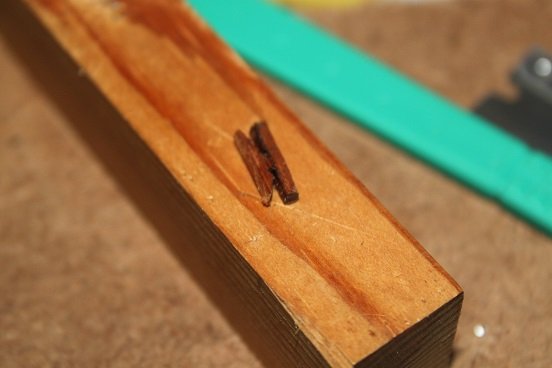
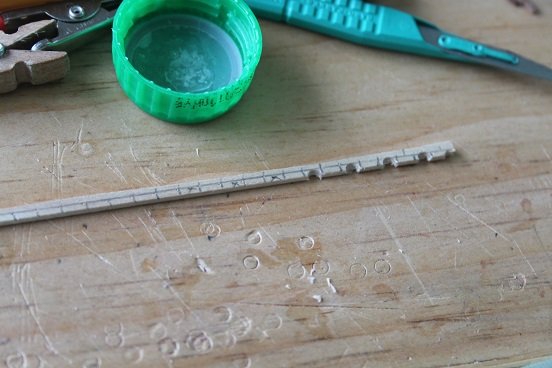
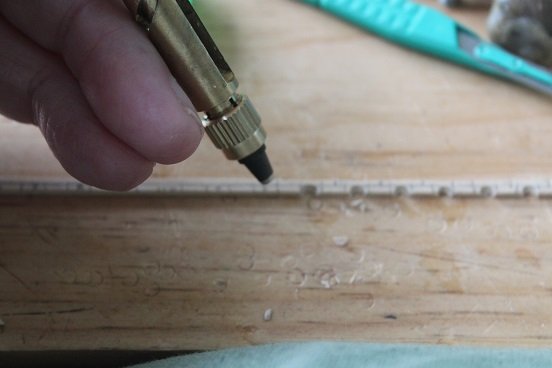
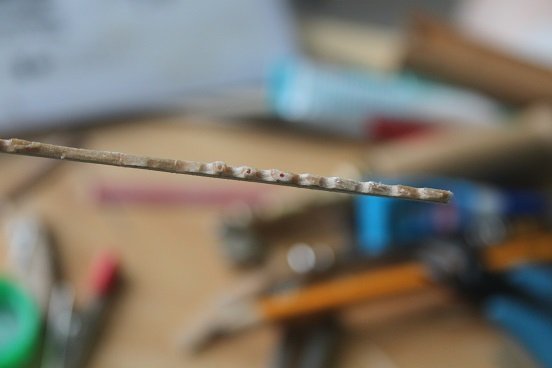
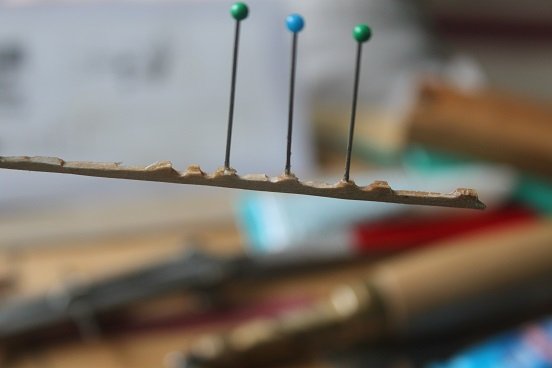
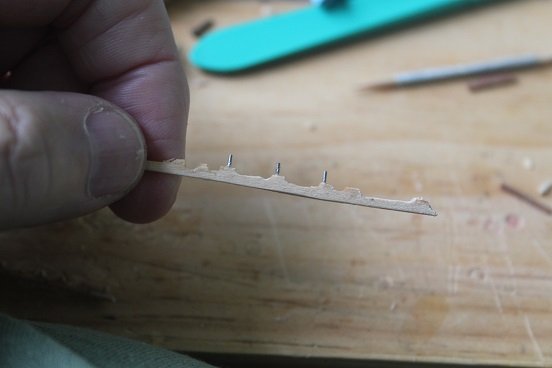
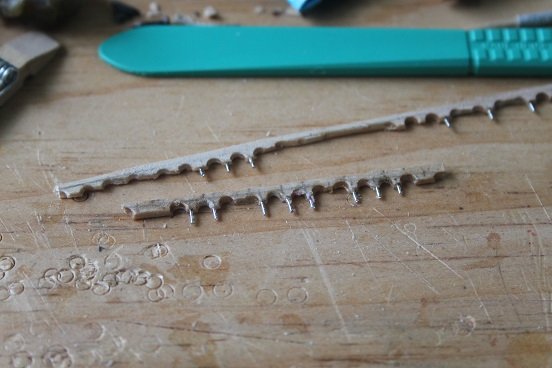
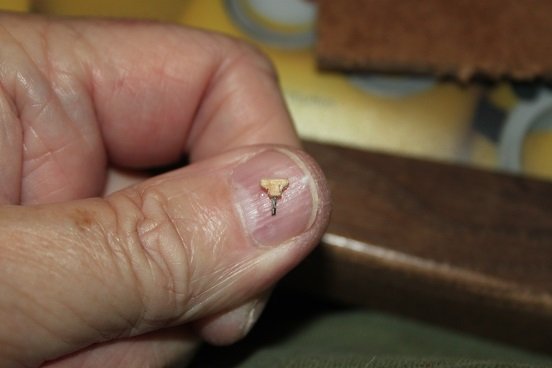
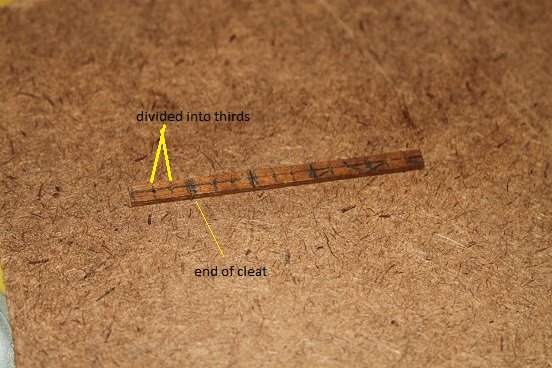
Had to make more small cleats and some shroud cleats, To make the regular style cleat I start by taking half circle cuts out of a piece of stock the correct height and width as the finished cleat. In this pic I'm using a screw punch to remove the unwanted material but a Dremel will work just as well these cuts establish the "wings" of the cleat once this is complete, drill the base of the to be cleats to accept a pin I'm working in basswood here, so it has been hardened with ca. but there is still some breakage as you can see next the pins are set in ca and trimmed when dry the cleats can then be separated and sanded to shape, I use small diamond files for this step I've used this technique successfully for different size deck/mast/boom cleats. This is the first build I've done that required shroud cleats...so this technique wasn't proven, but it turned out pretty well walnut from the spares box, the correct height, was marked up with the lengths and thirds of each cleat holes were drilled at the intersections and the cleats cut to length next to remove the shaded sections, accomplished with new #11 scalpels at this point every one of these split in two right along the shroud line...so the centers were drilled and pinned using ca. once the wedges were remove you should have something like this all ready for sanding and finish shaping


-
Pulling up a chair Phil
-
Hey Sam, good to hear from you again, the cleat technique is one I used back on my a Half Moon build, worked ok, I’m gonna look into your log, who knows yours may be better. Definitely let u know
-
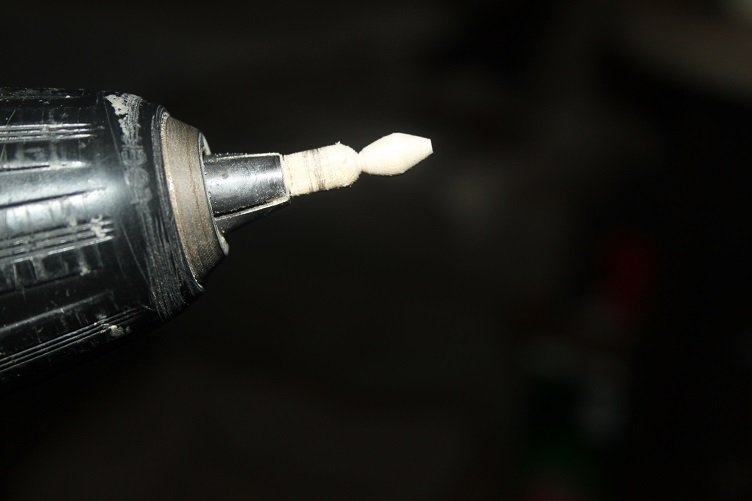
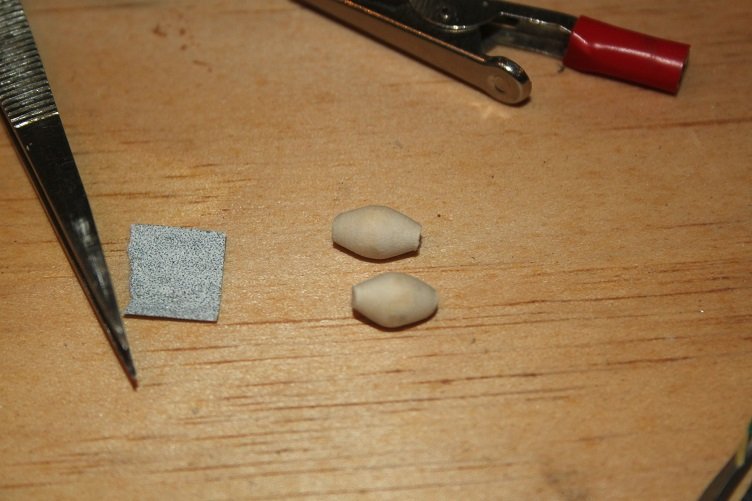
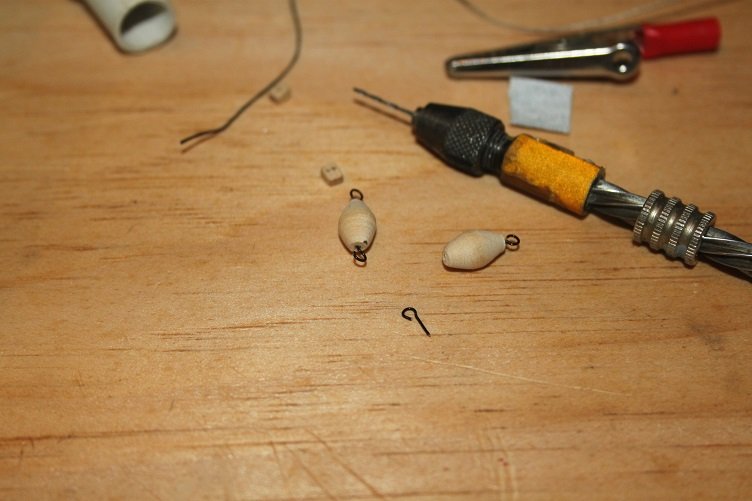
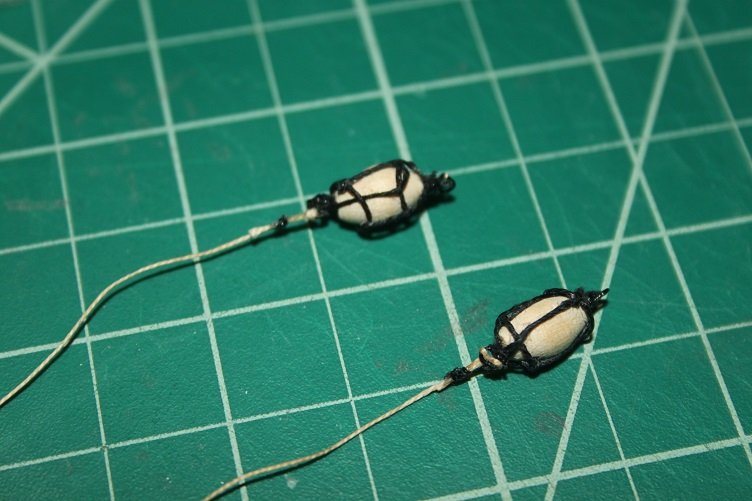
thx for the many likes...last update of the week started workings on the anchor buoys... chucked some basswood in the drill and spun against sandpaper and files once the desired shape was achieved they were parted off, drilled and had eye-hooks attached with ca still have to rig the harnesses for them. Turned my attention to the anchor rigging and getting the cat heads set up still needs a little fine tuning to get the droop right and started working on the stock that will yield the mast cleats that's all for now...see you next week