


Jeddahbill
-
Posts
80 -
Joined
-
Last visited
Content Type
Profiles
Forums
Gallery
Events
Posts posted by Jeddahbill
-
-
-
This looks great so far! The planking is really nice - very well done!
Cheers,
Bill
-
Very nice work!
Cheers,
Bill
-
-
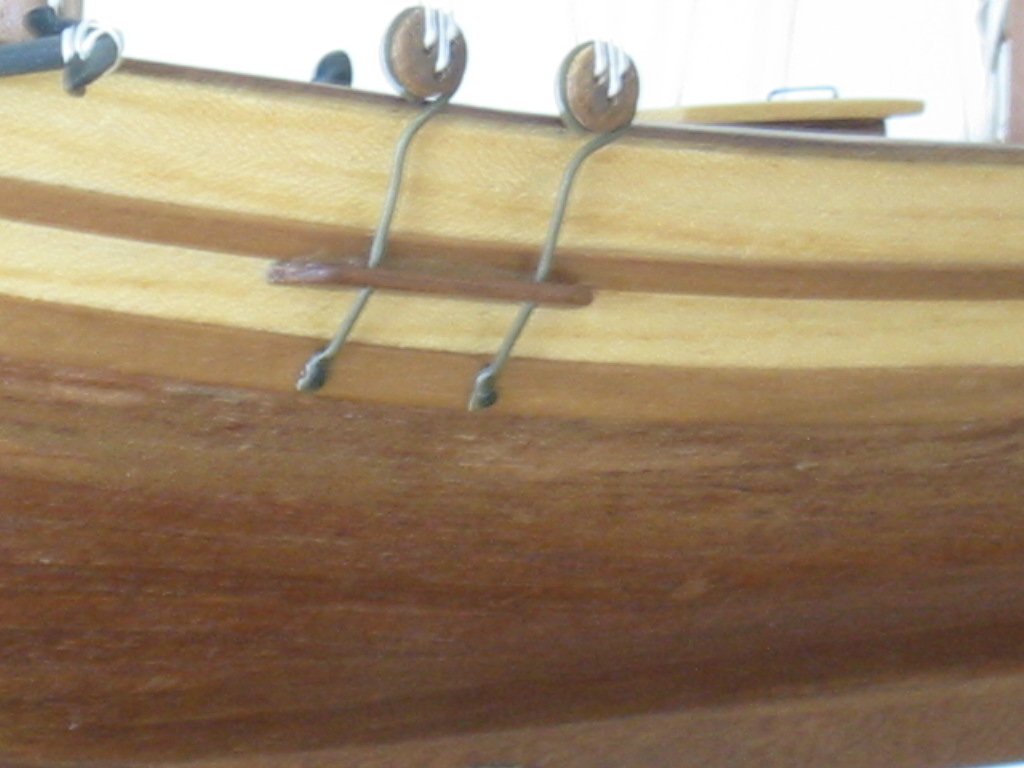
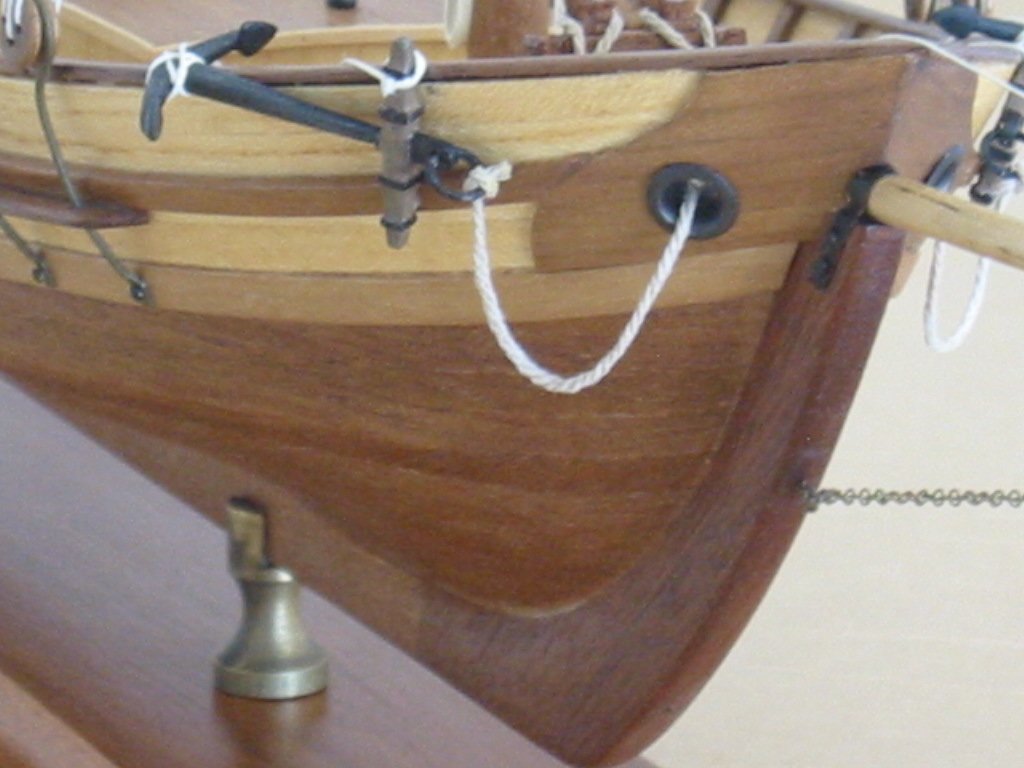
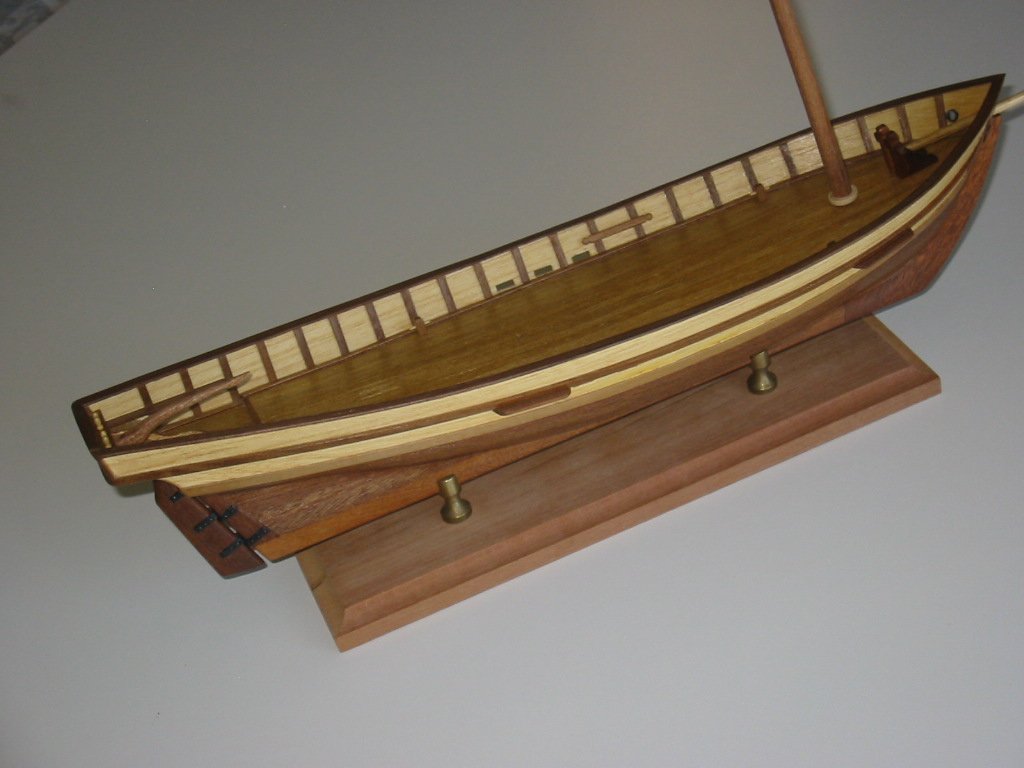
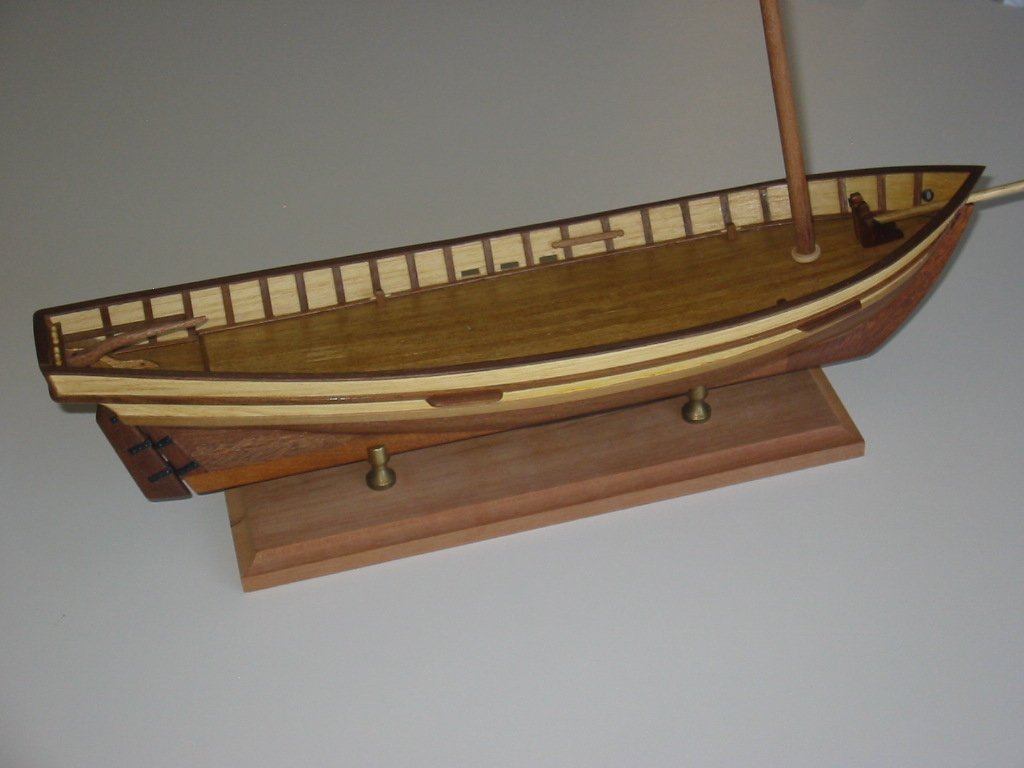
I have somehow misplaced almost all of the remaining progress photos of this build. These are a few images showing close up views of certain details. The kit comes with brass fittings, many of which I replaced with styrene and painted black.
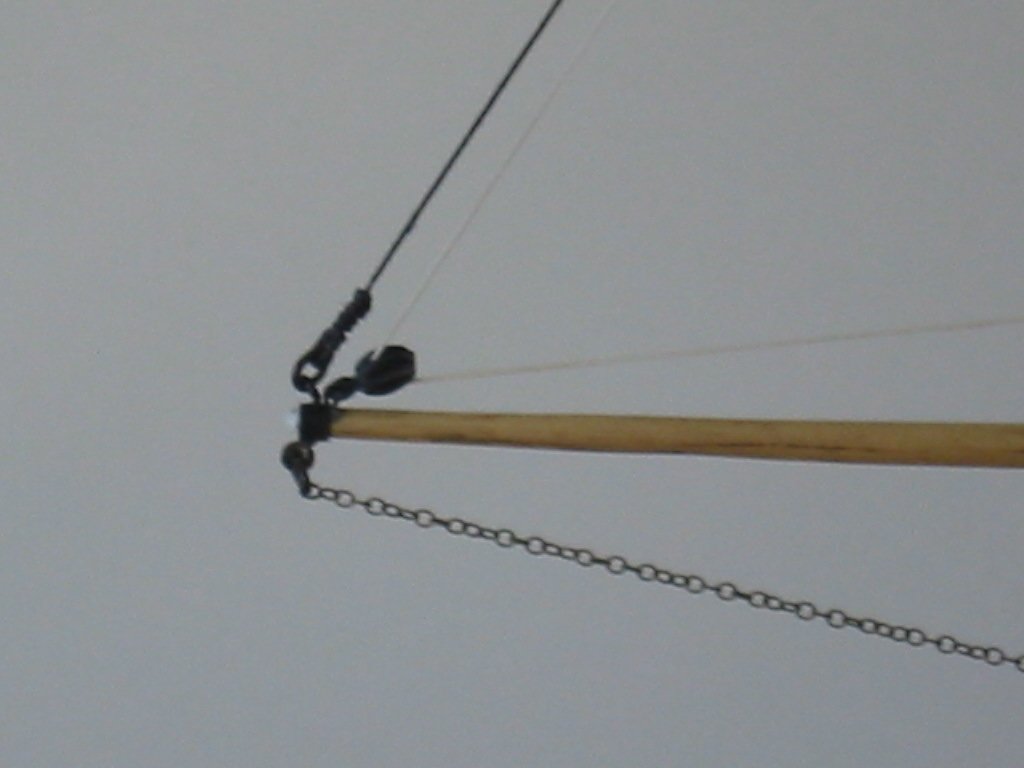
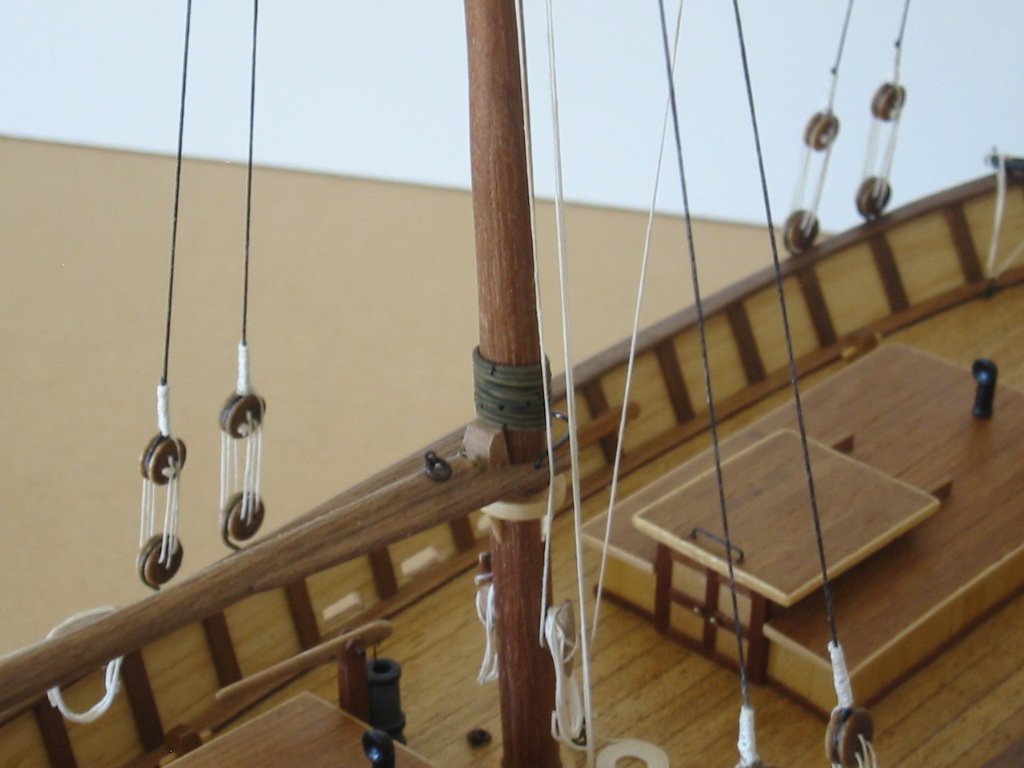
This shows details of bowsprit.
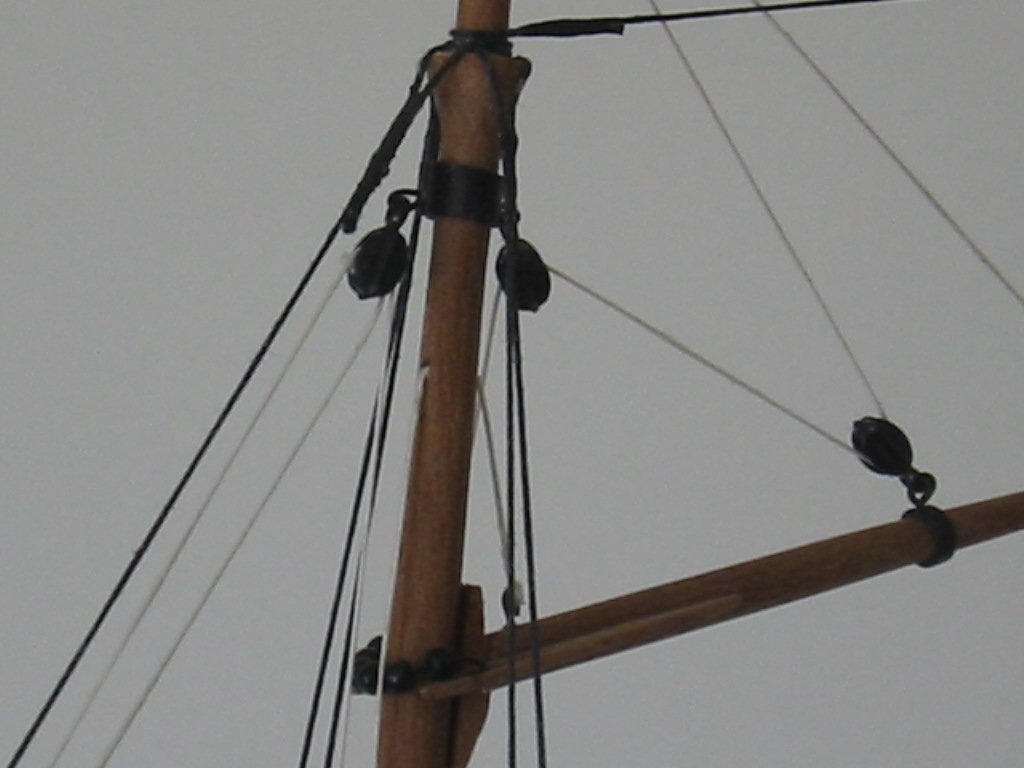
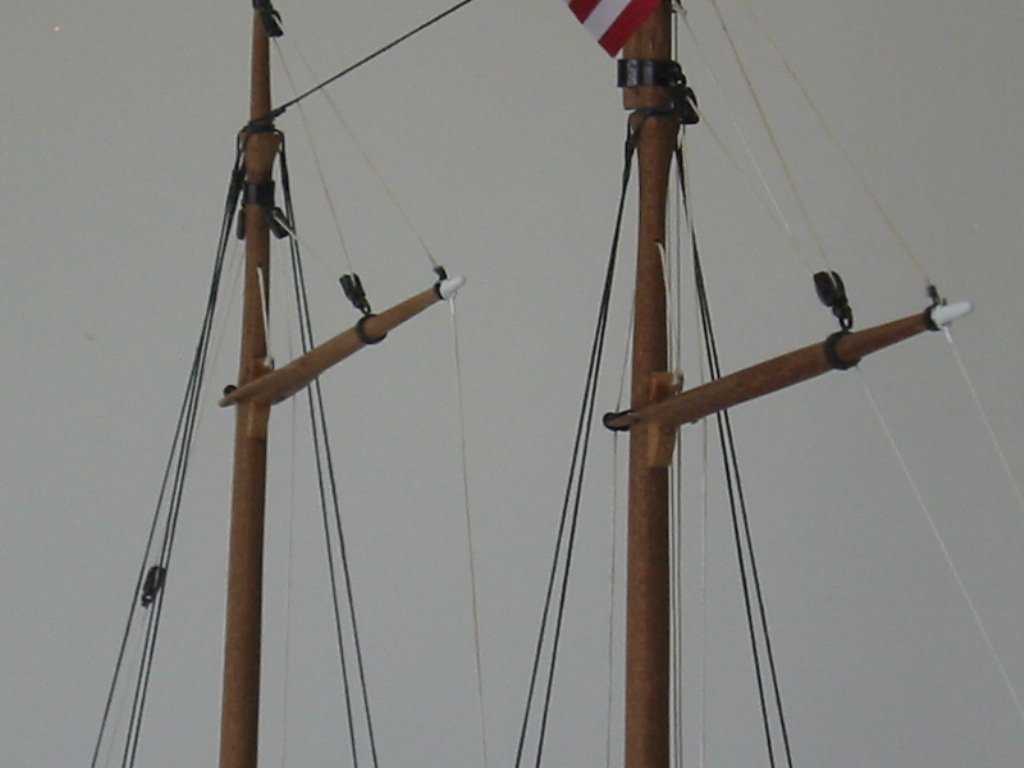
Closeup of Mast and gaff details.
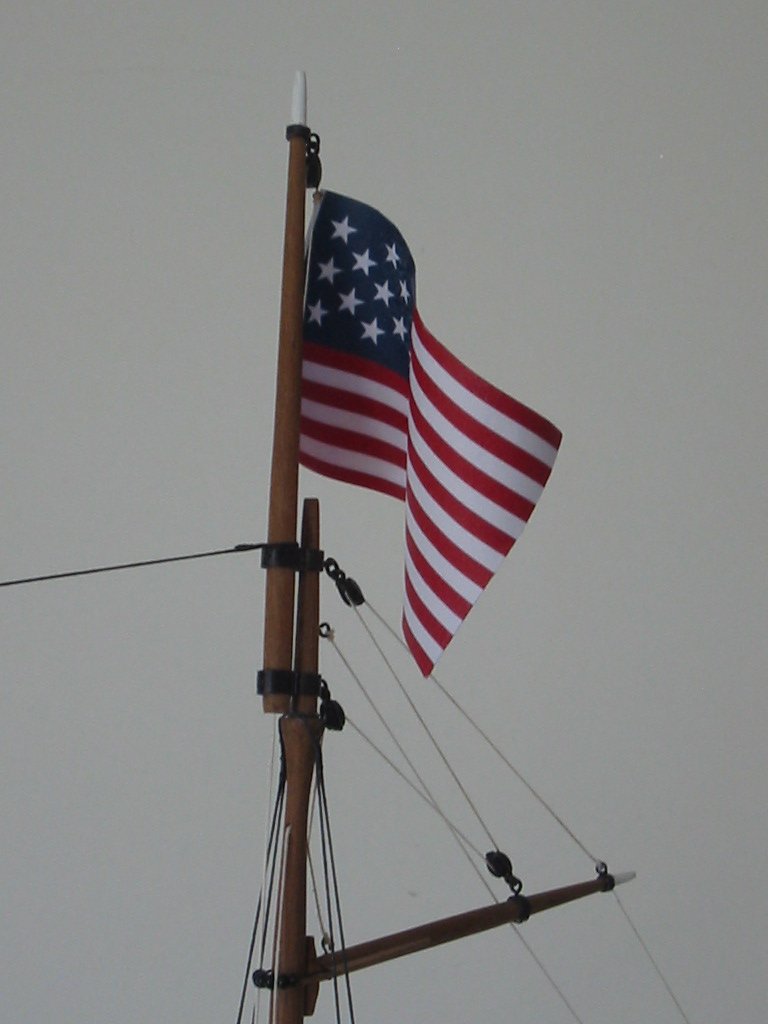
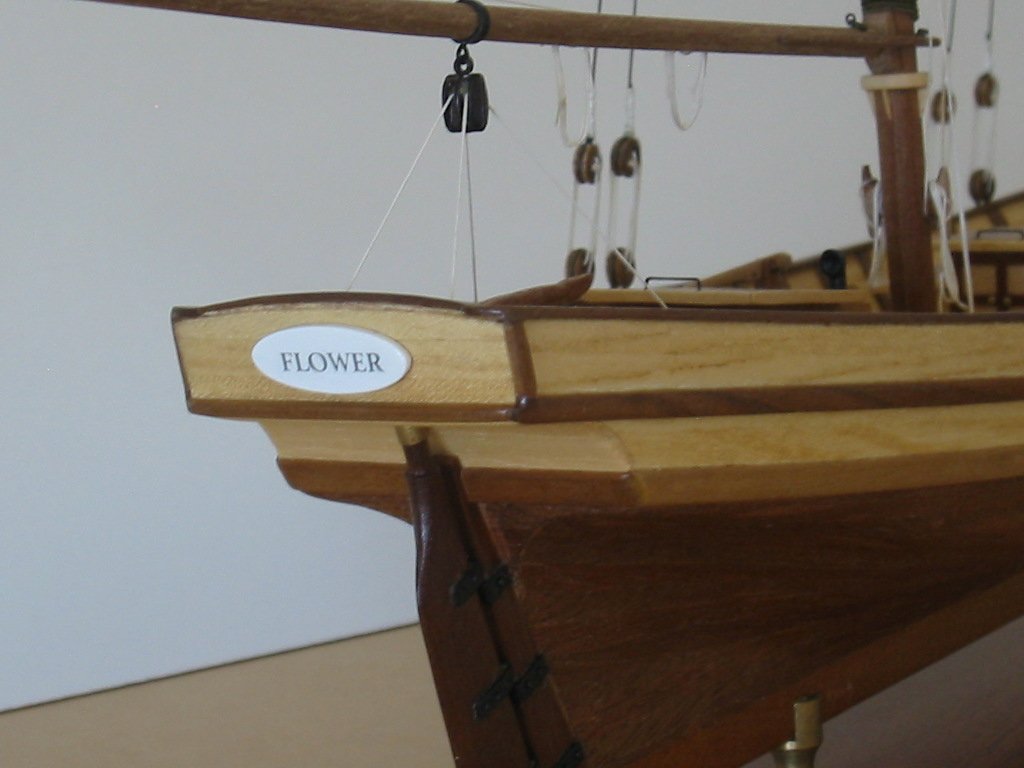
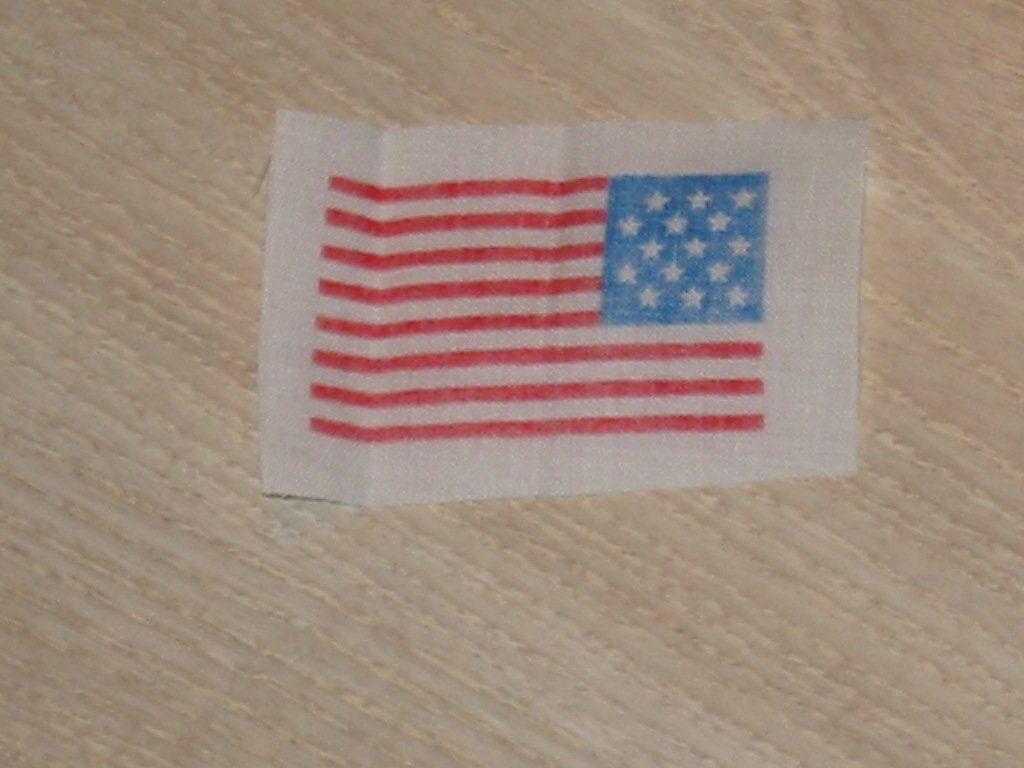
I did not use the flag provided in the kit and printed a replacement mirror image 15 star and 15 stripe flag on my inkjet printer with plain paper. Once printed, both sides were carefully aligned and glued with a very thin even coat of white glue. Before glue sets up, the flag was rolled with a large diameter dowel to give it a permanent curl. Next, the edges were carefully coloured with dry water colour pencils to eliminate the white paper showing. Finally, I sprayed a clear flat coat to protect the ink and seal everything and mounted the flag.
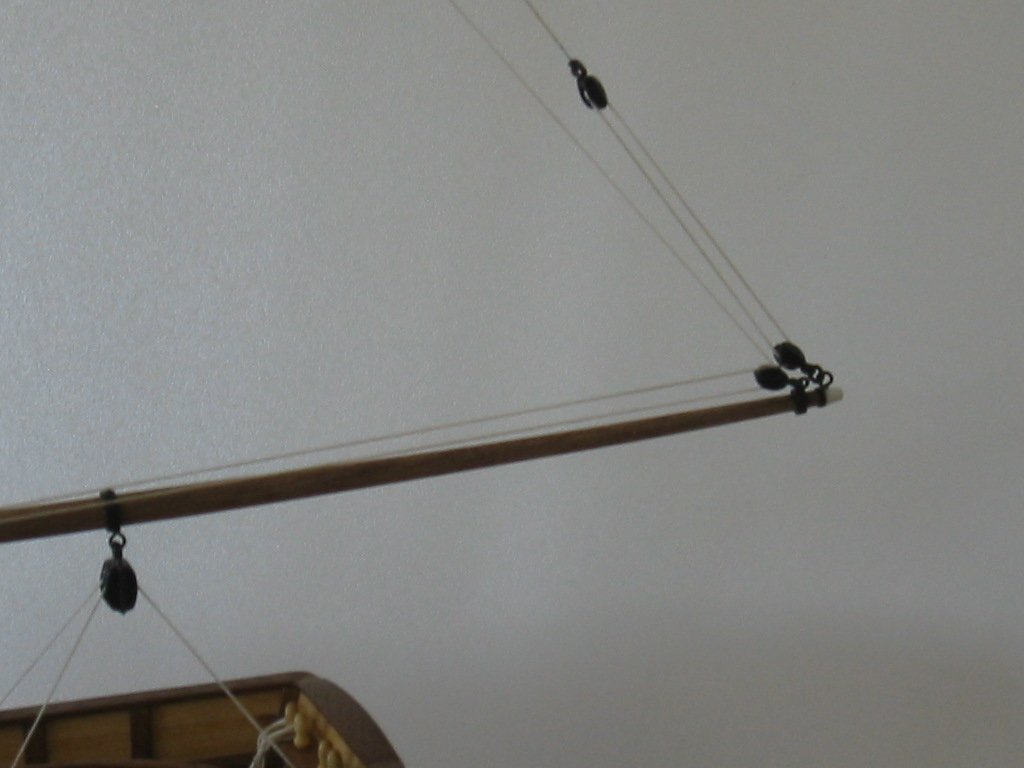
More details of the boom.
Kit chain plates are bright brass wire with a flattened end. I drilled a hole in the flattened end and darkened the brass a bit before bending them around the deadeyes. Flattened end of the chain plates were pass through holes drilled in the channels and then secured to hull with a small nail. Apologies for the poor image.
Details of the gaffs. I replaced kit brass fittings with boom jaws made from spare wood. Parrels were made from small black beads and wire.
More details . . .
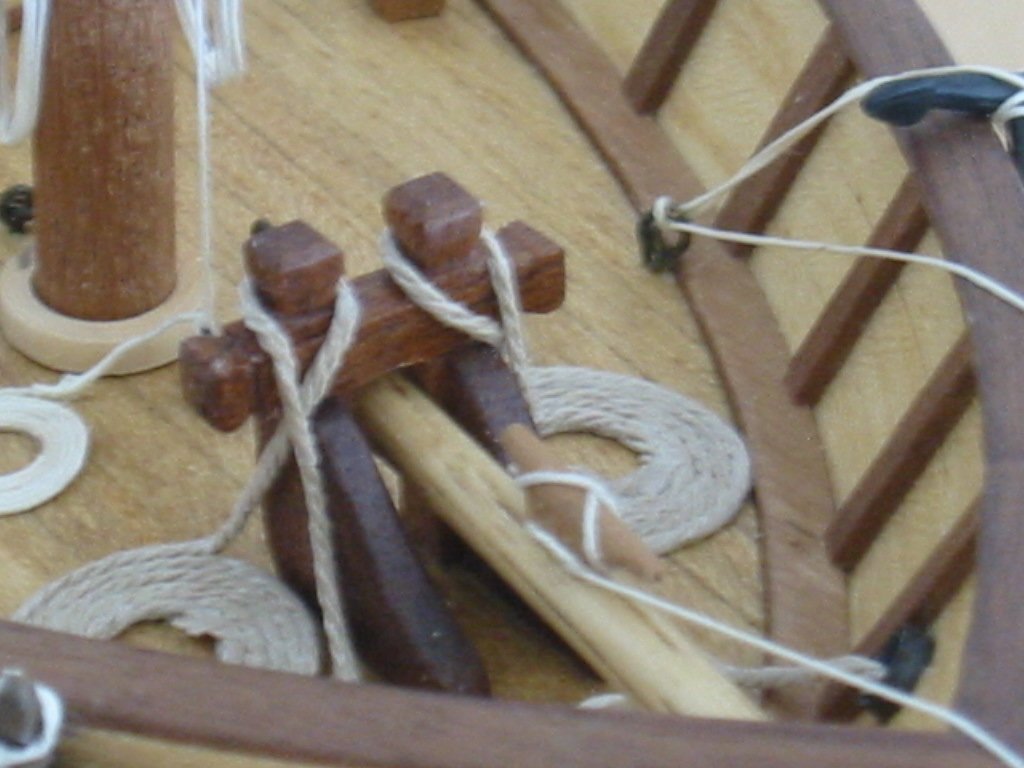
closeup showing various details. Boom jaws made from spare wood. Sail hoops made from darkened brass wire. I did not use the kit provided brass hinges for the deck house.
Anchor details. Kit comes with metal anchors which I painted black and simulated wood grain for the stock. Gammon is painted brass secured with small nails.
Decided on the name "FLOWER" . . . . .
-
More progress images. Test fitting of mast.
-
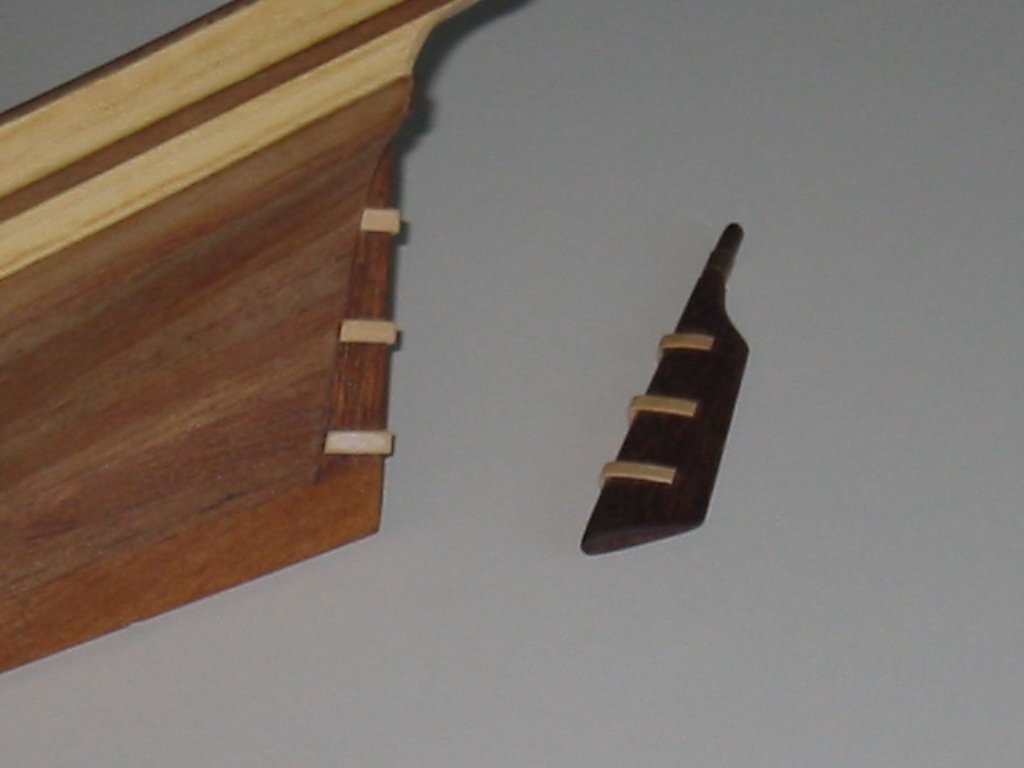
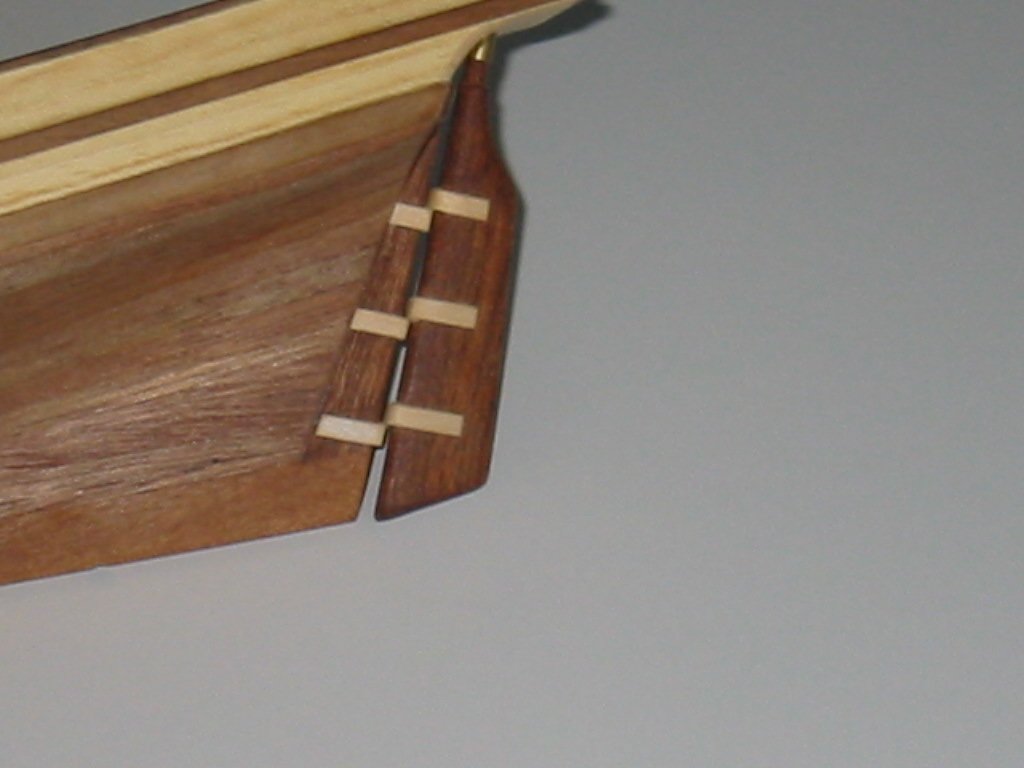
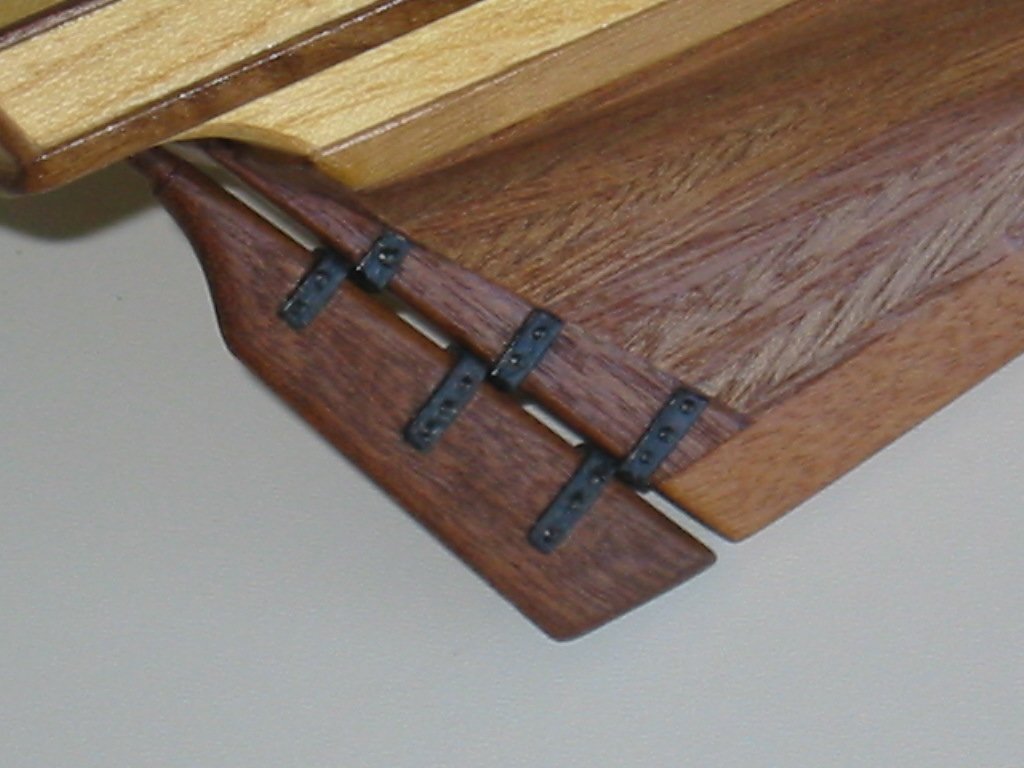
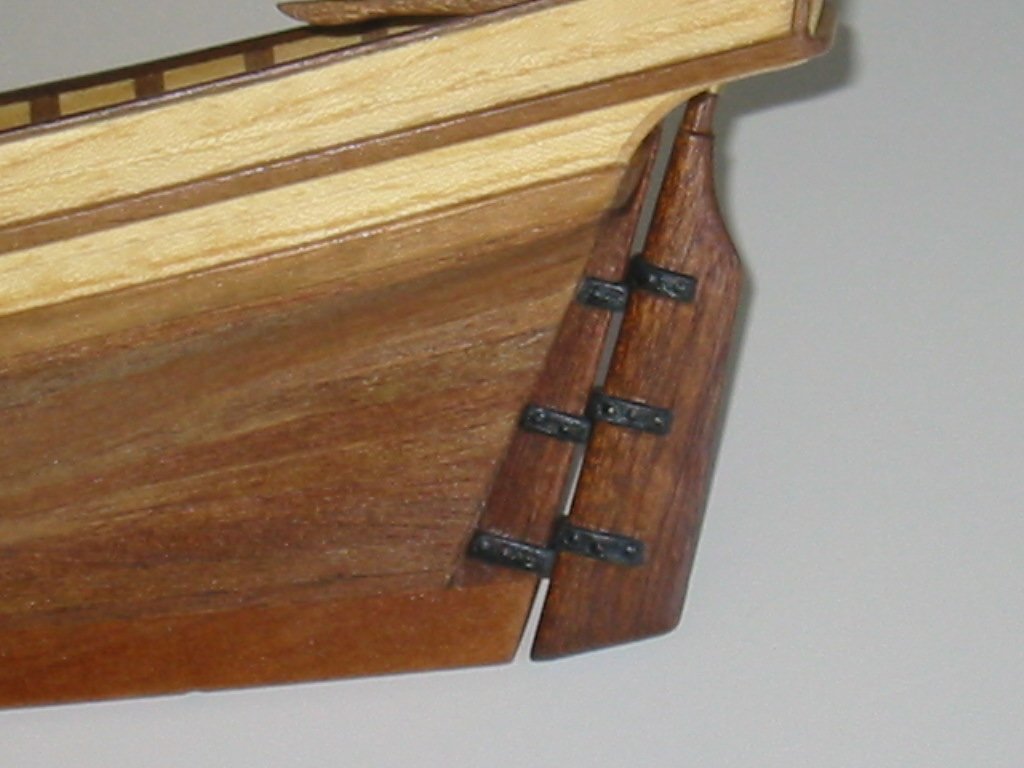
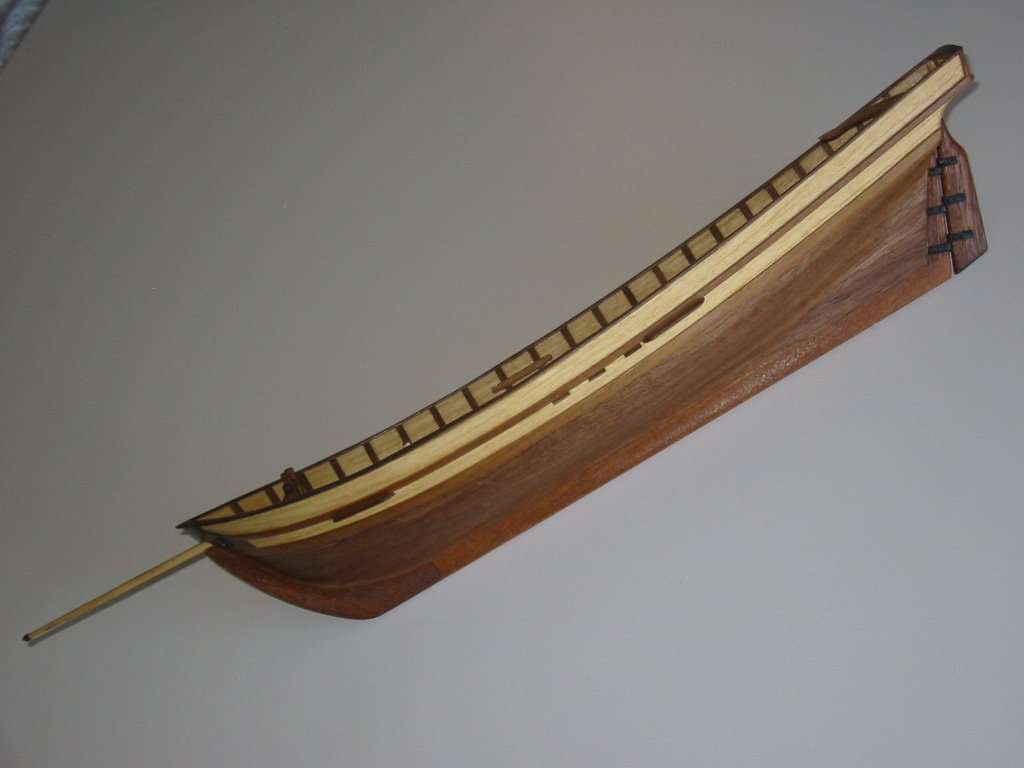
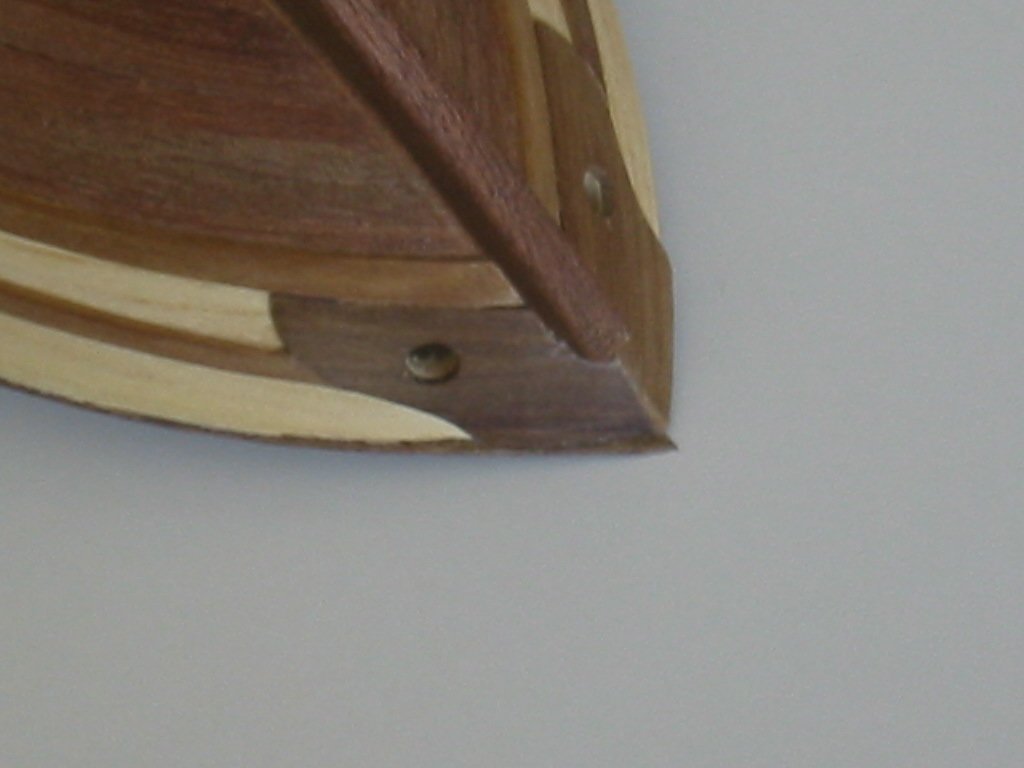
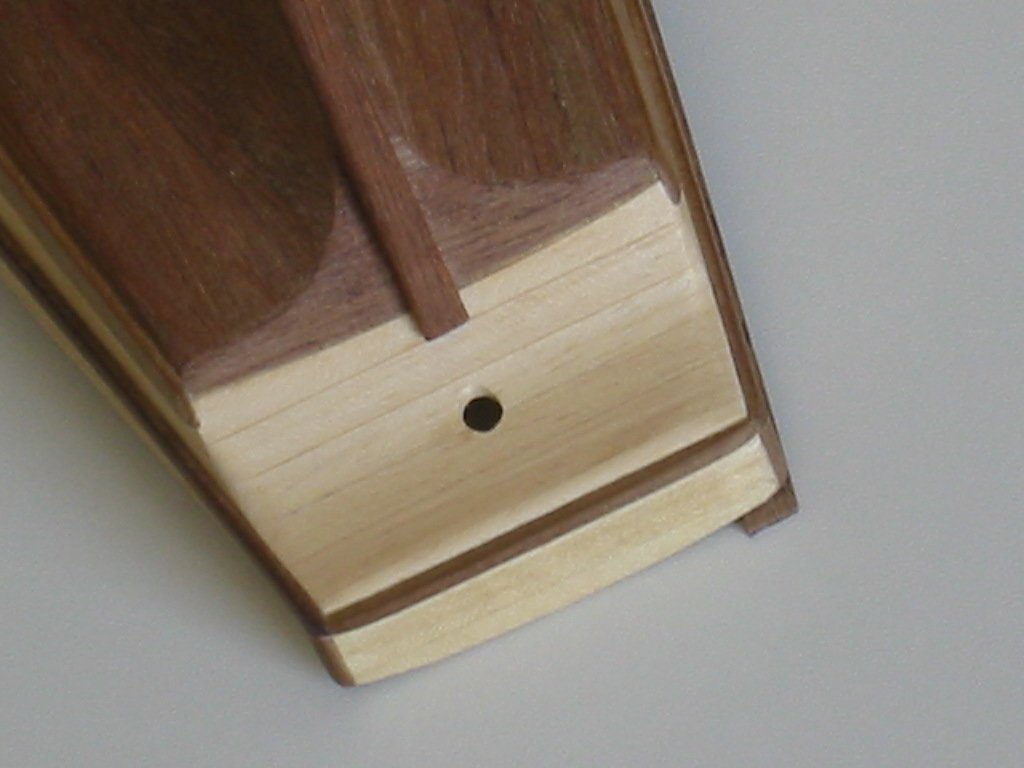
Moving forward with more in progress photos. The kit comes with shiny brass fittings, including the rudder hinges. I decided to scratch build replacements from wood with rivet heads from sewing pins and all painted black. The result is not movable and glued in place. The bowsprit in the kit and plans seems too short? I made a longer one that looked better and modified the bitts also.

Many thanks for having a look - questions & comments always welcome.
Cheers,
Bill
- nehemiah and Larry Cowden
-
 2
2
-
Many thanks! I believe the quality of the kit materials may vary with the version and date of issue. Some of items in my kit from 1982 were very good, otherwise were poor. Good luck with your build.
Bill
-
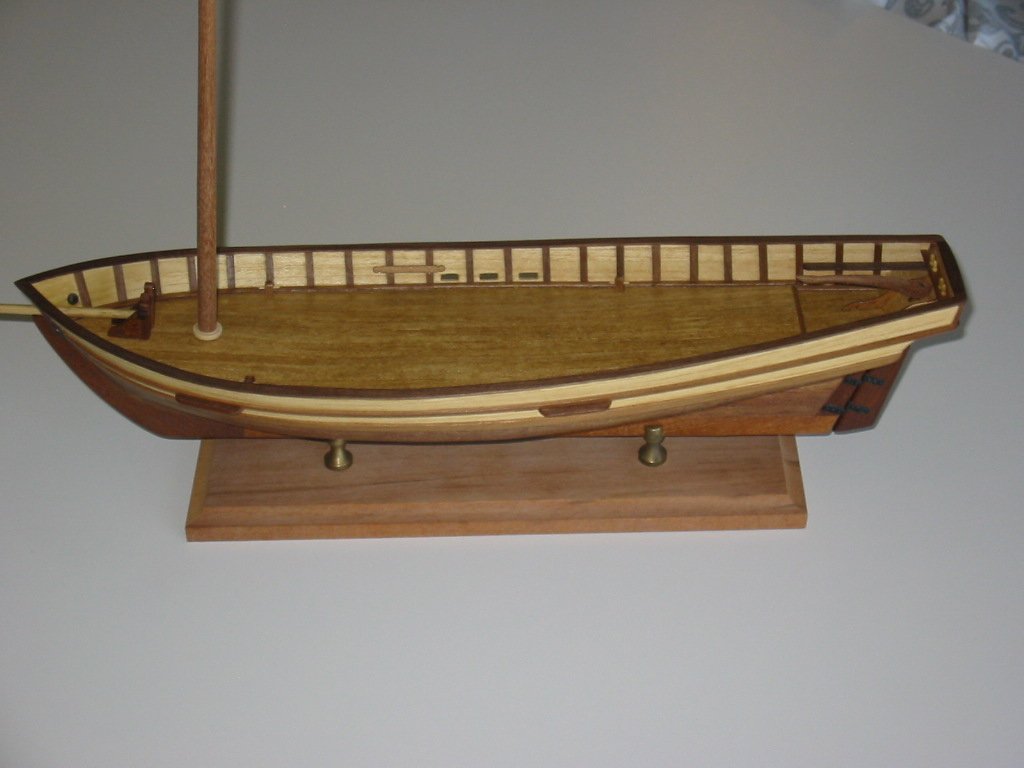
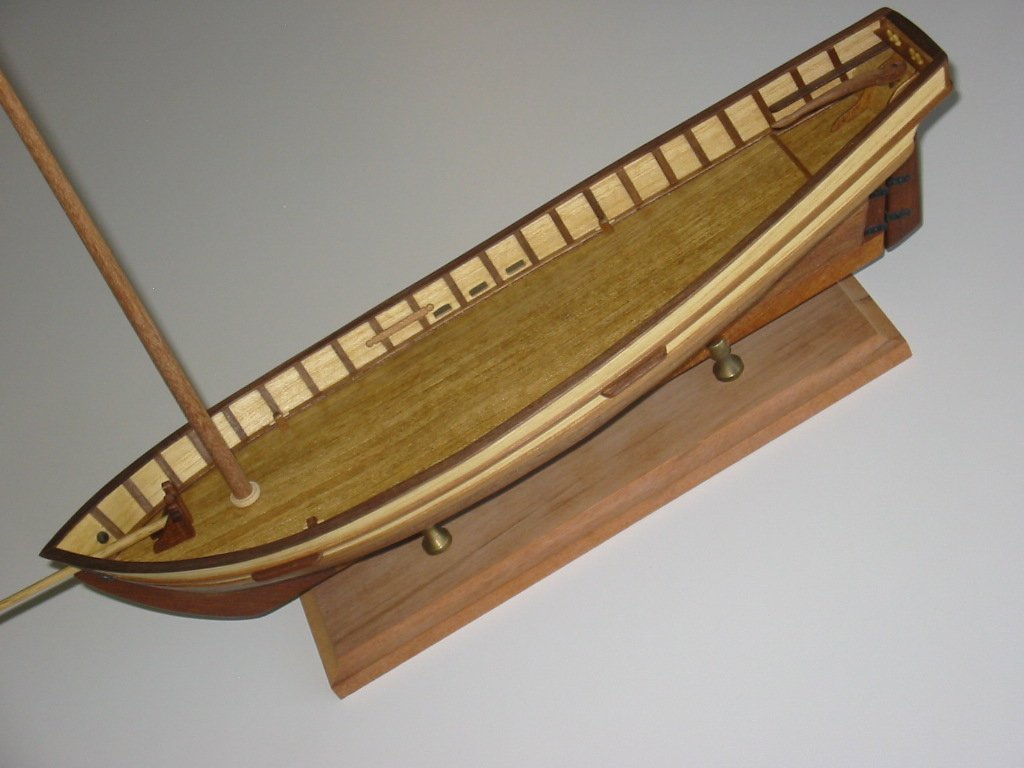
A few more images . The three keel parts in the kit were all different colours, but I went with them anyway.
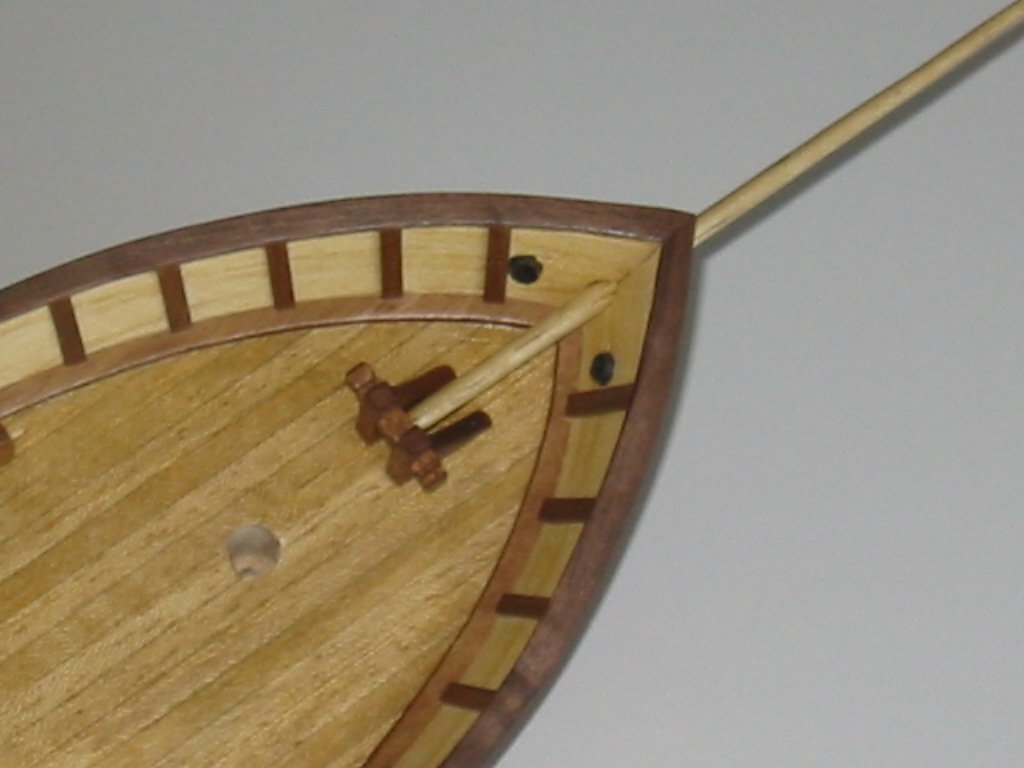
I drilled small pilot holes in the deck for the mast, these will be enlarged later when the masts are fitted.
- Larry Cowden, nehemiah and Swallowtail
-
3
-
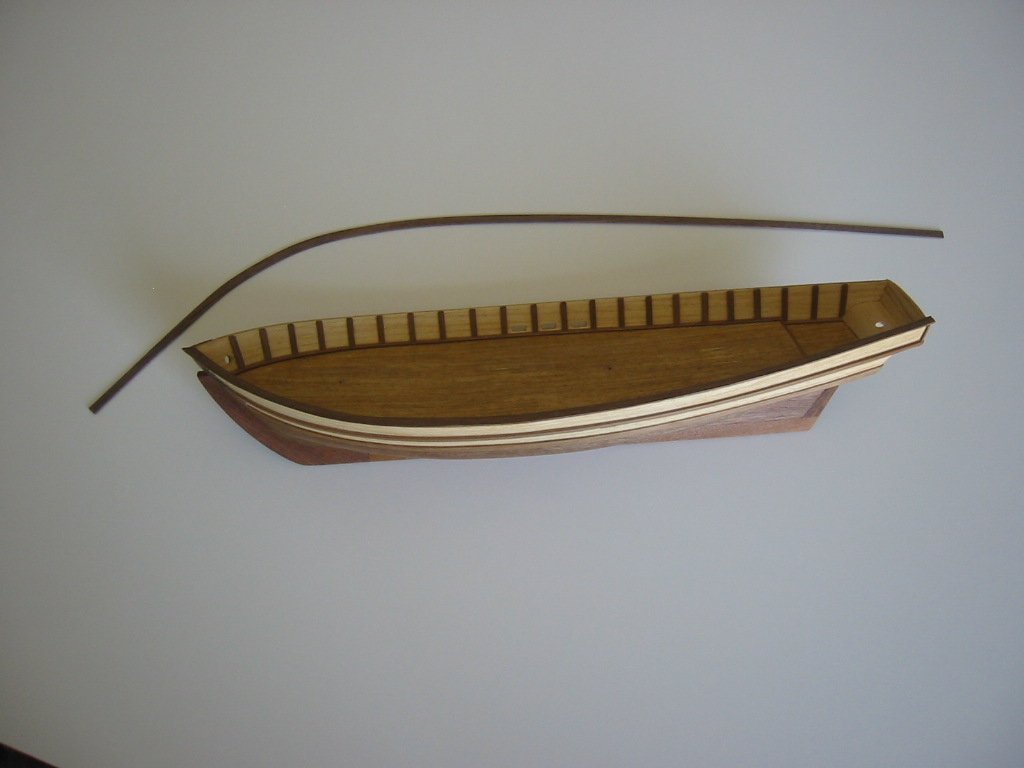
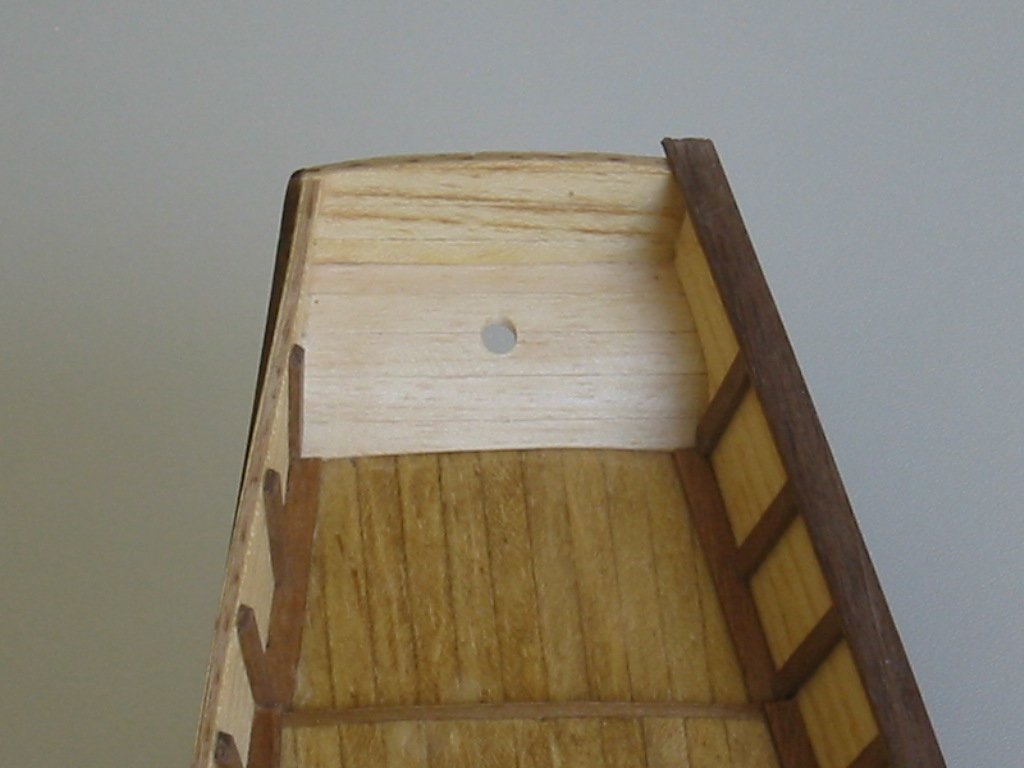
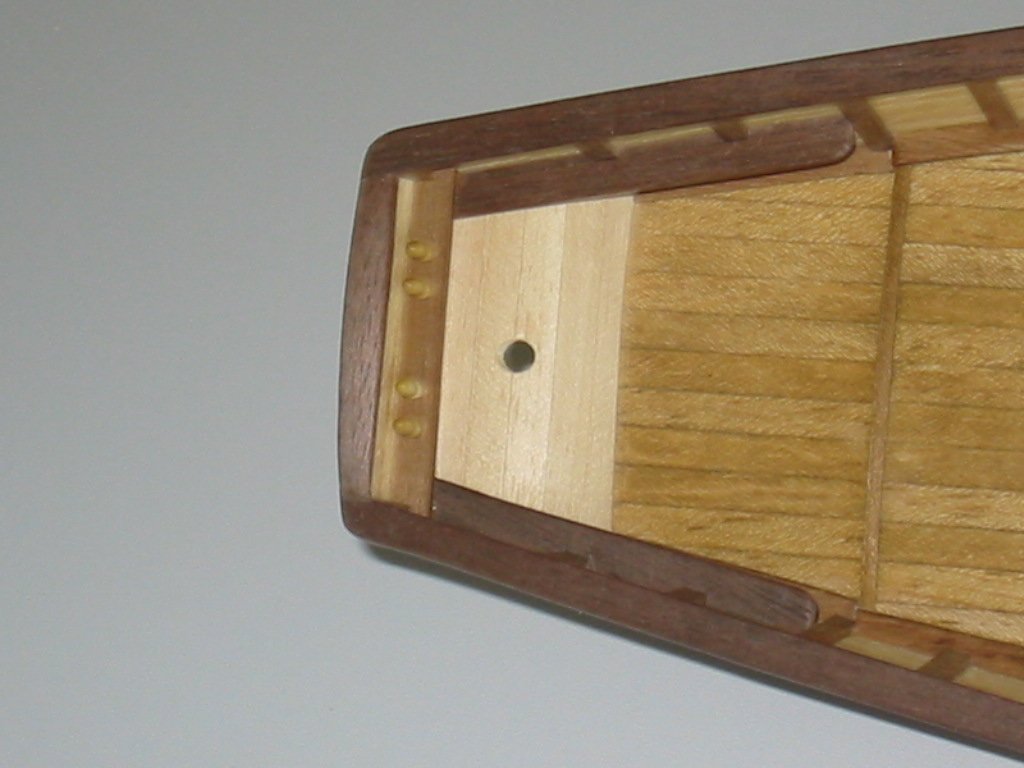
More images. Bulwark inner planking, stern area, hole for rudder, and cap rails. My kit came with thin plywood cap rails which really looked bad so I made new ones and shaped with a little water and heat.
-
Looks good! The deck planking shows really well, looking forward to more progress photos.
Cheers,
Bill
-
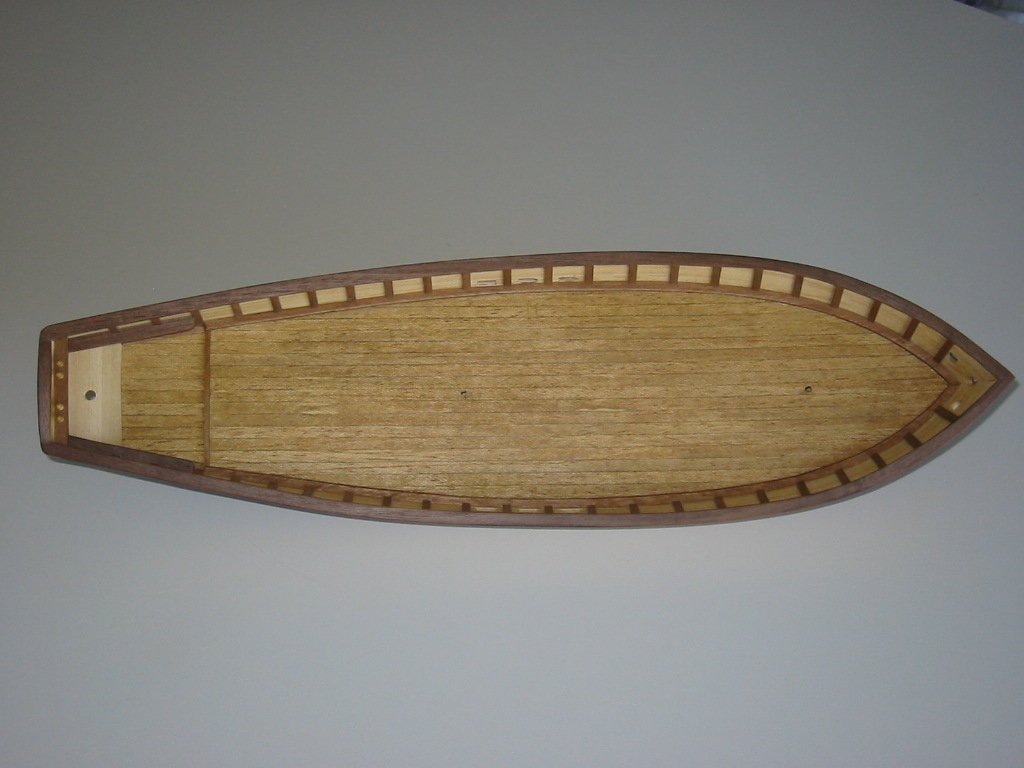
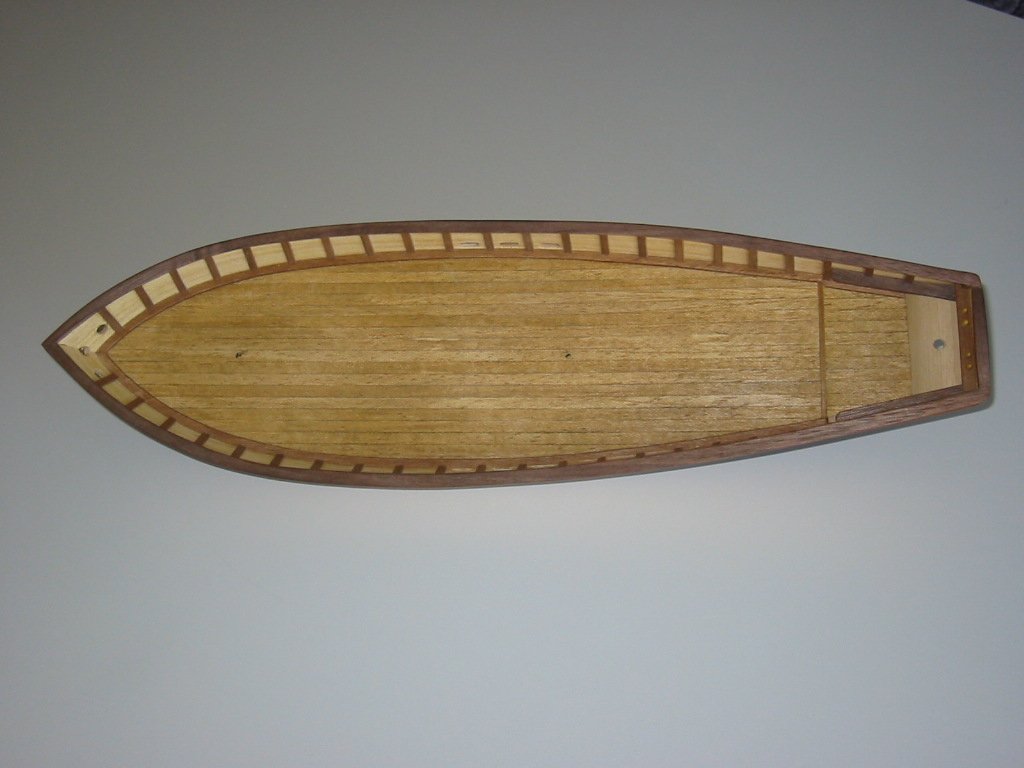
More images of the build. Once the keel and frame assembly was completed I moved onto fitting the deck. The deck has to be manipulated in multiple directions in order to conform to the top of the frames. I considered a few options on how to do this and decided to use push pins. Starting at the center and alternately working fore and aft, the deck was secured to the center line as seen here:
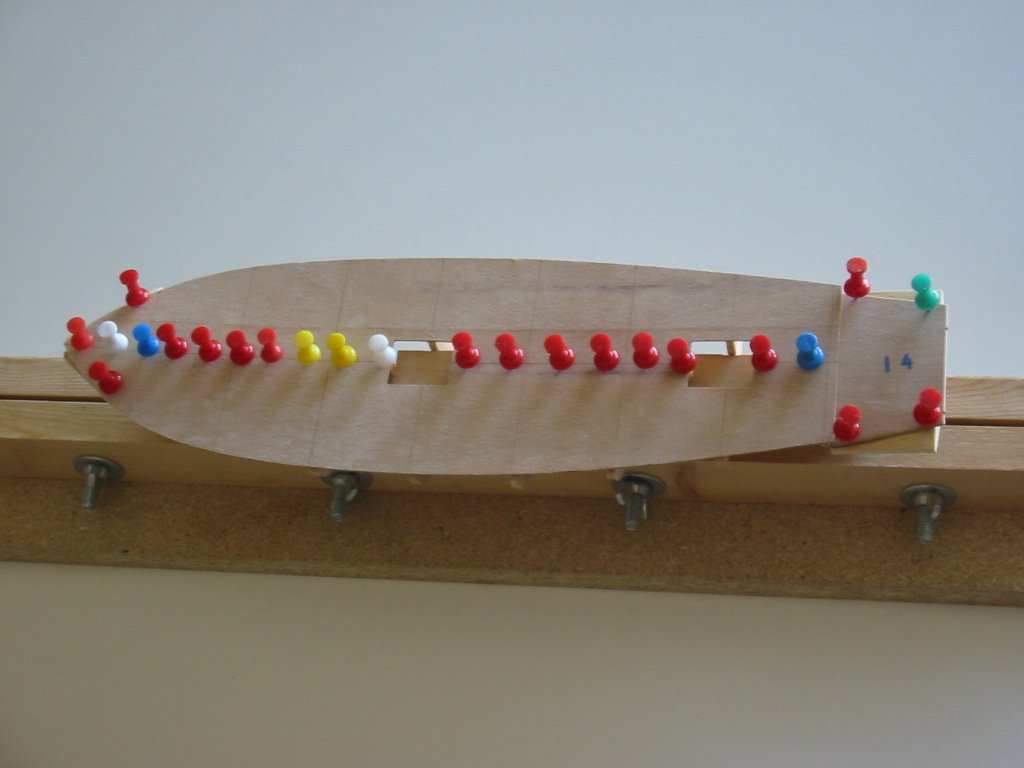
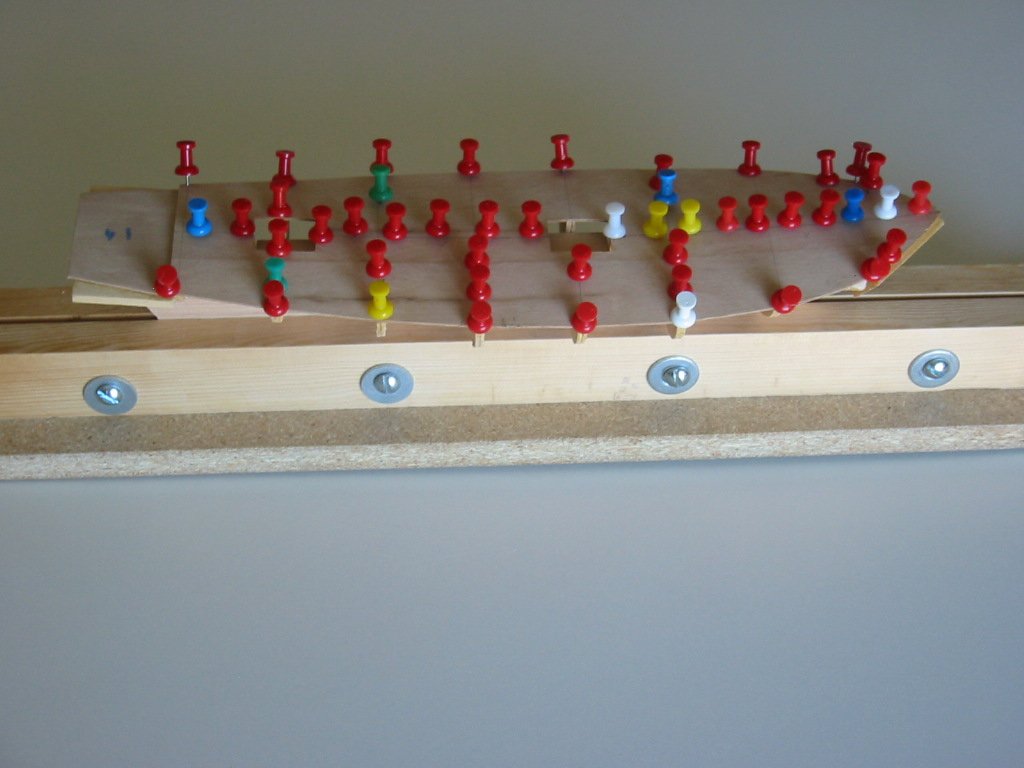
With the center line glued down tight, I started at the center frame and alternately pinned the deck port and starboard. Then moved to the next frame and repeat the process until all of the frames were glued and pinned so that the deck conformed tightly with all of the frames. I found this approach much better than rubber bands which I used in previous builds. Securing the deck from the center outward made it much easier to flex the deck so that it fit snugly on the frames:
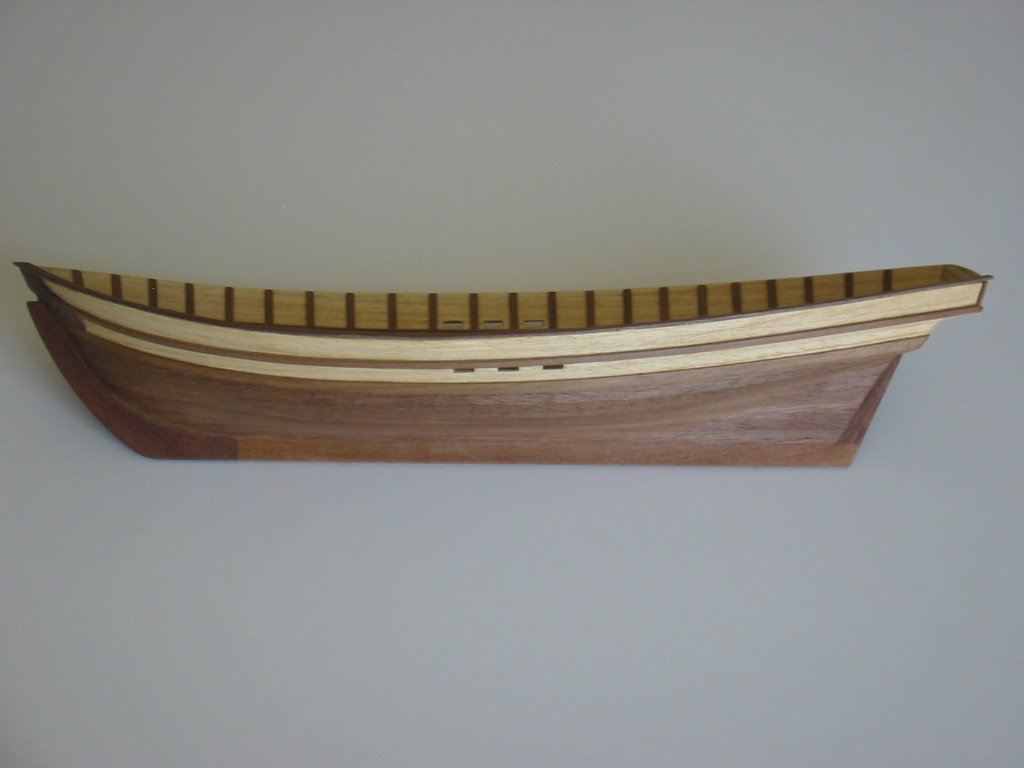
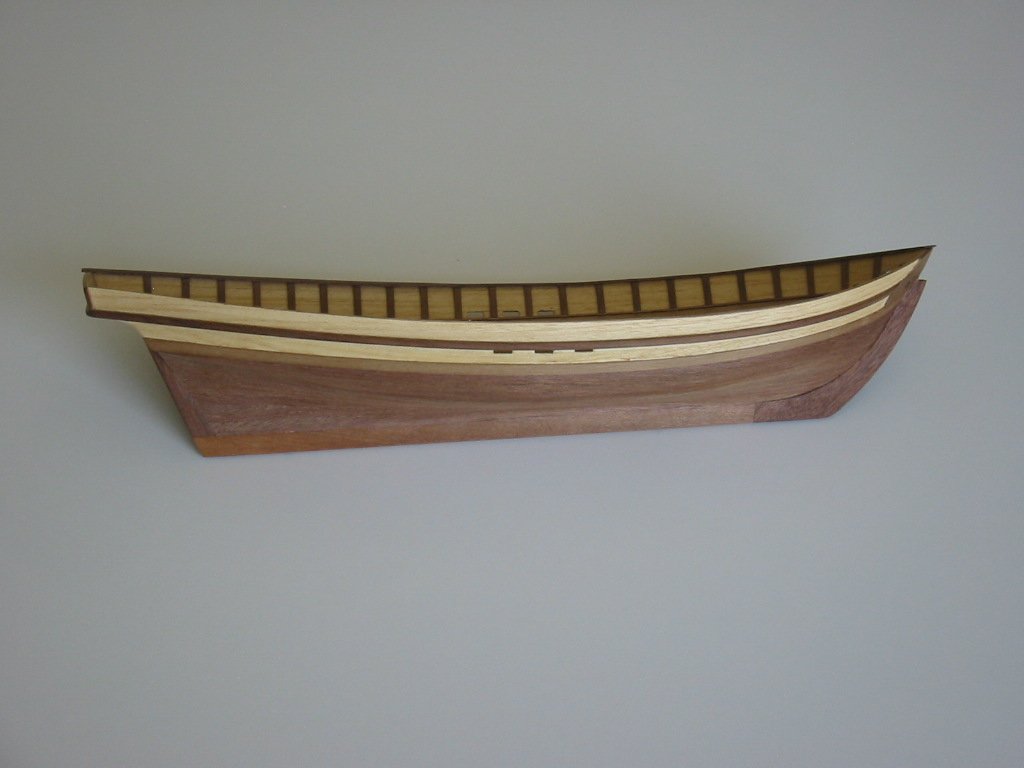
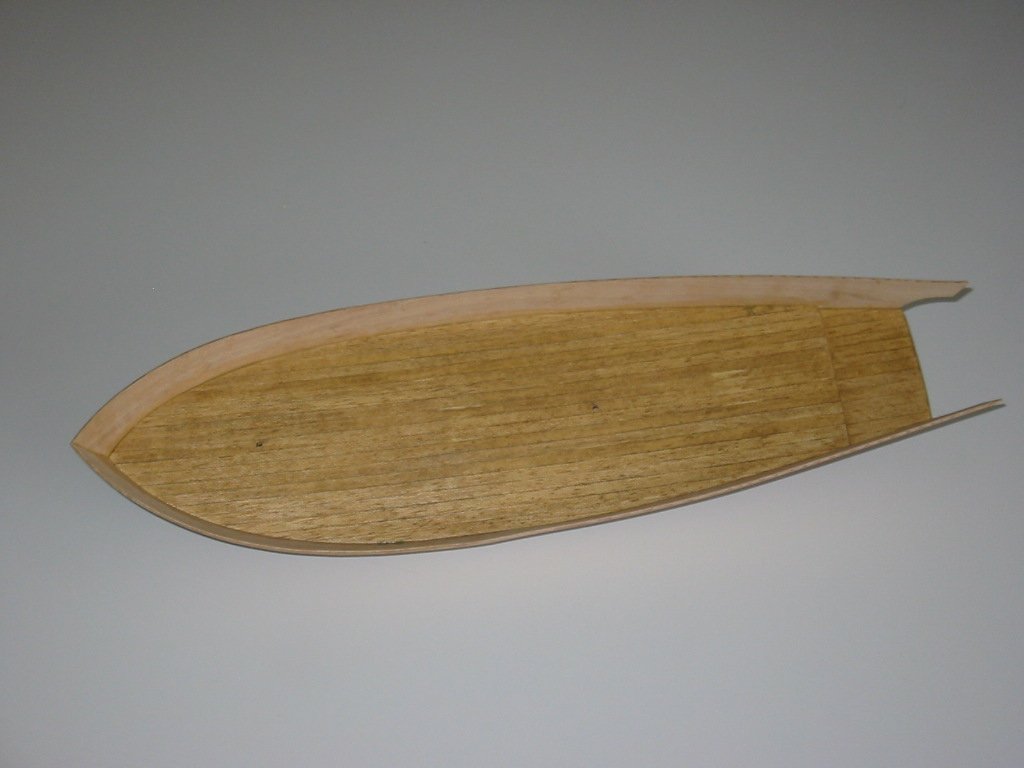
Next I carefully filed the the edge of each frame so that the hull planks would lay down smoothly with maximum frame contact. I spent a lot of time on this and made an extra effort to get this right because it really makes a very big difference in the appearance of the hull planking. The kit is designed for two hull planking and I did initially start with the kit supplied first planking strips. Right away I discovered the very poor quality of the wood and decided to look for an alternative. My supply of extra wood planks included some that were of high quality and very flexible so I started with these thinking I could do both hull layers with the same wood. Very quickly I found that this wood was laying down so nicely that I could avoid the second planking entirely. With just a little water and some heat from a curling iron I was able to get each plank to fit very snugly leaving no gaps and having to cut only a few:
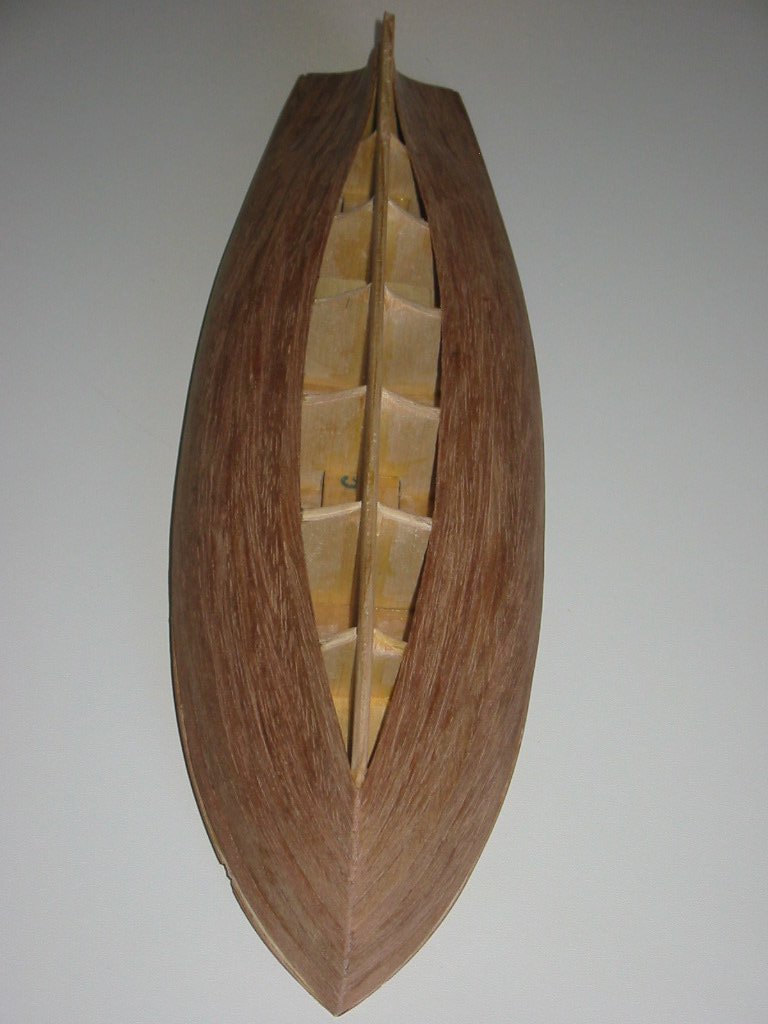

I don't know what wood these extra planks are made from, they were included with some old used kits I purchased in an plastic wrapper labeled "extra". I alternated from side to side laying one or two at a time with the edge of push pins pushed into the frames to hold the plank in place while the glued dried. When finished I was so pleased with the result that there was no need for a second plank layer and moved onto the deck planking:
I decided to just lay single deck planks. My prior attempts to use cut planks, butt joints and pencil to highlight joints never looked right. Using single planks followed by a wood stain seems to work better for me at least with my current skills - maybe I will tackle a more involved approach in a later build. With the deck planks in place and stained, I moved onto fitting the bulwarks:

Getting the bulwarks to fit required some careful heat bending, trimming and test fitting before they would lay in place appropriately. Once in place, they have to be handled gently so they don't break loose from the glue joint at the deck/hull edge. So far everything going well, more images coming soon.
Bill
-
Greetings!
New guy here and wanted to share my work on the Swift. This is my third wood ship kit and I am almost finished, but have photos from the beginning. This is the version of my kit:
Compared to the other kits I have done and the ones I have waiting on the shelf, some of the material in this kit was really poor quality. As I progressed through the build I had to substitute much of the kit supplied wood with spares that came with some of the other kits I have acquired. Examples of items I did not use from the kit include:
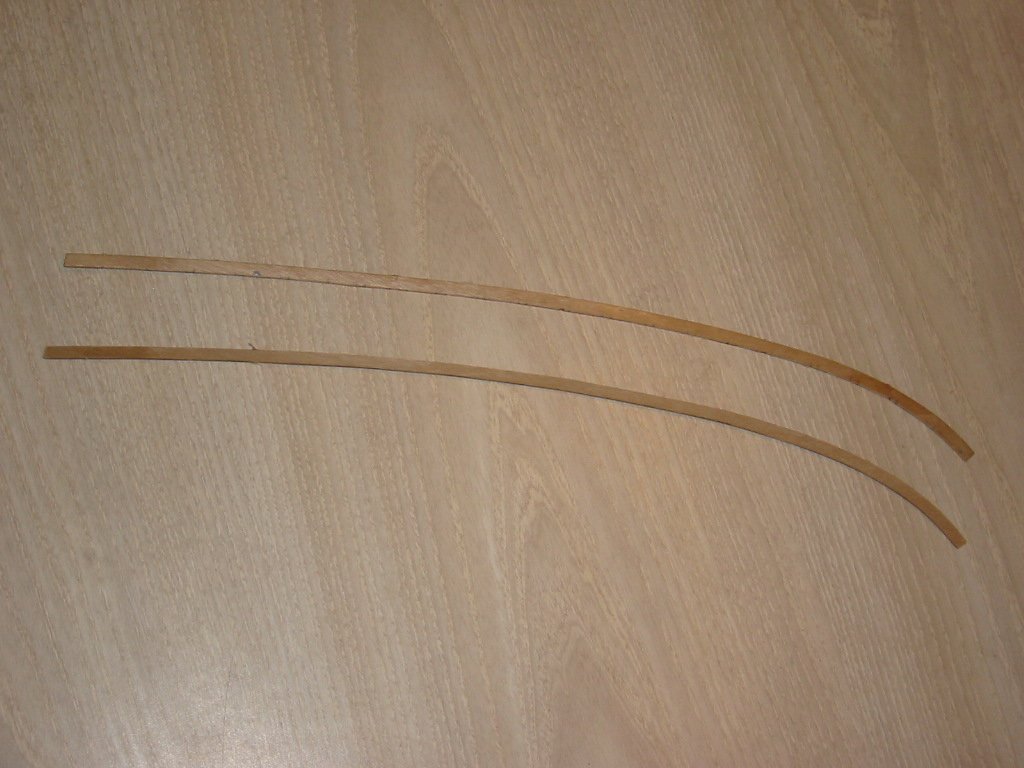

Perhaps I am being too picky about these items, but they really don't compare with the quality of the other kits I have. The first hull planking wood was horrible - all twisted, splinters, and very brittle. The cap rails came a thin plywood and just did not look right along with the flag which was printed on one side only. The plywood keel was a bit warped but I was able to use it and the frames. There were other items in the kit that I did not use which I will mention later in the build.
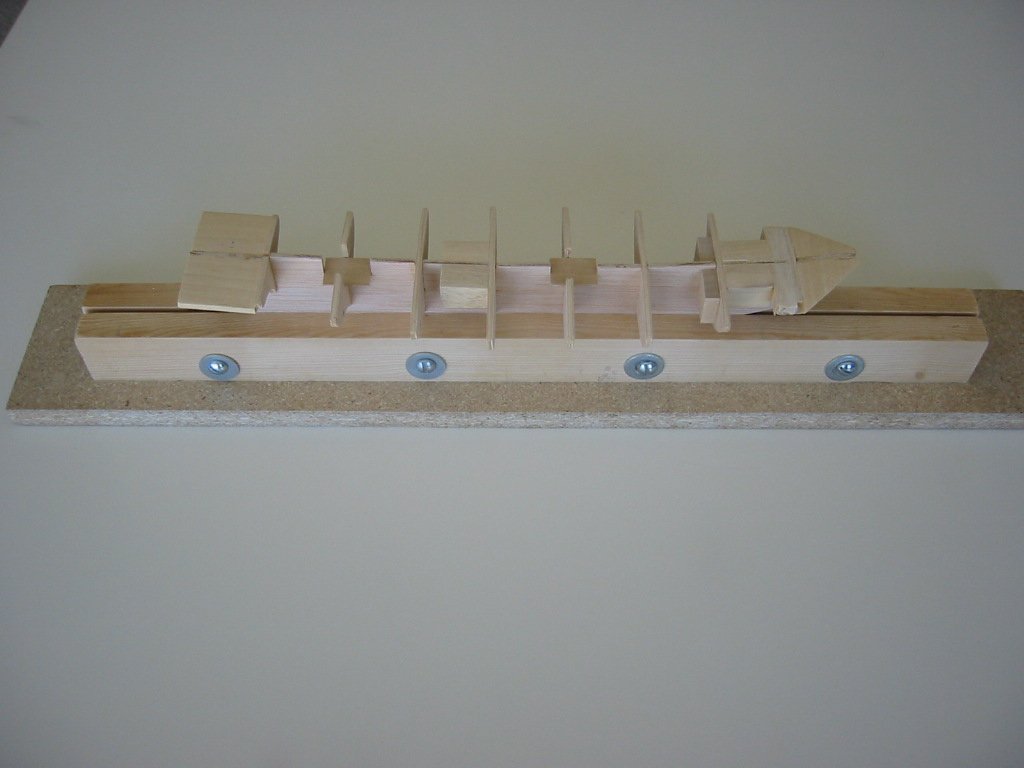
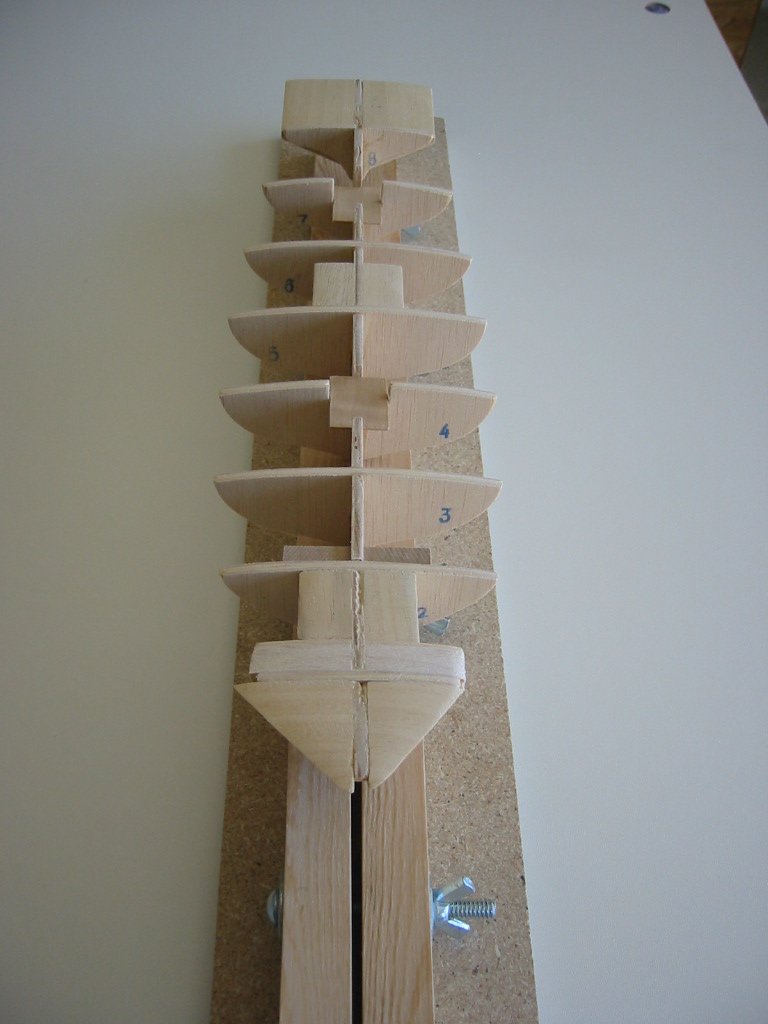
Started as usual with keel and frames. Added some additional blocks to help get everything straight. I did use clamped lego blocks to square up the frames, but can't find the images or maybe lost them:
This part of the build went well and once everything dried I moved on to the deck which I will post next.
Many thanks for having a look - comments and questions are always welcome and much appreciated!
Happy Holidays . . .
Bill
-
Thanks everyone! I am located in Murrieta which is in southwest Riverside County. Not the best of Southern California, but not the worst either. I am nearly finished with the Artesania Latina Swift, but have work in progress photos from the beginning which I will post as a build log shortly.
Bill
- ccoyle, Chuck Seiler, Keithbrad80 and 3 others
-
6
-
Hello! Just joined up and hope to learn from the beautiful work being done here. I usually model in plastic or resin, but have done a few wood kits and really enjoy working with wood. Looking forward to doing more wood kits and recently acquired a few that will probably challenge me, so I will be posting and seeking help as things progress.
Regards,
Bill
- Keithbrad80, ccoyle, mtaylor and 1 other
-
4

Swift 1805 by Swallowtail - Artesania Latina - 1:50 - first build
in - Kit build logs for subjects built from 1801 - 1850
Posted
Really looks good so far. What are you going to use to seal the hull? Satin polyurethane?
Cheers,
Bill