


Larry Cowden
-
Posts
137 -
Joined
-
Last visited
Content Type
Profiles
Forums
Gallery
Events
Posts posted by Larry Cowden
-
-
On 4/2/2013 at 6:30 PM, tlevine said:
The problem with the curvature at the bow for the first few strakes and at the stern for strakes 3 through 5 (for me at least) were part of the reason I did not use the provided wood strips. I do not like to edge bend strakes unless they can be well secured to frames underneath (think plank on bulkhead). Looking good, Bob.
If you did not use the provided planks, what did you use? I would think most builders would go with the provided planks.
-
On 1/10/2021 at 10:55 AM, clifforddward said:
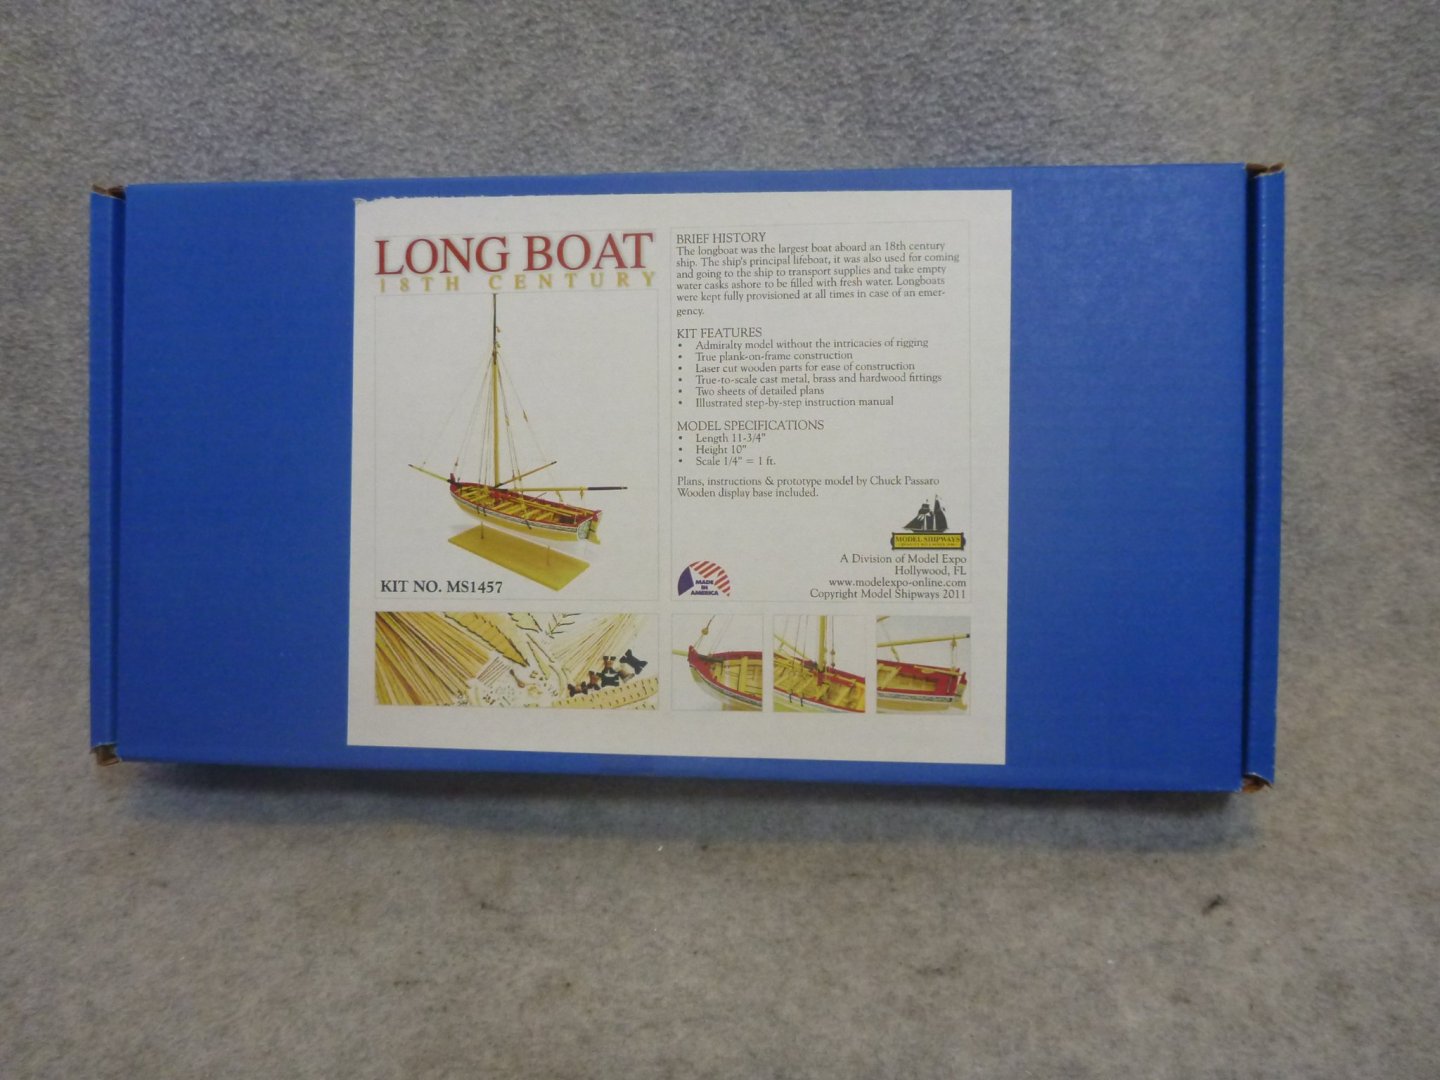
Model Shipways kit for sale...New-in-Box, never started:
Pending Sale 1) Model Shipways #1457... 18th Century Longboat Kit...1/48th Scale...$40 postpaid USA via FedEx Ground shipment.Please note I will be selling a number of shipbuilding related items from my workshop in the coming days, including tools and difficult to find modeling books...a result of my realizing my modeling passion is live steam model railroading. Stay tuned for some great stuff that I hope will be helpful to those with a passion for shipbuilding.
Best Regards,
Cliff
Is it still available?
-
On 9/18/2020 at 10:07 PM, Greg M said:
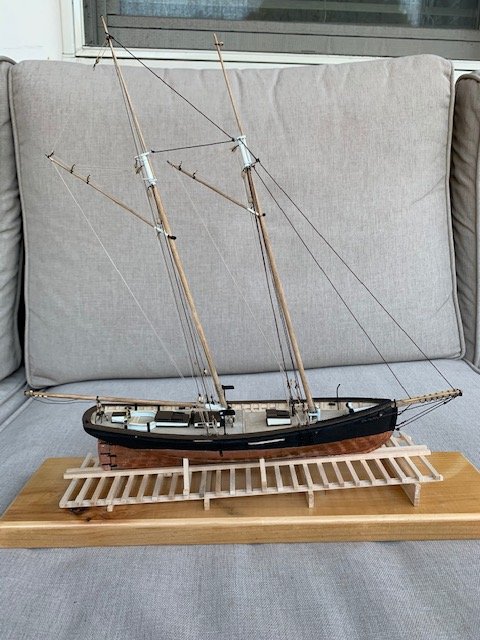
I spent today finishing up the Phantom to how far I wanted to take it. I decided to stop without installing any of the rigging for the sails. I plan to start my next build (Vanguard Models Alert) next week, but also will be focusing a fair bit of time on the Winchelsea.
As a bit of a debrief. I bought this kit on sale for $45 in 2004. Just getting back into the hobby after quite a few years away, the last entry in my previous build log was dated November 29, 2009 (Travel for work is halting progress). I figured this would be a pretty quick build to brush the rust off and I most definitely was not disapointed. I could see myself building this kit again at some point in the future and feel if I spent just an extra 2 weeks
My general impression with the carved hull was that it was good, not great. It appears to have been put together with two joined pieces of basswood that were of slightly different densities, so fairing the hull and carving the step below the caprail was very tricky. The hull was also slightly undersized at a couple points. Regardless, I was able clean it up pretty well, but I didn’t feel comfortable thinning the bulkwarks as much as necessary as I was very concerned damaging the hull, so the caprail is much wider than it should be. I didn’t realize it at the time, but nearly every issue that I had built upon this and caused me a fair bit of frustration that could have been avoided if I had just gone for it and thinned them down to where they should have been. I was thinking that in the future, alternatively I would remove all wood down to the deck and then notch and add the stanchions and plank.
I plan on taking some better photos as the running rigging is barely visible, but I was losing the light when I finished and the front porch was the only place with decent natural light, so these will do for the moment.

All kit rigging and blocks were replaced with parts from Syren.
Major Takeaways
Spend more time fairing the hull; at least another day.
Doublecheck the waterline at all the stations in case the marker rides a little high at some point.
Make an attempt at thinning the bulwarks all the way. If it fails, cut them off, notch and install stanchions per the plans and plank. This is my biggest mistake.
Install individual deck planks instead of sheets planking, with appropriately joggled waterways
Take the time to drill/carve out the cockpit. At this scale, cut the grating from a thin sheet. Drill and ream the grating squares with a needle file. This is my biggest regret.
Construct all the deck furniture for fit before installing or drilling mast holes
Use 28 gauge wire for the deadeyes attached to the chainplates instead of thread.
Serve the standing rigging.
Paints Used
Black (Hull) - Vallejo Black Polyurethane Primer
Black (Metal) - Vallejo Black
Primer (Metal) - Reaper Brush On Primer
White - Vallejo Ivory
Brown - Vallejo Chocolate Brown
Stained Wood (Masts/Bowsprit/Boom/Gaffs) - Army Painter Soft Tone
Ships Wheel - Vallejo Desert Sand/Army Painter Soft Tone/Vallejo Black
Build Log by Day
8/11/20 - Flattened Keel. Drew centering Lines. Prepped for Fairing. The keel is very wide with a wave around station 5. The hull is 2 pieces of basswood of different densities.
8/12/20 - Faired Ship. Stations 1-6,9 symmetrical. Small symmetry issues with 7,8 to keep in mind when coppering. Sanded with 100/150/220 sandpaper. Began 1/8”x1/32” step below caprail.
8/13/20 - Finished carving step below caprail. Constructed stem. Installed Stern, Stem, Keel. Sanded ship to 220. Drew Waterline and painted the waterline white, First coat of Black primer above waterline, Constructed Rudder. I would only prime just above the waterline in the future and wait until later in the build to finish painting
8/14/20 - Sanded and second coat of black paint, cut ~200 copper plates (3/16”x1/2”), Coppered bottom of keel, Drilled pilot holes for attaching to launching ways.
8/15/20 - Coppered ~75% of hull and rudder. Coppering the hull worked best by progressively attaching the plates from the stern instead of just coppering a band at a time.
8/16/20 - Finished coppering Hull
8/17/20 - carved bulwarks aft of step to 3/32”. I would do this prior to coppering in the future.
8/18/20 - Finished thinning bulwarks to around 1/16”, setup templates for decking.
8/19/20 - Installed Decking. Fouled the aft deck a little bit caulked decking with pencil. Added Satin varnish over deck/bulwarks. Installed Waterways from manilla envelope.
8/20/20 - Drilled/cut/filed scuppers. Painted/touched up exterior. Should have Installed the waterways after cutting scuppers to remove potential for damage
8/21/20 - Made mast jig at 7deg fore/9 deg aft for 3/32 bit (mast is 5/32). Drilled holes for mast in deck. Made 20 eyebolts of 28 gauge wire. Finished 6 cleats for attachment to stanchions. Built and fitted 3 pintles from strip brass.
8/22/20 - Installed stanchions, cleats and eyebolts. Installed Rudder using manila envelope for gudgeons; in the future use wine bottle foil, cut slot for bowsprit
8/23/20 - Installed Caprail and painted Vallejo chocolate brown. Drilled 1/16” holes for chainplates in caprail, drilled hawse holes
8/24/20 - Installed Splash Rail and Fairleads. Constructed chainplates from strip brass. Installed port chainplates. Used 1/16” bit through caprail. Used #70 drill for nail holes
8/25/20 - Installed starboard chainplates, Installed deadeyes on chainplates, installed belaying pins and eyebolts on caprail. Used 24 gauge wire for belaying pins.
8/26/20 - Installed exterior eyebolts/straps for bowsprit, routed and finished display base from old piece of knot free pine
8/27/20 - Built launching ways, installed pins and mounted Phantom to launching ways
8/28/20 - Built and installed traveller, installed 1/8” single blocks for Boom in deck.
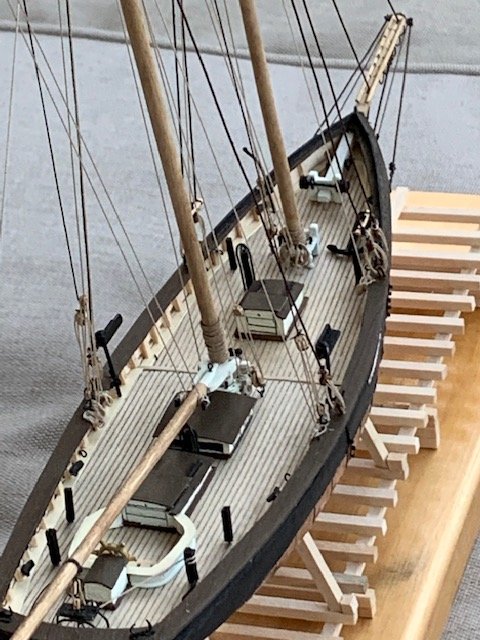
8/29/20 - Constructed Wheel house, aft companionway, bollards
8/30/20 - Installed Wheel House, Cockpit/Wheel, companionway, bollards, Stove/surrounding wires, drilled and positioned masts
8/31/20 - Installed Mast Coats (manila folder), Fife Rails, Pumps
9/01/20 - Constructed/installed skylight, fore deck companionway
9/02/20 - Installed ventilation pipe/cover, navigation lamps, anchor davits, fore deck bollards
9/03/20 - Installed anchor, constructed/installed winch bitt, shaped bowsprit
9/04/20 - Constructed bowsprit
9/05/20 - Installed gaskets on jackstays (28 gauge wire), stained bowsprit with army painter soft tone, installed bowsprit and inboard cleats, installed gammoning strap (from brass strip), constructed 3 stretching screws from 28 gauge wire (3 turns of wire from each end for large, 2 turns for small)
9/06/20 - Rigged Bowsprit foot ropes, bobstay and guy, Finished Launching Ways and Mounted Ship to base, Shaped and stained Foremast
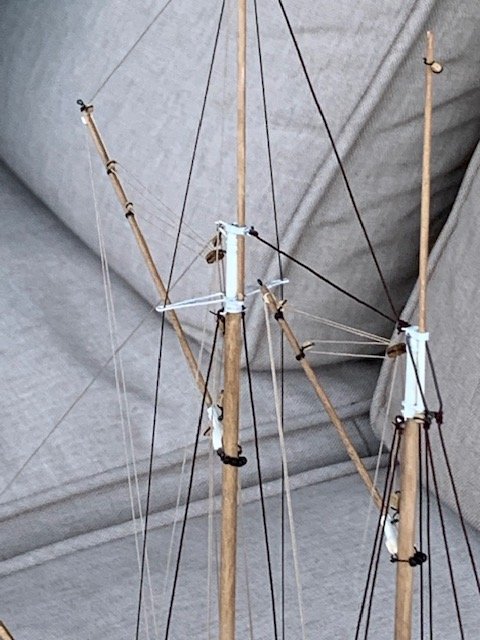
9/07/20 - Finished and installed foremast and top. Used wine bottle foil to make iron bands. Created mast hoops from thin paper bag rolled around dowel and sliced off strips. Shaped and stained main mast. Created boom rest from plastic in recycling
9/08/20,9/09/20 - Finished constructing and installed mainmast and top. Installed throat halliard eyebolts in deck.
09/10/20 - Day off
09/11/20 - Installed fore stay, jib stay, triatic stay and mainmast stay. Damaged bobstay and needed to replace. Prepared lanyards for shrouds
9/12/20.- Installed Shrouds, Set deadeyes for foremast shrouds
9/13/20 - Set deadeyes for mainmast shrouds, Reeved and seized lanyards, installed foremast shroud pinrails, removed and reinstalled triatic stay and mainmast stay
9/14/20 - Installed Backstays and rope coils over tackles (replaced on 9/18)
9/15/20 - Constructed, stained and installed Main Boom. Installed Topping Lift and Main Sheet Tackle, installed rope coil on topping lift tackle (replaced on 9/18)
9/16/20 - Constructed and stained Main and Fore gaff
9/17/20 - Installed Main Gaff, rigged topsail halliard, topsail sheet, peak halliard, main throat halliard and peak lines.
9/18/20 - Installed Foremast gaff, rigged peak halliard, throat halliard and peak lines. Added all Rope Coils.
Thanks for such a thorough review. I had an offer on buying this one on eBay and wanted to checkout build logs first. I don't see this one as worth my time such a small solid hull model.
-
-
On 10/23/2016 at 2:58 PM, Chuck said:
I am just using a #11 blade right out of the package. But I do know folks who make their own micro chisels in different shapes. That is above and beyond my abilities and time allotment for these so I am going to stick with whatever I can buy already made.
Like Keith said...I think its just my technique and stroke and its something that will get better with learned experience. It would always be nice to find a trick or product that does the job....a silver bullet so-to-speak........ but I think its just a matter of learning the correct touch and the correct amount of pressure and angles while slicing.
I dont want to over analyze my attempt because then you end up never finishing. So rather than fall prey to "analysis Paralysis" I am just going to keep going and apply a finish. There is always the next project and I will just find comfort that I will hopefully get better with more practice. I find myself slipping into the paralysis and must fight that....its a horrible thing.
Gunmakers use micro chisel sets for carving relief mouldindings on gun stocks. Maybe those sets could help.
-
On 10/23/2016 at 2:29 PM, Chuck said:
Lets get even closer.....This is what I see under magnification while carving.....you are so close to the details while carving it becomes hard not to obsess about the surface texture and I hope you can see the areas I would like to smooth out a bit but I am afraid to keep slicing and carving and wonder if there is another method. I think files would be too large and tough to use as I cant see getting any back and forth motion while its still mounted. Its fragile so attempting it after removal would most certainly break it...but who knows...it could just be my inexperience and that is how it should be done.
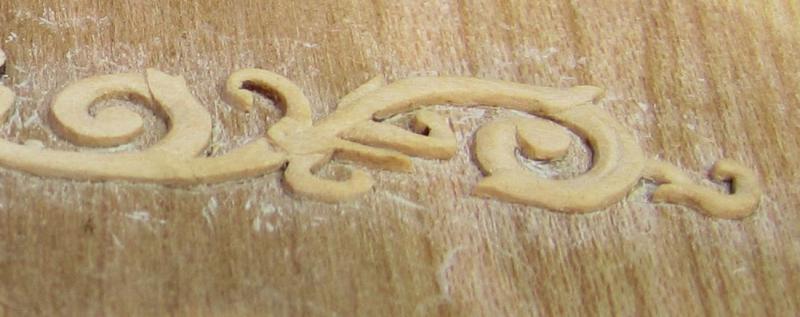
Maybe I have to just get better with teh initial carving and that will just come with practice.
Chuck
XJust a thought. Have you tried a Dremel with an extremely fine abrasive polishing wheel? Very light touch required.
-
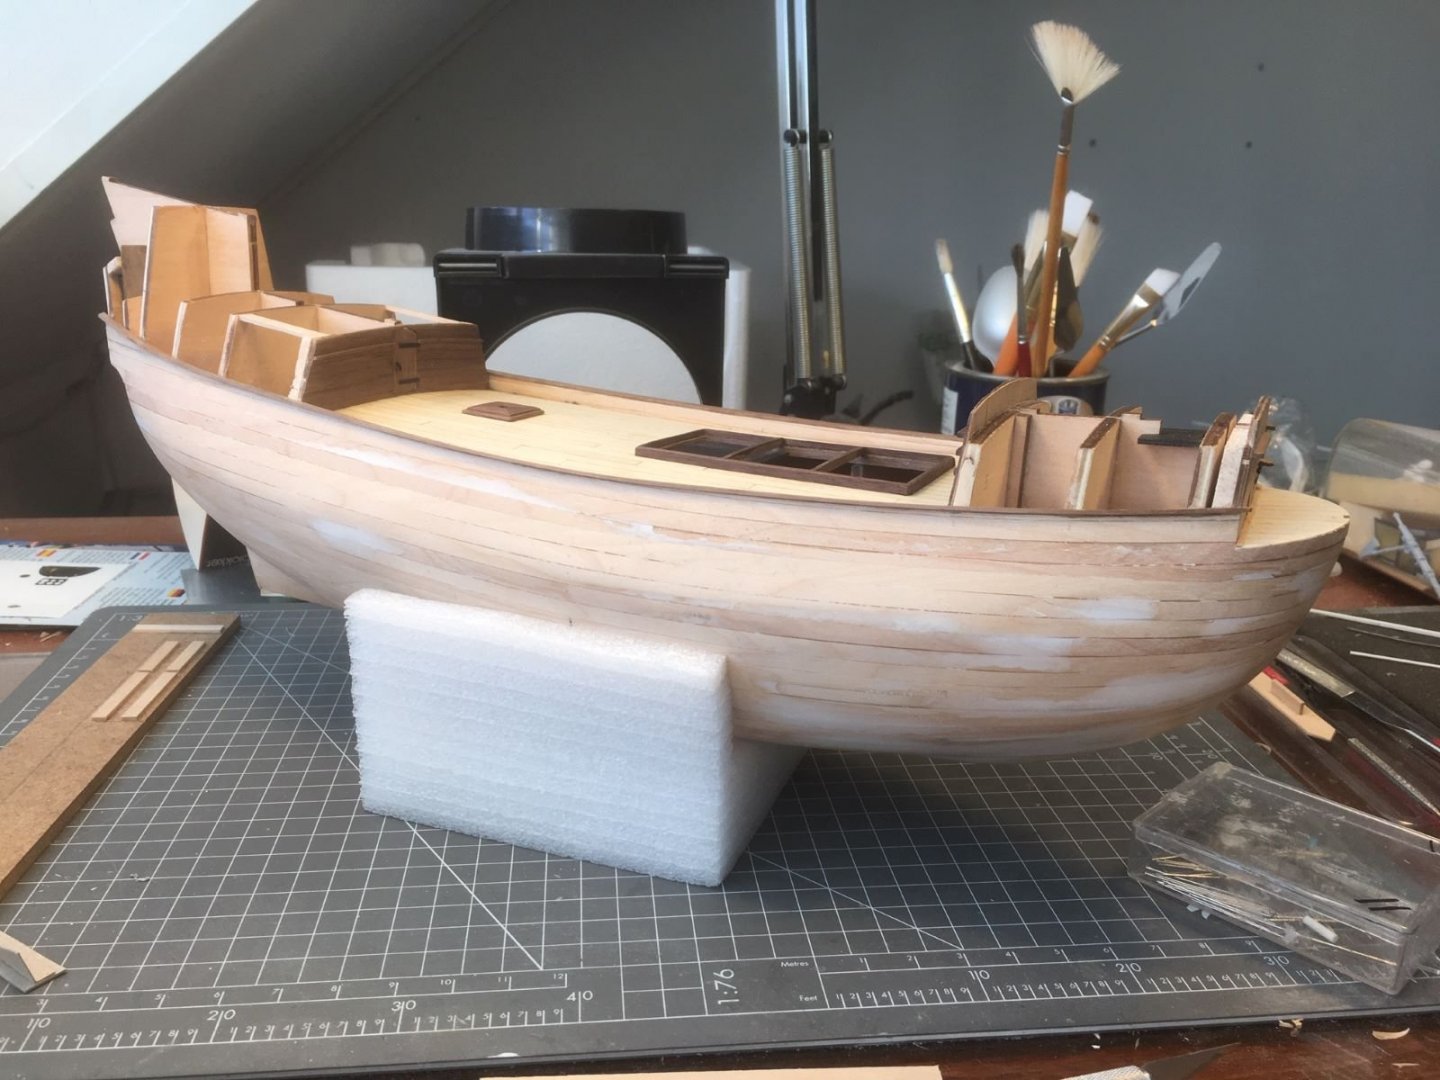
On 10/9/2020 at 7:41 PM, JAKE.FOGEL said:
So I did fair the hull but it ended up being way to much as i thought it would be a good idea to use my dremel..
I'm gona stick with it and sand the ever living hell out of it as it is a single plank hull. May not look exactly as its supposed to but it's my first build and it's a learning experience
I like your spirit!
-
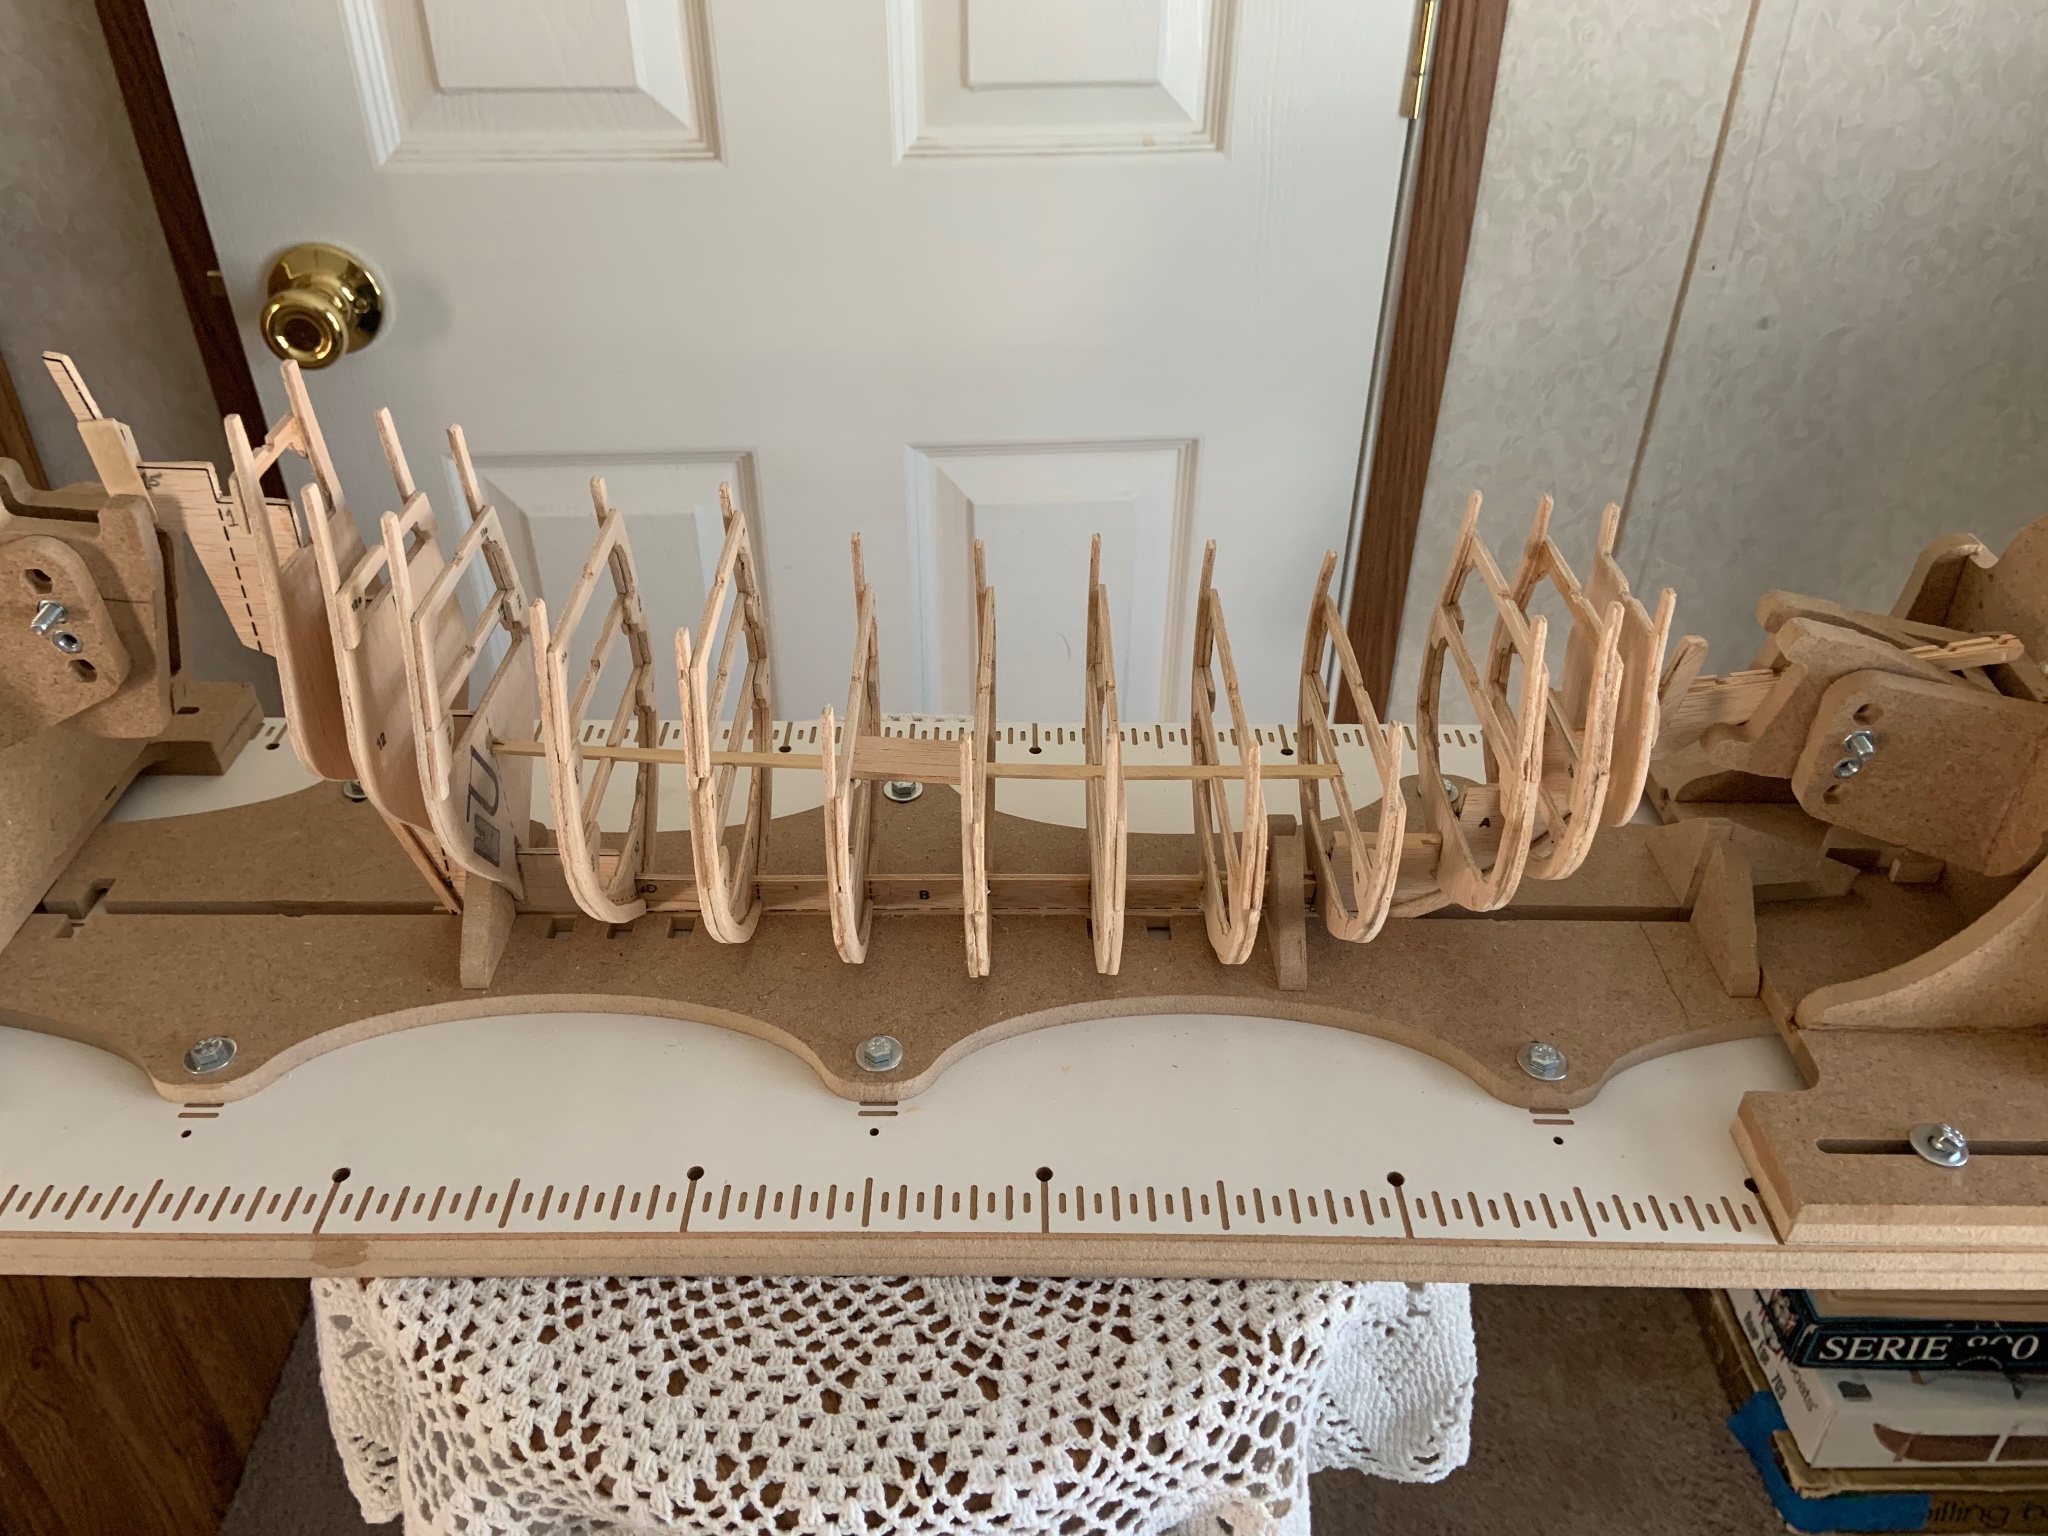
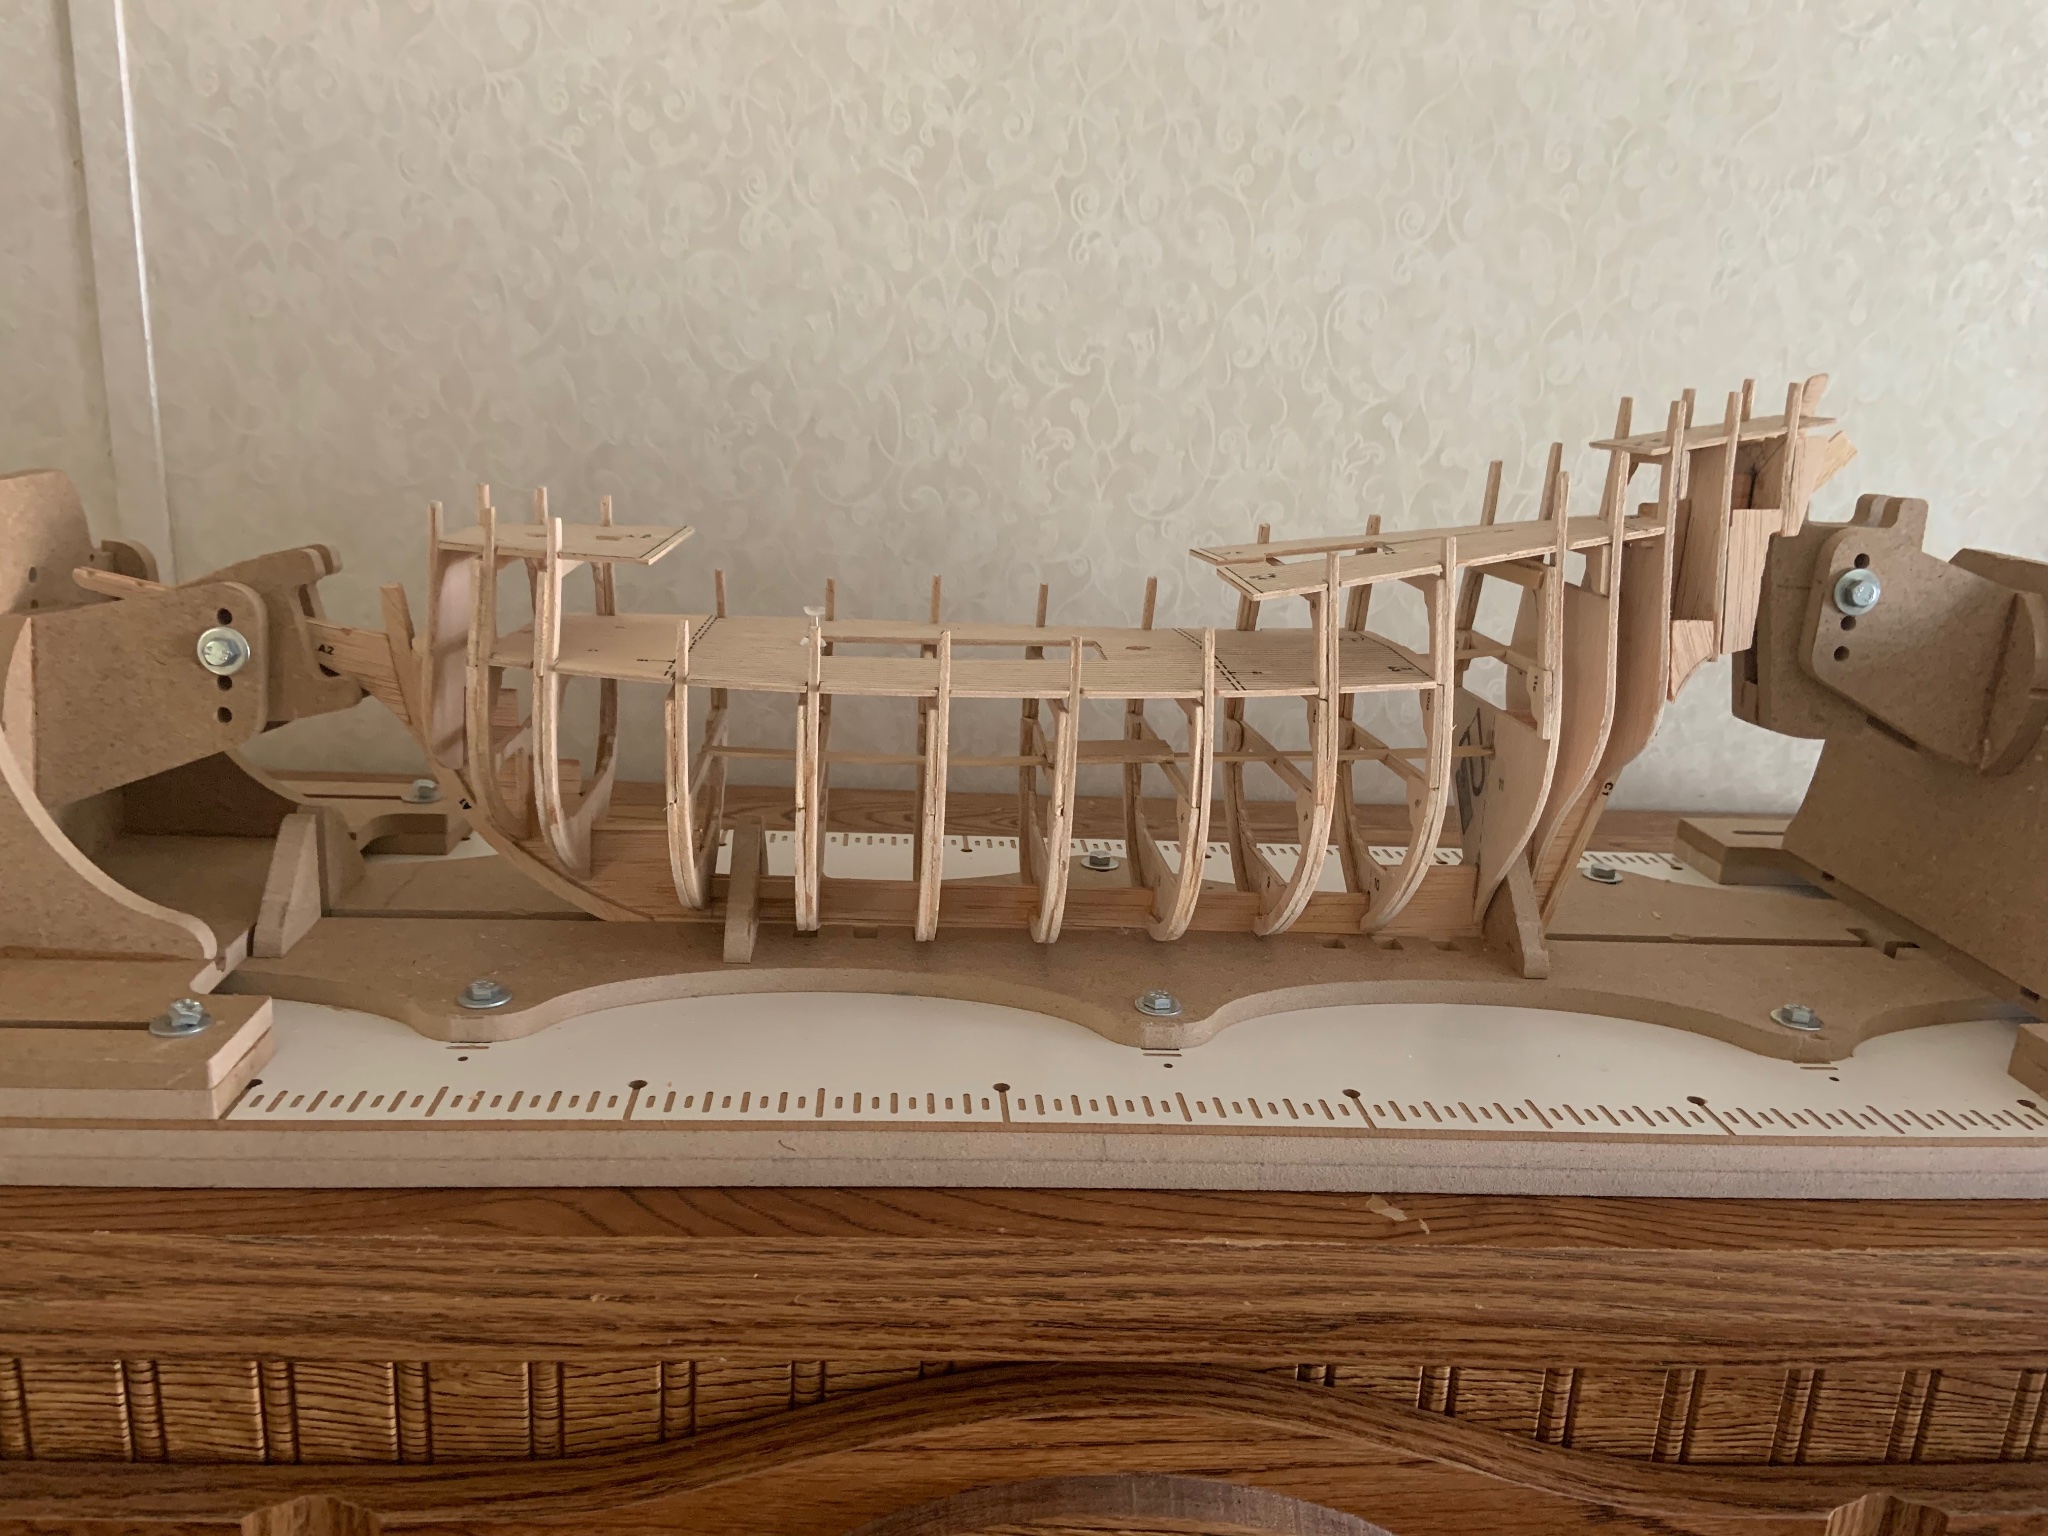
On 11/4/2020 at 1:42 PM, acaron41120 said:
Continuing on with the build log.

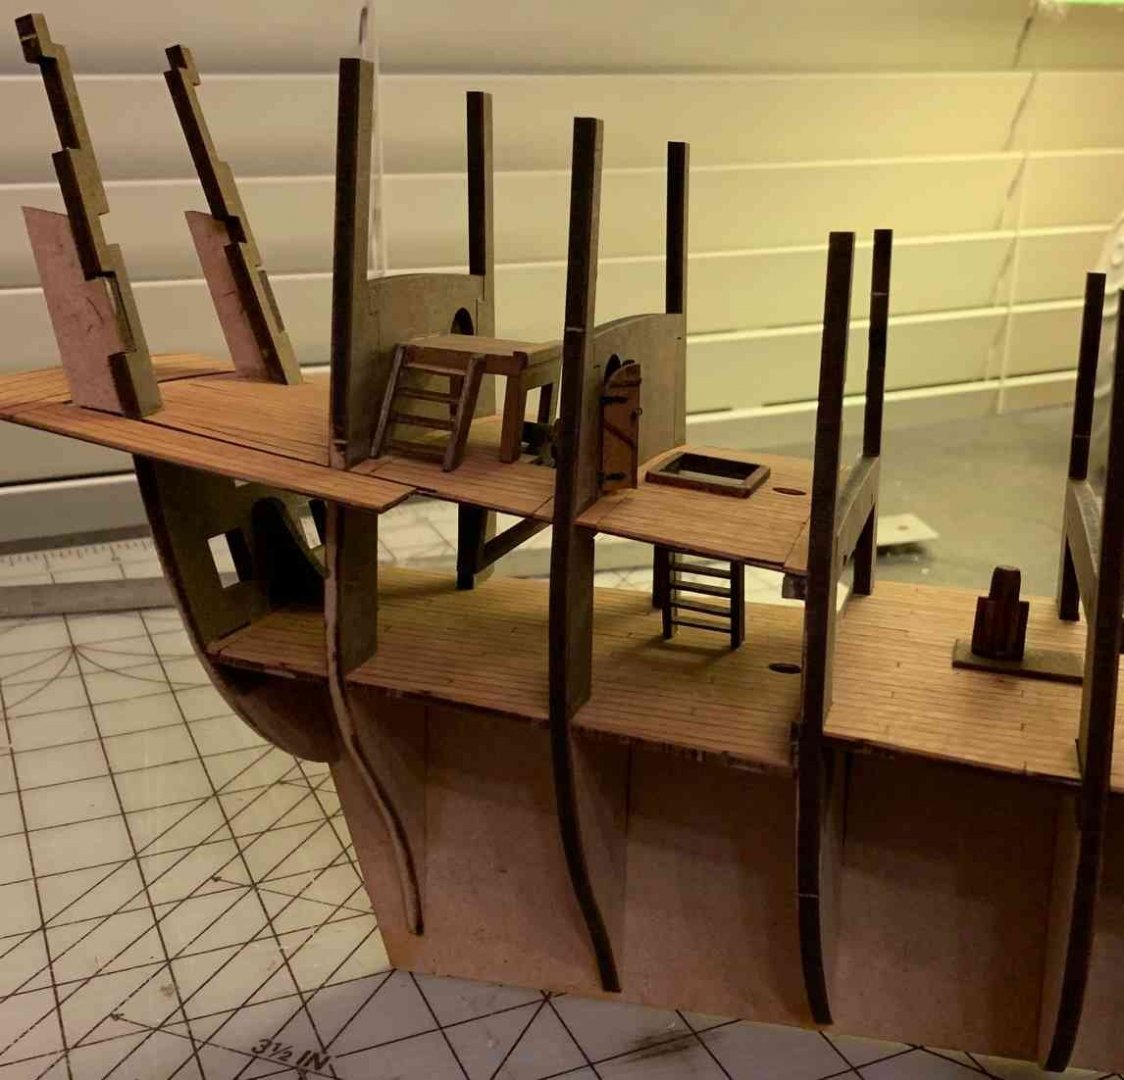
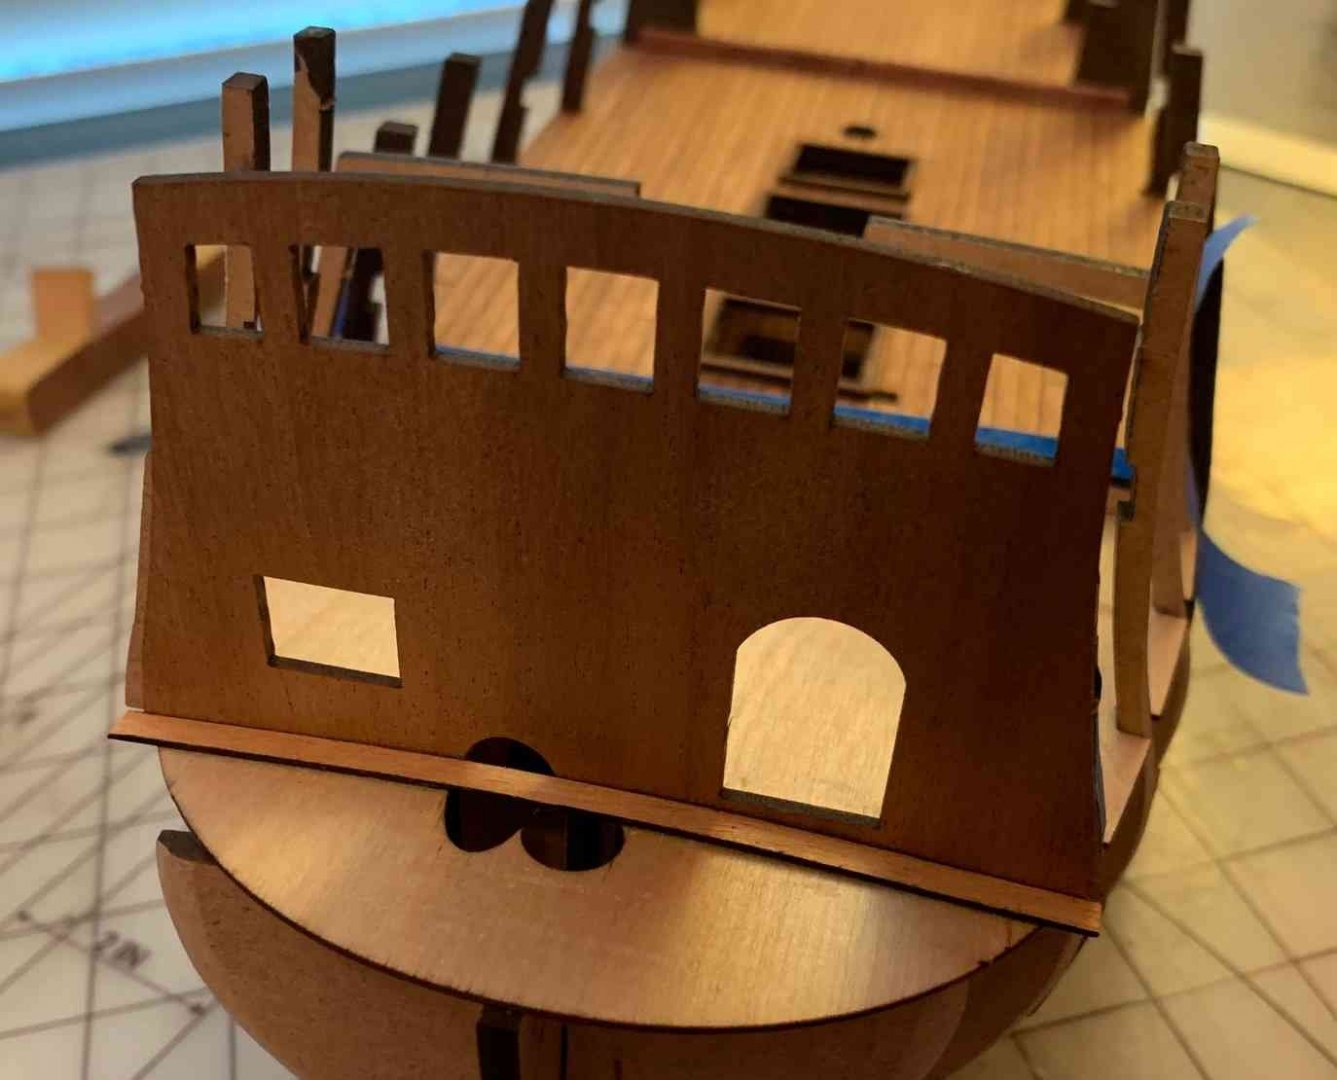
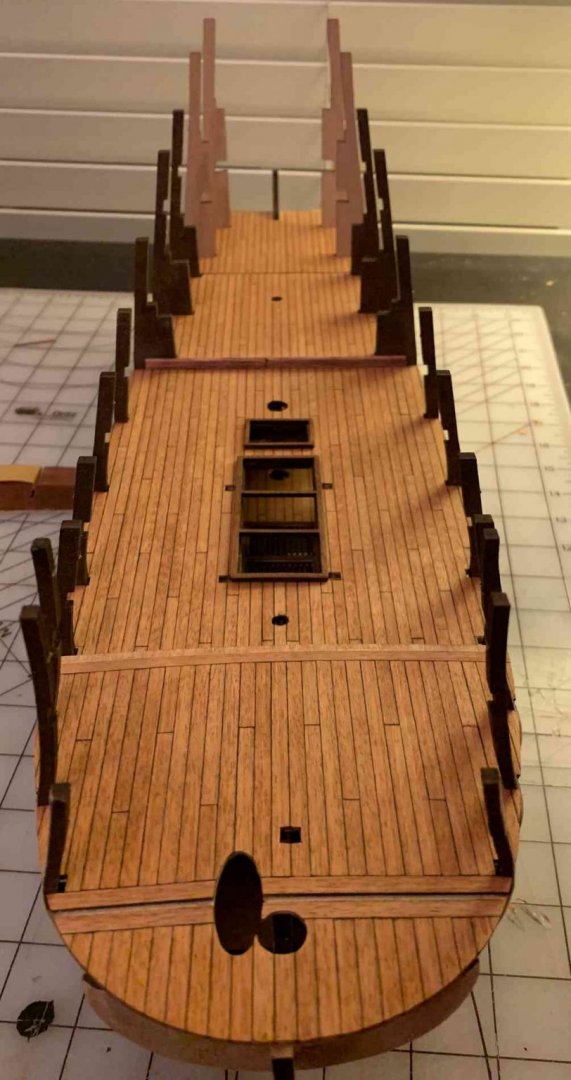
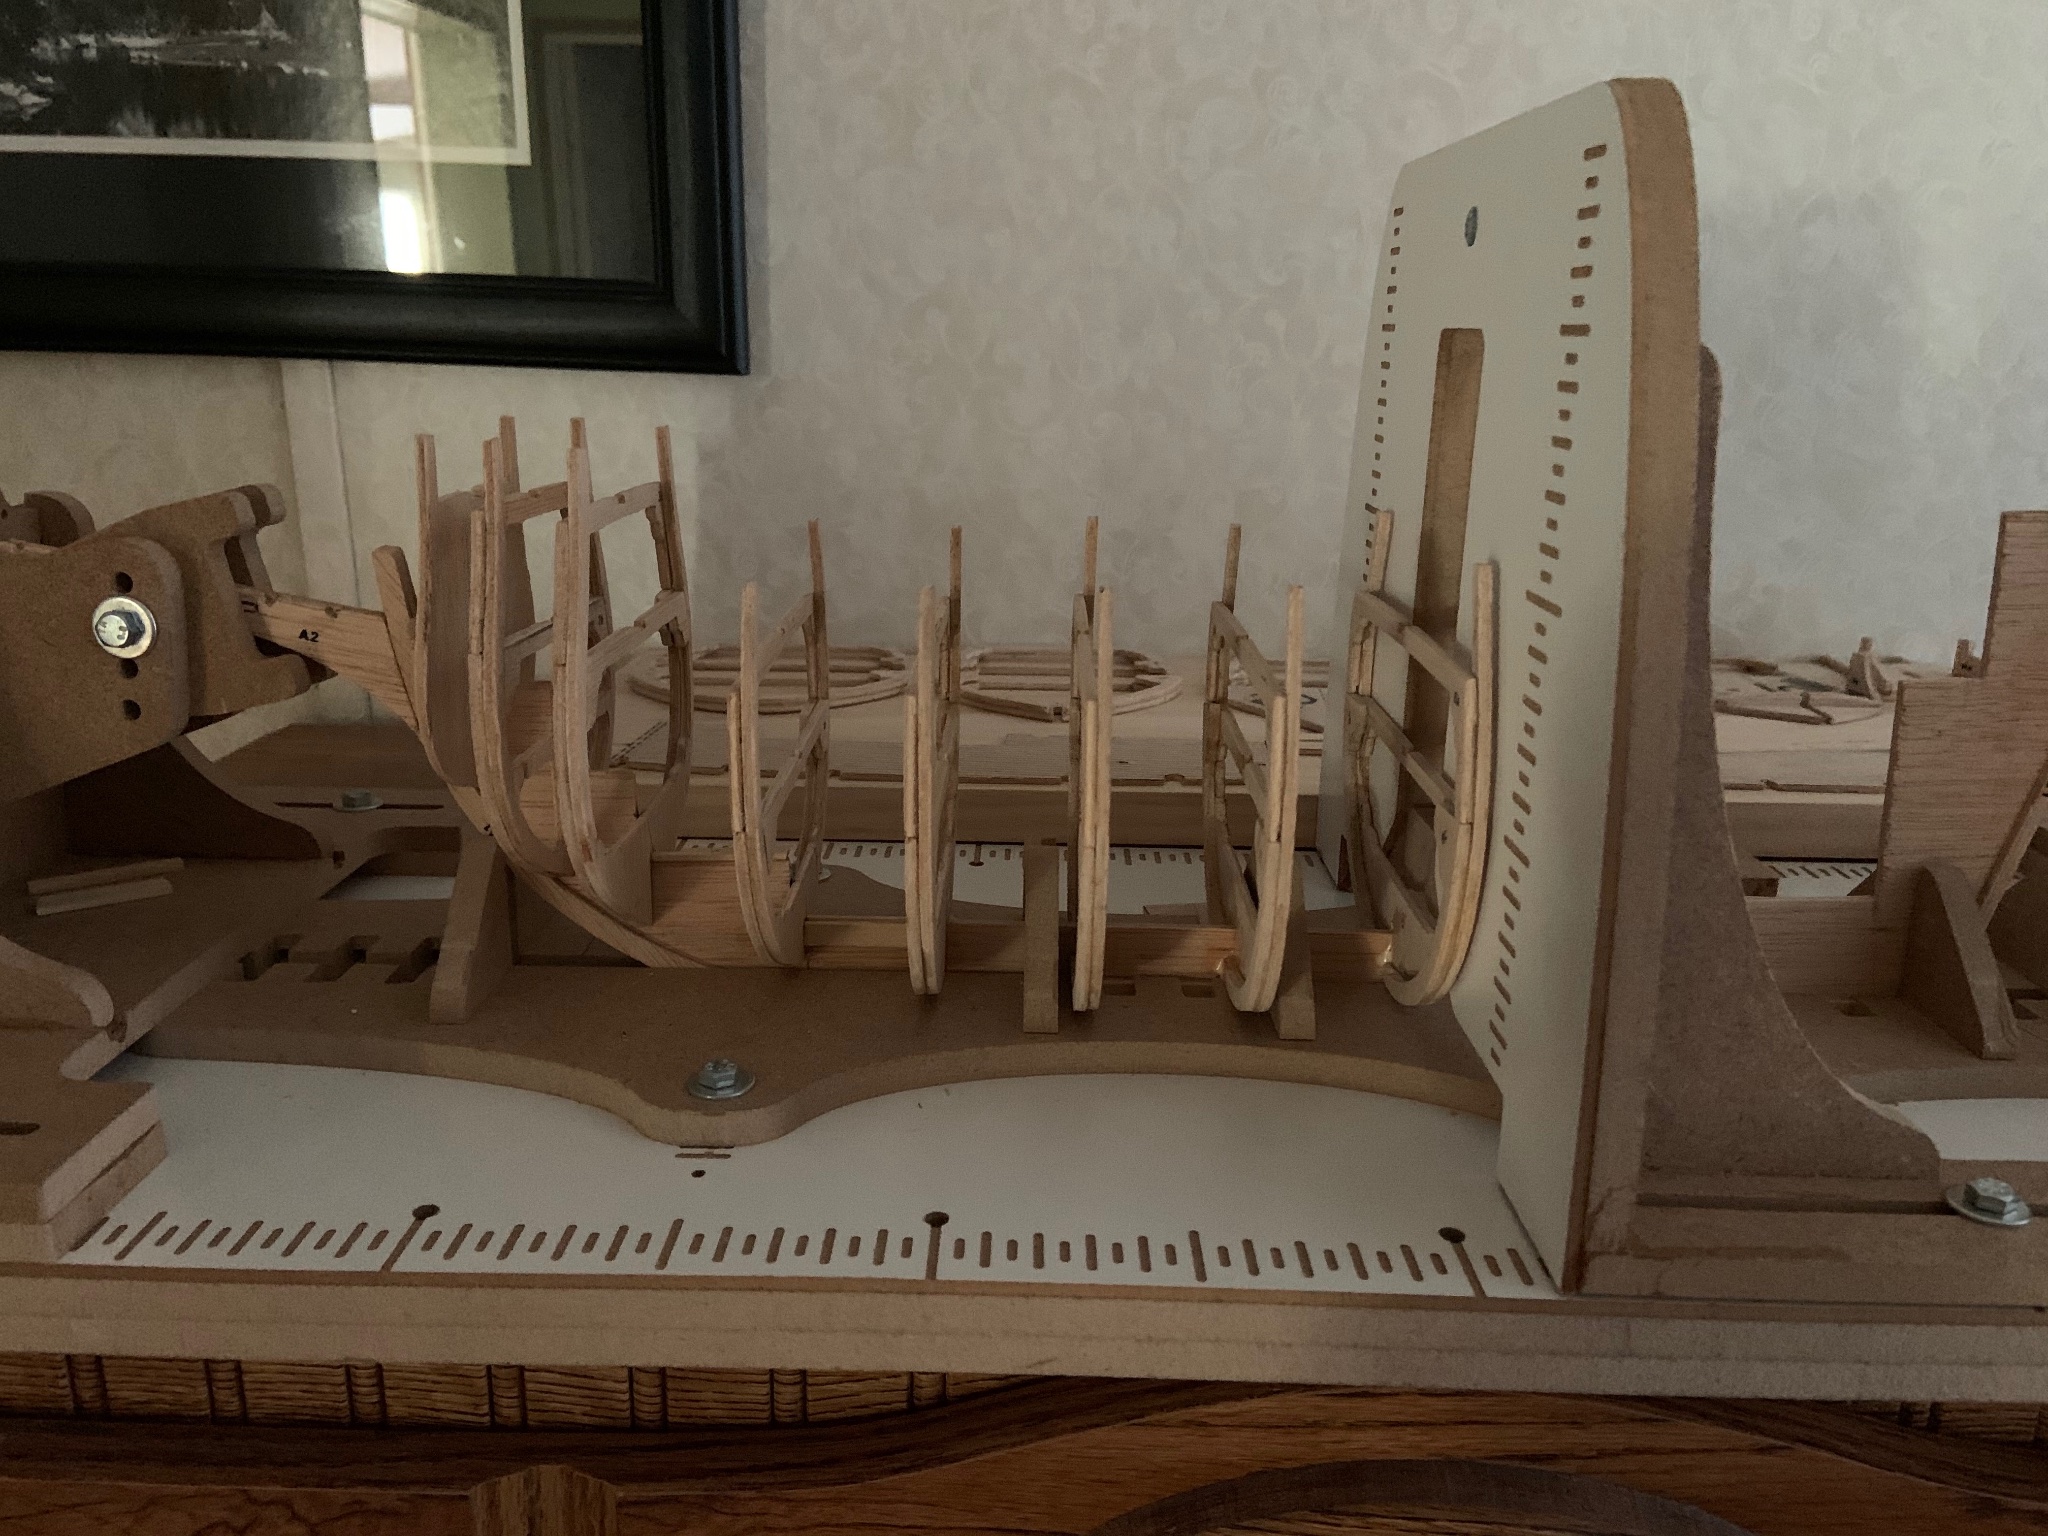
This is my build stand with frames 1 through 8 installed. The build stand really helps getting this aligned. This took two days to accomplish as it takes me about an hour to dry fit and get the frames installed. I only have 4 hours every other day to work on her due to my volunteer work and other duties.

Frames 9 through 13 and the mast step are installed. Frames 14 and 15 (at the aft) will take some extra work. Typical of some kits, not all the pre-drawn parts are quite right. There are some side pieces for frames 13, 14 and 15 that I'll have to make from pieces of scrap from the left over wood sheets that I saved. The originals were a little too short.
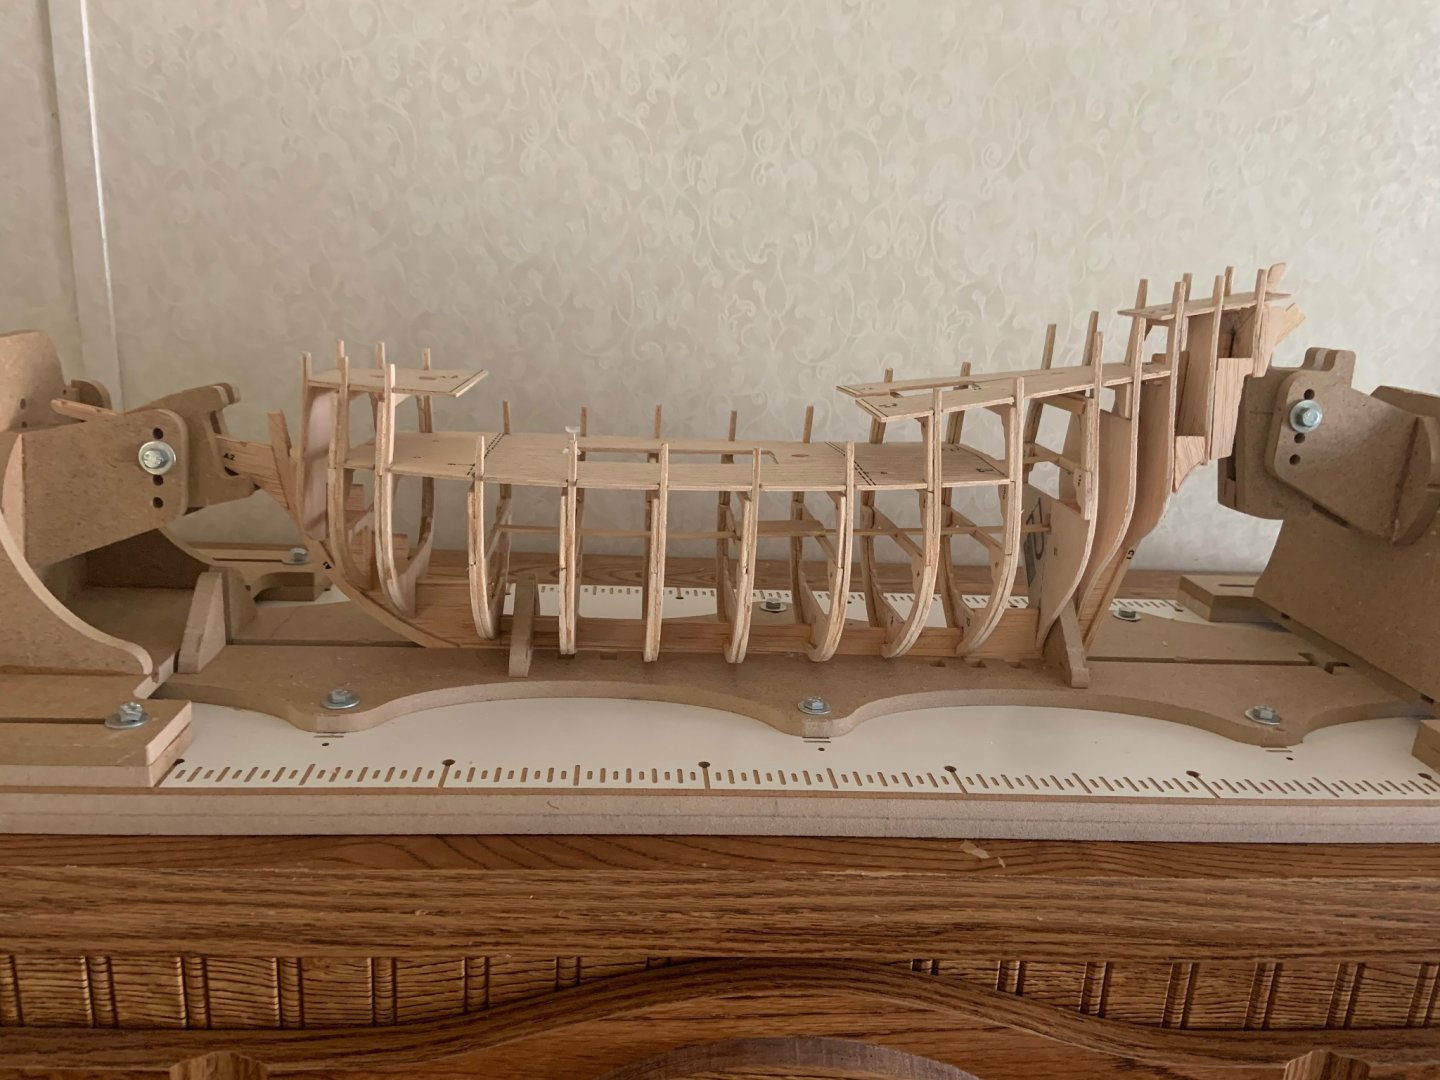
Frames 14 and 15 installed and the side pieces for frames 13, 14 and 15 were cut and dry fitted and then glued in place. Then I dry fit the false decks. This took some time as I had to file the false deck notches to fit the frames. But got it done. I'll leave the false decks in place to assist with the faring the frames; then my plan is to install the wale on each side before progressing on with the planking.
You chose Billing Boats. why? Do you have a link for your jig?
-
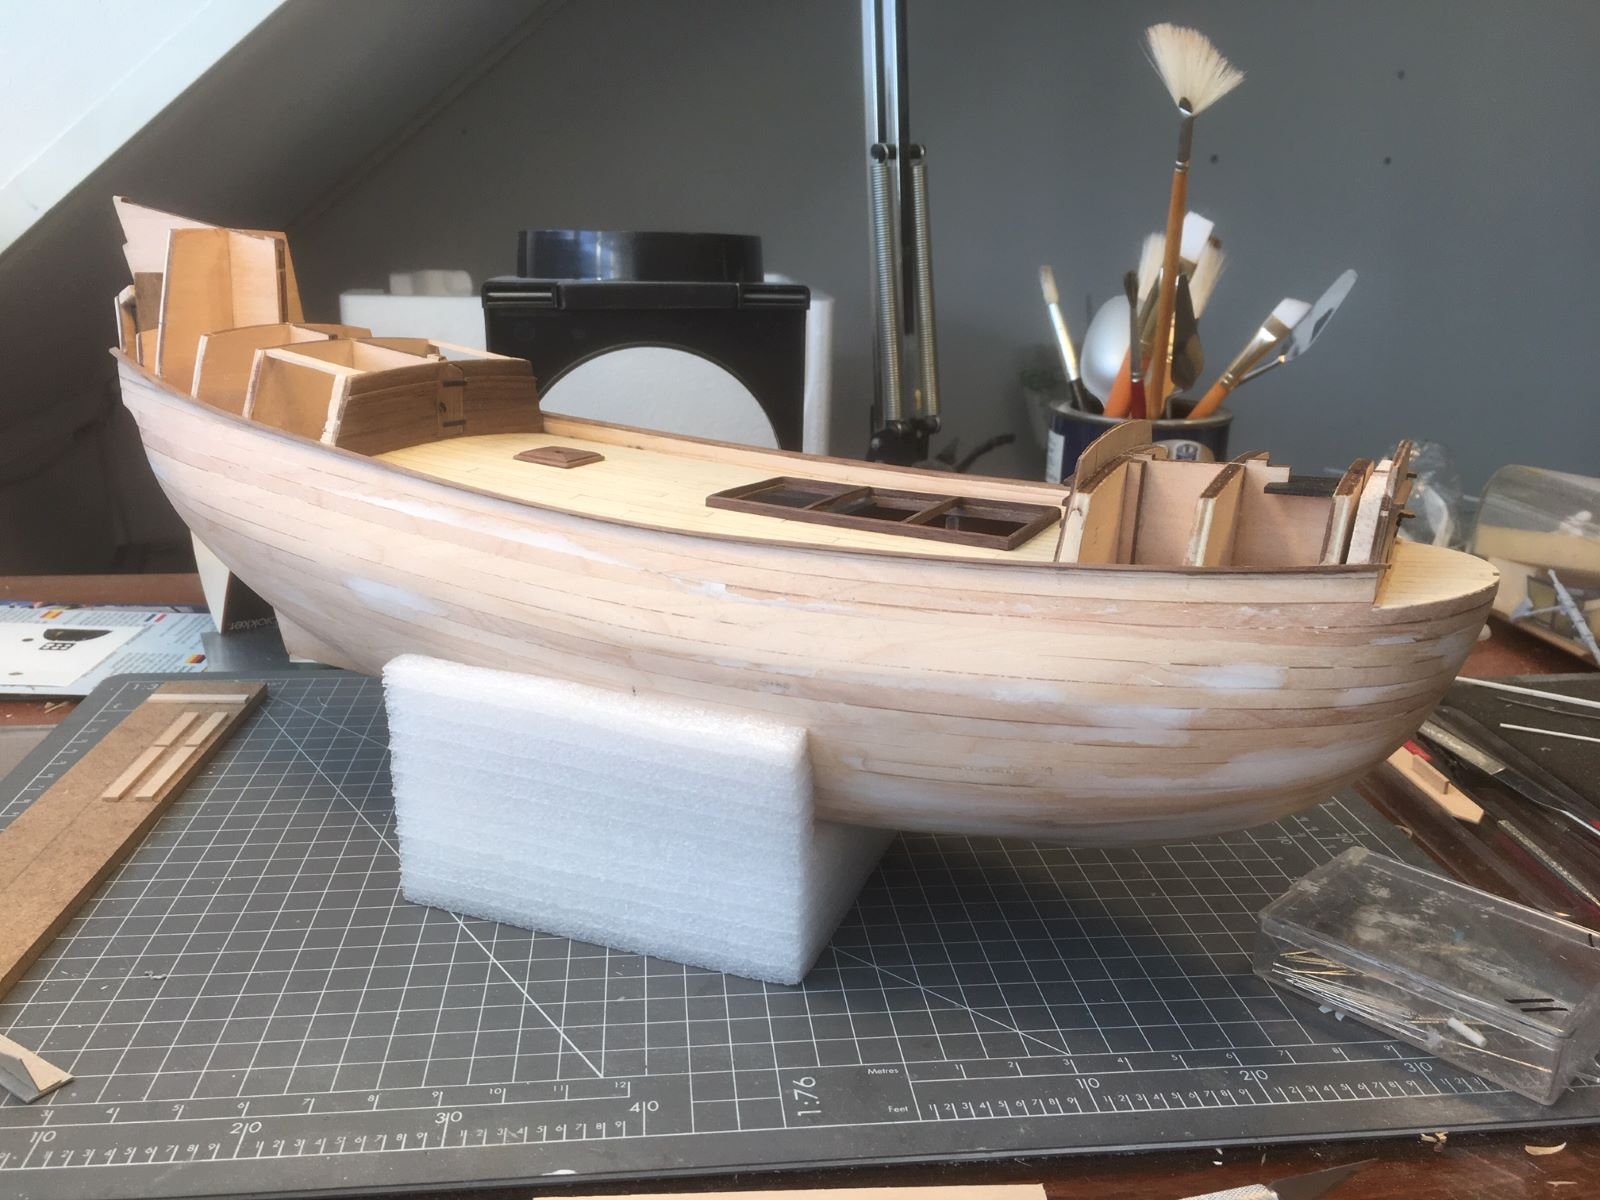
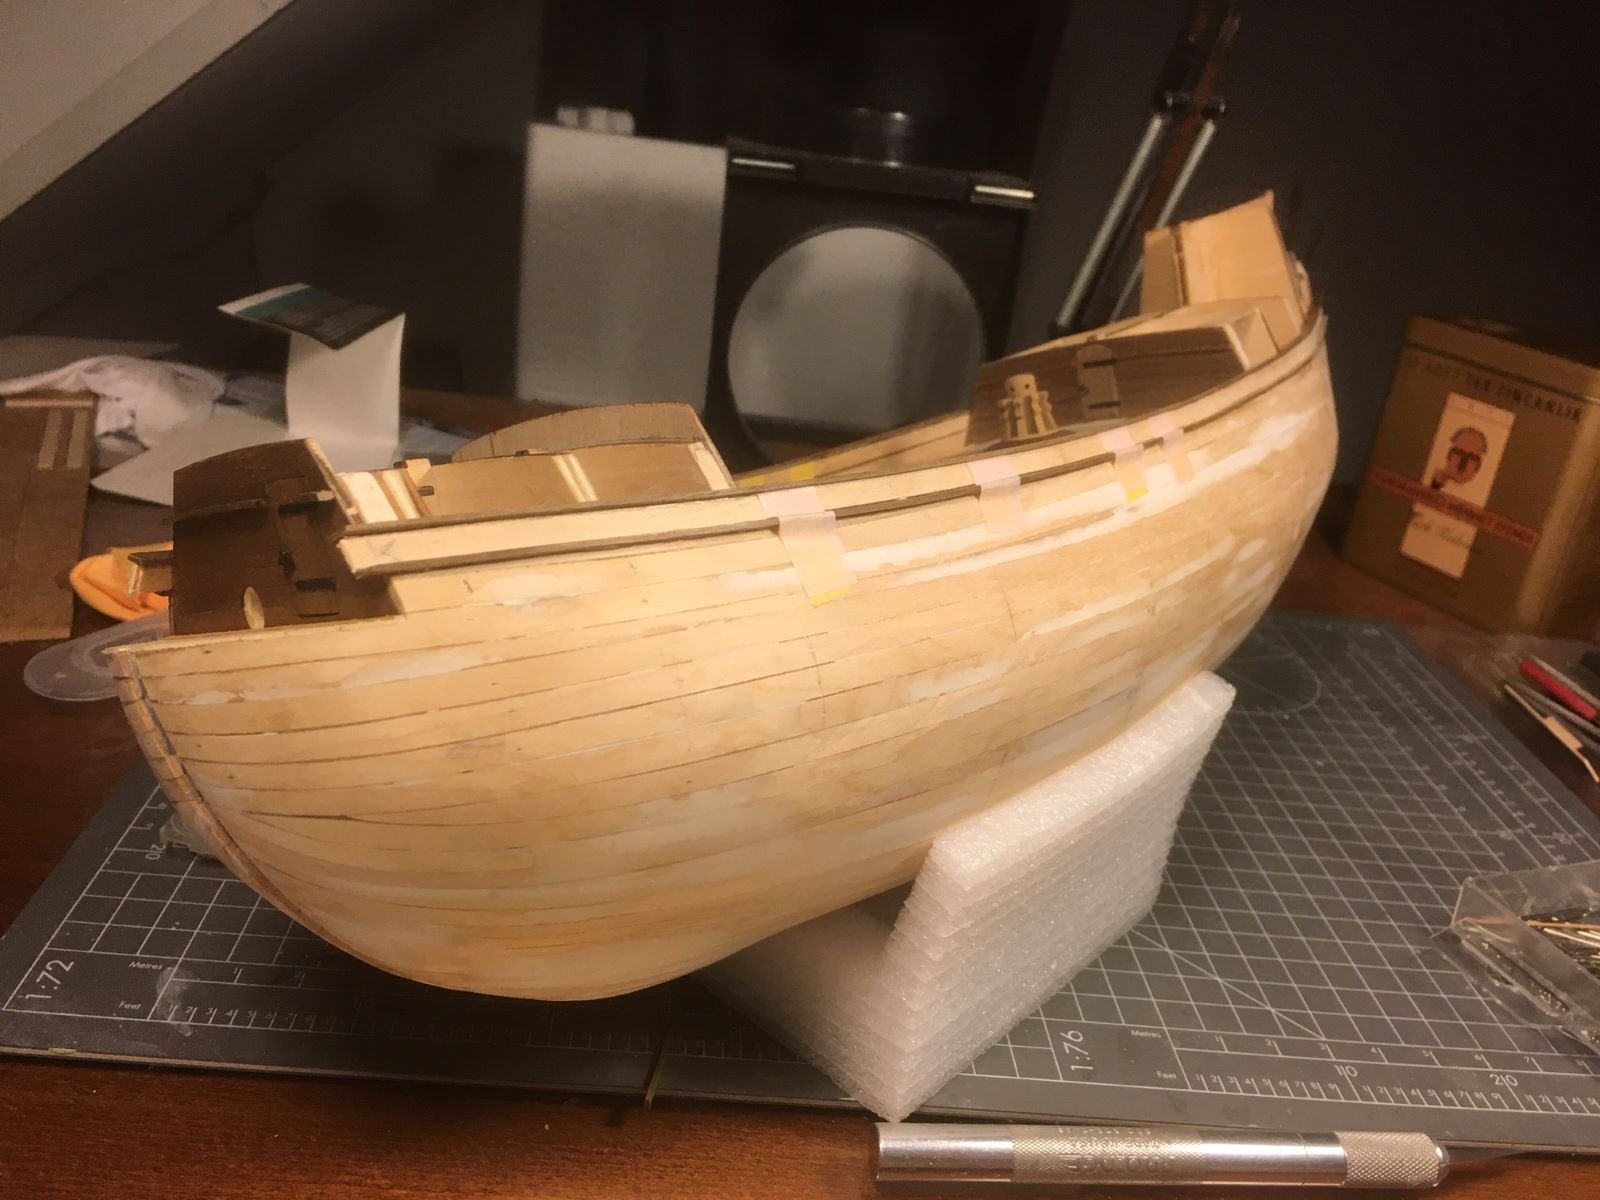
On 12/19/2020 at 2:17 PM, Danstream said:
Hi,
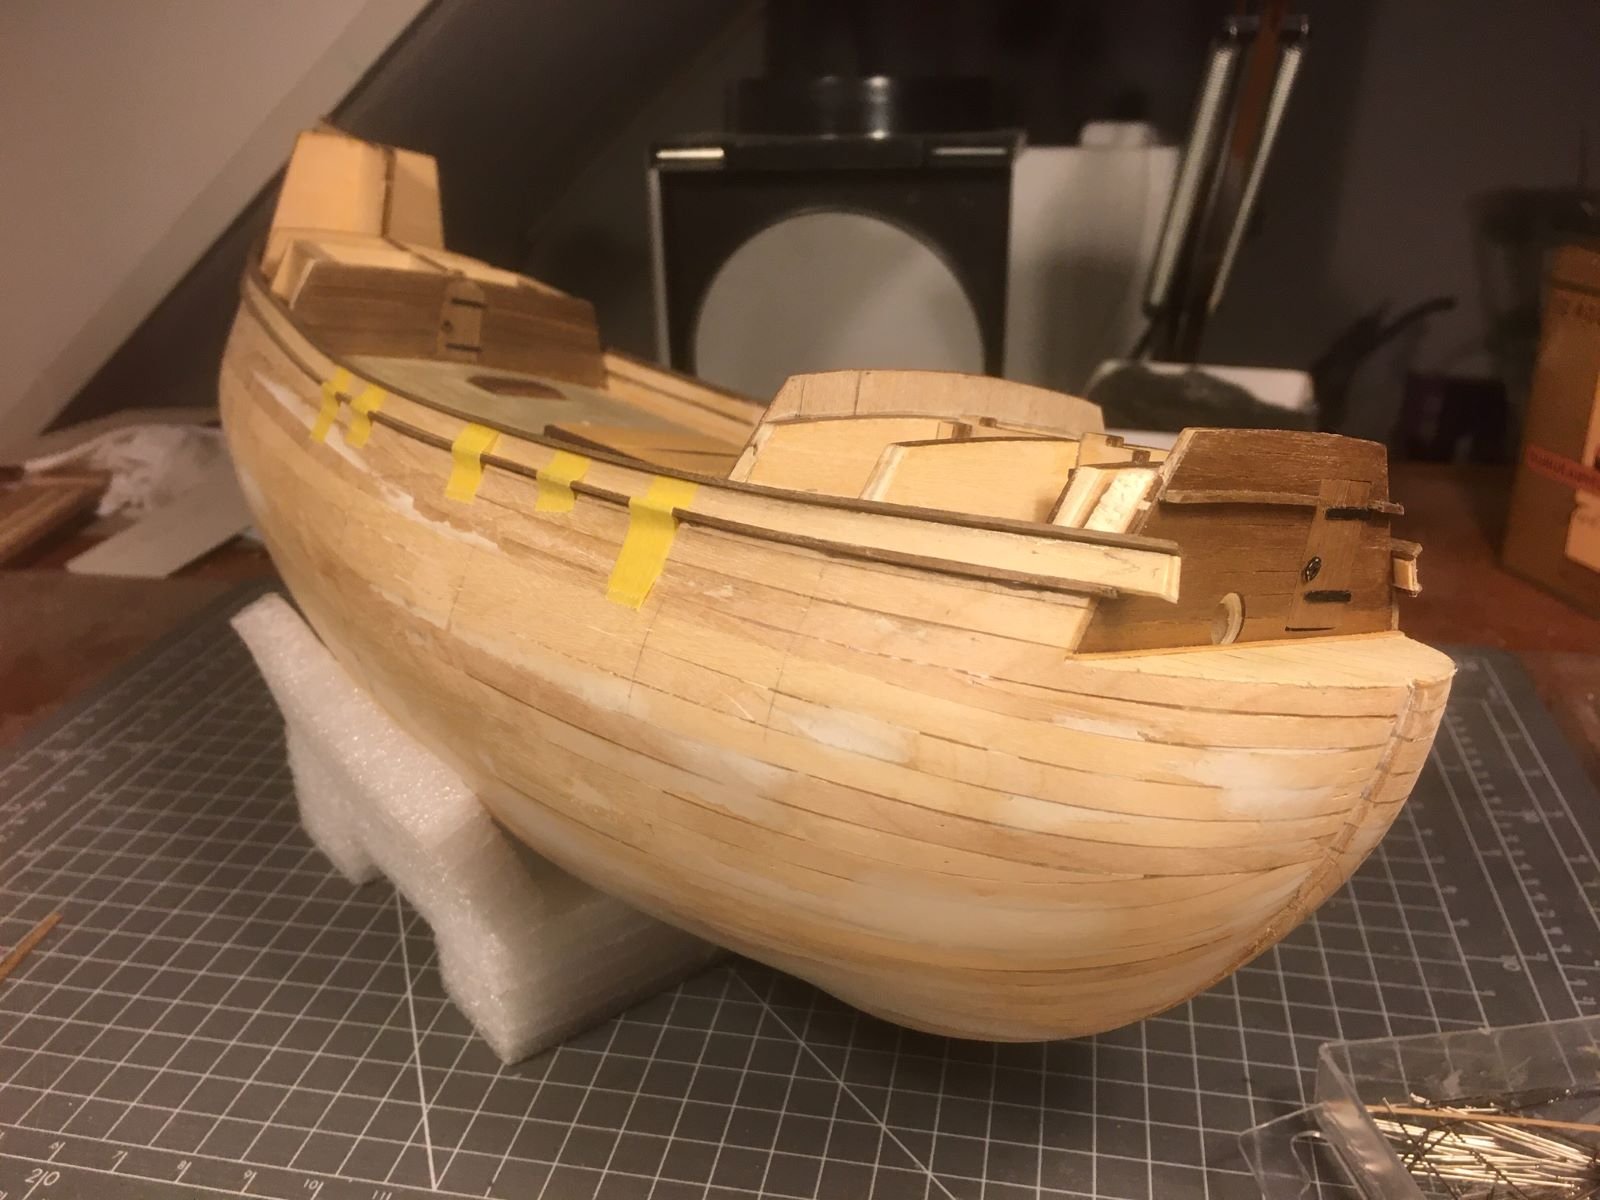
I glued a small wale (I do not know the term for it) on top of the upper edge of the planking that I recreated as shown in my post above:
Then, I went up with few strakes to form the bulwarks. I had to shape the planks quite precisely because I do not have any bulkhead extensions to support them.

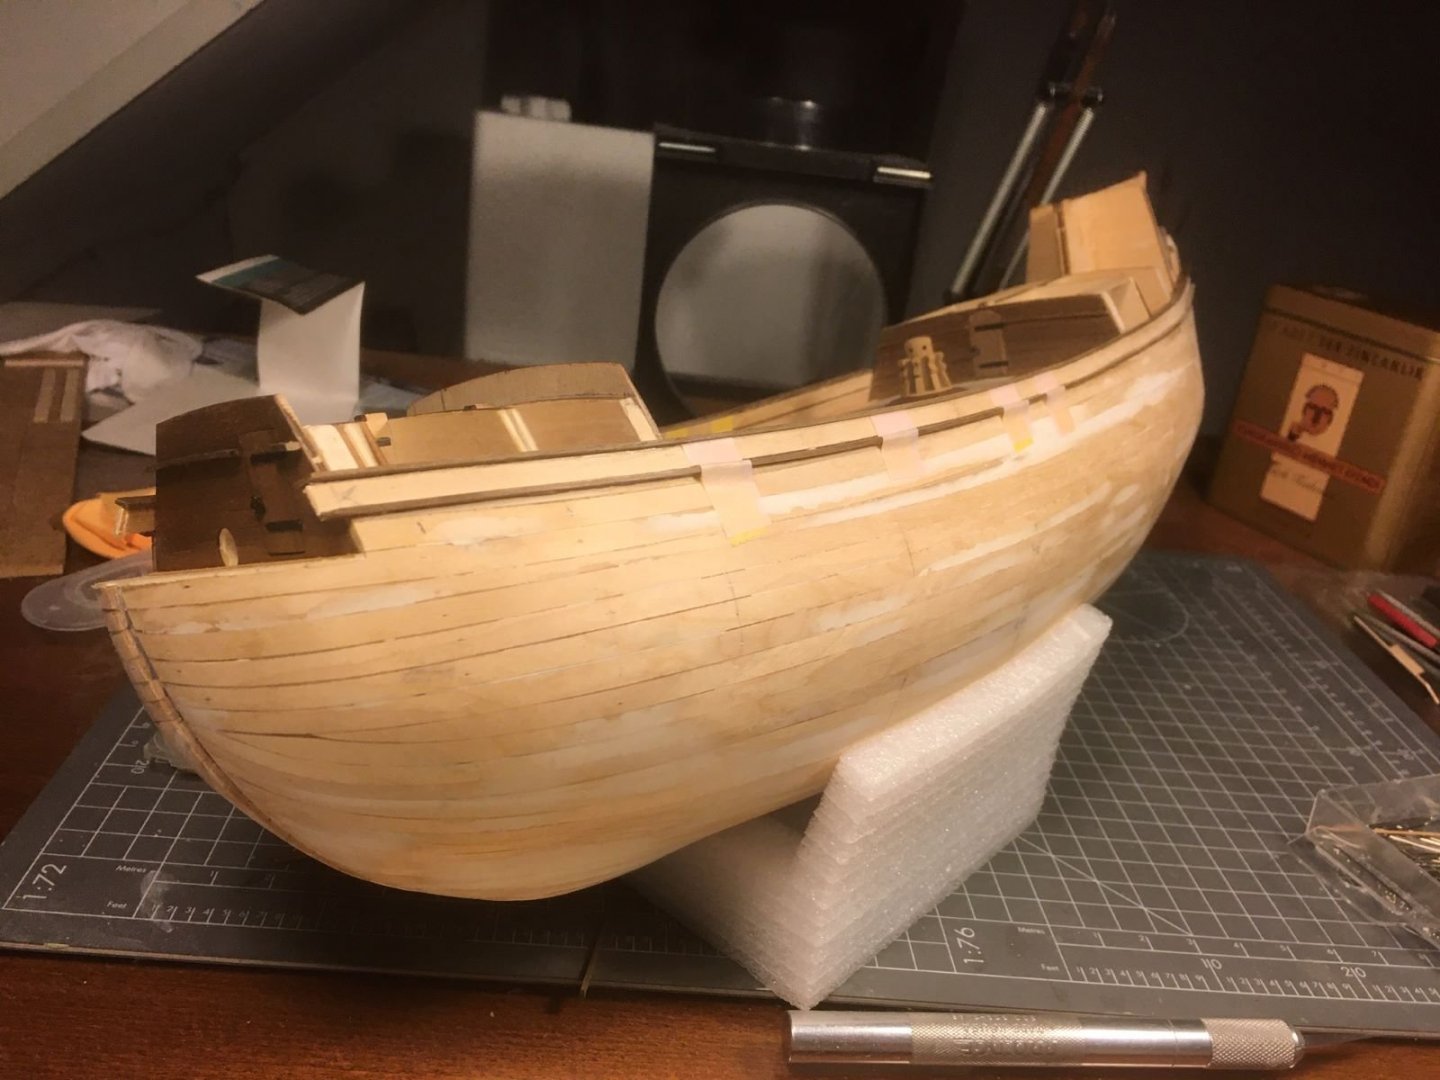

I interposed pieces of tape between the planks for those parts that I will remove later. Inside, I prepared the capstan and glued additional strips along the borders of the deck.

Work proceeded very slowly, but I hope to speed it up during the festivity break.
Until next time,
Dan.
With these changes you are making, are you still following the AL instructions?
-
On 10/10/2020 at 12:17 PM, TheRedGnome said:
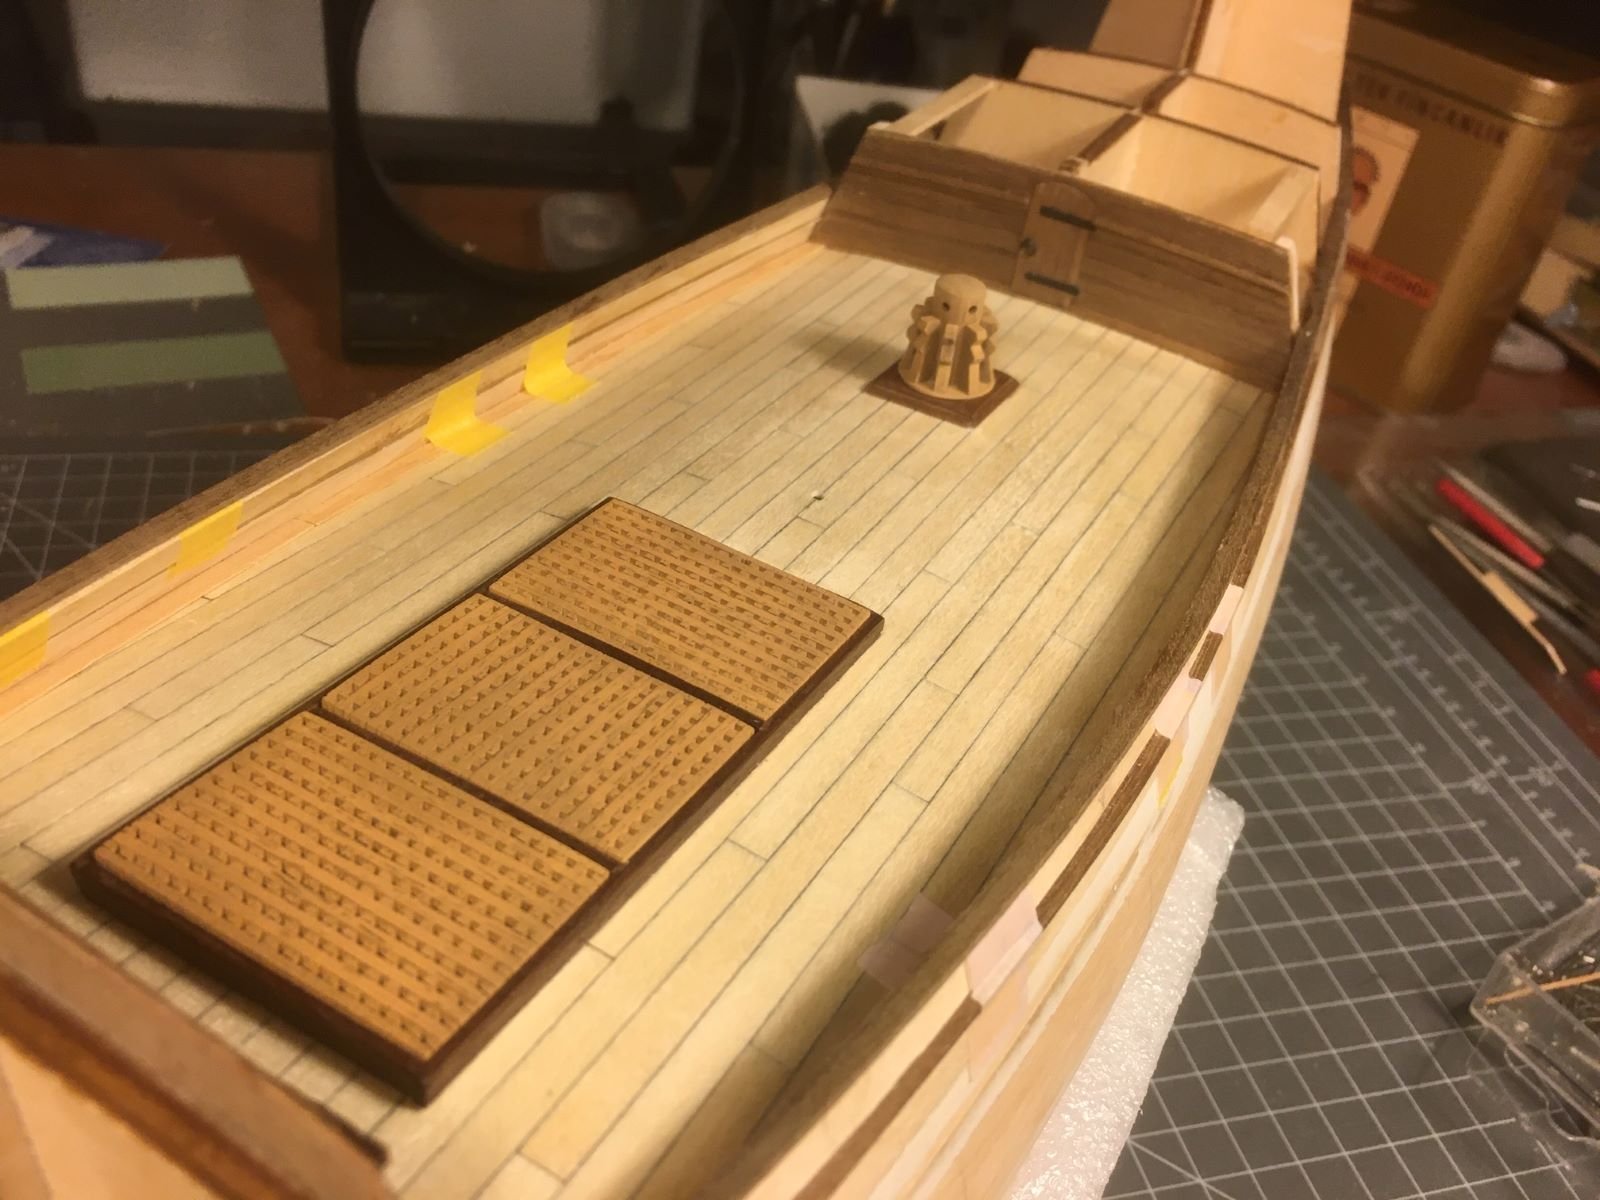
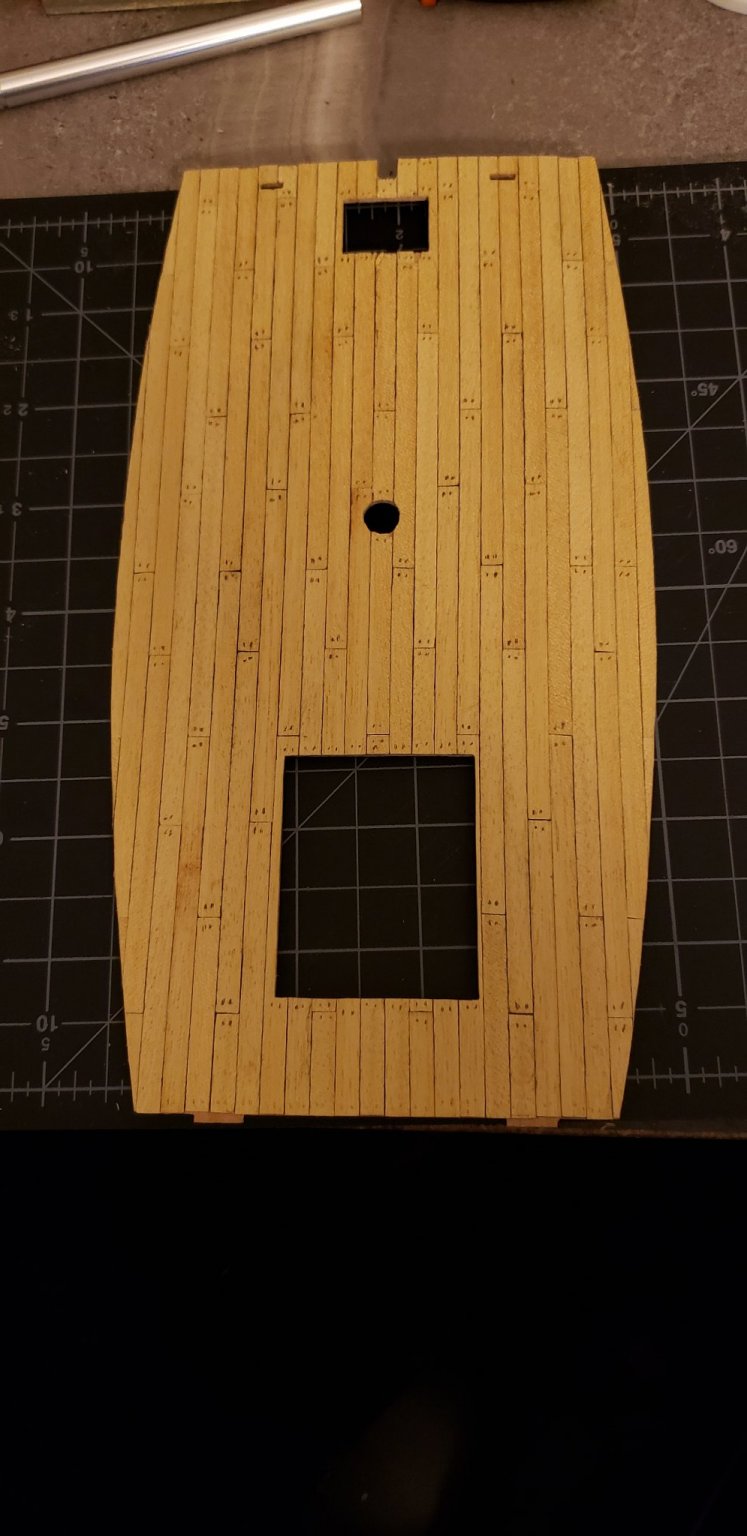
Last night, with the help from some Glenlivet 12 year, I managed to finish planking the first deck. It turned out even better than I thought it would.

SNice wok on the deck.
-
On 1/11/2021 at 7:07 PM, KrisWood said:
@Larry Cowden, Thank you for all your comments! The only thing I've ever done in AutoCAD is export drawings to other formats. Yes, Rhino can natively export to AutoCAD dwg format. I think you may be correct about the diagonal frames resisting the vertical action of waves. Viking ships were built to flex with waves, which is why the frames are lashed to the planks rather than nailed. I wish I was better at CAD work, regardless of the program used, because I'm really struggling to draw the parts that are not planar, like the frames.
@Jaager, I'm currently in the process of drawing all the parts I'd missed with my previous computer's Rhino trial. Once I'm done with that I'll be getting back into the wood. I am currently using basswood for my ship model and plywood for the building jig. There will be no plywood on the model itself, though I have some poplar I was thinking of using for the frame timbers and meginhufr (equivalent of a main wale on later ships). What is it about basswood that makes it unsuitable? What species of wood would you recommend instead of Basswood?
Also, I had a boxwood bush die in my yard last summer during the drought, and I'm thinking about pulling it out and cutting it into frame timbers with my dremel saw attachment. I could have swore I'd read somewhere that boxwood makes for good ship modeling wood.
Are you working AutoCAD in 2D? AutoCAD Mechanical lets you work in 3D. Draw your part in planar and use the extrude command to create the third dimension for a solid part.
-
9 hours ago, Jaager said:
Black bar at top of each post, three dots far right just before the post number - right click on them.
Thanks and done..
-
On 1/12/2021 at 4:20 AM, Jaager said:
Larry,
You might consider deleting your email address from open view and use a PM instead. Web crawlers ... Nigerian princes ... phishing attacks ... bad actors
I've had those on other media such as AOL. Nigeria is well known for criminal activity on the web. Phishing doesn't work with me. Those I can respond to, I let know they should cease and desist or else!
-
3 hours ago, KrisWood said:
@Larry Cowden, I second @Jaager's suggestion that you scrub your email from your post. I sent you an email, so you no longer need it there anyway. It's too easy for identity thieves and other ne'er do well's to make use of when posted on a public forum.
I reviewed that post and the forum does not provide a means to edit or eliminate the post. I have been attacked before on other media sites so it would be nothing new. I shifted my email to my profile under one of those listed media sites.
-
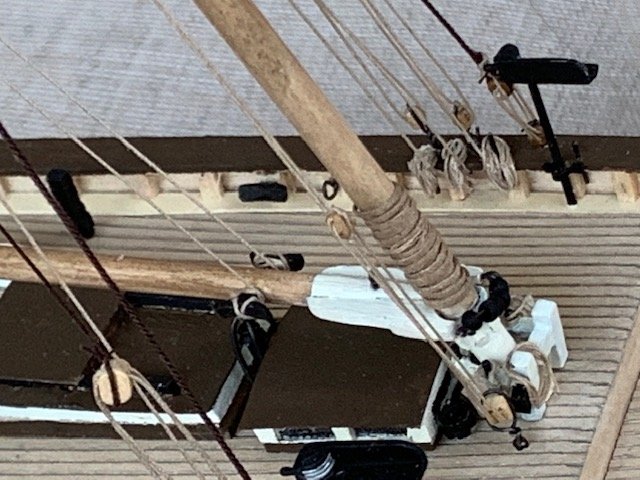
On 10/27/2020 at 4:08 PM, Jonathan_219 said:
Masts Staring Mainmast and Bowsprit:
I shaped and added the cheeks on the mainmast and as I starting looking at the main topmast I realized it has a pretty complex shape with a lot of wood to remove and I thought I wanted to get a little practice with something simpler first so after looking at all the masts I decided to tackle the bowsprit next. I picked it because the shape was pretty simple and it only had one piece so just simpler all around. I still found shaping the bowsprit challenging, not so much because of the difficulty but just because it took so much time to take off so little wood. I have tried using my exacto knife, sanding with the Dremel, and hand sanding. All of these methods have their challenges. The knife would be the quickest and seems to work well for blocking out small areas but if I try to do longer sections I'm constantly getting caught in the grain and taking out a bigger chunk that I want. Even if the chunk is going to be removed by subsequent actions it still prevents further knife work in that area which threatens to get me off center. I'm going to continue to experiment as some of the pieces have so much wood to be removed that sanding even with the Dremel would take a really really long time. I don't really have a place to set up a drill or a drill that would be able to hold a 10mm piece of wood. I think the masts are just going to be a lot of Dremel and hand sanding. Everything I've looked up for shaping the masts I've either tried or isn't practical in my setup.
Once shaped, the bowsprit was pretty easy to configure with cleats and blocks. I did end up cutting out the cleats that the instructions say to use 1x 1mm wood strip for out of 1 x 2 strip and just cutting to the correct size. My clumsy hands kept splitting the 1 x 1 wood. I wasn't sure how the blocks are attached to the masts (and yards later) but it seem they're just seized on the mast. I found an interesting video showing how to use one seize to create the loop for both the block and mast but for this mast at least I seized the block first and then seized the lines right next to the seizing for the block after wrapping the two arms of rope around the mast once. The results in a little more stand off from the mast and two ropes around the mast, but I don't see an issue with that for now, hope I don't find it later.
Here's a picture of the bowsprit just hand placed in the ship to see how it's looking.
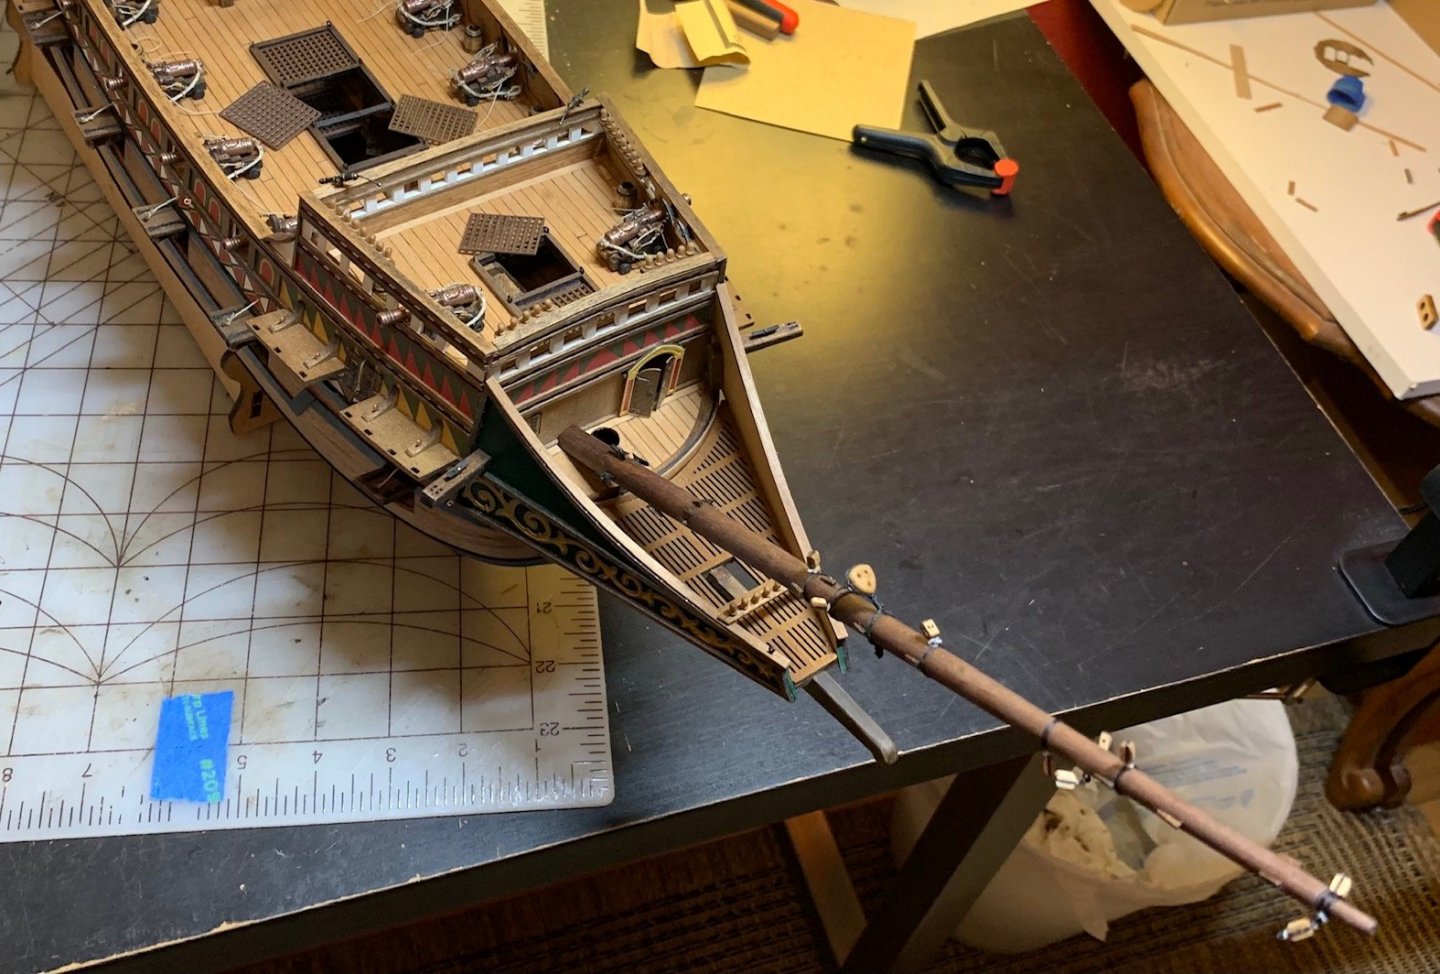
Am I seeing this right? The bow sprit looks off center to the centerline of the keel.
-
On 10/17/2020 at 9:45 PM, Jonathan_219 said:
Finishing Cannons and Gunports:
All the cannons are in place and rigged, lots of tiny pieces in those but it all came out fine. I just need to finish one side gunports and I'll be ready for the channels. I found some barrels in the kit and couldn't find any mention of them in the kit so I'm assuming they're there if I want to use them and I like that. I decided to make them gunpowder barrels and place them around the cannons. I stained them dark brown and I simulated coops (I think that's the word) on the barrels using thread and just CA glued black thread in two grooves that already existed on the barrels, and then painted the tops of the barrels black to give them some definition. I believe everything that goes on the deck is there now exception masts and rope of course. Some of it is still just hand placed and not glued but I'll probably get to the point of gluing the rest soon.
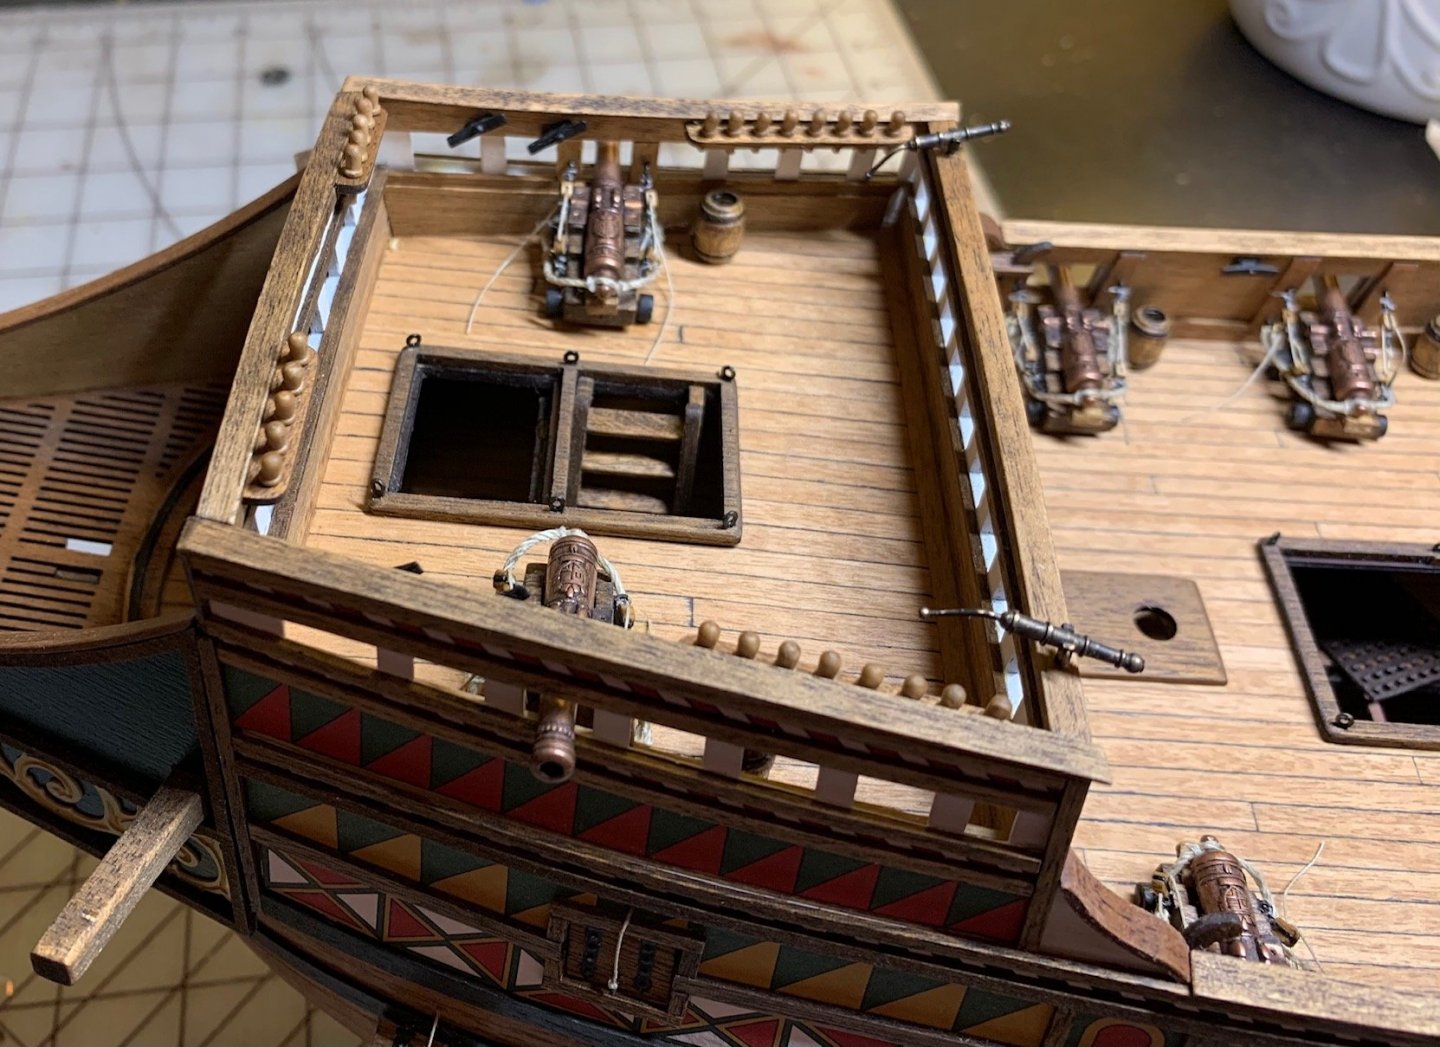
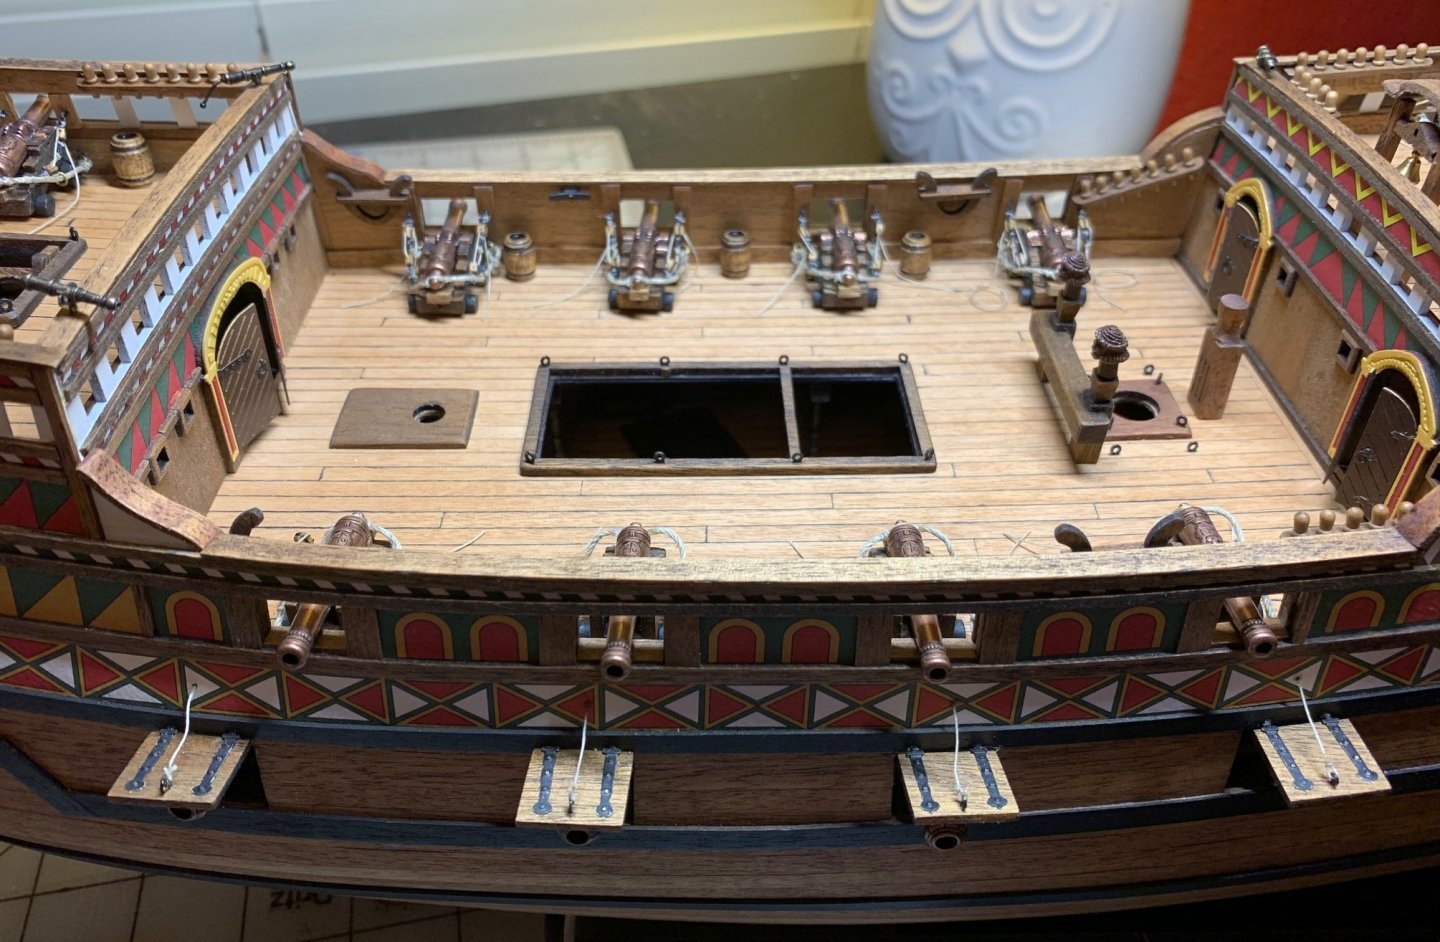
Nice job on the barrels. But I believe you may be a bit misguided in labeling them as gunpowder. The last thing a gun crew would want next to their cannons when fighting is a barrel of gunpowder that could accidentally be exploded by sparks from their cannons or an enemy ship. These barrels would have been stored deep in the ship's hold away from any chance of explosion. More likely they could contain water for swabbing the barrels between shots to extinguish any burning embers before loading the next charge of black powder. I was a member of a cannon crew and have experience running a cannon during historical reenactments and live fire target competitions.
-
On 7/31/2020 at 11:06 AM, Bill Morrison said:
Stunning work! The Amati kit seems exceptional!
Bill
Bill. Are you retired Navy? I lived in NL from 78'-2000'.
-
On 7/9/2020 at 1:55 PM, Jonathan_219 said:
Picture of the bow planking at the bottom. The bow planking has certainly been the most difficult to get right. Adding to this difficulty was that the plank did not reach all the way to the keel on my first second plank (lower wale plank). I decided not to try and splice but to add a couple of pieces at a 90° angle to the planking, I thought I had seen something similar to this somewhere but I'm not too sure about it after it's all done. I haven't trimmed these pieces yet as I'm not sure exactly where they'll stop since I probably need to add a piece to cover up a small gap between the deck planking and the hull. I think I'm too far in now to change much now but hopefully the rest will fall in place as I work to the bottom.
As you can see from the picture the second planking is going ok. It's not as perfect as I'd like but I think when I do a final sand and stain it'll be acceptable. There are still times when as I'm adding the plank I just can't get it to completely butt against the previous plank leaving a slight space between the planks. I've been gluing the first 15-20 mm at the bow starting where the plank touches the keel and then working back to the stern in 100mm or so sections.
I built a small rig to try and help cut the tapers on the planks as trying to cut smoothly just hand holding a ruler was pretty much impossible for me. I used some of the wood from the kit to create a channel that the plank would lay in to keep it from moving side to side and then I clamp the plank strip and the ruler. I also added a couple stops for the ruler to rest against to create the same taper on each piece. I calculated the taper by measuring the distance between the top and bottom areas of planking at the widest spot and several spots moving to the bow. Even with the rig cutting a smooth taper is not easy and I'm sure some of the issues I'm having with meeting the previous plank perfectly are from imperfect cuts. I do try to sand any waves out of the cut and trim and sand the back corners to help get that tight fit of each plank. The instructions say to carefully fill any spots before painting as painting is a lot less forgiving than staining and I hope that's true since I'm planning on staining and I'm sure there will be some spots that have tiny gaps even after final sanding.
At this point I'm continuing to work on finishing the second planking on the hull and then work up to all the parts I can do for now.
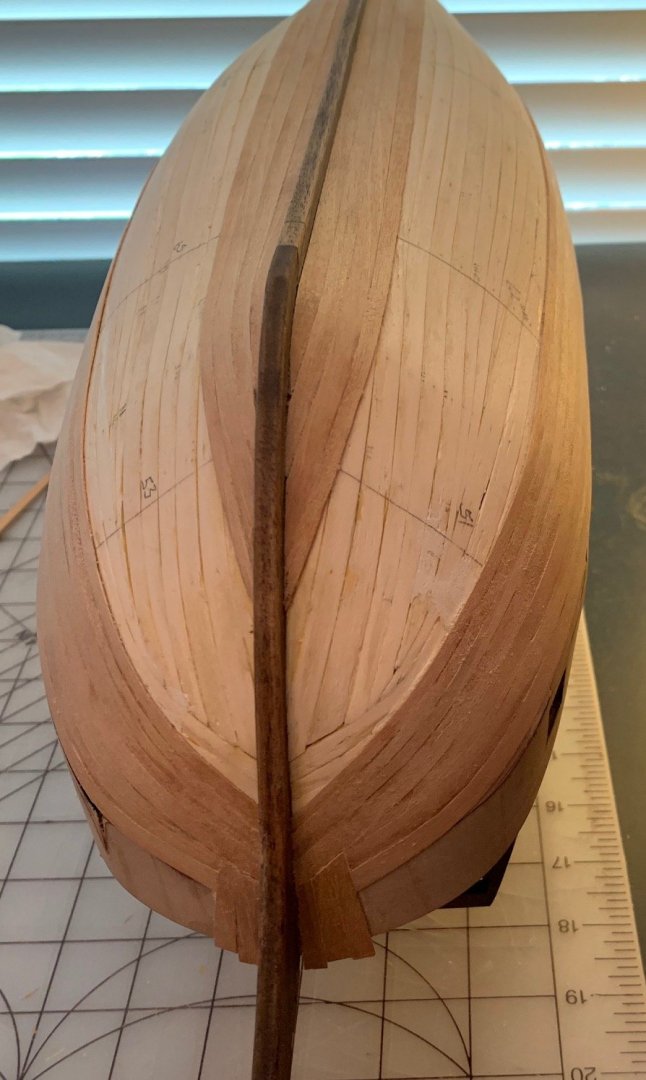
Did you ever consider using a heated plank bender?
-
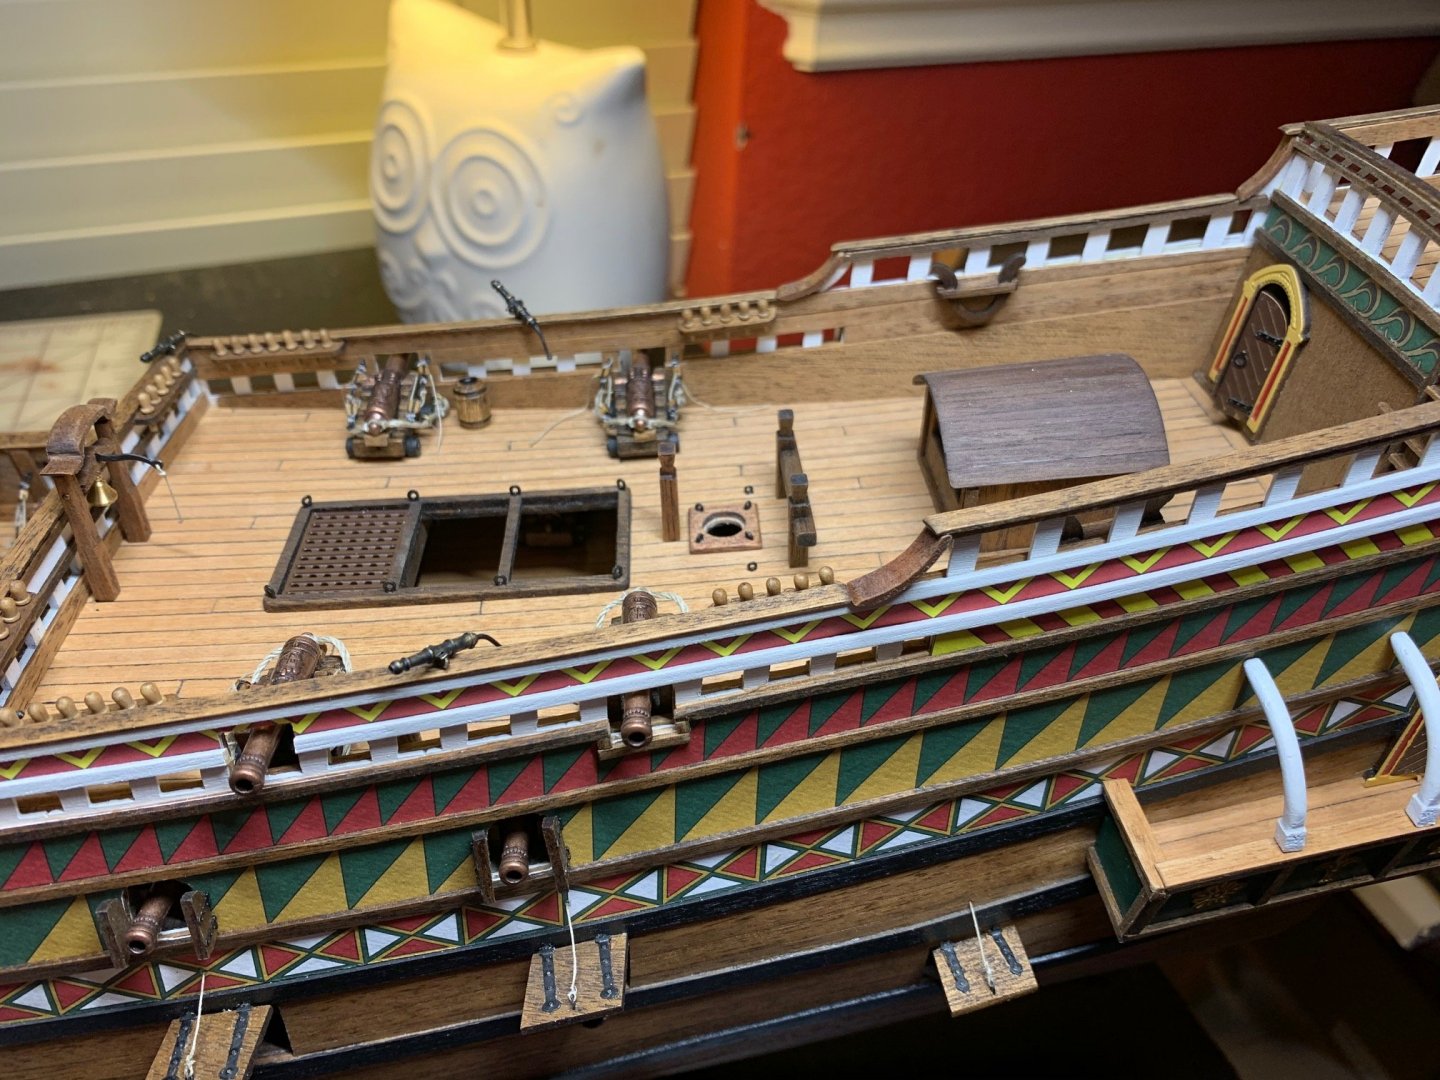
On 7/29/2020 at 11:36 PM, Jonathan_219 said:
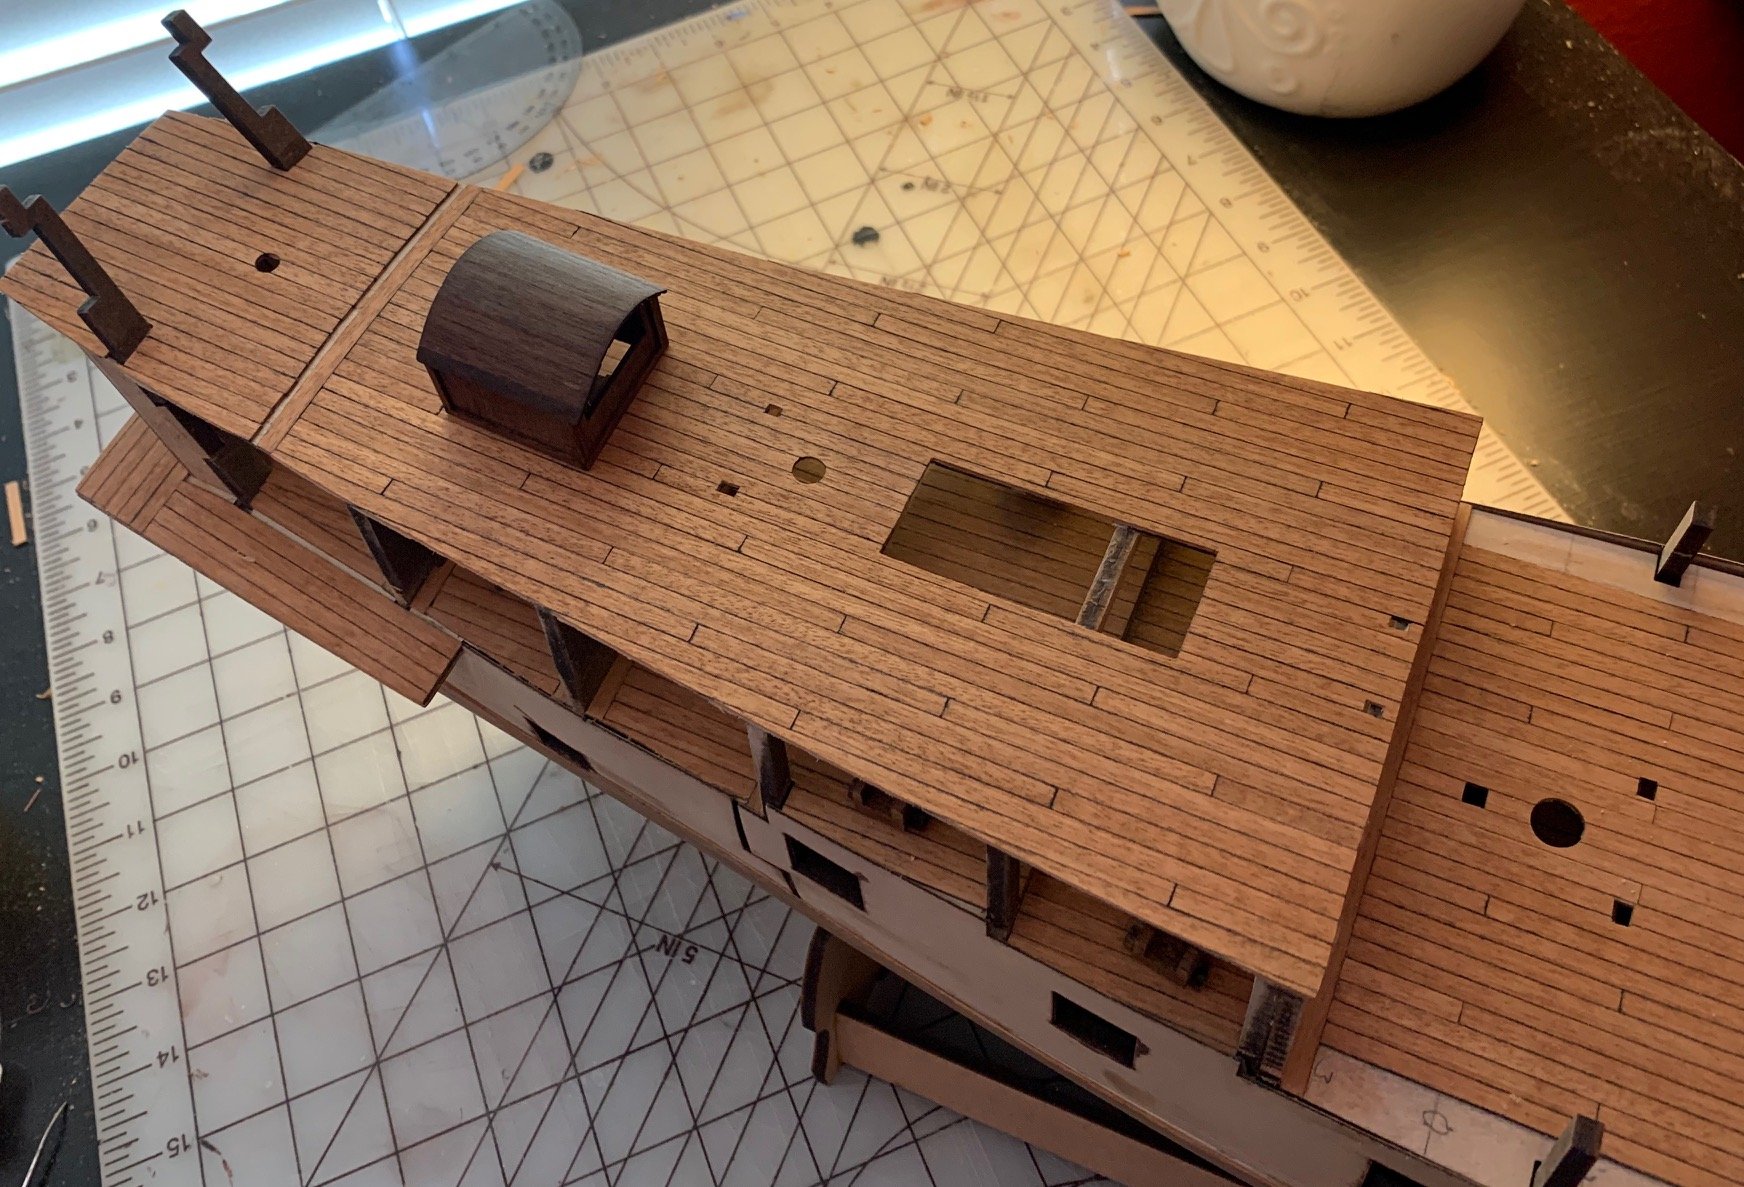
Quarterdeck and forecastle deck planking and Helmsman Canopy:
Finished planking the forecastle and quarterdeck and glued the forecastle deck to the ship, All went as planned. Can't say the same for the Helmsman Canopy all of which was due to my clumsiness and bad decisions. When I was gluing the four sides together I was having trouble getting them to stay square while the glue set enough to hold things in place so I decided I'd put a clamp to hold it steady. As soon as I released the clamp (spring loaded) the pressure broke the front side with pieces sproinging everywhere. I looked and looked but never found the upper arch which holds up the roof so I had to make a new one, I did find the piece that came out of the hole in the front section so it had the right curve and all I needed to do was cut a piece the right width and glue it in place. The piece broke as I was cutting it out but it was a clean break that could be glued back together so I proceeded to move forward. I think I broke that piece at least three more times but I finally got enough roof structure to give it some strength and surprisingly if I didn't know what had happened I don't think I'd be able to tell.
The instruction say to use 1x2mm wood strips to do the corners and roof but in the pictures they look suspiciously like 1x3mm stripe, at least on the roof so I decided to use 1x2 on the corners and 1x3 on the roof. The 1x3 in the kit is Walnut and it's much harder than anything I've worked with before but it seemed to go OK and when I stained the roof it looks really good, not sure if you'll be able to tell in the picture but there is a lot of nice coloring in the wood now and I like the look. I haven't decided whether I'm going to put a base around it or just glue it straight to the deck, it's another one of those things I'll consider before pulling the trigger and there's a lot to do before it matters.
I also went back and did the bases for the two small swivel cannons on the quarterdeck and they went in with no issues.

Tough break on the parts snapping. But you found a way to solve it.
-
On 6/13/2020 at 12:04 AM, Jonathan_219 said:
Rear Gallery Deck, Ladders, Helmsman Platform, Doors:
Everything here was pretty straightforward. I did feel that the doors looked a little plain so I added some additional detail. I took some 1mm Balsa sheet and cut it as thin as I could and then sanded it down to make planking to go on the doors (picture below) and for the helmsmans platform I ended up planking all the external surfaces with 2mm walnut and then staining it before installing it. I did touch up the doors after the picture was taken where the black paint had come off while working with them and exposed the brass. Of the 4 eyelets (pieces 227) I lost 2 and had to replace them, I hope there are enough spares or I stop losing things.
I glued everything in place and set the forecastle deck in place in preparation for starting to shape the bulkheads, I feel like this is going to take some time and I know that the better I get the shape now the easier the hull planking will be so I'll be taking my time and trying to get this as good as possible before moving on.

Very nice!
-
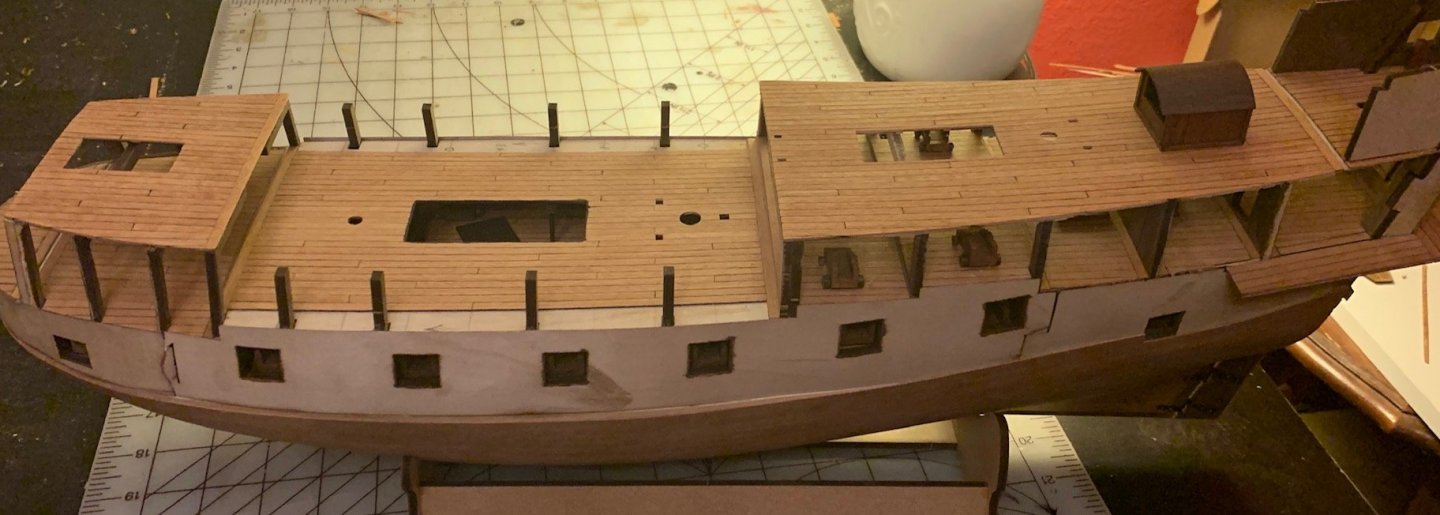
On 6/3/2020 at 10:49 PM, Jonathan_219 said:
Bow Deck:
Didn't trust myself to get the transverse planks positioned exactly correct just by drawing lines so my solution was to tape the deck and parts that the transverse planks butt against in place and glue one plank in place touching the particular part (picture below). Since part 114 has a plank on each side of it I let the glue on the first two planks dry and then took the bow deck and parts off and then put part 114 in place while sitting on my table. Then I could position the transverse plank of the other side of 114 and wait for it to dry. Once those three transverse planks were in place I just used my normal planking procedure to finish the bow deck. I used a knife to cut the elliptical hole pretty close and then used sandpaper wrapped around a small circular file handle to clean it up.
Putting the bow deck back in place was a nail biter as it really does feel like something is going to snap as you try and bend it enough to get it in place, but it all stayed together and went in. Used some painters tape to hold it down on the bulkheads as best I could. I really like the way it's looking so far, I can see my mistakes but will try to clean things up as I continue on and get more practice.
Looks great! What a tough fit!
-
-
On 3/27/2014 at 2:26 AM, Spiderpig said:
http://www.occre.com/galleon-revenge.html#!prettyPhoto
Just seen on Occres website a new model in their line. The Revenge. Looks quite a beauty!
Adam
On 3/27/2014 at 8:38 AM, Spiderpig said:True about the scale. However its still a large enough model. 650mm isn't laughable. I'm not sure on the cost, but I will be considering this as a future project.
Adam
Looks like a great ship!
-
On 1/13/2021 at 12:29 AM, rraisley said:
While I can't produce DXF or DWG files, I can produce PDFs. This is the project for the 32-pounder to date. I believe the barrel to be pretty accurate and the carriage as well, although I haven't yet put detail to the carriage, such as bolts, chamfers, capsquares, etc. The outline and such is about the best I can do at this point, and think it is quite accurate. I'll attach scale PDFs in a number of scales.
Bugler 32-Pounder Views 1-24 Hidden.pdf 75.13 kB · 6 downloads Bugler 32-Pounder Views 1-24.pdf 32.52 kB · 5 downloads Bugler 32-Pounder Views 1-48.pdf 75.56 kB · 5 downloads Bugler 32-Pounder Views 1-72.pdf 70.16 kB · 2 downloads Bugler 32-Pounder Views 1-98.pdf 70.18 kB · 4 downloads
Thanks for the prints.


18th Century Longboat by BobF - FINISHED - Model Shipways - 1:48 - Tri-Club
in - Kit build logs for subjects built from 1751 - 1800
Posted
Was the "claw" technique widely used? This is the first I have seen it used.