HOLIDAY DONATION DRIVE - SUPPORT MSW - DO YOUR PART TO KEEP THIS GREAT FORUM GOING! (Only 20 donations so far - C'mon guys!)
×


Glen McGuire
-
Posts
1,957 -
Joined
-
Last visited
Content Type
Profiles
Forums
Gallery
Events
Everything posted by Glen McGuire
-
 Brilliant work, John! Love the creativity for the mast hinges and the laminate spars. I just finished up a much cruder version of the Aurora in a bottle. The Antarctic exploration vessels from the heroic age are fascinating ships with incredible stories!
 -
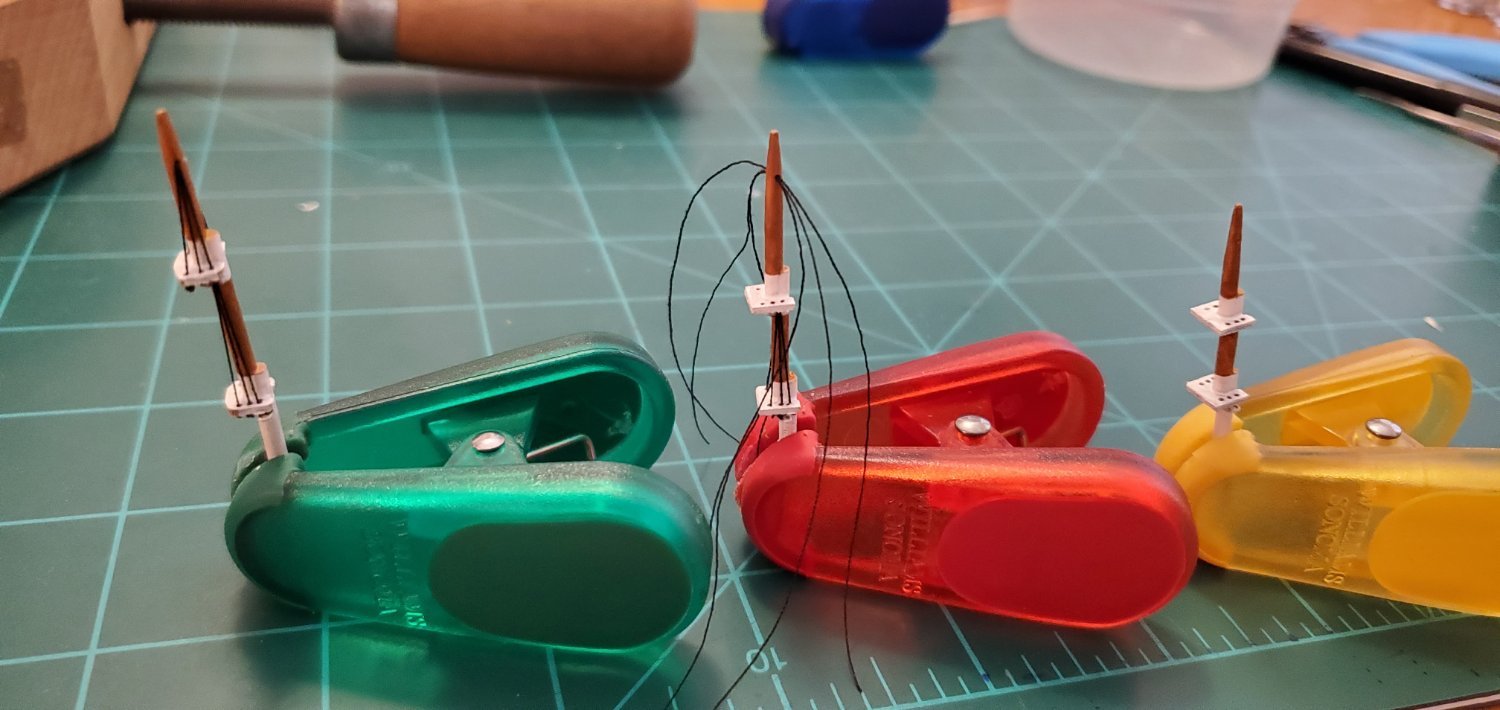
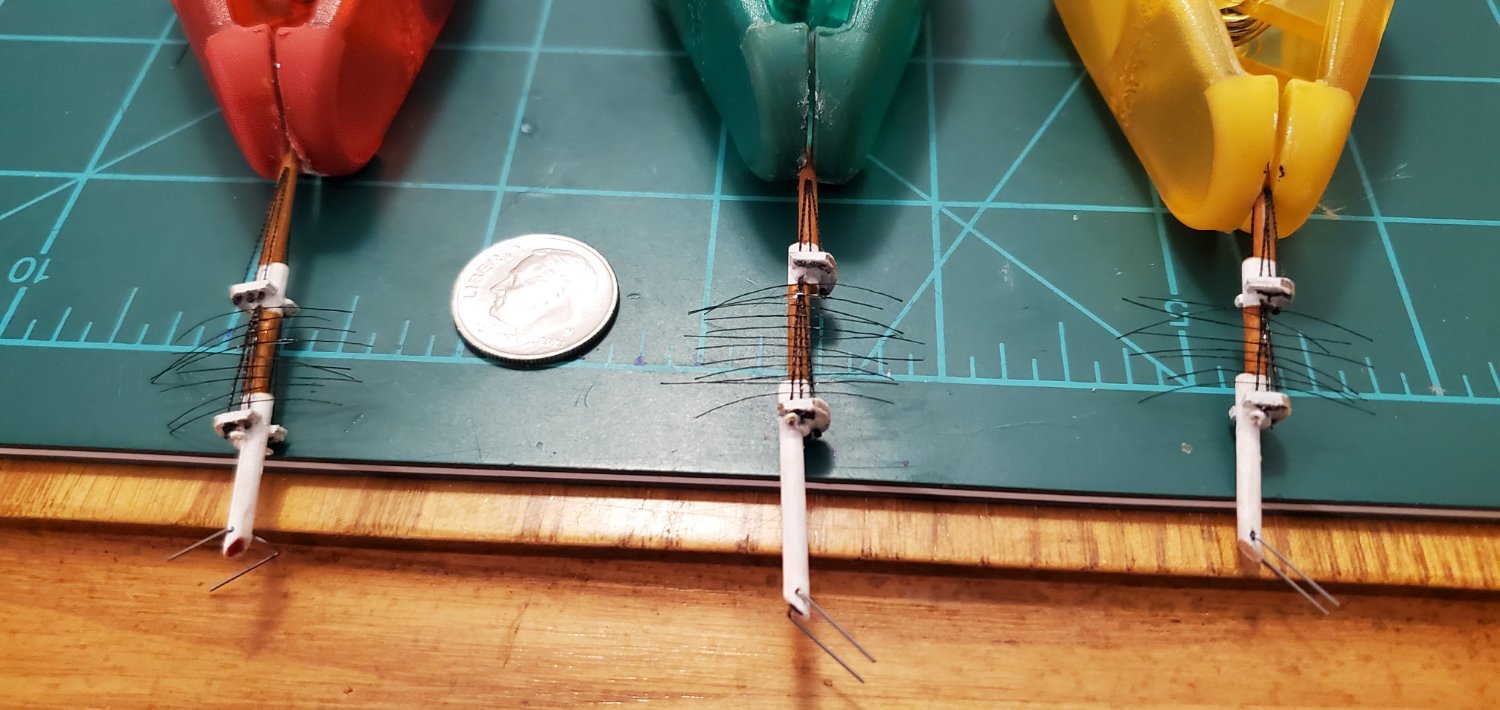
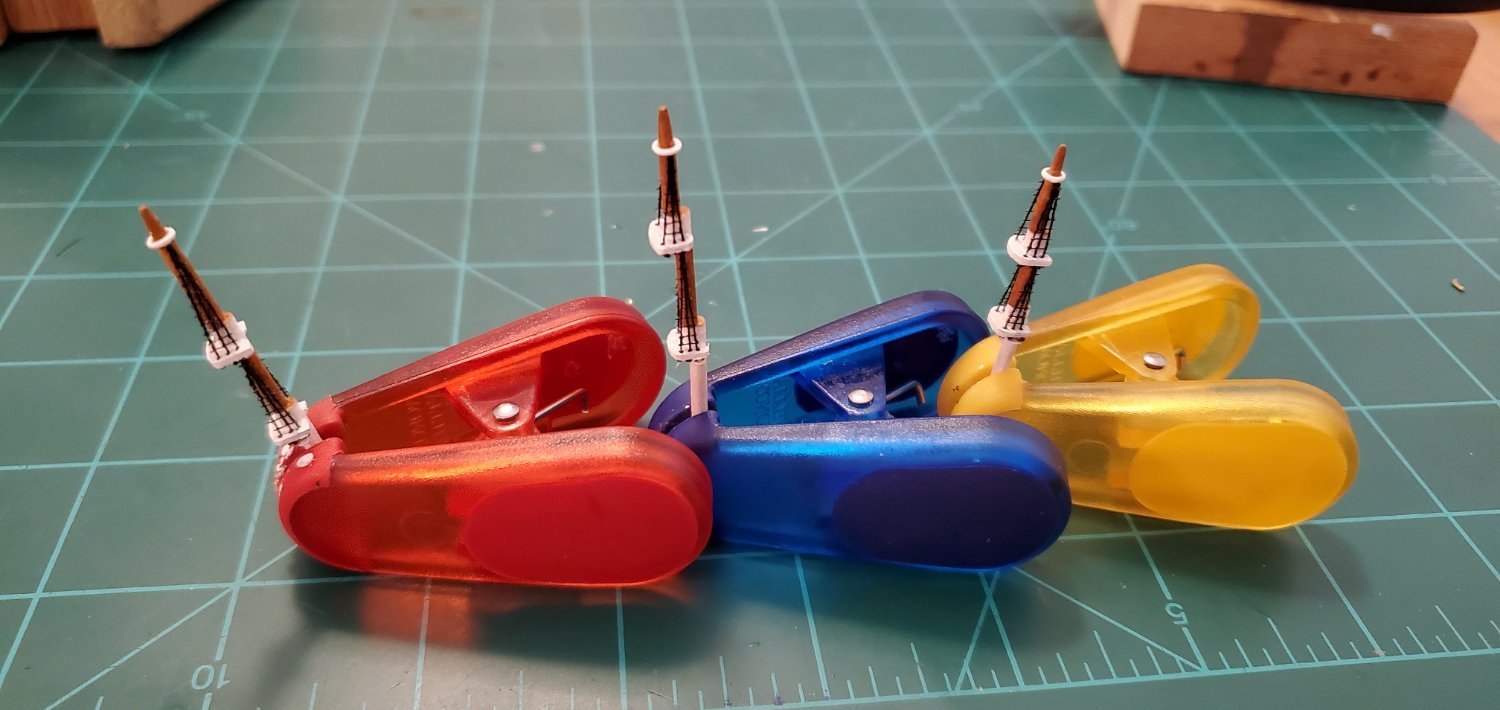
Masts completed and upper shrouds and ratlines added. Pictures show the basic process. I use standard Gutterman thread for the shrouds. The ratlines are 72D 8/0 fly tying thread glued to the shrouds with Aleene's fabric glue and clipped close with cuticle trimmers.


- 177 replies
-
- 6
-

-

-
- Independence
- bottle
- (and 1 more)
-
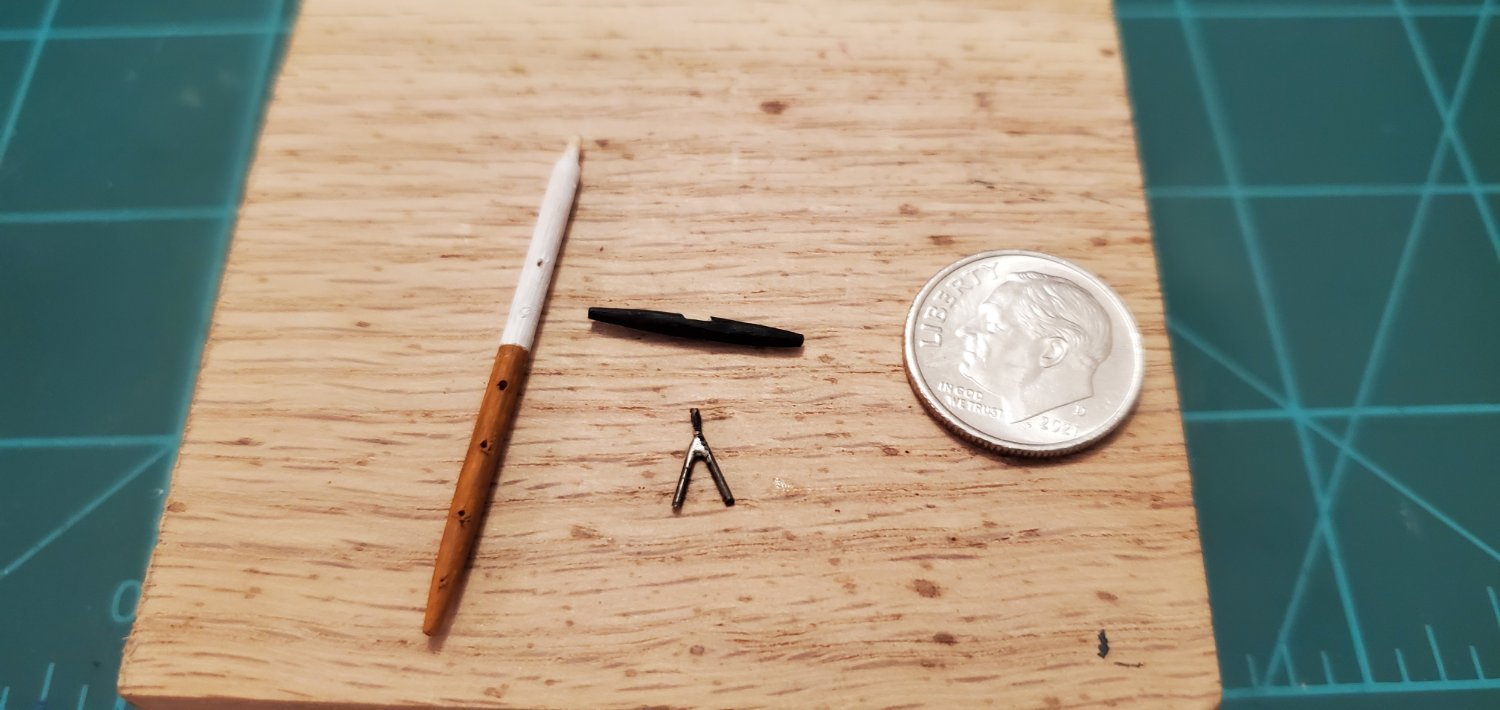
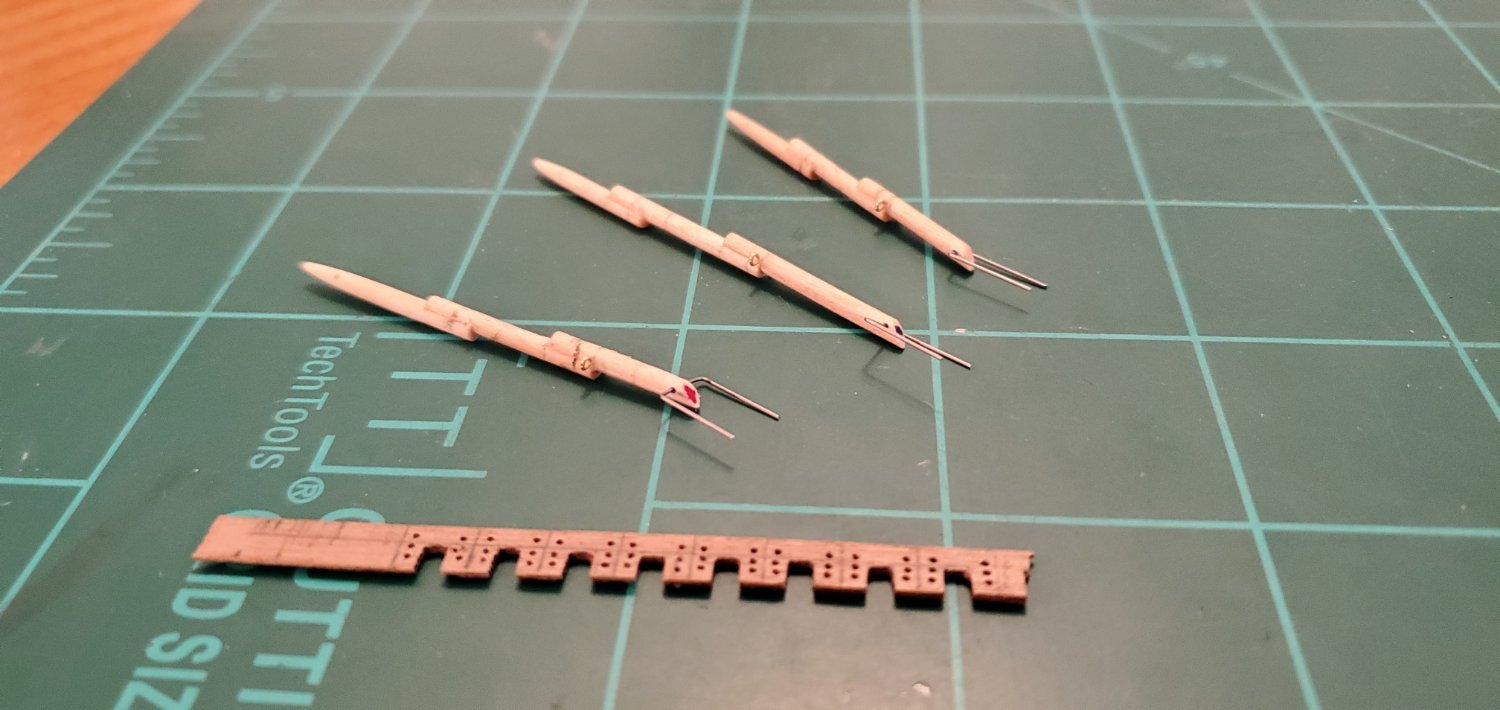
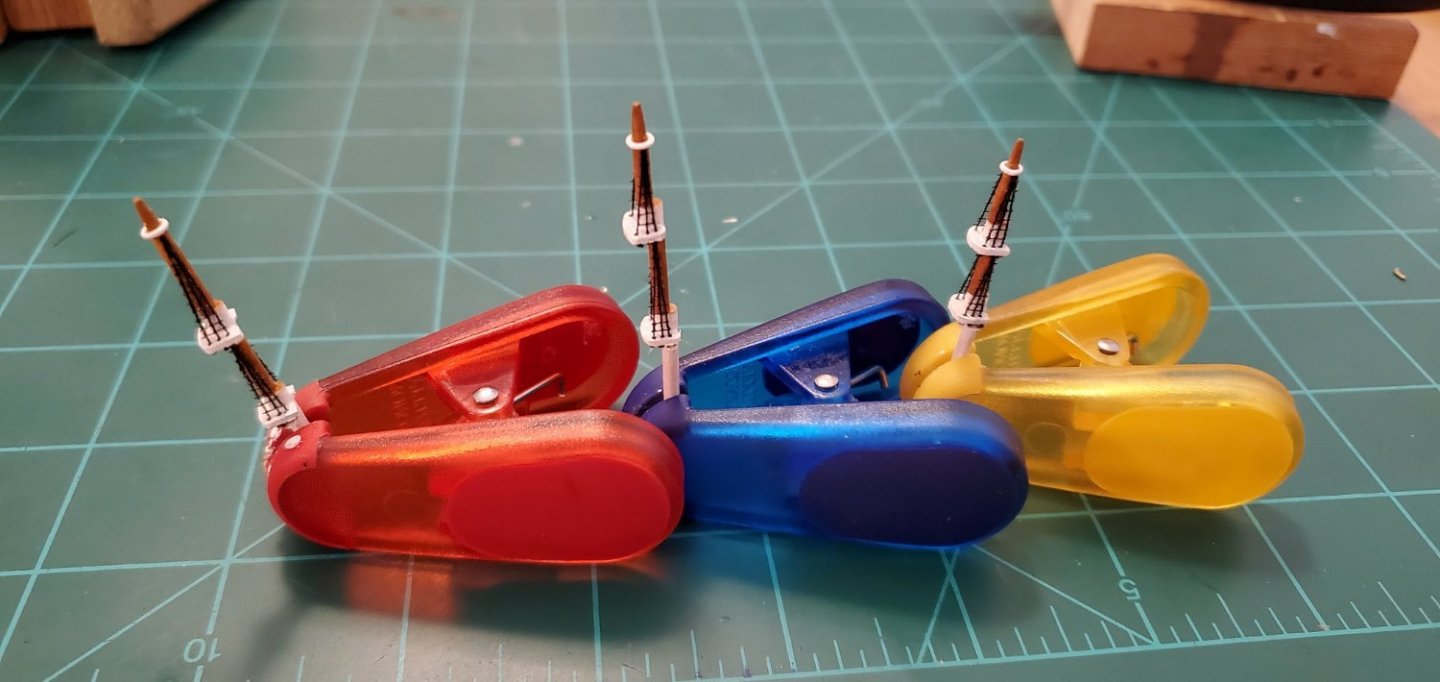
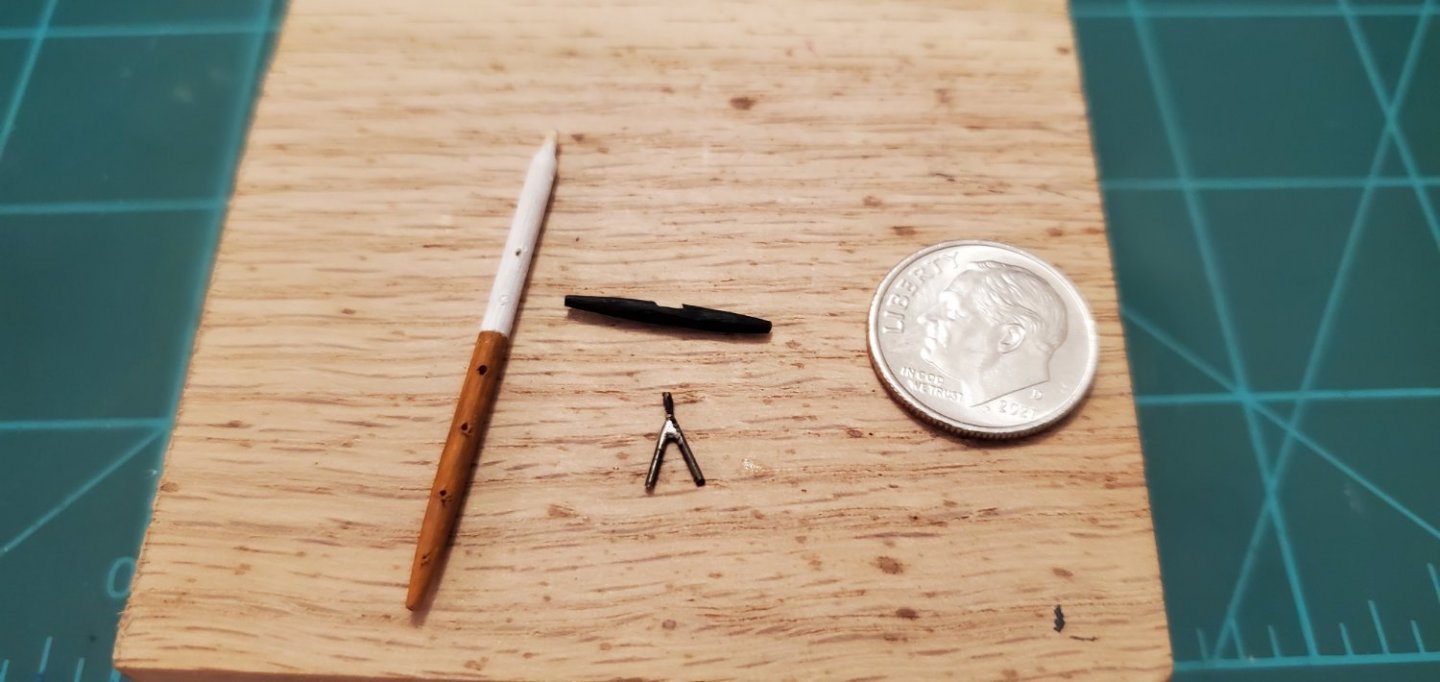
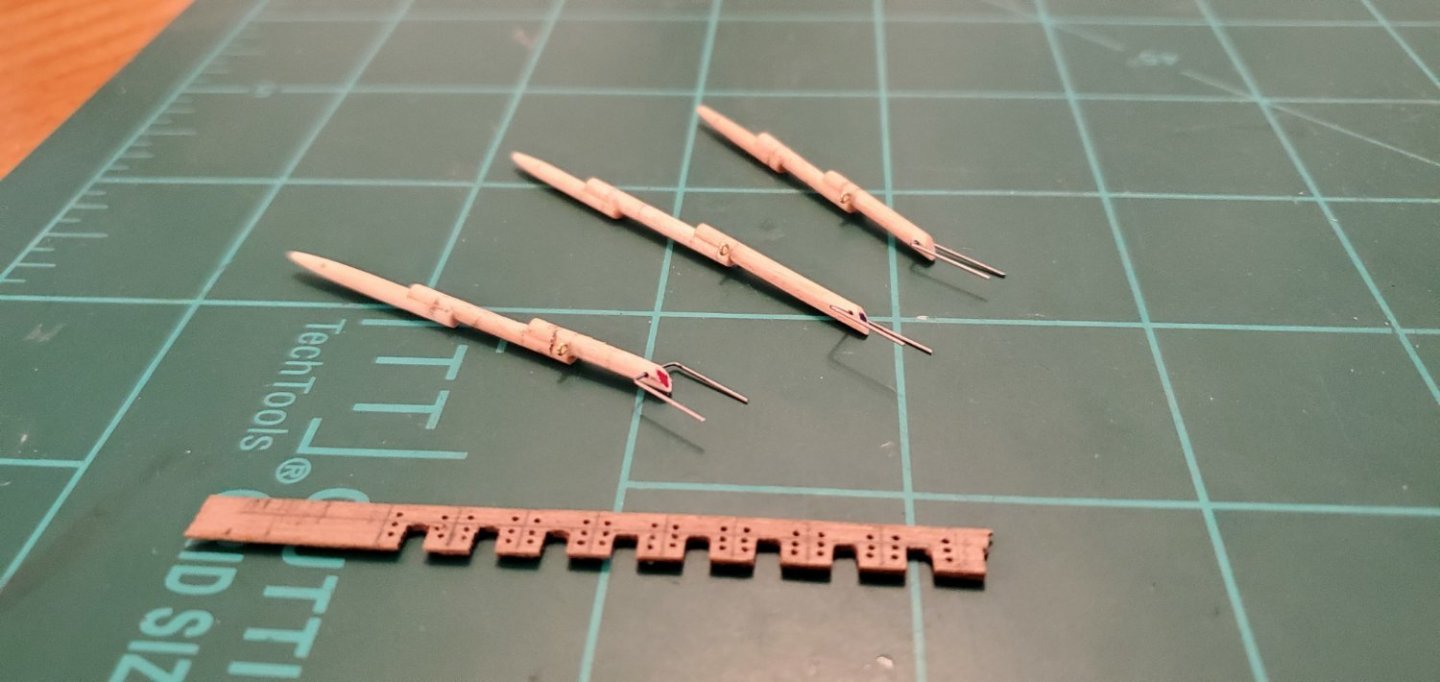
Moving off the deck now! The next small challenge was the dolphin striker. The sail plan drawing of the 1814 Independence shows it being split like the Constitution. I like to build as much of the ship as possible out of wood, but for the split dolphin striker, I just could not put any little pieces of wood together that looked good and had any sturdiness. So I soldered a couple of small pieces of wire. Don't tell anyone I cheated! Next up are the masts. With each of these builds, I'm trying to improve on the last build by adding a little more detail and/or improve a component where I can. I figure that's the fastest way to get better at this stuff. So for the masts, I decided to try a first for me and make them 3-piece. The overlapping sections add precious height to the overall structure when they are laid over, so I notched the ends where each section meets the one above it. I am determined NOT to have to rework things to fit the ship inside the bottle when it's time. I'm also trying a mass production of the mast tops.
- 177 replies
-
- 9
-
-
- Independence
- bottle
- (and 1 more)
-
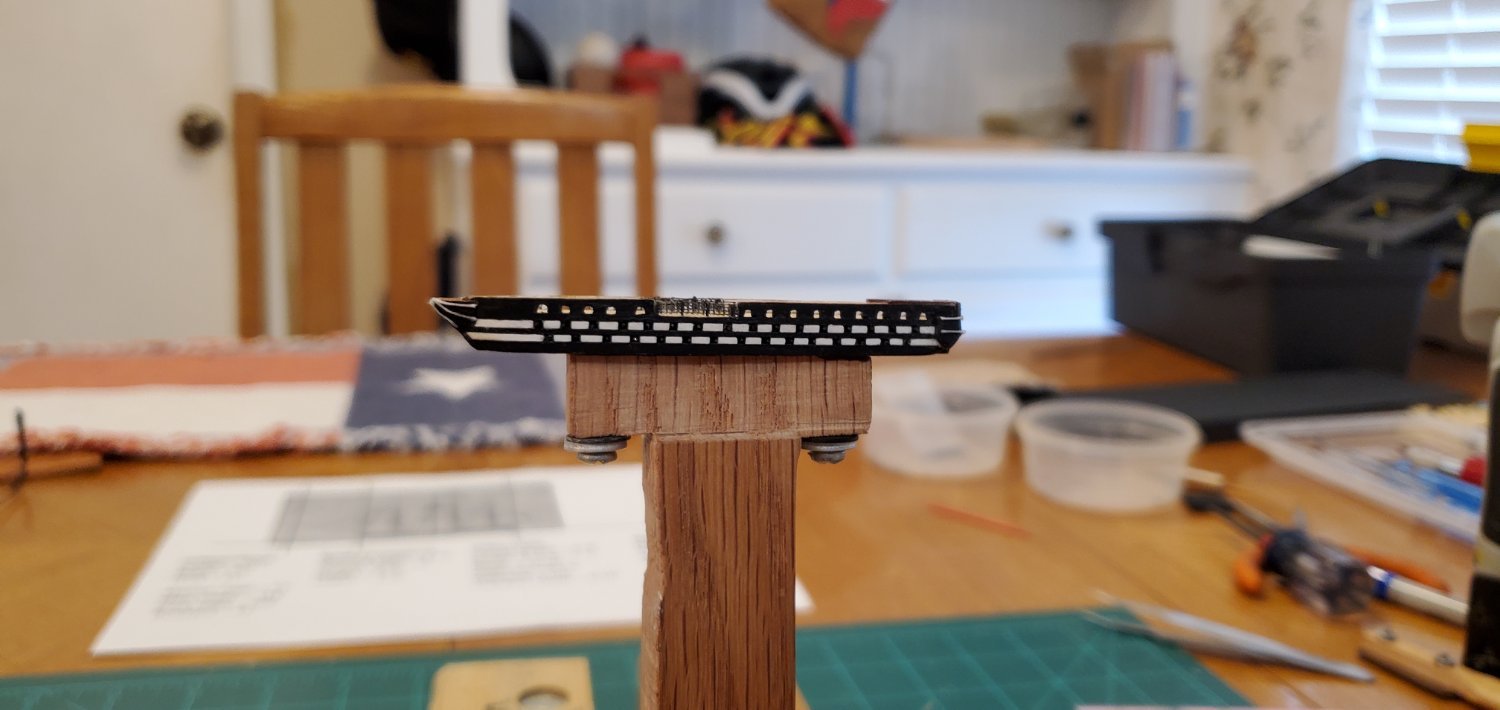
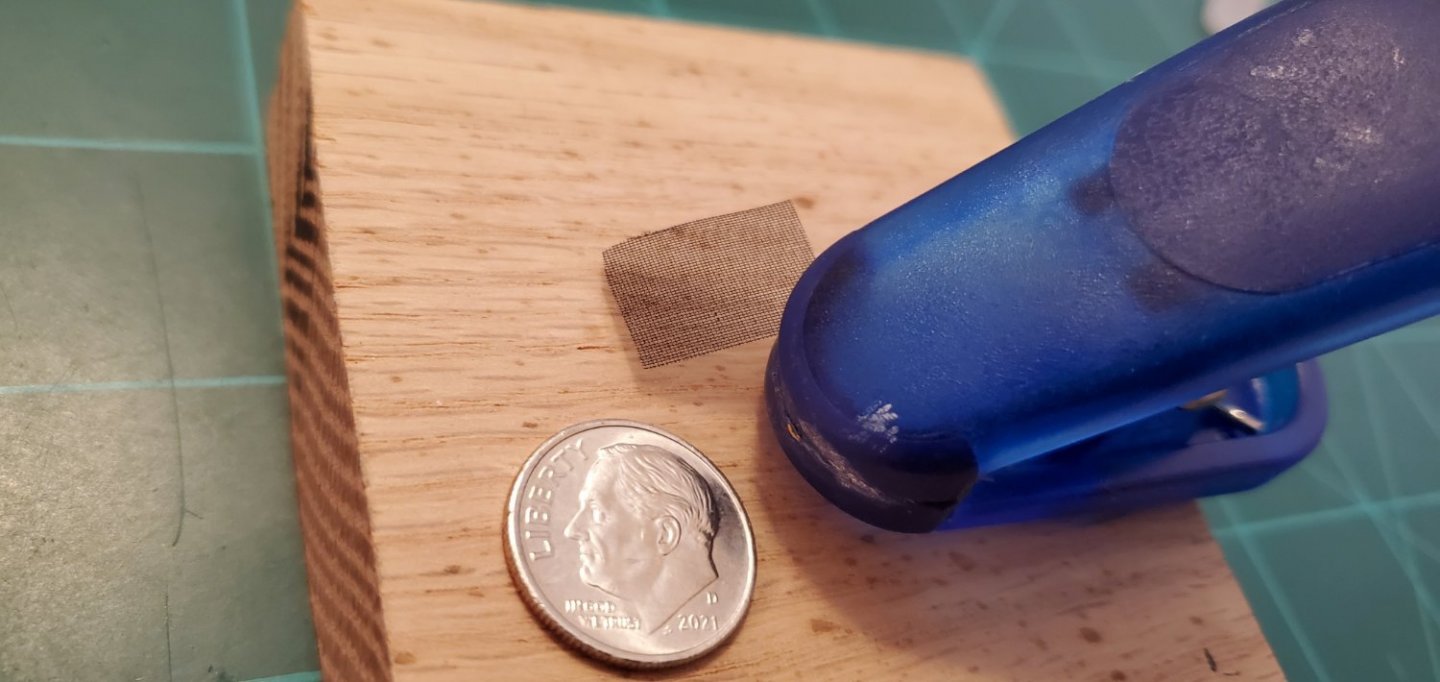
The micro mesh that @Keith Black suggested arrived this weekend so it was time to decide on the fate of the hammock netting. I really wanted the netting to work because I thought it made for a unique look. I took the micro mesh and cut a small section out and gave it a very light dusting of black spray paint, then cut it into a couple of tiny strips. Despite being stainless steel, it cut quite easily with small scissors. I really like the way it turned out - way better than the mesh stuff I used earlier. So huge thanks to @Roger Pellett for pointing out that my original netting was far out of scale and to Keith for finding that micro mesh on eBay! I never thought of ship modeling as a team sport, but I'm beginning to think it is!

- 177 replies
-
- 8
-
-
-
- Independence
- bottle
- (and 1 more)
-
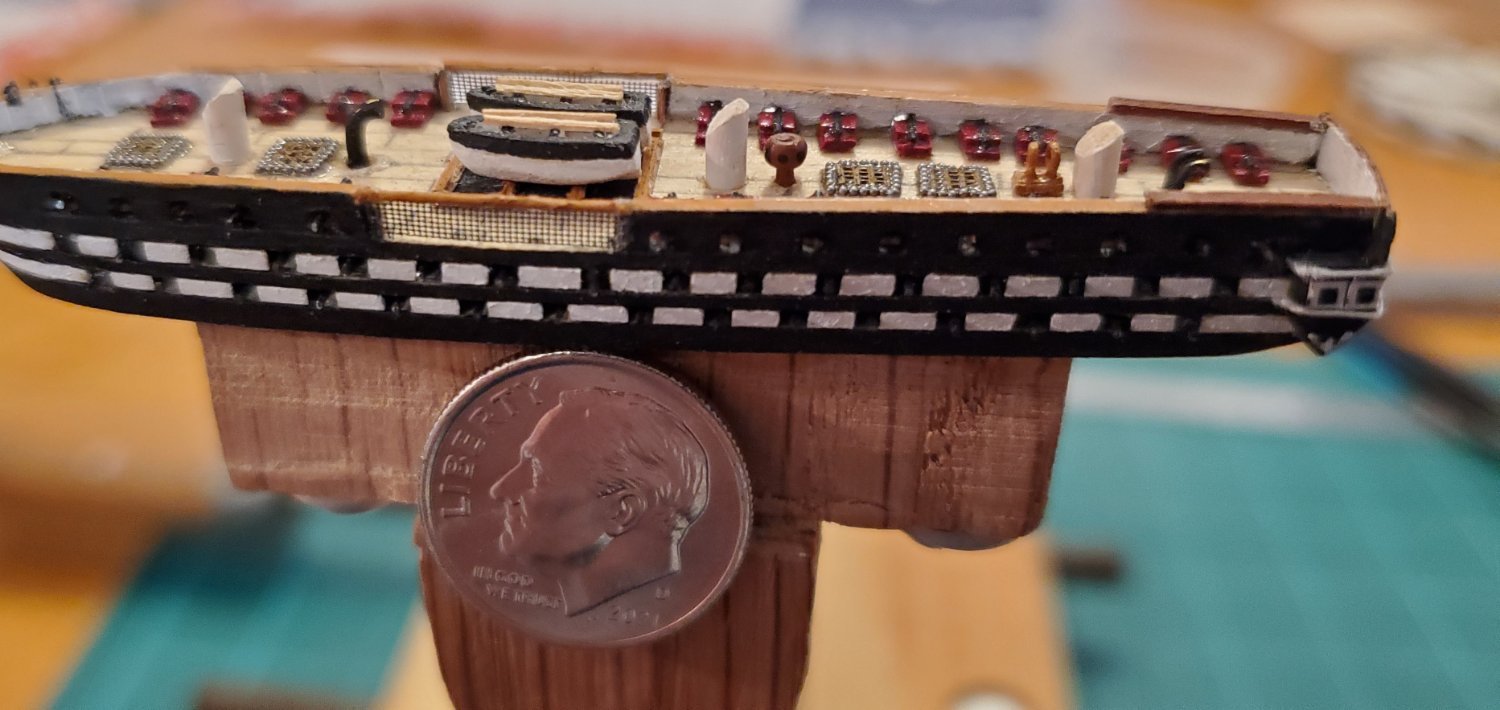
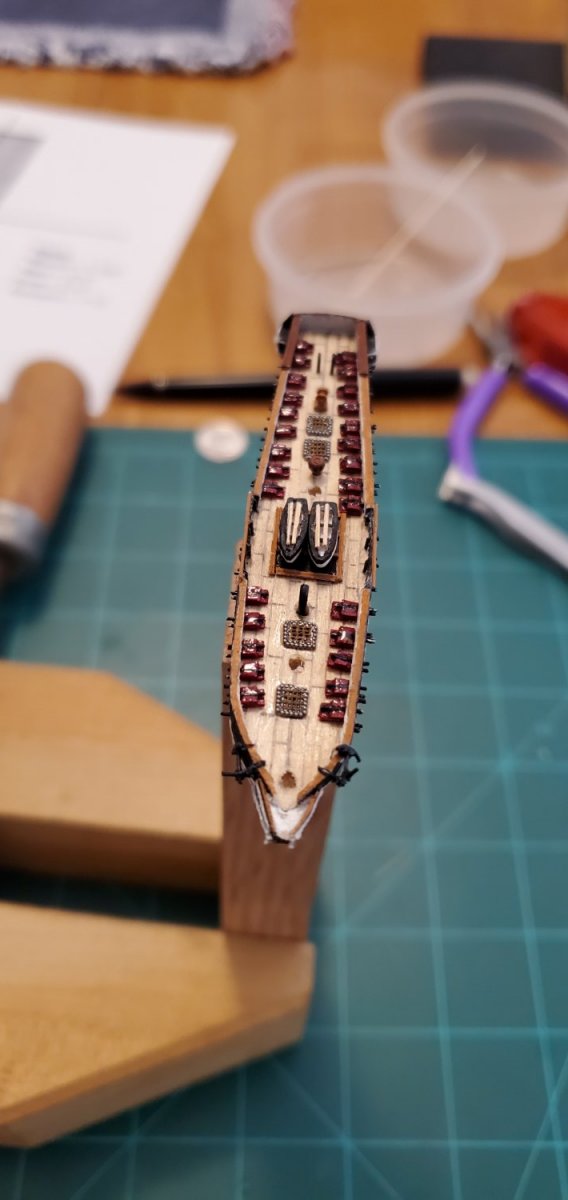
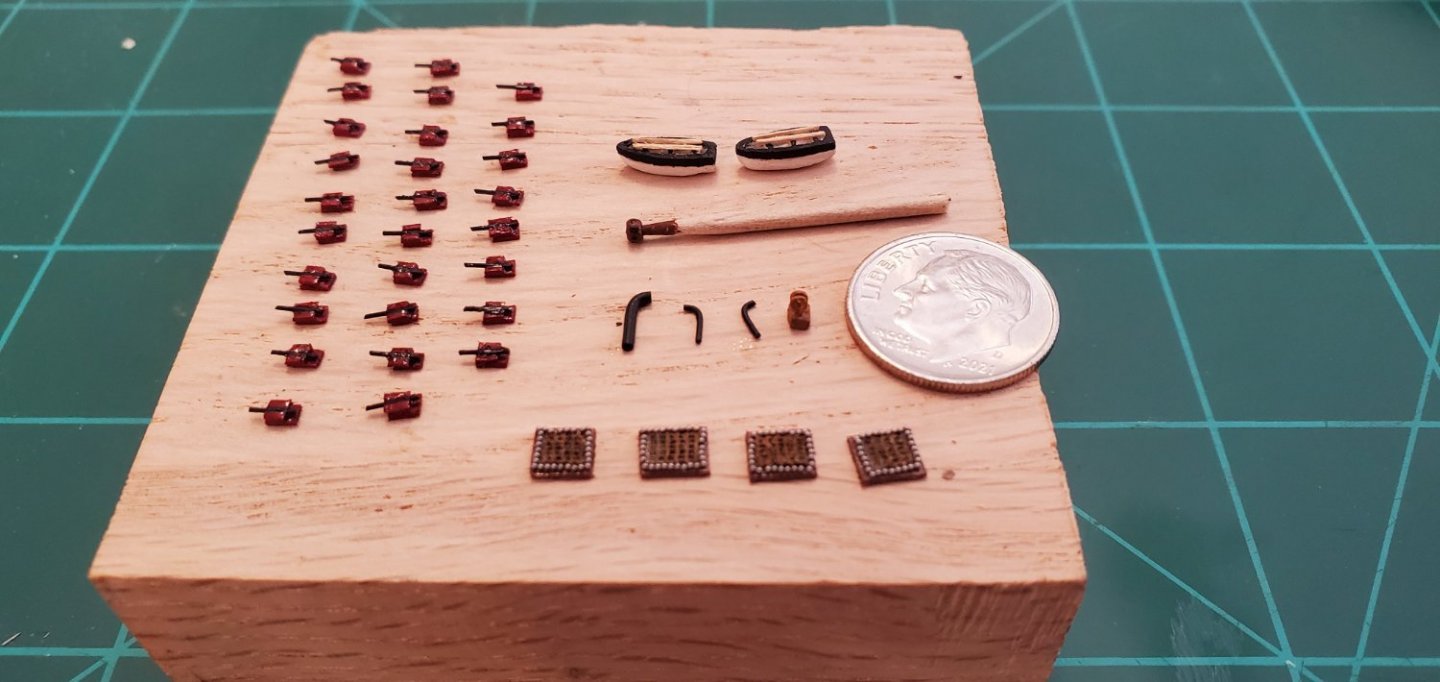
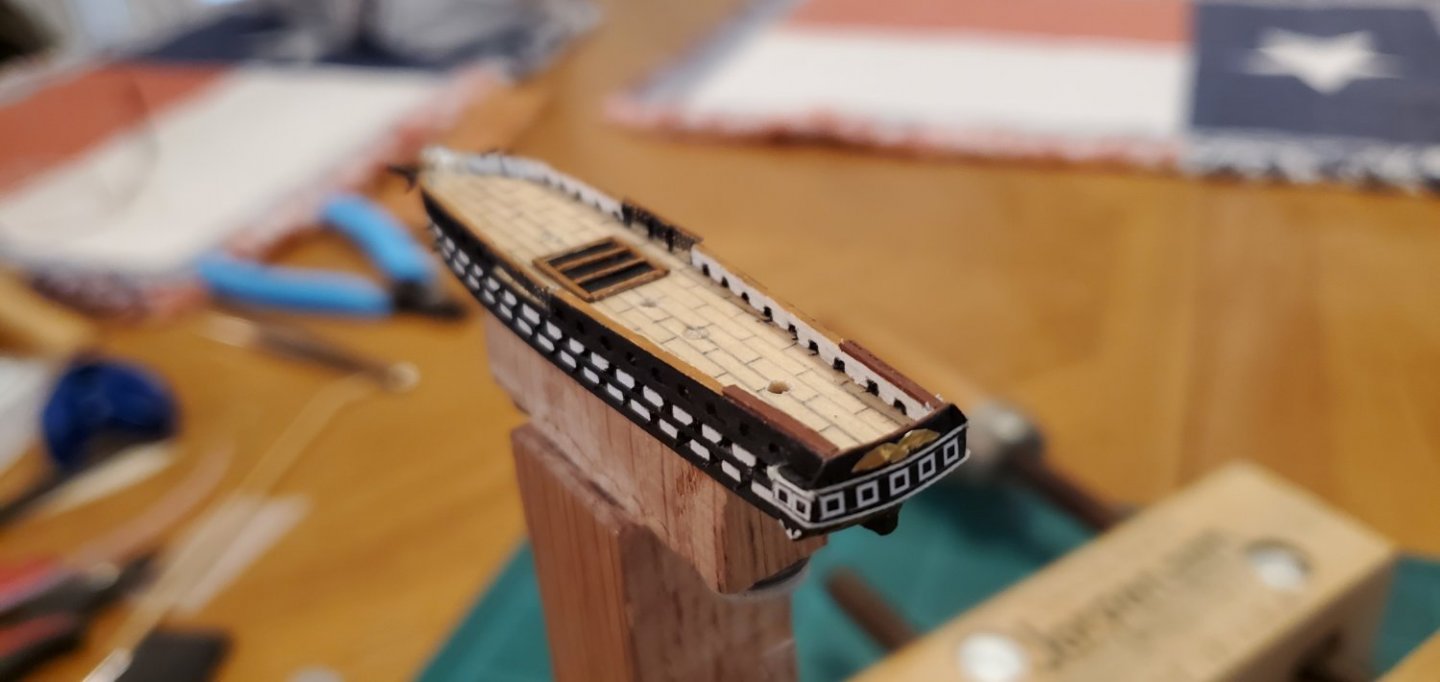
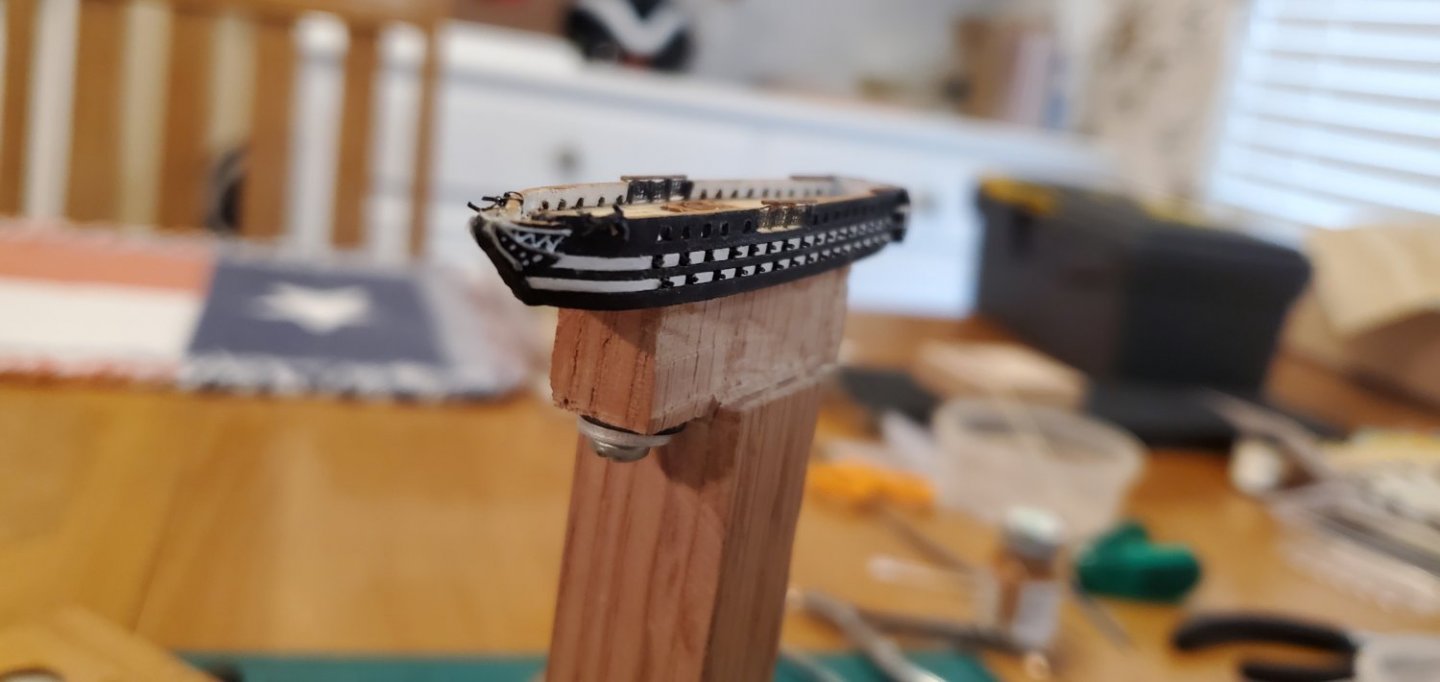
On to the deck fittings. Since I have no deck plans for the Independence, I'm making it Constitution-ish. Based on what I've seen in Constitution build logs, the spar deck is not near as busy as the decks of my previous Aurora and Morgan builds (not counting the cannons anyway). So besides the cannons, I'm outfitting the Independence with 3 vent pipes, a double captains wheel, a capstan, 4 gratings (with cannon balls of course), and 2 ship boats. And I immediately ran into problems. First, the barrels on my spar deck cannons did not stick out of the gun ports quite as far as the barrels on the middle and lower gun decks. Those stick out about 1/32", so we're only talking 1/64". But it was noticeable to me. Ugh. So I scrapped 14 of the cannons on the display side and rebuilt them with barrels of the proper length. The 2nd problem was my gratings. This is the first time I've tried to actually make something resembling gratings at this scale. I spent a lot of time building 4 of them using the same mesh that I'd used for the hammock netting, gluing it over a small black square for depth. To my surprise, I thought they came out looking pretty good. Unfortunately, I failed to consider how much of the deck would be taken up by the the cannon carriages. As a result, the gratings were way too big. Ugh again. So I scrapped them and made smaller ones. For the capstan, I used one of those tiny little beads and stuck it on the end of a toothpick. I know the cannon balls should be black. But then they just get lost and are not even really visible. So I'm using a bit of artistic license here because I want them to stand out just a bit.


- 177 replies
-
- 10
-

-
-
-
- Independence
- bottle
- (and 1 more)
-
Greetings from Colorful Colorado
Glen McGuire replied to Prowler901's topic in New member Introductions
Glad to have you on board, Todd! You're gonna enjoy the ride! -
Don't worry about the close-up pictures showing too many flaws. We are all way too familiar with that around here. Really nice work so far. I think you are doing a fine job on a very interesting subject!
-
He will be part of the family. The only dark side for him comes at 8 months when he goes from bull to steer. 😀
- 177 replies
-
- 5
-
-

-
- Independence
- bottle
- (and 1 more)
-
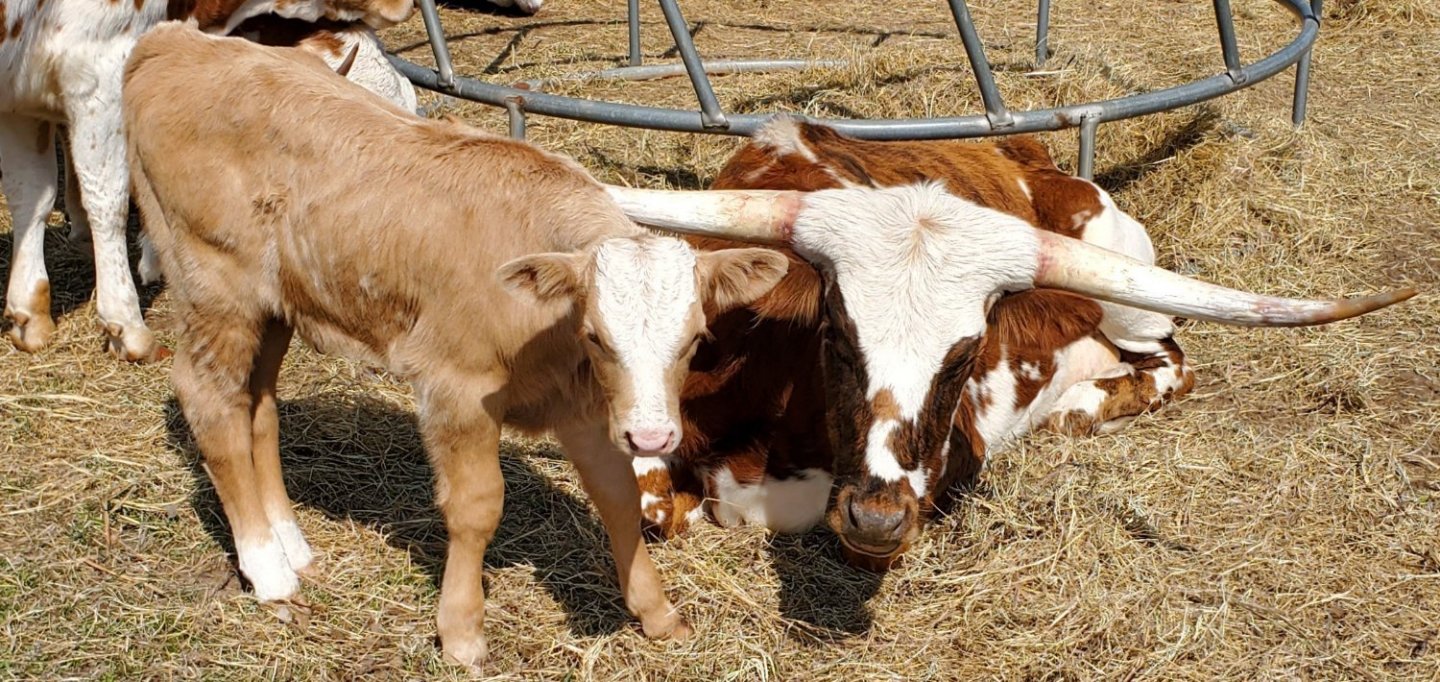
Baby Bevo (Shiloh) is doing fantastic! He's already sprouting little horn nubs! Here he is with his momma.
- 177 replies
-
- 4
-
-
- Independence
- bottle
- (and 1 more)
-
@Joe100 had a Churchill quote in a recent post that I wish I'd read when you and @gjdale wanted me to carve a penguin for that Aurora build. Churchill said, "When all the sick and wounded have been tended, when all the impoverished and broken hearted homes have been restored, when every hospital is gorged with money, and every charitable subscription is closed, then and not until then will I concern myself with those penguins."
- 177 replies
-
- 5
-

-
-
- Independence
- bottle
- (and 1 more)
-
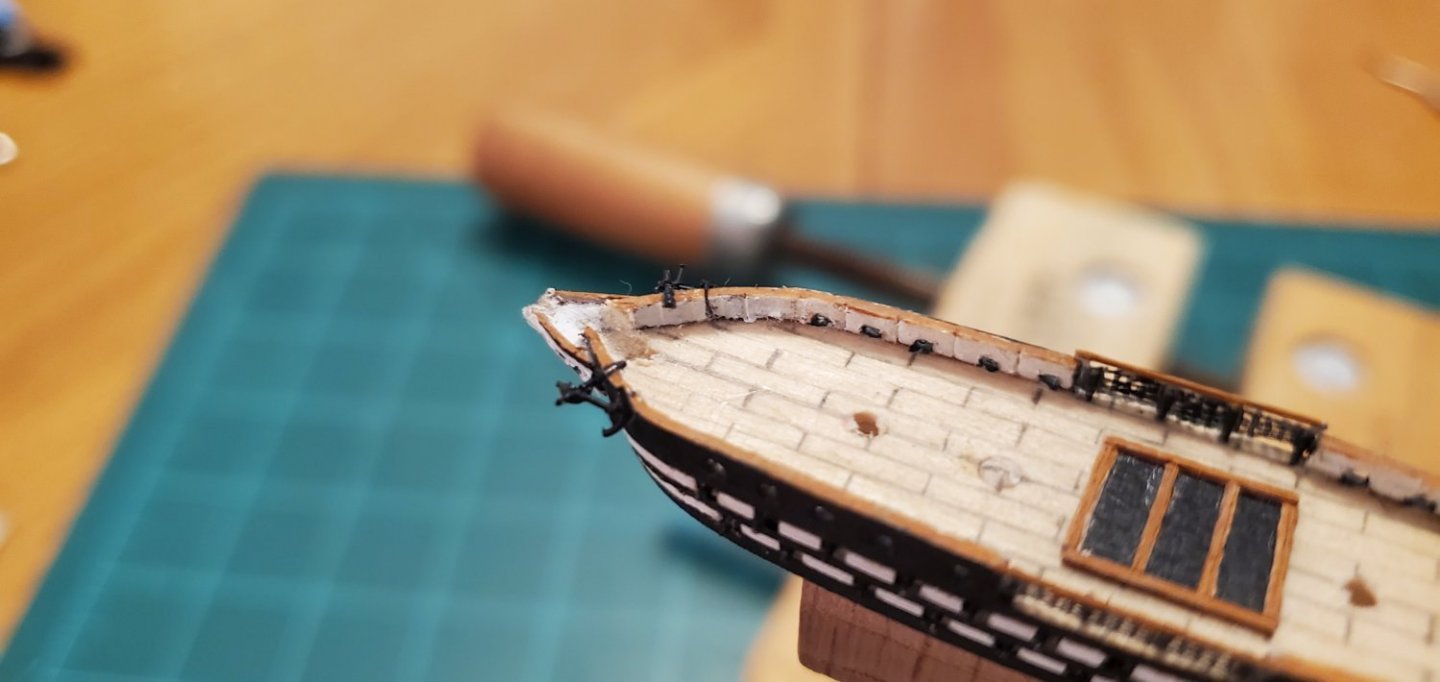
While I await the micro mesh order and ponder the fate of the hammock netting, work continues. For the quarter gallery, I added windows. a gold eagle, and a tiny bit of decorative paint. I also added a ship boat storage platform to the center of the deck between the hammock rails. The 2nd pic shows some decorative paint added to the prow and the 3rd pic shows the cathead and anchor assembly.
- 177 replies
-
- 9
-
-
-
- Independence
- bottle
- (and 1 more)
-
I did. But obviously I did not do enough searching last night. I found one this morning with the April 18th delivery. So I cancelled my previous order and placed a new one. Thank you, Keith!!
- 177 replies
-
- 2
-
-
- Independence
- bottle
- (and 1 more)
-
Thanks, Mark, Roger and Keith for the comments and suggestions. I just ordered some of that micro mesh. I really like the idea of having some kind of netting look. Unfortunately, the micro mesh won't get here till June. I'm too impatient to wait that long to finish this build, but it will be a nice addition to my box of stuff for future work. So I'm going to play around with some things based on the collective input and see if I can come up with something I like that has a good look. I appreciate the creative help from y'all!!
- 177 replies
-
- 2
-
-
- Independence
- bottle
- (and 1 more)
-
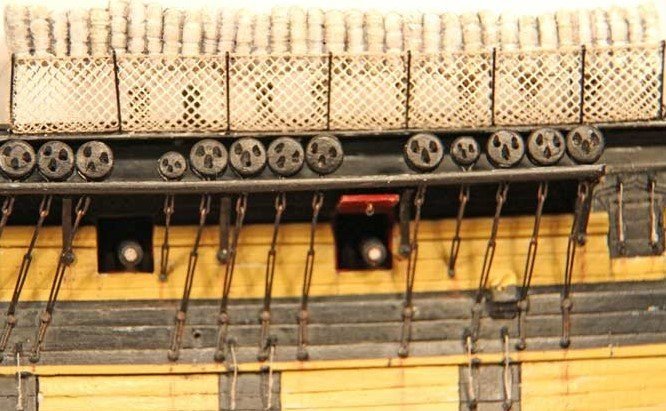
Hey Roger, thanks for the suggestion. Are you talking about simulating something like this?
- 177 replies
-
- 3
-
-
- Independence
- bottle
- (and 1 more)
-
Thank you, Mike. I appreciate your optimism! That sounds like a great idea! Thanks, Keith.
- 177 replies
-
- 3
-
-
- Independence
- bottle
- (and 1 more)
-
Speaking of fails, I had this brilliant idea for the quarter galleries of blobbing some wood filler in place and sanding it to shape (1st pic). Horrible idea. Didn't work at all. Not sure what the heck I was thinking. So I chipped it all off and carved out little pieces of walnut scrap for the galleries. The 2nd pic shows the finished work on the prow, the hammock netting, and the better version of the quarter gallery. I've got some white fly-tying thread on order to try for the gallery windows. We'll see how well that works. The netting is a little sloppy on the far side. I may pull it off and redo it. However, it's the non-display side and also will be hidden somewhat by the ship boats when they are added so I may just live with it. I'll revisit it later and decide what to do


- 177 replies
-
- 10
-
-
-
- Independence
- bottle
- (and 1 more)
-
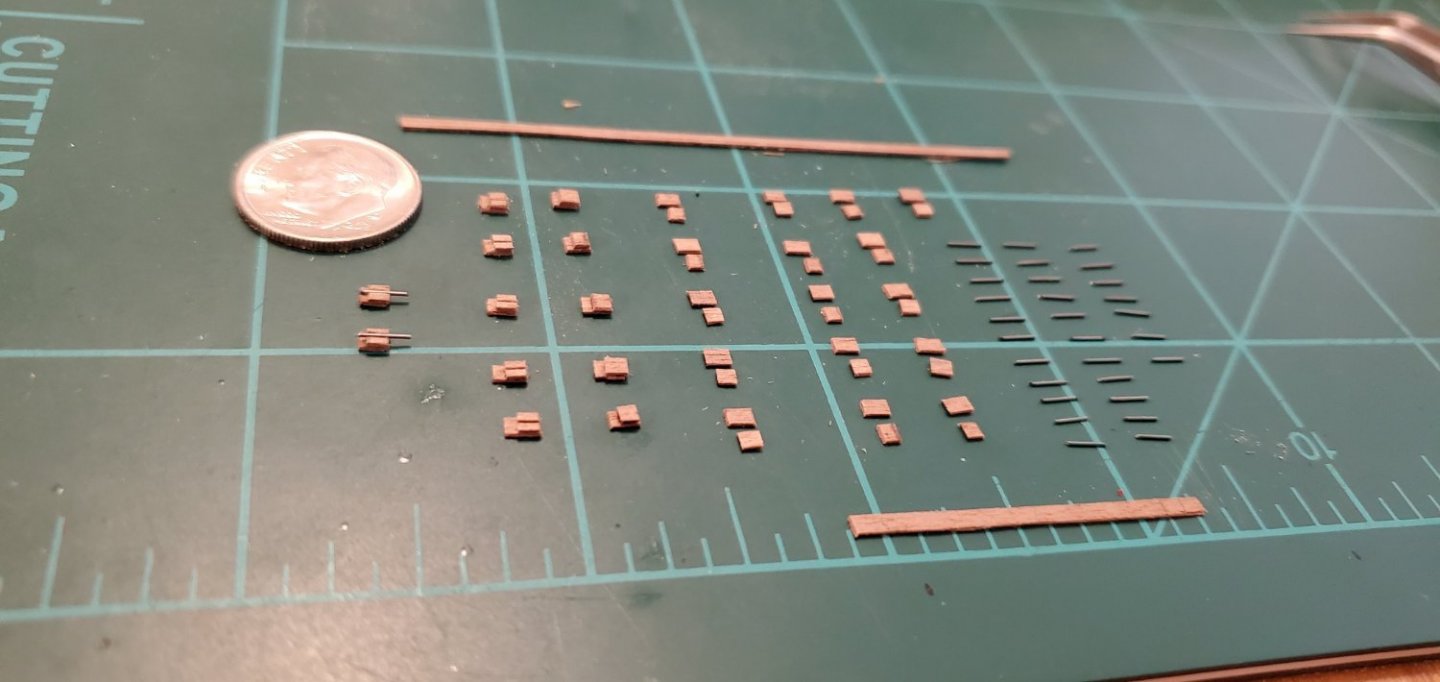
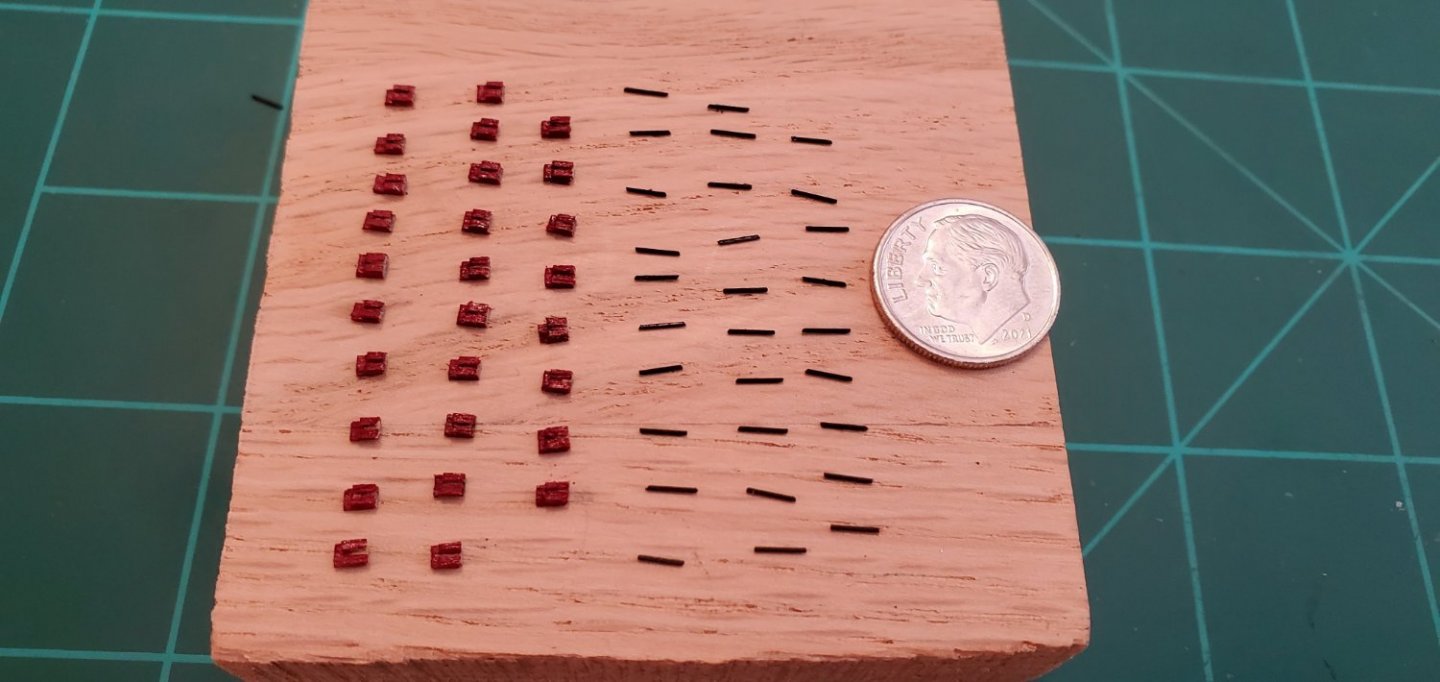
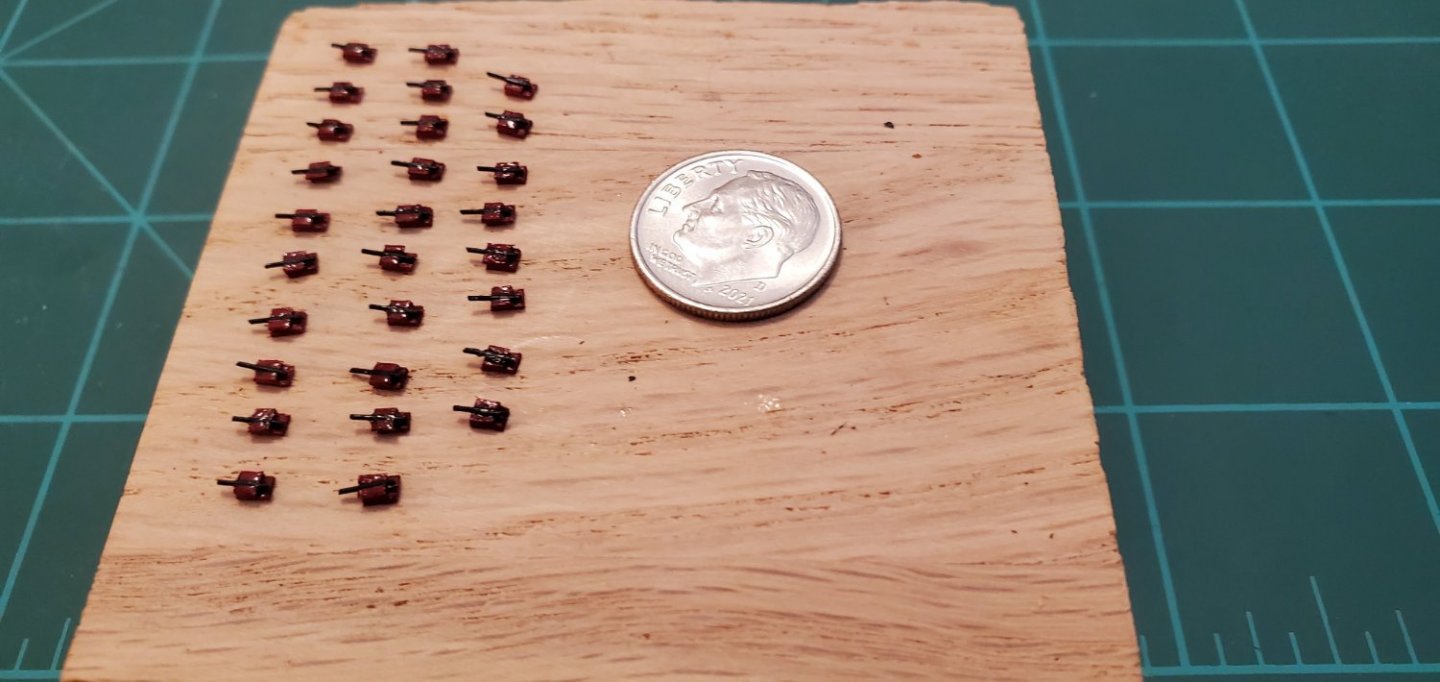
For the spar deck cannons, I tried a few things that didn't work too well and ended up in the scrap heap. I finally settled on a 2-layer carriage to give it a little bit of that stairstep look.
- 177 replies
-
- 7
-
-
-
- Independence
- bottle
- (and 1 more)
-
Let me know if you do, Joe. I'd love to see how yours would turn out.
- 177 replies
-
- 2
-
-
- Independence
- bottle
- (and 1 more)
-
Got it. The pic certainly helps my understanding. Thank you, Mark!
- 505 replies
-
- 5
-
-
- vanguard models
- Sphinx
- (and 1 more)
-
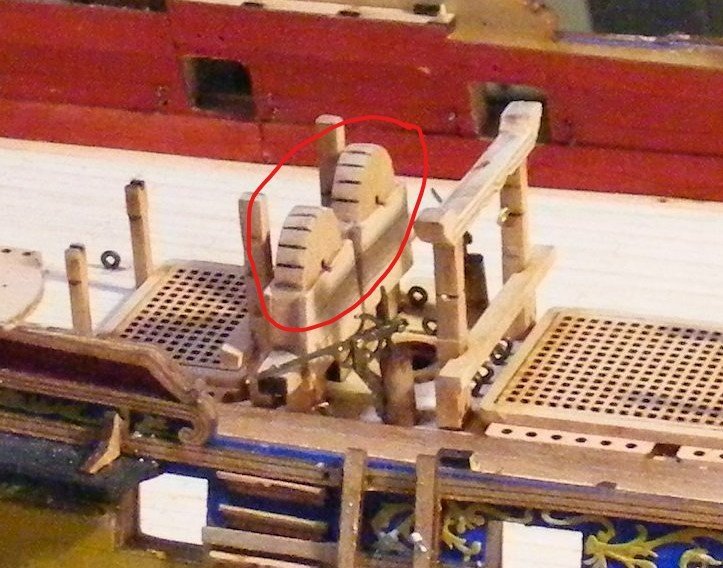
Good progress and very nice work, Mark. Your perseverance is inspiring. I do have a dumb question though. What is the thing I've circled in the picture below and what is its purpose? Obviously I've still got a lot to learn about this stuff!
- 505 replies
-
- 7
-
-
- vanguard models
- Sphinx
- (and 1 more)
-
Thank you, Joe, Keith, Grant, Ian, Mark, SH Johnny, Banyan, Roger, and John Fox III for the comments and likes. I gotta be honest, when I picked this ship, I was really sweating how in the world I'd be able to do those gun decks and all those cannons and make them look halfway decent. It came out better than I expected. So far anyway. But the sweating ain't over just yet. I've started work on the spar deck cannons with these tiny little carriages. Oh boy. TBD on how those will turn out. I've also got to figure out how to add a quarter gallery on the stern. I've never done a ship with one of those so I've got to go study some build logs. If y'all know any build logs off the top of your head that have good posts on a quarter gallery construction please let me know. Even without smoke or penguins or polar bears? You just made my day, Keith!!
- 177 replies
-
- 2
-
-
-
- Independence
- bottle
- (and 1 more)