-
Posts
1,976 -
Joined
-
Last visited
Content Type
Profiles
Forums
Gallery
Events
Everything posted by Glen McGuire
-
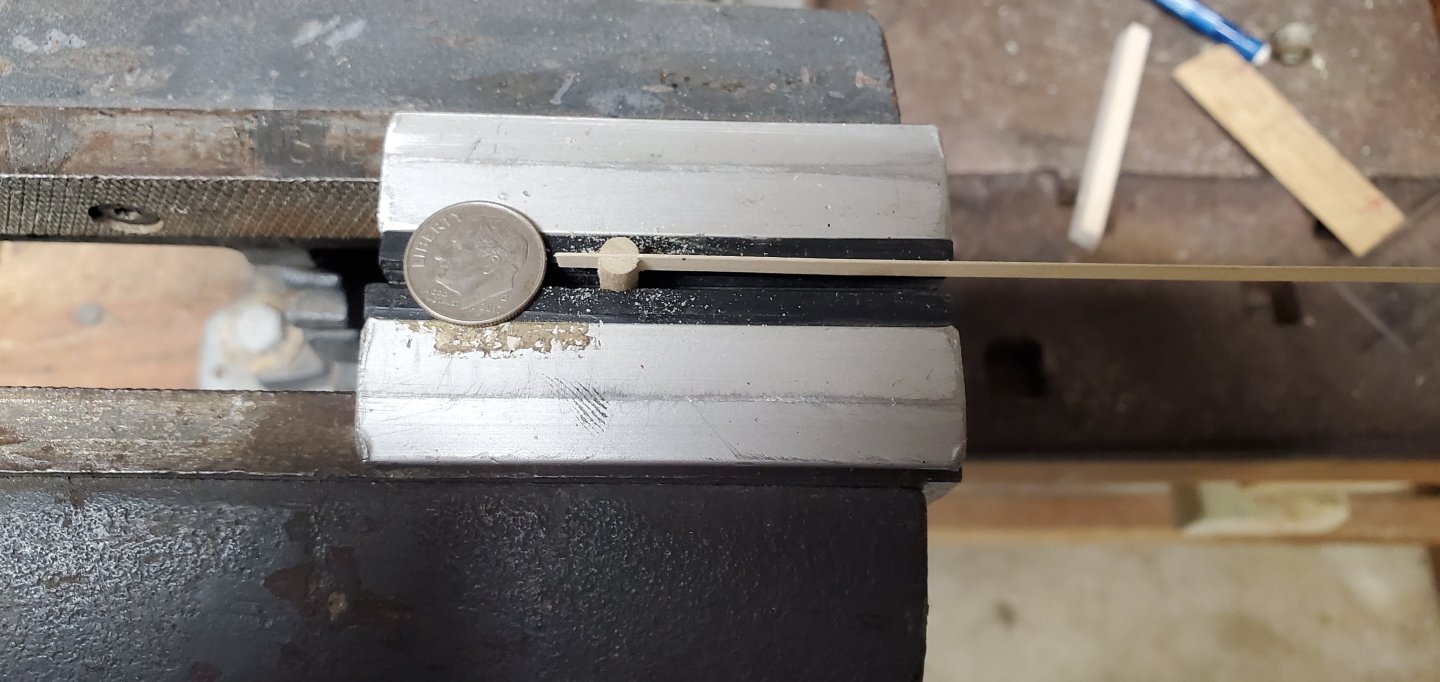
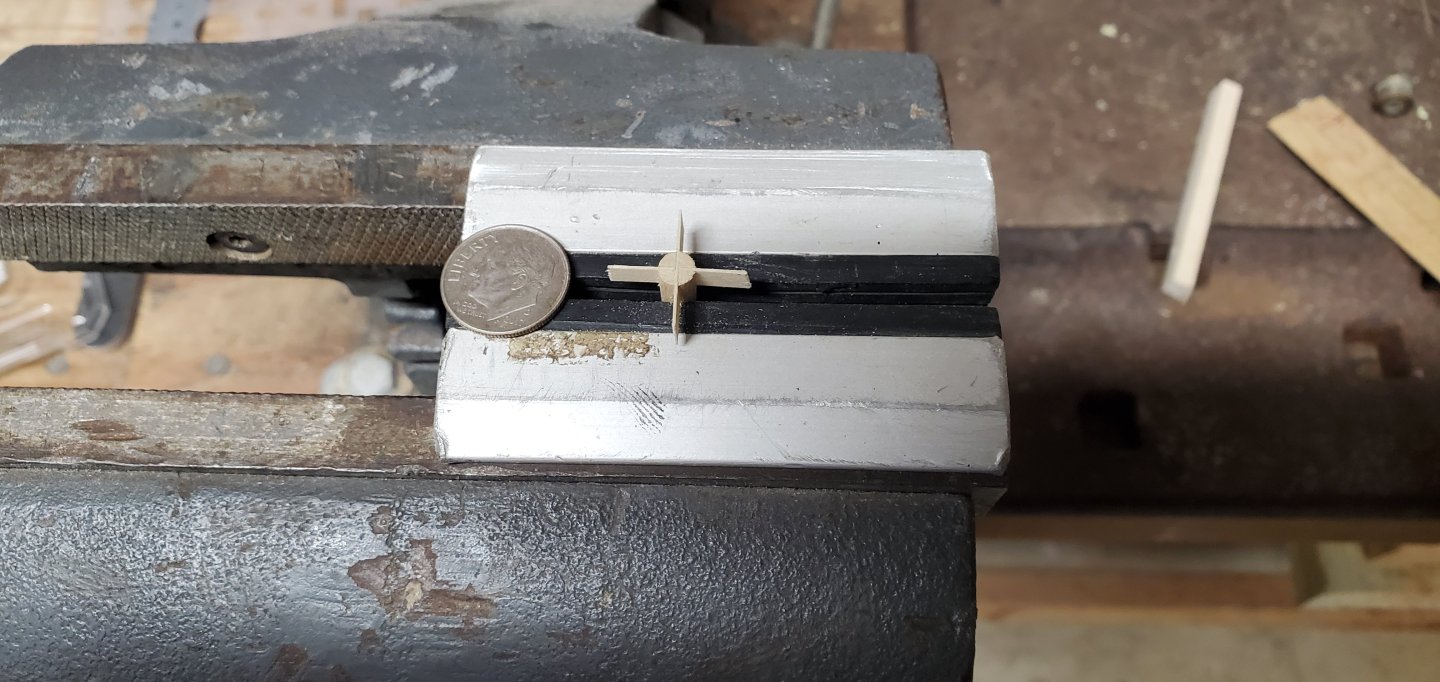
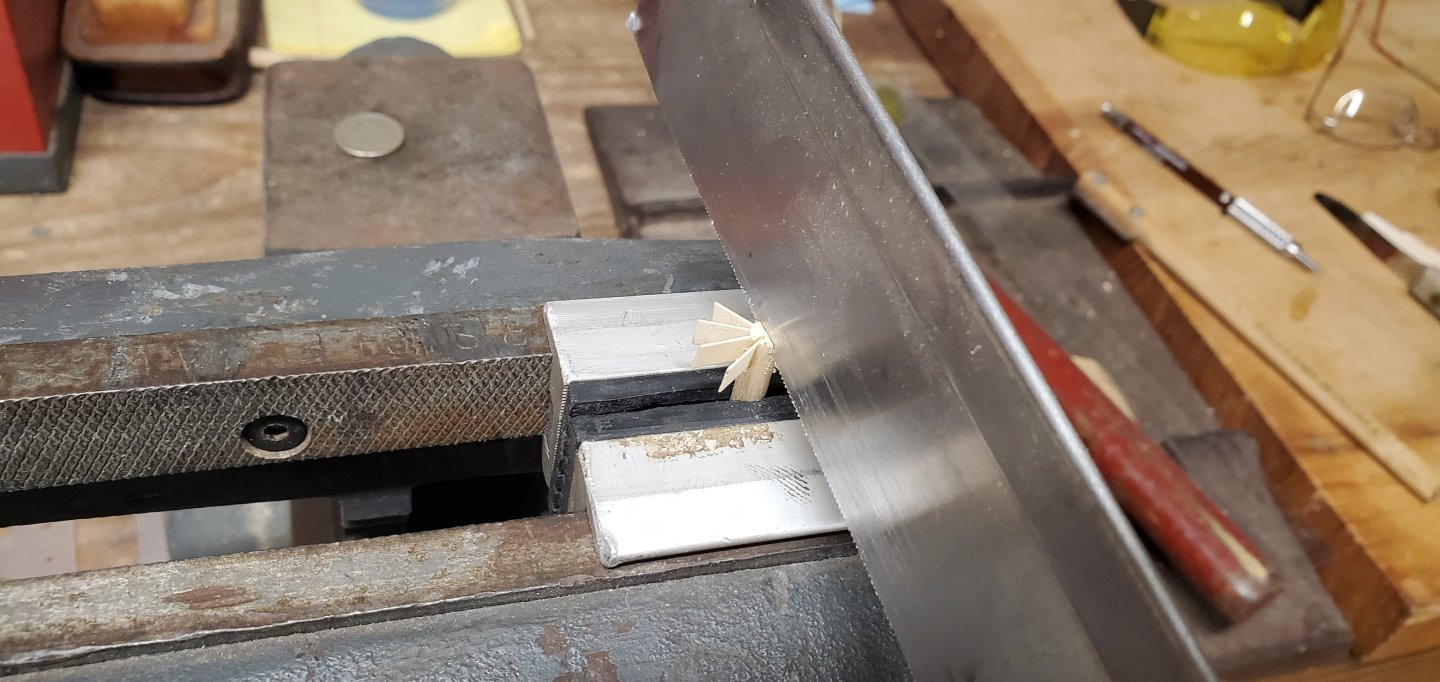
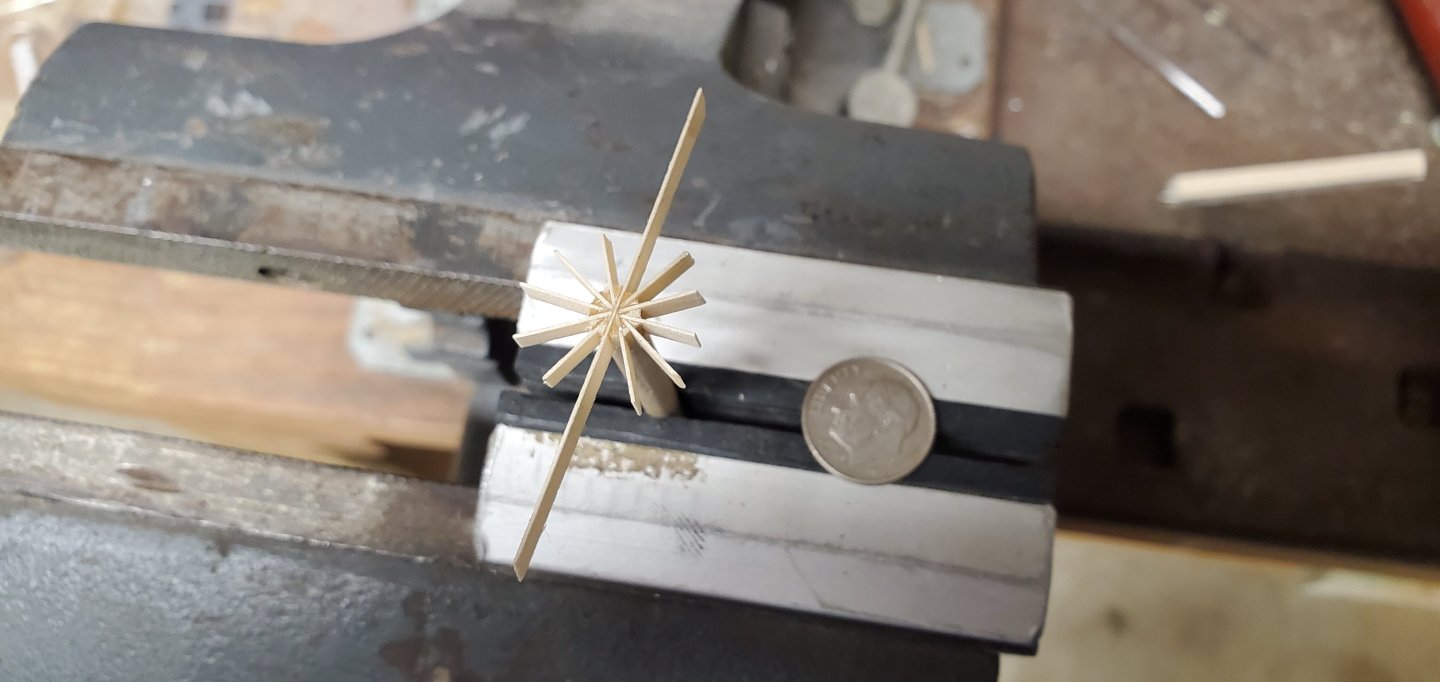
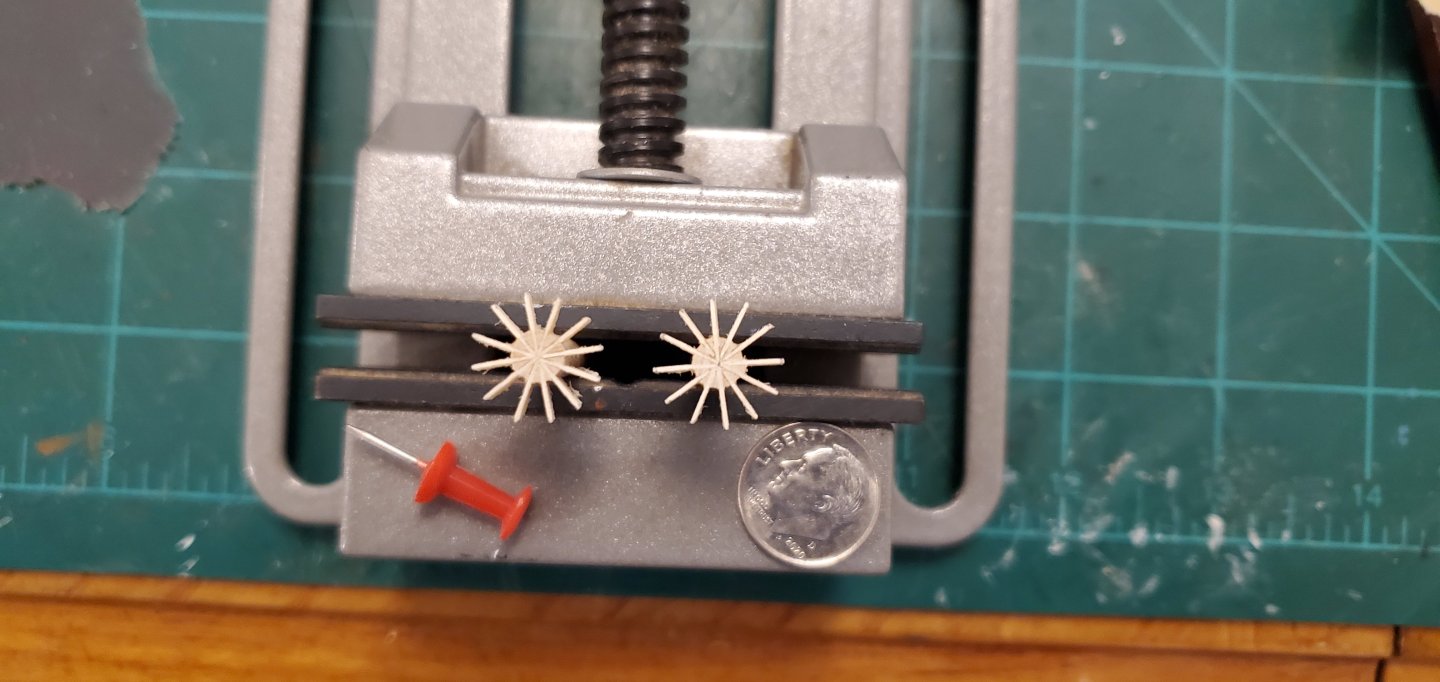
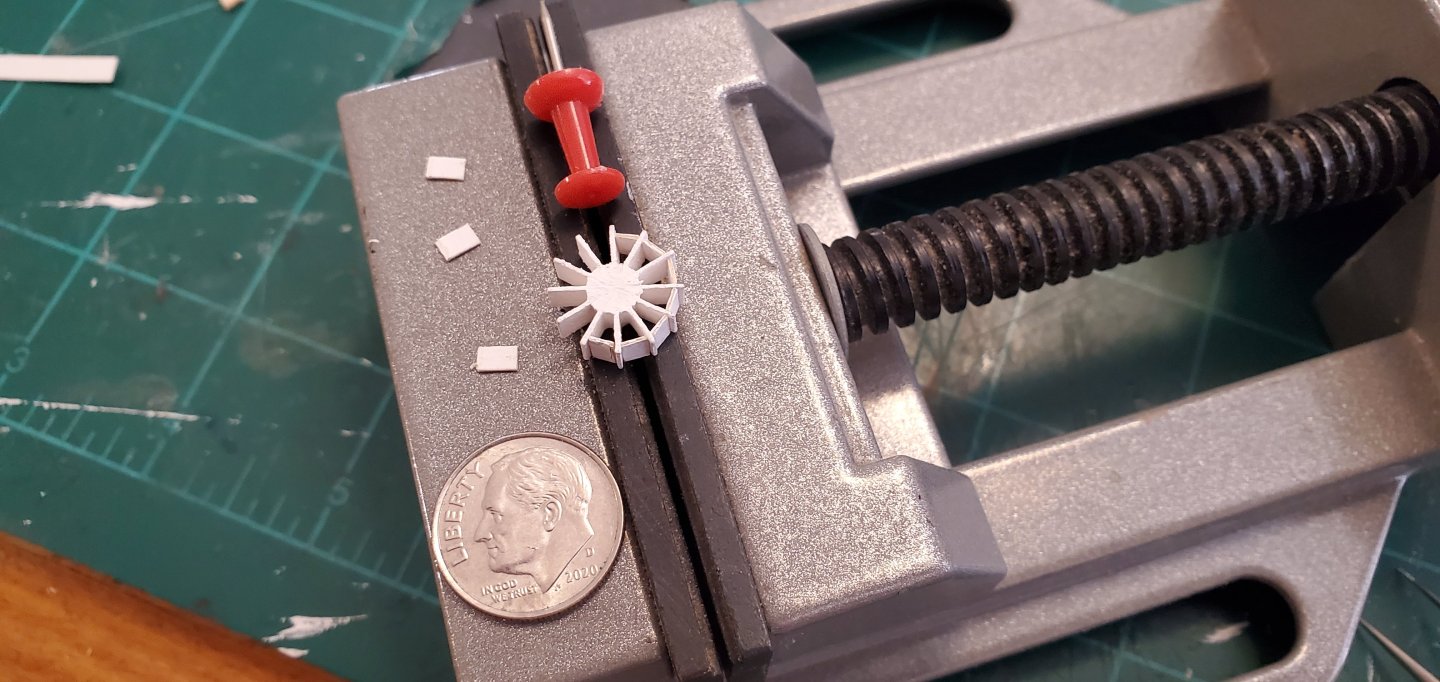
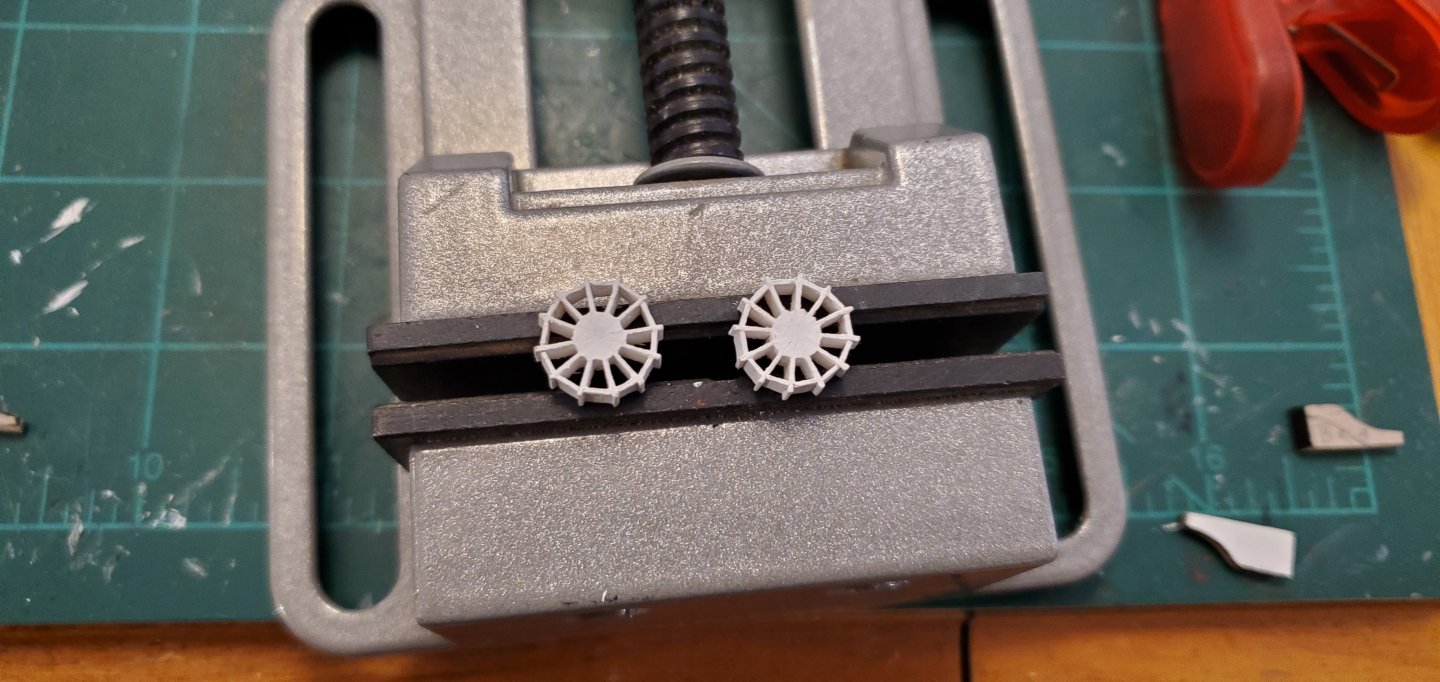
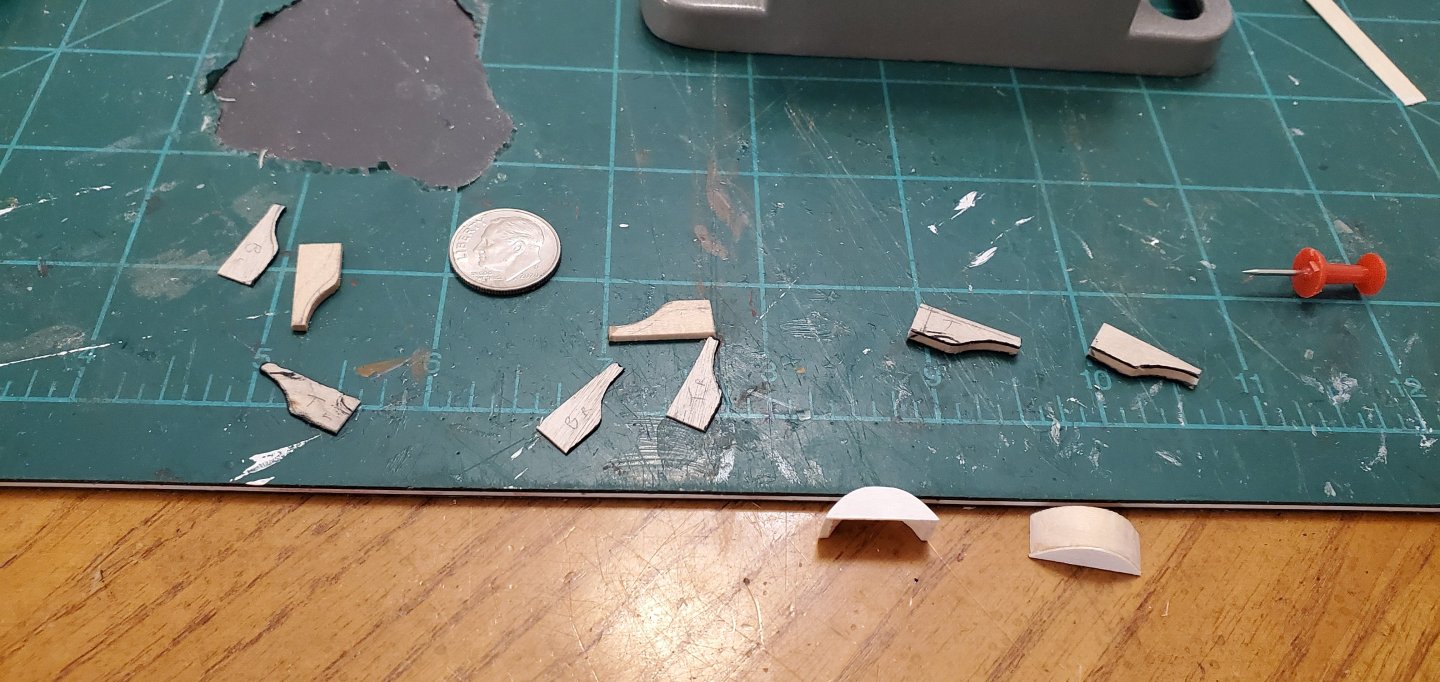
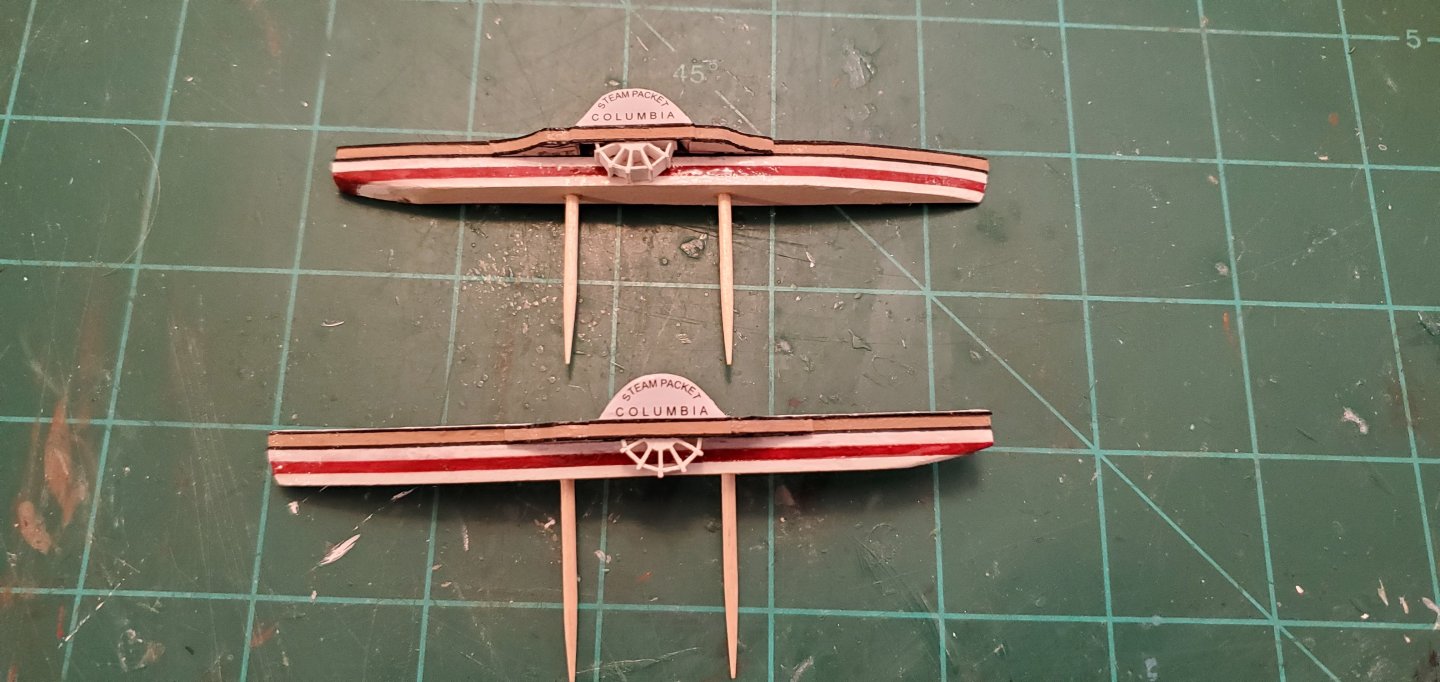
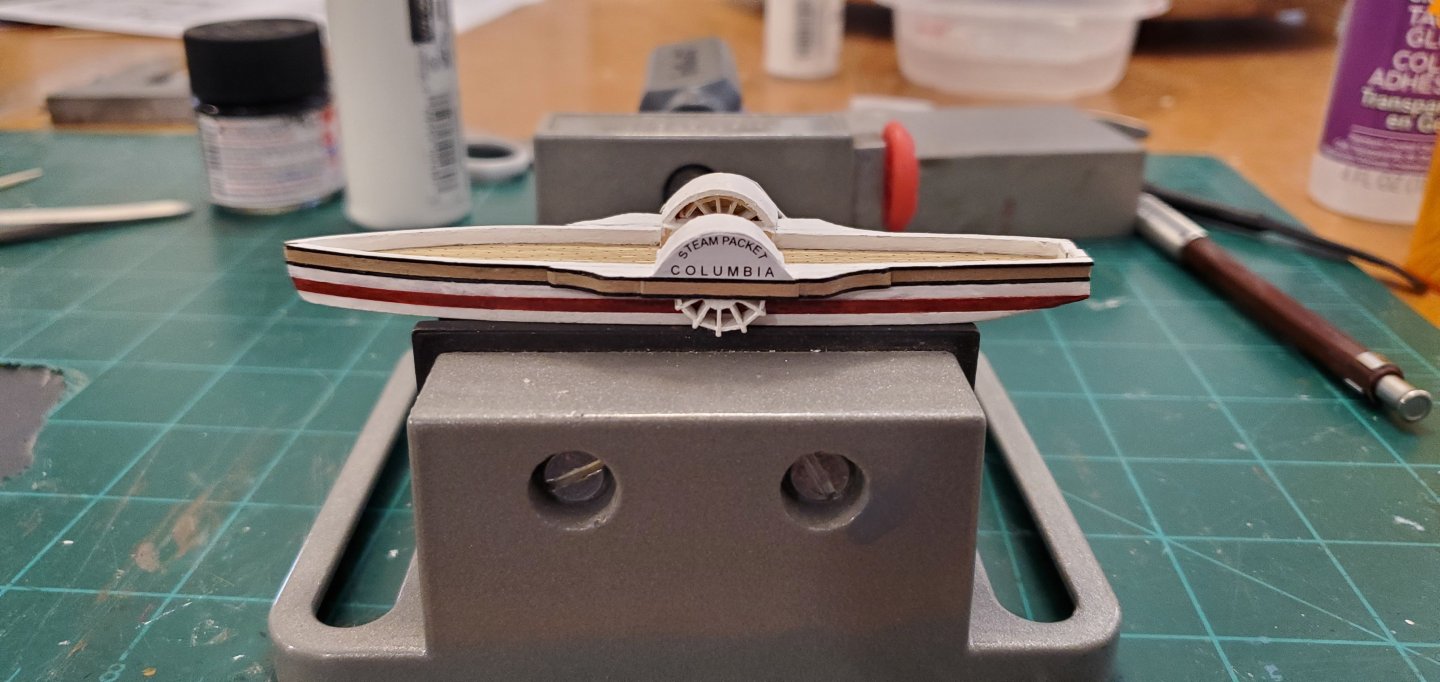
In case y'all are wondering what we're doing here in central Texas with all this winter weather... Despite all the noise outside from the terrified Texans, I managed to get a lot of work done on the paddle wheels. Actually it was a lot of work and rework and work and more rework. But I finally got a couple of paddle wheels and covers that I was satisfied with. I measured the wheel in the picture at 1/2" diameter. For that size, I chose a 3/16" dowel rod for a hub. For the paddles, I used super thin planking strips that are 1/64" thick. To make the wheels, I put the dowel in a vise and made a slit thru the middle with a fine kerf saw. fortunately, the saw makes a cut that the planking strips wedge into perfectly. Pics of the process below: I don't pay a whole lot of attention to the paddle length during the above, as I will trim them to the proper length after they are all in place. The next step is the most painstaking part of the process - making the spacers that go between the paddles. As hard as I try to get the paddles evenly spaced, there are very slight differences, which means I have to cut the spacers and trim to fit one at a time. My dark side kept telling me that I only needed to make half a wheel for each side since only half the wheel is visible below the cover. But I resisted the temptation to take the easy way out. For the covers, it was just a matter of making a number of small pieces and assembling them in place (with a few rounds of rework of course). Here's how she looks with wheels and covers in place. Still needs a bit of touch-up paint but overall I'm ok with how they turned out. Although I've still got the main cabin, funnel, and sails/rigging to deal with, I think those wheels will be the toughest part building the ship.
-
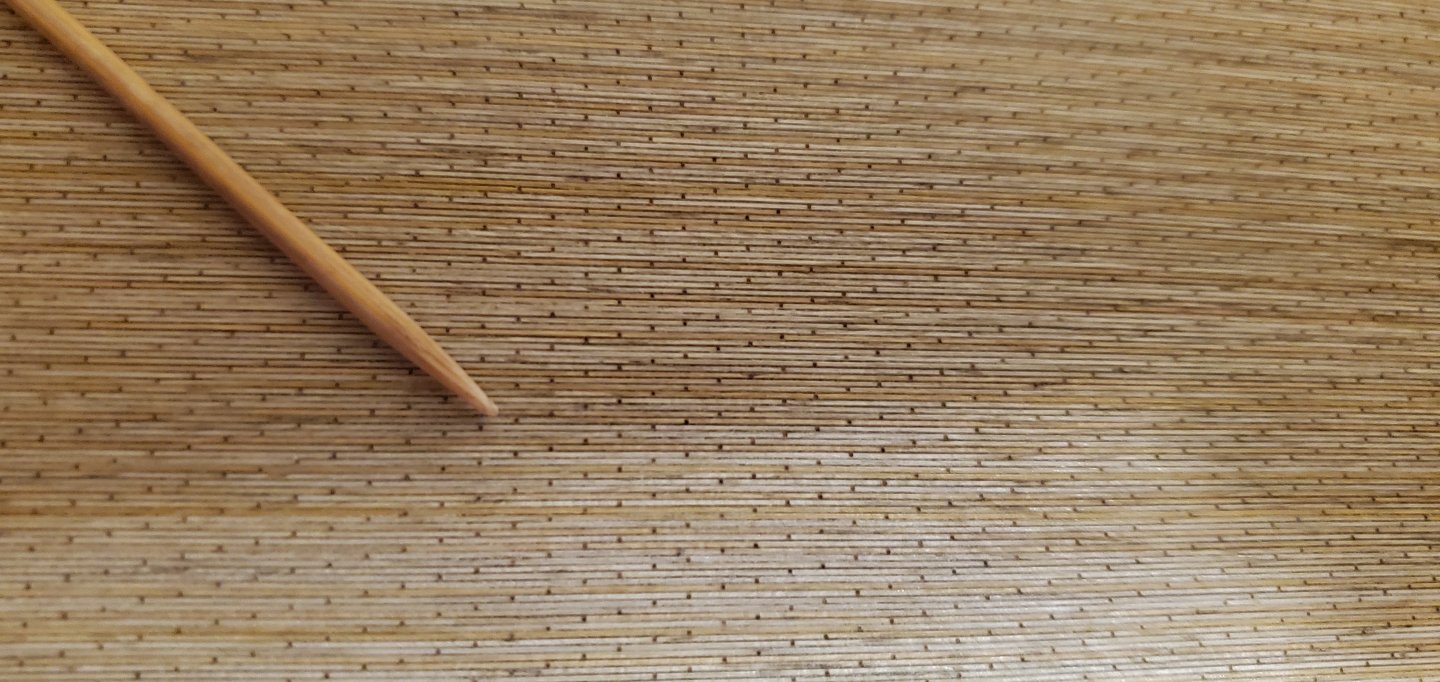
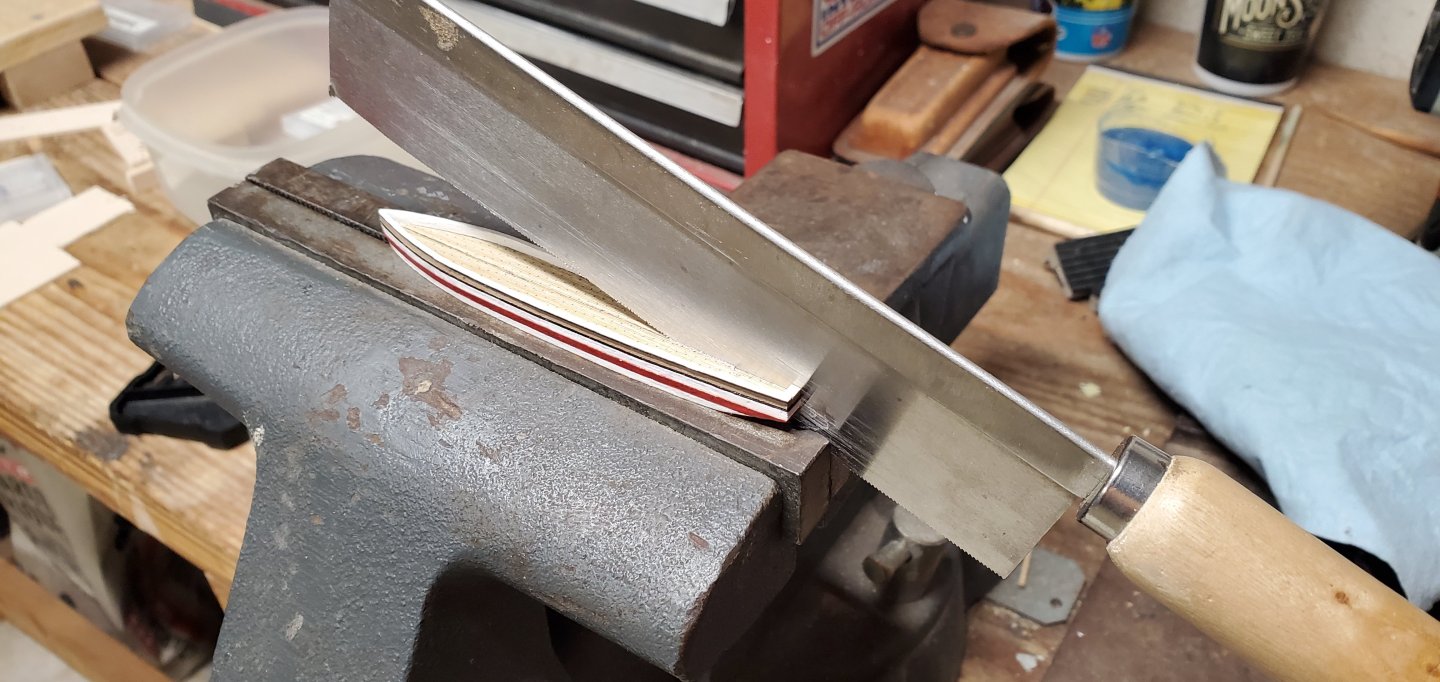
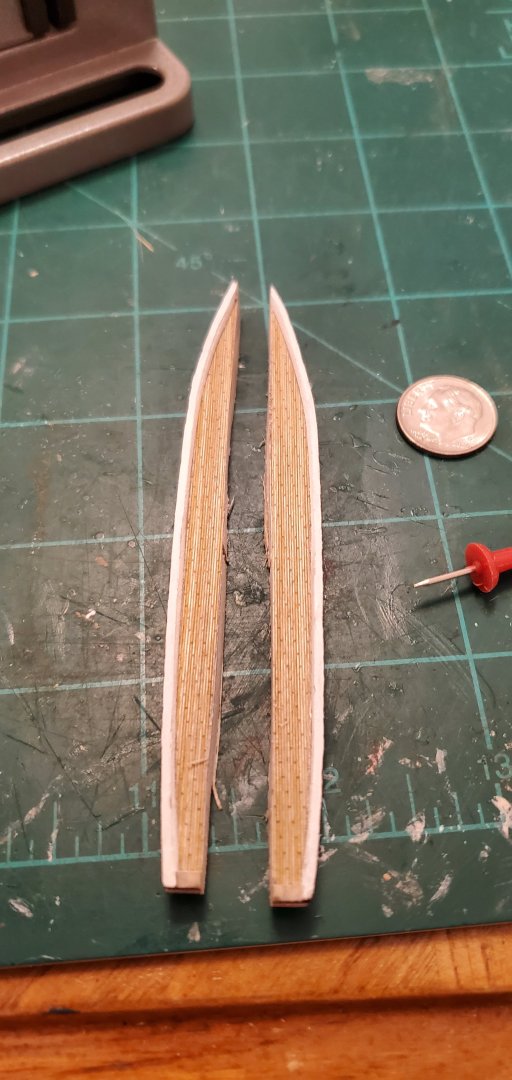
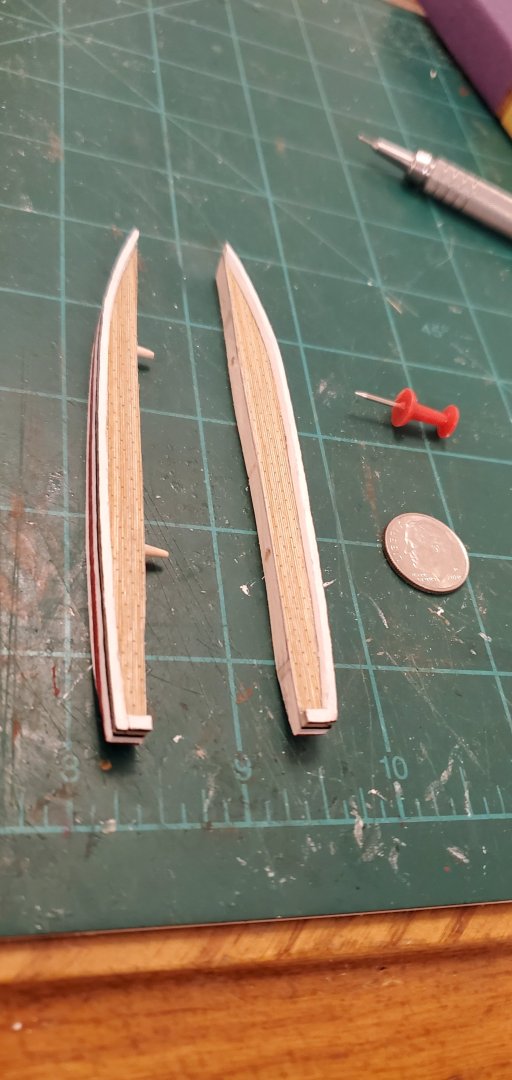
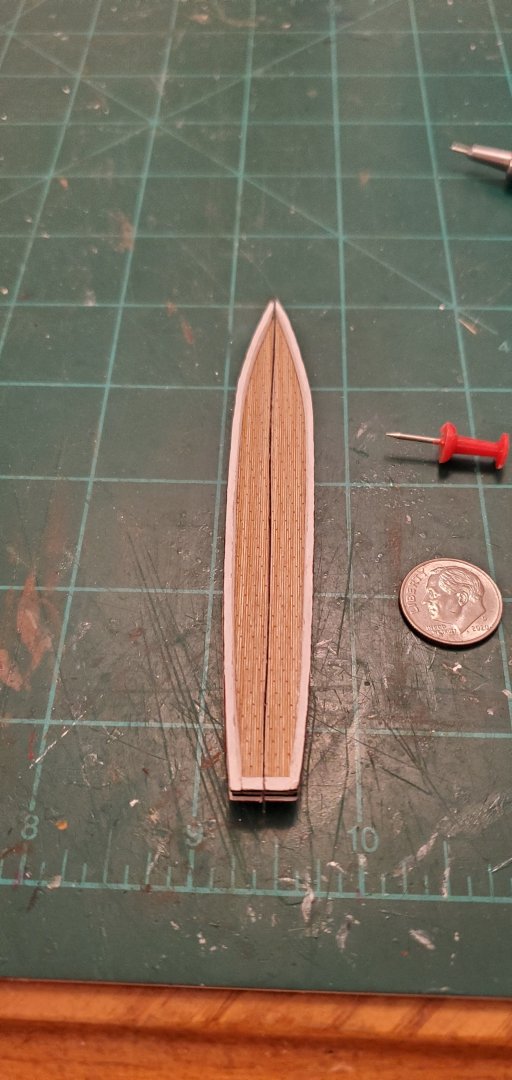
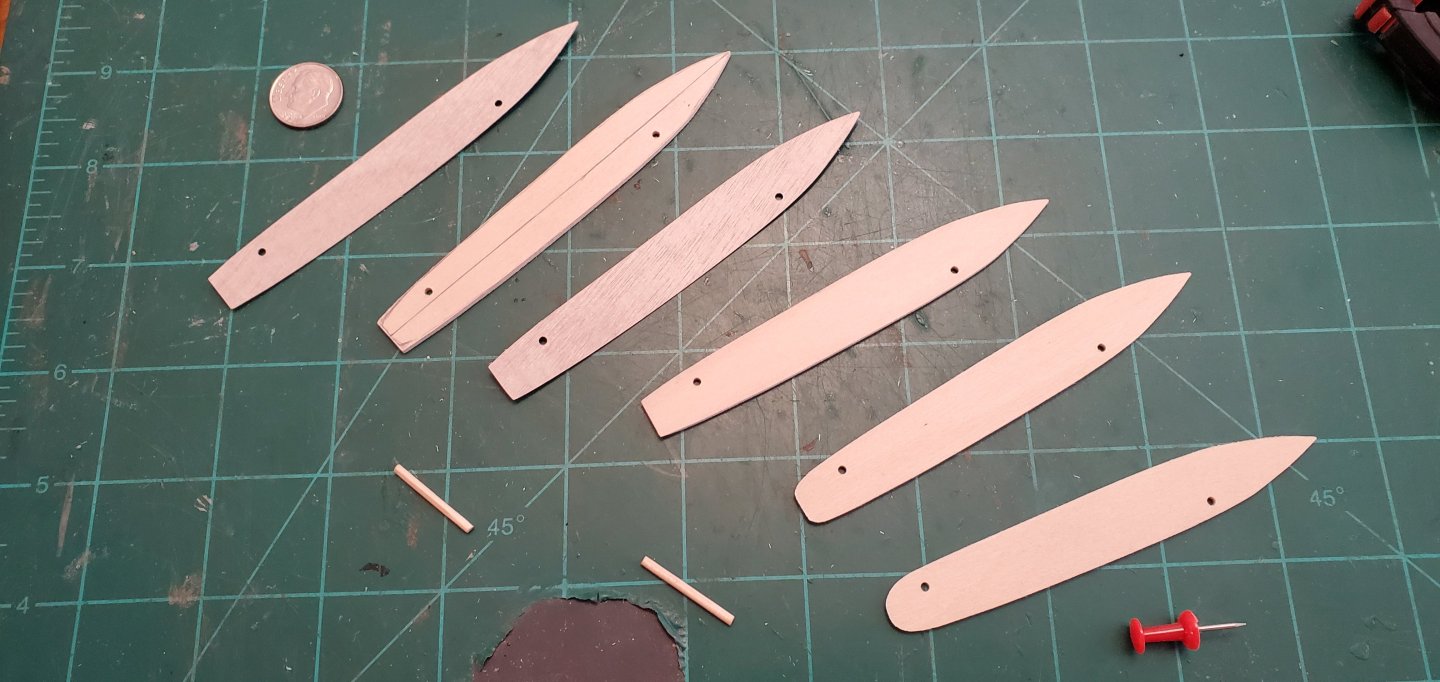
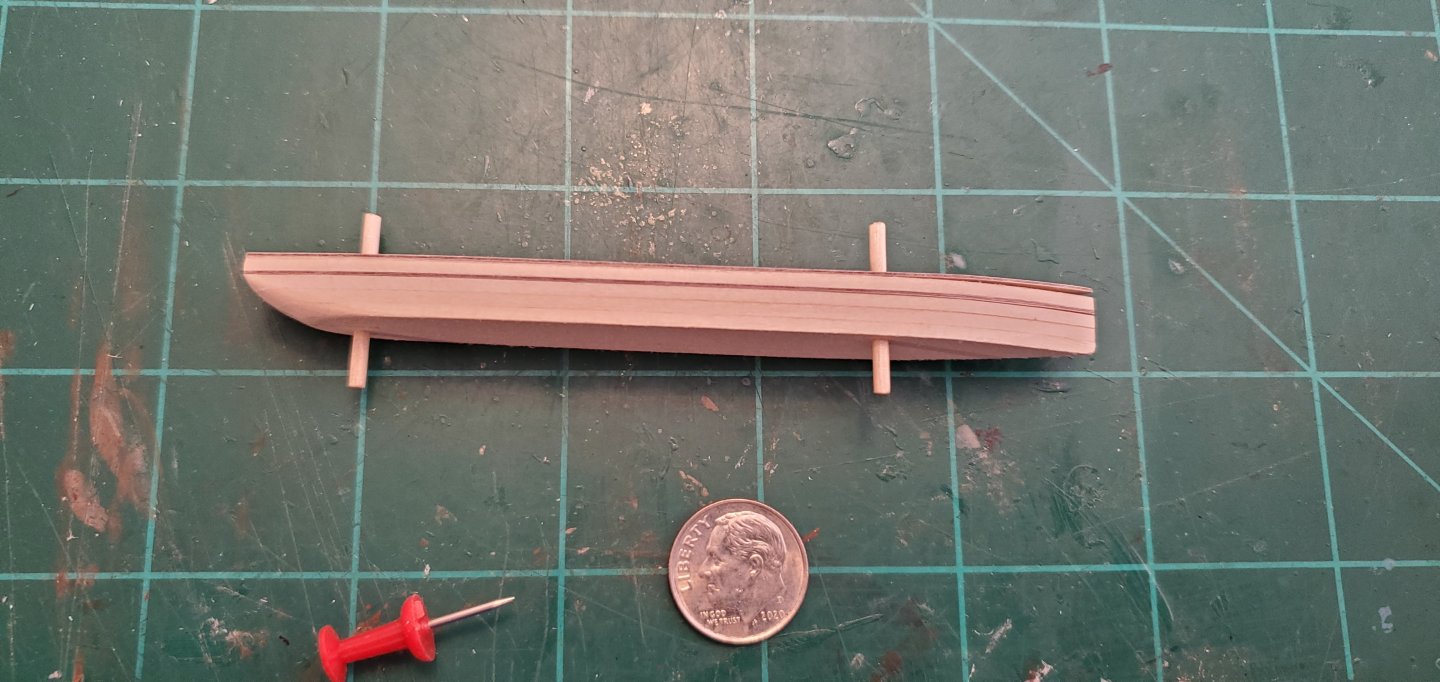
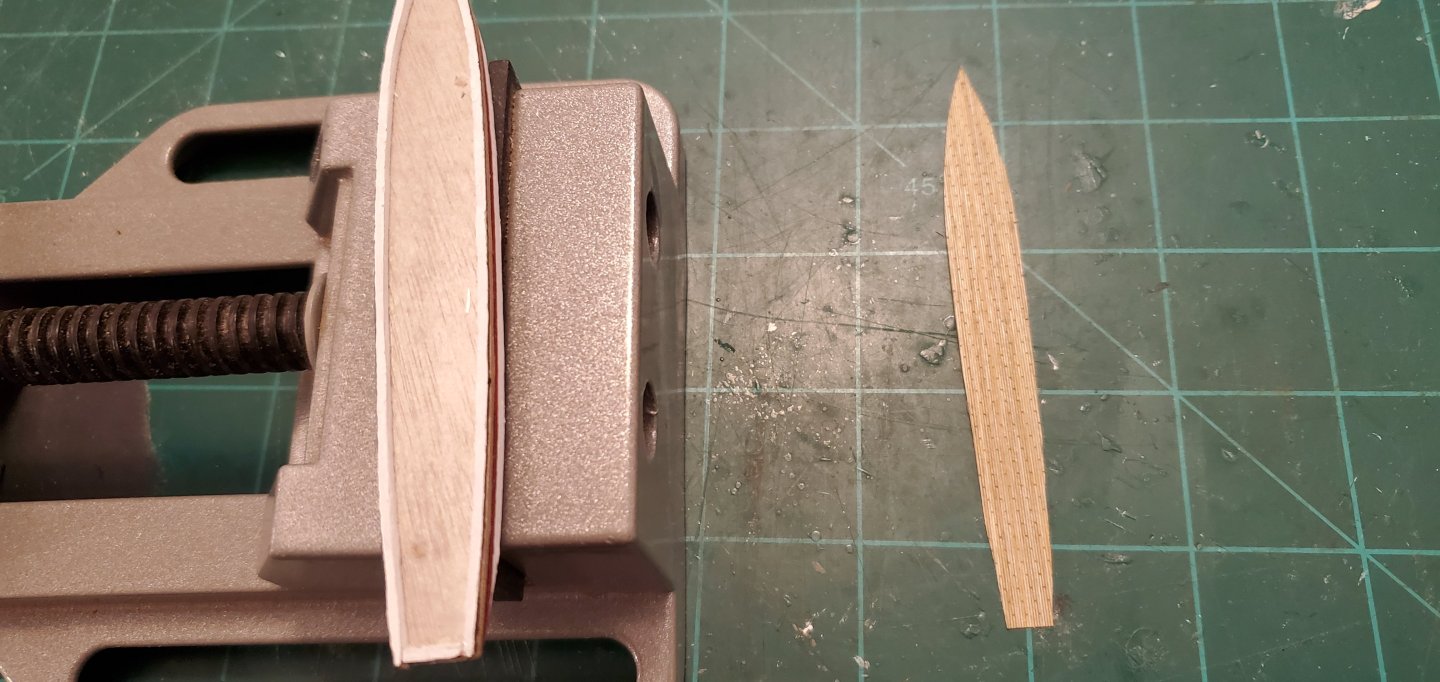
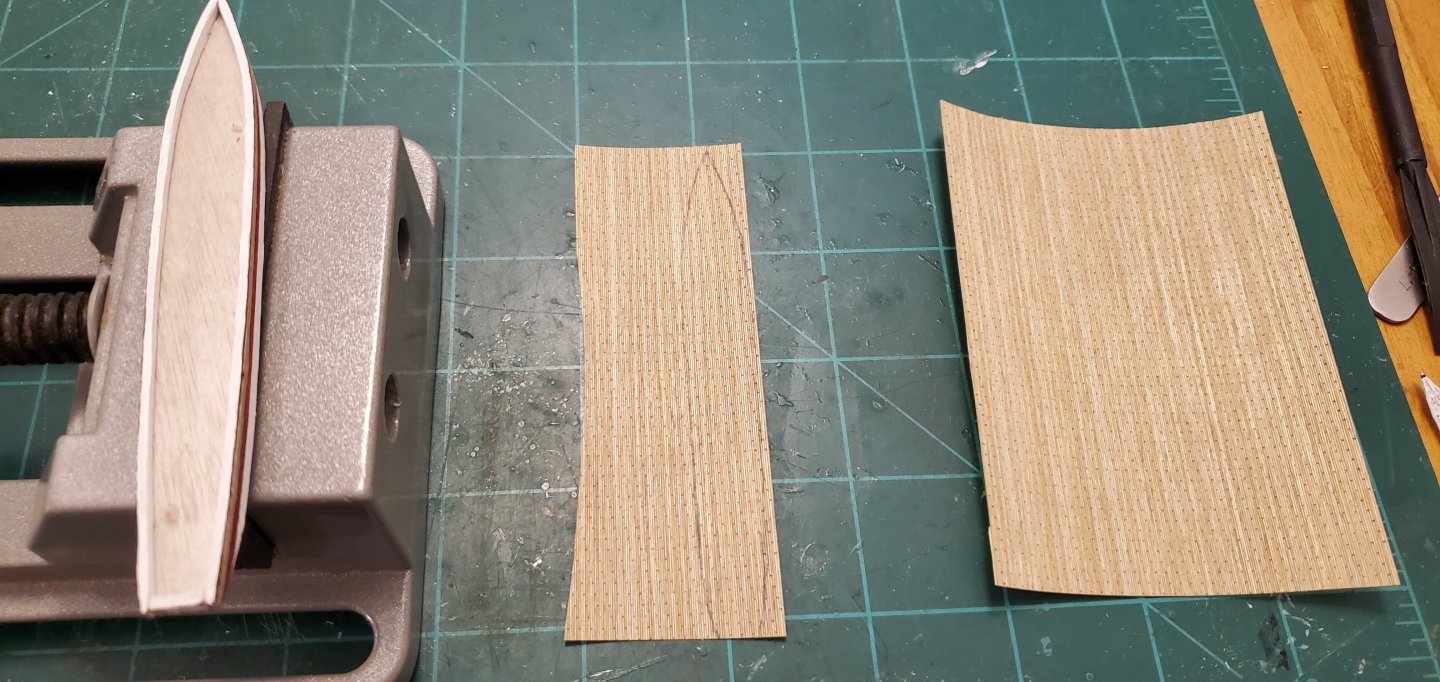
Thanks, Roel. Both the hull and the Artwox decking sheet are wood. Looking closely, I think the decking sheet is made from bamboo fibers but I'm not sure. @Landlubber Mike warned me that he'd heard reports that the adhesive backing on the deck sheet would sometimes fail after a while and the deck would peel up. He recommending using CA glue in addition to the decking's adhesive, which is what I did. Here's an up close shot of the decking material. That's the end of a toothpick for visual reference. I tried to find some Artwox decking that did not have those little holes that look like perforations but all their decking products seem to have them. But they are so small that to the naked eye they kind of blend in with everything else and are barely noticeable. Glad you made it clear that it was the "index" finger, Keith! Actually, you can continue to wag that index finger because I realized I had a very important and gut wrenching thing I needed to do before starting the wheels. And it's all because of the wheels. With those side paddles, the ship is far too wide to fit in that narrow bottle opening. Which means I have to do one of my least favorite things ever - split the hull. I've managed to do it a couple of times before, but the idea of taking my finished hull that I've spent days making and try to saw it right down the middle gives me the creeps. There's a real fear of screwing things up and having to start completely over. To make the cut, I drilled 3 holes in the bottom of the hull and glued toothpicks in place. That allowed me to anchor the hull in my workbench vise. I penciled a centerline and then took my fine kerf saw and carefully made the cut. This is a pretty long hull for me (4.25") so it took a while, but things went ok. Afterwards, I drilled holes sideways into the hull and added small, tapered dowels for guiding pins. Here's a few pics of the process: As garish as that split looks, once the ship is in the bottle, a large part of the split will be covered by the main cabin structure that runs from the stern to about 3/4 of the way to the bow. Plus, there's a forward mast that will distract from the view as well. And now with the hull safely split, I'll get started on those wheels. We're supposed to get some nasty weather/freezing rain here this weekend, so I should get to spend plenty of time in the shipyard.
-
The stairs and railings look fantastic. Well done, Nils.
- 313 replies
-
- lightship
- Feuerschiff Elbe 1
-
(and 1 more)
Tagged with:
-
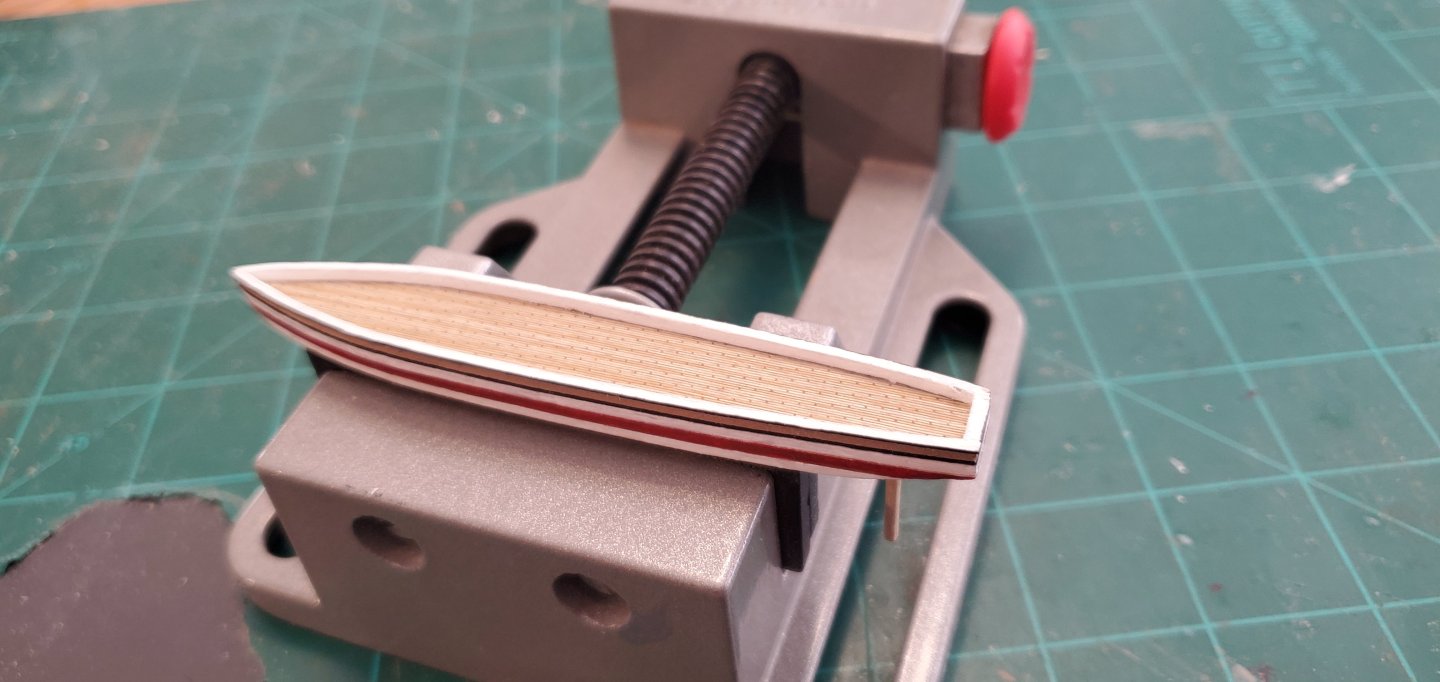
@Knocklouder - Glad to have you hop on board. Tell the first mate thanks for letting you take a break from shoveling snow to follow along! @Keith Black - Amen brother. Another battle with another bottle has indeed begun! With the dimensions of the bottle's viewing window figured out, time to actually start building the ship. From the painting, there appear to be 4 bands of different colors - white, dark, something in between, and the thin black pin stripes. Since it's kind of a sepia print, it's hard to tell exactly what the colors are. I experimented with some different options and found a color scheme I liked - From bottom to top - white, dark red, white, black pinstripe, khaki tan, black pinstripe. If you've followed my other builds, you know I like to do laminated hulls. On a hull like this where there are different color bands, it is particularly advantageous for painting. I use wood that matches the thickness I need for each color band and shape the hull. Then I simply paint the sides and glue the layers together. It is so much easier for me than trying to pinstripe clean lines on a rounded surface. In this case, the white, dark red, and khaki layers are 1/16" thick basswood. The black pinstripe layers are 1/64" thick plywood that @Keith Black turned me on to a while back. Thank you, Keith! Here are shots of the hull in progress: The last shot also shows the decking in place. The decking is another great tip I got from @Landlubber Mike. Mike has given me more fantastic tips on unique modeling supplies than I can begin to count. This one is from his amazing Seishi Maru 1/700 build. If you have not seen it, I would highly recommend checking it out here: https://modelshipworld.com/topic/39201-seishu-maru-by-landlubber-mike-five-star-1700-resin-and-pe-ija-crane-ship/#comment-1129840 The decking is from Artwox. It has a great color, super fine lines, and and is ultra thin. I measure it at 1/128" with the plastic adhesive backing in place. I love the look and it is very easy to work with as long as you remove the plastic adhesive backing before trying to stick it in place. Don't ask me how I know that. 🙄 Always a relief to get the hull shaped, bulwarks in place, and decking done. I think I will go ahead and tackle the sidewheels next.
-
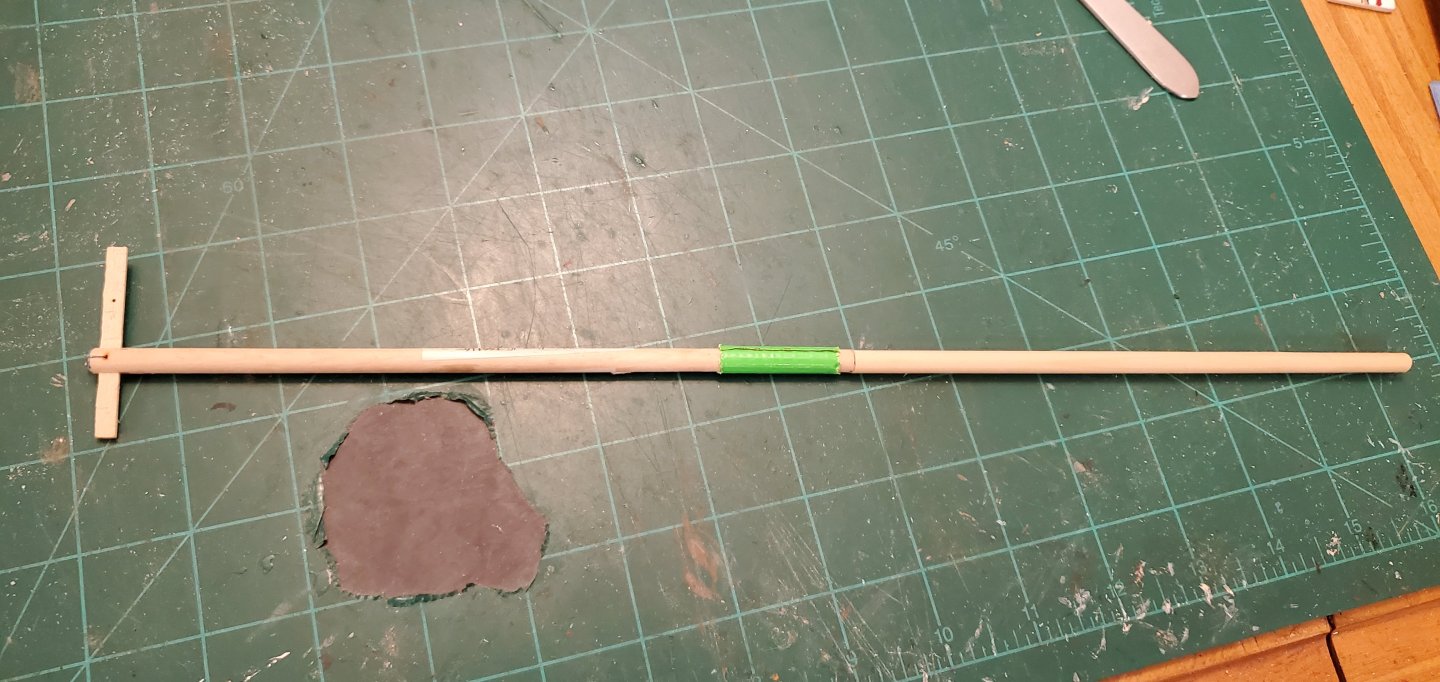
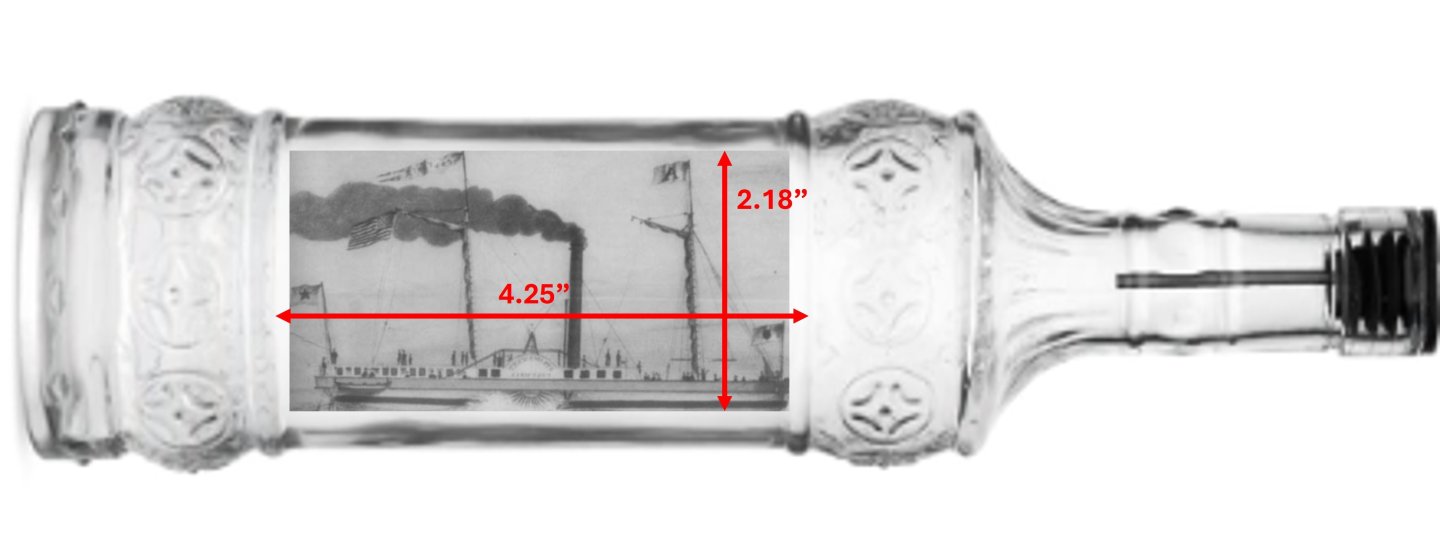
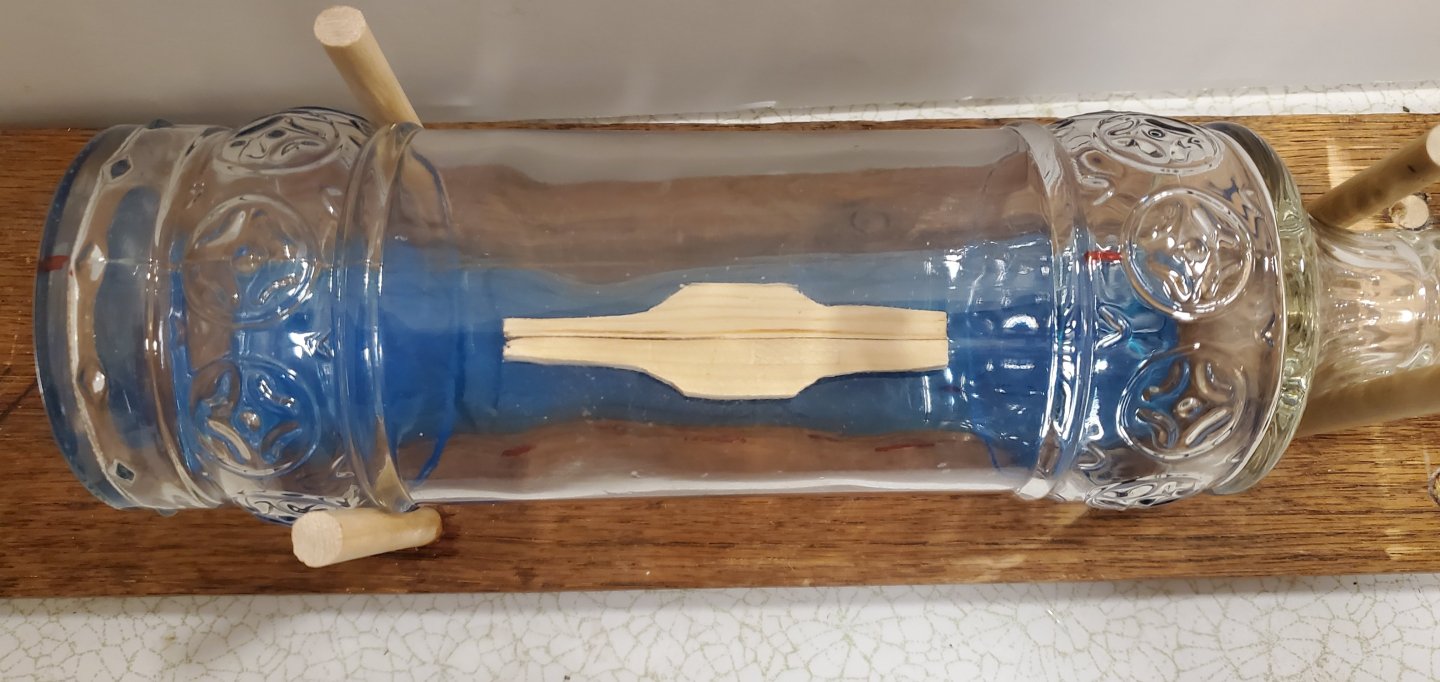
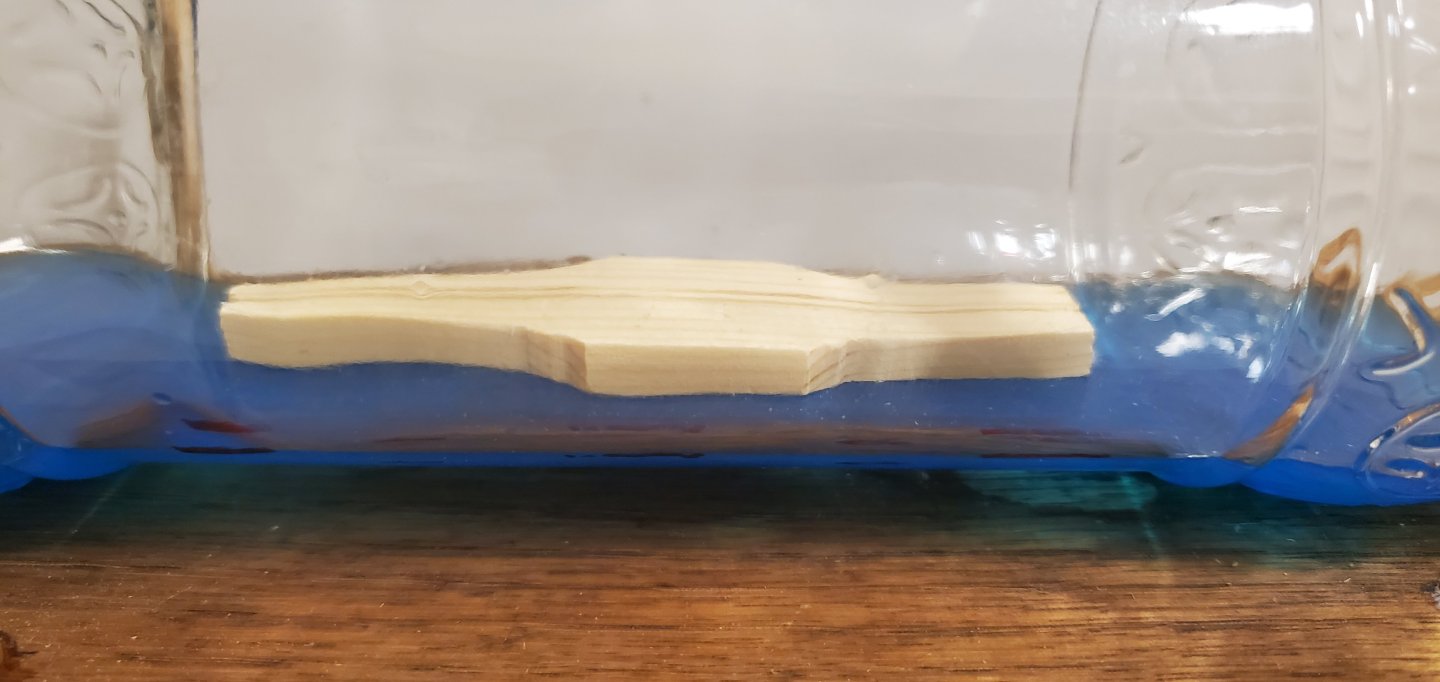
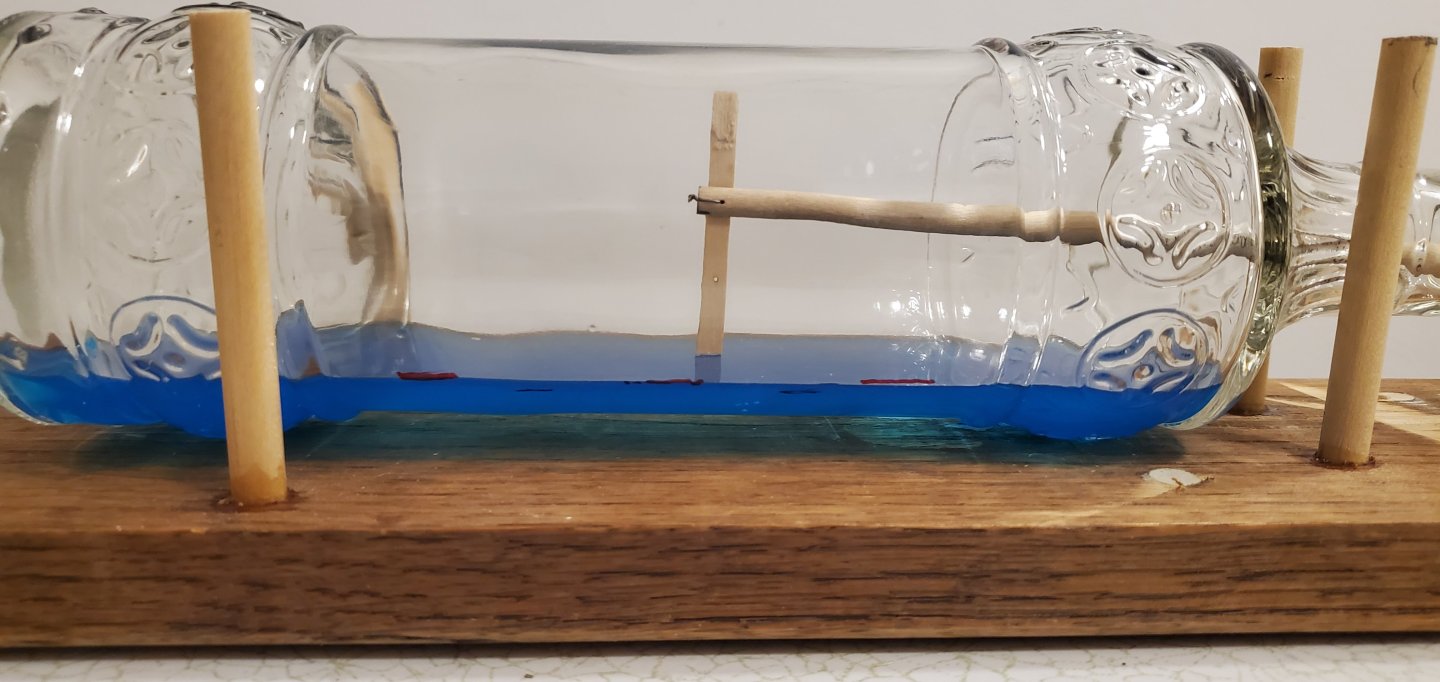
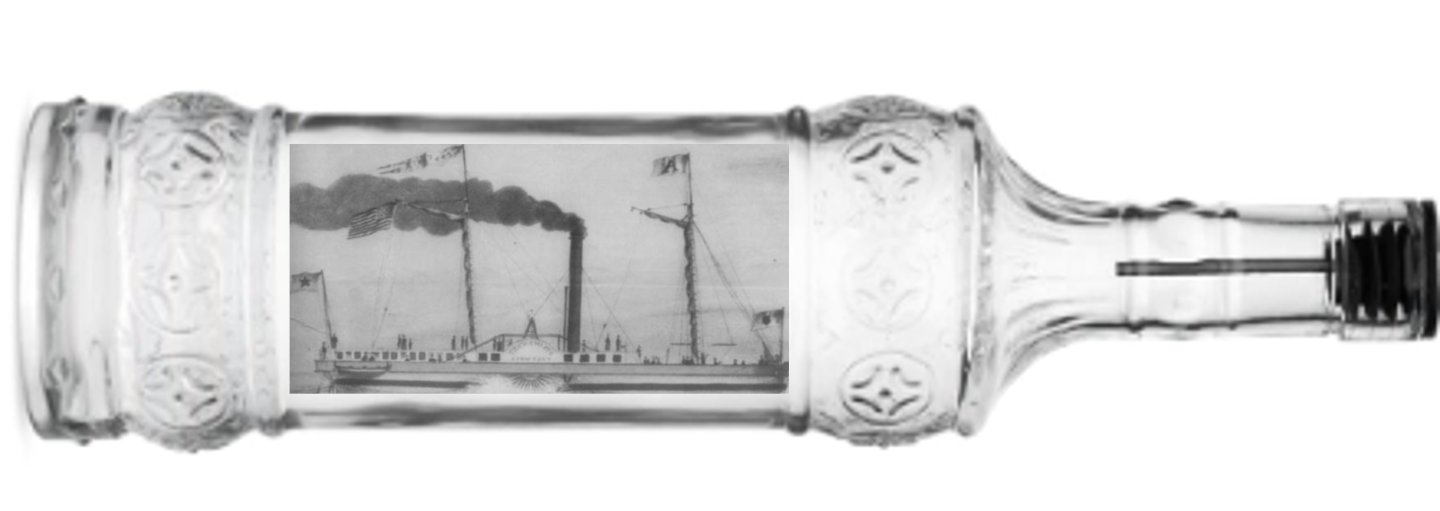
@GrandpaPhil - Thanks for joining in, Phil. Always appreciate you following along. Time to get started building the ship. With the very narrow profile of the bottle's midsection where the ship goes, I'm concerned about making the ship too big and not leaving room for any water or vice versa. But I also want the ship to fill up as much of the viewing window as possible (to Roel's point about the ship perhaps looking too small for the bottle). So I need to figure out exactly how much room I have to work with. Measuring the horizontal window of the bottle is obviously easy. To measure the bottle's inside diameter, I use crude tool with a dowel rod and pivoting arm on the end. Here's how the measurements came out. Usually I will wait till I'm finished building the ship before I put the epoxy resin water in the bottle. I'll measure the completed ship from waterline to top of the main mast, which tells me how much epoxy resin I can put in the bottle to have the mast's tip fit just below the inner ceiling of the bottle. In this case, I decided to put the epoxy resin water in the bottle first, and then take my measurements for how tall to make the ship. In addition to the height, I was also concerned about the water being wide enough to show some water on each side of the ship. I put 2 ounces of tinted epoxy resin water in the bottle. After it cured, I inserted a dummy hull an inch wide to see if the water would be visible on each side on the hull. There is less water on the sides of the hull than usual, but I thought it looked ok. Next, I used my crude measuring tool to indicate there was 2 1/16" of space from the waterline to the apex of the bottle. Now if I want to maintain the exact proportions of the ship in the painting, it would be 2 1/8" tall. I'll take some additional artistic license and squeeze the height down just a hair to fit. Fortunately, those early steam packet ships did not have the towering masts of the frigates, galleons, and clippers that were only powered by wind, so a long ship with not so tall masts is a pretty natural fit for the space I have to work with. Overall, I'm happy with how the foundation of the build has been set.
-
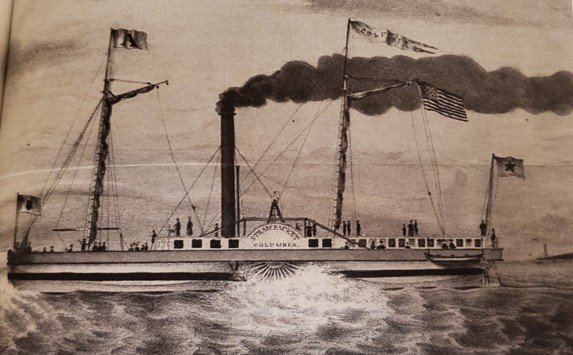
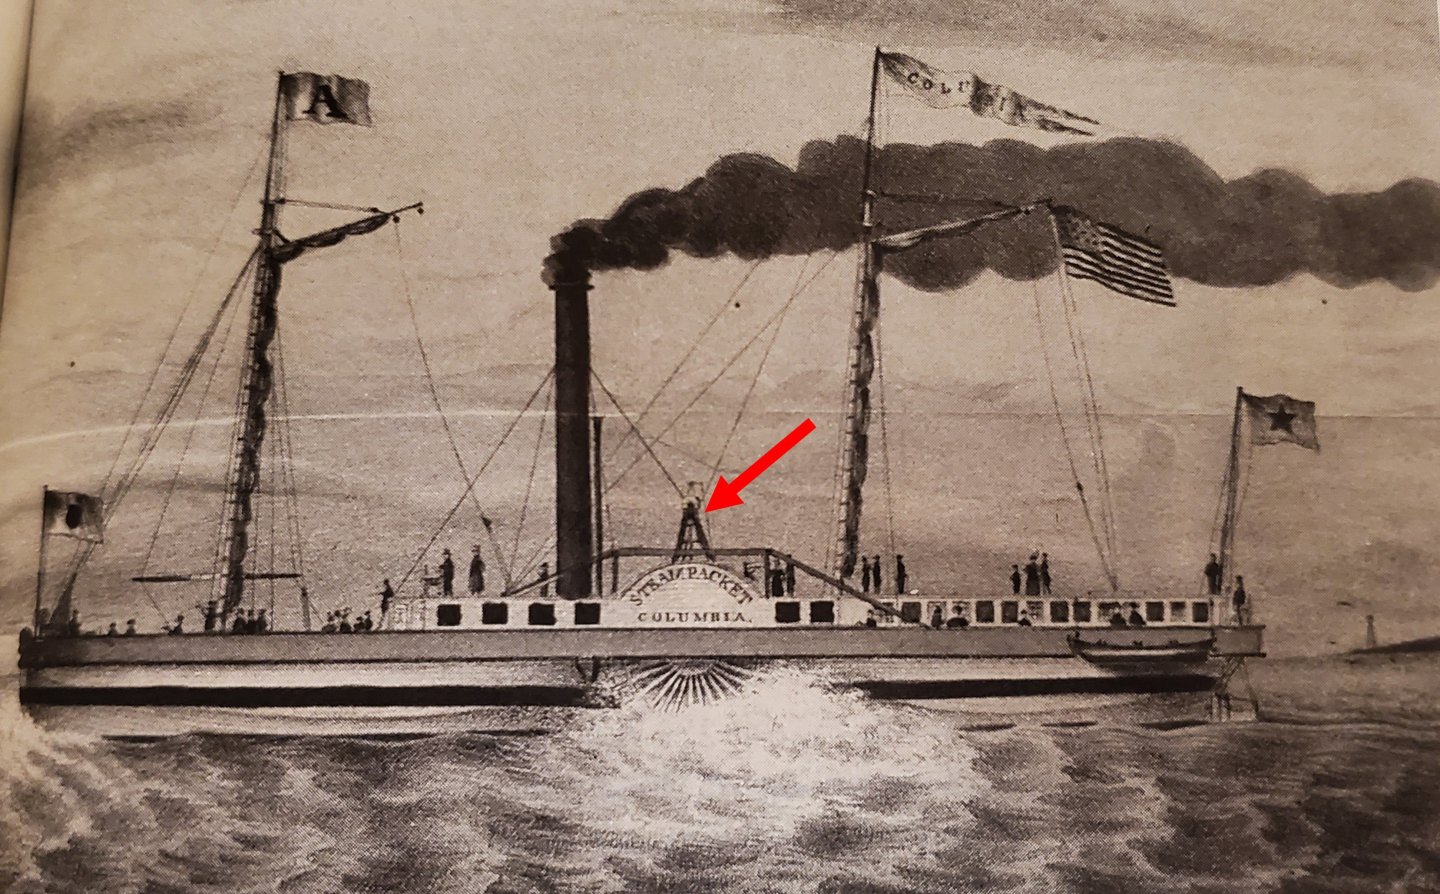
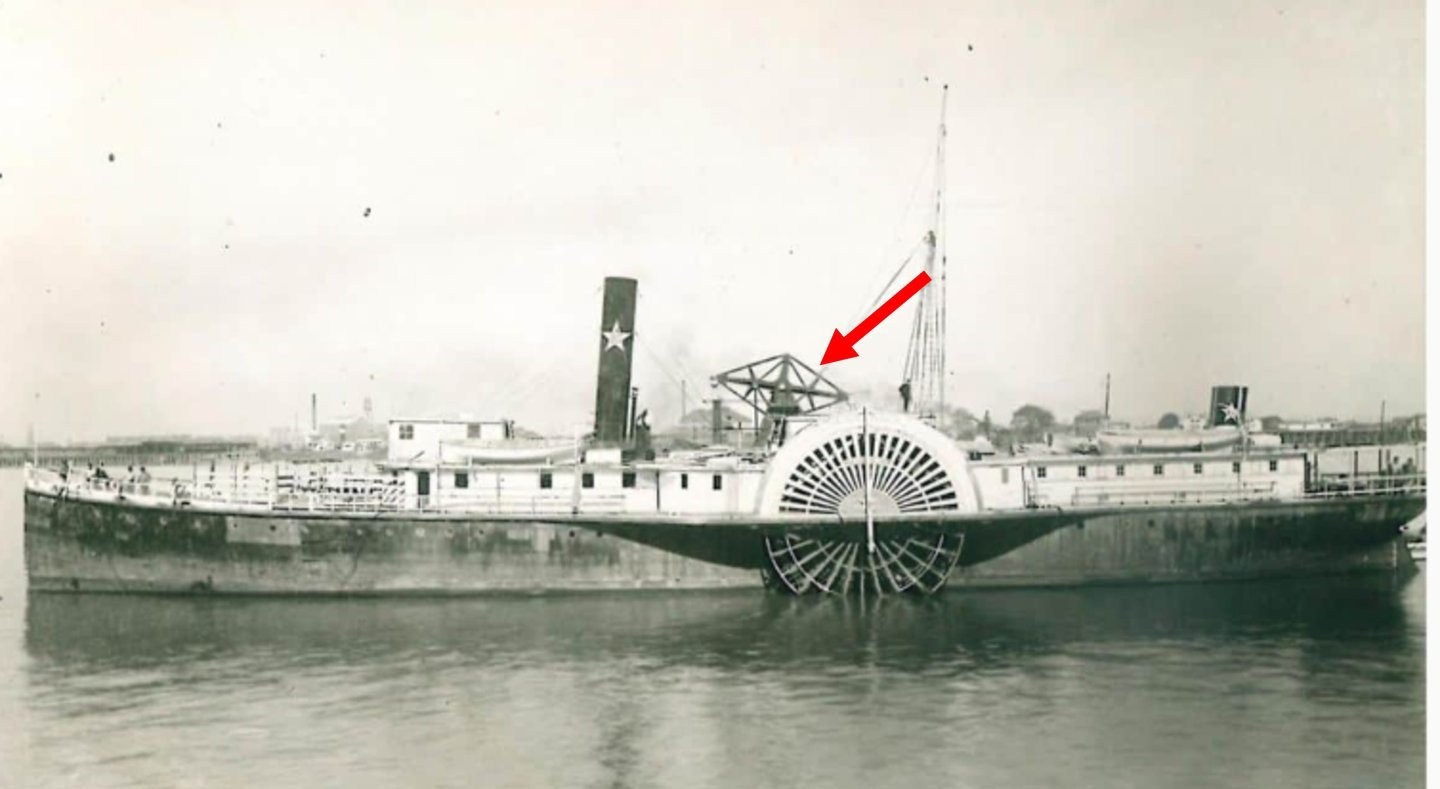
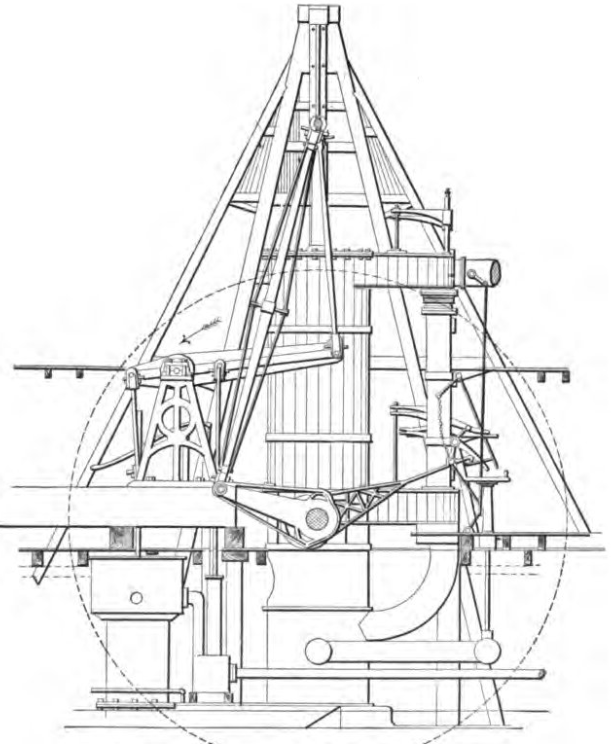
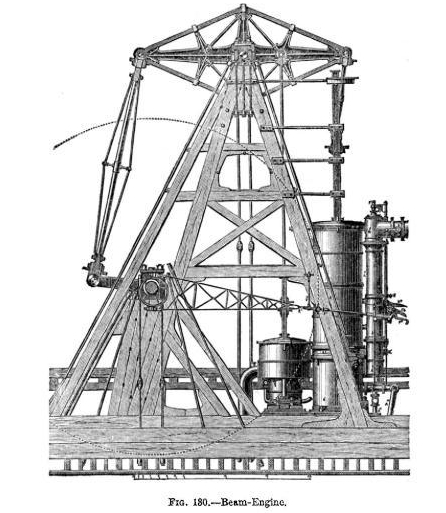
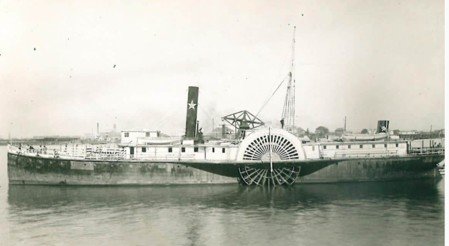
Thank you @gsdpic, @tmj, @Keith Black, @Paul Le Wol, @JacquesCousteau, @Javelin, @SaltyScot, @BANYAN, @gjdale, @Canute, @Bryan Woods for hopping in the wagon on this one. Might be a bumpy ride from time to time but should be fun! Like you, Gary, I also live in Wilco with an Austin address and have been called to jury duty up there. I would highly recommend visiting the restaurant on one of your trips to Georgetown. It's well worth it. Roel, The picture came from the website of the Texas State Historical Association. It's been around since 1897 so I'd tend to think they would be a reliable source. However, I spent some hours yesterday doing further research and found that you are probably right. Besides the paddlewheel cover, one of the obvious differences between the picture and painting is the small, odd-looking structure in the middle of each ship. In the painting, it's an A-frame shape and in the photo, it looks like an elaborate teeter-totter. What I learned is that both structures are actually the powerplant for the steam engine. In the painting's ship, it's called a crosshead (or A-frame) engine. It was a very common type of engine employed during the early period of steam ship construction. There were 2 A-frames connected by a horizontal beam. The piston rod connected to the beam and the beam moved within vertical guides. Here's an example of one. In the picture's ship, the structure is called a walking beam engine. The beam connected to the piston rod that ran parallel to the A-frames and was reinforced with 30 degree angle iron struts giving it a distinctive diamond shape. Here's a closeup example. The crosshead engine had a high center of gravity making it inherently unstable in rougher waters. By 1840, shipbuilders had mostly abandoned it in favor of the walking beam engine. So Roel, circling back your comment, I believe you are correct. The painting and picture are different ships. And it is highly likely that the painting is the Columbia and the picture is another ship. So I will use the painting as my guide on this project. However, I really like that lone star on the funnel of the ship in the picture. It just might find its way onto my version of the Columbia via artistic license or other means!
-
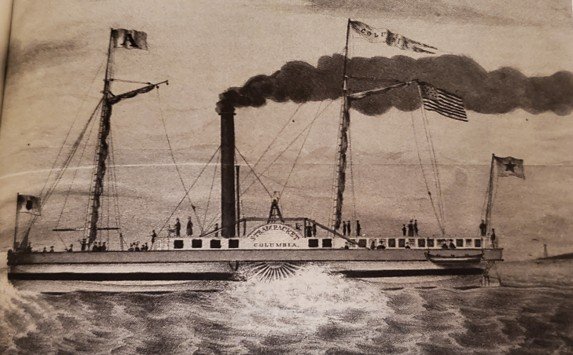
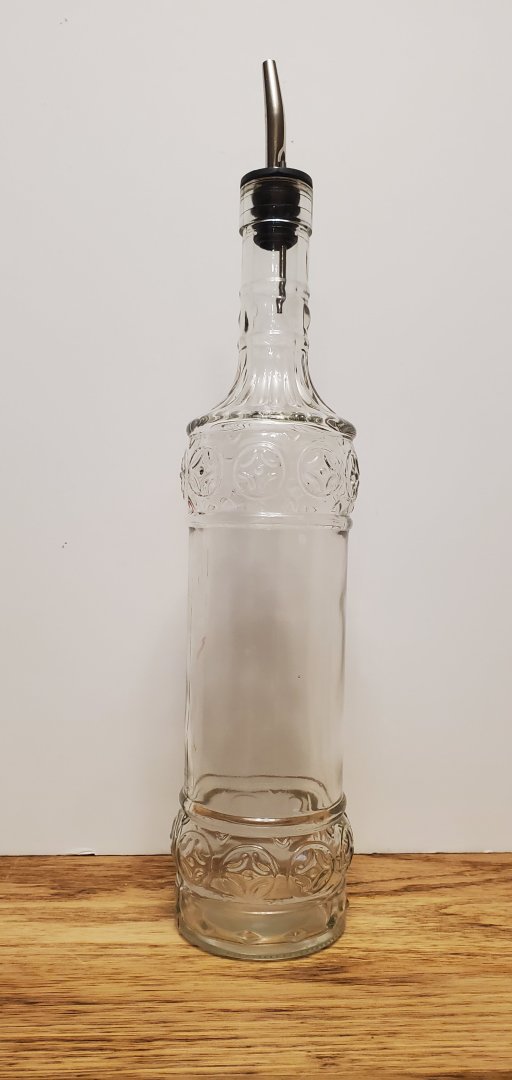
This project will be my first commissioned ship-in-bottle project. A good friend of mine is a part owner of an upscale chop house in downtown Georgetown, Texas called City Post. The name of the restaurant comes from the historical nature of its building. The building was built in 1931 during the great depression and served as a US Post Office from 1932 to 1990, after which it became Georgetown’s city hall. In 2021, the building was sold and the new owners converted it into a high-end steakhouse, naming it City Post as a tribute to the building's history as a post office and home for city government. The building is a beautiful structure, constructed with the same majestic pink granite as the Texas state capital, which stands about 30 miles to the south. The owners of the restaurant asked me to make a ship-in-bottle for display in the restaurant’s Mayor’s Room, which is a large banquet hall-type room reserved for special parties and events. I was very honored to be asked to do something like that. With the building having such a unique background and the restaurant’s name derived from that background, I wanted to create an SIB that would tie into all that history. The challenge, however, would be finding a plausible connection between Texas maritime history and the Postal Service. Texas Maritime History and the Postal Service So I began my research and eventually ran across the steam packet Columbia. The Columbia was a sidewheel paddler built in 1835 and put into commercial service by New York businessman Charles Morgan (not the Charles W Morgan of whaling ship notoriety). In 1836, Texas had just defeated Mexico in its war for independence and established itself as the Republic of Texas. Several years prior, Morgan had begun commercial steam packet service along the US eastern seaboard from New York to South Carolina, and from there to New Orleans. With the new Republic of Texas, he saw an opportunity to expand his business empire by providing commercial steamship service for the fledgling republic between its main port of Galveston and the large US port in New Orleans. So in 1837, Morgan sent his steam packet Columbia, under the command of captain John T Wright, to New Orleans, and then on to Galveston creating the first regular steamship service for the Republic of Texas. So how does all this have anything to do with the postal service? Stay with me for just a little bit longer and I’ll somehow get this background story into the harbor. As a brand new, independent nation, one of the things Texas needed was an official postal service. Before winning independence in 1836, Texas was a Mexican state (part of Coahuila y Tejas) with no established postal service. Mail was carried by slow-moving wagon train using oxen or mule power. In December of 1836, a Post Office Department was formally established by the Republic of Texas congress. However, the creation of a formal postal service did not change the fact that delivery of the mail still relied on beasts of burden. So when the Columbia arrived in Galveston and began regular passenger and cargo runs to New Orleans, it became the preferred (and much faster) method for moving mail from the Republic of Texas to the United States and places beyond. I said earlier that I knew it would be a challenge finding a link between Texas maritime history and the postal service, but there you go. That’s my story and I’m sticking to it! The Steam Packet Columbia Now, for the ship itself. As mentioned above, the Columbia was a sidewheel steam packet built in 1835. Charles Morgan, who was a shipping and railroad magnate, bought the Columbia and put it into service initially carrying passengers and freight between New York and South Carolina and eventually Galveston and New Orleans. She was equipped with two masts, one fore and one aft of a single, tall funnel. The Columbia had a light draft which made her very maneuverable and particularly well suited for the shallow waters of Galveston Bay. The Columbia was said to be the first ship to bring luxury to Texas travel. She had room for up to 60 passengers. The main cabin was described as opulent, with fine linen, silver forks, ivory knives, dimity draperies, and stained-glass windows. Many of the walls were decorated with arms recently used in the Texas war for independence. Below deck there were cabins with more affordable and austere accommodations. I could not find any ship plans for the Columbia nor could I find any dimensions other than her having 423 tons of gross tonnage. So I will pattern my Columbia after other steam packets of that era. Here are the only 2 images I could find of the Columbia. The first is a painting showing the 2 masts and tall funnel. The second is a photograph showing only 1 mast, so maybe the ship is under repair in the photo. Also, the funnel does not look quite so tall as in the painting, so maybe the artist exaggerated it for effect. The Bottle The restaurant owners wanted to pick the bottle for the project. They chose a beauty, but they also chose one that presents a real challenge for an SIB project. One of the unique features of their restaurant is a hidden Speakeasy in the building’s basement that you can only access by an unmarked elevator. It’s a crowded, dimly lit room where everything is in tight quarters with a spacious bar in the middle. If you are not familiar with Speakeasy’s, they were hidden bars with secret entrances that sold alcohol during Prohibition (1920s). They asked the folks in the bar to “speak easy” (quietly) so cops on the street would not hear them. The bottle the restaurant owners chose is a bartender’s pouring bottle for bitters and such. It’s a foot in length with a very long and narrow neck, and it’s only 2.75 inches wide. Fortunately, the Columbia’s masts were not particularly tall, so its profile actually is a nice fit for the bottle. And I absolutely love the way the decorative parts of the bottle provide a perfect viewing frame for the ship. But that looooong, narrow neck. Oh boy. And with that, it’s time to get busy and git er done!
-
If it's the brass wire that is too flimsy, you might try music wire. On my SIBs, I've used it for the funnel stays on sidewheel paddlers as well as tiny railing. Even at .015", it stays rigid and does not bend easily like brass wire. https://www.amazon.com/dp/B002WXPNB4?ref=ppx_yo2ov_dt_b_fed_asin_title Regardless, your Billy is coming together nicely. Can't wait to see how you make the paddlewheels. They are quite a challenge at that scale!
-
I like the red much better. Really eye-catching!
- 44 replies
-
- Scientific
- Billings Boats
-
(and 1 more)
Tagged with:
-

HMCSS Victoria 1855 by BANYAN - 1:72
Glen McGuire replied to BANYAN's topic in - Build logs for subjects built 1851 - 1900
Thanks for the health update, Pat. So glad to hear that you are all clear. Full speed ahead with your Victoria!!- 1,013 replies
-
- gun dispatch vessel
- victoria
-
(and 2 more)
Tagged with:
-
She looks great in her new home. Well done, Bob!!
- 261 replies
-
- Victory Models
- Pegasus
-
(and 3 more)
Tagged with:
-
I agree with John and Bob that printing on paper and then applying would be a good solution. You've got 2 different fonts to deal with and the lettering on the original has sharp lines which will be hard to duplicate freehand at this small scale, especially the serif font of the "Pittsburgh, PA". I believe you could easily create a graphic with the lettering on slightly weathered/off-white background for printing. You could even add that faint dividing line that runs thru BILLY if you wanted to get crazy! I'm also wondering what causes those wrinkles near the top. It almost looks like a stretched canvas that's not quite tight enough - like how my bed looks after I put the sheets on it! That's the cool thing about these projects of yours - trying to figure out what's going on by just studying these old photos.
-
Swigging and rigging. Does it get any better than that?
- 261 replies
-
- Victory Models
- Pegasus
-
(and 3 more)
Tagged with:
-
She looks fantastic, Gary. Superb craftsmanship. Congratulations on a fine build!
- 90 replies
-
- Friendship Sloop
- bluejacket shipcrafters
-
(and 1 more)
Tagged with:
About us
Modelshipworld - Advancing Ship Modeling through Research
SSL Secured
Your security is important for us so this Website is SSL-Secured
NRG Mailing Address
Nautical Research Guild
237 South Lincoln Street
Westmont IL, 60559-1917
Model Ship World ® and the MSW logo are Registered Trademarks, and belong to the Nautical Research Guild (United States Patent and Trademark Office: No. 6,929,264 & No. 6,929,274, registered Dec. 20, 2022)
Helpful Links
About the NRG
If you enjoy building ship models that are historically accurate as well as beautiful, then The Nautical Research Guild (NRG) is just right for you.
The Guild is a non-profit educational organization whose mission is to “Advance Ship Modeling Through Research”. We provide support to our members in their efforts to raise the quality of their model ships.
The Nautical Research Guild has published our world-renowned quarterly magazine, The Nautical Research Journal, since 1955. The pages of the Journal are full of articles by accomplished ship modelers who show you how they create those exquisite details on their models, and by maritime historians who show you the correct details to build. The Journal is available in both print and digital editions. Go to the NRG web site (www.thenrg.org) to download a complimentary digital copy of the Journal. The NRG also publishes plan sets, books and compilations of back issues of the Journal and the former Ships in Scale and Model Ship Builder magazines.


.png.55251309292f8a4cf0624e2be7b42cd4.png)
