BCN-Modeller
Members-
Posts
18 -
Joined
-
Last visited
About BCN-Modeller
- Birthday 11/09/1962
Profile Information
-
Gender
Male
-
Location
Barcelona (Catalonia), Spain
-
Interests
Wood kits: Nelson Navy, Spanish Navy , US Old Navy
Plastic kits: Modern and 2WW warships 1:350 or bigger
Recent Profile Visitors
The recent visitors block is disabled and is not being shown to other users.
-
 Old Collingwood reacted to a post in a topic:
HMS Sphinx 1775 by James H - FINISHED - Vanguard Models - 1:64
-
 Old Collingwood reacted to a post in a topic:
HMS Sphinx 1775 by James H - FINISHED - Vanguard Models - 1:64
-
 Old Collingwood reacted to a post in a topic:
HMS Sphinx 1775 by James H - FINISHED - Vanguard Models - 1:64
-
 Old Collingwood reacted to a post in a topic:
HMS Sphinx 1775 by James H - FINISHED - Vanguard Models - 1:64
-
 popeye the sailor reacted to a post in a topic:
Calypso by Fuji - FINISHED - Billing Boats - 1:45
-
 Geowolf reacted to a post in a topic:
Palma Nova by BCN-Modeller - Artesania Latina - 1:25 - First Build
-
 Geowolf reacted to a post in a topic:
Palma Nova by BCN-Modeller - Artesania Latina - 1:25 - First Build
-
 Geowolf reacted to a post in a topic:
Hi, from an absolute rookie from Barcelona
-
 Gus M reacted to a post in a topic:
Palma Nova by BCN-Modeller - Artesania Latina - 1:25 - First Build
-
 Gus M reacted to a post in a topic:
Palma Nova by BCN-Modeller - Artesania Latina - 1:25 - First Build
-
Hi, from an absolute rookie from Barcelona
BCN-Modeller replied to BCN-Modeller's topic in New member Introductions
Thank you @Louie da fly for your kind words. Just begining the build log and facing the first difficulties but eager to learn from them. I know that for running, first you have to learn to walk, and for now i think i’m just crawling. Only dreaming to be able to make something roughly similar to the nice models others members build. Best regards from Barcelona, Pascual -
You work have build a very beautiful model. Great Job. Best regards from Barcelona, Pascual
- 55 replies
-
- constitution
- model shipways
-
(and 1 more)
Tagged with:
-
The long strips I first fitted to the bulkheads, are the top and bottom sides of the gun ports. These can only fit in one way. Thank you for the explanation @James H. Very clever and Fail Safe. Much more easy that what i was thinking. The more you show as this model in the forum, the more i like it. waiting for the next update.
- 355 replies
-
- vanguard models
- Sphinx
-
(and 1 more)
Tagged with:
-
One question: The position of the cannon ports is determined by a messure from other part, by example the bow ? close bulkheads ? as in the following quote you stated that you push them into position. It's just that i don't know how to determine this position even probably it would be stated somehow in the instructions. Just curious about that. Really a nice ship. Waiting to see it completelly rigged.
- 355 replies
-
- vanguard models
- Sphinx
-
(and 1 more)
Tagged with:
-
Really a very good work. I always like the ship, but i know that the model it's somehow difficult to find I love the Cousteu series i saw when i was young and the ship with the HeloPad and the miniSubmarine was beautiful. I remember that they have also a Catalyna Airplane from 2WW with the calypso decoration or similar. There was a plastic kit from Revell long time ago for this ship, not remember the Scale. Enjoying your build and keep it as reference just in case i would be able to make the billing boats model sometime. Best regards from Barcelona, Pascual.
- 70 replies
-
- calypso
- billing boats
-
(and 1 more)
Tagged with:
-
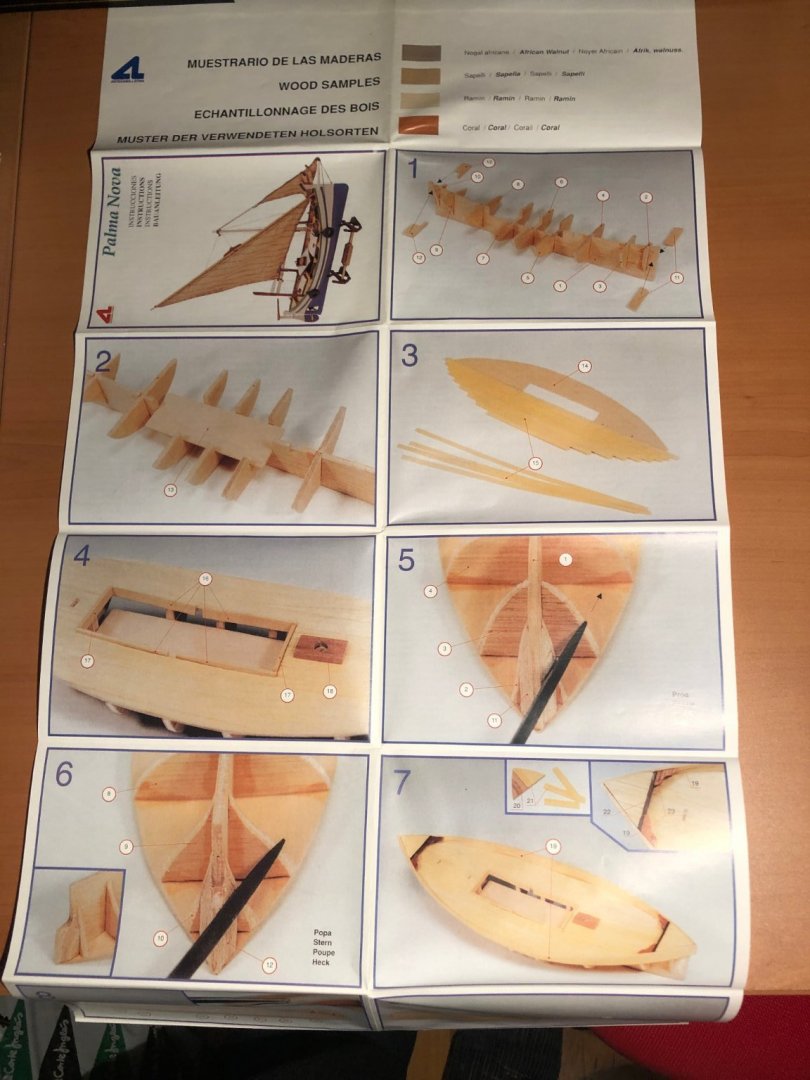
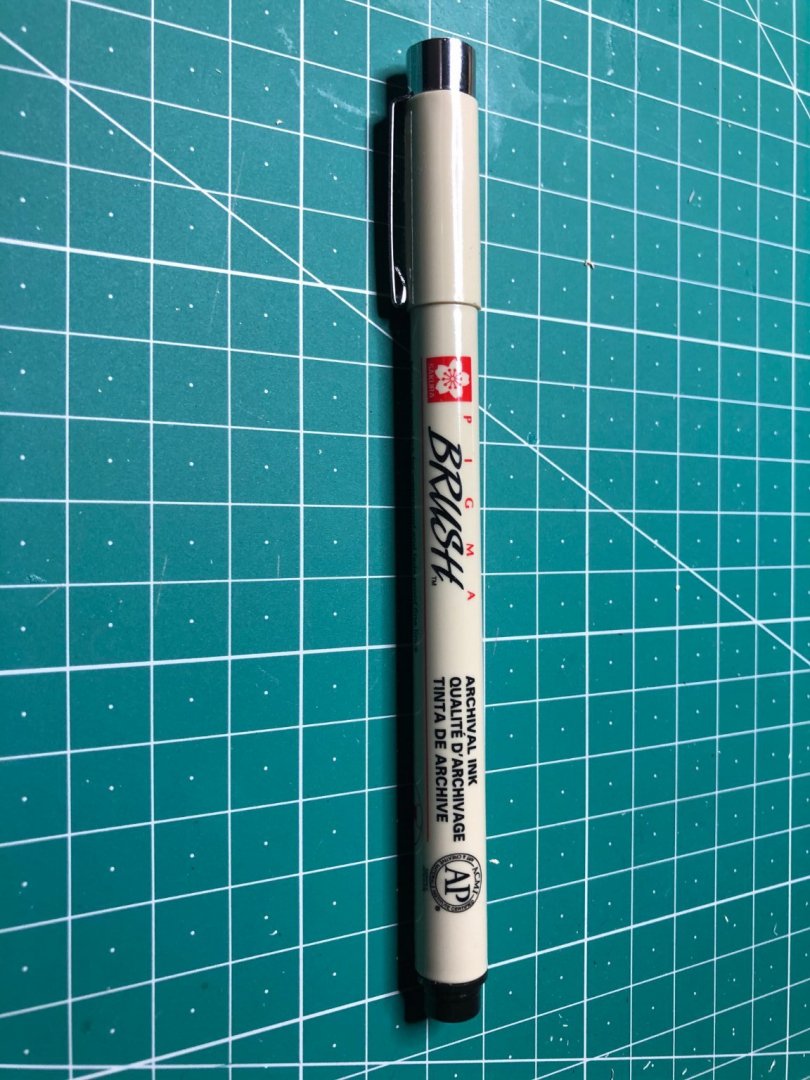
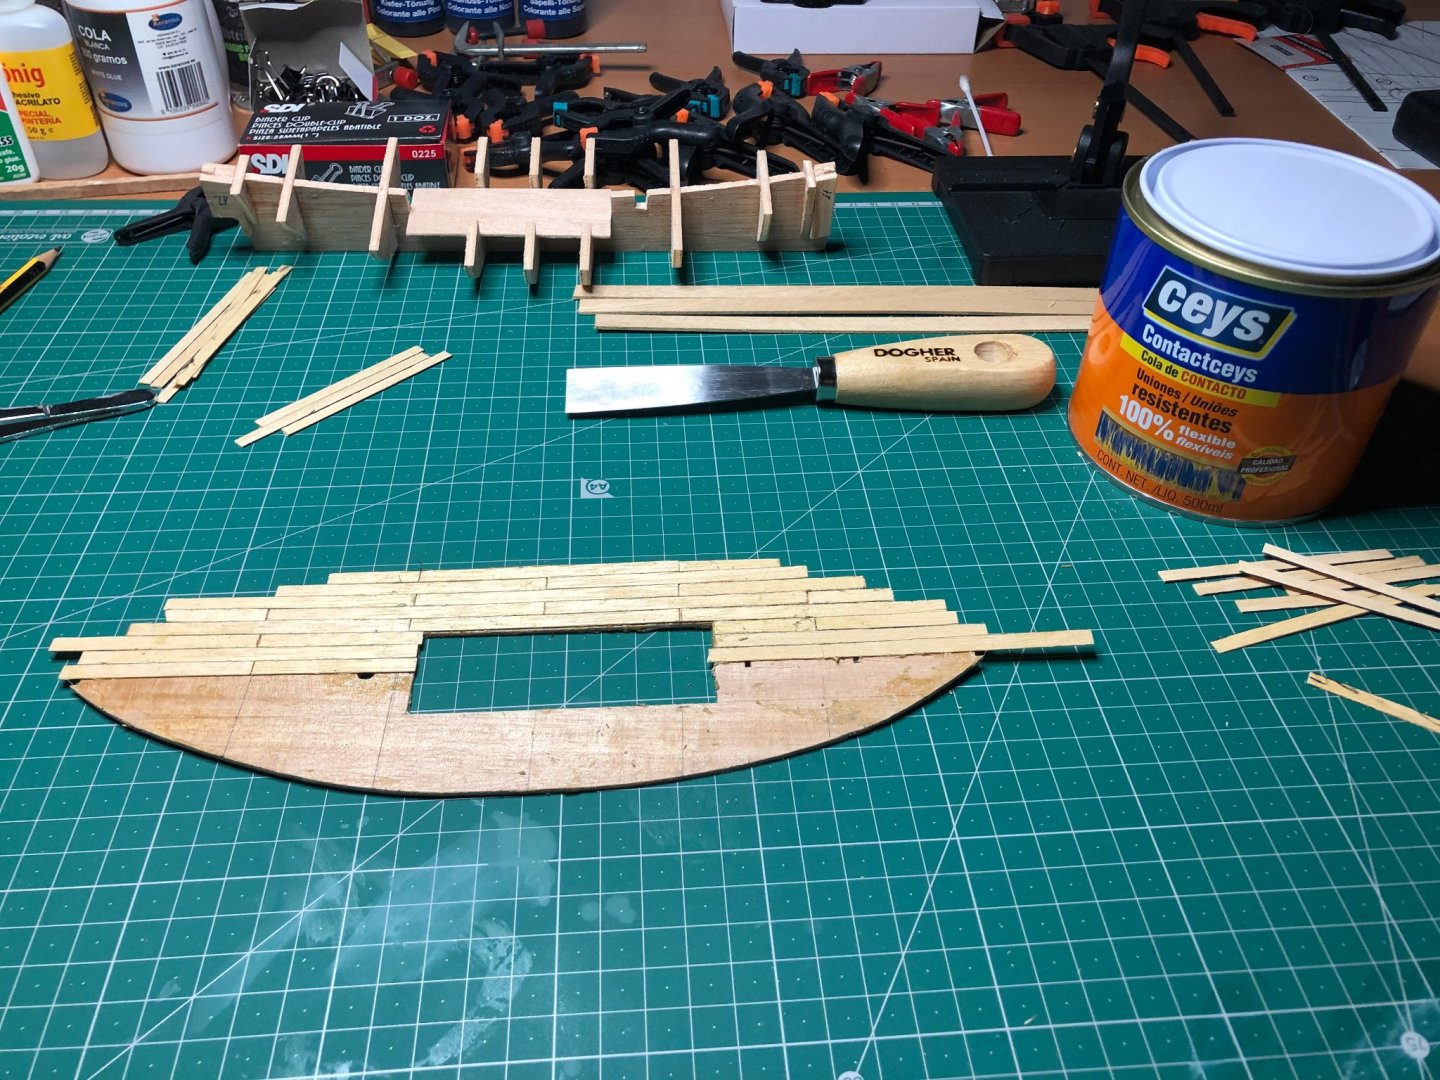
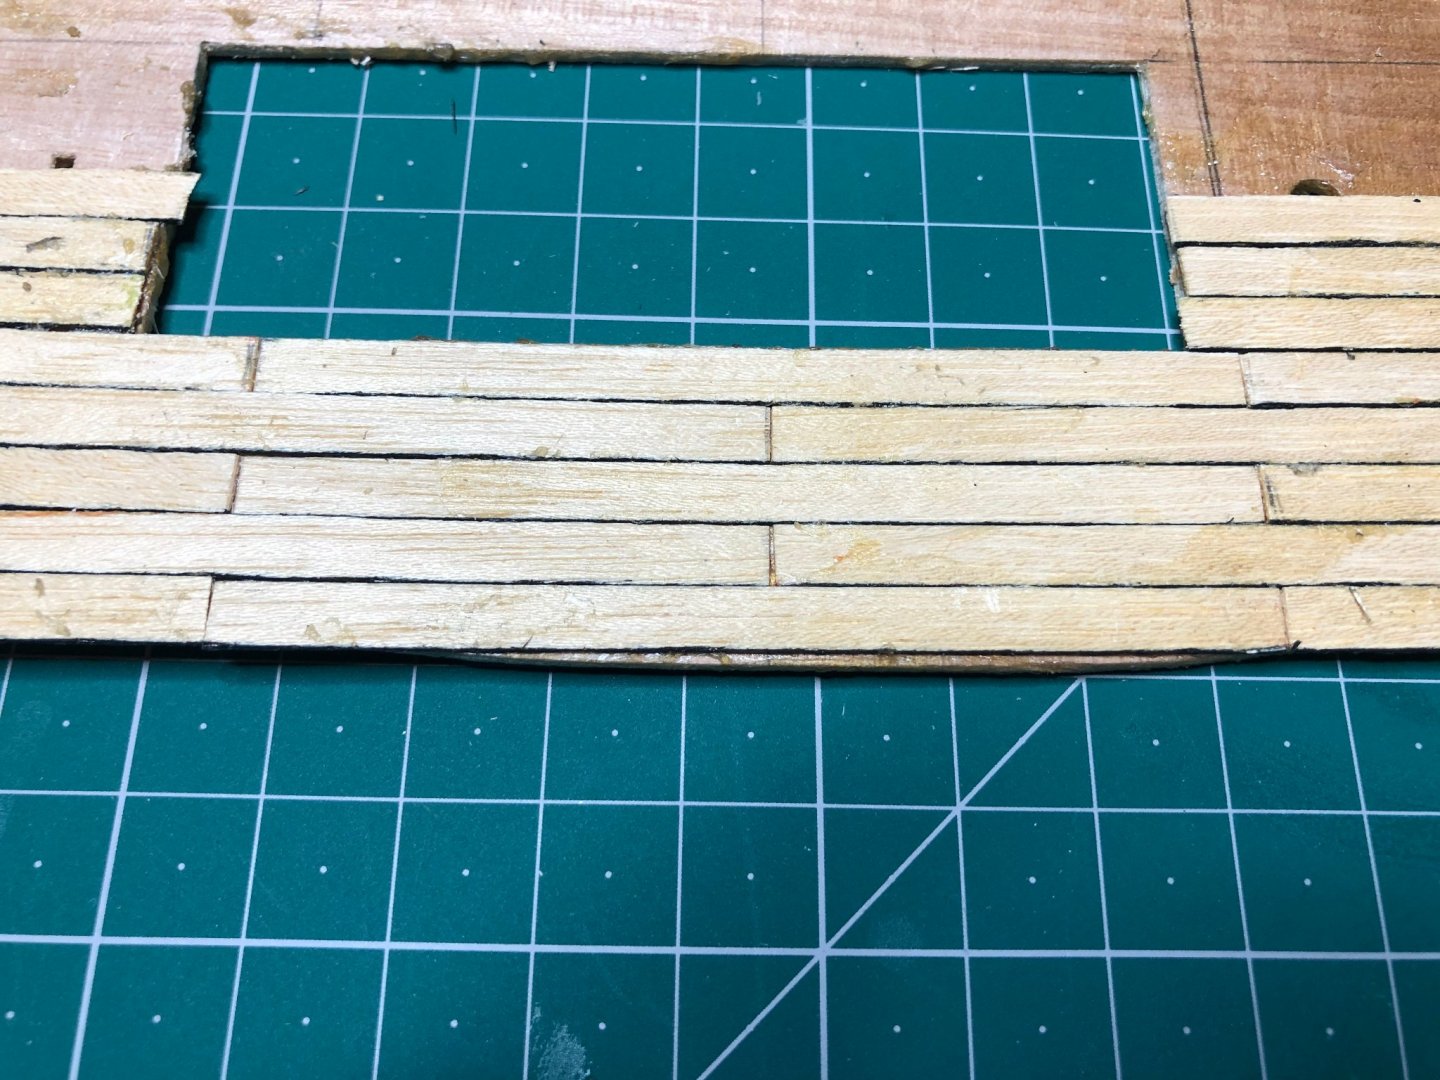
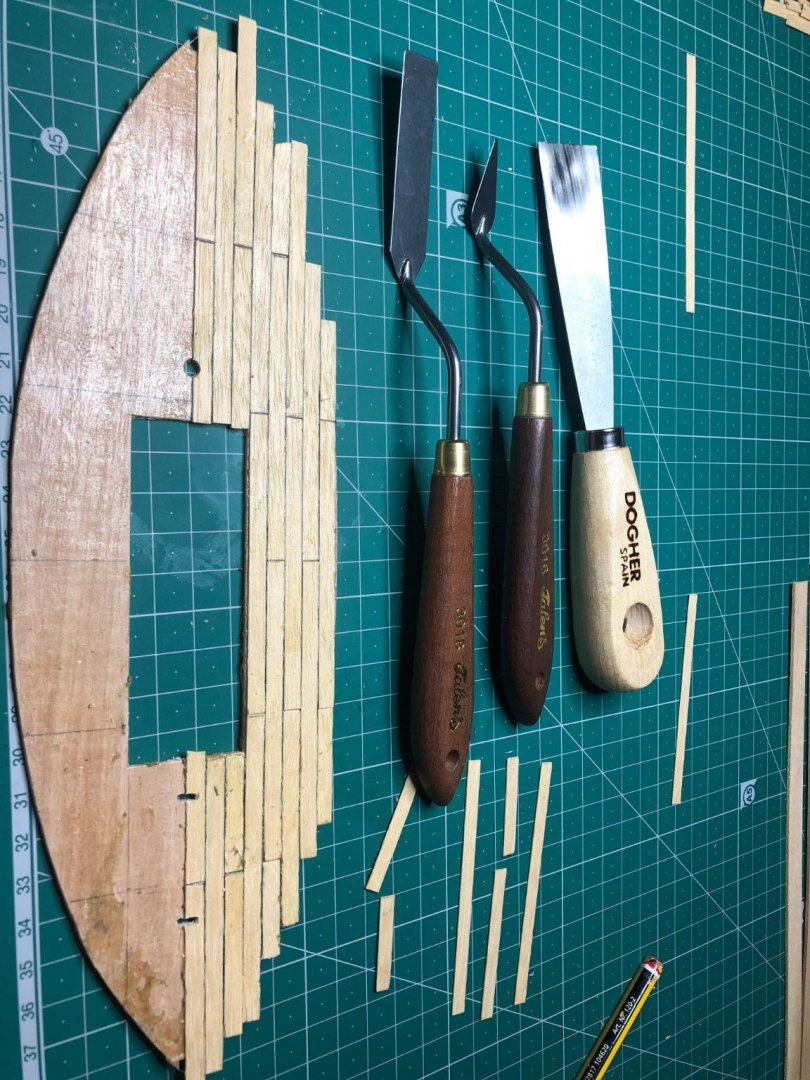
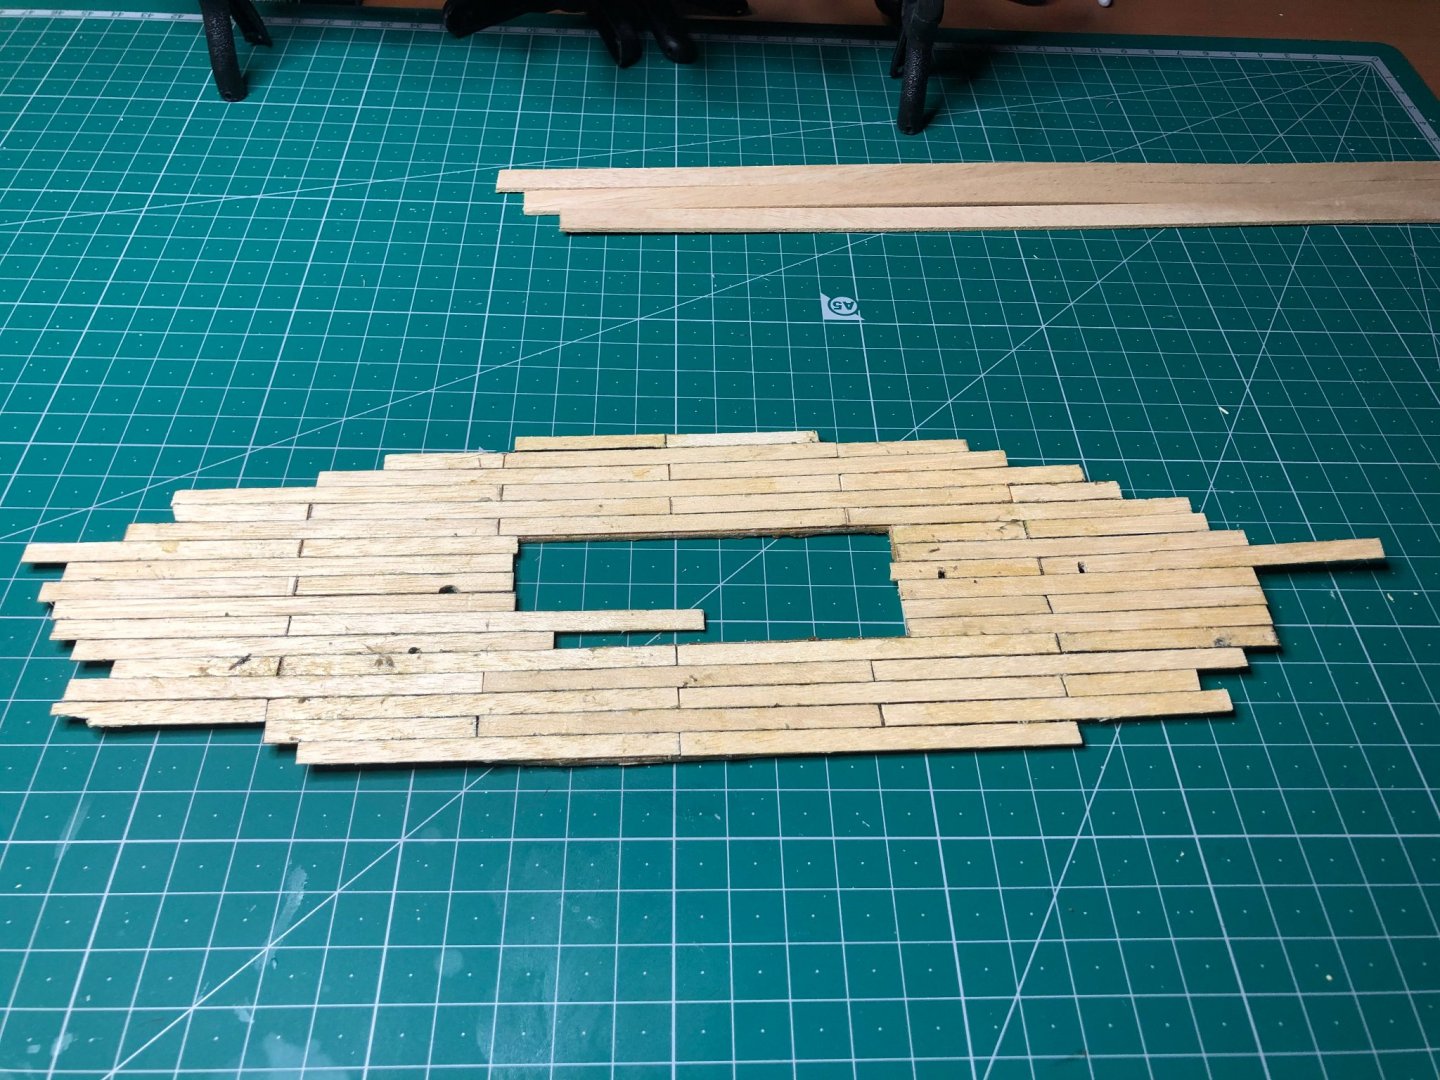
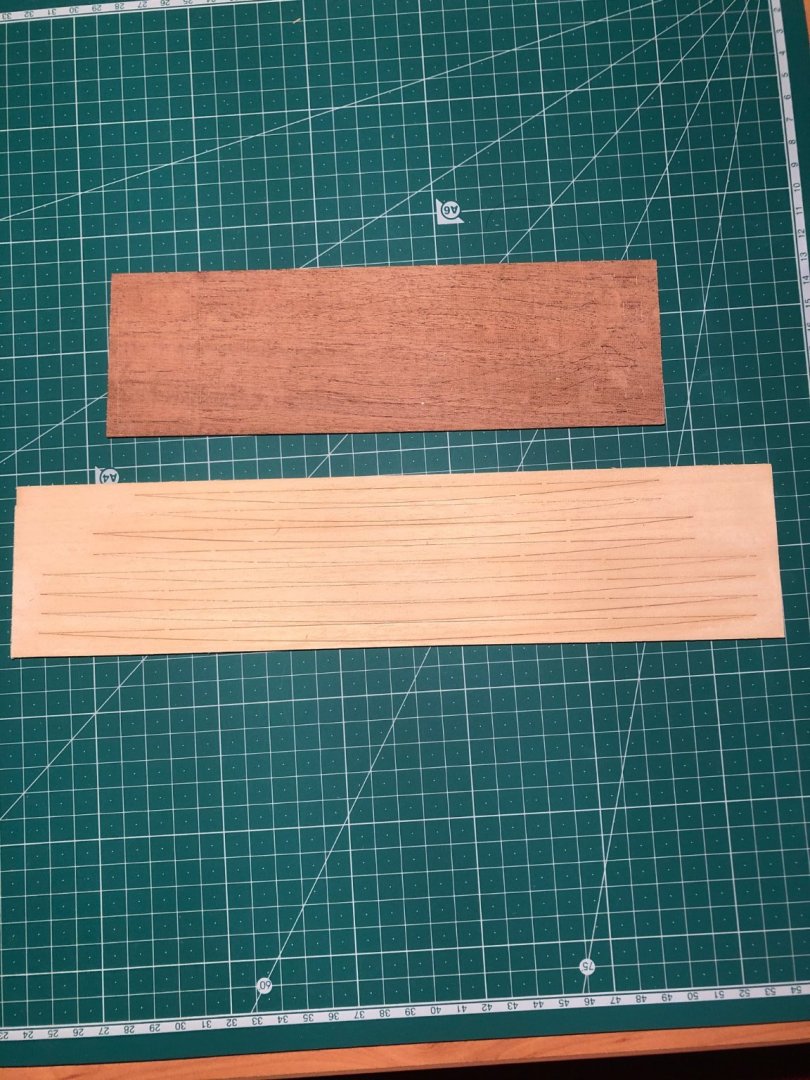
4.- Deck Planking In the booklet they just stated to put the deck planks on the deck part and the picture-guide show the planks being assembled in the whole length of the plank, as you can see in picture number 3 and picture 4. I decided to try to improve it, cutting the lenght of the deck planks trying to make it looking more real. As the Scale is 1:25, if a real plank is 200 cm length it have to be 8 cm in 1:25 scale. Not really sure about the length of the plank in real life but 200 cm sounds quite good for me and the boat is not as big as have bigger planks that otherwise will not be show good in the model also. Moreover i will like to prove the caulking techniques i saw in the forum and as i was able to find some pigma brush pens in a local art shop i decided to try them instead of the pencil HB that initailly i was thinking to use. So i print with the pigma brush one side of the deck planks, cut the planks to 8 cm, and began the deck planking with contact adhesive glue as stated in the instructions booklet. Here i began to have problems as i realised too late when putting glue in the deck and in the plank to be glued on it, that i have used soo many glue. Probably because the tool i used was quite big but also due my in-experience as it was the first time i used this type of glue. After a few moments i have got glue everywhere, even in the surface on the deck planks with no so beautiful results as you can see. In the following picture you can see the glue, the tool and my first half deck plank. As you can see the right side was the first i made, so the left side of the deck looks a little better. I would have to improve the planks joint for next builds as you can see that some are not really well done in the following picture. I had to let it dry in order to re-fit the holes in the middle of the deck as stated in the instructions. Next day i did the re-fit of the holes and with an smallers tools i continue the deck plancking. From right to left: The original tool used and on it's left the two new ones more small. This time glue goes much better, even still too many for my taste or my actual skills. And then i have got another problem, i didn't realised that the deck planks were not paired until i have got several glued. I was not going to allow that my first model would look in that way, so i undo all the work of the day with all the mess. Brooken in the way all the planks already glued this day. After a little, i was able to finish gluing the deck planking, as you can see. Not a really meritorious work ( a lot of glue on top of the deck planks) but i learned a lot, specially how not to do things next time. I hope that wih a good careful sanding it would look better. Any advise about the grade of the sand, i'm a little afraid of destroy the deck plancks with are just 0,6 mm thickness. I like the look of the caulking, and the deck plank with the planks cutted instead of just in a single plank all the length of the boat, as stated in the instructions and the picture-guide. Moreover i decided to deck plank also de lower deck, even nothing was told in the instructions book about it. Because each time i do a work seems to be more easy that when i did it before. If somebody will make this kit, i think that this lower deck plank would be better if done before gluying the lower deck to the structure. As this part of the boat can be shown or not i decided to give a try with white wood glue instead of the adhesive glue used before, just to see what happens and if it would be better or not, as really i don't know why is the reason to use this type of adhesive glue for the deck planking. Perhaps anybody would help me on that matter. Any comments, recomendations or advise would be really welcome. Best regards from Barcelona, Pascual. Next Steps: - Re-fitting the holes of the deck - Cutting the deck planks to fit the deck - Sanding carefoully the deck - Marking the deck planks pins with a pen - Assembly of the deck in the boat structure
- 4 replies
-
- Artesania Latina
- Palma Nova
-
(and 1 more)
Tagged with:
-
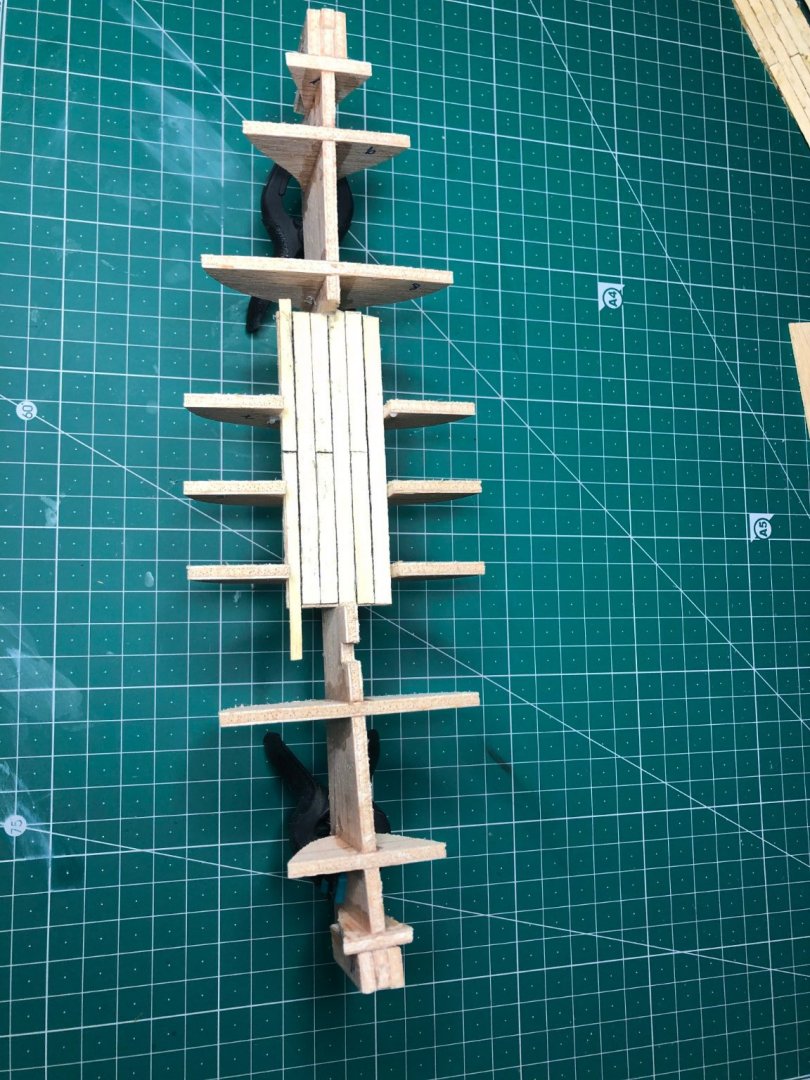
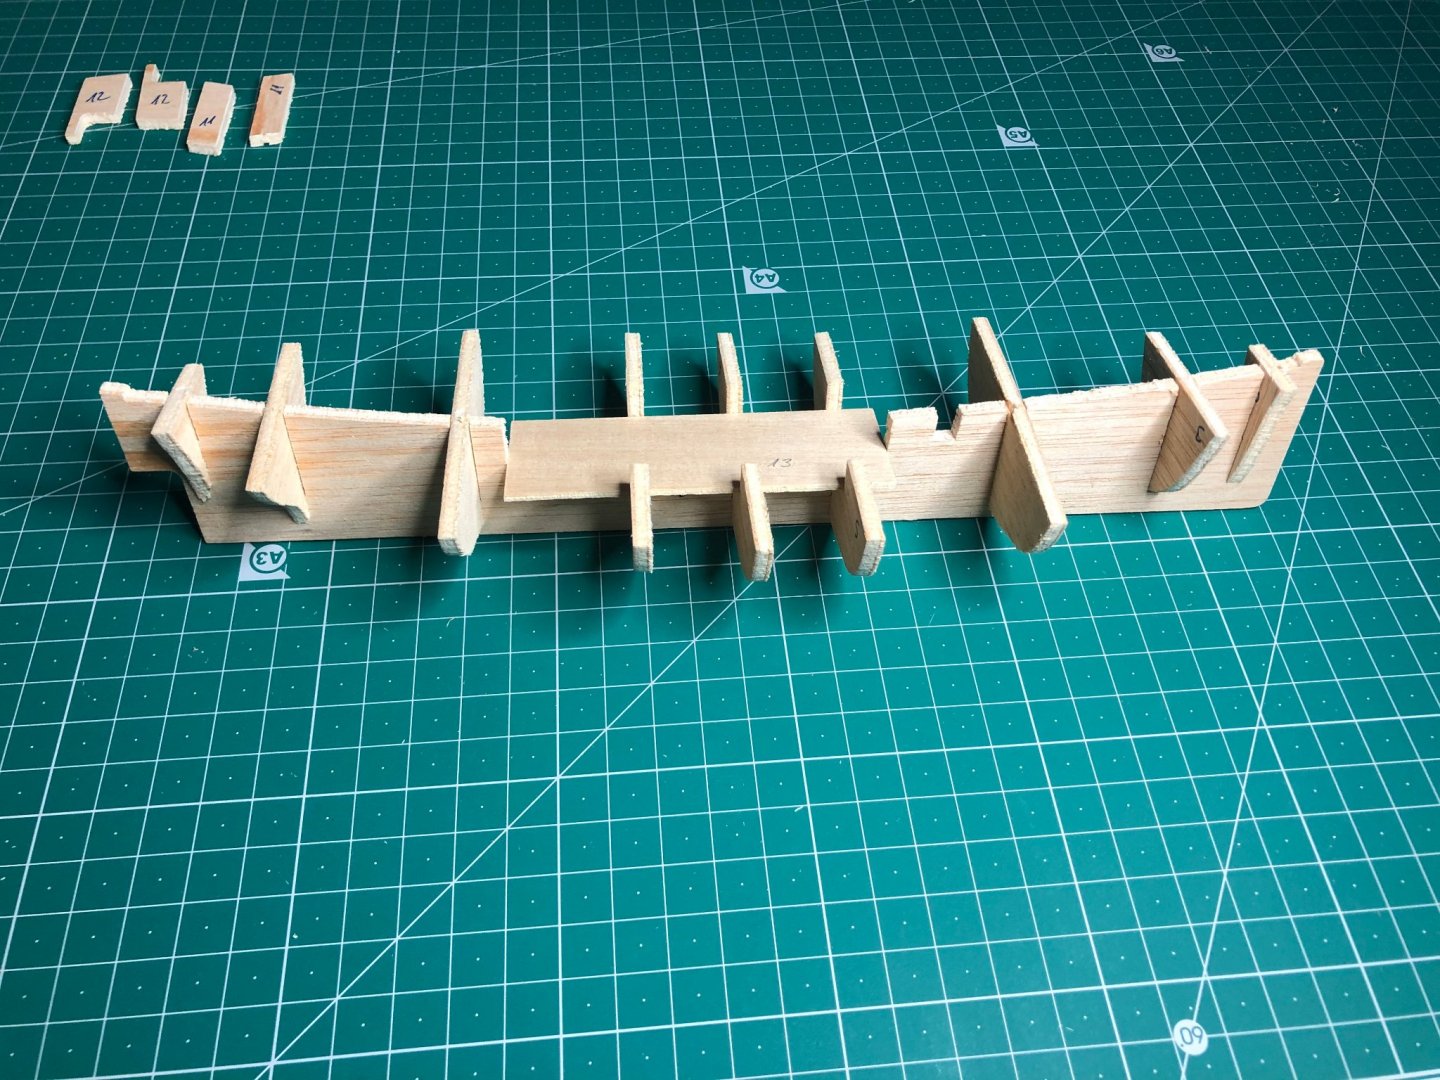
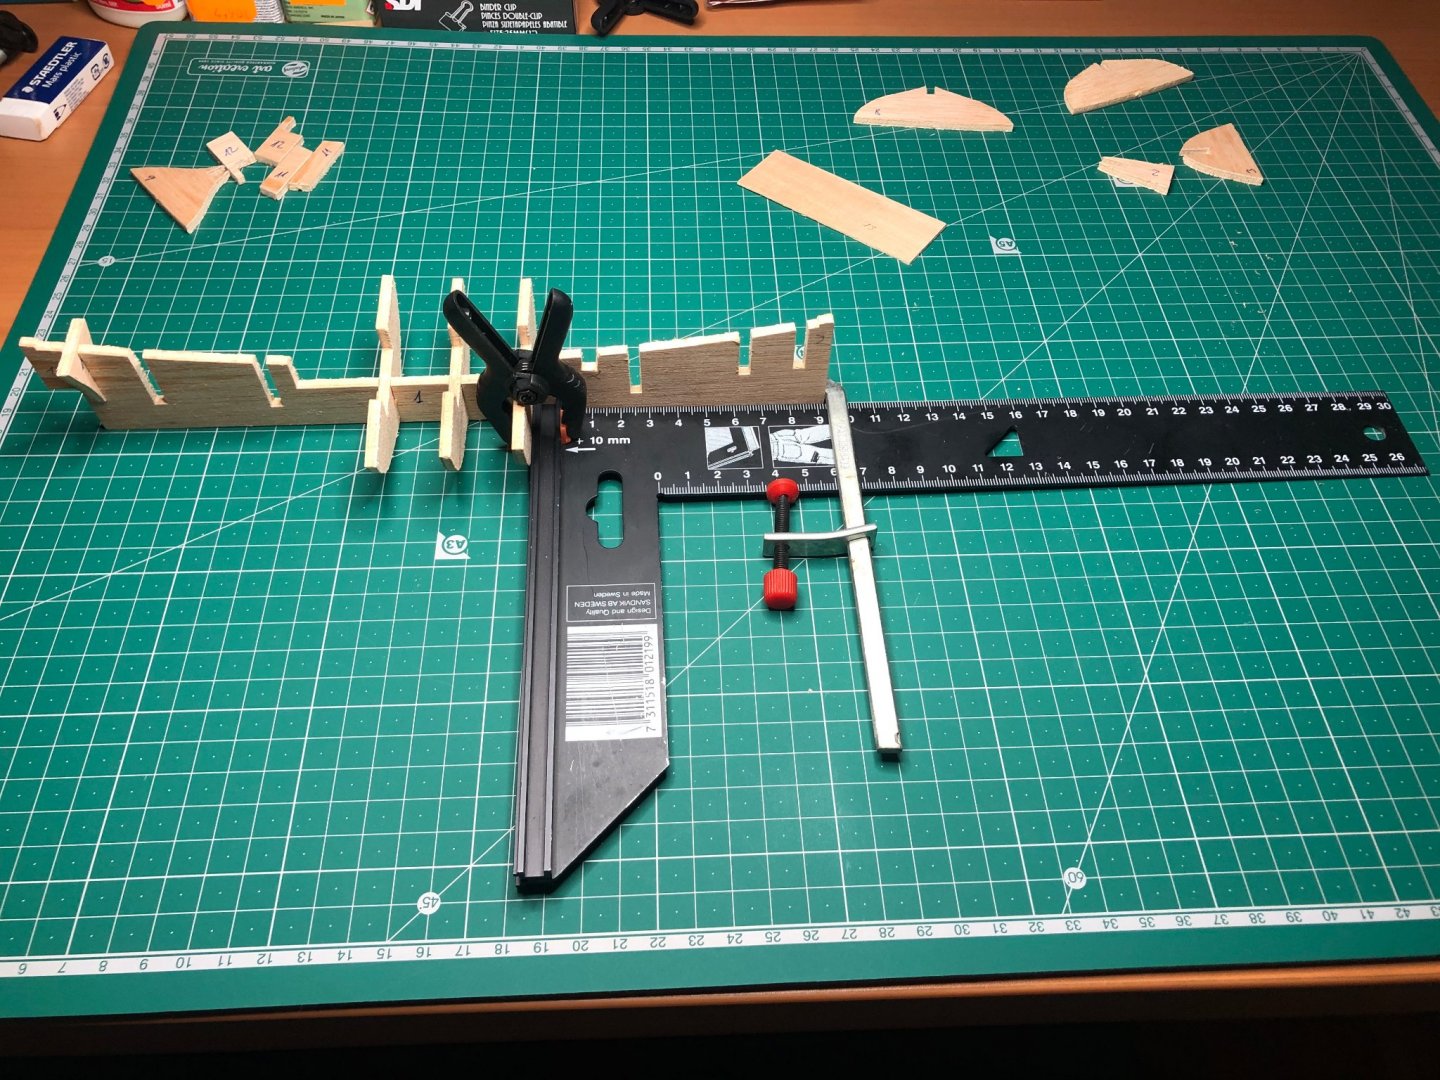
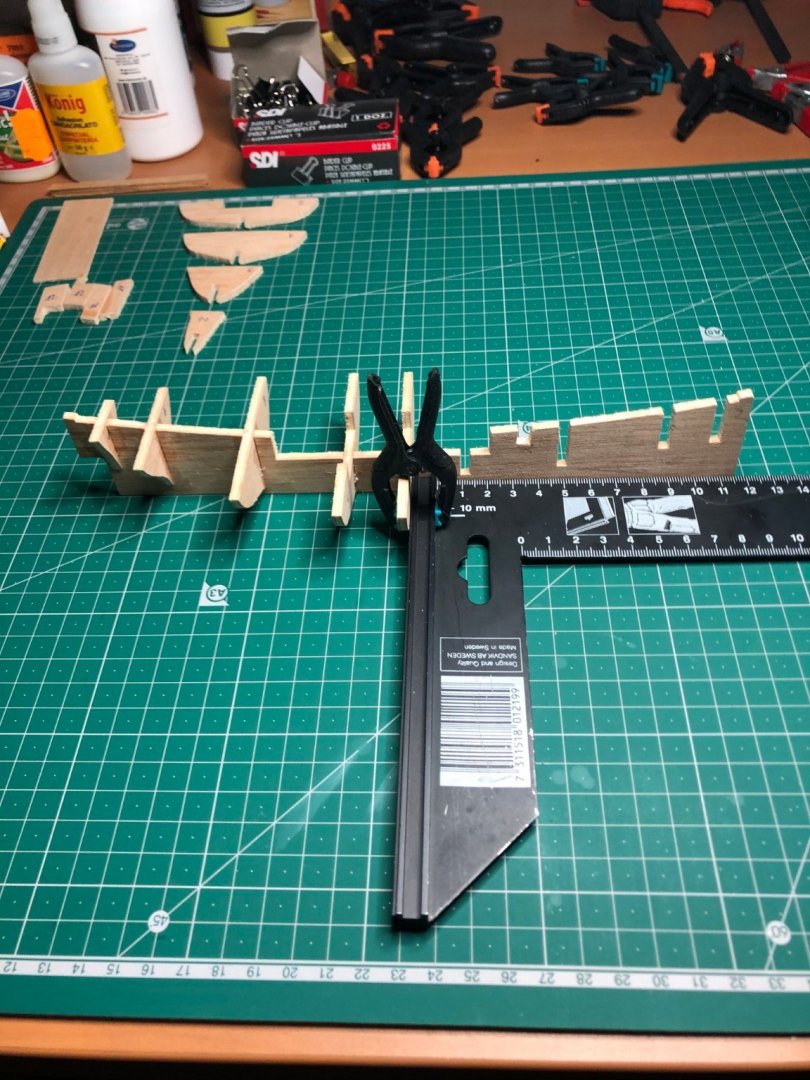
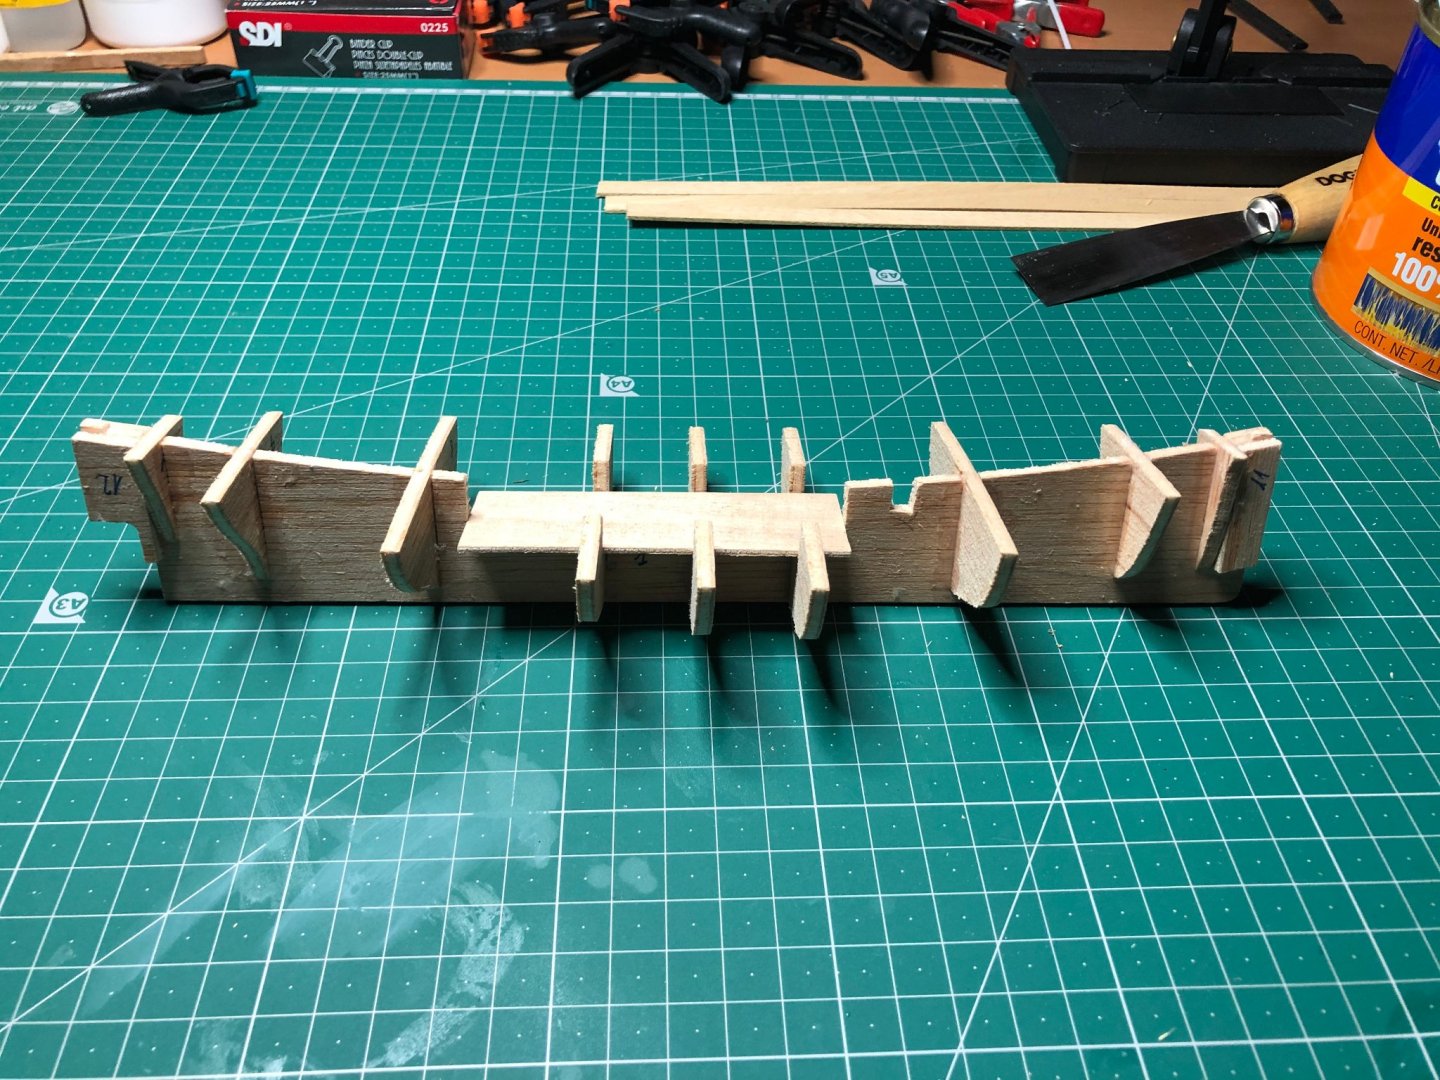
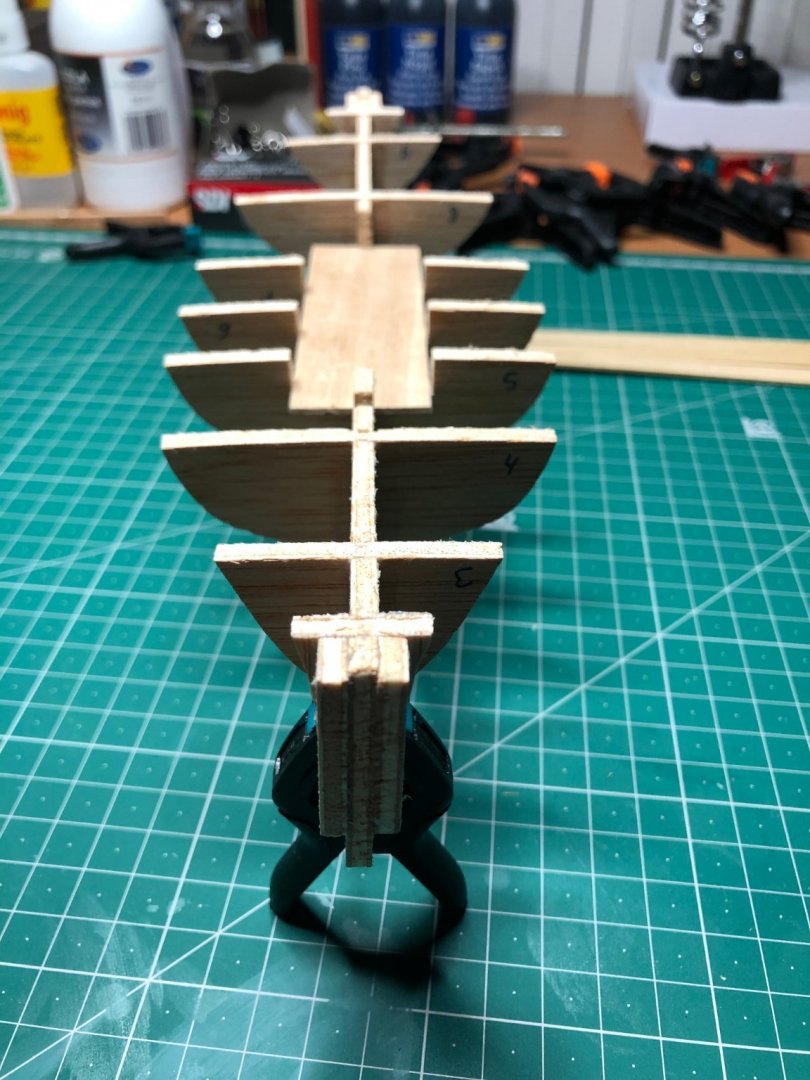
3.- Assembly the bulkheads I began make some dry fitting with the bulkheads on the structure. I realised that the bulkheads in the middle, as they didn't have a lot of joint surface, have movement both vertical and hotizontaly with the keel structure. Therefore, as i saw that a lot of experienced members strongly stated at their logs that a good bulkhead assembly is very important later to have a nice model, i decided to take my time and put this bulkheads one by one with the help of a square rule to assure good horizontal square assembly trying to do my best with the vertical alineation of the bulkheads ( this have to be done by the eye with the help of an horizontal ruler), letting drying the glue sometime begore putting the next one. Not the best square ruler for this task, just one i have got in the house for repairs. i will have to obtain a better one more small from the model shop next time i would be able to go there. After a few days i'm quite happy with the results. Perhaps i would be able to make it more quickly but remember that this is my first build. As you can see i also glued the inside deck for increase the strengh of the structure. Nex Step: - Deck Plancking as per the instruccions booklet.
- 4 replies
-
- Artesania Latina
- Palma Nova
-
(and 1 more)
Tagged with:
-
I understand you would have only a day and there are a lot of things to do in Barcelona, also i don't know if i would be in Barcelona in the time of your visit but, if possible, it woud be a pleassure to meet with you. If you send me a private with a little advance we can try to meet and share a coffe ( but perhaps in summer it would be better to share a beer). Best regards from Barcelona, Pascual
- 355 replies
-
- vanguard models
- Sphinx
-
(and 1 more)
Tagged with:
-
That are really good news for begginers like me. I though i can only dream about building something like this until a few years of hard learning. I will follow your progress with even more interest than before. Best regards from Barcelona, Pascual
- 355 replies
-
- vanguard models
- Sphinx
-
(and 1 more)
Tagged with:
-
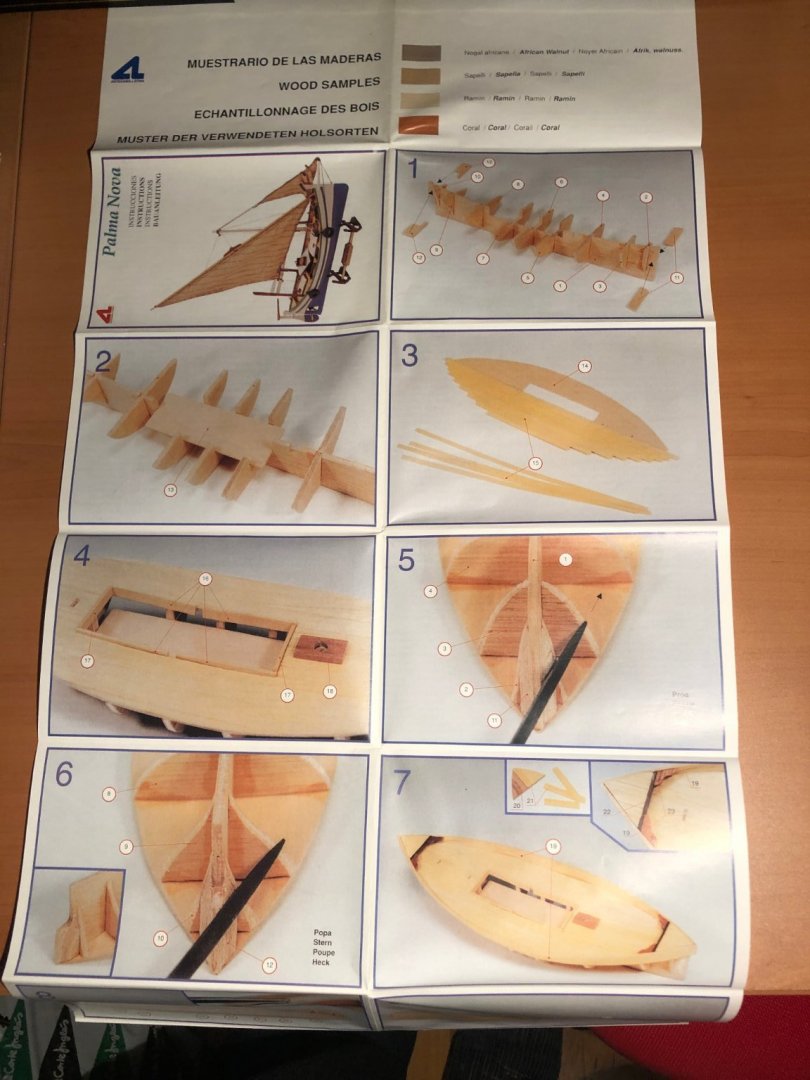
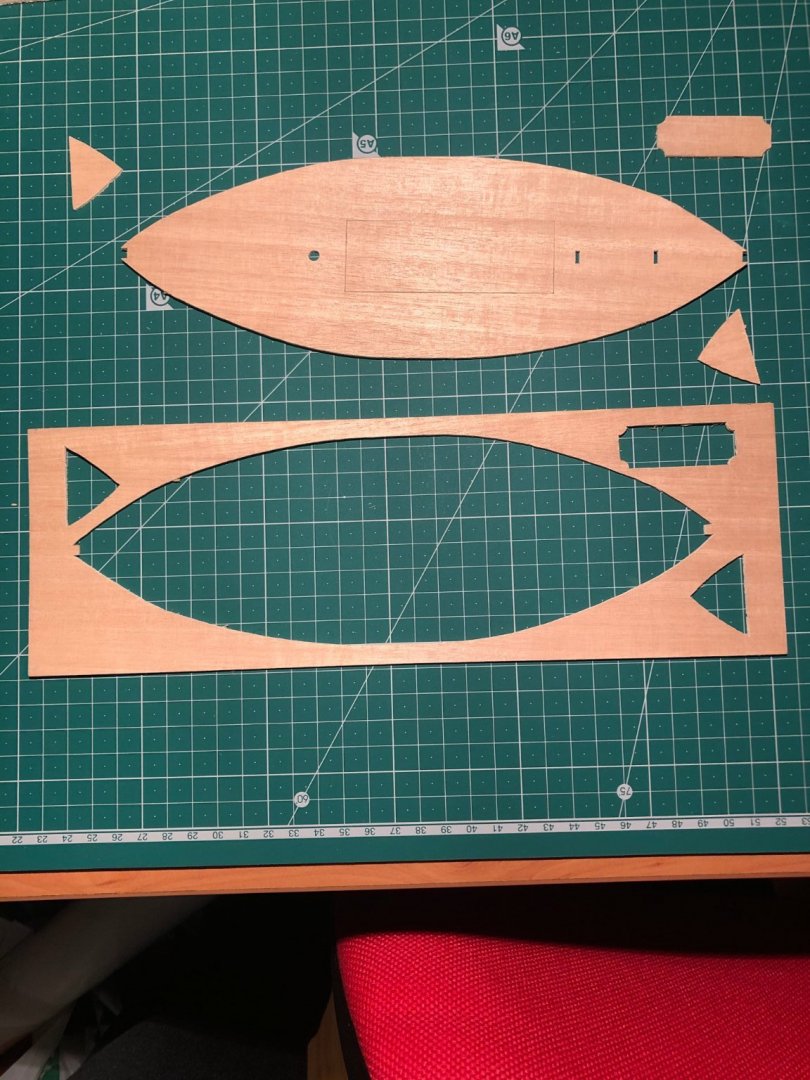
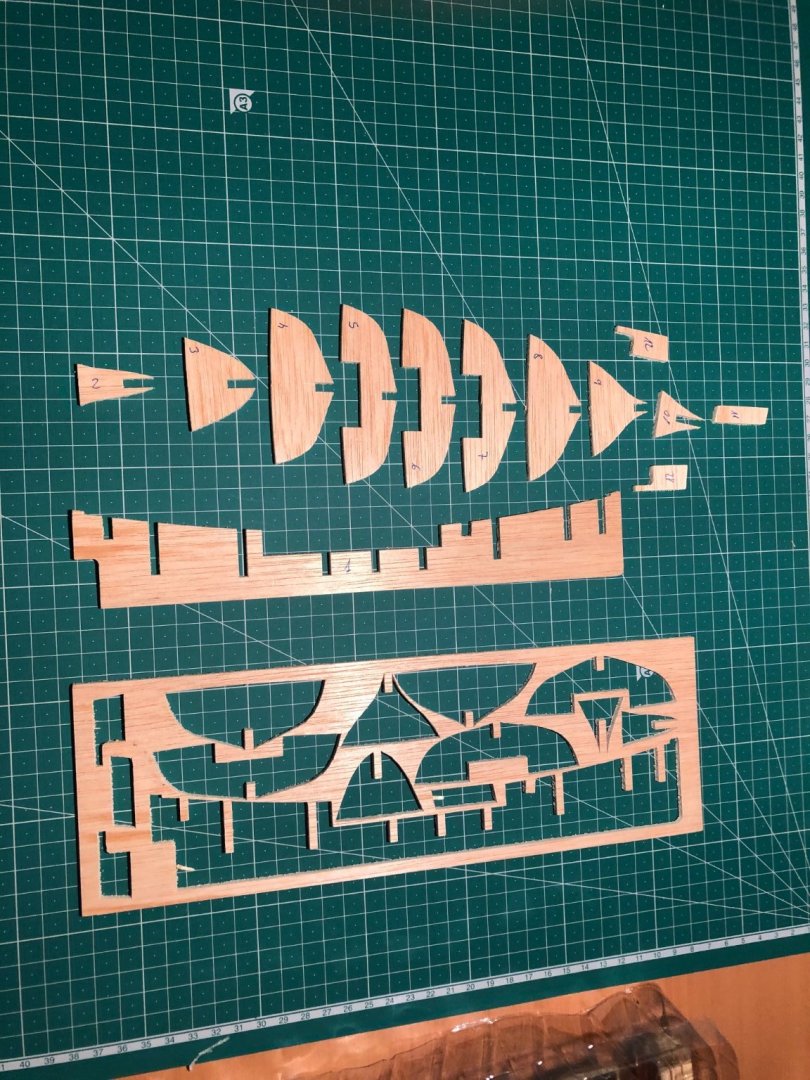
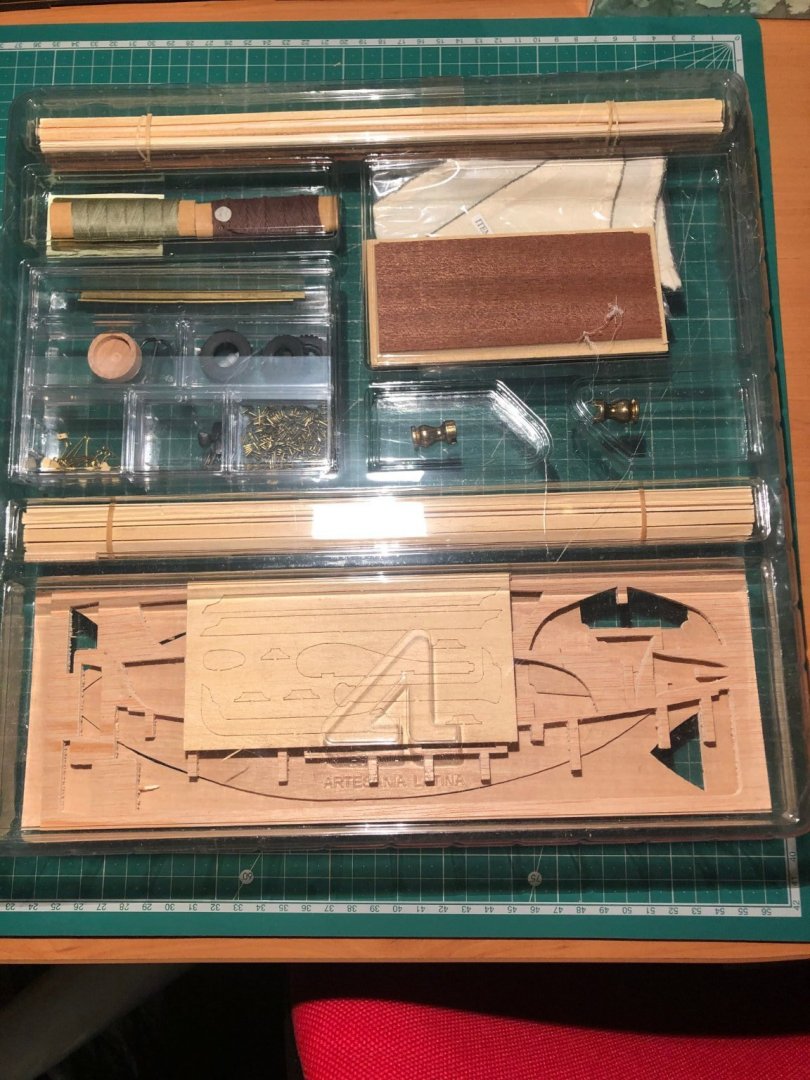
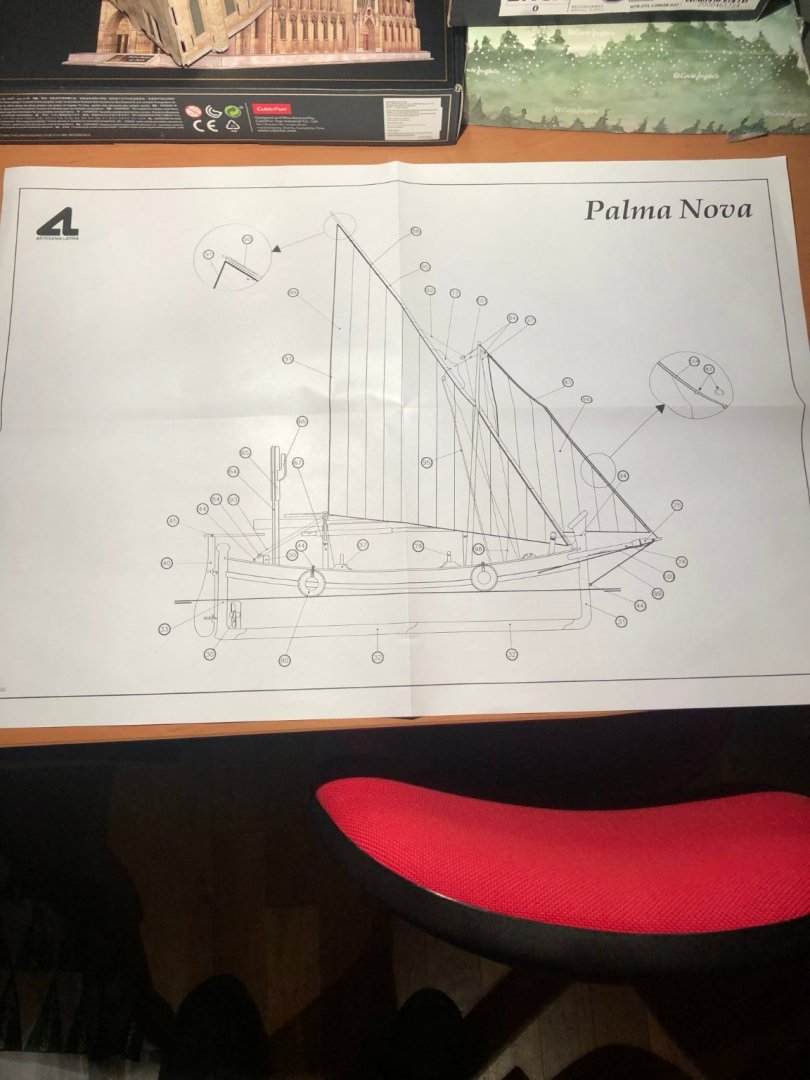
2.- The Kit This is a quite old kit from Artesania Latina that i have had on the shelf for more that 15 years as i received it as a gift a long time ago. Scale is 1:25 and it seems to do not be very difficult except from the sails that seems to have to be sewing, even i didn't opened them at this stage, so i will handle it when i will need them for the build. A curious thing is that it seems to be for begginers as some of the hull planks are already trimed. So let's see what we have got in the box: The planks already trimmed in the picture above as stated. Instructions are in Spanish, English, French and German. Very "limited" and sparse but they are also a photo build-guide that seems very helpfull and a list of parts, so i hope i will manage to to this small boat properly. Small detail on the picture building-guide. Next Steps: - Put numbers to all the parts - Read Carefoully the instructions, photo-guide and parts list. - Fixing Bulkheads to Stern Best regards from Barcelona, Pascual
- 4 replies
-
- Artesania Latina
- Palma Nova
-
(and 1 more)
Tagged with:
-
1.- Presentation of the build. Hi everybody, Following the counsels of already members and moderators received in my presentation i will begin a ship build log for my first build. I have decided to begin with Palma Nova kit 1:25 scale from Manufacturer Artesania Latina as it seems to me the less challenging of the two kits i have got from a gift several years ago. The objectives are: - To learn as much as i can. - To improve my non-existent skills at the moment. - To have fun with the build. I will try to add and index of the build log on this first page as the build will develope. Moreover i have decided that i will try to finish this kit at whatever cost because i read the post for new members " For Beginners -- A Cautionary Tale" from ccoyle were explains that a lot of people quit at the begining for problems in plancking, rigging, or anything else in their first build. So even my build would became the most uggliest kit in the forum i have decided to go until the end trying to solve the best i can all the problems and mistakes i will indubitablement make. Hooping the next following builds would be better. Be patient with my poor skills, and of course any recomendation or sugestion to improve would be very apreciated. Best regards from Barcelona, Pascual
- 4 replies
-
- Artesania Latina
- Palma Nova
-
(and 1 more)
Tagged with:
-
I have tried to "post forum member tags" in a reply "copying and paste" the link in the Forum member name but it seems i have not do it properly as i obtained something like this: Thanks for your welcome: https://modelshipworld.com/profile/25537-bruce-d/ https://modelshipworld.com/profile/220-jjt/ https://modelshipworld.com/profile/27286-mike_in_ri/ https://modelshipworld.com/profile/5-jim-lad/ https://modelshipworld.com/profile/15-ryland-craze/ When i really wanted to show in the forum something like this example from another post from another member: Many thanks, much appreciate all comments fro wellcoming, @mtaylor , @Jim Lad , @JJT , @michael mott and @Keith Black Any advise about how to do it. Sure is very easy but i don't know how to do it. Best regards from Barcelona, Pascual.
-
Hi, from an absolute rookie from Barcelona
BCN-Modeller replied to BCN-Modeller's topic in New member Introductions
Thanks for your welcome: @bruce d @JJT @Mike_In_RI @Jim Lad @Ryland Craze @Kevin @Keith Black @mtaylor @Gus Martinez @ERS Rich @Edwardkenway @Mike from Aus @GrandpaPhil I will try to begin my buil log today, but as you can see until now i didn't have too much time for the model shipbuiling or the forum. Any comments, recomendations, or advise would be really very welcome. Best regards from Barcelona, Pascual.
About us
Modelshipworld - Advancing Ship Modeling through Research
SSL Secured
Your security is important for us so this Website is SSL-Secured
NRG Mailing Address
Nautical Research Guild
237 South Lincoln Street
Westmont IL, 60559-1917
Model Ship World ® and the MSW logo are Registered Trademarks, and belong to the Nautical Research Guild (United States Patent and Trademark Office: No. 6,929,264 & No. 6,929,274, registered Dec. 20, 2022)
Helpful Links
About the NRG
If you enjoy building ship models that are historically accurate as well as beautiful, then The Nautical Research Guild (NRG) is just right for you.
The Guild is a non-profit educational organization whose mission is to “Advance Ship Modeling Through Research”. We provide support to our members in their efforts to raise the quality of their model ships.
The Nautical Research Guild has published our world-renowned quarterly magazine, The Nautical Research Journal, since 1955. The pages of the Journal are full of articles by accomplished ship modelers who show you how they create those exquisite details on their models, and by maritime historians who show you the correct details to build. The Journal is available in both print and digital editions. Go to the NRG web site (www.thenrg.org) to download a complimentary digital copy of the Journal. The NRG also publishes plan sets, books and compilations of back issues of the Journal and the former Ships in Scale and Model Ship Builder magazines.


.thumb.jpeg.d4afeec7f556d3c7cd1acf0853871246.jpeg)
.thumb.jpeg.6fa6ccf1d8f843ba1c9521e33cacefb5.jpeg)
.thumb.jpeg.797fb37d789537567baaf95ce2f79c57.jpeg)
.thumb.jpeg.2ba70831625a182aa3b99da7b542275b.jpeg)
.thumb.jpeg.d05711dab651755b70c90c62b9304fad.jpeg)
.thumb.jpeg.c3f44537d8d9e003bb86f7e695977565.jpeg)
.thumb.jpeg.8a47fba5e245428a572a93d643b1f9e3.jpeg)
