


Bluntysmodels
-
Posts
15 -
Joined
-
Last visited
Content Type
Profiles
Forums
Gallery
Events
Posts posted by Bluntysmodels
-
-
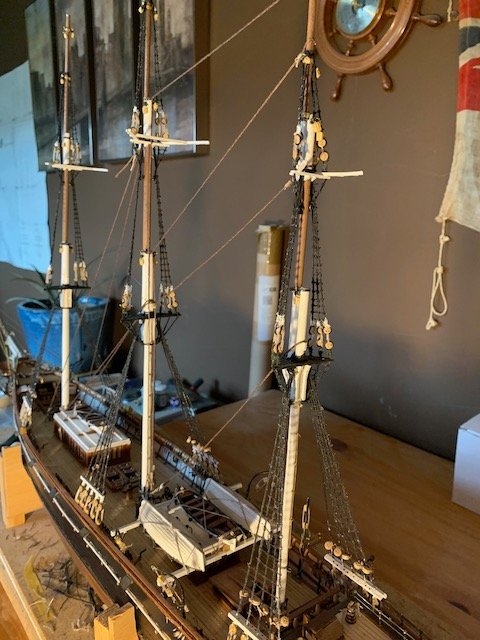
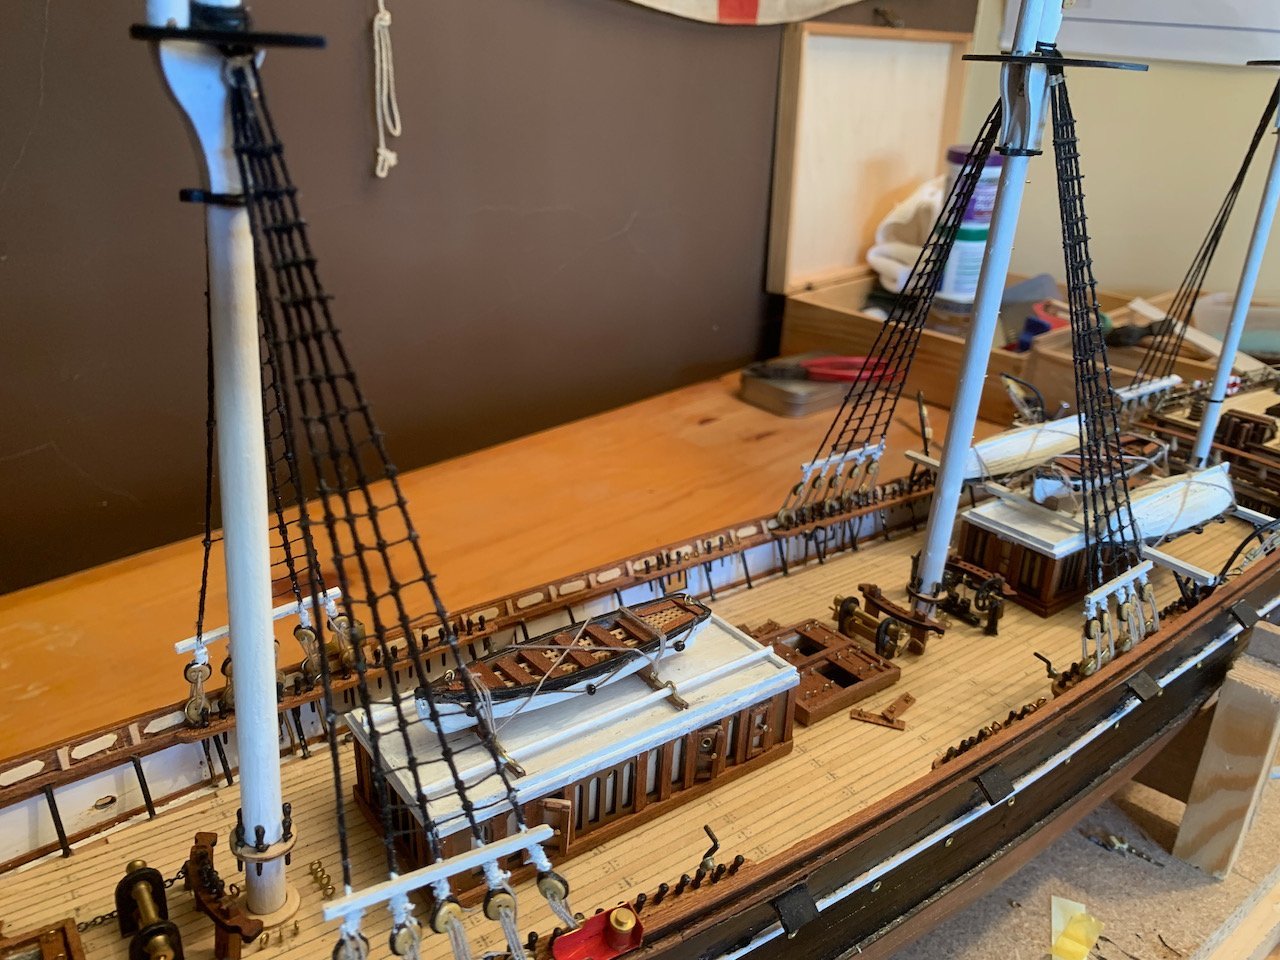
Amazingly a year has gone by and I have just finished the rat lines and started on the stays. Now winter is approaching again I might put more time into it again.
- hof00, BobG and Keith Black
-
 3
3
-
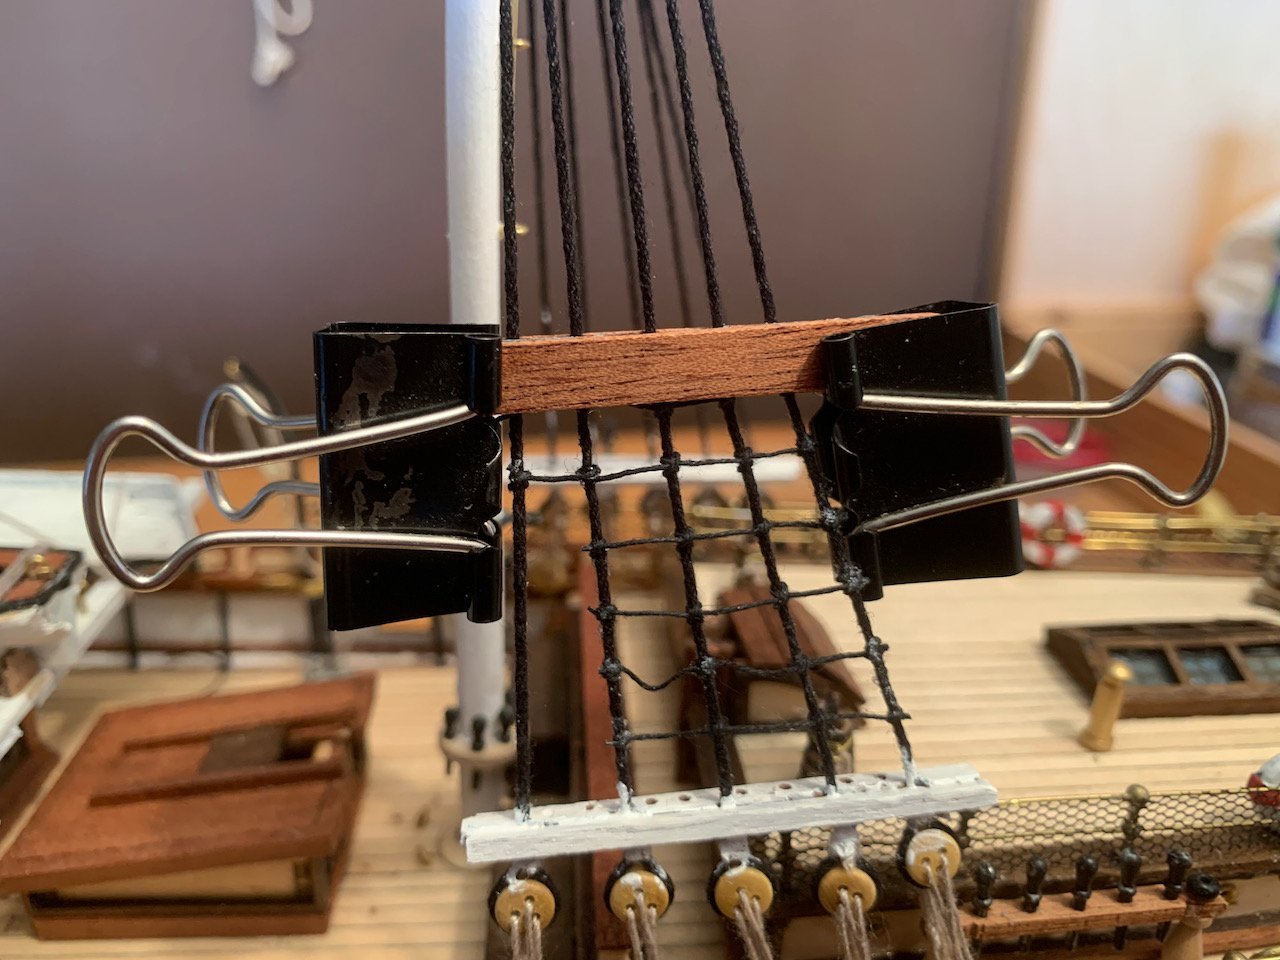
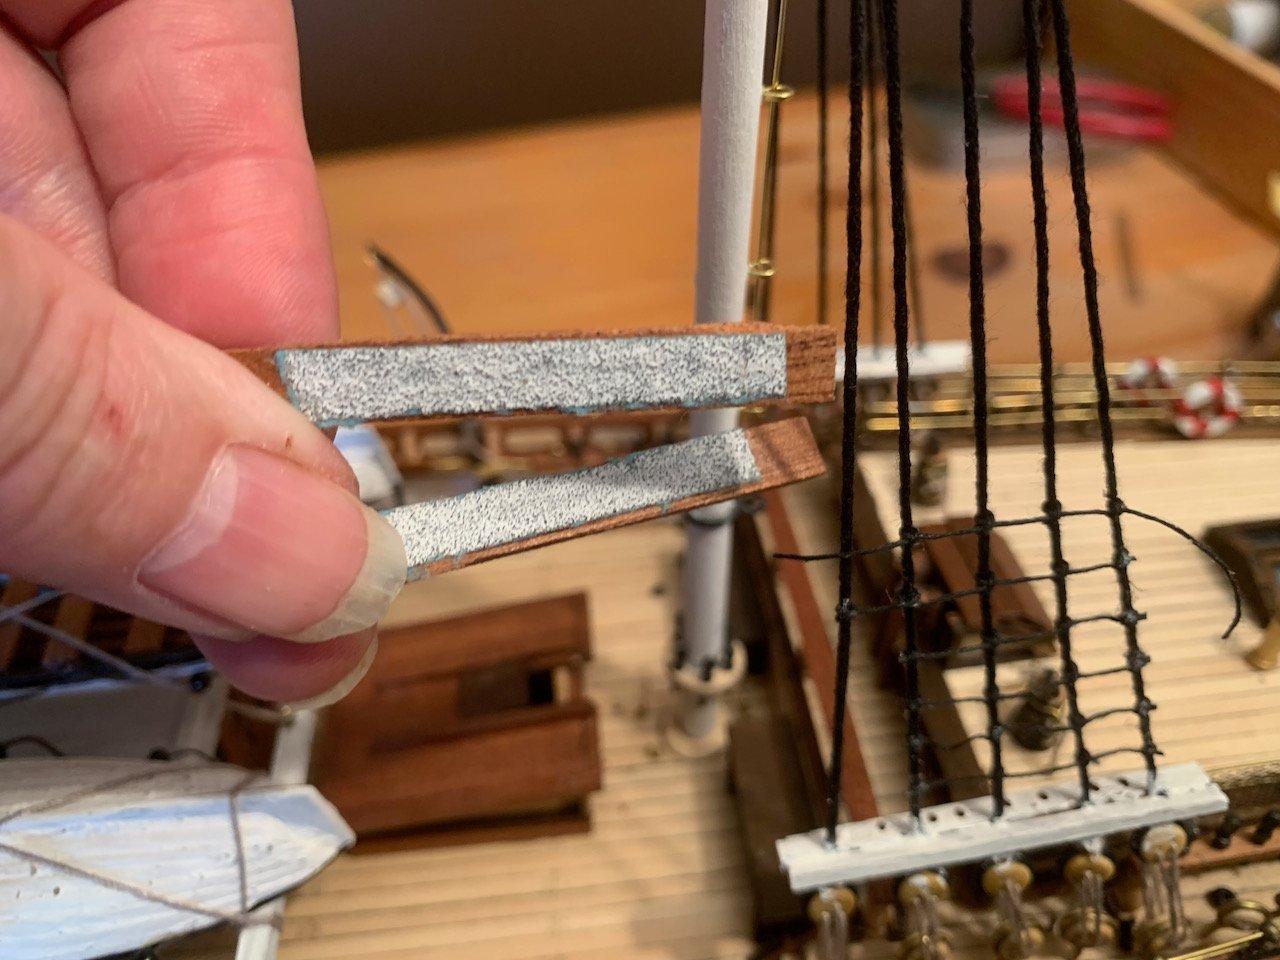
I used a method picked up from here but can not find it again now to properly attribute. But thanks anyway. I made a guide with 5mm strip and glued sandpaper to it. Using bulldog clips to hold it as I tied it keeps the spacing and holds the shrouds to stop the gaps narrowing.
- Snug Harbor Johnny, Keith Black, LeoM and 2 others
-
4
-
 1
1
-
-
On 8/31/2021 at 11:50 PM, petervisser said:
Hi Blunty. Your model looks great! Lots of very nice detailing. As for the rake of the masts they do vary a little. I have Longridge's book and he states that the foremast is raked at 86*, the main mast 85*and the mizzen mast 84*. The angle is measured from the horizontal to the after side of each mast. Therefore they are angled aft, for clarification,
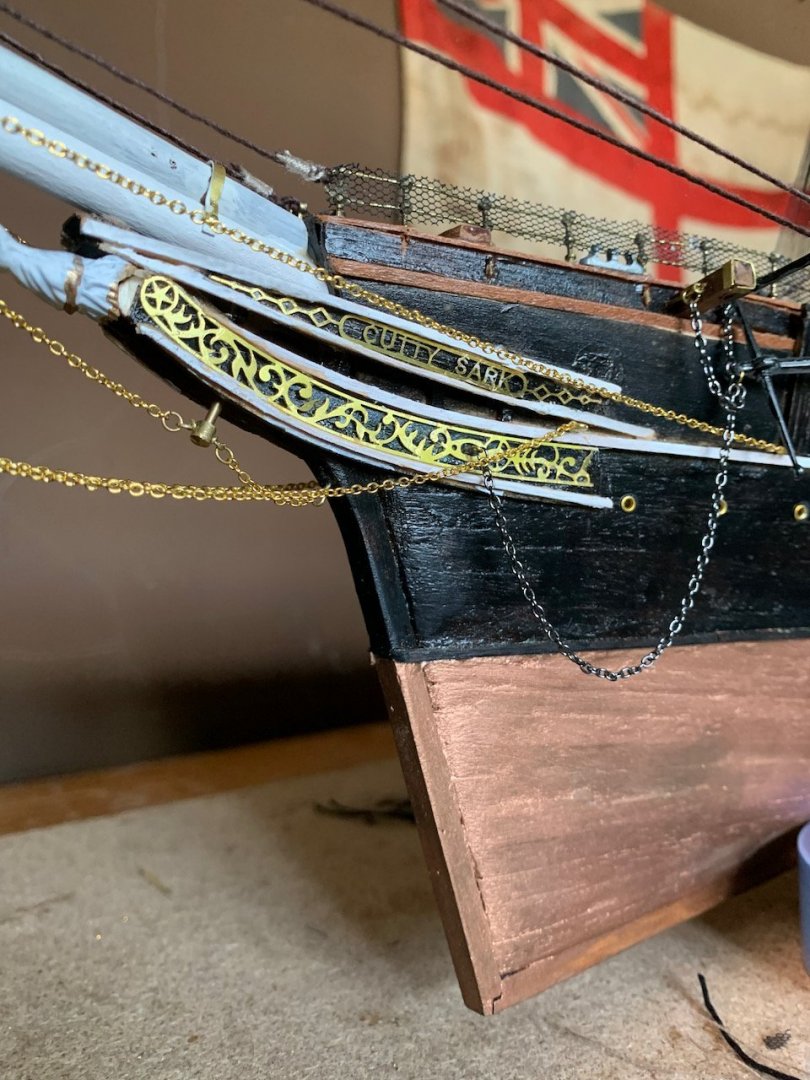
By the way, I wondered if you could send me a photo of the bow and stern decoration that's included in your kit. The ones from Billing that I have are not ideal, especially, the stern. I am thinking of applying to AL to see if I could purchase a set of theirs.
Anyhoo, great work so far. Good luck with the masting and rigging!
Peter
Hi Peter
Took a while but here are pics of the decorations. They are reasonable representations.
Pete

- Ian_Grant, Keith Black and Bob Fraser
-
3
-
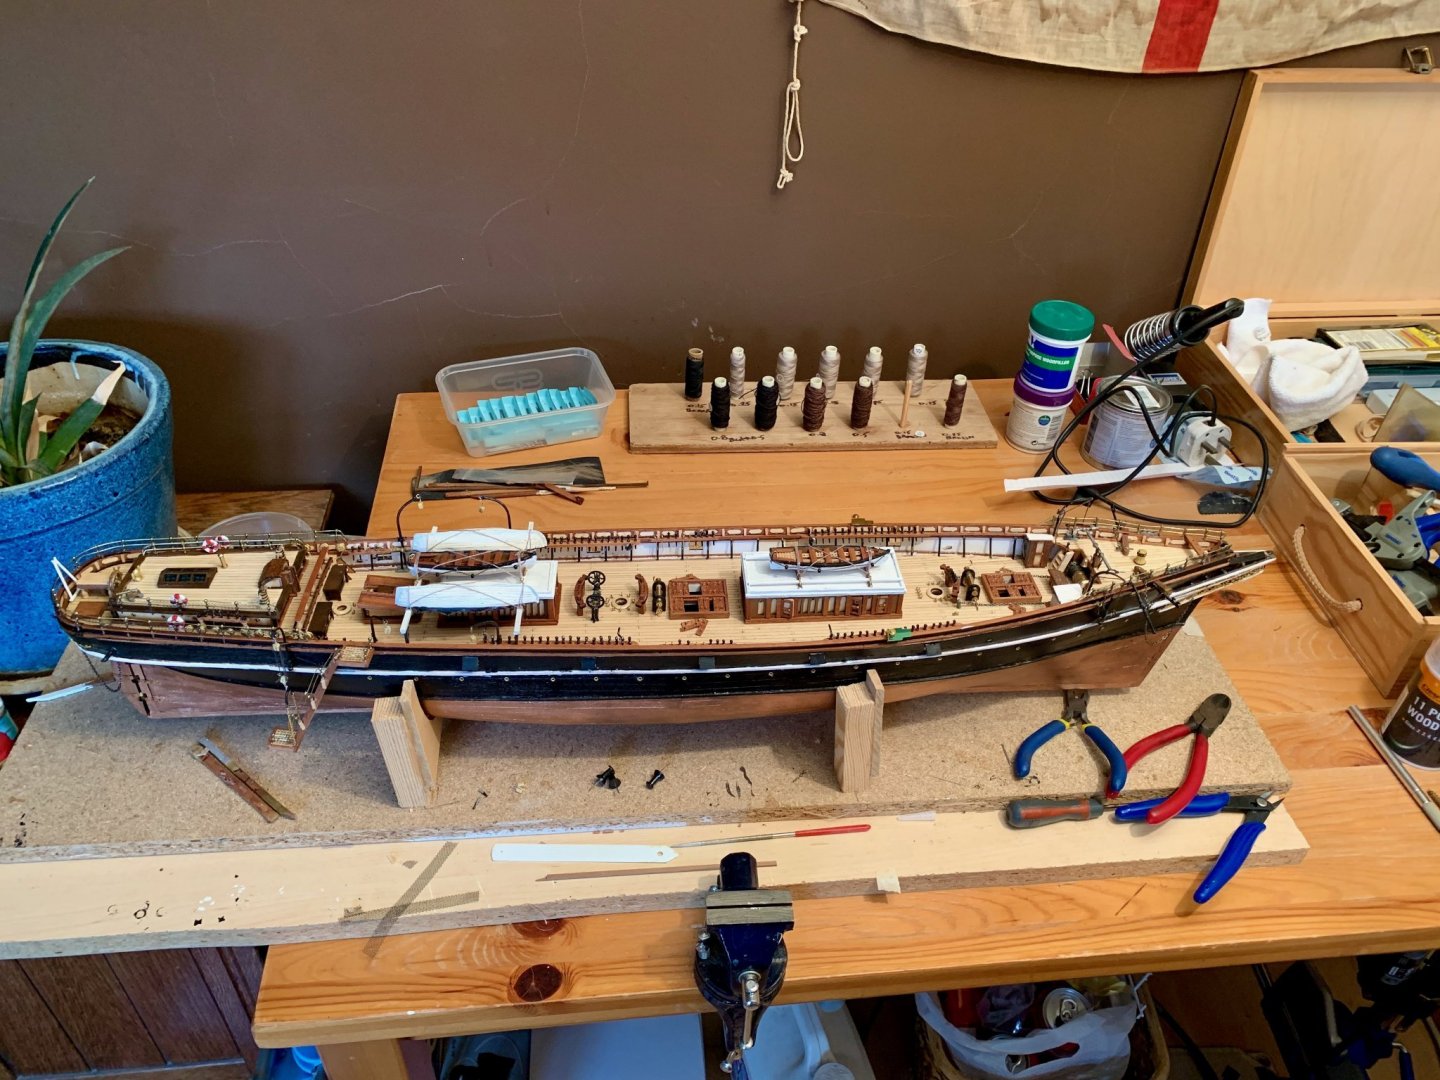
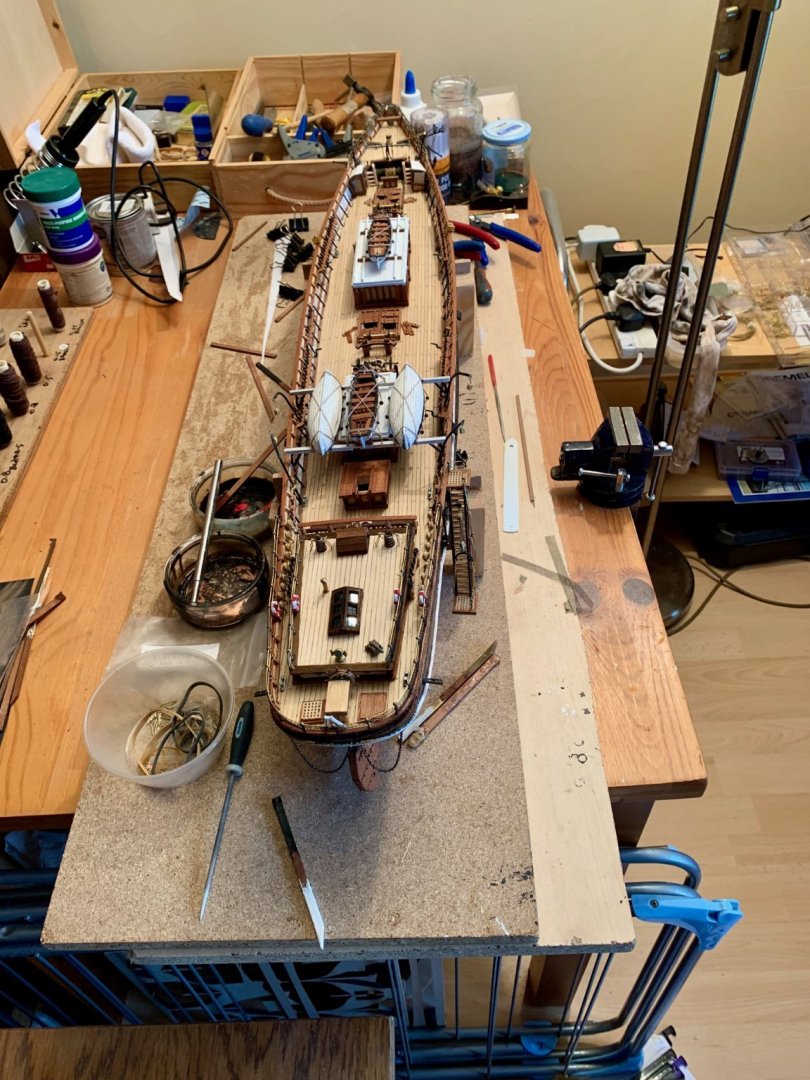
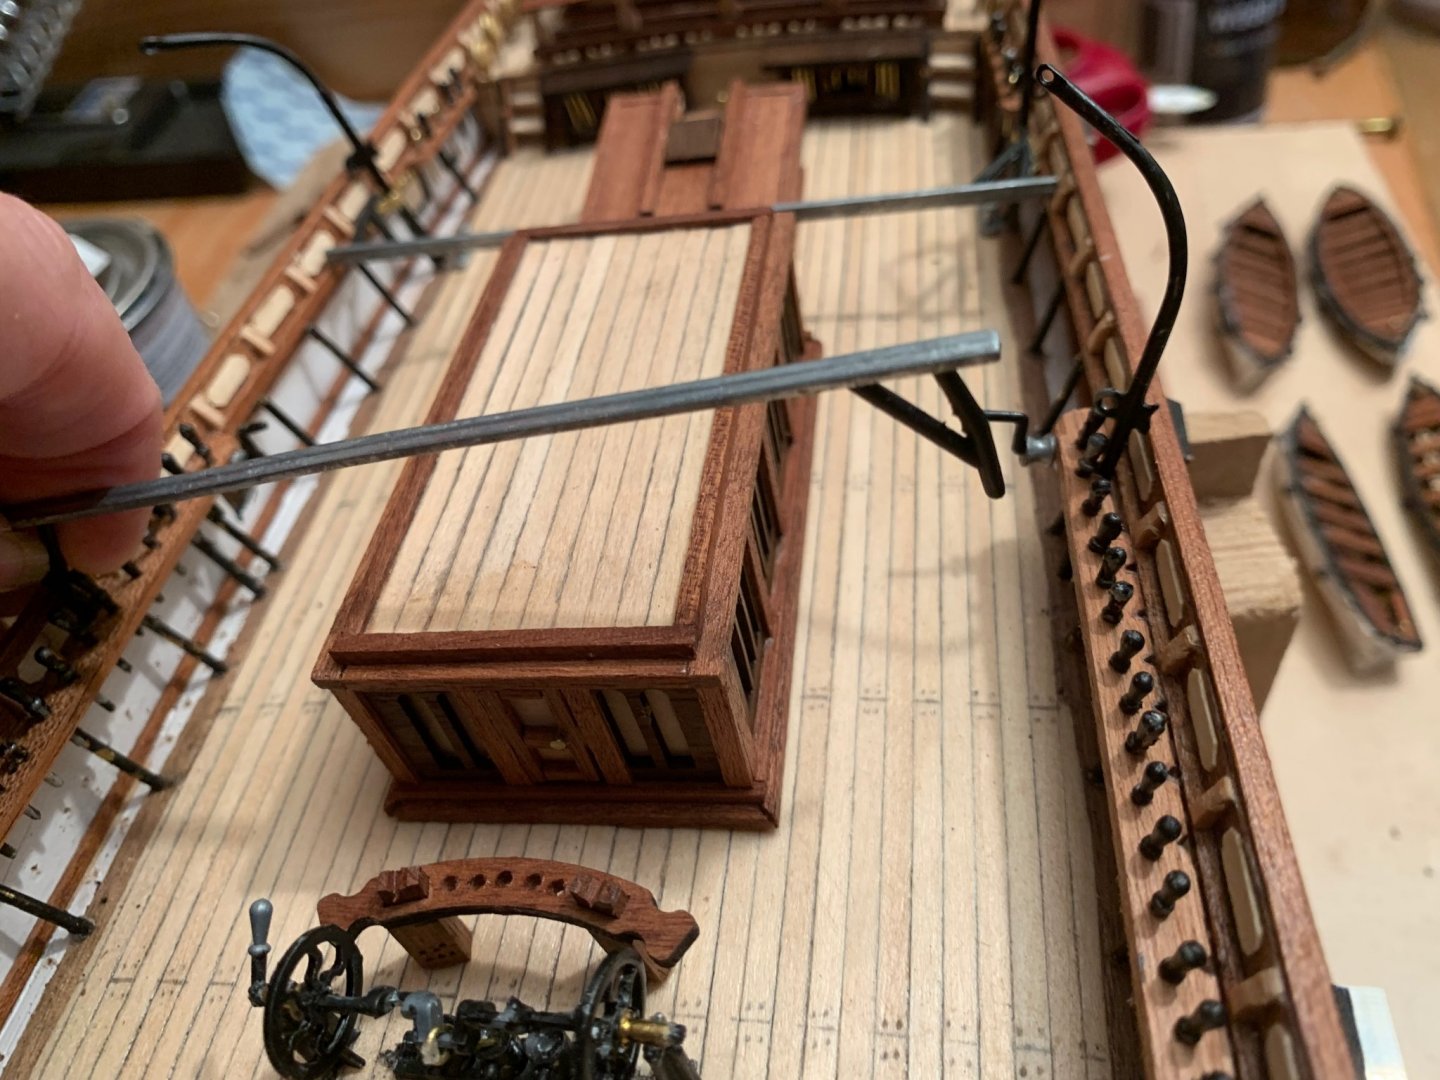
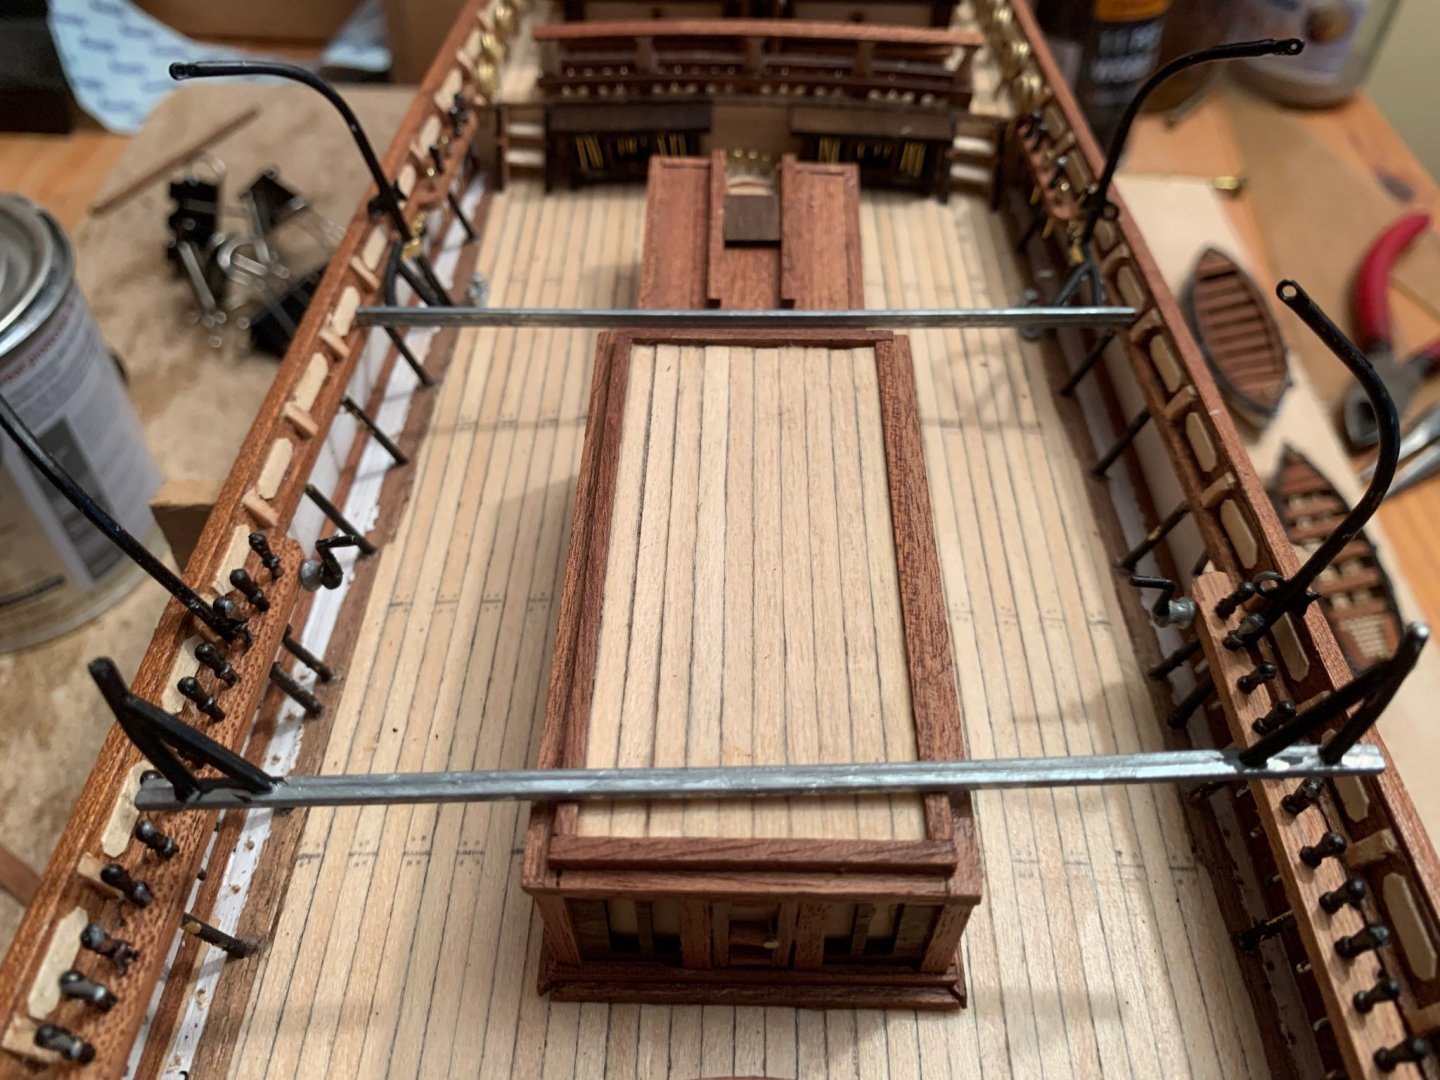
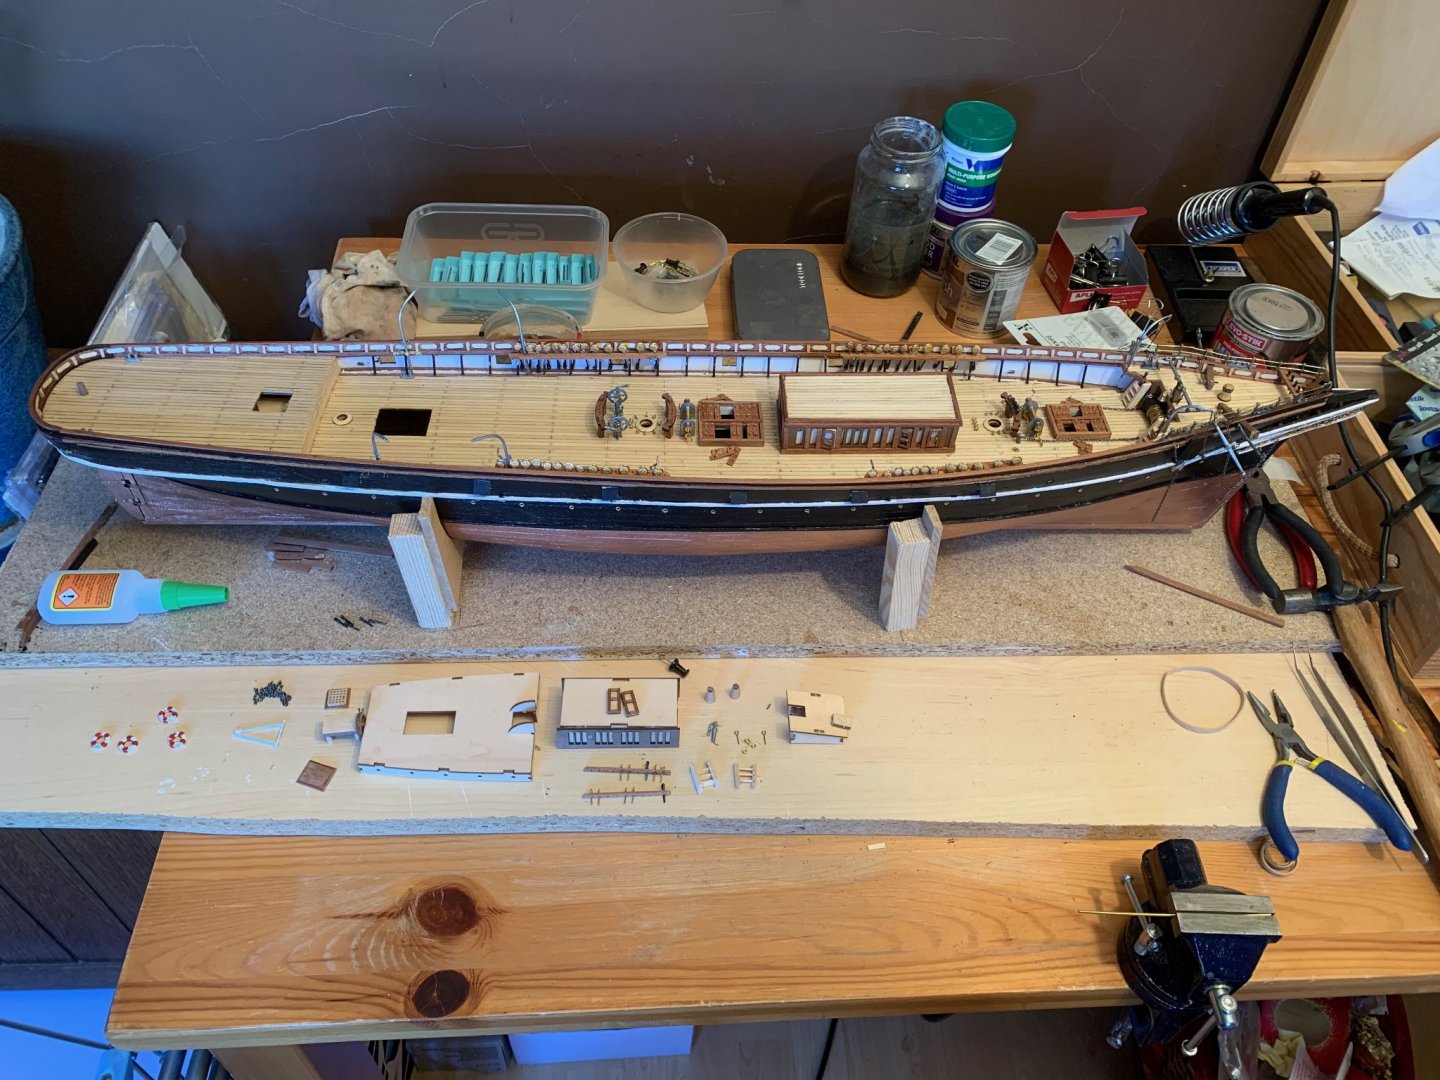
Well I have managed to adapt the boat supports to reach across the ship and have mounted the lifeboats, etc.
I have also fitted the accommodation ladder so all the deck work is complete.
Now to start the rigging! Masts are prepared ready to be put in. Any tips on getting the rake angle correct?
I have also re-painted some parts after my trip to the real thing.
-
At long last the missing laser cut sheet arrived from HK. So I am now able to resume the deck fittings. Although it is a bit hot at the moment to be sitting inside!.
Still not happy wit the accommodation ladder. Will leave that for now as it can be finished any time and mounted.
I do have another problem though. Wondering if anyone has any suggestions. The pre-cast boat supports for the life boats and jolly boat are supposed to fit between the gunwhales. But for some reason the width of my model is about 15mm too wide for the forward one and 4mm for the aft one, see pics. It was all built on the frame so not sure why it is too wide. I suspect I will have to make supports out of wood instead to fit.
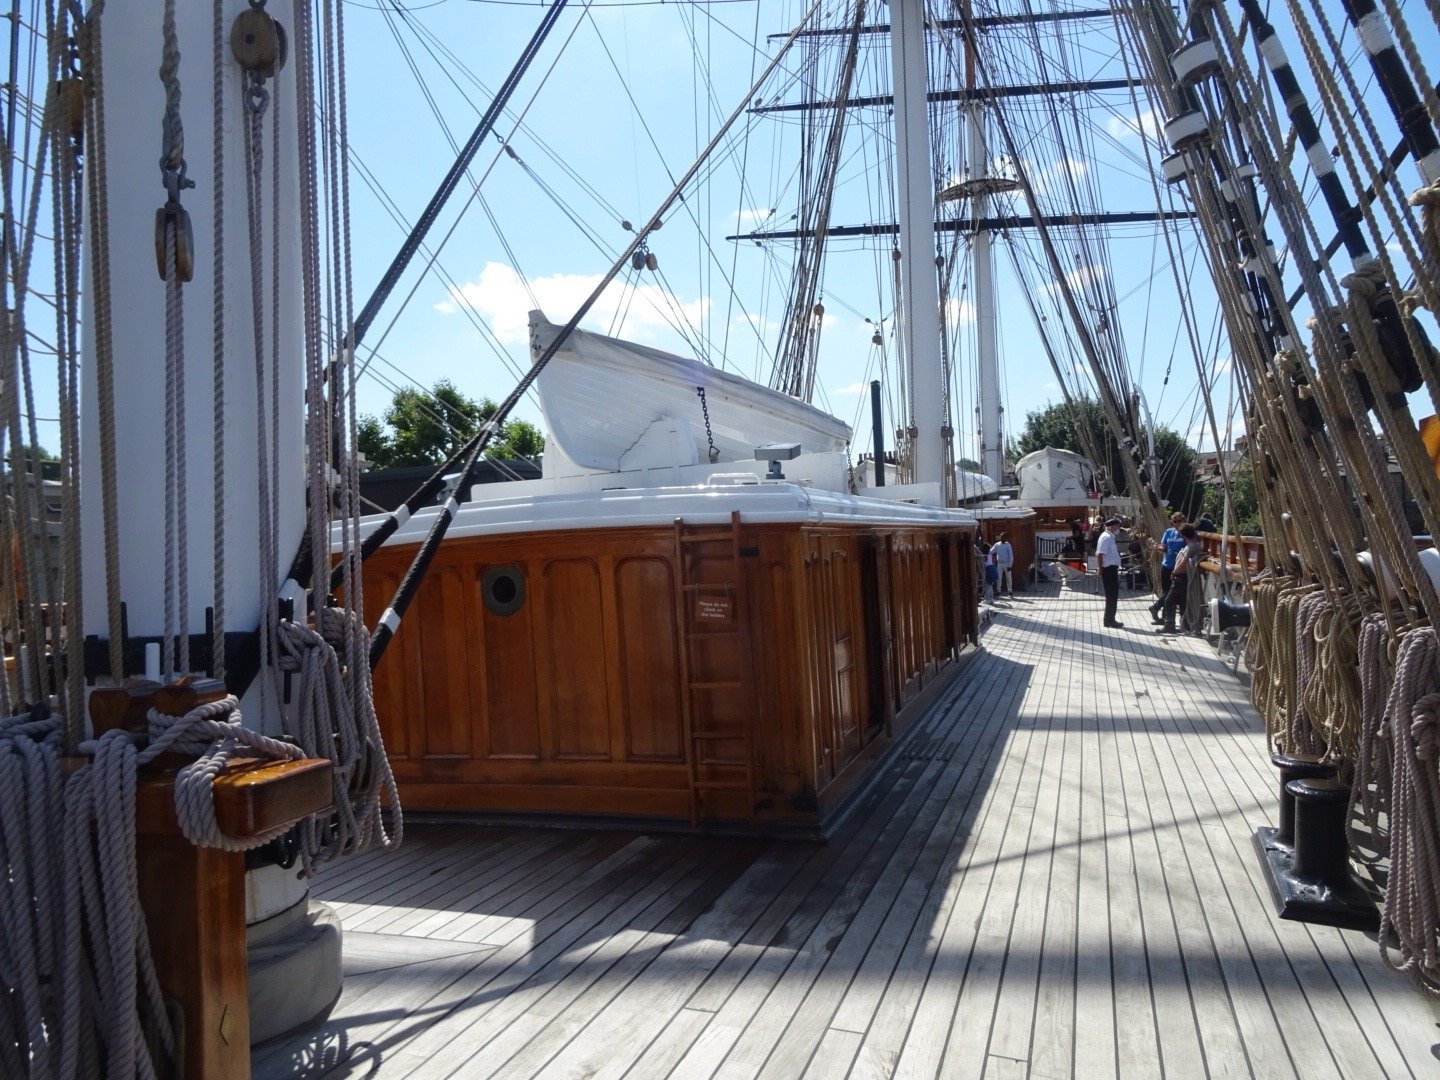
On a lighter note I have booked a trip to the actual Cutty Sark in August to remind me of what it really looks like and to take some pictures.
- Keith Black and BobG
-
2
-
Still waiting for the parts from AS to arrive so have started to make up the masts. Foremast and Main mast assembled and ready to mount.
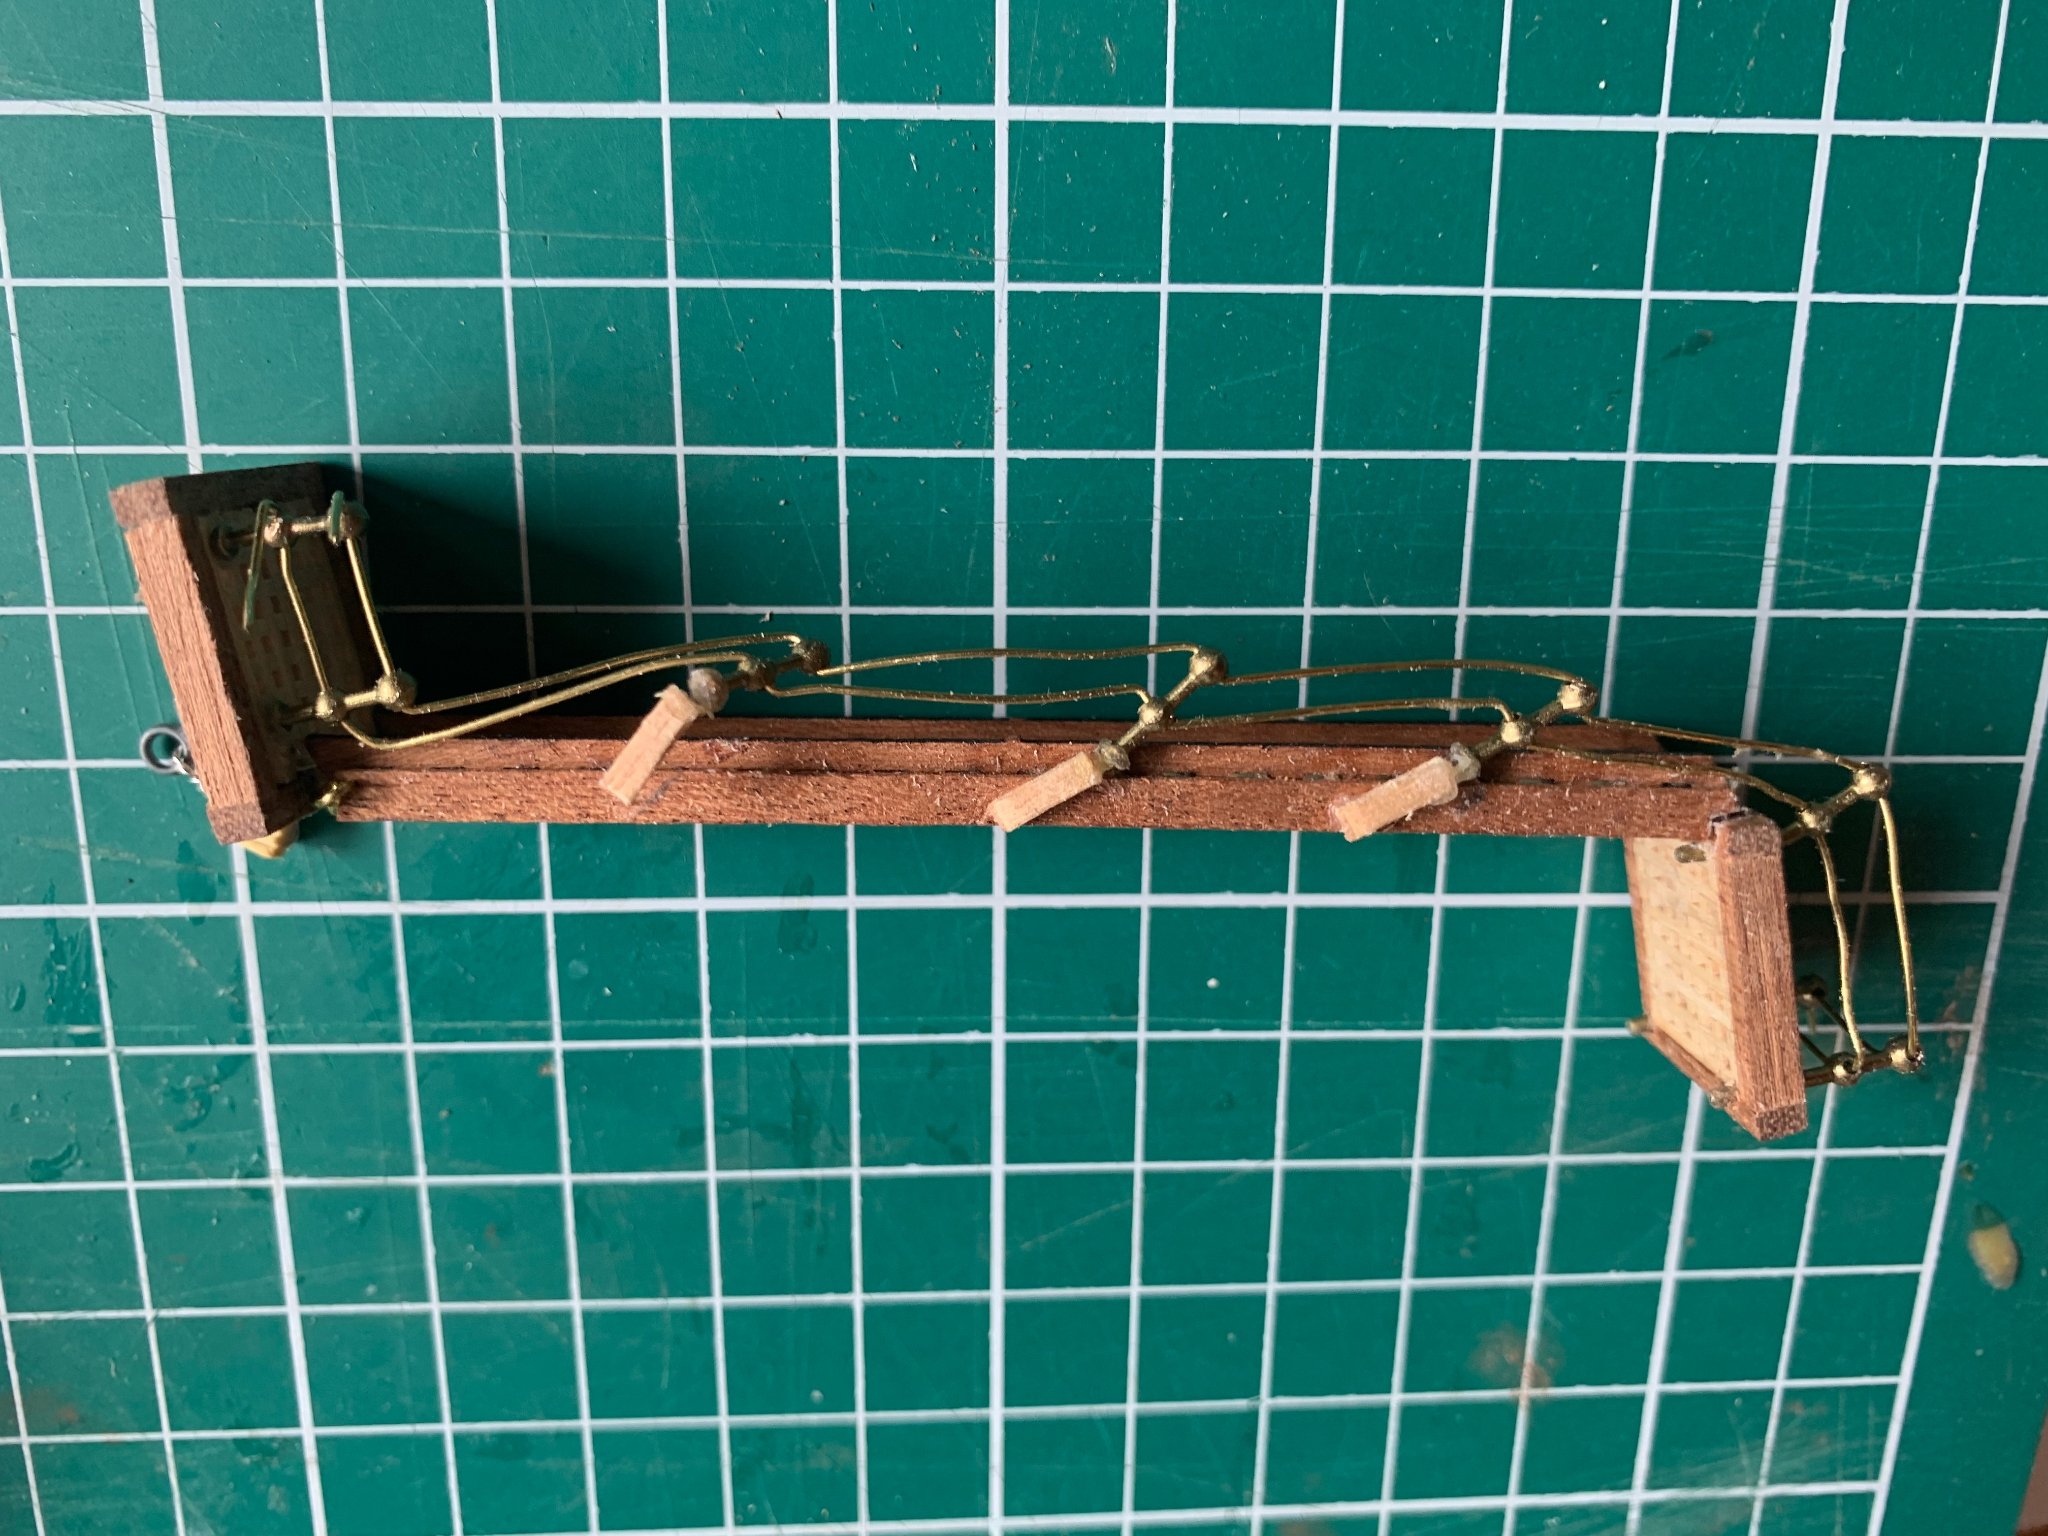
On another side I am struggling with the hand rails on the accommodation ladder. The stanchions are too small to attach and maintain the tension or get the brass wire straight.


- Keith Black and BobG
-
2
-
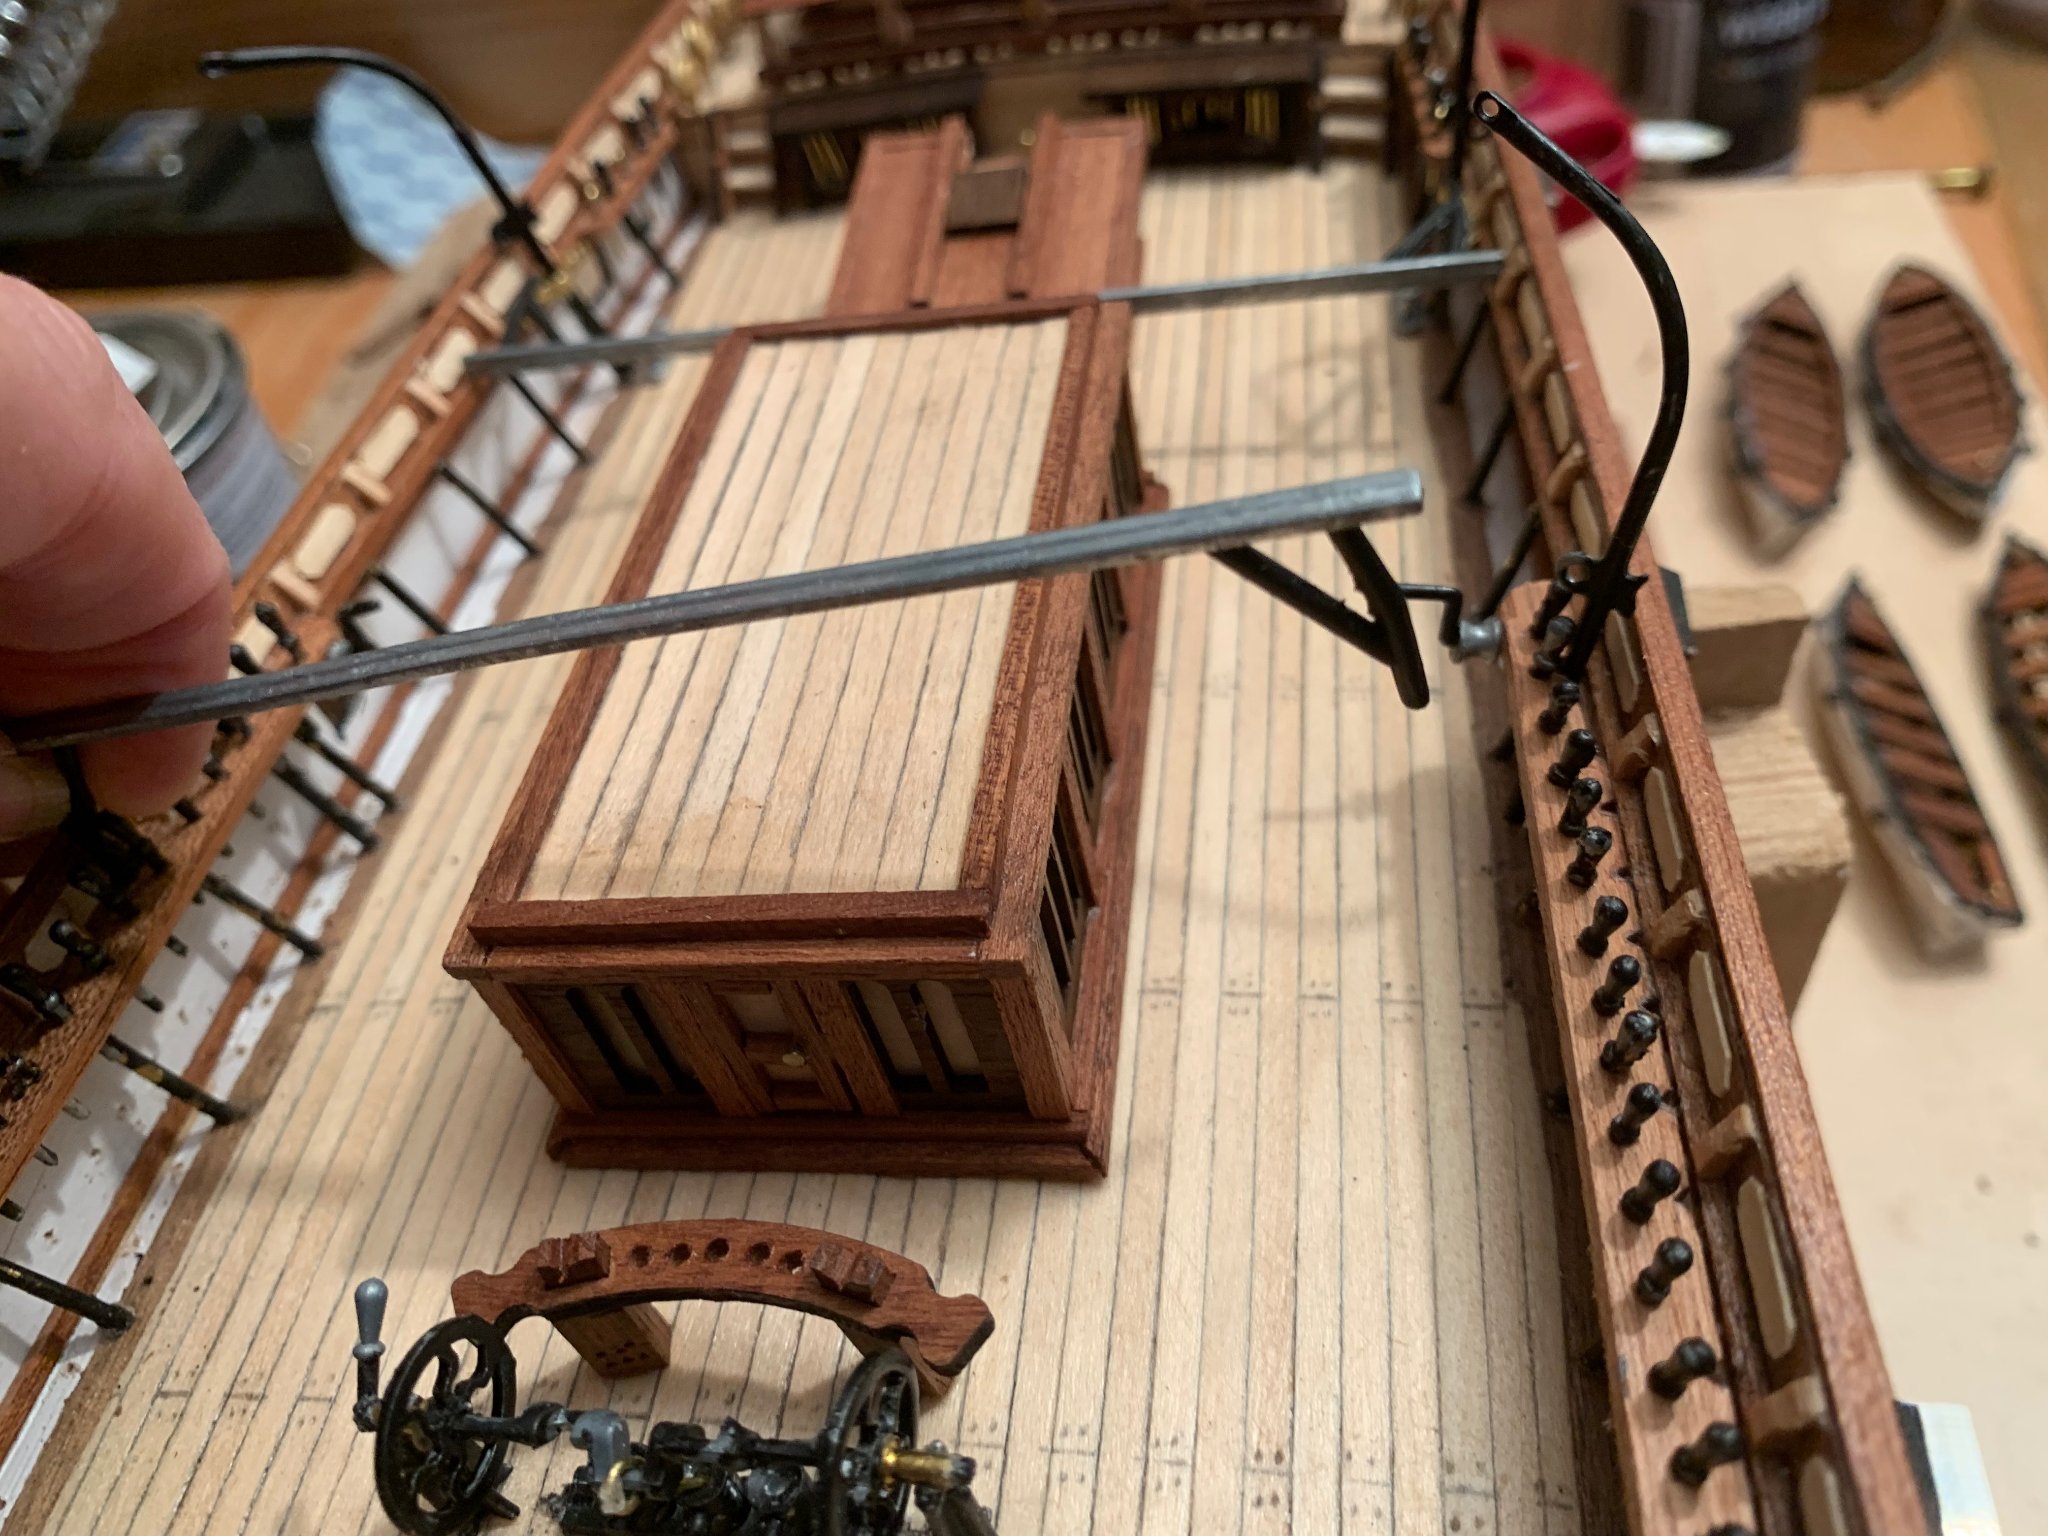
As I have time waiting for the missing parts to arrive I have decided I was not happy with the pinrails and lower deadeyes. The instructions were to put a loop in the tail of the chain plates and nail through the bulwark. But this was just not very practical and I could not see how I would thread the eyes.
I have removed the rails and bought some new strip (there was not enough to start again in the kit) This time I am drilling in the edge of the deck and inserting the chain plates into these. I will do this when I do the standing rigging, after threading them so I can get the even lengths.
- Keith Black and hof00
-
2
-
Thanks Ryland and others. I have started a build log as suggested nad got it up to present date with a few pics from as I went along.
- Keith Black and mtaylor
-
2
-
Bringing the log up to date now. I have had a significant slow down due to missing a pre-cut sheet. The kit contained 2 of one Walnut deck parts instead of 2 different ones. So I am accumulating many part built fittings waiting for the replacement.
AL are good at replacing for free, but the downside is it is shipped from Hong Kong and they have said the due to Covid it has to be sent by ship, so will not arrive until possibly mid June.
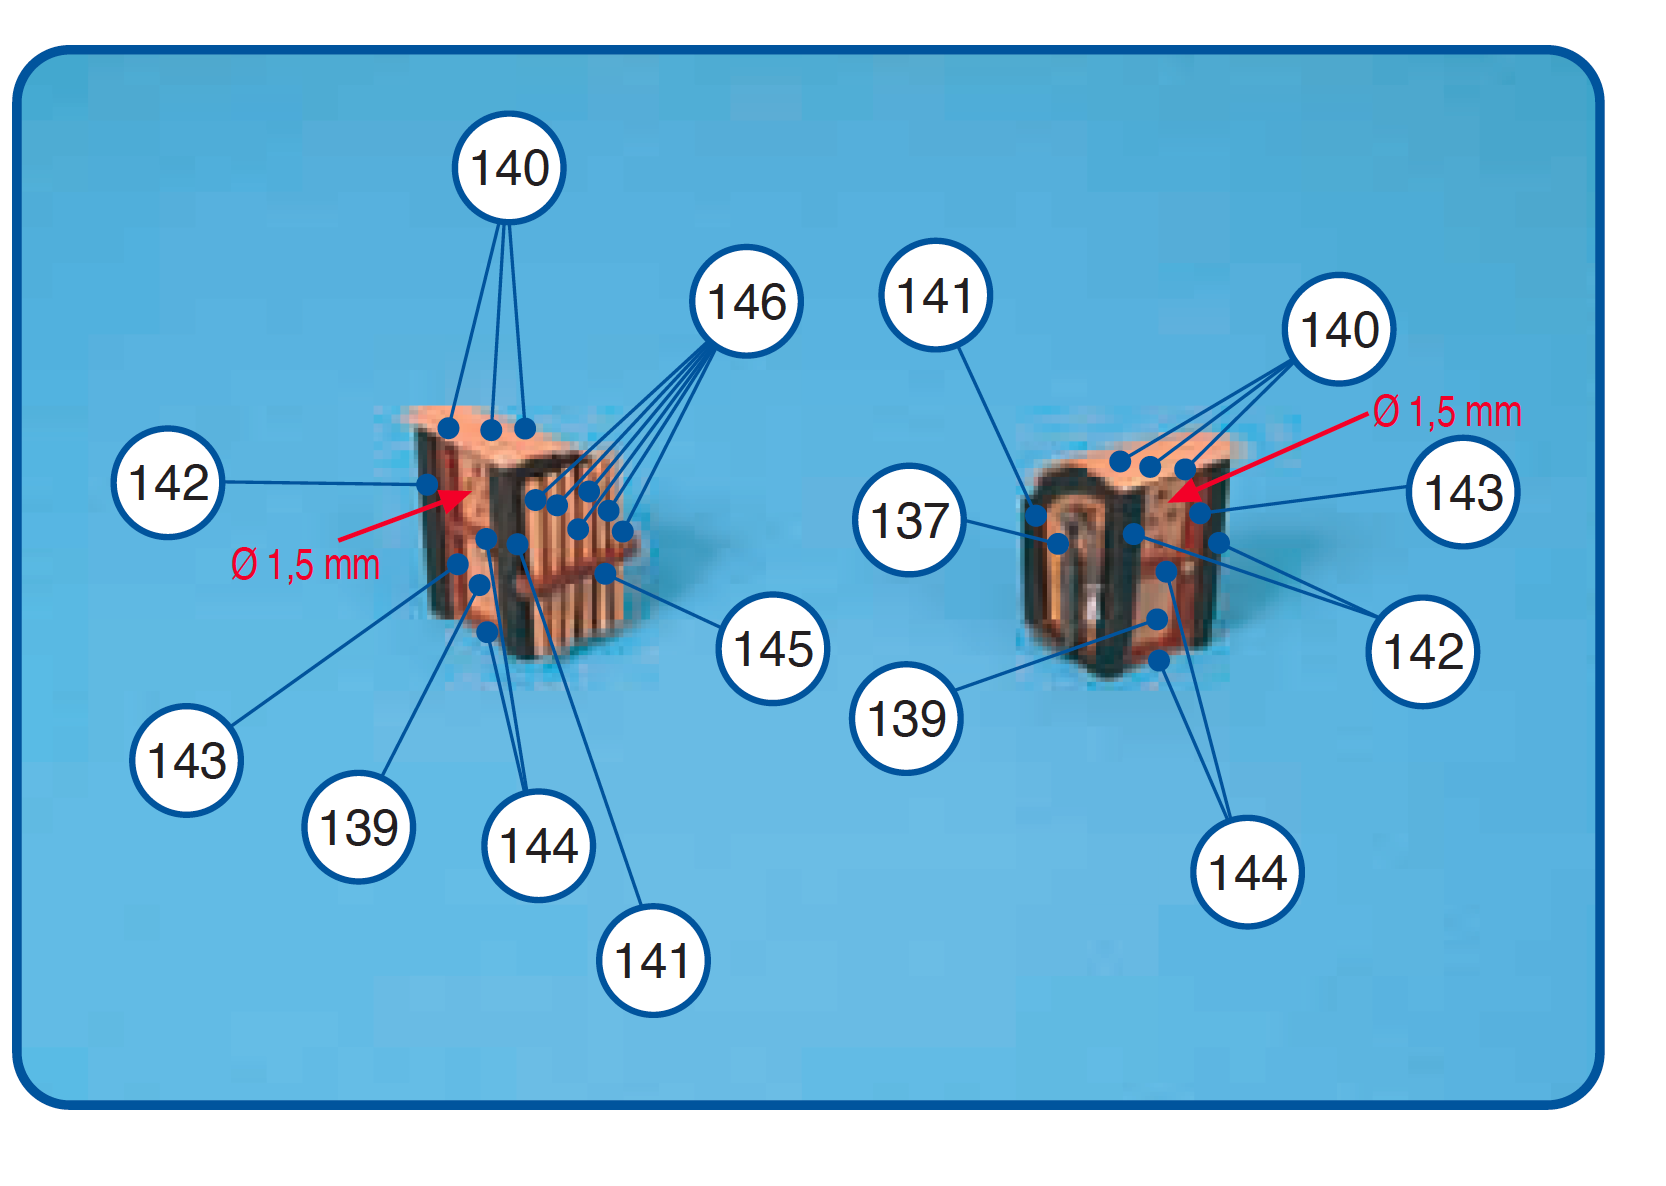
A good example of the vague instruction is for the Latrines on the dec. The instructions just say: With parts 26, 103, 129 and 130 mount the latrine bilge pump. With parts 131, 132, 133, 134, 135 and 136 mount the windlass and with parts 137, 138, 139, 140, 141, 142, 143, 144, 145 and 146 mount the latrines. and a tiny pic in the book.
I am also not happy with my pin rails so have bought some more wood strip and am going to do them again while I wait.
I have been doing a full log/blog on Blogger which has more pics if anyone is interested.

-
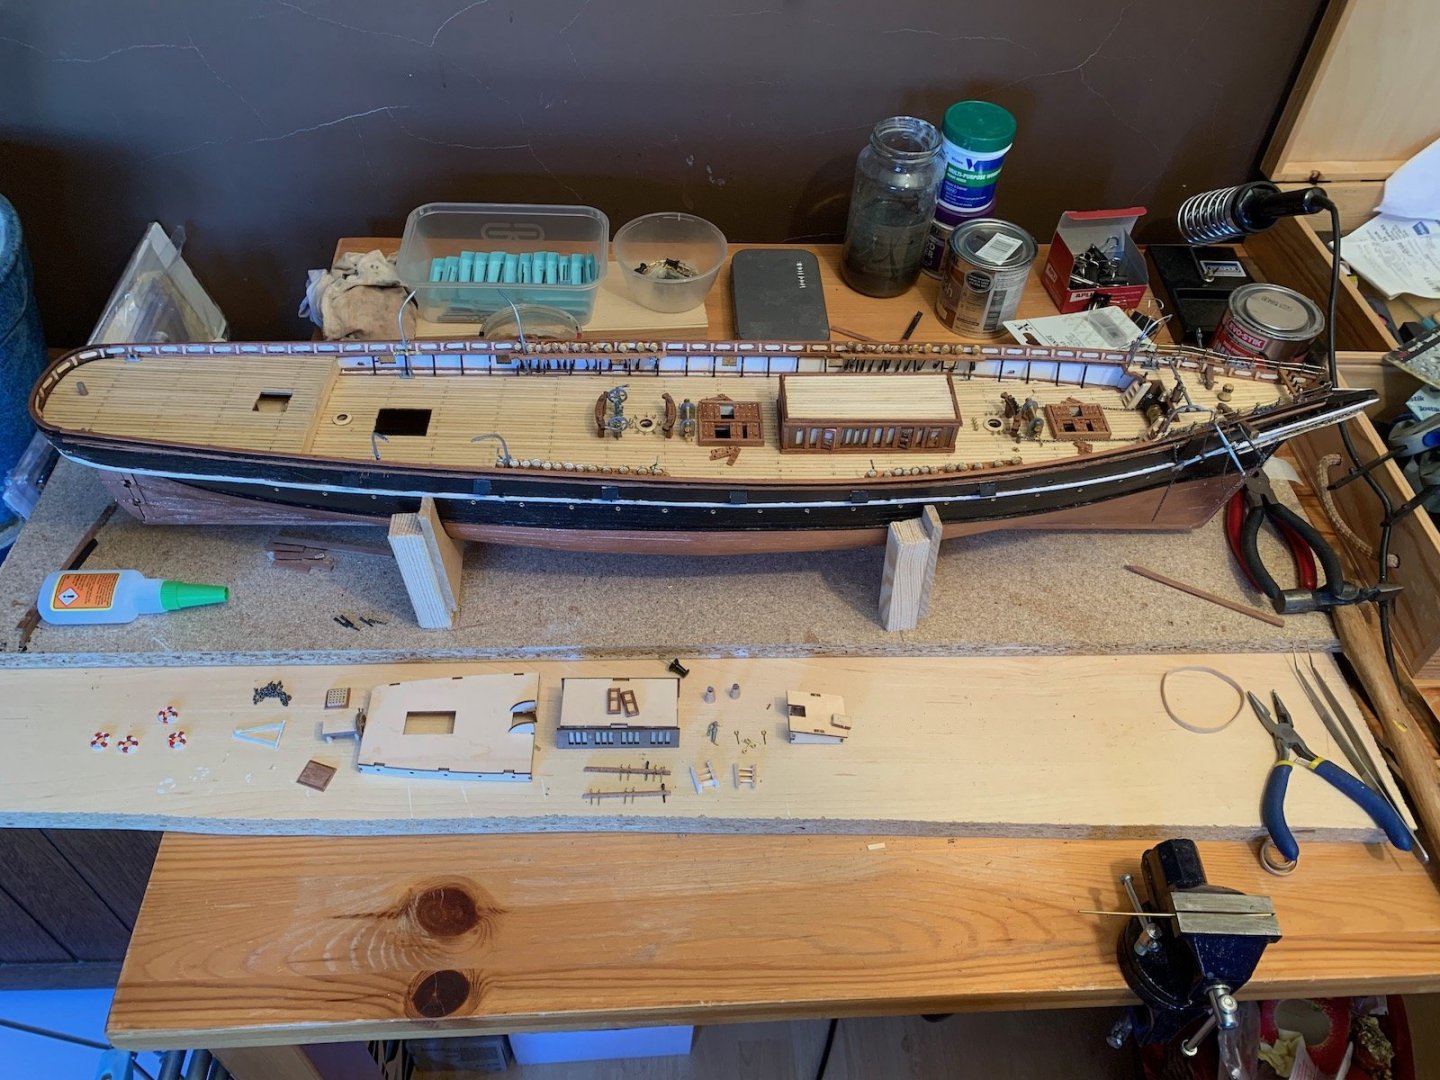
Hull sanded and painted. Starting on the deck fitting. This took me through to the end of March, I have not been working since the end of Feb so have had the time to spend. This is where I am now finding the AL instructions to be, shall we say a bit vague!

- gieb8688, Henke, Keith Black and 2 others
-
5
-
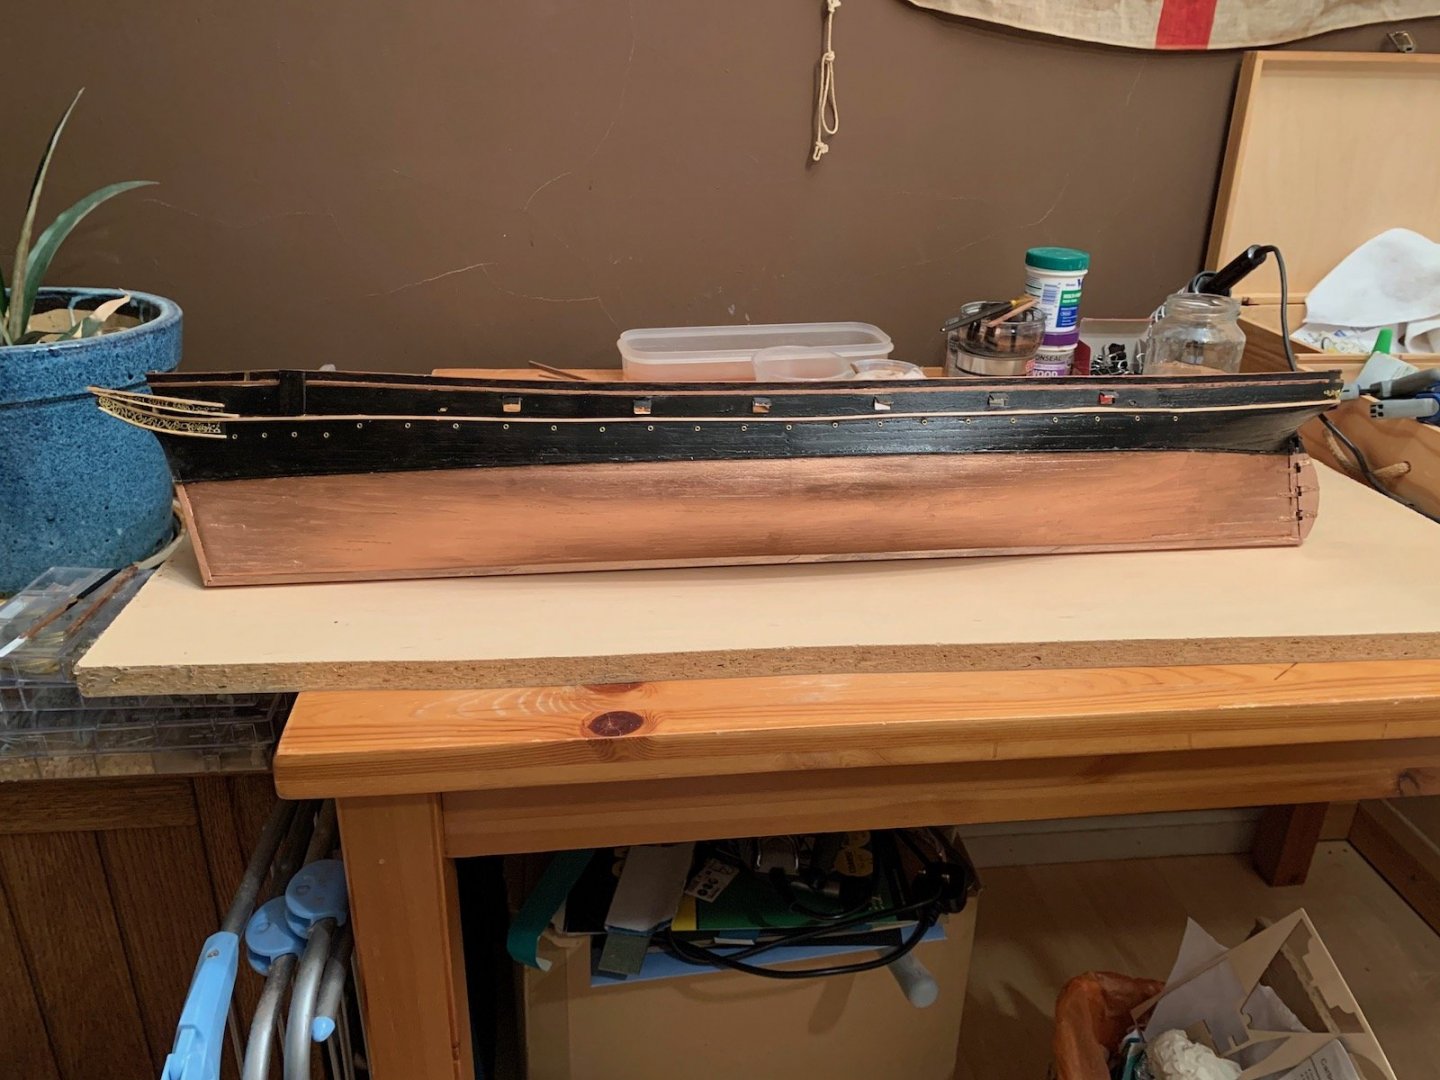
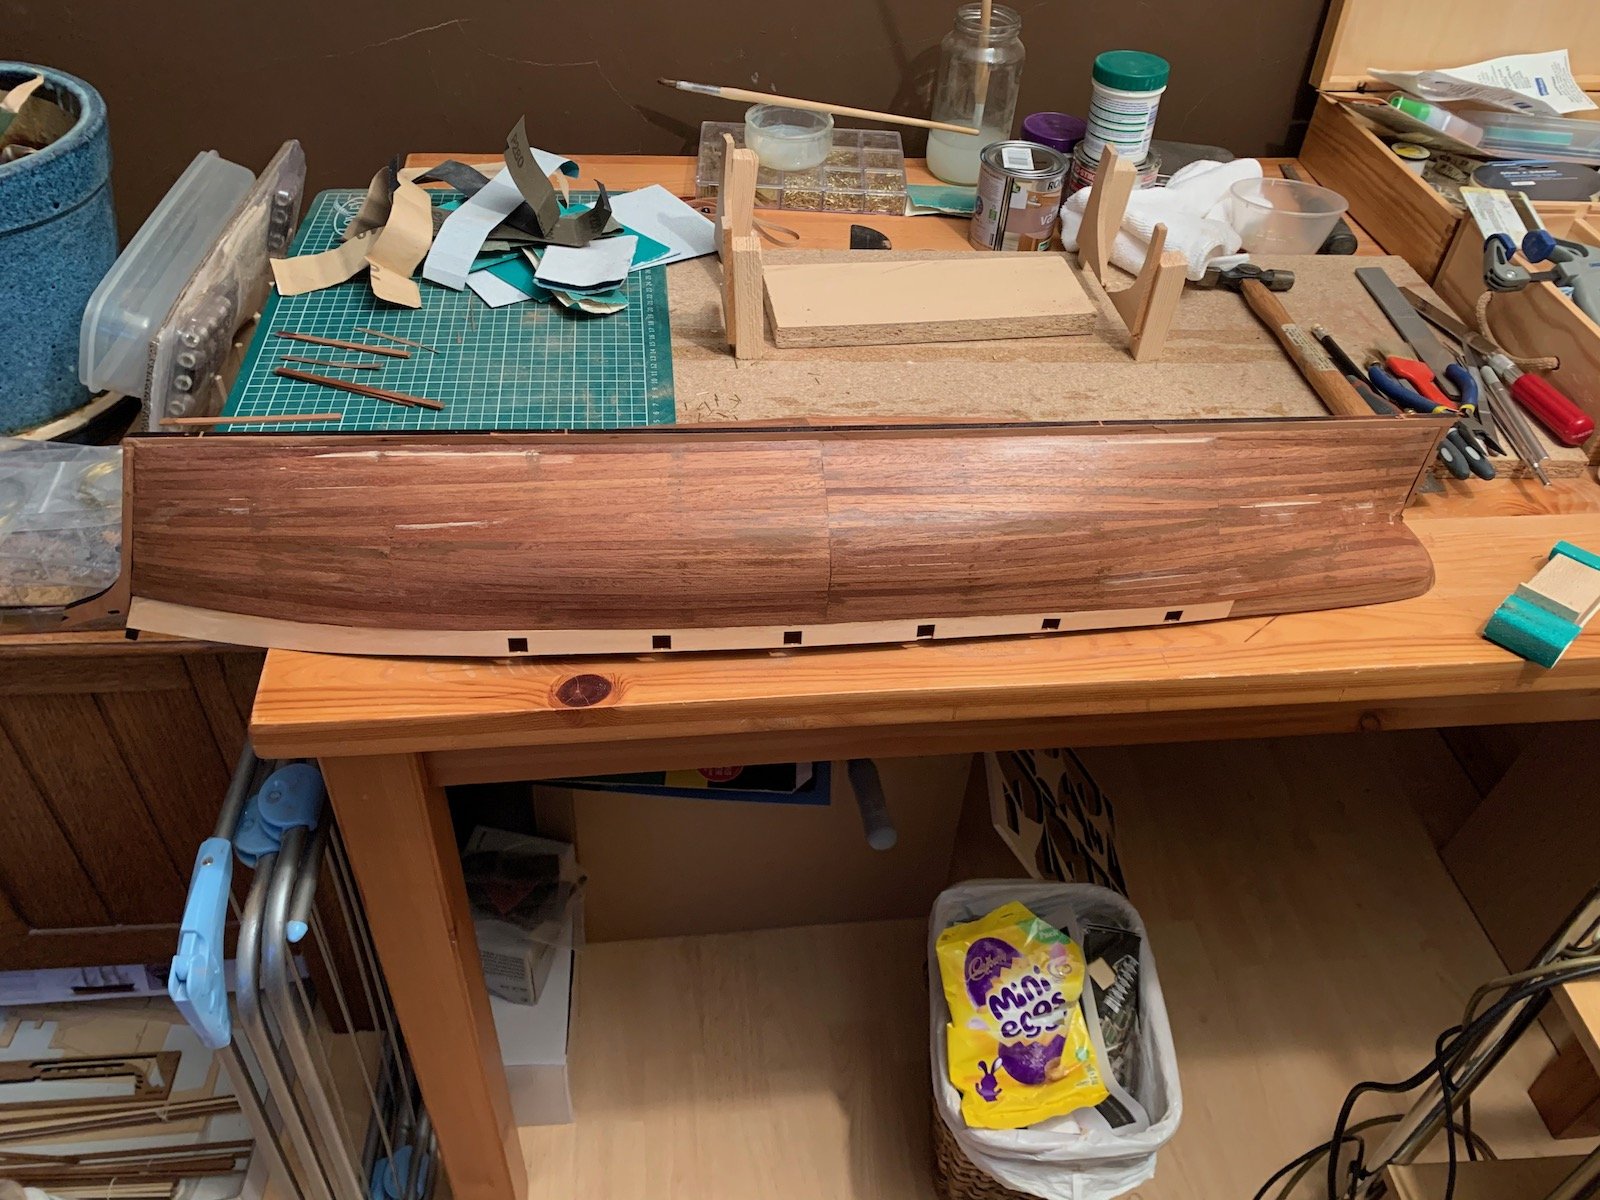
Then the hull planking. I did it in quarters and pinned it temporarily. I then removed all the pins before sanding. I have decided I am going to paint below the waterline in copper paint rather than buying plates or leaving as polished mahogany as the AL instructions. Mostly to hide a few sins.

-
Hi All. This is only my second model ship and I started it in February so a bit of catching up on the log to do. I wasn't going to do a log but another member suggested it could be useful to others so here goes. I want it to look nice rather than be historically accurate in every detail.
I will skip quickly through to where I am now. I will add a few images from the early stages as well.
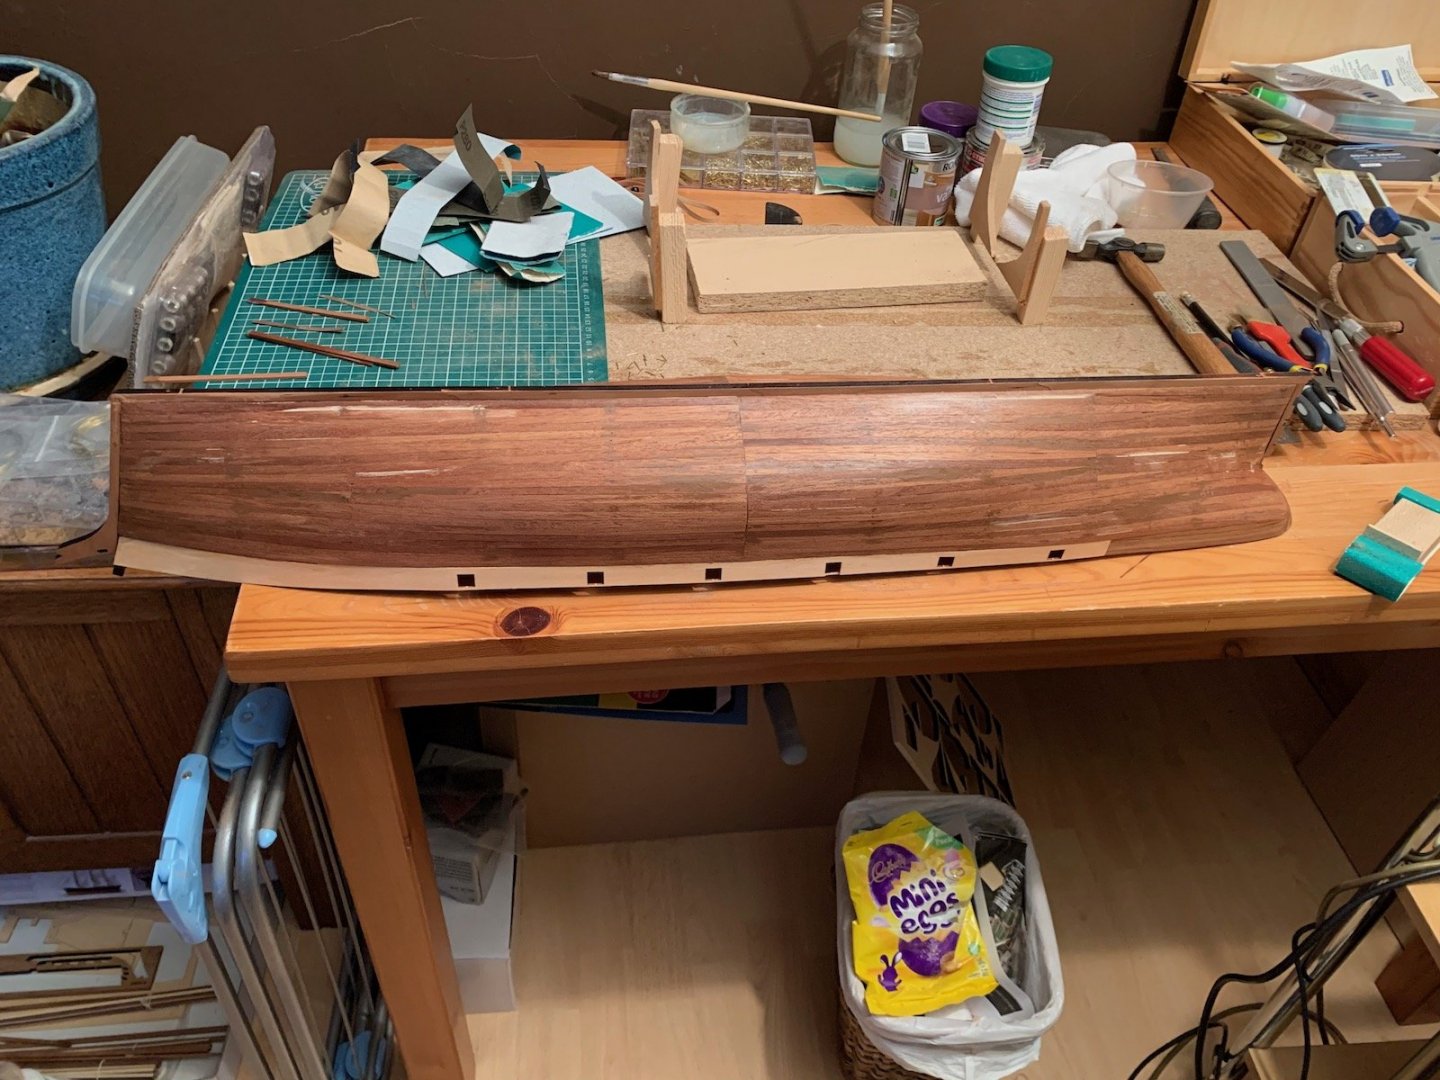
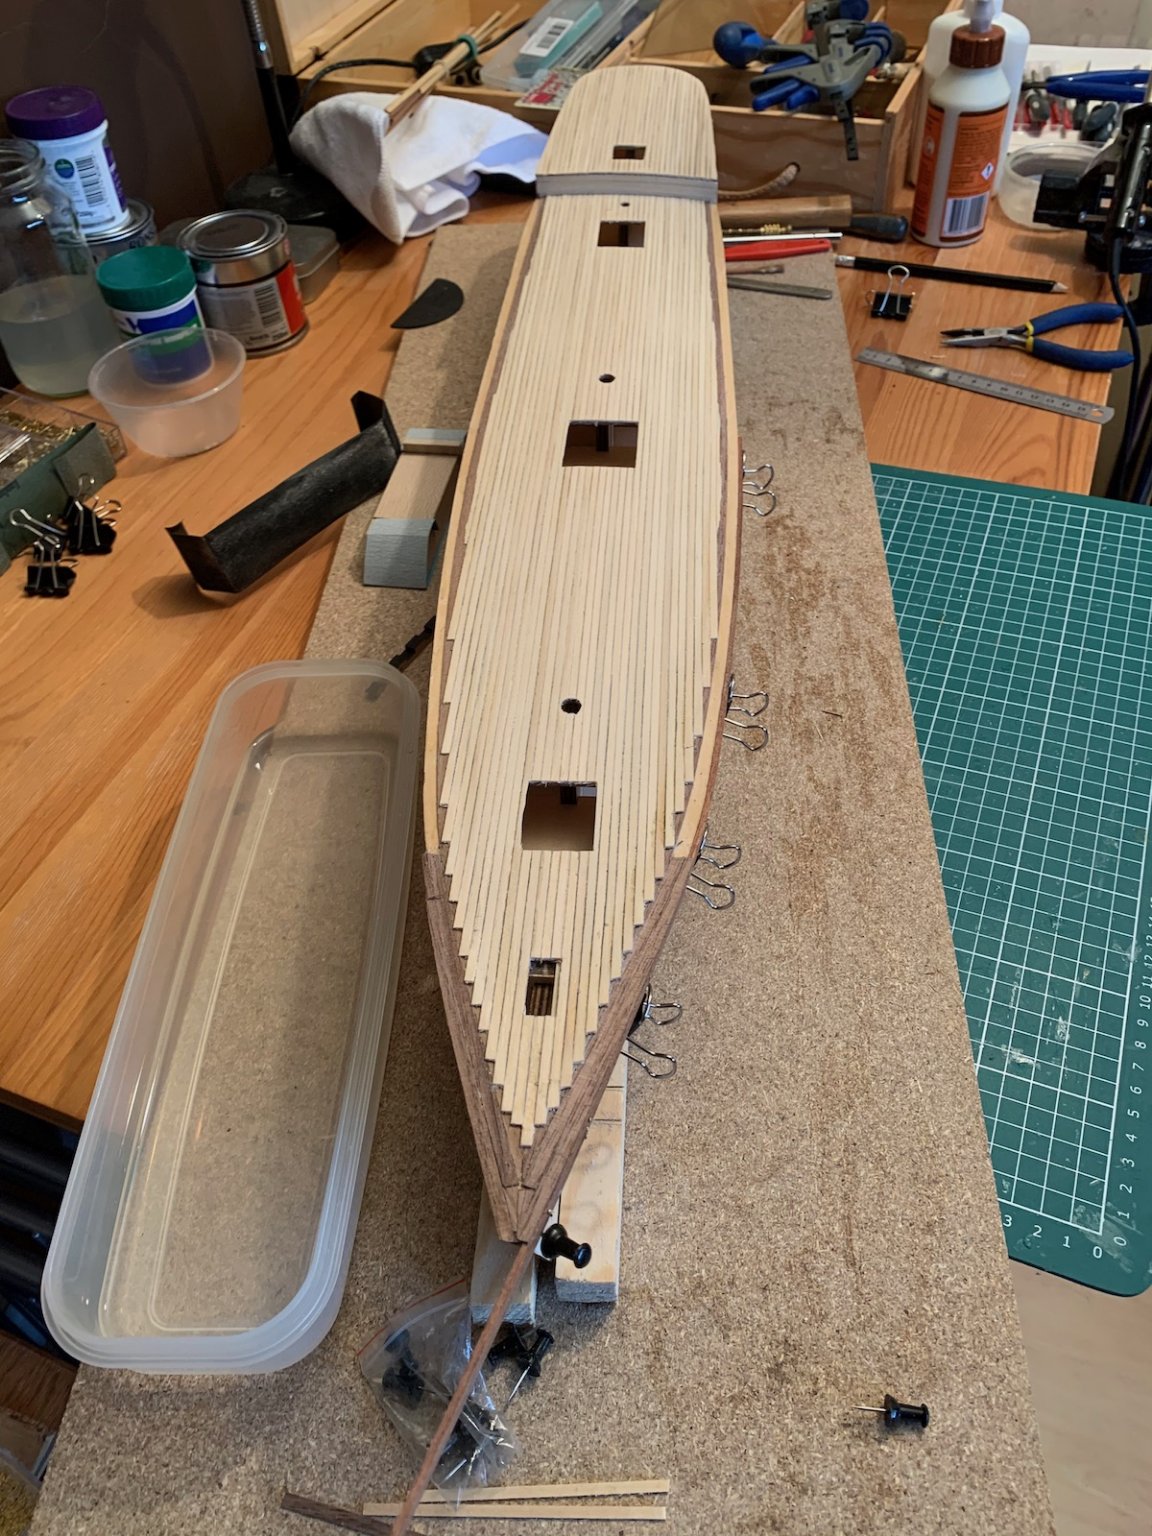
I made up the frame and put the decking on. I used a 2B pencil on the edges of the planks for the caulking.

- gieb8688, Keith Black, BOYSEE and 2 others
-
5
-
Hi. I have just joined Model Ship World. I am currently building the Artesania Latina Cutty Sark. This is my second wooden model kit, the first was the Constructo Albatross and I learned a lot and made many mistakes on that build. I am following the kit instructions and I am building just for my own satisfaction and fun. I really am not obsessed with total historical accuracy as long as the final result looks OK.
I started the Cutty Sark in February and am progressing well. I have my own blog on blogspot, which I really just started for myself to record my progress. Not sure if I want to add one on here as well.
I have hit a few snags on the way, not least the fairly vague instructions from AL. So one reason for joining is to get tips from more experienced model builders. I am also waiting for replacement parts as there was a missing pre-cut sheet, and a duplicate of another one. Unfortunately shipping from HK to UK is at least 8 weeks atm. The missing sheet means I have quite a few part made deck fittings waiting to be finished.
Looking forward to participating in this forum and both learning and hopefully being able to also contribute.
Pete
- ccoyle, mtaylor, Keith Black and 3 others
-
6


Cutty Sark by Bluntysmodels - Artesania Latina - 1:84
in - Kit build logs for subjects built from 1851 - 1900
Posted
That is all the forward stays on. Will be starting on the Spars now. Good to be back on woodwork.