RogerF
-
Posts
102 -
Joined
-
Last visited
Content Type
Profiles
Forums
Gallery
Events
Everything posted by RogerF
-
The handrails look to have been a challenge. Are they glued directly on to the superstructure or did you have to drill out holes for the mounts? The handrails on my U-Boot which are similar to those you have just added, required 0,3mm holes to be pre-drilled using a (PE!) template for each attachment point - I just said... "Nope. Pass!" Great stuff and I love the way your progress is marching on, it helps me to understand some of the processes and decisions that need to be taken with regard to the sequence of superstructure build that I will be facing soon with 'Hood'.
- 174 replies
-
- 7
-

-
- prinz eugen
- trumpeter
- (and 2 more)
-
The voices of experience. The PE is almost worth the money just to get the railings set but some of the railing parts themselves are no easy walk-in-the-park! I will add some stairways, assuming I can bend them satisfactorily, and anything else that 'makes sense'!
- 174 replies
-
- 6
-
-
- prinz eugen
- trumpeter
- (and 2 more)
-
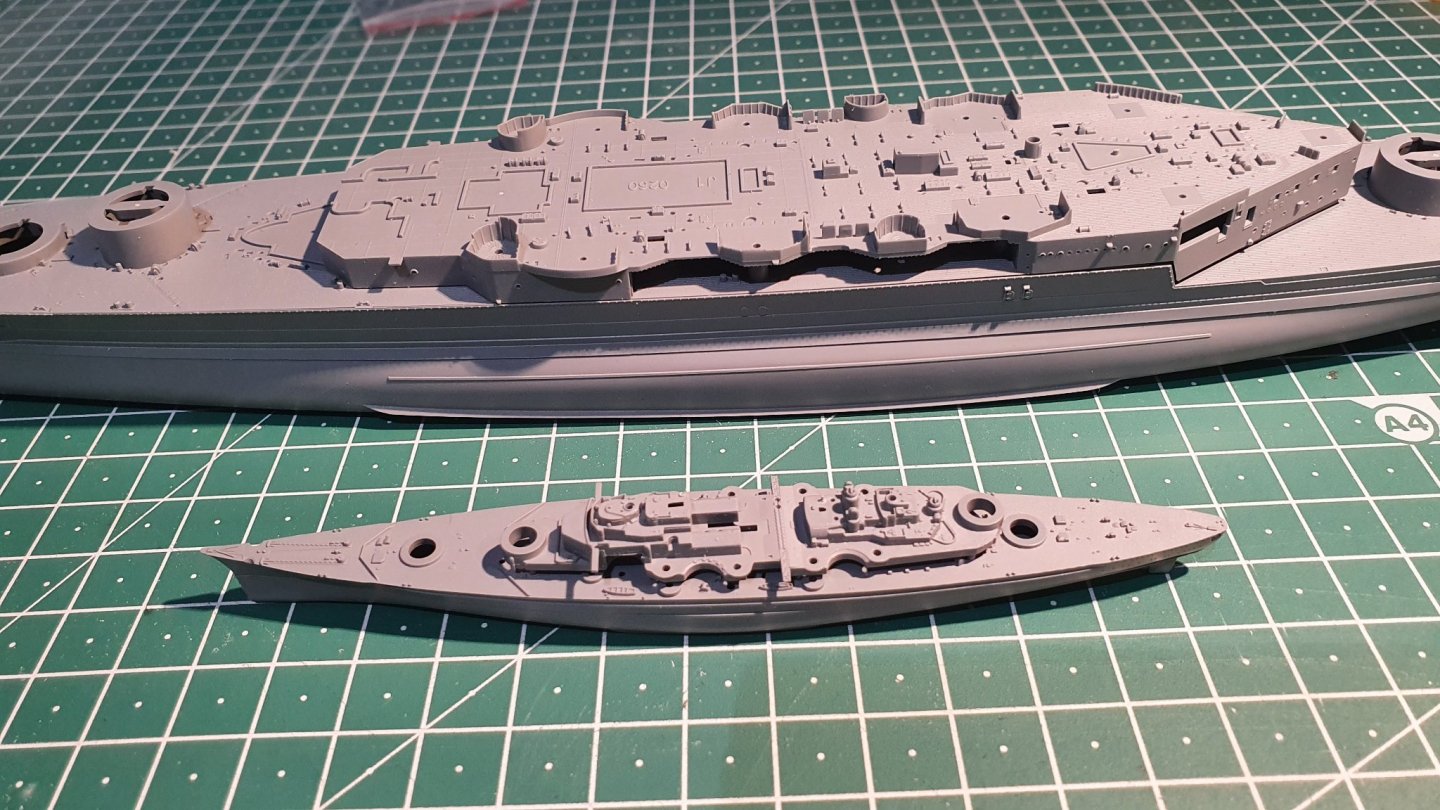
Thanks for the encouragement guys, it's much appreciated. I chose 1/700 scale simply on the grounds that I don't have space for larger scale models and Flyhawk offers such a wealth of gorgeously crisp detail but the scale makes the whole build quite a challenge. Also, I couldn't resist this little Flyhawk gem that cost a mere €11. It's a 1/2000 scale Bismarck which I thought would be fun. Upper hull and deck are one moulding, lower hull and superstructure seen here separate mouldings which should be interesting when I start painting. Here it is alongside Hood for size comparison. Well, why not?!
-
This is, to my mind, a further example of taking detail too far, especially in this scale where so many parts require almost super-human skills in just removing them from the sheet. Following my own less than satisfactory entry into PE at 1/700 scale, I shall now only deal with PE parts that: a. represent a quantum leap in detail compared with the plastic part they are intended to replace and more importantly: b. I have a realistic chance of mastering without breakages and deformation. With the Flyhawk kits the detail of the plastic parts is so good that I can do without much, if not most, of the PE parts but the Trumpeter kits in 1/700 are just not of the same high standard as Flyhawk offerings so I guess choosing which PE parts to tackle and which to ignore will prove not so easy. Good luck and keep us updated on the progress.
- 174 replies
-
- 9
-
-
- prinz eugen
- trumpeter
- (and 2 more)
-
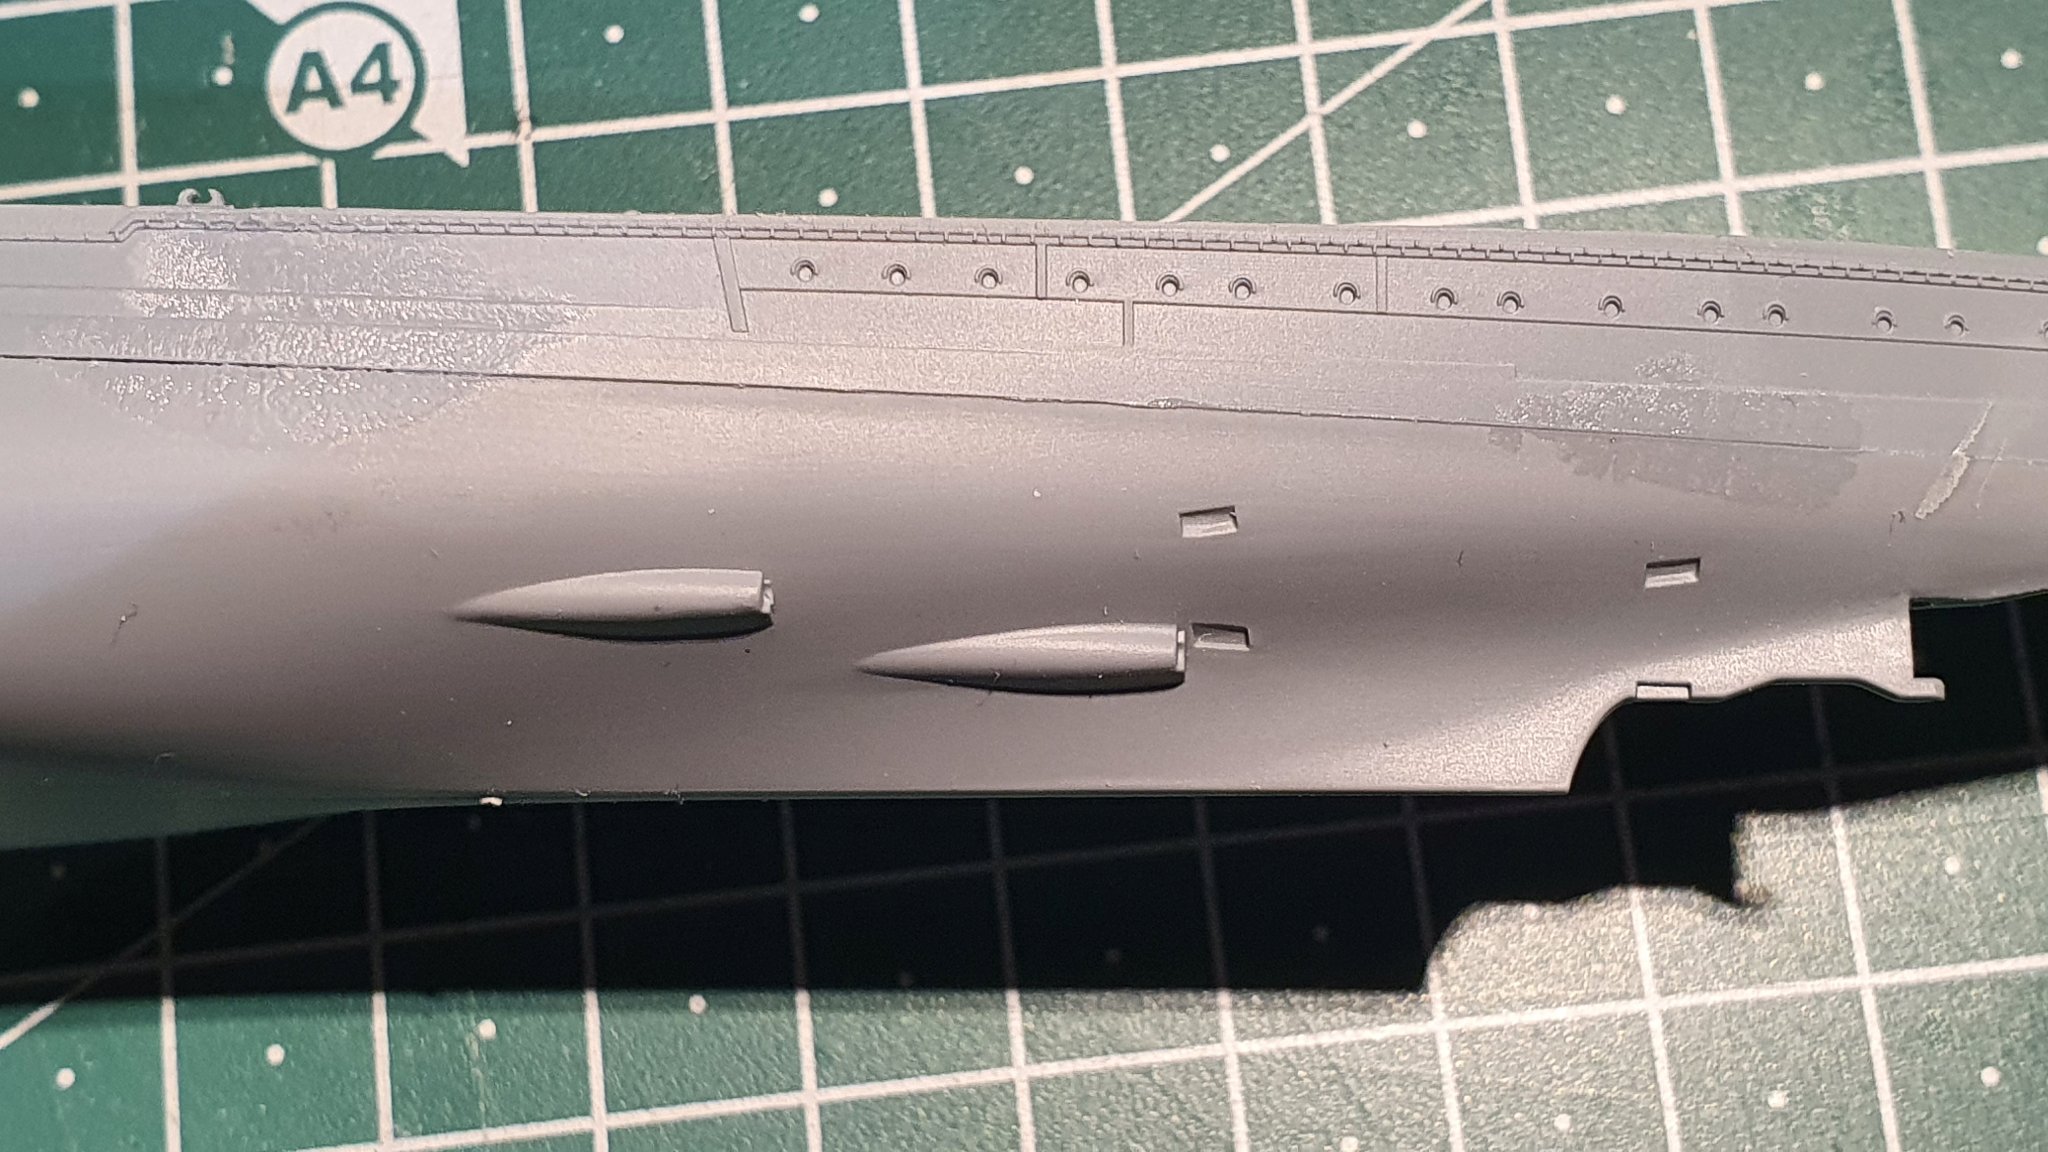
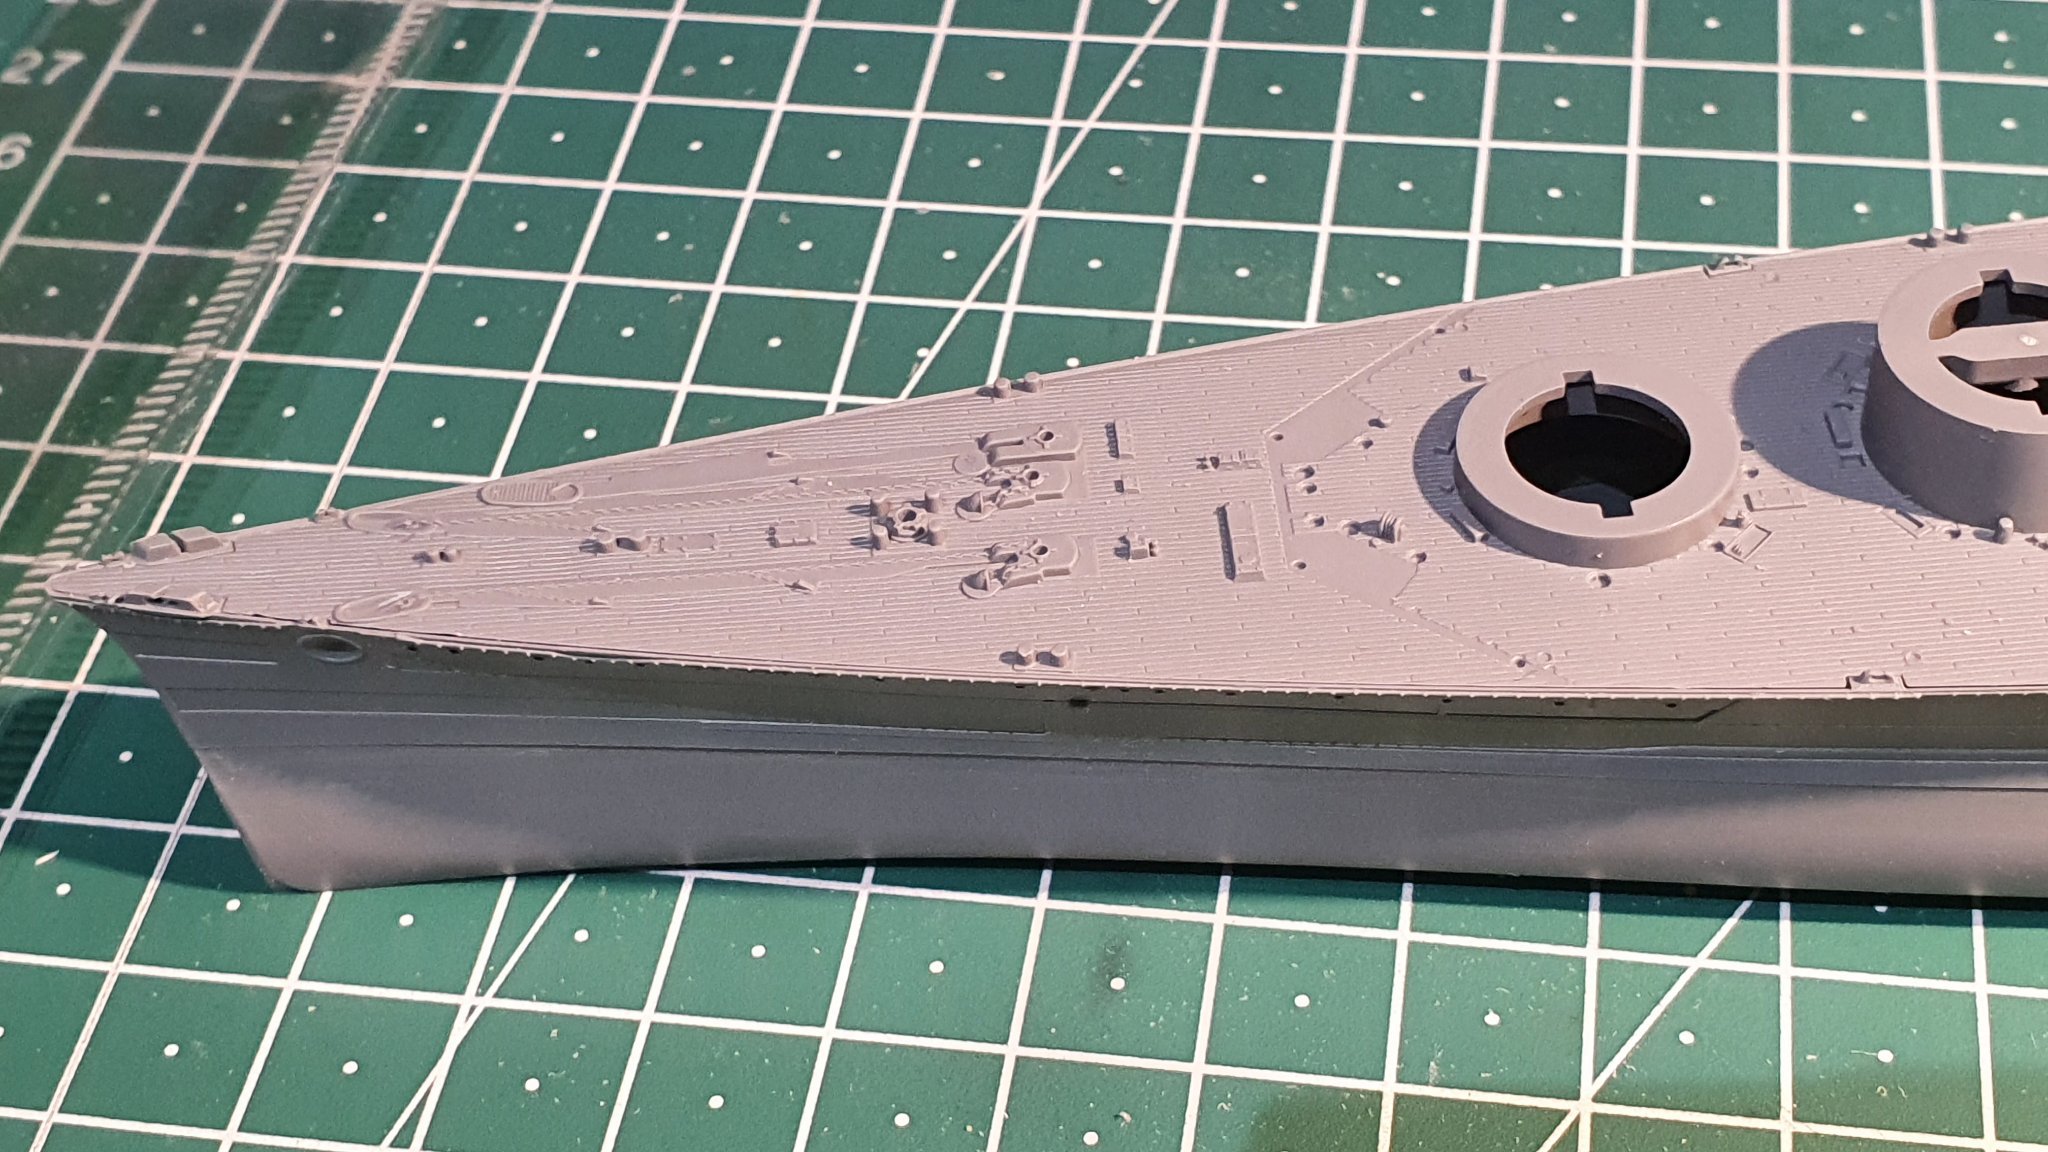
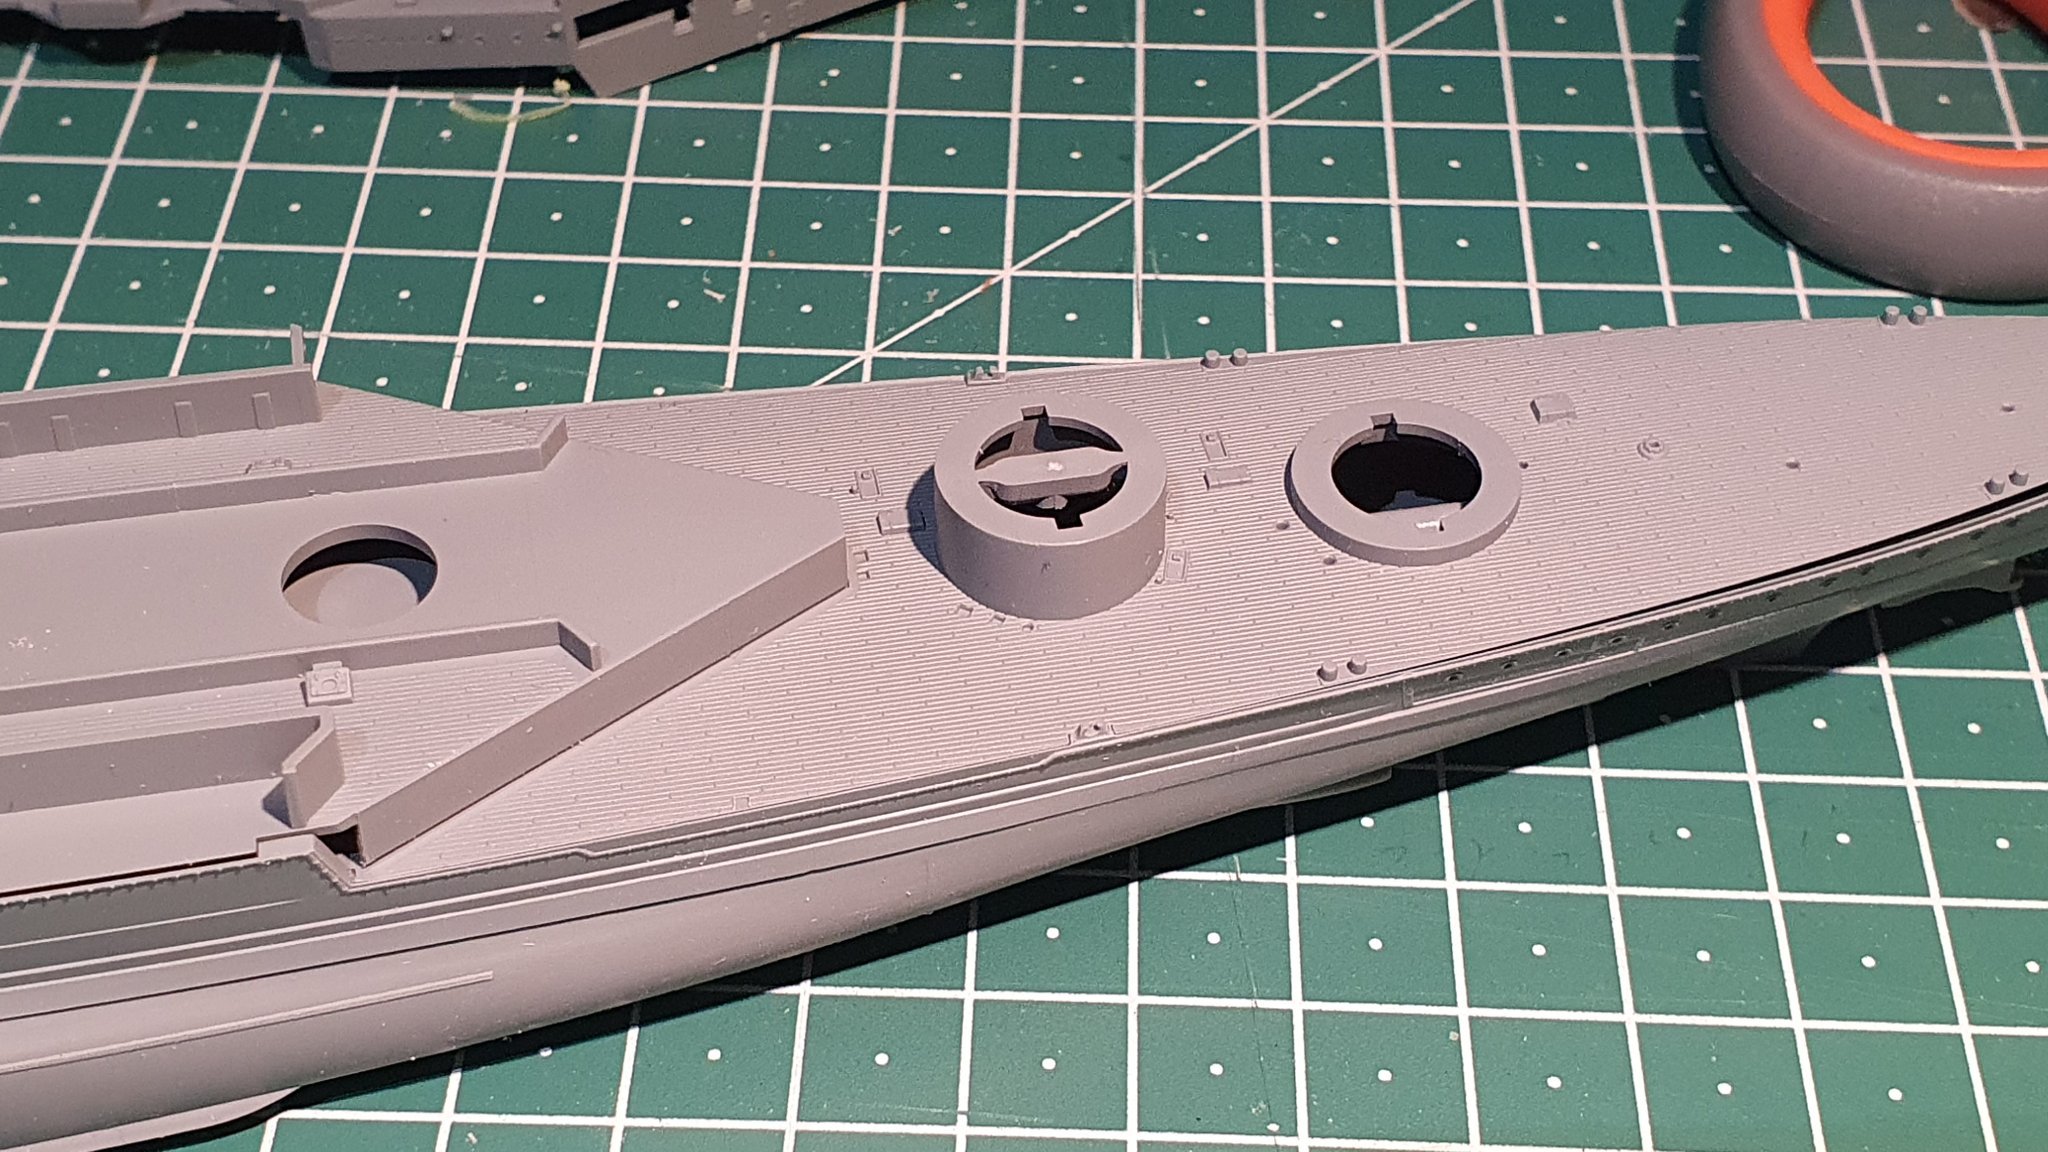
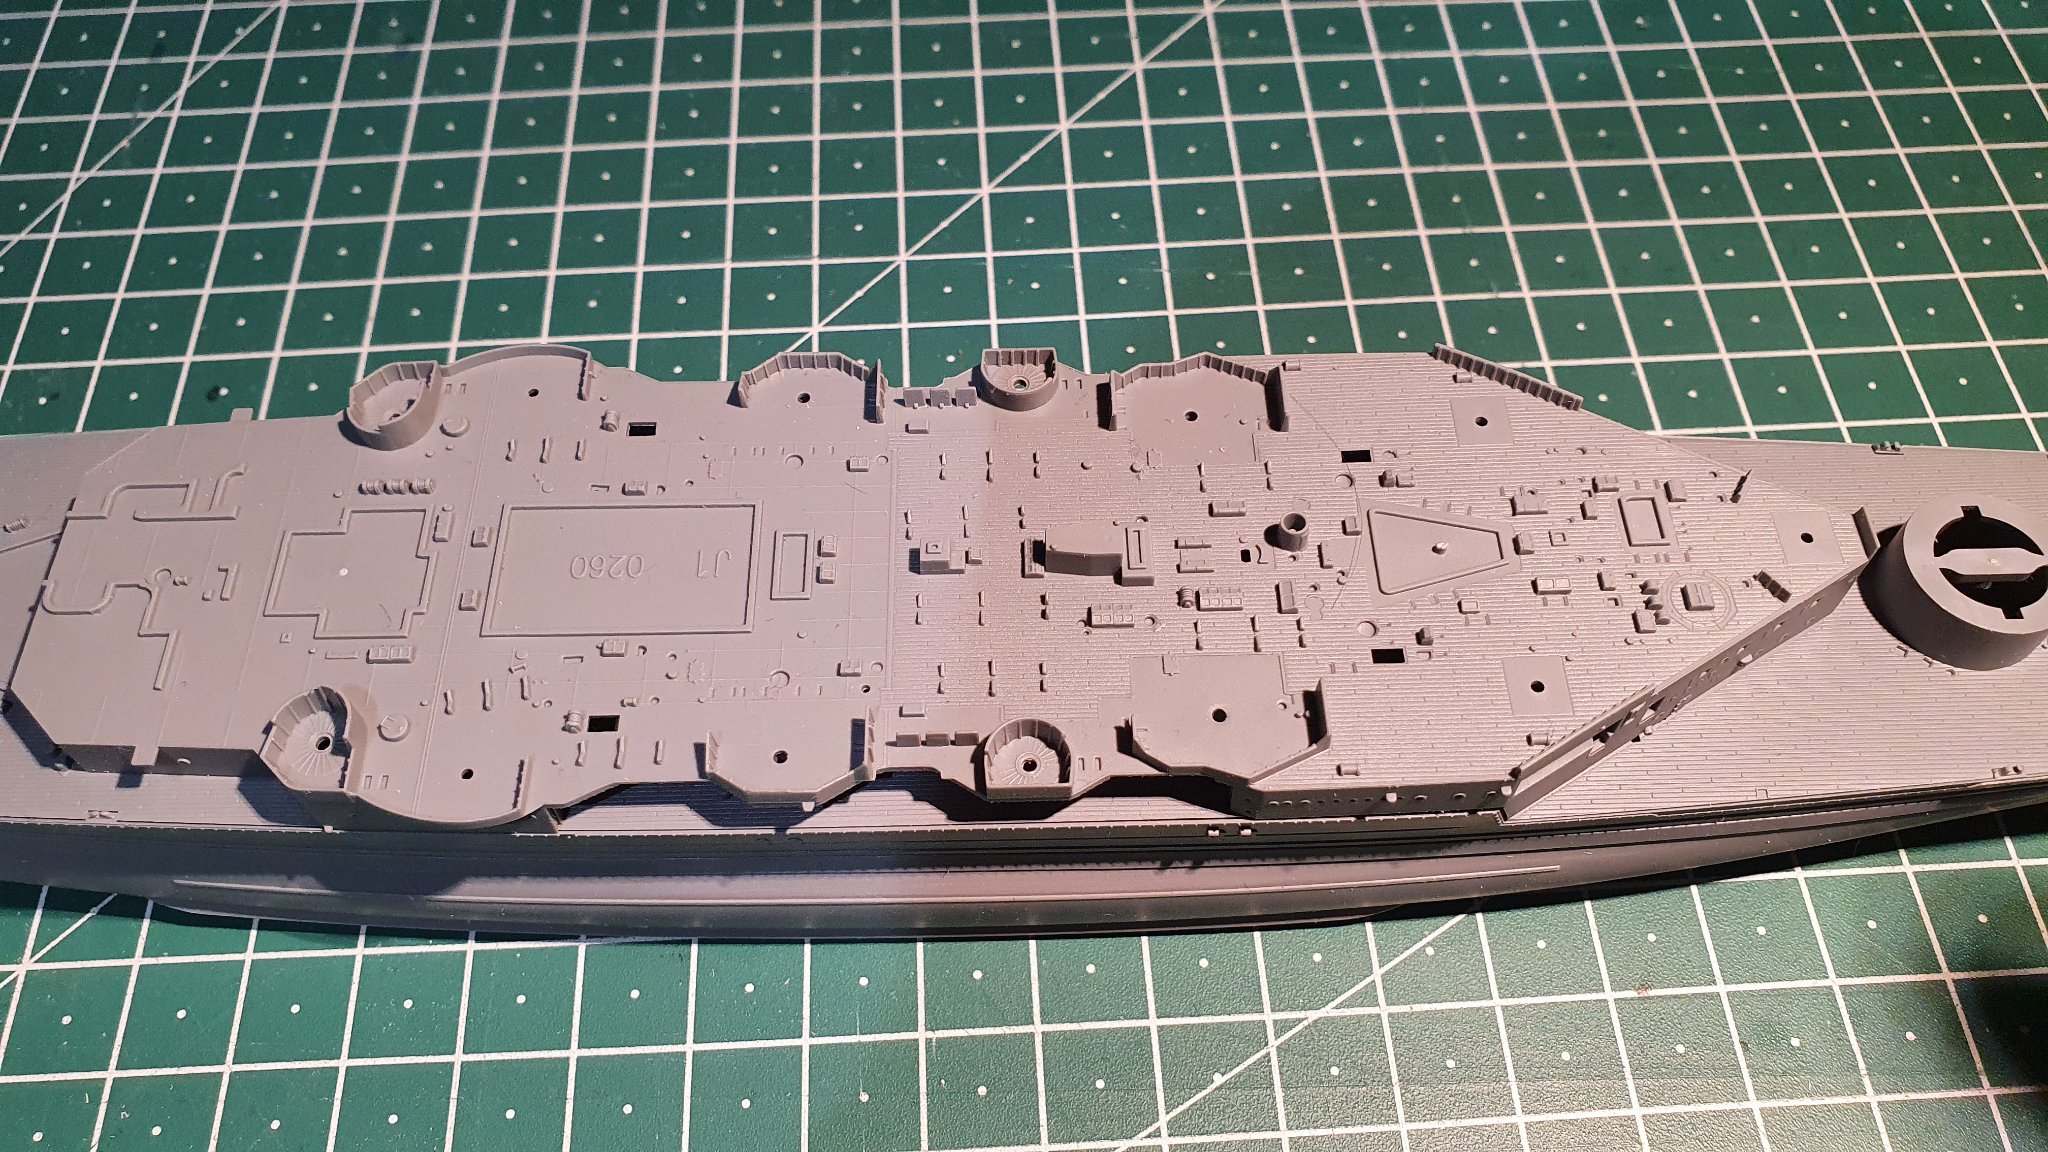
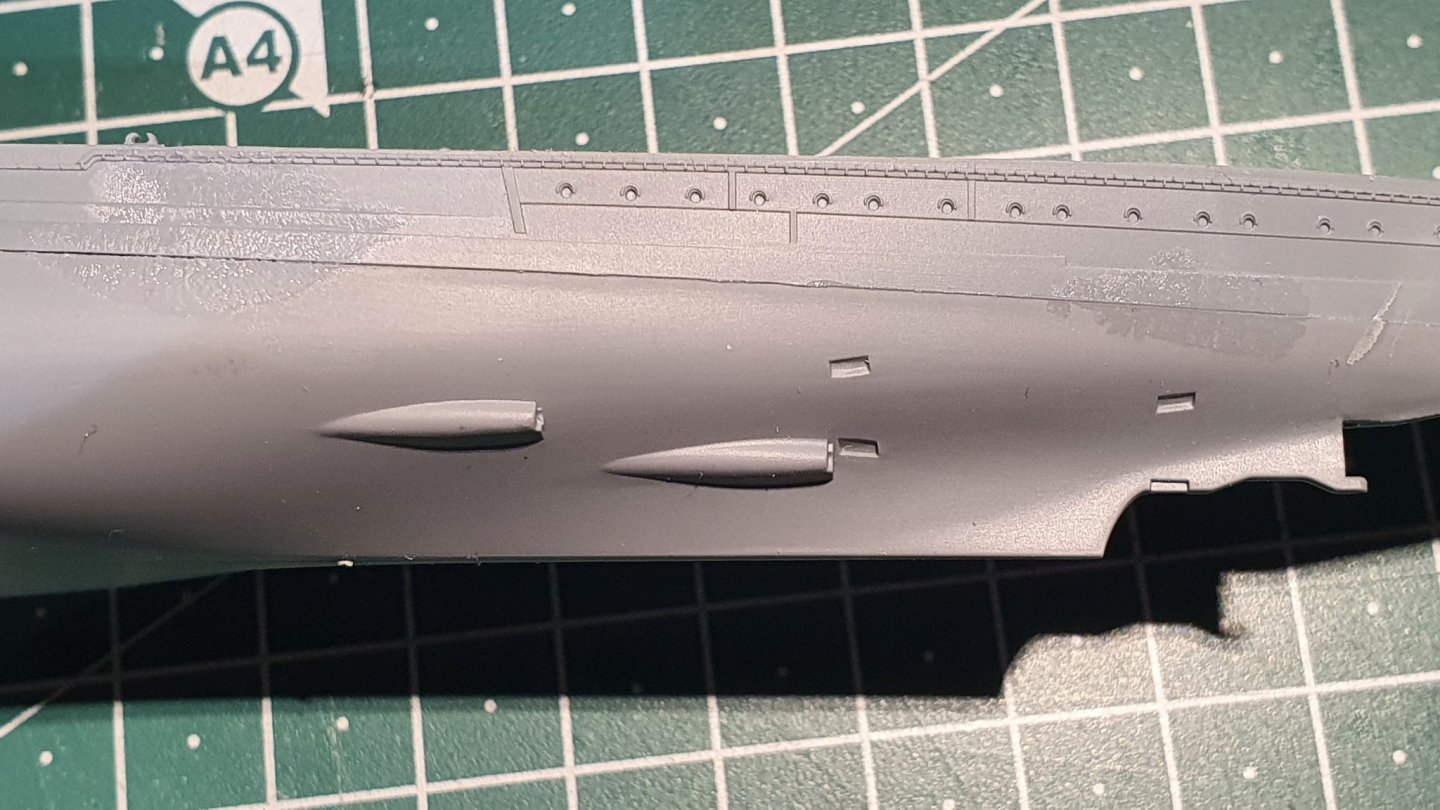
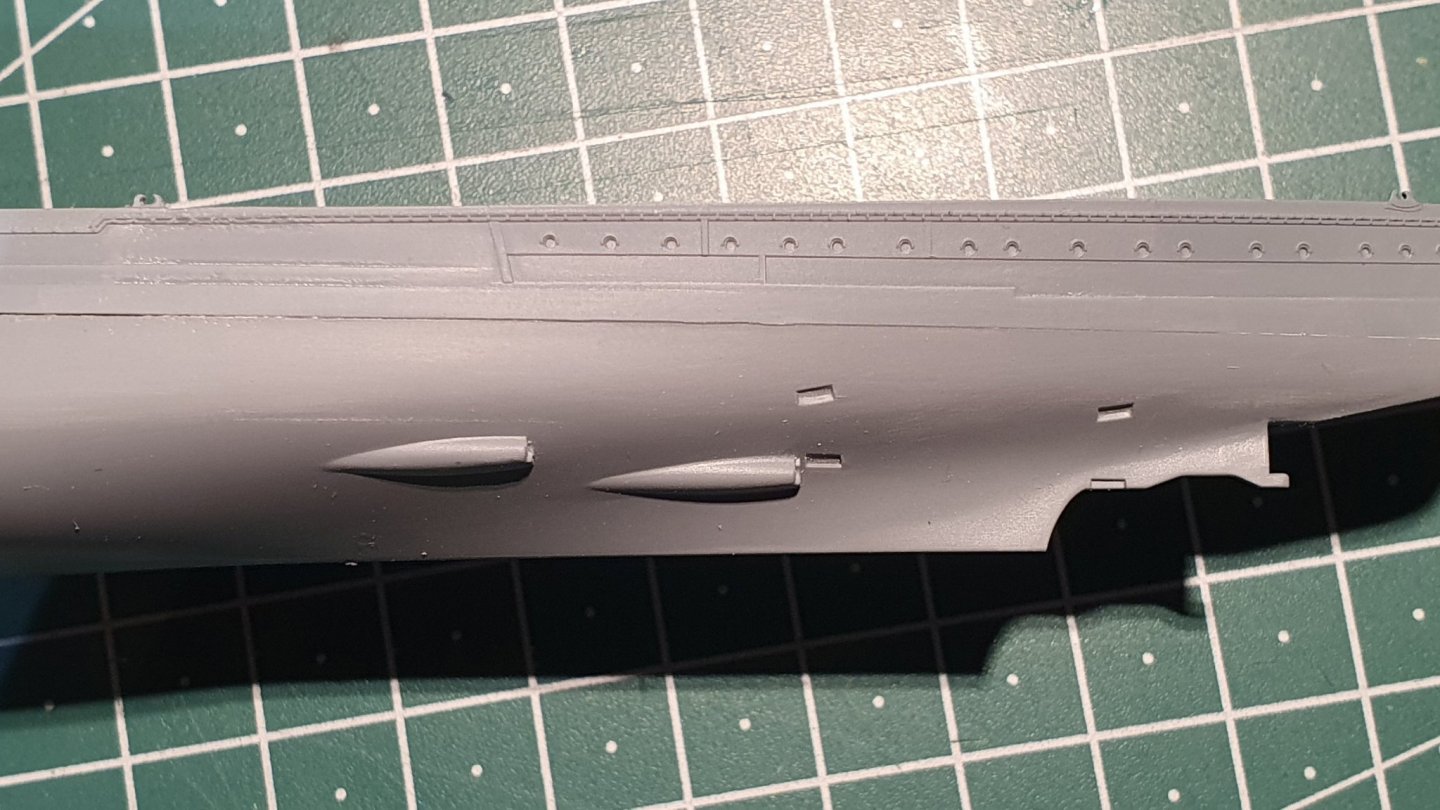
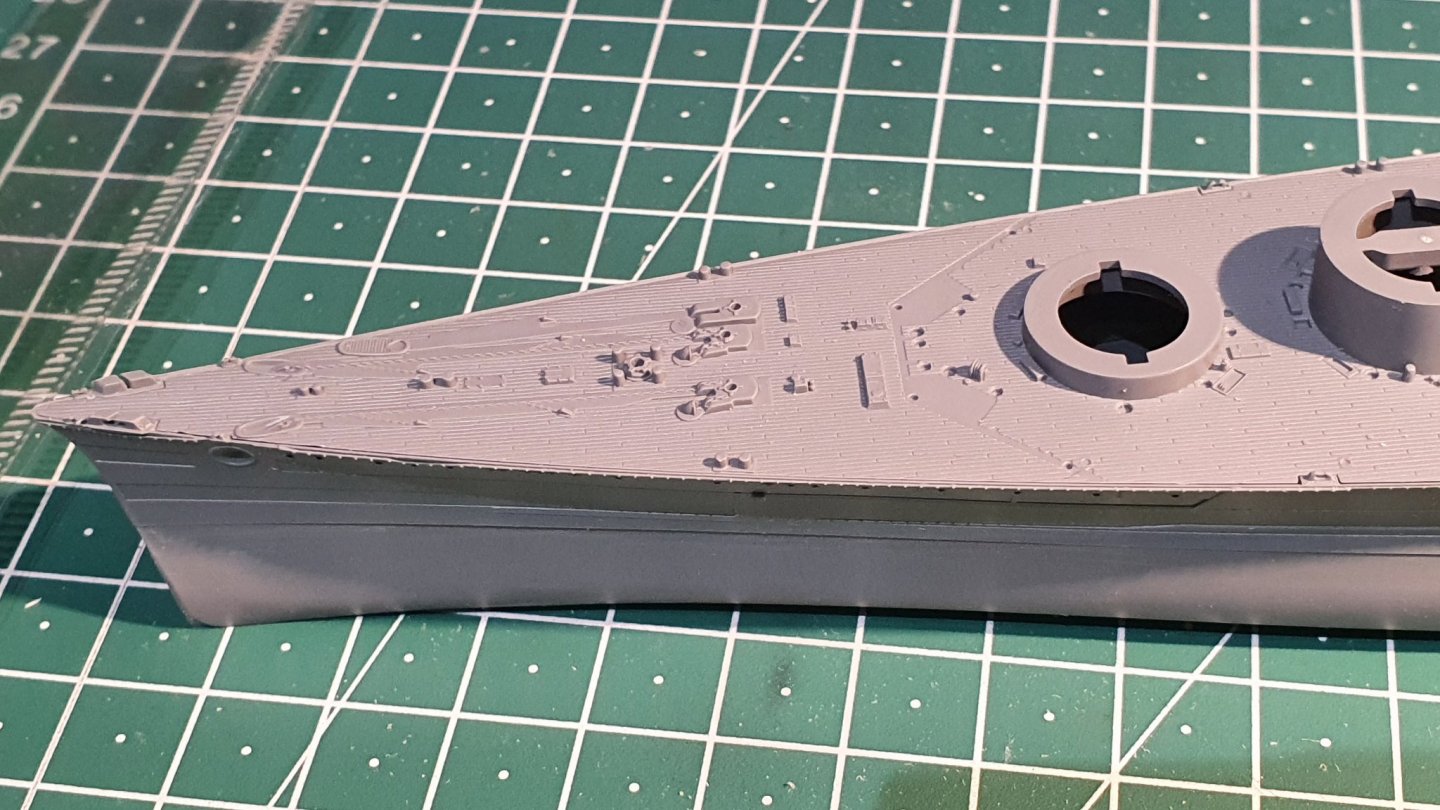
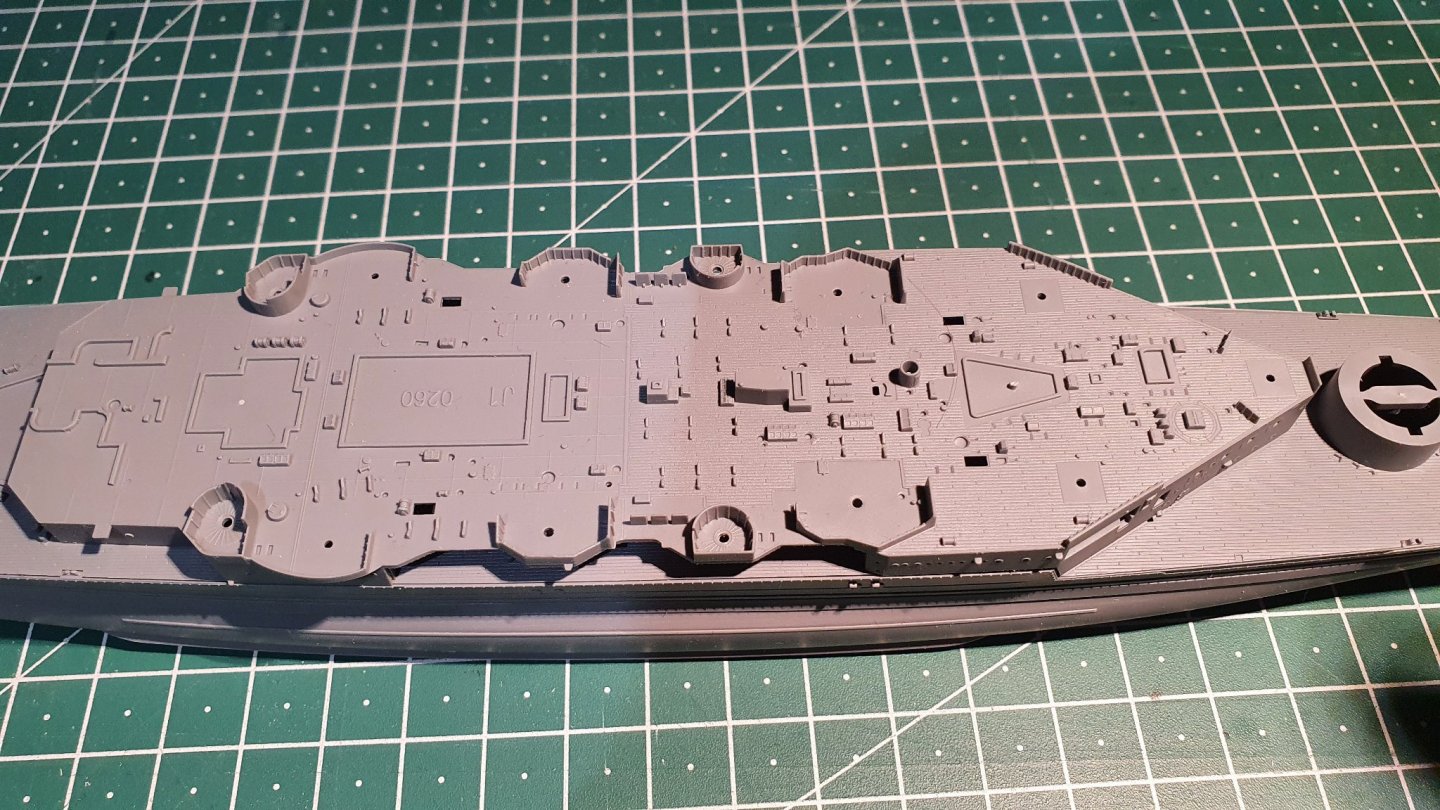
Following the disappointment with my first attempt at building the PE mast platform I decided to take a breather before getting back down to actually building this ship. I figured gluing the plastic hull halves together would be a good start and should not prove too difficult and it wasn’t. The fit of the two halves is beautiful but with the bow end lined up the lower hull half was short of the top half by about 1mm. Not a lot, but the join needed sanding and shaping to remove the step that would otherwise have been left. No big deal. More of a deal was the fact that despite extreme care on my part I managed to get traces of cement on the outside of the hull, compounded by being accompanied by a totally unnecessary fingerprint. By masking and then careful sanding with Tamiya sanding sponge (1500 and 2000) I was able to remove the worst and the areas should be hardly visible, if at all, once the hull is painted and weathered. Next step will be to add the prop-shaft ‘blimps’ and rudder prior to priming hull - the screws will not be added until the model is nearly completed to avoid being damaged during the build. I will be using Vallejo primer but not yet sure if it will be black or grey. 1st photo shows the cement marks which in the 2nd picture have been largely removed. Then just a couple of pics to show how the deck(s) fit and how wonderful Flyhawk’s moulded detail is. Progress will be slow, but I am starting to enjoy the process although at this rate it will take me a year to finish!

-
What you see in my pic is a PE part which I cut out from its brass sheet - on a hard, acrylic base 'tile. Guys, I’m not new to model building and I’m not new to the tools of the trade BUT, I AM new to working with PE this thin. I can bend PE of any thickness as long as it is straight/flat , but I first have to get that piece of PE out from its sheet! No tweezers/shears/scissors on earth can get between these parts to cut, a KNIFE is the only solution, and I am not capable of doing this. End of!!!!!!! I love you guys but I know when I have to throw in the towel, ok?!
-
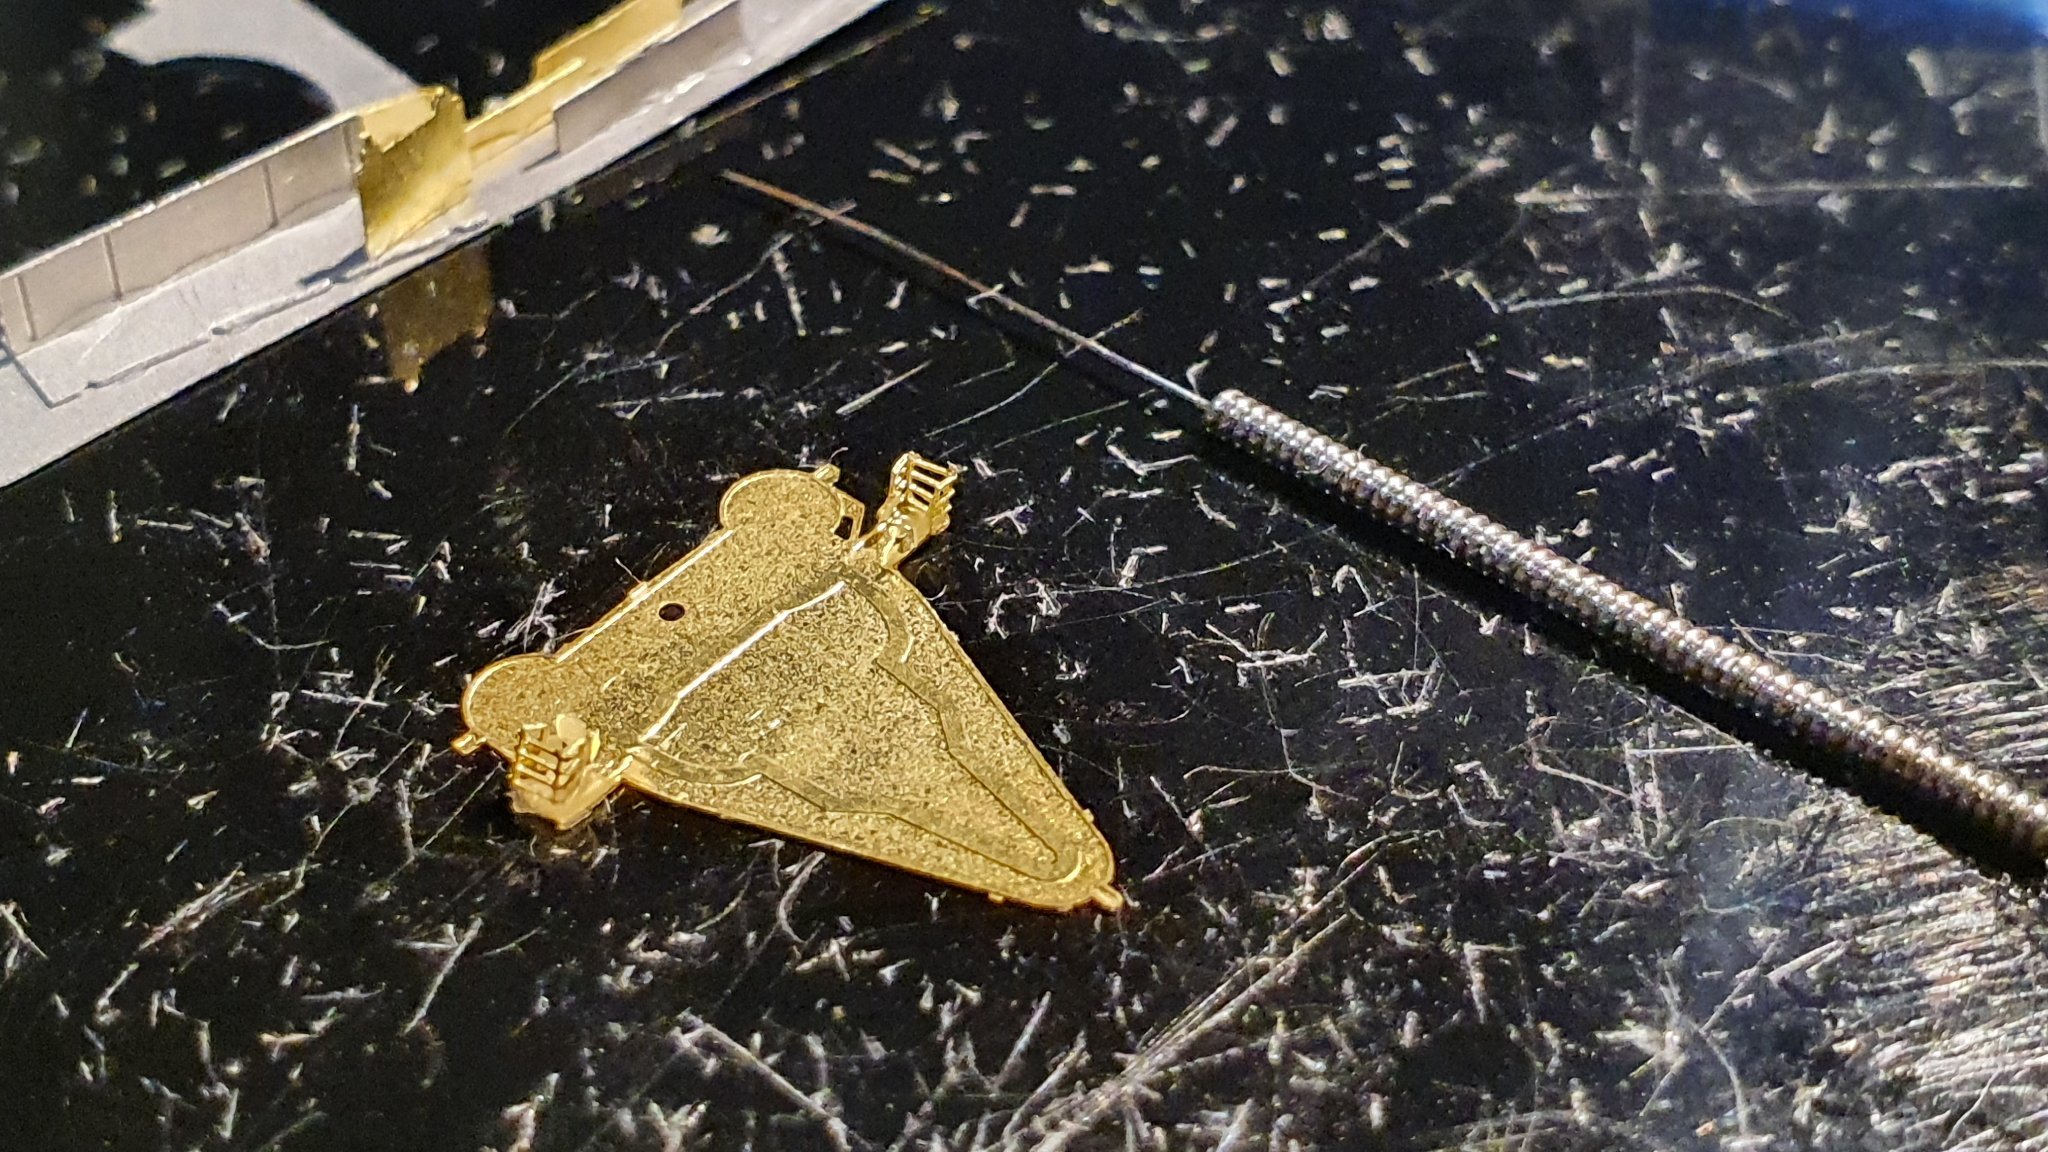
Progress is painfully slow. My experiences with the PE in this kit have been sobering to say the least. The next piece to be removed from the brass sheet is the base of the mainmast platform which despite the greatest care I am able to muster, broke and bent in 2 places before it was even fully removed from the sheet. I can't work like this. I have to accept that I am not capable of working with brass sheet this thin with parts having areas that bend or break every time I look at them. If you look closely you can see 2 of the spots that need filing where the the knife has cut through the brass to remove the part, eg. bottom extreme right and left. I am simply not able to handle a piece like this to file it where needed without bending or otherwise damaging it elsewhere. I could file where it needs to be filed but the part would suffer as a whole and that's my dilemma. I've started to re-think and I'm tending towards a different approach. I will ignore 80 to 90% of the upgrade PE and concentrate on the superbly detailed plastic. I'll add wooden deck, brass artillery barrels, turned brass main mast all the railings (a must!) and the 3d-printed parts and leave it at that. I don't see what else I can do!
-
Mmmmm, not till next year you say. At my rate of build you'll overtake me before I even get the hull painted! I too have the FH wooden deck which is another challenge yet to be faced which I'm looking forward to (dreading!).
-
Glad you like the acupuncture needle tip, they cost me just €7 for a pack of 100 via Amazon. They're actually much shaper pointed than can be seen in the photo because the tip is blackened from using a cigarette lighter to burn off residual glue and are flexible which makes it easier to apply glue carefully so avoiding unintentional distortion/movement of the parts. I previously used hypodermic needles but these are much easier to use, at least with the superglue gel I was using. And yes, the ILK kit is excellent value and even comes with PE breakwaters, unlike Flyhawk's plastic.
-
The attention to detail on the Flyhawk kit is nothing short of sensational it's true. That said, some areas of the I Love Kit with upgrades are better than Flyhawk in my opinion. Examples: In the ILkit, the main mast is all brass and in 2 pieces, Flyhawk has only the top half in brass. The ILkit has two PE sheets, one in steel and one in brass. At least one layer of the starfish mast platforms are made of steel sheet which is stronger and less likely to get unintentionally damaged than Flyhawk's ultra-thin brass versions. The legs of the main mast are given PE ladders while Flyhawk relies on crisp moulding of the plastic legs etc. etc. Both are fine models and I do want to add as much PE as is I can reasonably be expected to handle but will definitely leave out anything which is obviously unnecessarily OTT. And yes, railings are a must, in this scale they just set the model apart from other offerings in this scale. Oh and I had an hour or two practising gluing old spare PE parts together today and then tackled the AWL railing on the mast platform. After much wasted effort and unintentionally 'rolling' the railing in my fingers, I managed to affix it to the platform. Pheeew! I'm not very happy with it, looks a bit tatty but at least it's on, much better than if I'd just left it off. I used an acupuncture needle to apply the super glue and it worked a treat, a cheap and cheerful superglue applicator with a very fine point - recommended!

-
Thanks for the tips Mike, much appreciated. Fortunately I have some spare PE I can practice on to develop technique. I use good quality surgical scalpel blades from both Swan Morton and a German medical supplies company but I tended to rock the blade over the cut-line to separate the part from the sheet. I've tried the 10 blade (curved) and the 10A blade which is straight but I have broken both types, I suspect because surgical scalpels are never intended to be used in the way I use them or to cut metal rather than soft human tissue! I never thought of trying a back and forth movement as you describe, sort of like sawing?! But I will try that tomorrow. I always cut parts with the sheet laid flat on either a hard, acrylic tile from "The Small Shop" 'Etch Part Cut-Out Kit' or a glass plate for the bigger PE sheets. In both cases I also use their clear pressing tool to hold the part to be cut along the line of cut. I think the super thin brass sheet used for the Flyhawk up-grades is just close to the limit of what even an experienced builder can reasonably be expected to work without unwanted bending or damage. Or then again I might just be ham-fisted! Thanks again for the comments and tips chaps, so a good night's sleep and let's see what the morrow brings. 🙂
-
Flyhawk PE in 1/700 - Holy Moses, what a challenge. My first venture into PE in this scale brought me down to earth with a bump (see my newly started Hood blog). The size and detail of some really is insane. I toyed with the idea of giving up on the PE altogether but re-reading through your progress to date I'm motivated to carry on regardless. I think we learn as we go forward, certainly I get that impression from your experiences so far, and your determination as you proceed from obstacle to obstacle is an example to us all. Your Gneisenau really is starting to look 'the business' and I will try to emulate your patience, finger-skills and breath-holding ability. The worst part for me is spending an hour or more bending over the desk fiddling with microscopic detail as my back starts telling me I need to give it a rest. There are some great tips you've shared along the way (sliding ladders up from the lower deck to the upper through the appropriate hole rather than the other way round is just one example) and it's what makes these detailed blogs so valuable. I will persevere, despite the daunting tasks that lie ahead. Thank you so much for sharing your experiences and illustrating them with so many detailed photos Alan, it will make life that much easier for me as I get down to building my Hood in earnest. This bit on the end of my little finger detached itself from the mast platform I started yesterday:

-
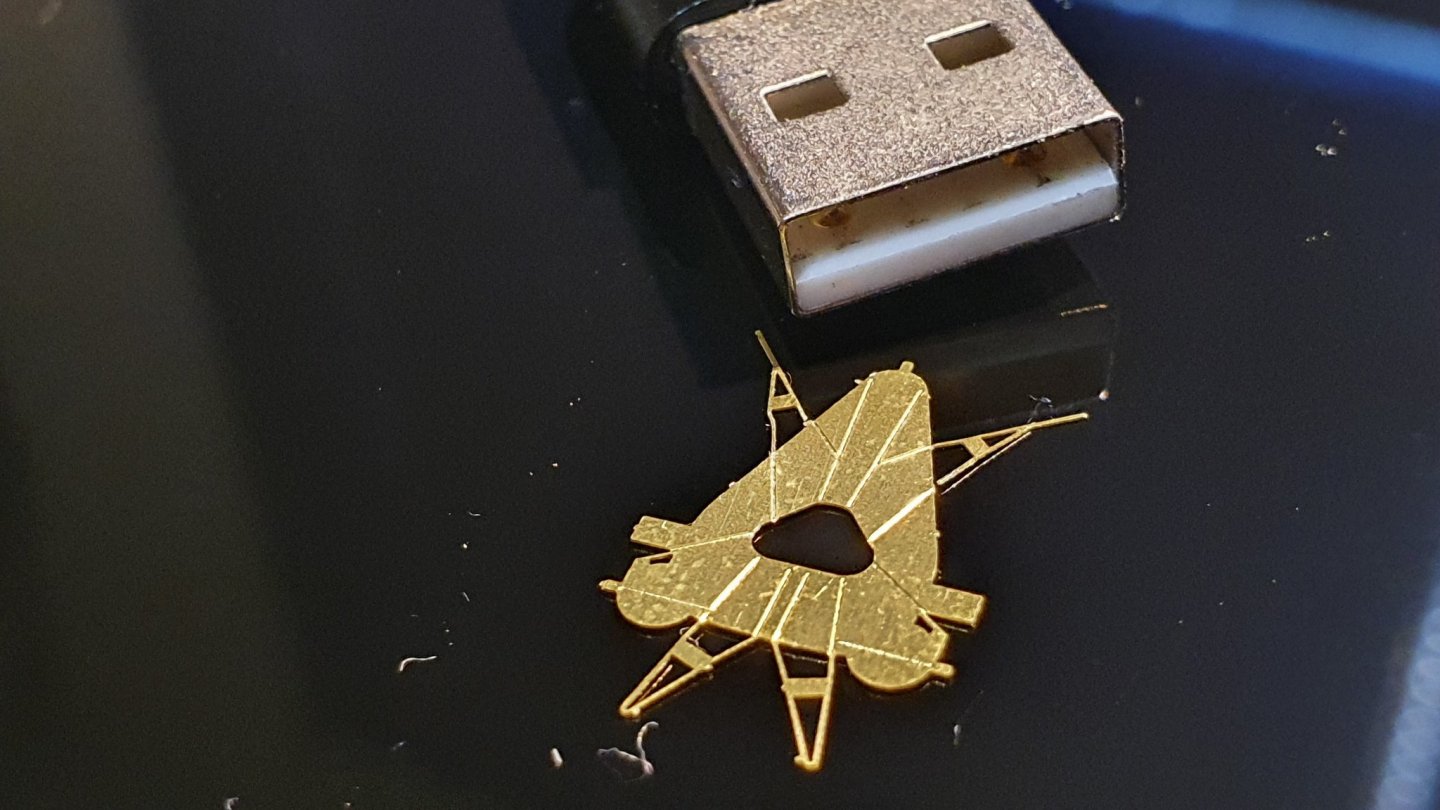
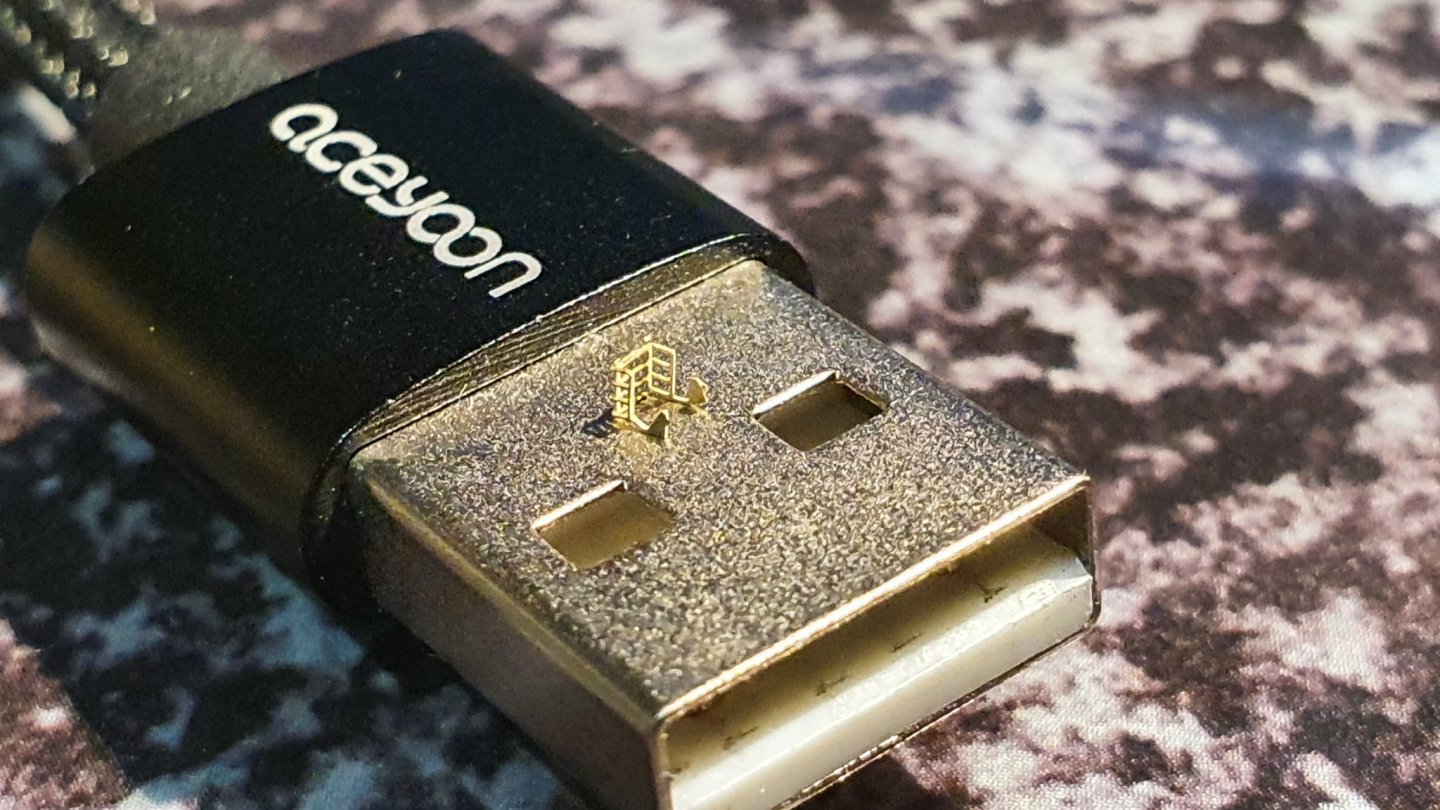
Yesterday I decided to start my Flyhawk HMS Hood. I'm a slow builder so it will be a very long time before it's finished. I wanted to begin with the foremast starfish platform to see how easy/difficult it would be working with PE at 1/700 scale. WARNING!! The brass PE sheets with this kit are extremely thin. The sheets from Griffon for my 1/144 German U-Boat were 0,2mm thick and at times a challenge, especially the really small parts. The brass sheets from Flyhawk for the Hood are a mere 0,13mm thick. Gulp! But the first challenge is to remove the adhesive film which is applied to both sides of each sheet – bear in mind the thickness - the sheets are extremely fragile and almost bend just by looking at them. Secondly the surface of the brass attracts fluff, hair and dust like a magnet and displays ugly fingerprints if you so much as touch the surface without (new!) latex gloves, you have been warned! The next challenge is to remove each piece from the sheet. The space between each part and the rest of the sheet is very small so it is not possible to use a nipper, the parts have to be removed using a sharp craft knife/scalpel. This is not easy, not only did I manage to break two scalpel blades on just this one part, but the brass is so thin that, railings for example can be easily bent during this operation no matter how careful you are. The first photo below shows the platform with the side railings bent up and round at the sides. One detached completely and can be seen next to the platform. The second photo shows the detached railing on a USB connector which gives a better idea of how tiny the parts are. I will attempt to glue the AWOL railing with either superglue or crocodile (trimethoxysily… you know the stuff) but this experience has put the dampers on my enthusiasm for the moment and I am even contemplating building the model without any PE at all. Mmmmmffff. Not a good start but I wanted to warn others who have not worked with Flyhawk PE before of my first experience at this scale.
- 62 replies
-
- 11
-
-
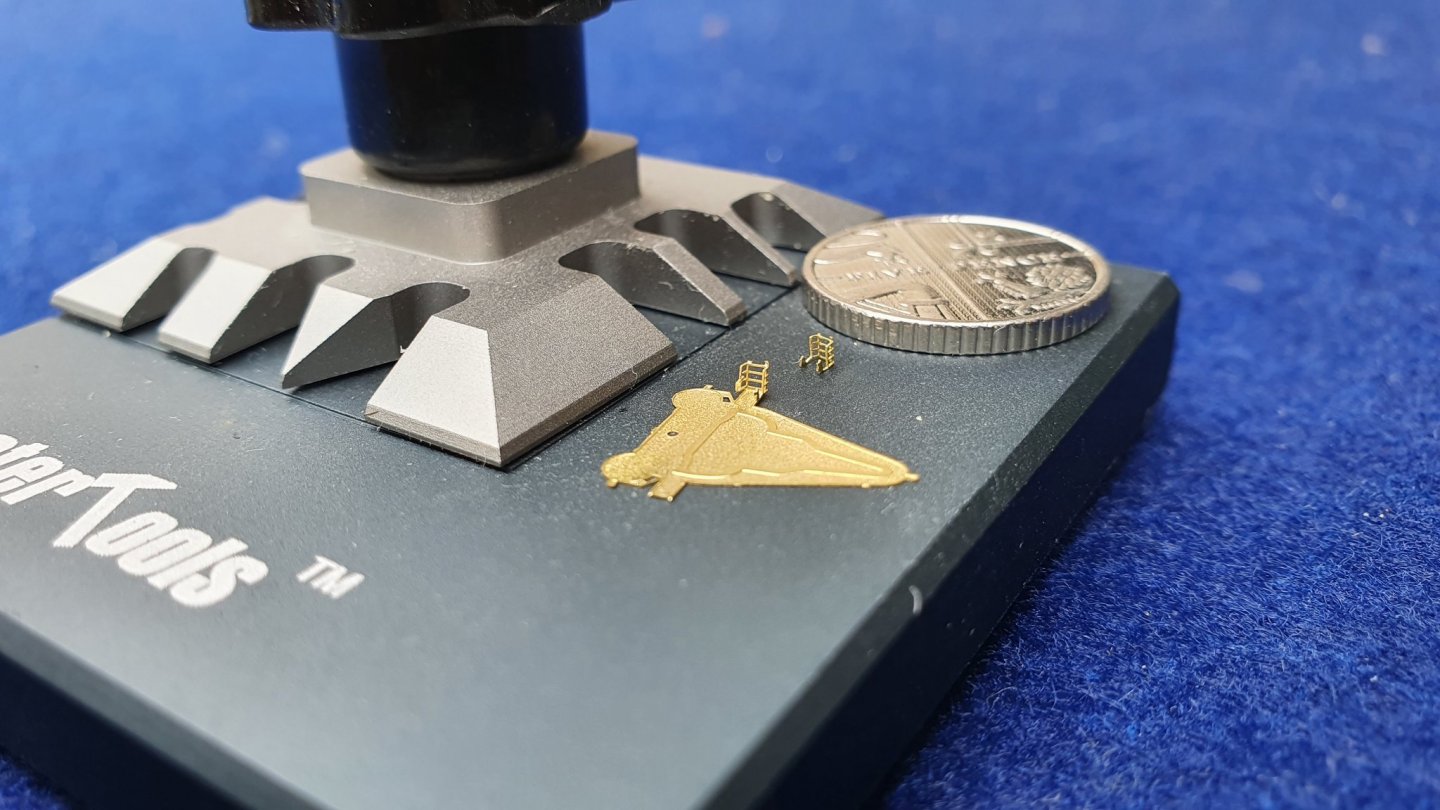
Oh dear! My Flyhawk Hood having arrived, I have been familiarising myself with the parts and instructions. Close-up examination of the stairs/ladders would seem to indicate that the steps are indeed intended to be twisted.... I had a closer look with a microscope(!) and it certainly looks that way. In fact the stairs might well look a bit strange if only the hand rails are bent and the steps left as they are. The steps are cut to shape differently to the I Love Kit ones and the only drawing of a finished ladder in the PE instructions - Part A45 on page 3 of the PE instructions - seems to also suggest bending the steps. I tell you what, we'll wait until somebody else gets as far into their Hood build that ladders are being fitted and see what they do.... 😉
- 225 replies
-
- 4
-
-

-
- I Love Kit
- Hood
- (and 2 more)
-
As a relative newcomer here and one still finding his feet, I would just like to put out a question for consideration. I bought Flyhawk's 1/700 Bismarck with all the available Flyhawk trimmings such as wooden deck, paint masks and original Flyhawk stand. I'm now also the proud owner of their wonderful 1/700 versions of both HMS Hood and HMS Lance. So, in total I now have 3 Flyhawk kits which to my eyes represent the closest thing to perfection that I have ever seen in over 60 years of (plastic) model building. However, on this forum I recently read an opinion with which I have a problem. The statement went something like this: Flyhawk kits are good but not the best." Unfortunately I can't remember exactly where I read this assertion or who made it and within what context, BUT I found myself shaking my head! Was the poster right in his assertion, or is it just me that can't follow his logic through lack of in-depth knowledge of what is actually currently available out there?! I don't doubt that there are kit manufacturers who design and manufacture fabulous wooden ship kits or resin kits of which I have no knowledge, for example, but does anybody else seriously believe that any current manufacturer of plastic ship kits - or kits of any other material for that matter, comes close to what Flyhawk achieves in 1/700 scale? Just wondering!!!
-
Glad to hear that your kit seems to have survived without damage to the contents of the box OC. I understand what you are saying Craig, but my supplier here in Germany has it in stock - but not the wooden deck, paint masks or the delightful original Flyhawk stand. Most European specialist stores simply do not stock the huge variety of kits and upgrades that you in the US enjoy. I ordered mine, not because it was cheaper but because they could supply everything I needed from stock. Mine arrived yesterday and I picked it up today. Everything was well packed and there was no damage, just lucky I guess. However, I ordered from Hobbyeasy in Hong Kong which I understand from experiences posted by members of this site, to be a reputable dealer. They declared it as a 'Model Kit' and for customs purposes valued it at 8 USD when the total bill with all the extras was actually around 130 USD... cheeky, cheeky! As a result I only paid €1.29 in customs duty (just over 1 dollar US) - I didn't complain! It is a real gem of a kit and I am looking forward to starting the build. I recently read somewhere here that ".. Flyhawk kits are good but not the best..."! I should have asked who made anything better, more detailed kits but, being a peace loving chap, did not wish to cause any friction. 🙂 I will take building mine slowly and in short bursts so as not strain the eyes (and back!) too much. I'm really looking forward to your build-blog, yes siree!
-
Hi Craig, As you may be aware, I'm a new member of Model Ship World and only now getting down to finding all the stuff that really interests me. As you will have gathered, your builds in 1/700 fall into that category but I was pleasantly surprised to find this gem of yours from back in 2017. That's a great Model and what a superb job you made of it, really museum display standard. Although I'm keeping to 1/700 scale myself for the time being (space limitations for anything bigger) This really tweaked my interest in 1/350. The bigger scale really does enable really fine detail to be created when including all the upgrade PE parts etc and make the task of bending the PE parts that much easier - funnel tops excepted! It also interested me to see your approach to weathering which you have kept fairly low-key. This is the way I intend to go too even if the real ships looked much more battered, battle scarred and moth-eaten in reality. With the Bismarck this is not so wrong since she (he!) was only in service for a few months before being sunk. HMS Hood on the other hand ...! HMS Duke Of York looks like a super choice for this scale, perhaps I should order one with all the upgrades myself, after all what harm could yet another unbuilt kit on the shelf do?! Anyway, my Flyhawk Hood is waiting to be picked up at my local DHL so I'm a happy bunny right now. Would you believe that the German customs want 1 Euro 29cents duty which is nothing compared to the value of the shipment (over 100 Euros, but DHL want 6 Euros from me for collecting the € 1,25 and passing it on to the customs office! Thanks for giving us all so much pleasure with your build logs. Kind regards Roger
- 151 replies
-
- 4
-
-
- duke of york
- tamiya
- (and 2 more)
-
The above was your answer to the question: How did you twist the steps of the PE ladders? I decided to try one of those ladders (I chose part Y78) to see if I'm up to the task! Bending the sides up at a right angle was no sweat but, the steps! I have a couple of very fine-nosed tweezers in my collection but MY question is: How did you hold the staircase while bending the steps? The scale is microscopic and it must have taken a long time and tremendous patience to bend up all the steps of all the ladders. I'm sort of looking forward to the challenge as a love-hate relationship!
- 225 replies
-
- 2
-
-
- I Love Kit
- Hood
- (and 2 more)
-
Awww, come on Craig! You can't leave us in the lurch like that! I was hoping to follow your lead on the Flyhawk Hood avoiding any problems you might encounter as your build progressed. Humppff. Looks like I'll have to go it alone once my Hood arrives - unless anybody else cares to lead the way .....
- 225 replies
-
- 3
-
-
- I Love Kit
- Hood
- (and 2 more)
-
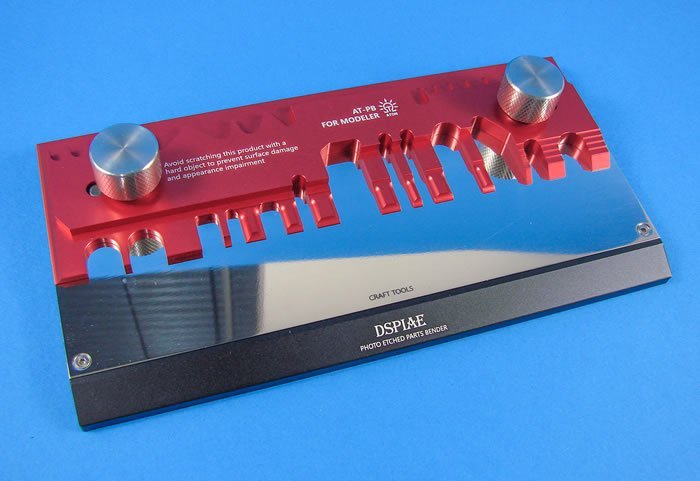
I'm glad you appreciated the link to the 3-D video - that's just one of the things about this forum that I love. Everybody is only too willing to share experience, tips and tricks and links to relevant information to be found on the web. In the case of 1/700 scale adding rigging will always be a compromise between accuracy and what is physically possible. I find I am spending endless hours researching colour schemes, ship anatomy and rigging so that my understanding of the subject is as complete as possible before I start the build. I'll be interested to see the results of any rigging you decide to add to what is already a superb model. While bending PE parts for the U-Boat I completed, I used two bending tools, a small, square bending tool and the exquisite DSPIAE bender which wile very expensive is a wonderful tool to use for really accurate bending of the tiniest PE parts - but then I justified the financial outlay by admitting I have a 'tool fetish'!

- 225 replies
-
- 6
-
-
- I Love Kit
- Hood
- (and 2 more)
-
First of all, a great build, attention to detail and execution are first rate. The end result is excellent but have you considered any rigging? I know that in this scale rigging is a pig - but it can bring that last bit of life to ship models, even 1/700 warships. Rigging is a real pain and in 1/700 scale you have to make compromises. The biggest problem from my point of view is that even with really detailed books, like Draminski's, it's often hard to decide what to include and what not. Also where do the ends of the rigging end up? For Hood I found this 3D video from Draminski quite an eye-opener and should you decide to add any rigging then I am sure it will help you locate and replicate sufficient rigging to do your already superb model justice: https://www.youtube.com/watch?v=YnzlkfKivpw The beauty is that, as a video, you can stop it at any point you wish and examine details of where the rigging cables are secured at both ends before attempting to render them on your model. That said, it's your model and when it's finished, it's finished!! Flag? Like the rigging I mentioned, it's YOUR model. You don't have to prove anything to anybody. Most Hood models have the lower hull painted red, you've learned that recent thinking/knowledge says that it was almost certainly dark grey if not even black and you have painted YOUR model more accurately than 99% of all other Hood models so .... if nobody notices that the hull of your model is grey and not red then who is likely to know that the flag you have added is not accurate for the time? Go for it, fly the flag and if you ever expect a visit from somebody who's as savvy about HMS Hood as you have become, then remove it until they've admired your work and left the house. But I suspect their first question will be - "Why have you painted the lower hull GREY (gray!) not red?!" The flag is for you - fit it and I guarantee you'll smile every time you look at it. Thanks once again for sharing such a pleasurable build with us. Kind regards Roger
- 225 replies
-
- 6
-
-
- I Love Kit
- Hood
- (and 2 more)
-
So many thoughts, so many problems... I now only use acrylic paints and wherever possible applied with an airbrush. A few tips I now adhere to when painting. 1. Always use a thinner made for the paint you are using. Yes, it's more expensive than home made solutions but there is nothing worse than using almost the same brand of window-cleaner or whatever as a guy used in a youtube video only to discover too late that it does not work for you and your choice of paint. Also, Tamiya thinner MIGHT work well with Vallejo and vice-versa but that may not always be the case. 2. Always prime the surface first. If the surface is plastic then WASH it first! Any grease from finger prints or from the surface of the injection mould will affect how the primer adheres to the plastic so use latex gloves! Water, washing up liquid and a toothbrush are all that's needed. 3. Adjust the airbrush to apply THIN coats of paint. Build up the layer of paint gradually until the desired effect has been achieved, drying the applied paint with plain air from the brush between sweeps of the part being painted. 4. These are just a few basic considerations and are intended primarily for plastic kits. The rules for models made from different materials - wood for example - will doubtless vary but one aspect of painting is common to all materials - CLEANLINESS! Paint will not adhere well to any surface that is not clean and fingerprints are just one source of the painter's nightmare of an unclean surface - masking tape removes paint from an unclean surface faster than the painter can curse as he removes both tape and underlying layer of paint instead of leaving a nice clean join between the two colours. Just a few thoughts from a relative newcomer who learned both the easy and the hard way.
-
Looking really great Craig, the detail and overall impression is very good indeed and you've persevered with all that PE which adds so much to the (nearly) finished model. I think we're all looking forward to the finished model, I certainly am - it's been a very worth-while build to follow so thanks for taking the time to photograph and post with comments. I'm in two/three minds - start my I Love Kit Hood, wait until my Flyhawk Hood arrives (it's in transit) and build that first or build both in parallel ... mmmm.. !
- 225 replies
-
- 5
-
-
- I Love Kit
- Hood
- (and 2 more)
-
I've been catching up with your progress after returning from my holiday on the Baltic and I'm very impressed. It is quite tricky deciding on the sequence of build with wooden decks, paint masks and endless PE to contend with. With Bismarck, and probably Hood when she arrives, I intend to paint the hull first then paint the plastic deck detail that protrudes through the cut-outs in the deck (after removing any plastic that needs to go before the wood deck is fitted) and build the superstructure in blocks that can be painted and dry fitted to each other until it's time for them to be fitted permanently to the deck. This should make painting much easier, especially with Bismarck where the Baltic camouflage is going to be a big challenge for me in this scale. I find researching detail and colour schemes a very rewarding part of model building and learning about the anatomy of the real ship helps me understand how parts fit together. We're all crazy for working in 1/700 scale but anything bigger will leave me with no space for additional models so 1/700 it shall be! Microscopic 'flying parts', PE and plastic, are a real pain but I will wear an apron with the bottom hem taped to the edge of the desk so as to form a hollow into which the AWOL parts can be caught before they descend to the carpet never to be seen again. Of course parts flying away across the workbench are a different matter! Great stuff Alan and I'm learning from your experience of building an FH 1/700 ship, you are certainly working at a much faster rate than I will be once I get started!
-
I presume you mean the stand and not the model!!! The Meng kit is pretty rudimentary and is a 'snap-together' kit moulded in multi coloured plastic parts needing no glue or paint - so, as seen in the pic has been built out of the box completely unpainted. I bought and built it to help me familiarise myself with the ship's architecture and give me experience working in 1/700 scale before embarking on Flyhawk's far superior Bismarck..... but then their Hood suddenly became available.......! The stand on the other hand is two layers of acrylic glass - clear and black complete with delightful screen-printed name and ship silhouette and will do the finished item proud. I just have to decide how to attach the ship to the stand (the Meng has a plastic base as can be seen).