HOLIDAY DONATION DRIVE - SUPPORT MSW - DO YOUR PART TO KEEP THIS GREAT FORUM GOING! (Only 20 donations so far - C'mon guys!)
×


Jared
-
Posts
305 -
Joined
-
Last visited
Content Type
Profiles
Forums
Gallery
Events
Everything posted by Jared
-
Hi. I am in Oakville. Where are you?
-
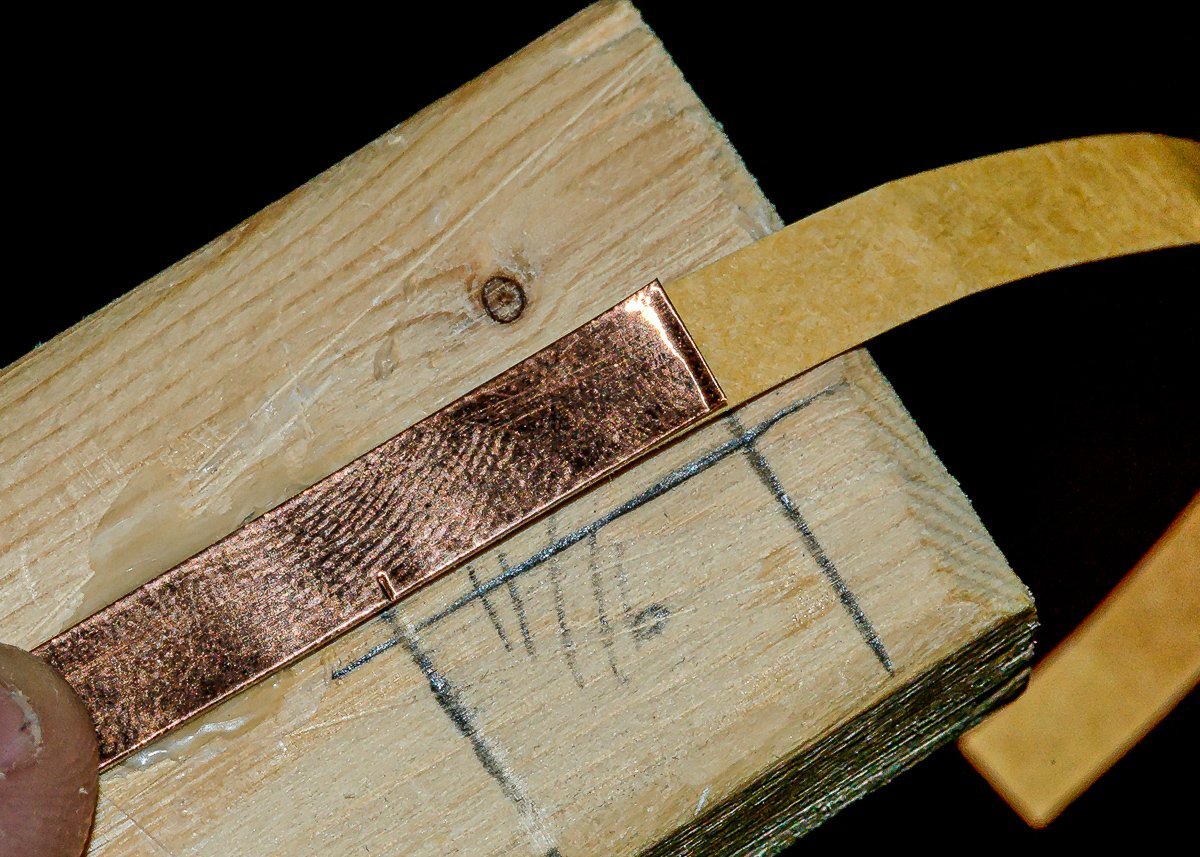
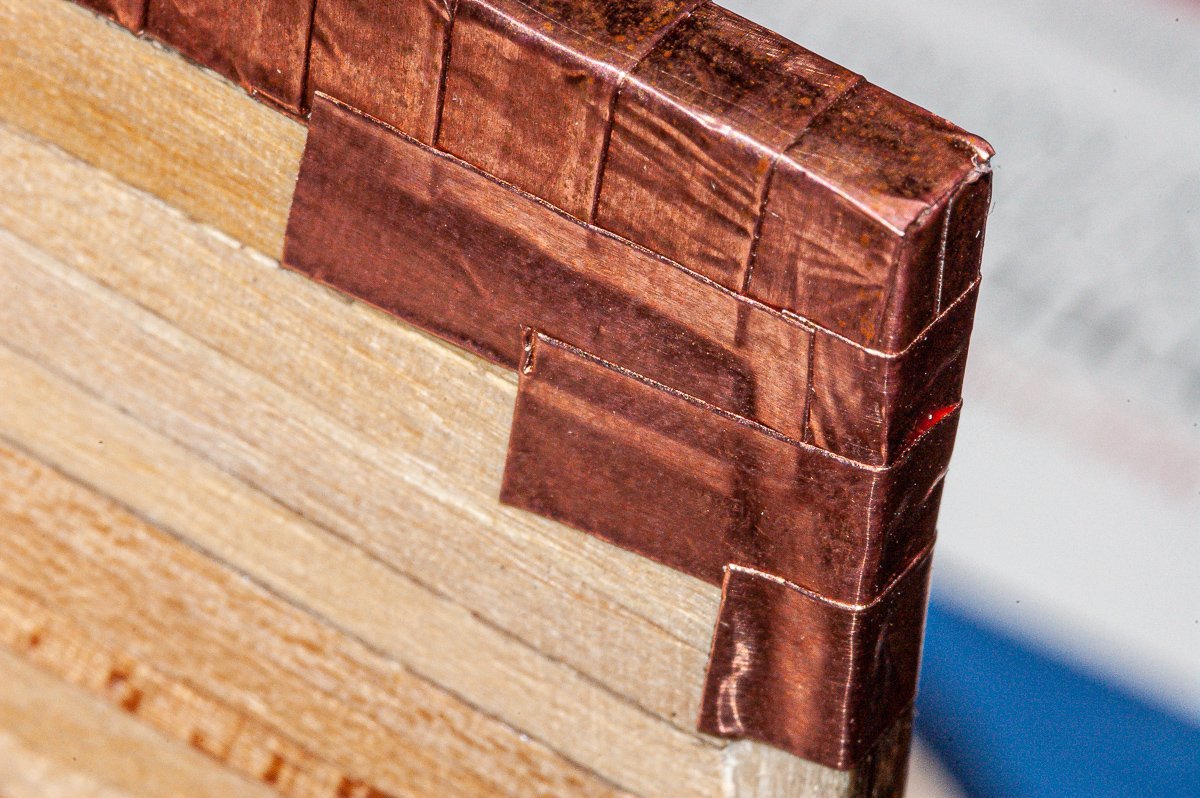
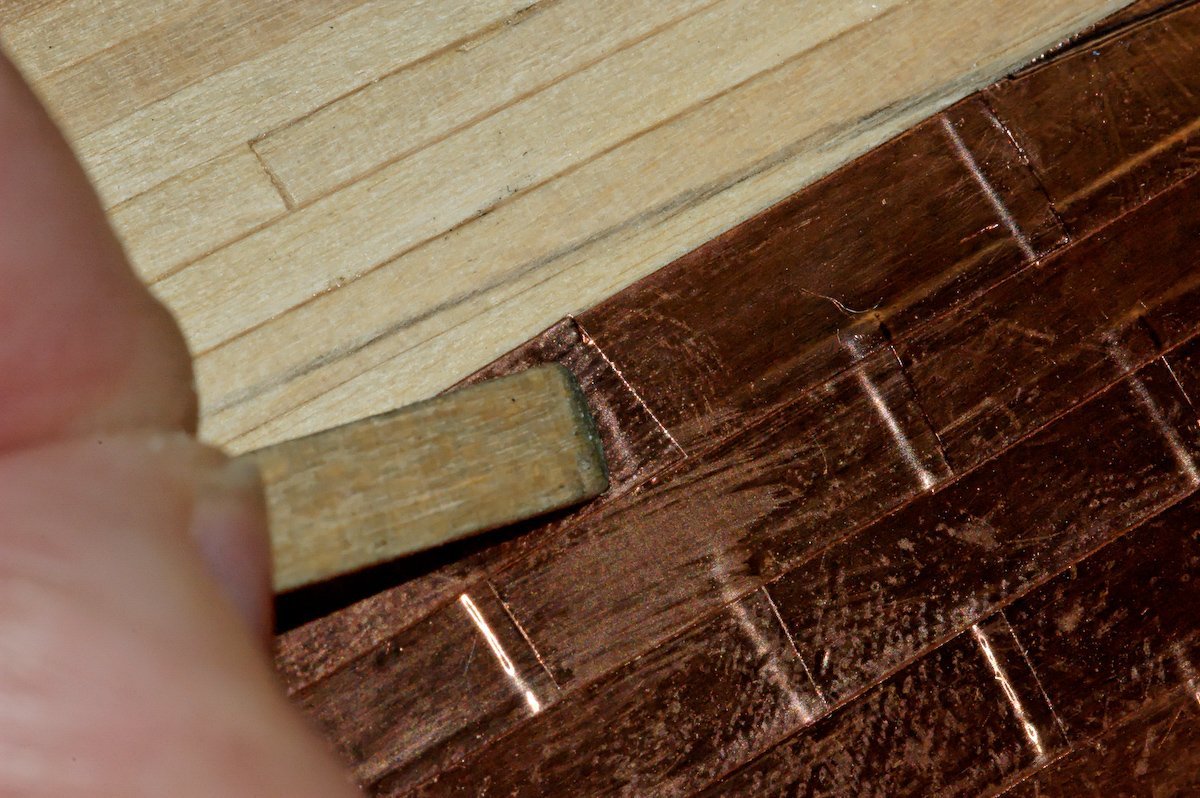
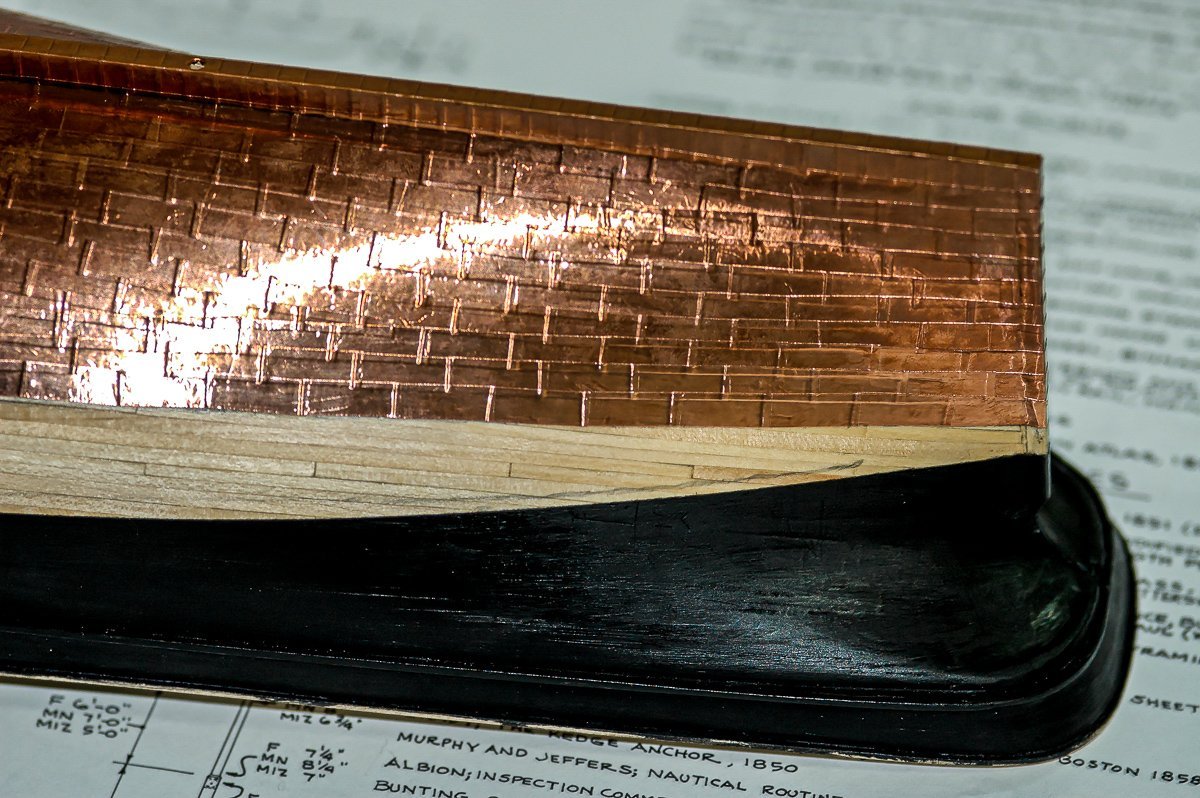
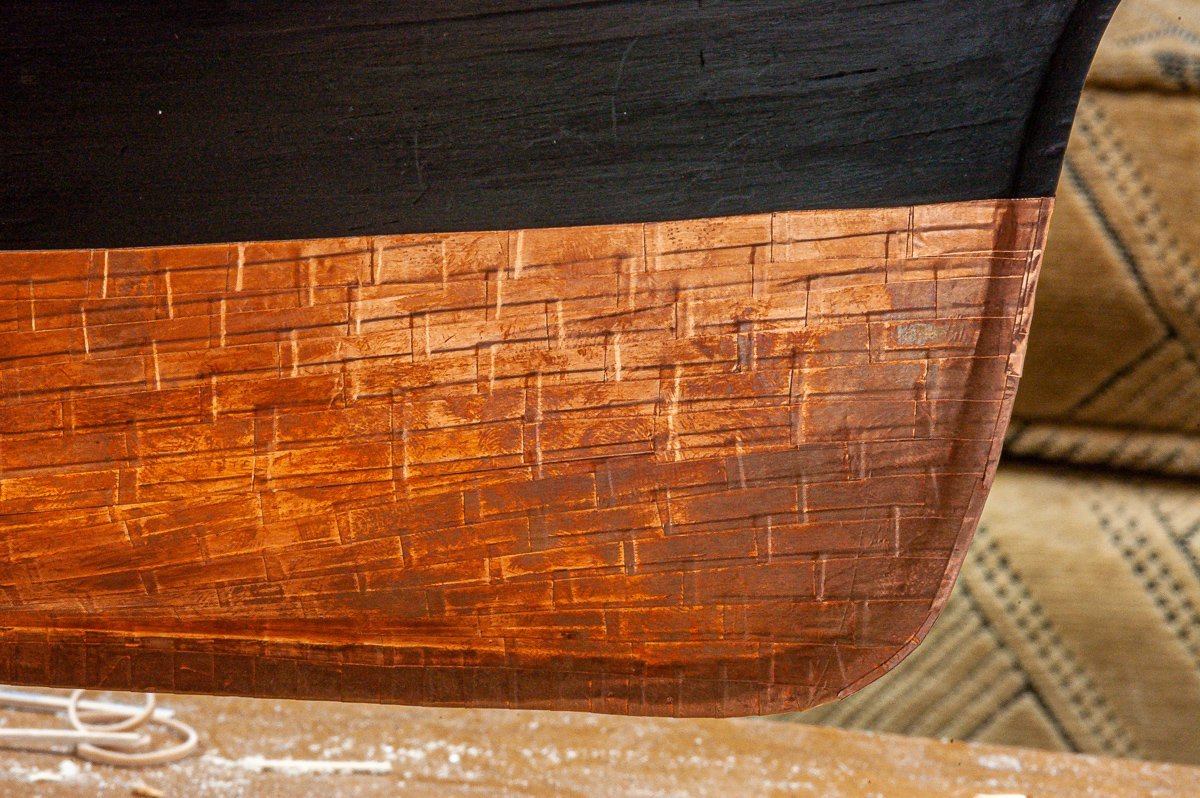
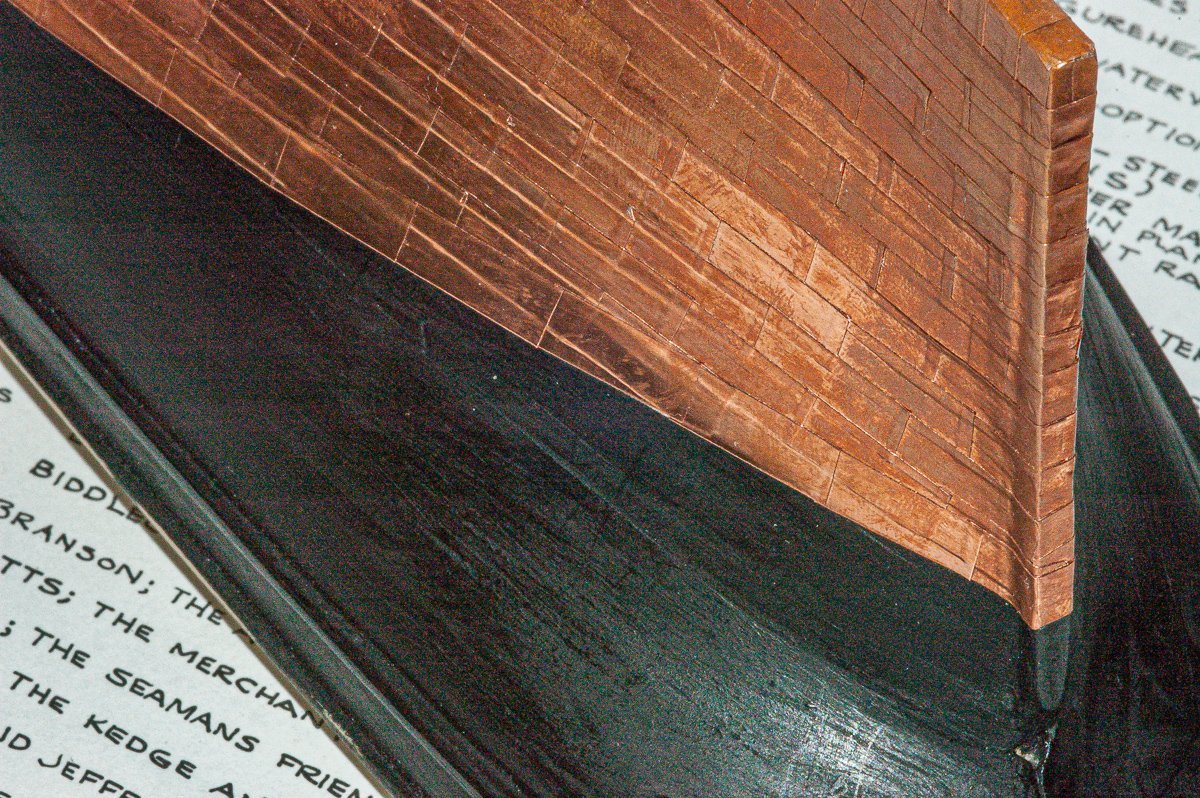
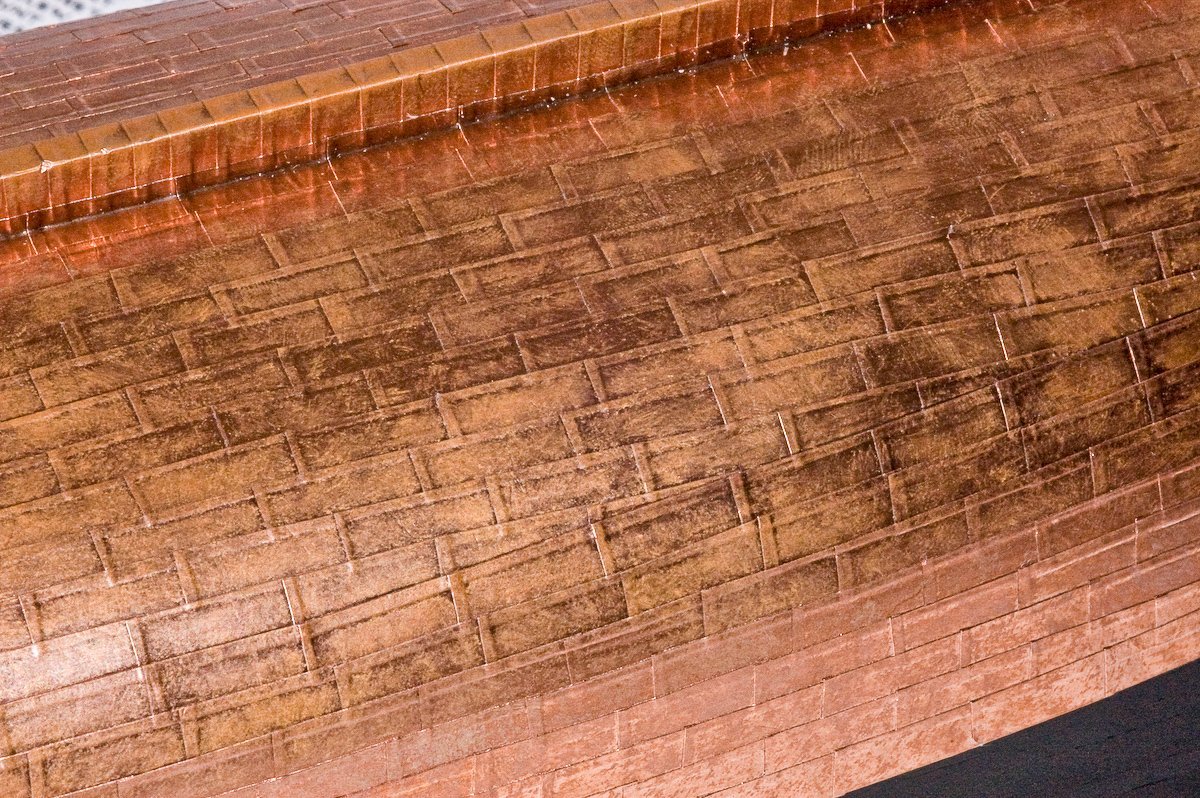
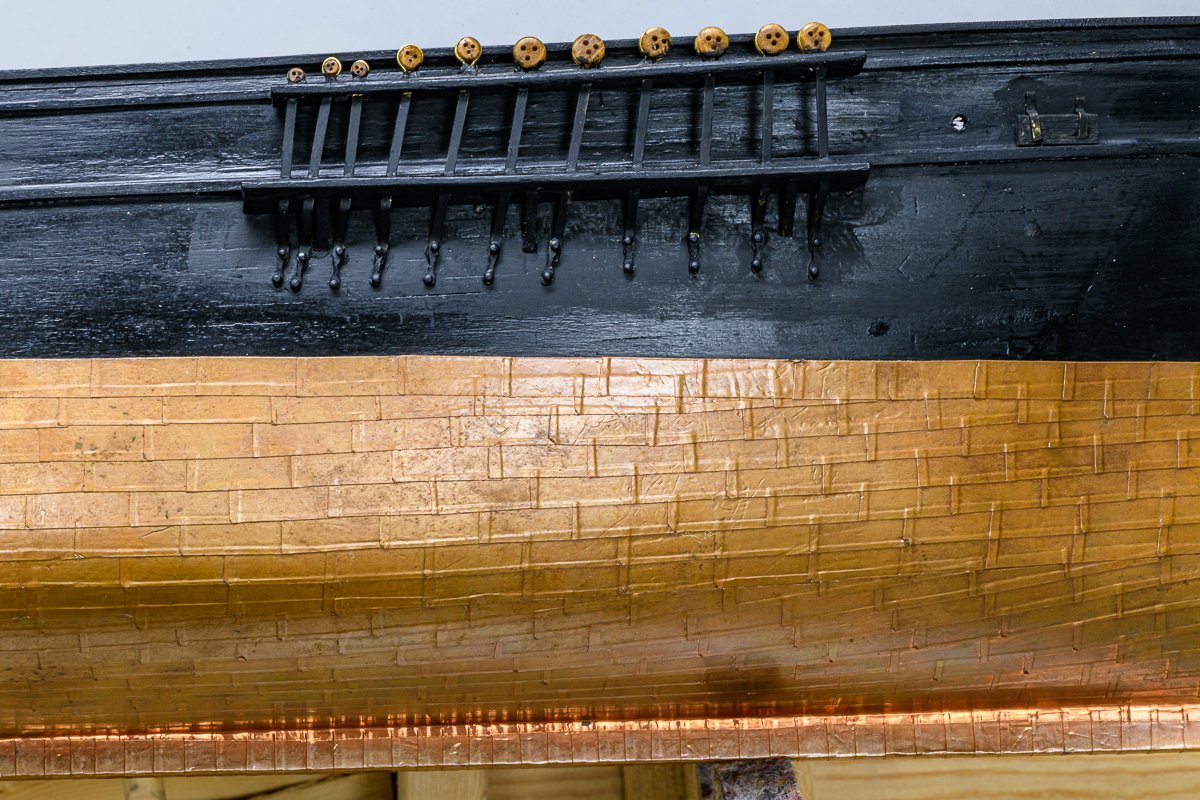
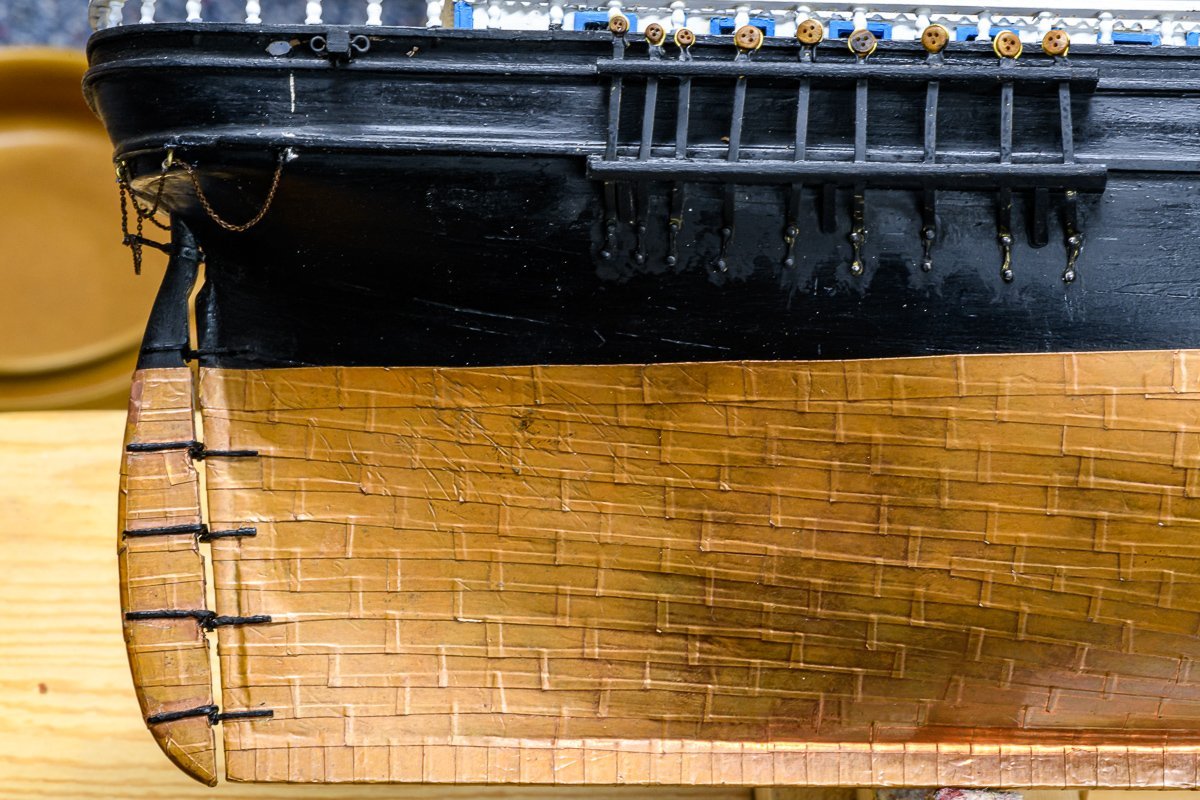
After completing the painting of the upper section of the hull, I began the long and arduous journey of coppering the Hull. Some images of the finished coppering were posted on my second log entry above. I marked off the lengths of several copper sheets at a time using a marked scrap sheet of wood as shown in the first photo below and scoring the cut location along an edge using an hobby knife. To achieve 90 degree cuts I cut the sheets on a Chopper II. Using a set of geometry dividers, I then marked the lines for the coppering upwards and towards the bow to achieve the correct overlapping pattern of the copper plates. I used a smooth scrap of wood to help me press each copper plate into place. Images of several of these steps are shown in the photos below, along with some of the intermediate and finished results. Early in the coppering I drilled holes in the keel for the future mounting pedestal brass rods (photo 5).


- 431 replies
-
- 7
-

-

-
- Flying Fish
- Model Shipways
- (and 2 more)
-
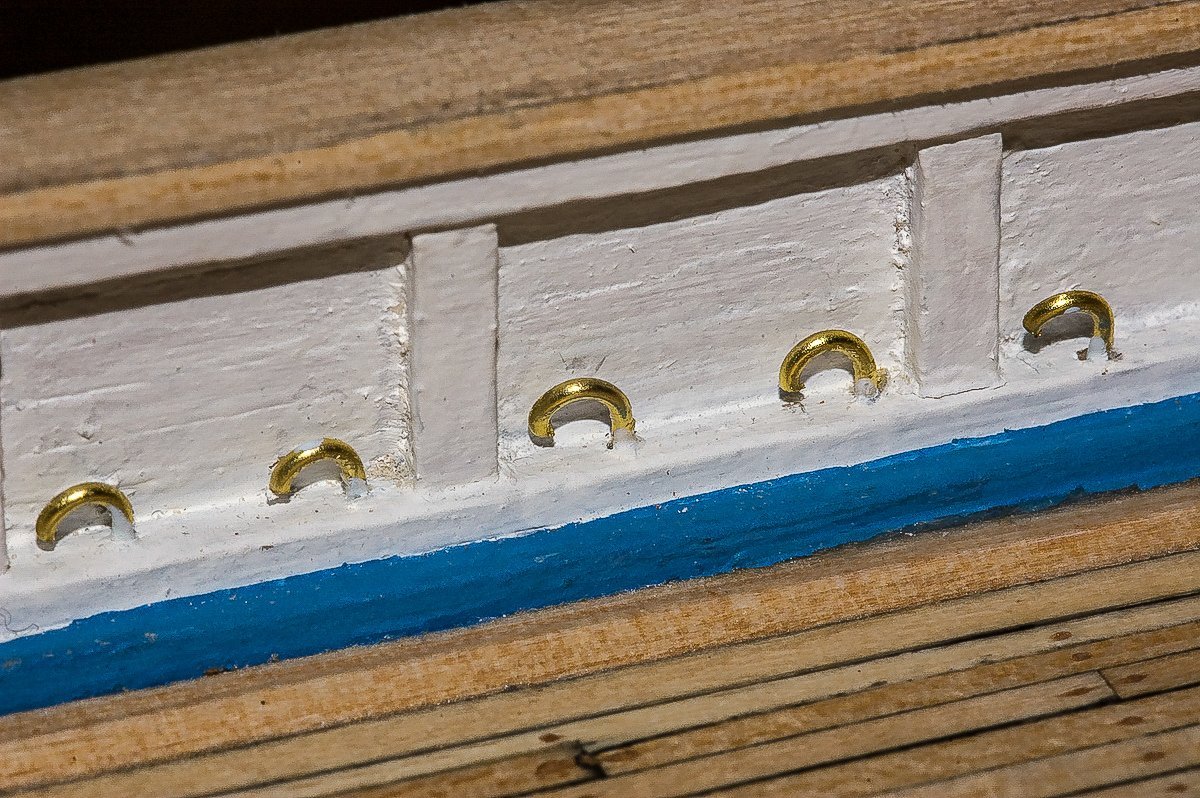
After completing the bulwarks, for reasons I don't recall I jumped ahead of the instructions and made and installed the 1/32" gooseneck pipe vents. I then planked the forecastle deck, and then painted the upper part of the hull black, covering up all my carefully laid planking. The following set of images track this all. For making the gooseneck vents, I have a pair of grounded down, rounded needle nose pliers which I made to fabricate small loops and other rounded structures from brass wire. I don't recall how I marked to lower paint line. I probably took measurements from the drawings using geometry dividers.


- 431 replies
-
- 3
-
-
- Flying Fish
- Model Shipways
- (and 2 more)
-
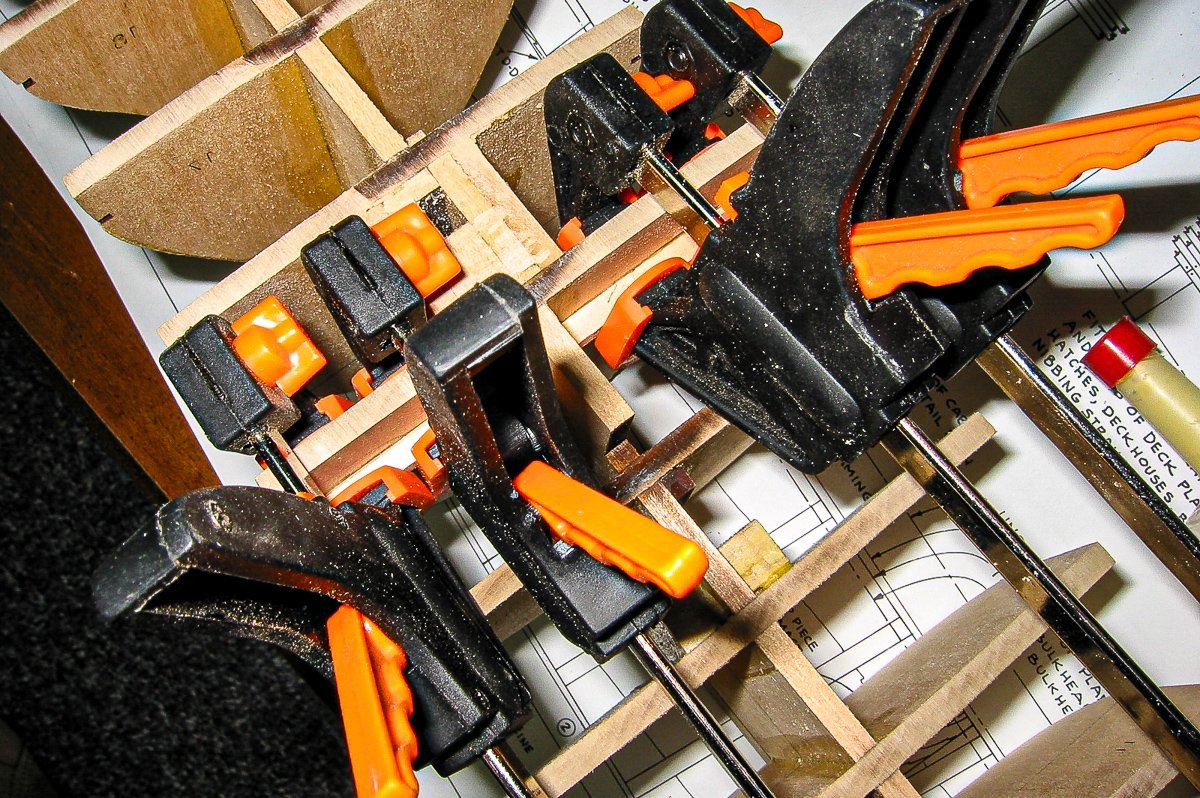
Building the bulwarks. One never has too many clamps!

- 431 replies
-
- 5
-
-
- Flying Fish
- Model Shipways
- (and 2 more)
-
I too have been struggling with what to do with the anchor release pull cord. There seems to be very little info on this on the internet. The only thing I have to go on are 2 photos I took in 2016 of the Curry Sarks cathead and a description of that ships anchor release gear on pages 172 and 173 of Longridge’s “The Curry Sark” book. These show that ship’s release mechanism includes a stout metal shaft that passes through the bulwarks at the front of the catheads. I will follow this design on my FF, given the lack of any other info., using a pull rope rather than a stiff rod. I am finding you build log very helpful.
-
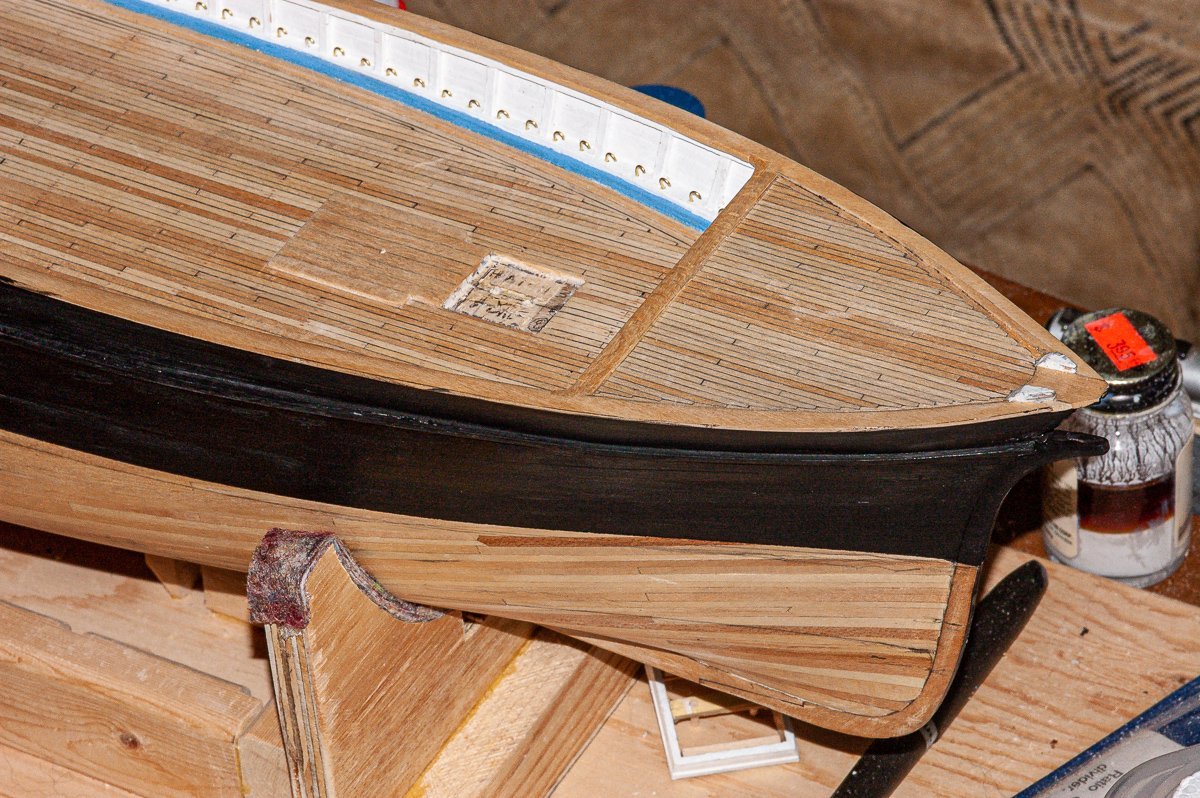
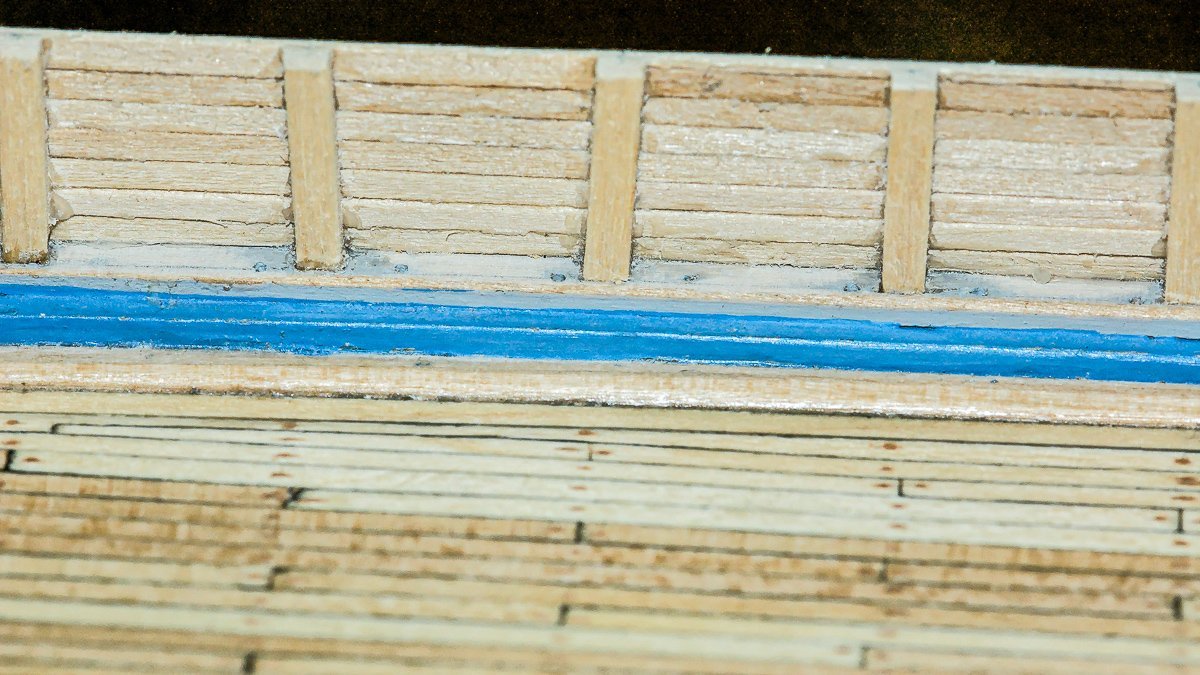
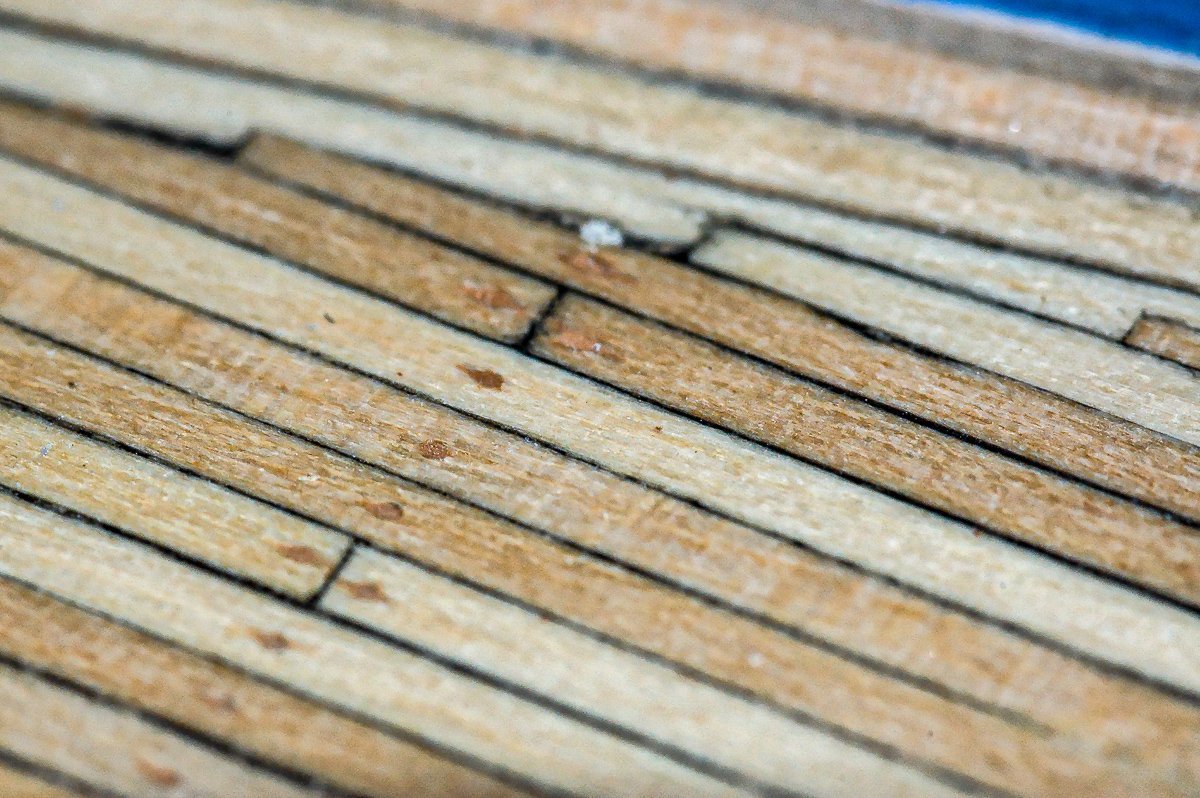
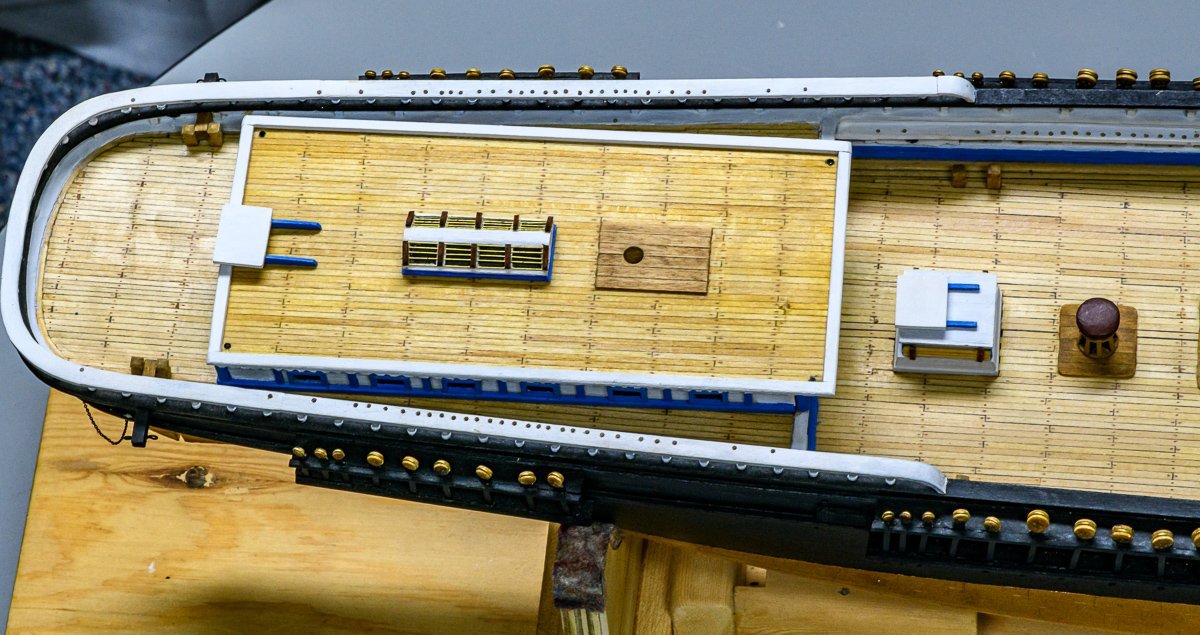
Next up was the planking of the main deck which I enjoyed. I basically followed the methodology and plan in the manual (Photo 1). The planks were cut to 2.5" lengths then edge painted with black paint to simulate the caulked seams. They were laid in rows from the center of the deck in a staggered pattern, where the butt of every 4th board lined up with a bulkhead. This was simplified by drawing lines to locate the plank butts on the balsa underdeck which I discussed in an earlier log entry. Margin planks were fitted on the forward upper deck (Photo 2). To simulate treenails I used a sharp nail to form small holes at the ends of the planks, which I then filled in with mahogany-coloured wood filler. The deck was then finely sanded to give a clean smooth look (Photo 2). At a future stage of the build, I will probably apply tung oil to finish the deck.

- 431 replies
-
- 3
-
-
- Flying Fish
- Model Shipways
- (and 2 more)
-
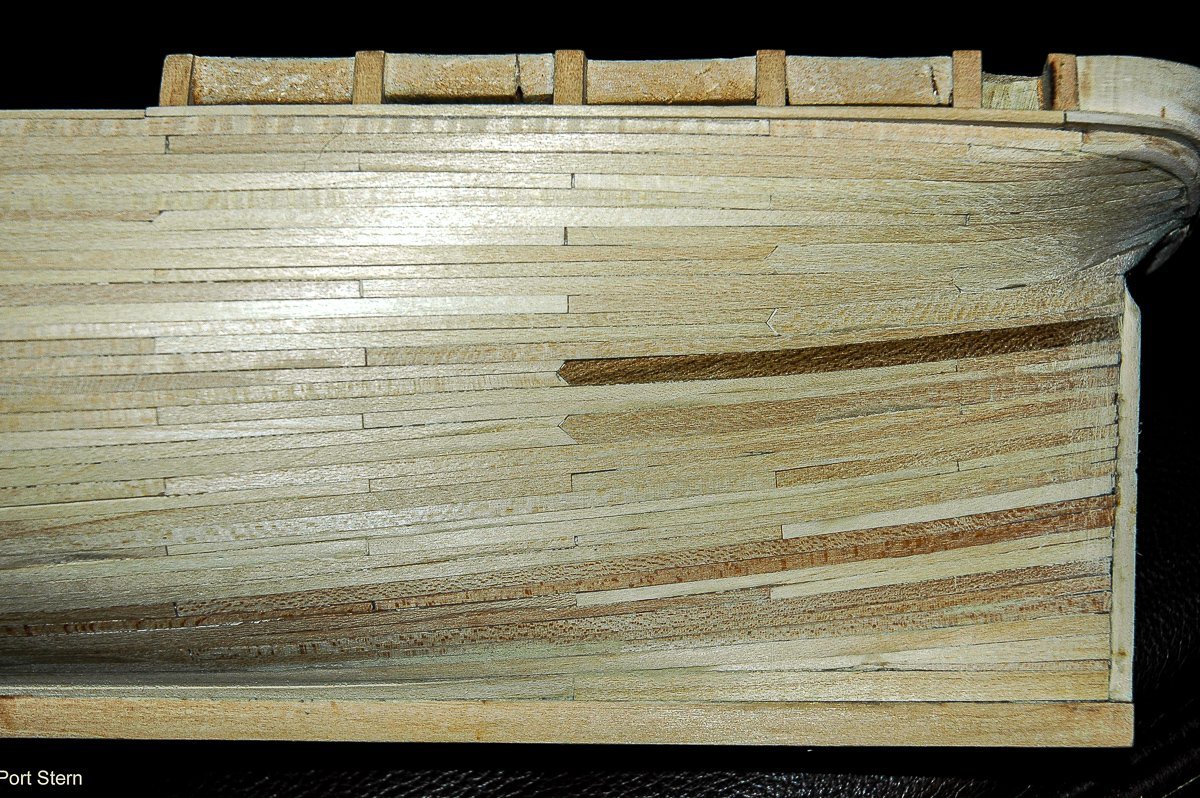
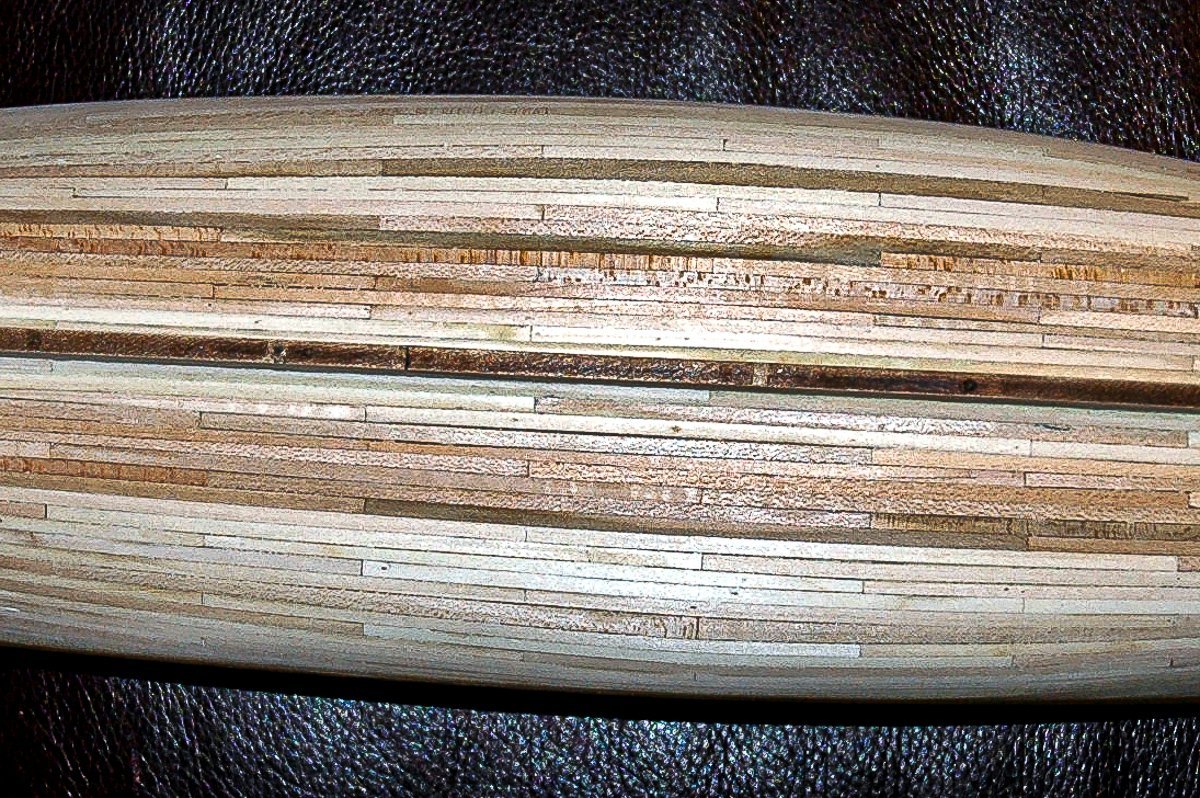
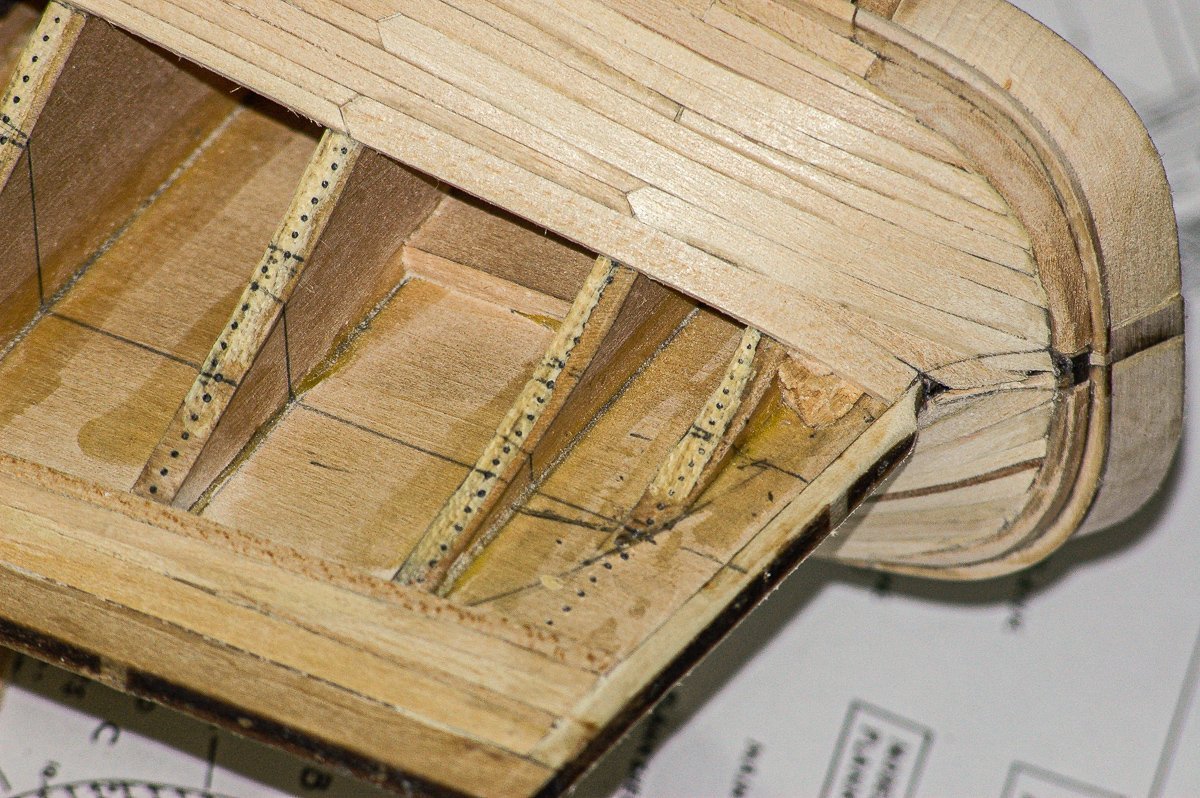
The 4 images below show the finished planking. I tried to adhere as closely as I could to the planking instructions with respect to the length and width of the boards, staggering the planking butts and using stealer inserts. To strengthen some of the joints, I glued additional boards behind some of the planks, especially where the plank butts did not attach over a bulkhead. Sadly, with the hull now being coppered and painted, it is hard to really appreciate how much time and effort went into laying the planks properly!


- 431 replies
-
- 6
-
-
- Flying Fish
- Model Shipways
- (and 2 more)
-
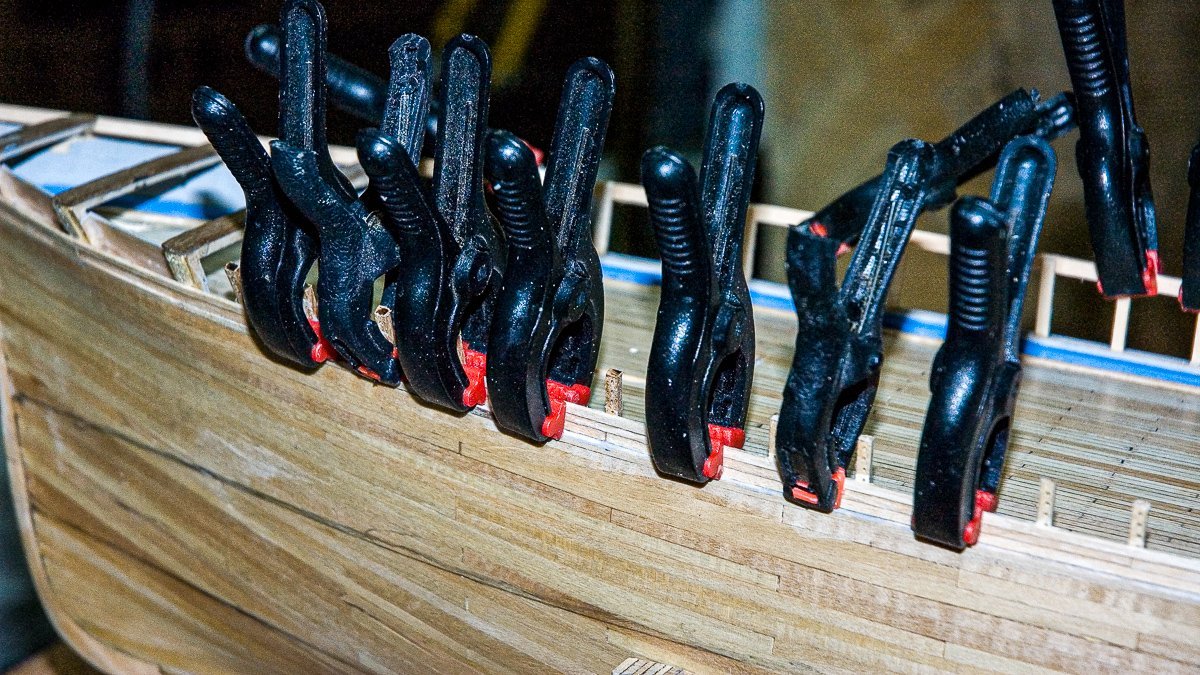
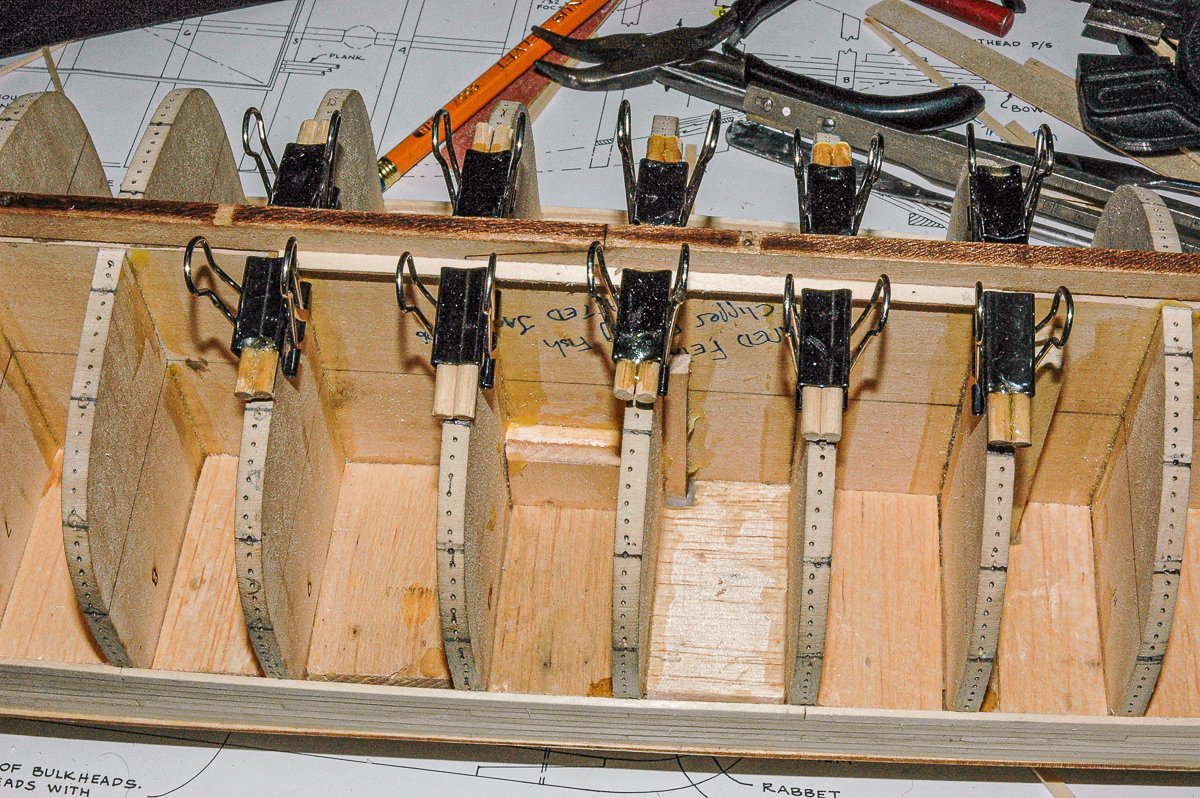
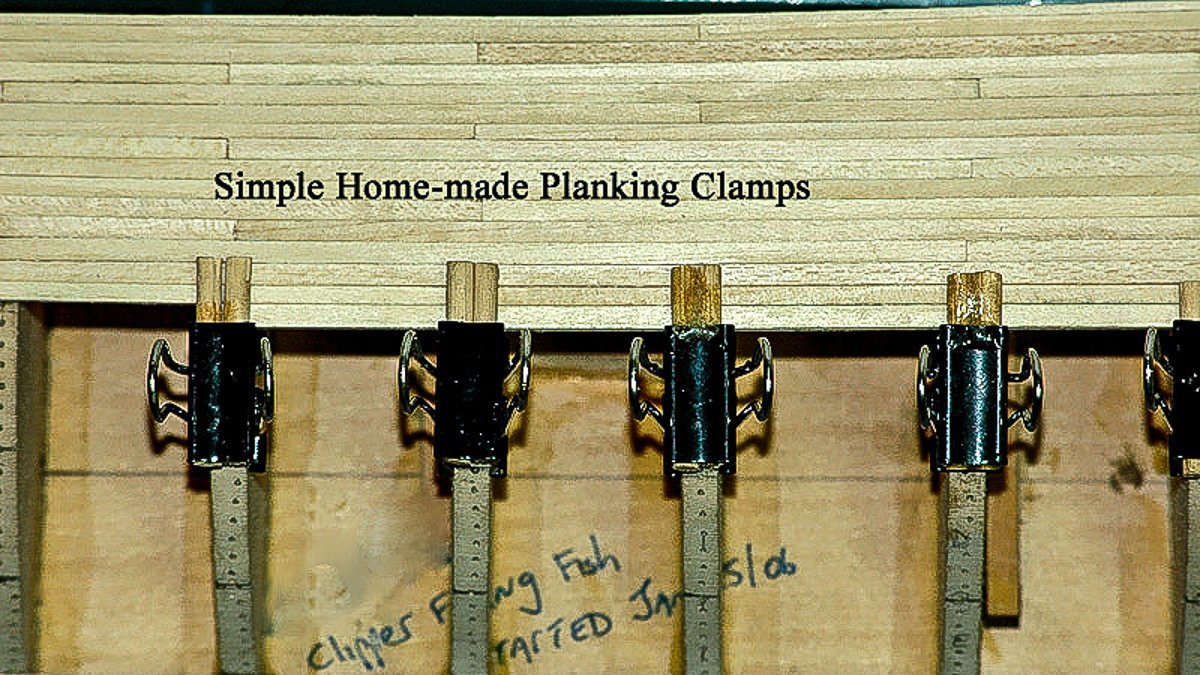
My home made planking clamps in action. The first image below show the laying of some of the planks making up Belt F. For the first 2 rows of planks along the keel, the binder clips are affixed to the bulkhead, with the "flat side of the clamp pressed against the plank being glued to hold it tightly in place. The same is true for the first 2 rows of planks laid in Band A. Thereafter, I use the end of the clamp with the extended dowels to hold the freshly glued planks down. This provides additional surface to hold the planks more tightly against the bulkhead (see second image). At some point when the non-planked space between the descending and ascending rows of planks becomes too narrow, the clamps can no longer be used and I resort to the human finger clamp :-). I used a proportional divider to mark the location of each row of planks, within each band, on each bulkhead as shown in the 3 images below. This saved me a lot of time and grief.
- 431 replies
-
- 5
-
-
- Flying Fish
- Model Shipways
- (and 2 more)
-
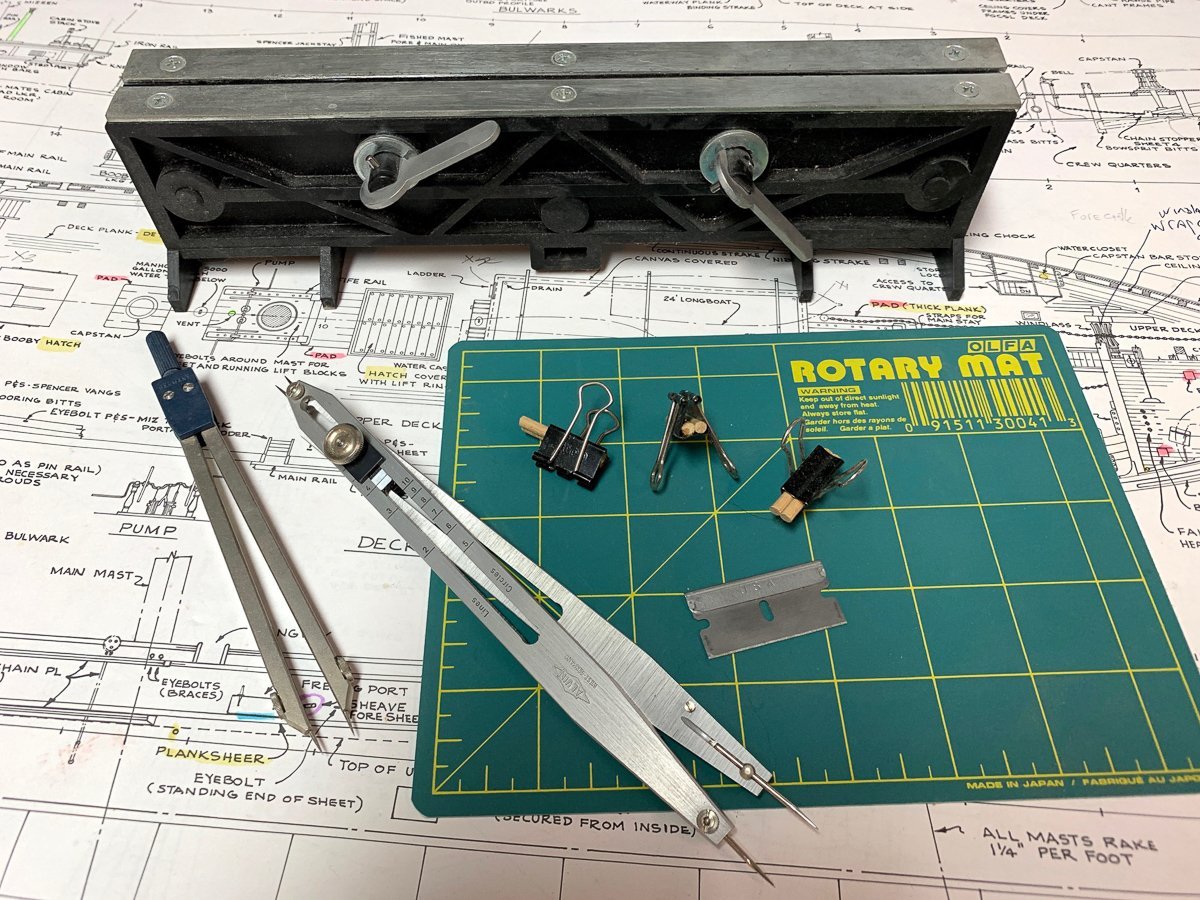
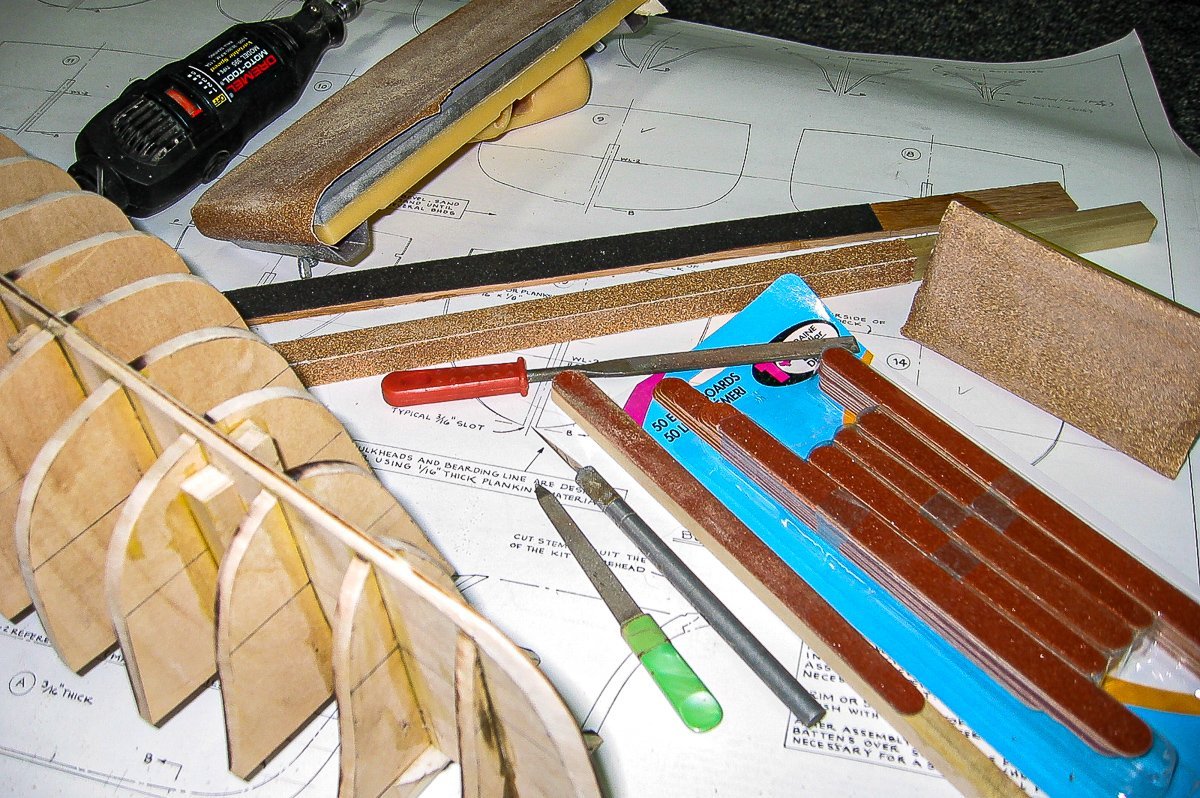
I think the quality of the hull planking on a wooden model ship is of utmost importance. It is critical that the boards be cut right and fitted together tightly and smoothly, to achieve a museum quality look. It is therefore very important to acquire a good set of planking tools. The next photo shows what is in my tool box: 1. Plank tapering tool (top). This clamp-like jig hold the wood firmly in place and lets you taper the wood to the desired angle while preventing the wood strips from splitting. I use sharp razor blades for the cutting. 2. A set of dividers (bottom left) - for taking measurement off the build sheets and transferring them to the wood building materials. 3. A set of proportional dividers (second item in, bottom left) - although pricey, they are so worth it for marking the exact locations of the planks on the bulkheads. Makes the job so much easier. 4. Plank bender (crimping tool) - not shown in the photo. I believe mine was made by Artesania Latina. 5. Planking clamps (middle of the photos). These are needed to hold the planks firmly in place when gluing the planks to the hull. A number of vendors offer various planking clamps. I found it was easy enough to produce my own at negligible cost, using small-sized Acco binder clips to which I glued 2 small dowels with epoxy glue. The dowels were flush with one end of the clips and overhung the other (important). I will show some photos of how they are used in my next post. 6. For laying down the temporary batons in my previous log entry, I used a hand model nail driver (not shown in this photo) 7. Cutting pad 8. Chopper II - NorthWest Short Line - To cut the wood strips to desired lengths. (https.evergreenscalemodels.com/products/chopper-ii) Hope this was helpful.
- 431 replies
-
- 3
-
-
- Flying Fish
- Model Shipways
- (and 2 more)
-
You did a fantastic build!
-
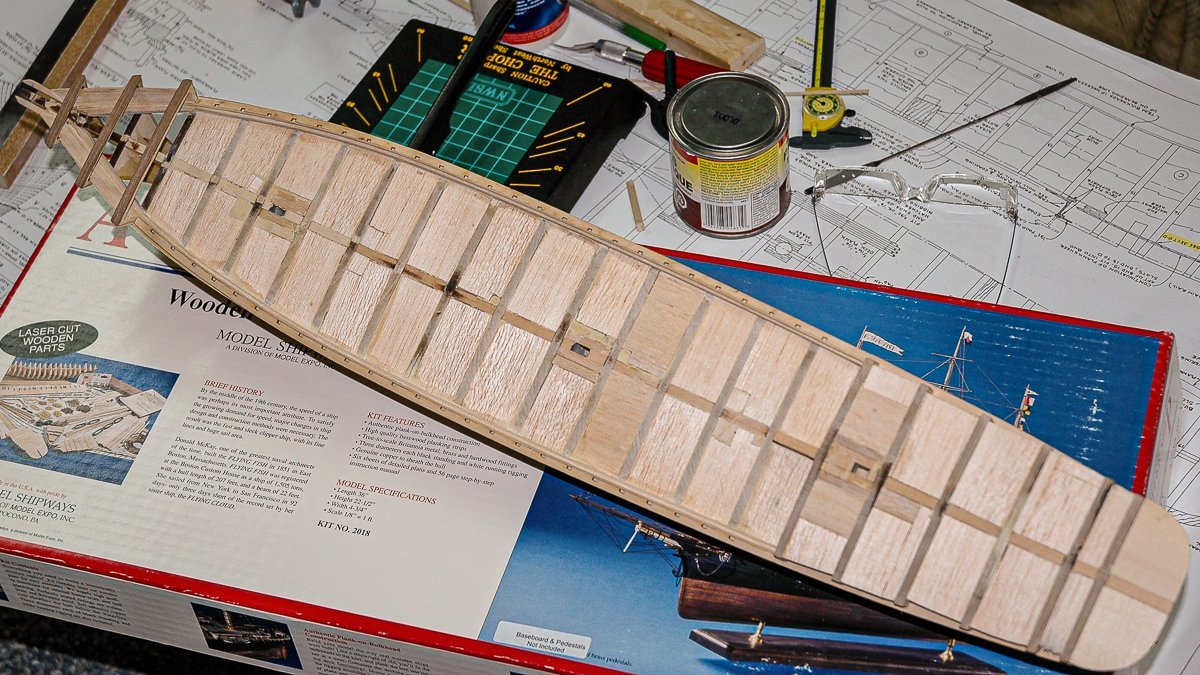
After laying the balsa underdeck, I skipped ahead to planking the Hull, leaving construction of the bulwarks and rails to later. I closely followed the instructions on page 16 of the manual to mark the location of the belt seams on the bulkheads, using tick strips as shown in Photo 1 below. Then I tacked temporary battons along the seam marks to check that everything flowed correctly, making adjustments as necessary (Photos 2 & 3 below).
- 431 replies
-
- 2
-
-
- Flying Fish
- Model Shipways
- (and 2 more)
-
Thank you
-
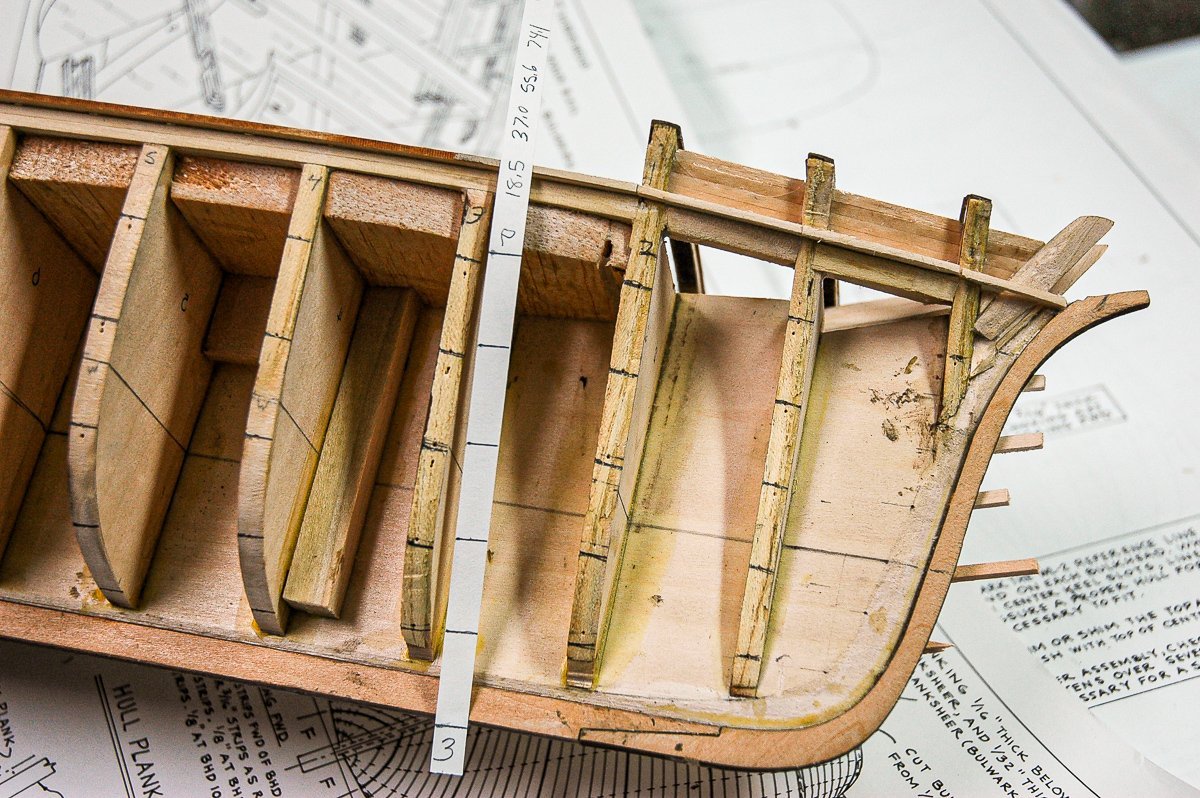
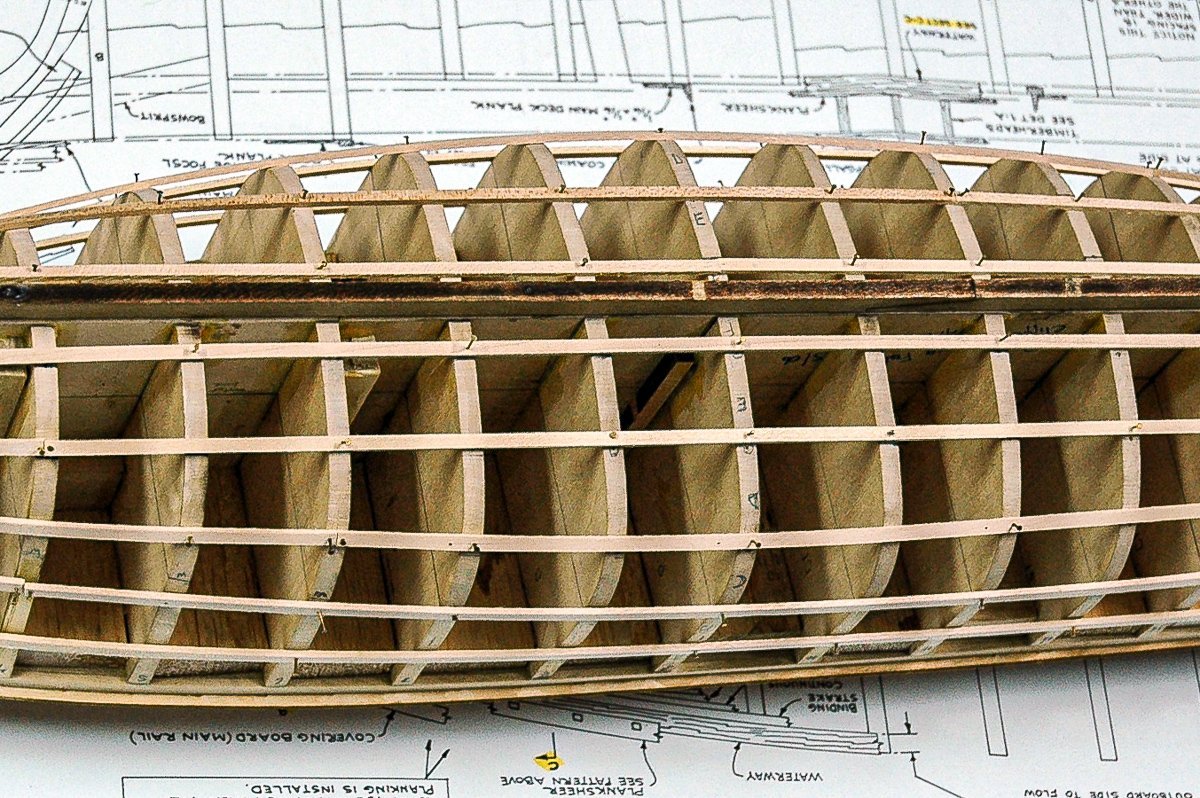
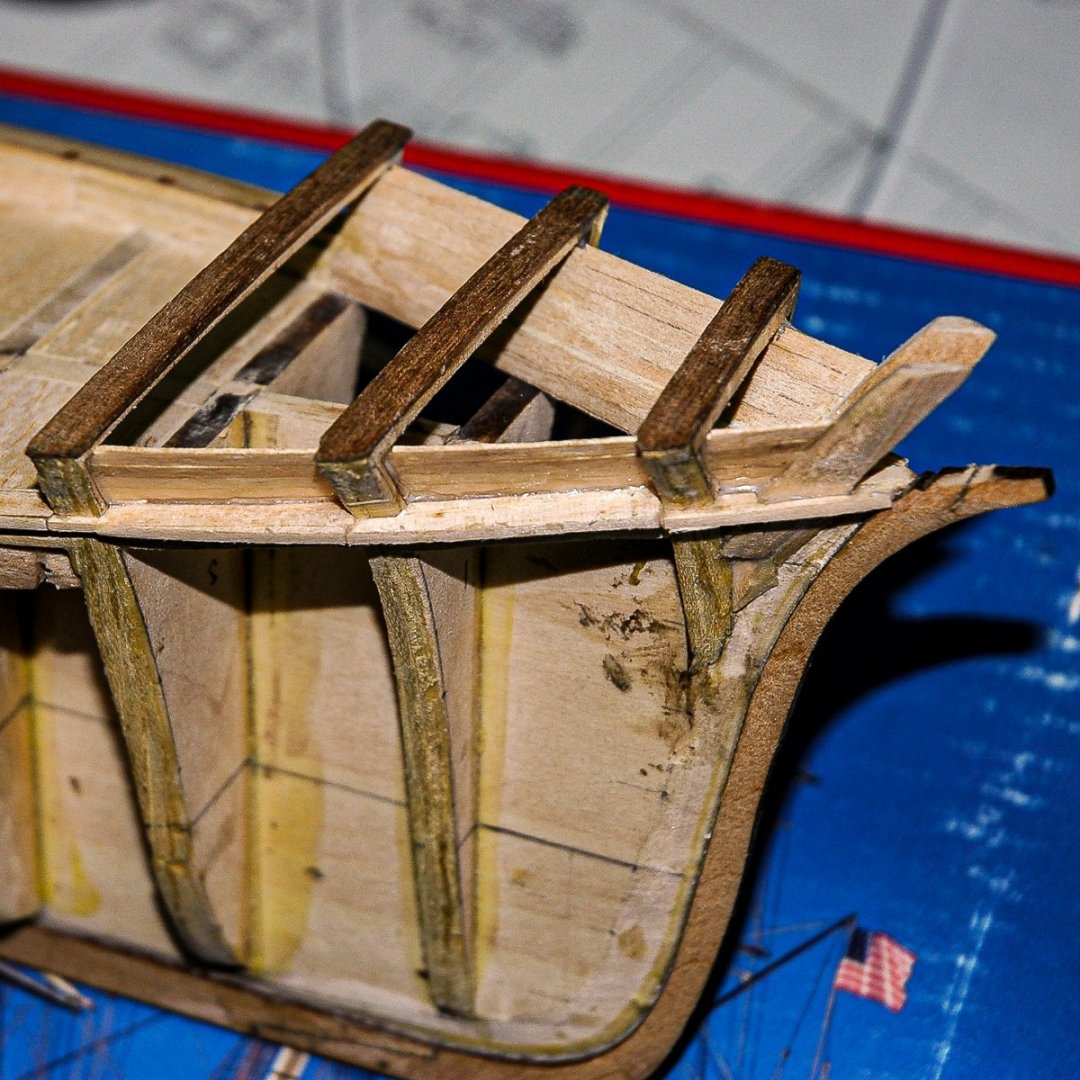
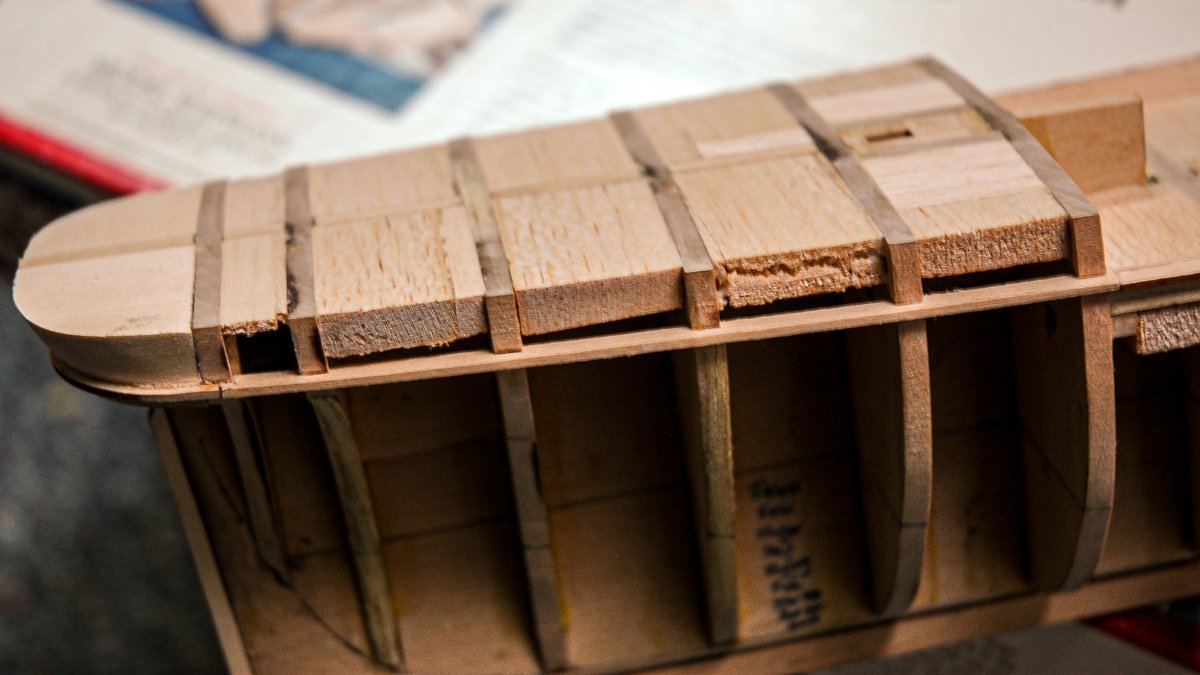
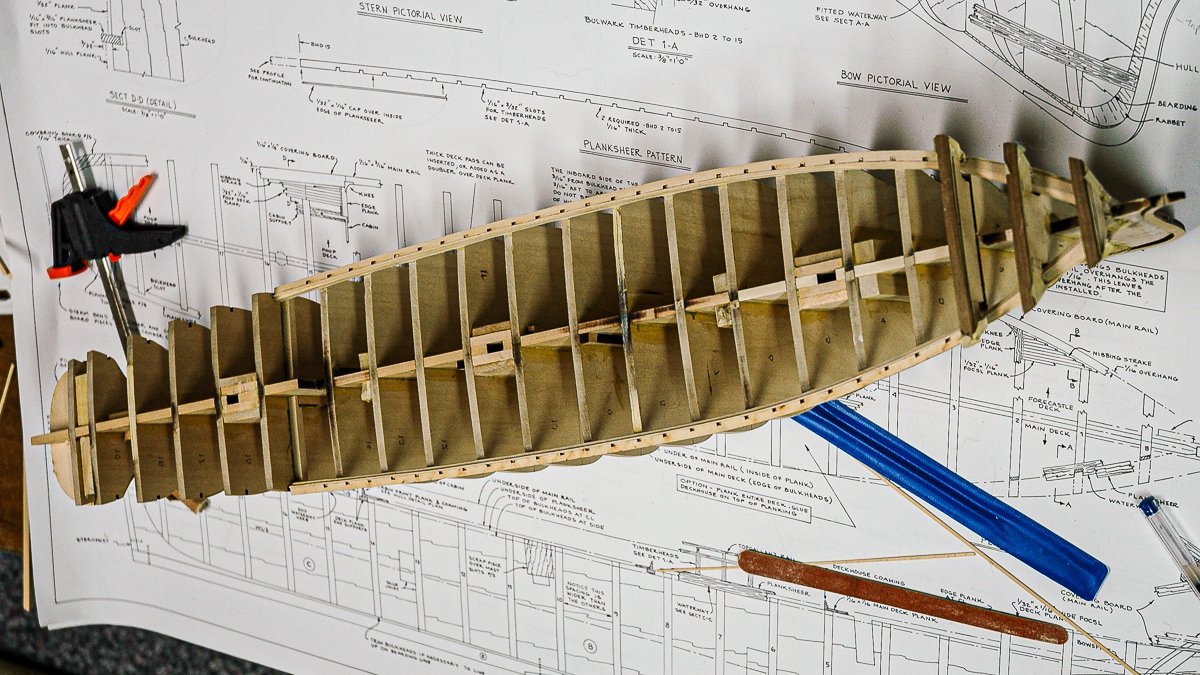
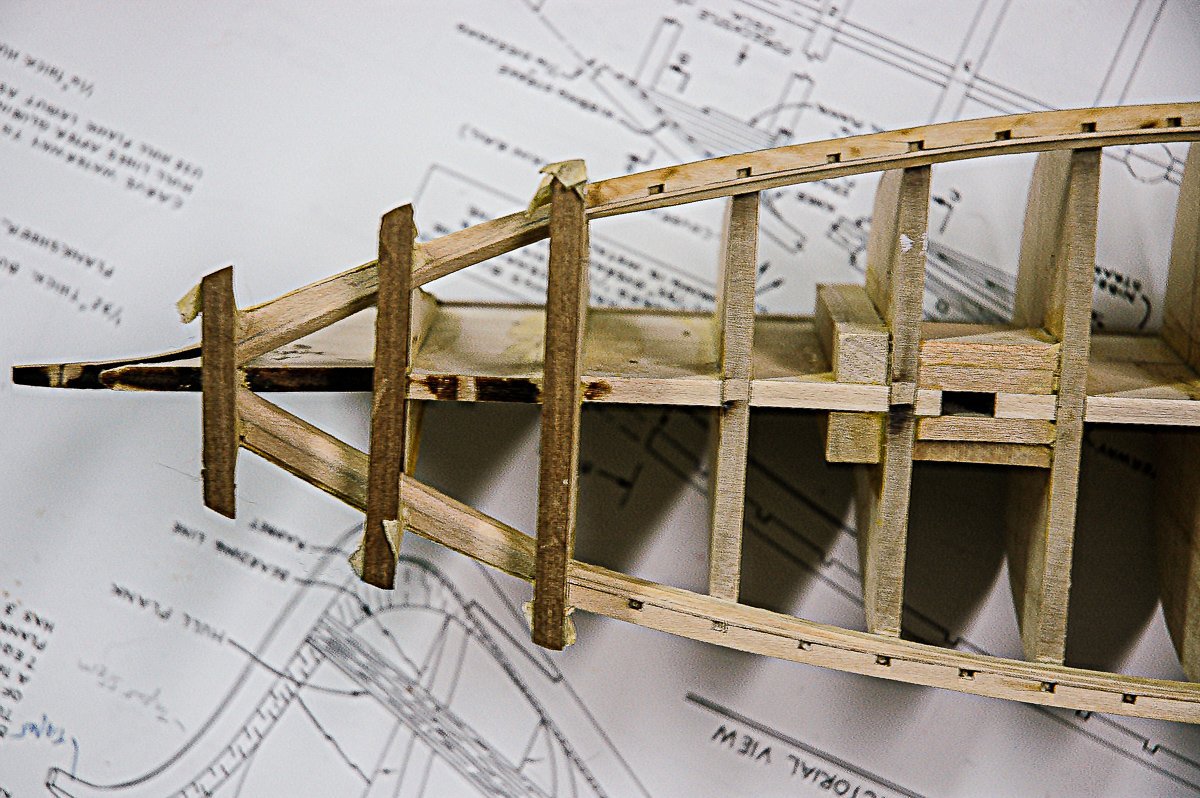
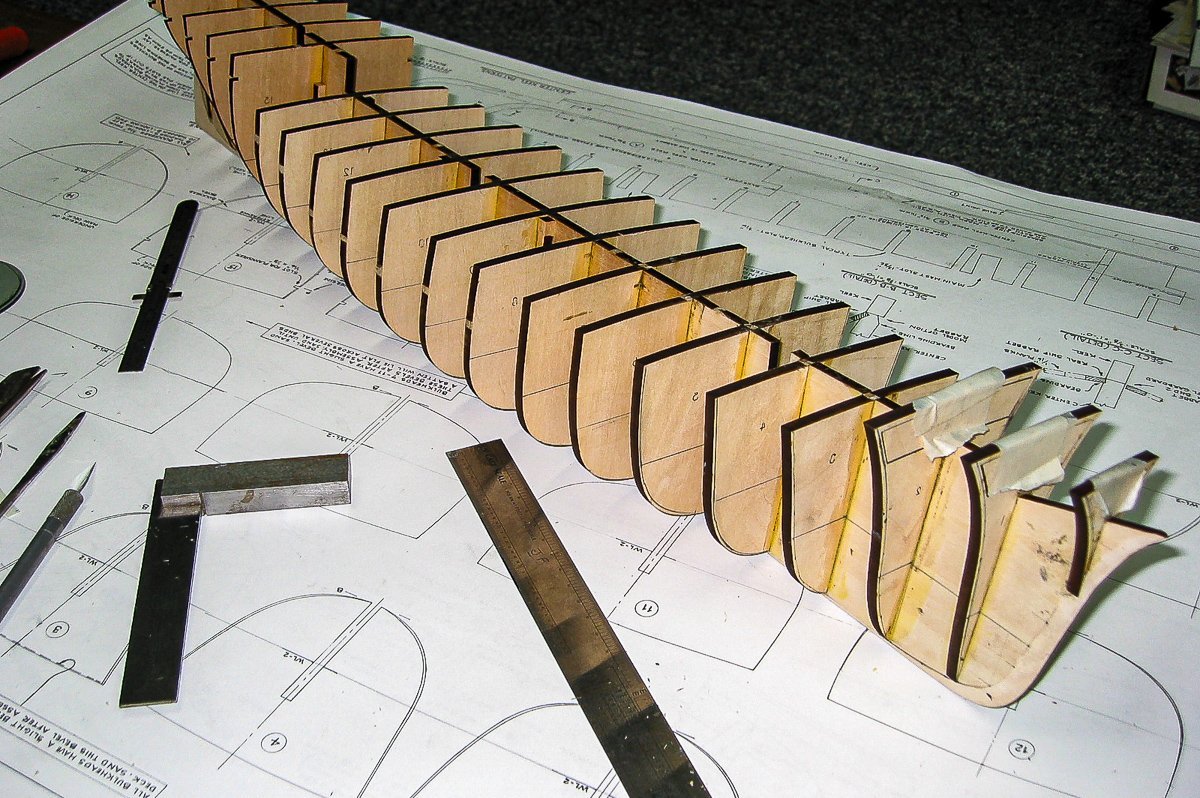
As I get back into the build after my long shore leave, I am finding it useful reviewing my past activities and posting some of the construction here. After completing the waterways and planksheer, I completed the some of the bow and stern framing as per pg. 14 of the manual. I then deviated somewhat from the plans. I was concerned about the subsequent planking of the decks - As I was intending to lay the deck boards at scale lengths, I wanted more of a surface to attach the boards to than just to the bulkheads. I also wanted to strengthen the model. To achieve these objectives, I made a solid subdeck which filled the open spaces between the bulkheads and hull using balsa wood, as shown in the photos below. When I later laid the deck planks, I was very happy with my decision. The balsa spacers were sanded down to match the shape and height of the top of the bulkheads.
- 431 replies
-
- 4
-
-
- Flying Fish
- Model Shipways
- (and 2 more)
-
Building the waterway, planksheer and mast slots.
- 431 replies
-
- 4
-
-
- Flying Fish
- Model Shipways
- (and 2 more)
-
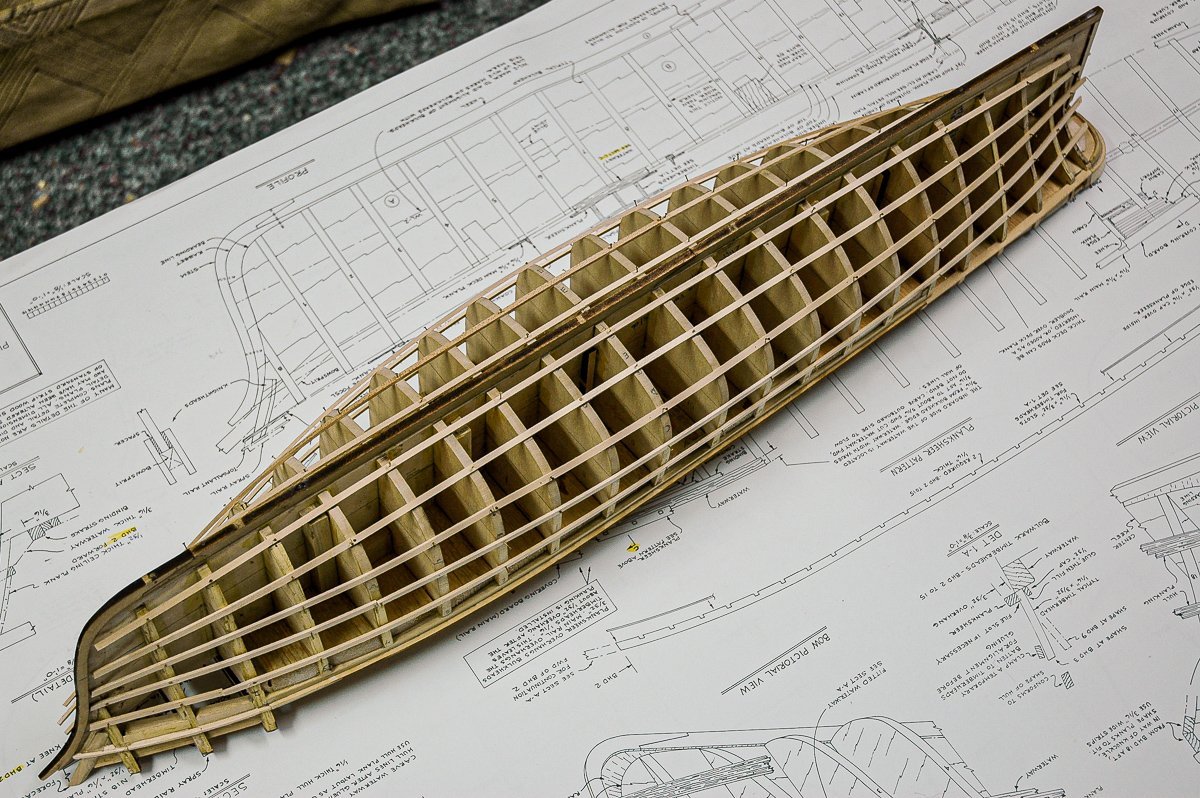
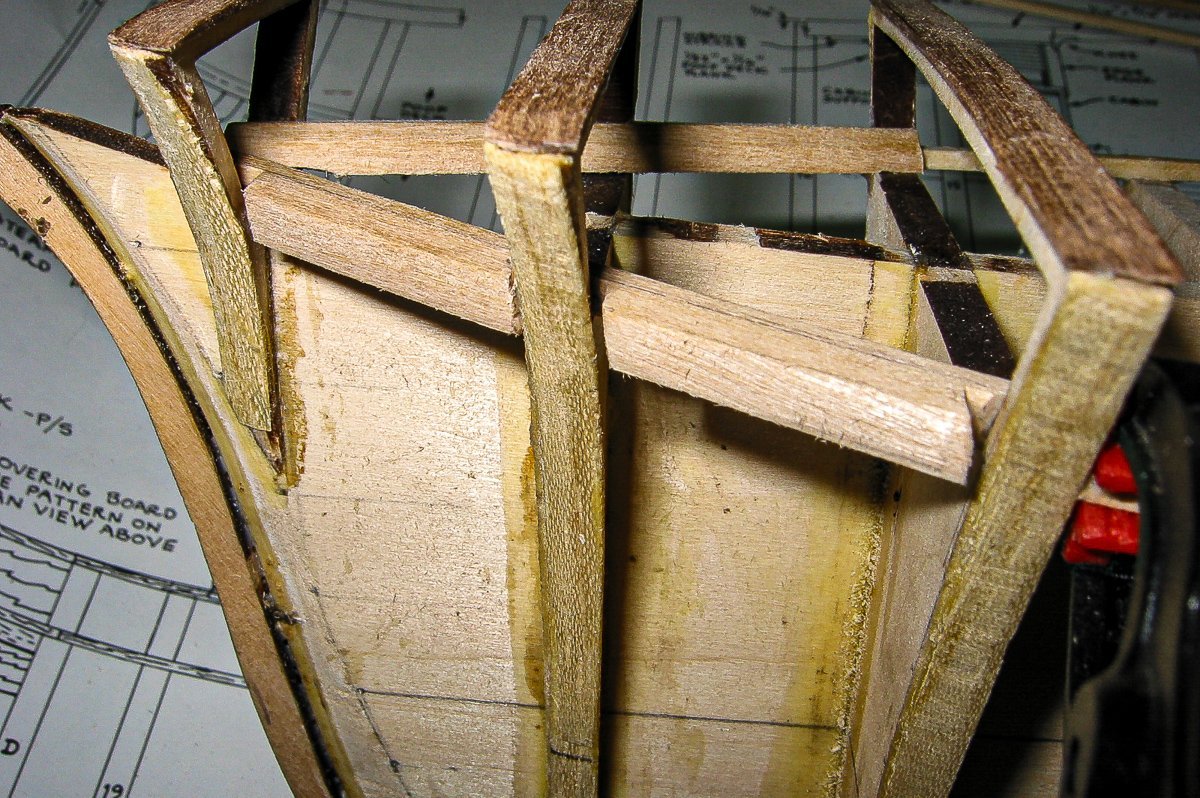
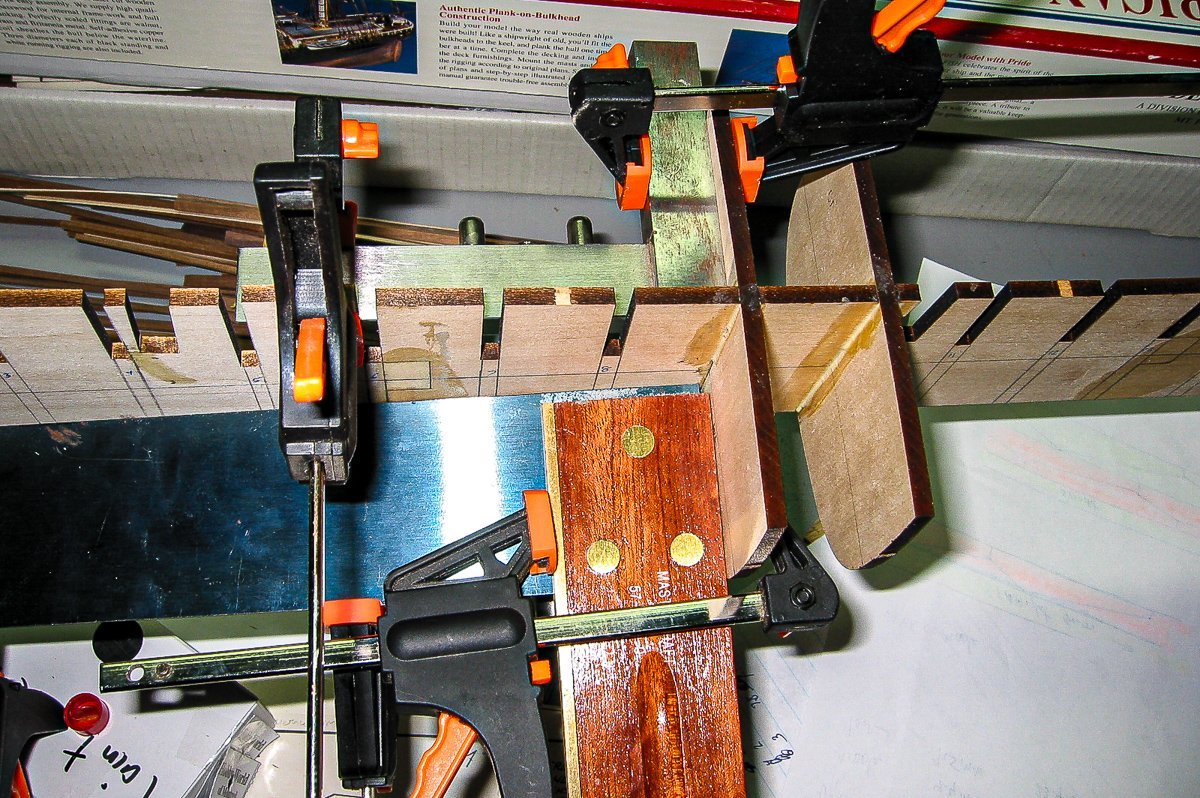
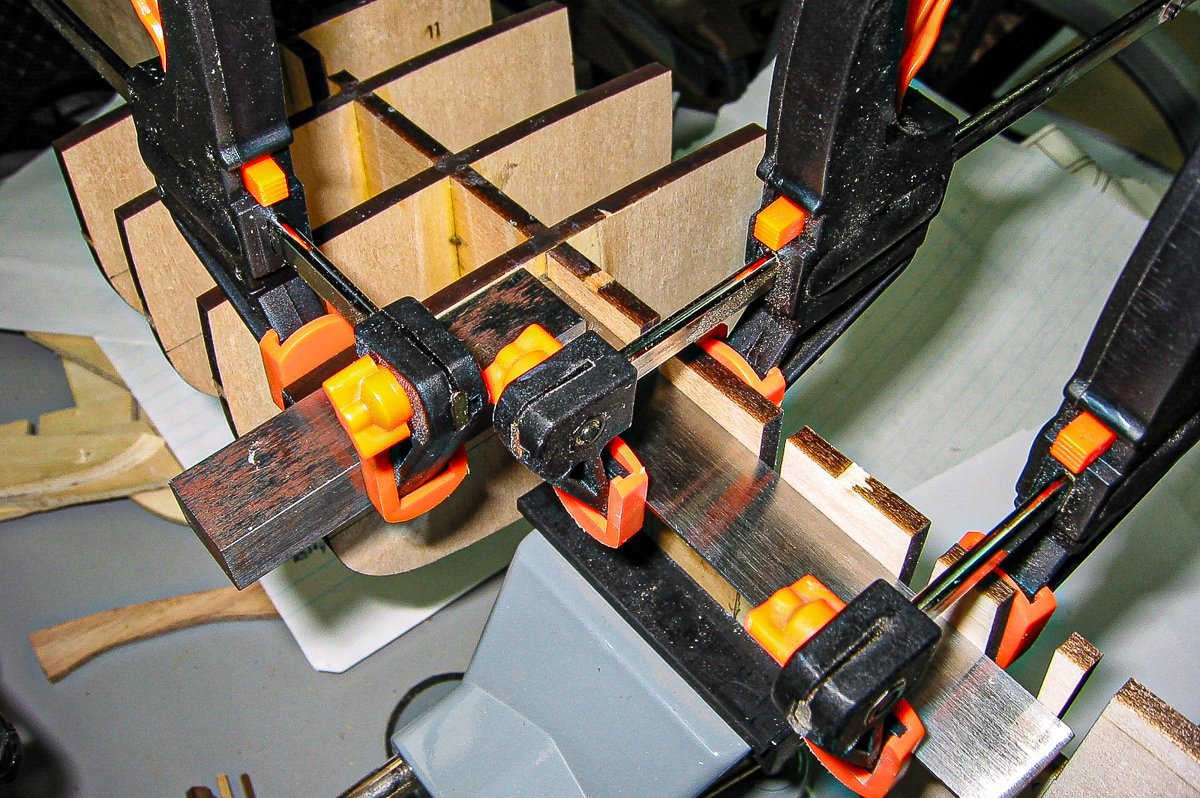
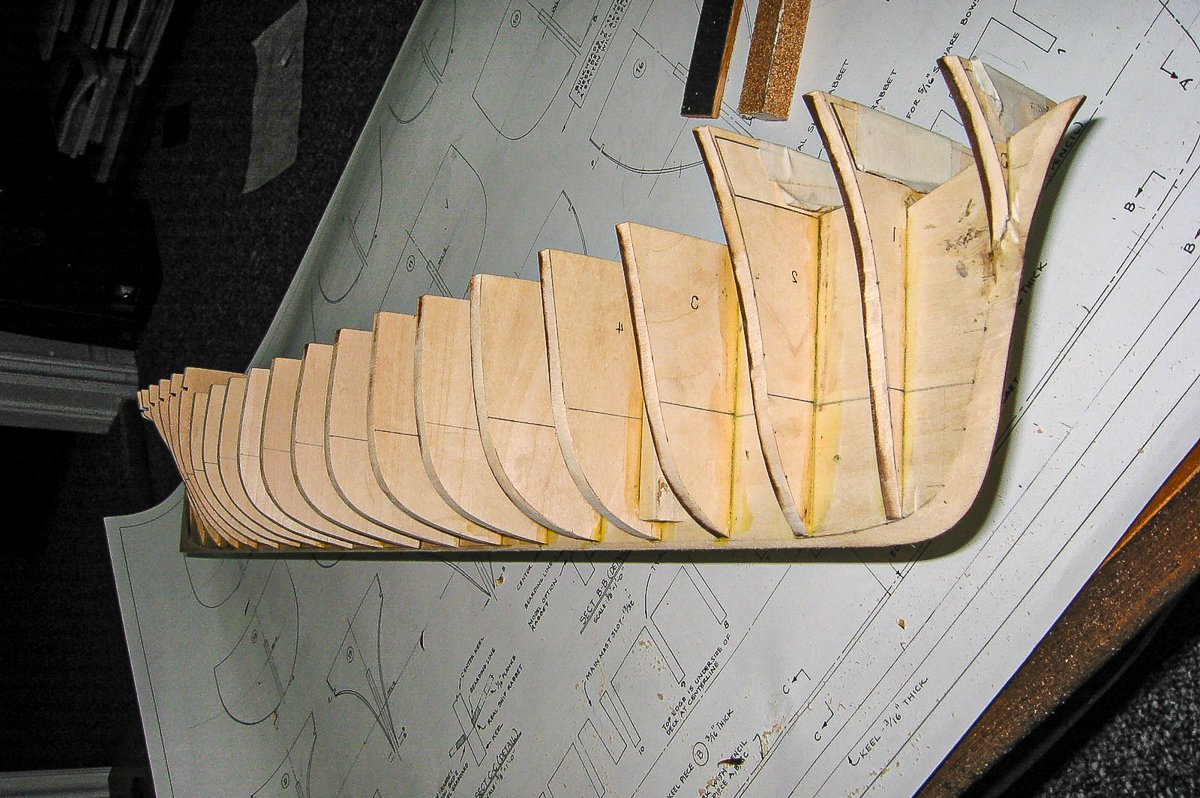
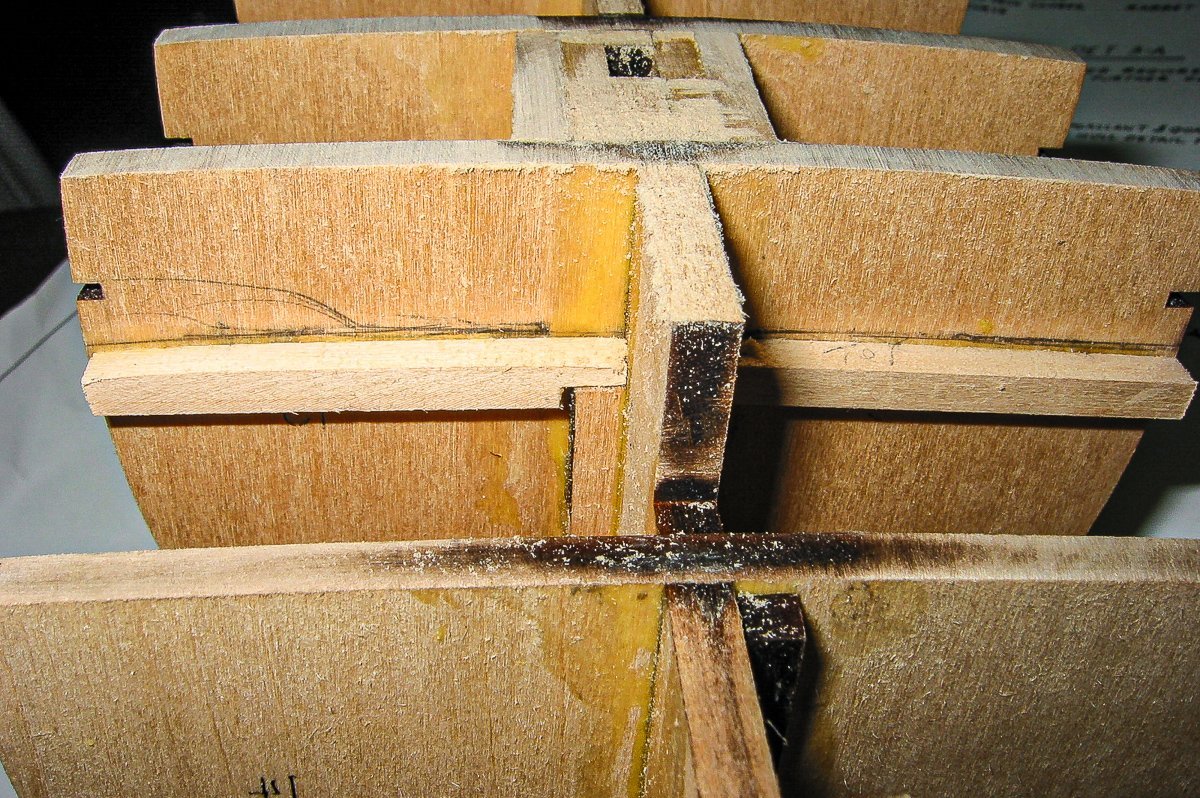
Although I began this build 15 years ago, I took a lot of photos and notes of the work in progress so recreating a log here should be fairly straight forward. I will begin today with the initial assembly of the keel and bulkheads. In my building of the Flying Fish, I have followed the instructions provided by Model Shipways in the manual and drawing sheets as best I could, and referred to various books and other resources for additional information on techniques and design as needed. With respect to the assembly of the keel and bulkheads, the most important important thing was making sure the keel was straight and the bulkheads were squared. For the latter I used mini bar clamps and L Shape 90 degree try square rulers as shown in some of the photos below. I then beveled the bulkheads using a hobby knife and various sanding tools, some which I made. I reinforced a number of the joints with square shaped pieces of wood as shown in the last 2 photos below. Addendum: Having just read tips for mounting model ships to display boards in the tips section of MSW, I wish I had provided more reinforcement inside the hull with wood blocks, where my pedestals will soon be attached. Fortunately I have not mounted anything yet and will follow the advise of using brass rods rather than screws for the mounting, to avoid possible problems of splitting the keel and simplifying the leveling of the boat on the display board.
- 431 replies
-
- 4
-
-
- Flying Fish
- Model Shipways
- (and 2 more)
-
Your model is coming along very nicely.
-
Thanks Ryland. I started a log yesterday. Fortunately I took a lot of photos throughout the build so far, and will soon start uploading images.
-
Thank you. I am sure we can help each other on this challenging kit.
-
Thanks everyone. I will look through my old photos and see what I can put together on my build.
-
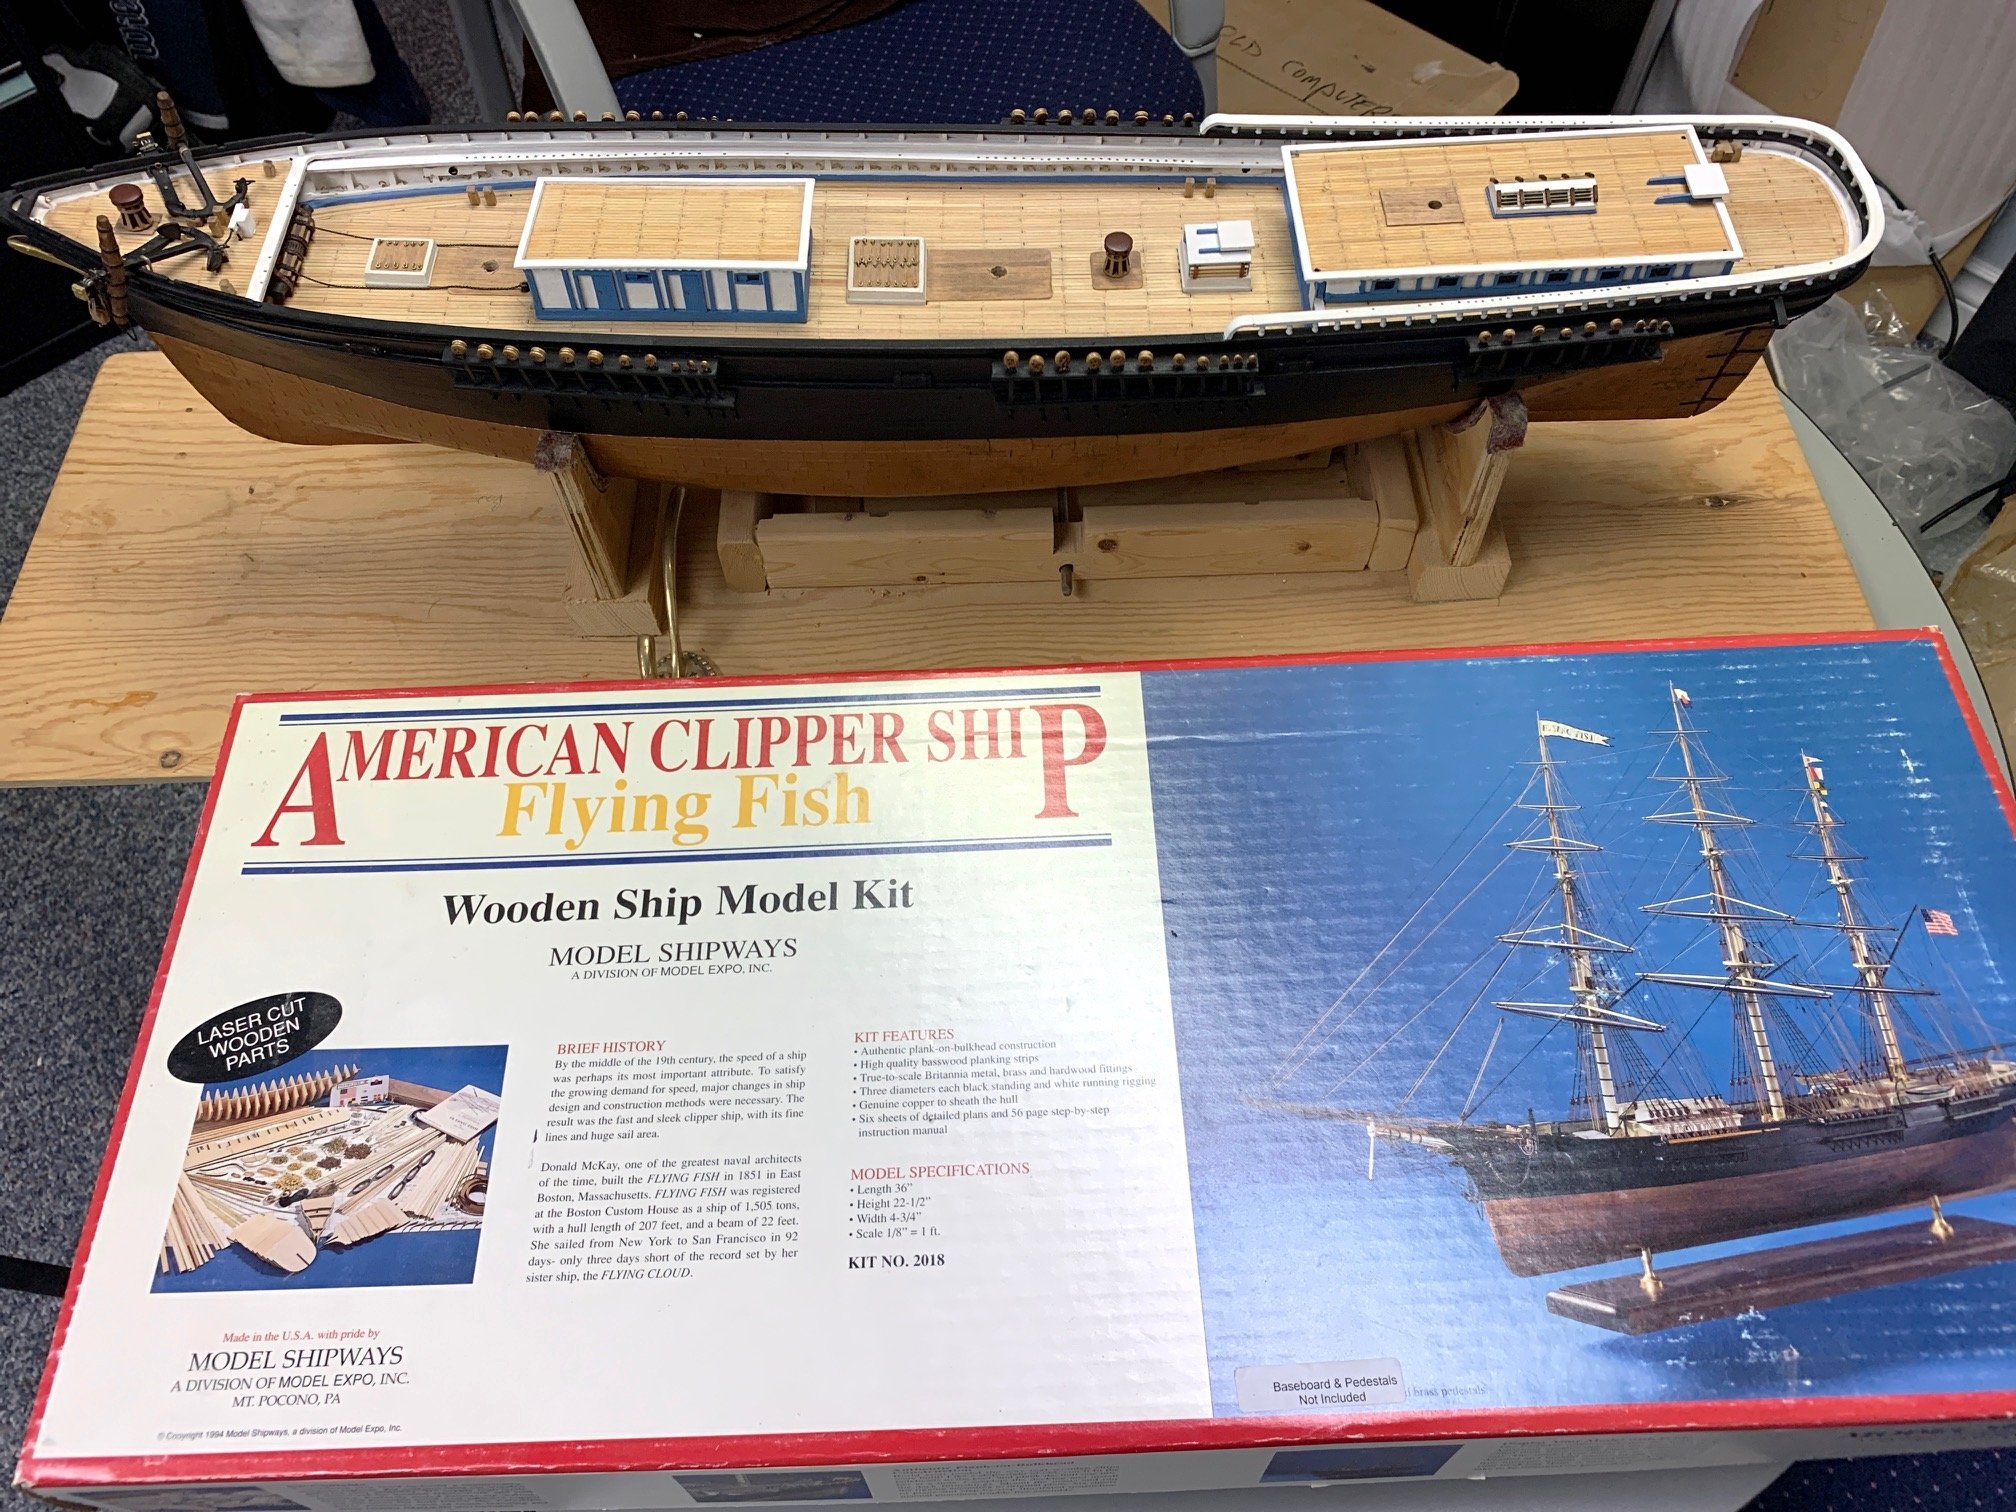
Hello fellow modelers. I look forward to participating in this group as I get back into the hobby after a 9 year "break". I want to finish up my Model Shipways Flying Fish clipper, which is about half finished. Previous builds include the Artesania Latina Charles Morgan whaler, which I essentially scratched built everything from the deck up to make it more true to the original ship's design, and before that, the Artesania Latina Swift 1805. I am a retired microbiologist and am not an active leisureologist who enjoys woodworking, tall ship model building and photography.
-
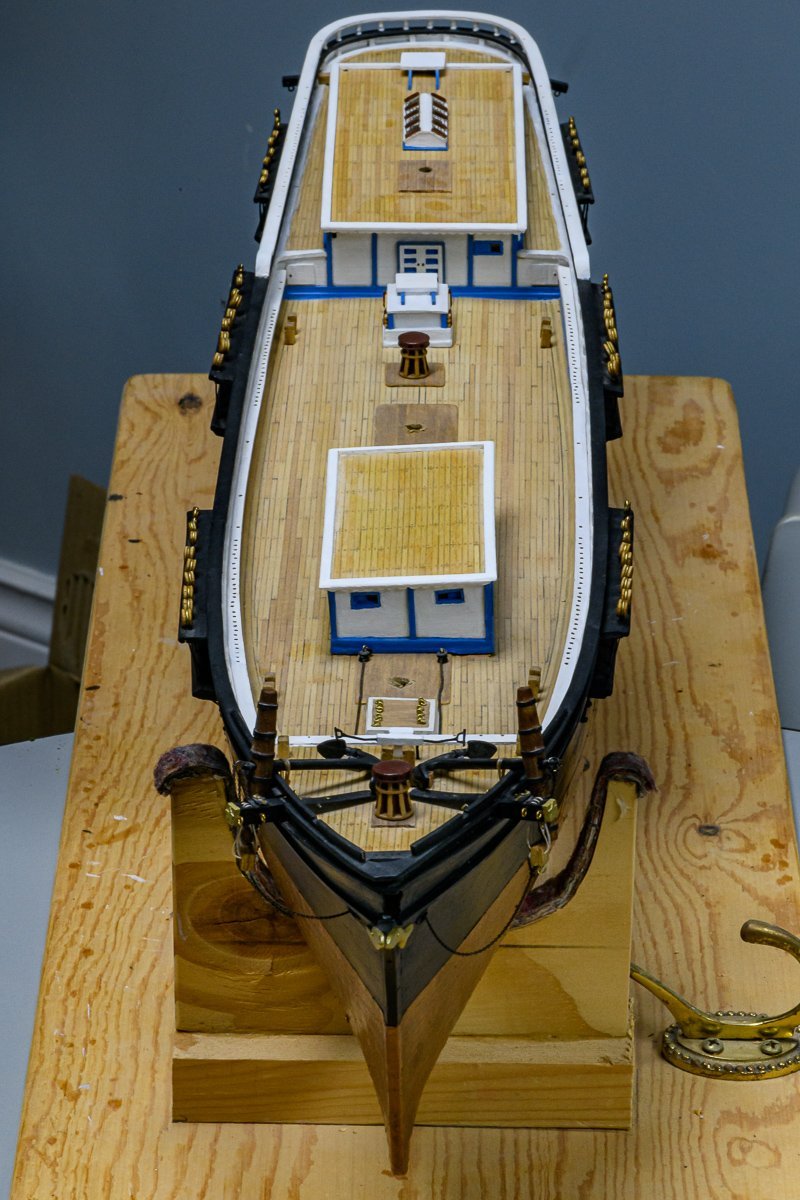
Pictures of my Flying Fish model - Aug. 21, 2021


- 431 replies
-
- 7
-
-
- Flying Fish
- Model Shipways
- (and 2 more)
-
Hi. I am new to Model Ship World. I began building the Flying Fish in early 2006 and worked on it slowly over the next 6 years. And there it remained gathering dust until this month, when I decided to pick it up again in hope of taking it to completion. As can be seen in the photos I will be adding, the Hull has been completed and the deck structure are at an advanced state of completion. I look forward to meeting others of you who are also working on this model. Jared

- 431 replies
-
- 6
-
-
- Flying Fish
- Model Shipways
- (and 2 more)