HOLIDAY DONATION DRIVE - SUPPORT MSW - DO YOUR PART TO KEEP THIS GREAT FORUM GOING! (Only 20 donations so far - C'mon guys!)
×


Jared
-
Posts
305 -
Joined
-
Last visited
Content Type
Profiles
Forums
Gallery
Events
Everything posted by Jared
-
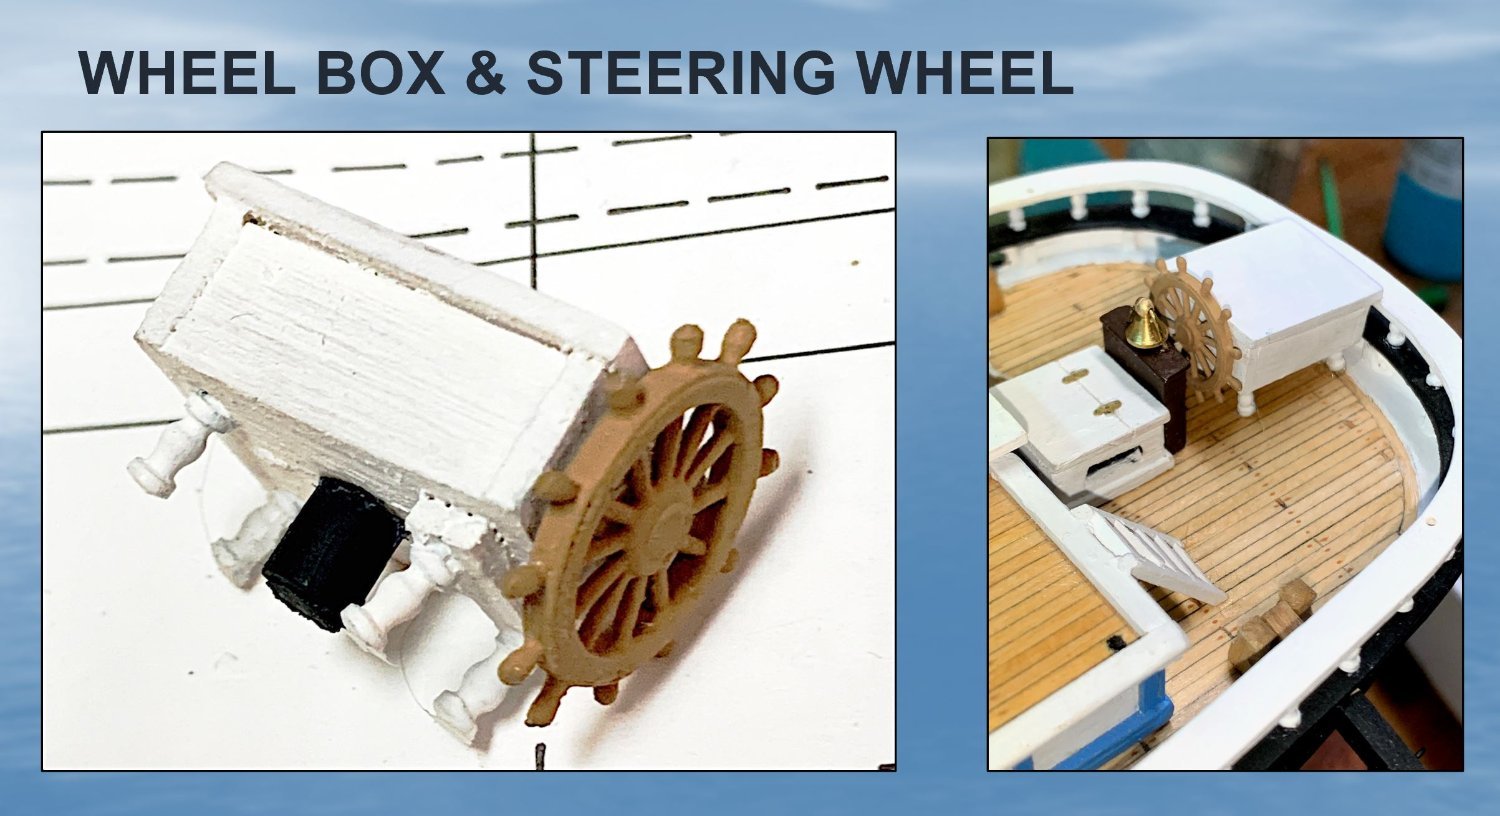
The build this week focused on the wheel box and steering wheel (photos attached). The wheel box was fairly easy. I build the unit around a small scrap block of balsa wood in a manner like what I described in my previous build entry for the water closets. The Britannia steering wheel casting was one of the better castings in this kit. I primed then painted it before assembly on the wheel box. I then glued a rudder extension onto the bottom of the wheel box, then glued the completed assembly onto the aft deck. According to the plans, there are 2 grates on the deck adjacent to the wheel box. I had a go trying to hand build these following the simplified grating procedure described in the manual. As I expected, at this small scale, it is near impossible to hand build a realistic-looking grate. The basswood I used was too weak and splintered easily under the drill and needle file. The square smallest holes I could make were about 3/64 in. square and spaced about 1/8 in. apart. While I am sure better grates could be made this way using other types of woods or materials, I think the way I will go is to purchase one of the the precut gratings that are available from Model Expo.

- 431 replies
-
- 4
-

-
- Flying Fish
- Model Shipways
- (and 2 more)
-
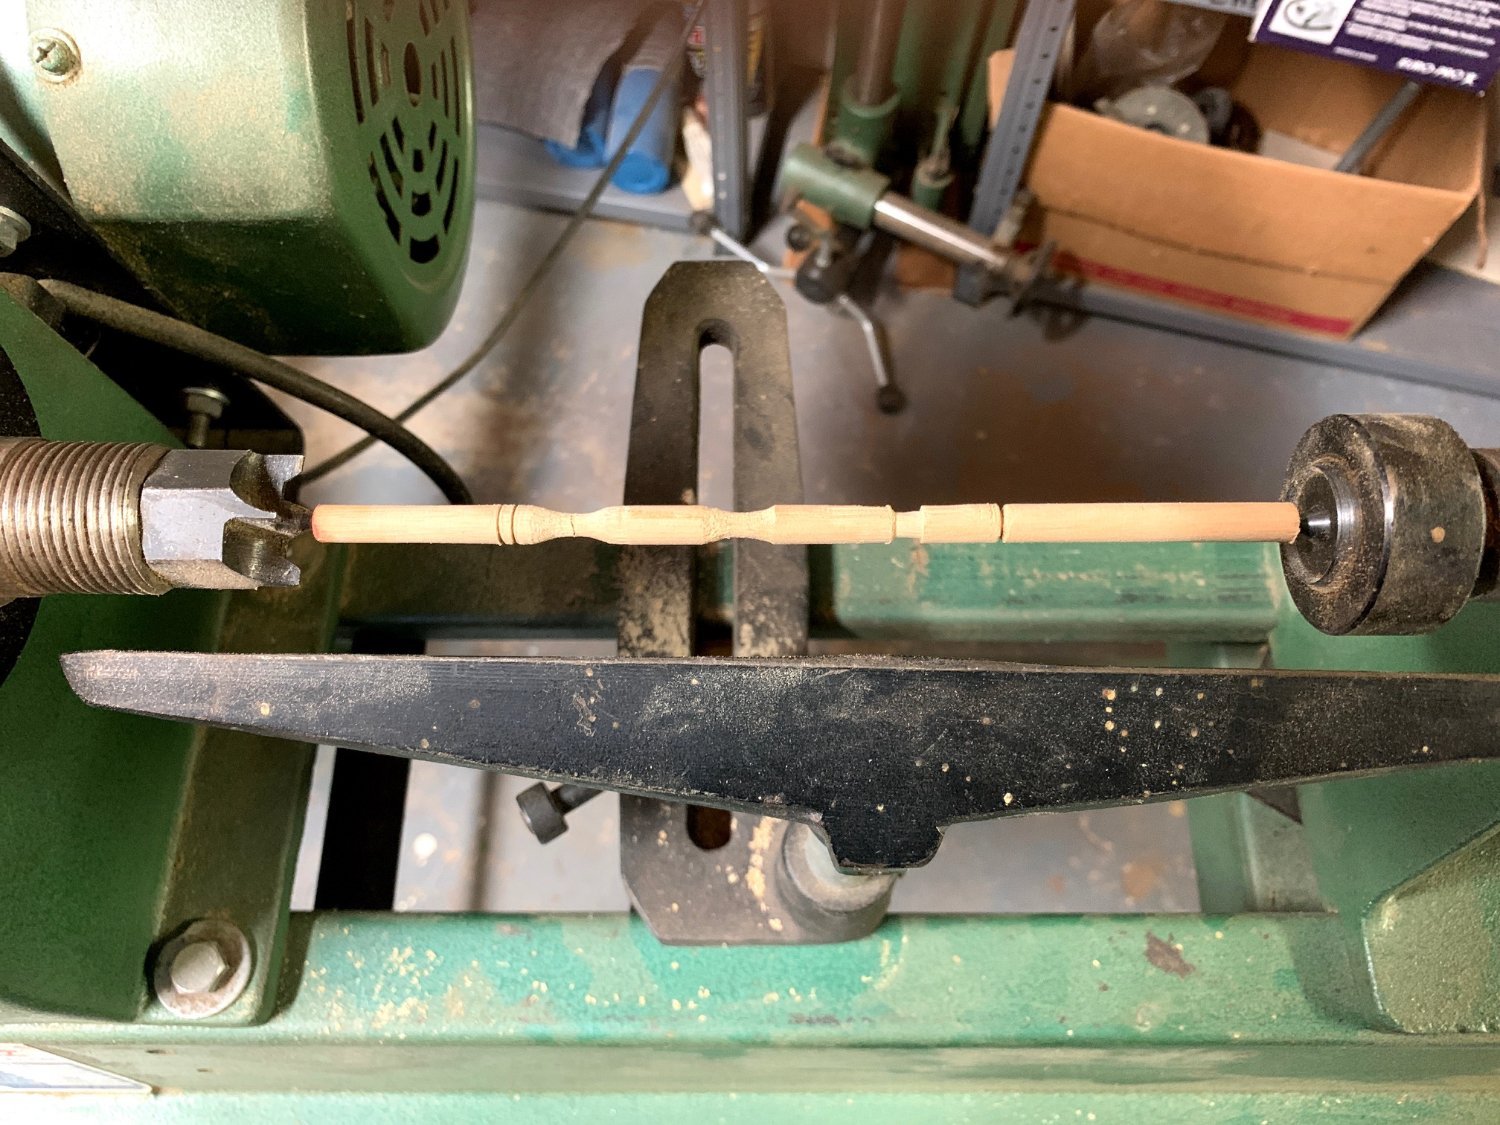
I did a trial today with my full size wood lathe. I was able to turn a 1/4" wood dowel on it and if I was very careful and worked slowly, could shape the wood. However, I eventually broke the piece at a thickness of about 1/8". I think if I stick to sandpaper I should be able to shape my masts on it. On my previous build (Morgan Whaler) I shaped the masts with sandpaper, turning the wood dowels on a drill.

- 602 replies
-
- 3
-
-
- Flying Fish
- Model Shipways
- (and 2 more)
-
Thanks for the info on the lathe.
-
Very interested in how you are building your masts. Nicely thought out. What small wood lathe did you get? I am not sure what method I will use yet. I have a large lathe but not sure if I will be able to use it. I would probably need to design an adapter to hold the small diameter masts.
-
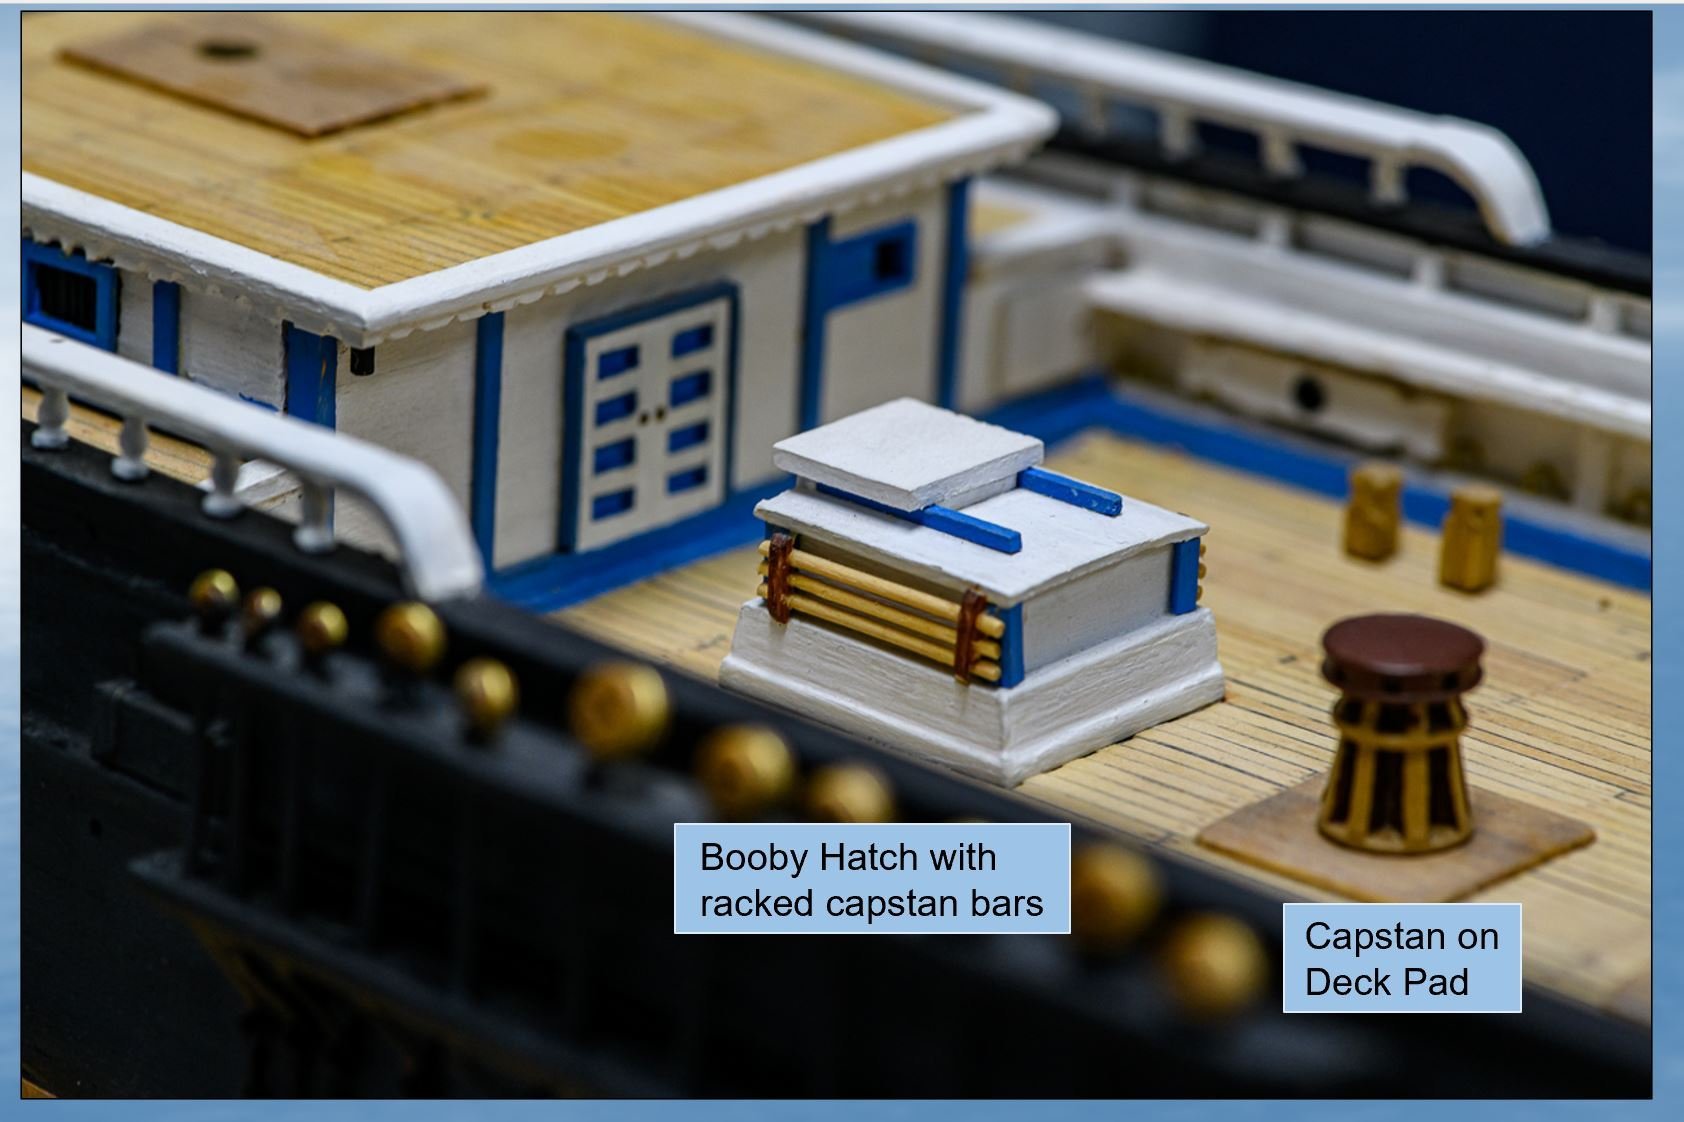
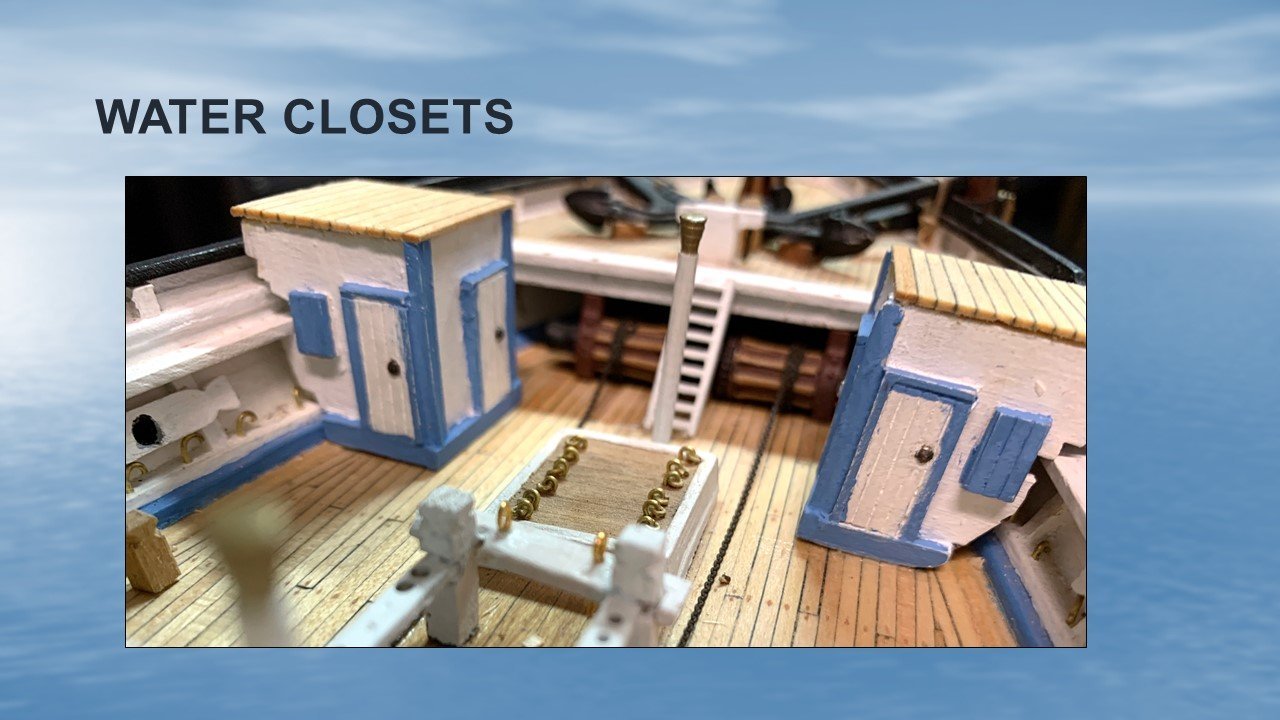
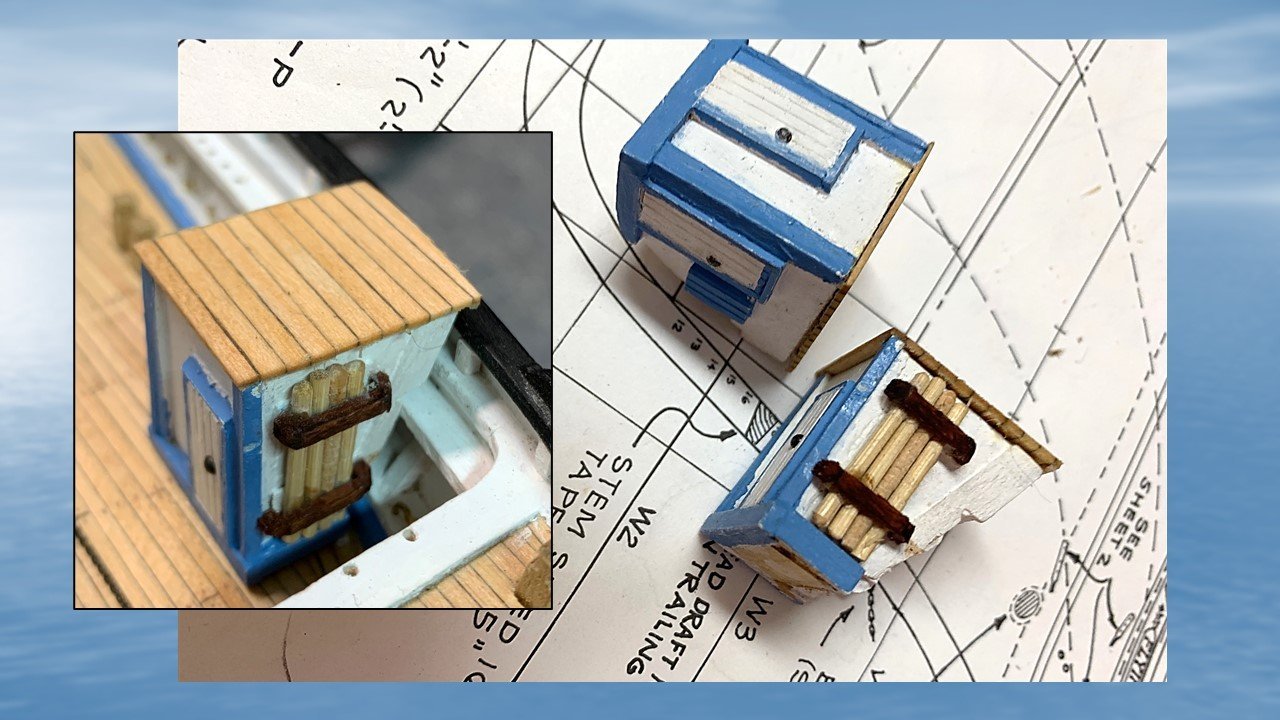
This week I scratch-built the 2 water closets on the Flying Fish. Their construction required a lot more hours of work than I had anticipated. As with the other deck structures I have discussed above, I elected to build the 2 water closets on top of solid wood blocks I shaped on a drum sander. Carving the lower back end to fit into the bulwarks etc. was the most challenging part. Thin sheets of solid basswood were then glued onto the front, top and sides of each, then I added wood strips for the various moldings. The water closets doors were made with some etched basswood I had on hand. The Capstan bars were made from a bamboo kebob skewer, using sand paper and then a draw plate to bring the diameter down to the desired size. The same size wood strips used for the deck were used to fabricate the roof's. After gluing they were sanded and finished with tung oil. The various other parts were painted after different steps in the construction.
- 431 replies
-
- 8
-
-
- Flying Fish
- Model Shipways
- (and 2 more)
-
I am enjoying reading about you unique approach to building your Hull.
- 3,560 replies
-
- 1
-
-
- clipper
- hull model
- (and 2 more)
-
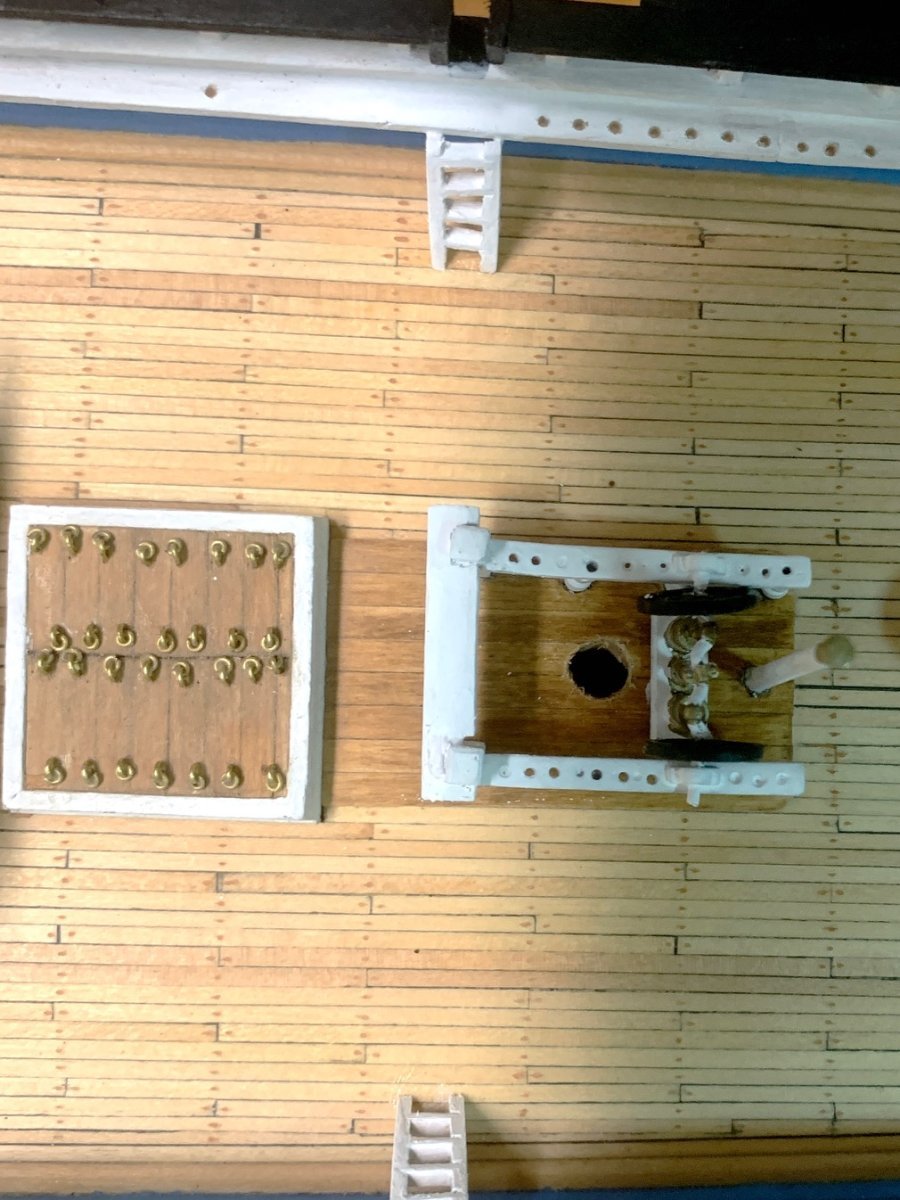
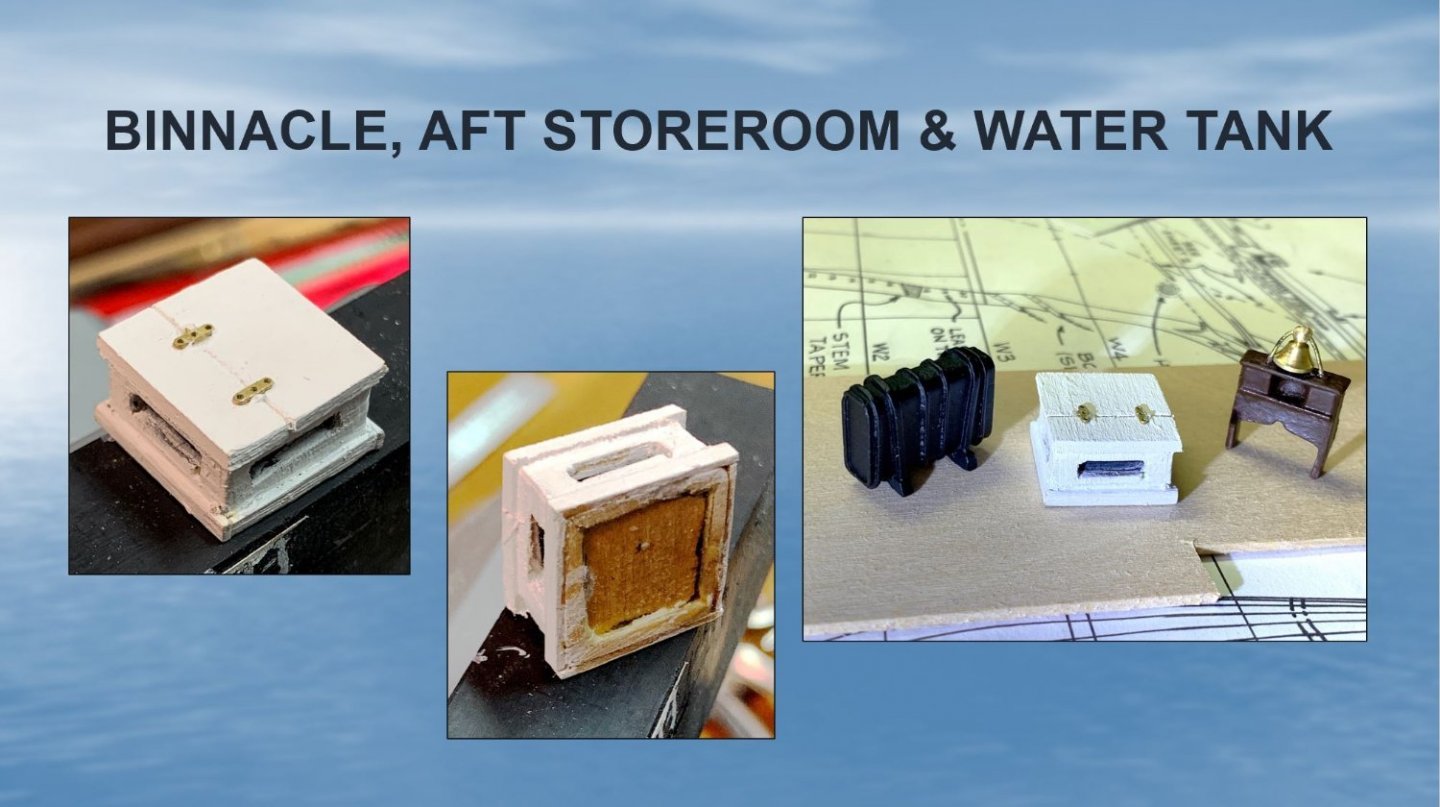
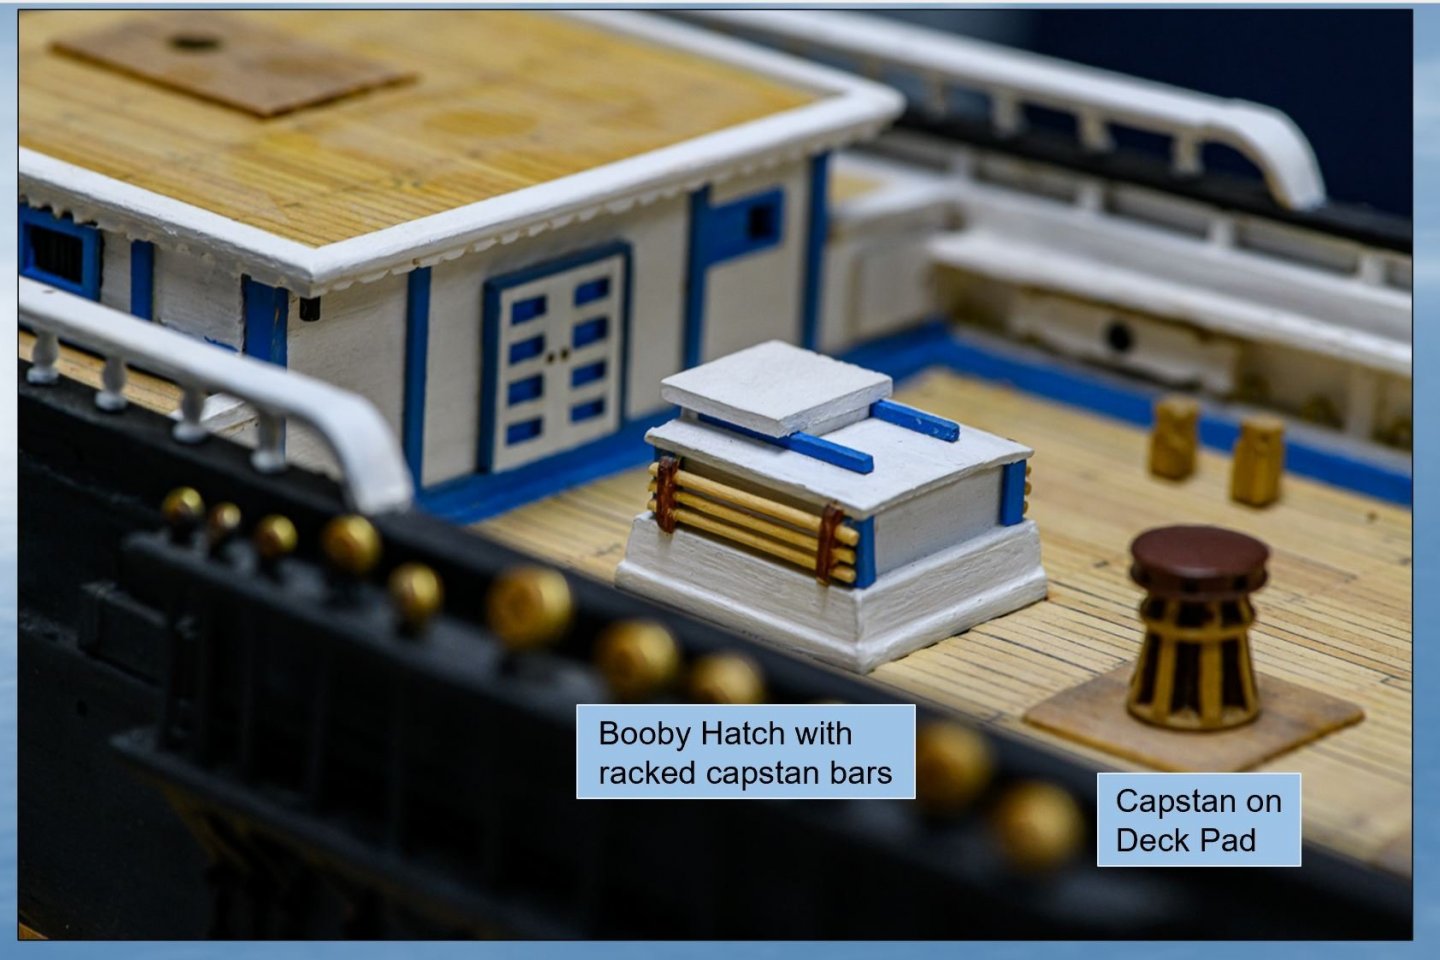
With the new year comes a few completed deck structures. The Britannia cast water tank looked good so only I only needed to give it some primer and paint. The cast binnacle cabinet was not cast anywhere as nicely. Sanding its top surface smooth considerably improved it. This was then primed and painted, and the bell mounted on top via a small diameter brass rod I bent to shaped. This was glued into 2 small holes I drilled into the top of the binnacle. The aft storeroom hatch / skylight was scratch built (about 4 hours work). Due to the frail nature of the outer walls, I built the structure around a small solid wooden block. The walls were made from a thin sheet of basswood, with the window openings cut with an X-acto knife. The latches on top of the structure were made using a pair of finely etched metal castings I had. I chose not to bother putting bars on the skylight openings, given the scale.
- 431 replies
-
- 3
-
-
- Flying Fish
- Model Shipways
- (and 2 more)
-
I will be very interested in learning how you make out with your lathe. Also I really like your idea on improving the cast boats. I think this will add a lot to the look and will experiment myself. 😁
- 602 replies
-
- 2
-
-
- Flying Fish
- Model Shipways
- (and 2 more)
-
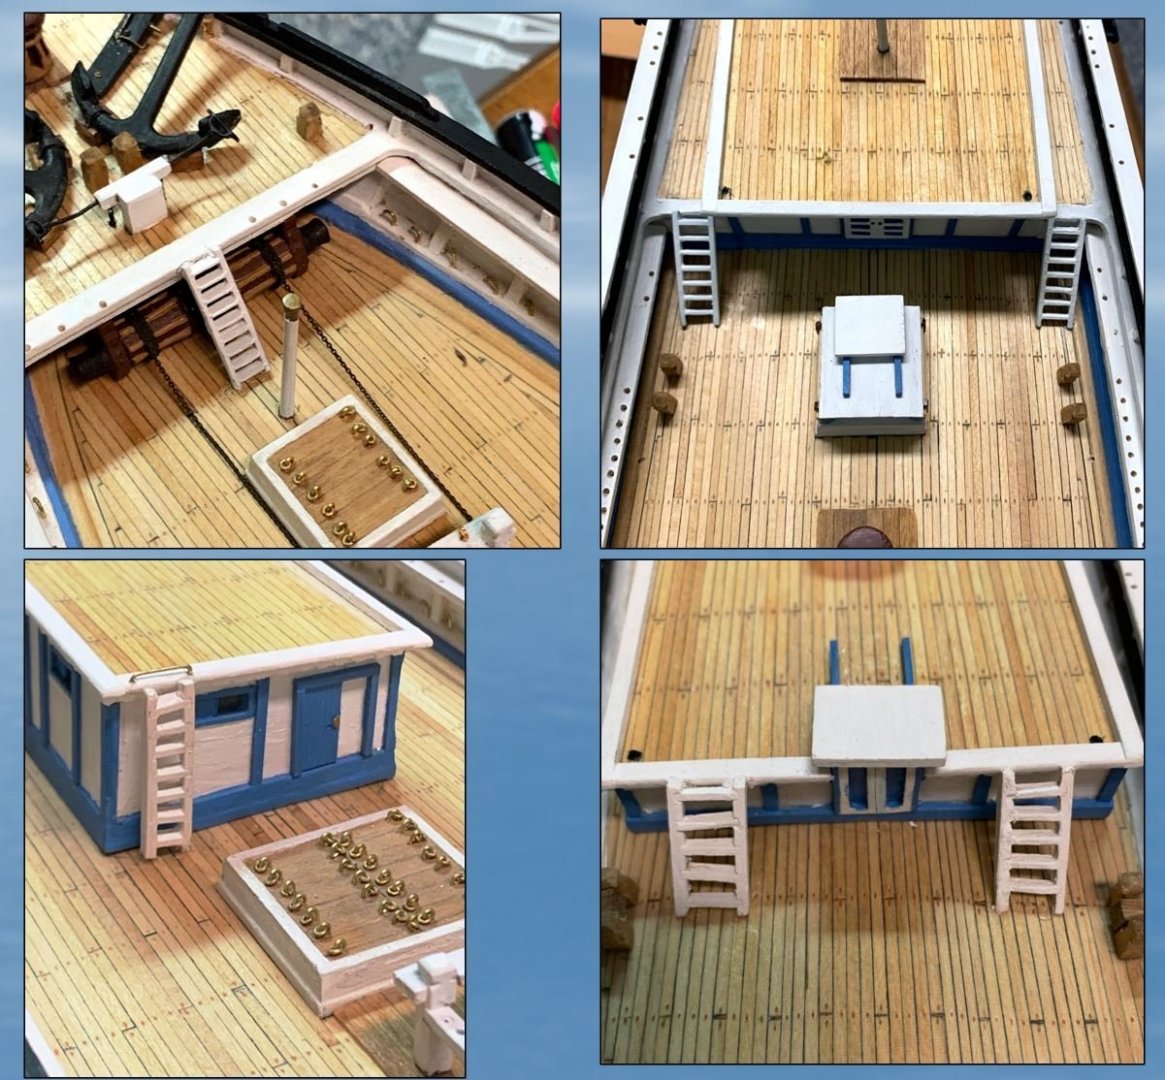
Finishing up the year with completion of the 2 gangways and scratch built portable ladders. Happy New Year to you all!

- 431 replies
-
- 3
-
-
- Flying Fish
- Model Shipways
- (and 2 more)
-
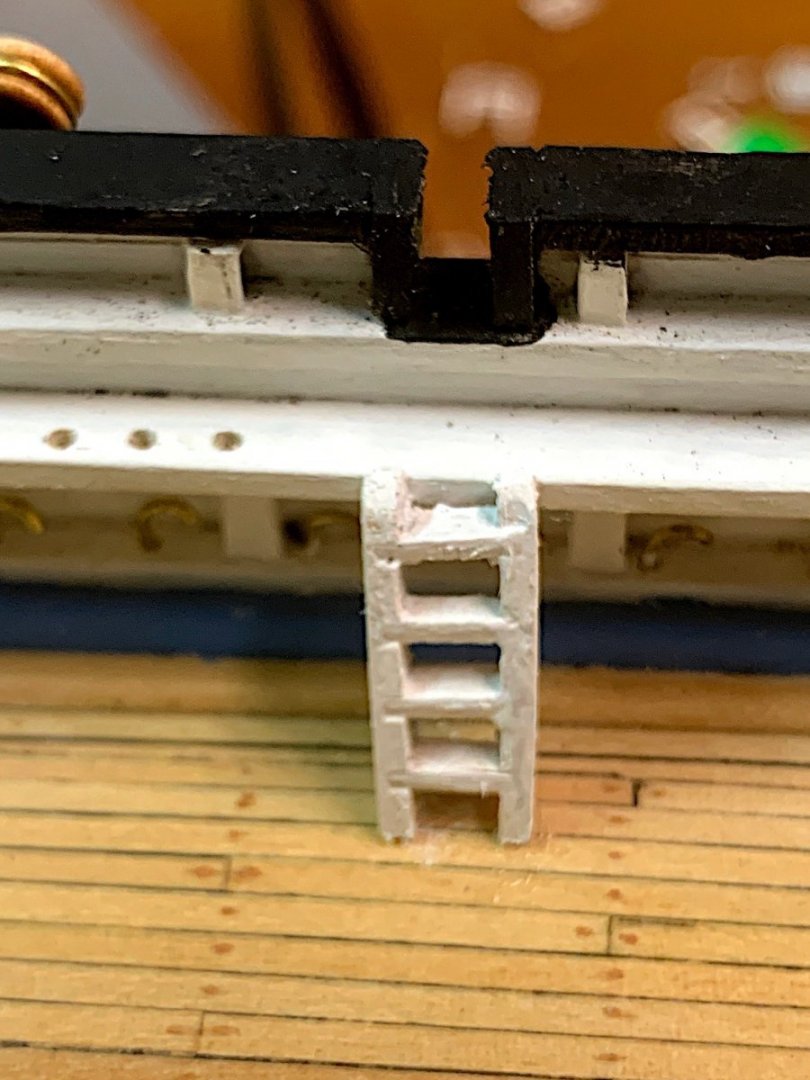
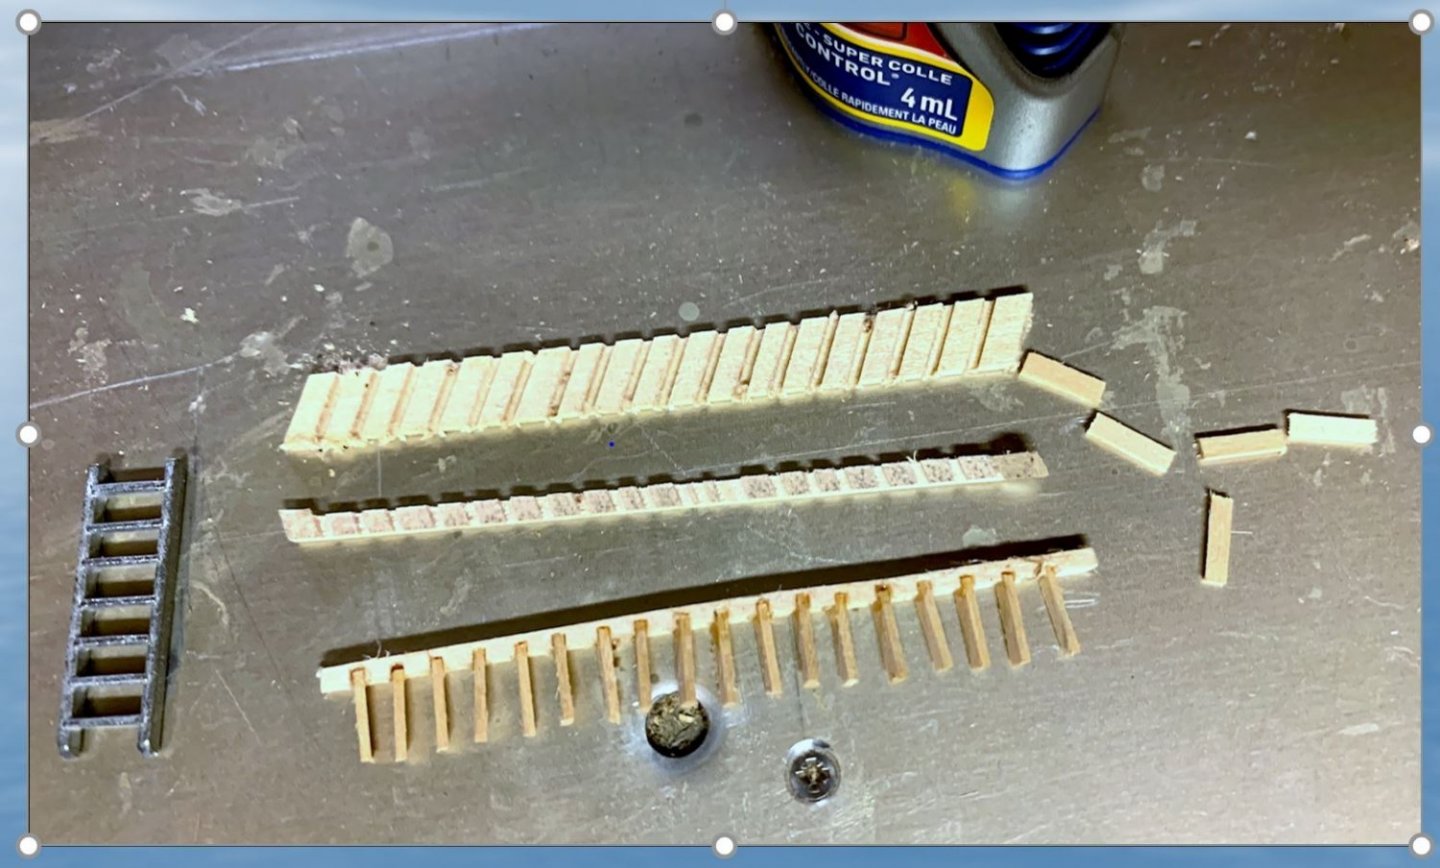
All postings from today going forward will show the current status of my model. This week I have been working on the various ship's ladders and had a go at building several from scratch, using the method summarized in the second image below. For the ladder side rails, I cut 68 degree notches into a wide piece of basewood stripping using a mini table saw. The basswood strips were slightly thicker than desired thickness of the ladder side rails. The strips were then ripped to the size (side of side rails). The steps were cut on a chopper, then were glued into the notches on one of a matching pair side rails, after which the matching side rail was affixed. I found it difficult to make ladders that were longer than about 5 or 6 rungs, because as the ladder grew longer distortions caused by the tiniest of errors resulted in visible distorted (twisted and bent) structures. No doubt with more practice I could get better at this. In the end I used scratch built ladders at the aft sides of the poop deck and forward deck houses, and the Britannia castings elsewhere shown in the photos below. The hand rail on the steps leading to the forcastle will be constructed later.
- 431 replies
-
- 3
-
-
- Flying Fish
- Model Shipways
- (and 2 more)
-
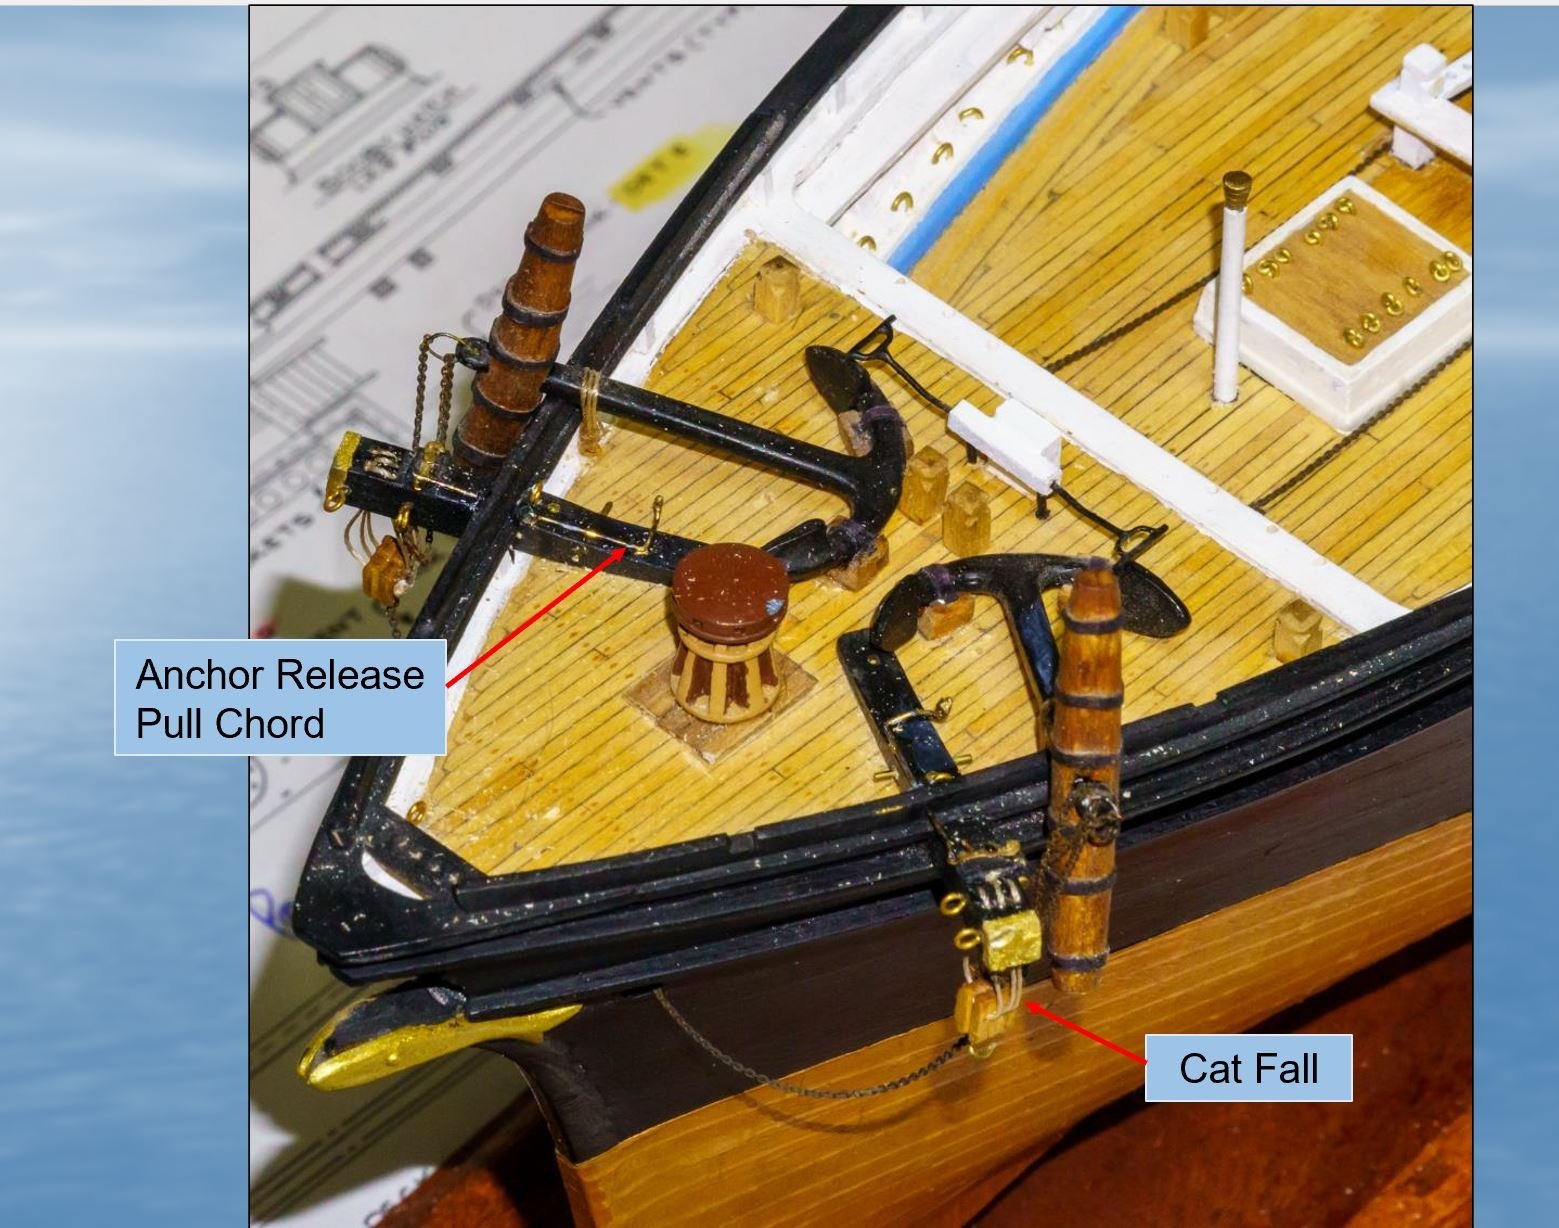
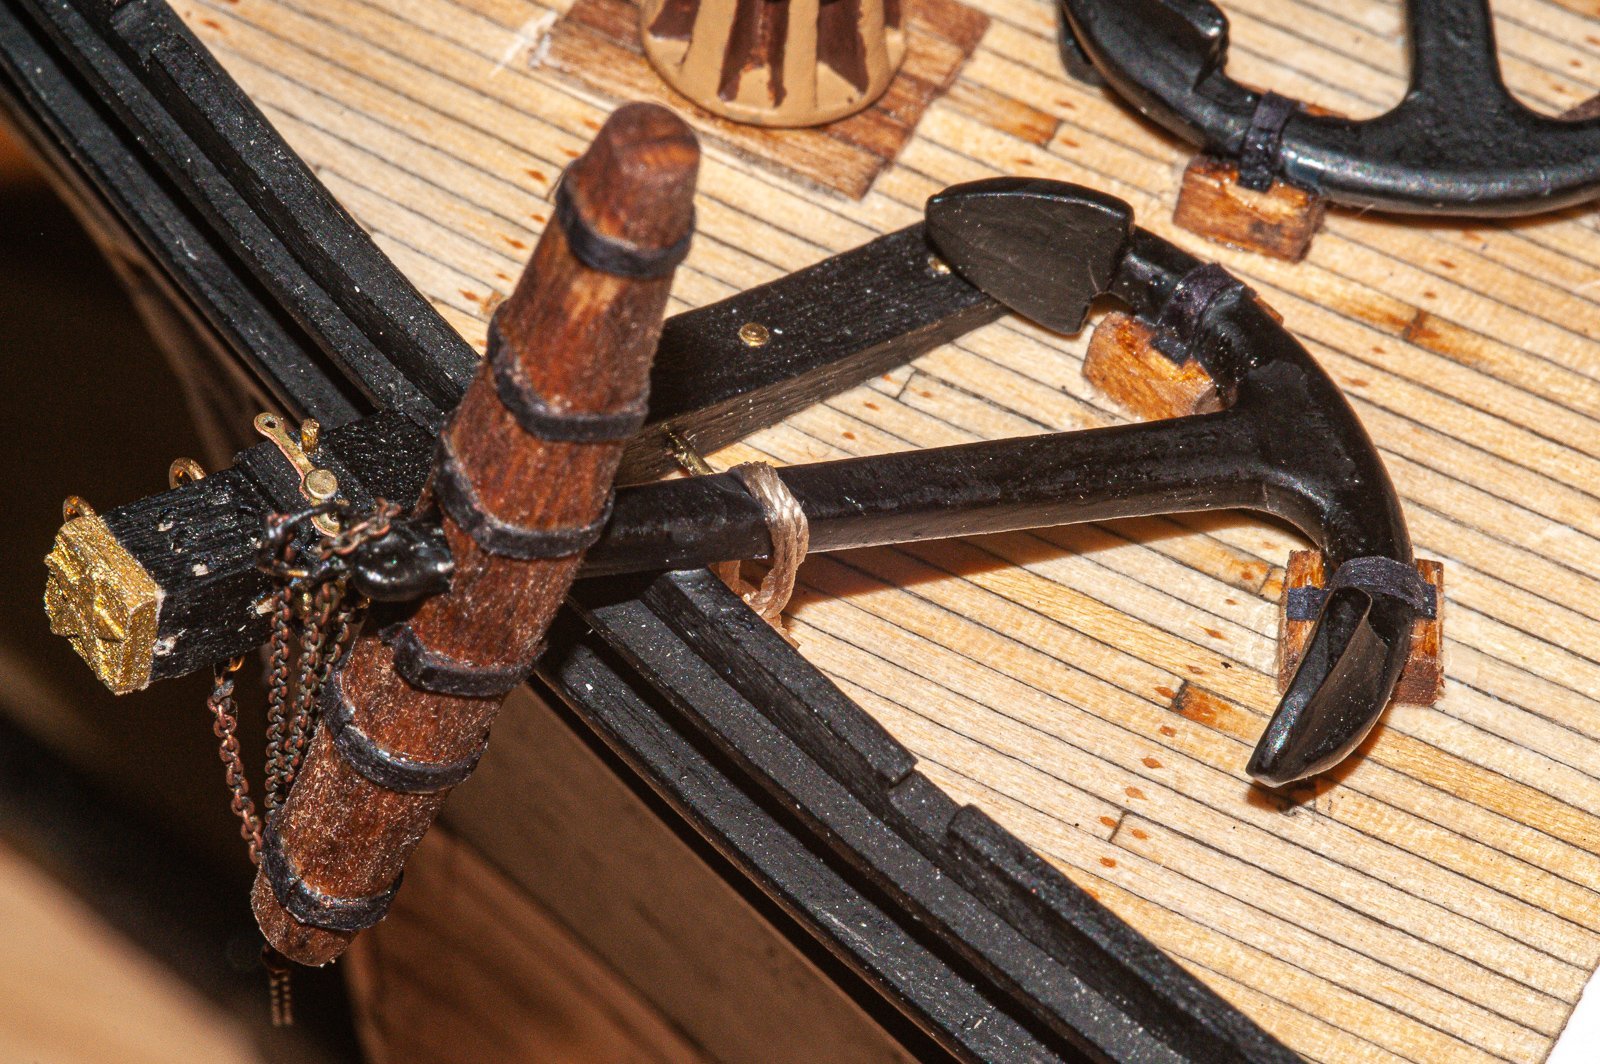
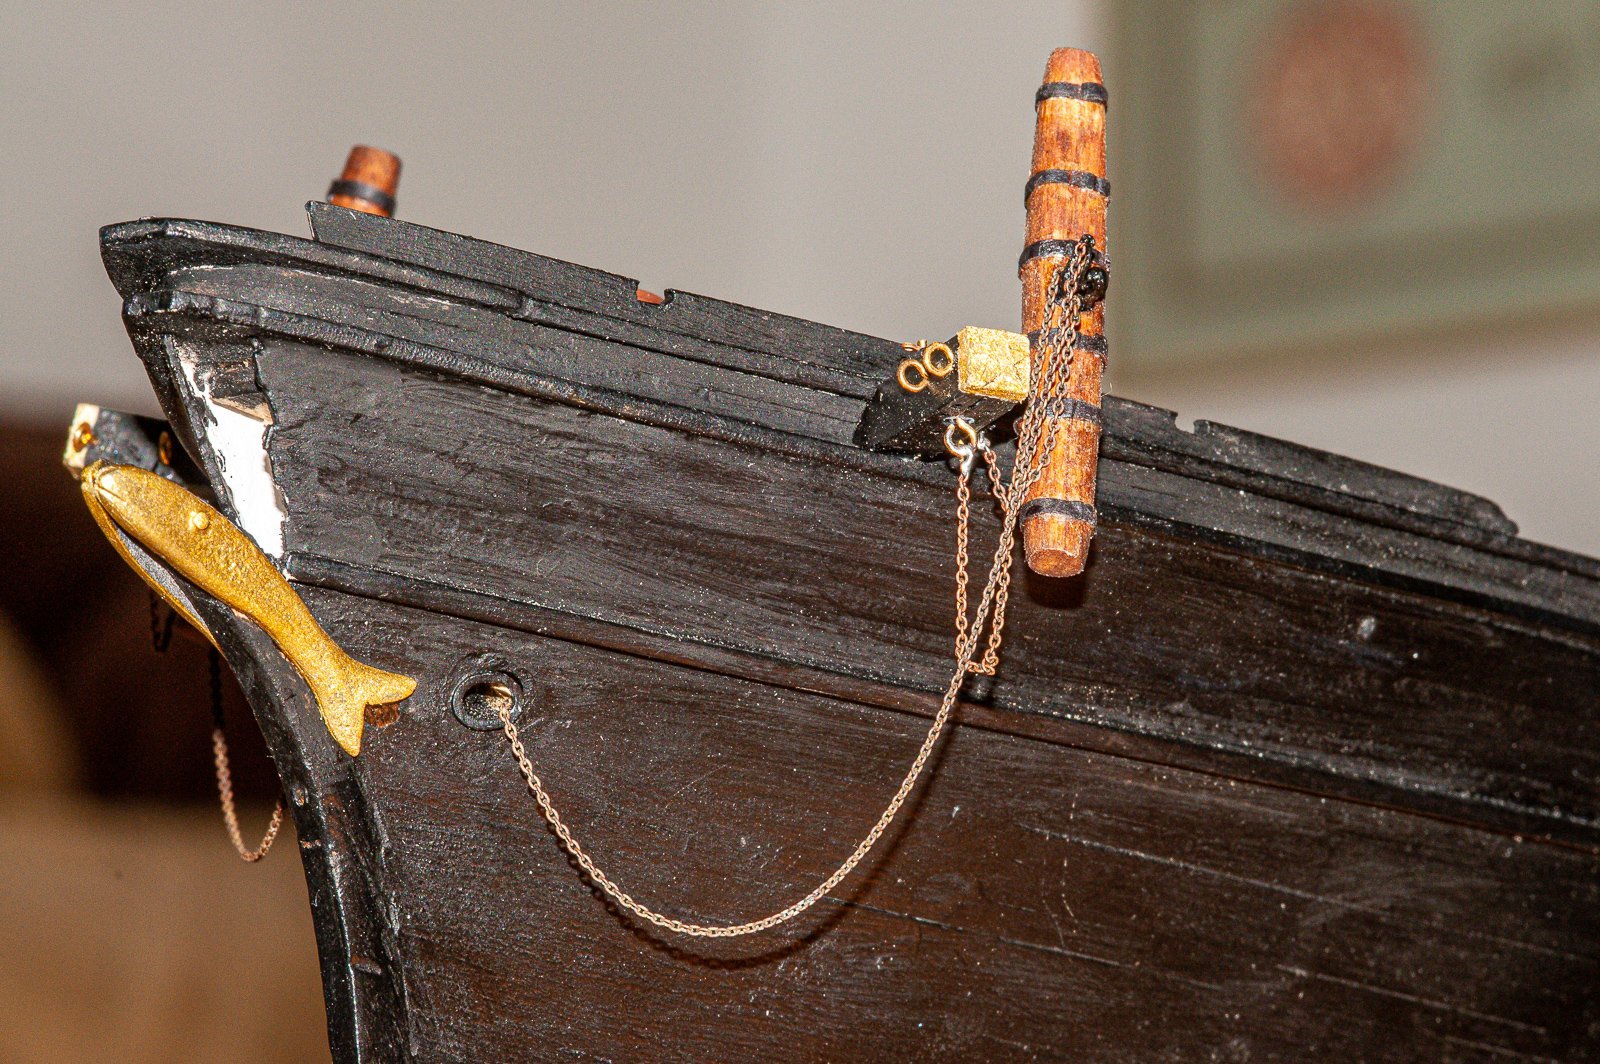
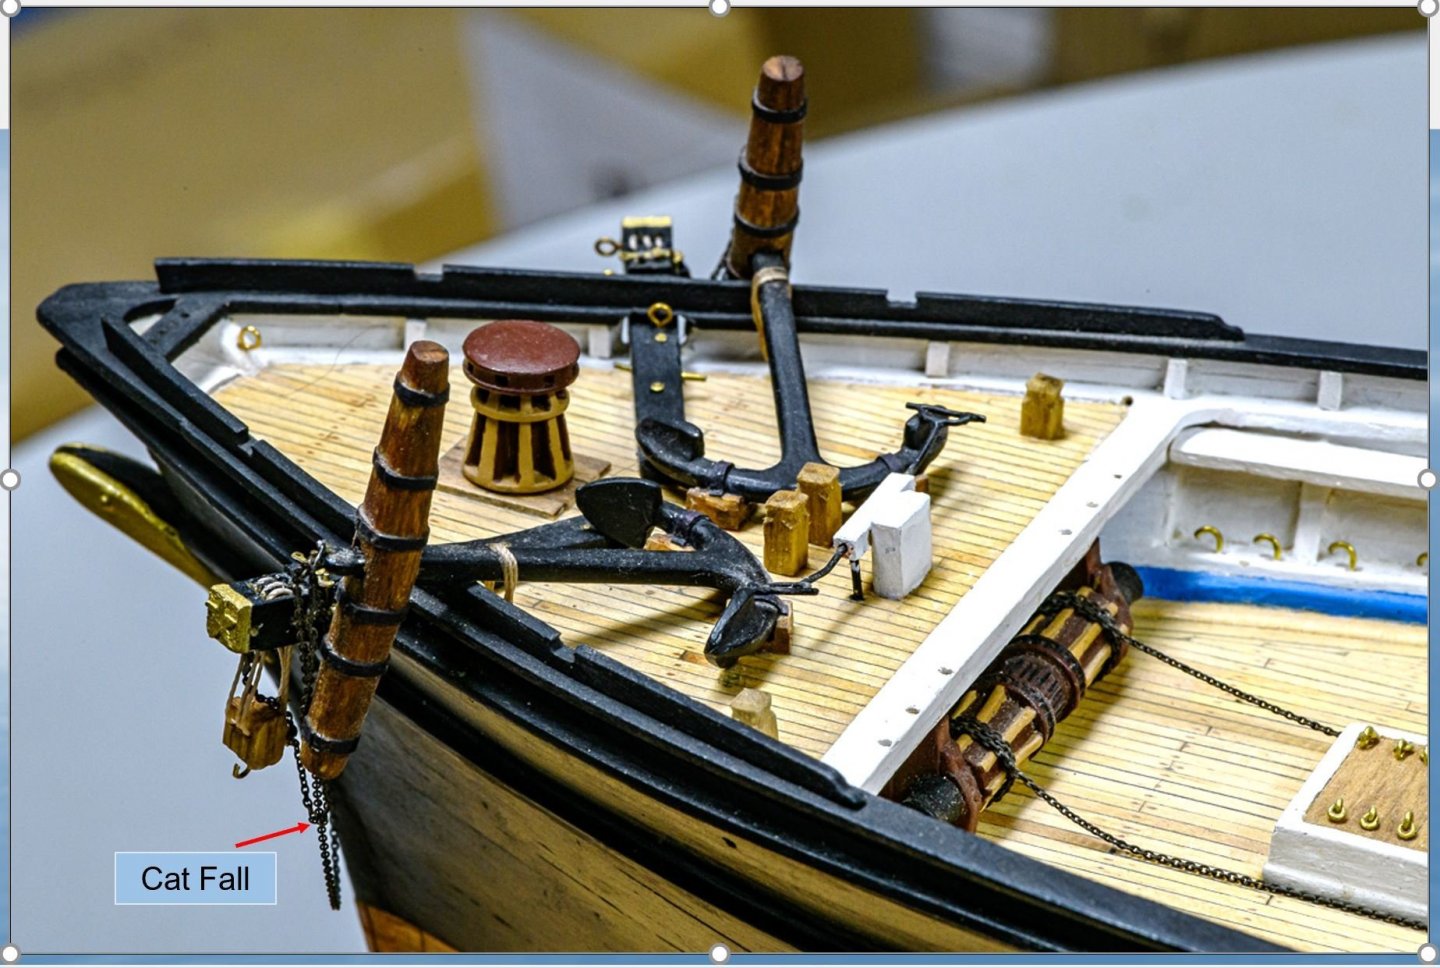
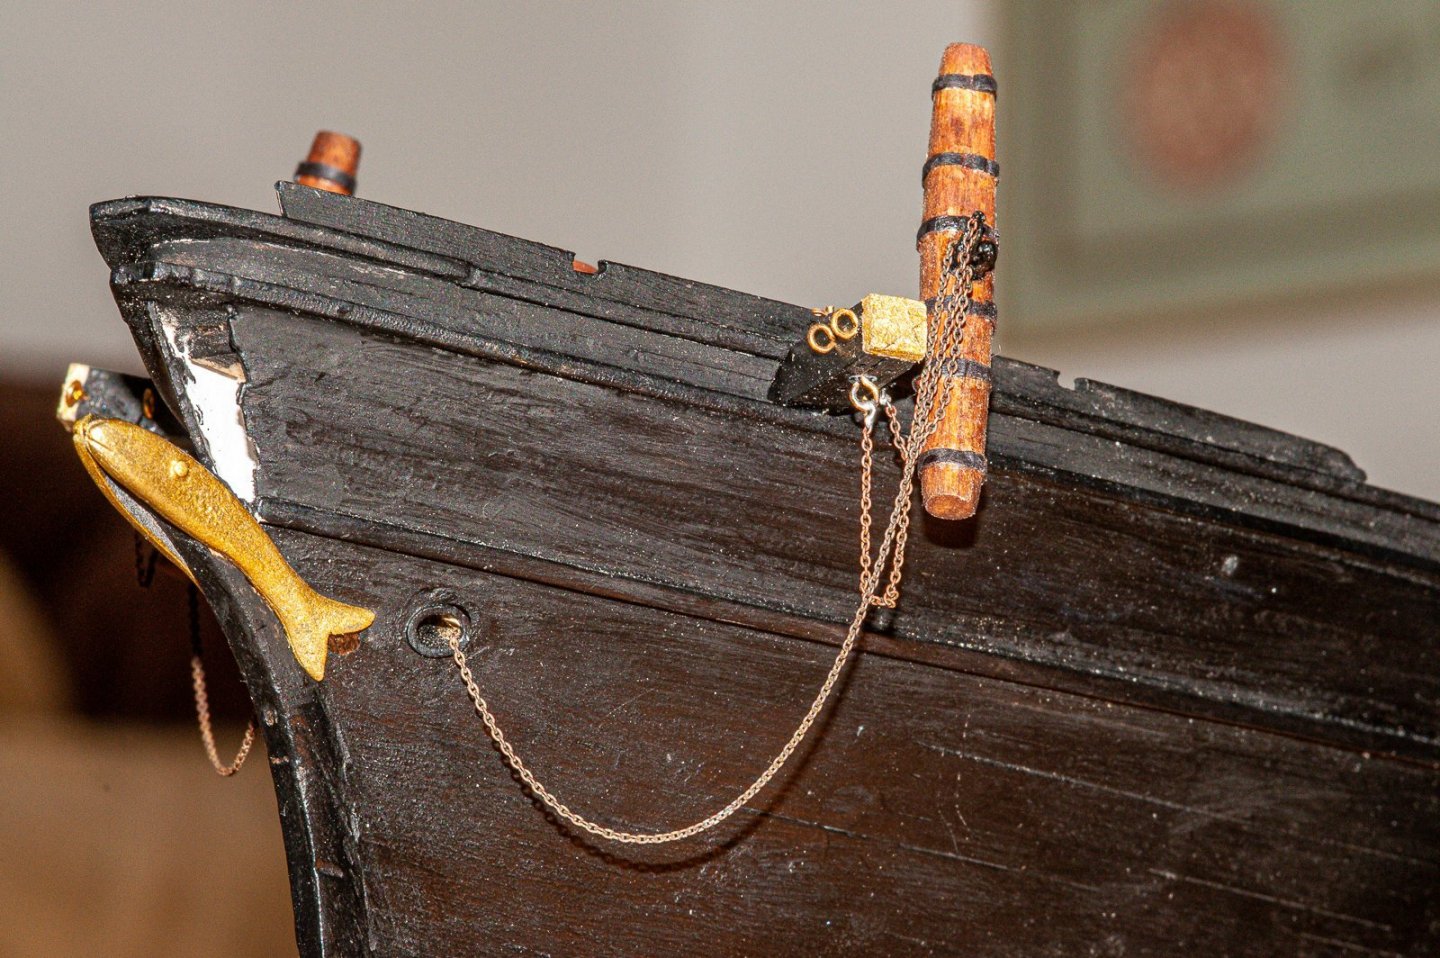
Since September I have been working towards completing the various deck structures on the Flying Fish. This is still in progress. Here is where things stood as of the end on November. I thought the design of the anchor pull chords a bit flimsy and vague and decided to model mine after the ones described in Fig. 68 of C.N. Longridge's outstanding book on the Cutty Sark.

- 431 replies
-
- 4
-
-

-
- Flying Fish
- Model Shipways
- (and 2 more)
-
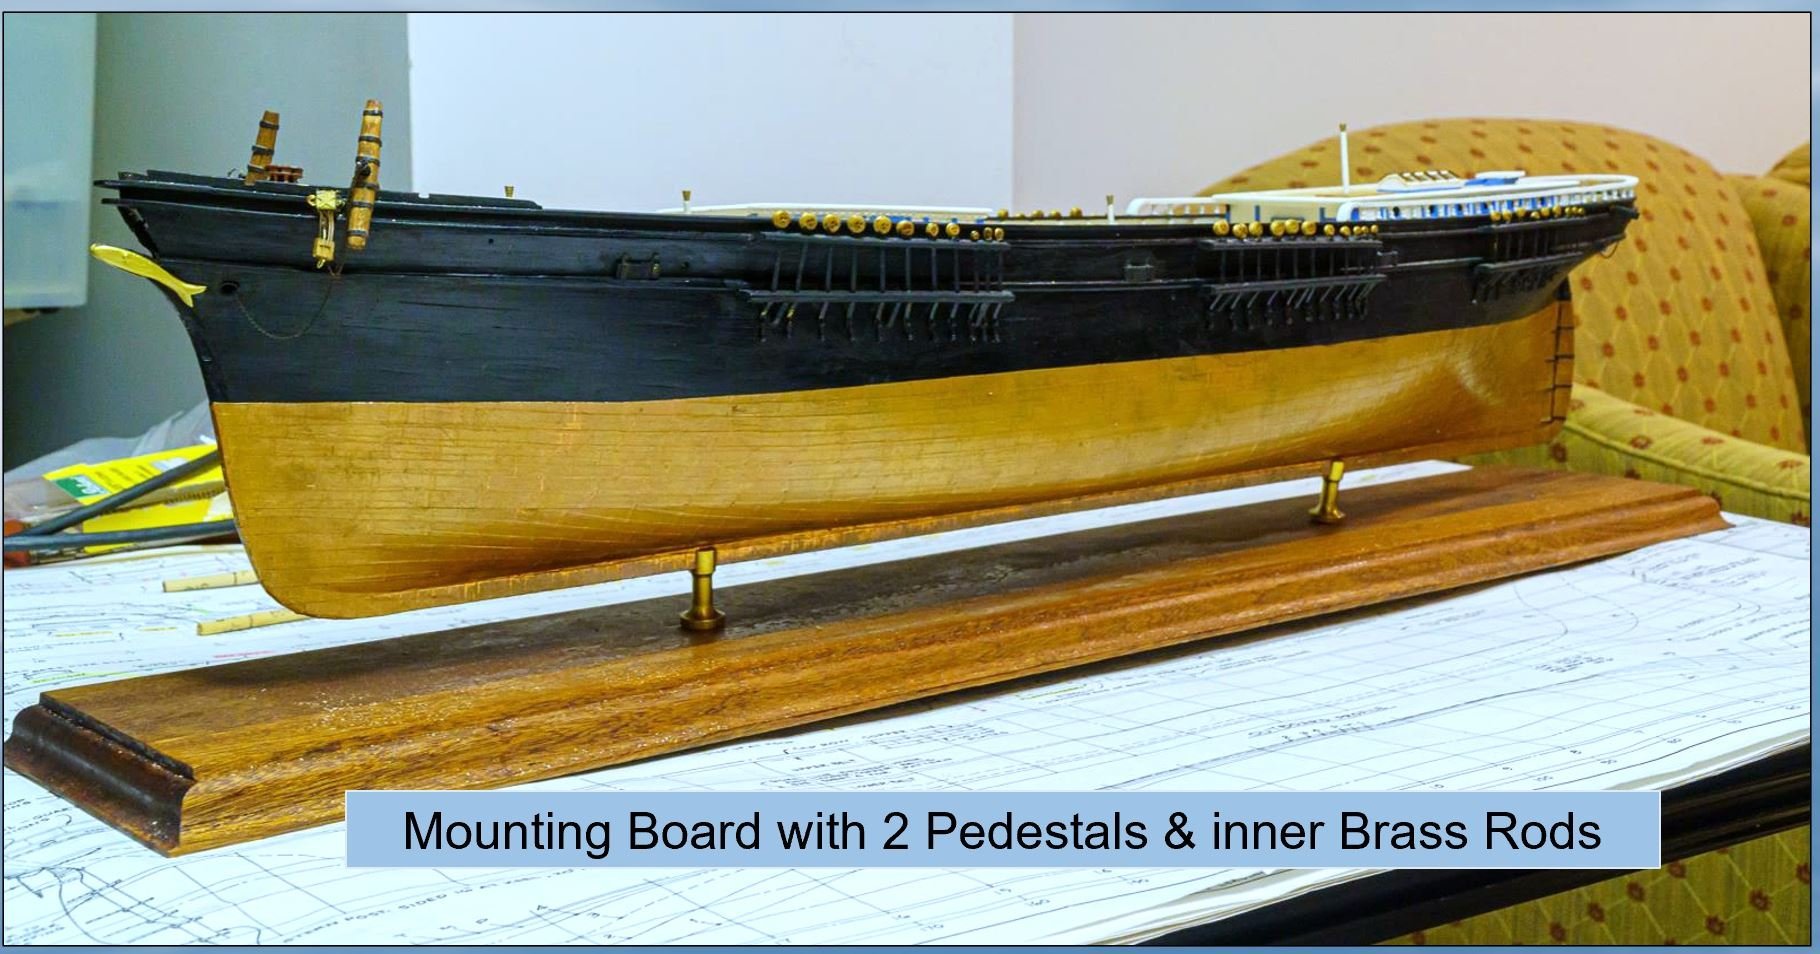
As noted in my Sept. 24 post, when I started back up with my build late this summer, my first task was to construct a mahogany mounting board. I then mounted my model onto it, using brass pedestal's I purchased from Model Expo. Rather than using the brass screws supplied for the attachment, I followed the recommended mounting using brass rods I cut from wire instead. This made it much easier to ensure the hull was mounted squarely. There is a thread on mounting the hull this way in the help section of Modelshipworld.

- 431 replies
-
- 4
-
-
-
- Flying Fish
- Model Shipways
- (and 2 more)
-
Thanks George. I have been trying to make ladders the last two days. Not decided yet whether to use them of the metal ones. it does not take much of a cutting error to throw the whole ladder off into a twisted mess. A question or afterthought for anyone who understands railings. The forecastle deck has an elevation of about 5 feet above the main deck. The plans show that there is a rail on the ladder leading between these decks. but not on the aft overhang on the forecastle. In a book I have on clipper ships, it does show rails on some of the larger clipper ships, but not on all. By modern standards that would be a safety no no. It is odd that there would be a safety rail on the ladder but not on the forecastle itself. As on isn't in Buttersworth's painting of the FF, I guess it really didn't have one (He does show the rail on the poop deck in his painting). Merry Christmas
- 602 replies
-
- 3
-
-
- Flying Fish
- Model Shipways
- (and 2 more)
-
Thanks for this information on the figurehead of the Flying Fish ClipperFan, and for your feedback gak1965. Merry Christmas..
- 431 replies
-
- 1
-
-
- Flying Fish
- Model Shipways
- (and 2 more)
-
Nice work on the deck structures George. I don't know the answer to your question of the pin placement. I think I just followed the design on the plans. I am impressed with the work on the railing on your poop deck. Looks like a challenge ahead for me. It appears that my build is not much far behind yours. I am trying to decide what to do about the ladders - to use the Brittania cast ones supplied in the kit or scratch build them. I think am going to have a go at the latter and see how that works. Merry Christmas, Jared
- 602 replies
-
- 3
-
-
- Flying Fish
- Model Shipways
- (and 2 more)
-
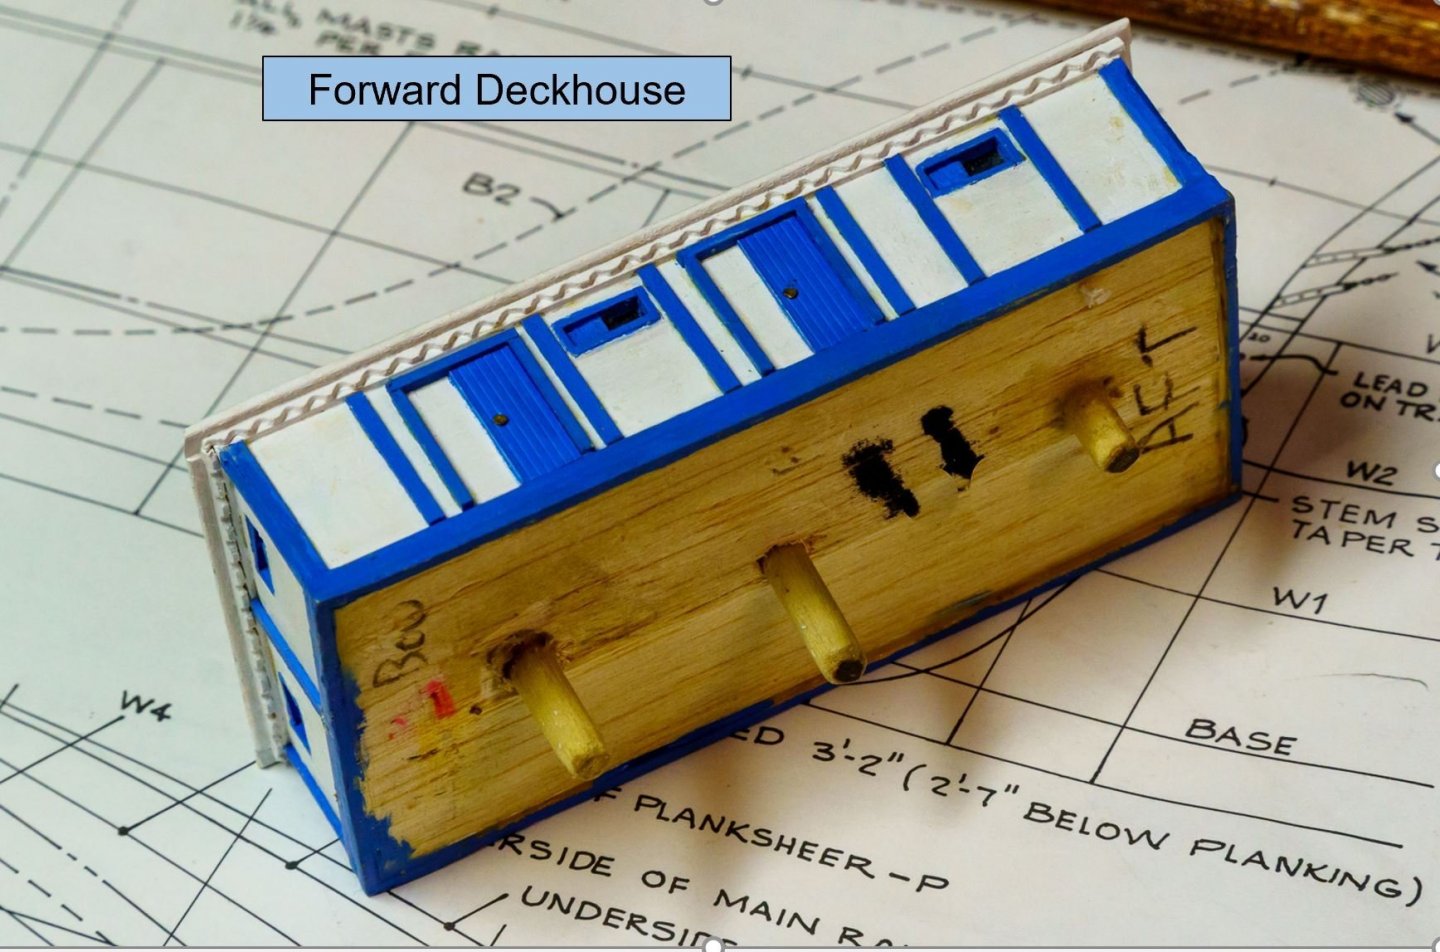
This set of images shows the construction of the Deck and Poop Houses, and a number of the other structures on the deck as of early 2012, when my work on my Flying Fish model unfortunately had to be mothballed, only to be picked up in late summer of 2021, 9 years later. I decided to build the two houses on solid blocks of balsa wood, to provide additional structural support and strength See first image below).
- 431 replies
-
- 7
-
-
-
- Flying Fish
- Model Shipways
- (and 2 more)
-
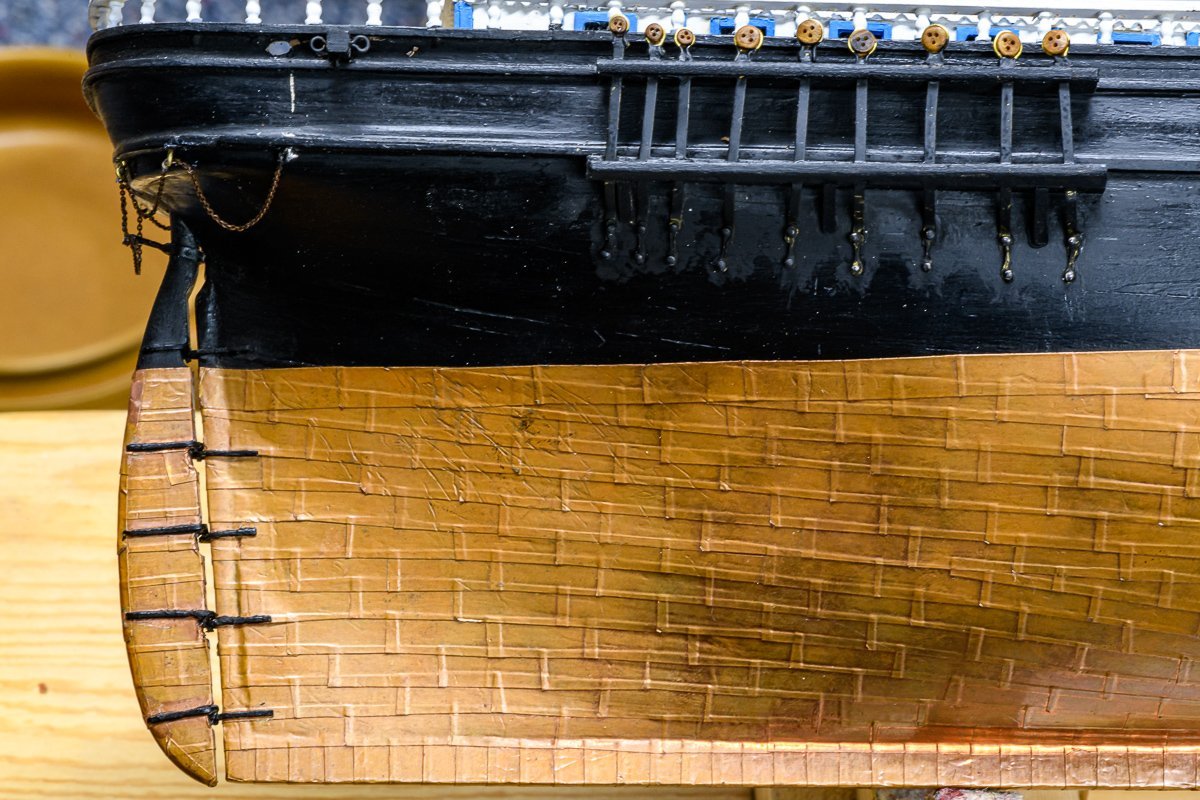
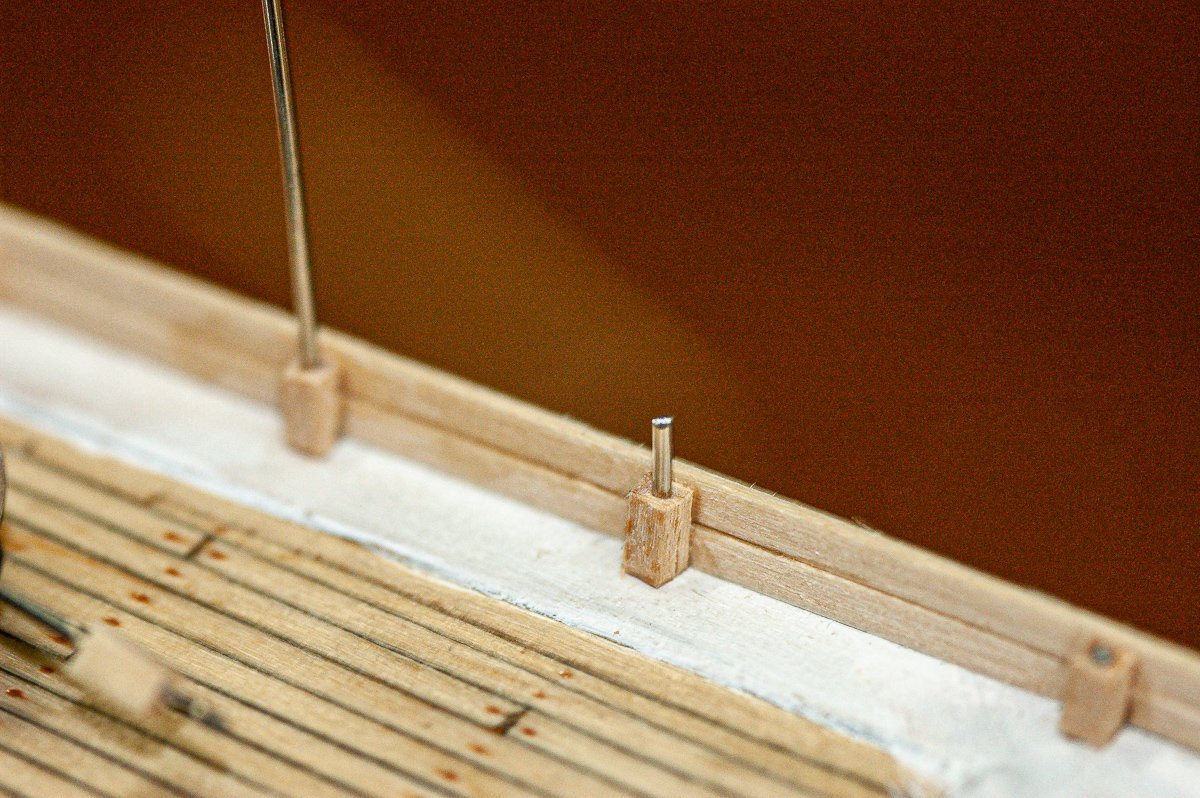
Sorry I have been preoccupied on other things. Here I pick up on my build log with the building of the chain plates and deadeyes. I used marked dowels with thread attached as temporary masts to help me lay out the positioning of the chain plates and deadeyes (see second photo). I don't recall the details of how I made them other than following the plans and soldering them together, then mounting them on the hull, adding the wood planks and painting.


- 431 replies
-
- 4
-
-
-
- Flying Fish
- Model Shipways
- (and 2 more)
-
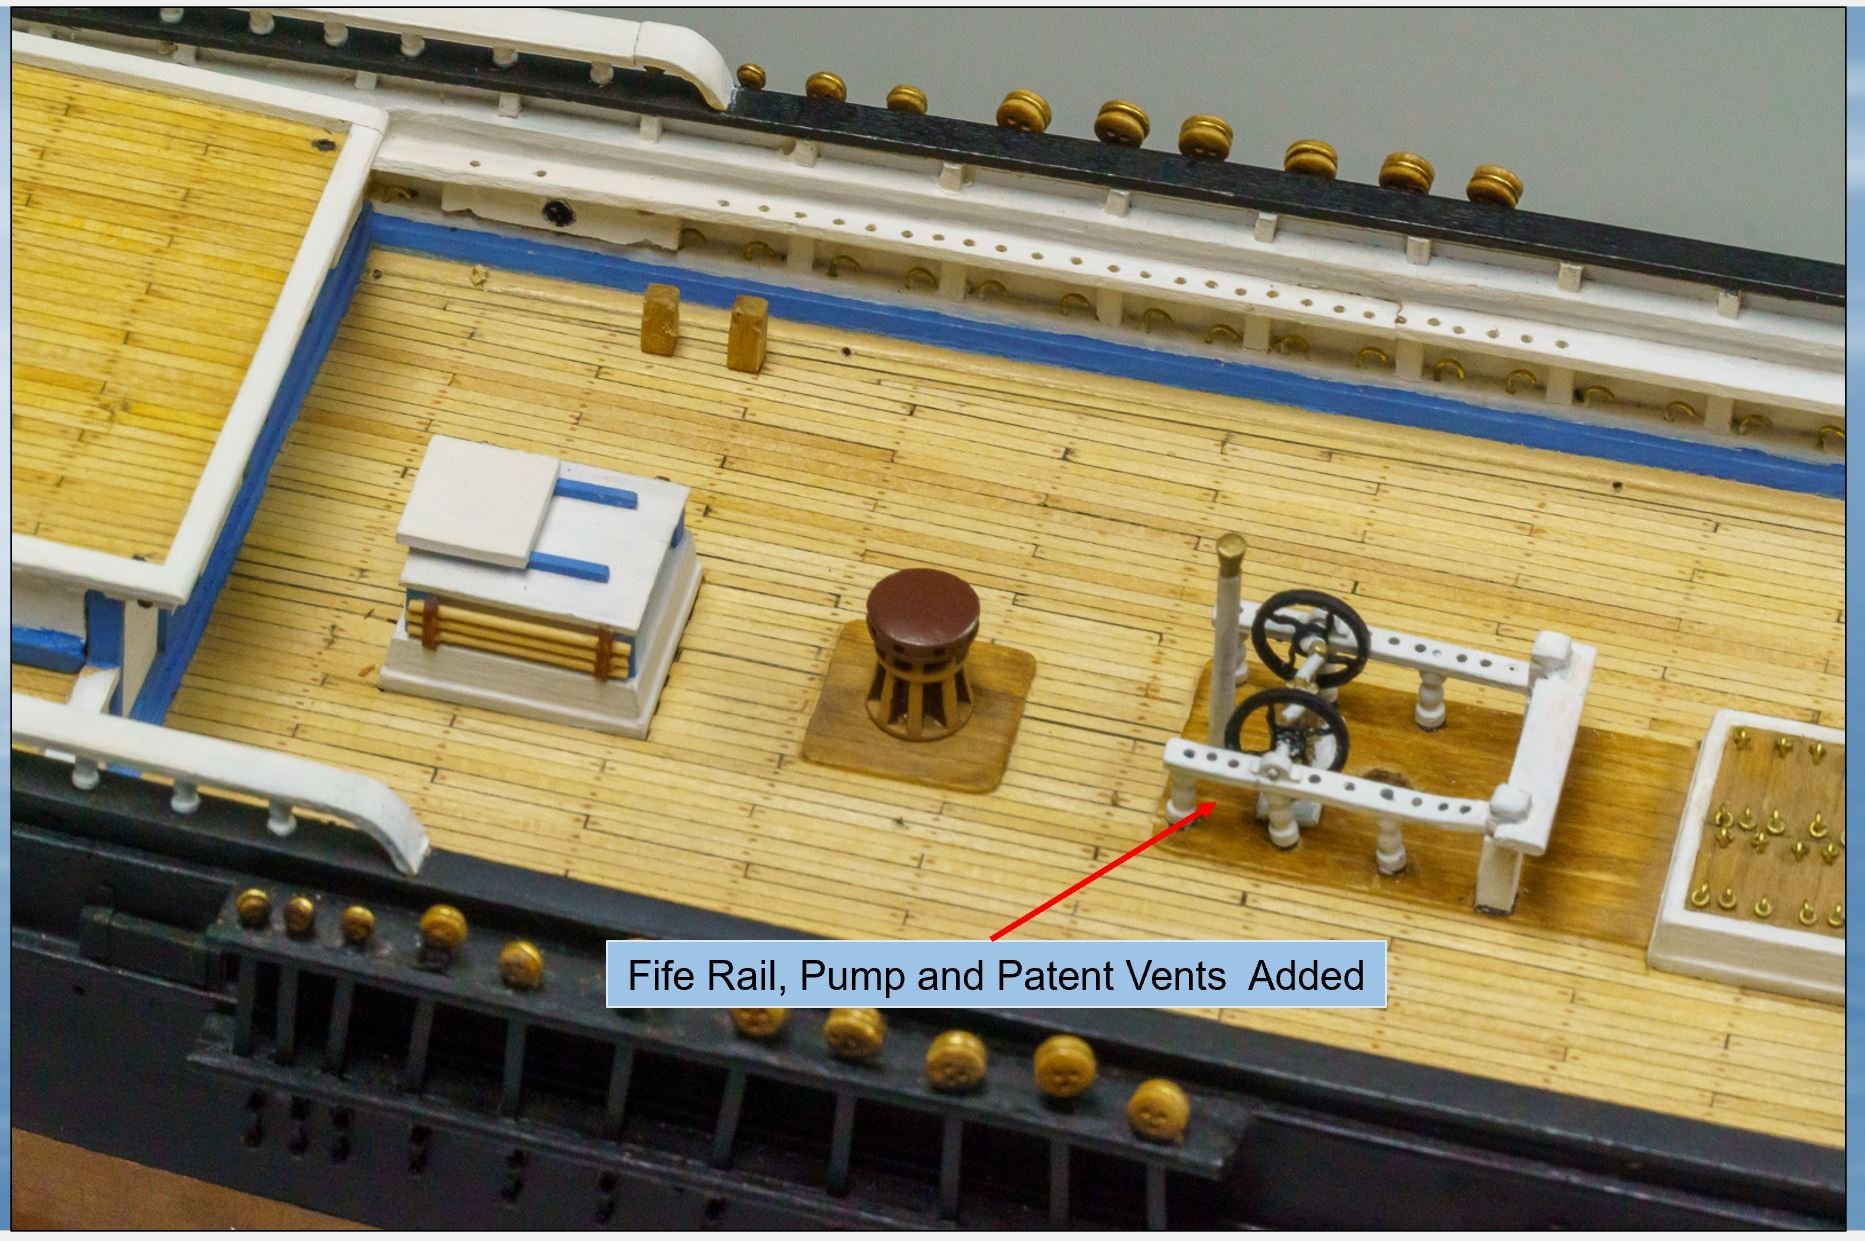
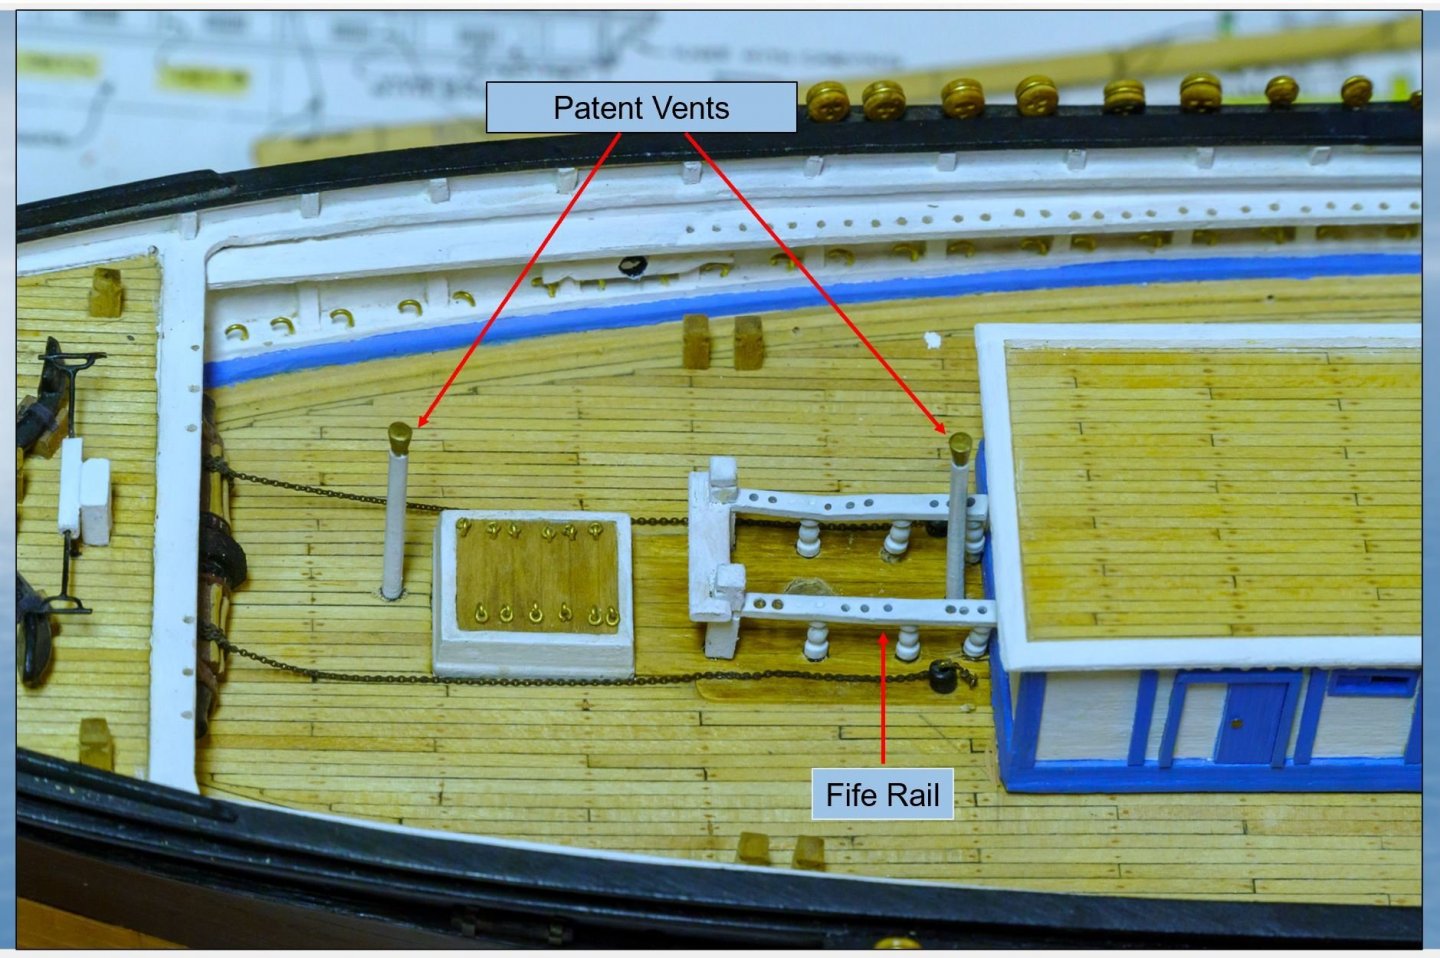
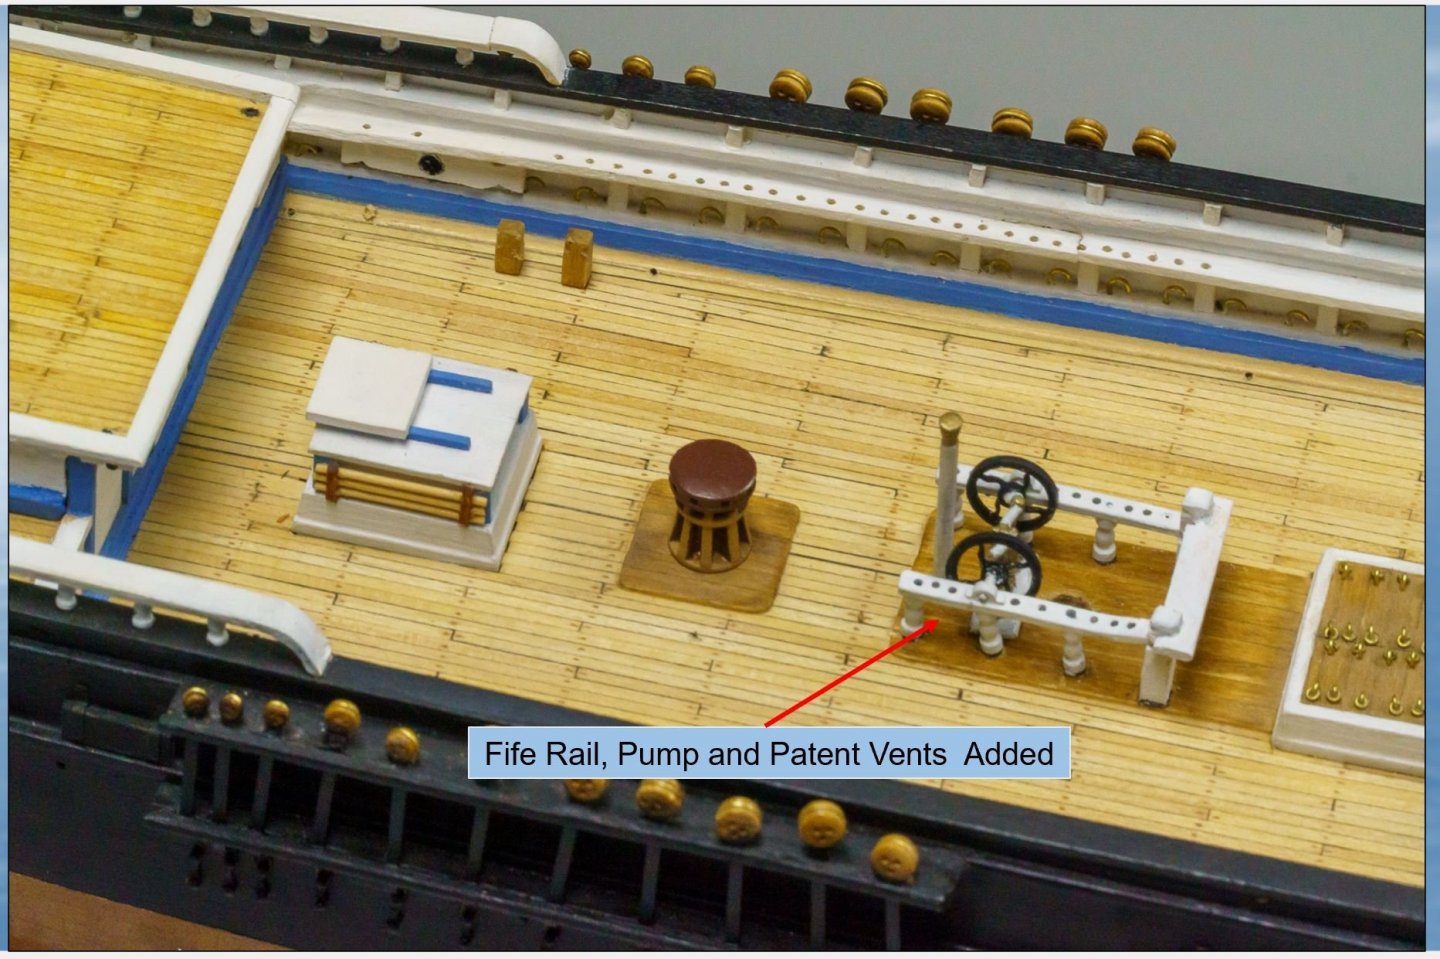
I agree with your comments on the metal castings. I debated whether or not to use the fife rails. In the end I did. They are pretty soft and the hole all had to be carefully drilled out. I nearly have it all mounted. Fitting the bilge pump required bending the metal.
- 602 replies
-
- 2
-
-
- Flying Fish
- Model Shipways
- (and 2 more)
-
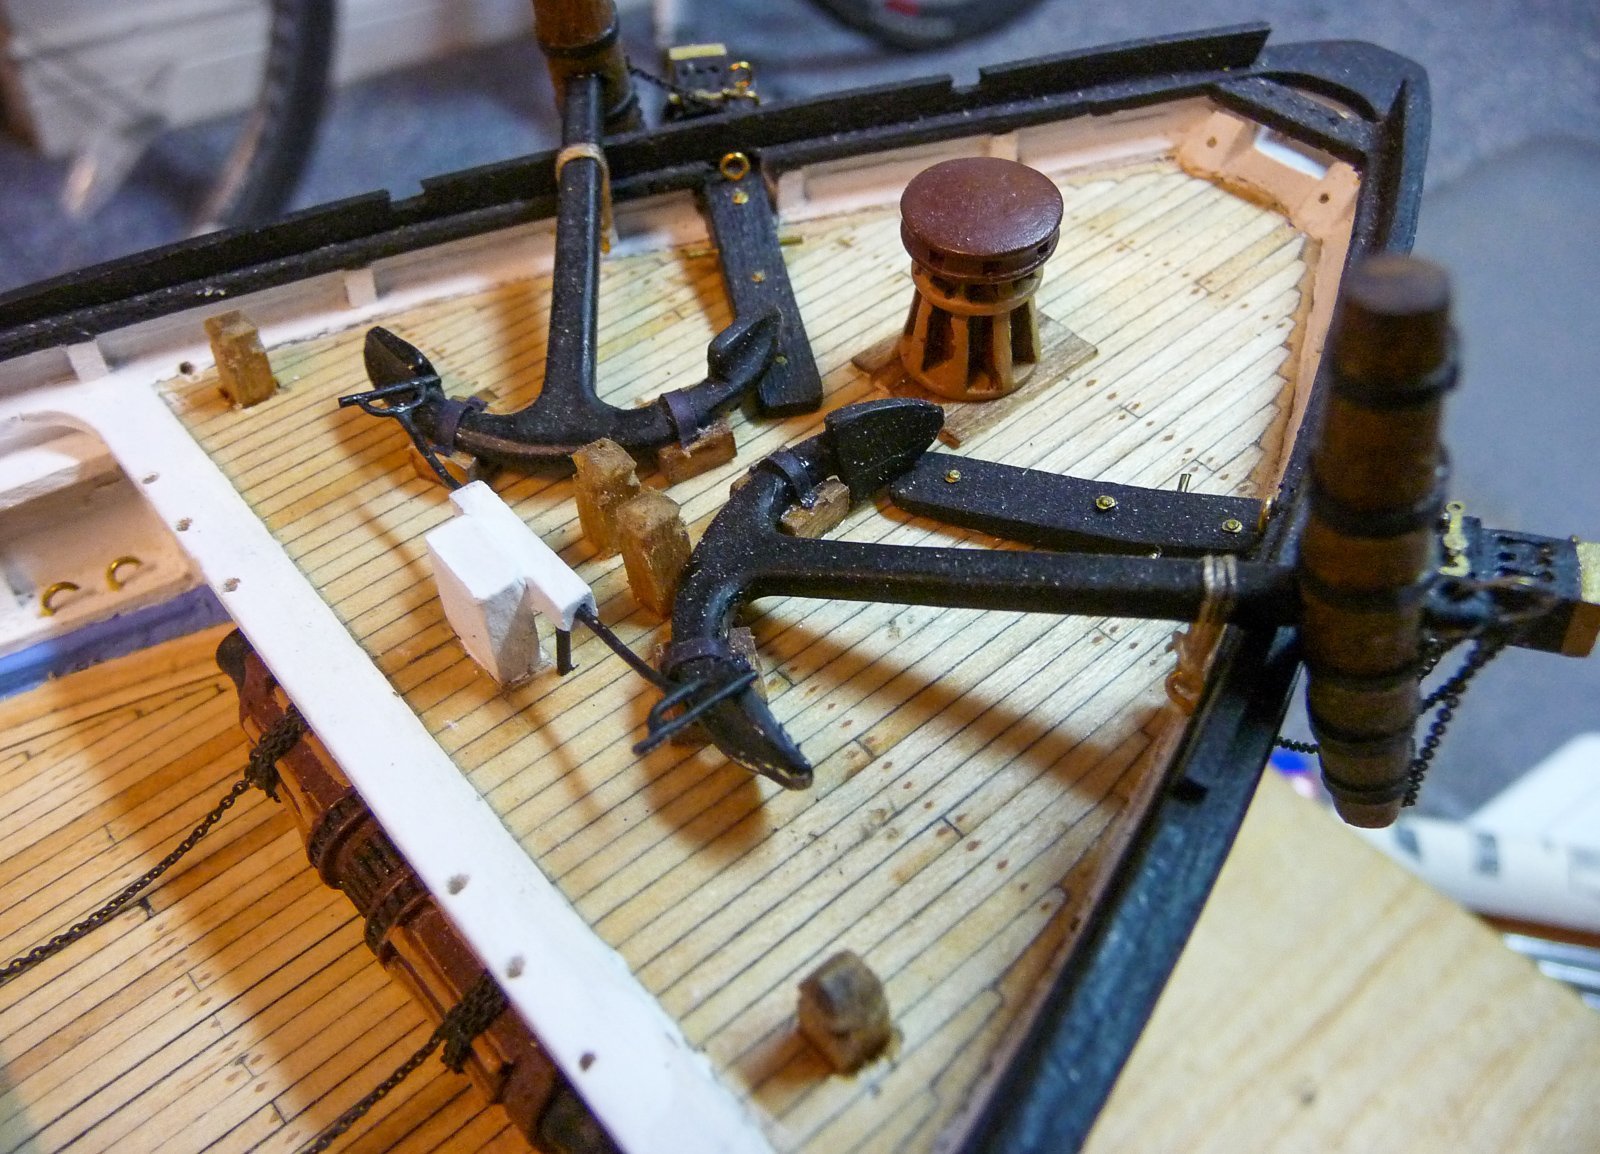
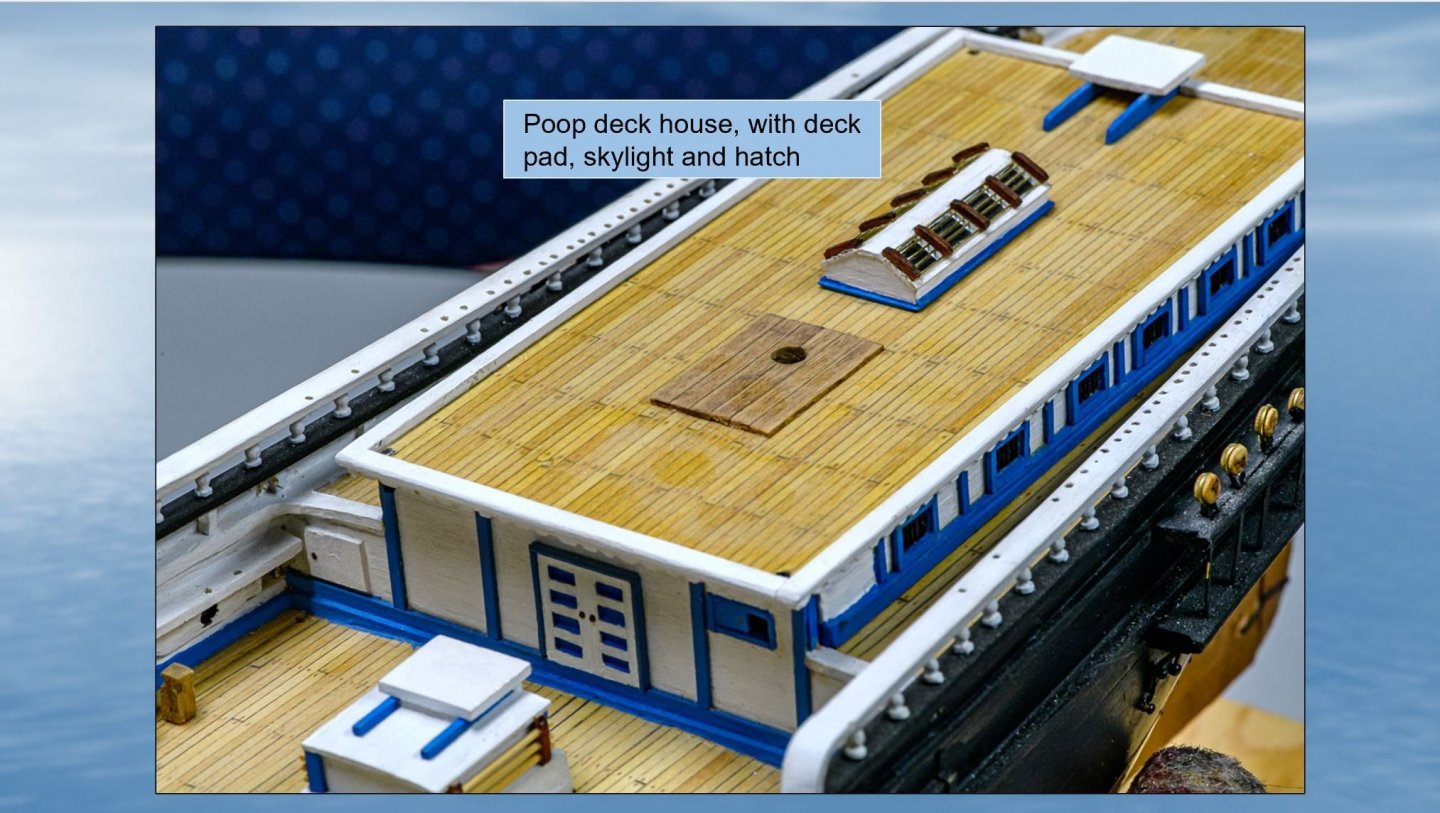
Here are a few images taken during the build on the poop deck of my model. At this stage the anchor release chords had not been installed.


- 431 replies
-
- 3
-
-
- Flying Fish
- Model Shipways
- (and 2 more)
-
Welcome aboard. Its good to have several of us on this challenging build. Jared
-
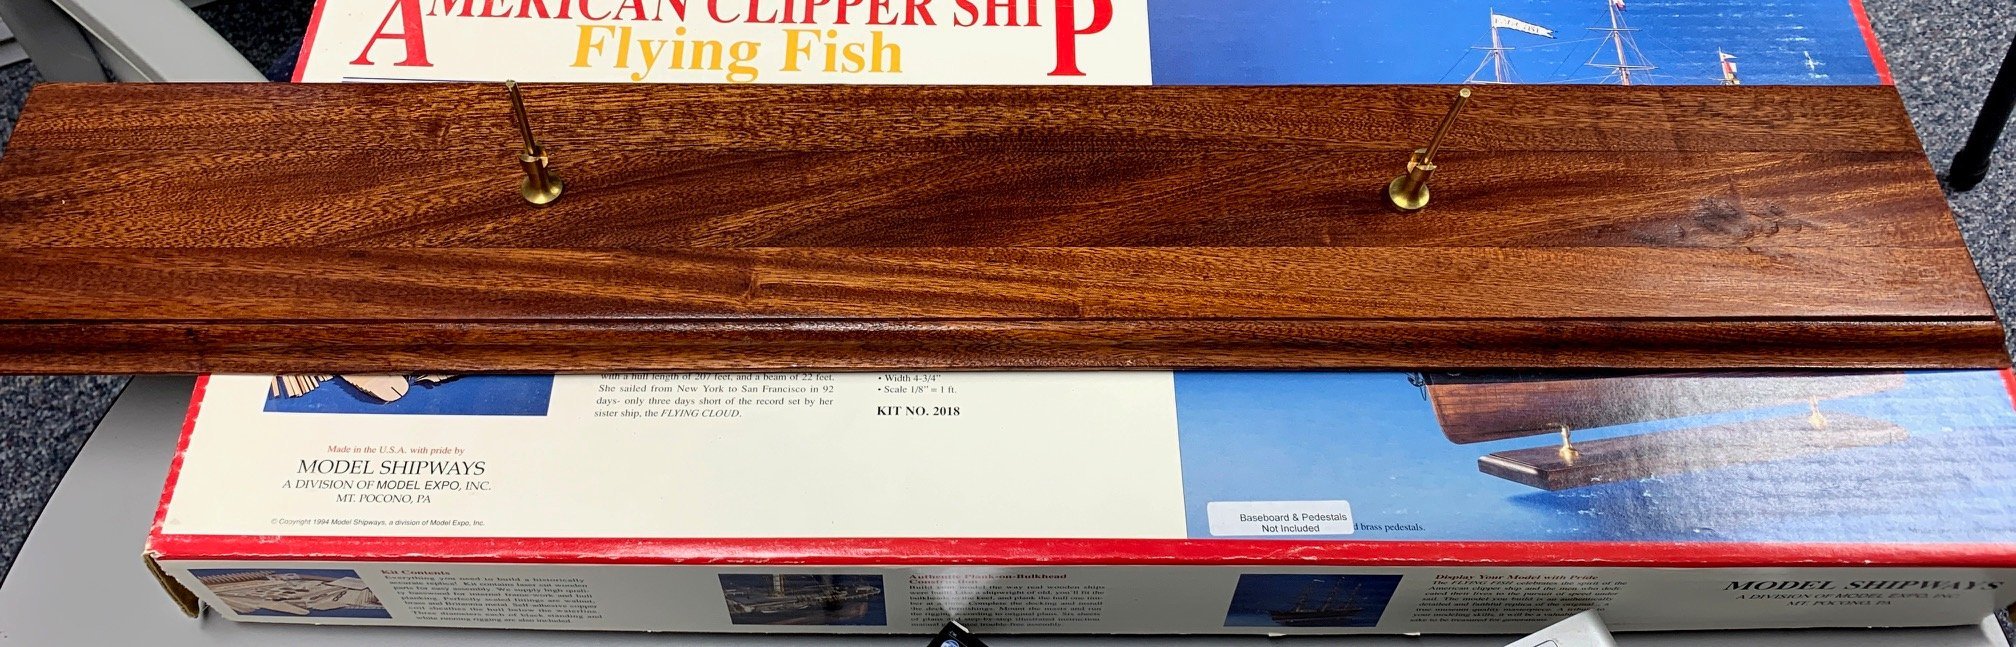
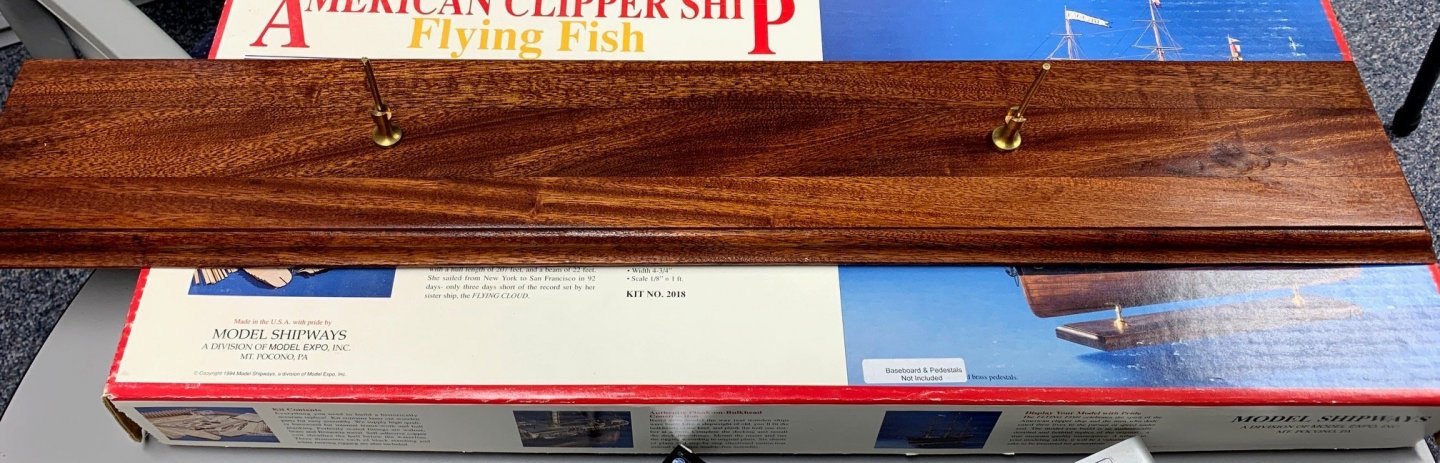
Jumping ahead to the present, I just completed construction of the mounting board base I will use to mount my Flying Fish. I was fortunate to have access to a woodshop with a shop planer. I built the base by gluing together 3 pieces of mahogany I had machined to size. After it dried, the board was sanded smooth, then passed through a router to give a nice shape to the upper edge. It was then finely sanded, stained and finished with a couple of coats of tung oil. Holes were partially drilled through the base at the locations of the brass pedestals. The ship will be mounted to the base vial brass rods (approx. 3 mm dia.) which I will epoxy the the base and in the hull, which was described in the tips section of this website. The use of bendable brass rods is a neat way to ensure the ship will be mounted level later. Because of the coppering, the brass pedestals had to be filed wider at the top notch to fit over the keel.

- 431 replies
-
- 4
-
-
- Flying Fish
- Model Shipways
- (and 2 more)
-
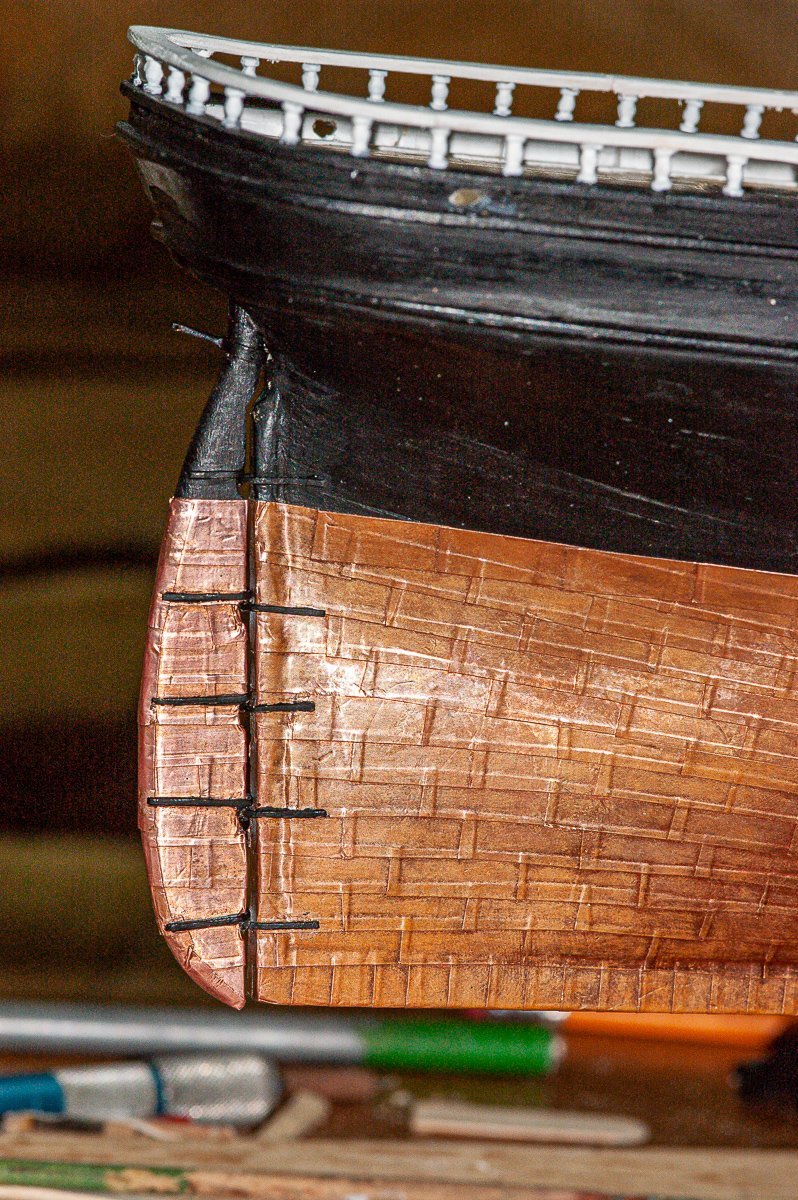
I don't recall to precisely the details of the construction after completion of the coppering of the hull. From the dates on my photos, I worked on several structures including installing the topgallant rail, taffrail, and started construction of the deckhouse. To strengthen the timberheads, I secured them with both glue and inserted cut pins (see photo).


- 431 replies
-
- 5
-
-
- Flying Fish
- Model Shipways
- (and 2 more)