HOLIDAY DONATION DRIVE - SUPPORT MSW - DO YOUR PART TO KEEP THIS GREAT FORUM GOING! (Only 20 donations so far - C'mon guys!)
×


Jared
-
Posts
305 -
Joined
-
Last visited
Content Type
Profiles
Forums
Gallery
Events
Everything posted by Jared
-
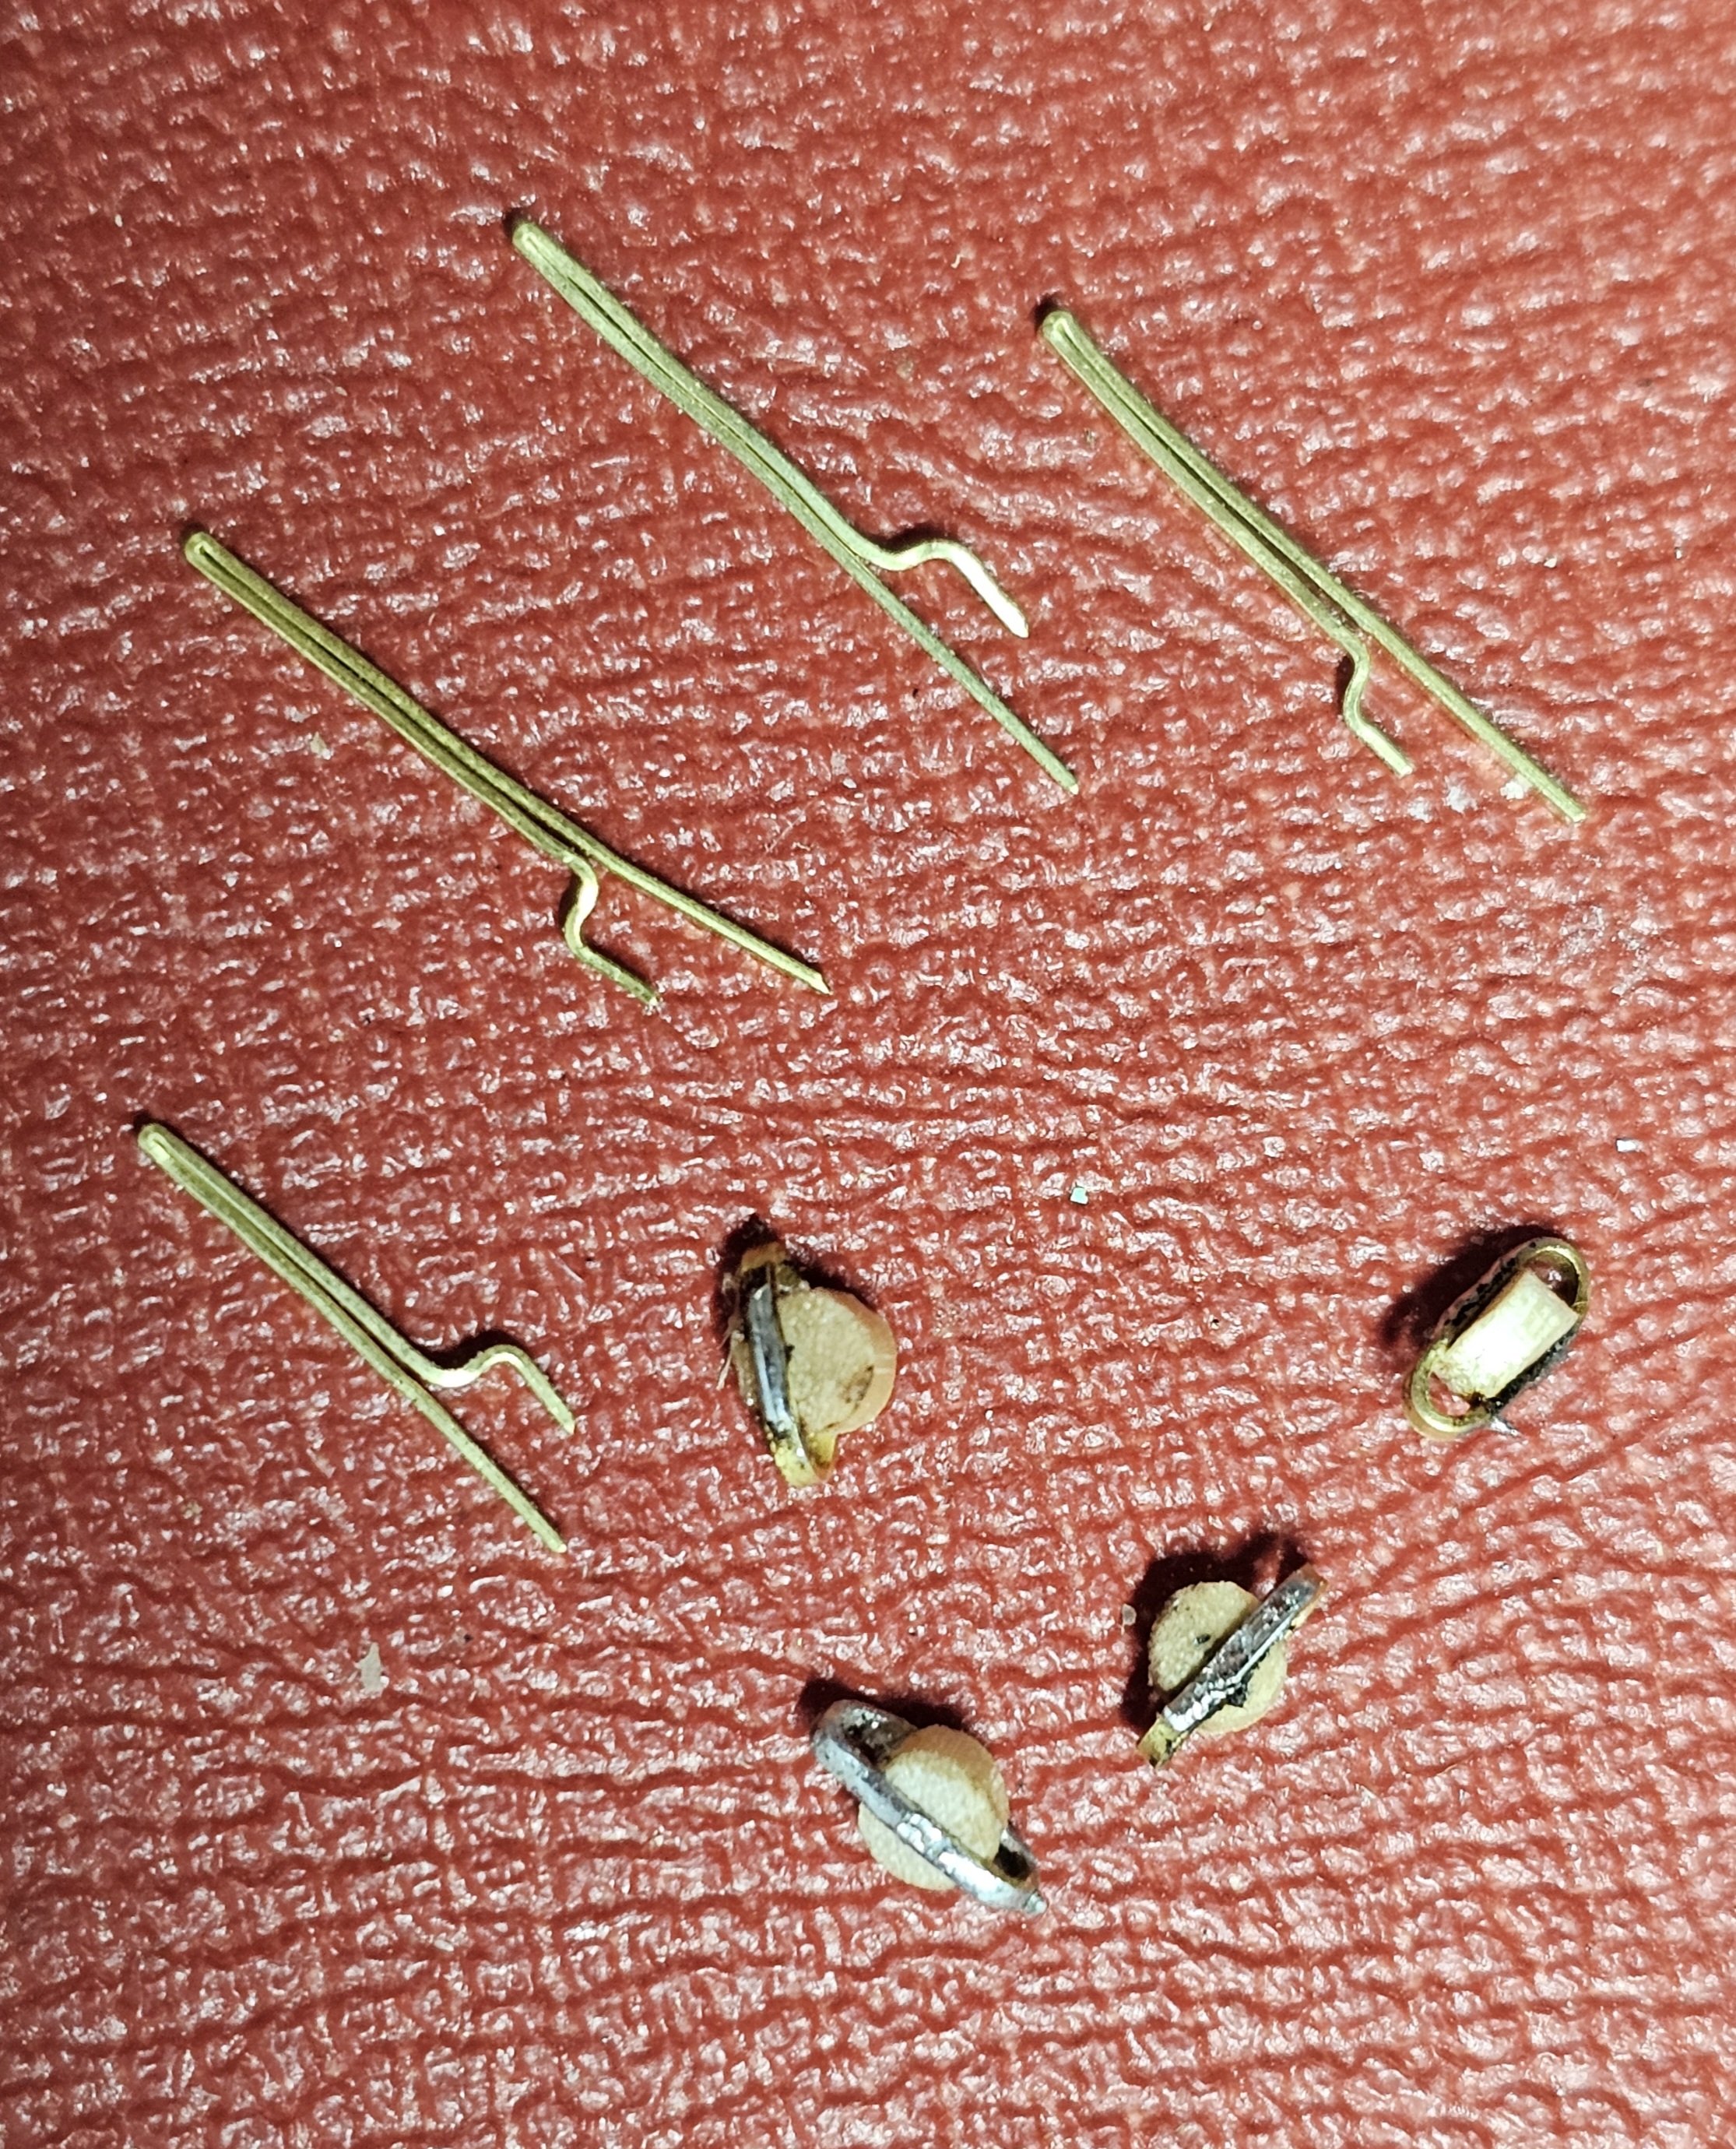
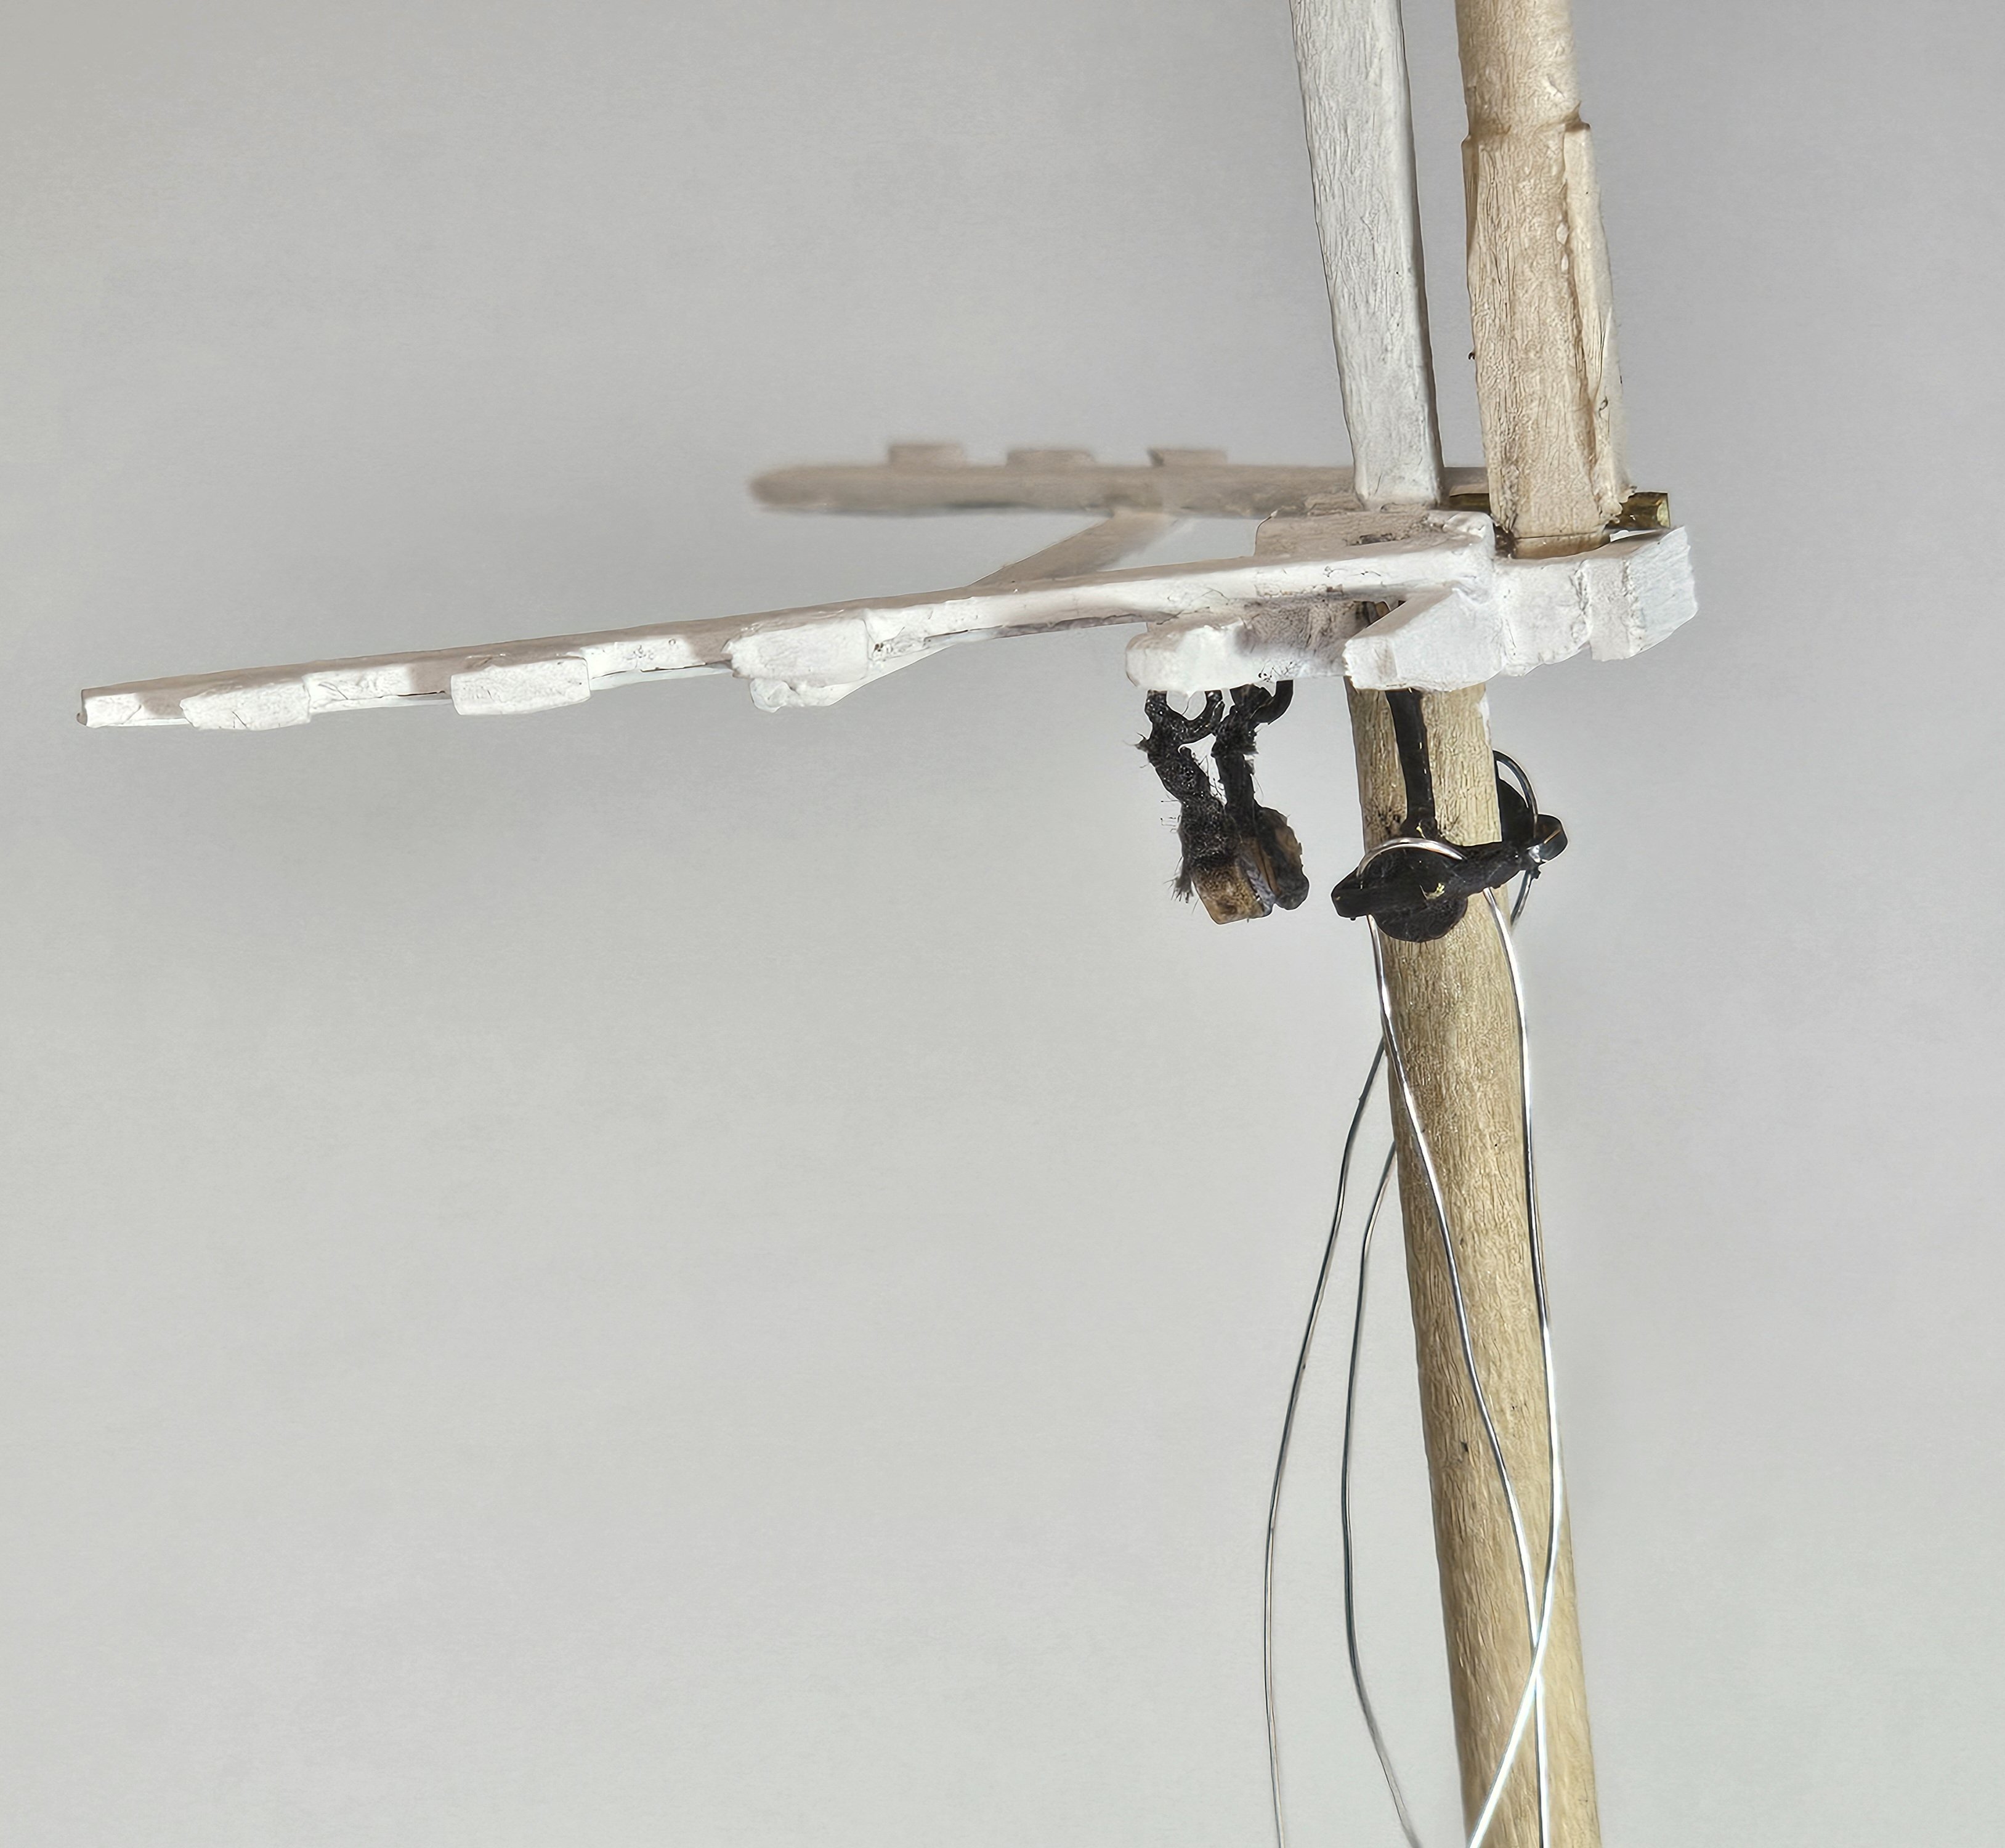
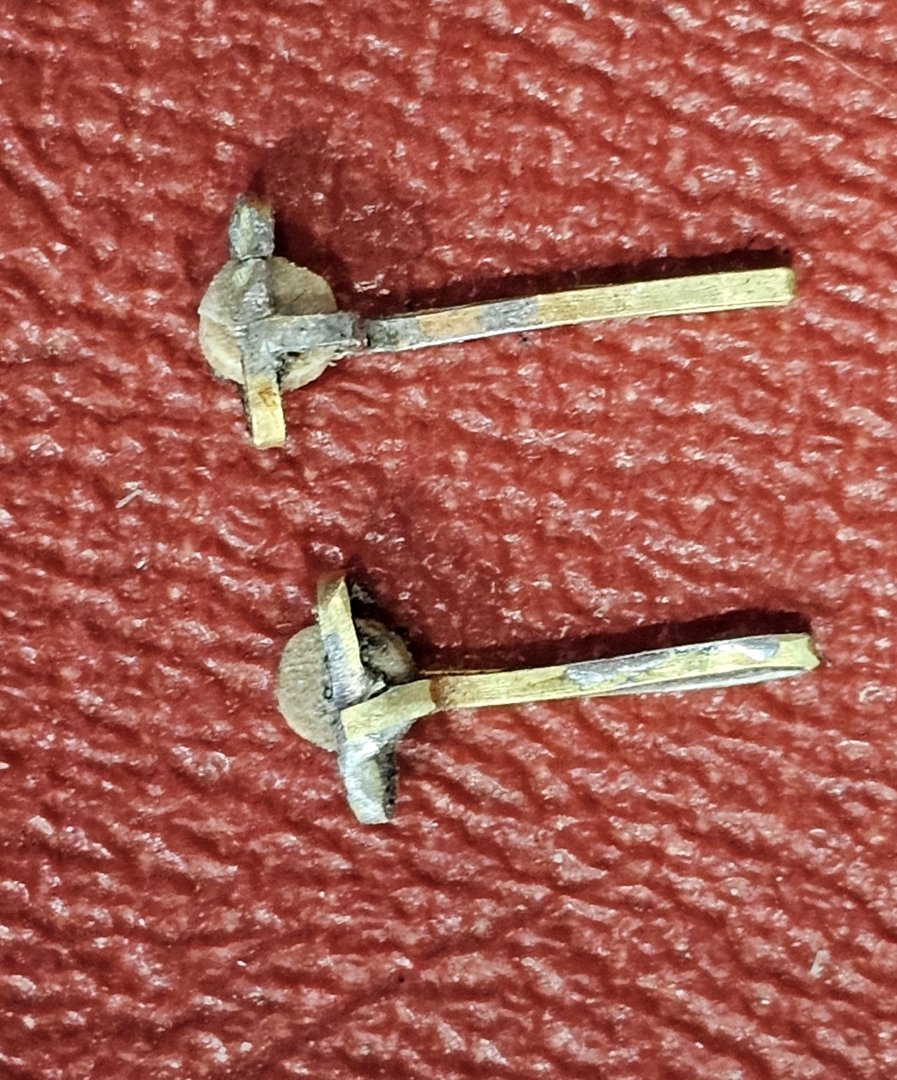
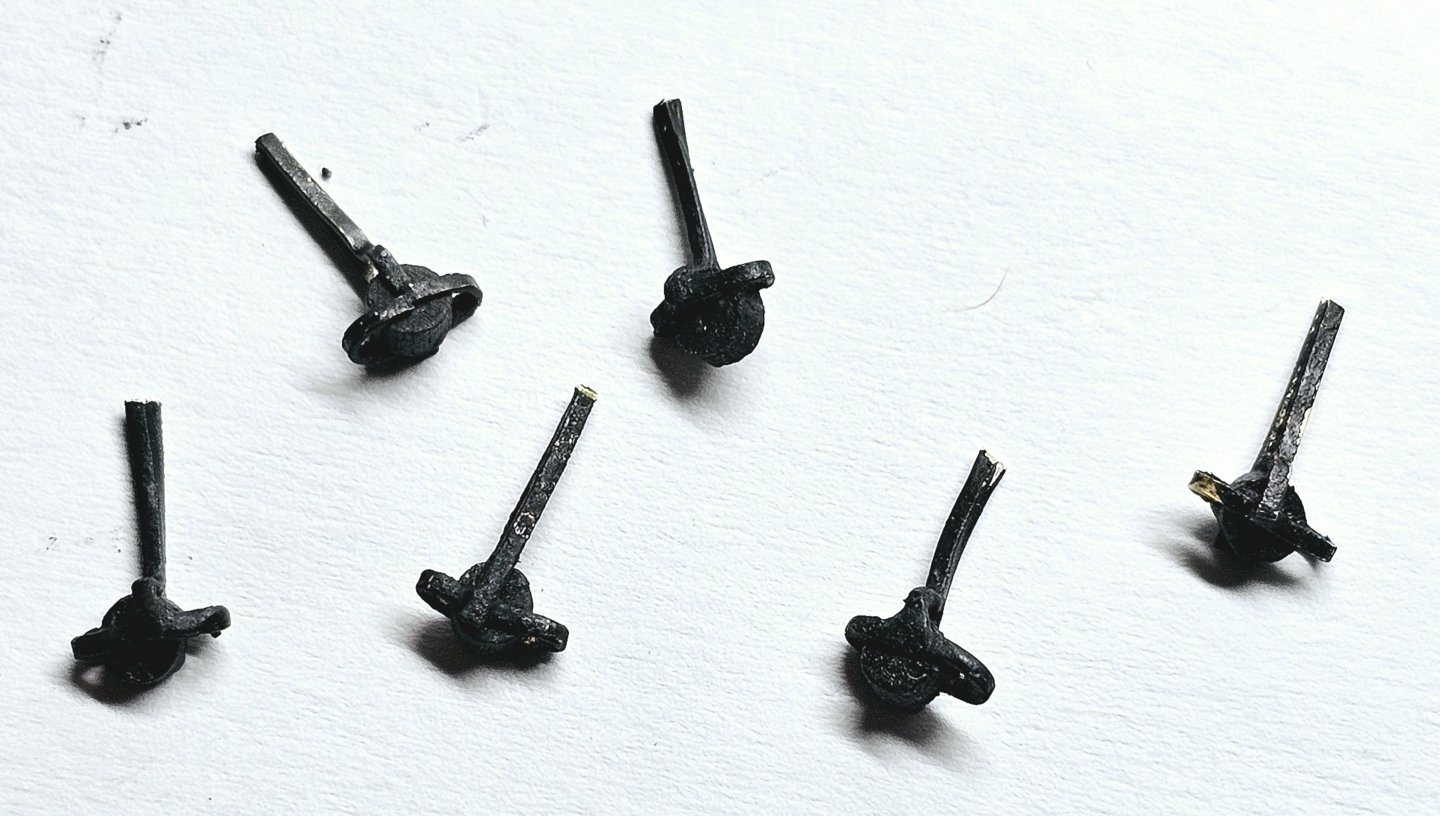
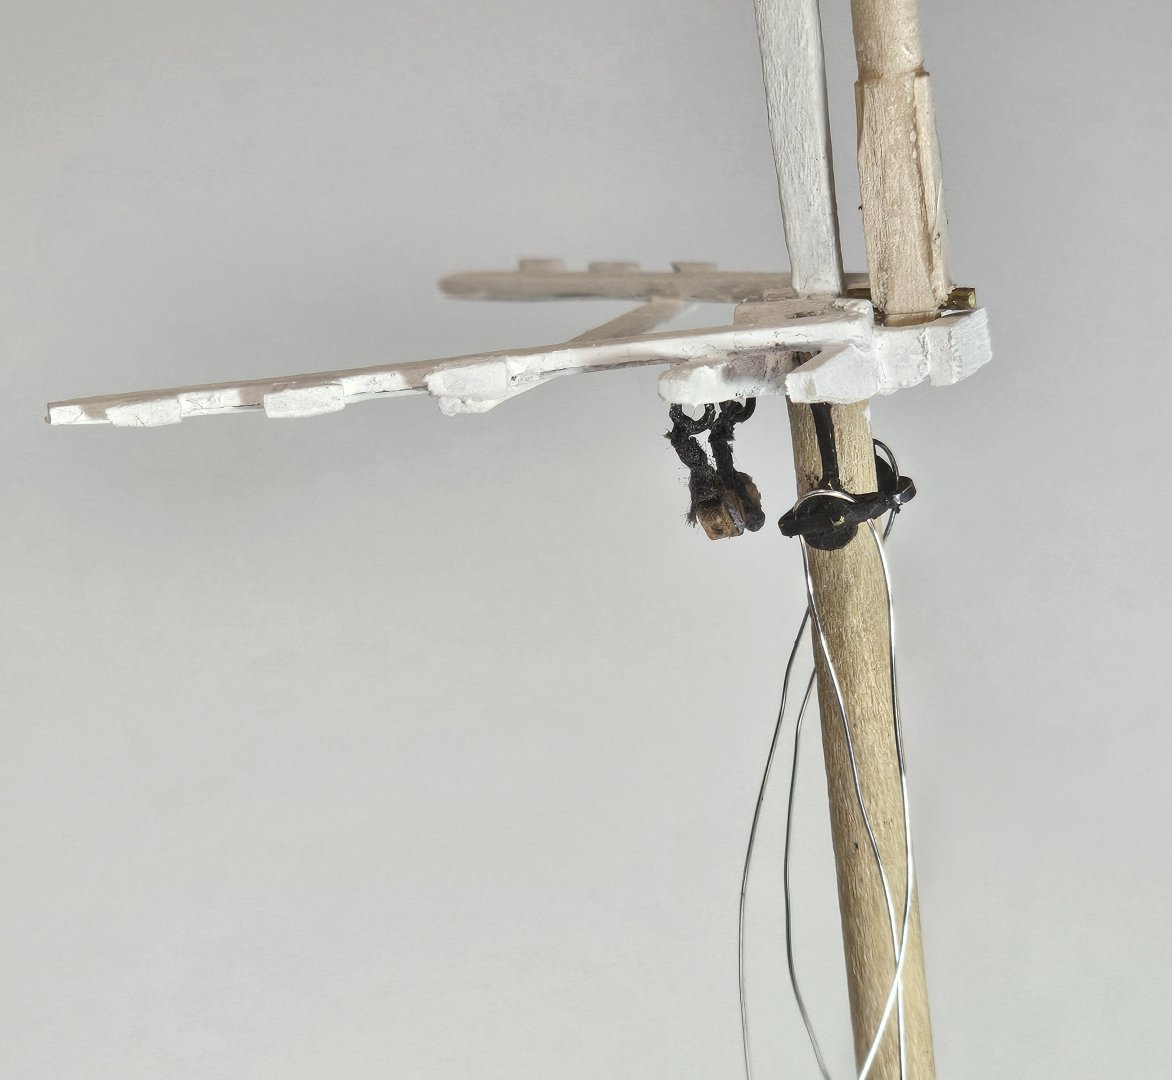
This weekend I attacked the gin-blocks (labelled iron blocks on the model plans). They form part of the rigging used to raise and lower the topsails on the fore, main and mizen masts. A pair of gin-blocks mount on the tressel cross trees under the upper tops (on p&s sides). This wasn't very clear from the drawings and I am thankful to George (GAK1965) for helping me understand what was needed. The gin-blocks are somewhat complicated to make due to their small size and complexity. Fortunately George presented an elegant way to make them in his FF build log (pg. 14). The only thing I did differently was to lightly solder the brass bits together as I was having too much difficulty trying to hold everything together with superglue. My finished gin-blocks are shown below with some on the intermediate steps. The black paint is a great way to hide craftmanship challenges that are better not to be shown 🙄. The last photo shows the gin-blocks mounted on the main mast. Anticipating later rigging the chains through them will be tight and challenging I fed avthin steel wire through each to help me fish the chains through them later in the build.

- 431 replies
-
- 4
-

-
- Flying Fish
- Model Shipways
- (and 2 more)
-
Thanks. To clarify this rail is all wood. The plywood layer was quite strong on its own. The thin basswood layer was only added to increase the thickness to 2 mm.
-
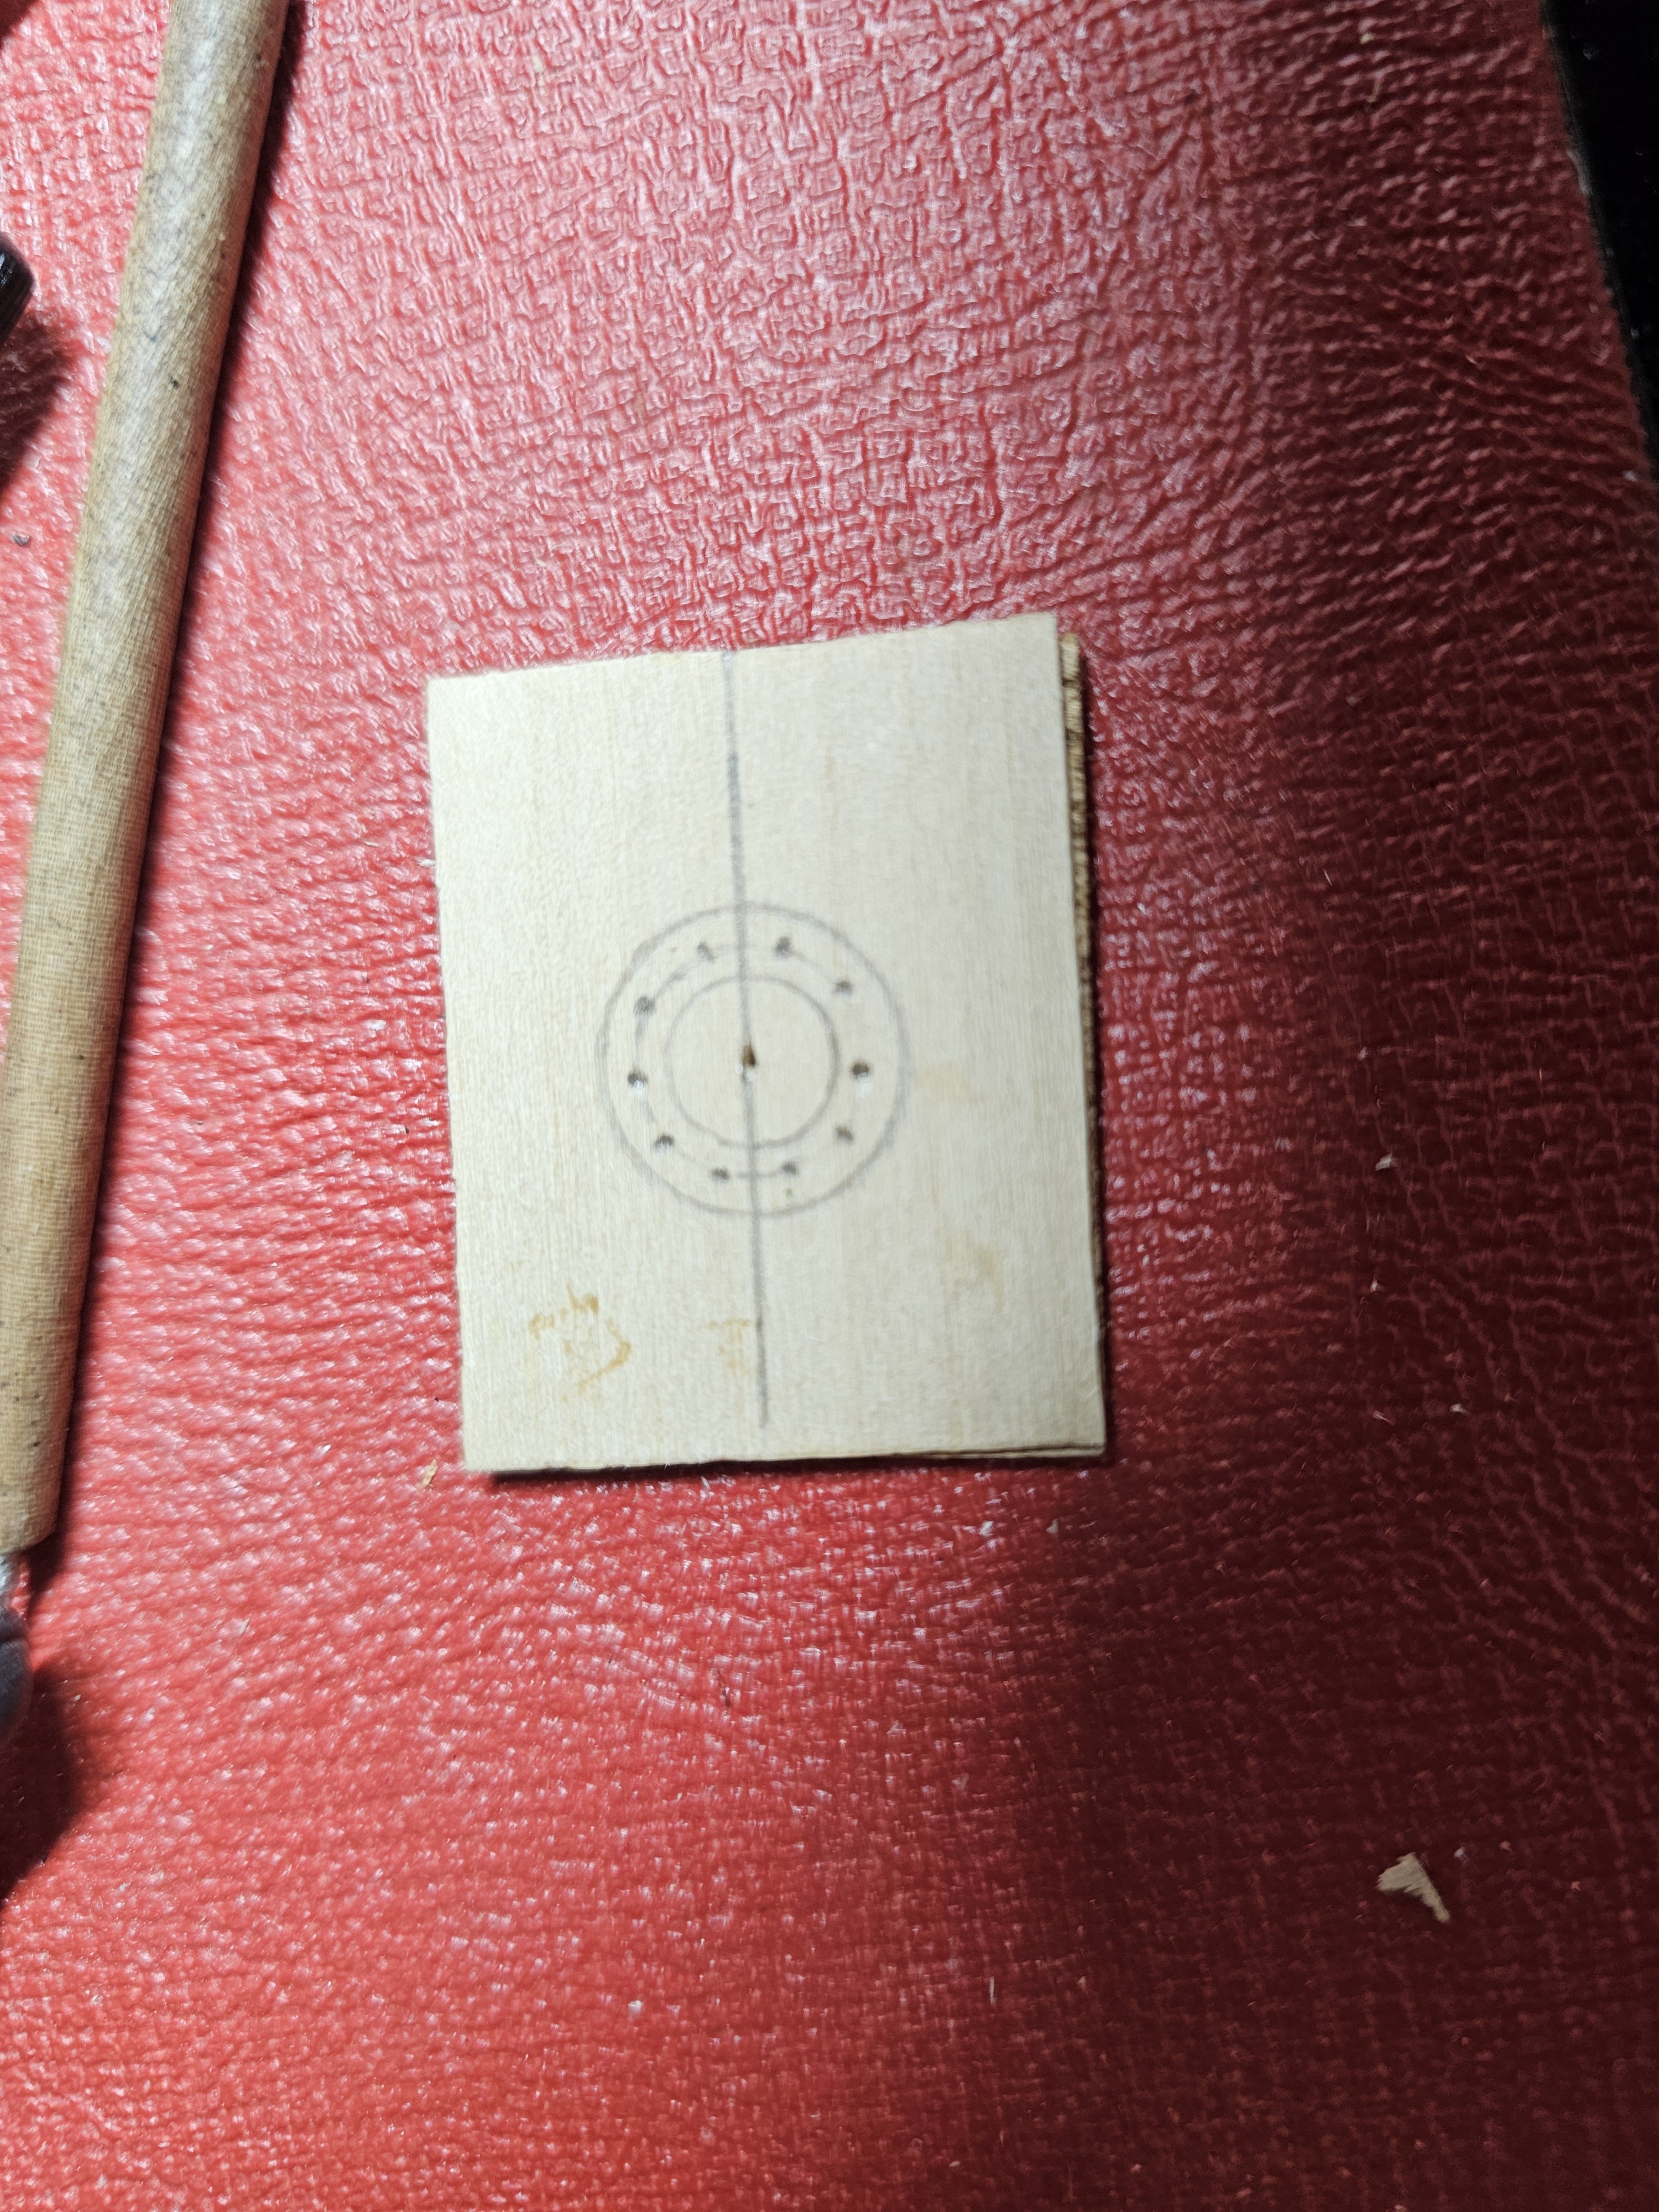
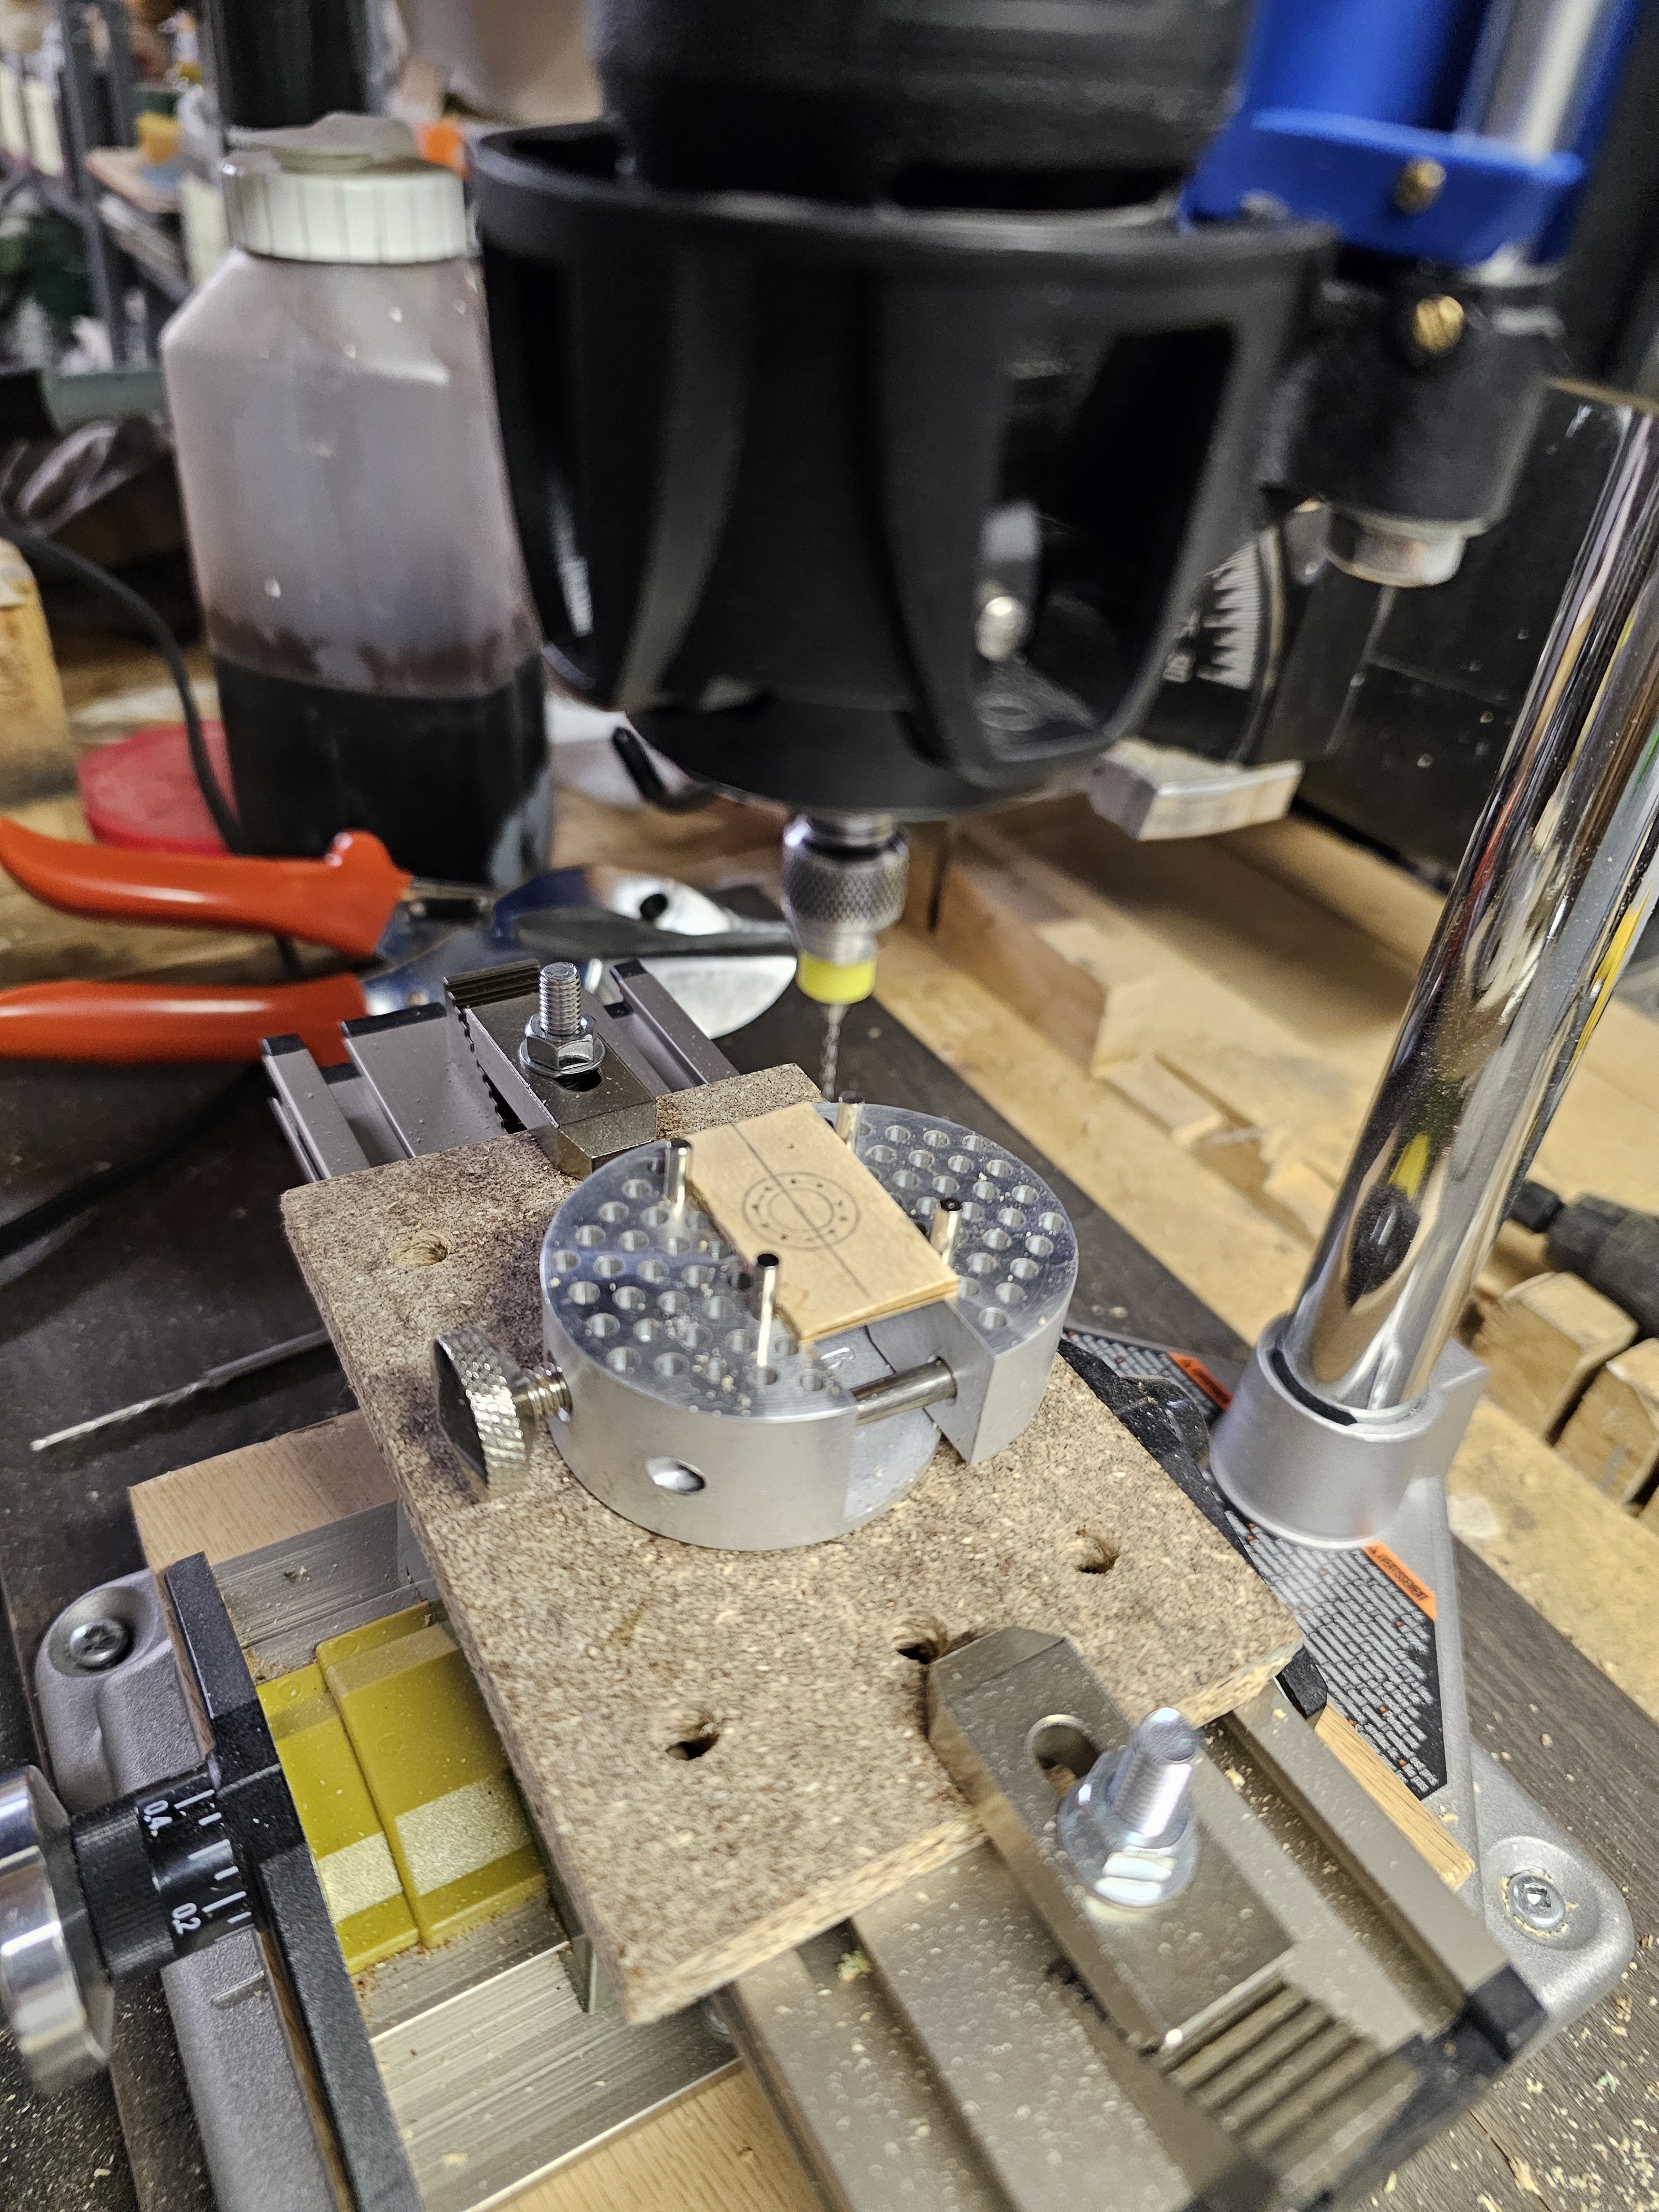
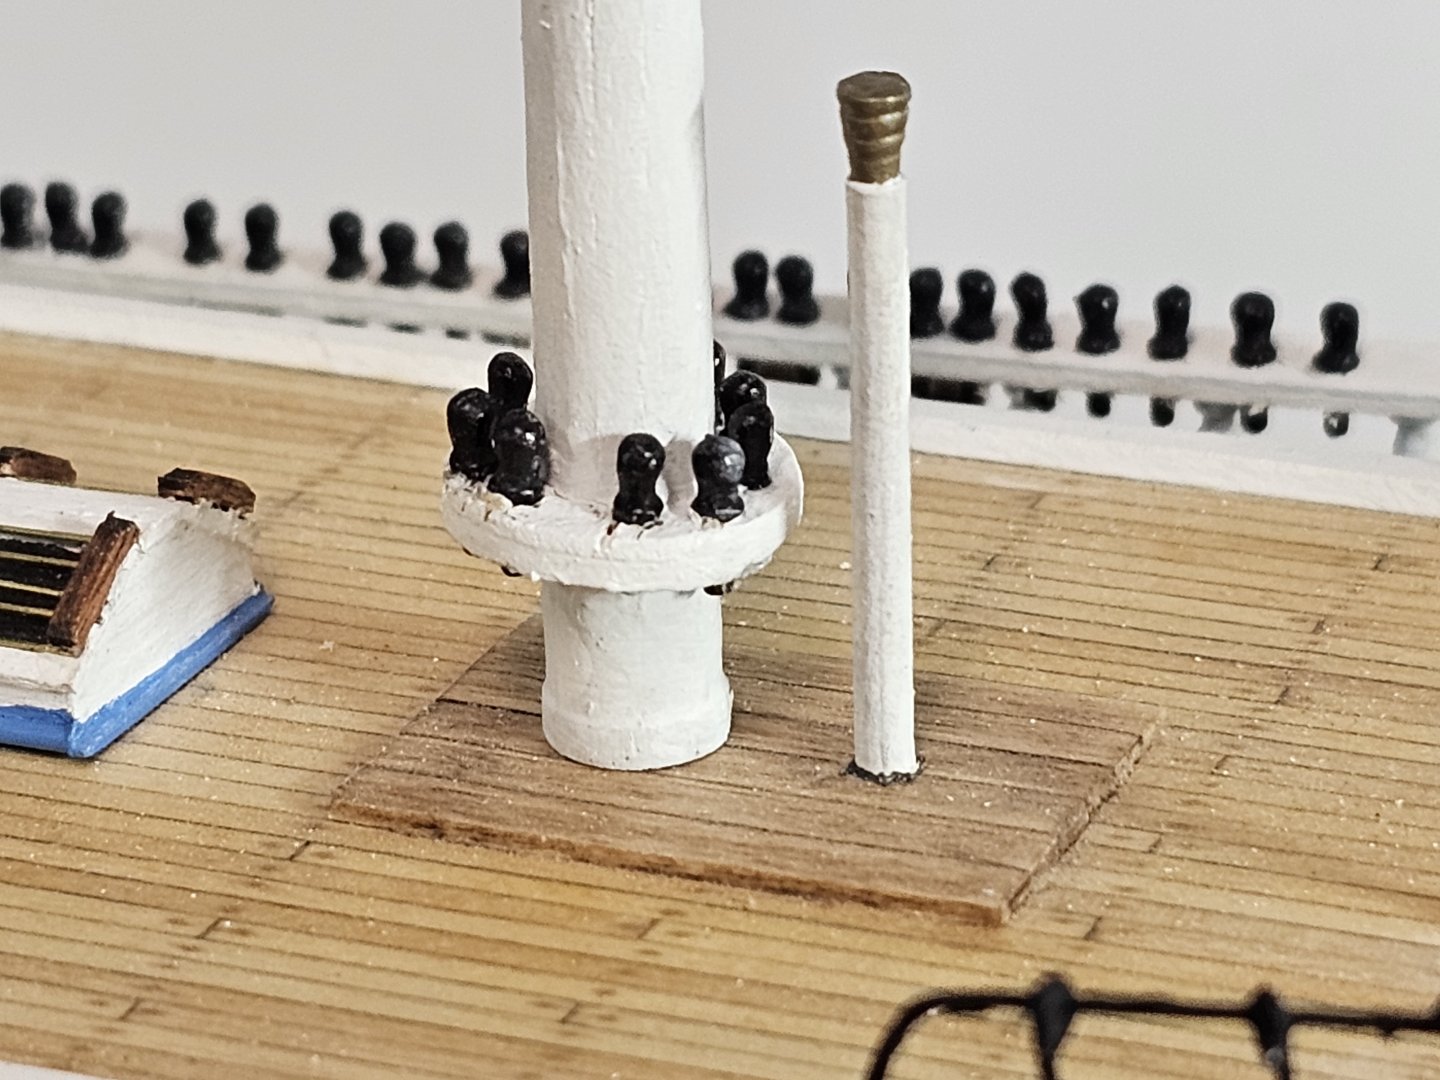
I made the ring-shaped belay pin rack which mounts to the mizen mast from a 1.5 mm thick piece of scrap plywood to which I glued a 0.5 mm scrap of bass wood sheet. I then traced the design with a compass on it. The holes for the belay pins were drilled on a Dremel drill press, fitted with a Proxxon X-Y table. The ring shape of the belay rail was then filed and sanded to shape. It was then mounted on the mizzen mast, painted and fitted with 10 belay pins.


- 431 replies
-
- 1
-
-
- Flying Fish
- Model Shipways
- (and 2 more)
-
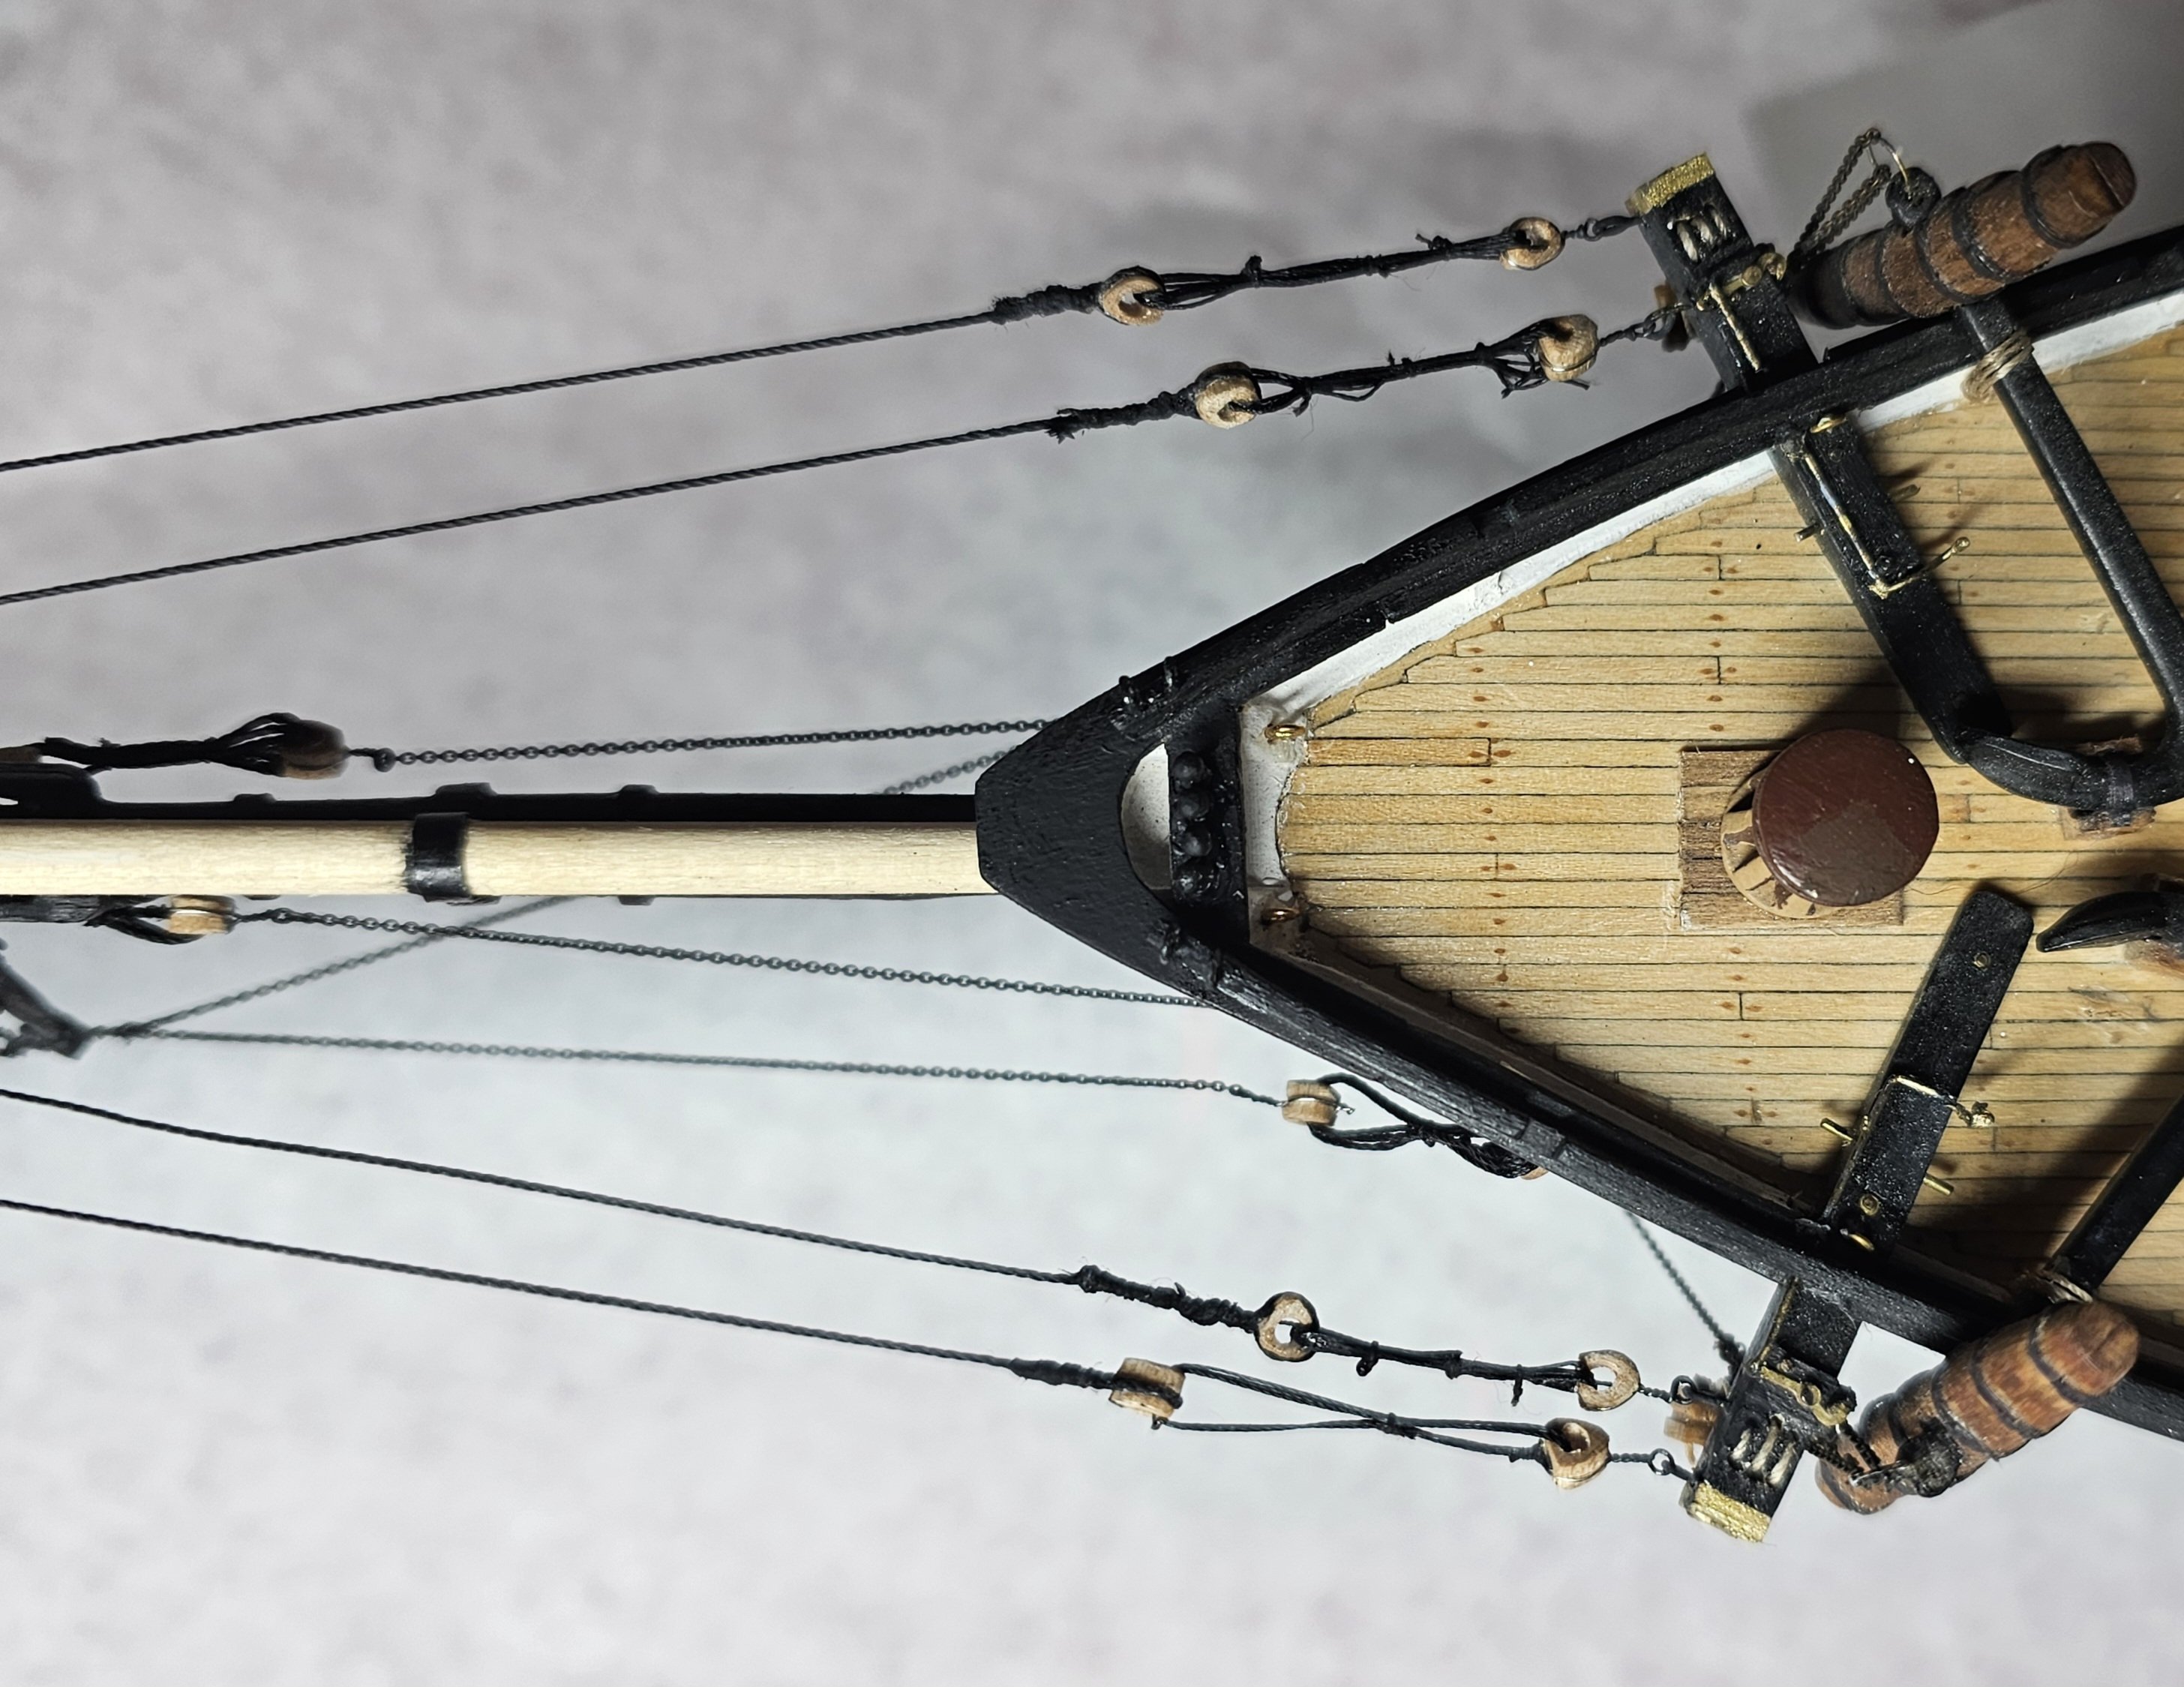
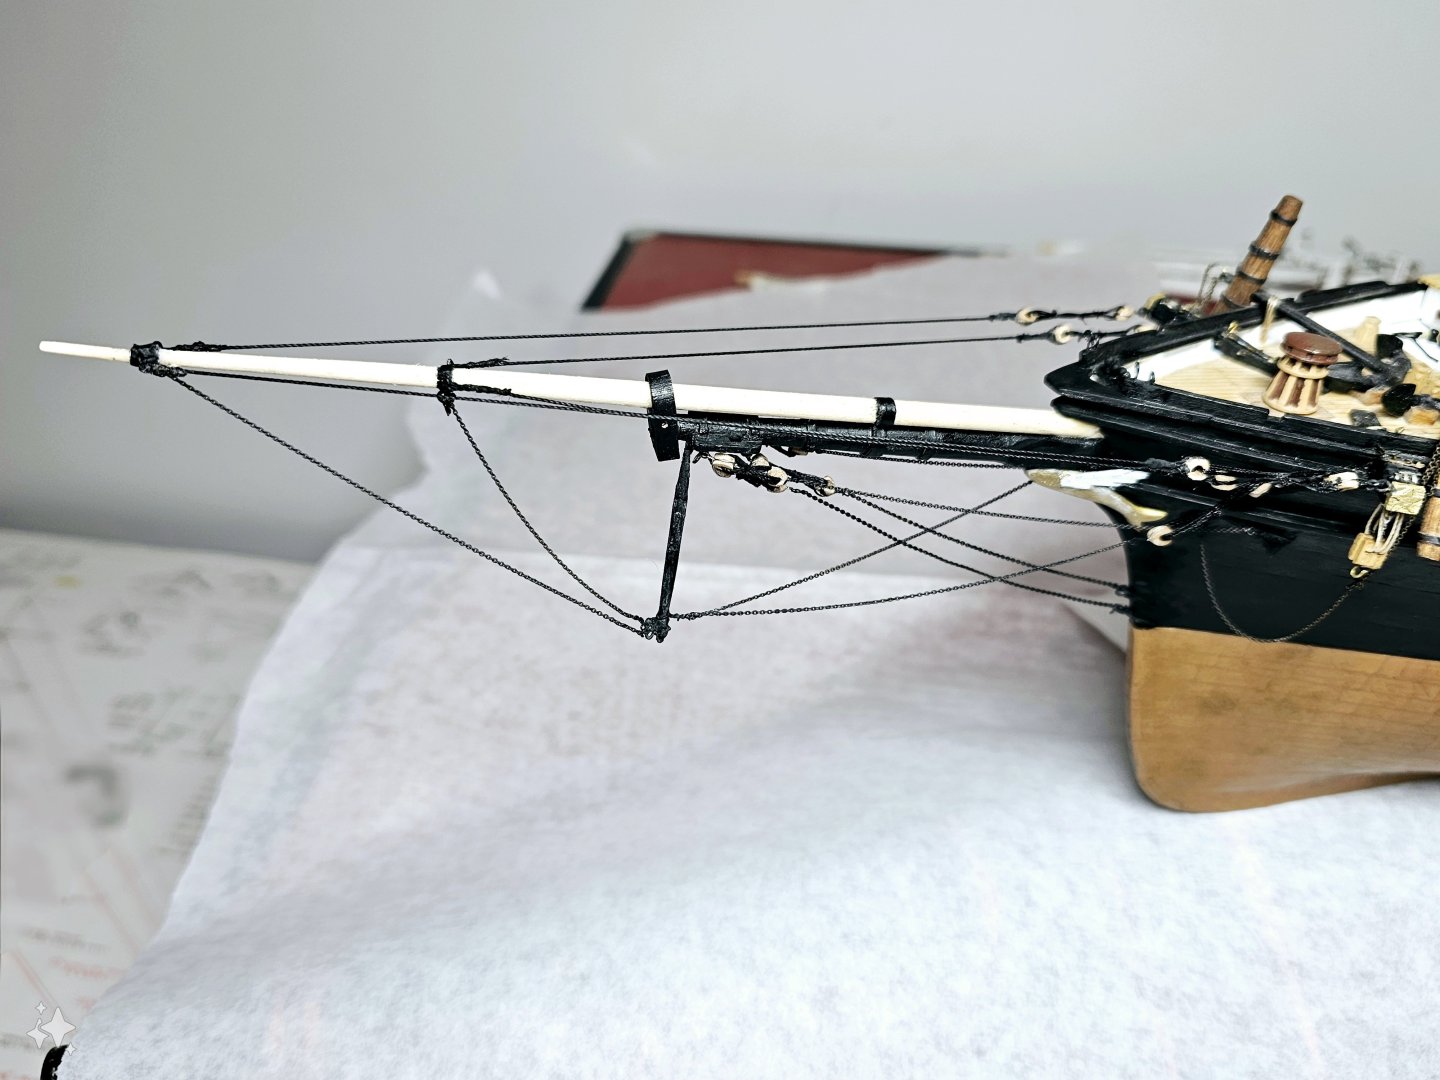
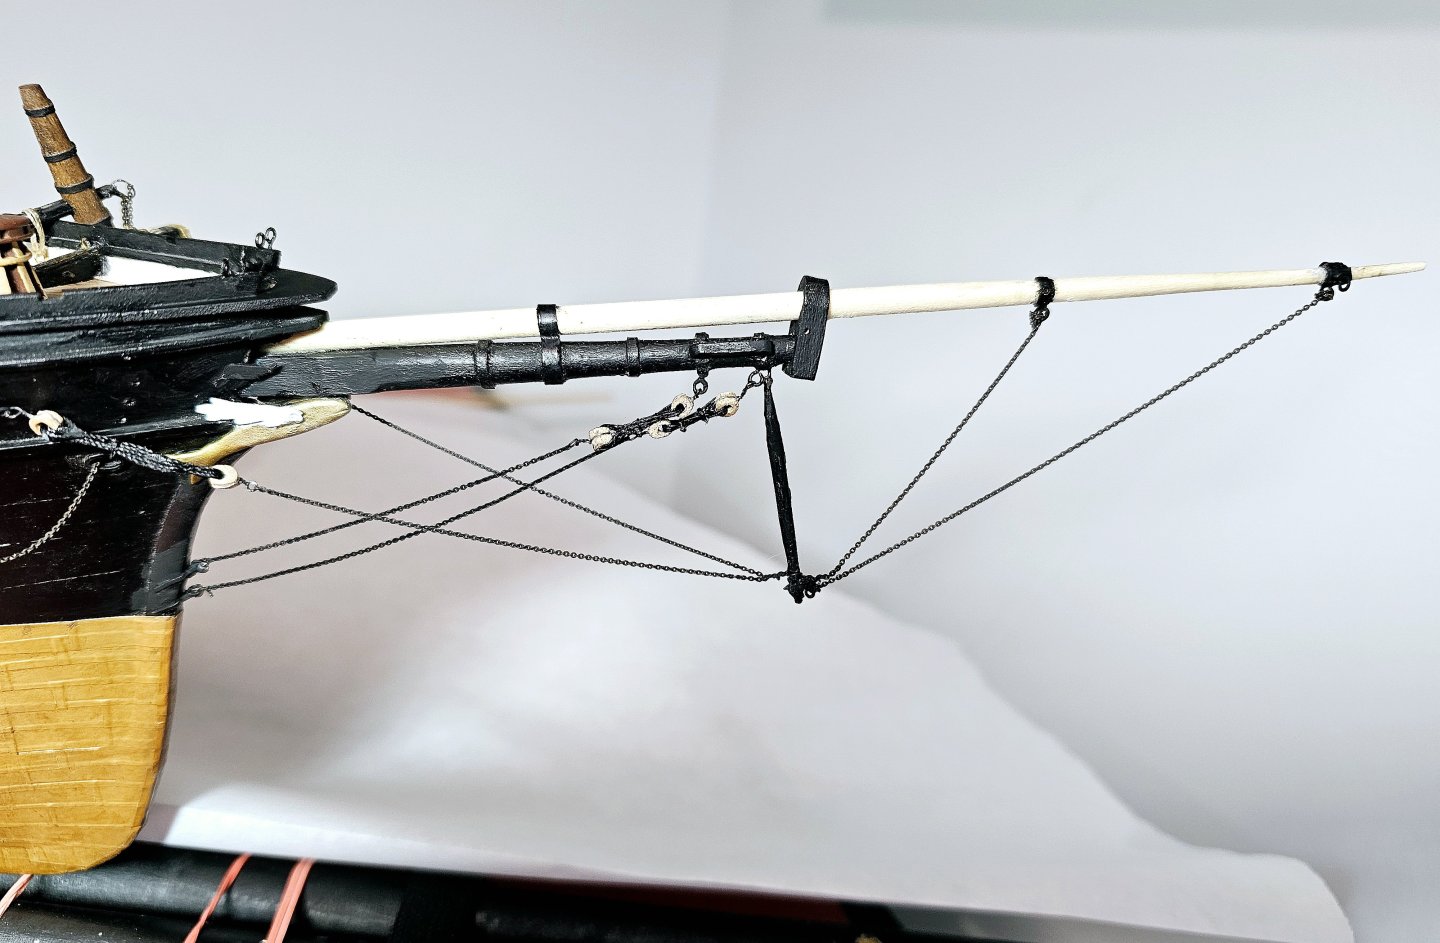
Happily just completed the four bowsprit guys. It was slow delicate work, but easier than the chainwork because of their more accessible location. The footropes were then added (Photo 3).

- 431 replies
-
- 2
-
-
- Flying Fish
- Model Shipways
- (and 2 more)
-
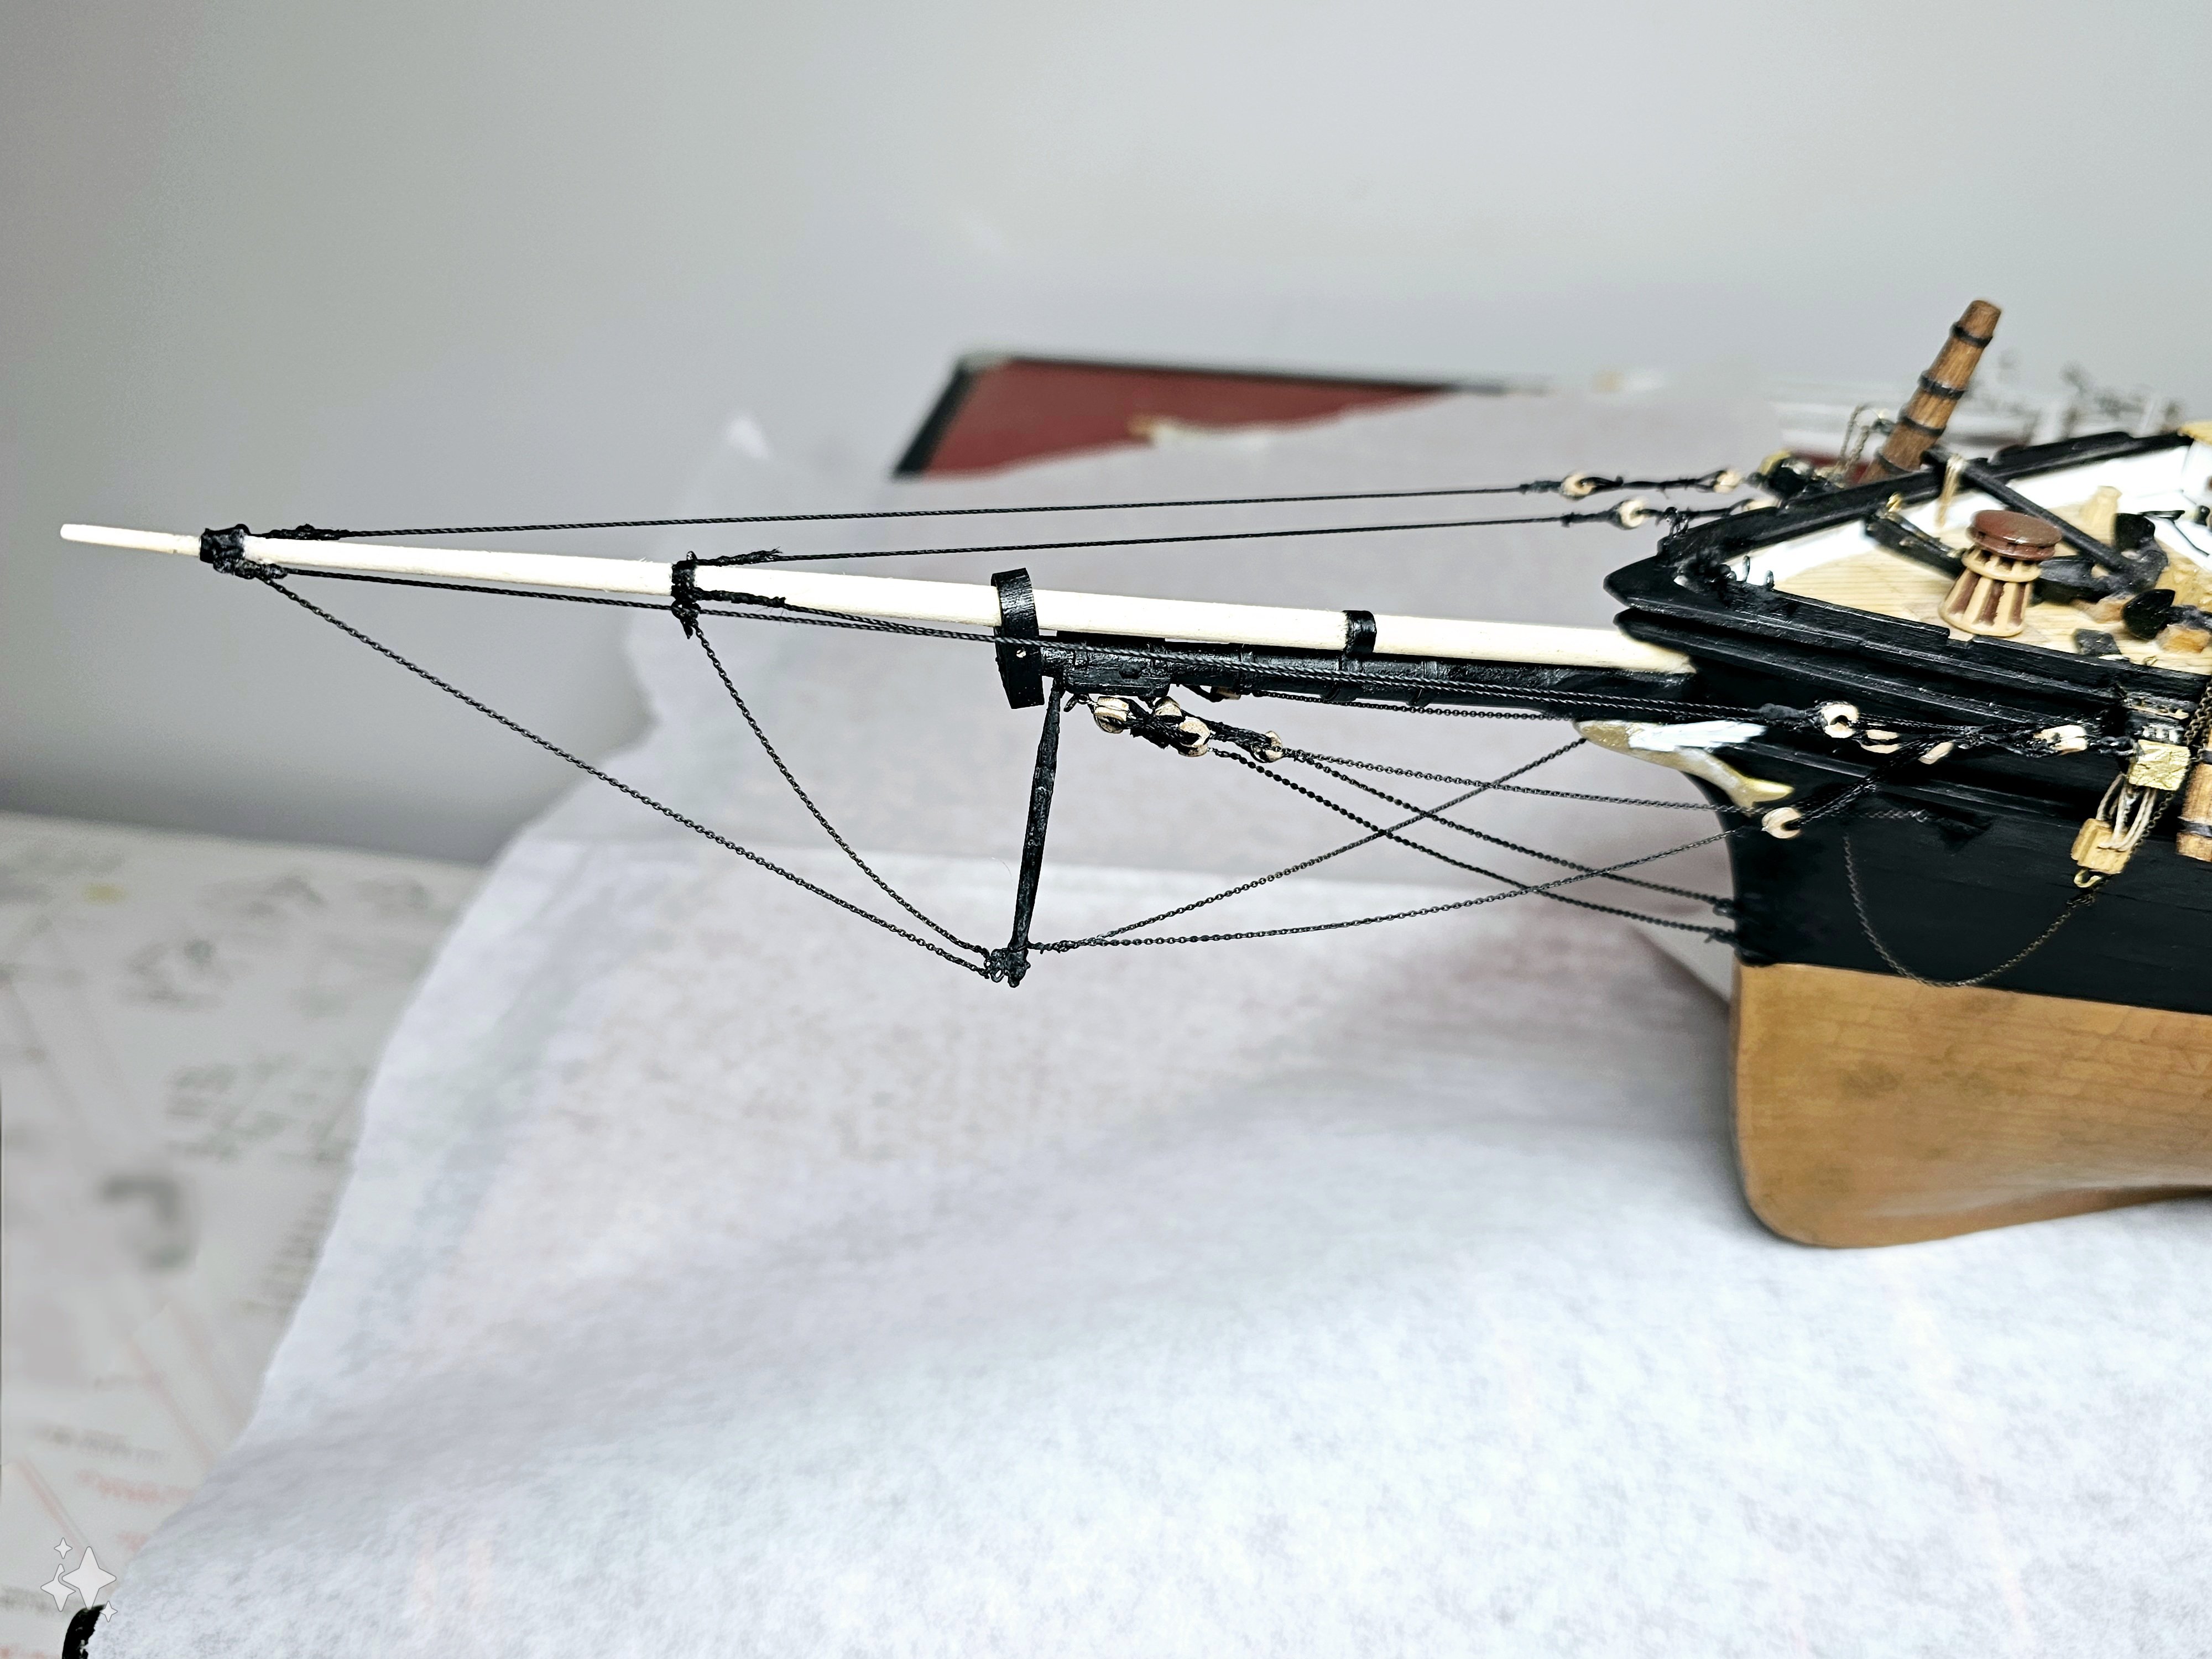
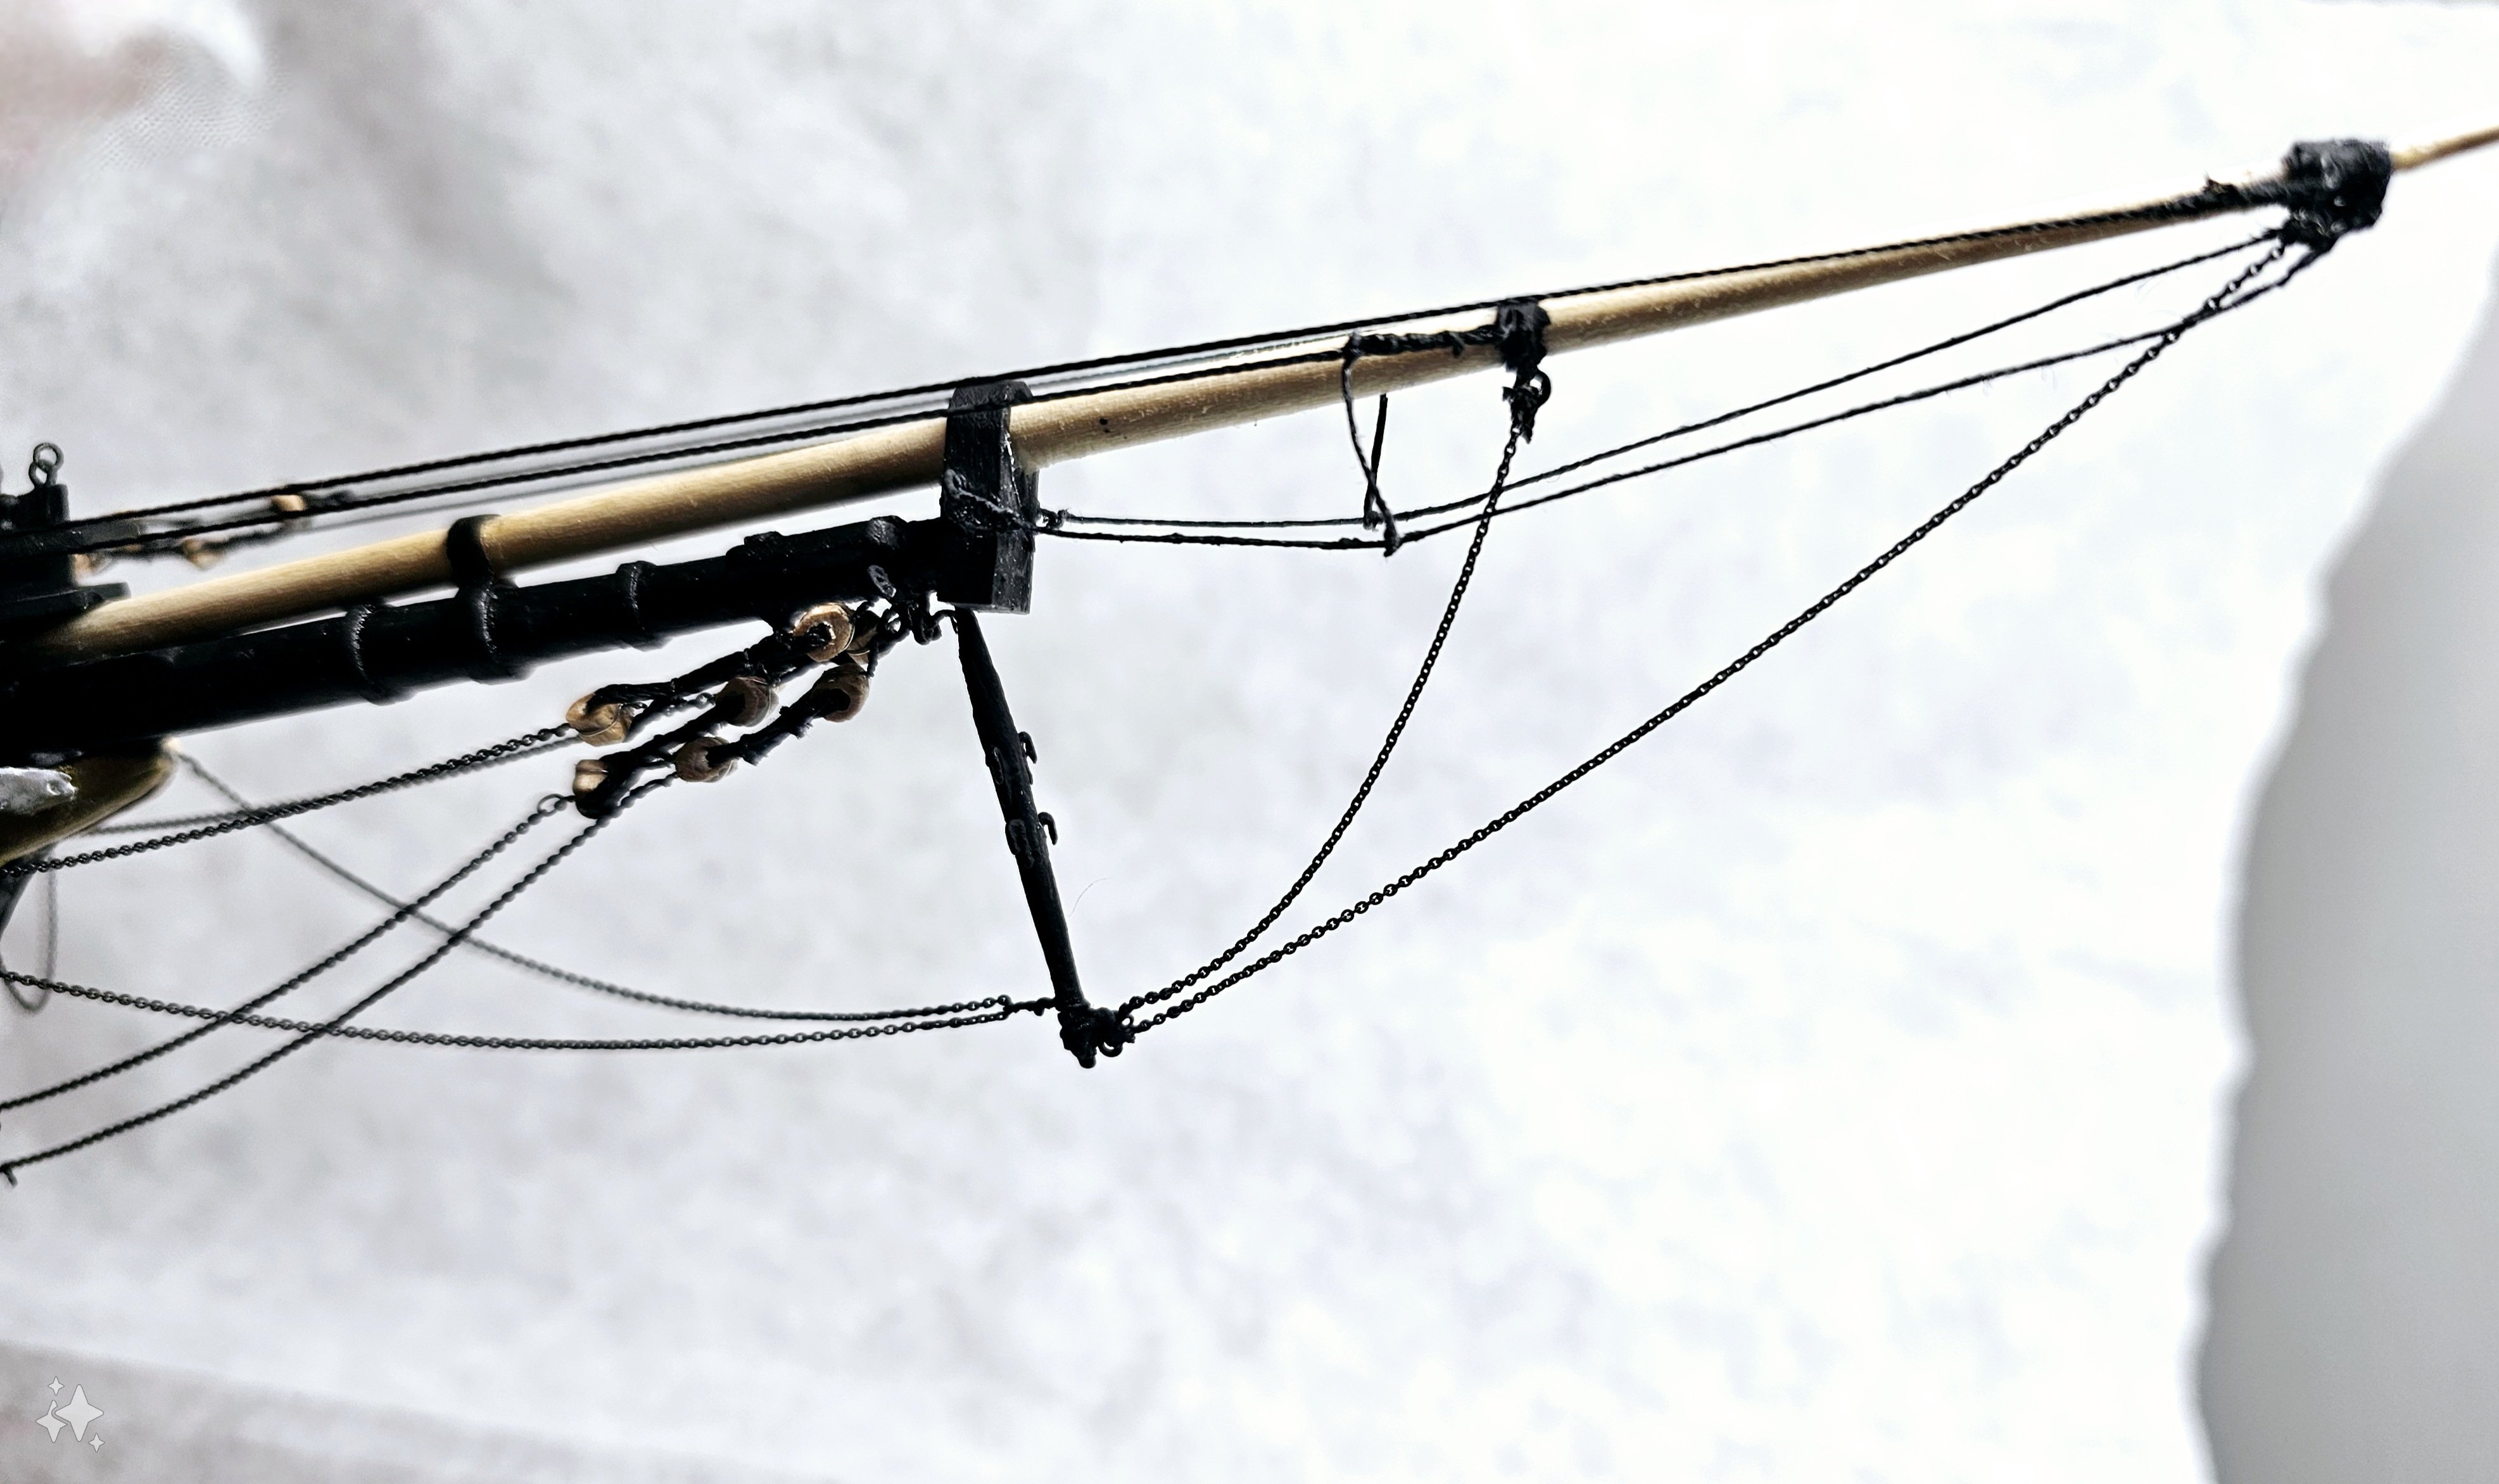
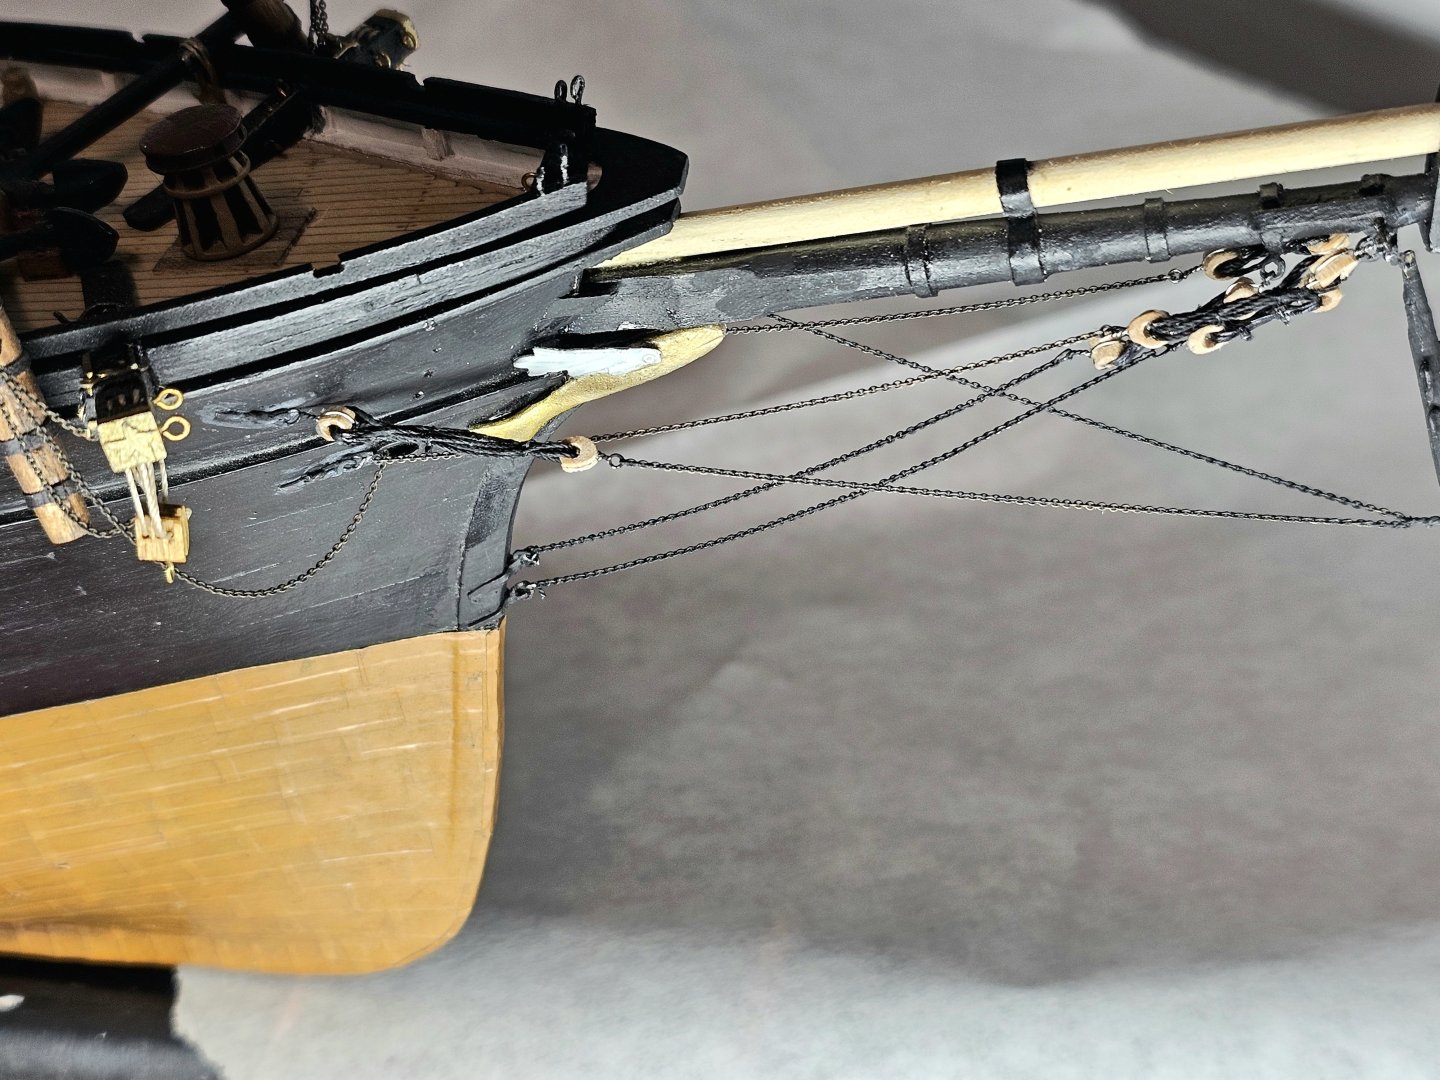
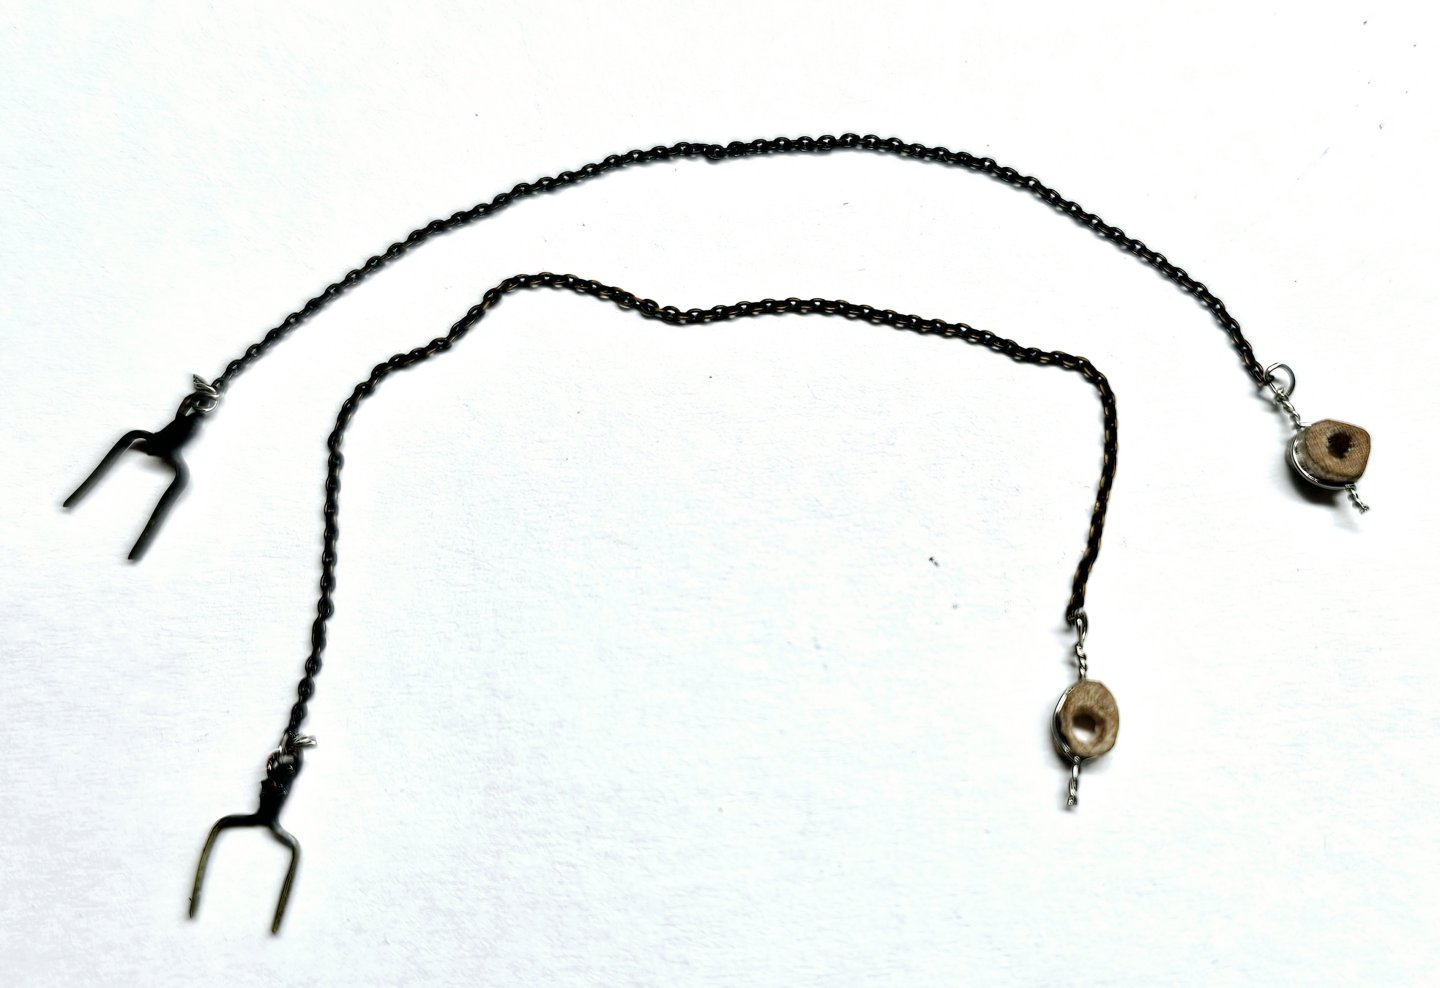
Here I have added the martindale backropes (chains) and the martindale stays, probably the most challenging part of my build so far (Photo 1). The bowsprit shrouds (chains) were then added, producing a web of chains, hearts and brass strips when all was done (Photo 2).
- 431 replies
-
- 4
-
-
- Flying Fish
- Model Shipways
- (and 2 more)
-
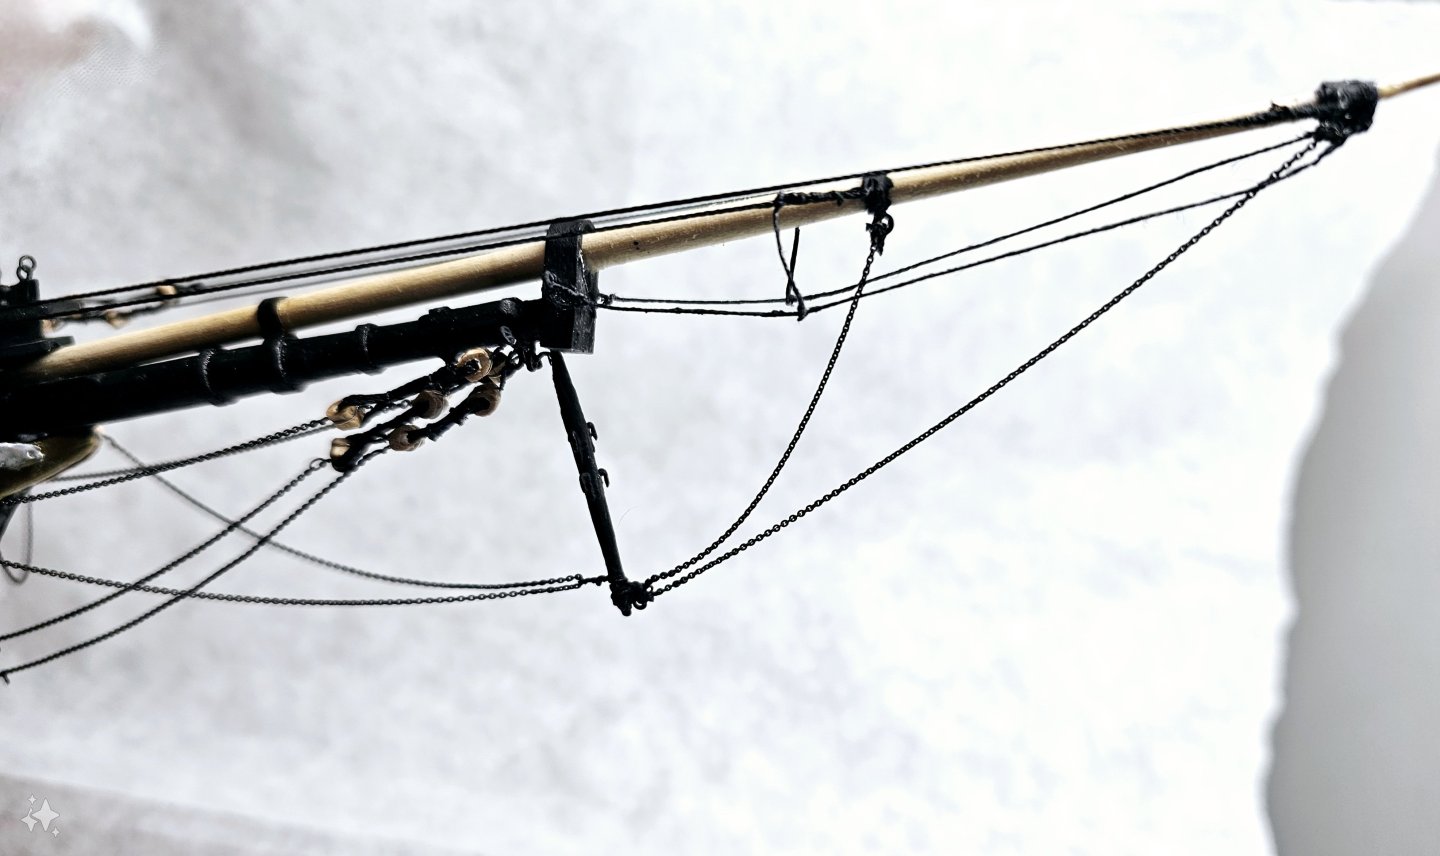
The chain jackstays on the bowsprit have been completed and mounted as shown in the accompanying figure. I found the rigging the lanyards between the hearts to be quite challenging, owing to the awkward underside location of the jackstays. Required a lot of patience and steady hands to complete.
- 431 replies
-
- 1
-
-
- Flying Fish
- Model Shipways
- (and 2 more)
-
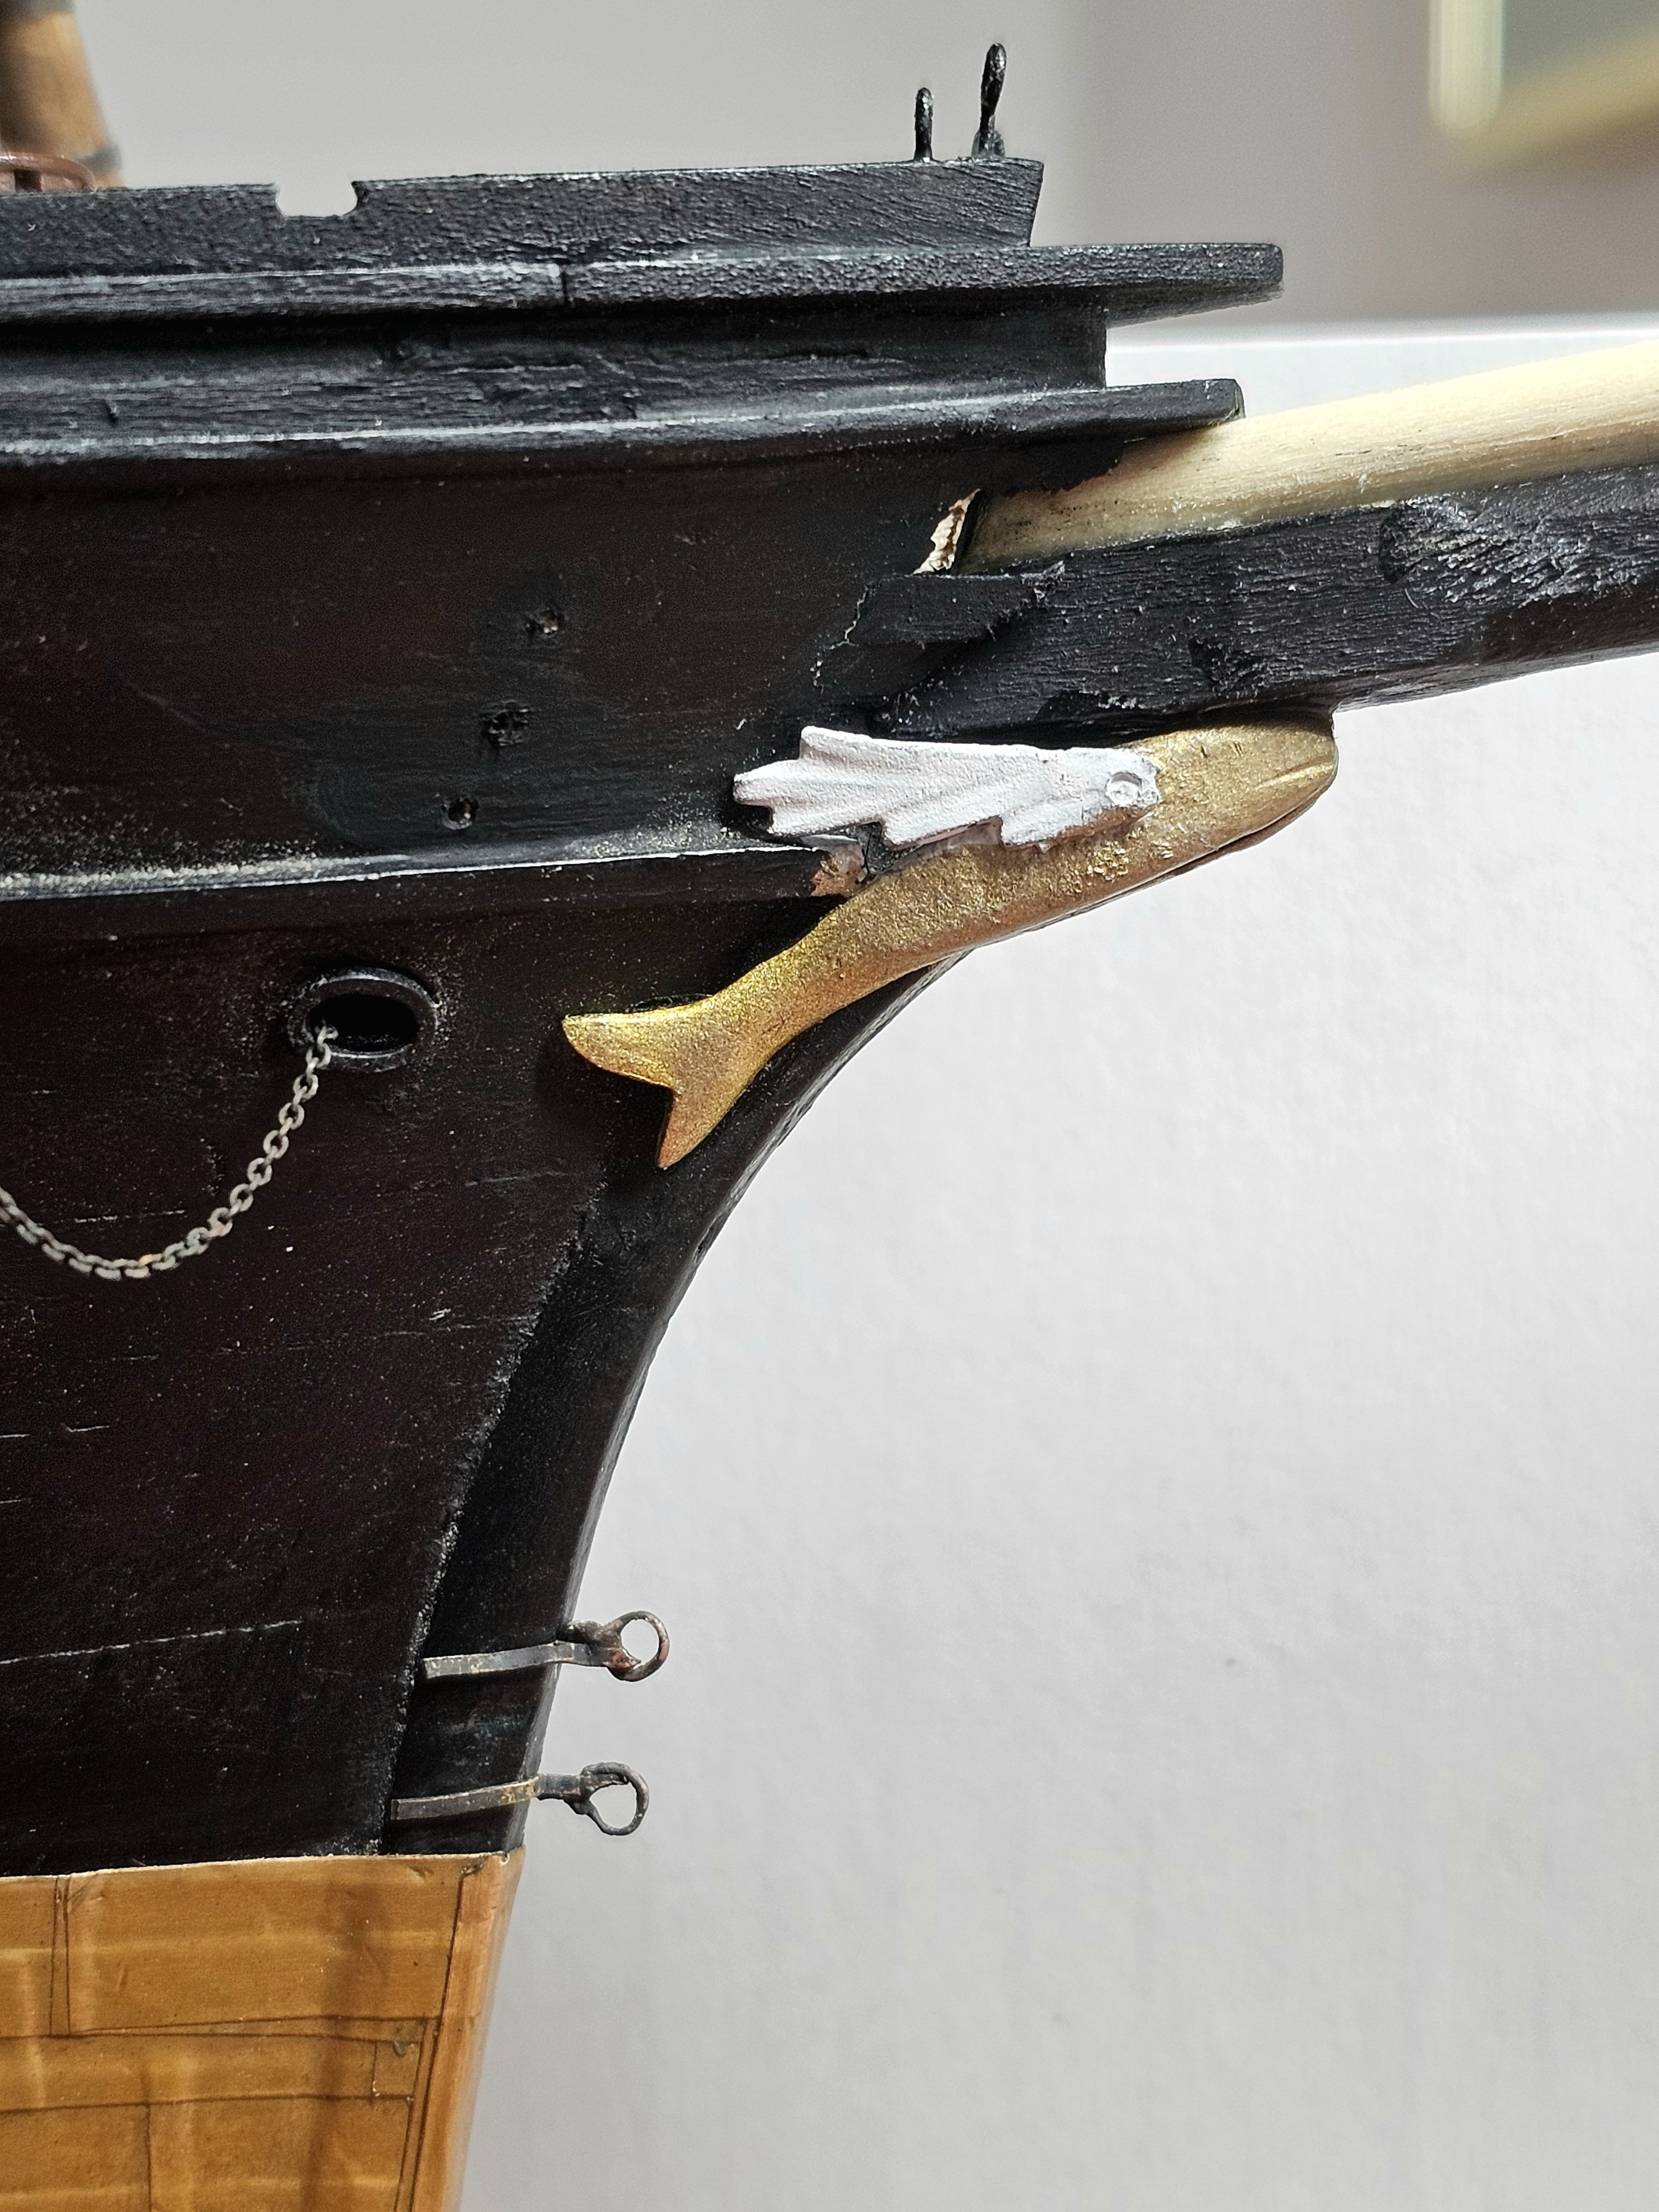
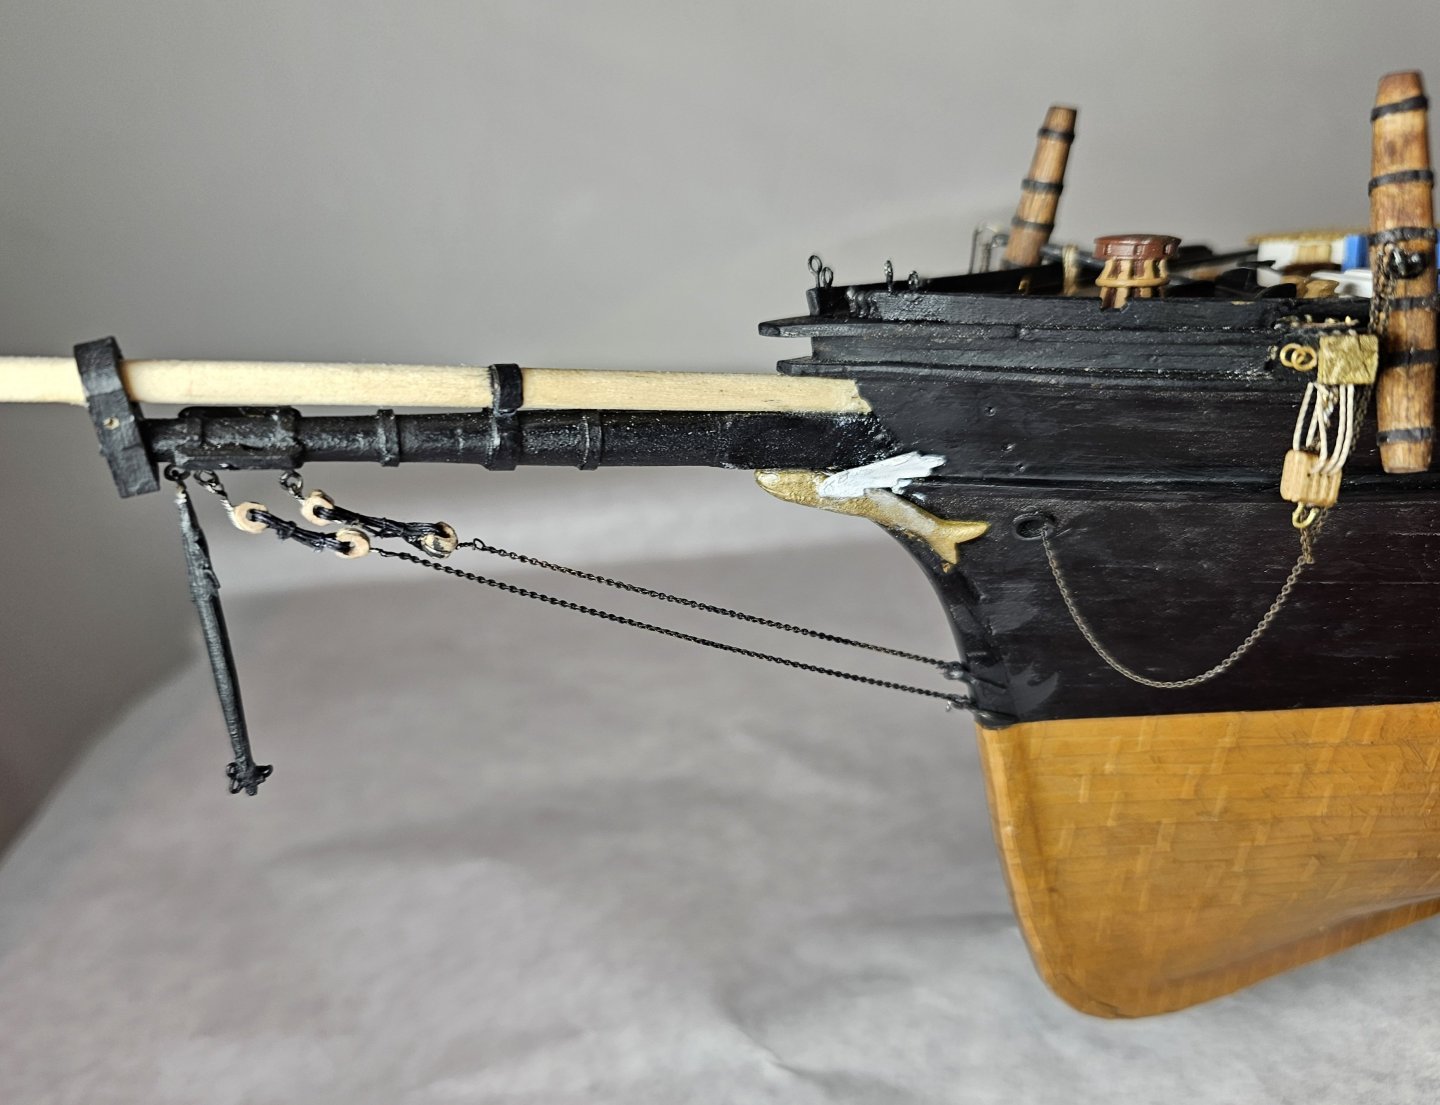
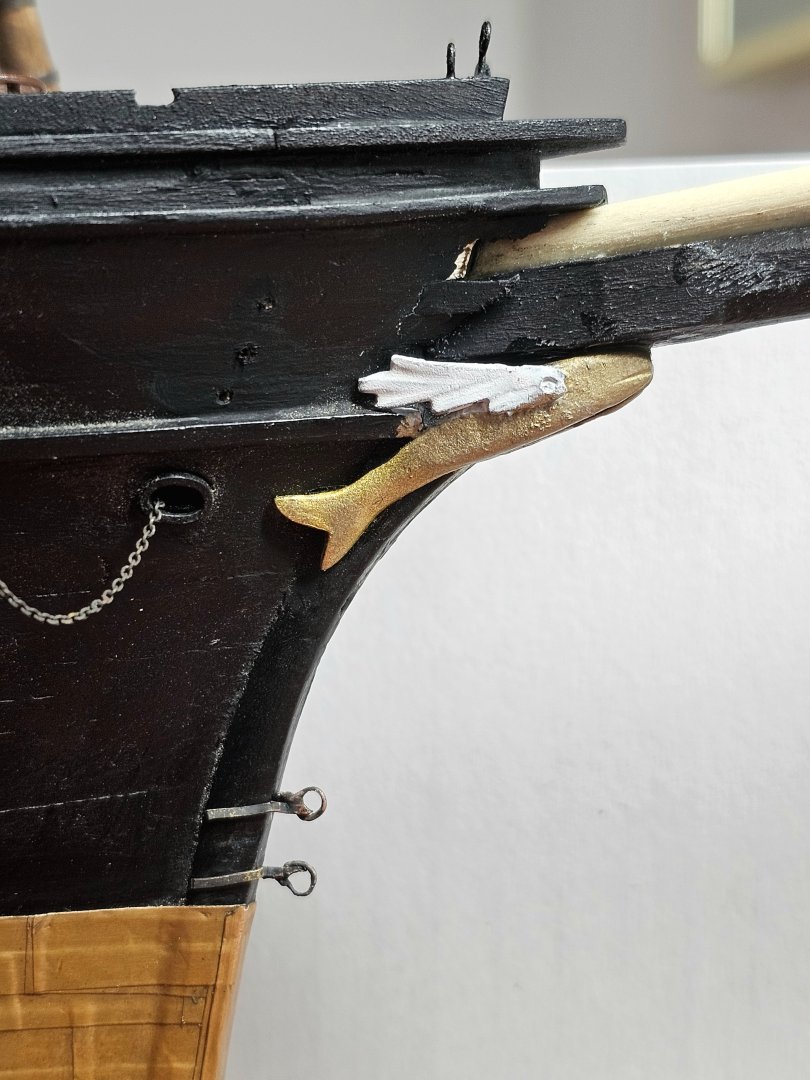
Thanks George. The figurehead was quite simple. I simply glued the wing on using gel super glue. I then painted a clear primer on the wings and later, white acrylic paint. I was going to crimp a brass strip then drill a hole through the cramped part through which I would make a ring to attach to the bobstay chain. However I kept breaking my drill bits and came up with the soldering approach. It took me quite a few tries to get it right. Working at such a small scale with vision problems is quite challenging.
-
No worries - I wasn't embarrassed at all. I truly admire fine workmanship and appreciate your input to my log Clipperfan. Thank you.
-
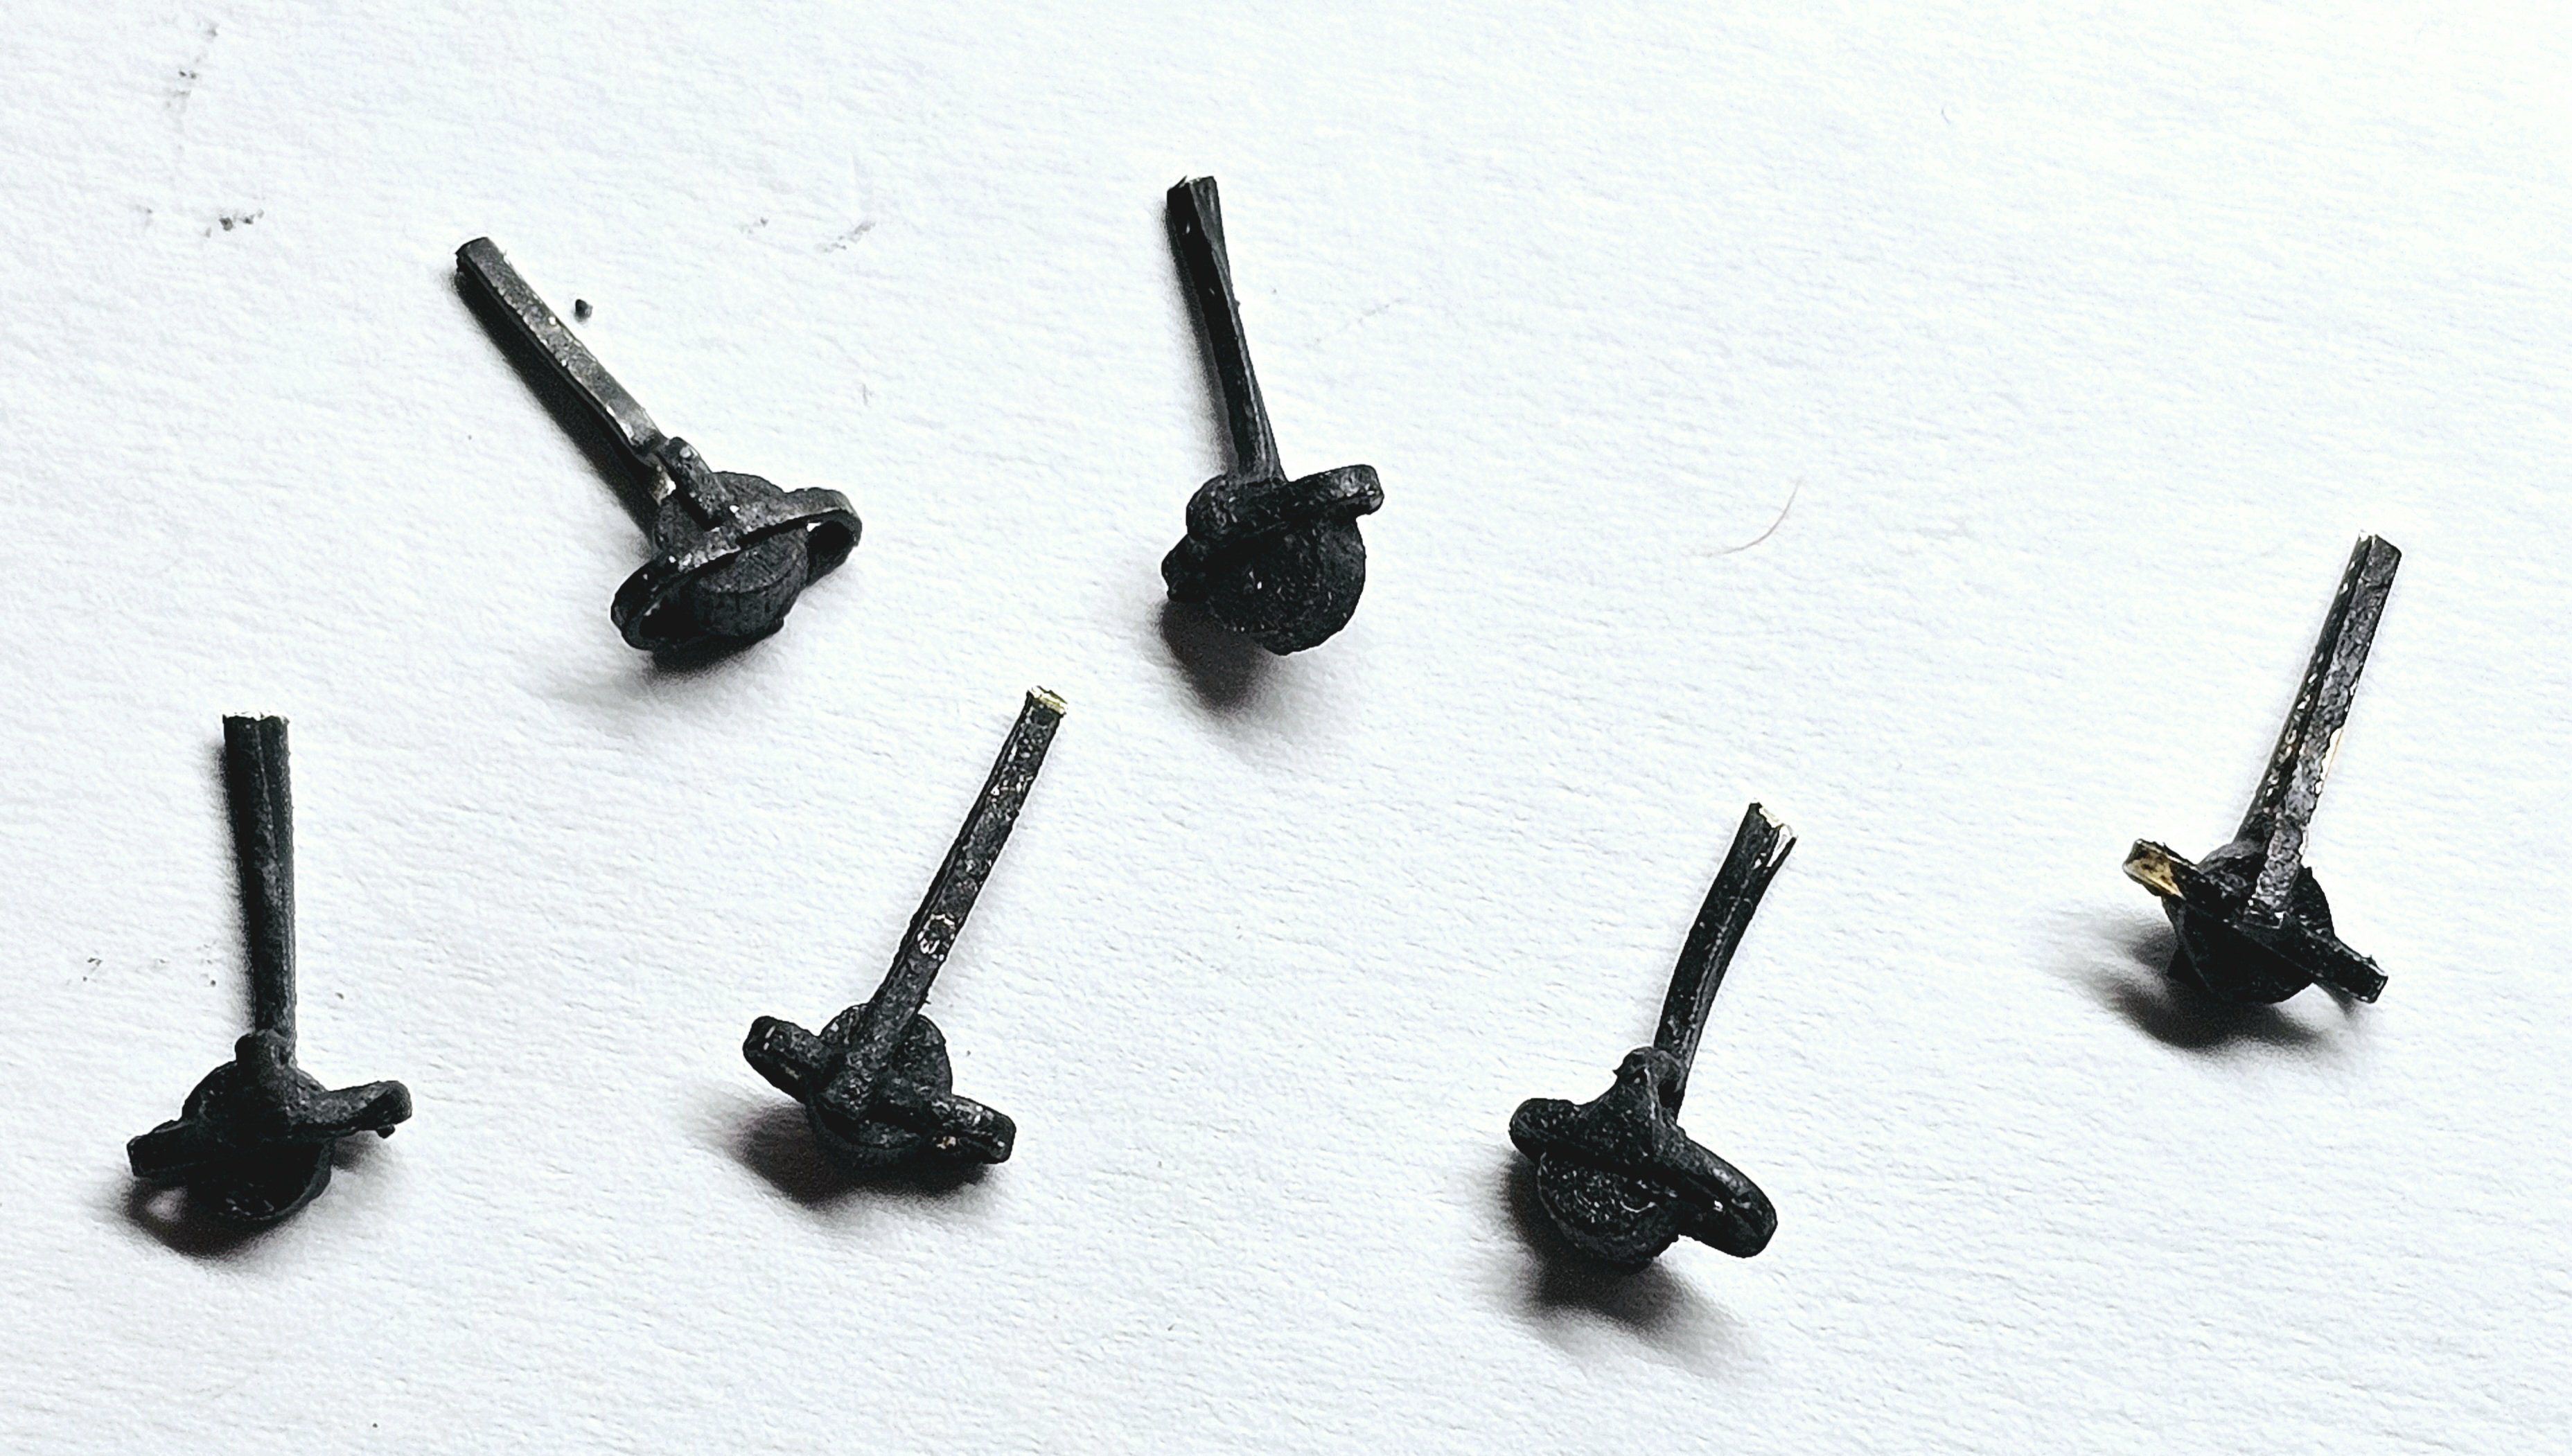
I completed the iron straps on the stem that attach to the bowsprit bobstays. These were made by soldering a brass ring through a short section of brass strip, something much easier to say than do. After a number of failures, I figured out a way to do this. The brass strip was then bent to fit the stem and cut to the final length (Photo 1). Using very fine stainless steel wire I linked one end of the tiny diameter chain to the brass strip and the other end to a wooden heart (Photo 2).
- 431 replies
-
- 3
-
-
- Flying Fish
- Model Shipways
- (and 2 more)
-
Vlad's workmanship is incredible! Museum quality for sure. Unfortunately my skill level is nowhere near that. 🫣
-
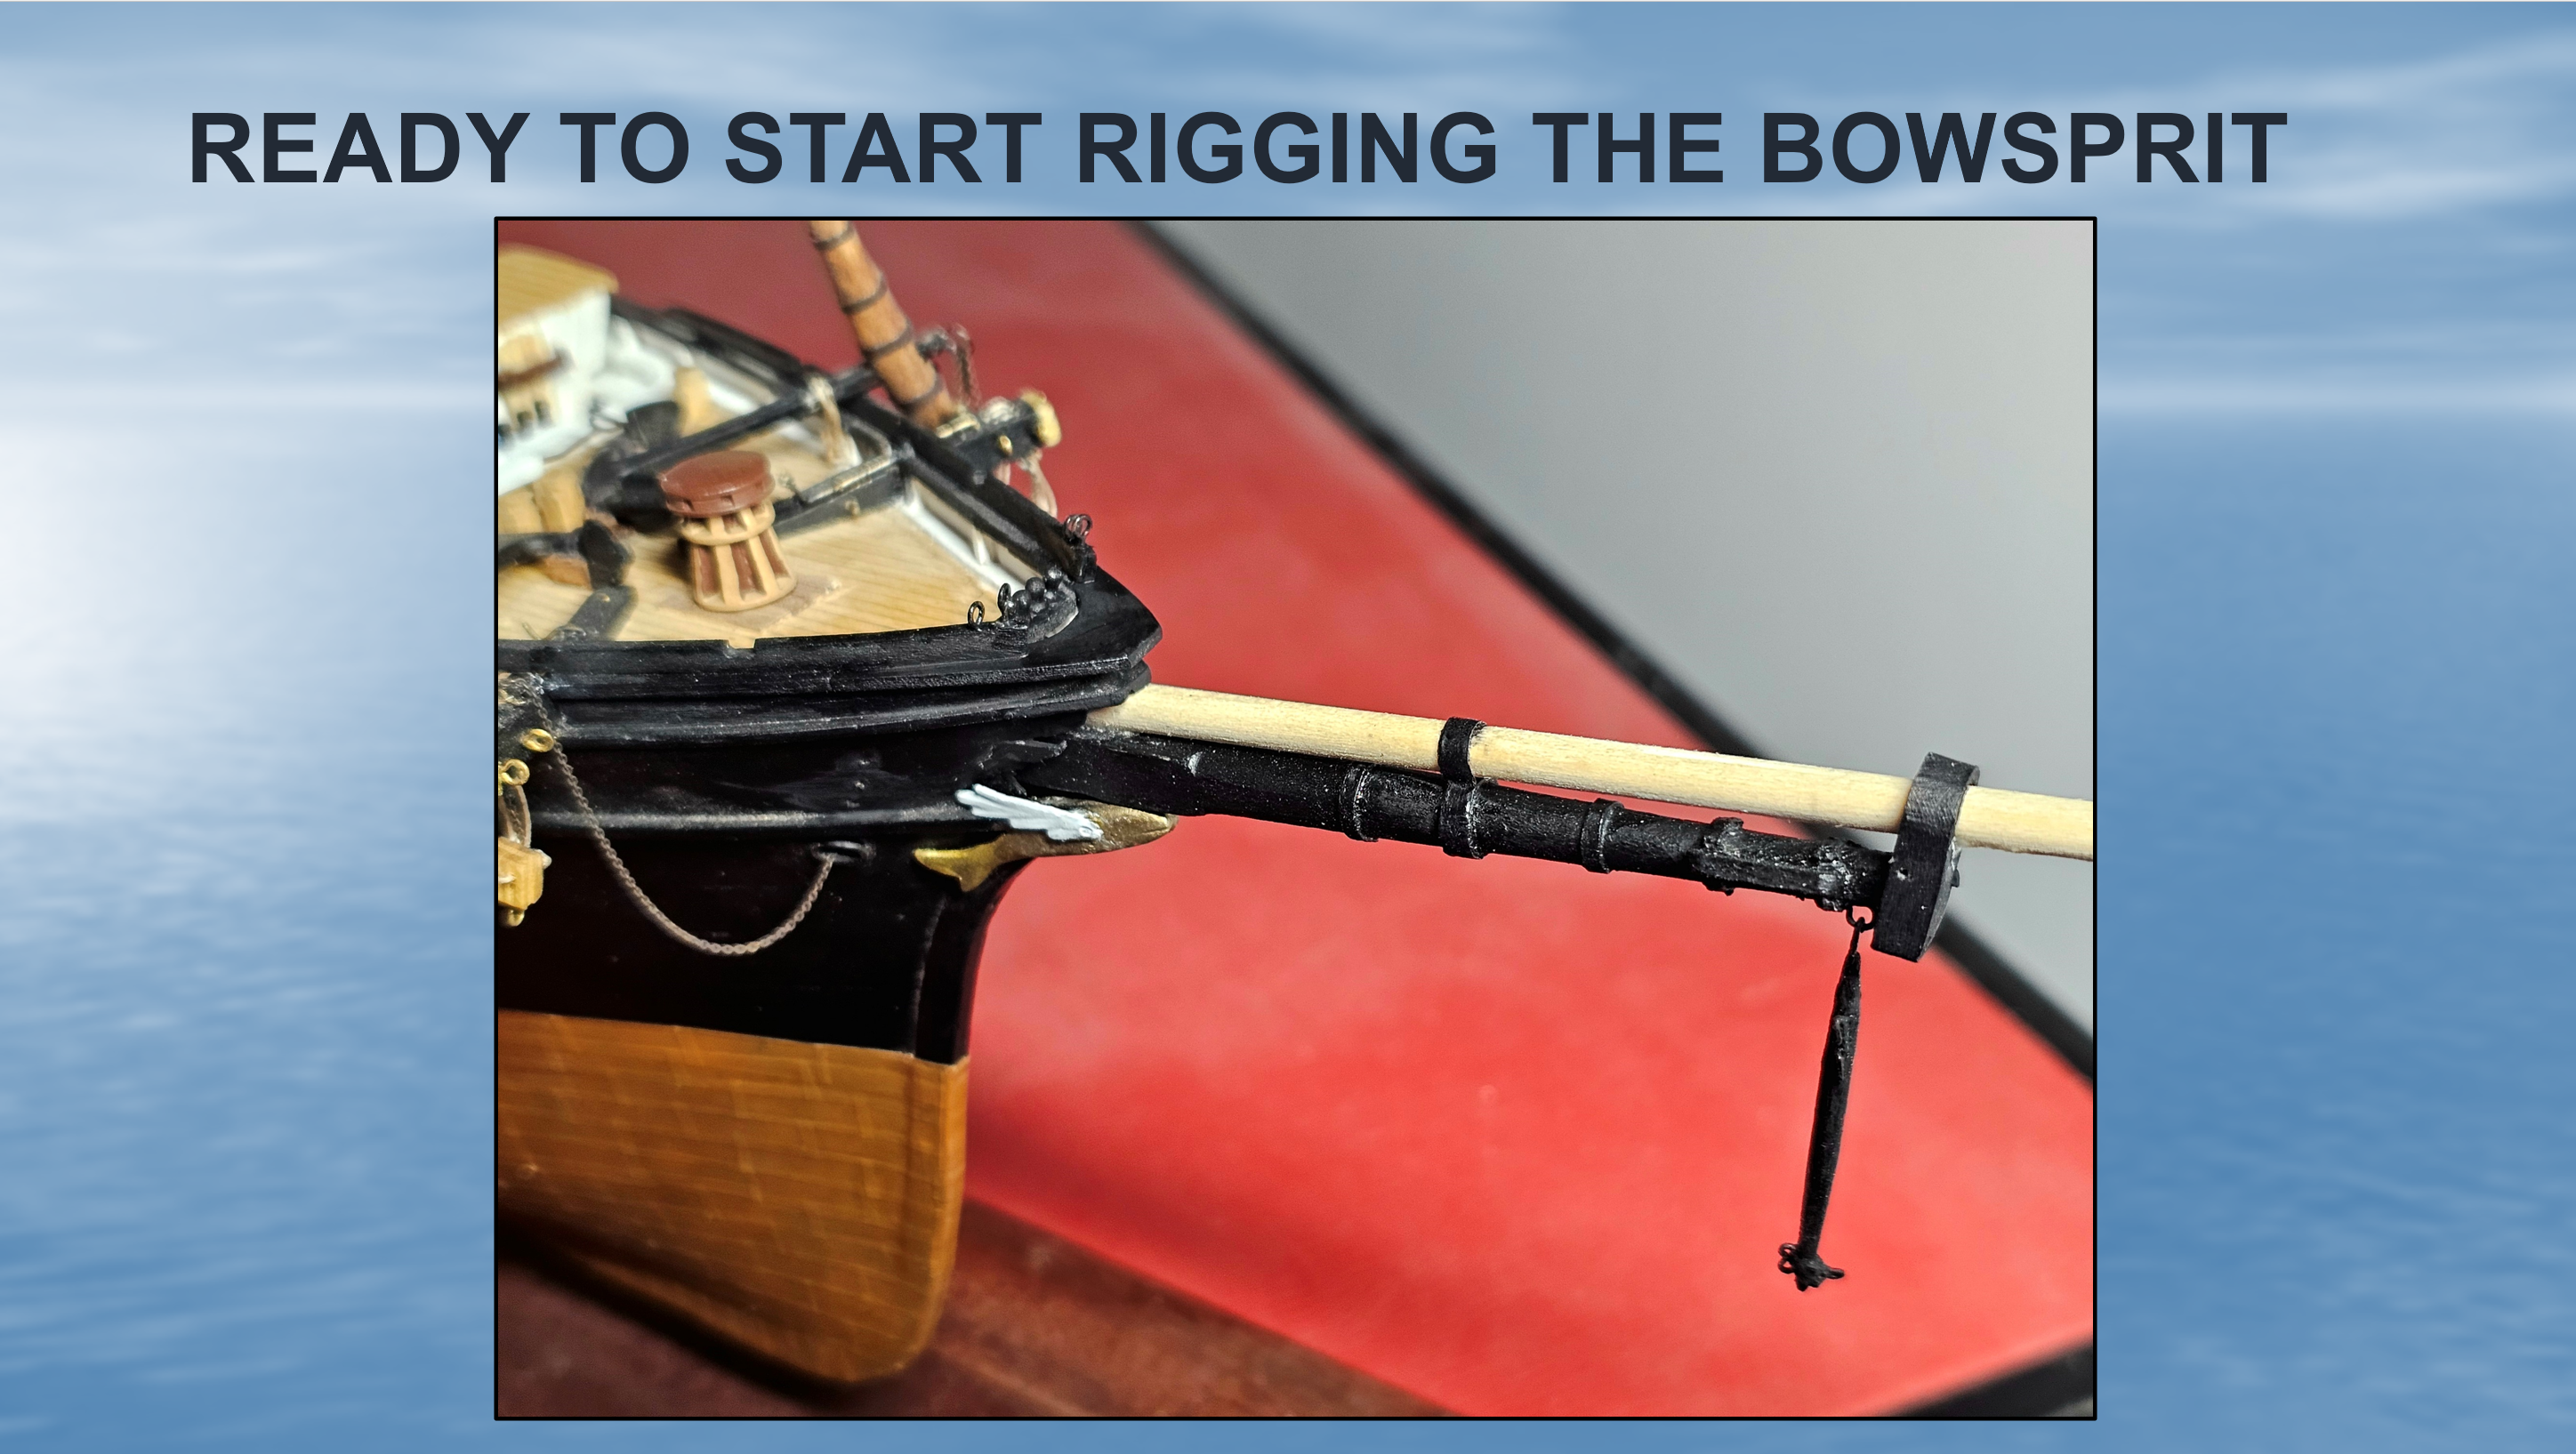
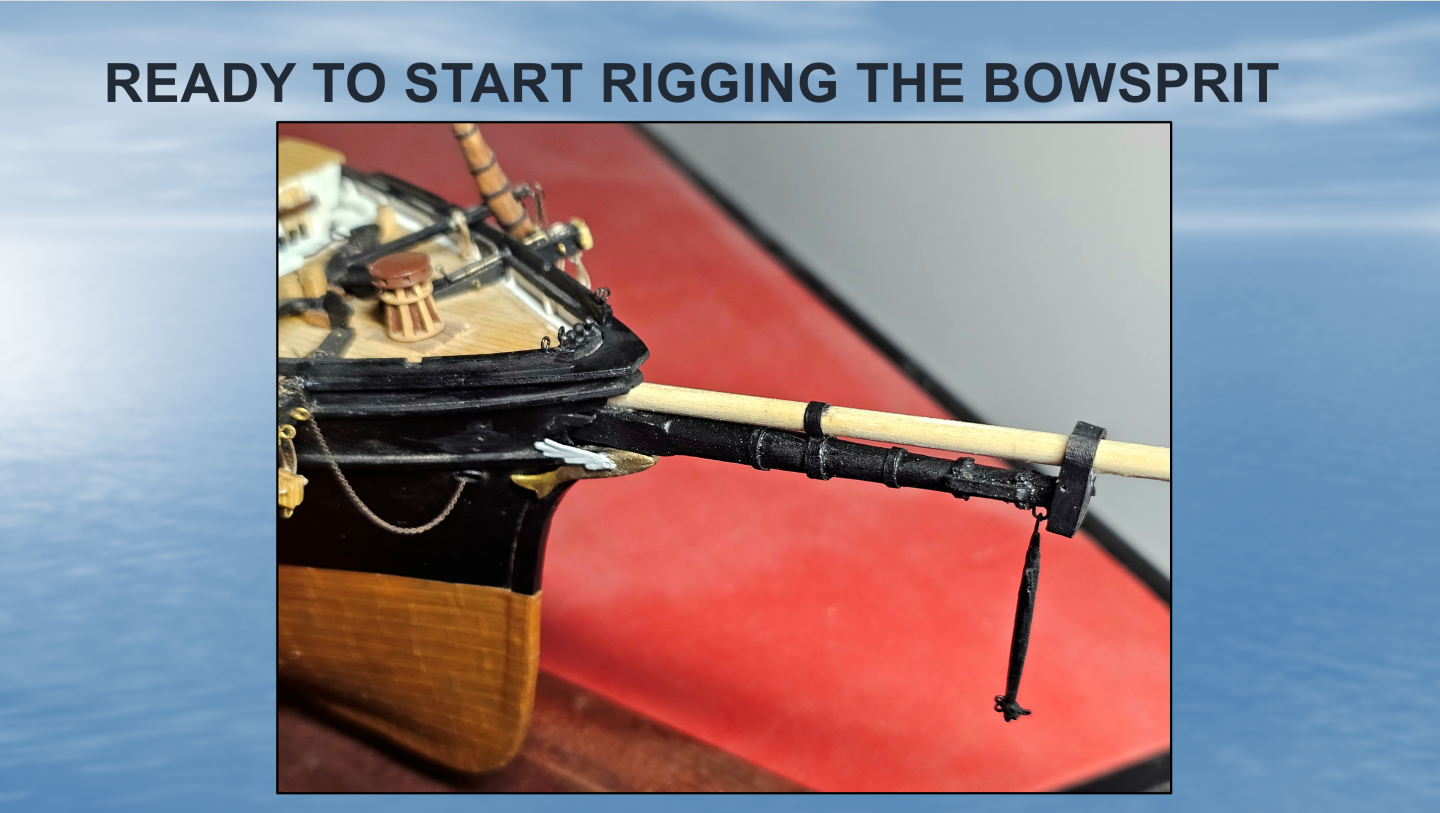
Thanks ClipperFan and Rick 310. My kit had plenty of deadeyes but was missing a couple of other parts. Model Expo was advised and the missing parts were quickly sent with no fuss at all. Over the past few days I have made 14 hearts and 6 bullseyes. Looking forward to starting the rigging of the bowsprit this week.
-
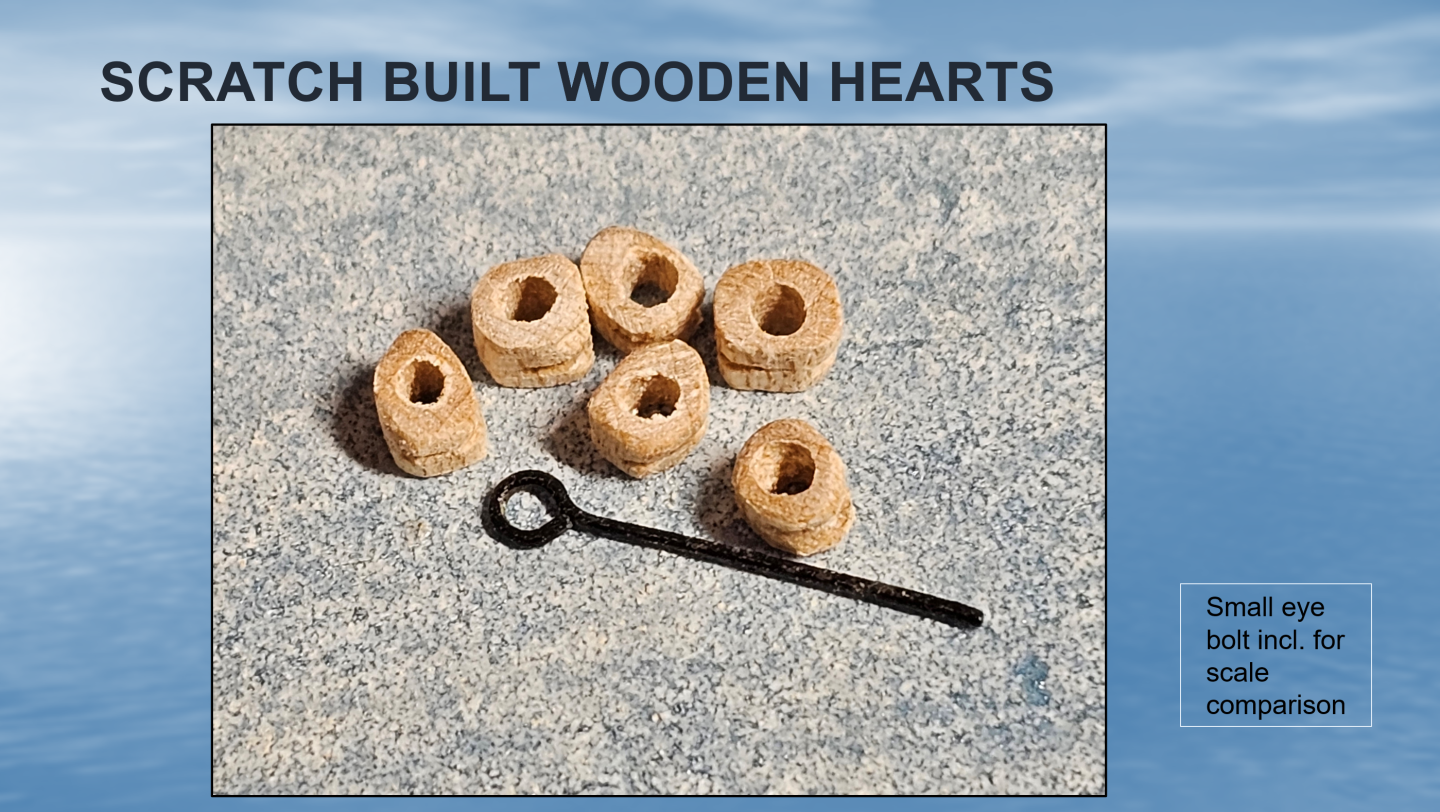
Most of the holes in the masts and bowsprit for the remaining eyebolts, sheaves and metal fittings have now been predrilled (Photo 1). I also finished off the fish figurehead, having added on the wings (Photo 2). The bowsprit has been secured in place (the other masts shown in the first photo are loosely fit in place for now. I am not ready to start rigging the bowsprit. The kit drawings call for a number of wooden hearts for the standing rigging, but supply none in the kit, so I have started scratch building my own (Photo. 3).

- 431 replies
-
- 4
-
-
- Flying Fish
- Model Shipways
- (and 2 more)
-
It's progressing very nicely. Best regards.
-
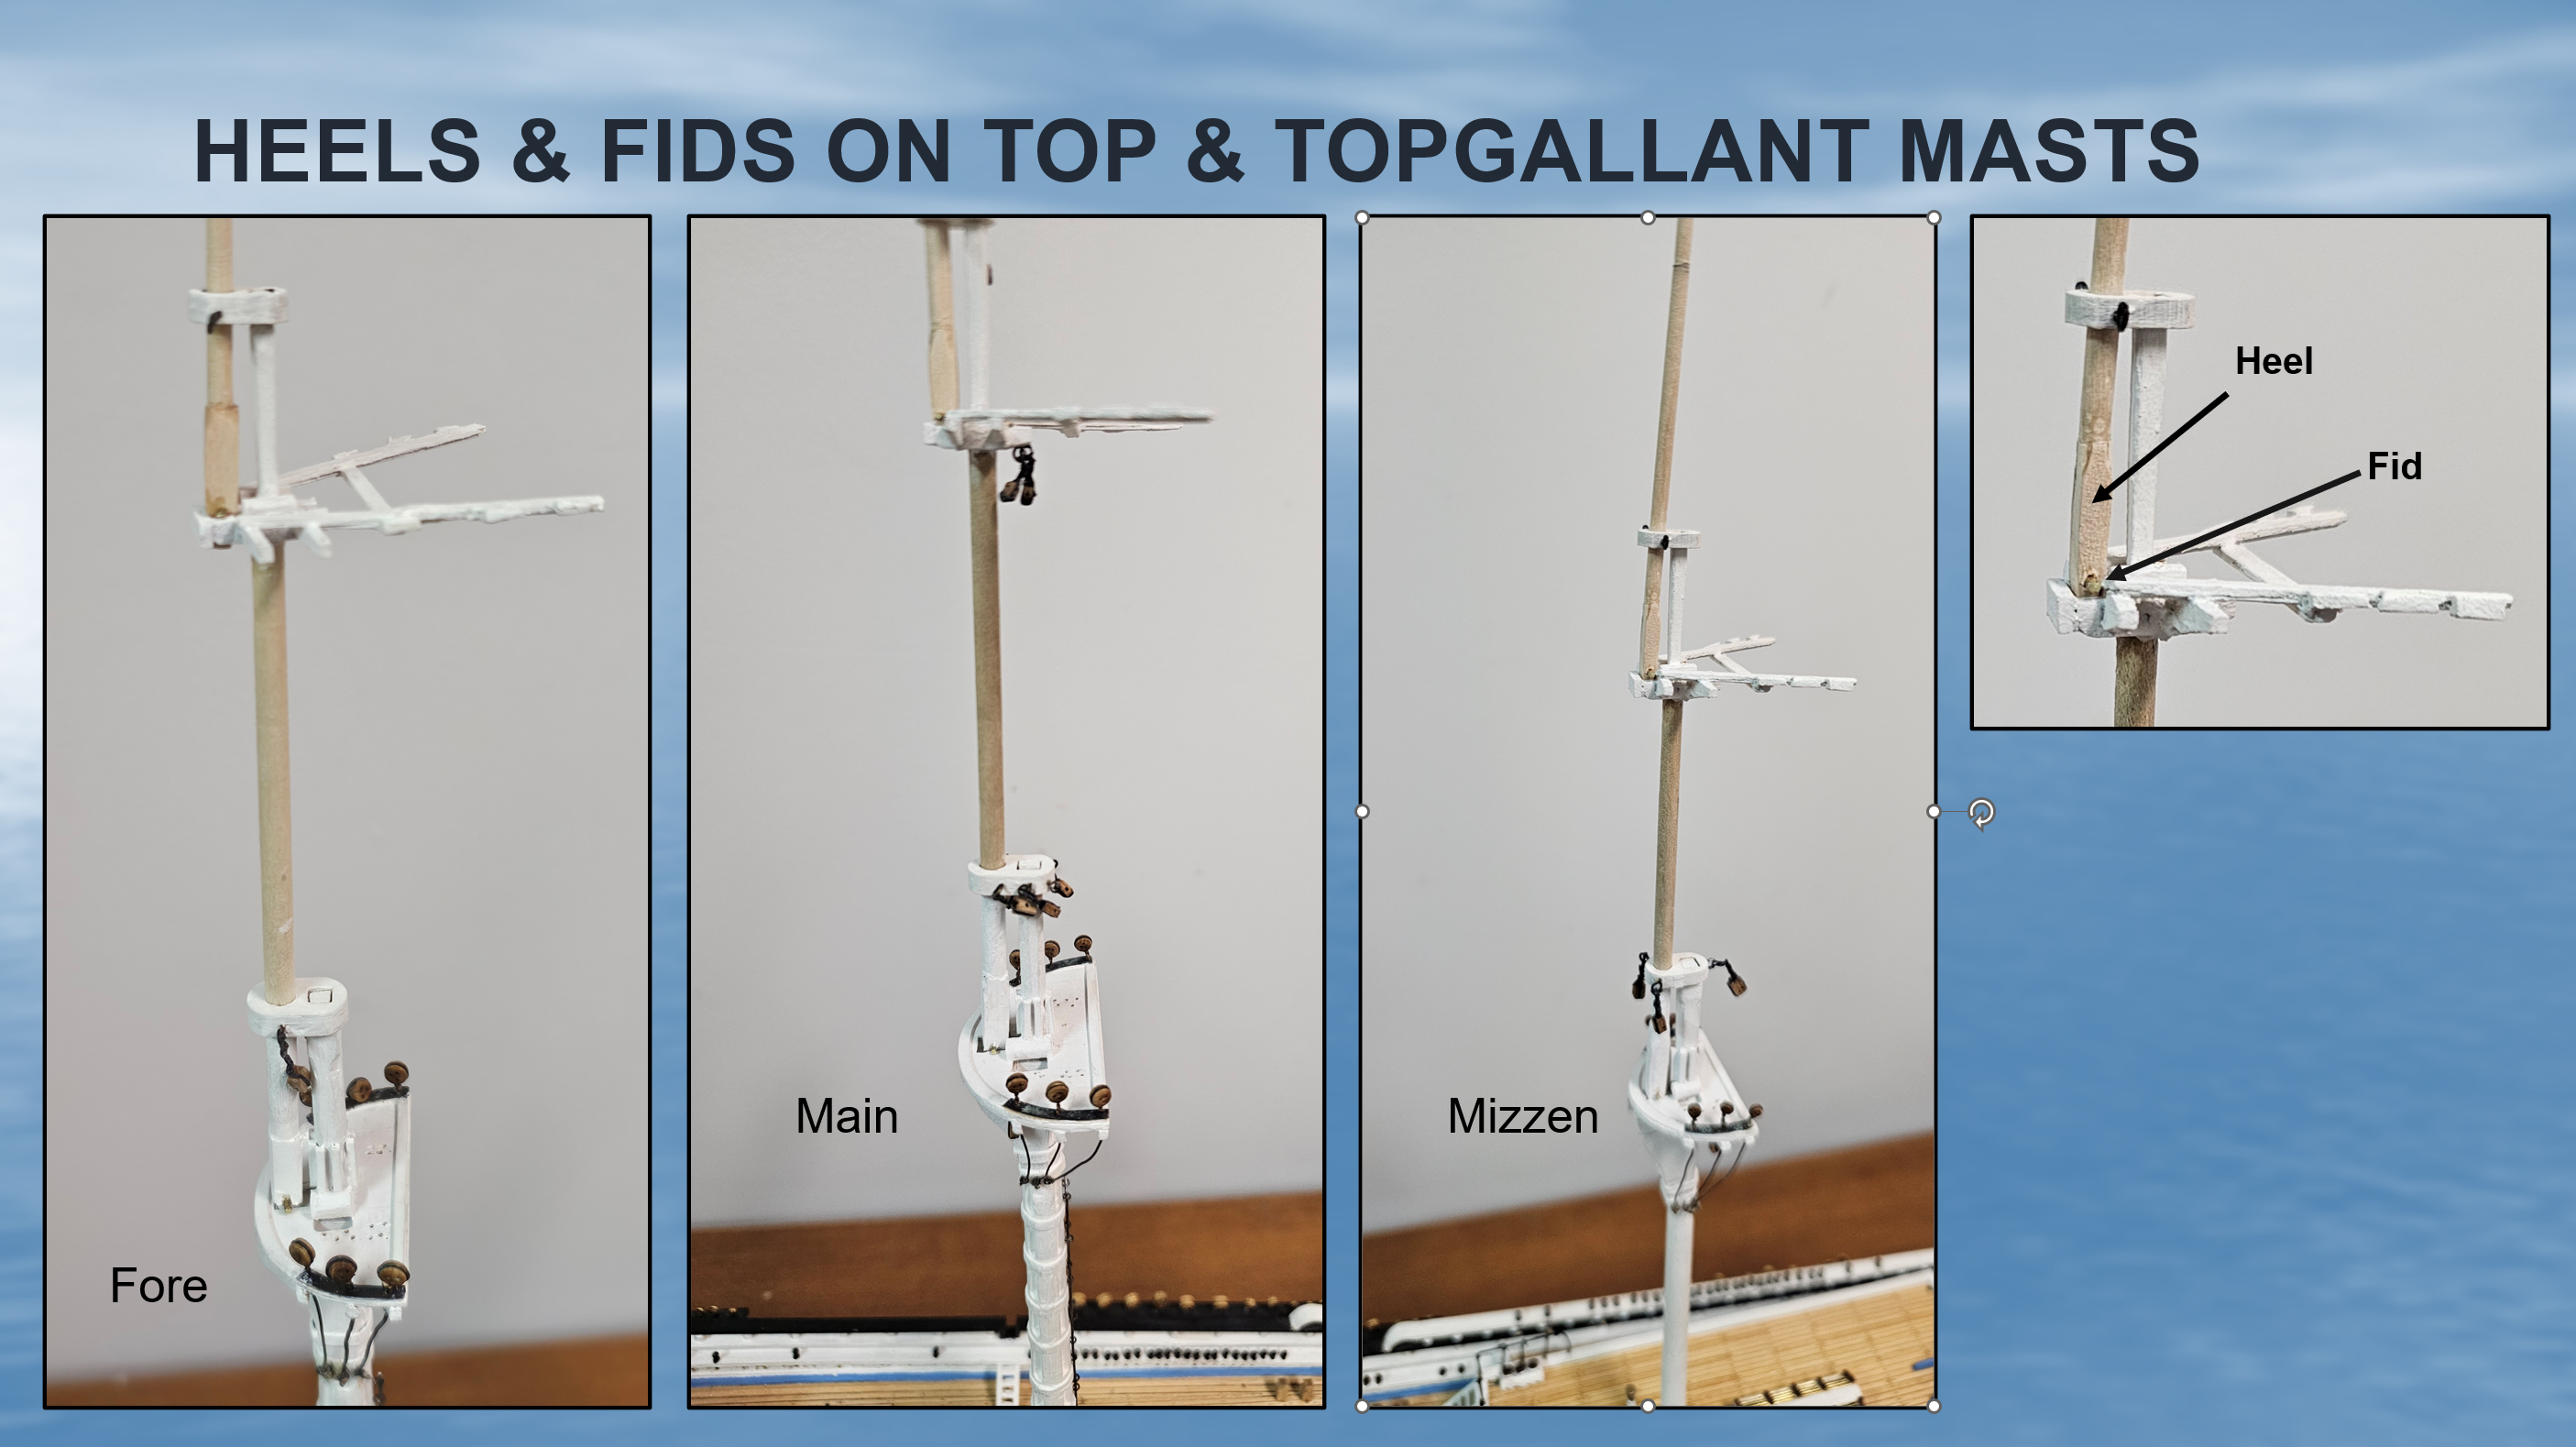
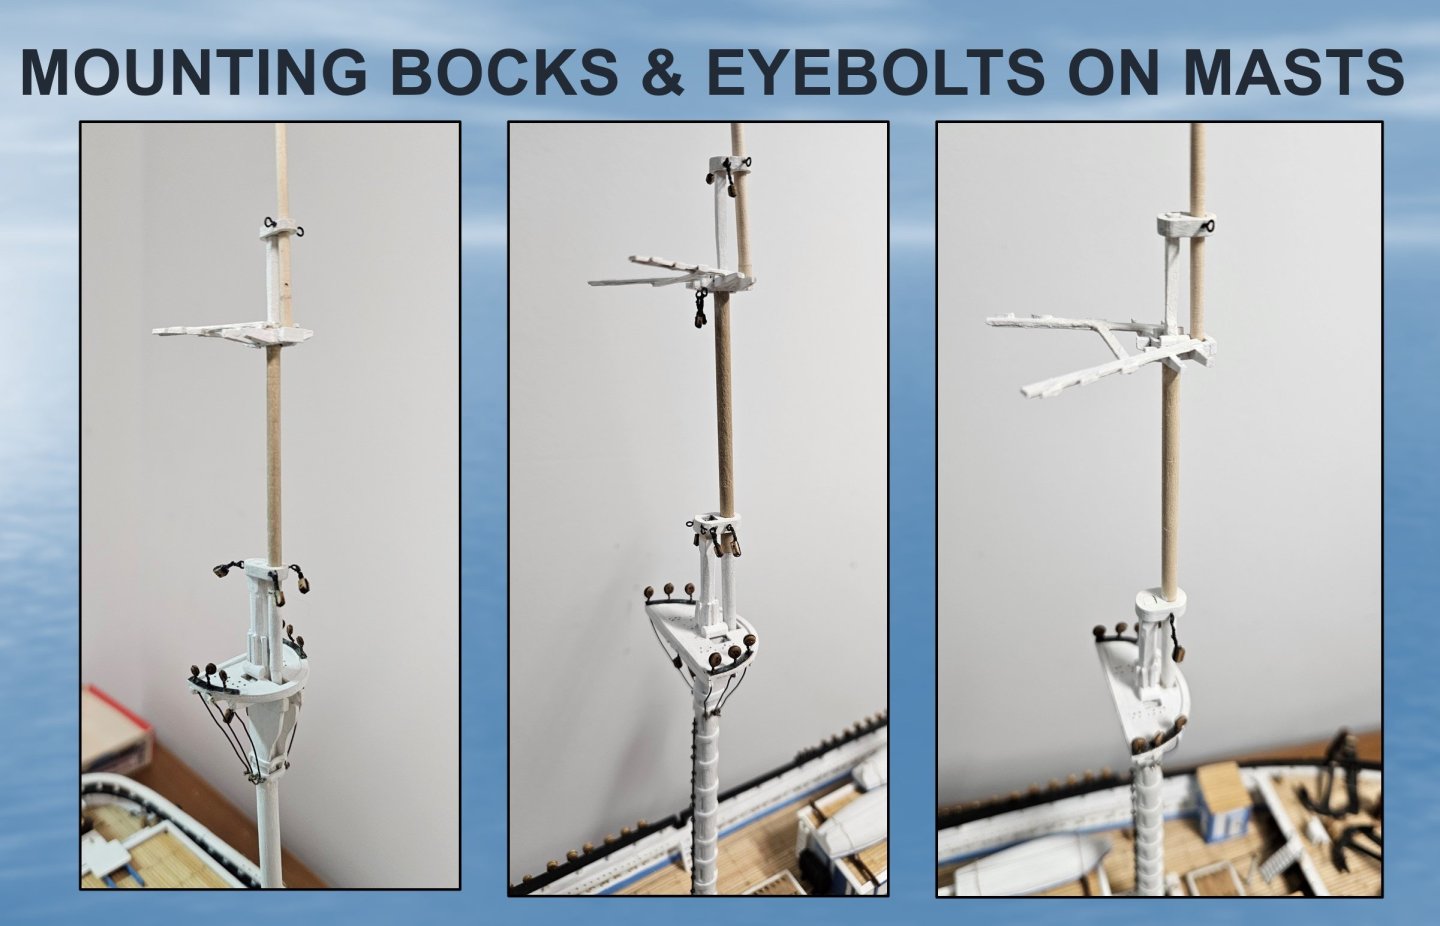
Finishing up on the masts, I have added the heels for each topmast and topgallant mast. To do this, I filed the bottom of each mast square then built up the heels by gluing a thin plank to each. They were then sanded down to the required sizes and the top edge/corner of each heel was hand carved carved to shape with a razor blade. A hole was drilled through the bottom of each heel into which a small piece of brass rod (fid) was inserted. The fid, which rests on the trees, bears the weight of the mast. I believe this completes the construction of the 3 masts, except a few metal parts (trusses and eye bolts) which I will add later. I would like to get started on the lower standing rigging and work on this as I tackle the metal work and yards.

- 431 replies
-
- 4
-
-
- Flying Fish
- Model Shipways
- (and 2 more)
-
Thanks for this info. Appreciated!
-
Thanks Rick. My challenge will be making all the intricate metal structures that link the yards to the masts. Lots of techniques to learn.
-
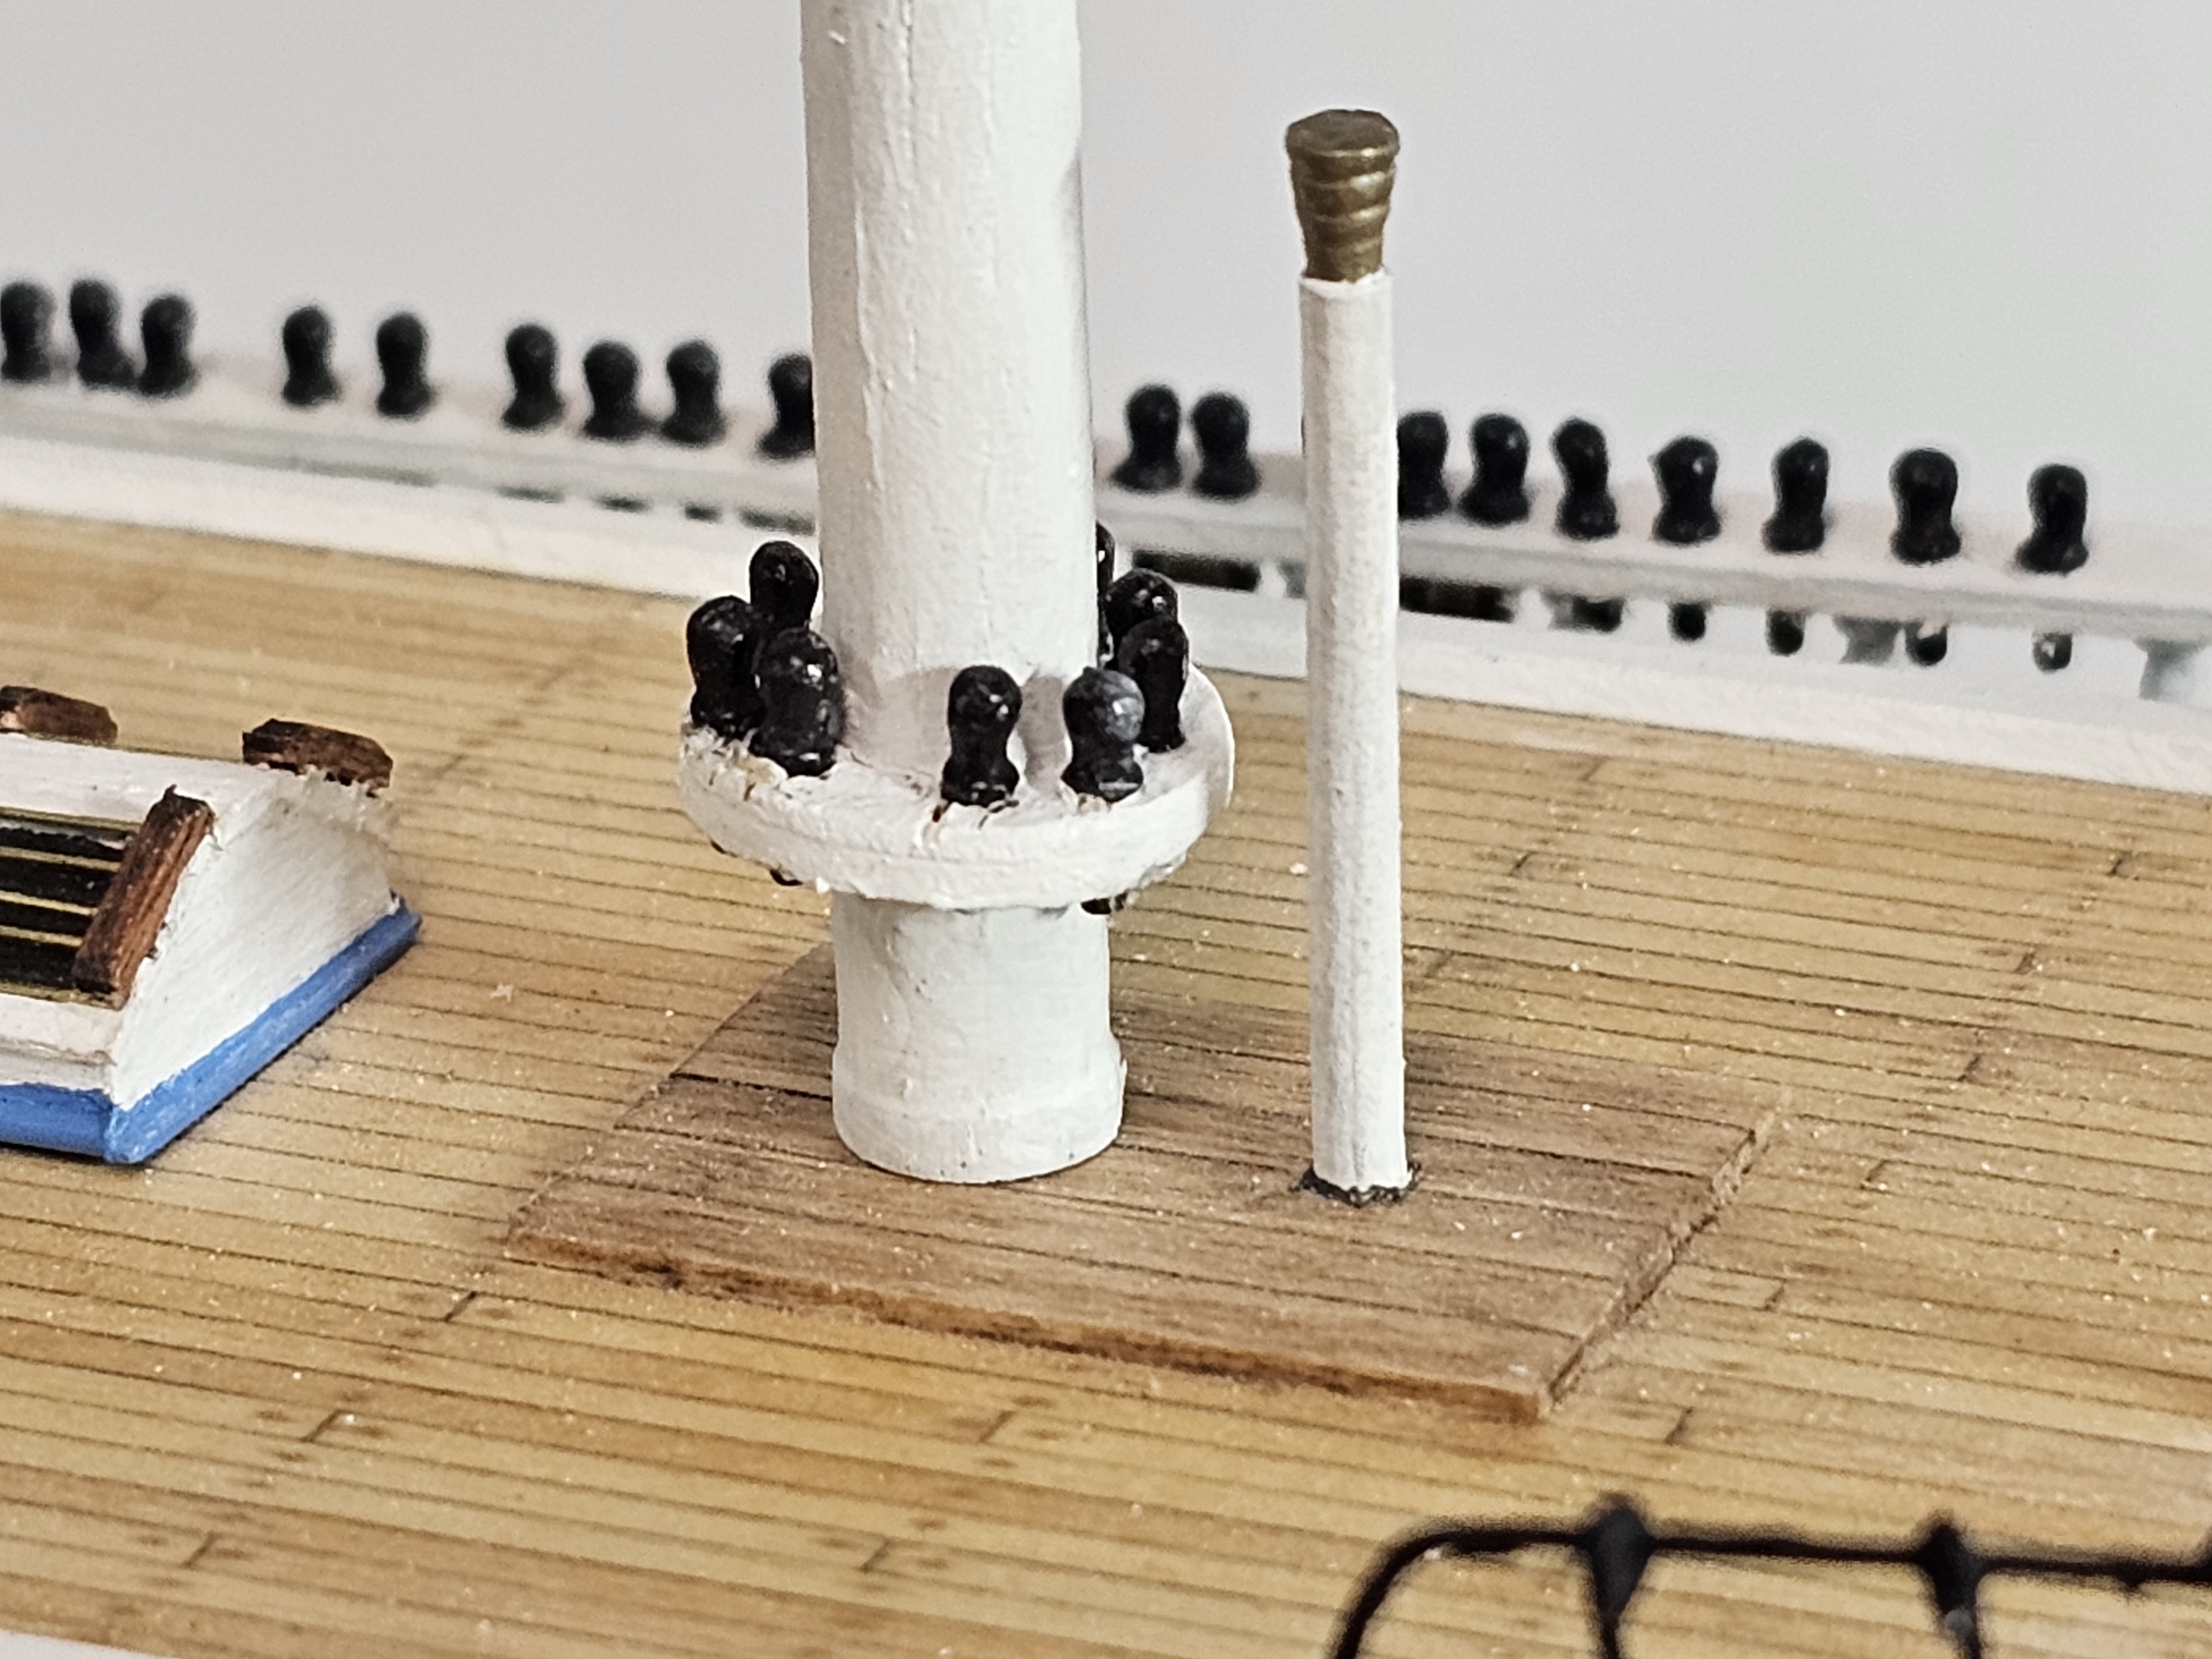
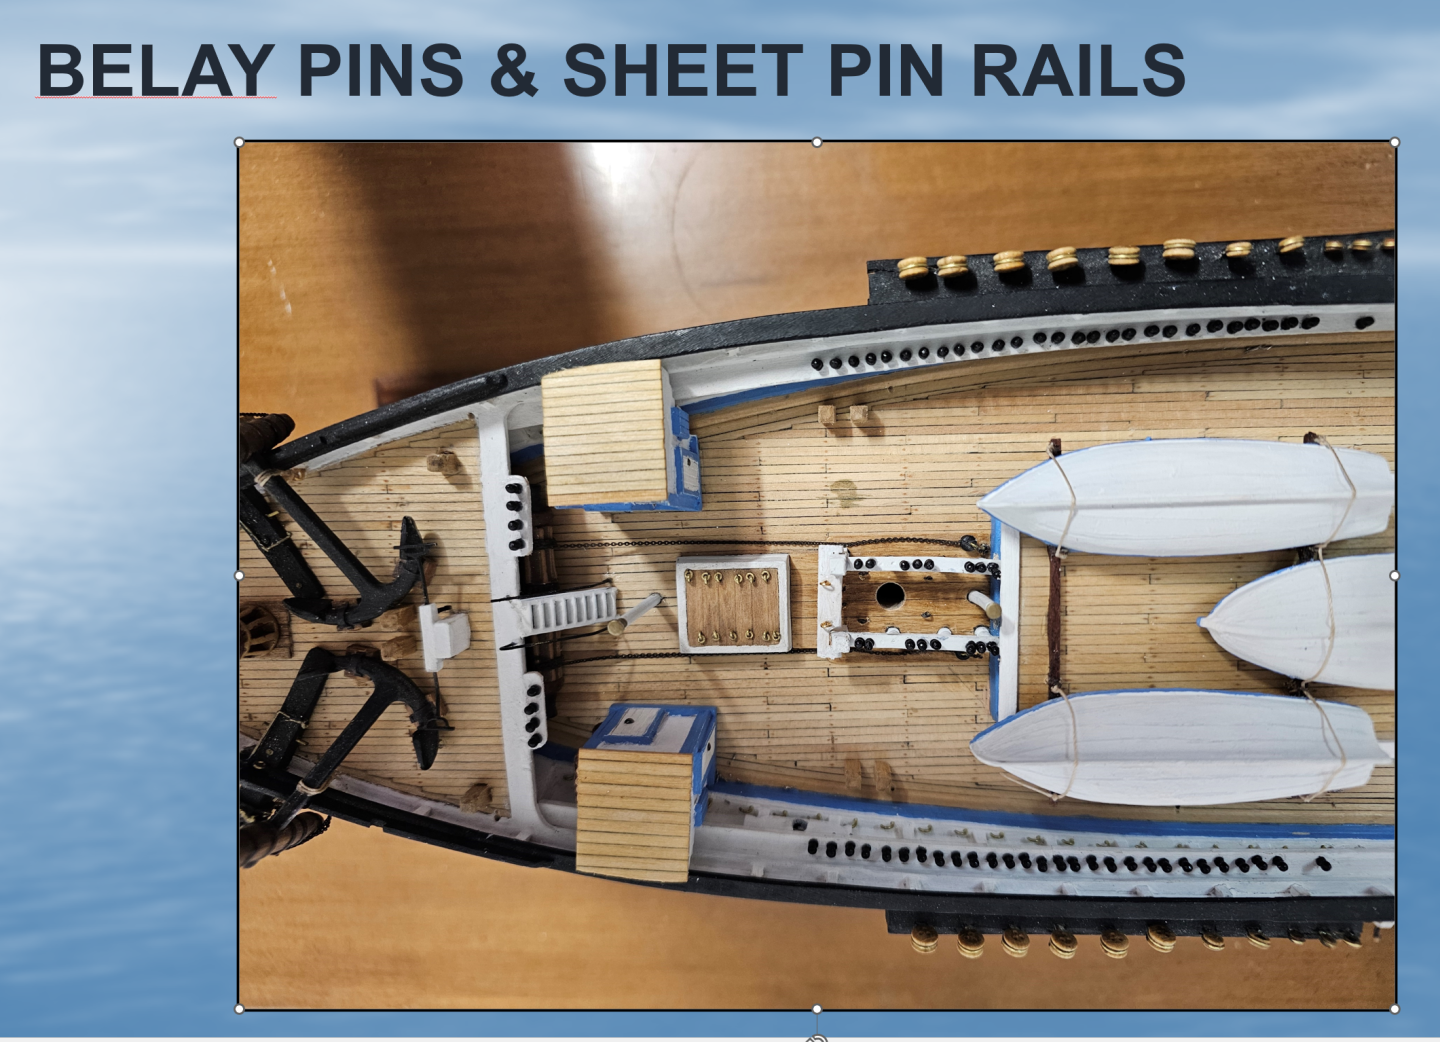
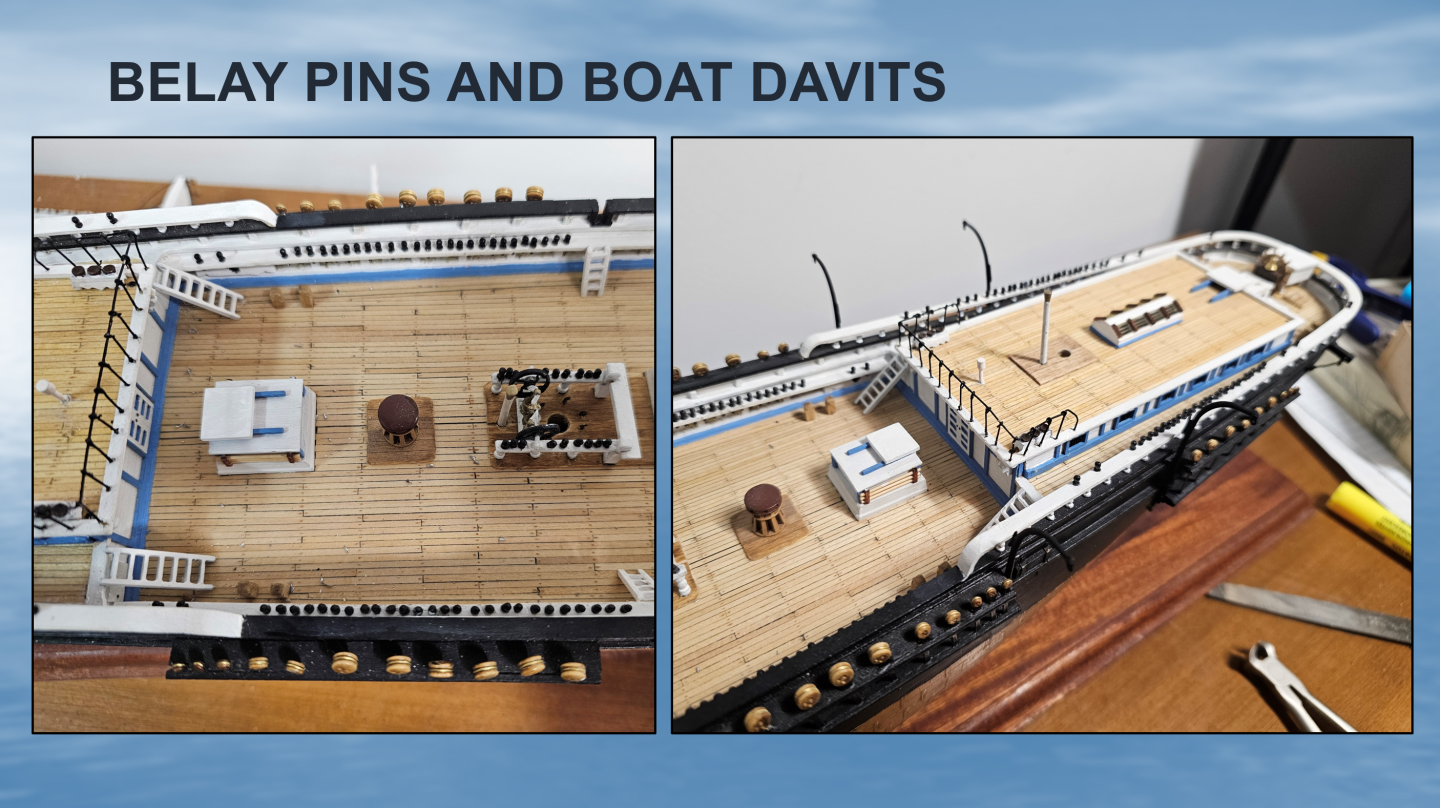
Over the last 2 days I have been focusing on finishing off the deck so that I can begin the rigging phase of the model. All of the belay fin holes had to be redrilled as they were too tight for the Belay pins. I tried to chemically blacken the metal belay pins that came with the kit but was disappointed by the results as they a came out as a rusty dark black. After painting them black I mounted them on the pin racks as shown in the photos below. I noticed that at the bow section of the boat I had missed building the 2 sheet pin rails and had some time ago erroneously misread the plans and drilled a few holes in the top rear plank of the forecastle. As you can see in the photo to the left, these errors and omissions were corrected. I also tried blackening then painted as above the 4 boat stanchions and mounted them loosely on the boat for the photo. These won't be permanently mounted until the model is nearly finished, to avoid accidently breaking them off.
- 431 replies
-
- 3
-
-
- Flying Fish
- Model Shipways
- (and 2 more)
-
After a prolonged absence to do some travelling and other stuff, I have started up again on my Flying Fish. I have been installing the various blocks and eyebolts on the masts, as shown by the photo below. I just discovered that all the holes I had predrilled for the many belay pins are too tight and need to be redrilled 😞
- 431 replies
-
- 3
-
-
- Flying Fish
- Model Shipways
- (and 2 more)
-
This is an interestIng link of the lifespan of plastics: https://thediecastmodel.com/how-long-do-plastic-models-last/
-
Congratulations George. You have done a magnificent job on this model and the workmanship bears this out! Your work certainly inspires me to keep working on mine. What's your next ship?
- 602 replies
-
- 1
-
-
- Flying Fish
- Model Shipways
- (and 2 more)
-
I'm with Rick on this. Your log has been exceptionally helpful George and I am most thankful to you. Sorry I can't help on your davits question.
- 602 replies
-
- 1
-
-
- Flying Fish
- Model Shipways
- (and 2 more)
-
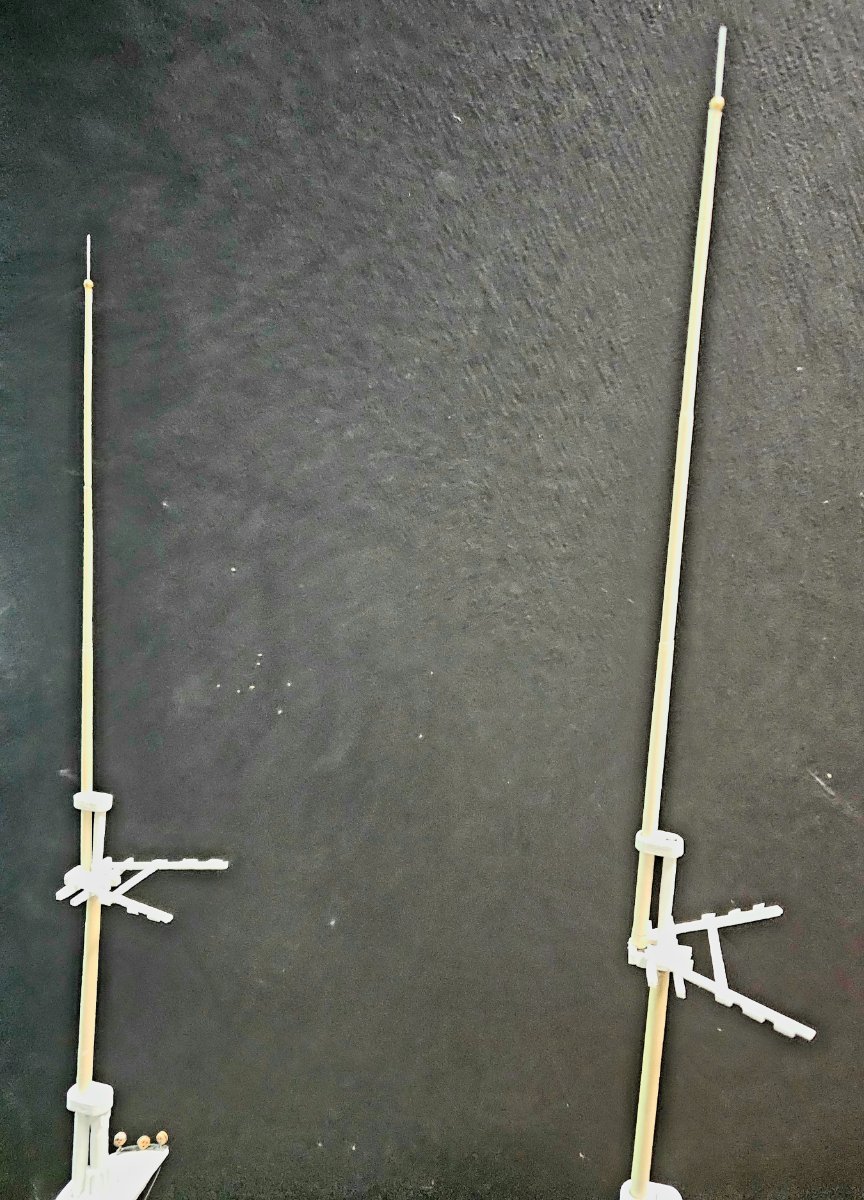
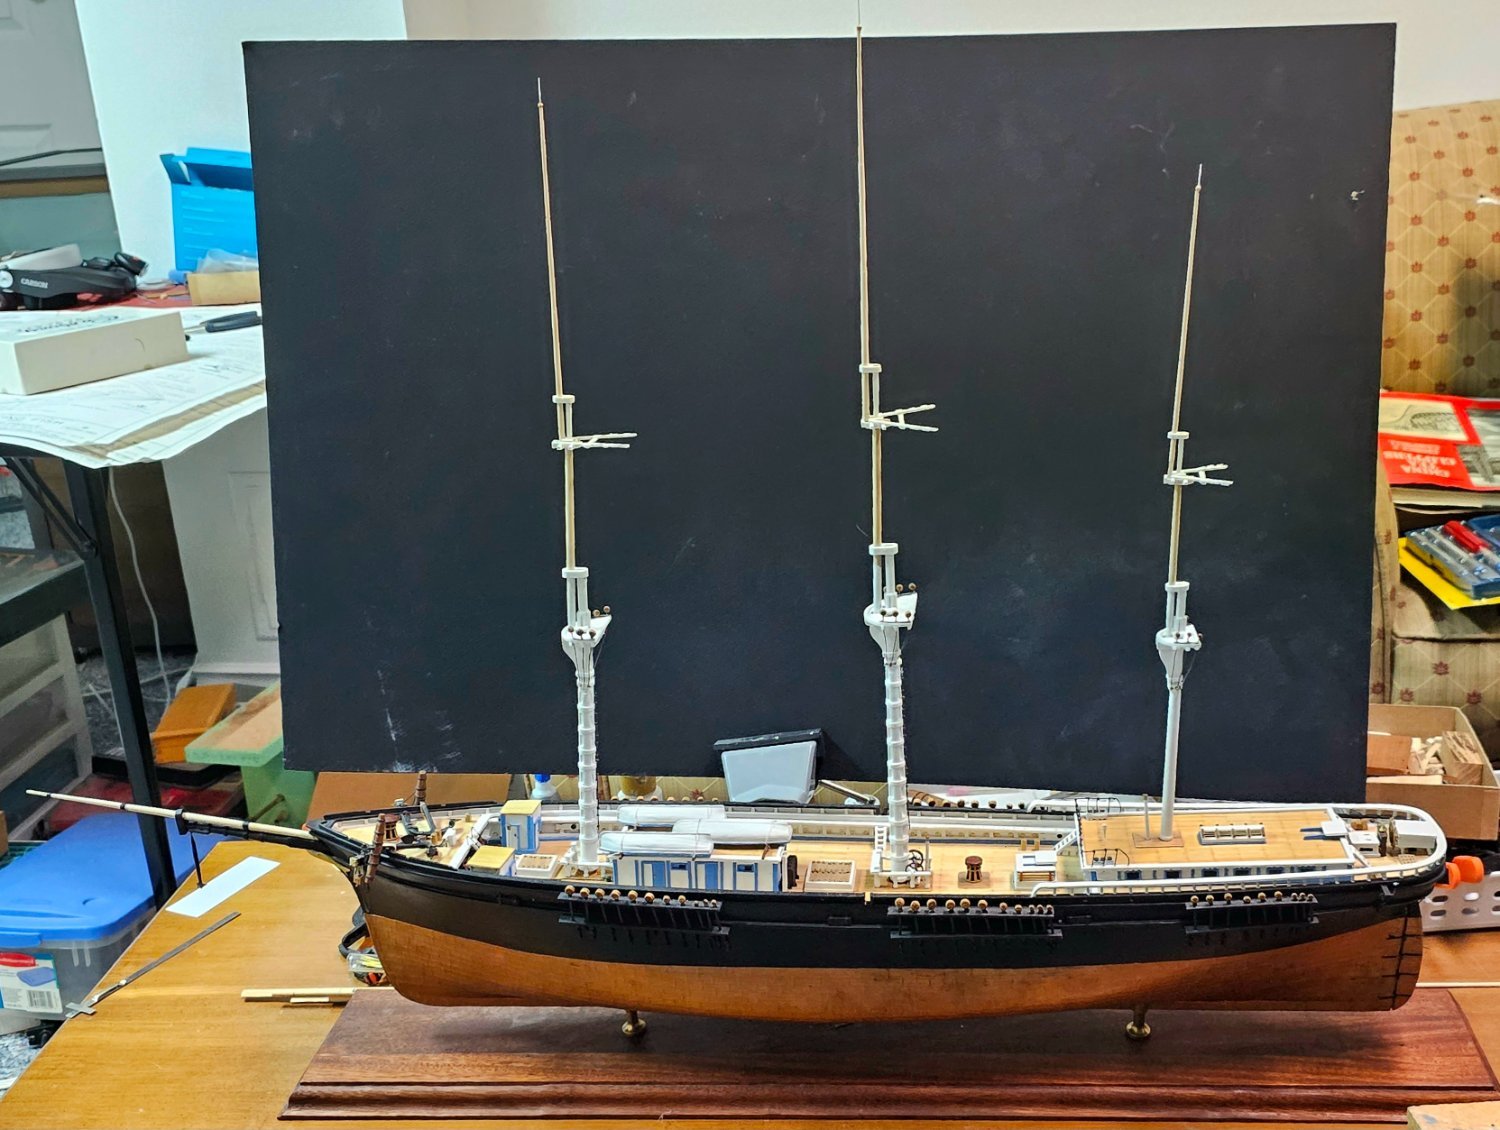
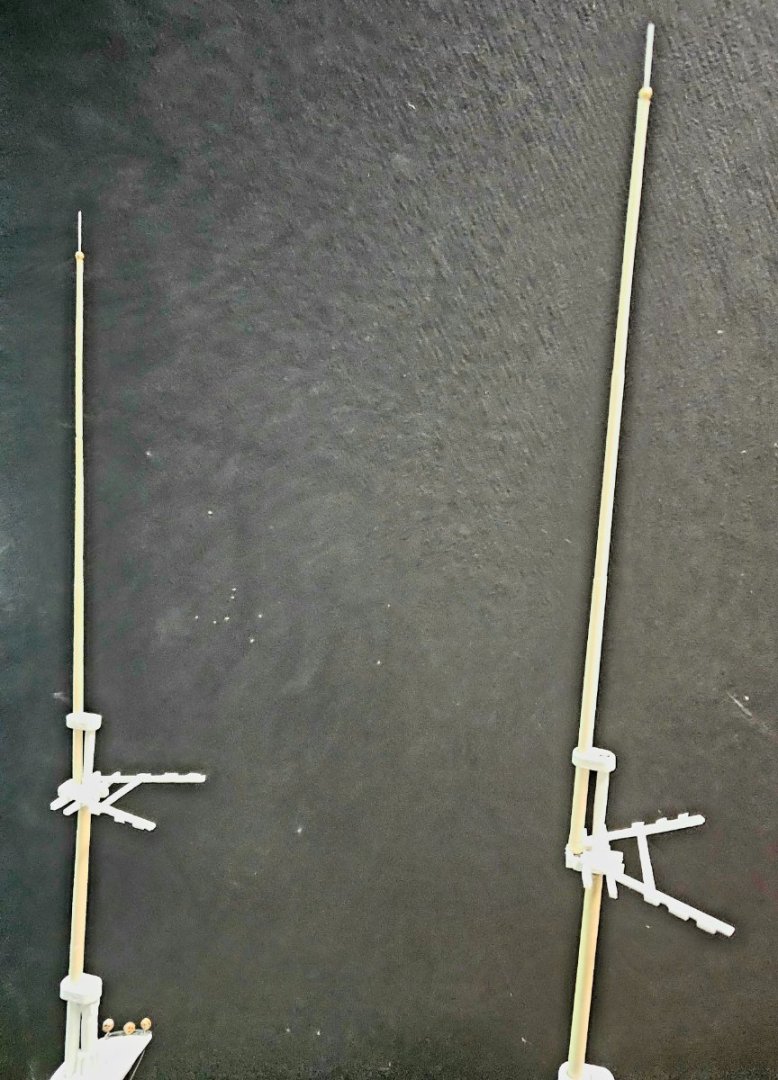
Today I complete the topgallant masts. The second photo show a side view of the model, with the various masts loosely attached. I still have more to do on them, including installing fids, eyebolts, and blocks.

- 431 replies
-
- 7
-
-
- Flying Fish
- Model Shipways
- (and 2 more)