Jared
-
Posts
313 -
Joined
-
Last visited
Content Type
Profiles
Forums
Gallery
Events
Everything posted by Jared
-
That was also my experience with chemical blackening Rick.
-
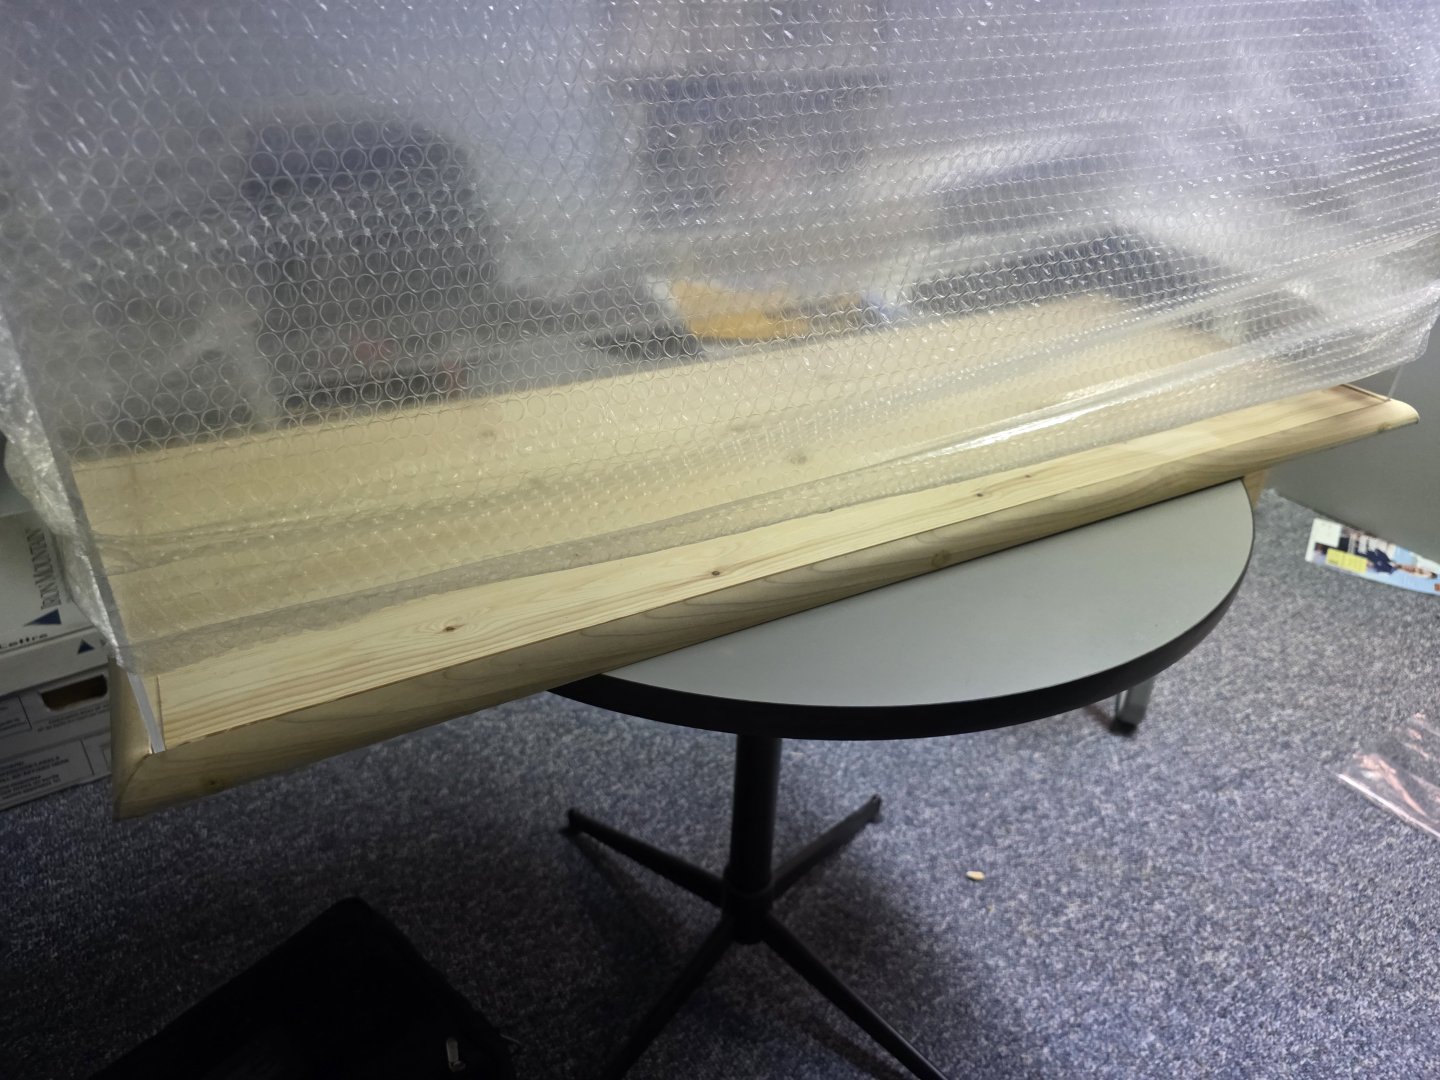
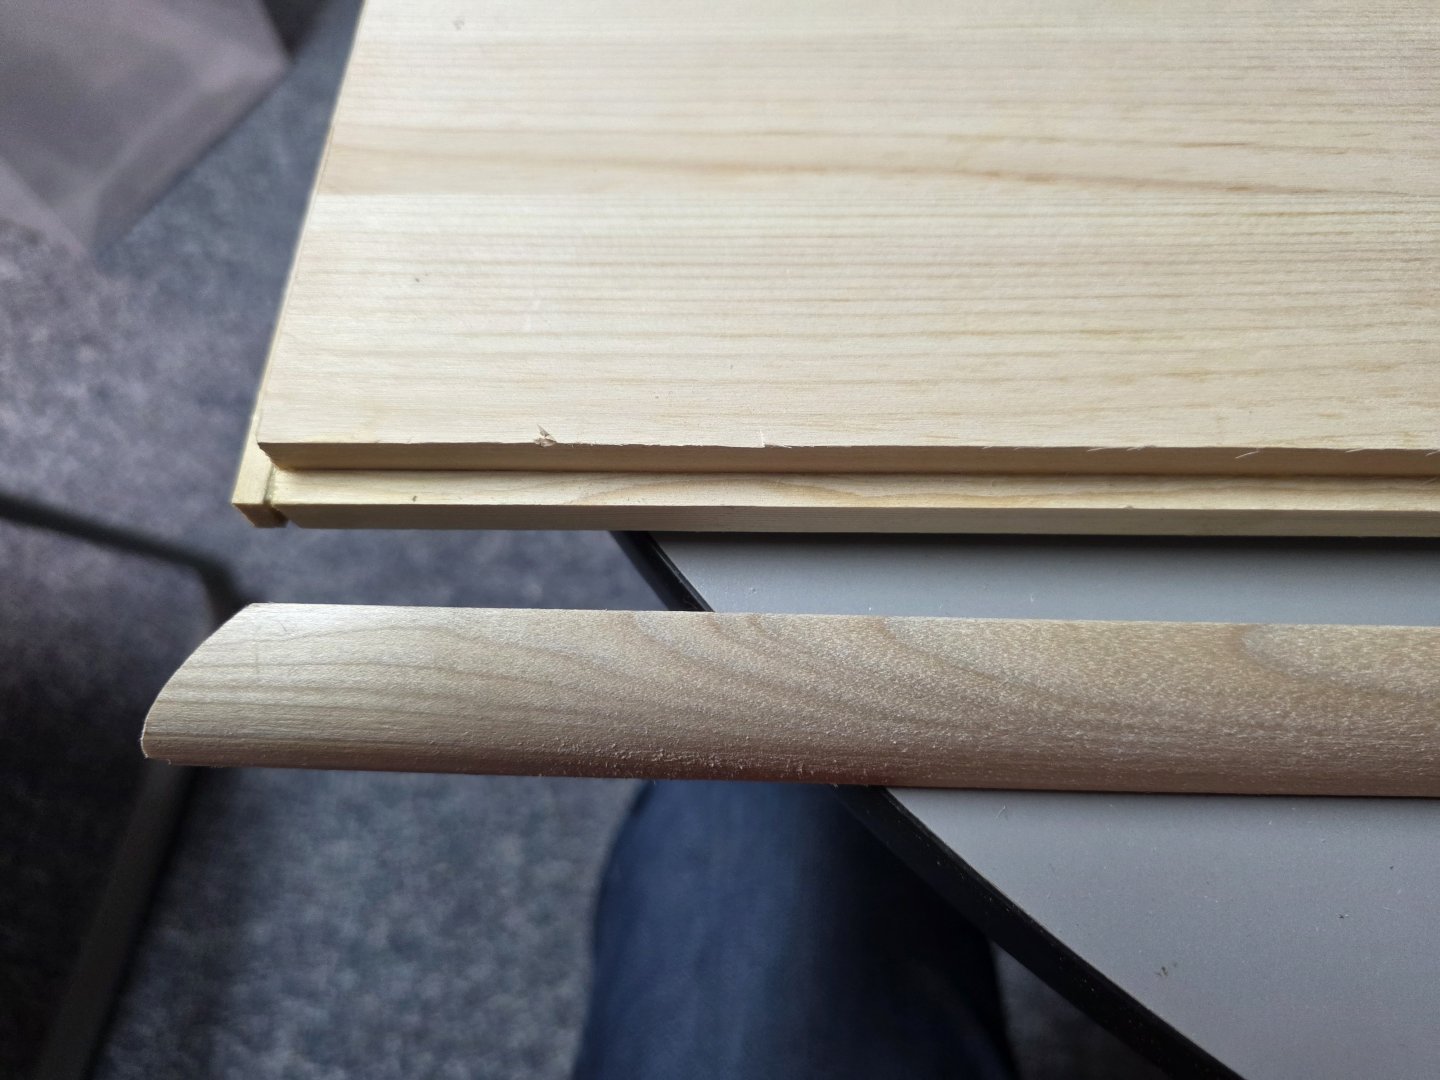
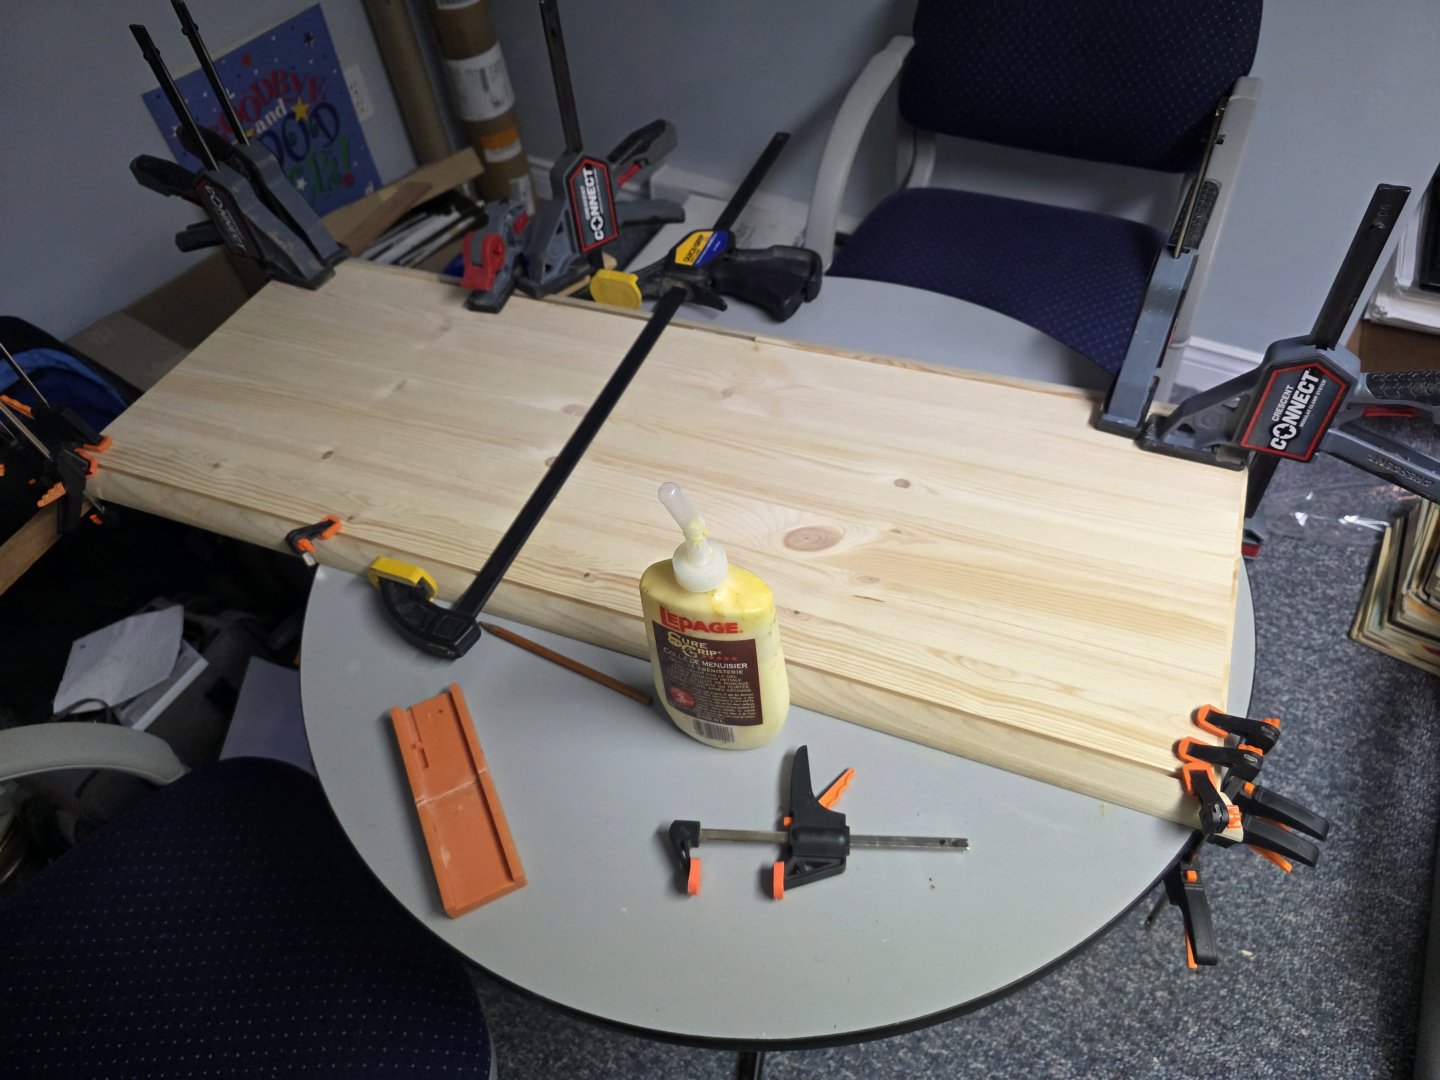
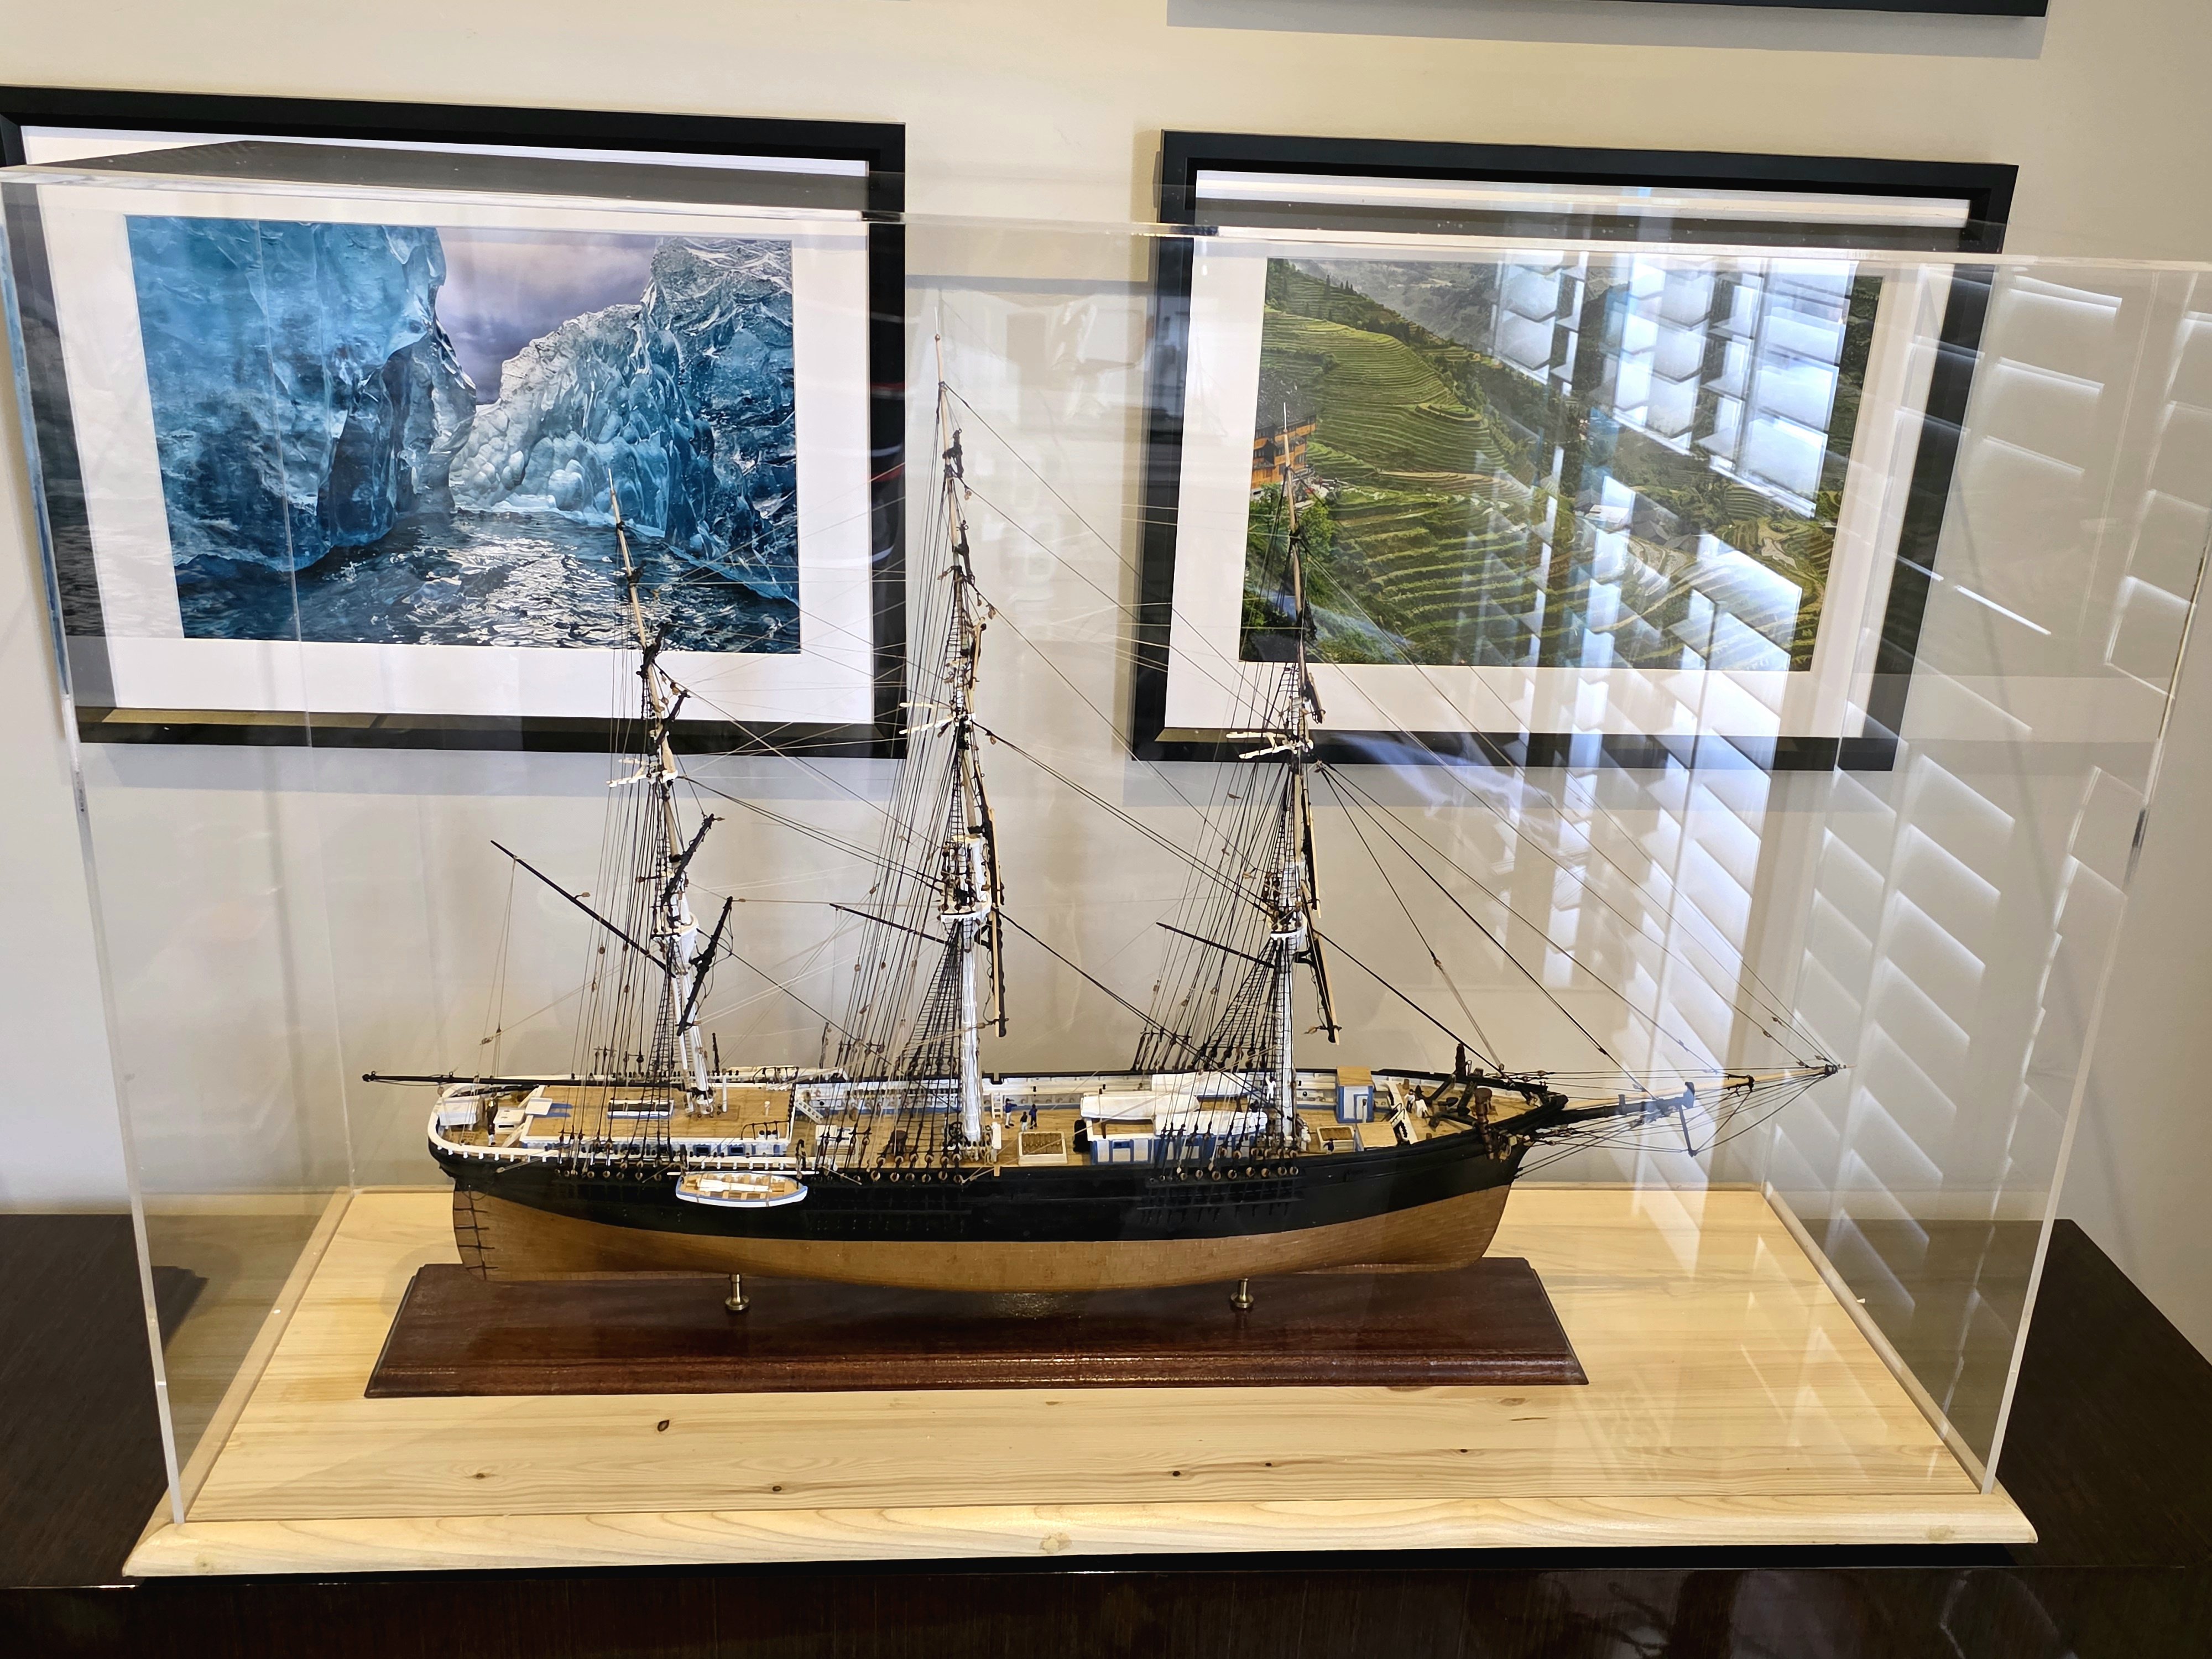
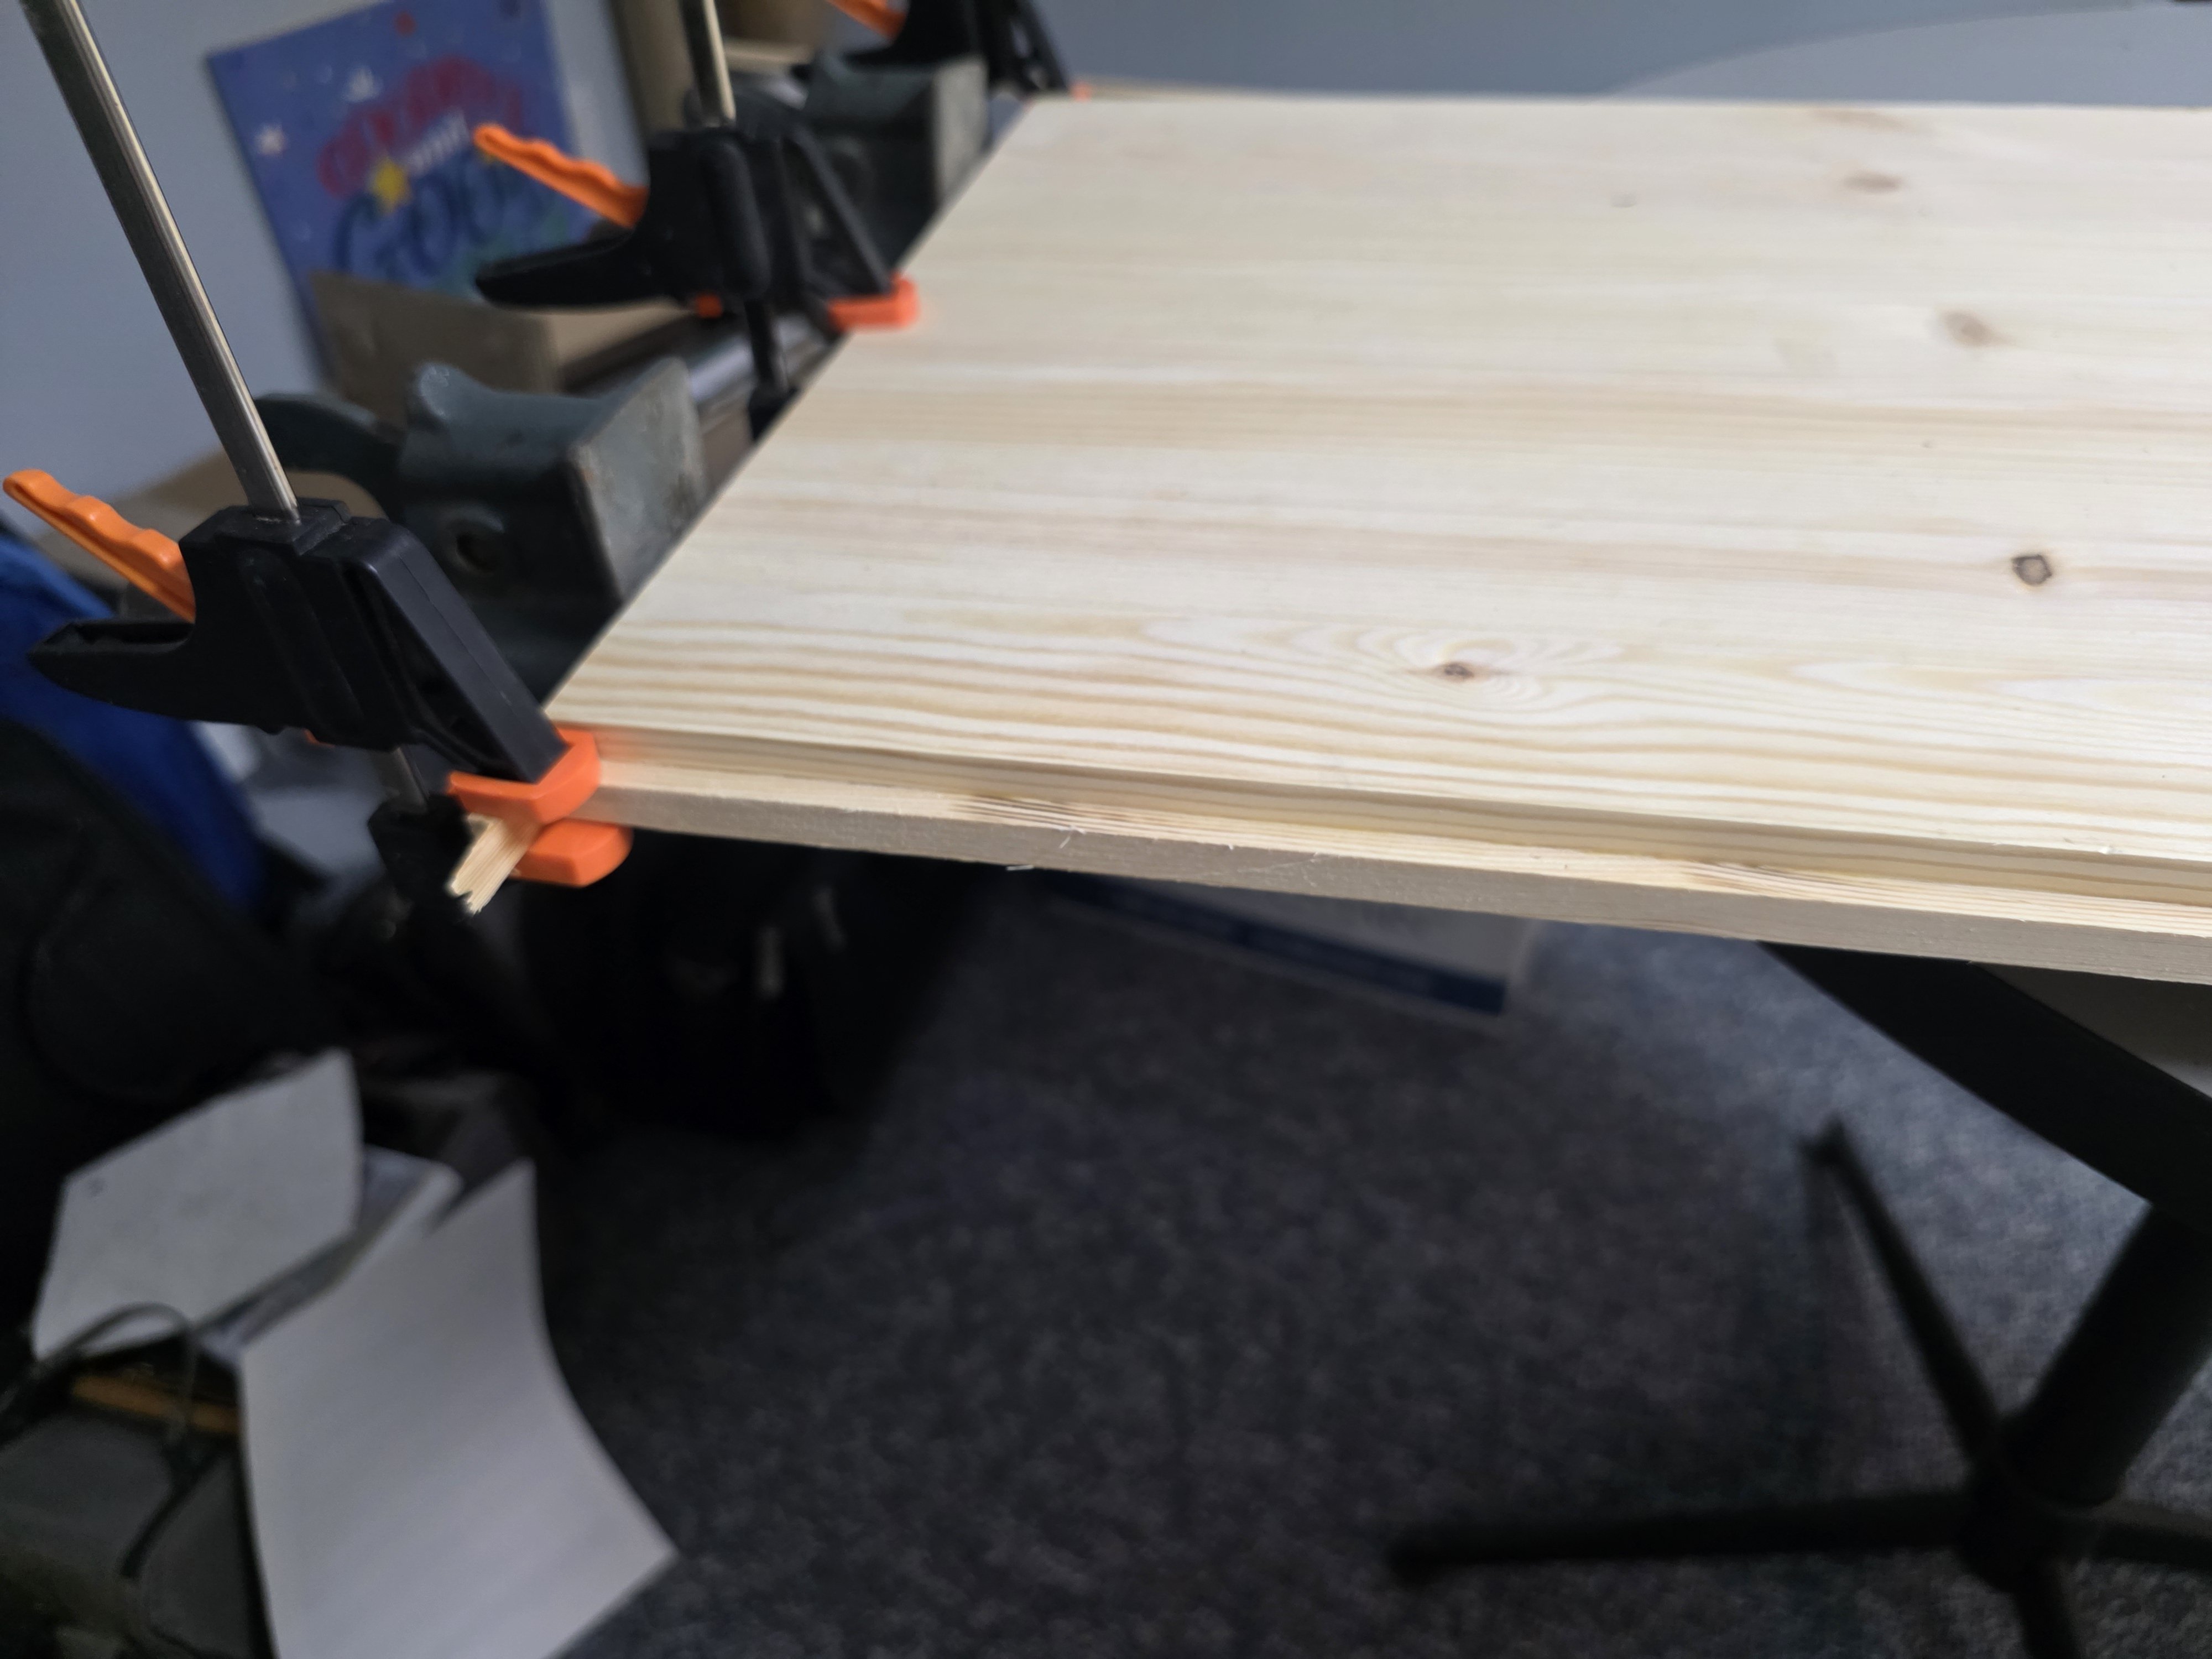
To conclude my build log, I have completed fabrication of a case to house and protect my Flying Fish. I had a 5-side 3/16" Acrylic box made at a local specialty shop. I made my own base from a 3/4" sheet of laminated pine shelving purchased I from a hardware store. I cut the sheet on my radual arm saw to the inner dimensions of my case then glued wooden strips 0.228" wide x 1/2" tall along each edge. I cut the strips from the leftover pine. I then cut pieces of 3/4" quarted round poplar molding to size and glued them to the side strips. Two or 3 1.5" finishing nails were then hammered through the glued strips into the main base to secure the sides. Several coats of clear Varathane finish were applied to all the wooden surfaces to protect the wood from humidity damage. I screwed the base of my model to the pine base and added 6 small rubber feet to the base. The completed cased model is shown in the first photo below. A laser typed plaque will soon be added inside of the case. I had a very small hole drilled near the bottom side edges of the Acrylic box to allow for air exchange. The holes were filled with a cotton plug to prevent insects getting into the case. The other photos show some of the steps in the case base construction. Thanks for your interest. Jared


- 433 replies
-
- 1
-

-
- Flying Fish
- Model Shipways
- (and 2 more)
-
We too got walloped here in Ontario George. My snow blower is my best friend!
-
I wish I had thought of this! It would have saved me so much agony! Thanks for posting this.
- 360 replies
-
- 1
-
-
- Flying Fish
- Model Shipways
- (and 1 more)
-
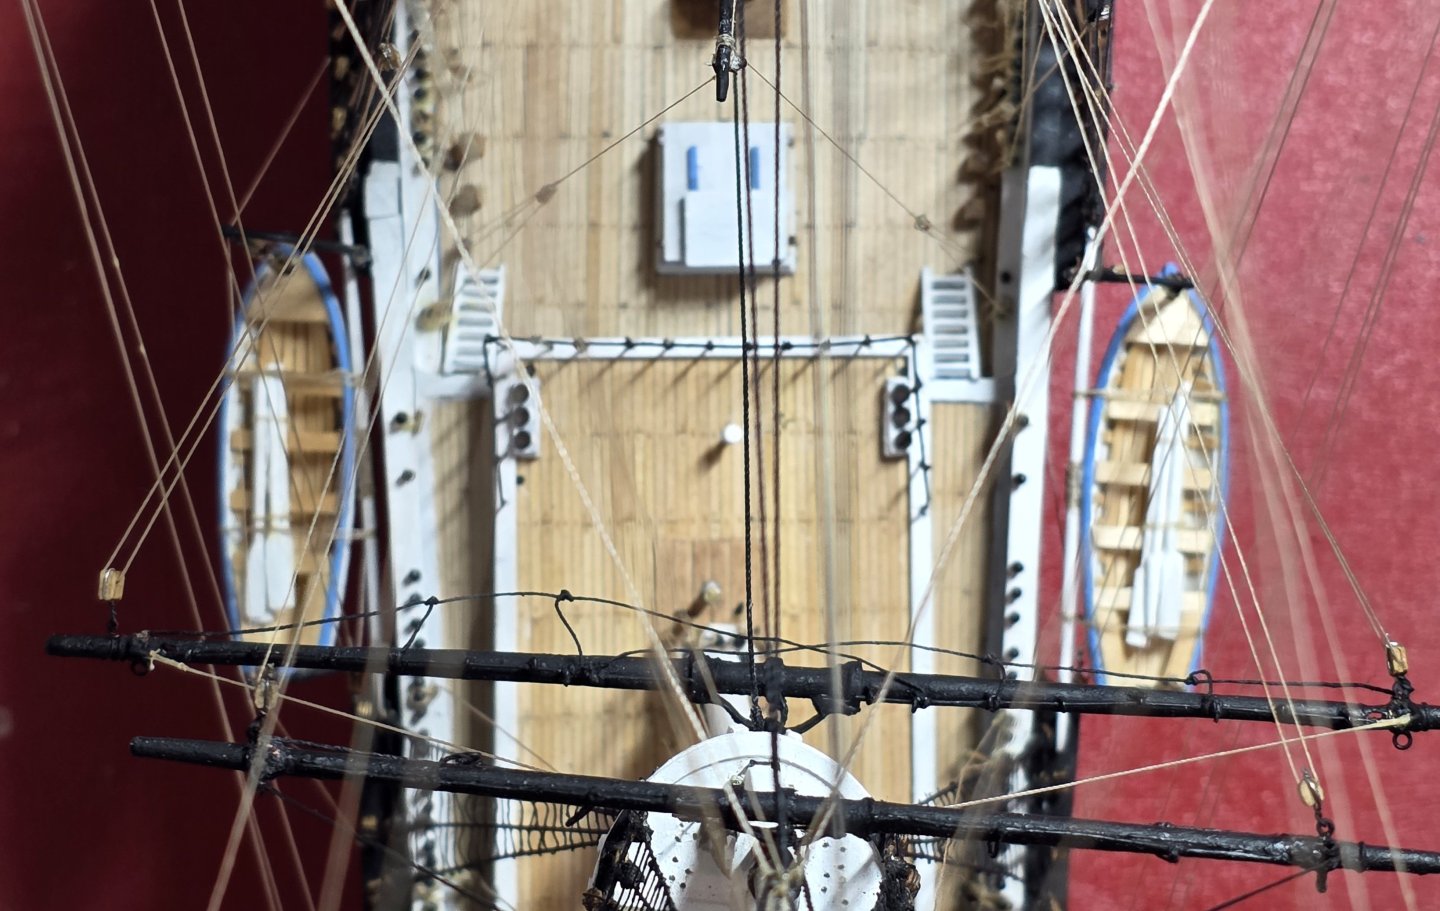
Rigging under and behind the fife rails was near impossible on my build. Eyebolts that I had put in place behind the fife rail had to be removed then the lower part of the rigging attached to the freed eyebolt. I then reglued the eyebolts into place and continued with the rigging. The other caution is the supplied belay pins in the kit are way too short to be able to rig by the conventional way. I had to tie knots to the upper part of the belay pin then hide everything under the rope coils. The crappy cast metal belay pins were one of the worst emements in the kit!
- 360 replies
-
- 1
-
-
- Flying Fish
- Model Shipways
- (and 1 more)
-
Nice work Alan. Happy New Year. Your carving method would make fir an interesting MSON presentation.
-
Looks fantastic. Happr New Year.
-
Wishing you the best for your pet George. Best wishes for the holidays ahead and for a great 2026. Jared
-
A beautiful model and fascinating story as well. I look forward to following the rest of your FF build.
-
As much as I would like to blame lens distortion for this "optical illusion" I can't. As I mentioned several times in this blog, the requirement to drill sheaves in the thinnest spars made these areas extremely fragile and a few snapped during the subsequent rigging process (see #230 and #373) when I was attaching the lift grommets. Where the observed "bow" occurs, I used epoxy for the repair but had difficulty aligning the spars. The bowing actually looks worse than it actually is, because of the way the chain crosses over it. At the time if this break a lot of the rigging on the lower sections of the foremast had completed so I made the decision to leave well enough alone as alignment looked fine from the port and stbd. views. For the break discussed in #373, the broken pieces were pinned and glued together, ensuring good alignment.
- 433 replies
-
- 1
-
-
- Flying Fish
- Model Shipways
- (and 2 more)
-
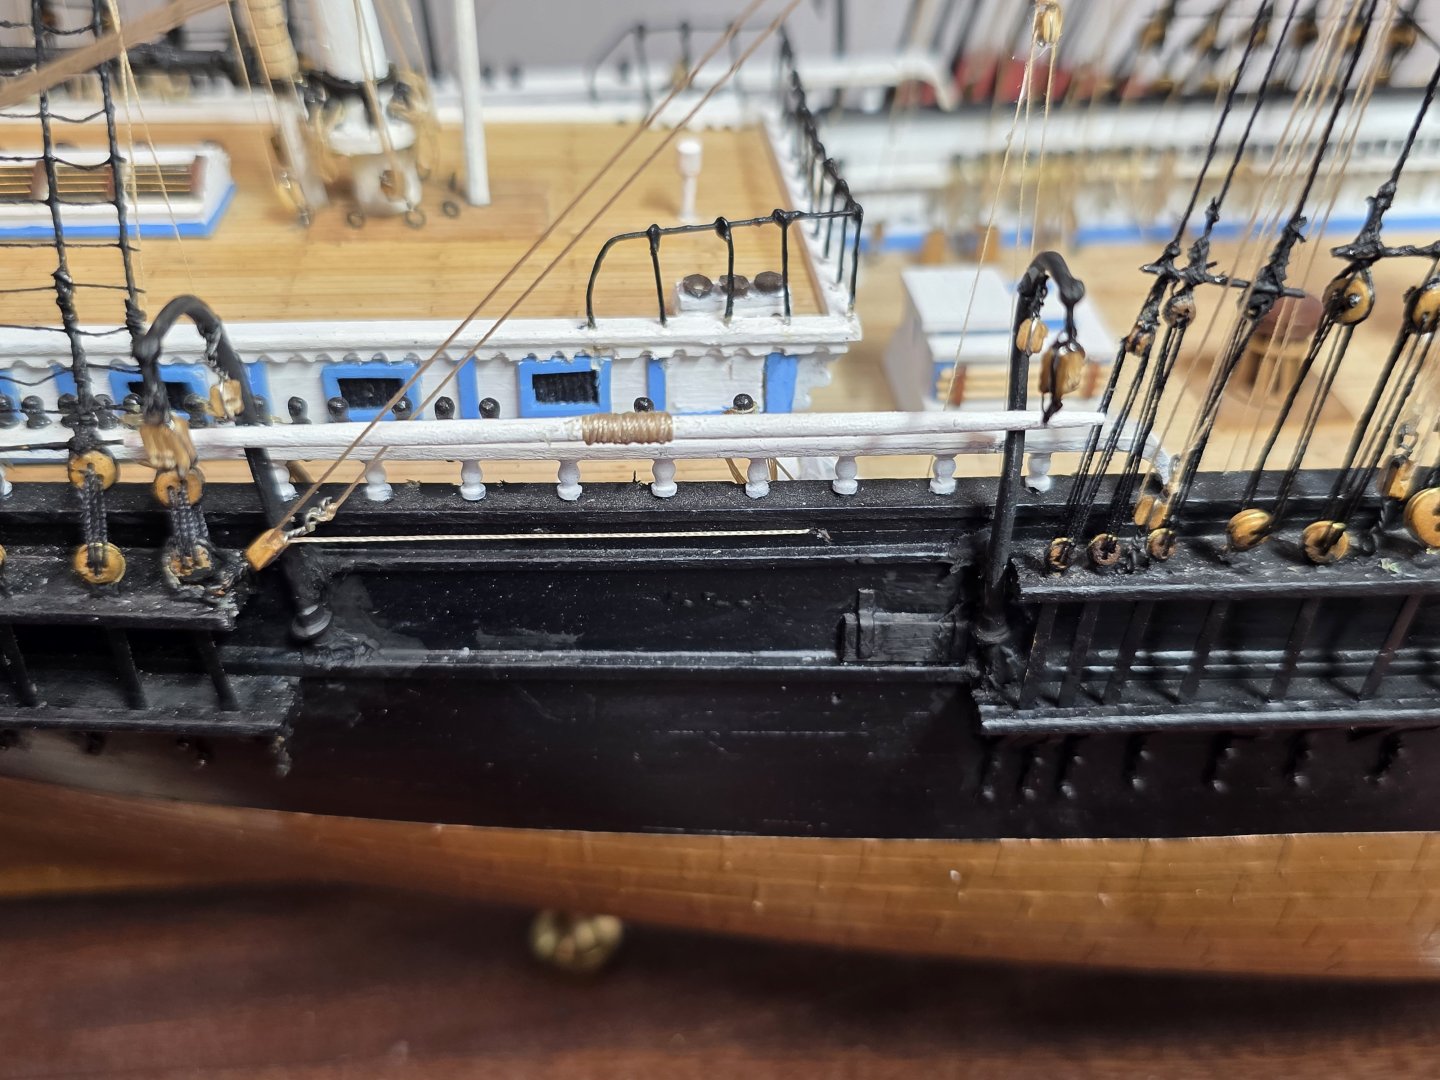
Here are the last of my focus stacked images on my completed Flying Fish. The images were photographed on large sheets of white paper. The most difficult problem I encountered with this technique was trying to cleanup the background of the images in Lightroom, where the sheets overlapped or crinkled. I was pleased, however, that the focus stacking produced sharp images of the ship throughout the images. It took between 12 and 30 raw images to create the various images. The images were stacked using Helicon Focus. I used a Nikon D850 camera mounted on a sturdy tripod, with 24-70mm f2.8 and 105 mm f2.8 lenses.
.thumb.jpg.28c31814390ad6c58b69084be7c11b78.jpg)
.thumb.jpg.ec1c8e0b032ca9c6b2d0c6dda31bceab.jpg)
.thumb.jpg.69f2e47ee530efc7bc429bb101c6c67e.jpg)
.thumb.jpg.d902770fa04cb14e1949ffec7a110d6e.jpg)
.thumb.jpg.7e3642af18693a9a4c05201e0d384fd1.jpg)
- 433 replies
-
- 2
-

-
- Flying Fish
- Model Shipways
- (and 2 more)
-
I will try creating some more Ai images broadside, soon as I finish making a few more focus stacked images. With the Ai images, your images are only as good as what you can instruct the Ai generator to do. There is a lot of luck involved to this.
-
Feeling the need for some creativity in image making, I fed one of the photos of my Flying Fish model into Google Gemini and asked it to create a photorealistic image of what the ship would have looked like in Boston Harbor in the 1850's. I was blown away by the results, which I share here:


- 433 replies
-
- 8
-
-
-
- Flying Fish
- Model Shipways
- (and 2 more)
-
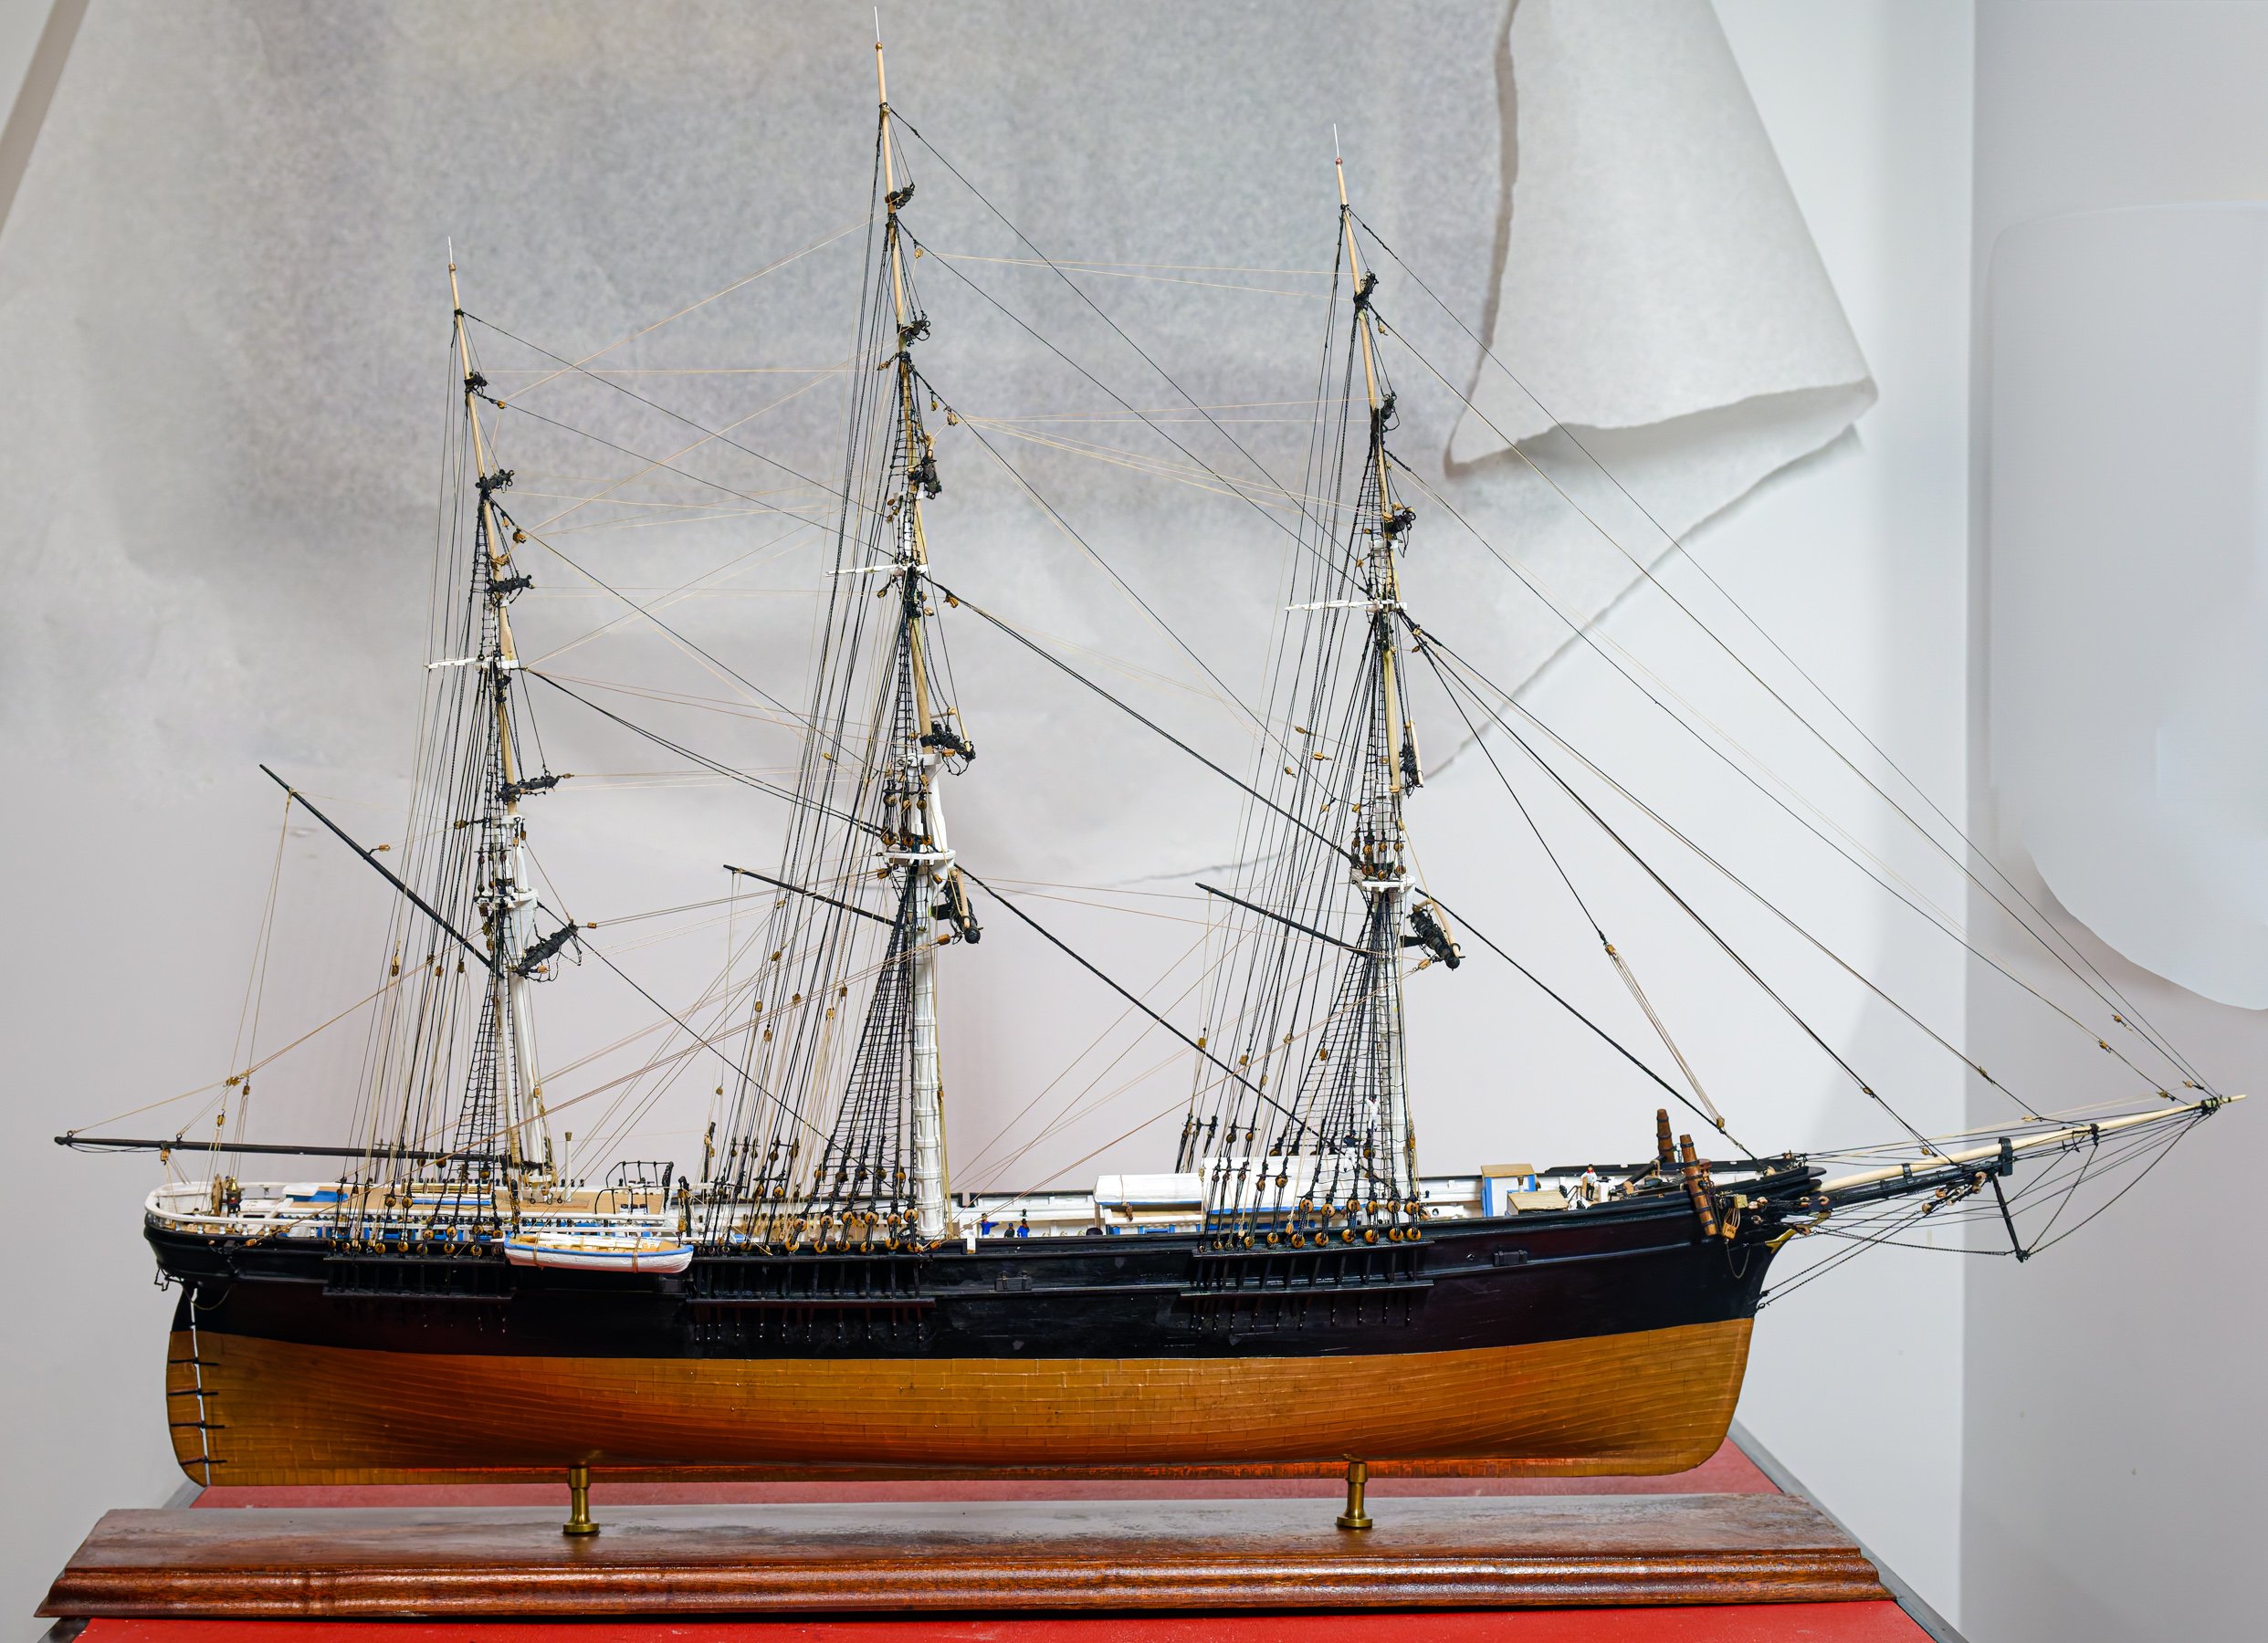
I have finally gotten around to photographing my completed model of the Flying Fish, using the focus stacking technique to show the entire model in sharp focus. Here are my first 4 images showing the starboard and port side view of the ship, a stern view and a 45 degree view.
.thumb.jpg.feefab57d459f4dbd2466974b843c68b.jpg)
SmartPhoto.thumb.jpg.ed75d0803eac0bae81b488ee4bff4a46.jpg)
SmartPhoto.thumb.jpg.6f589fc9a68e49a49280b8ba41c4148d.jpg)
.thumb.jpg.df2c67b123a5801be380ed648b2f589b.jpg)
- 433 replies
-
- 7
-

-
-
-
- Flying Fish
- Model Shipways
- (and 2 more)
-
Need small repair done on jibboom of Le Superbe model
Jared replied to Mr. Matt's topic in Masting, rigging and sails
I agree with Alan. Drill center holes in the 2 broken pieces where they joined and insert a steel or brass rod then epoxy them together. I broke a very thin mast on my Flying Fish and this method saved the model. Yiu can see this with photos at #373 on my Flying Fish build log. -
It's looking great Alan.
-
You have made a lot of progress over the last 4 weeks while I was away Rob. Beautiful work! How did you make the name boards?
-
It is such a relief and really satisfying when you finally are able to declare the model finished! Keep up the great work
- 360 replies
-
- 2
-
-
- Flying Fish
- Model Shipways
- (and 1 more)
-
Beauriful work!!
-
Your shop looks pretty normal to me Rob. Whatever works is good!
-
Now that I have completed my build, i thought I would share some truths I have learned about model ship building: 1. Making mistakes comes very easy; fixing or redoing them not so. 2. When you hold difficult tiny pieces in place, glue never dries quick enough. 3. Check your plans again andvl again. Measure twice, cut once. 4. Most small parts that you accidently drop onto the floor will bounce and roll in the direction you will least be able to find them. A vacum dustbug is your best friend for finding them again. 5. Fine rigging lines and chains are designed to snag, kink and entangle on all pertruding parts of a tall ship model. Untangling them requires careful fine movements, lots of patients and a few choice swear words. 6. Glued joints and soldered joints have a tendancy to come undone at the worst moment possible. 7. No matter how careful you are when rigging, count on you hands to accidently bang into the pertruding lower yards and other rigging many times. After a few breaks, you will learn to move you hands very slowly when rigging. 8. Missing something critical in the complex ship's drawings is not hard or infrequent, necessitating unanticipated fixes and more swearing. 9. During the course of a build, the most common comment you will hear from your friends is "I don't know how you have the patience". 10. Once your model is finished and admired, you will begin to forget about all of the above mentioned moments and start a new model. 🤣🤣
- 433 replies
-
- 8
-

-
-
-
- Flying Fish
- Model Shipways
- (and 2 more)
-
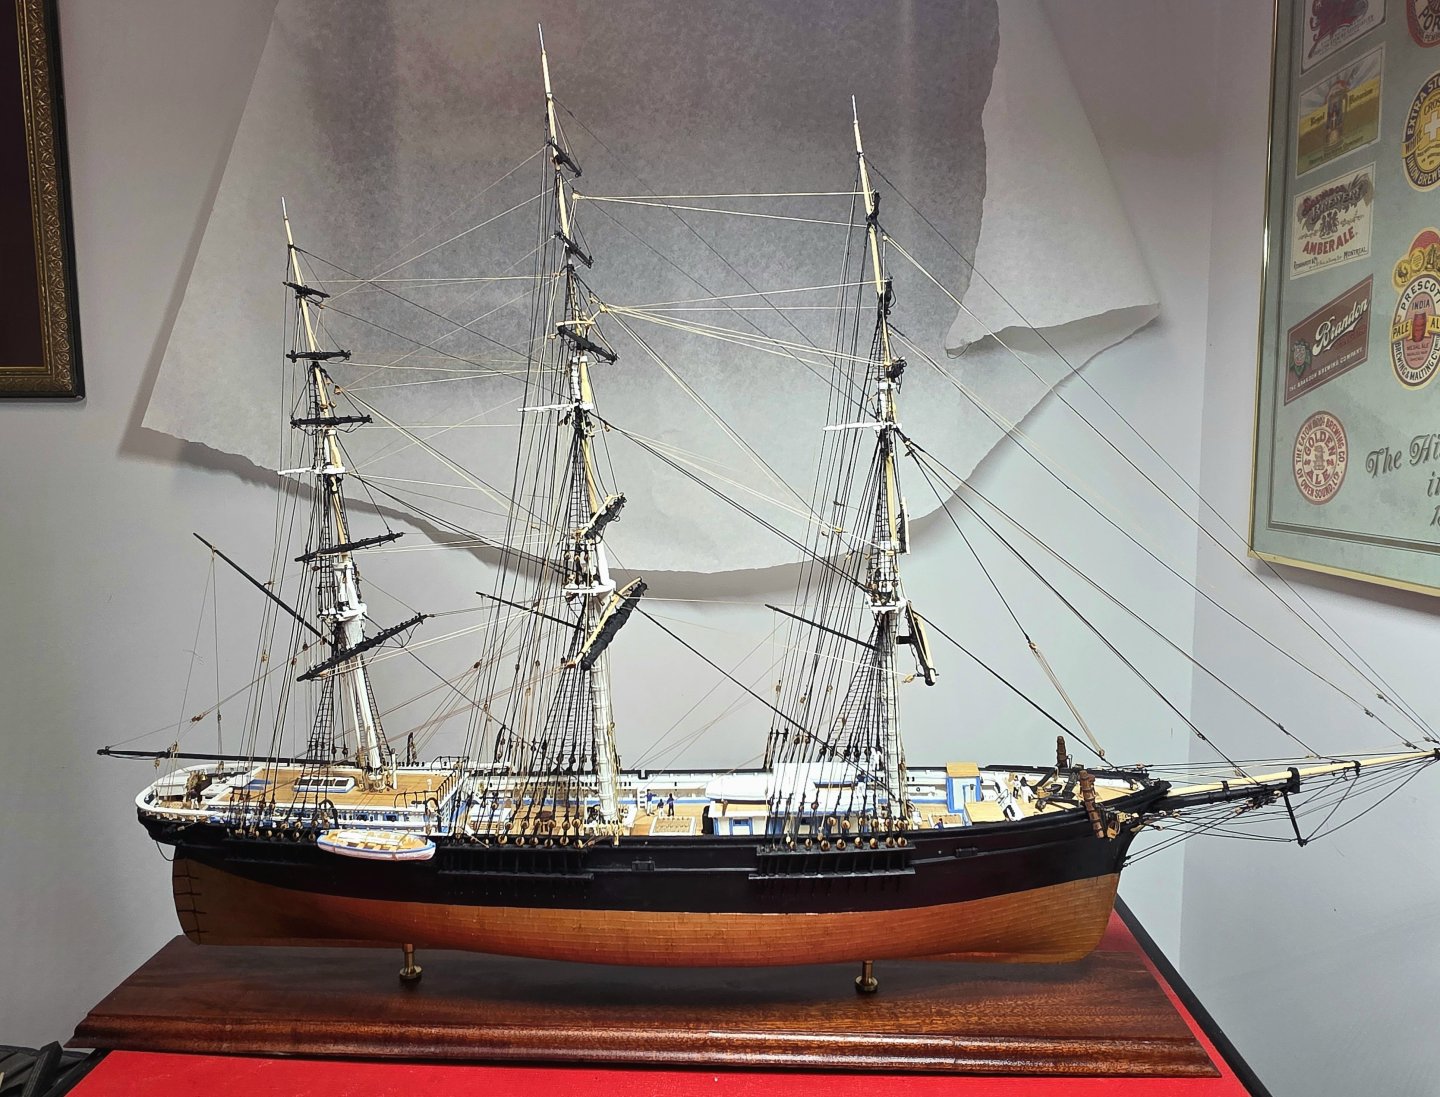
Here is a higher resolution photo of my completed Flying Fish (not focus stacked).

- 433 replies
-
- 8
-
-
-
- Flying Fish
- Model Shipways
- (and 2 more)
-
Thanks Rick. Much appreciated. Can't wait to see your finished model which will be stellar.
-
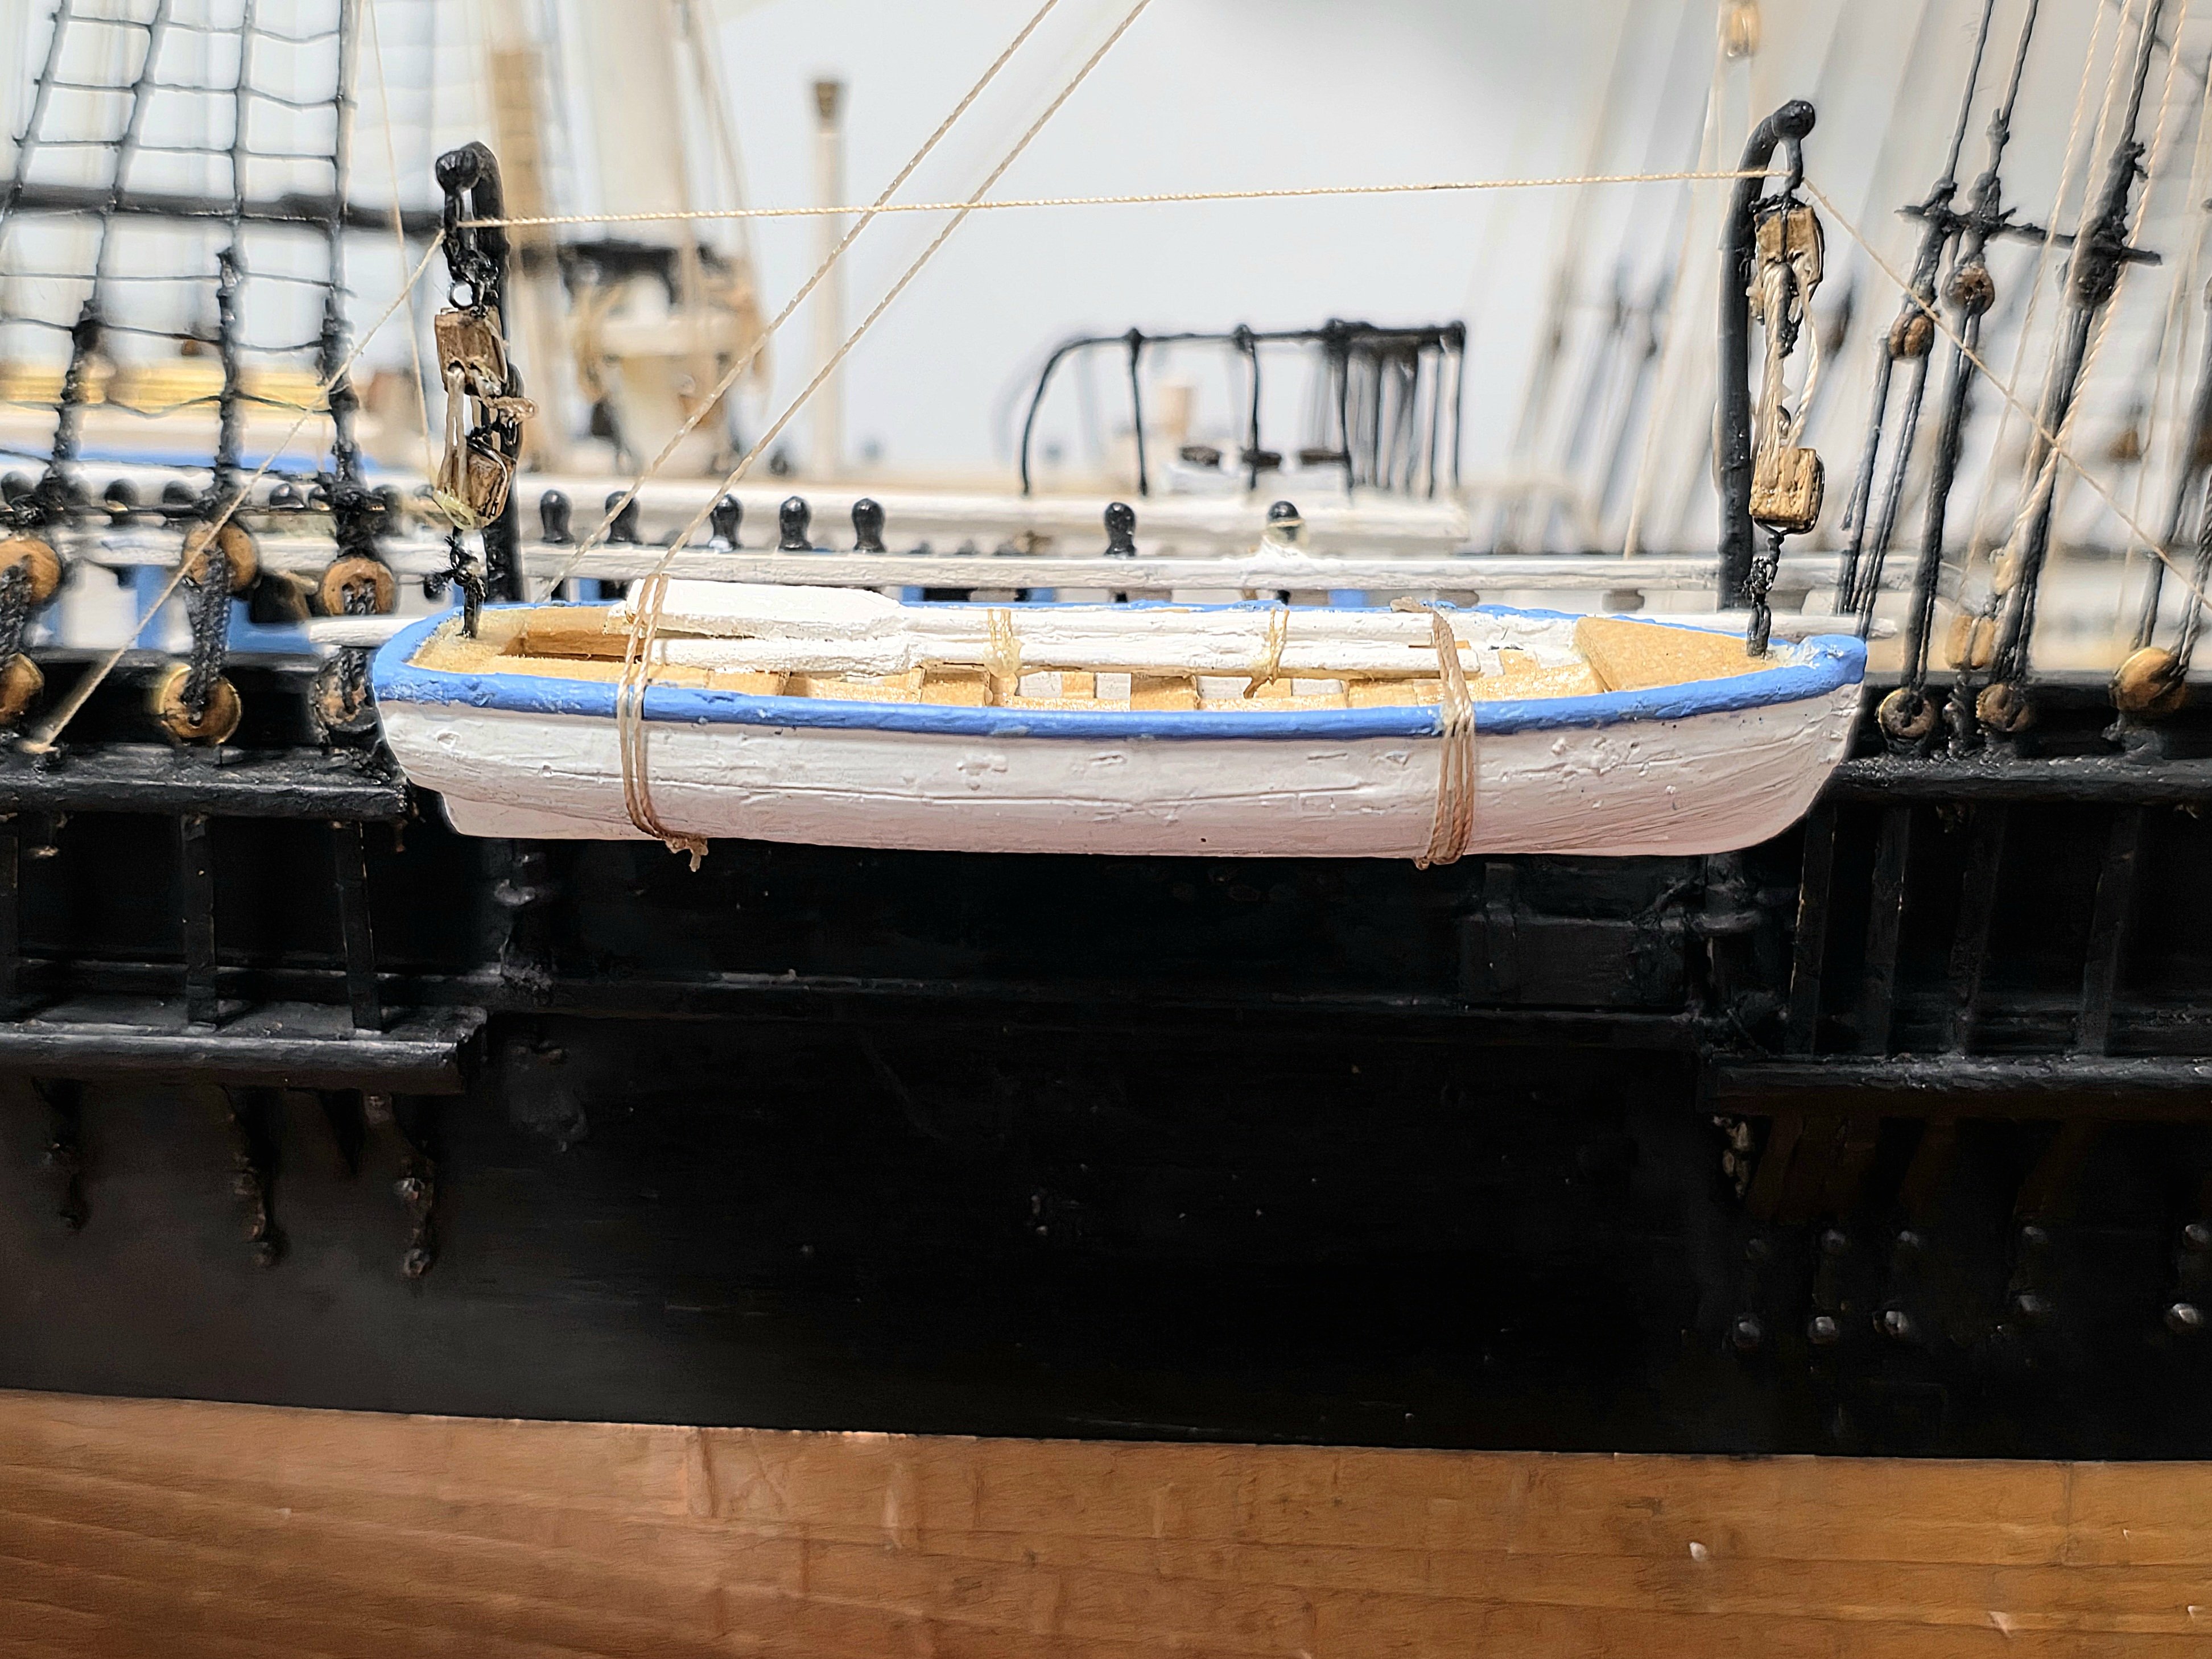
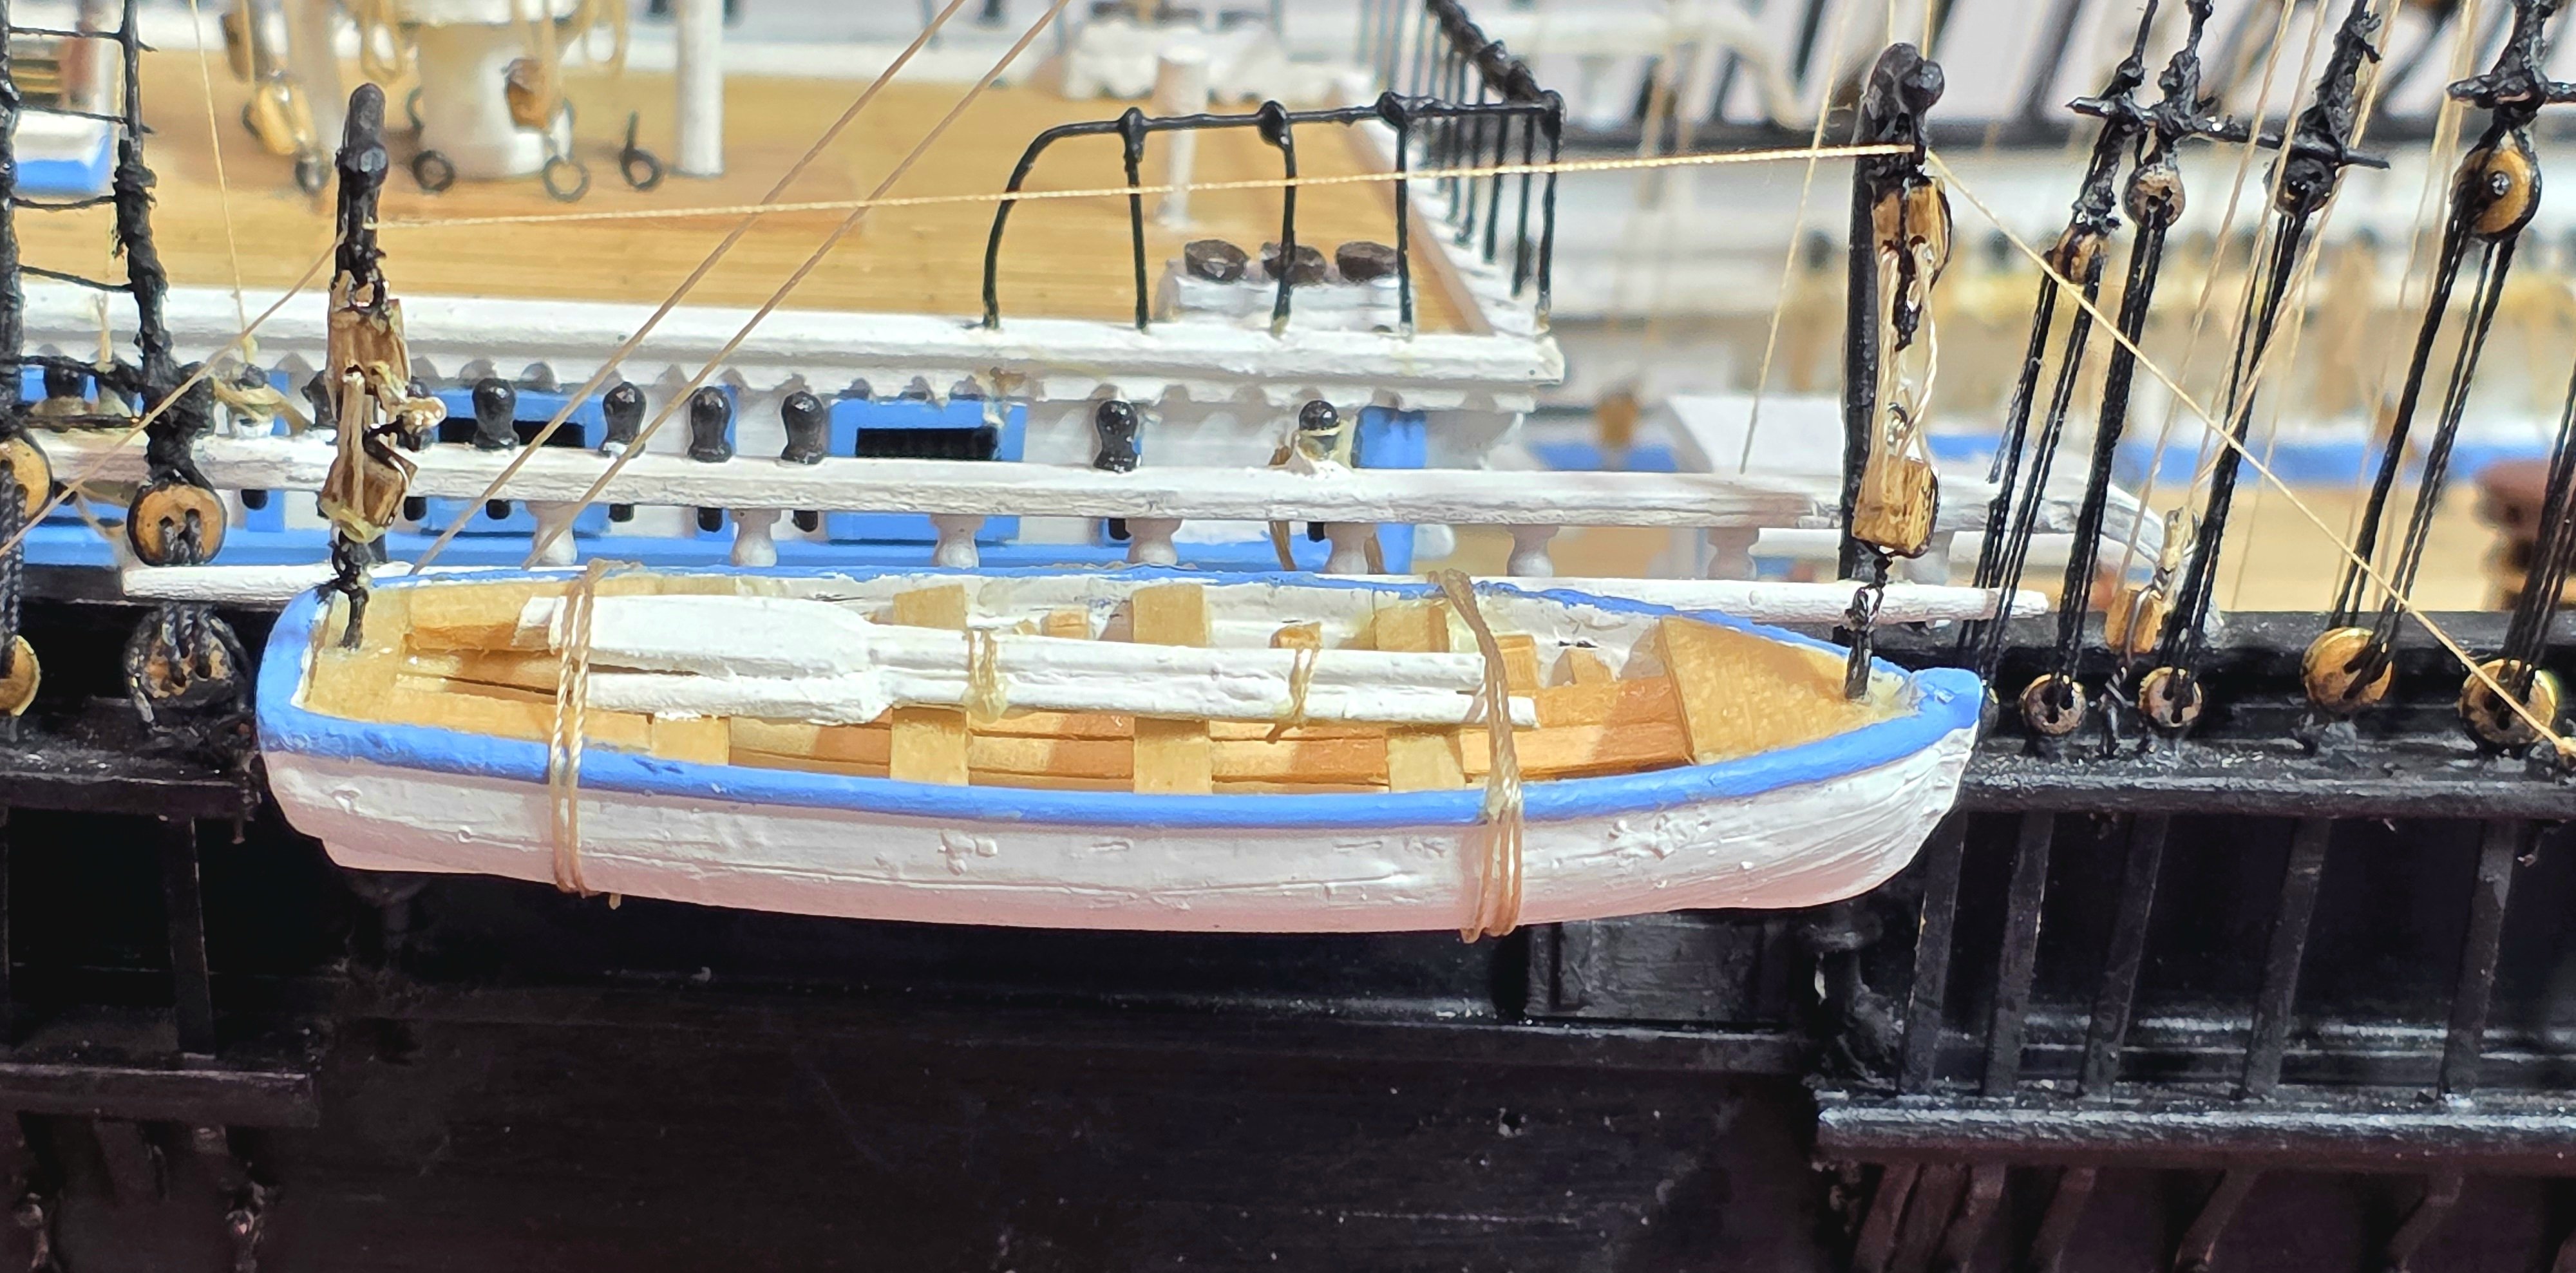
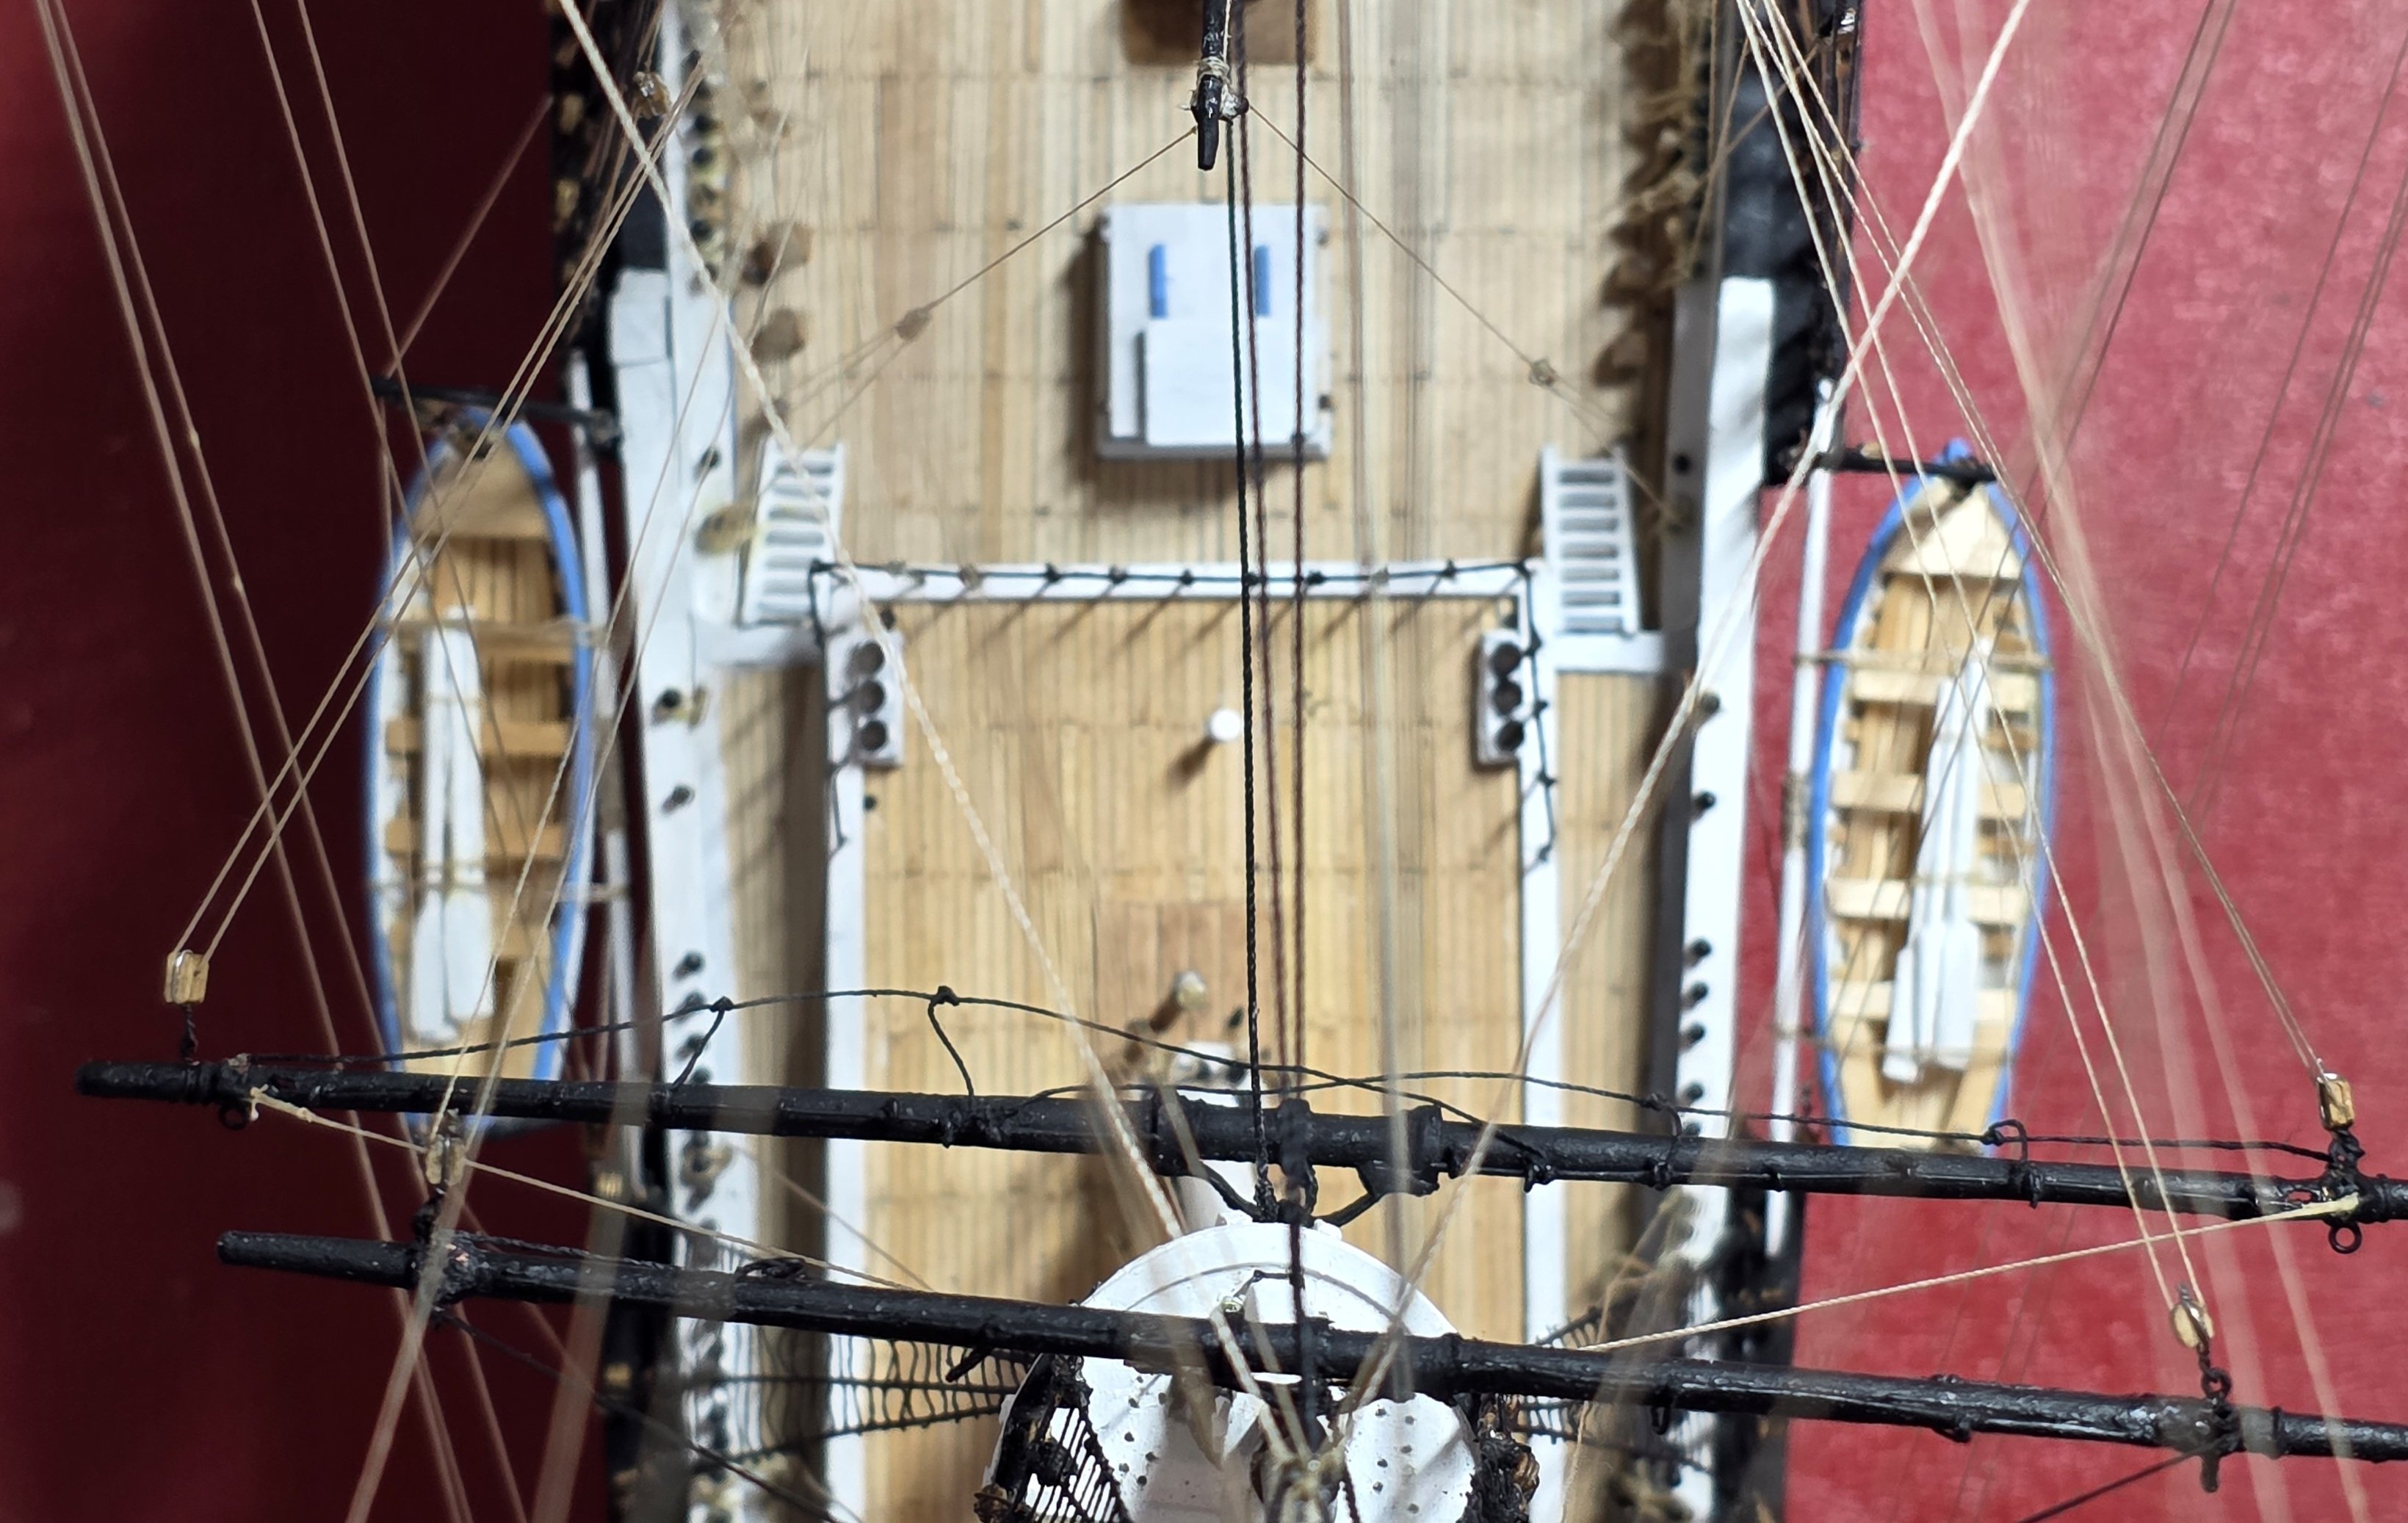
Wow! I never thought I would get to this moment. My Flying Fish has reached completion. Mounting the 2 ships boats was an interesting bit of enjoyable work. There were lots of pieces that had to made and connected. These are shown in the photos below. Next I then spent time tightening some of the chains under the bowsprit. This included cutting out and replacing the rigging between 2 of the hearts. Lastly I cleaned up the model and applied a few spots of touchup paint here and there, and polished up the mahogany base with a fresh coat of tung oil. I have not finalized my decision yet whether or not to add any flags. I think they would be distracting/tacky looking on the model. I can revisut this later before the model is placed in its case. The last photo shows a stbd side view of my completed model. In October I am planning to post much better highly detailed images as a conclusion to this log. Final Thoughts: This model was a real challenge from start to finish, but was a work of considerable satisfaction and enjoyment for me. I learned a lot of new skills and am most grateful to George, Rich, Rob and Rick and others who have offered encouragement and answered my questions throughout the build. I also would like to give a shout out to NRG for hosting this terrific web site and for all they do for our members and hobby. For anyone thinking about building this beautiful model, be advised that it would be an extremely poor choice kit for a beginner. I would rate it as an advanced kit. My impression from looking at other build logs over the years is that many of the modeller's who have bought this kit with good intent sadly were unable to complete it. Thank you all.


- 433 replies
-
- 10
-
-
-
- Flying Fish
- Model Shipways
- (and 2 more)
-
You are making great progress with the rigging. The tight working space on the model certainly does not make any of the rigging easy! However this is not stopping you and you are doing a fine job of it. Like the detailed photos.
- 360 replies
-
- 1
-
-
- Flying Fish
- Model Shipways
- (and 1 more)


.jpg.ae6301fdf430a82777e05231347f3c8c.jpg)
.jpg.145c1c36b2b196b864db00e77afb88b1.jpg)
.jpg.f5eff1e0ef9cfee5f3dc4daddf31dc16.jpg)
.jpg.d39a9d892be7aa81a58222386676cafd.jpg)
.jpg.e4c1b6c43934160c7d7ce4f53e162294.jpg)


.jpg.9953f9133a4e08ee1dfd3bc93cfab128.jpg)
SmartPhoto.jpg.36c8efc624266144c9ae1d52c29e5a79.jpg)
SmartPhoto.jpg.7b3d79e071ee047b579b3334d5f173ac.jpg)
.jpg.e9155792f30472b2be9a5b9dc9e0dd7e.jpg)