HOLIDAY DONATION DRIVE - SUPPORT MSW - DO YOUR PART TO KEEP THIS GREAT FORUM GOING! (Only 20 donations so far - C'mon guys!)
×


Jared
-
Posts
305 -
Joined
-
Last visited
Content Type
Profiles
Forums
Gallery
Events
Everything posted by Jared
-
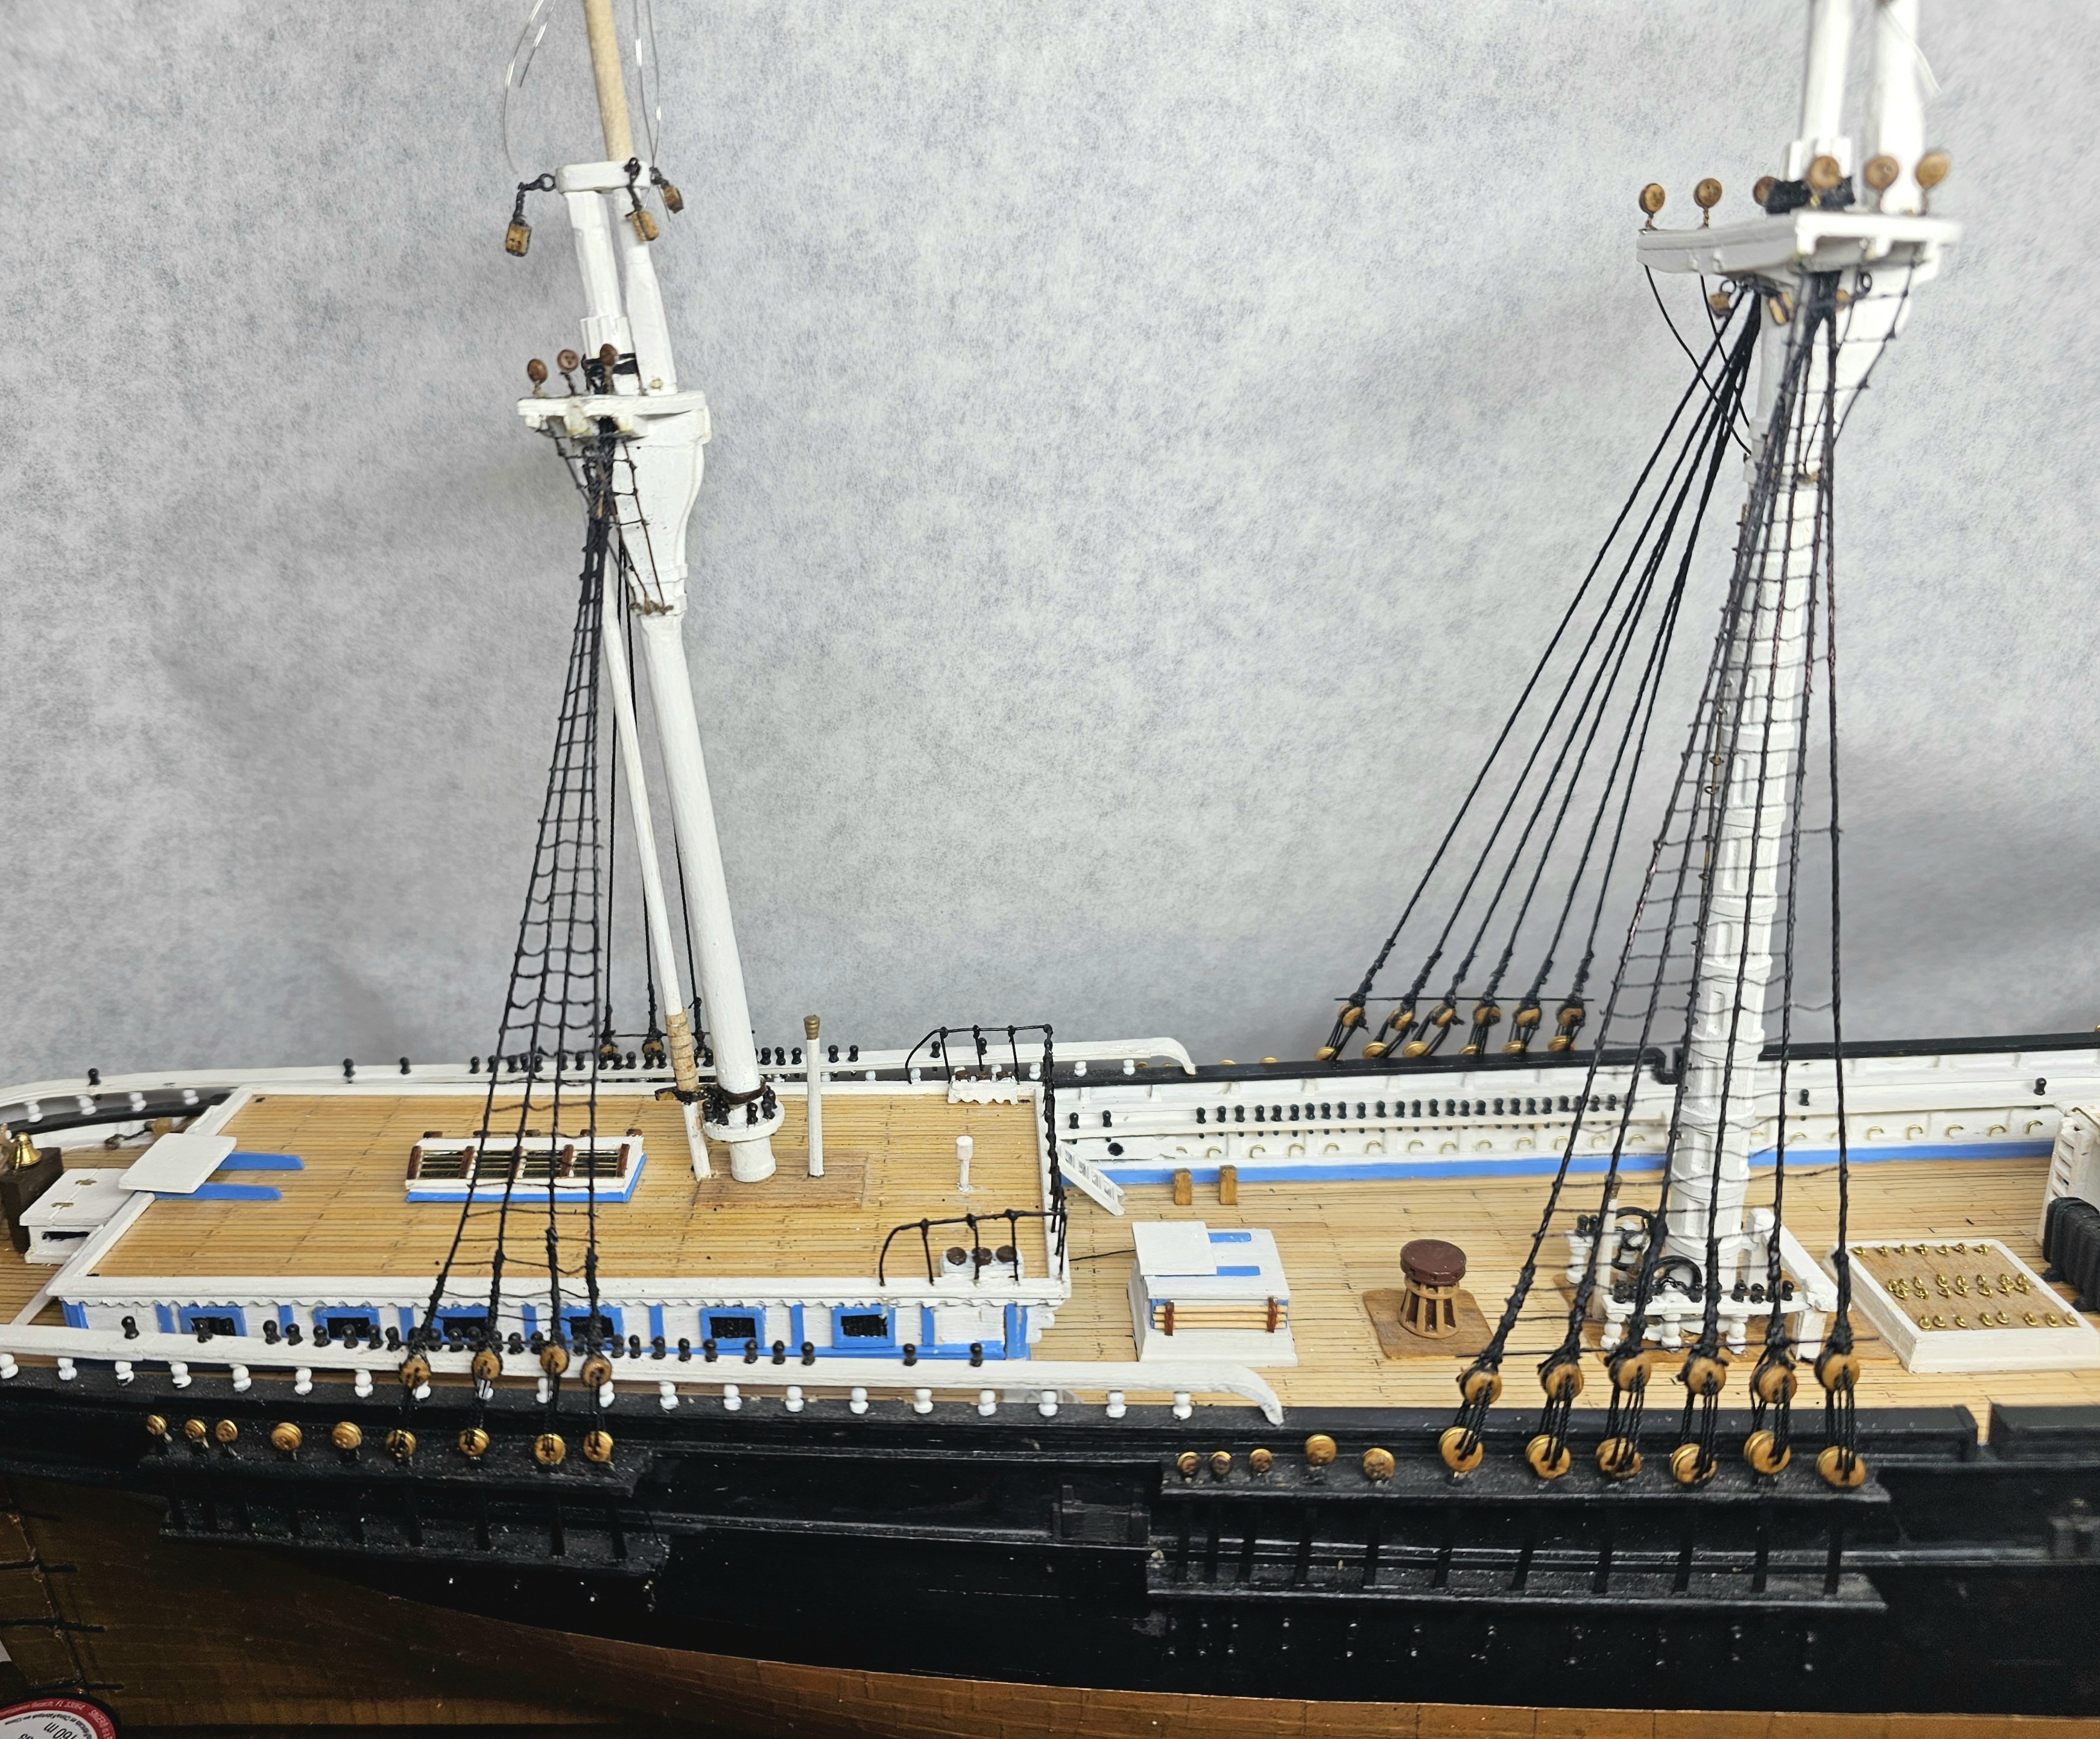
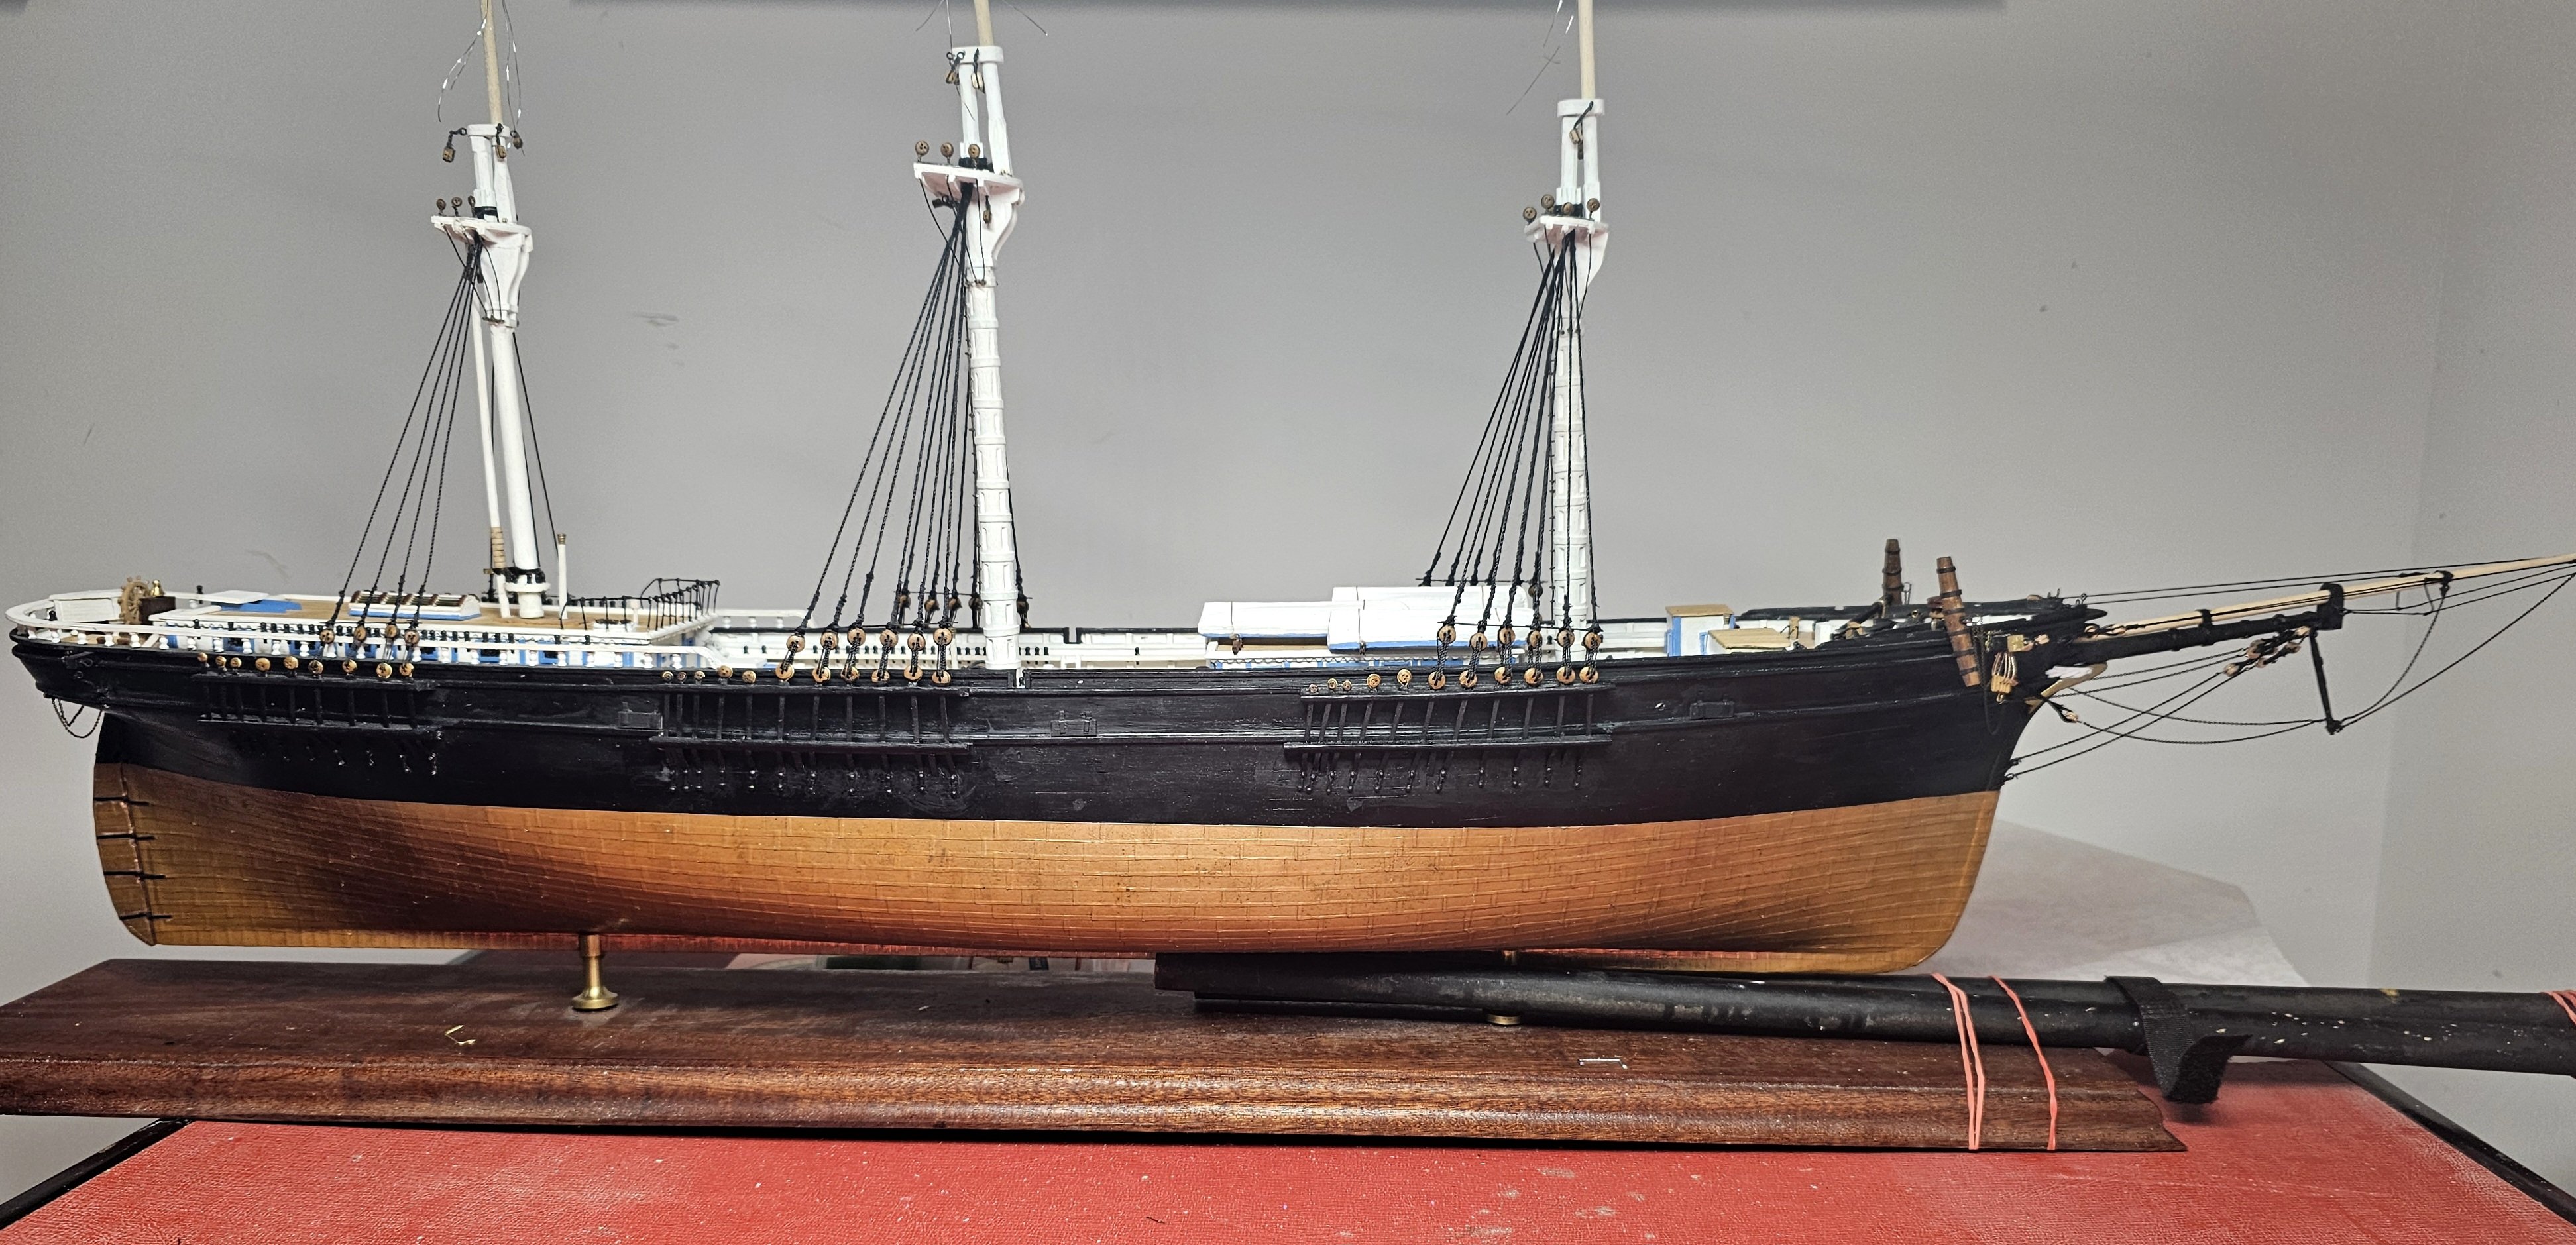
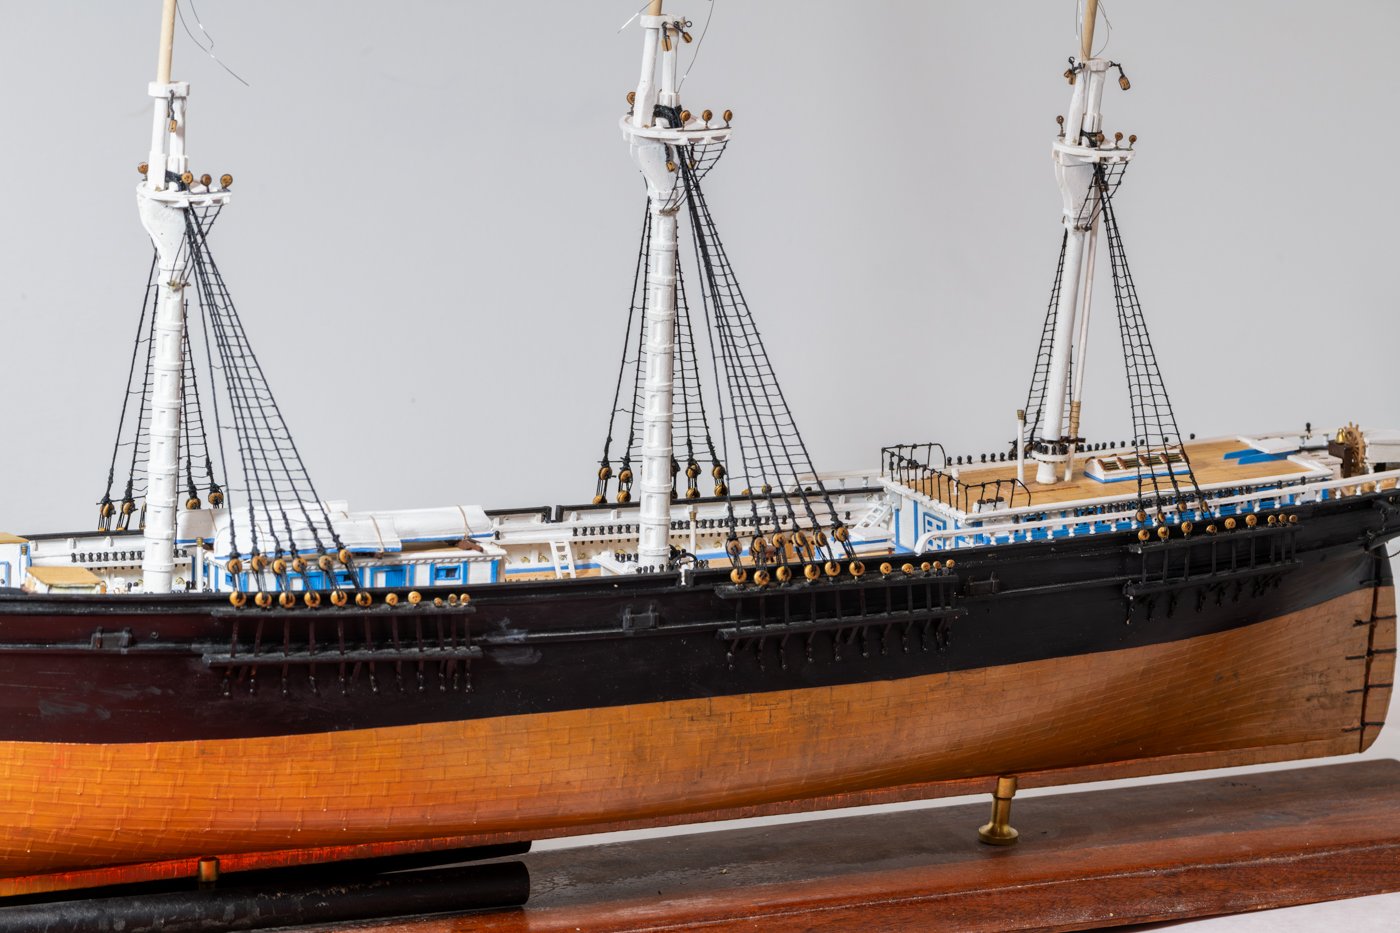
Have completed the lower yards on the forecast and mainmast, and temporarily mounted them on the model. Its finally starting to look like a tall ship. Correction: The eyebolts I inserted at the ends of the lower fore and main masts are wring and have been removed. They are meant to go on the ends of the topsail yards only, to secure the Flemish horse footropes see fig. 88 in kit's manual). Foot ropes not added yet.
- 431 replies
-
- 4
-

-
- Flying Fish
- Model Shipways
- (and 2 more)
-
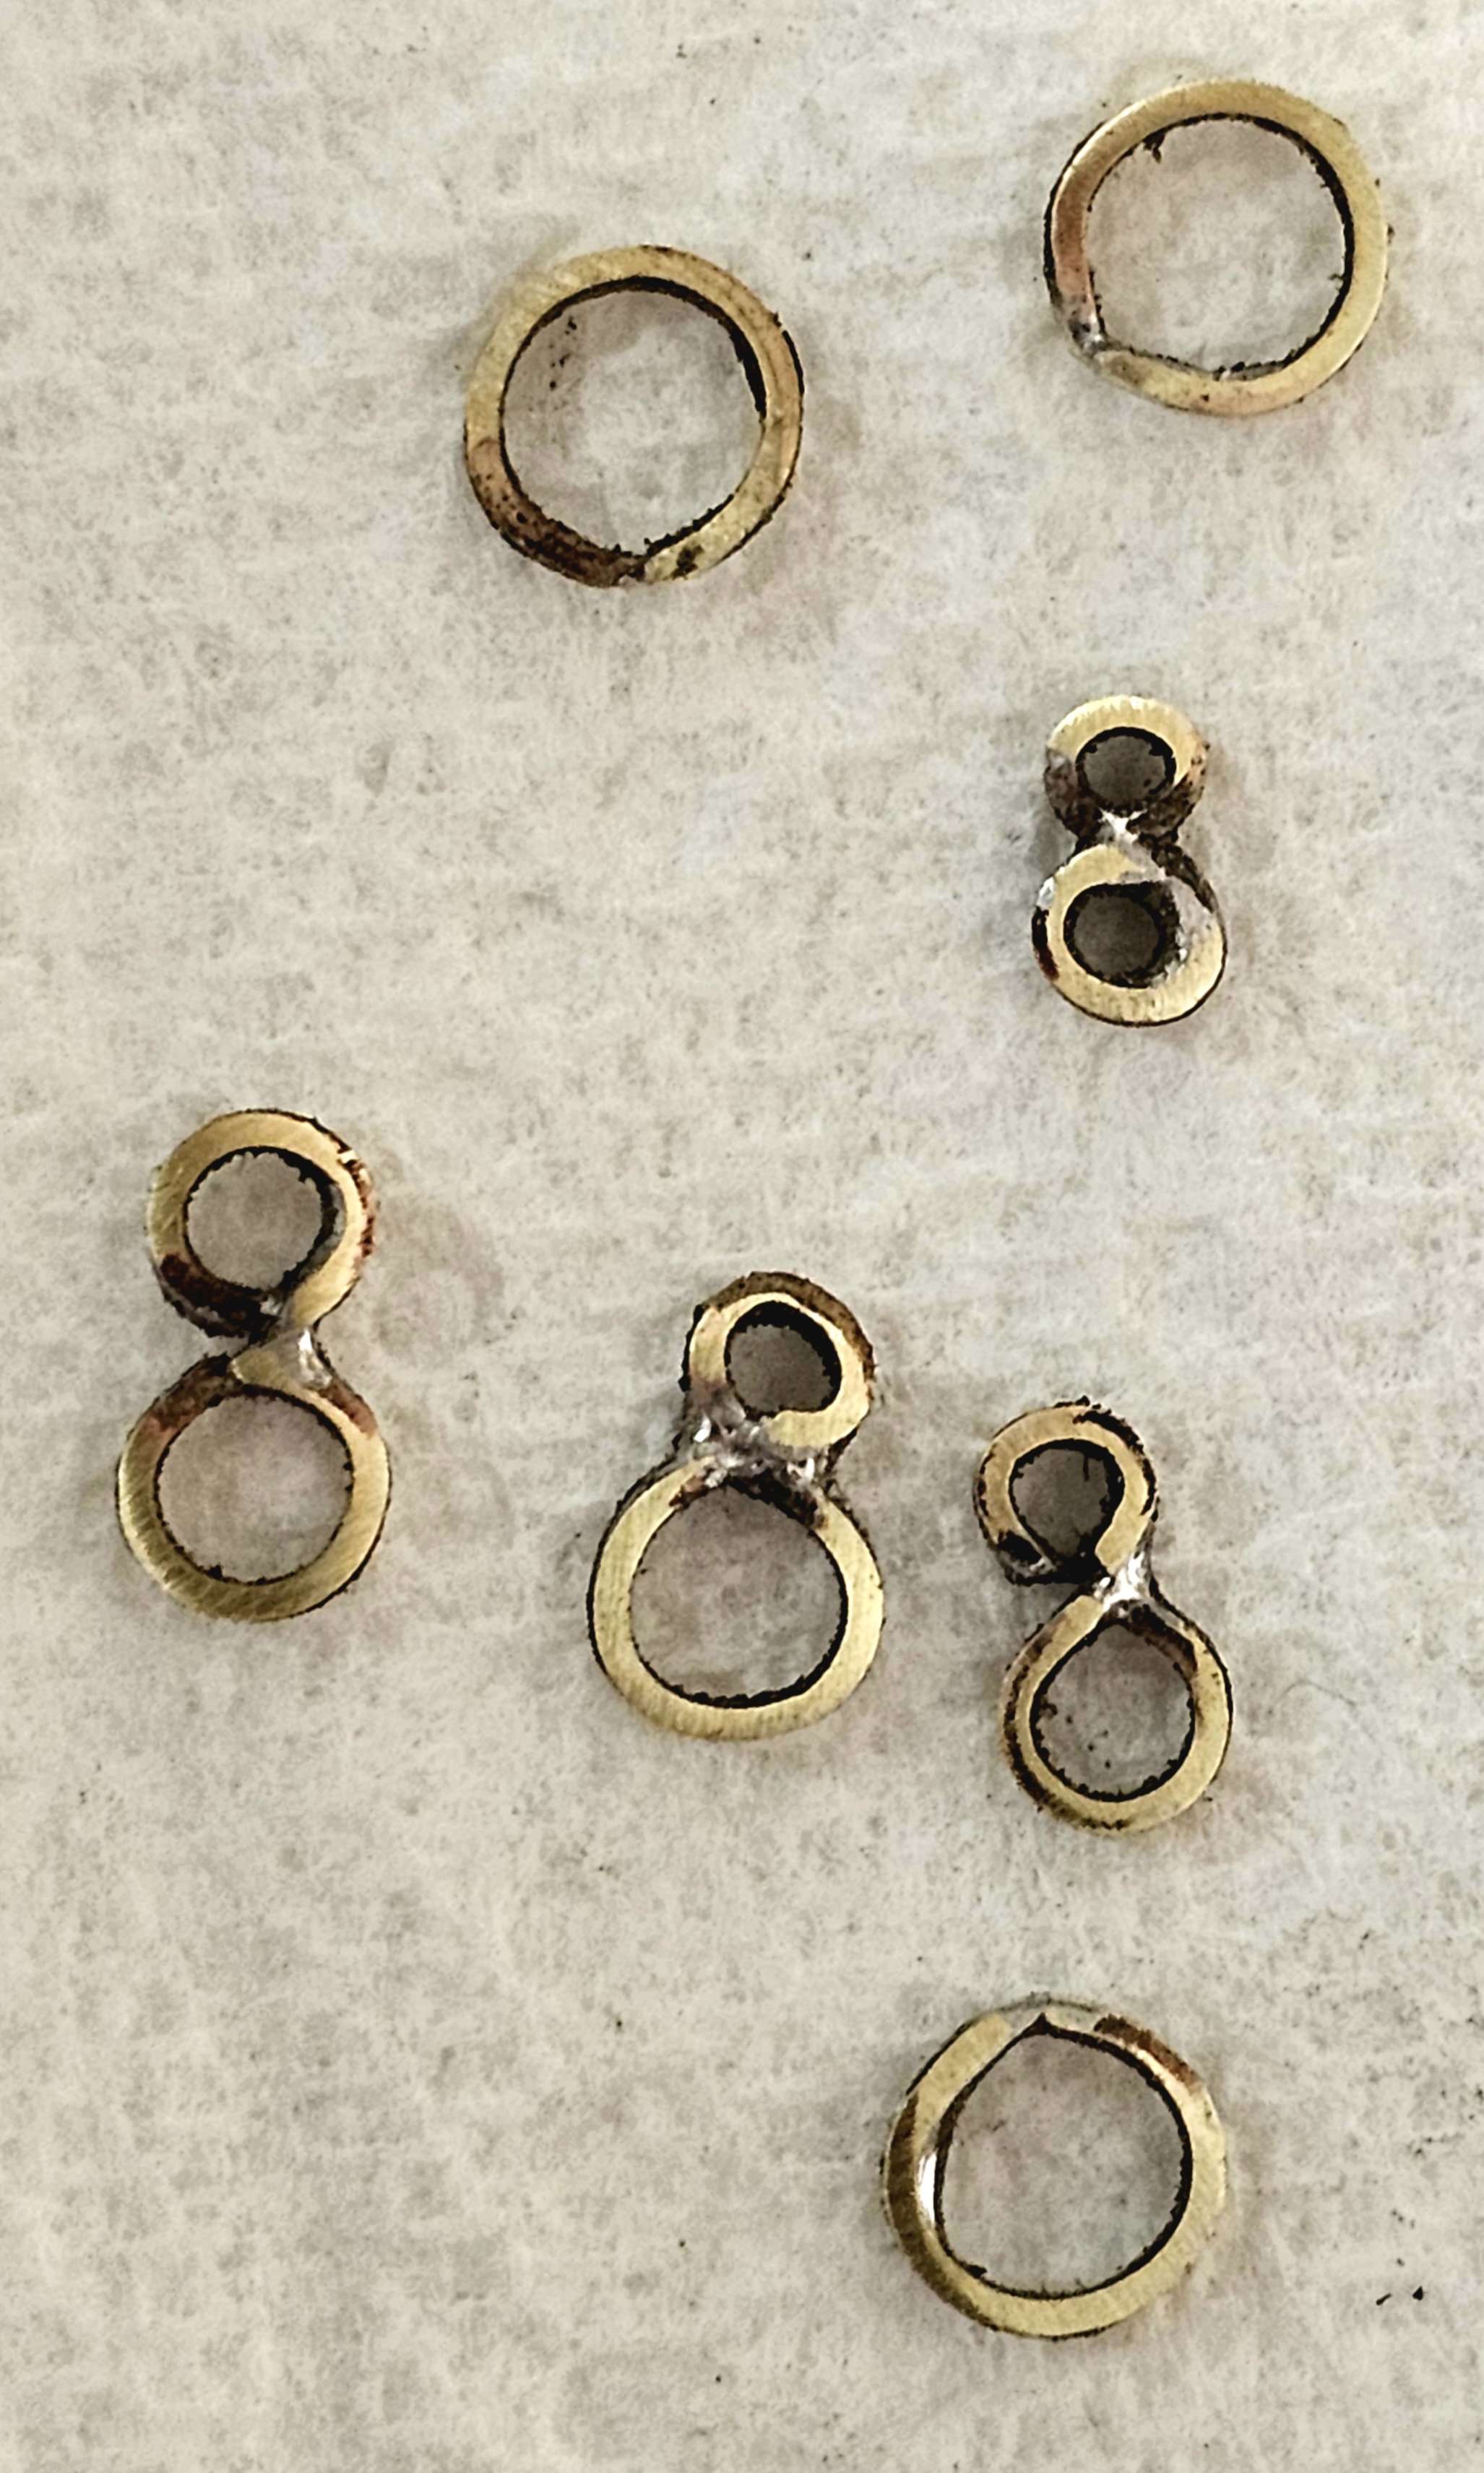
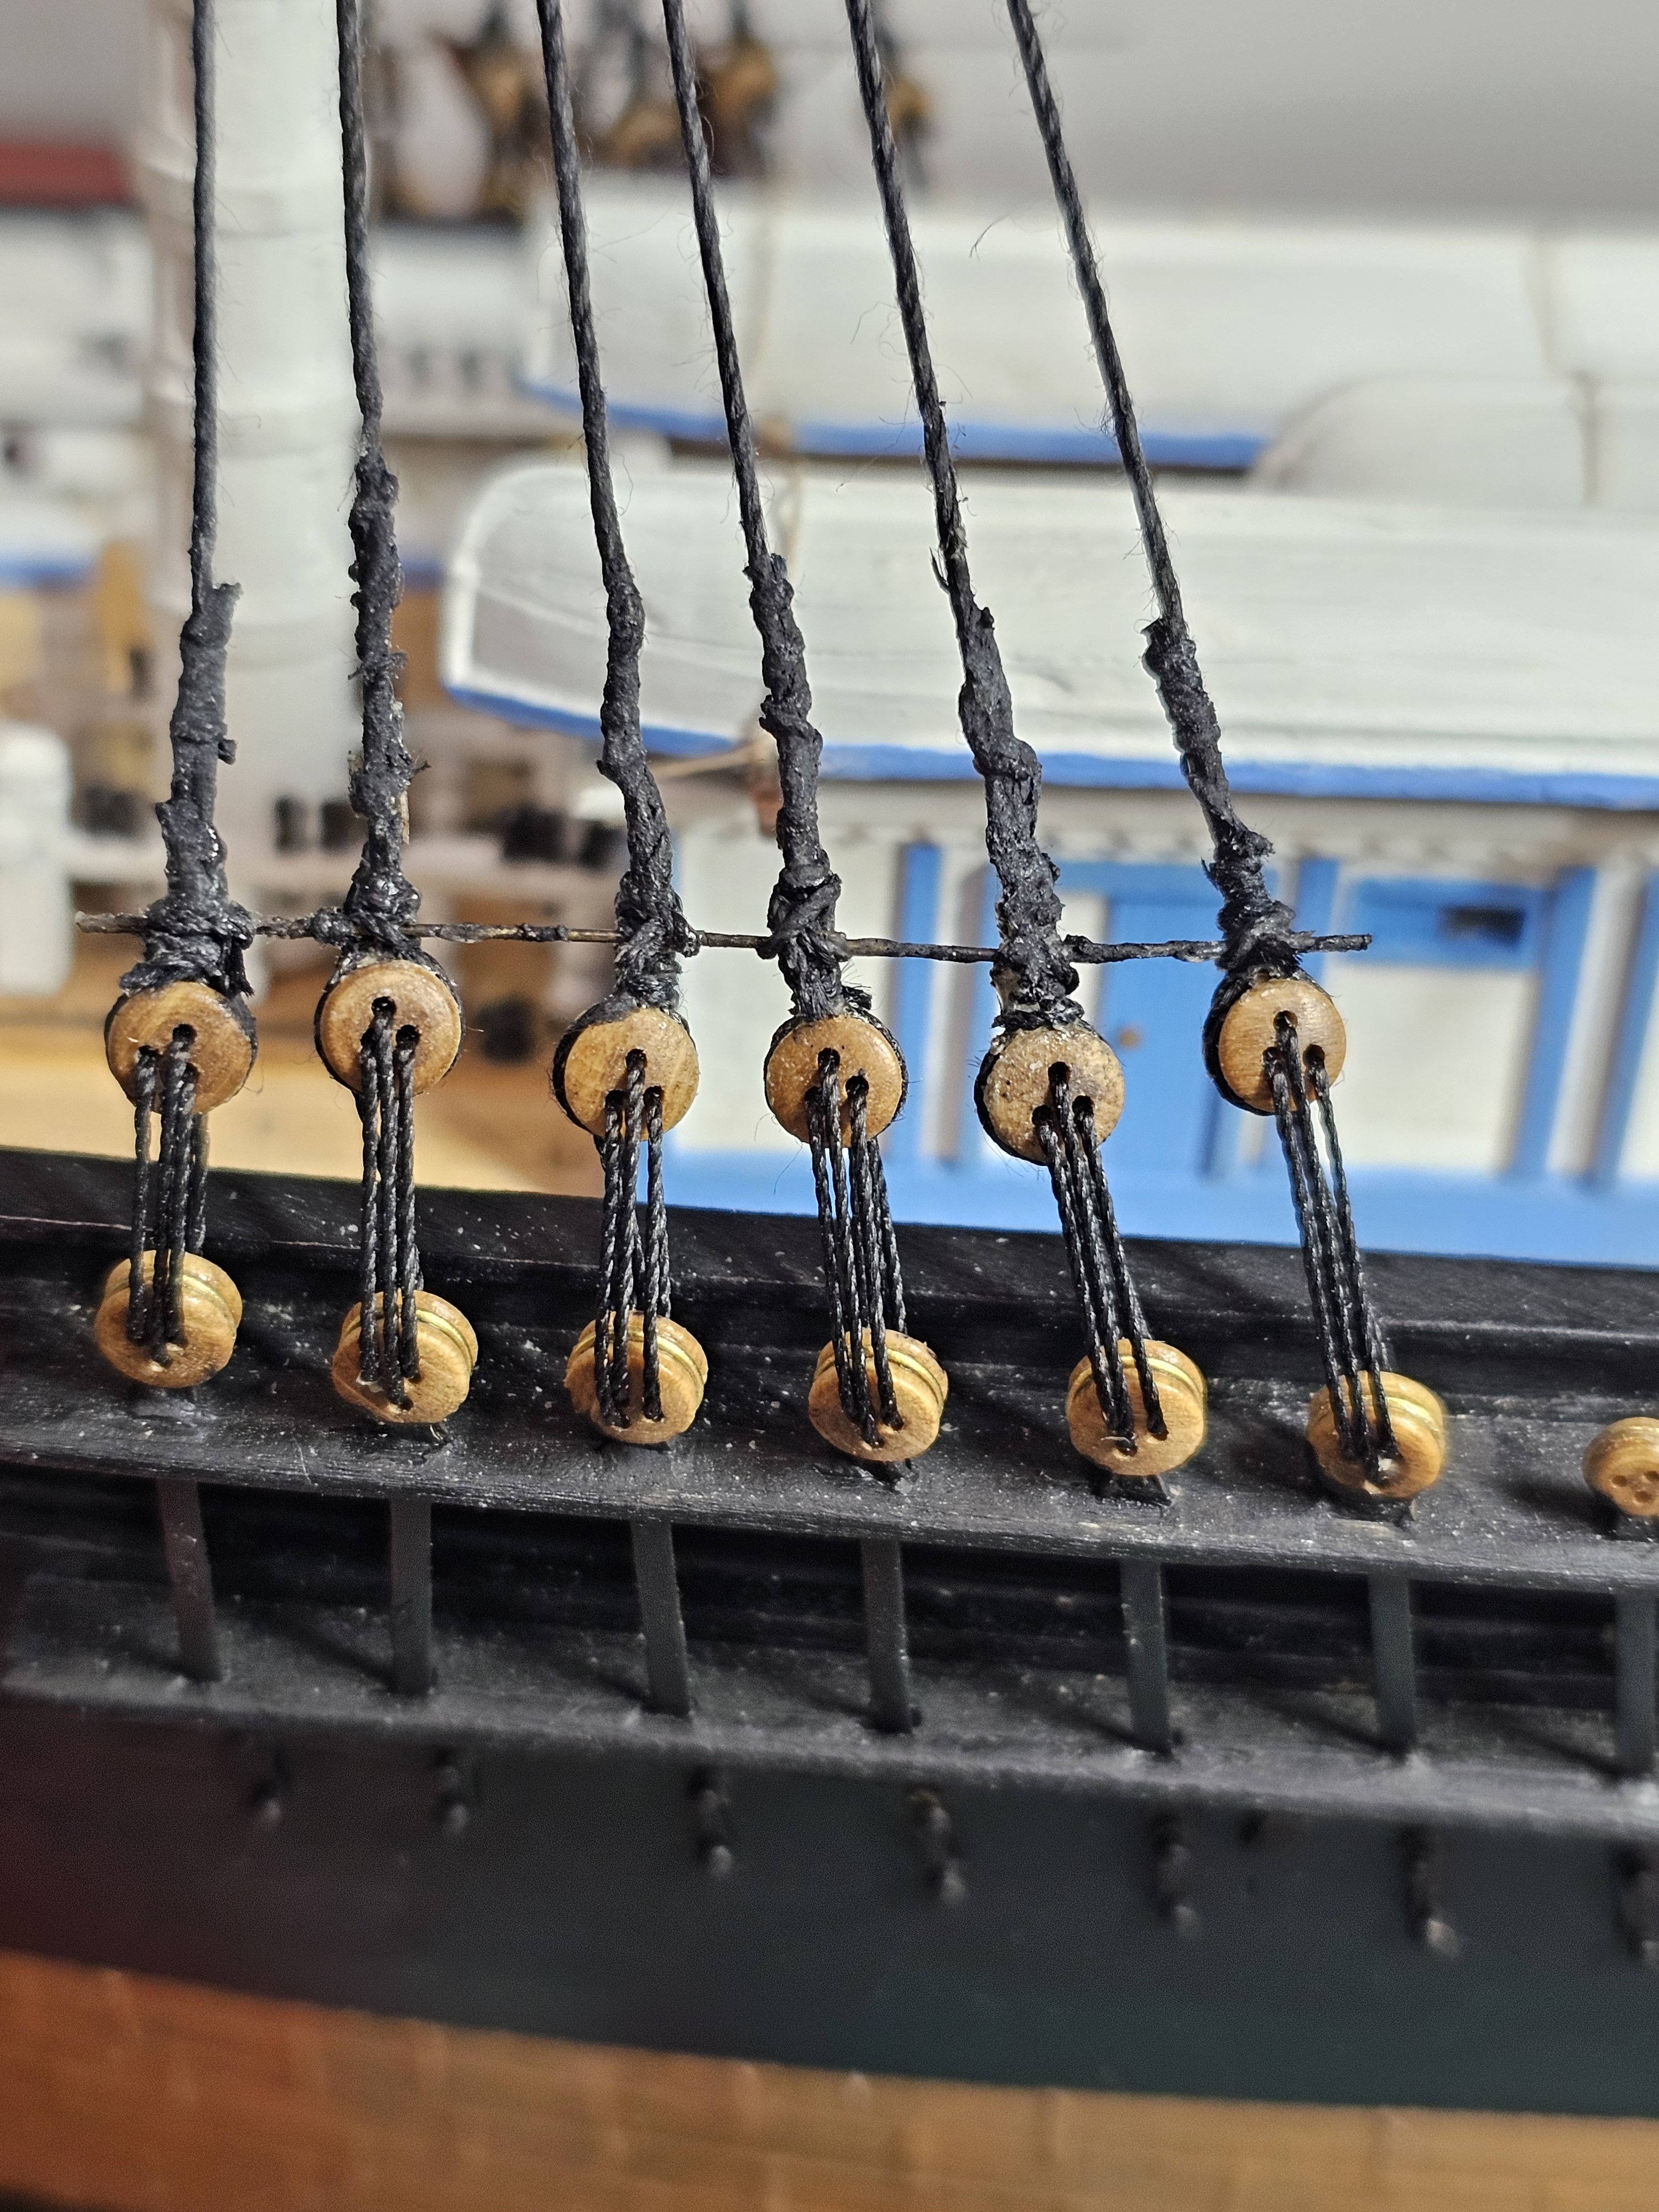
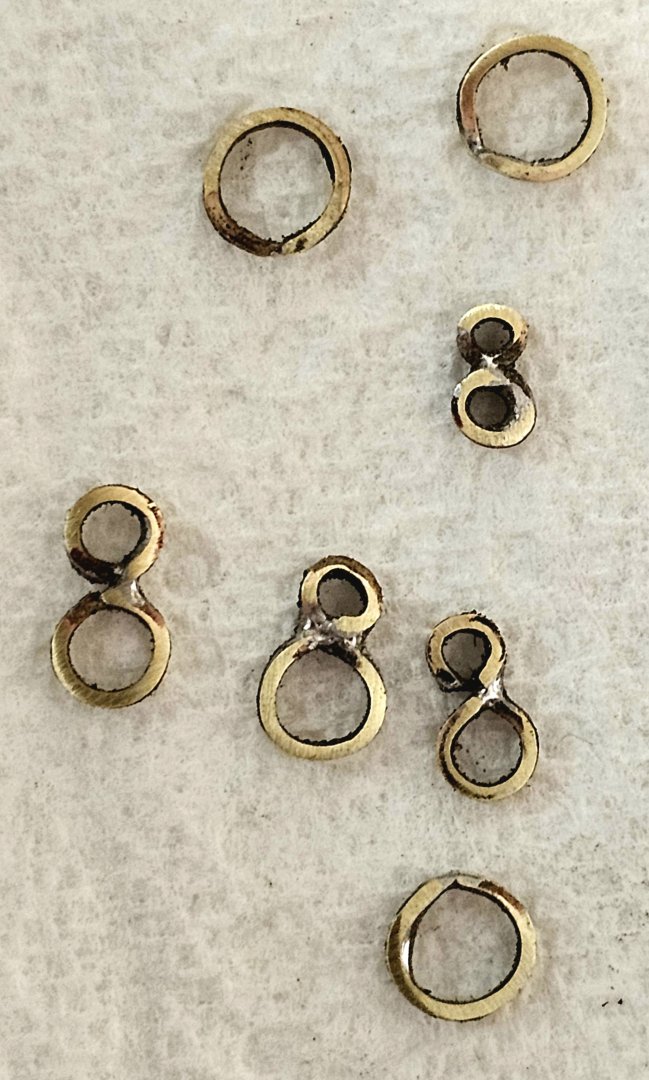
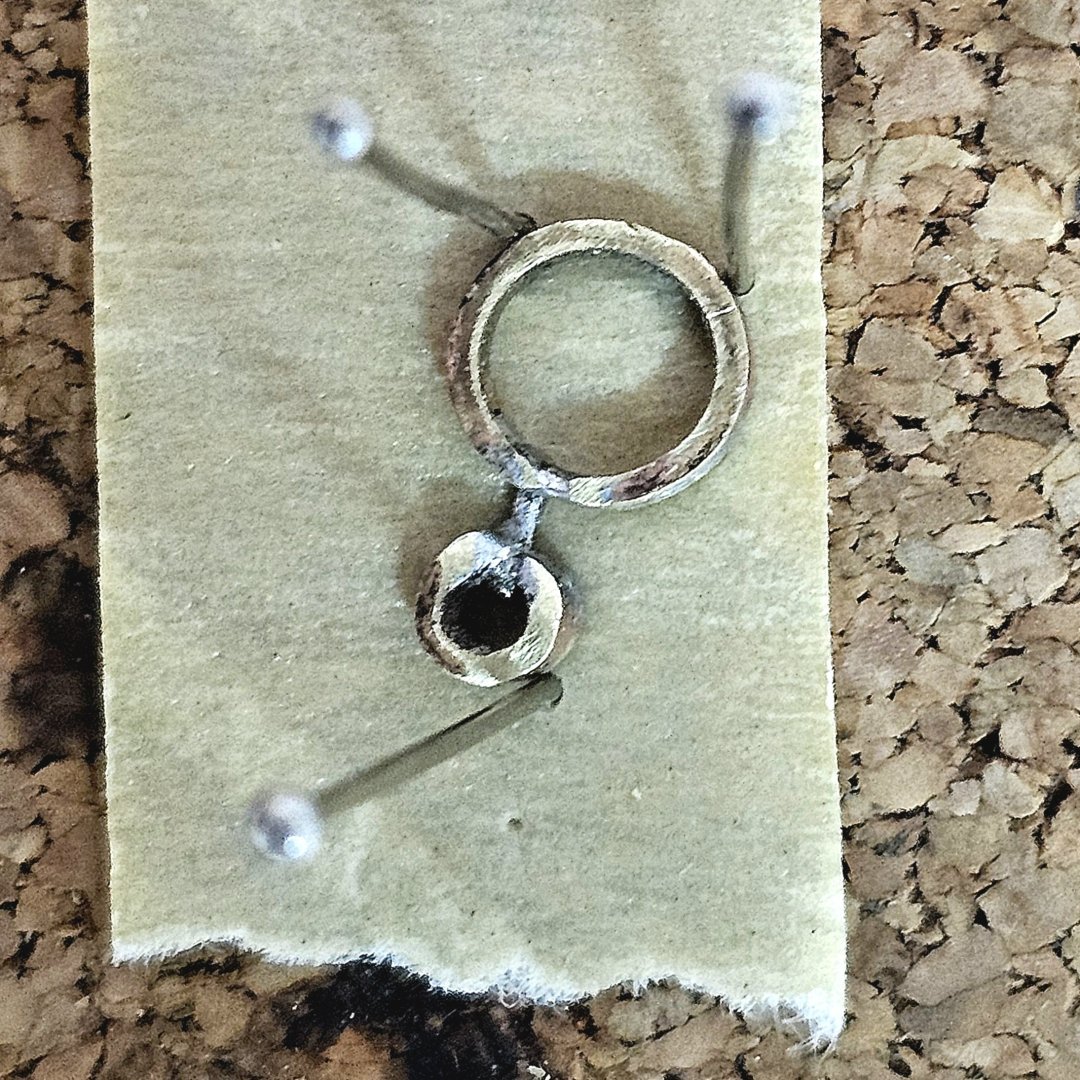
For the remaining stunsail bearling yards I decided to greatly simplify the construction of the stunsil irons. The way I did it in #189 above was a real pain because of the small brass wire between the 2 rings. It is much easier to solder the 2 rings together and not add the pin (see photo). The weld is much stronger and, at this scale, basically looks the same.
- 431 replies
-
- 4
-
-
- Flying Fish
- Model Shipways
- (and 2 more)
-
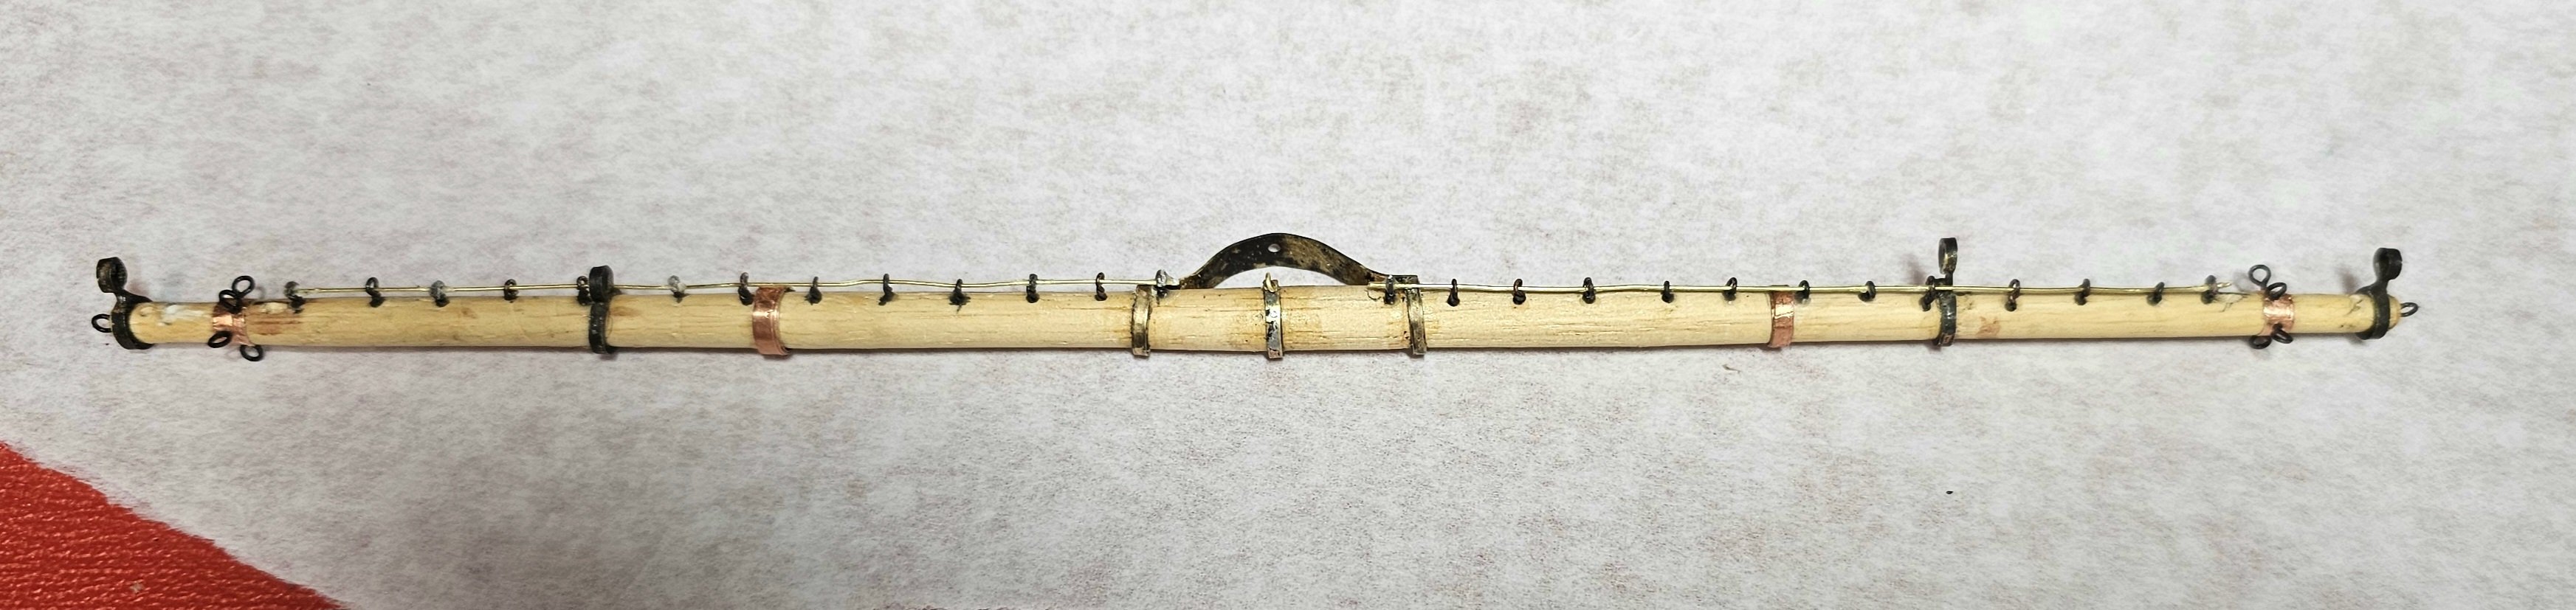
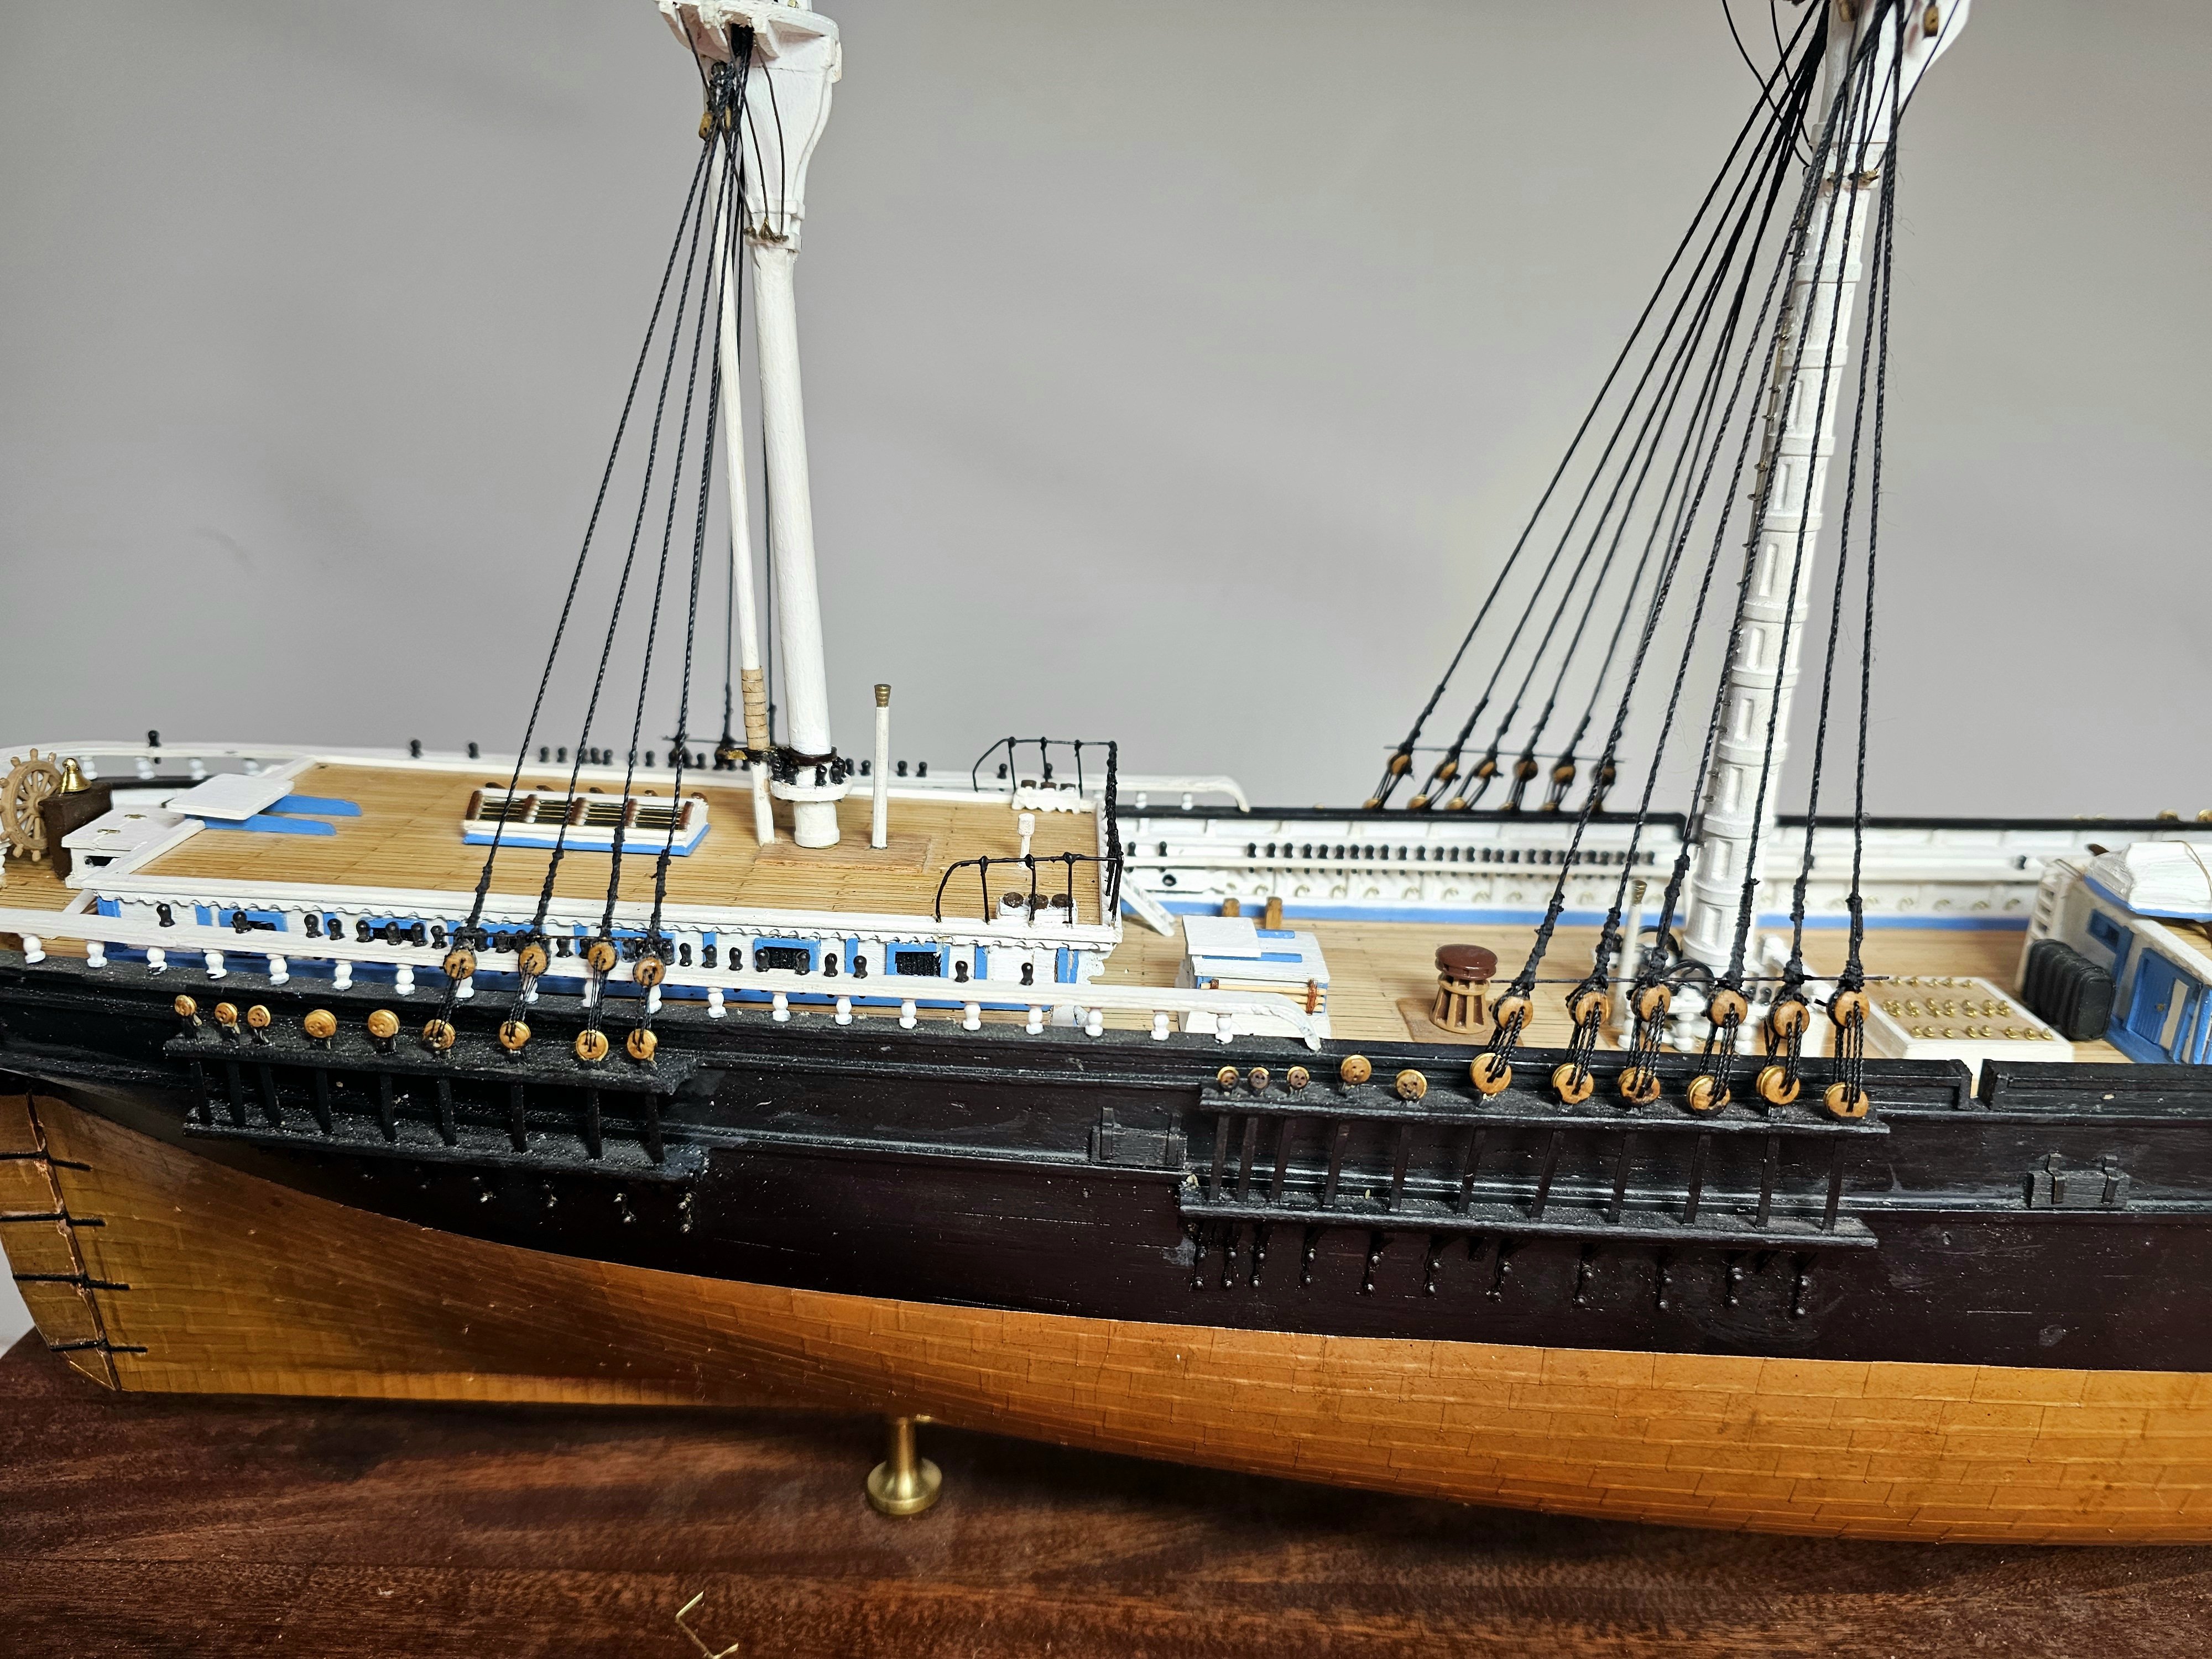
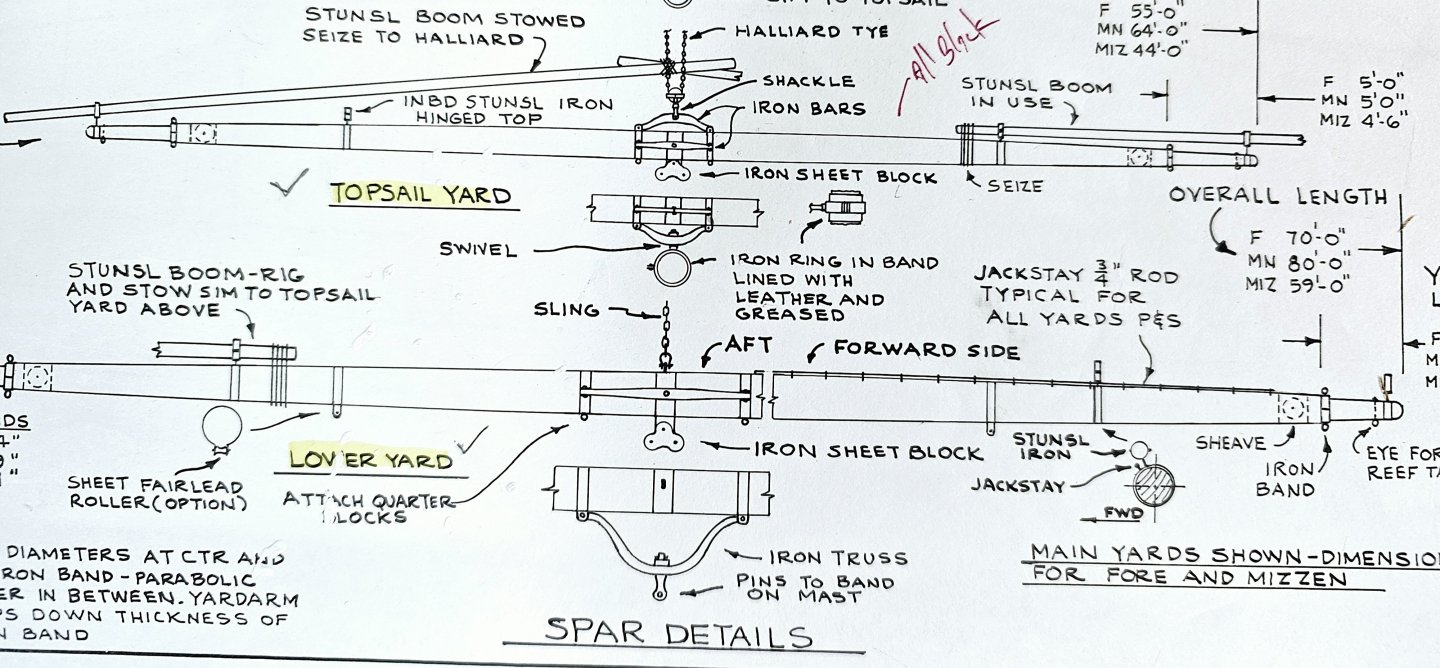
I have completed the lower yard fittings. After doing the jackstays' I now realize I could have been an orthodontist! All that remains now before mounting the yard is to add the footnotes, make the pin for the truss and painting everything black.

- 431 replies
-
- 2
-
-
- Flying Fish
- Model Shipways
- (and 2 more)
-
Made some interesting progress over the last 2 days. One of my biggest concerns with this model was having to construct the required iron fittings on the masts, in particular the lower yard truss and the stunsail irons. I don't have a lot of experience working with brass or soldering very small parts. Happily I can report that these parts were much easier to build than what I expected. The attached photos show the results so far. I basically constructed everything using brass strips, brass rod and brass sheet, more or less following the drawings in the kit. I can provide more detail if wanted.

- 431 replies
-
- 4
-
-
- Flying Fish
- Model Shipways
- (and 2 more)
-
Thanks George. I think it is quite complex as I looks from fig. 104 in the instruction book that the bottom of the stunsail sails were attached to the stunsail boom which extends or retracts as I described earlier, while the top of the stunsail sail attaches to a stunsail boom that is hauled up be a halliard. I am planning to install the stunsail booms only, in the retracted position.
- 431 replies
-
- 1
-
-
- Flying Fish
- Model Shipways
- (and 2 more)
-
I wanted to show better quality images of the ratlines than the phone images I posted 2 days ago. Shot with a Nikon D850 on a tripod. The second image was focus stacked from about 30 images to show everything in sharp focus.

- 431 replies
-
- 5
-
-
- Flying Fish
- Model Shipways
- (and 2 more)
-
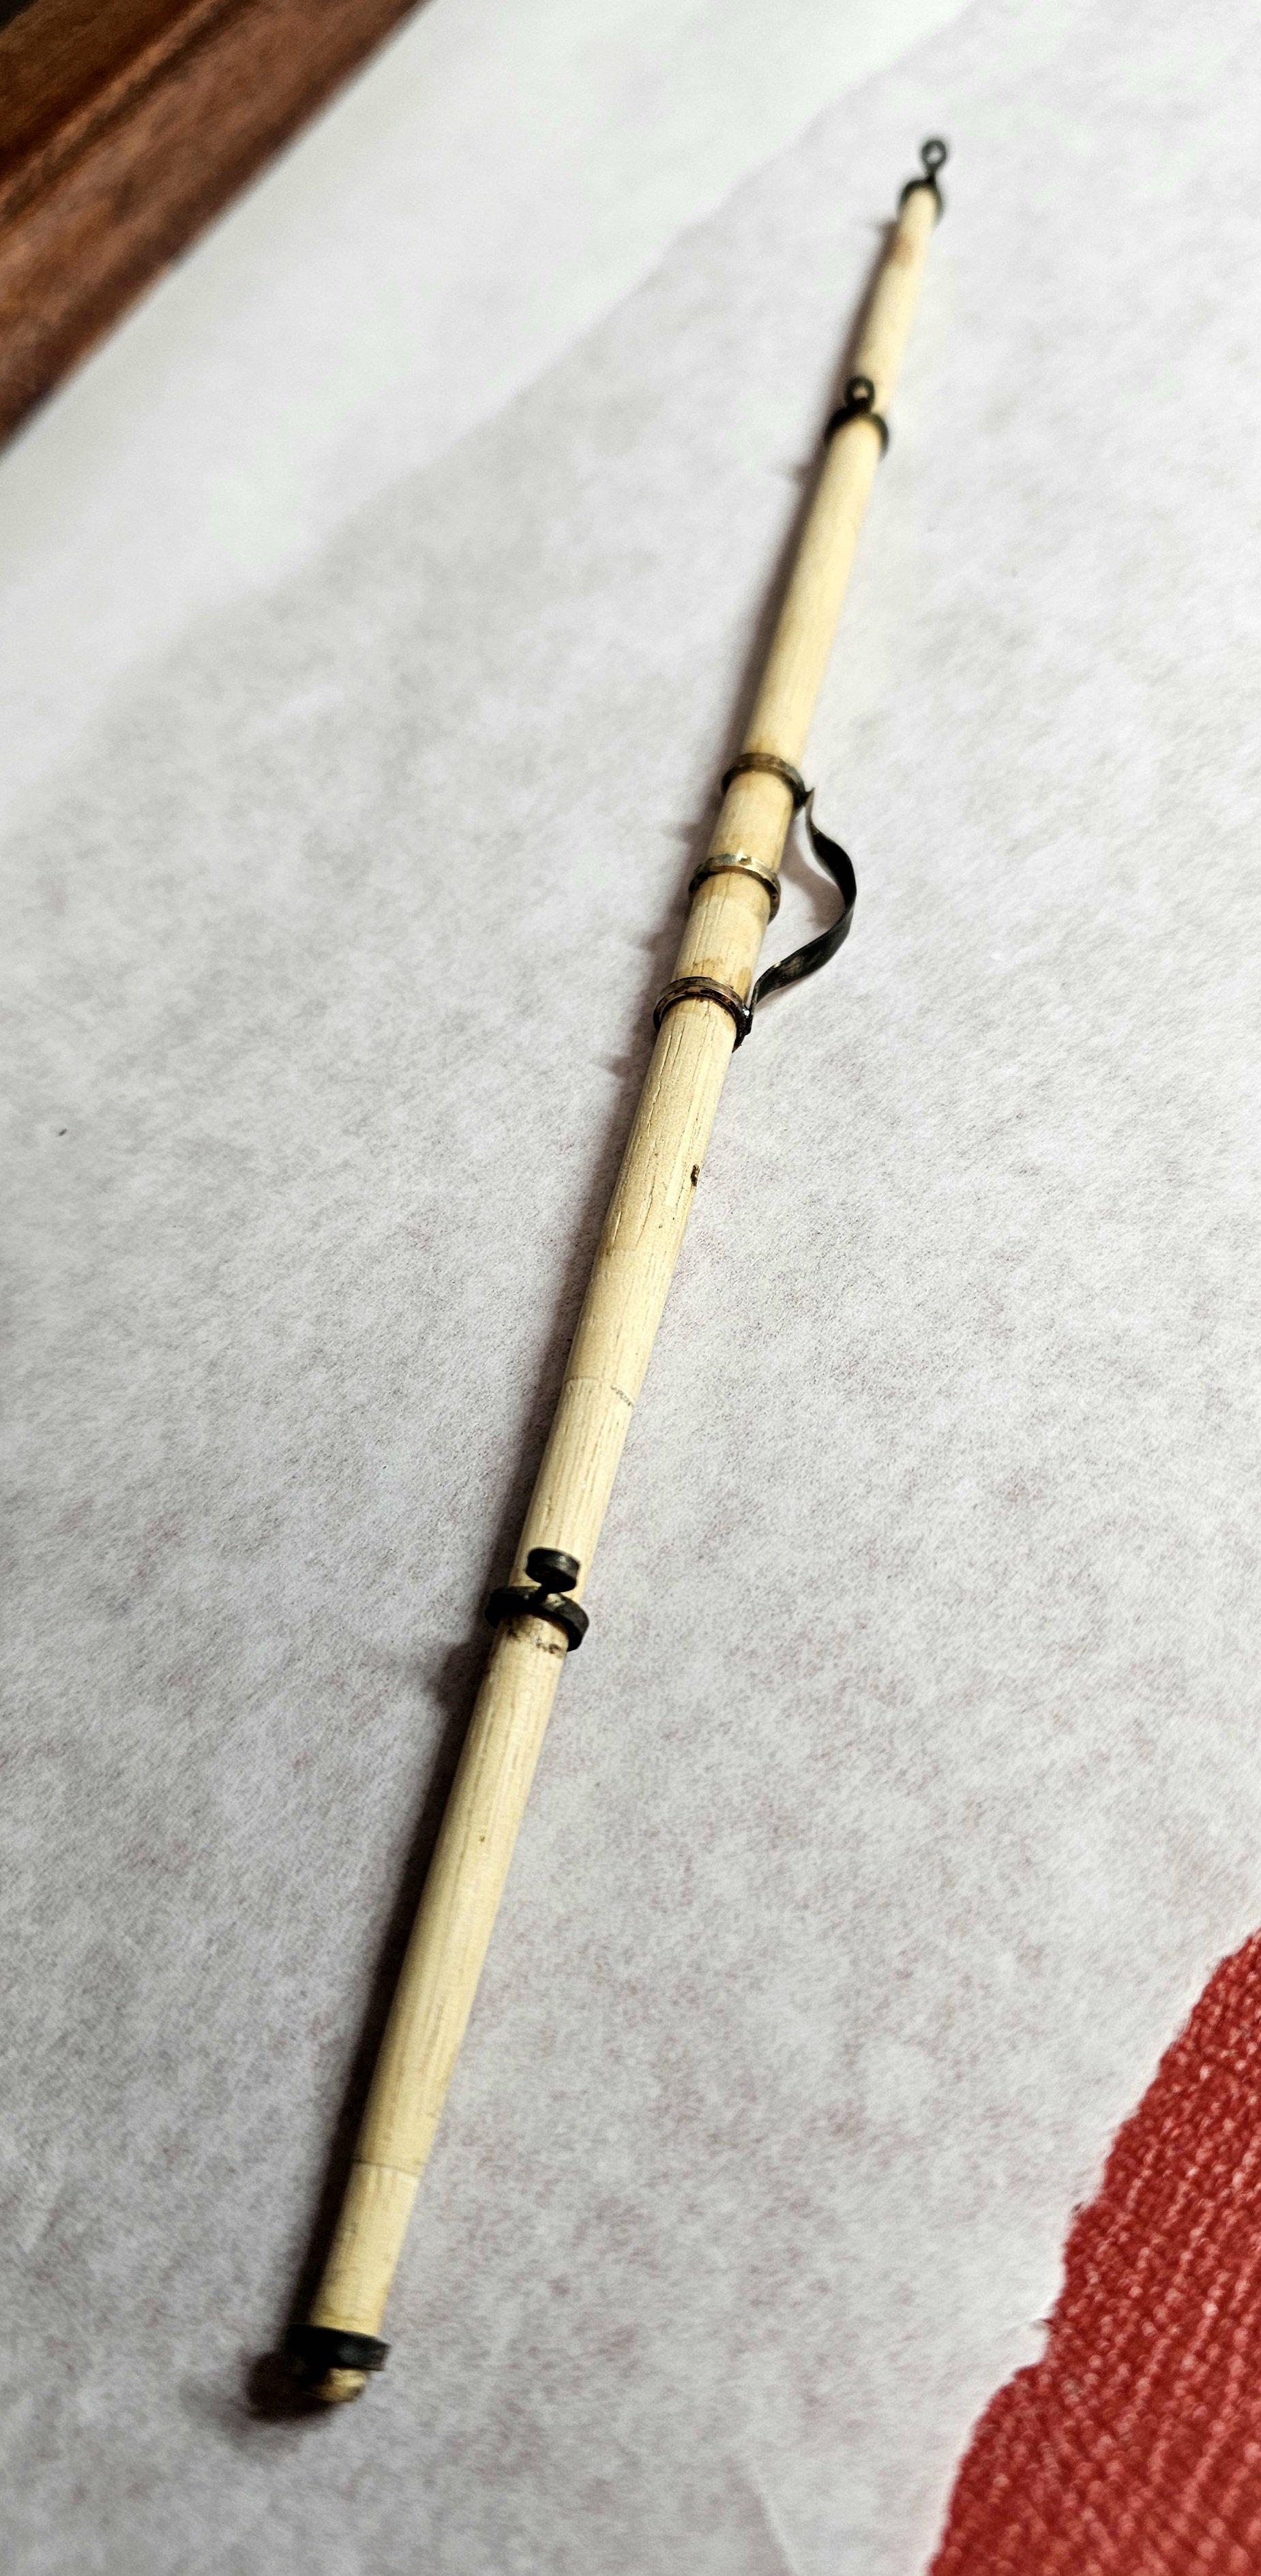
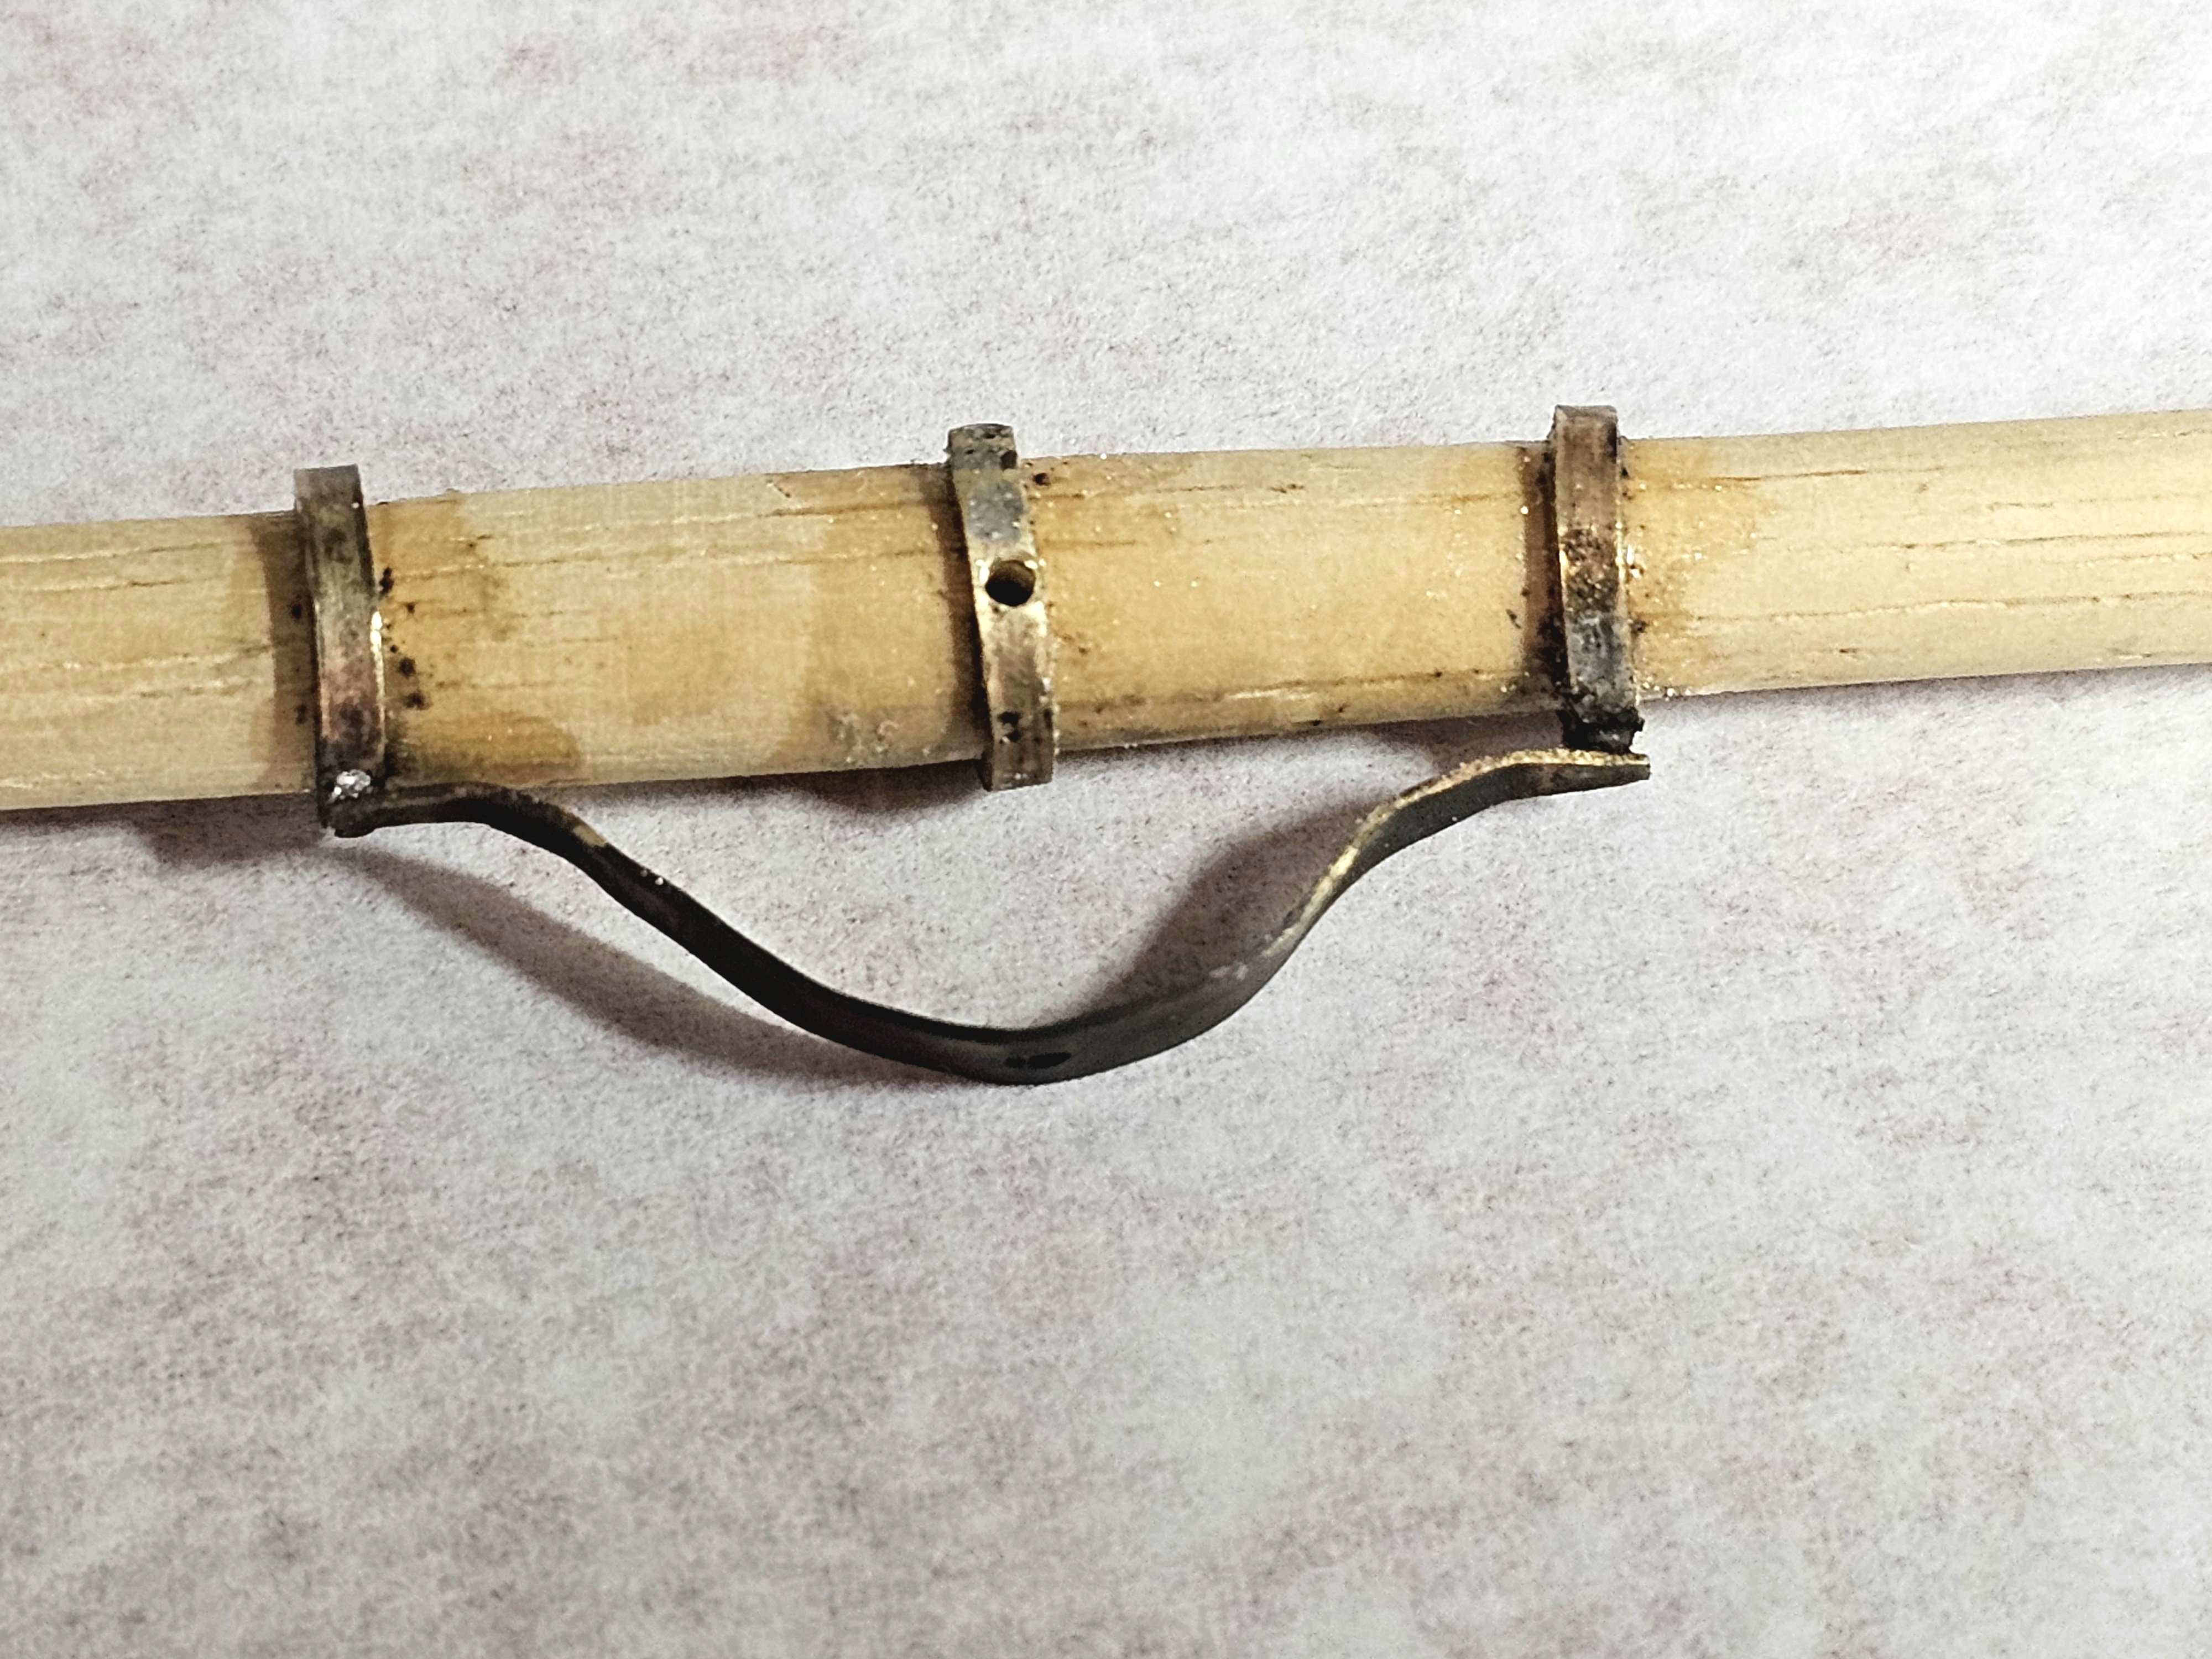
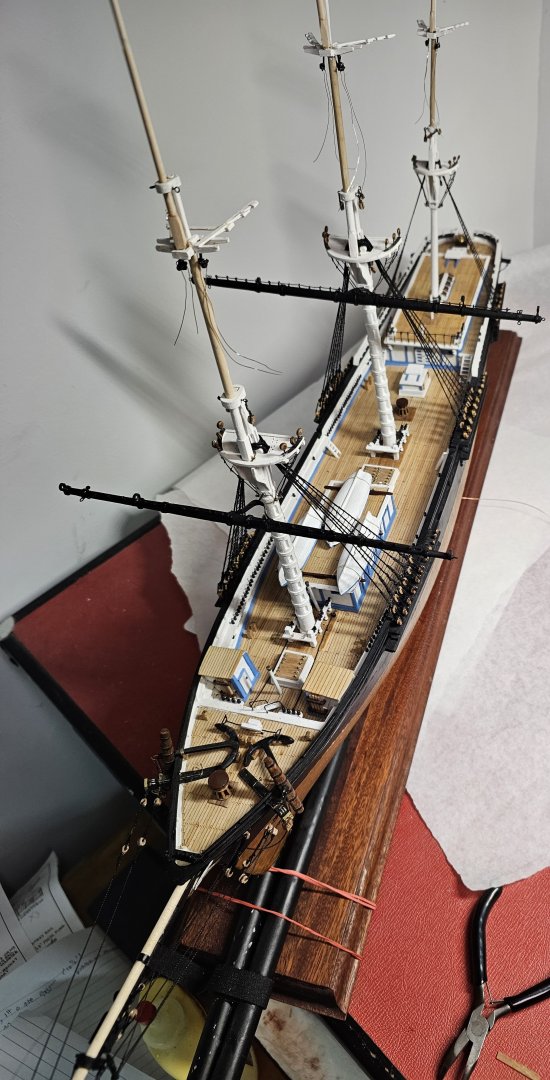
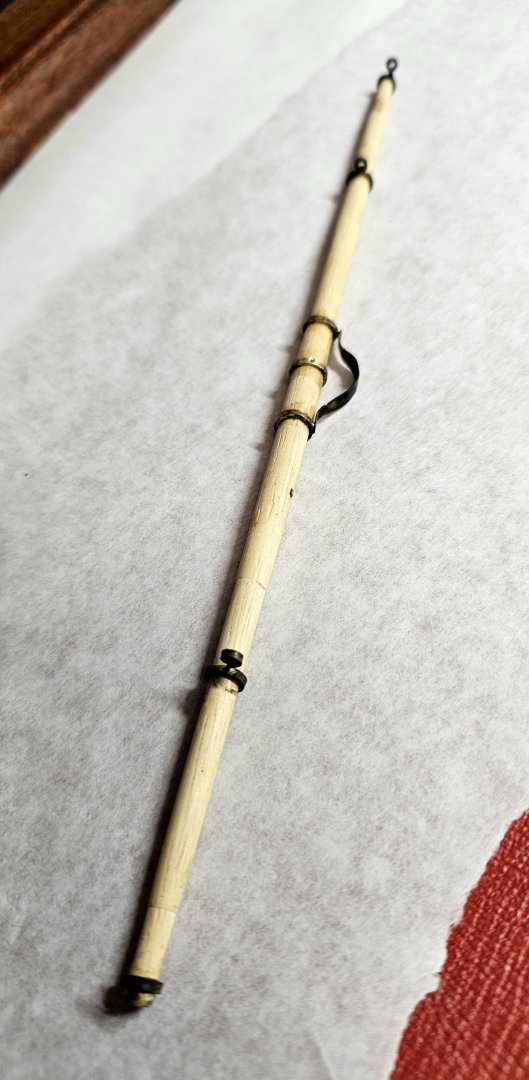
While most of my yards have been turned on a mini lathe I have not started to add the various fittings to them yet. I am going to start this now to as I continue with the standing rigging. Looking ahead at the yard plans (see attached photo) I have a question about the operation of the Stunsail yards. The photo show their stowage position on the top left and their extended position on the top right for when in use. My question is how these yards were moved from the stowage to extended positions and vice versa. Were they moved by rigging or by the more basic "arm strong" method? Thanks.
-
Thanks for your encouraging feedback. I have no shortage of camera gear and really should be using it as I did earlier in this log (see page 1).
-
Made good progress over the last 3 days and completed all the lower ratlines on the port side. One of the best things I found with the sewing method was how easy it can be used to fix (replace) individual rungs that don't quite look right. I have noticed wide angle distortion in some of my photos which gives the appearance of the masts and mast tops looking out of alignment with each other. Please ignore.
- 431 replies
-
- 4
-
-
- Flying Fish
- Model Shipways
- (and 2 more)
-
Have now completed the ratlines on lower main and mizzen masts on the starboard side. Really like the sewing method.

- 431 replies
-
- 4
-
-
- Flying Fish
- Model Shipways
- (and 2 more)
-
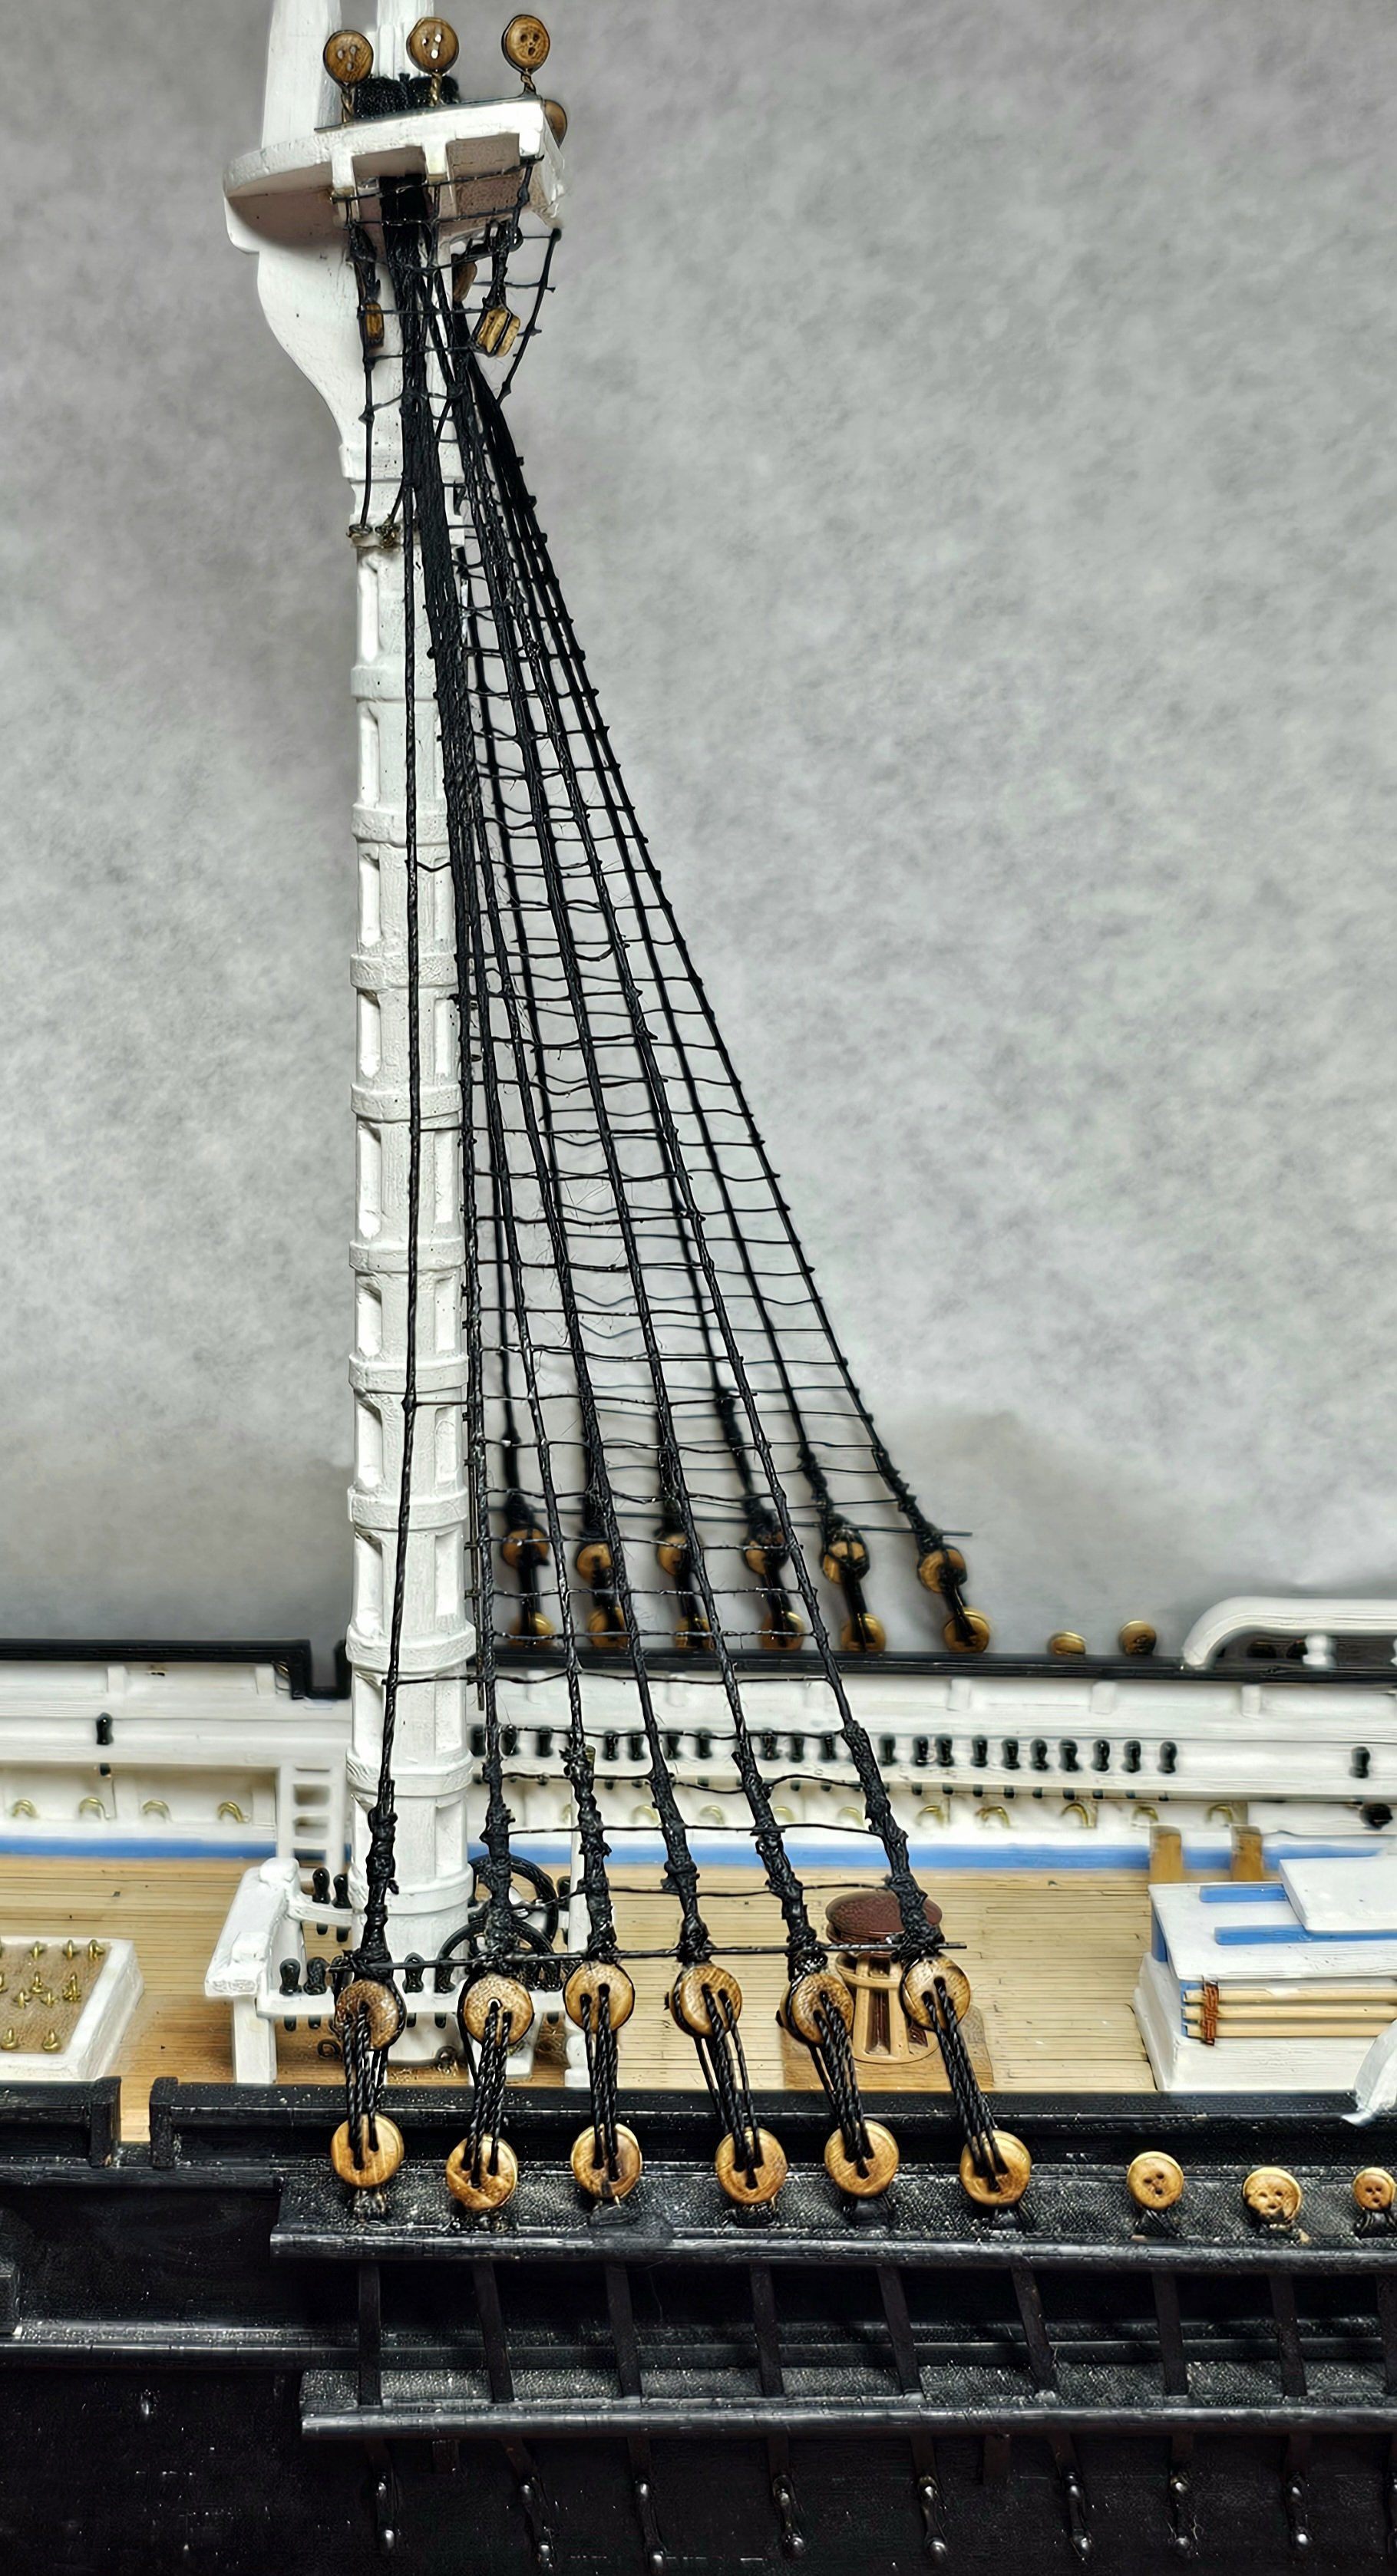
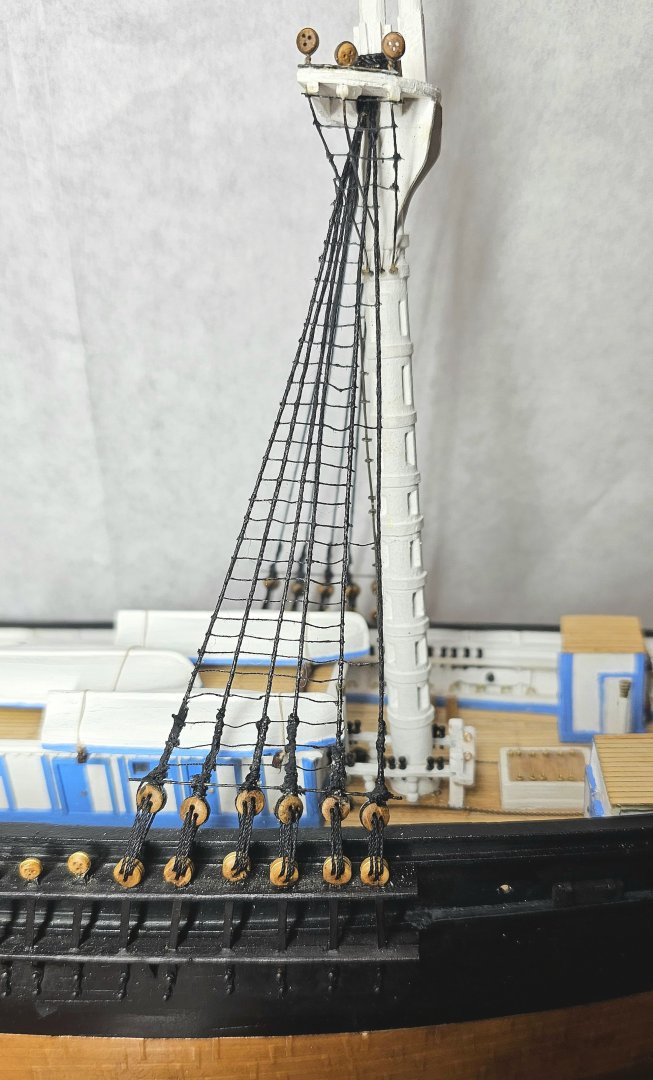
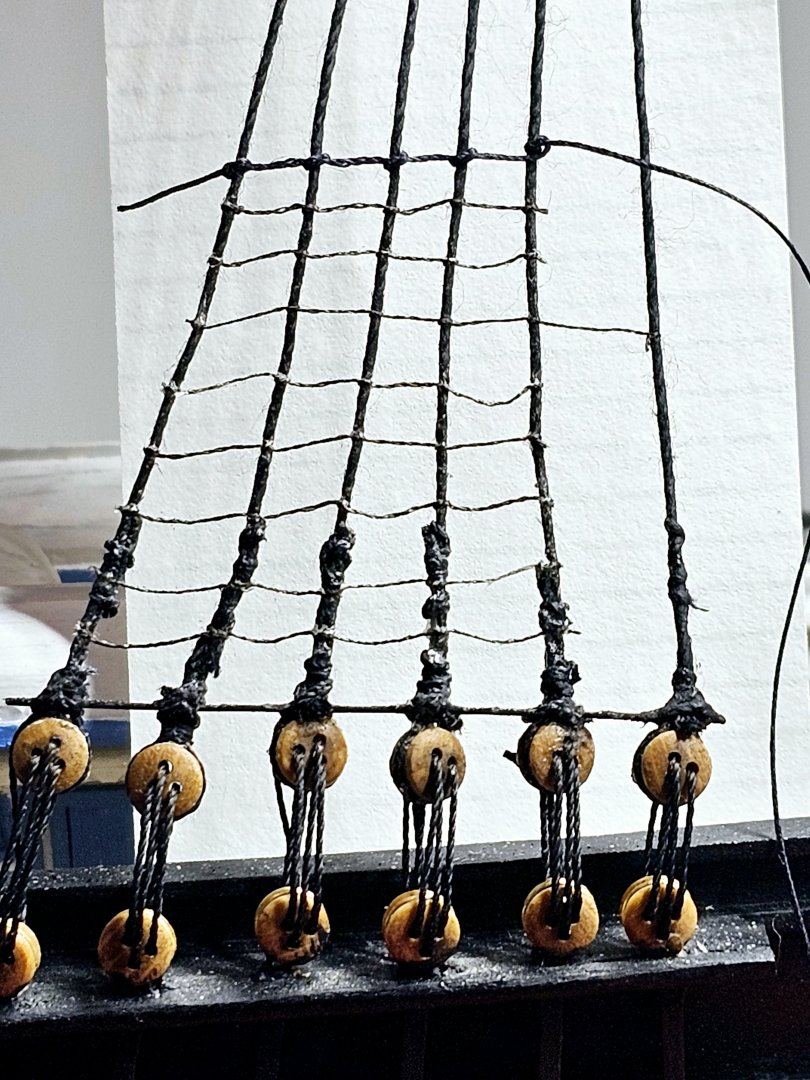
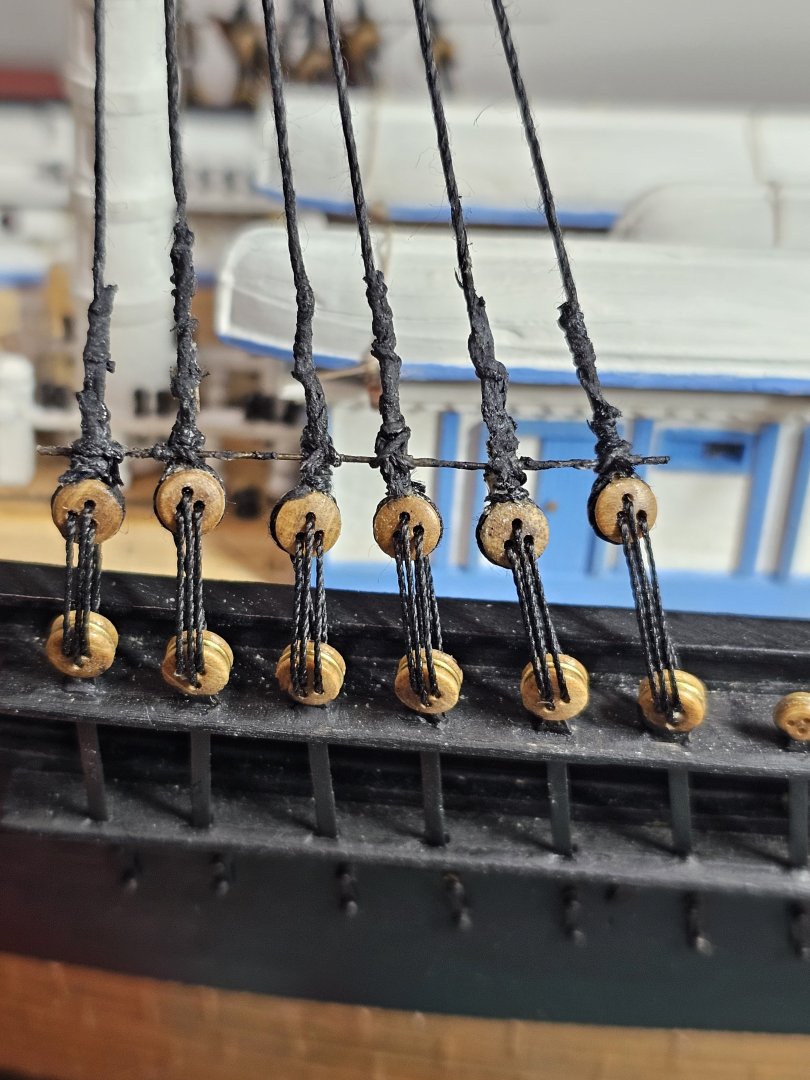
Thanks George and ClipperFan. I have just completed the ratlines on the lower forecast stbd. side. I decided to not worry about putting ratlines or not behind the futtock shrouds. The shrouds are all so close together there I don't think you would ever see them if they had been mounted. The finished assembly with 2 of the intermediate stages are shown in the 3 attached photos. I printed a pattern with 10.5 line spacing units in Excel and clamped different sized pieces to the back of the shrouds. Using the pattern it was easy to sew my way through the shrouds, maintaining a straight line. As described in George's blog (pg. 15 I think), every 6th ratline extended across all 6 shrouds, the others only crossed shrouds 2-6 (counting from fore to aft). I found it best to sew all the threads in place and not adjusting them for tightness until all we're in place. I used dilute white glue with a drop of detergent to fix all the ratlines in place. I then cut off the excess thread at the ends of each ratline. For the ratlines on the metal futtock shrouds I simple glued the thread across the shrouds. When dried in place I tied a small knot at each end then cut off the excess thread.

- 431 replies
-
- 3
-
-
- Flying Fish
- Model Shipways
- (and 2 more)
-
My preference would be to captain the ship so I wouldn't ever have to do any climbing 🤣
- 431 replies
-
- 1
-

-
- Flying Fish
- Model Shipways
- (and 2 more)
-
Thank you. It makes sense. It would be a rather tight squeeze I would think to climb up behind the futtock shrouds!
-
I started working again on my ratlines a couple of days ago, after a week of unscheduled rest due to an unplanned bout if covid. Fortunately it was mild. I am using the mercerized cotton thread that was recommended by George (much nicer to work with than the thread I had been using, all of which I removed from my model. I experimented with the sewing needle method Rich recommended and really like it. I will update my progress once I have completed one of the lower masts. My question for the group is how high up the shrouds on the lower mast should the ratlines go? The kit instructions are not overly clear. It looks like they only go up as far as the lower end of the futtock shrouds, and not behind the futtock shrouds. Instead it looks like attach to the futtock shrouds and continue up to the top. Have I got this right? I have quite a few books on rigging and model ship building and not one shows a clear drawing or photo. I also looked at some of the build log photos of others but am still a bit unclear on this. Thanks for your help as always.
-
Thanks. That is an interesting approach. It would certainly simplify aligning the connecting rungs. When I receive some mercerized cotton thread I ordered I will experiment with this technique and George' and see which works best for me and looks best. Having limited vision in one eye and consequental loss of 3d sense, elimination of knot tying is certainly an attraction! Thanks for everyone's helpful suggestions and thoughts. Jared
- 431 replies
-
- 1
-
-
- Flying Fish
- Model Shipways
- (and 2 more)
-
Thank you. What do you mean by "threaded the ratlines rather than tied them off"? Thanks George. For the ratlines I was using black polyester thread from my wife's sewing basket. I will get some cotton thread.
-
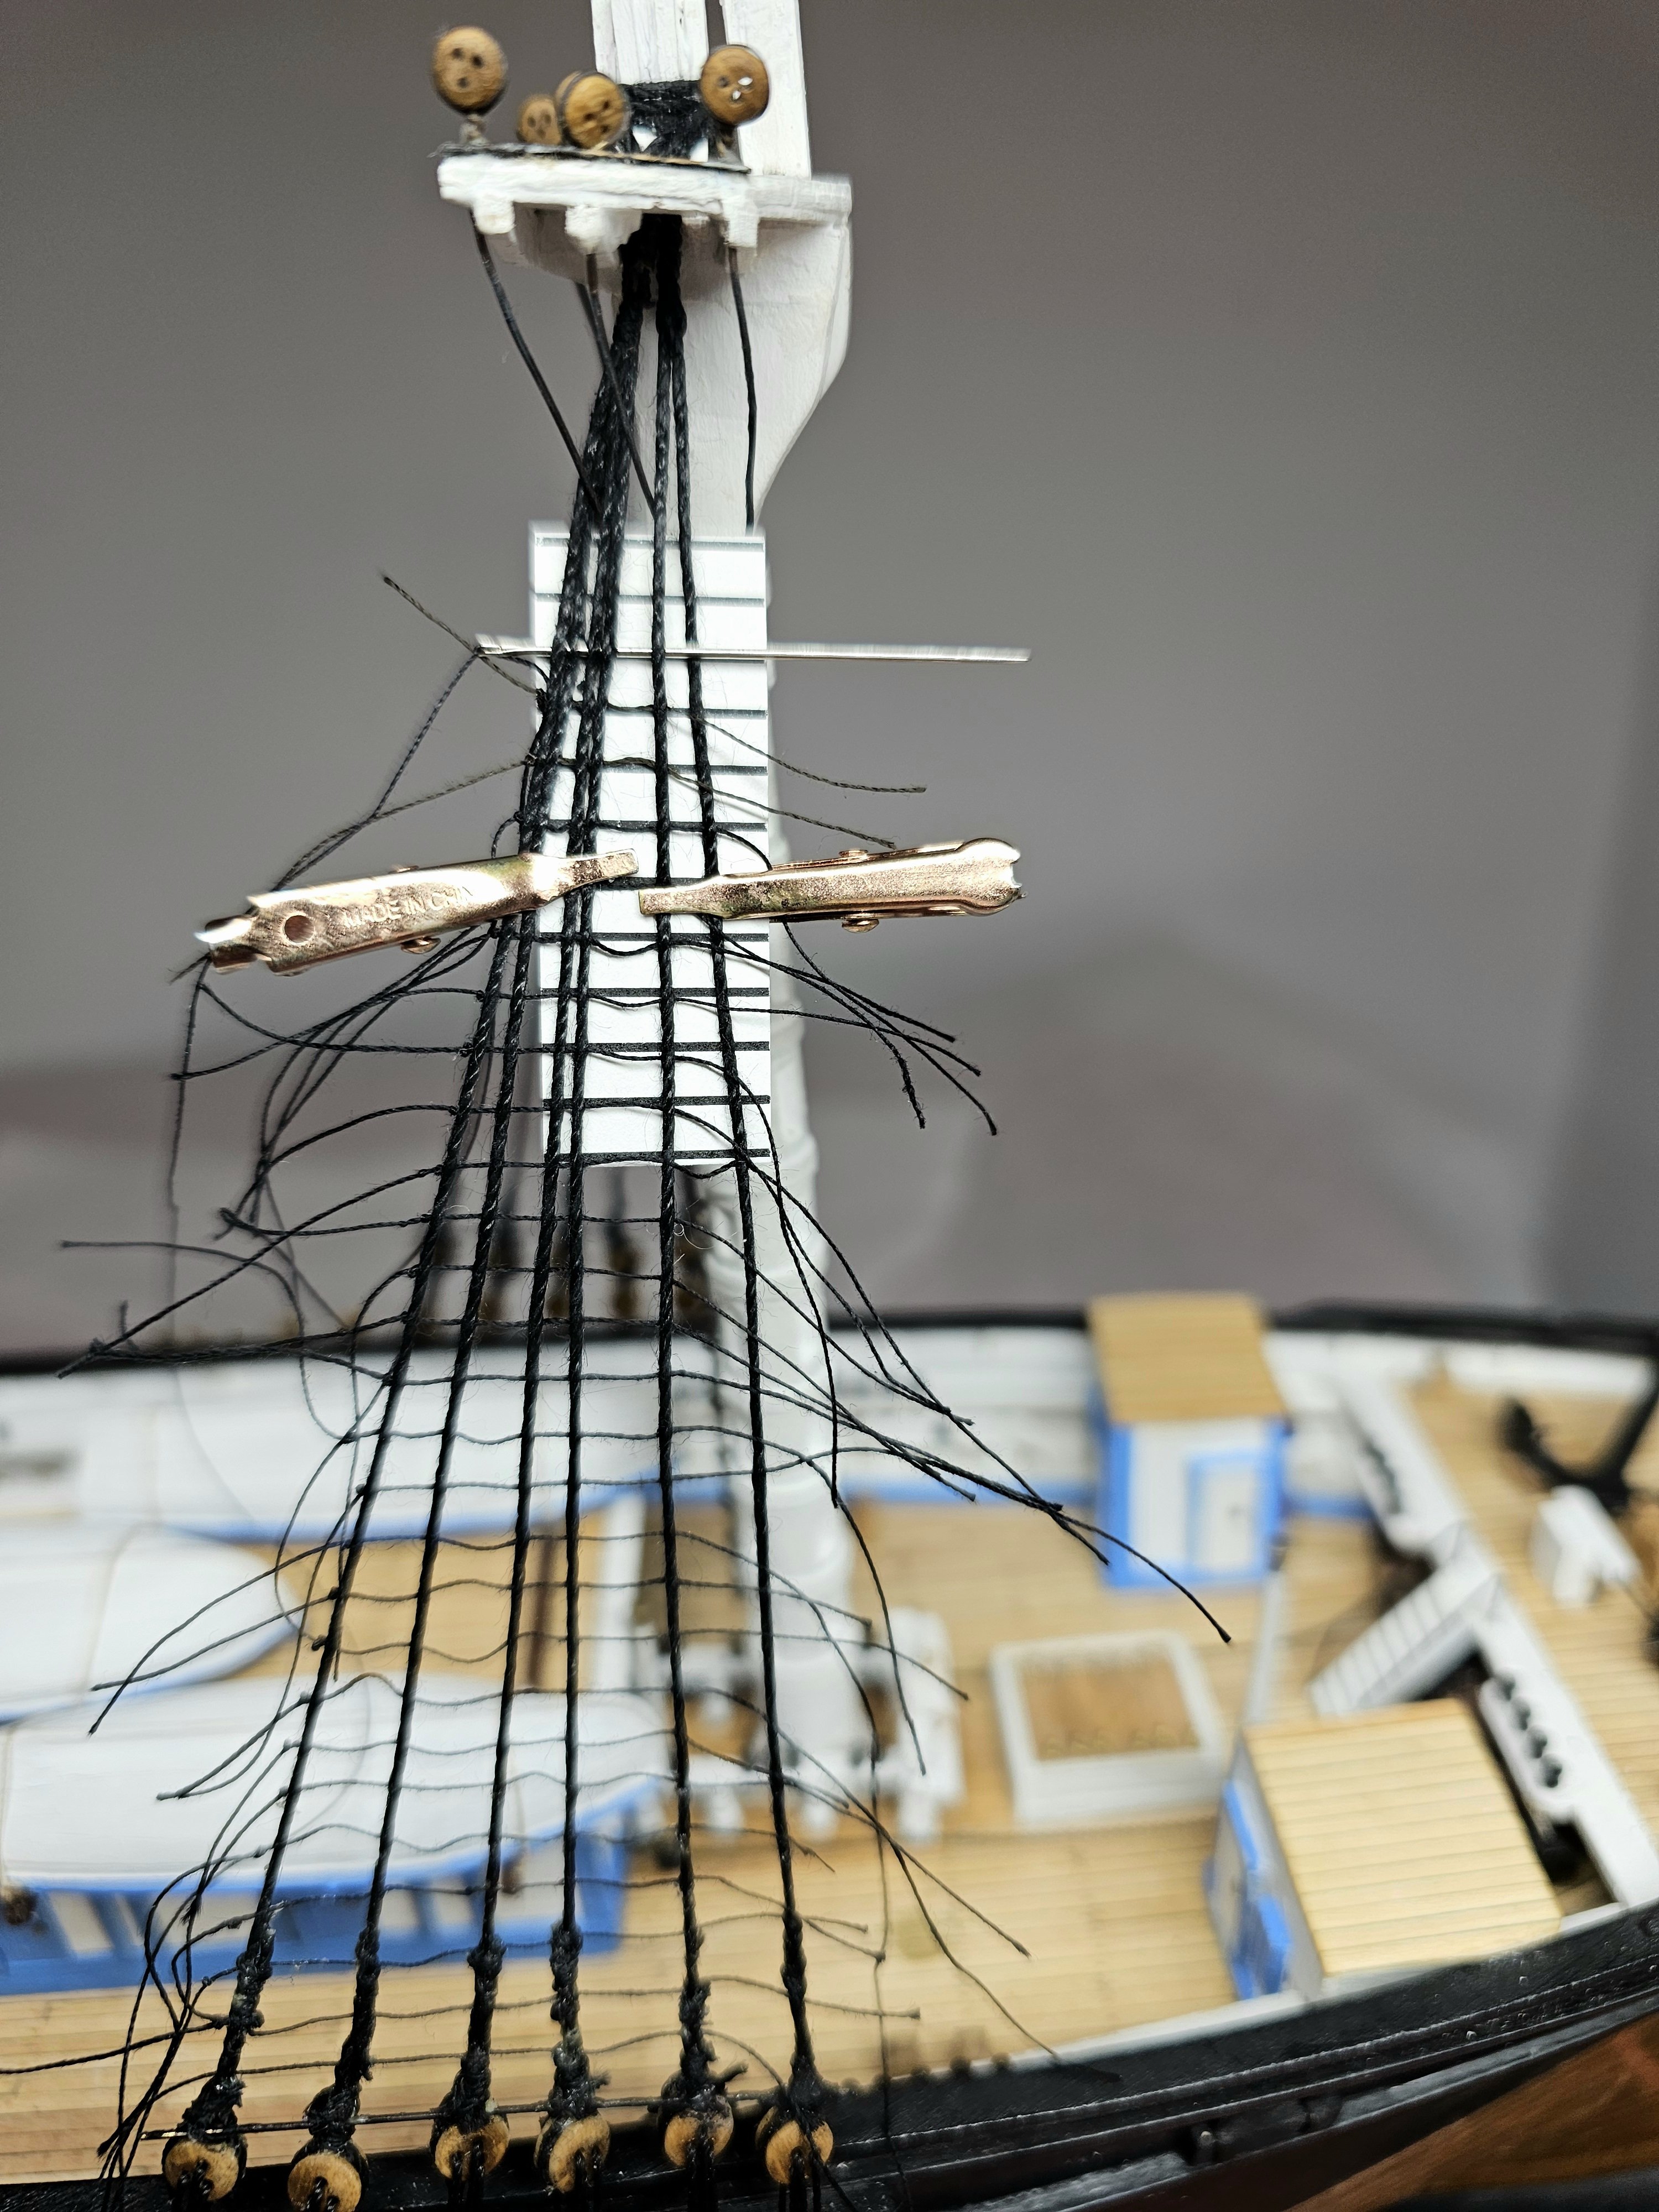
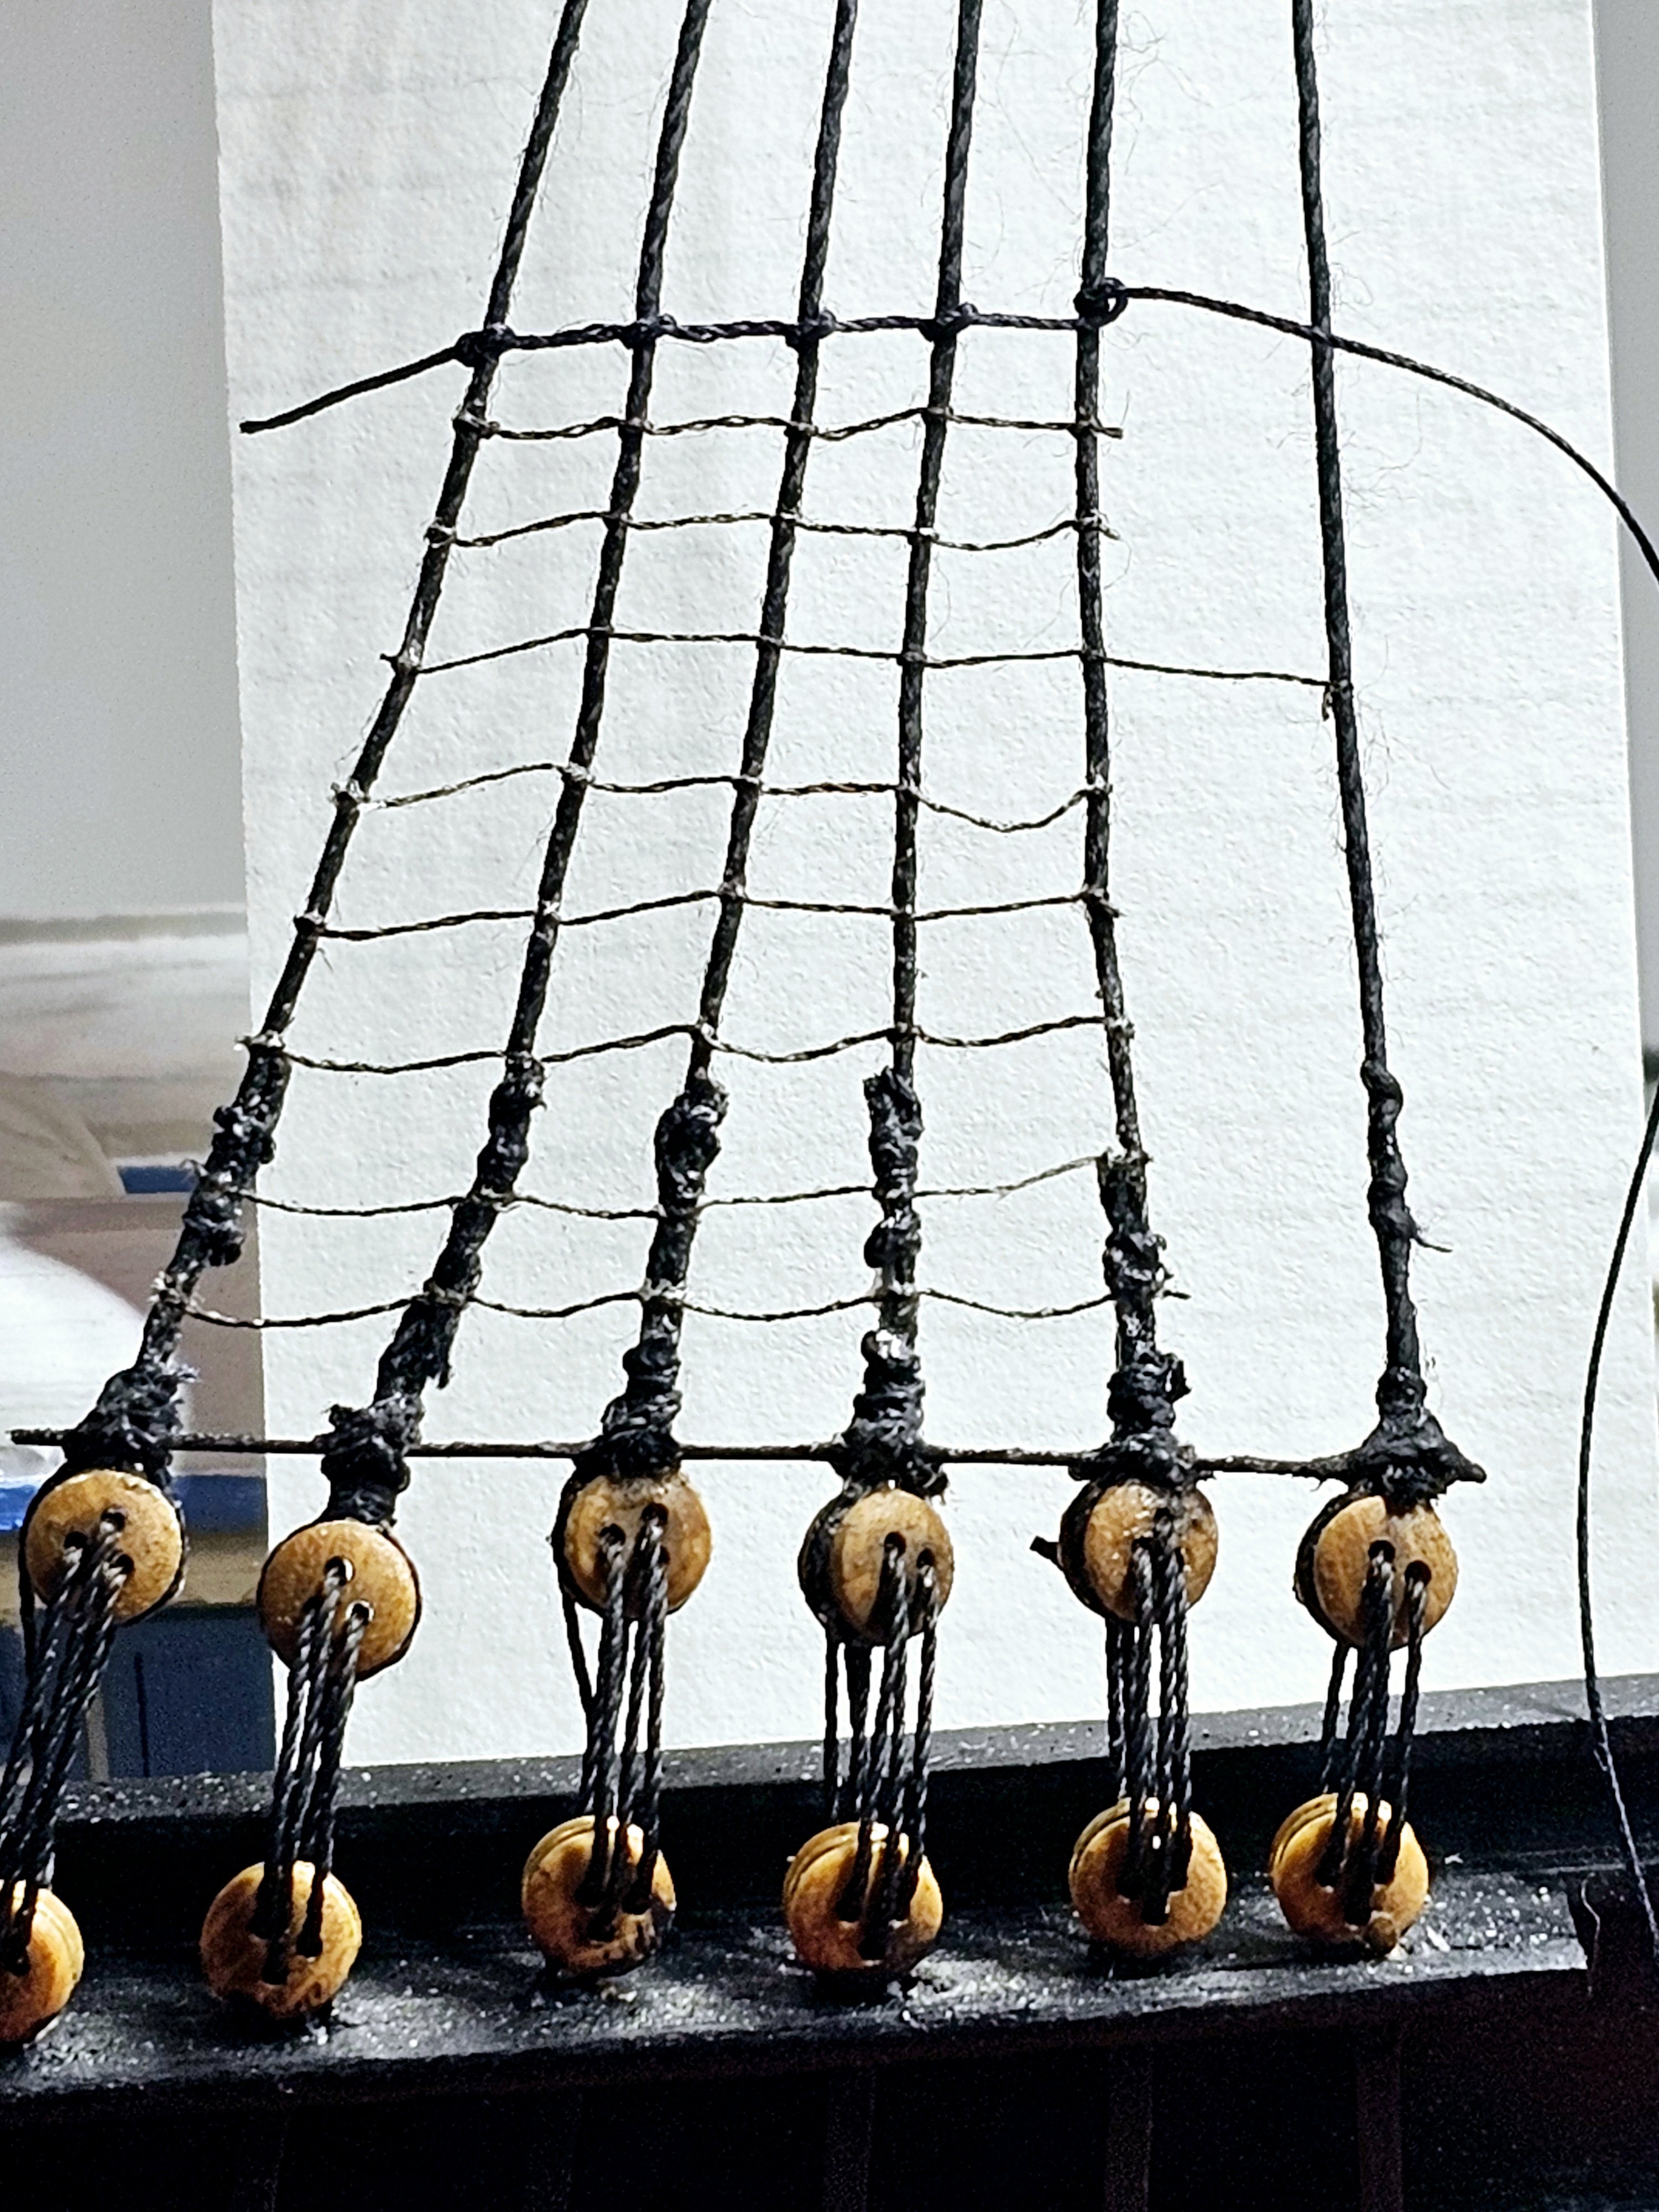
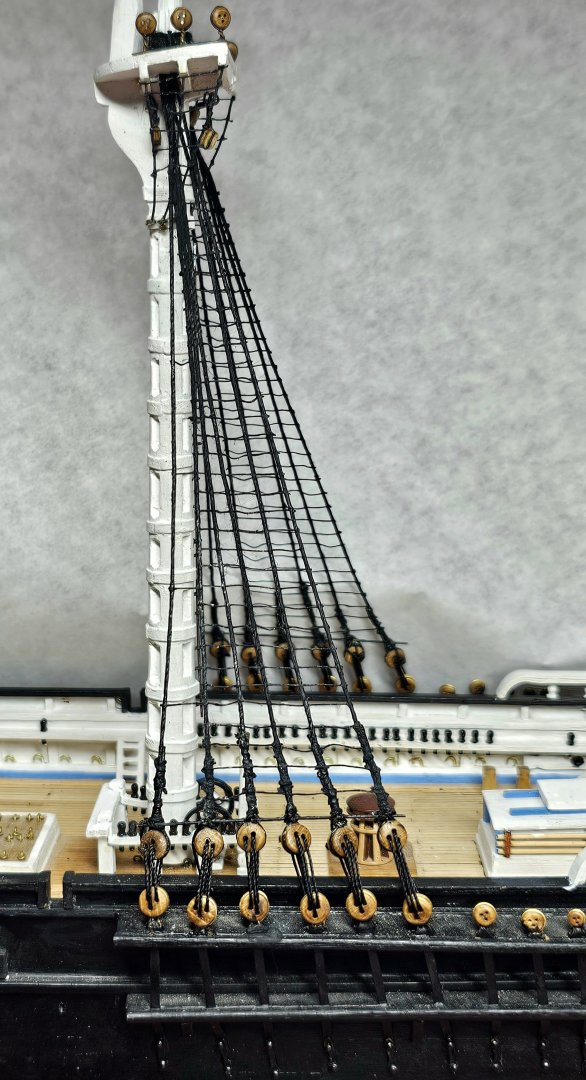
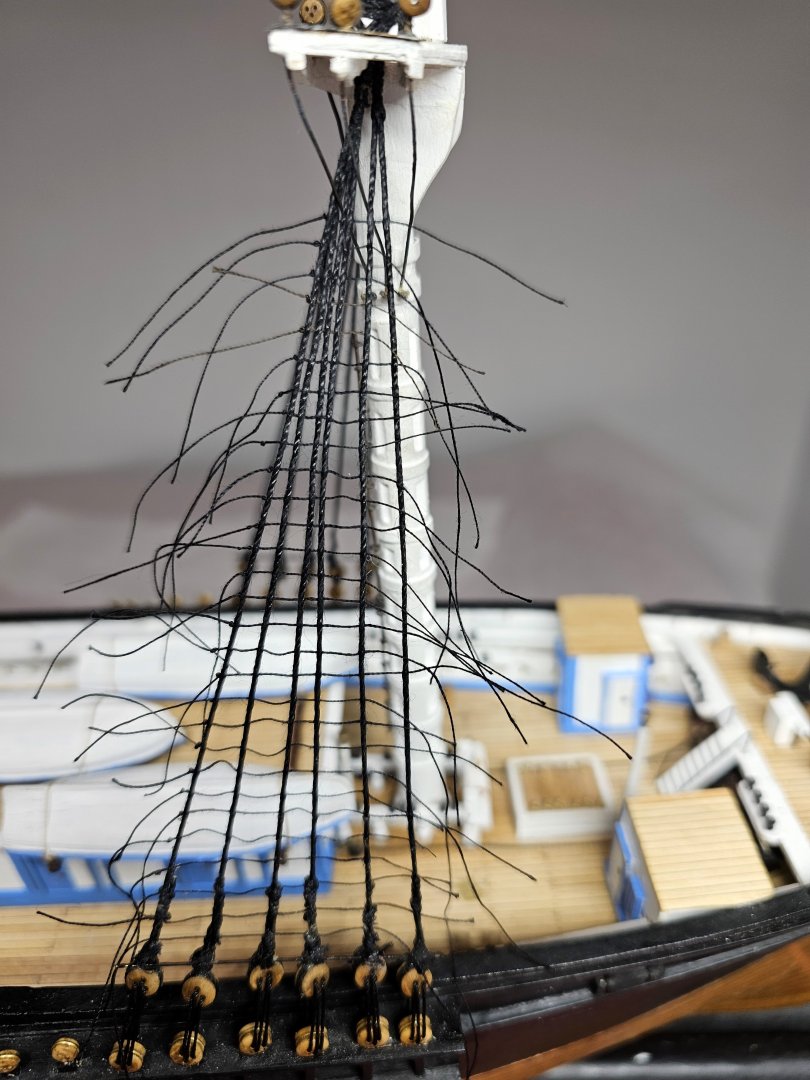
I have a question for the group. The Flying Fish plans show the rope diameters for the shrouds and ratlines on the foremast as being 10.5 and 1.5 inches, respectively. That works out to be 0.035" and 0.004" at scale. I started the ratlines using very thin black thread line but don't like how it is looking (see photo). Thevthread is very difficult to work with and I think it looks too flimsy on the model. It is also near impossible to get it to appear linear. I have had to stiffen it with white glue to reduce the ratline waviness. The topmost ratline in the attached photo was made with a much thicker/stiffer black sewing thread. It is only fitted temporarily on the ratlines so the knots are not overly tight or small. It is easier to work with and I think it will look better, but not to scale. I would appreciate your thoughts and suggestions. Thanks
- 431 replies
-
- 1
-
-
- Flying Fish
- Model Shipways
- (and 2 more)
-
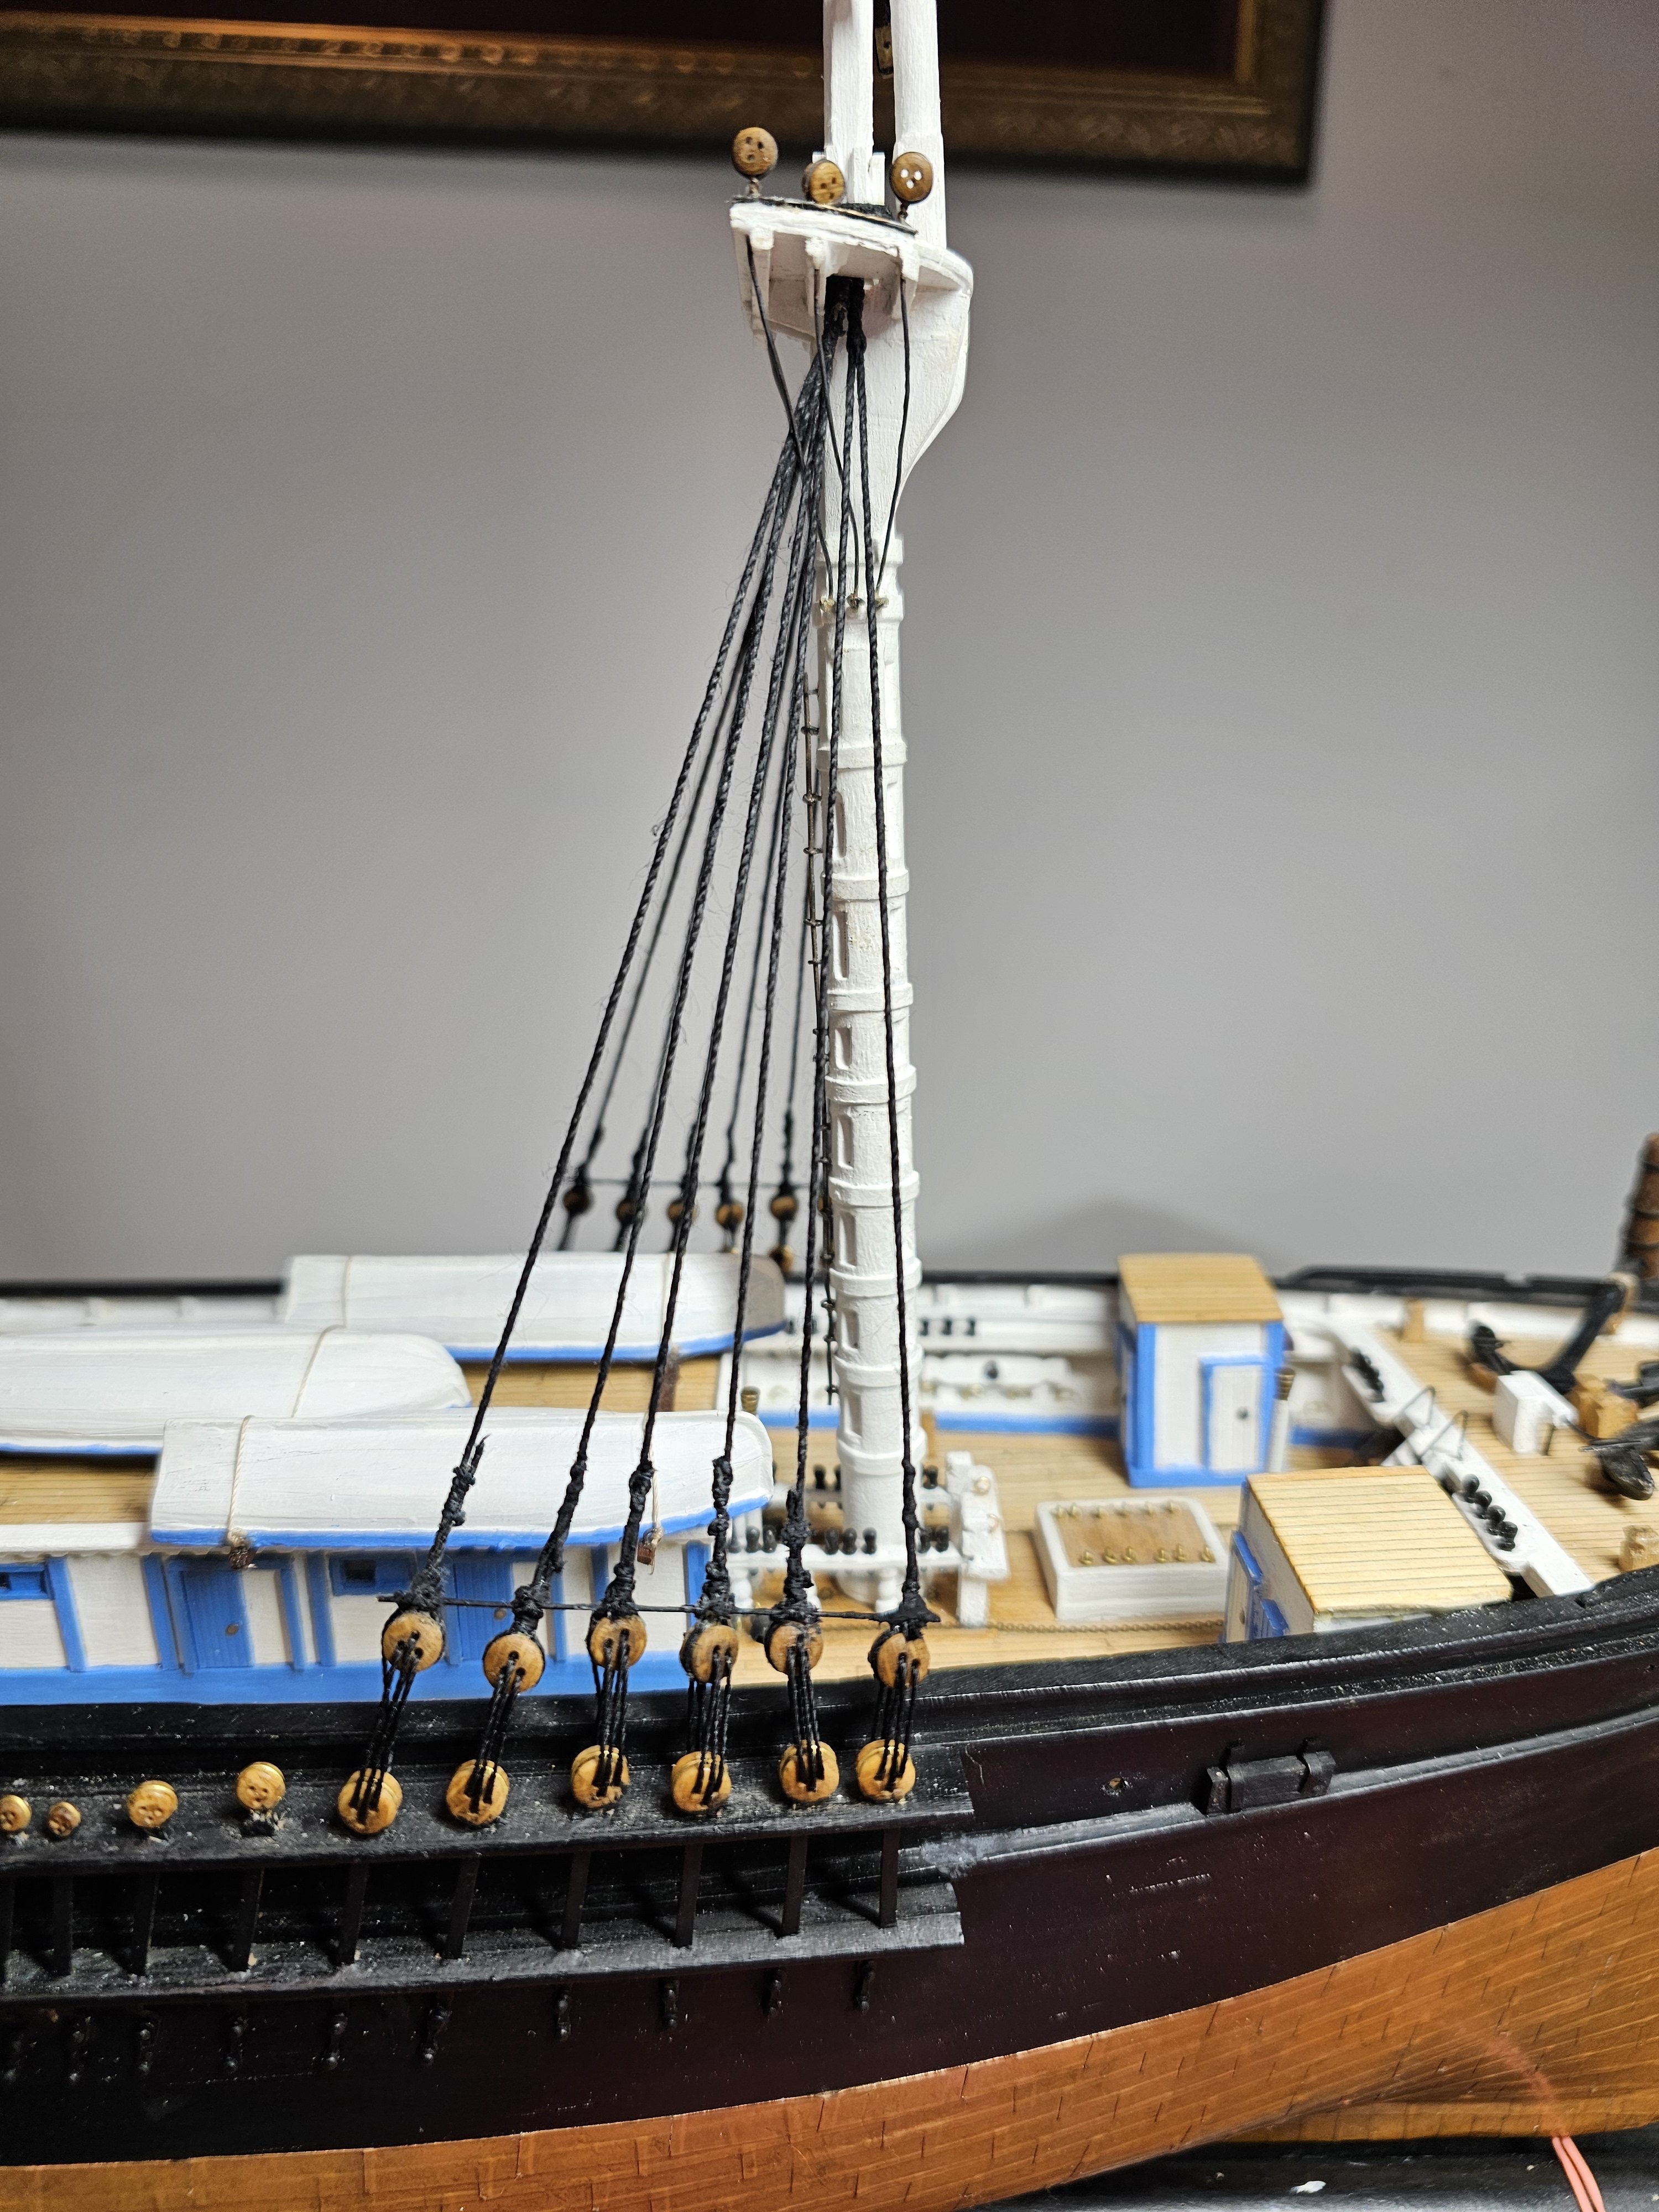
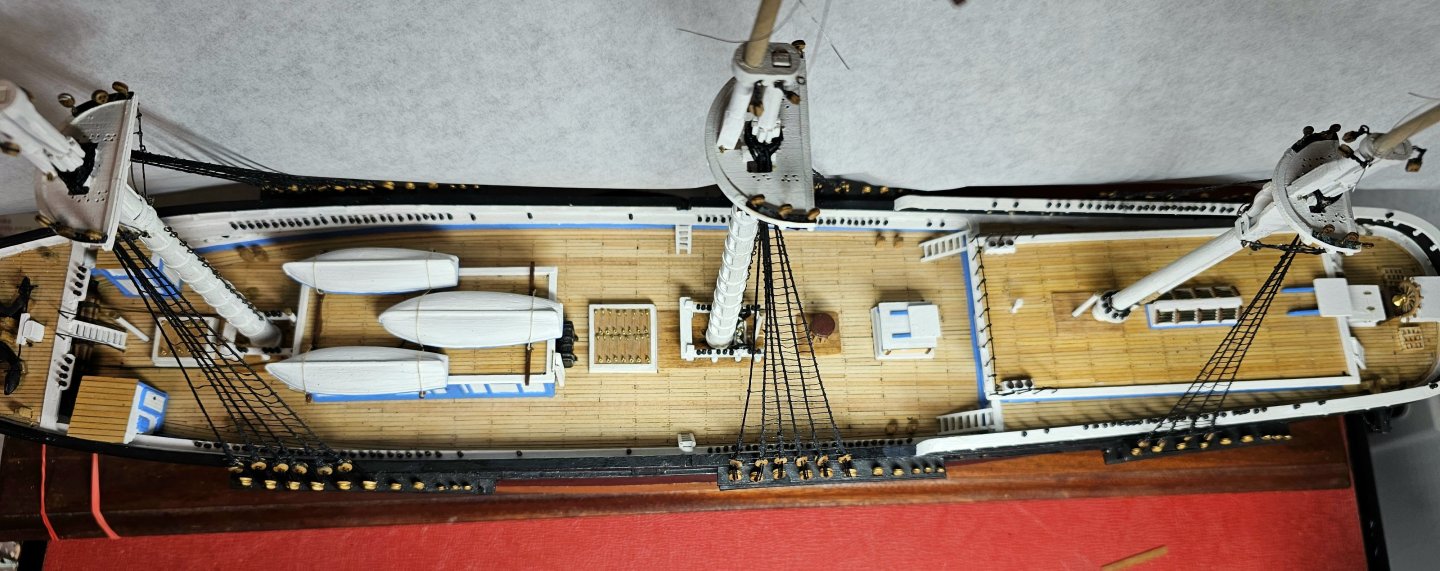
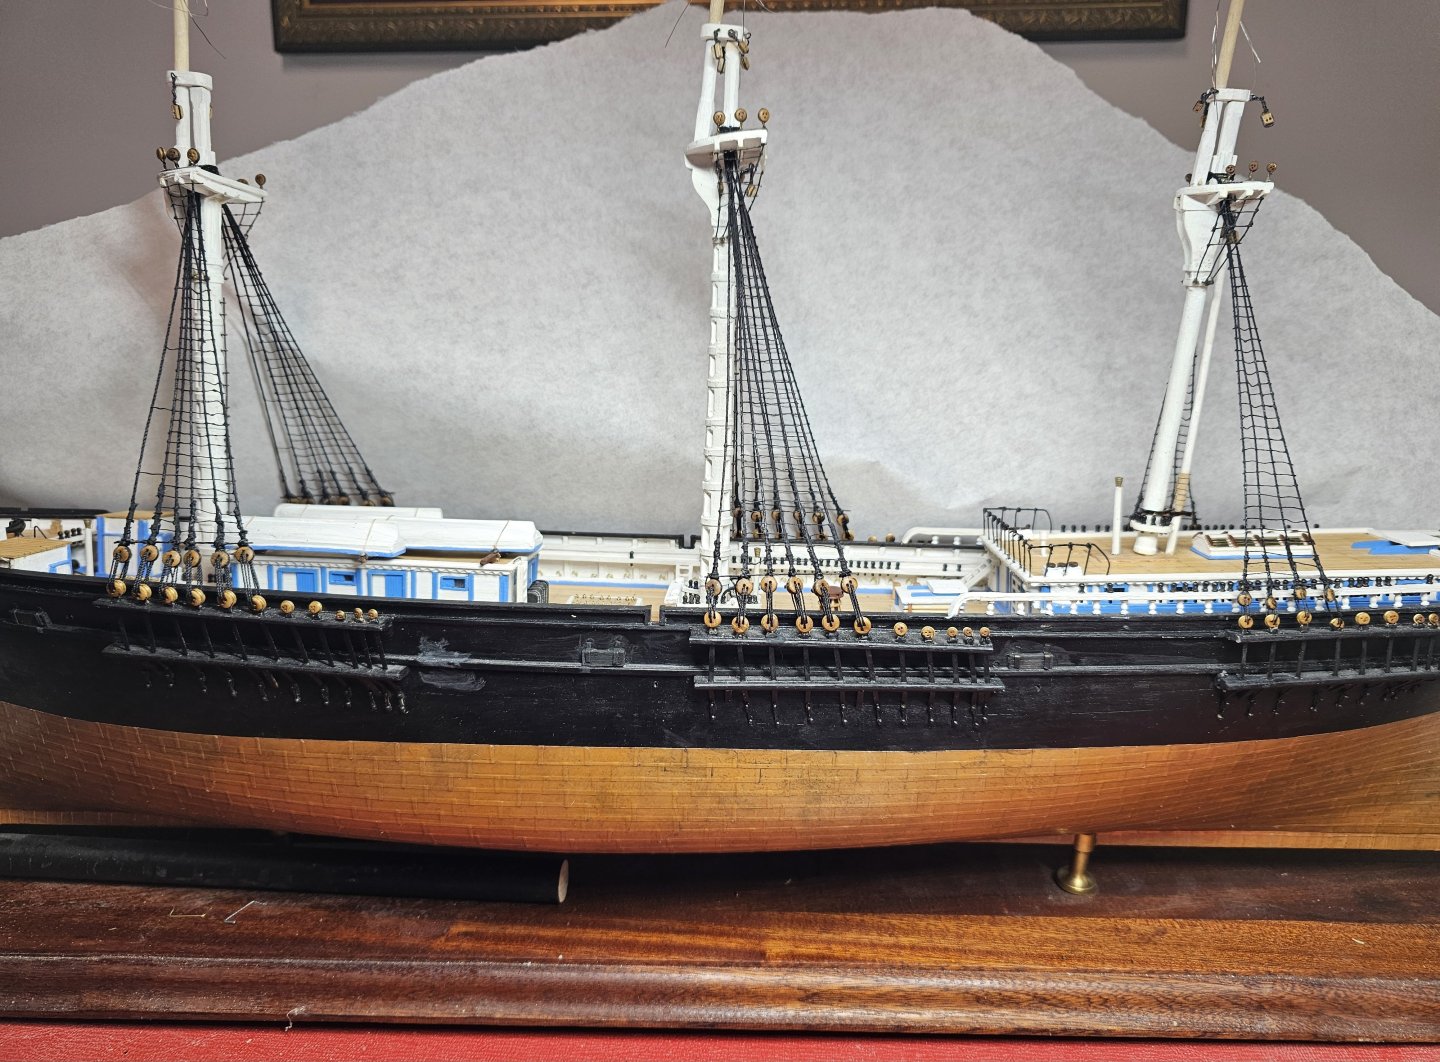
All lower shrouds have now been lashed to the deadeye and sheer boards. Getting the deadeyes to all line up was quite tricky and required more than one try for several of them.


- 431 replies
-
- 3
-
-
- Flying Fish
- Model Shipways
- (and 2 more)
-
Thanks George. I fully agree with your ratline suggestion.
-
Thanks for all the feedback. Over the weekend I discovered Ashley's book of knots. In this encyclopedia of nautical knots he mentioned that the ratlines were lightly tarred. Work on the model is progressing painfully slowly. I managed to lash all of the lower formast shrouds in place. Patience is the name of the game!

- 431 replies
-
- 1
-
-
- Flying Fish
- Model Shipways
- (and 2 more)
-
Thank to each of you for your feedback. Black ratlines it will be. There were suggestions in the forum I had linked to that the ratline were more lightly treated than the other standing rigging. If left untreated I would expect thin lines to deteriorate quicker, however, they could be easily replaced as needed on the fly. I am saddened to learn the rigging on the present day Cutty Sark isn't as it was historically.
-
You are doing a fine build!
-
Looking for some feedback as to whether to make my ratlines tan or black. There is a long thread on this topic at: After reading through it all the comments I am still left wondering which way to go. It is surprising that none of the more notable rigging books in my collection talk about the color - were the ratlines tarred or not? My thoughts are for using tan ratlines - this is how they are on the Cutty Sark in Greenwich, which I visited and photographed two years ago. Any thoughts? Thanks.
-
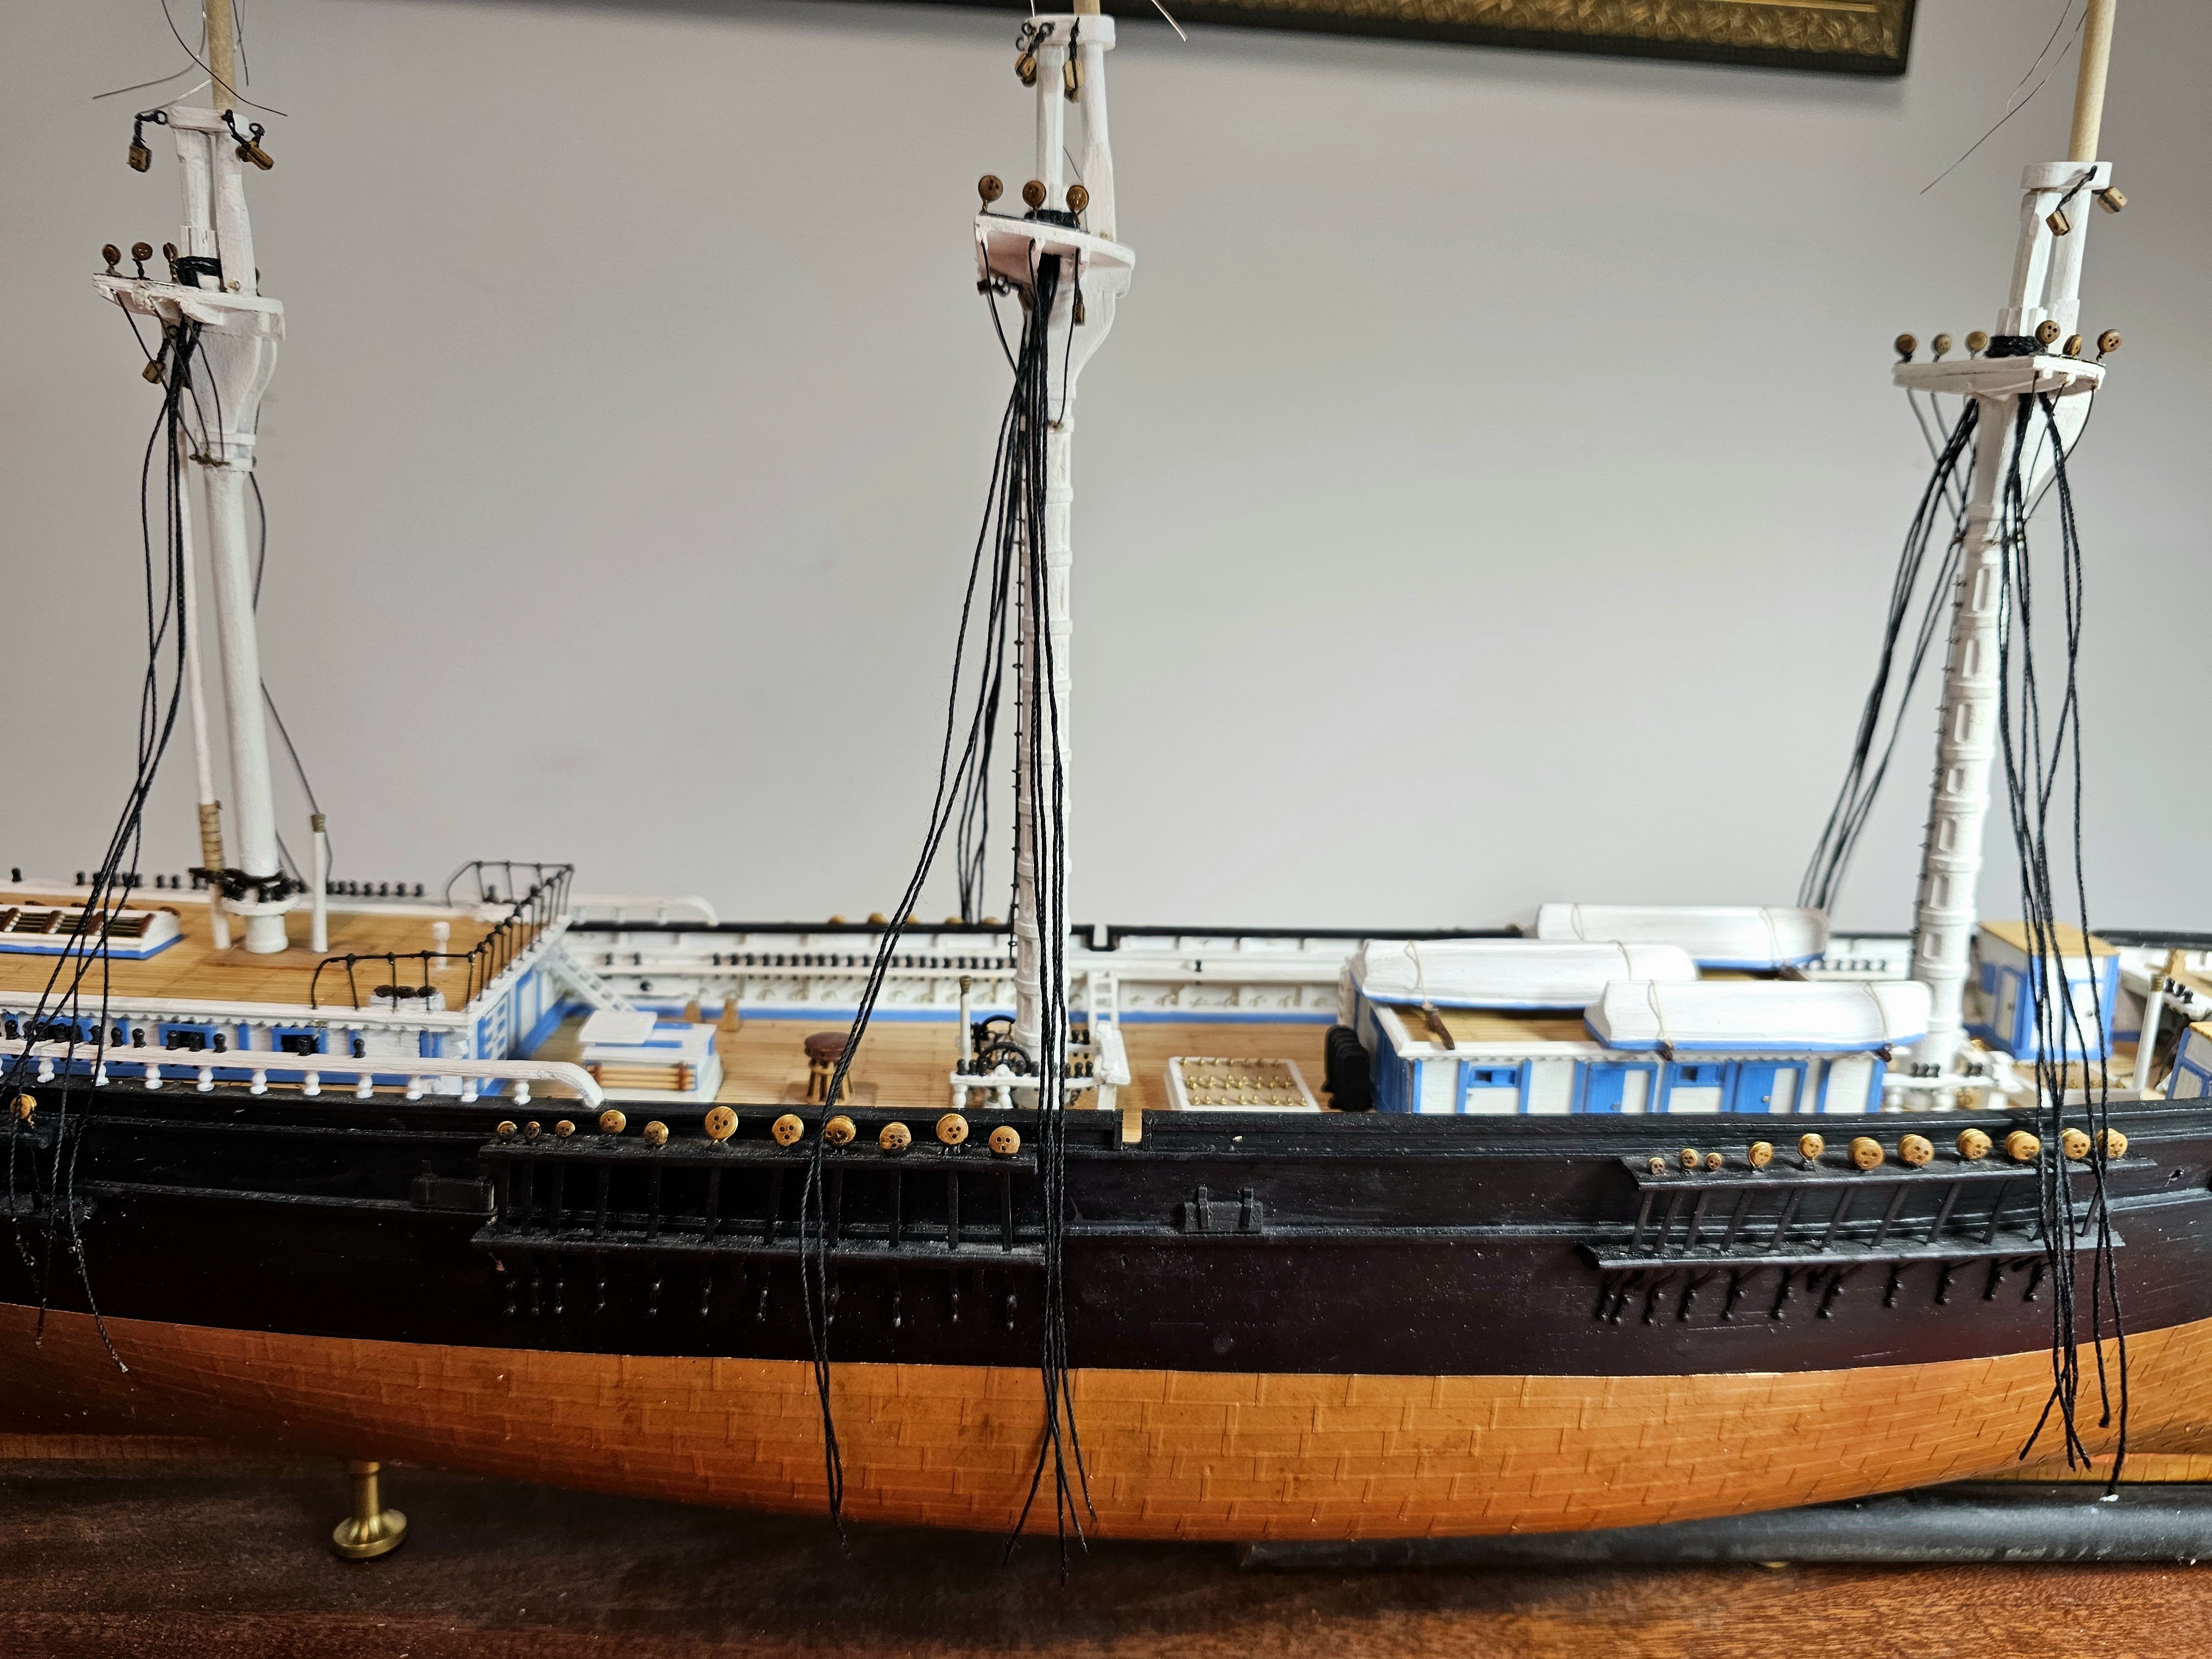
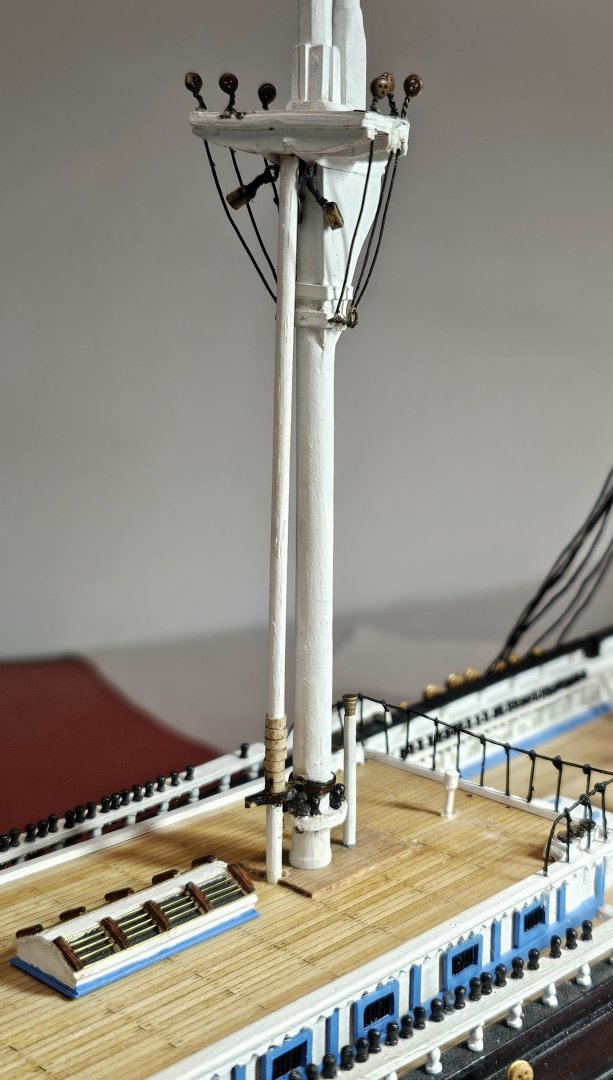
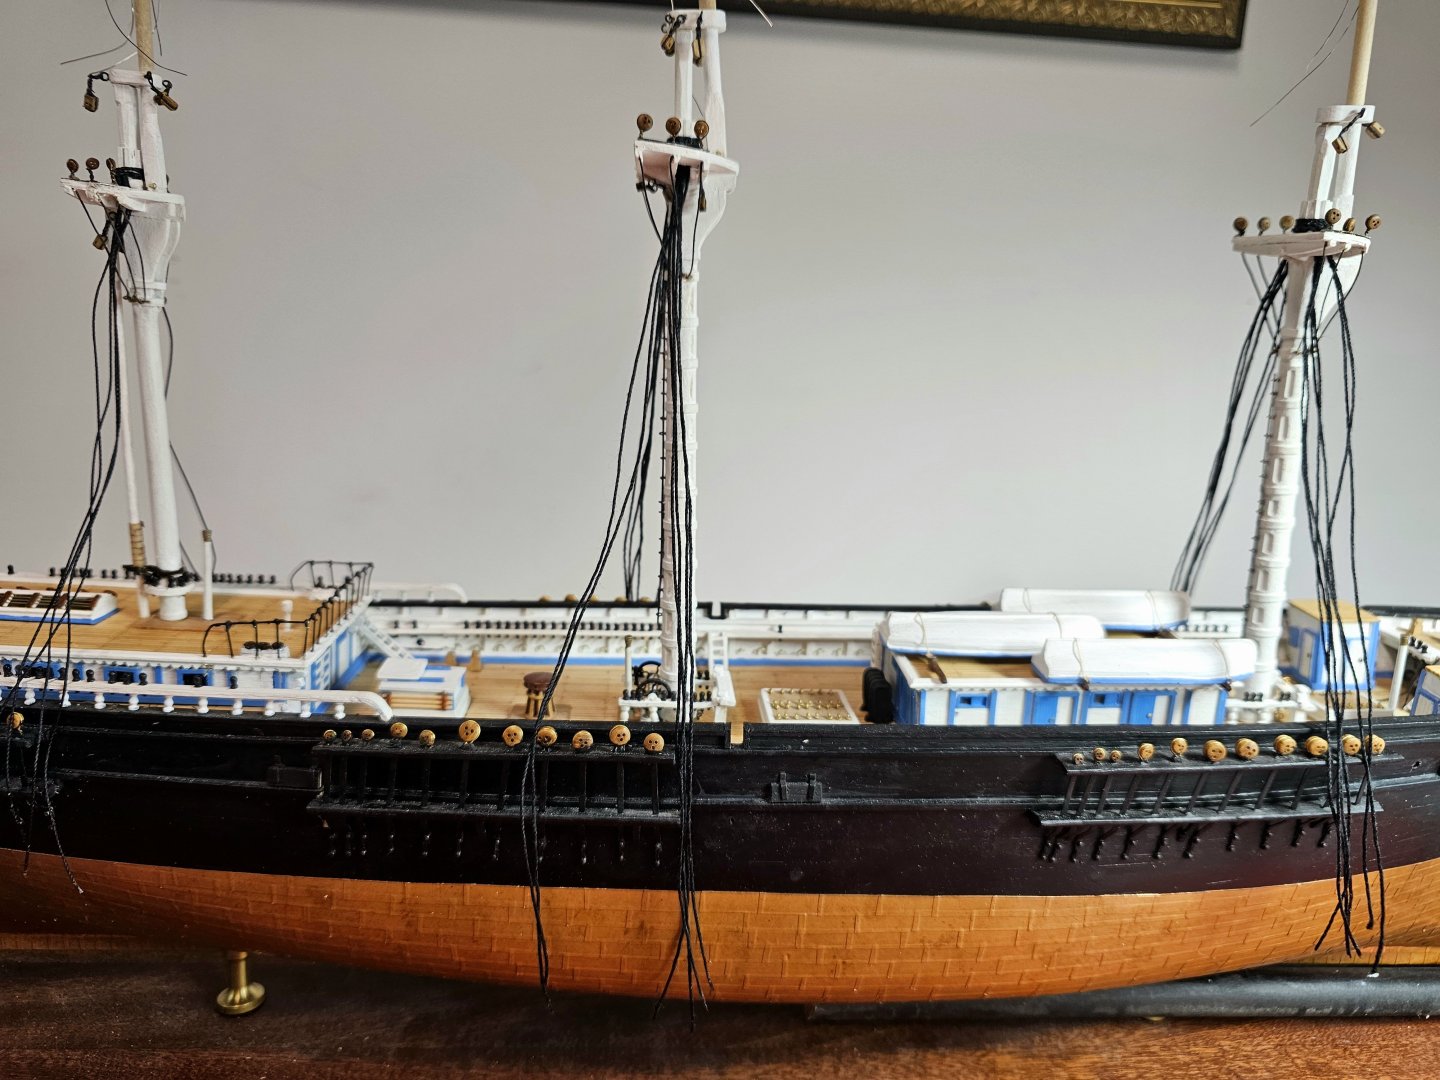
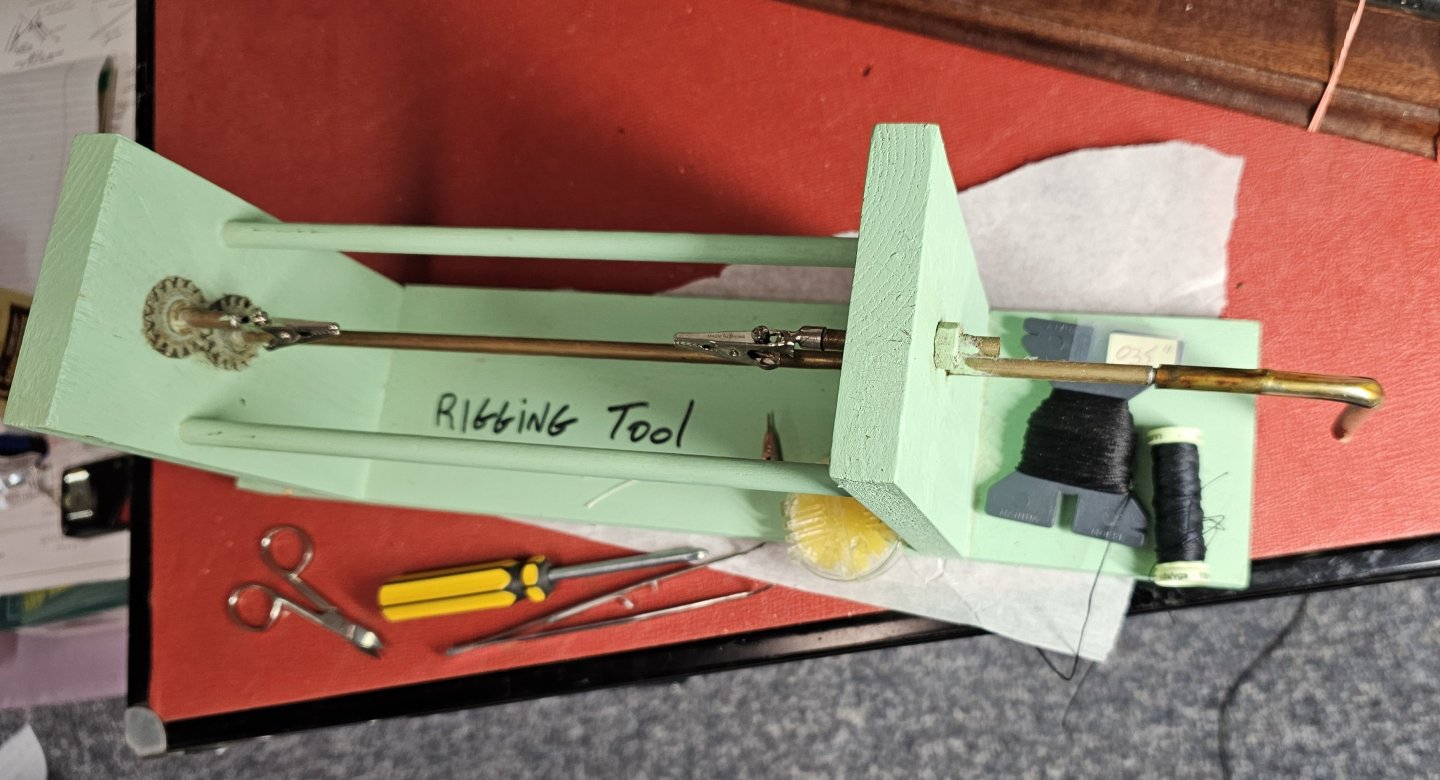
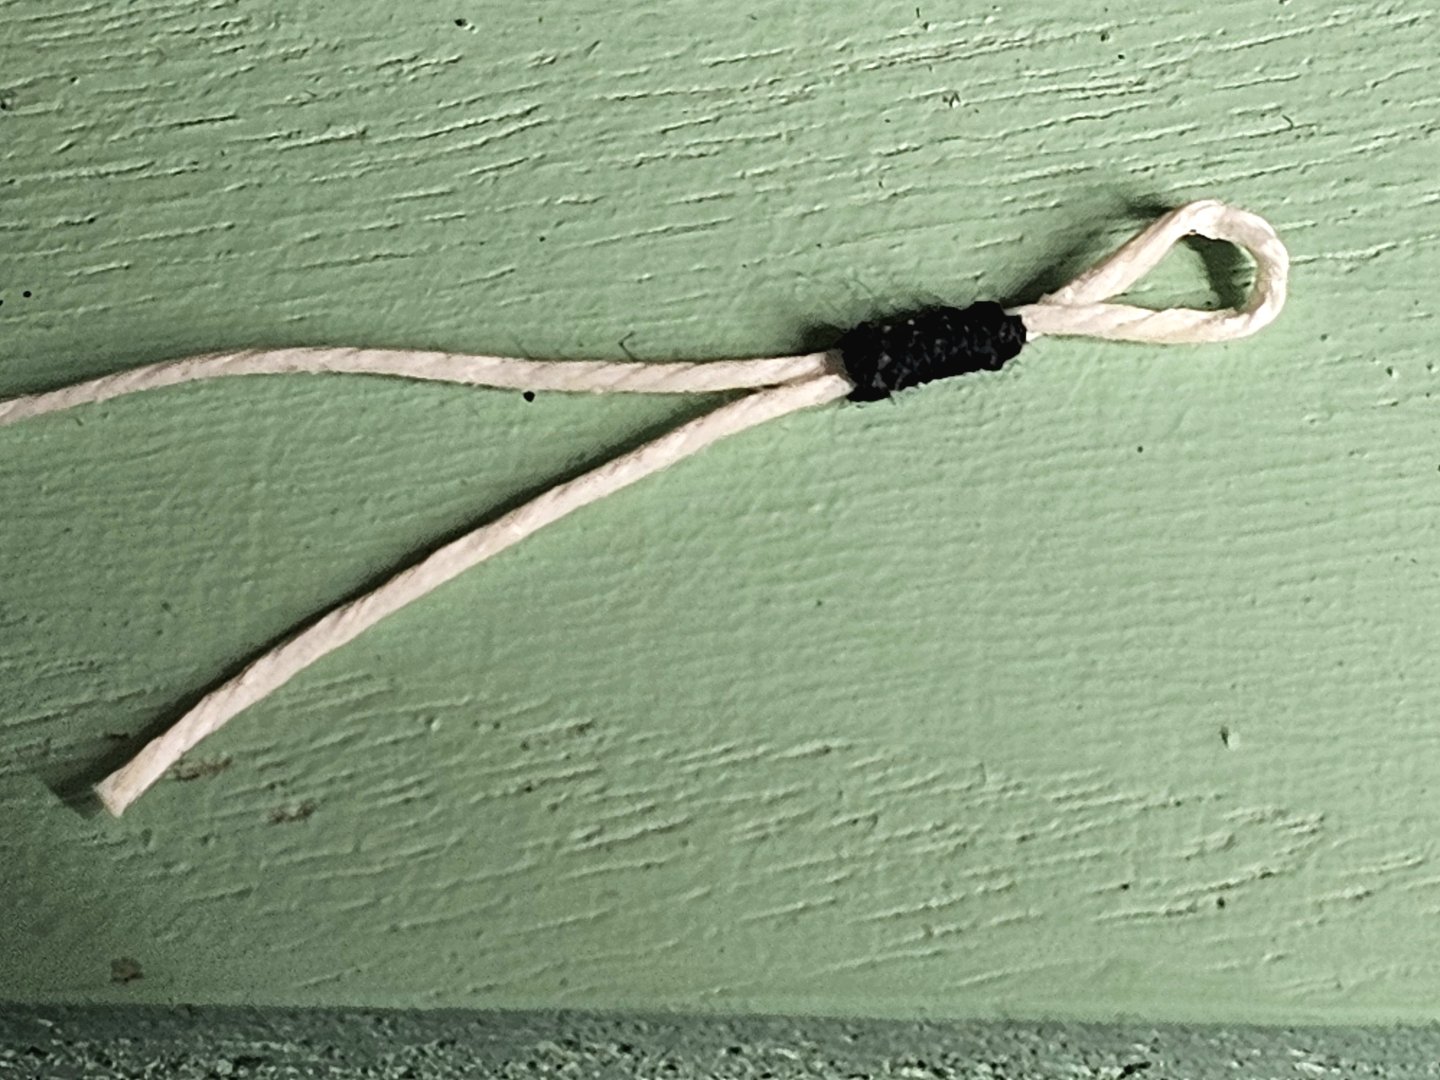
Thanks for your encouraging feedback. In the last 2 days I have added the spencer mast to the lower mizzen mast. The hoops for the sails were made from a Manila file folder. The band that holds the mizzen and Spencer masts was made with difficulty from a brass strip which I bent and soldered. Unfortunately the space between the spencer and mizzen masts is greater than it should be, but not much I can do about it. Hopefully the standing rigging will hide this. And speaking of standing rigging I completed the siezing of all the lower shroud line, using a rigging tool I made some years ago when I built the Morgan whaler. The lines in the lower fore and main masts were made using 0.035" black rigging thread (not supplied in the kit). The line on the lower mizzen is 0.028". All lines were waxed before siezing with black sewing thread (common whipping knot). The white line in the last photo was used to better demonstrate how the siezing knot looks.
- 431 replies
-
- 4
-
-
- Flying Fish
- Model Shipways
- (and 2 more)