Oldsalt1950
-
Posts
496 -
Joined
-
Last visited
Content Type
Profiles
Forums
Gallery
Events
Everything posted by Oldsalt1950
-
 Slowly making progress, sanded the deck and hull some more, and worked on the bulwarks. Plenty of sanding left to do. Still waiting on supplies and some tools. Gun carriages were assembled to a point, need to be painted and the brass blackened, before more work can continue. Since there was no real Albatros, I will be re-naming my shi[ the "Nixie" and will be deviating a bit from the plans. Nothing major, but she will be a bit different.
 -
Welcome SUBaron, smart move on your part. Swift is a good warm up, and a fun project. Old Ironsides will be a challenge. Looking forward to reading your building log.
-
The shipyard has run into supply issues. Building on temporary hold while awaiting supplies.
-
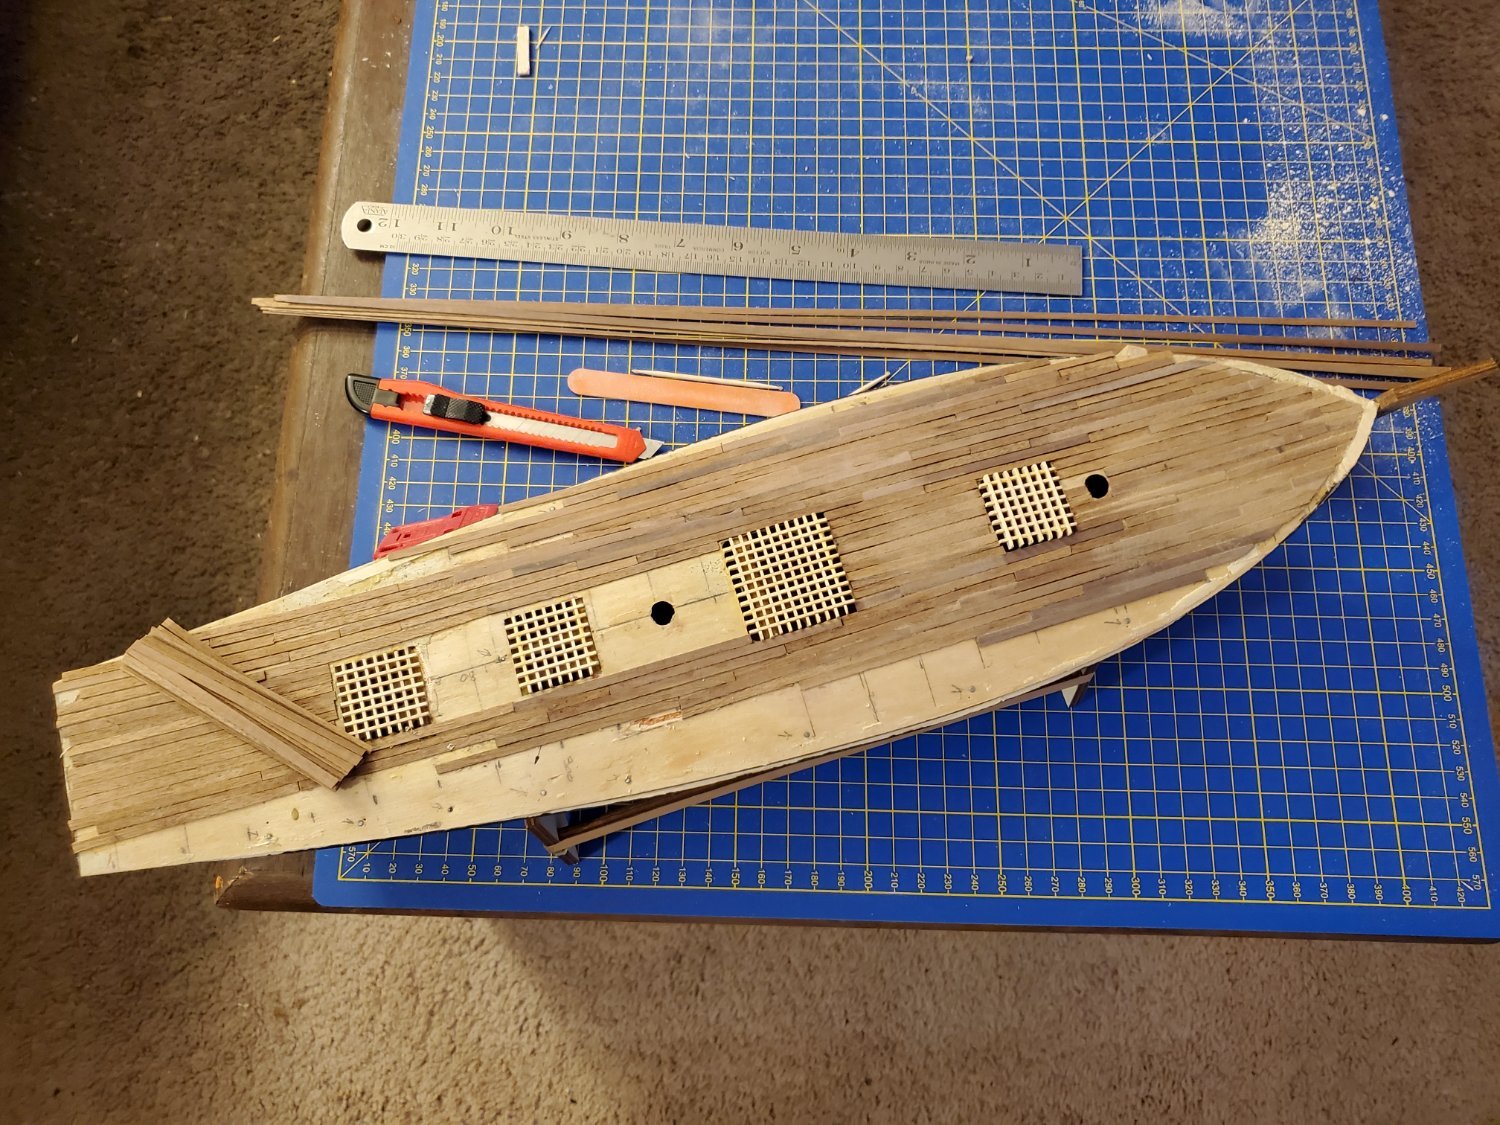
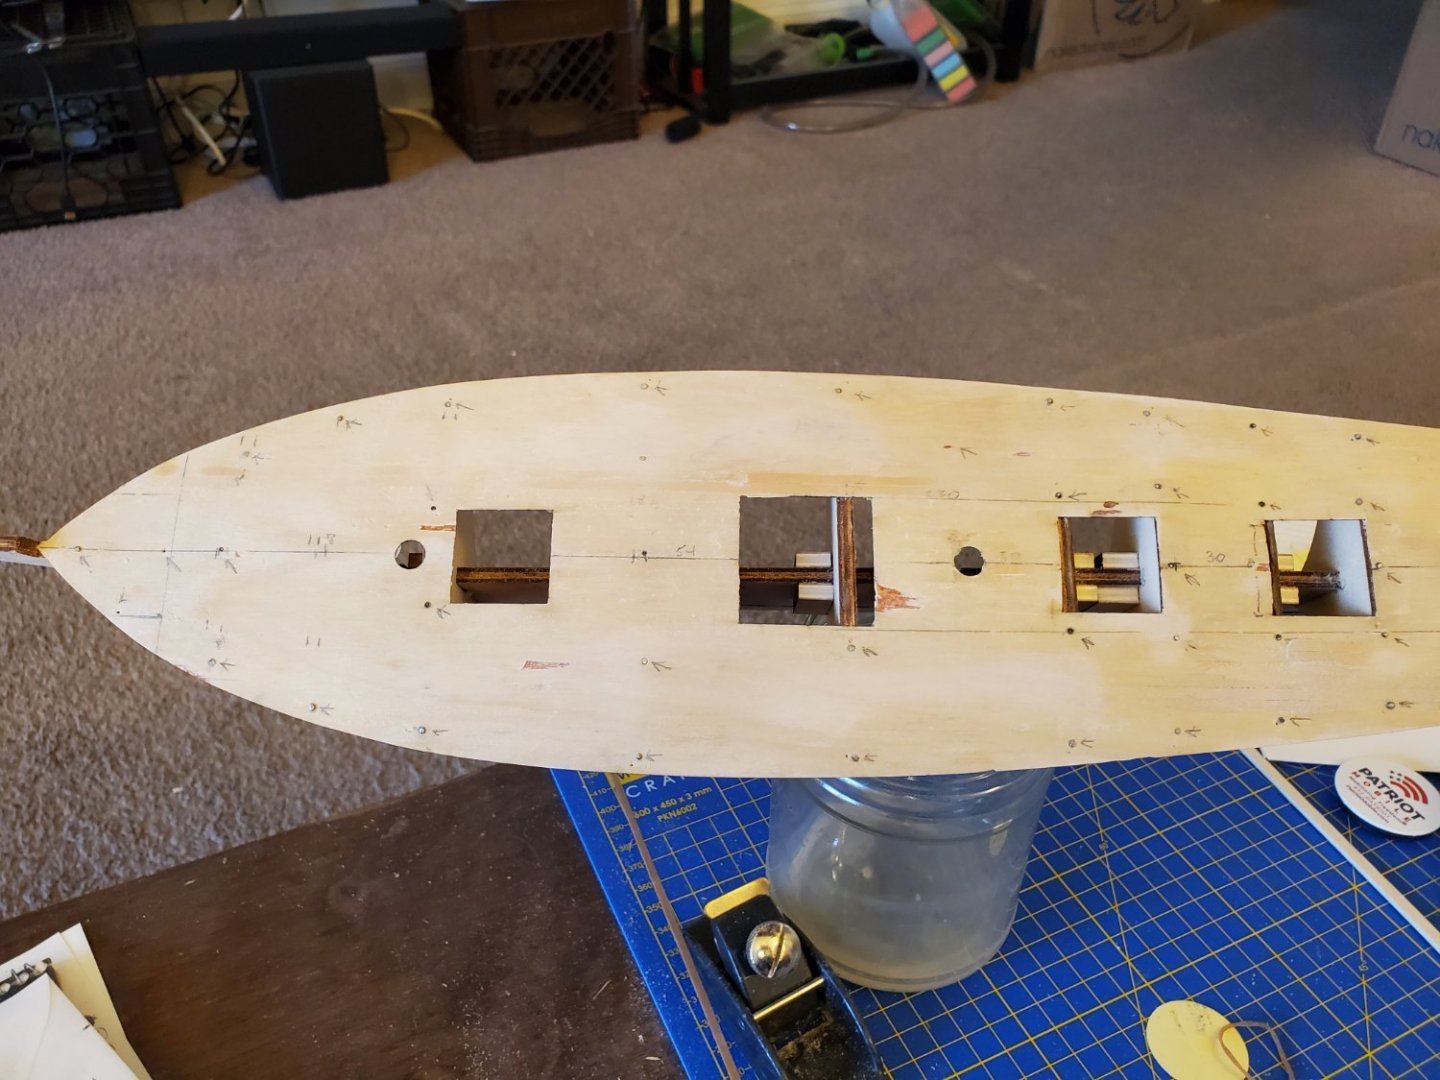
Started planking the deck. Cut some decking planks 80mm, 60 mm, 40mm and 20mm so i could layout the pattern. Things are finally starting to take shape.

-
Welcome aboard. Working ships as opposed to warships have their own alure.They have a certain dignity which is far different than the swagger of a warship.
-
Casey, welcome aboard. I live in Delco too. The ship looks good.
-
Real building skills, and tradesmen started to disappear shortly before WW2. Once mass production came to be the norm, time really became money. My Grandfather was a carpenter, built his own house, and every corner were square and the walls were true both vertically and horizontally. Today, few carpenters have a plane they use at the job site. Show them a spoke shave, or an adze and they want to know what it is for. Only the Amish still hold onto the old skills. Pegs and blacksmith made "cut nails" hold everything together. Yes, it takes time, but anything they build stands for longer than any modern construction will. We try to emulate some of the techniques used long ago, but on a much smaller scale. It isn't easy, but once you understand the concepts, it is a joy to do. Just my 2 cents, your milage may vary.
-
Very true, but they also carried less sail on shorter masts allowing them the greater rake.
-
John, leave them natural to start and see if the look appeals to you, you can always paint them if you don't like it. Your build is looking good. I'll be building Rattlesnake once I finish my current build, so I'll be following your work with intrest.
-
I'm not big on sails, I like to be able to see all the rigging. That being said, a dunking in some tea to make the sail cloth look a bit aged is not a bad idea. To do so, make sure you have some scrap material so you can test the time you leave the material in the tea to get the look you want. If it doesn't come out uniform don't worry sails carry different coloring depending on what they came in contact with. Salt spray would make them white.
-
This may be a little late for you, but the masts on most Baltimore Clippers are raked. I looked at the plans for the Mantua version, and the fore mast is raked at 5 degrees the main at 15 degrees. Hope this helps and you are able to step the masts with this rake. She's looking good.
-
Just a quick note for anyone who is building any iteration of Albatros(s) from any of the kits available, there is no real Albatros, this is a proto-typical representation of a class of ship know as a "Baltimore Clipper". If you are ex-Navy , think of it like a class of ship, in this case the "Knox Class DE/FF". There are variations to each ship in the class, I served on two different FF's and although they were Knox Class, there were differences in the two ships. I'm not sure where my build will take me as I progress, but there will be changes from the plans provided with the kit.
-
The hull from deck down has been completed, sanded and filler applied where needed. More sanding to follow. Deck planking is next on the agenda, followed by more sanding.
-
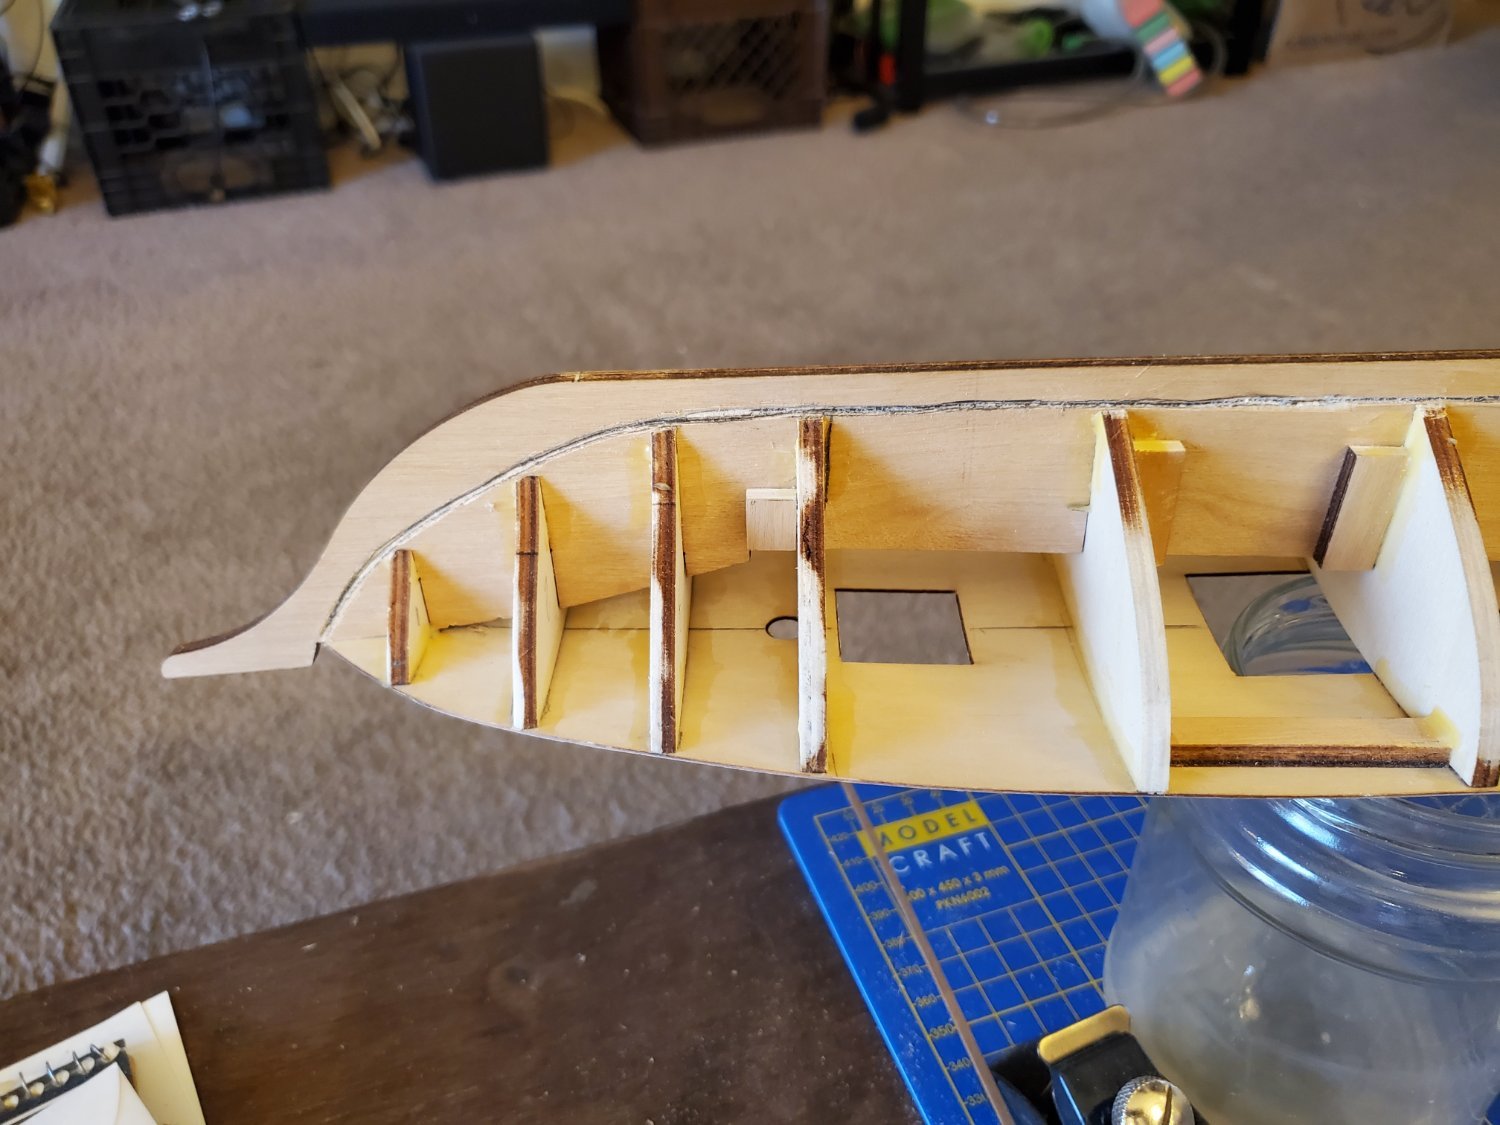
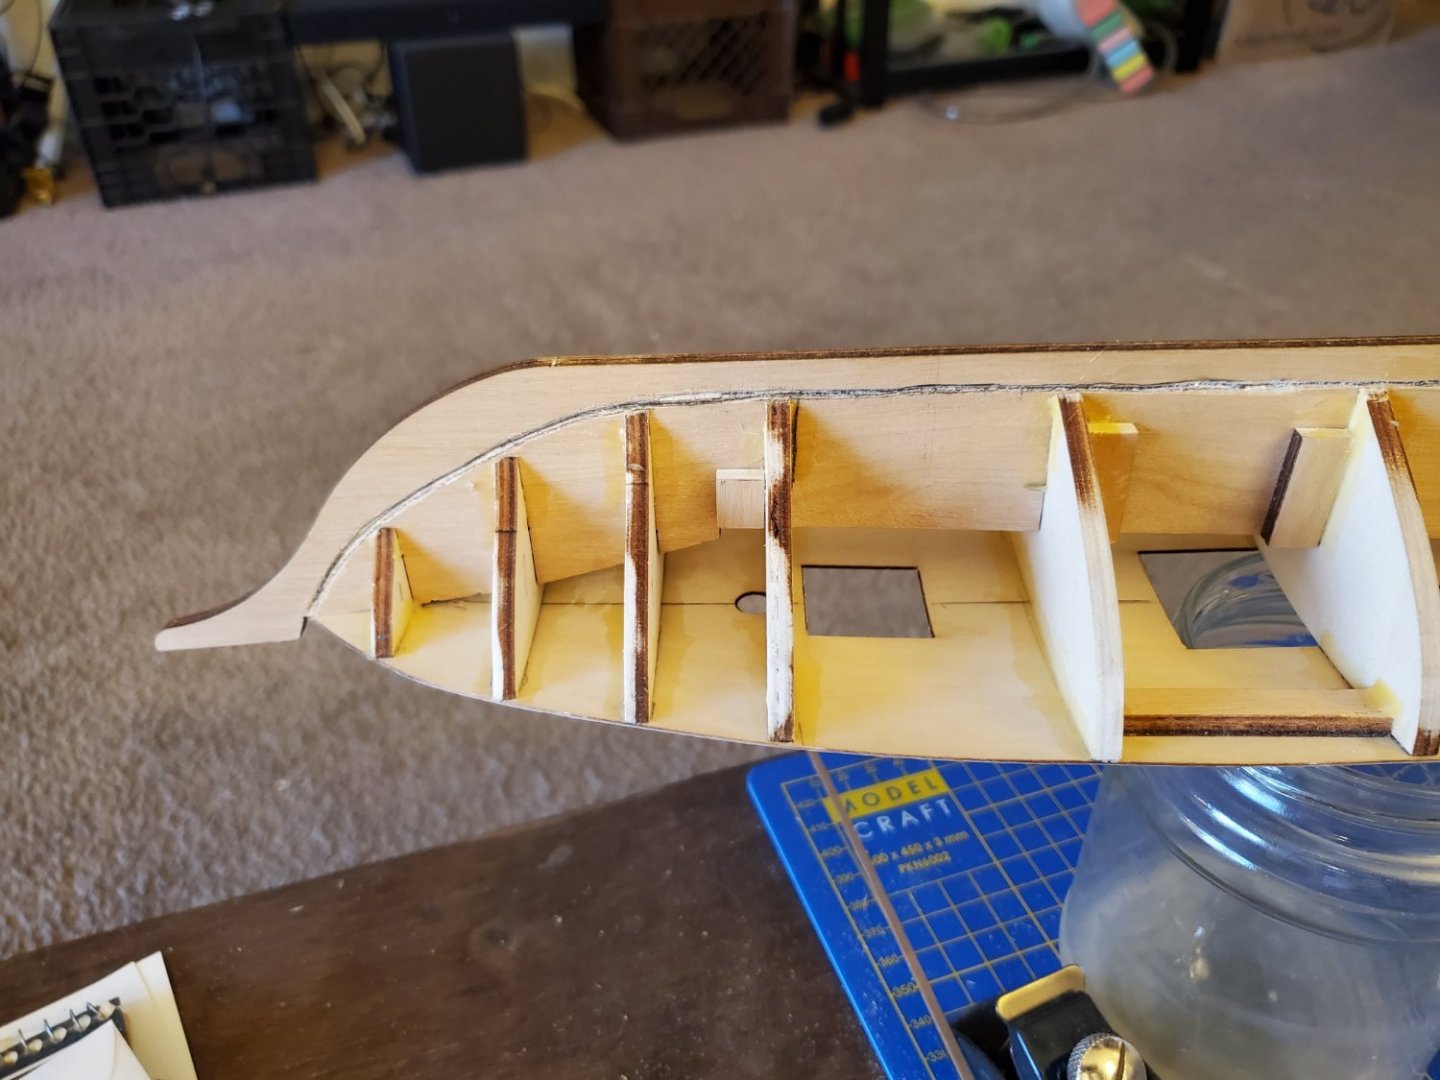
Welcome to my build. Pull up a chair and get comfortable and follow along, as I try to fit all these pieces of wood, string and metal into a model resembling what is on the box. This is my first build in over 50 years, so I'll be dusting off some old skills and learning new ones along the way. Opened the box and removed the "instruction manual " and line drawings to see what I was in for. The line drawings were 1:1 for the kit, which is always a bonus as you don't have to keep trying to get measurements correct. The instruction manual left much to be desired, but the pictures sure are pretty. The parts list is on the back of each section of the manual. Next step was acquiring to necessary tools for the build. I'll be in that process for a while. Next was removing the parts from their respective bags and labeling them so I could readily find them when needed. Small parts such as blocks, belaying pins were left sealed in the bags they came in. Removed keel, bulkheads and false deck from the sheets they were attached to and dry fit the parts. Unfortunately for the fairing process, I was on my own, as there are no "cheat lines" suggesting the fore to aft tapper along the bulkheads. Been there before, it just means a lot of hand fitting and sanding. That reasonably accomplished, I glued up the keel and bulkhead, and then cut the rabbet line. False deck was then added for more strength, More sanding. Marked false deck centerline and drew athwart ship lines every 20mm for reference when planking. Hull planking began. Mantua used balsa wood for the hull planking on this kit, and it is fairly forgiving, but very thick, but narrow 50mm wide by 20mm thick, would have liked something a little wider and thinner. The kit is supposed to be double planked, but there is not enough finish wood to accomplish this. Knowing my limitations anyway, I had planned on painting the hull, so this was not a big deal. Here is where I am at today:

-
Use clove hitches and a dab of CA, Also there should be a bit of a dip in the climbing ropes of the rat line fore to aft, Looking good. I'm building the Mantua version.