HOLIDAY DONATION DRIVE - SUPPORT MSW - DO YOUR PART TO KEEP THIS GREAT FORUM GOING! (Only 13 donations so far - C'mon guys!)
×


Oldsalt1950
-
Posts
496 -
Joined
-
Last visited
Content Type
Profiles
Forums
Gallery
Events
Everything posted by Oldsalt1950
-
 Looks like I'll be ordering some cannons myself. Those look great.
 -
Have been going over building logs and the plans before proceeding on the rest of Stage 'A' of the building plan. There are a number of items left to finish Knightshead &Timberhead install, Covering boards for forecastle, Gunport framing, Forecastle and Quarterdeck breast beam and the Waterway. In addition to that I've added Poopdeck removable bulkhead which isn't really mentioned in the plans, planking the upper hull to the deck line and removing the fillers in bulkheads A-C, I-L. That should take most of if not all the weekend or more. Then it is on to checking the fairing again, installing the gabbard and whales and marking the bulkheads for planking.
-
The MS model of the Rattlesnake calls for .040 dia Manila Hemp line.
-
Welcome aboard. It looks like almost everything except the rigging has been done. When you inherited the ship, where there any scrap pieces of wood included like the sheets the parts came out of. If so, it has the model number printed on them. We can use that to determine who the kit manufacturer is.
-
Allanyed, very true. One could also use polyester as that is another option. What I was getting at is no one really looks at the totality of what is used to construct our models and how the various components interact and can cause degradation. Wood has a PH and off gases, glues have a Ph and off gas, paint, varnish, shellac, poly all have a Ph and off gas. It all contributes to the issue we have with preserving what we've built. Unfortunately, to run the tests to see what is really causing the issue is cost prohibitive for what is deemed a hobby. Jim
-
SUBaron, you've hit on the crux of the problem. We have no way of measuring how other environmental inputs contribute to the degradation. Since it would be cost prohibitive to engage in testing to find out, we will never know. Jim
- 111 replies
-
- 2
-

-
- Swift
- Artesania Latina
- (and 3 more)
-
SUBaron, exactly! By the time any of it matters, we will all be long gone. Jim
- 111 replies
-
- 1
-

-
- Swift
- Artesania Latina
- (and 3 more)
-
SUBaron, it is an interesting discussion, but misses a lot of other factors that play into preserving and protecting the finished product. I just added to that discussion posting what I know from my vast storehouse of somewhat useless information that most people don't care about. : )
- 111 replies
-
- 2
-
-
- Swift
- Artesania Latina
- (and 3 more)
-
Interesting discussion, but I think you are looking at the wrong picture. Acidity or lack of it, i.e., going either side of Ph7 which is neutral will invite some kind of degradation. You also need to add in the factors of airborne pollutants. Then factor in the time period that it takes before any noticeable effects become seen. It takes a long time for this to occur. Everything we use to construct our models off gases. It is just how things work. What these gases are and how they affect the materials we use to construct our models is an unknown, and we really need not concern ourselves over it. The reason a case for our finished models should not be airtight is like a house, some circulation is required. Without it certain gases build up and the air also become stale and retains unwanted odors. Use whatever wax product you wish, it all evens out in the end, and eliminates those fuzzies .
-
Glomar, take your time with the fairing, start at the deck line and follow the curve along the deck this will get you started. I see there are bevel marks on your bulkheads, so follow those to establish your curve. You also have a sub-deck whose curve you can follow to establish your fairing curve at that point. just take it a little at a time and all will be good. fairing looks more intimidating than it really is. Remember to check your progress as you go. Jim
-
I may be forced to go that route myself. I don't want to hold up the build over the transom decoration.
-
The dreaded bearding line always causes a little bit of distress. Since you have an actual keel to add to the bulkhead frame it is a little easier to do. I draw out the bearding line from stem to stern, and sand it by hand rather than use a Dremel. It takes a little longer, but you have much more control. Some use and Exacto knife and chisel. Find the method that works best for you and stick with it. Jim
-
Having spent much time on Navy ships, and my fair share of time repainting "Haze Grey", non=skid and a variety of other leaded paints let me say this. You will never get a match as no two ships were exactly the same shade of grey. Weather and sea salt do a number on the paint and how it looks. Add to this that depending on the Boatswains mate who ran the paint locker, all the paints were adulterated a bit by combining used cans of paint. Take for example 'White striping", it was never pure white paint on any of the ships I served on. The Boatswains mates always mixed a little blue paint in with it, the amount of course based on the SWAG principle. Jim
-
Gun Port Yellow?
Oldsalt1950 replied to Dave_E's topic in Painting, finishing and weathering products and techniques
There are many good acrylic paints on the market, and if you are lucky a local store will carry some of them. I have a "Michael's" close by so I can just pop on over and look at the various colors and brands and pick and choose. A tube of Grumbach's only runs about $8.00 and will last through more builds than I'll be capable of during my lifetime, unless of course I apply it with a trowel. Jim -
Thanks Cathead. I knew they could move things using existing rigging, just couldn't put the picture together. Jim
-
Welcome aboard Nate. You have a good list of things to do. There are some great kits available to get you started, and I recommend you start with something simple. Maybe a single mast boat in a large scale to get you started Model Shipways 18th Century Longboat is a good example and relatively inexpensive, add to that their replacement parts guarantee and you are sitting pretty. Model Shipways is part of Model Expo. Take your time, this isn't a race. Read and reread the plans until you have a firm understanding of what is to be done. Read the build logs of others who have constructed orc are constructing your kit. If you are still stuck or don't understand after that, ask questions here. Best of luck, hope to be reading a build log by you soon. Jim
-
John, I have the transom straightened out. Height and it being a little off plumb. I'm trying to decide what to do about the fancy work. Do I invest a lot of time trying to get the Britannia fitting to work, or do I make my own? I may just clean up the casting, and make an impression of it and use some Sculpty and go from there. Either way it is going to take some time and hard work to get right. I the meantime, I'm fiddling with the ships boat. Still haven't found out where or how they got that boat off the ship. I also have to figure out what I'm going to do concerning the portable gangways. I know I'll build them the question is to install them or not. They cover a lot of detail work. Jim
-
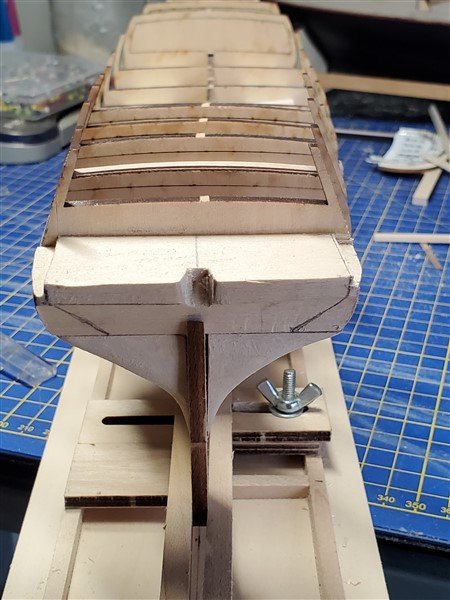
Had to perform some surgery on the transom. Noticed that it looked a bit crooked, so off came the blocks. Fixed that and then chiseled out channels on both sides of the upper block so that the outer bulwarks sat correctly. Shimmed bulkhead I for fairing and the top of bulkhead L so the quarterdeck will be level.
-
John, it may not look like much progress, but that is actually quite a bit. You have a lot of time invested in that work, and it looks great. Slow and steady work beats spurts of quick work. Remember this isn't a race. Jim
-
You can speed up the drying process with a hair dryer. The ship is looking good. Jim
- 111 replies
-
- 2
-
-
- Swift
- Artesania Latina
- (and 3 more)
-
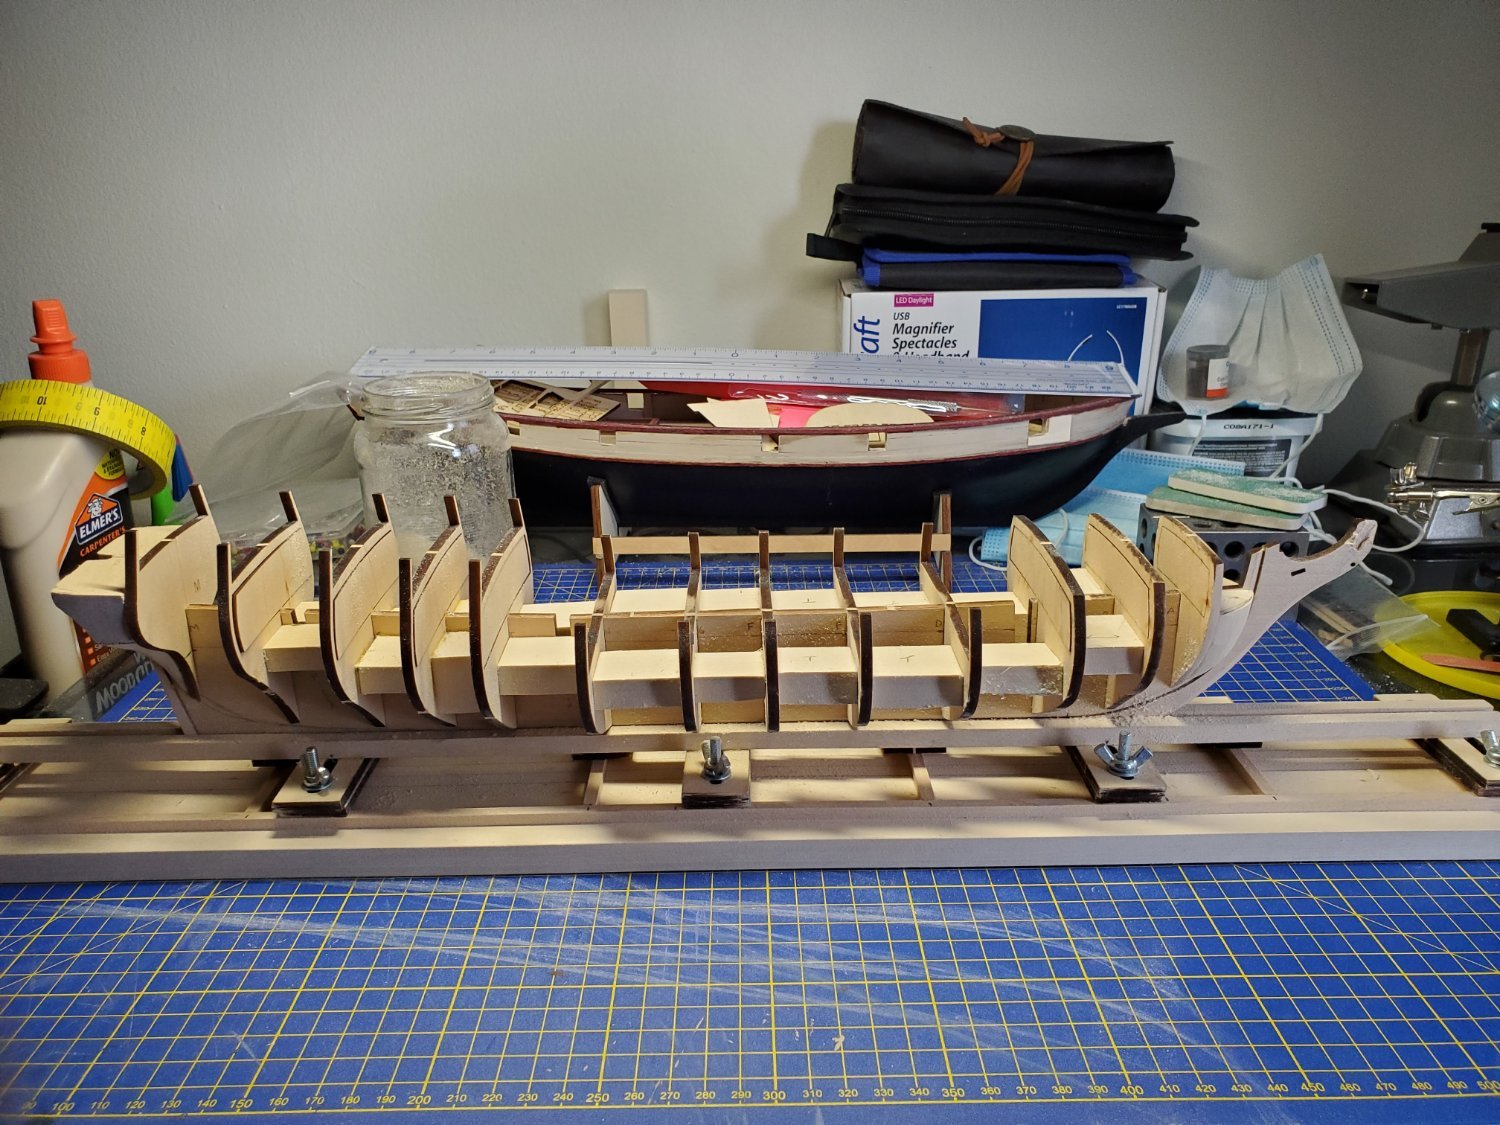
Added bulkhead stiffeners. Should eliminate most of the bulkhead flex when fairing.

-
You can never have too many clips, or types of clips. Don't forget rubber bands too.
- 83 replies
-
- 1
-
-
- Lady Nelson
- Amati
- (and 2 more)
-
John, my rabbet was done by sanding it rather than chisel and knife. Fairing is going to take some time, will most likely add blocks between bulkheads before doing so to stiffen them up as they flex pretty good. It is definitely going to take time to fair the hull properly, but there is no sense in rushing the project. I ordered a Falkonet 20 oar lifeboat to replace the one that came with the kit, don't think I want to spend days sanding a hull for a boat that will only get glanced at on the completed ship. Speaking of which, have you noticed there are no davits for lowering the ship's boat or raising it anywhere on the plans. Will have to look into that and see if I can find anything. Jim
-
Dapper Tom has a crosstree and mast platform on the main mast, I assume that you have painted that black, along with the various spars. If so , I would use white for some contrast on the mast tops and bow sprit. Jim