HOLIDAY DONATION DRIVE - SUPPORT MSW - DO YOUR PART TO KEEP THIS GREAT FORUM GOING! (Only 13 donations so far - C'mon guys!)
×


Oldsalt1950
-
Posts
496 -
Joined
-
Last visited
Content Type
Profiles
Forums
Gallery
Events
Everything posted by Oldsalt1950
-
 I assume your mast platforms are black? If so white would be in order Chief. Jim (Stg1sw (ret) )
 -
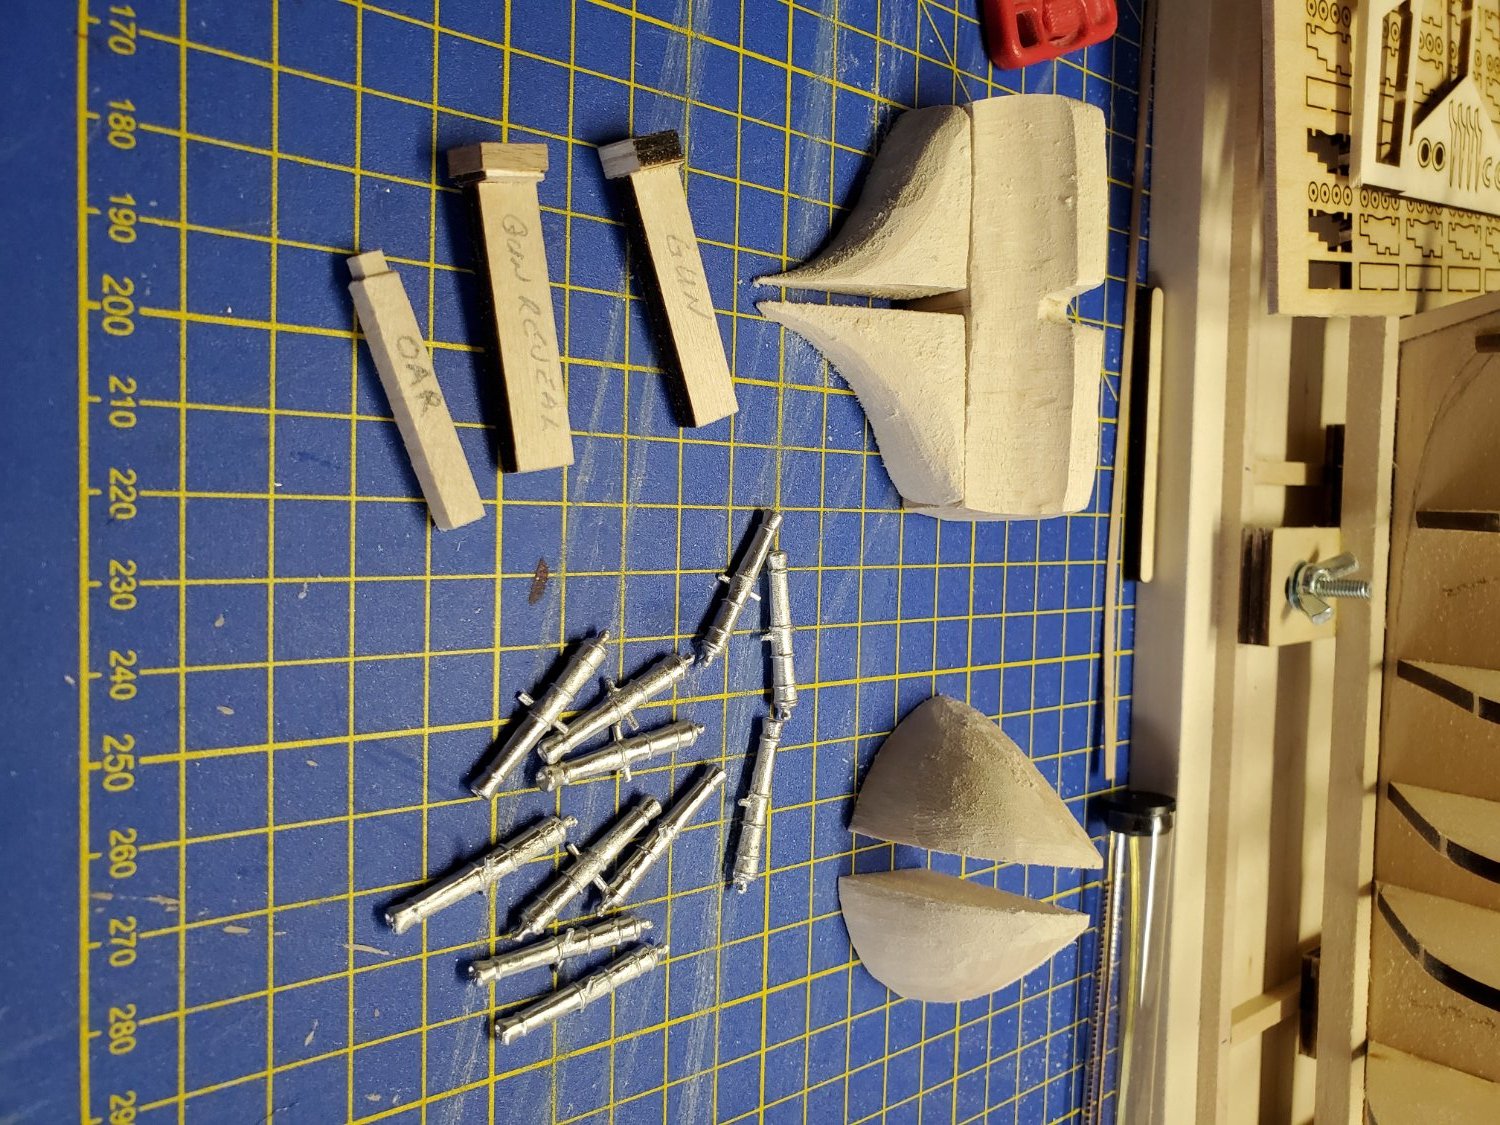
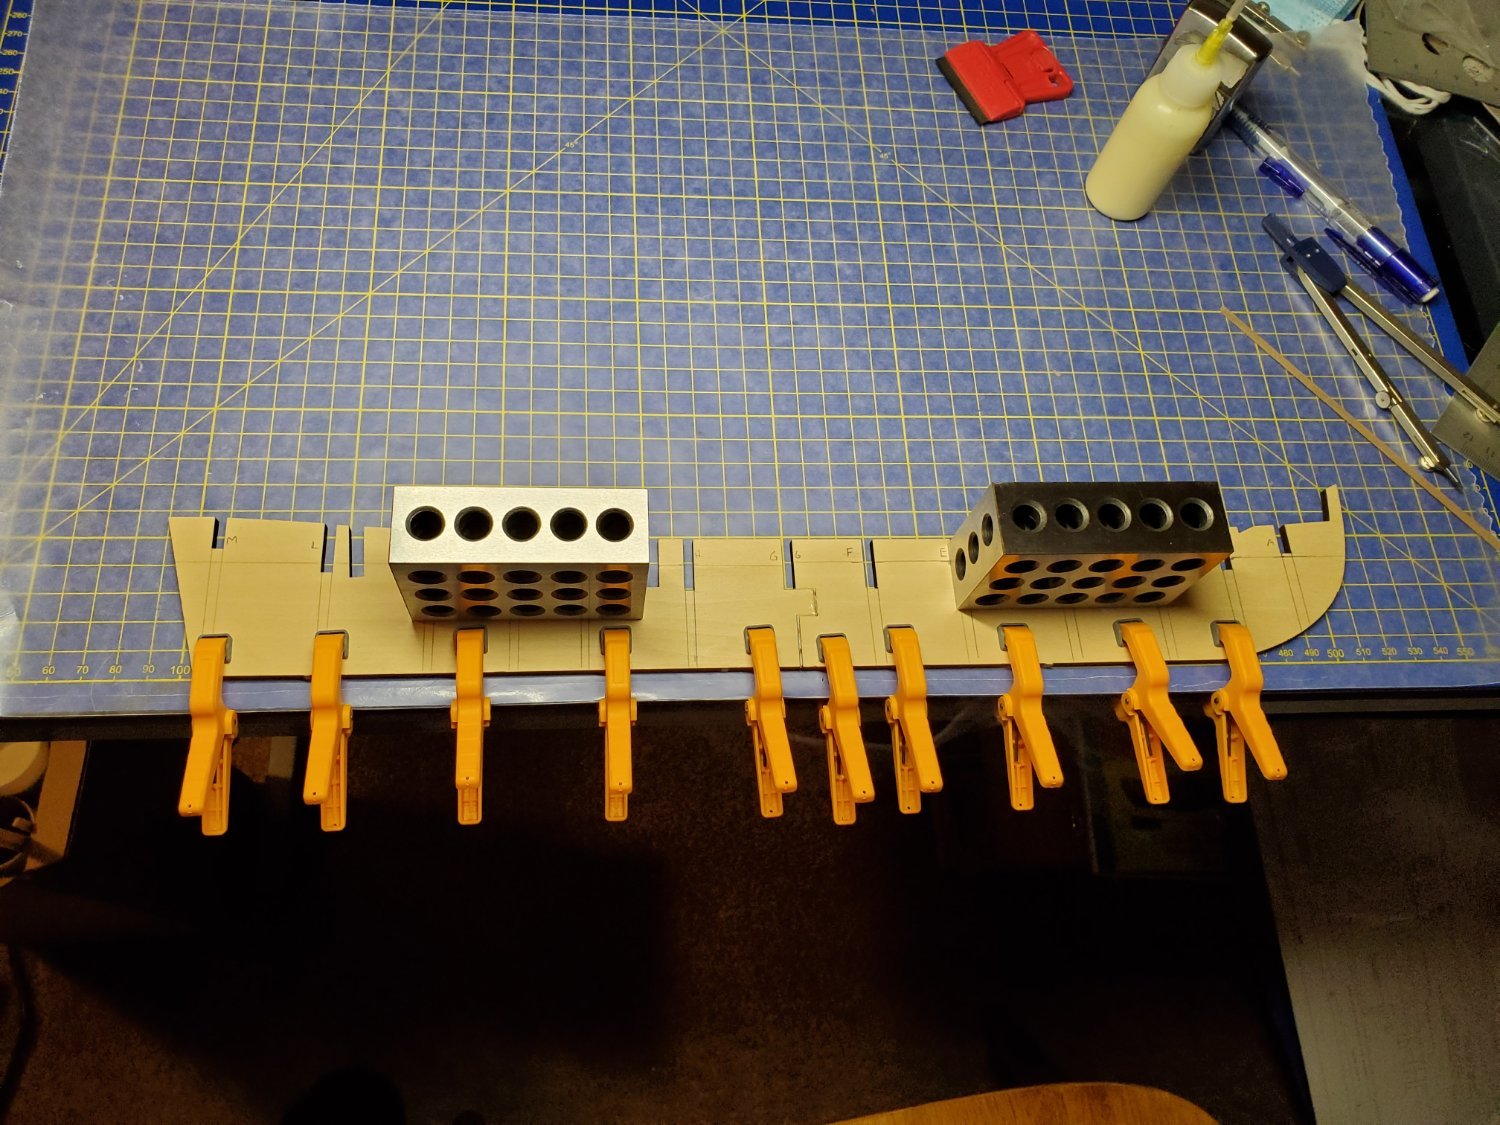
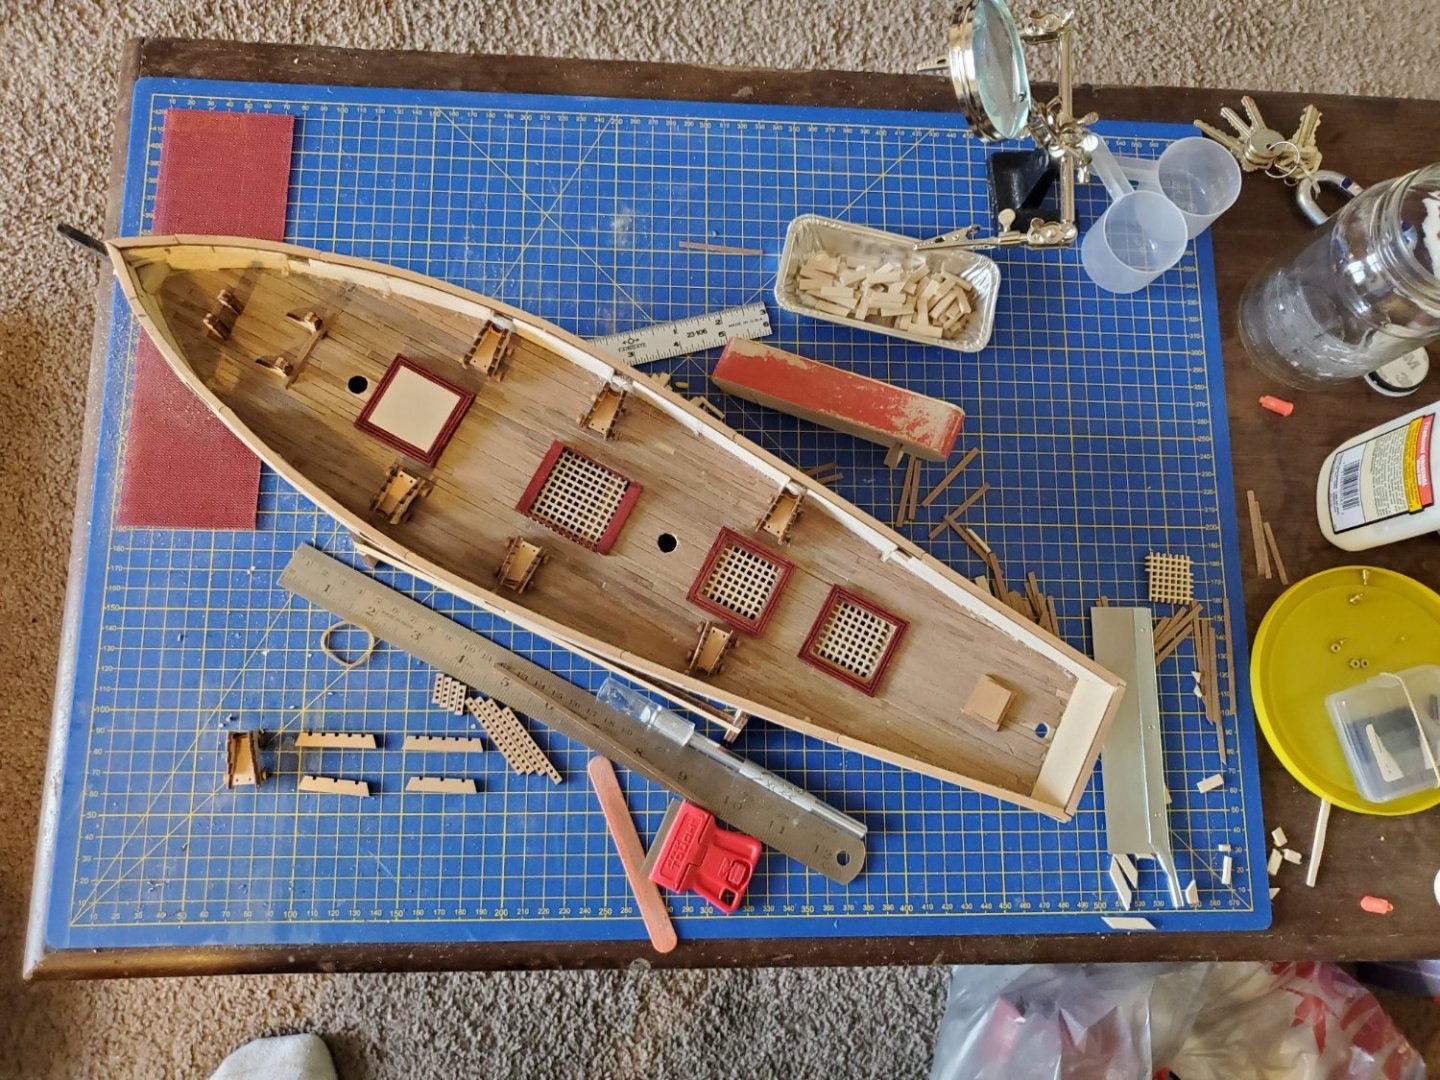
Made a lot of sawdust, 3 jigs and cleaned up the cannons. It may not look like much, but the bow inserts and the transom blocks took a day to complete. The 3 jigs are for the gunport openings, the sweep openings and the gunport reveal. Used my 1 and only power tool a Dremel with a wire brush to clean up the cannons. Living in an apartment limits what power tools I can have at my disposal.

-
She's looking good. Glad to see you are enjoying the build and the problem solving. I made a notebook with tips from various builds for fixes to problems that were encountered, it comes in handy when I encounter an issue.
- 111 replies
-
- 2
-

-
- Swift
- Artesania Latina
- (and 3 more)
-
John, you can try mixing a little of the Hull White with the Iron Black. Should give you a dark grey that will be close to what grease that has picked up some dirt and debris looks like. Jim
-
Johnathon, you might consider purchasing some 1-2-3 blocks. They not only work very well for squaring things but are also handy as weights when gluing up flat stock. You can get them from Amazon for about $9 per pair. Jim
- 83 replies
-
- 3
-
-
- Lady Nelson
- Amati
- (and 2 more)
-
John, seeing as a working line passed through the sheave, the shaft holding the pulley would have been greased. That means it accumulated dirt and rope fibers as the line passed through it. A dark brown to black would be the most likely color. Hope that helps. Jim
-
No more so than rubber cement. I never leave any paper templates on a part of my ship models more than a few hours.
-
With a little modification, this will do exactly what it is designed to, that is hold the keel and allow you to square the bulkheads. I modified mine at no additional cost, just used some scrap pieces to hold the clamps tight to the base board.
-
Stick glue works well.
-
The Baltimore Clippers in general are an interesting classification of ship. No two were alike, and trying to find the history on an particular one damn near impossible. Names changed, a lot were scuttled in and around Cuba. They were used as slave ships, fast merchants, privateers, smugglers. Jim
-
John. for now, I'm going without the pins installed in the keel. Hopefully it will remain intact until I have the garboard strakes installed, which should help hold it together. There isn't a lot of meat along the keel and bulkhead frame to hold on to once the rabbet is cut Jim
-
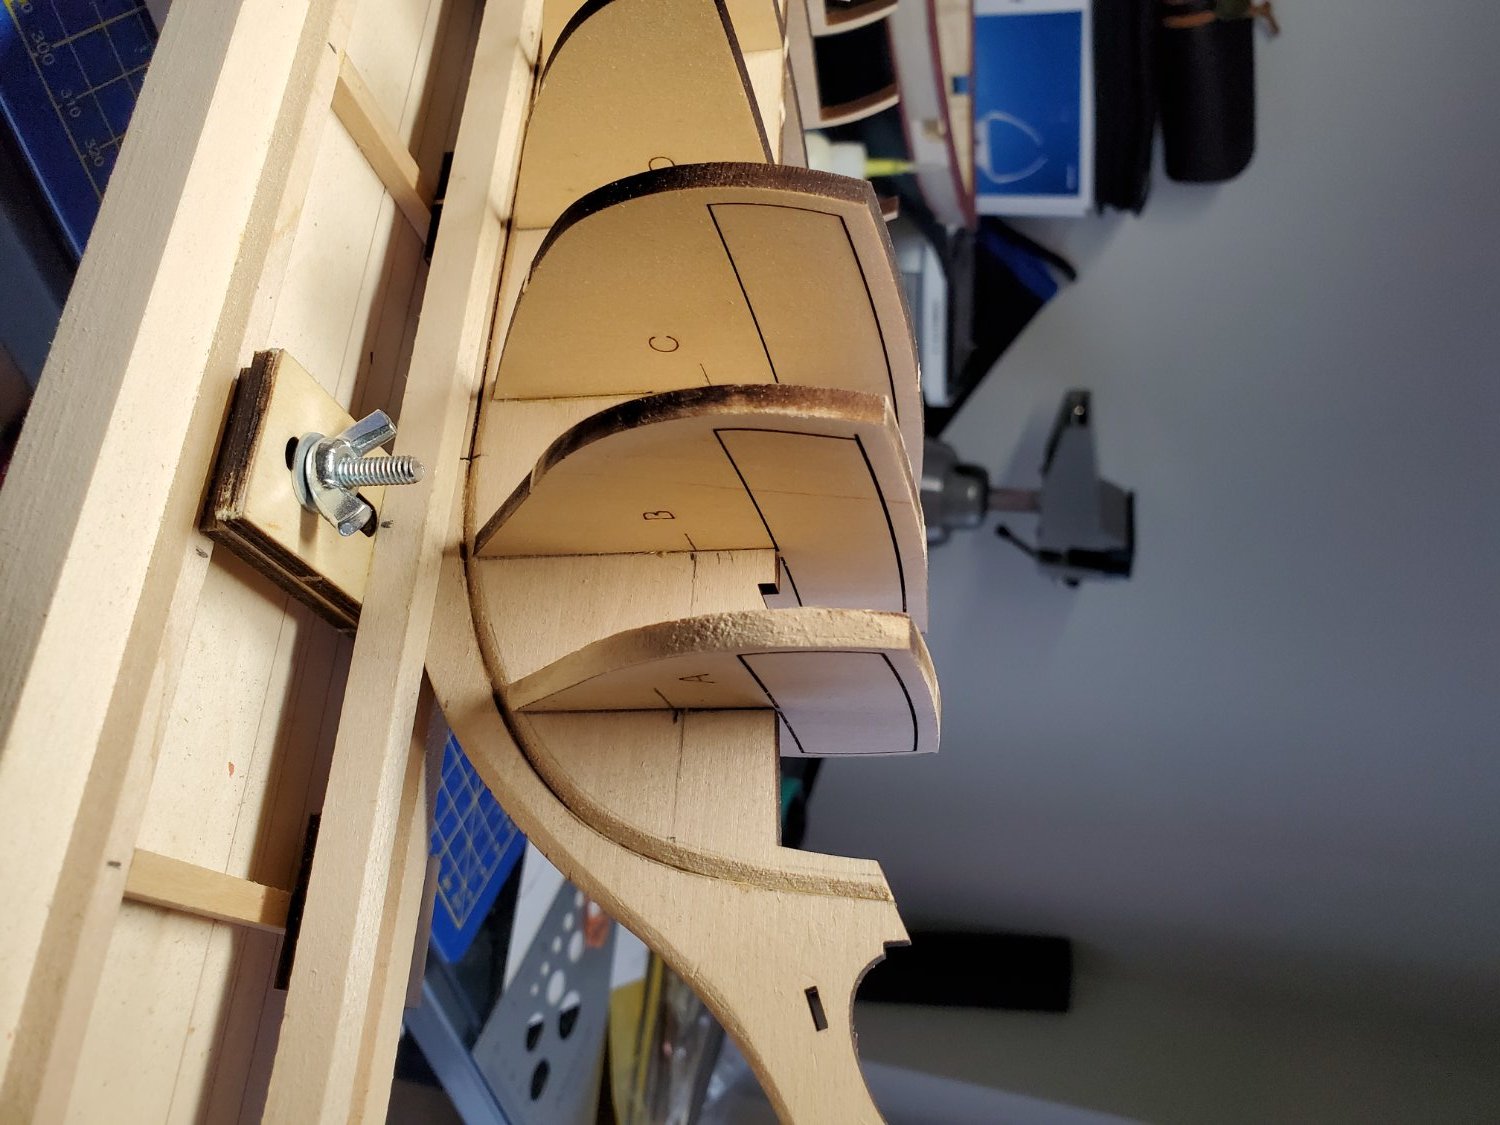
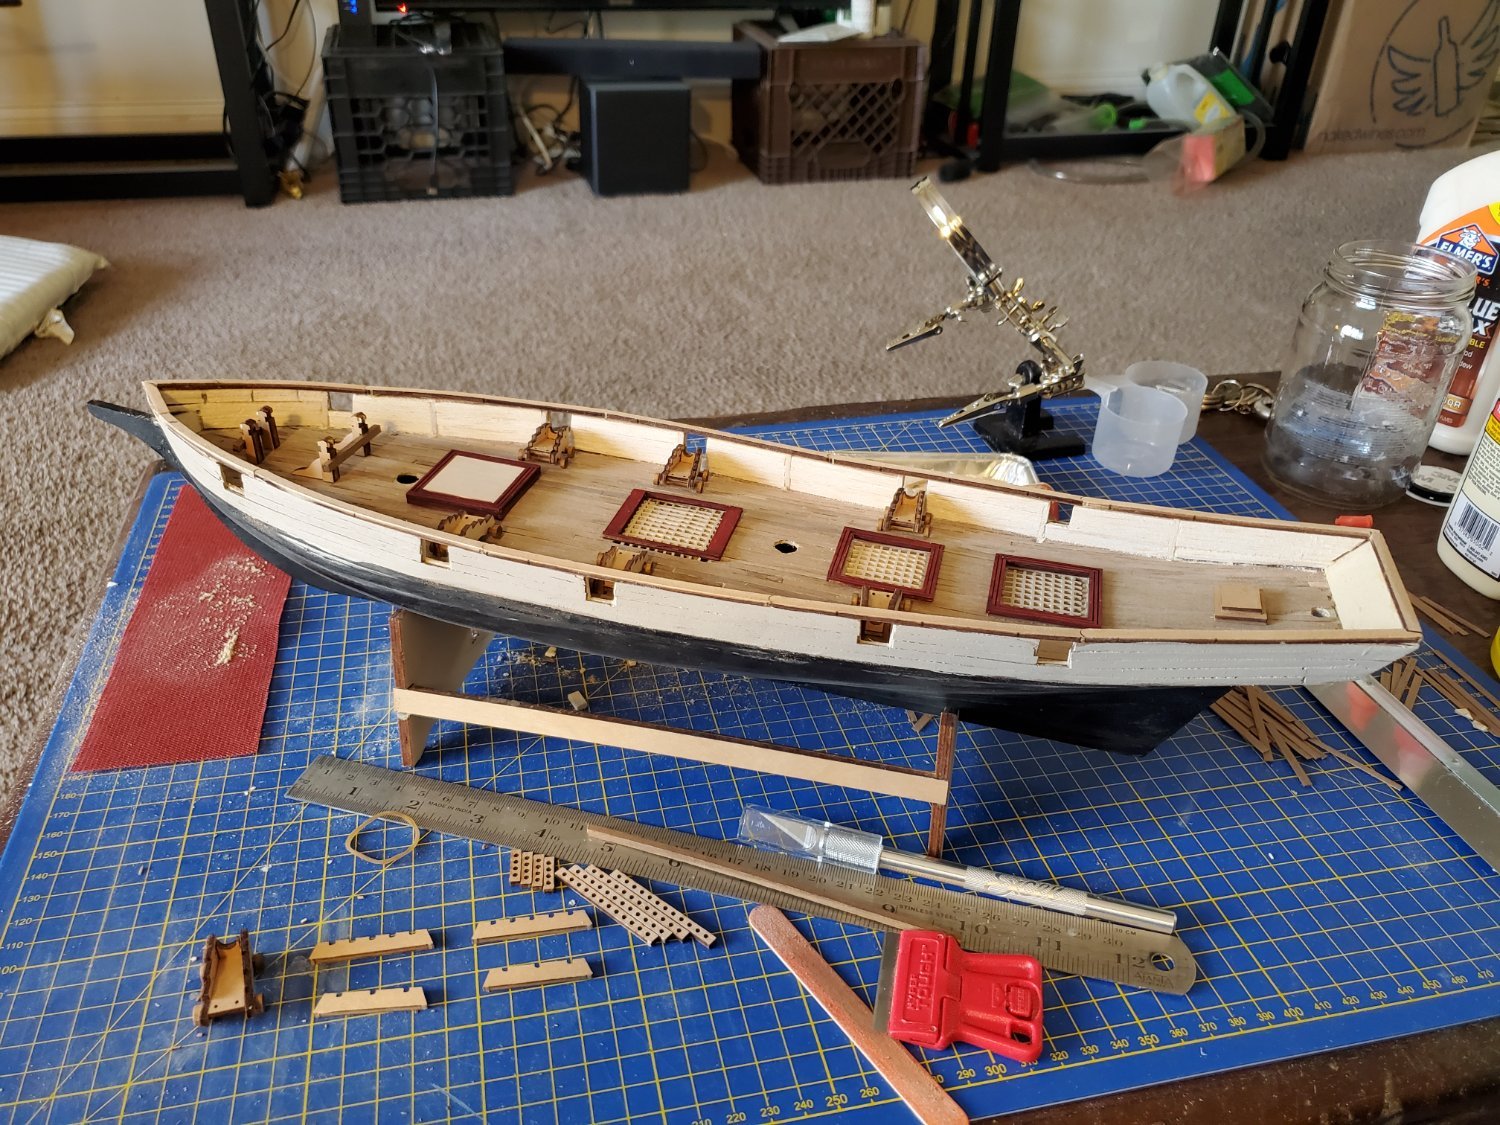
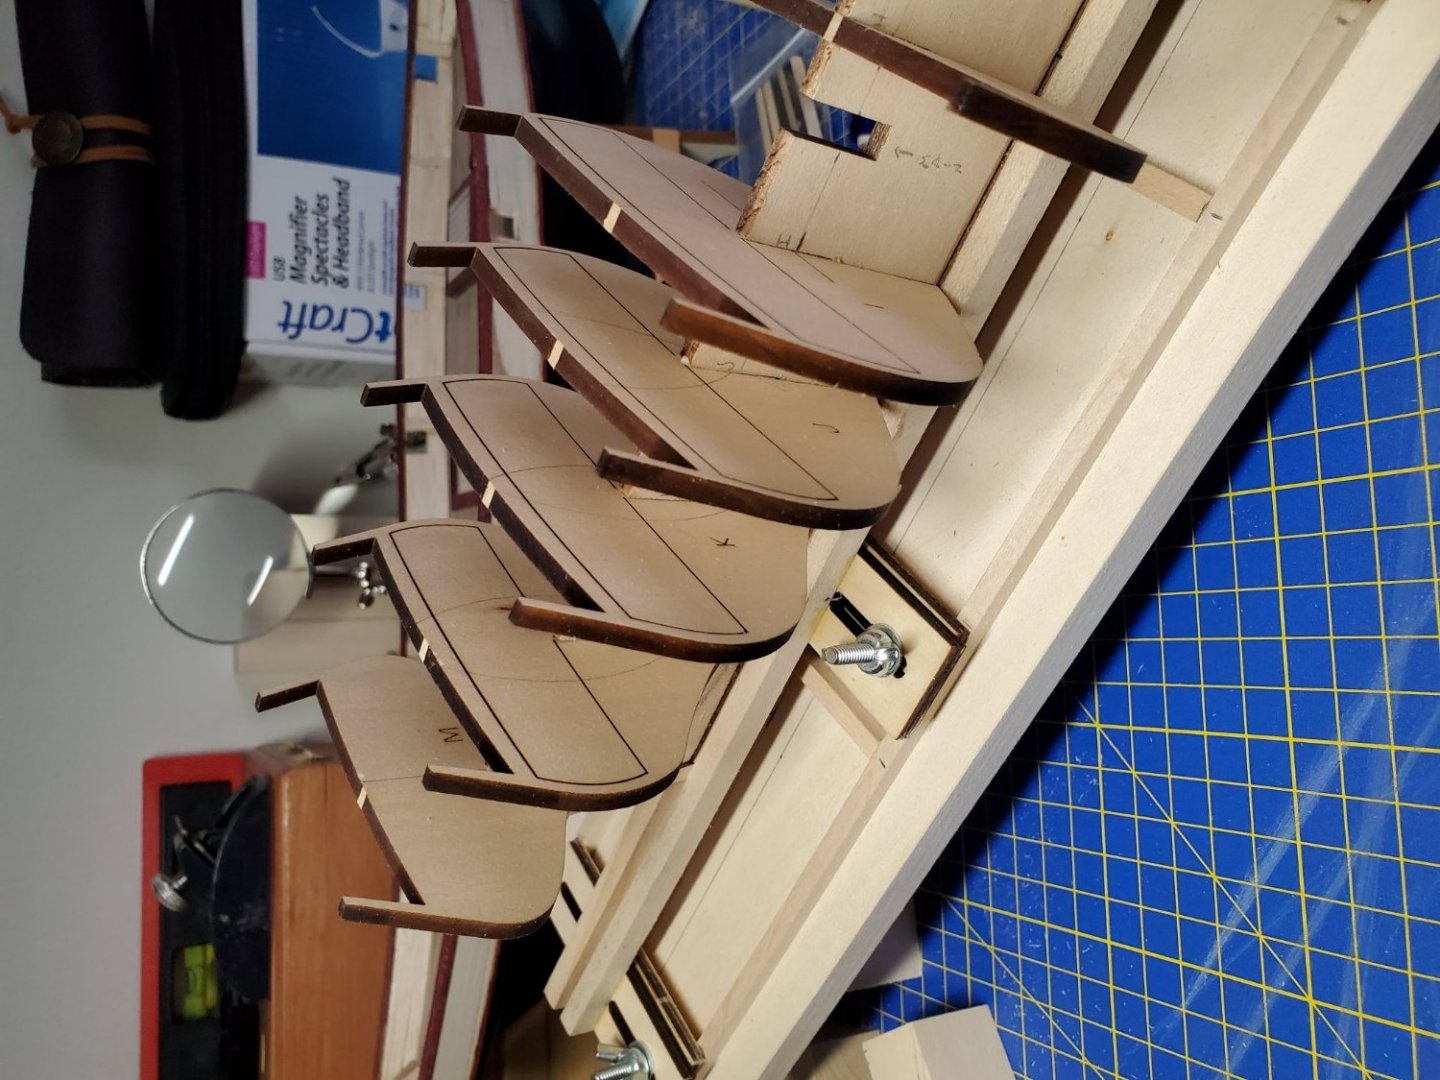
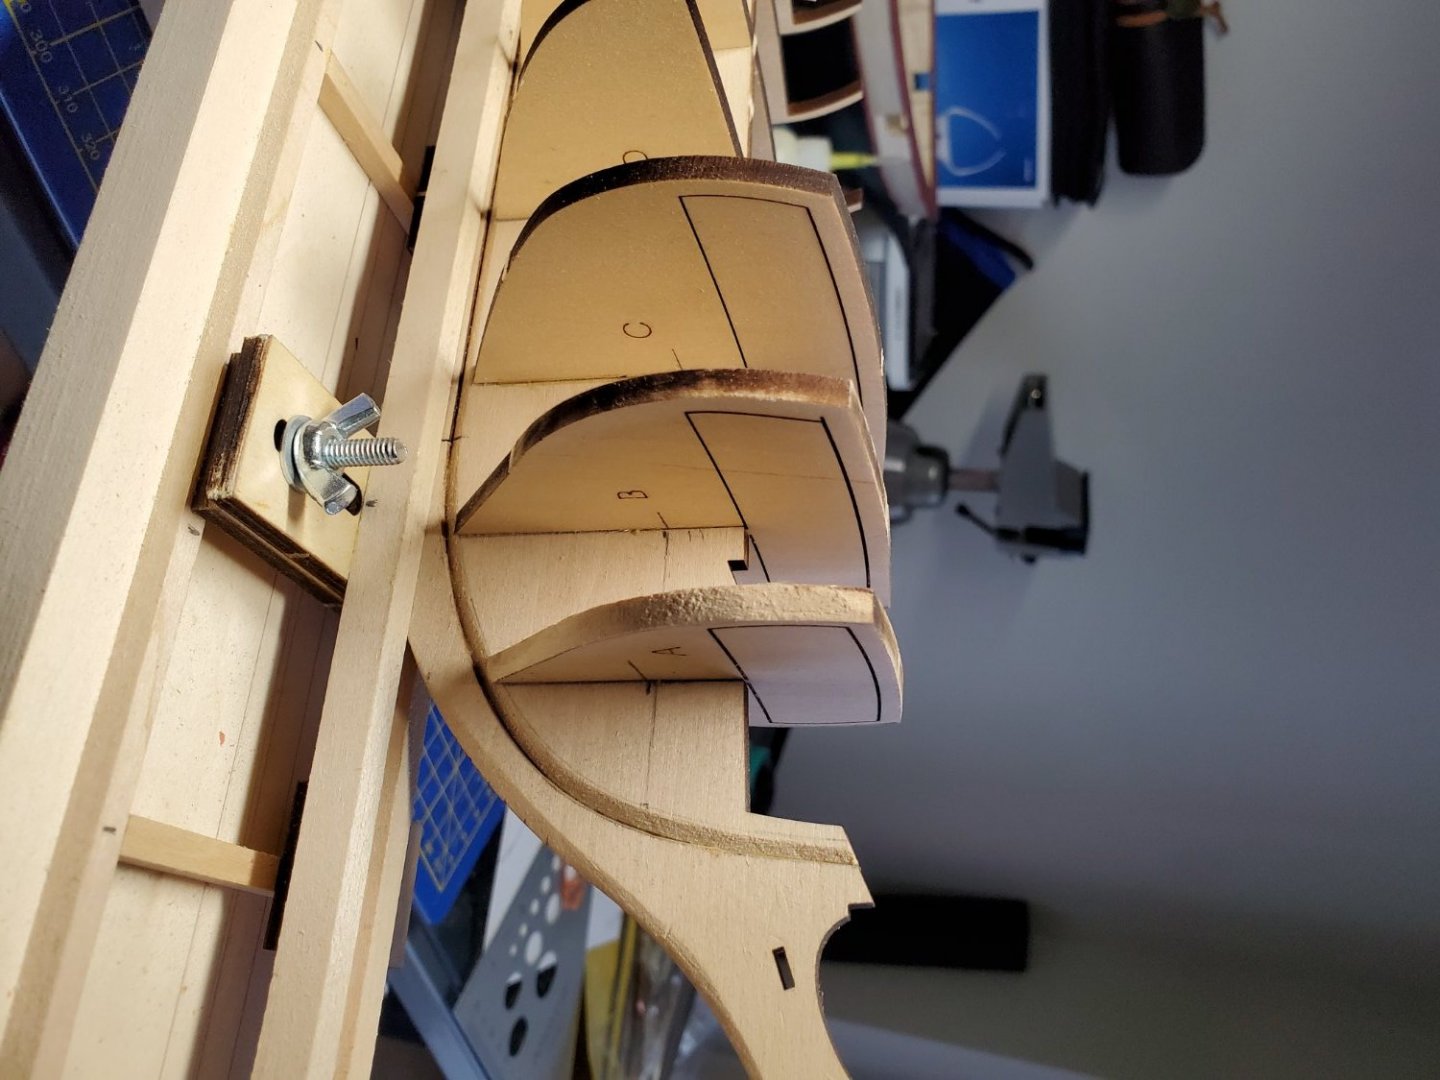
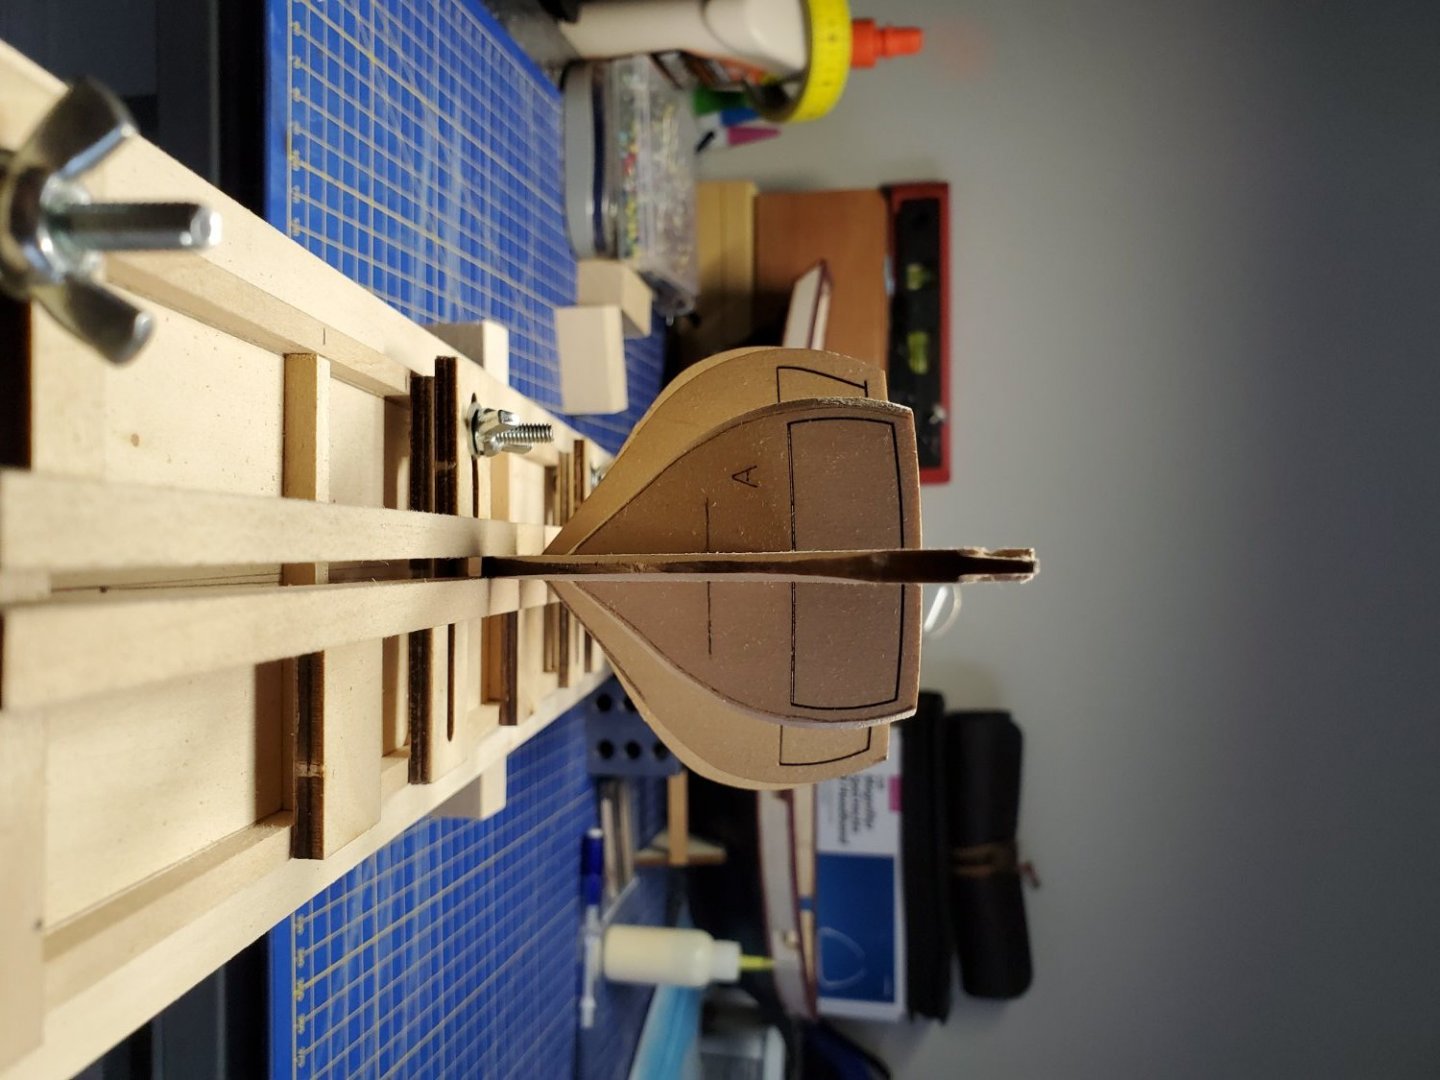
Productive day in the shipyard. All the bulkheads were fitted, Stem was tapered and carved for figurehead, Keel mounted to bulkhead frame, and bulkheads attached. Work will slow down this week as the forward and aft filler blocks are carved and shaped. Will then have to decide if I'll install filler blocks before fairing the bulkheads. Bulkhead A has already been rough shaped.

-
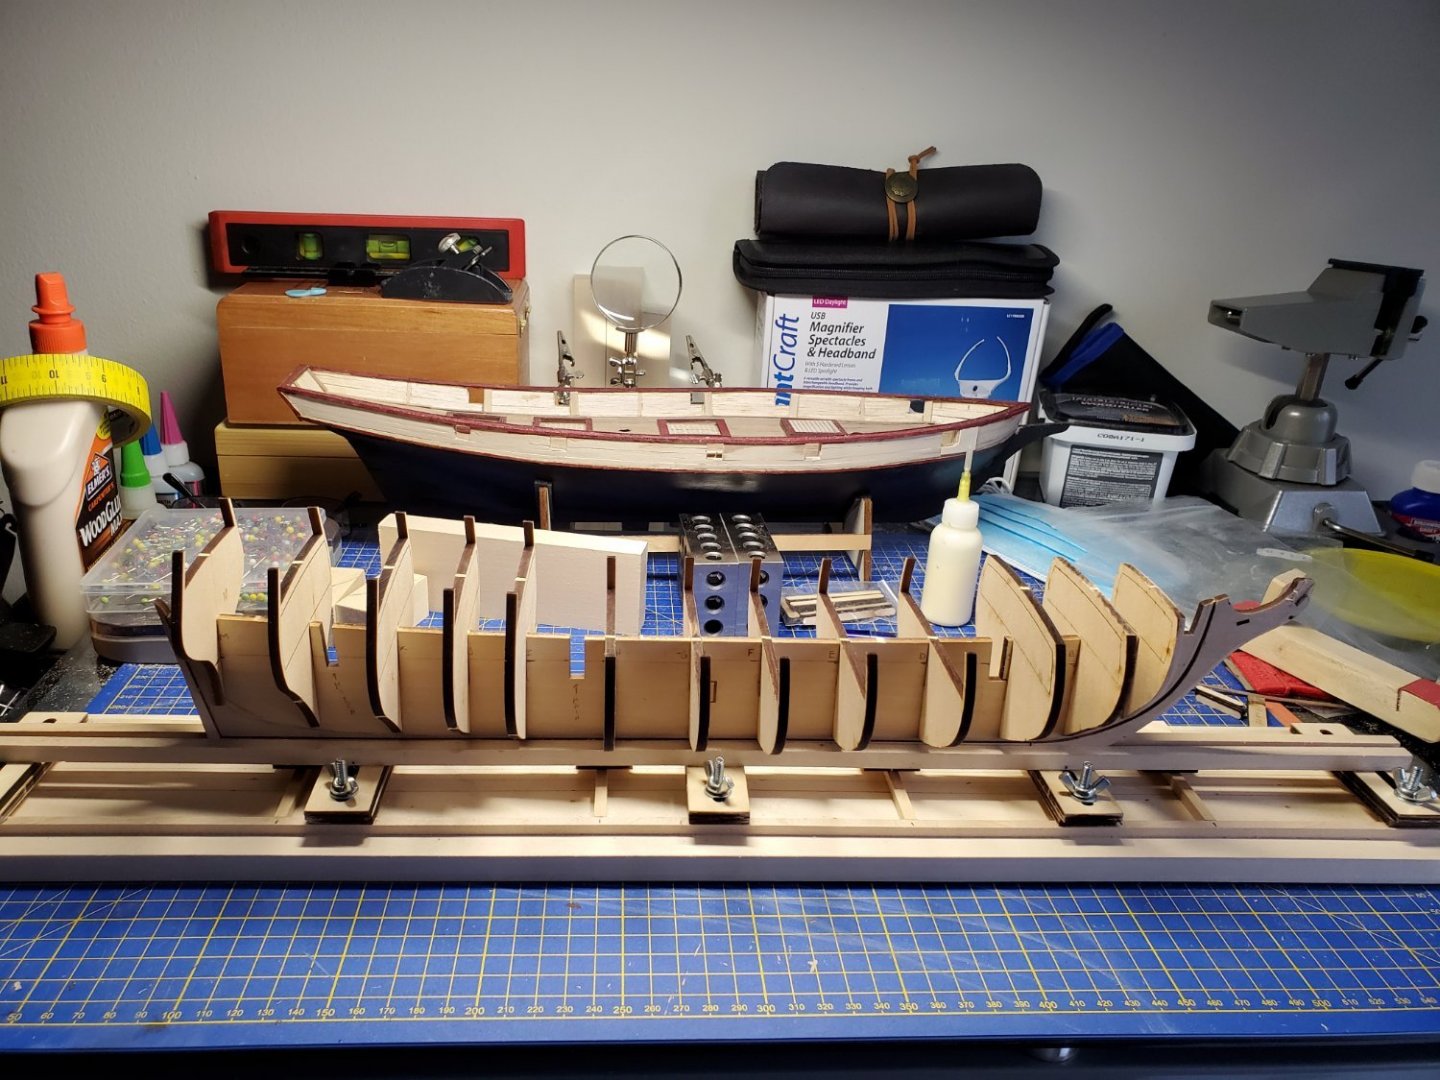
Today was a productive if somewhat slow workday. Started dry fit of bulkheads to the frame. Only A through E done so far, I'm definitely not rushing this process. The beardline and corresponding rabbet have been roughed in, not sure if I am going to take it the full 1/32 of an inch in depth. Doesn't leave much meat for the keel to attach to. I will probably try and split the difference so the rabbet depth is 1/3rd the width of the keel. Lots of work yet to do, Will fair bulkheads A-c and K-M while of frame the others can wait until after they are installed. Still need to mark all reference lines, will use tick strips and. measure from the deck. Being I worked for Planning and Estimation at SIMA , Philadelphia I've learned it is best to have a good working plan and stick to it. Work is more efficient and enjoyable when you can see and know the steps involved. I'd like to take the time now to thank all those who published build logs of Rattlesnake, they are a wealth of knowledge and inspiration. Jim
-
She's taking shape nicely John. I just started my "Snake", so will be following right behind you. The logic behind having the forecastle deck beams attached is that it would strengthen the bulkhead extensions, not that it really helps from what I've read on other builds. Good intentions, bad execution. Jim
-
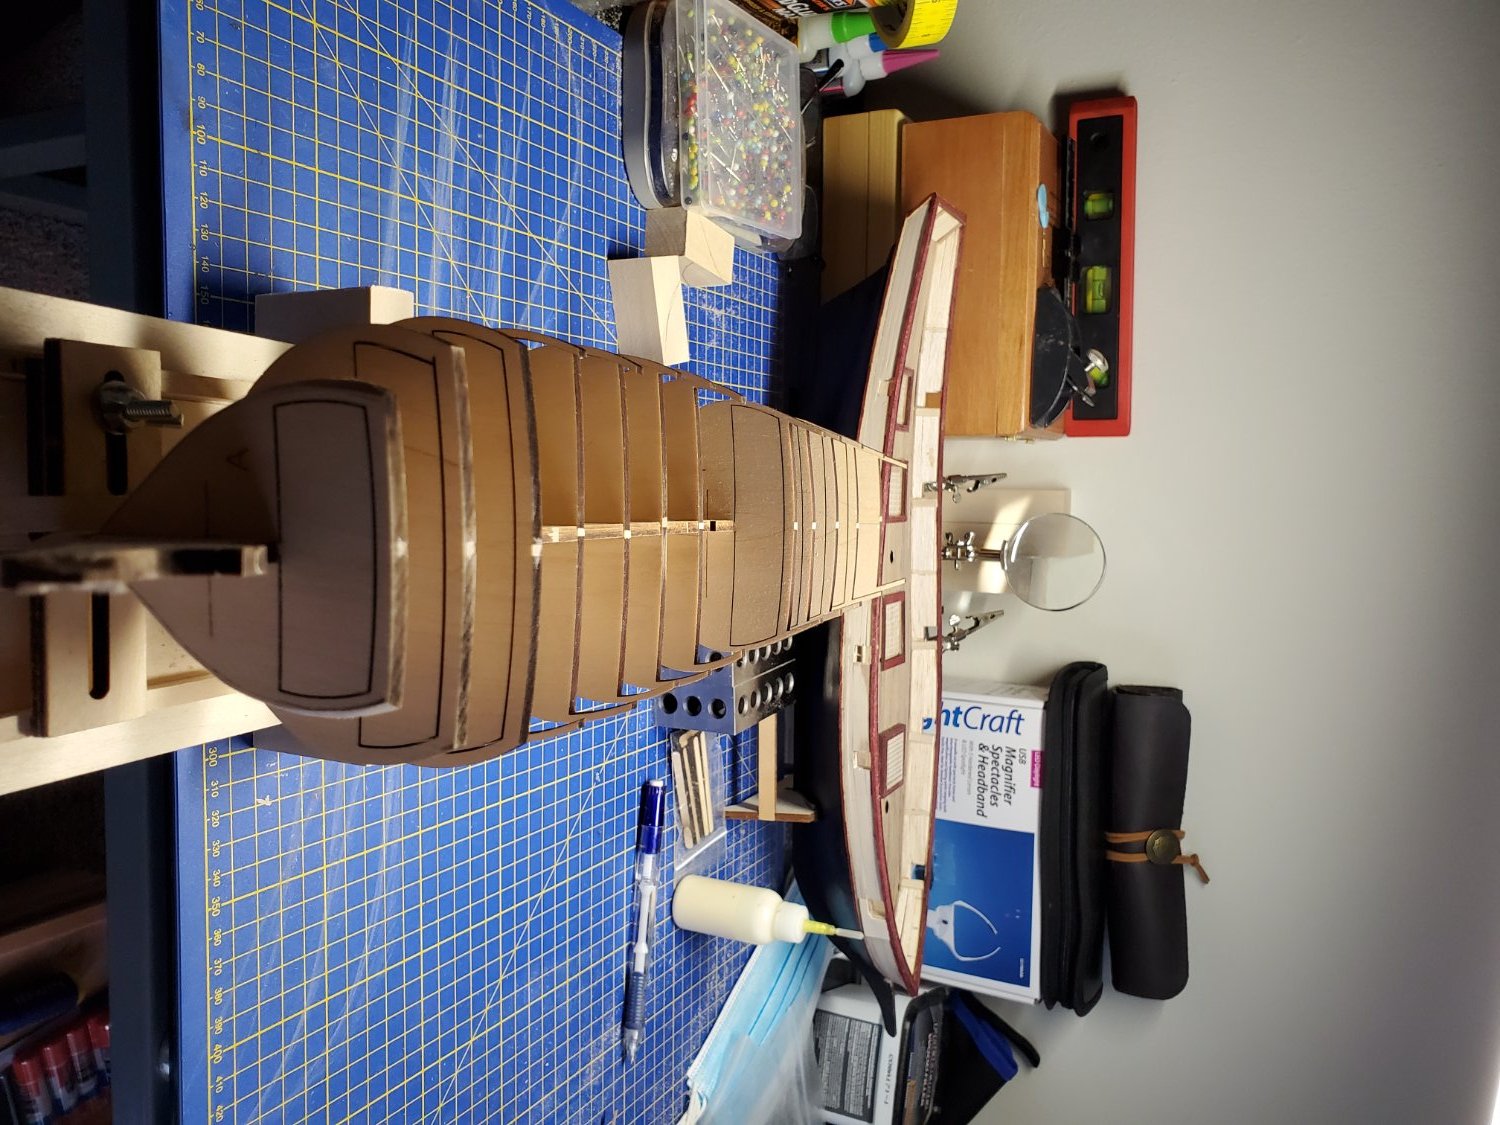
Since updating the shipyard, decided that I'd start and new project. Once snake bit, it is an itch you just have to scratch, so into the deep end of the pool I go. Not much to show right now, the keel frame is being glued up so while that is curing, I'll be re-reading building logs and doing the background work to get the frames installed square, establishing the dreaded rabbet and prepping for hull planking.

-
This build is being put on hold while doing research and work on another project. This is going to basically be a test bed for various procedures, and will eventually be finished as a concept ship.
-
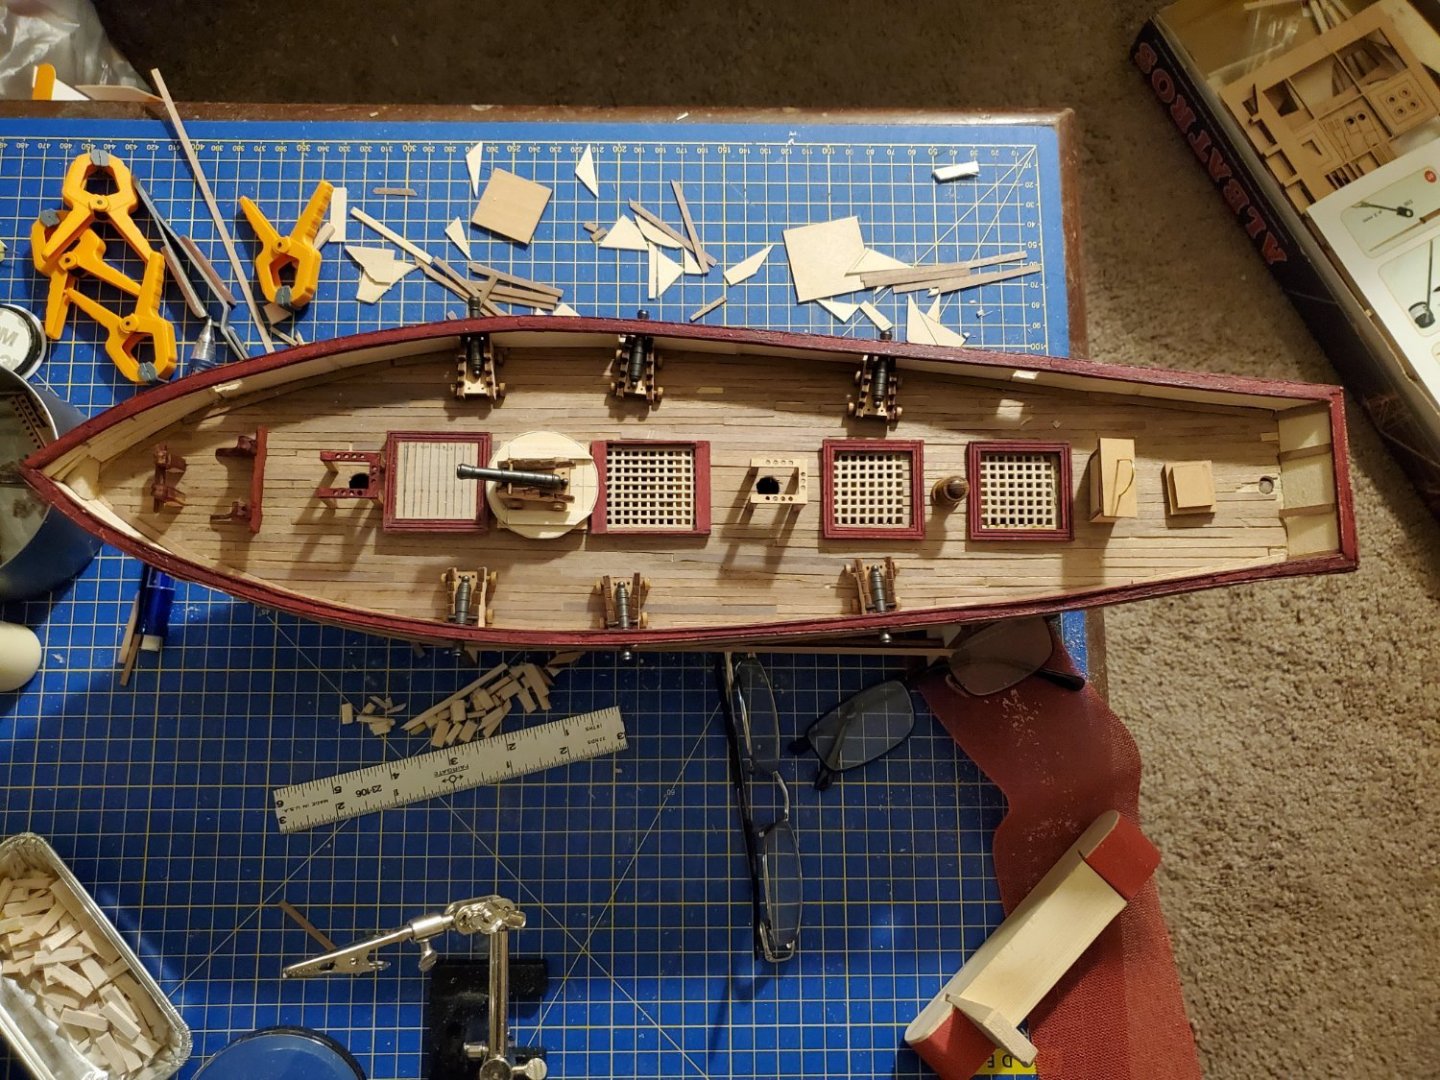
I have been struggling with the final arrangement of all the deck fittings, and since the "Albatros", was not a real ship, but just a model of one of the variations of the "Baltimore Clipper", I have some wiggle room. There is a question as to where /if to mount the capstan, the mounting of the trainable 12 pounder, and the 12 pounder hatches and what they looked like. Most models have the capstan aft, the 12 pounder sitting on the deck mid ship. Dr. PR put his 12 pounder on a modified carronade sled mounted to what is a metal ring for training about the compass. I'm torn about what to do with the capstan, but did workout and construct a mount for the 12 pounder.
-
The above pictures are just a trial fit of the components. The deck is going to be busy. Phil, I've been following your build, very impressive. Jim
-
Typhoons are no joke. We came with 3 degrees of having equipment sheer of the ship, 45 degrees was our worst. The helmsman was in a climbing harness lashed to the ships helm. Phil, I think we have a lot of room to do what we wish with our Baltimore Clippers as they seem to have been configured in many different ways. There is no type, just a fast low riding hull with cannons and carronades wherever they fit best.
-
Finally got in some supplies. All the brass has been blackened except the ships bell. Will be assembling and painting the deck furniture and the cannons. Then have to make a decision on what color the upper hull will be, along with the interior of the bulwark. I can then rig and mount the cannons and move on to tapering the masts and doing the rigging.
-
Looking good John. Looks like your wales are going to be right where they should be. Take your time, this isn't a race.
-
My metal ruler was wrong.
Oldsalt1950 replied to modeller_masa's topic in Modeling tools and Workshop Equipment
When it comes to rulers, yes they will be a little off but within tolerance. However, when you take a measurement, don't start at the bitter end of the ruler. Start at the 1 " or 1 CM mark and take your measurement, then subtract 1 from the reading. The ends are always a bit off. -
My typhoon was in 72 off Vietnam on a DLG, we caught the tail end of it. Three days of semi-submarine duty. Had to strap the helmsman to the helm with a climbing harness. Fun times. Jim
-
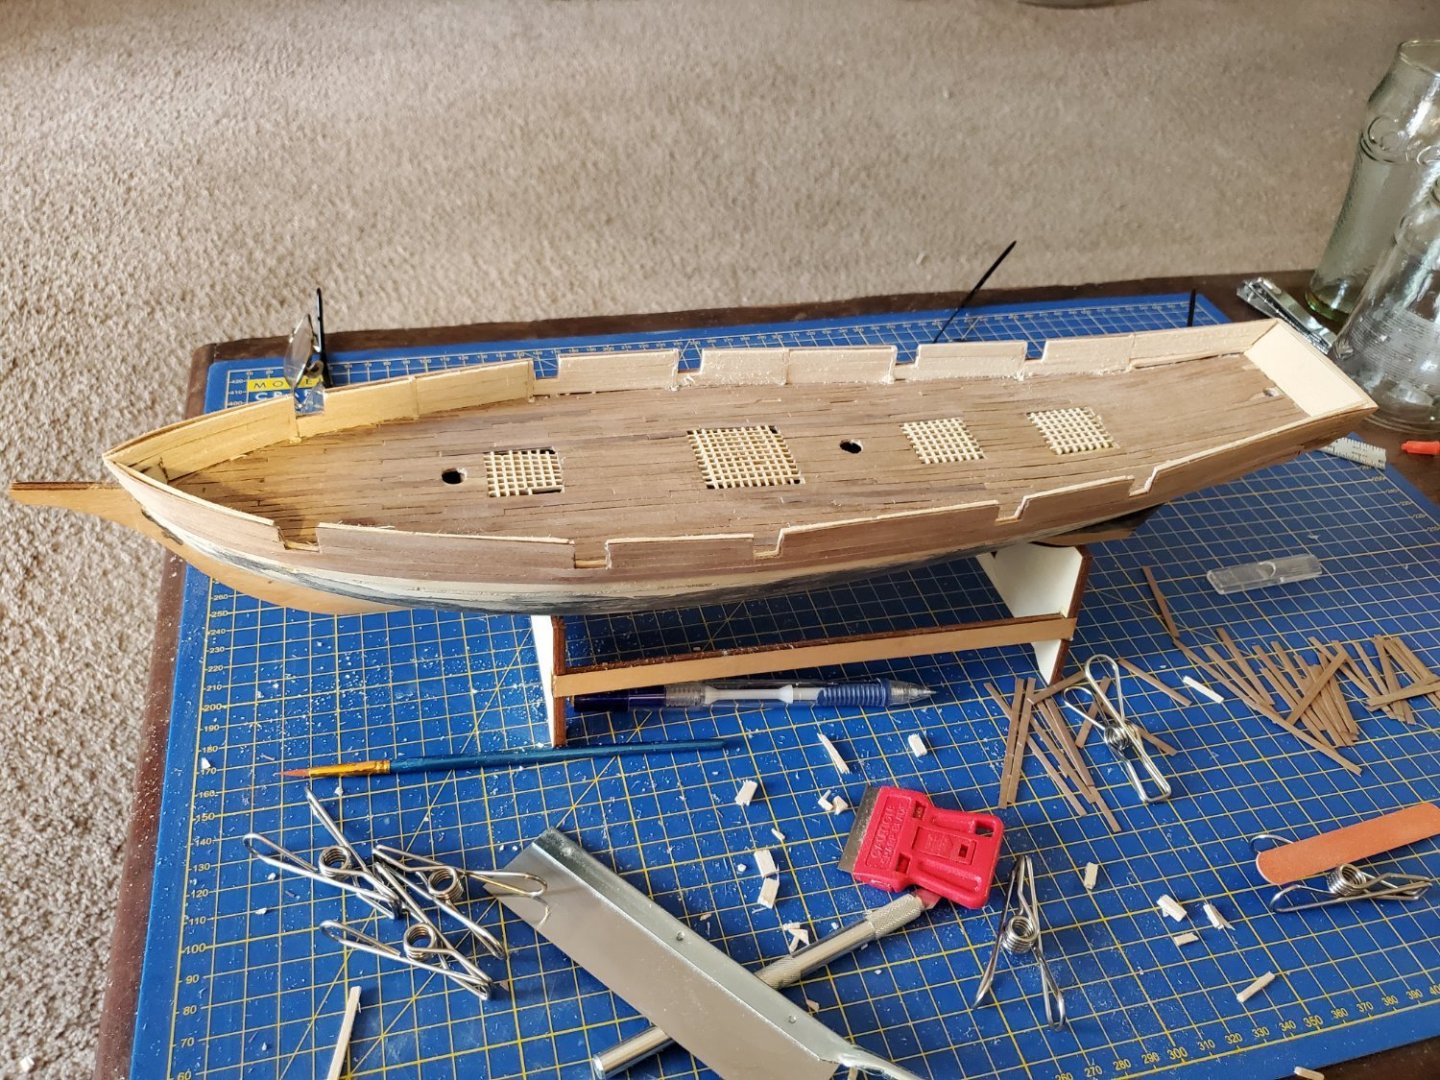
bulwarks have been planked inside and out. had to work out those details as the instructions only show a picture of the bulwarks completed in typical Mantua magic. I had planned on installing the deck furniture but ran into a small issue. If I install the hatch combings as per the plans, there is a large issue with the two aft hatches. The plans call for the capstan to be mounted between them, and the capstan arms are a scale 11 feet long. No real issue there, but if one were to try and figure out how the capstan would be operated, the crew member would have to step up and down over a scale 15" combing. That isn't going to work, so I'll need to work out that issue. The second issue is the forward hatch, but a simpler fix. That will have the grating replace with a solid hatch cover. It isn't always fair winds and following seas out in the ocean. Been there in my time in the Navy and it is no fun. Taking white water over the bridge looks good in the movies, but it sucks in real life.
-
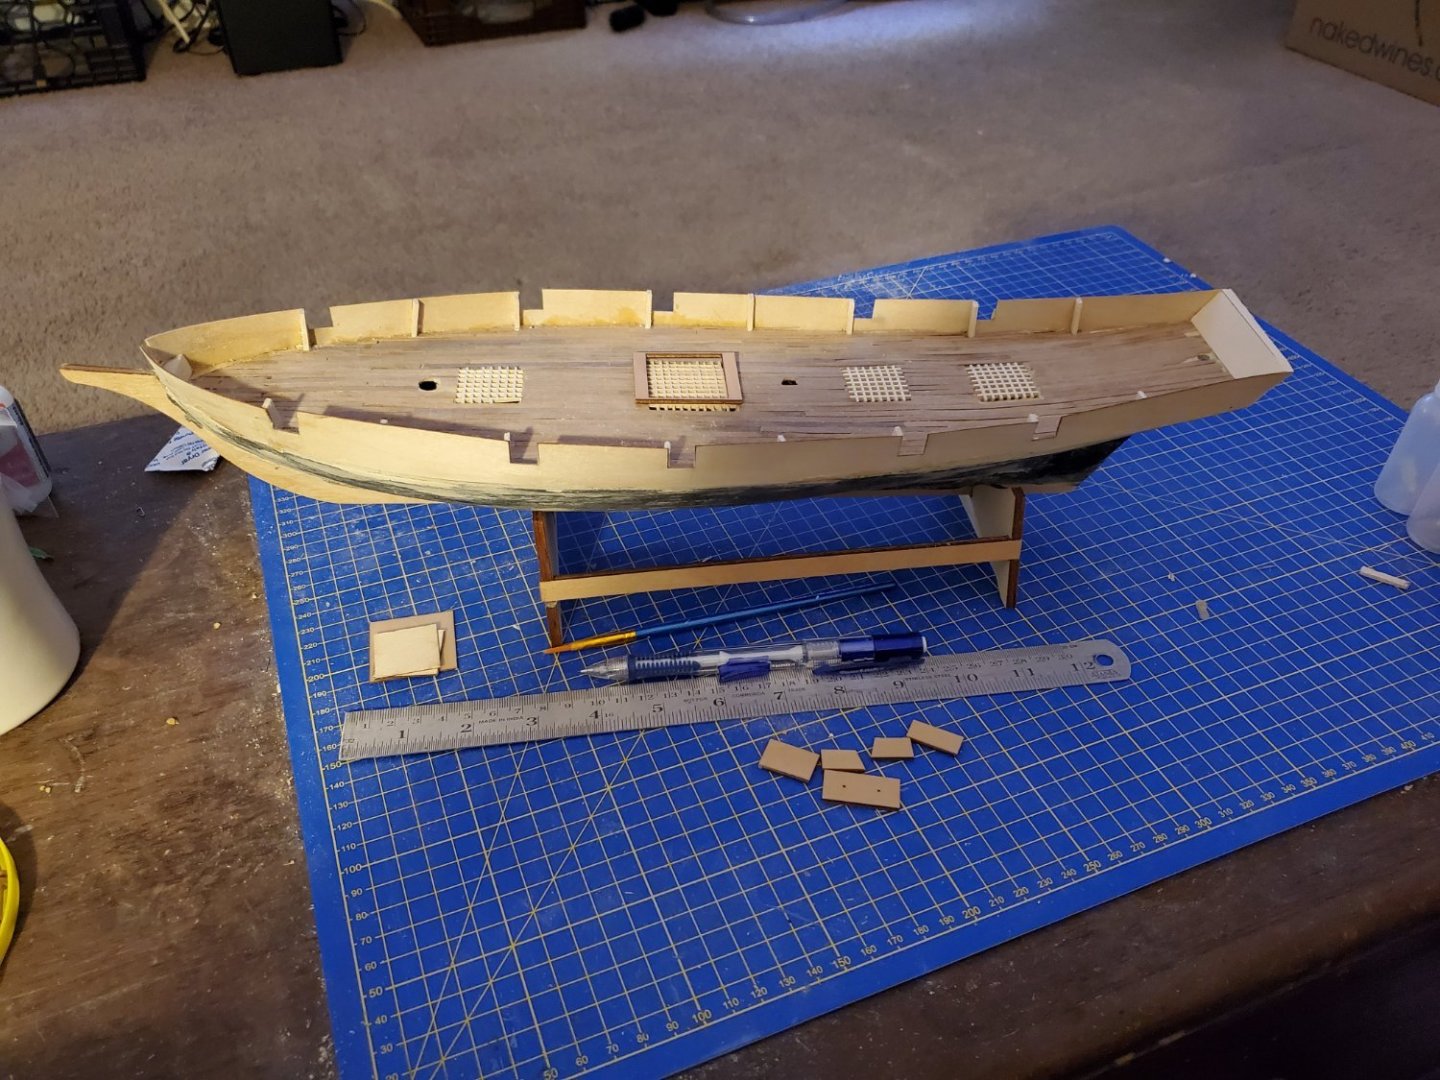
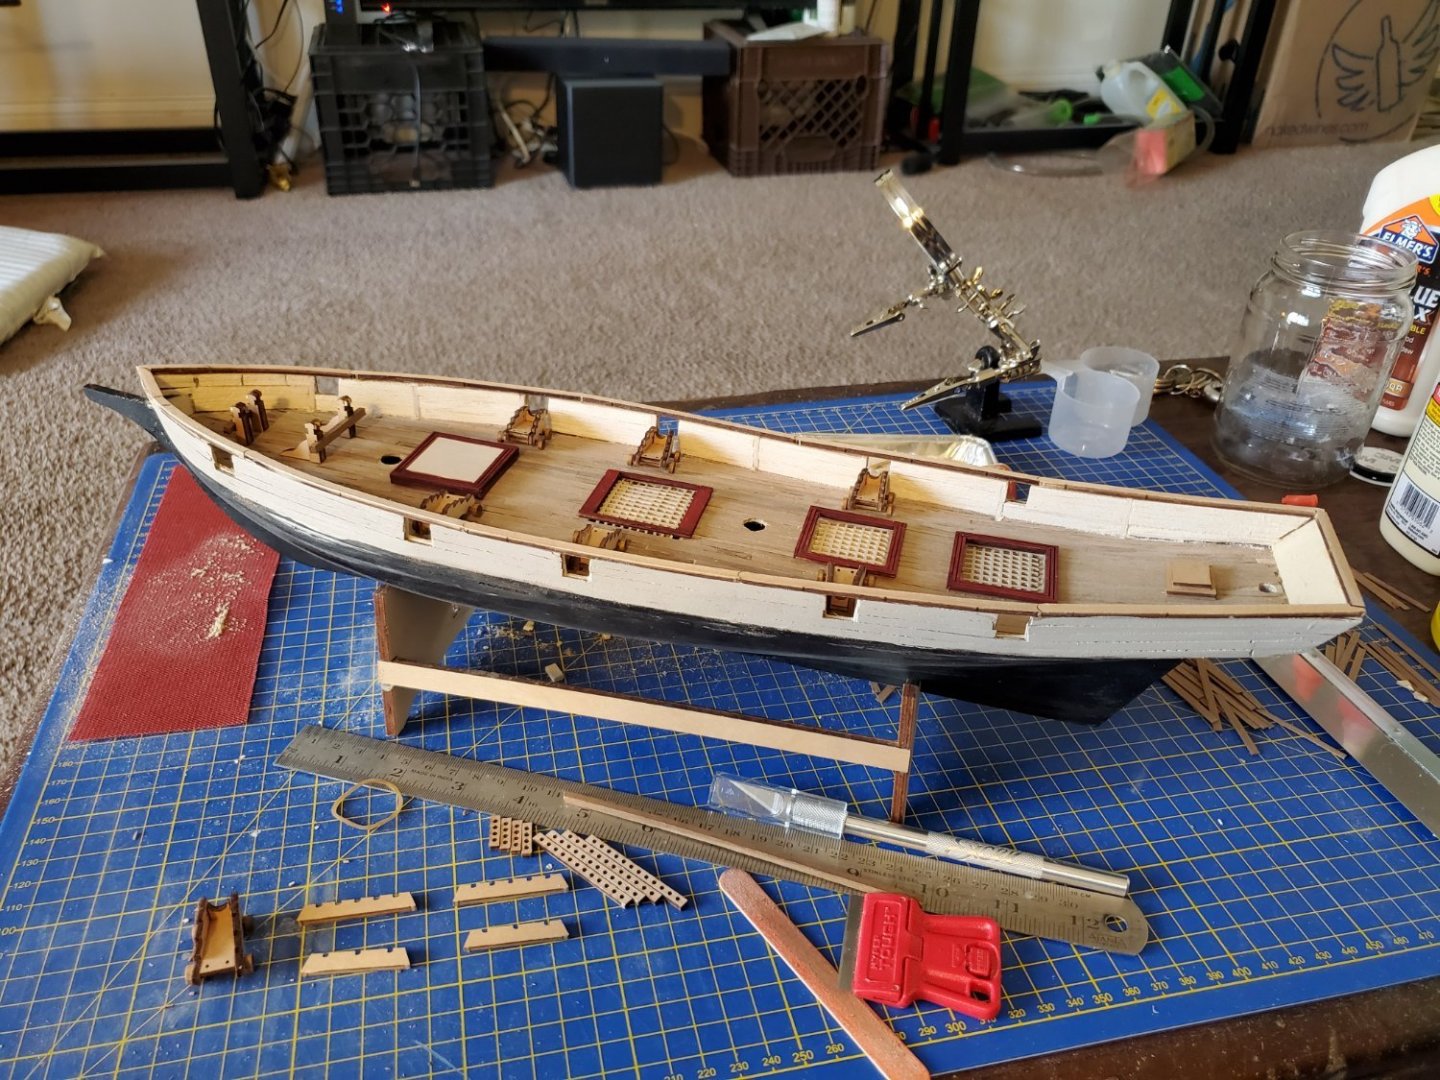
Finished sanding the hull, bulwarks added and transom fitted and installed. Next up will be inner and outer planking of the bulwarks, then on to deck fittings and installing the completed gun carriages. It is starting to take shape.