JGoff
-
Posts
59 -
Joined
-
Last visited
Content Type
Profiles
Forums
Gallery
Events
Everything posted by JGoff
-
Yeah I purchased that on your recommendation in one of your many logs. By far one of the most useful purchases I have made. And great idea with the styrofoam to stabilize/hold the mast. I’ll have to utilize that next time!
-
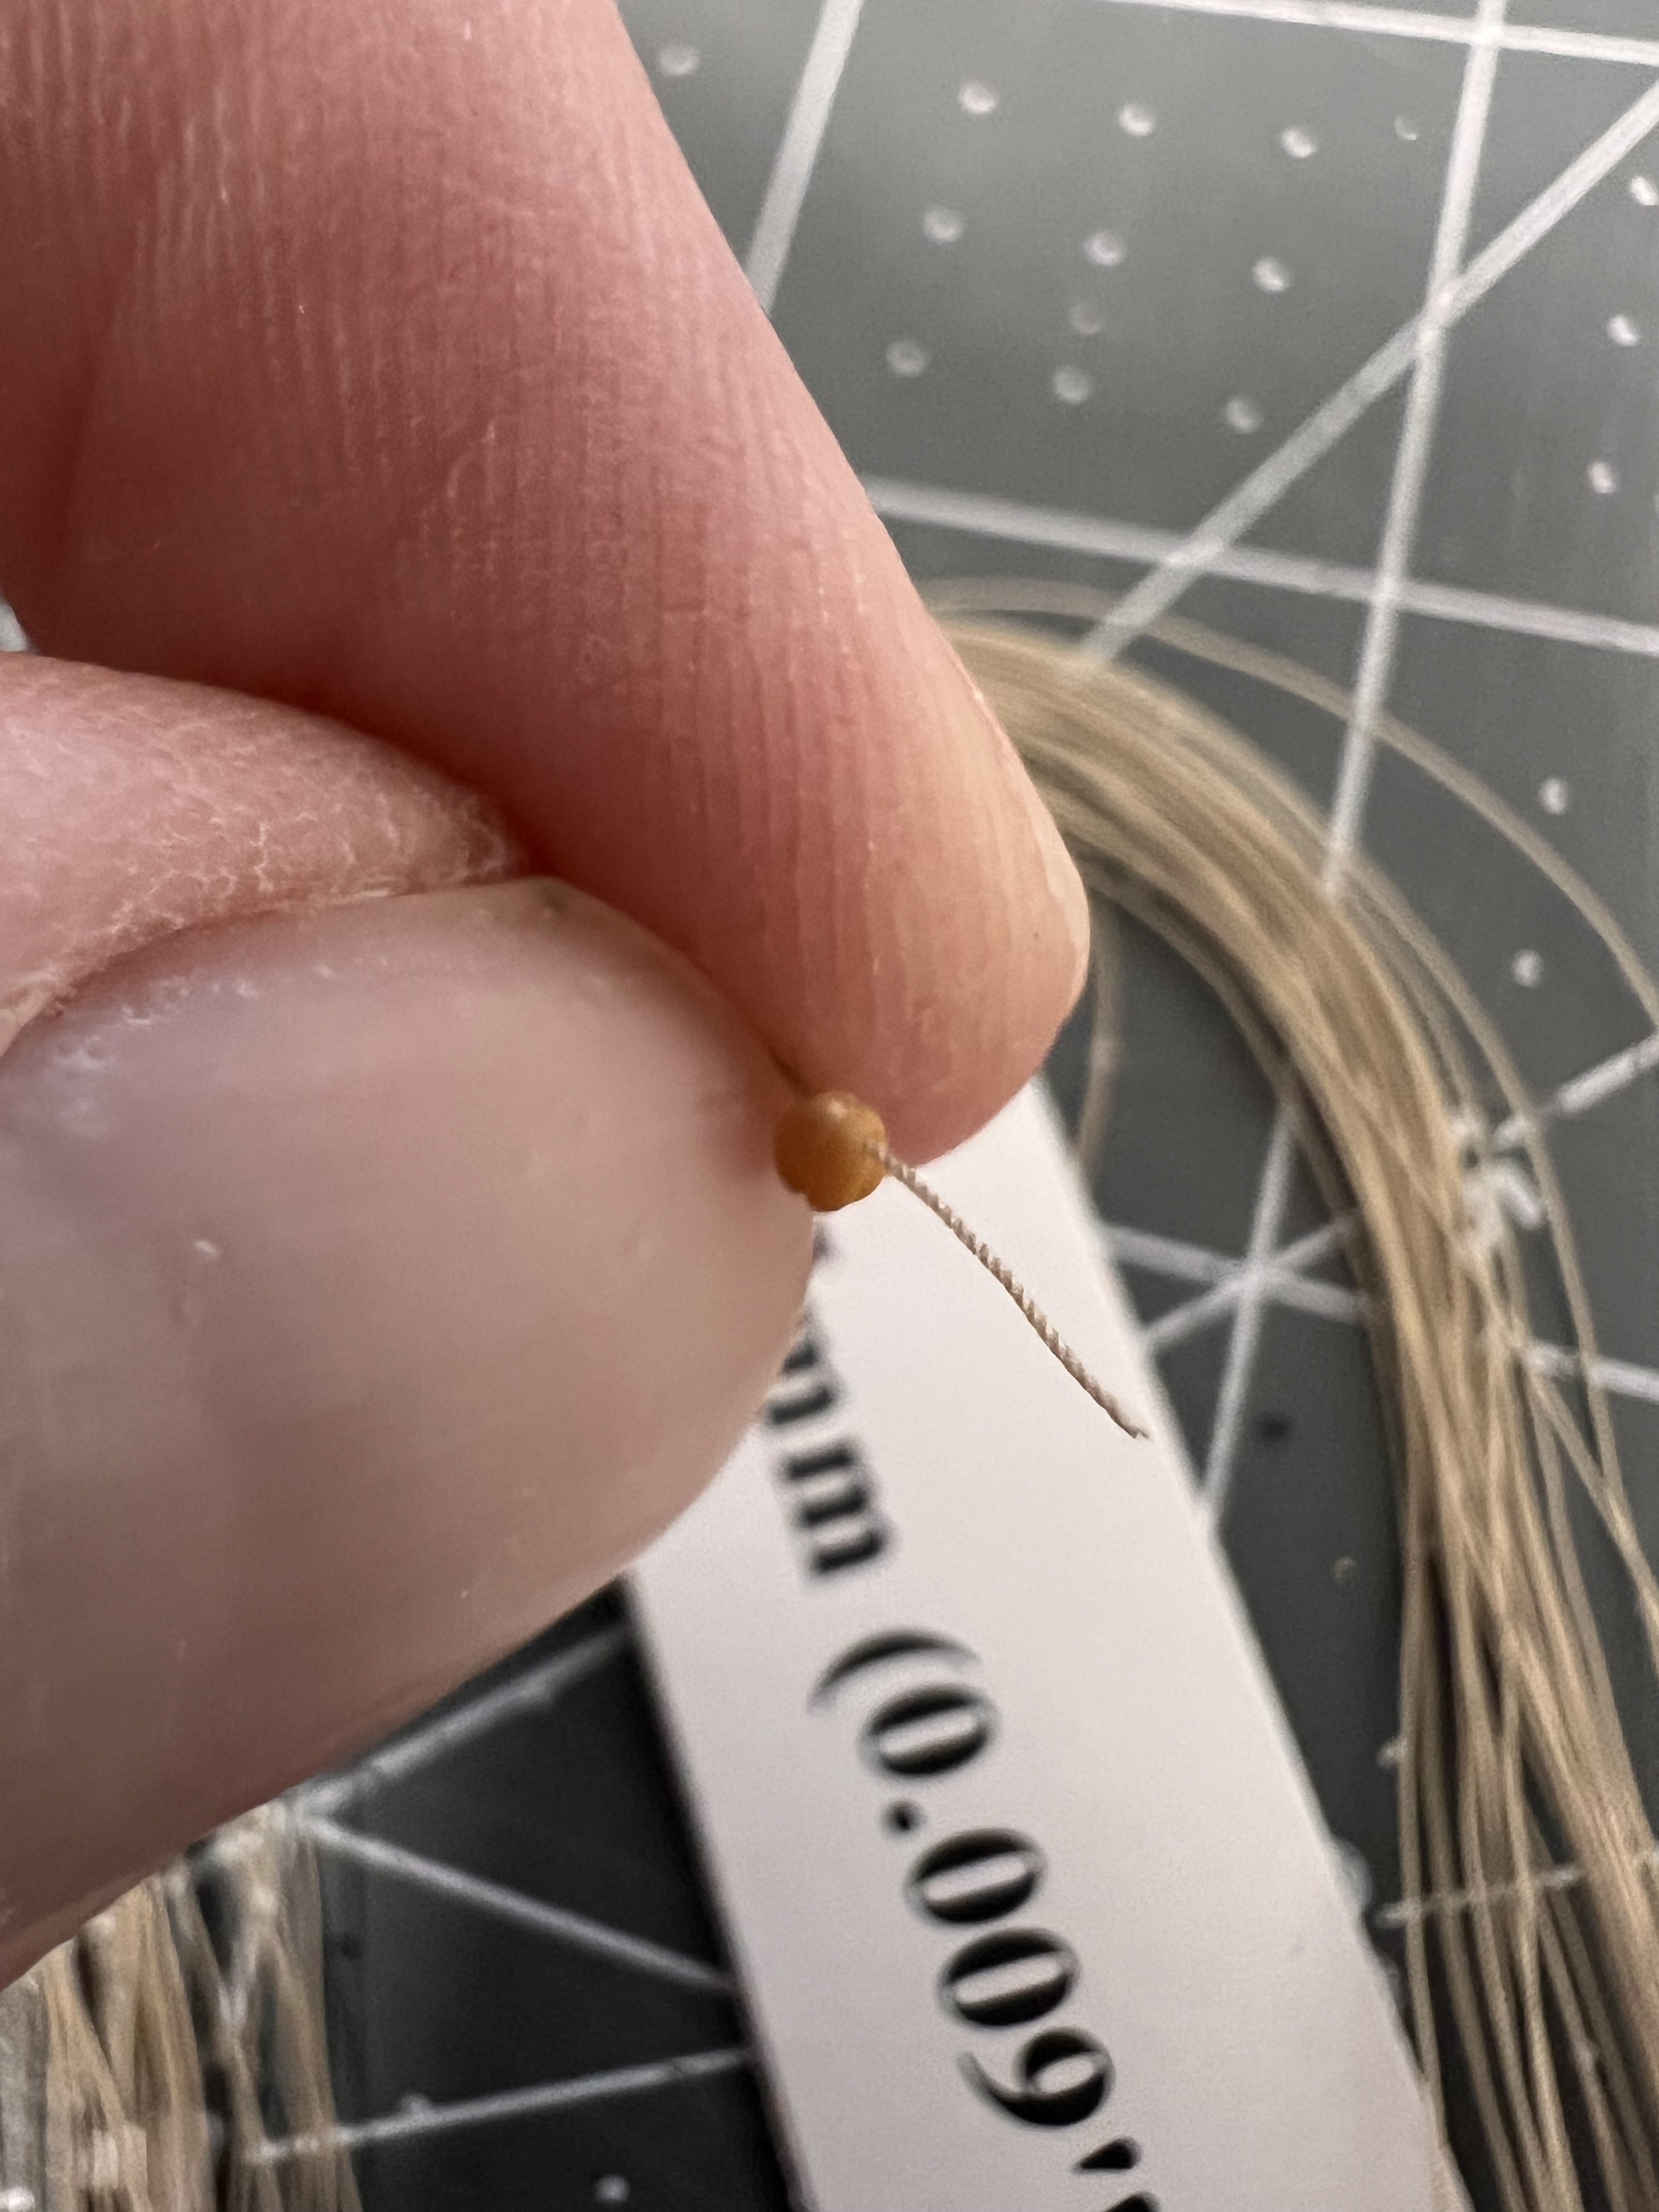
Just a brief update…rigging begins. For stripping blocks, I am using Chuck’s guide, Stropping Blocks. It is still a fiddly process for me, at least with this 3mm block from Syren and .25 mm rope from Ropes of Scale. One thing that I realized was the need to make sure the rope will go through the sheave(?), and in order for a .25 mm rope to pass through this block, I had to open up a little with a small drill bit. Thanks for dropping by.
- 83 replies
-
- 2
-

-
- Lady Nelson
- Amati
- (and 2 more)
-
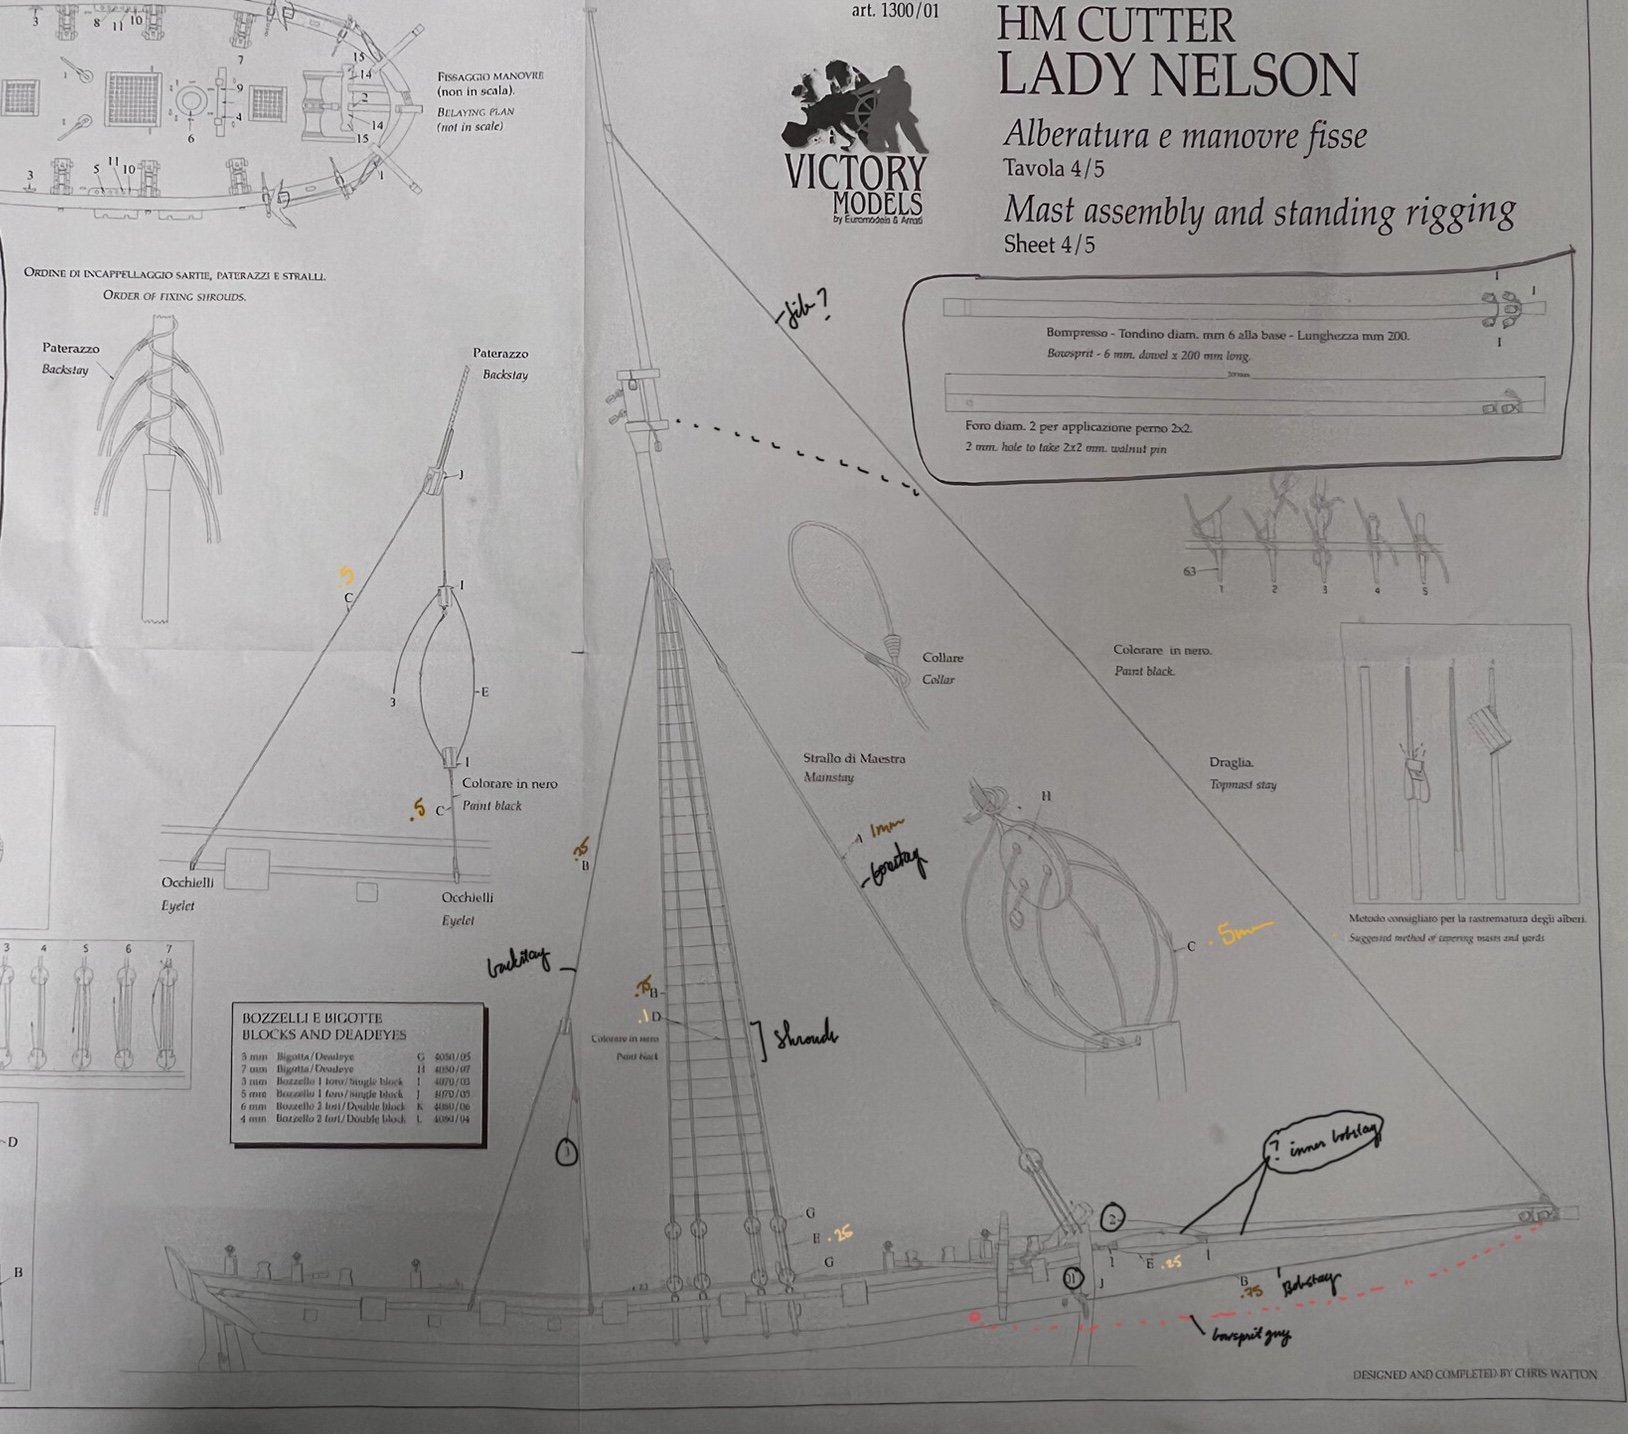
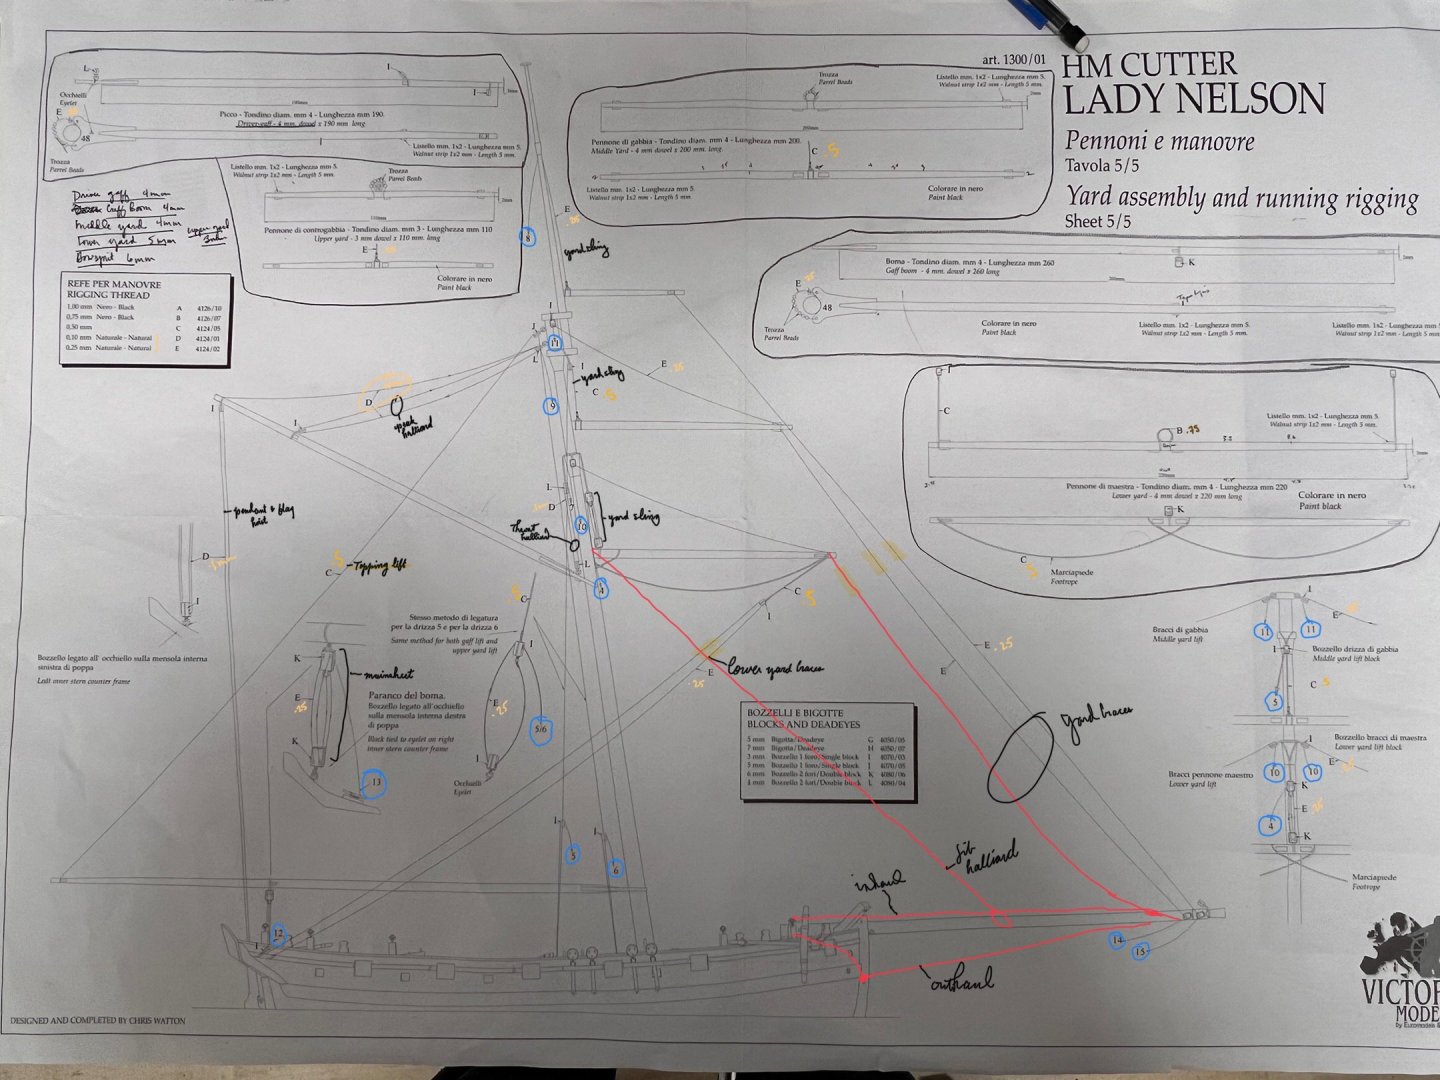
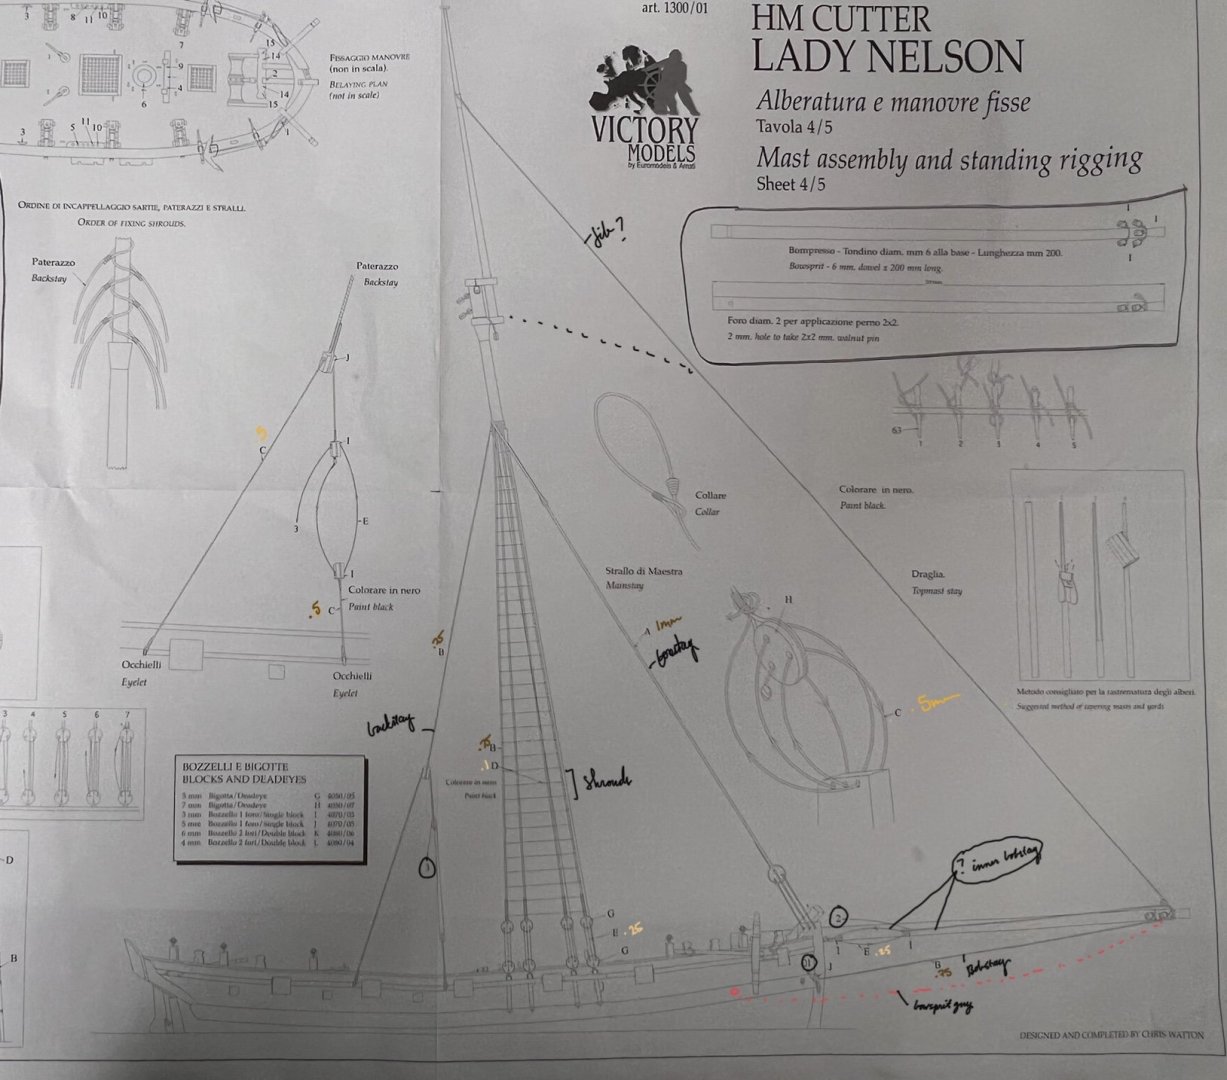
Thanks @glbarlow and @vossiewulf for the response. I do have the Peterrson book, which I have started studying and comparing to the Lady Nelson plans. I don’t have the plans for Cheerful but they might be worth going ahead and purchasing. I’m thinking I would like to do that for a next or future build anyway. I have started labeling the rigging on the plans and adding a few things from Peterrson. I’m not finished but thought to include as a reference: Im not quite sure what the bowsprit rigging is here. I thought maybe inhaul and outhaul but those are running rigging. So I’m thinking the inner bobstay? Anyone know?
- 83 replies
-
- 1
-
-
- Lady Nelson
- Amati
- (and 2 more)
-
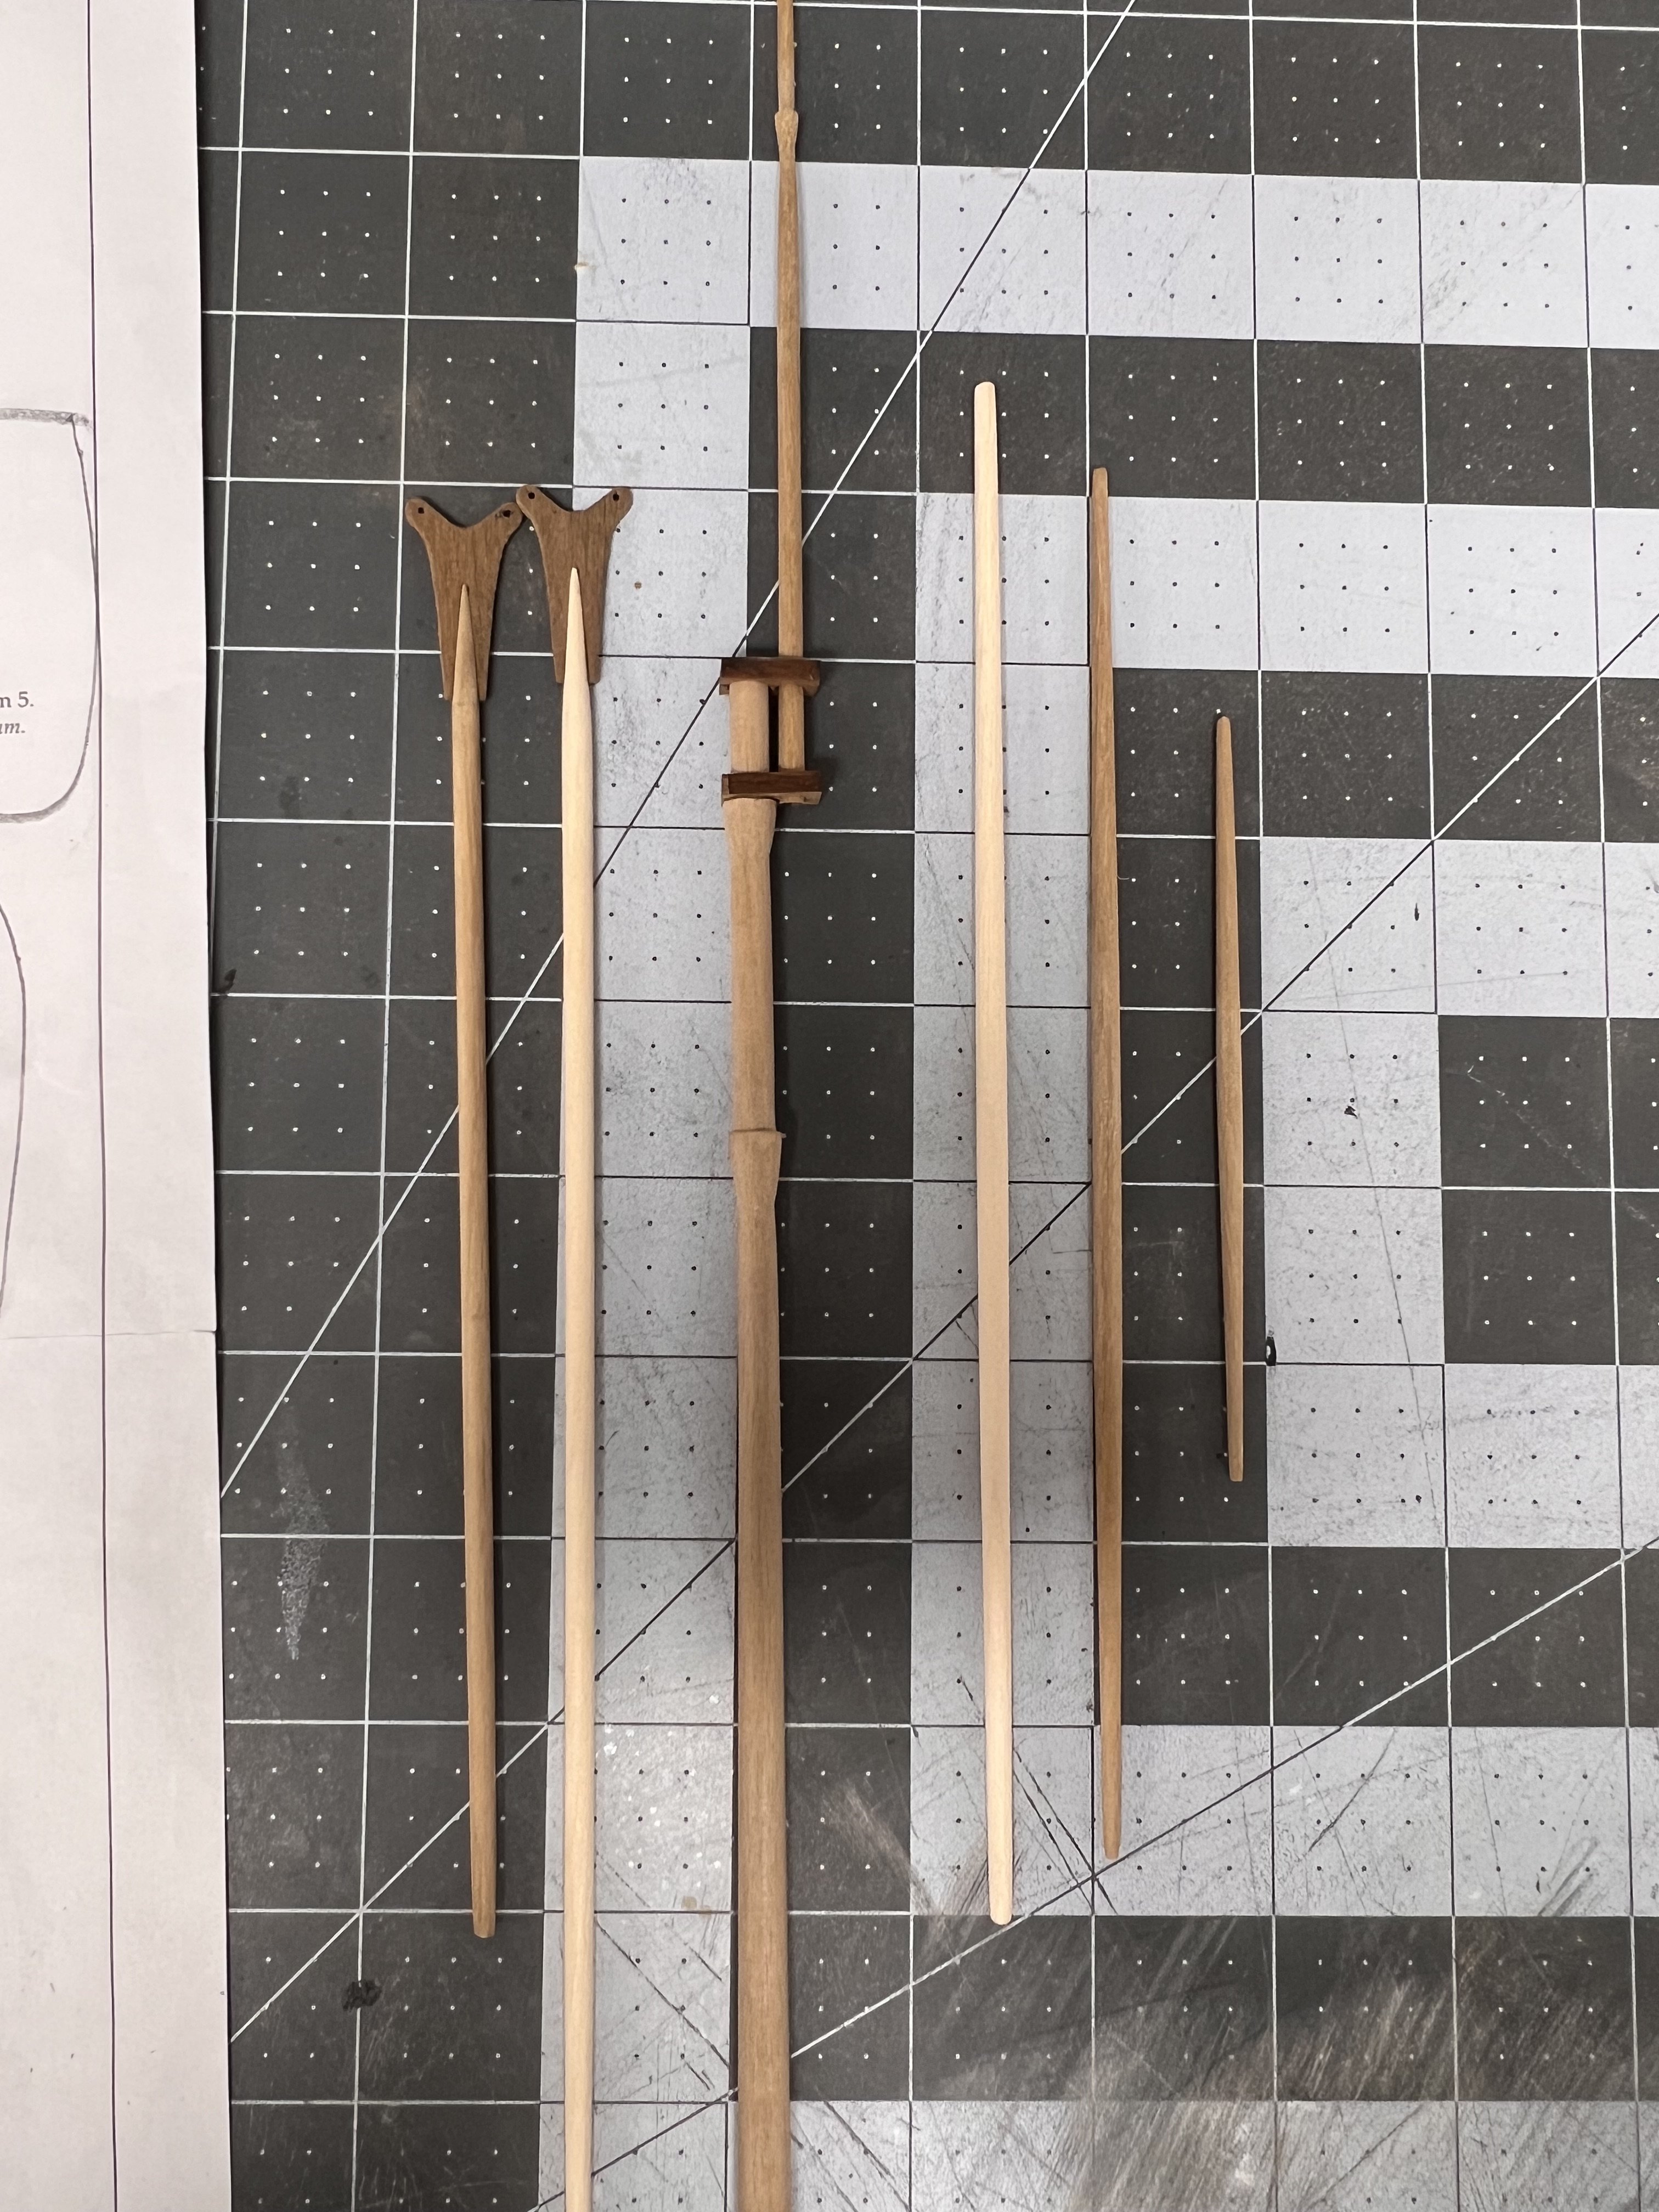
I’ve now finished tapering the mast, yards, gaff, and boom. Initially, I found this a bit daunting since I don’t have a lathe, but I came across a YouTube method that made sense to me. I divided the dowel into sections for the taper and, using a sanding block, rotated it while gradually working my way down. I also picked up some carving knives, which helped refine the taper and shape the top portion of the main mast. Next, I’ll start preparing everything for rigging and stropping blocks. Chuck has a great tutorial on stropping blocks that I plan to follow. It’s clear to me that the mast, yards, and rigging in this kit are a simplified version compared to a true cutter rig. I considered modifying everything for historical accuracy but, for now, I plan to follow the kit’s drawings. From my research, the plans seem to capture the fundamentals well. Of course, as I continue reading, I may decide to make adjustments.

- 83 replies
-
- 7
-
-
- Lady Nelson
- Amati
- (and 2 more)
-
This is really incredible work and the detail you achieve is quite surprising at such a small scale. Probably a really simple question, but what are using to apply the paint?
- 39 replies
-
- 2
-

-
-
- Black Seas
- wargaming
- (and 1 more)
-
Thanks Glenn. I had gotten that 24 gauge wire for that purpose. I wasn’t very pleased with my attempts with eyebolts but I’ll acknowledge I probably gave up too soon. Now the ring bolts I did make with that wire using your log. A big improvement over the kit supplied ones. I’m sure I’m not done with eyebolts yet, so I’ll transition to those for the remainder of the rigging. Thanks for the encouragement. And to all, thanks for the likes and for dropping by.
- 83 replies
-
- 2
-
-
- Lady Nelson
- Amati
- (and 2 more)
-
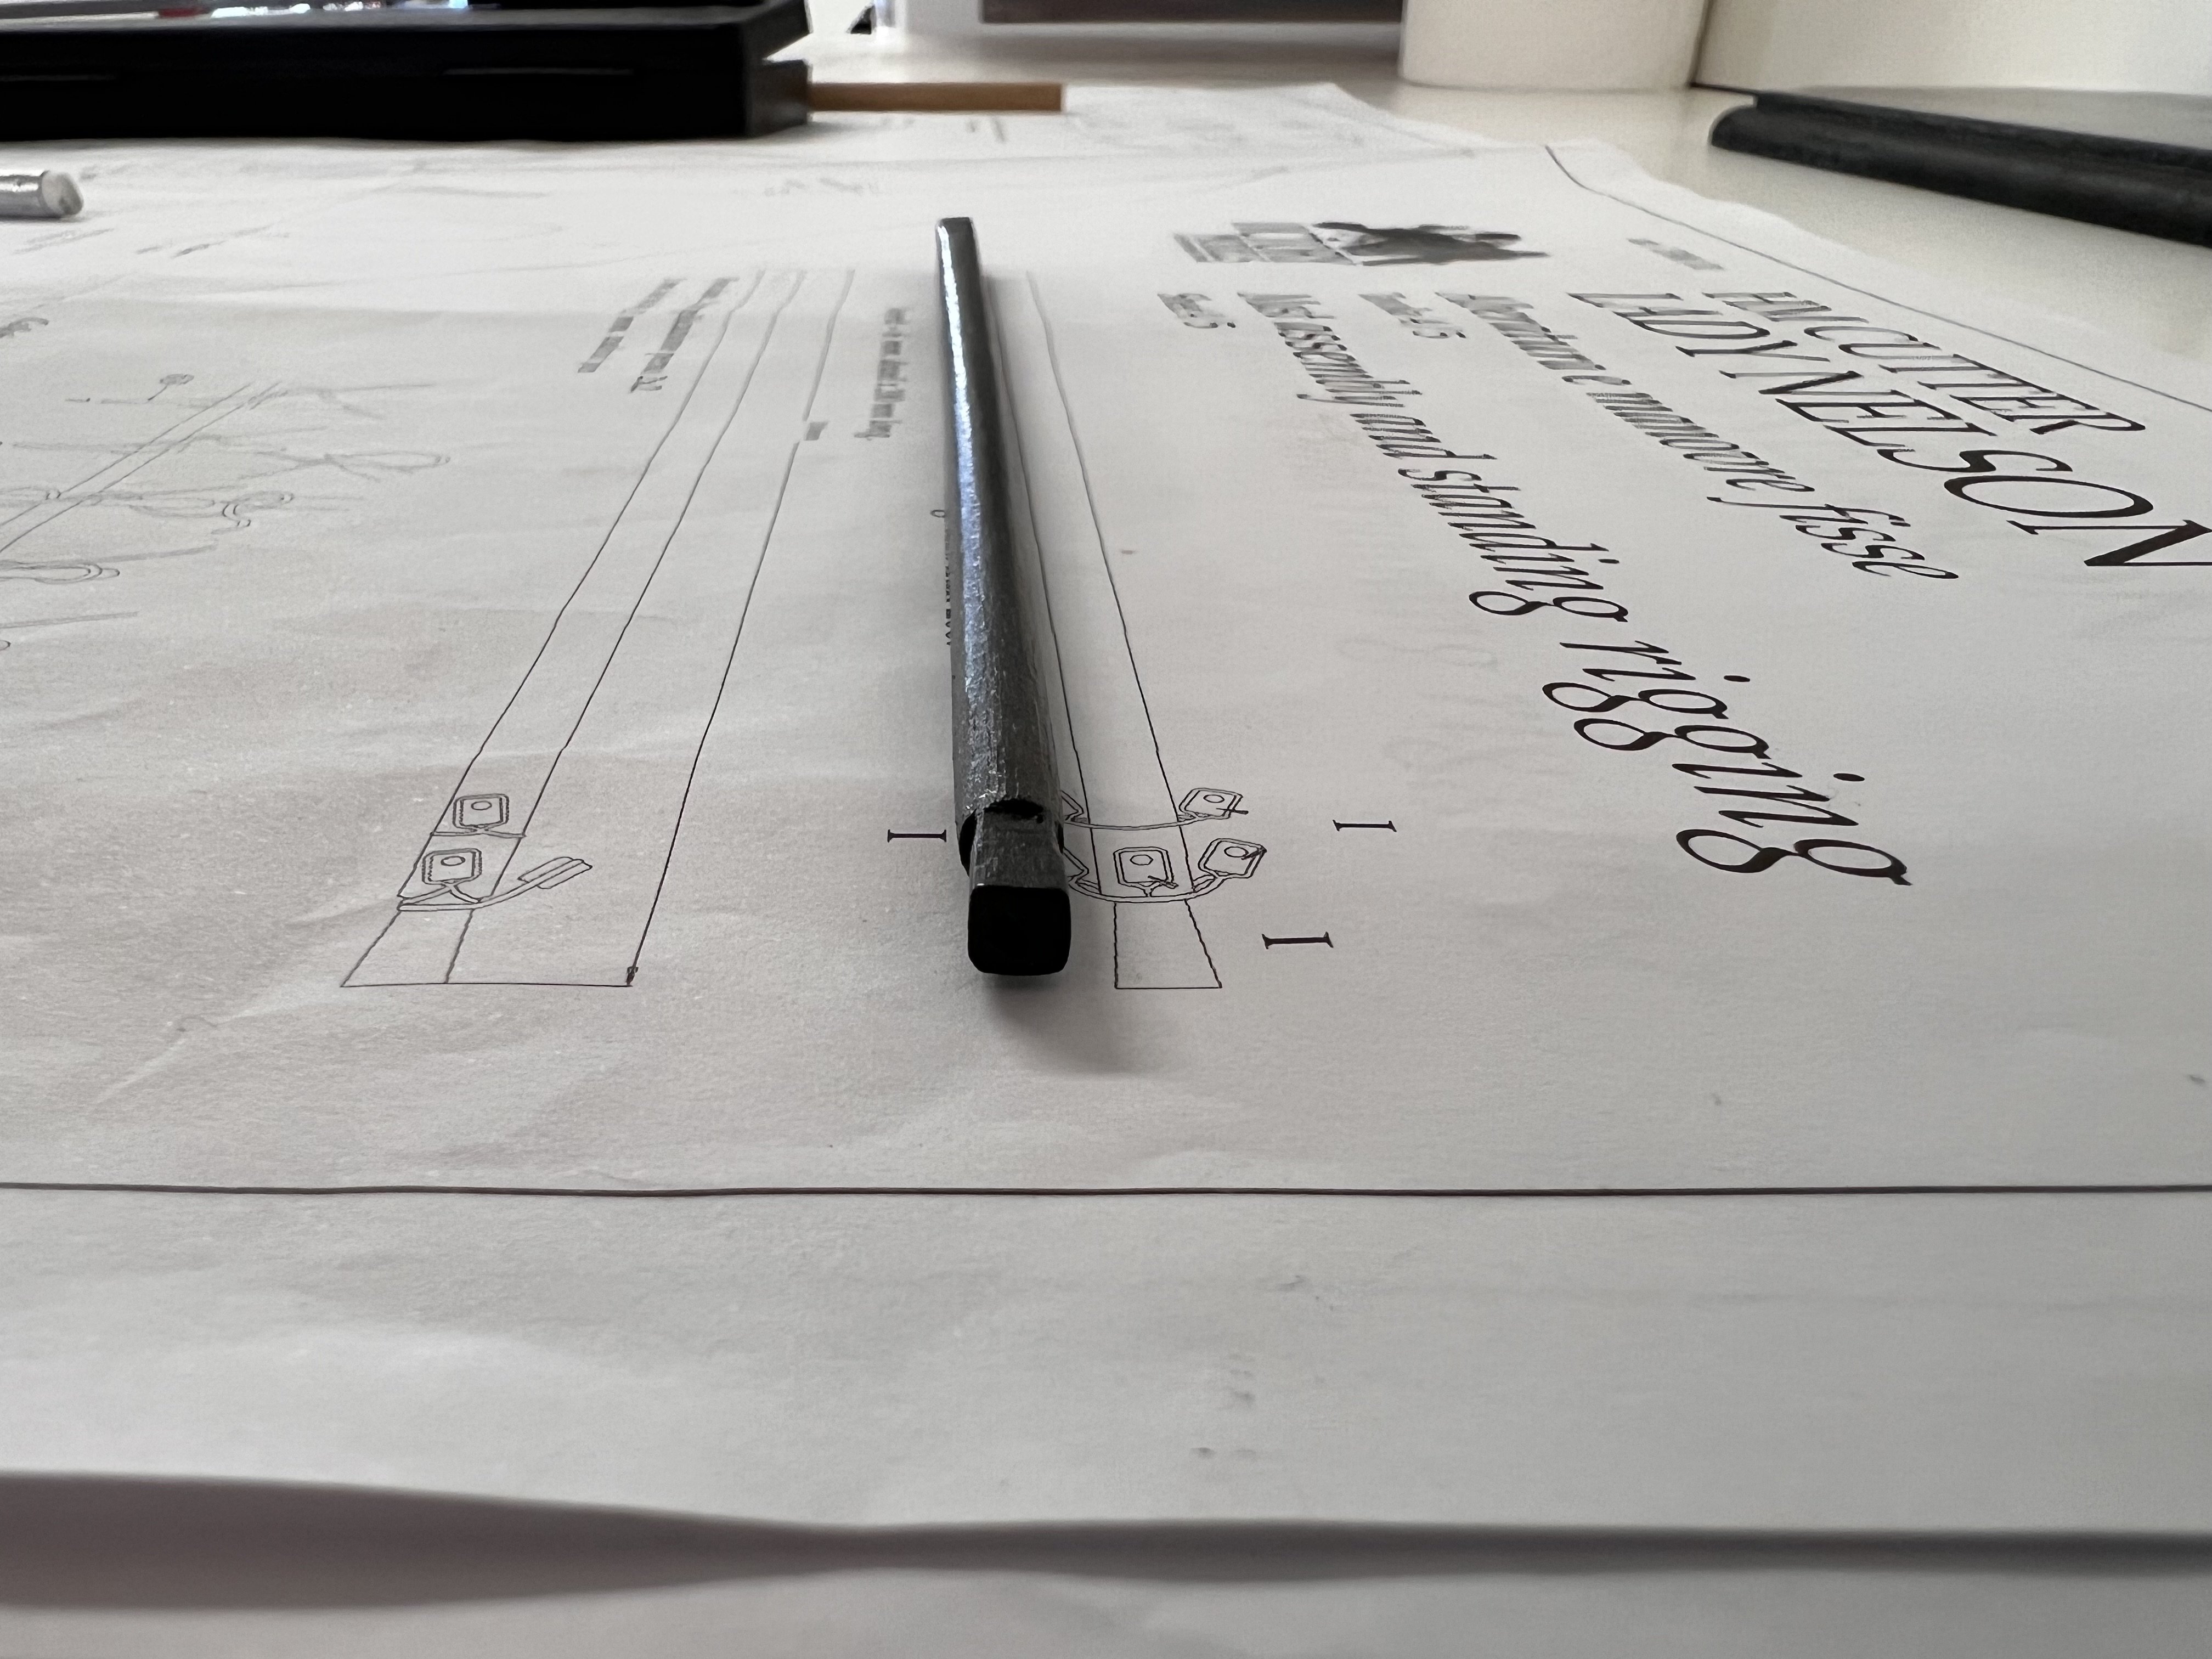
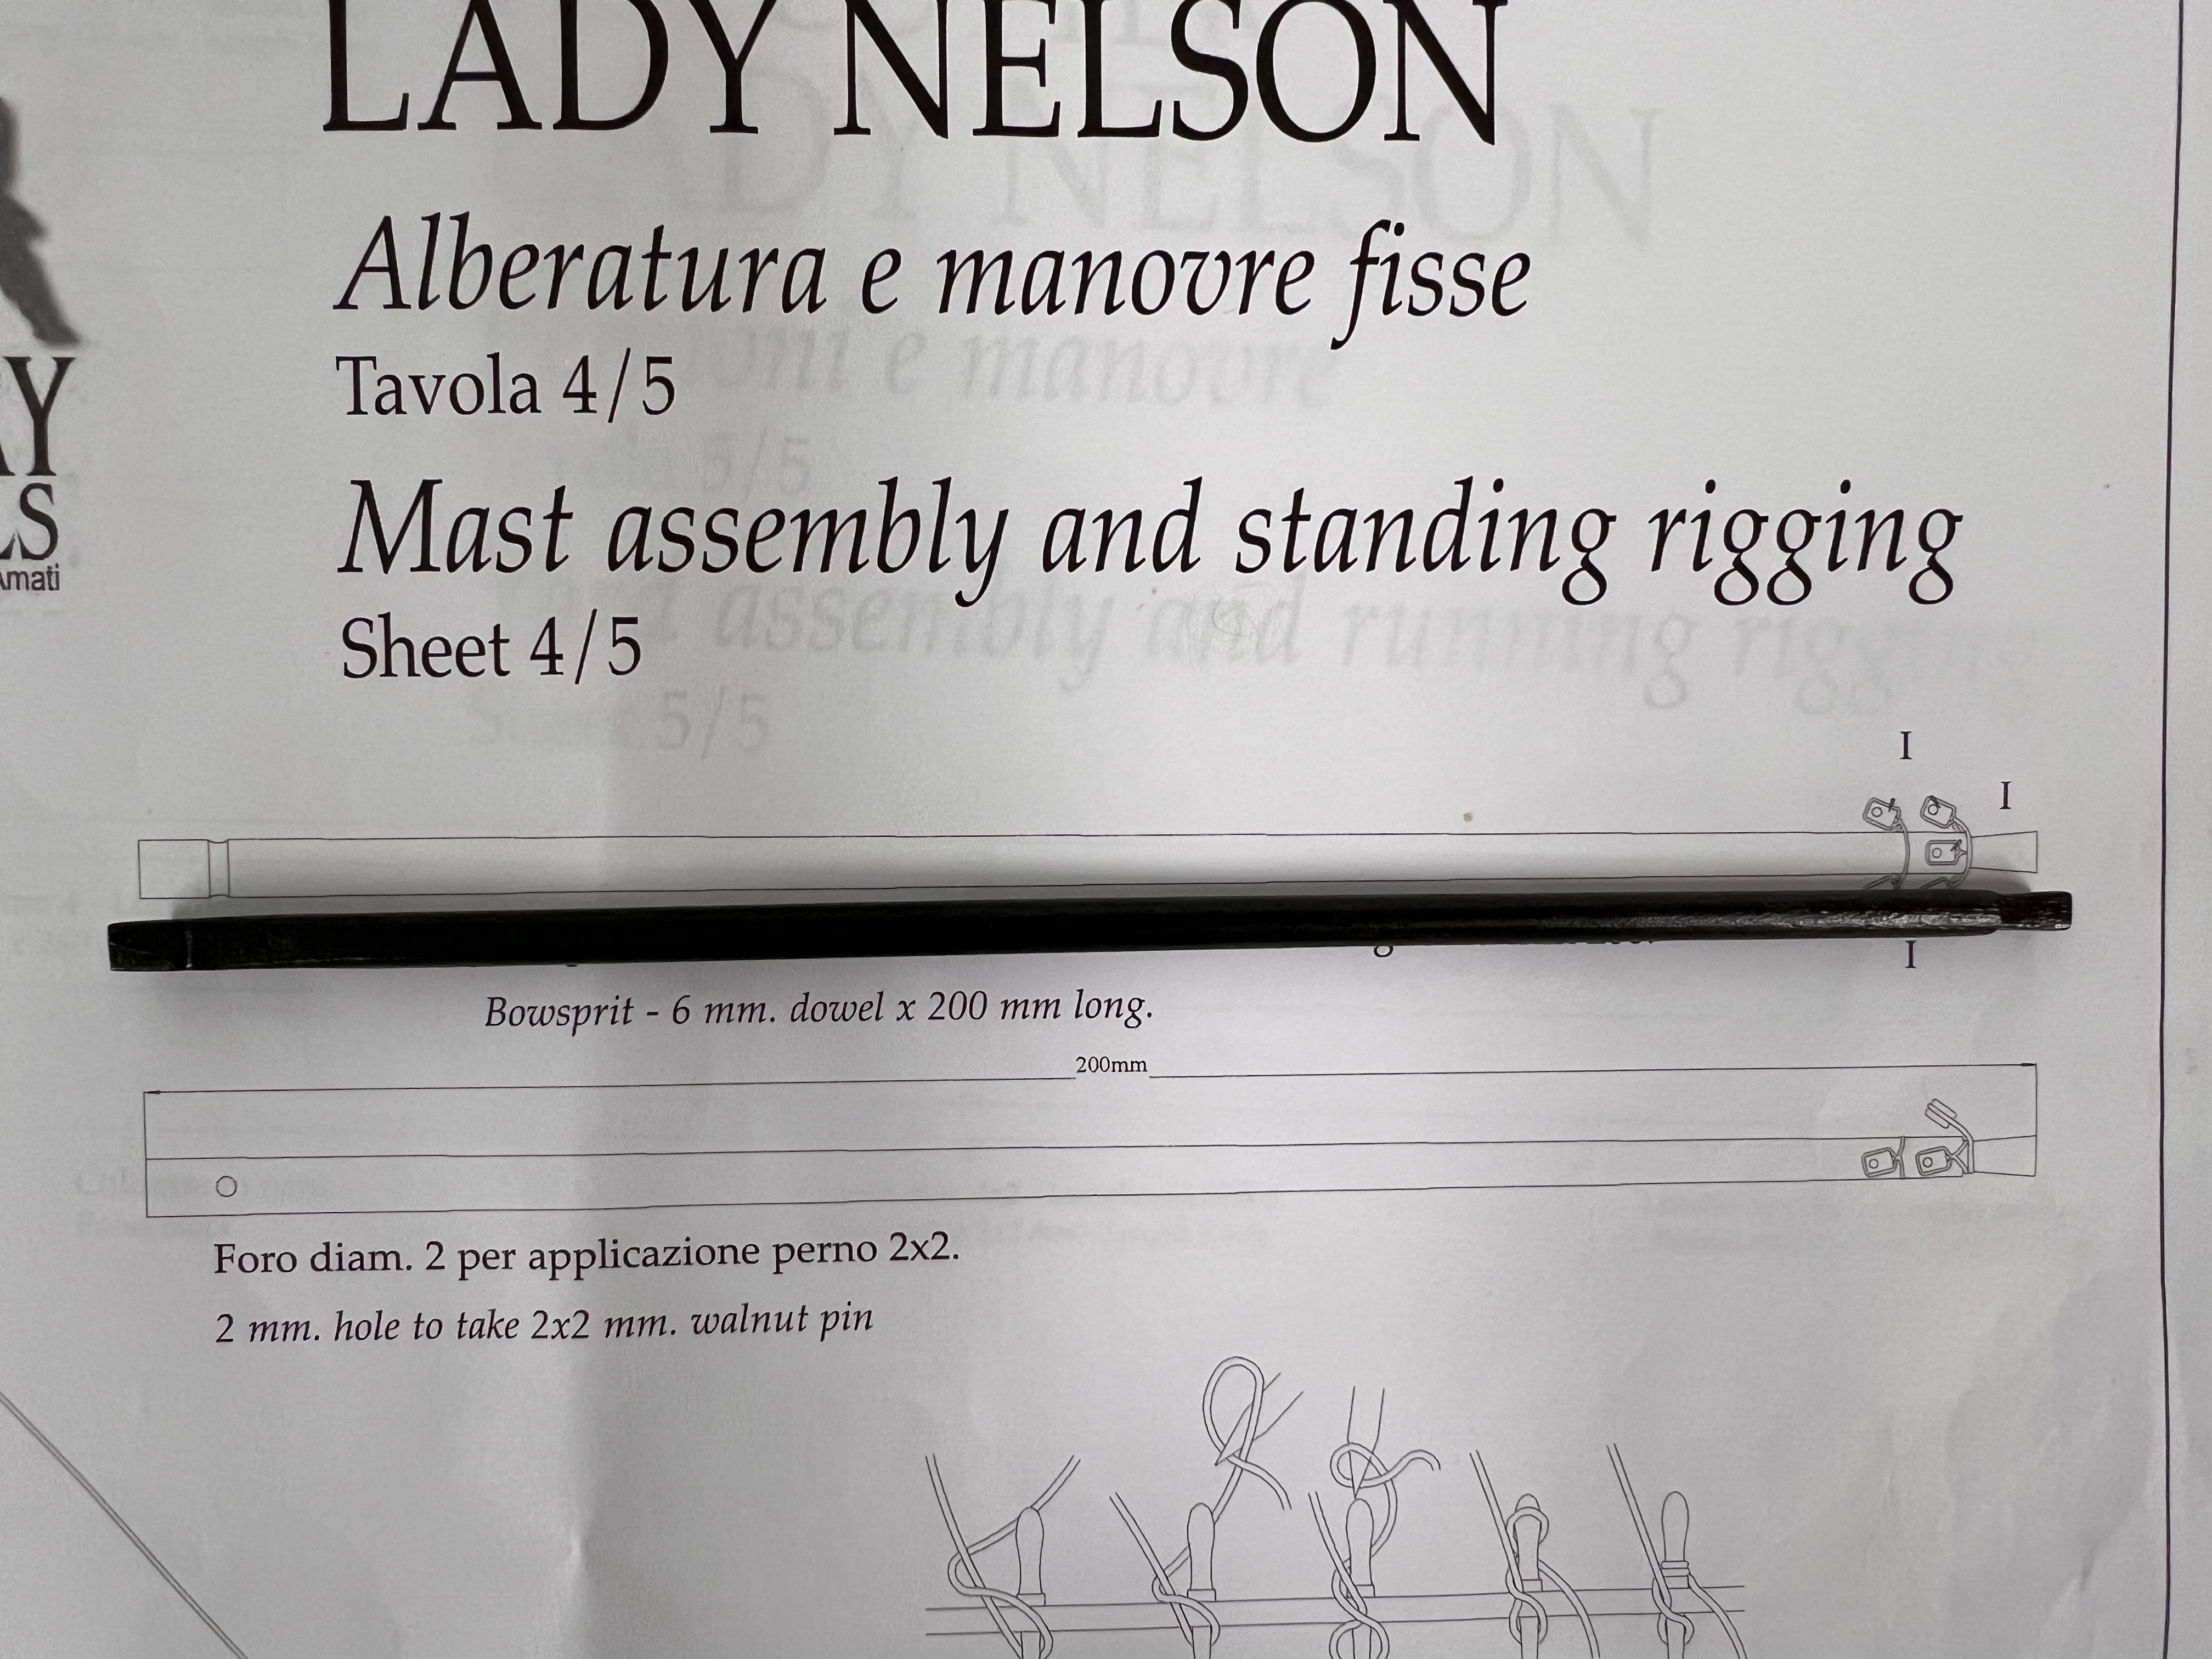
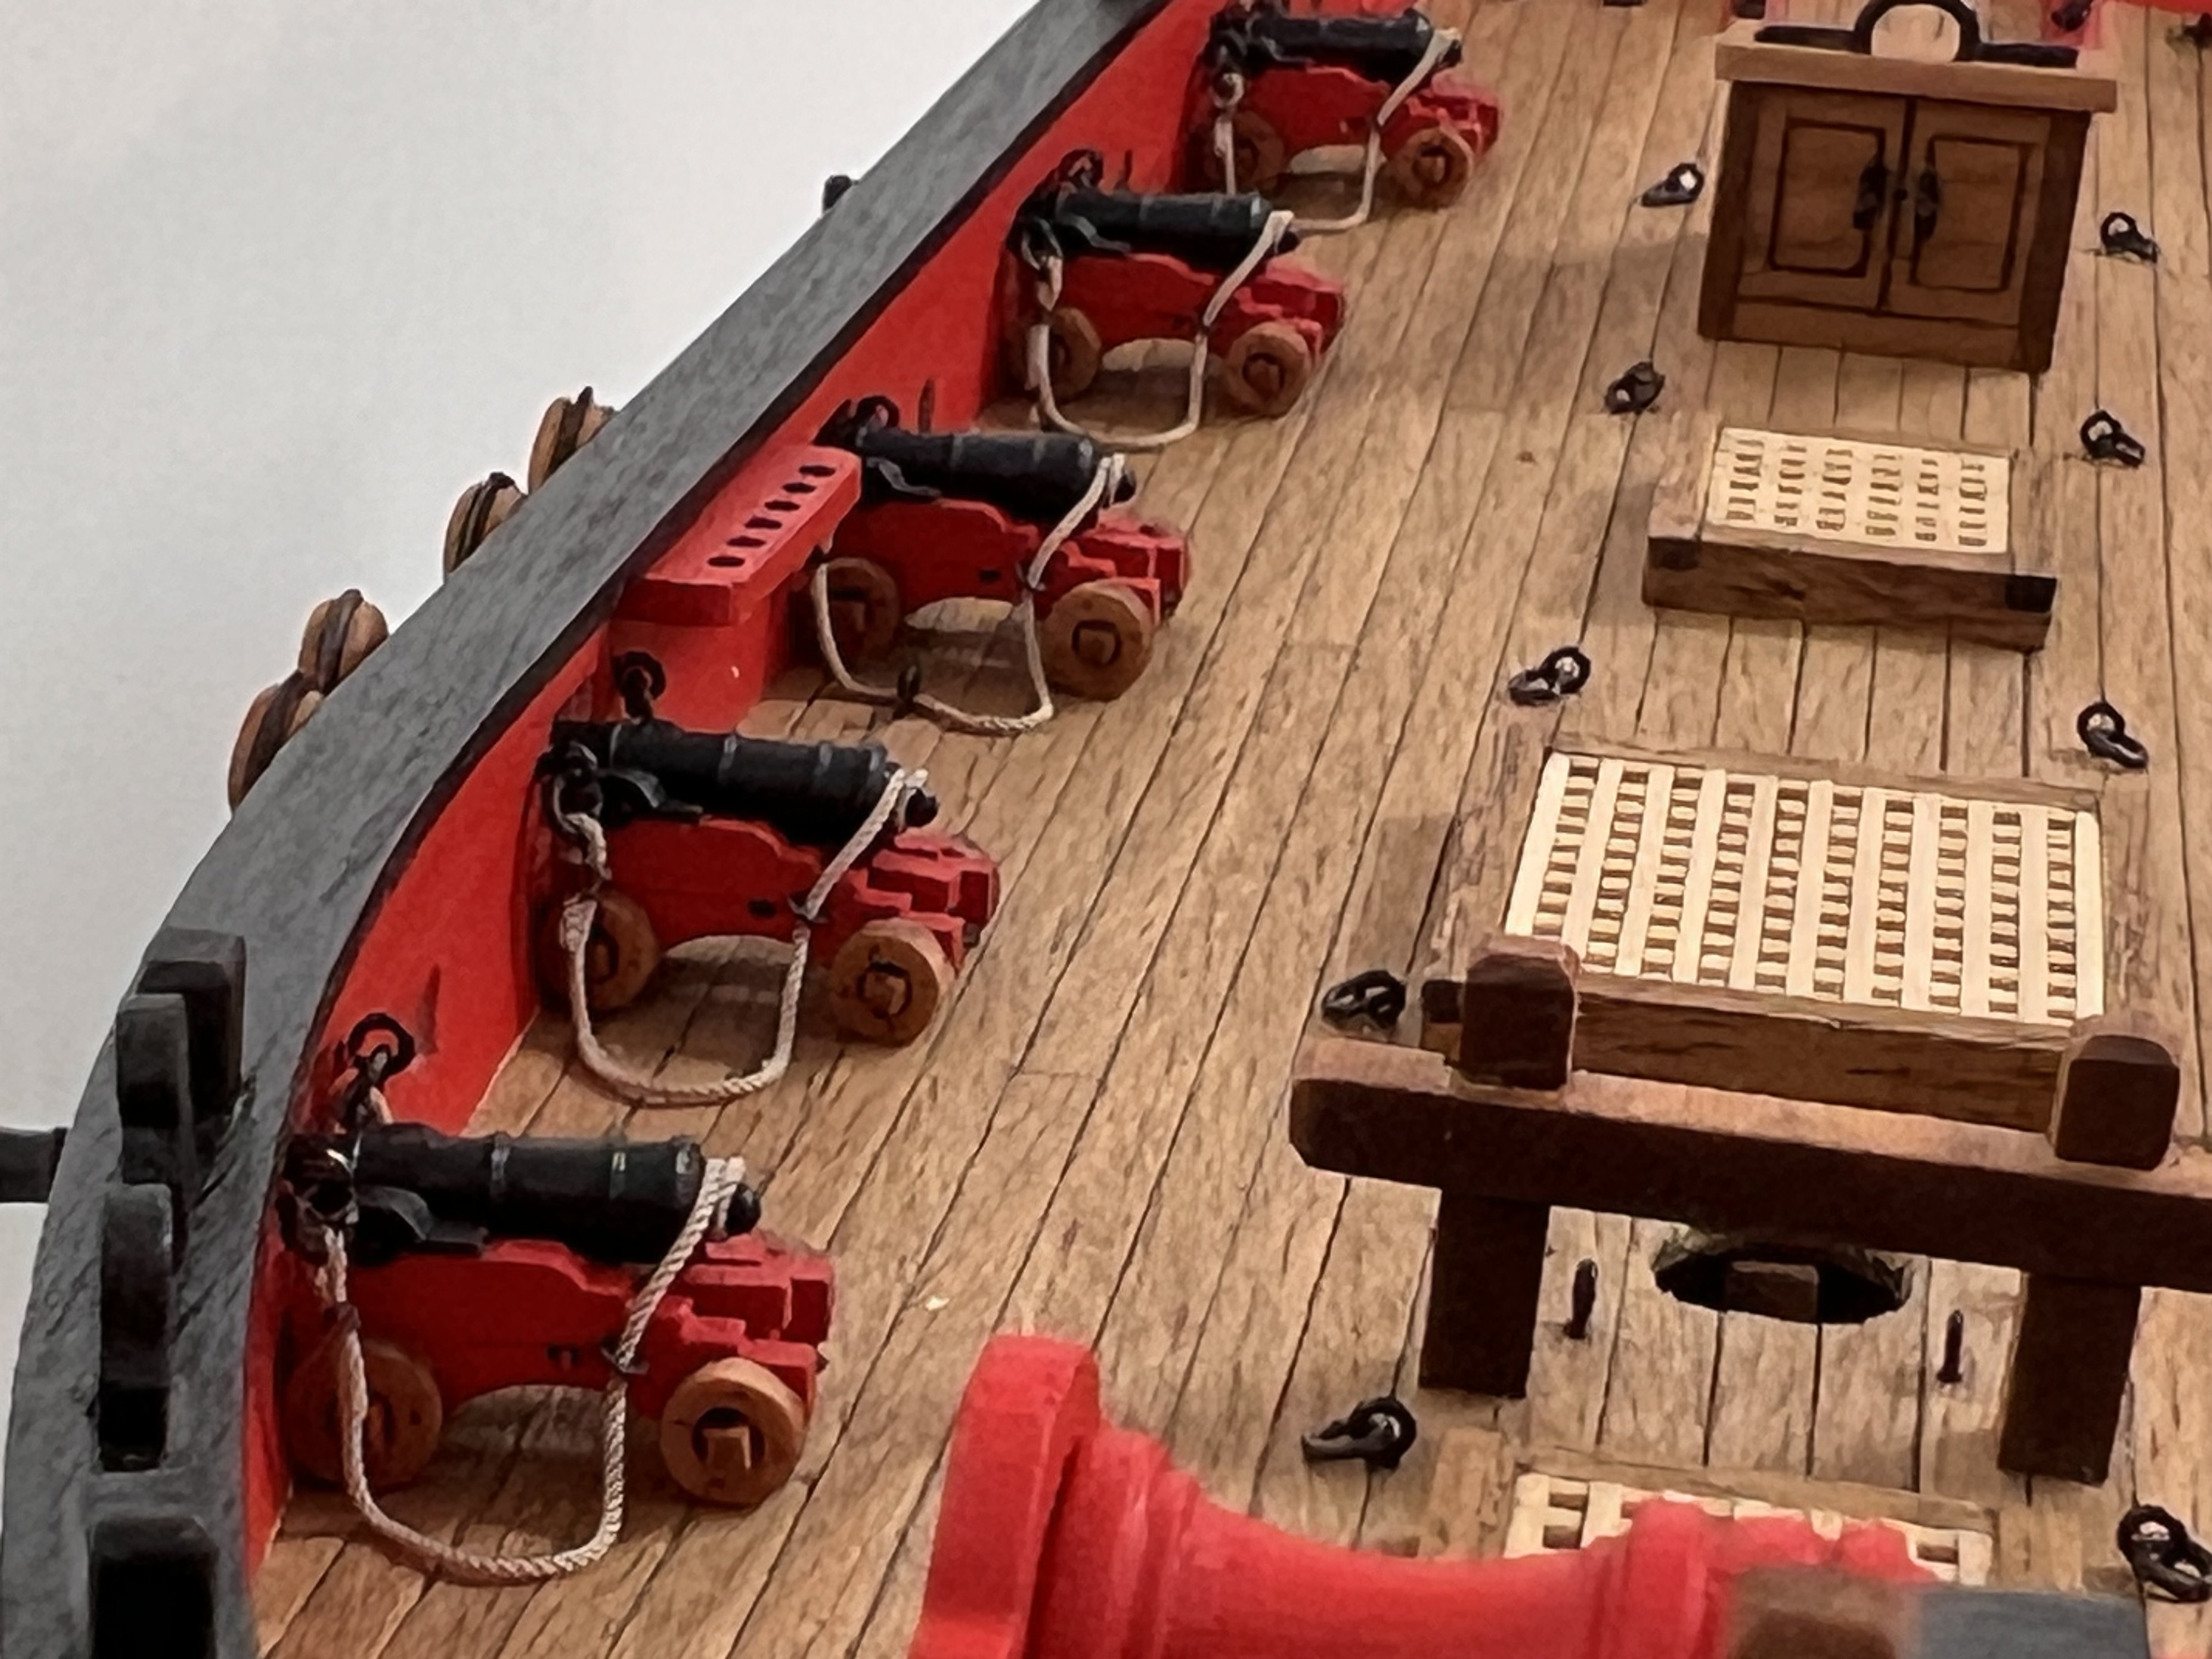
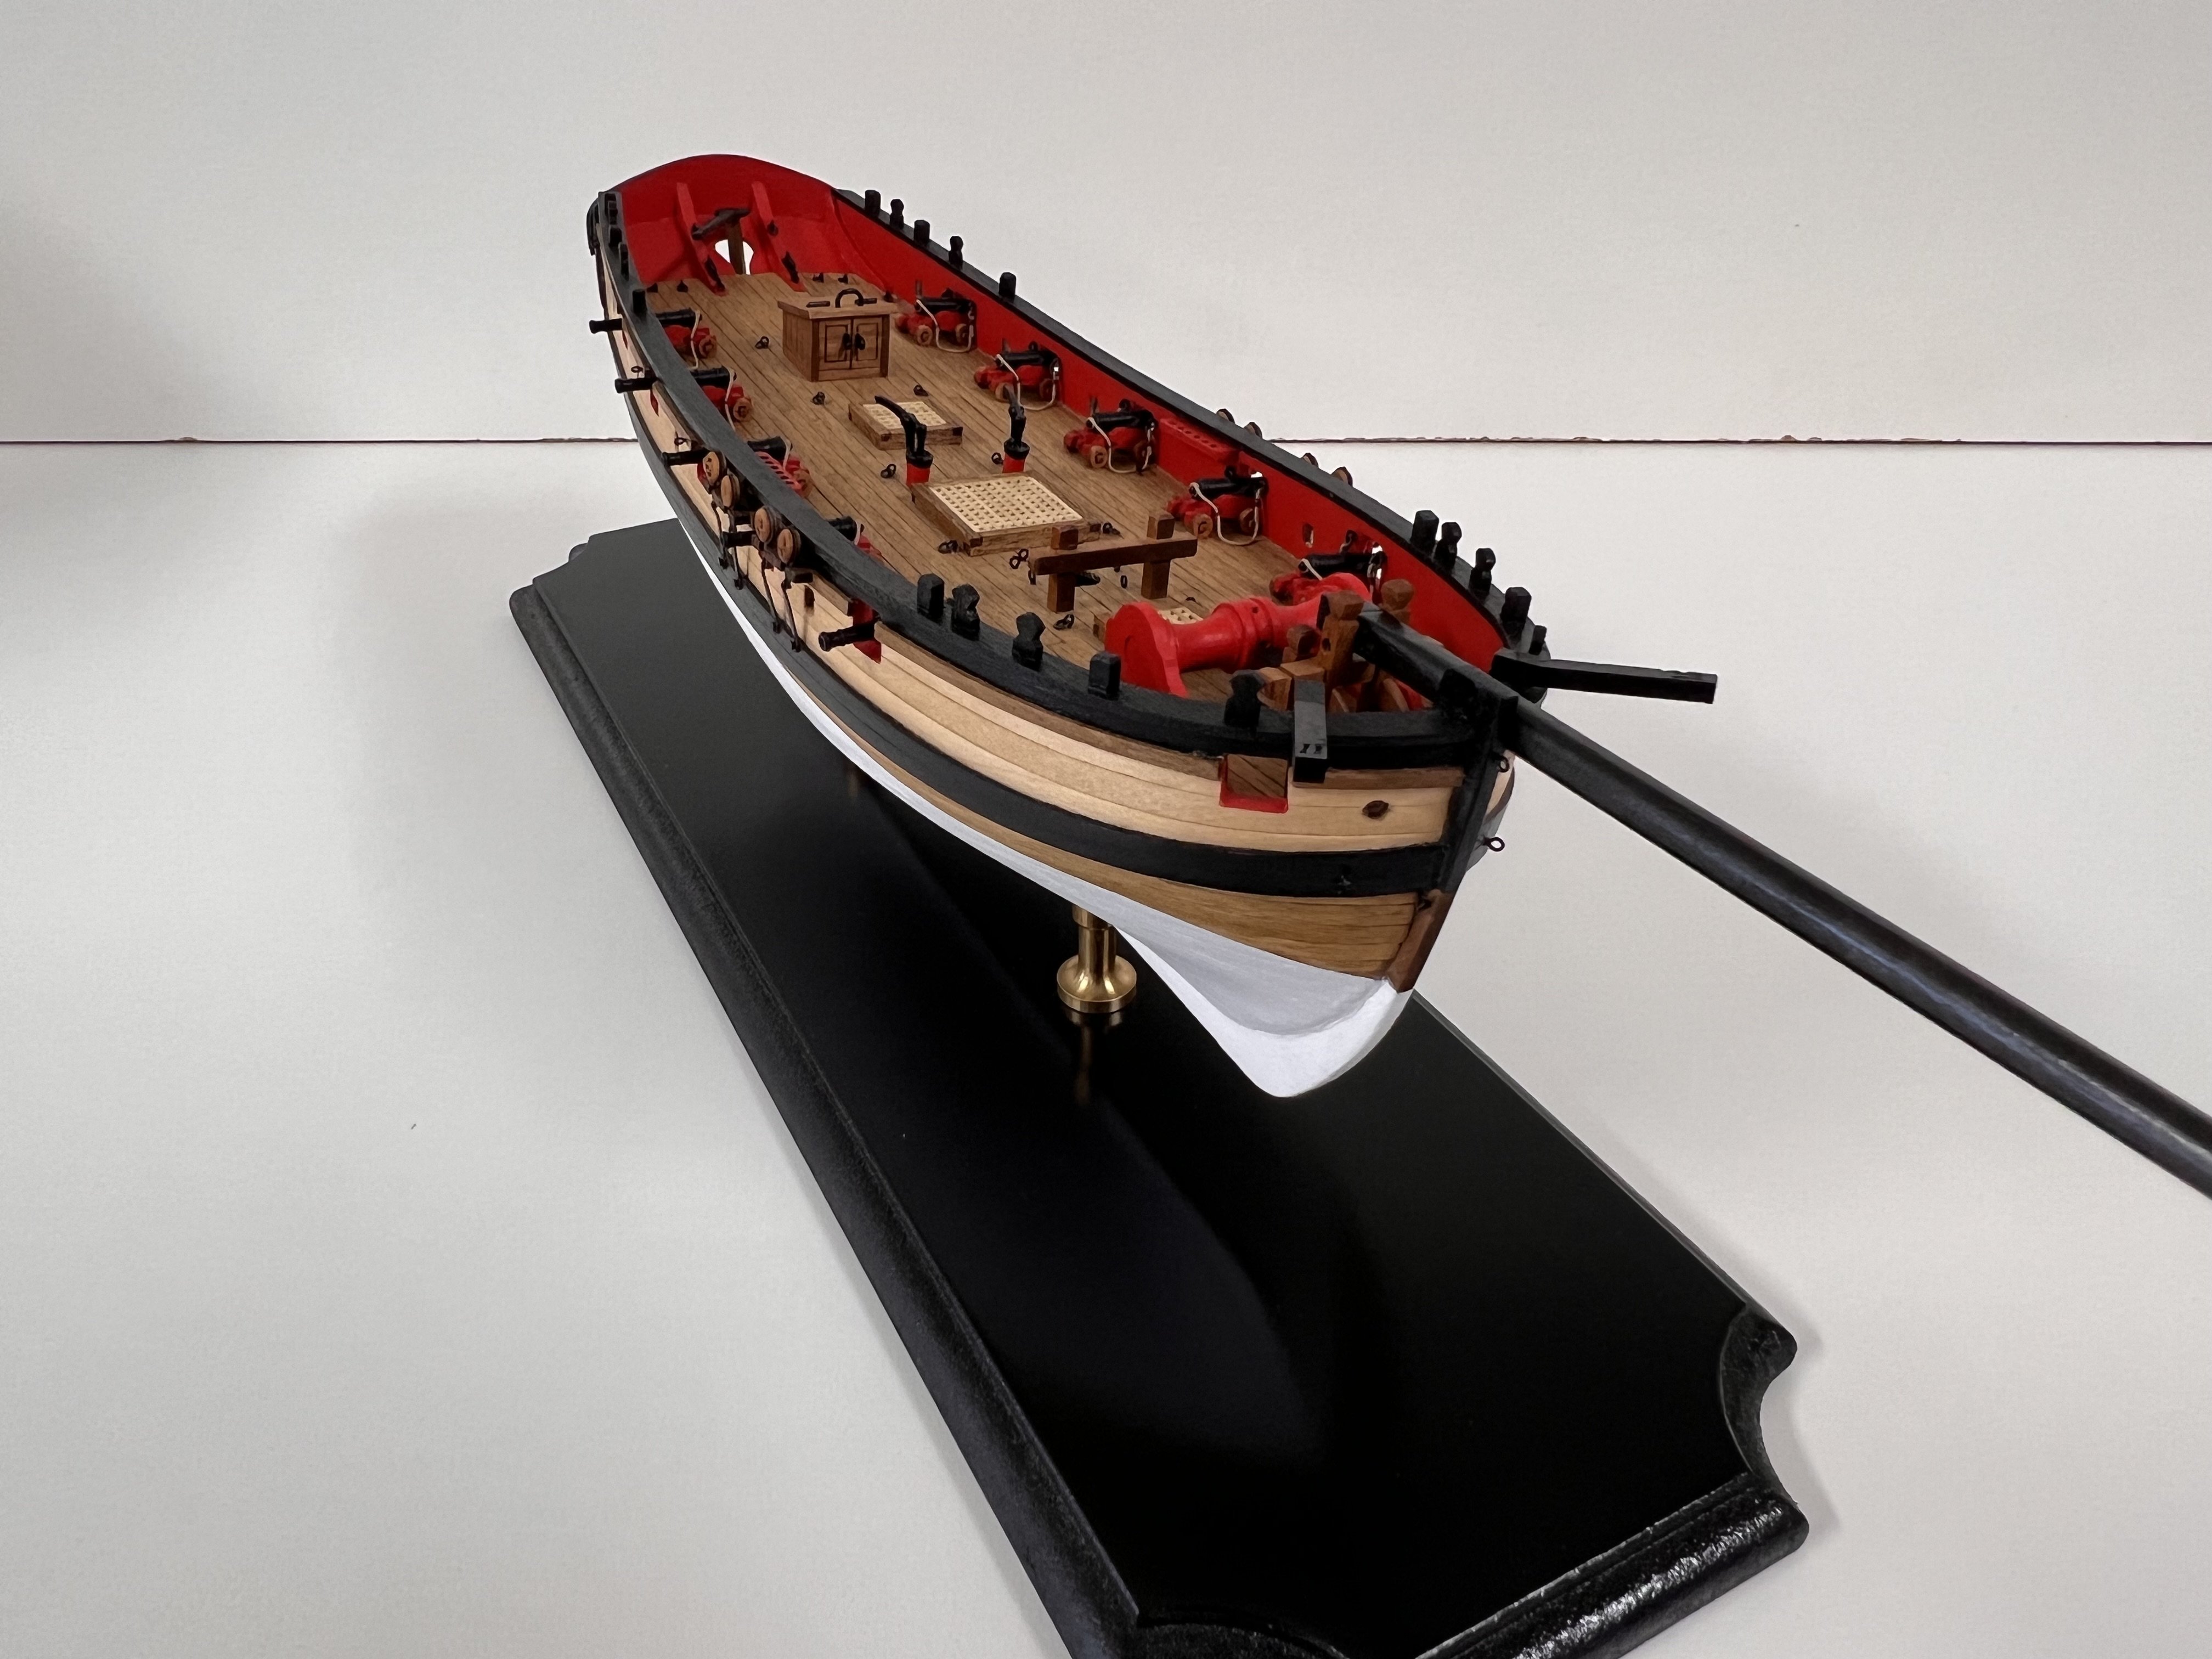
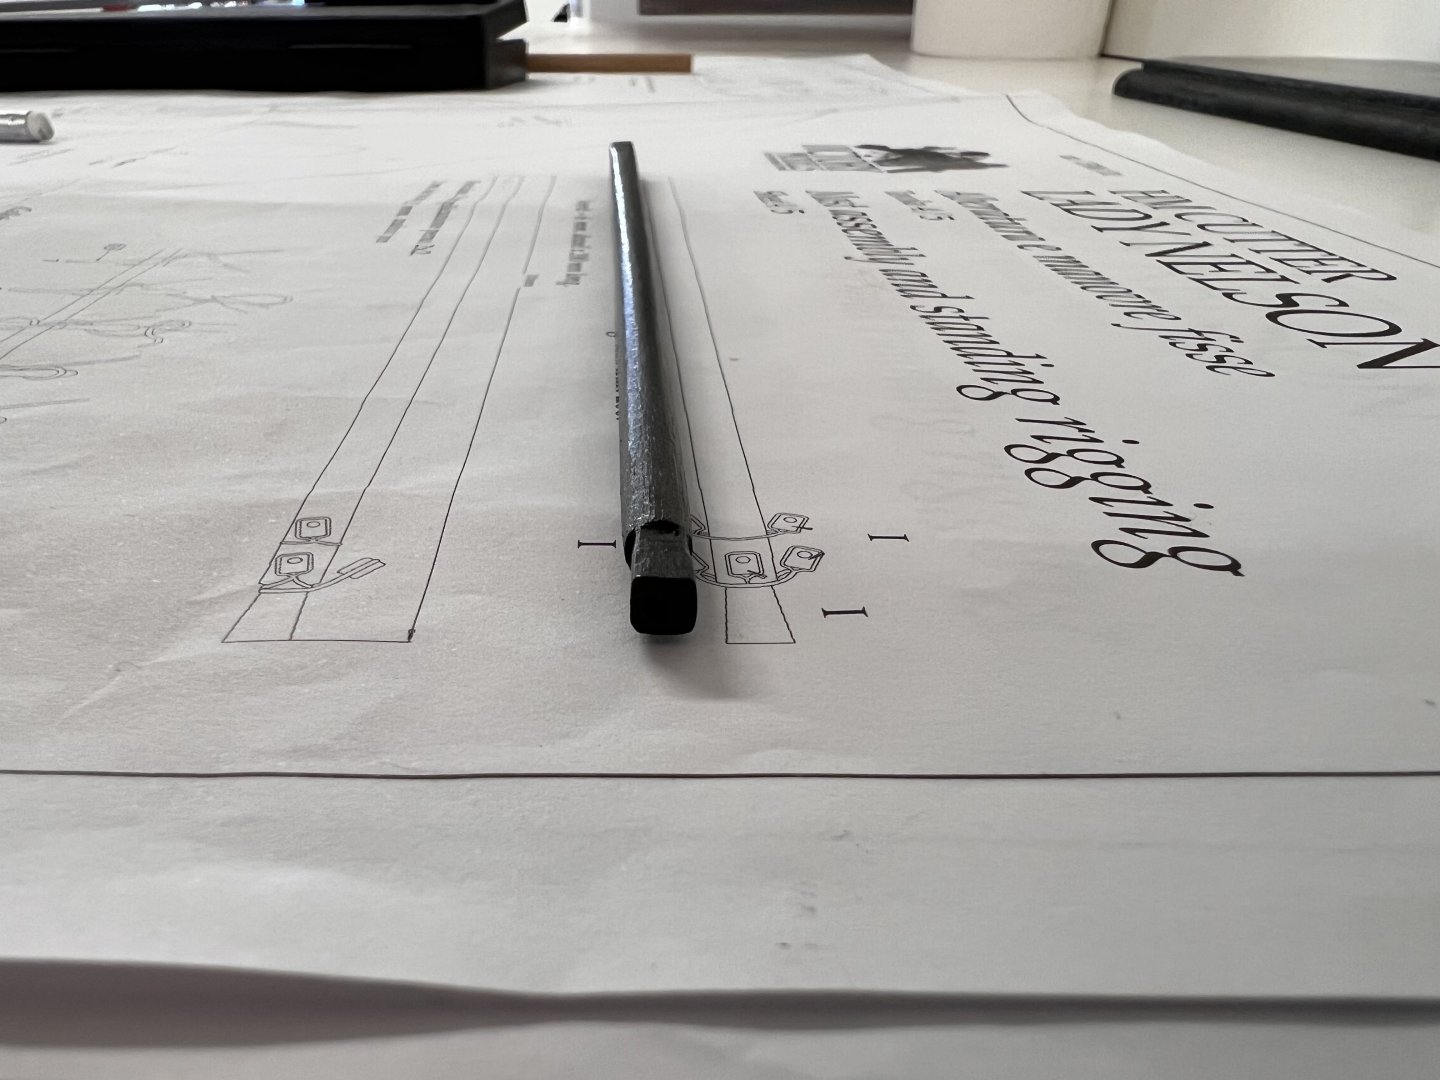
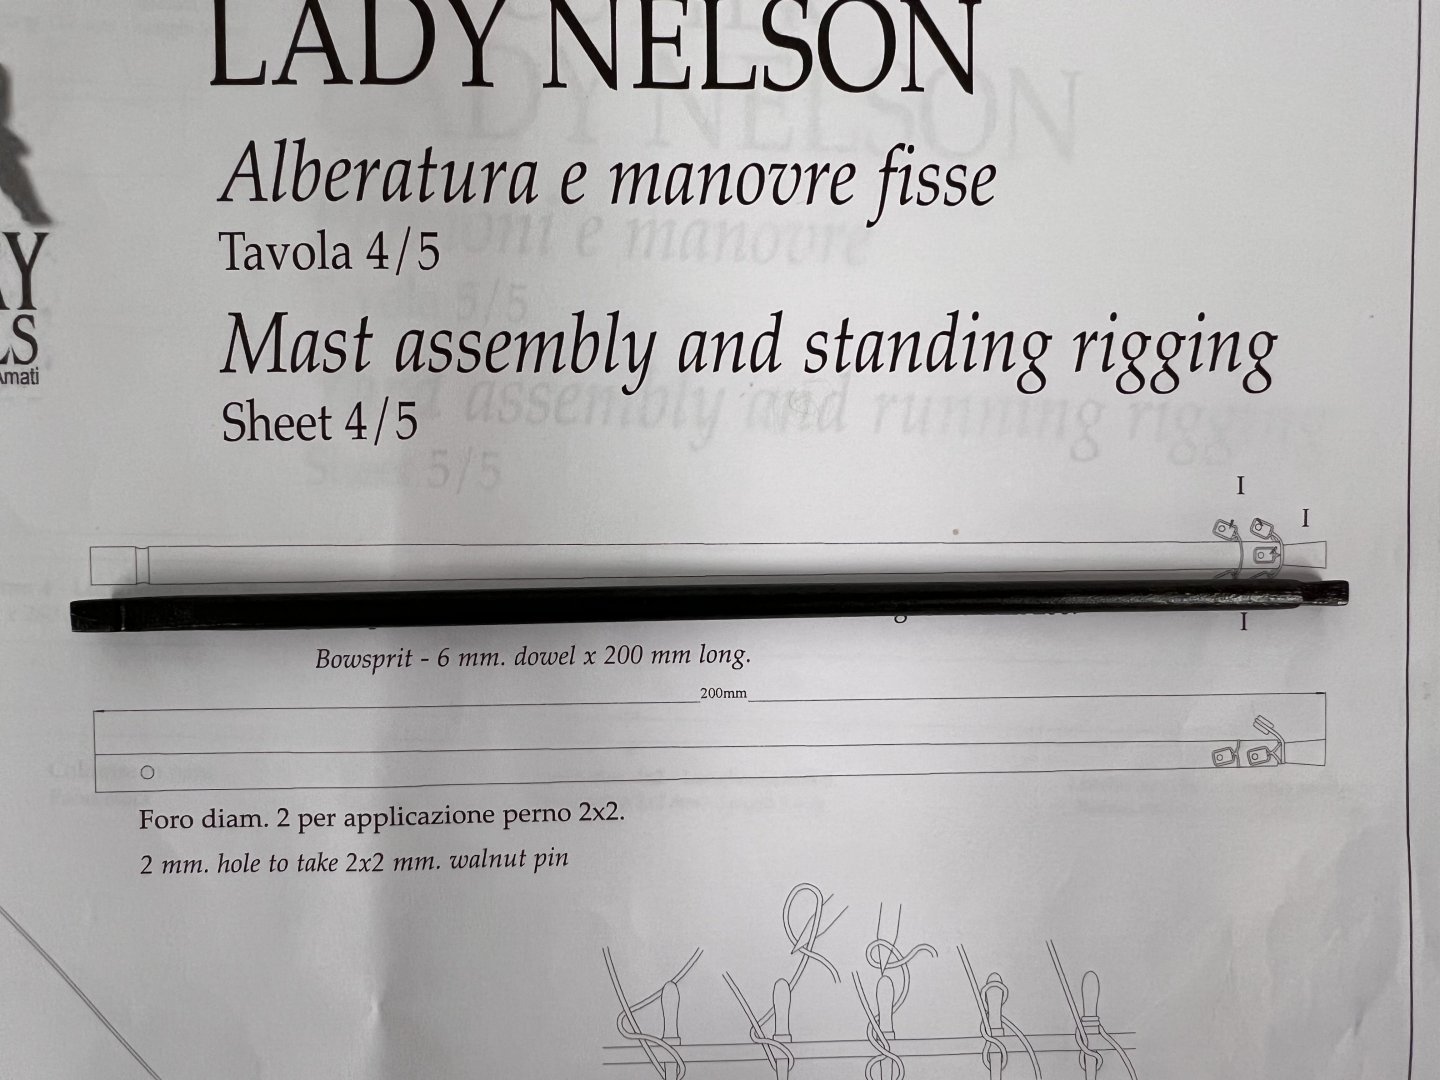
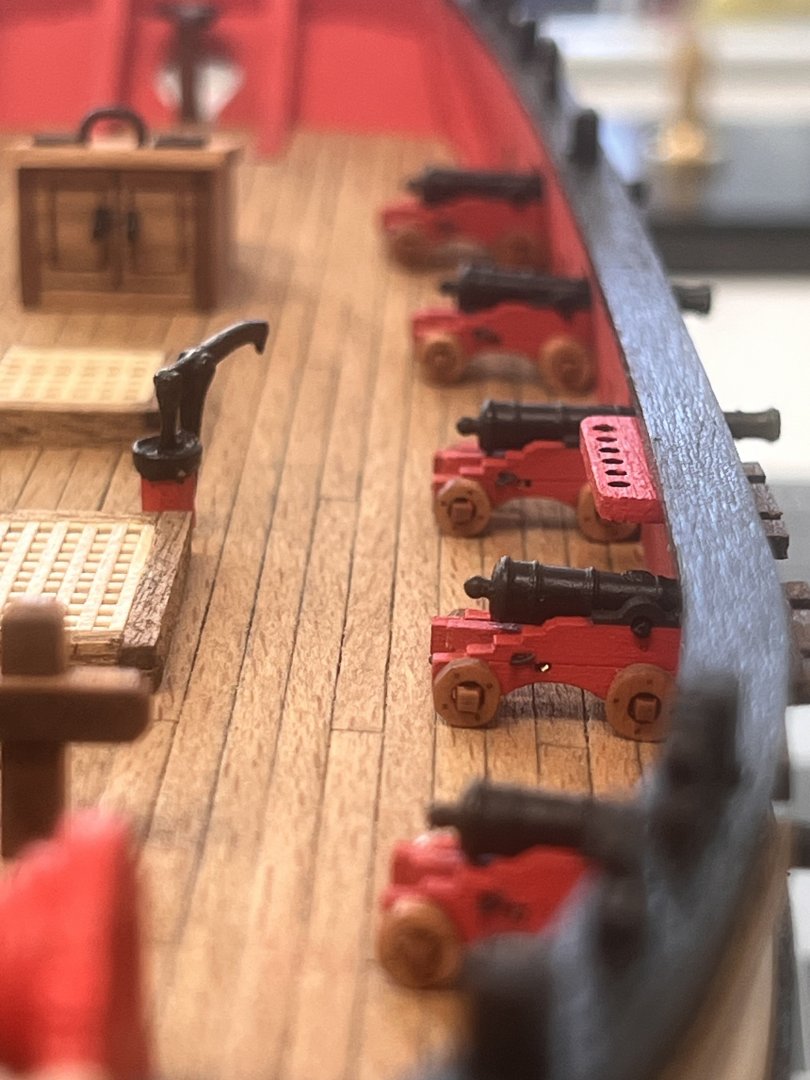
After some time away, I was finally able to put in a few solid hours this weekend. I’ve secured the breaching lines to the cannons but have decided to forgo the side and train tackles. I also shaped the bowsprit from square stock and have painted and seated it though it’s not yet glued and pinned - I’m still debating whether I’m satisfied with it or if I should start fresh with a second attempt. I’m also shifting my attention to the mast, yard and boom, considering the best approach for shaping them from the round stock included in the kit. Plenty to think through but it feels good to be back in the shipyard.


- 83 replies
-
- 7
-
-
- Lady Nelson
- Amati
- (and 2 more)
-
Thanks Dan! Of course, you are outpacing me, so I may be looking to you in the next few weeks.
- 83 replies
-
- 2
-
-
- Lady Nelson
- Amati
- (and 2 more)
-
Thanks! Yeah I am considering rigging gun tackles. I did purchase the 2mm blocks from Syren just in case I decided to go down that rabbit hole. Just so you appreciate the size of a 2mm block and threading the rope through is a patient endeavor. I’m using .25mm from Ropes of Scale.

- 83 replies
-
- 6
-
-
- Lady Nelson
- Amati
- (and 2 more)
-
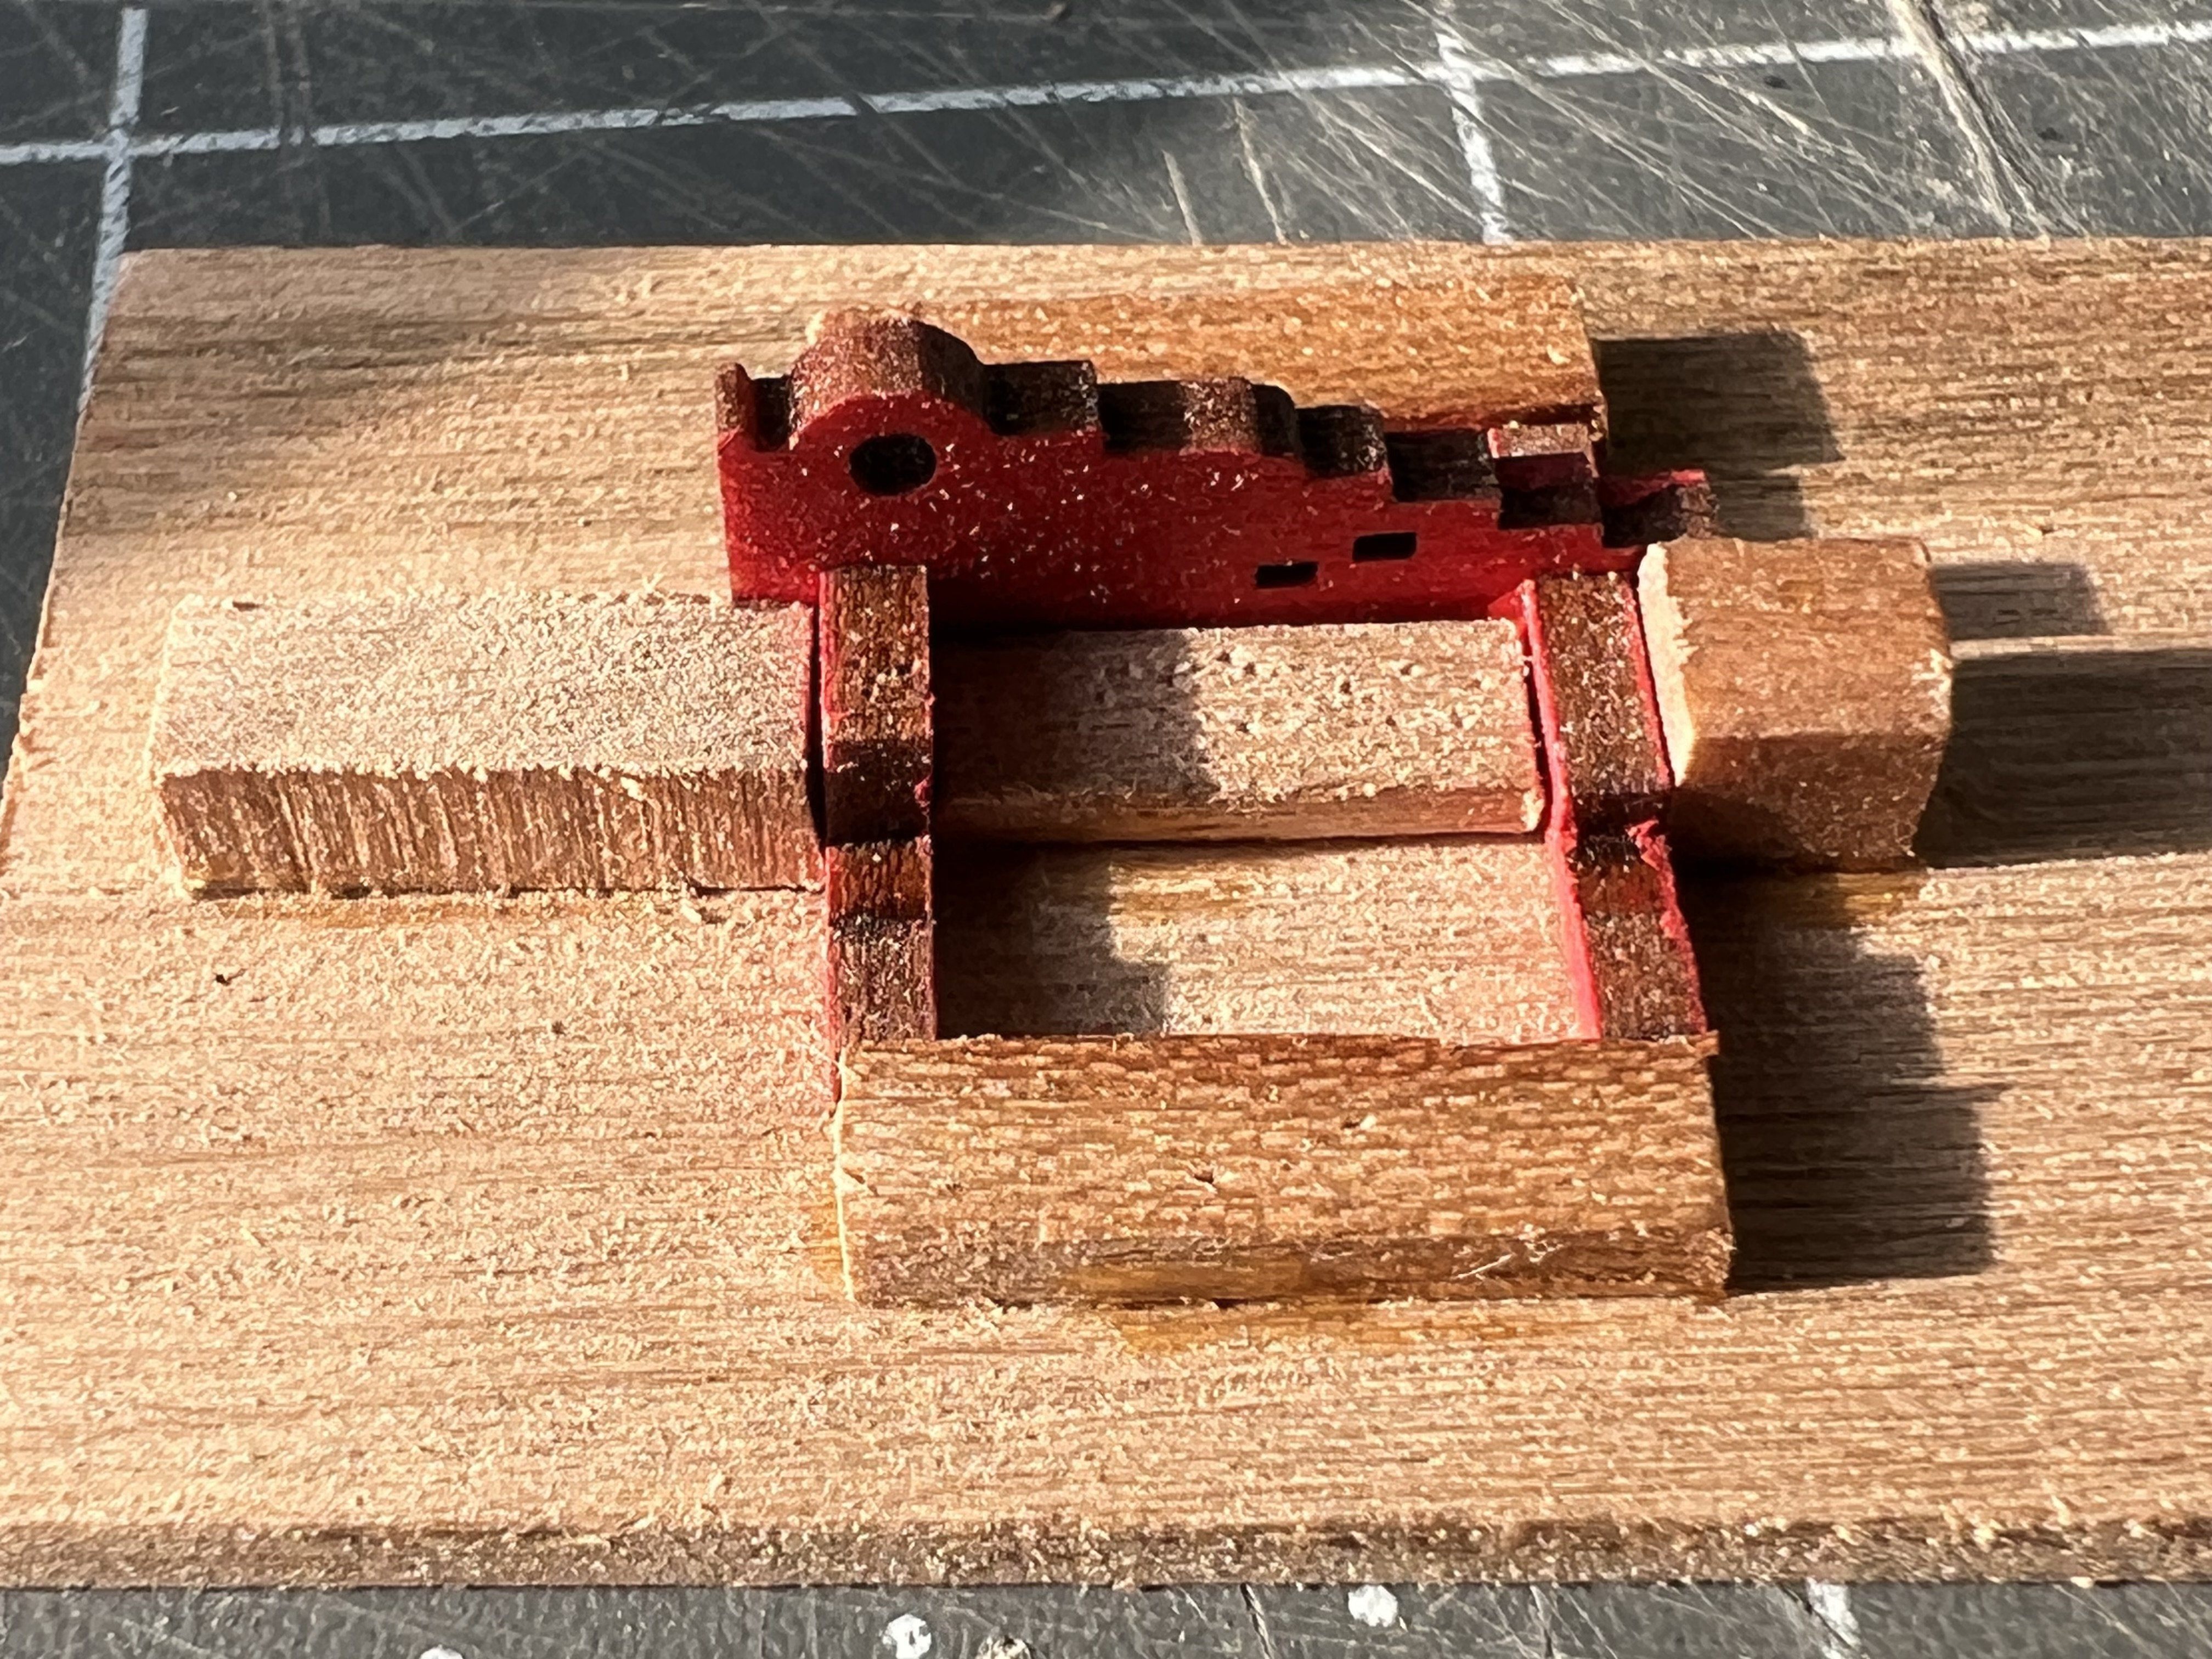
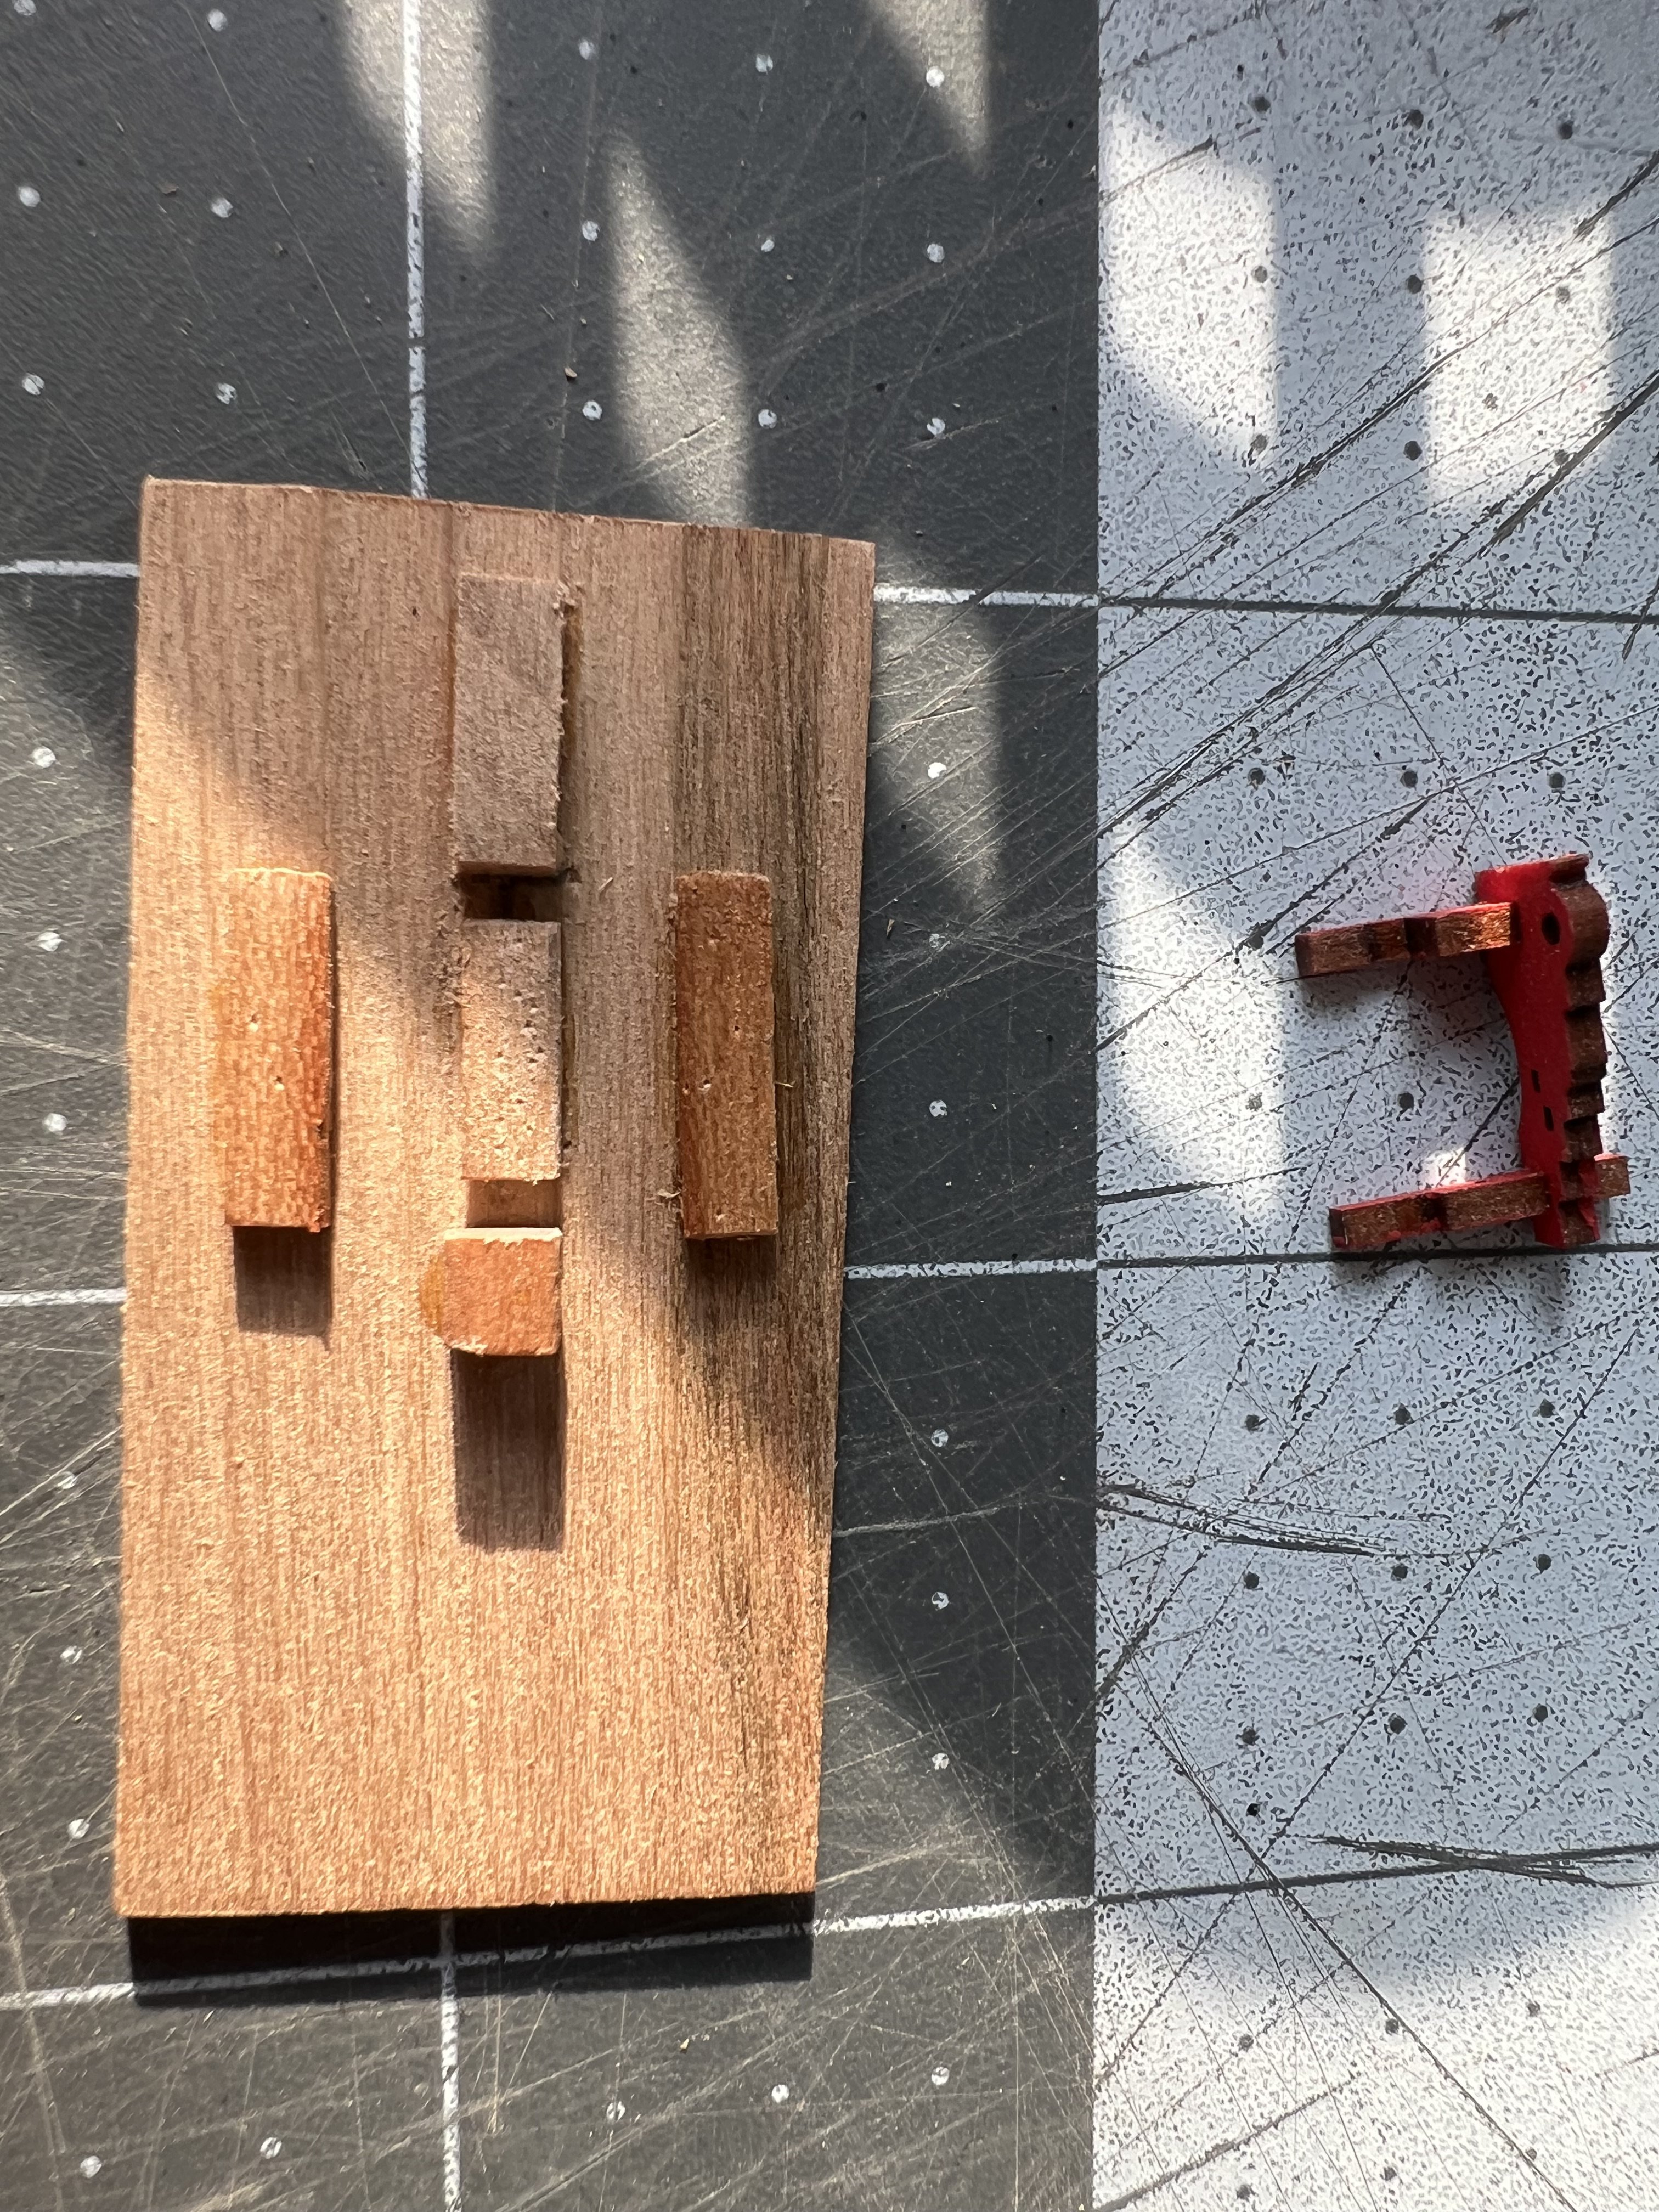
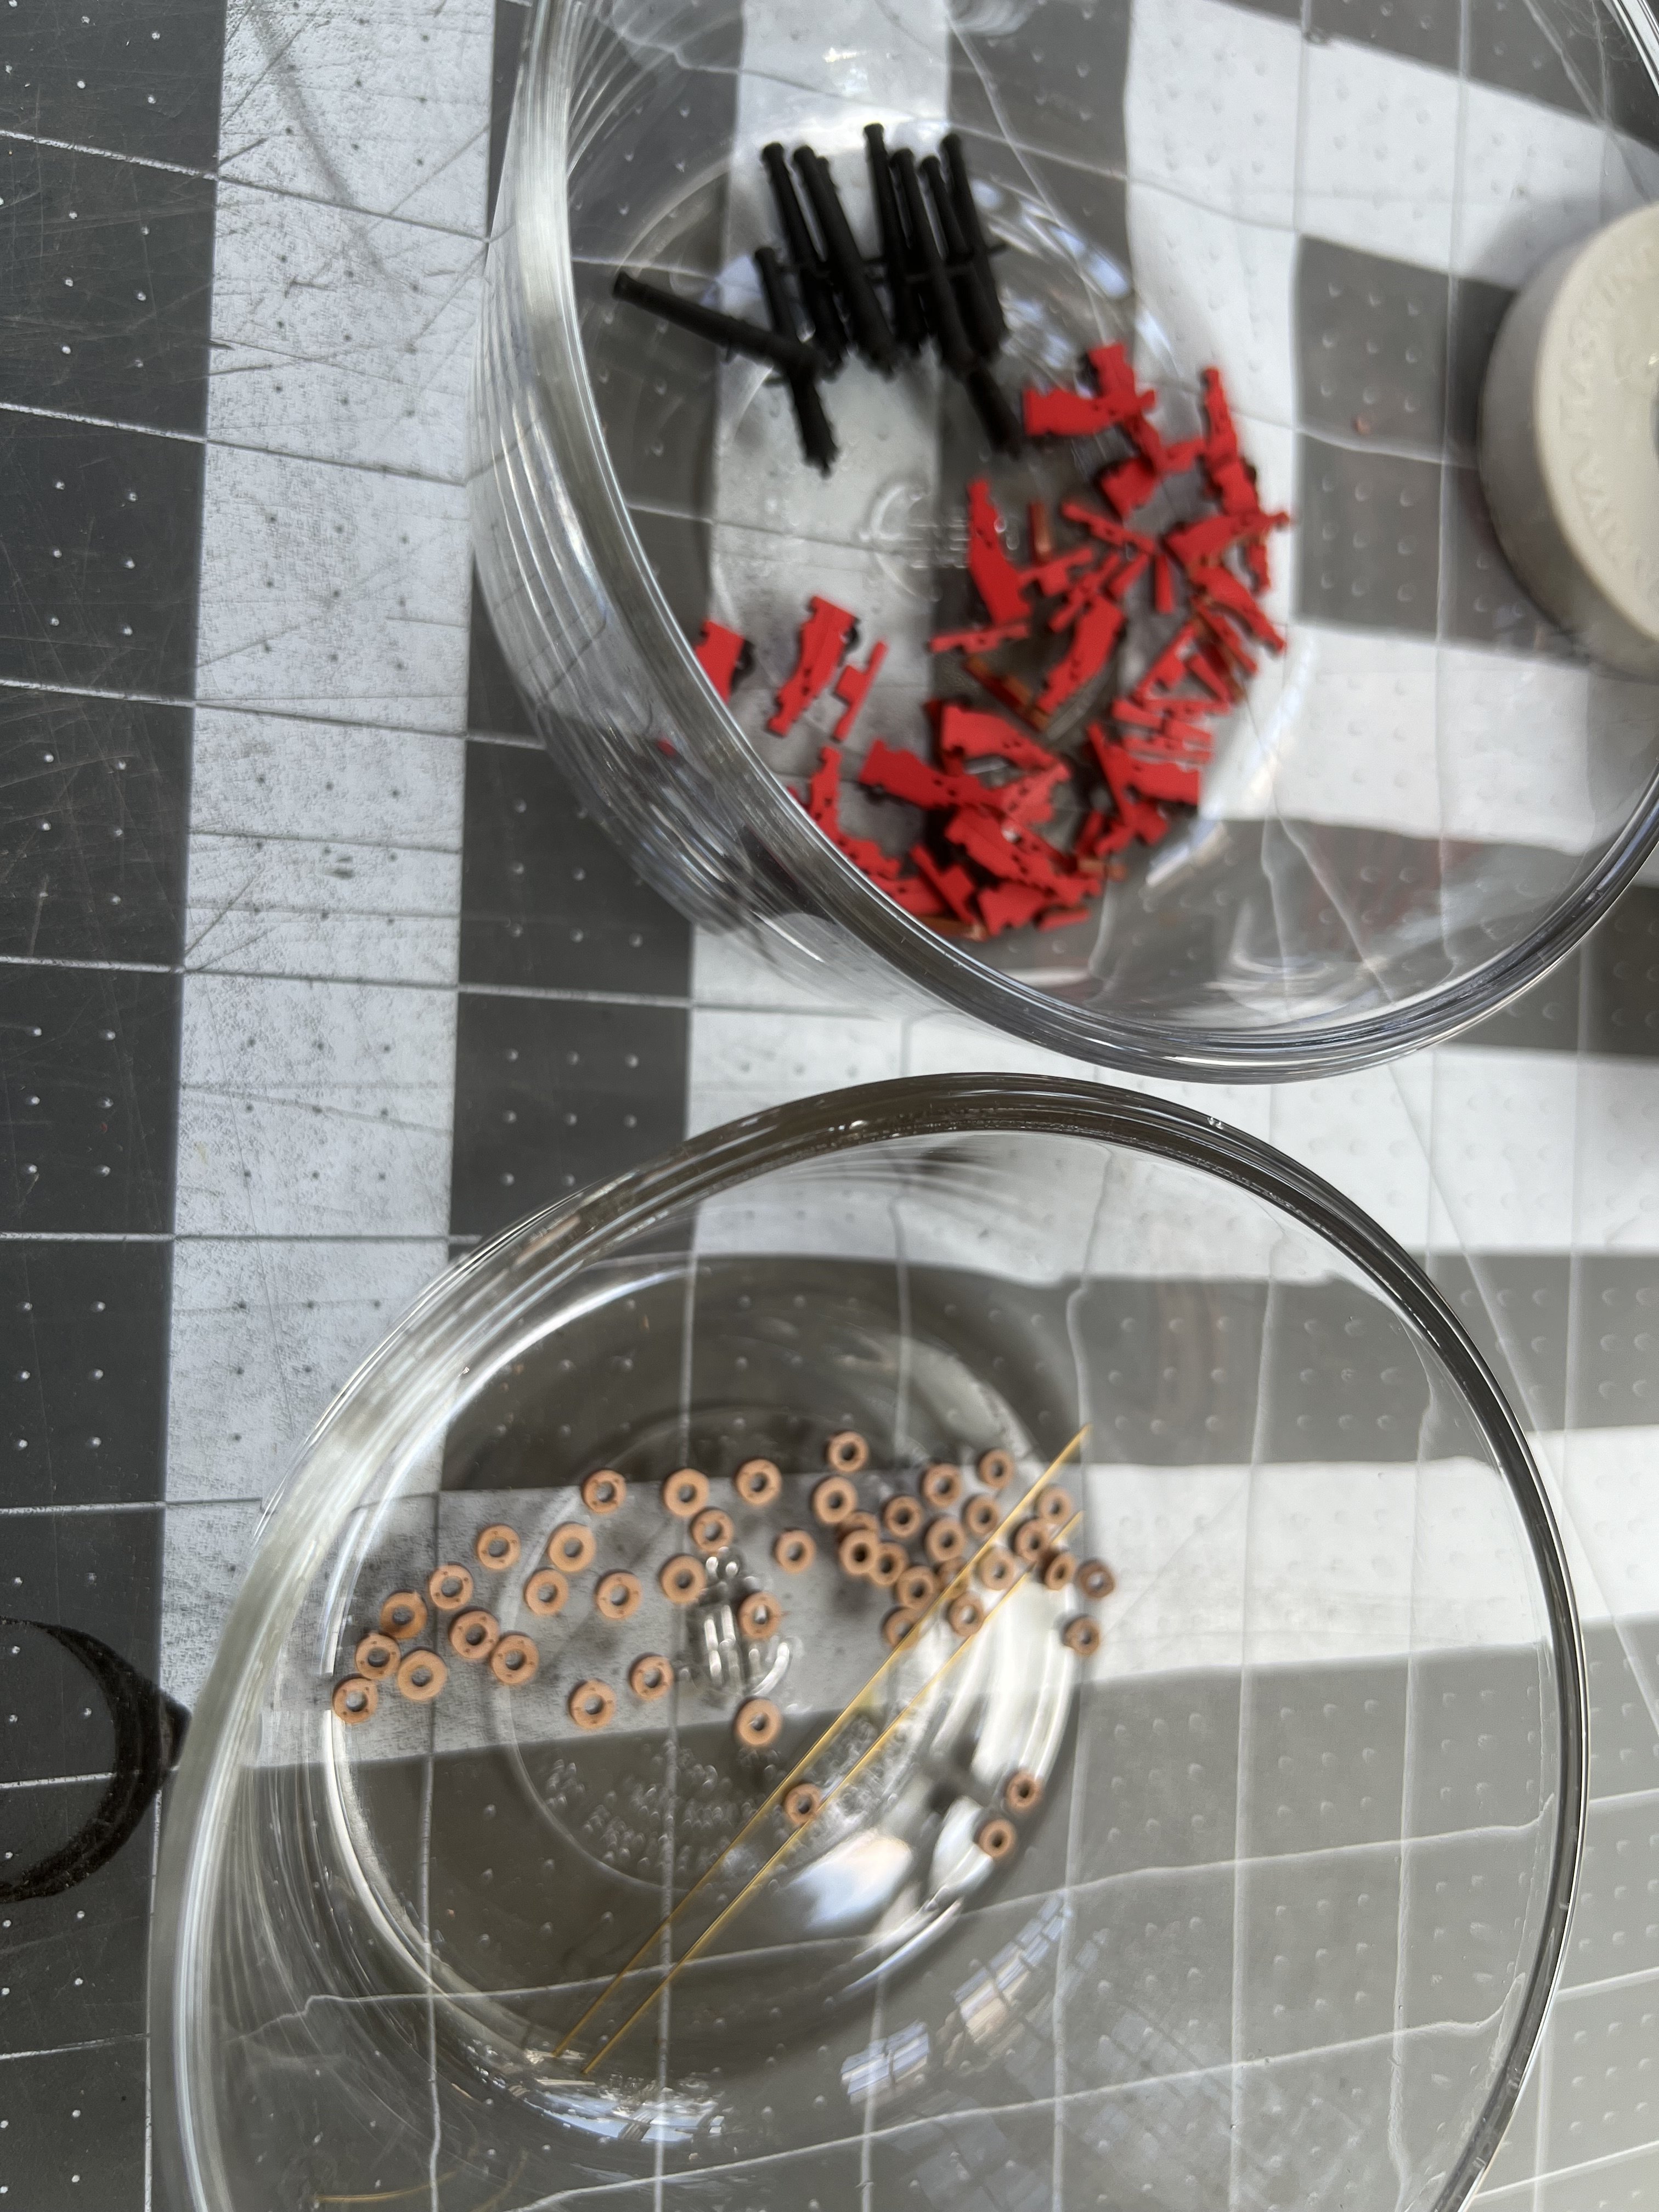
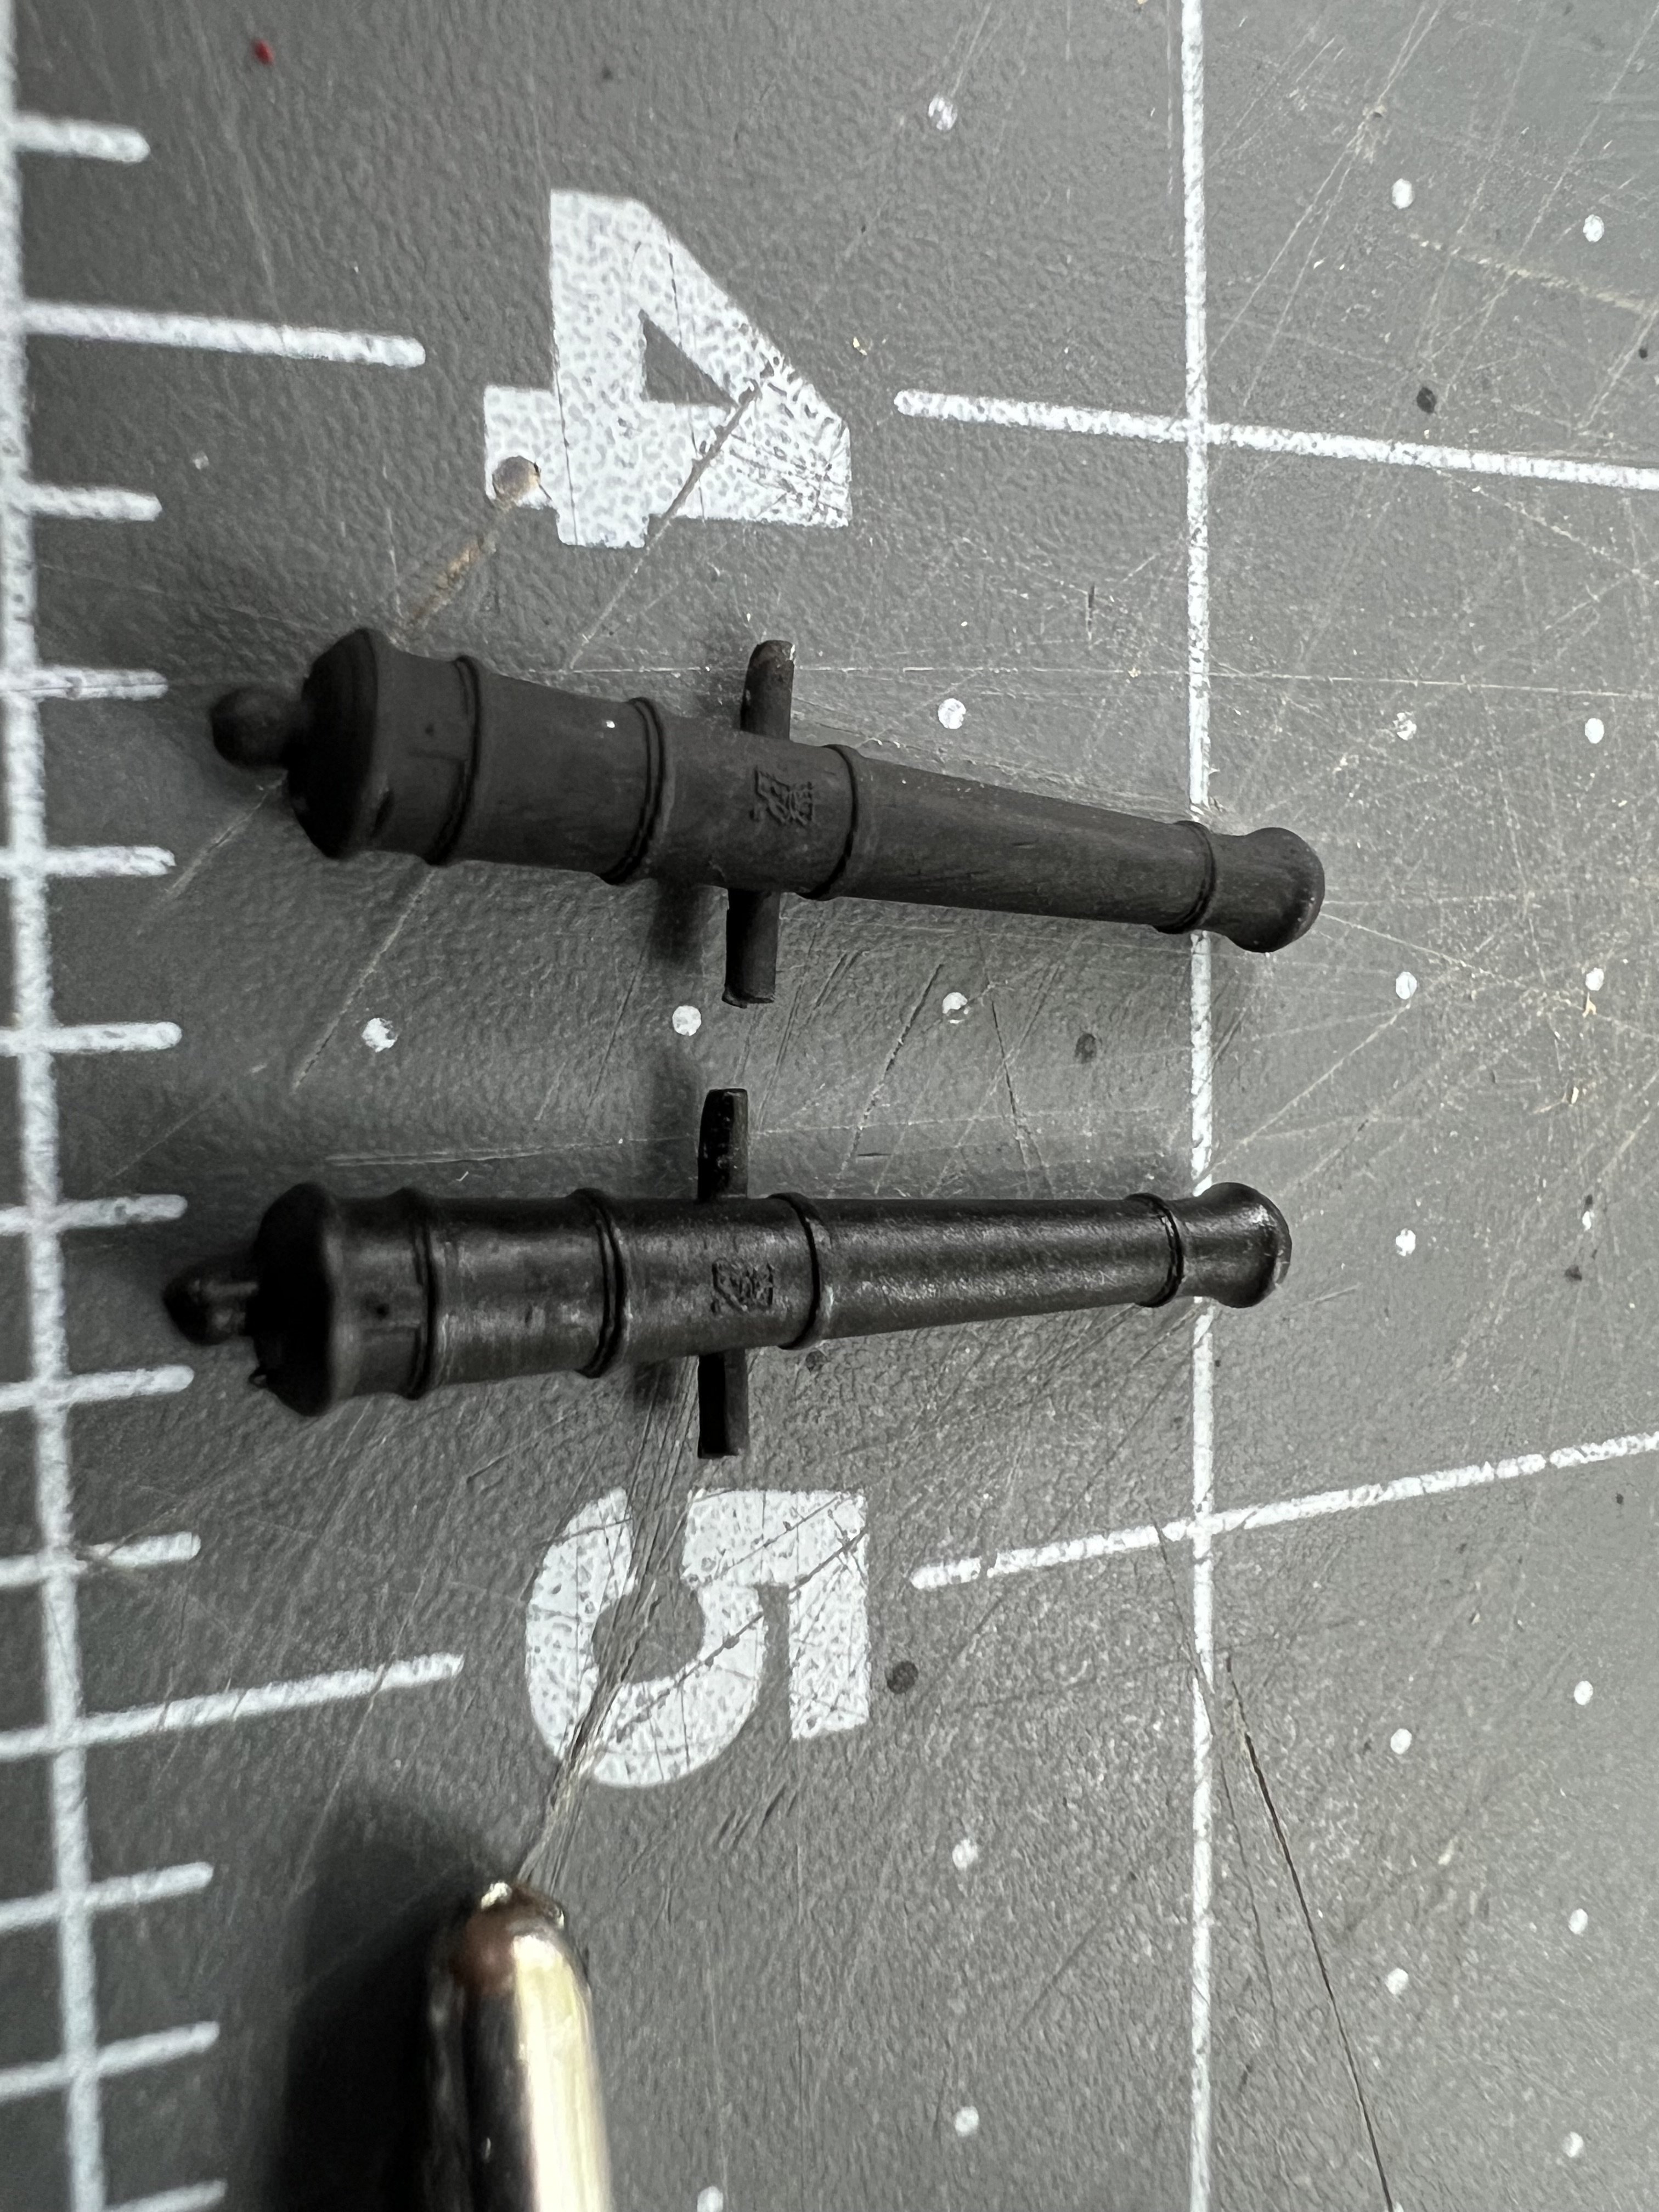
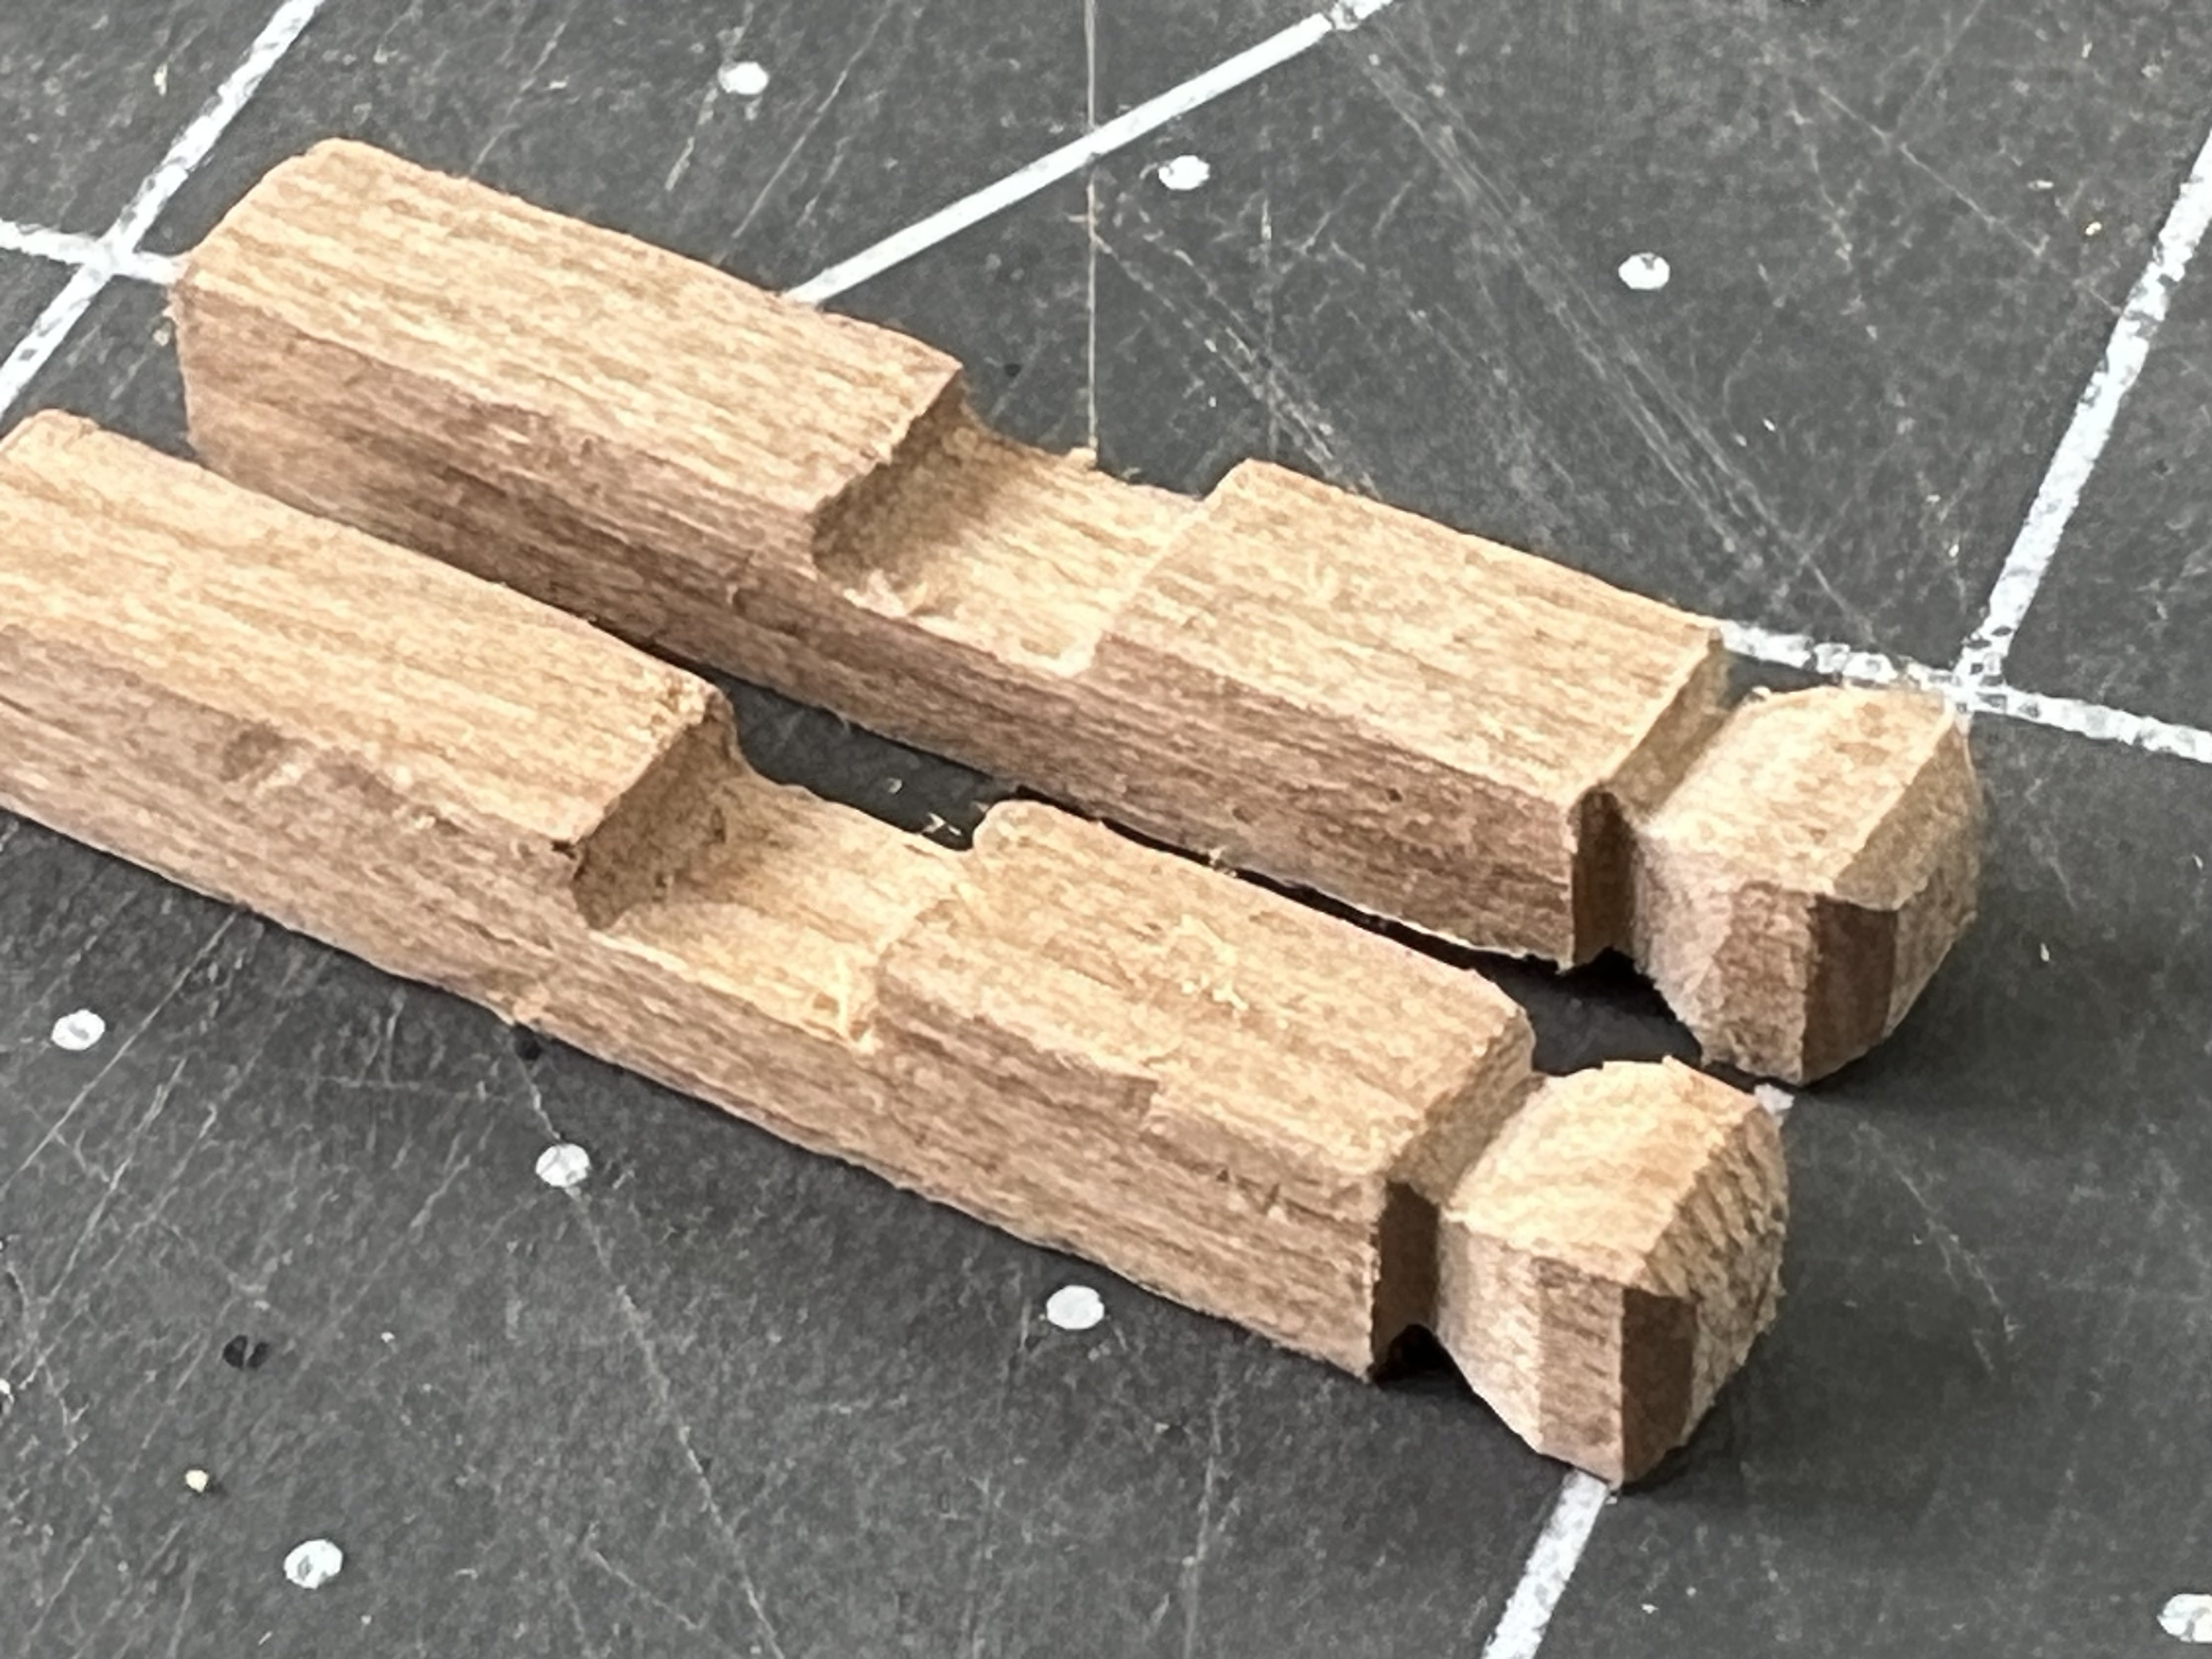
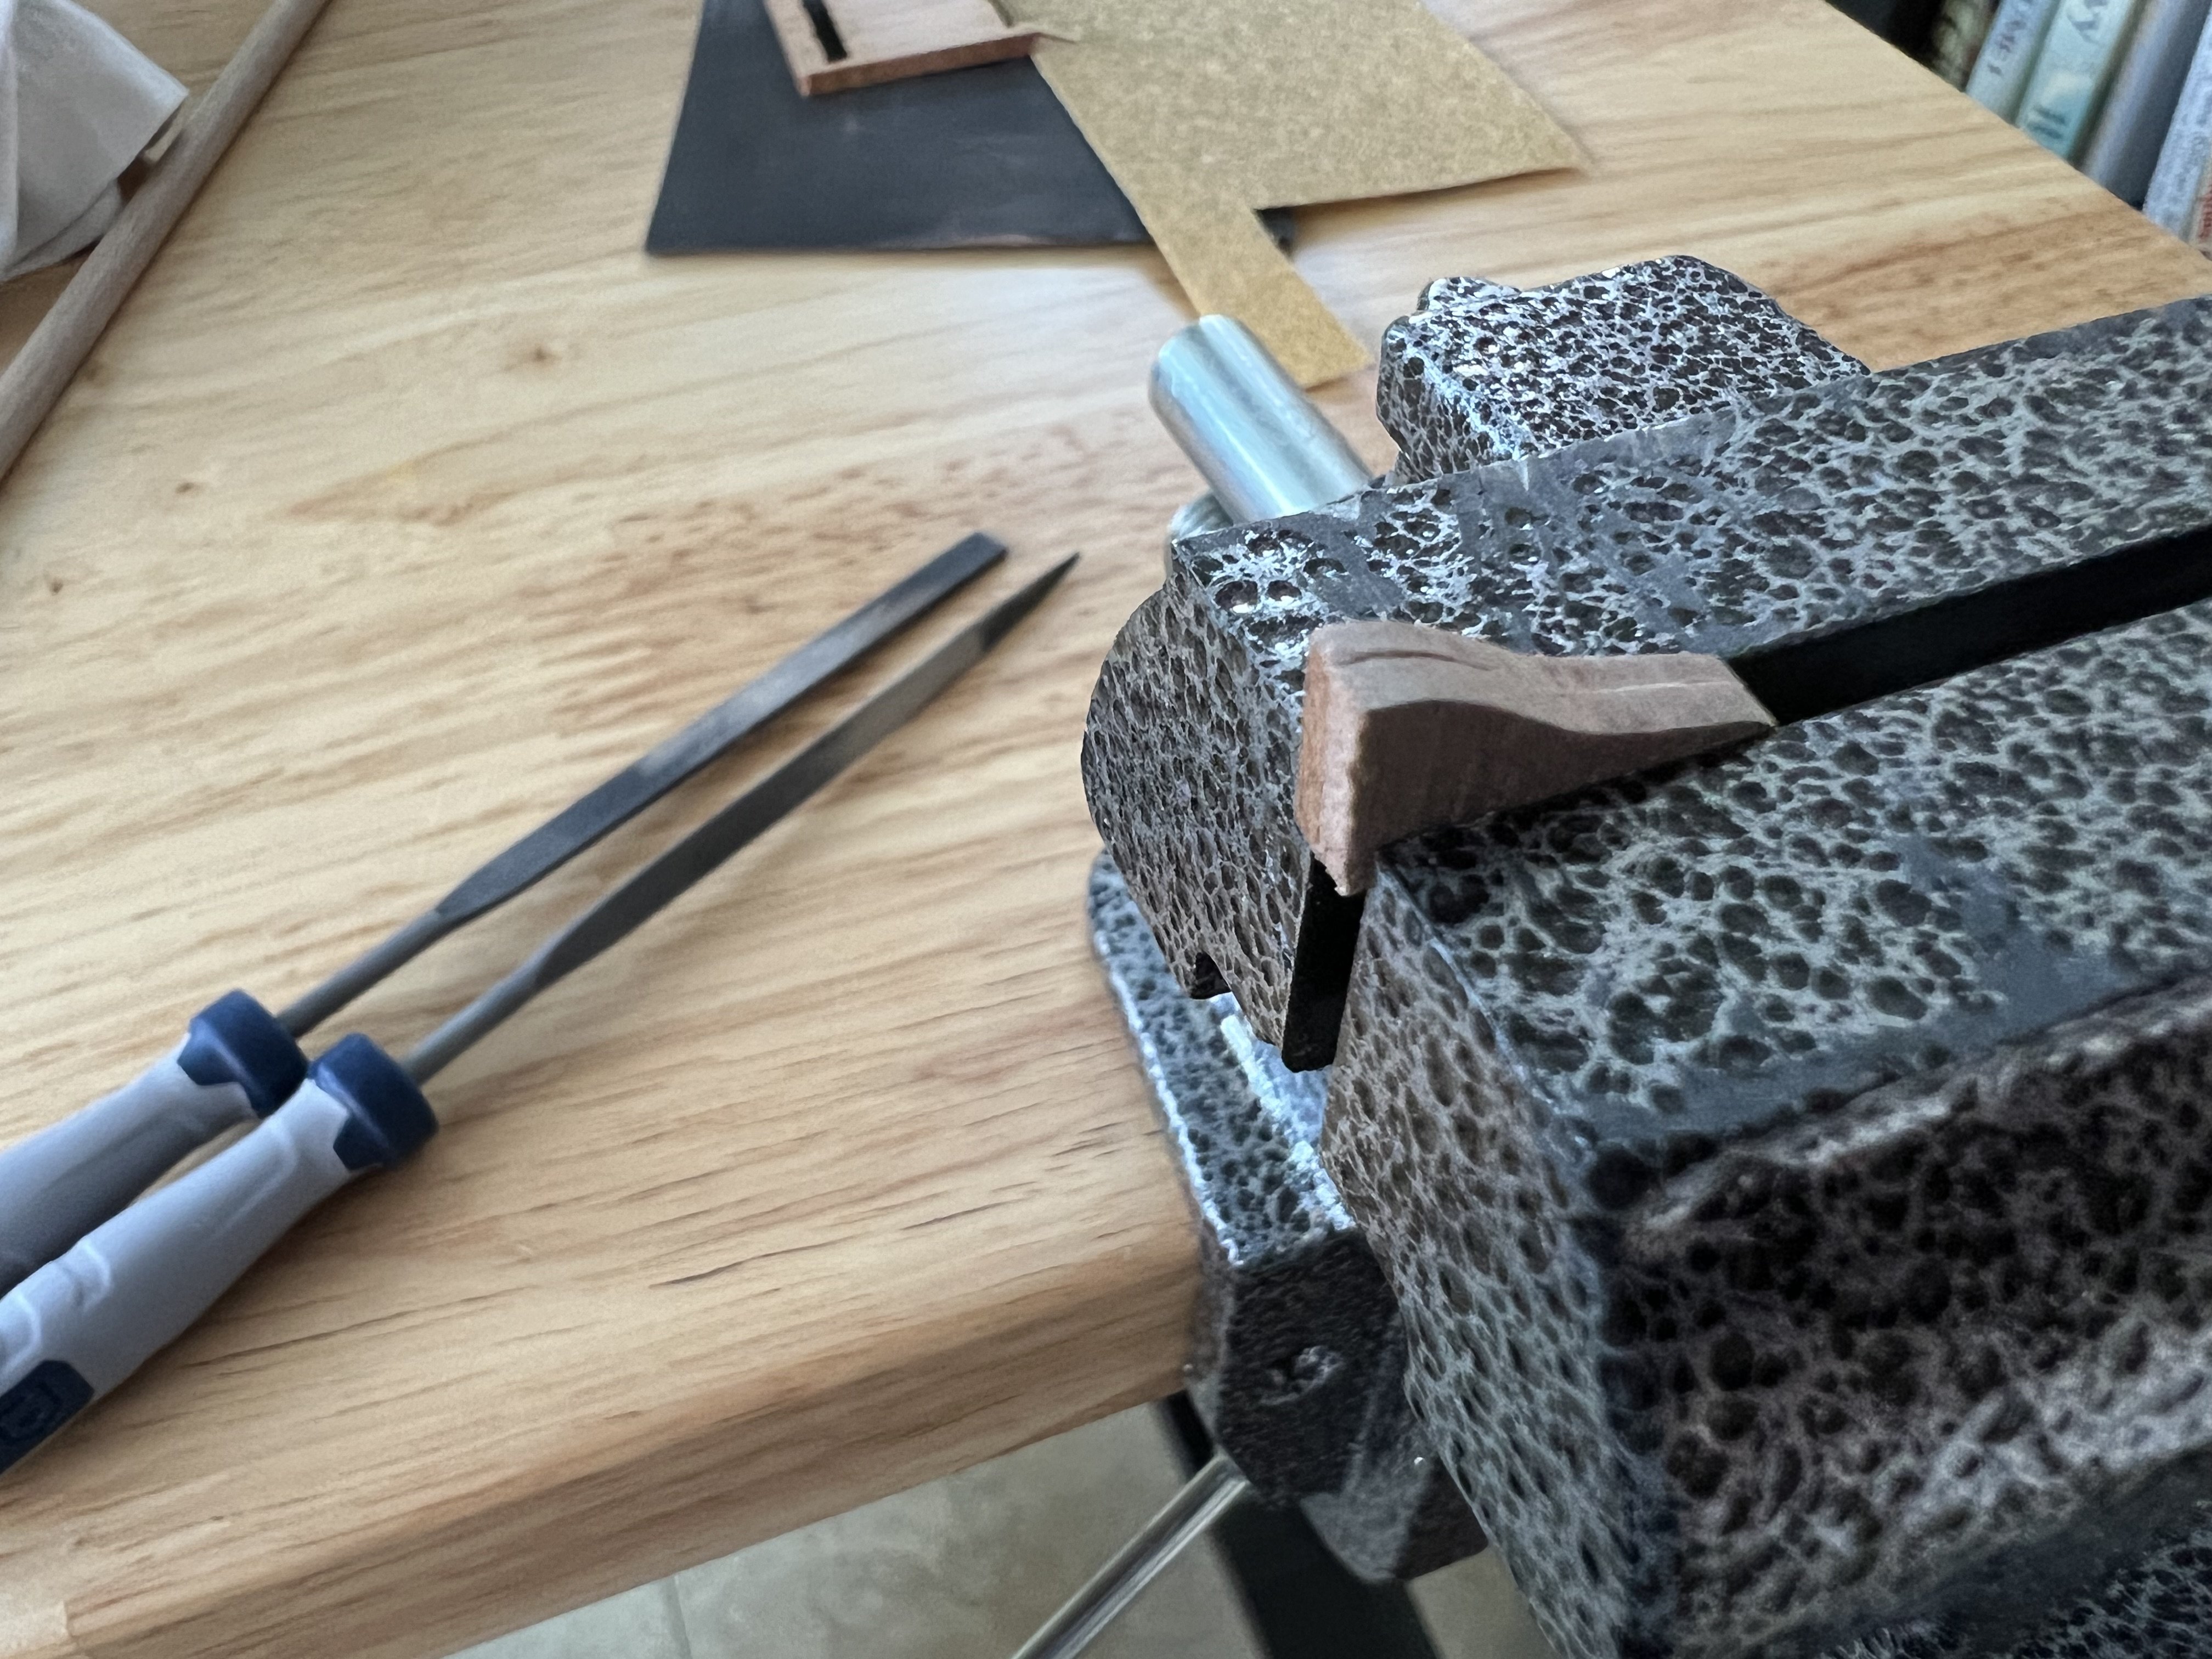
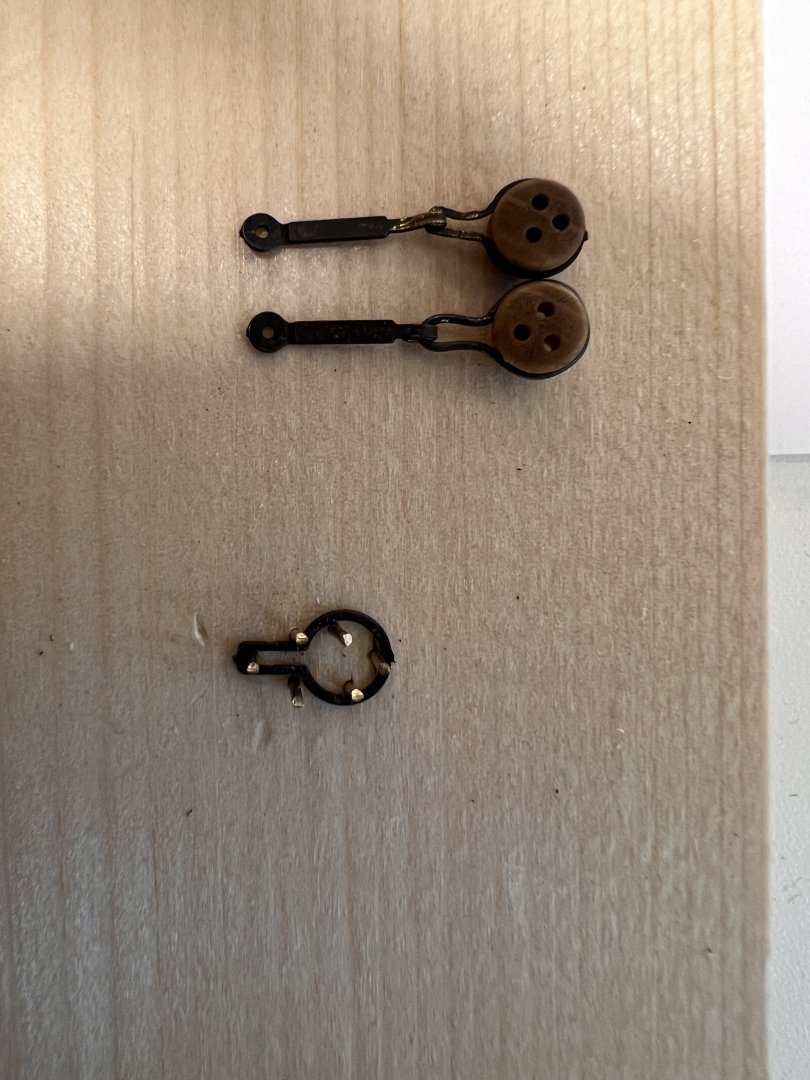
Life has been busy with many different responsibilities, so my time in the shipyard has not been as much as I would like. But I have finally painted and assembled all the cannons, which are the purchased 3lbrs from Vanguard. I will rig them with breech rope before gluing them to the deck. Next up I am working on the channels, and the strops for the deadeyes defeated me. After fighting with them for a while and splitting several in multiple places, I thought I might could do them with the 24 gauge wire that I had purchased. Making several attempts at that, consistency in size proved challenging so I made a little jig using one of the kit supplied strops, nails and a block of wood. The one at the top is with the kit supplied strop and below is with the 24 gauge wire. It still takes a little fiddling but the jig will offer some consistency and more dignified speech. Any thoughts on the use of the wire as a substitute? What do people generally use if they are making their own parts? Thanks for the input and dropping by!
- 83 replies
-
- 6
-
-
- Lady Nelson
- Amati
- (and 2 more)
-
I love the detail on the companionway. You (and Dan) are really elevating this build, and I look forward to what’s next.
- 39 replies
-
- 3
-
-
-
- Amati
- Victory Models
- (and 1 more)
-
Your work is absolutely stunning. It has been a joy to follow along, and I will look forward to your next ship!
- 840 replies
-
- 2
-
-
- winchelsea
- Syren Ship Model Company
- (and 1 more)
-
I’ll pull up a chair and hang around if you don’t mind. I have been appreciating the fact that you have dove right in to the work. The first layer of planking is looking good, and I’ll be interested to see how the pear turns out for your decking. What motivated you to choose pear?
- 39 replies
-
- 1
-
-
- Amati
- Victory Models
- (and 1 more)
-
Indeed! And you are absolutely right. It has been a little journey of sorts and not quite knowing the path I’ll take to the final destination. At least for my first build this has been my process. Perhaps for my next build, I’ll do some planning, but this one is all about just figuring it out and trying to stretch my skills. Every time I sit at my workbench it is a new task to work through one piece at a time. I appreciate you stopping by and for your kind comments, Roger.
- 83 replies
-
- 1
-
-
- Lady Nelson
- Amati
- (and 2 more)
-
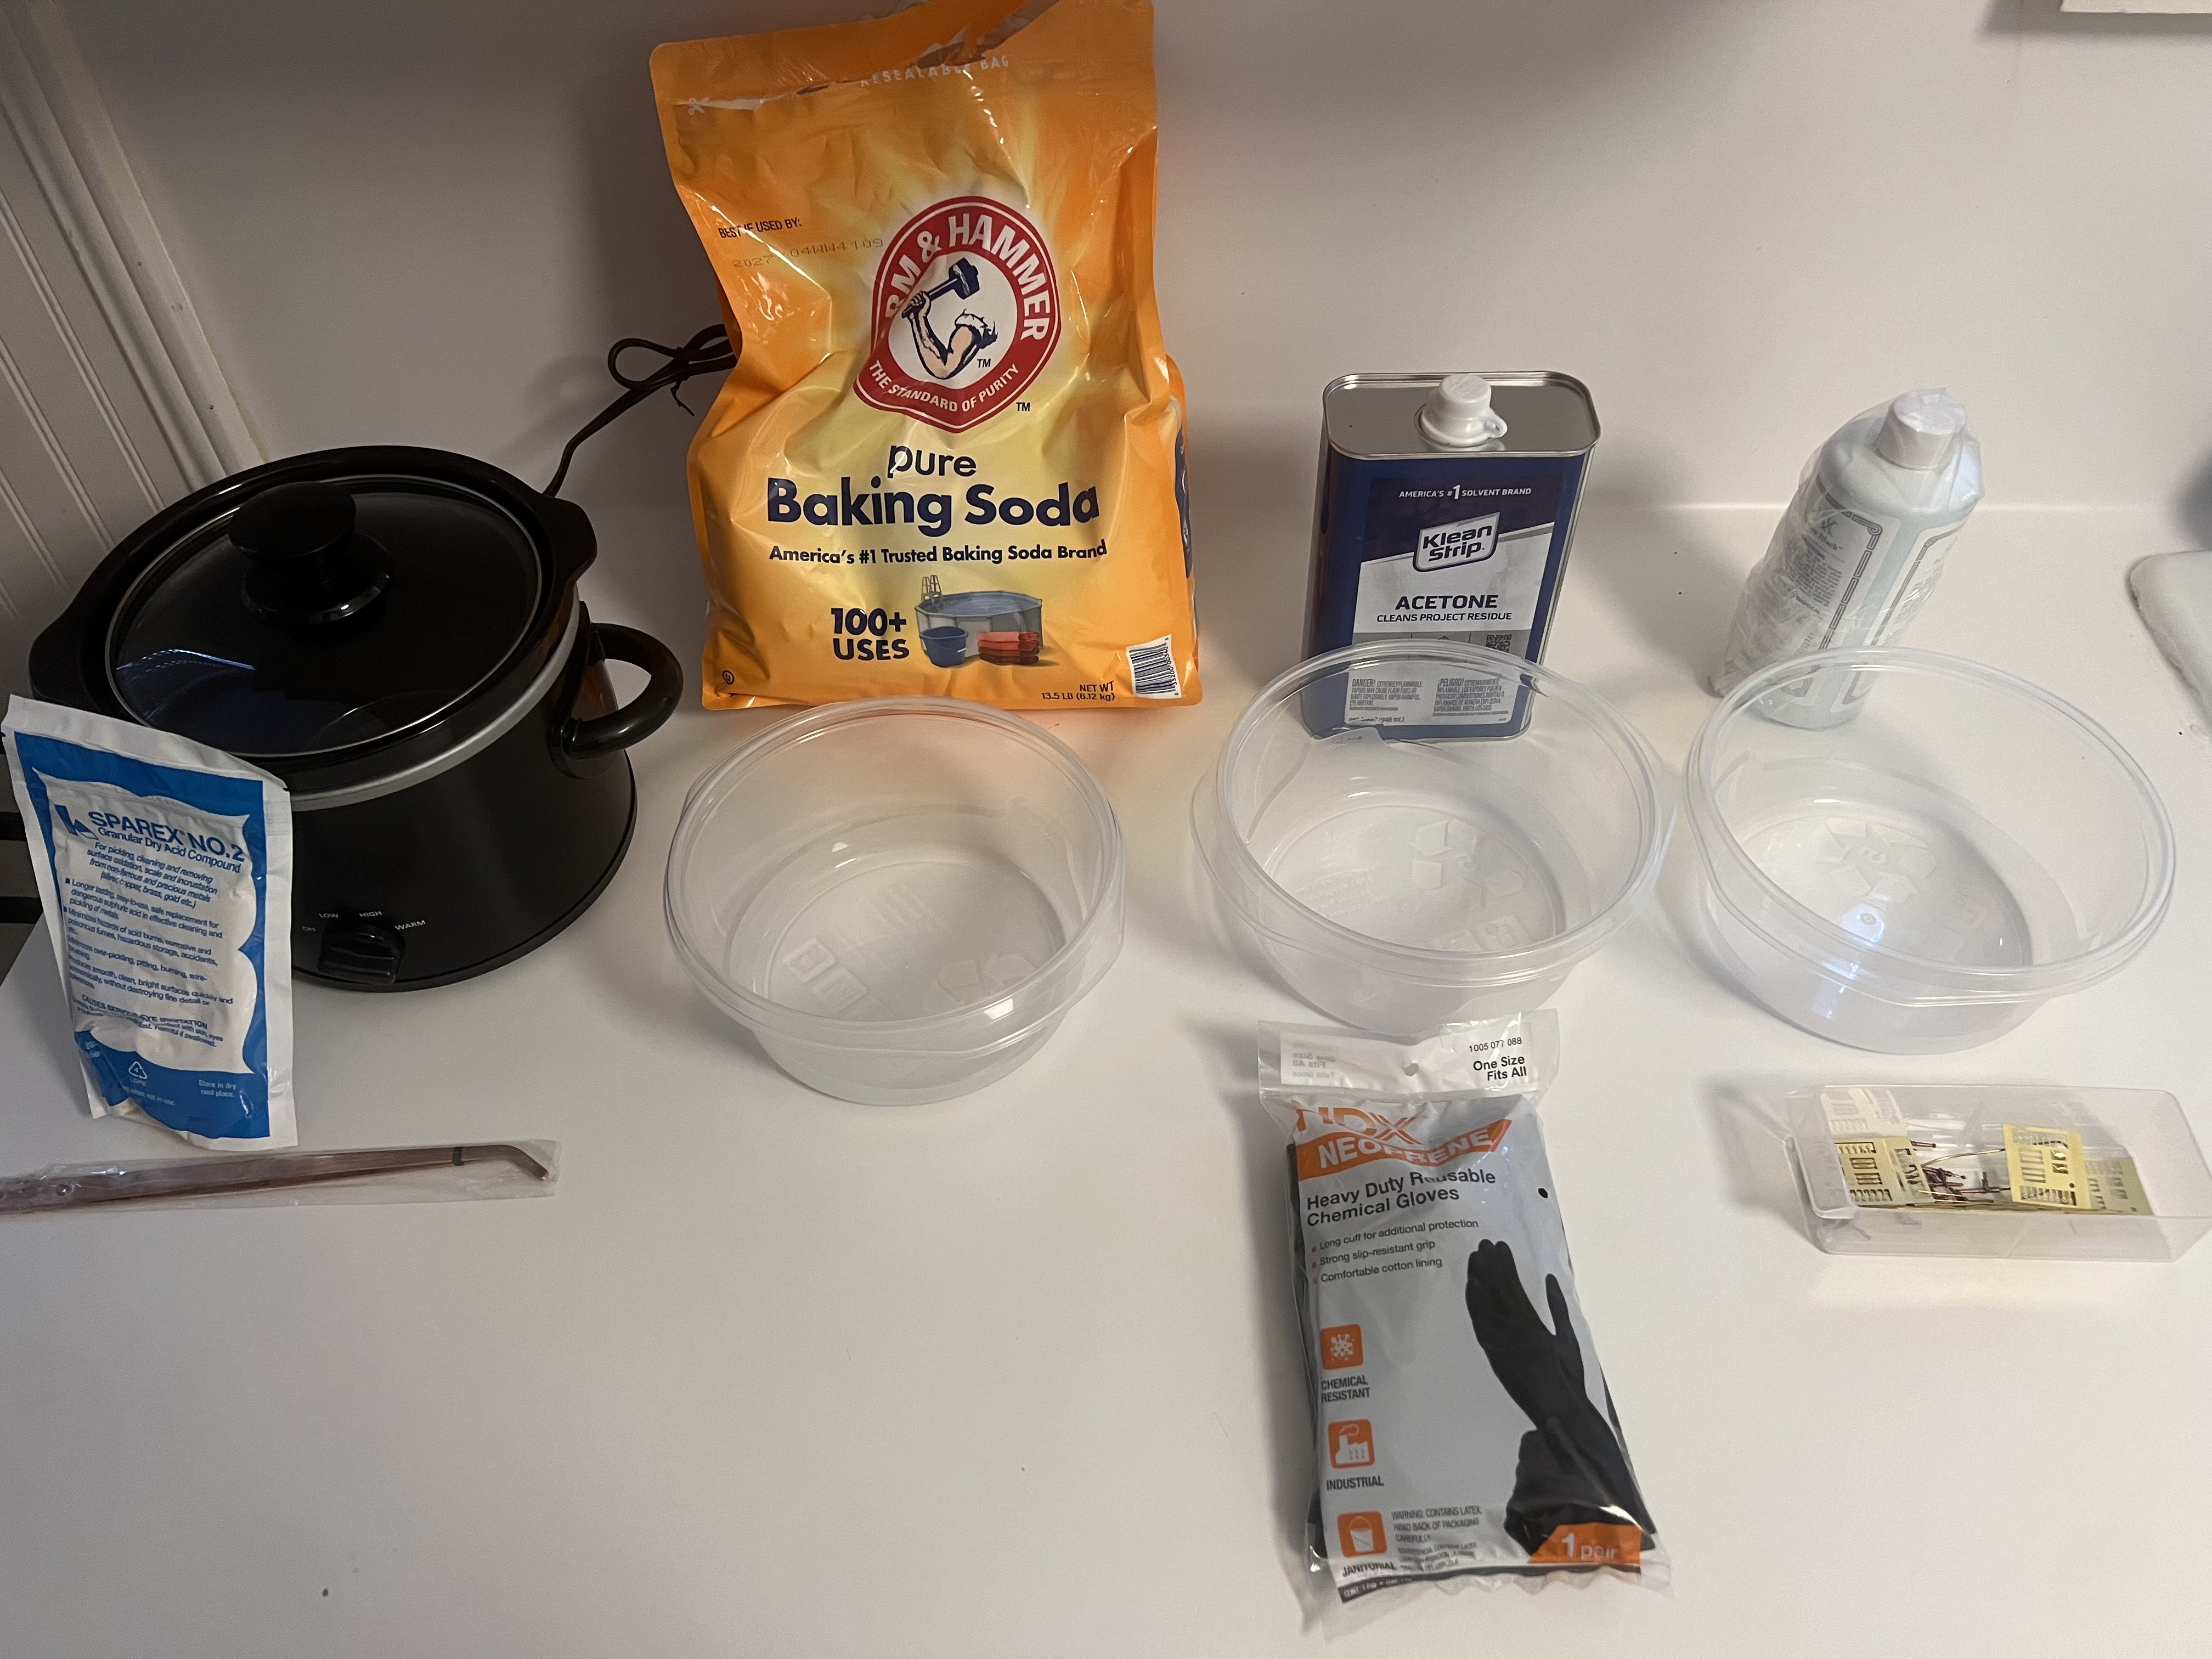
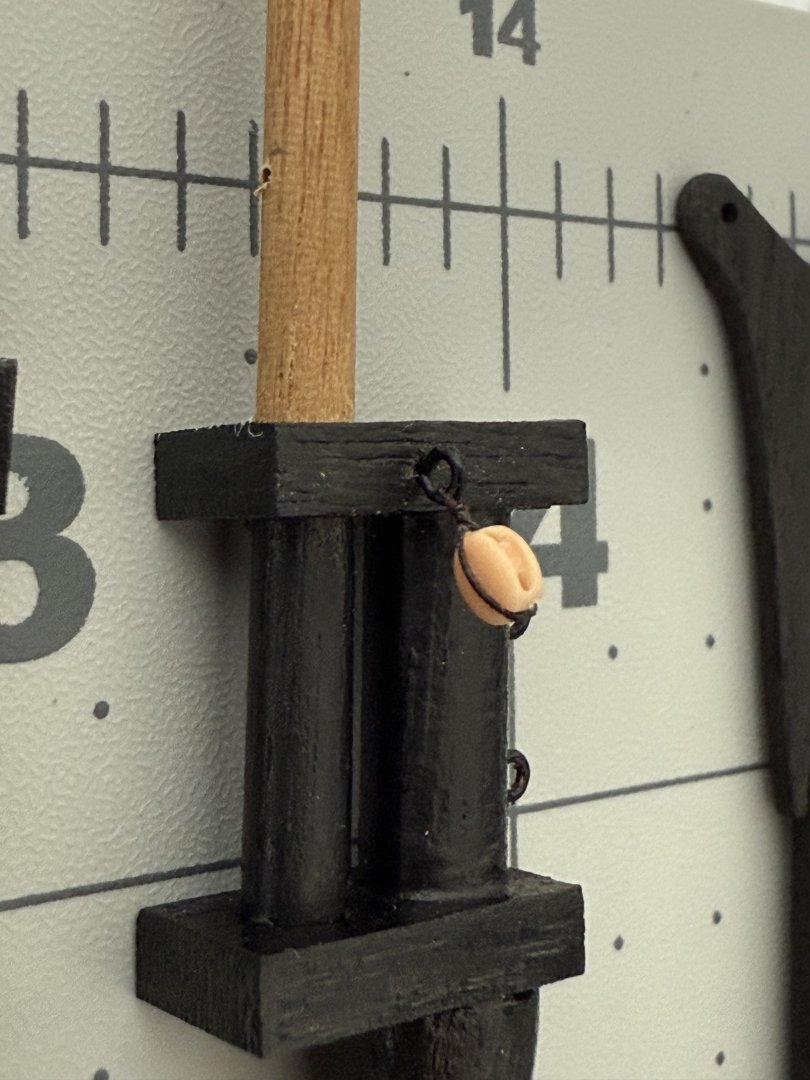
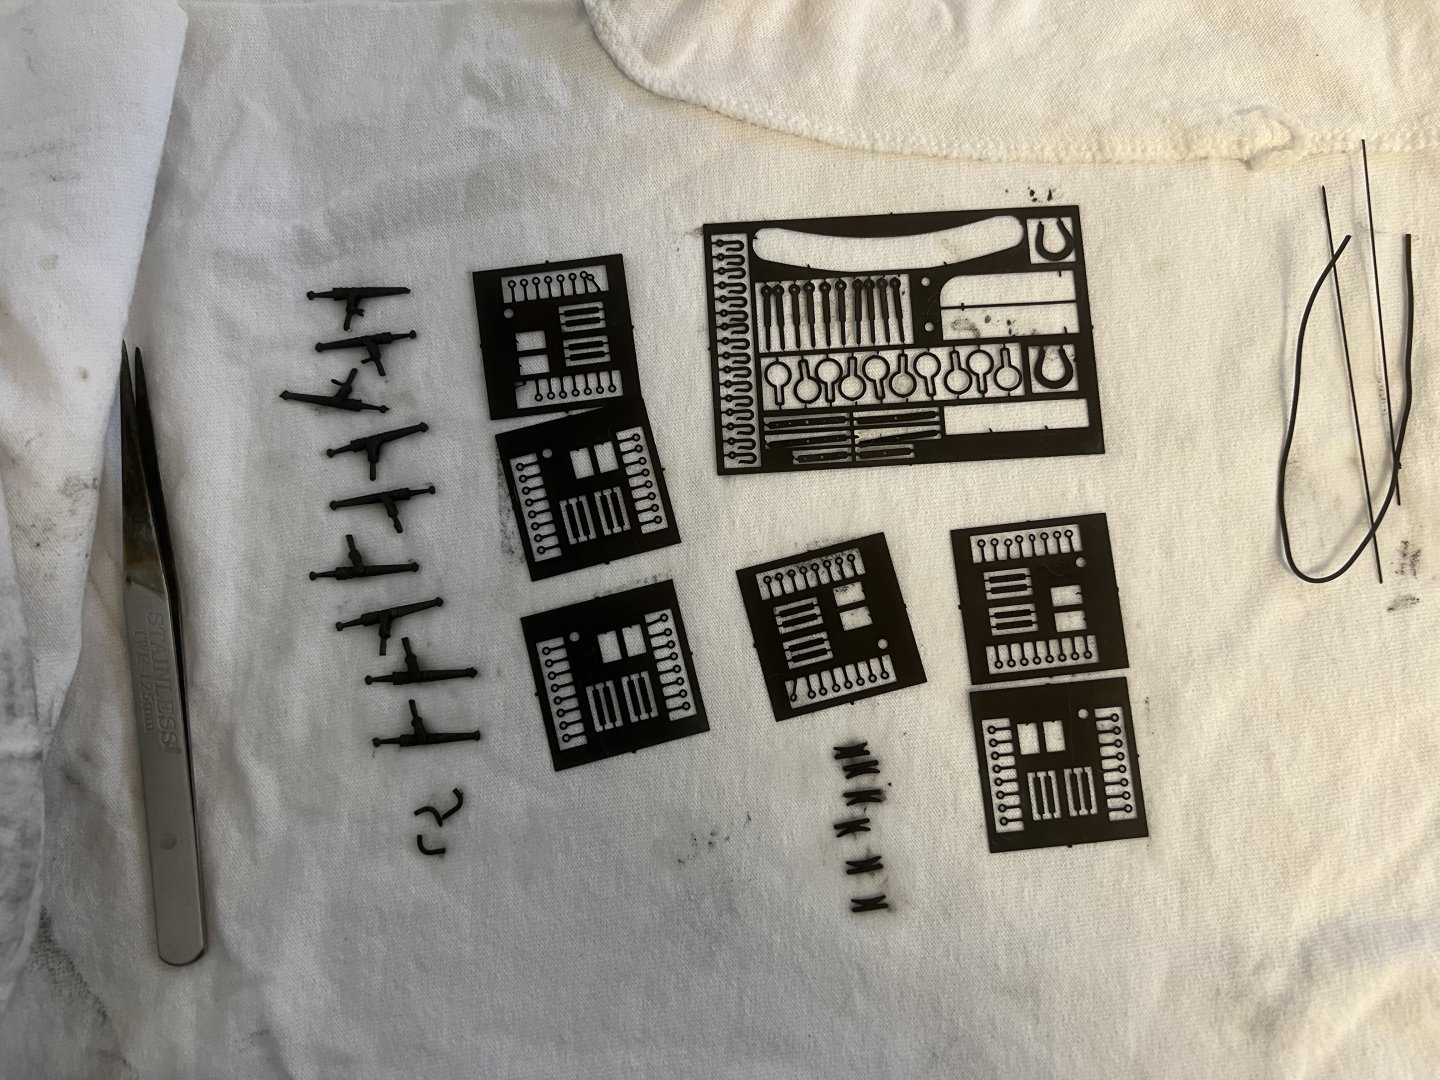
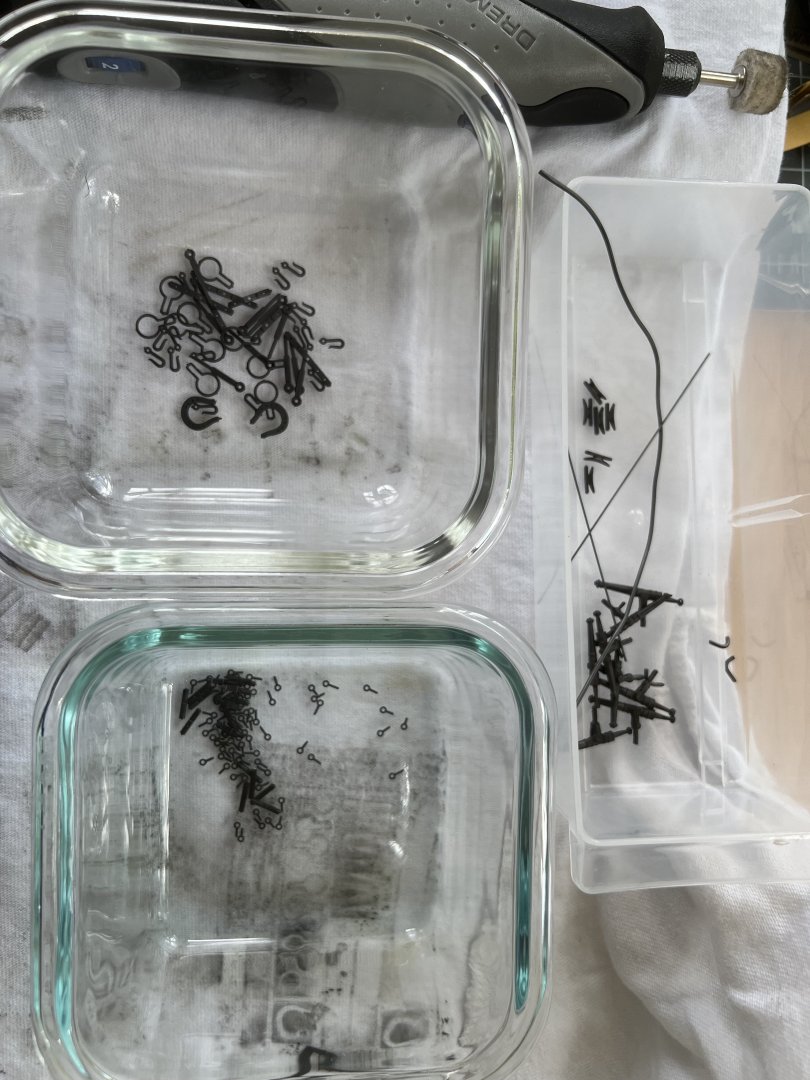
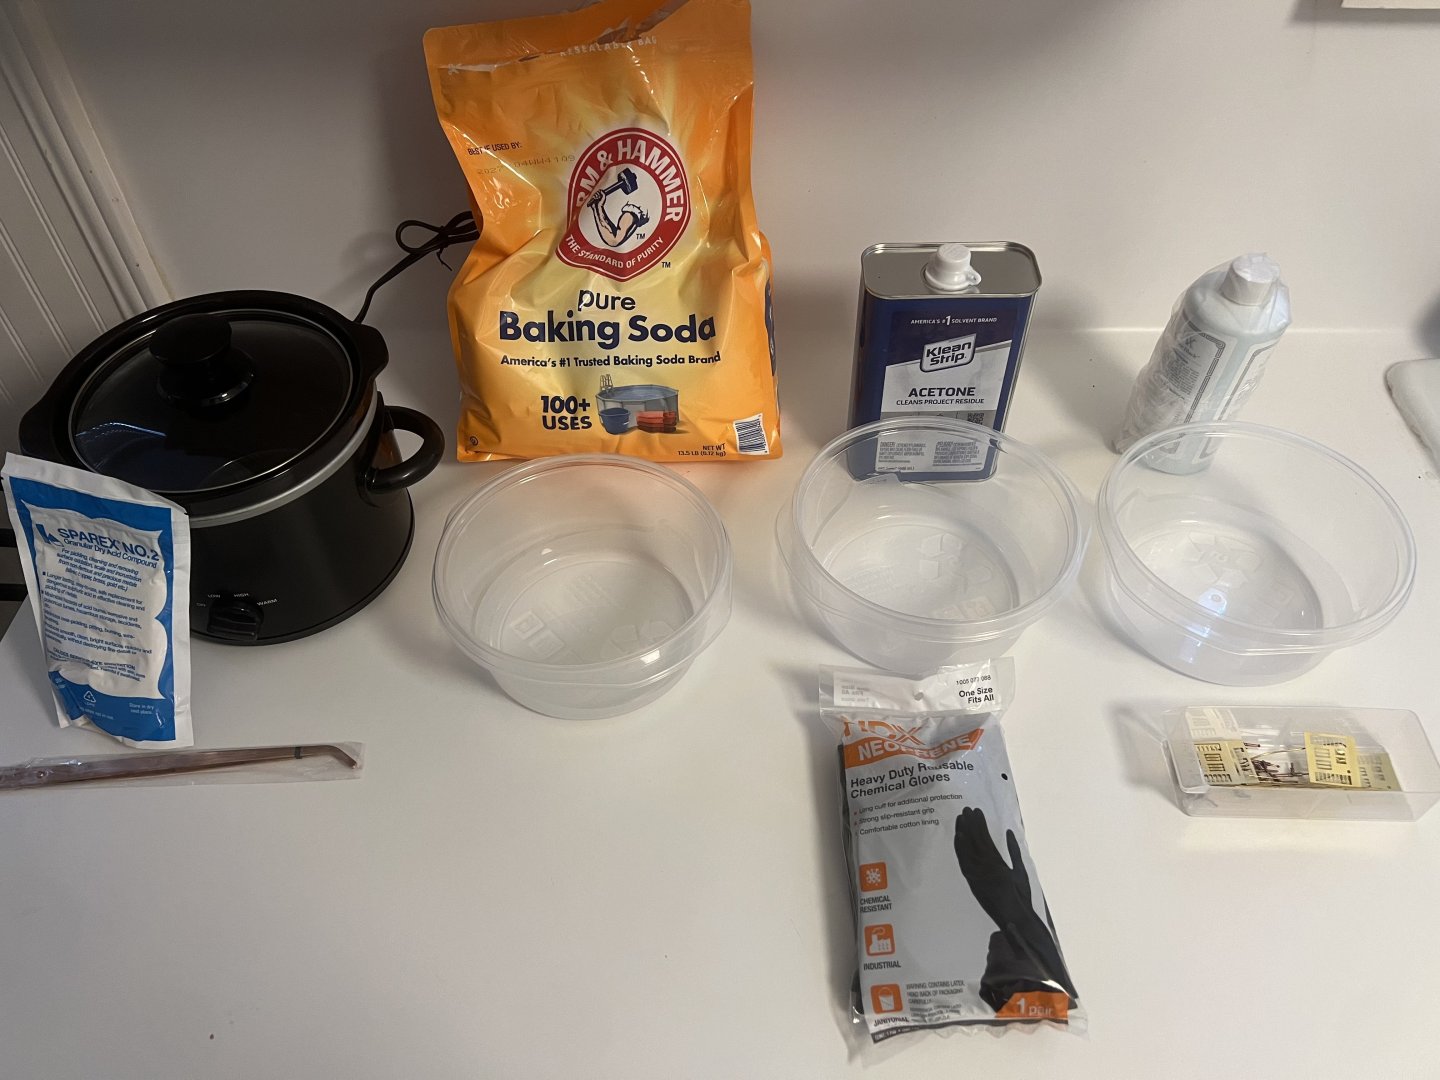
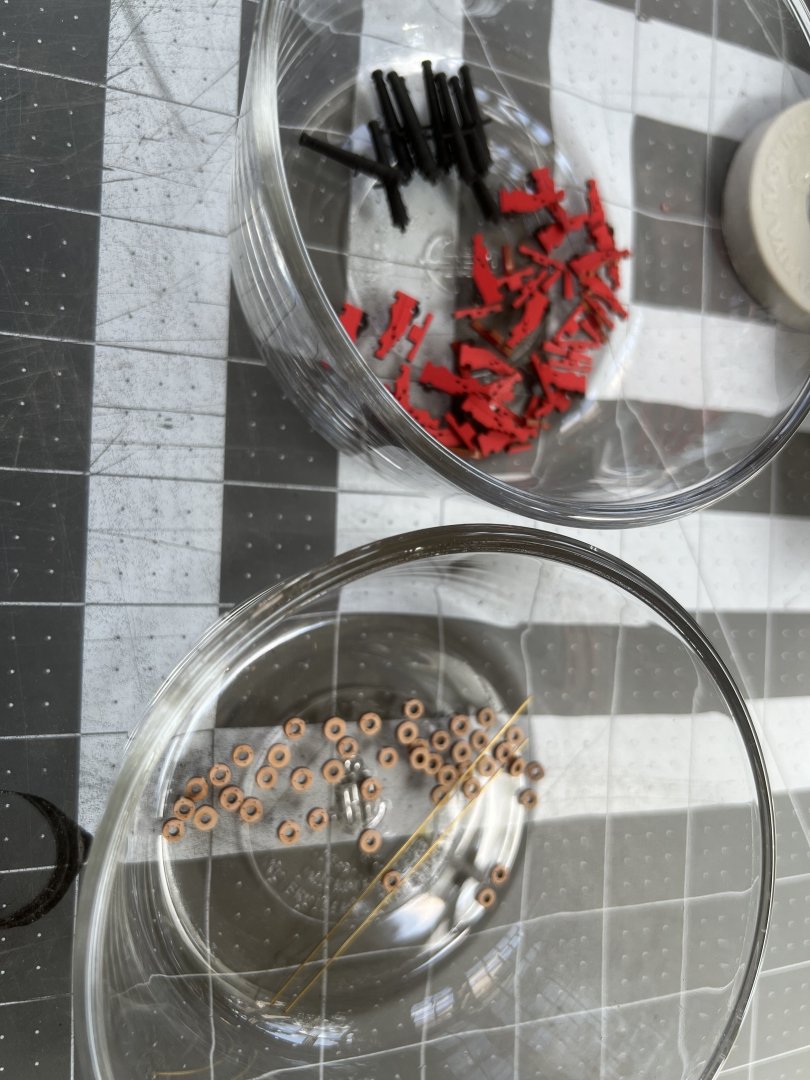
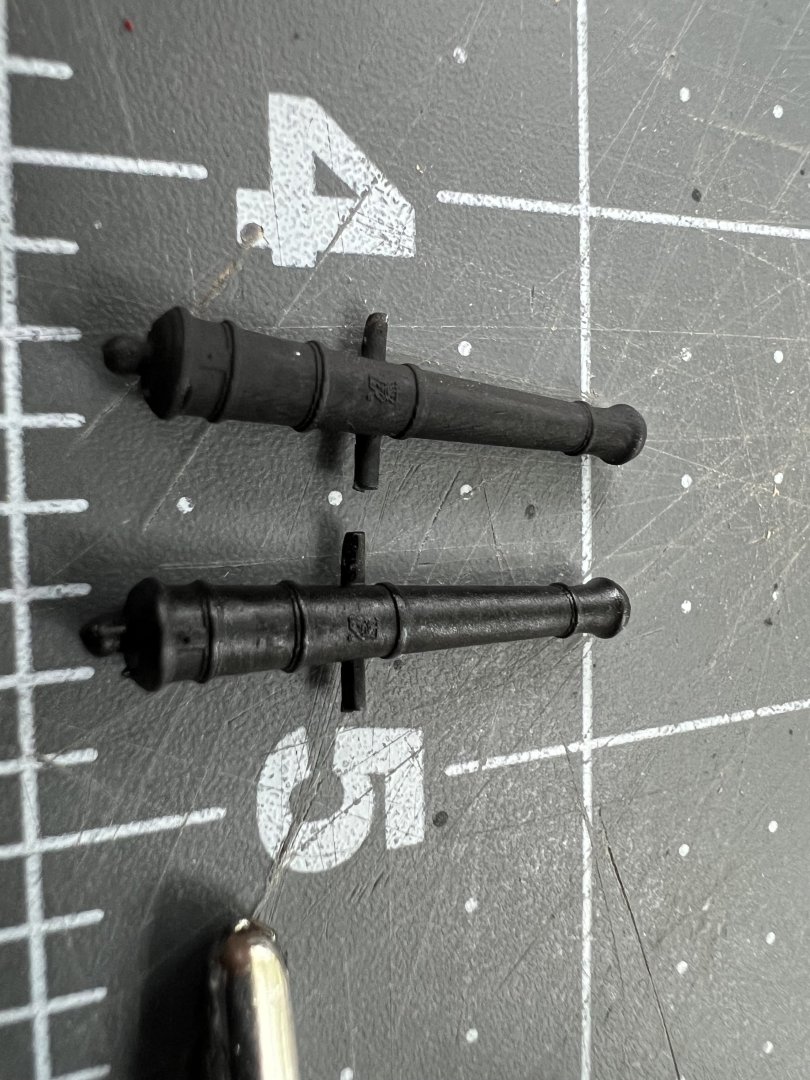
Thanks for the likes guys! A quick Sunday afternoon update as I have finally gotten around to spending the time to engage the blackening process. I followed the article “Blackening Revisited” and I’ll summarize the process here: 1. Pickle in sparex for 15 mins 2. remove with copper tongs and place items into baking soda solution water to rinse. 3. Place items into acetone for 10+ mins using gloves from this point forward. 4. Place in blackening solution with hot water at a 1:7 ratio agitating gently to expose all surfaces for 3-4 mins 5. Dry for 10-15 mins and polish with dremel. After following this, I decided to give the parts another bath into a fresh blackening solution mix for 10 mins and this seemed to do the trick. And in case I decide to make my own eyebolts and such, this just arrived: Getting this project done now frees me up to finish the rudder and canons. Till next time!

- 83 replies
-
- 6
-
-
- Lady Nelson
- Amati
- (and 2 more)
-
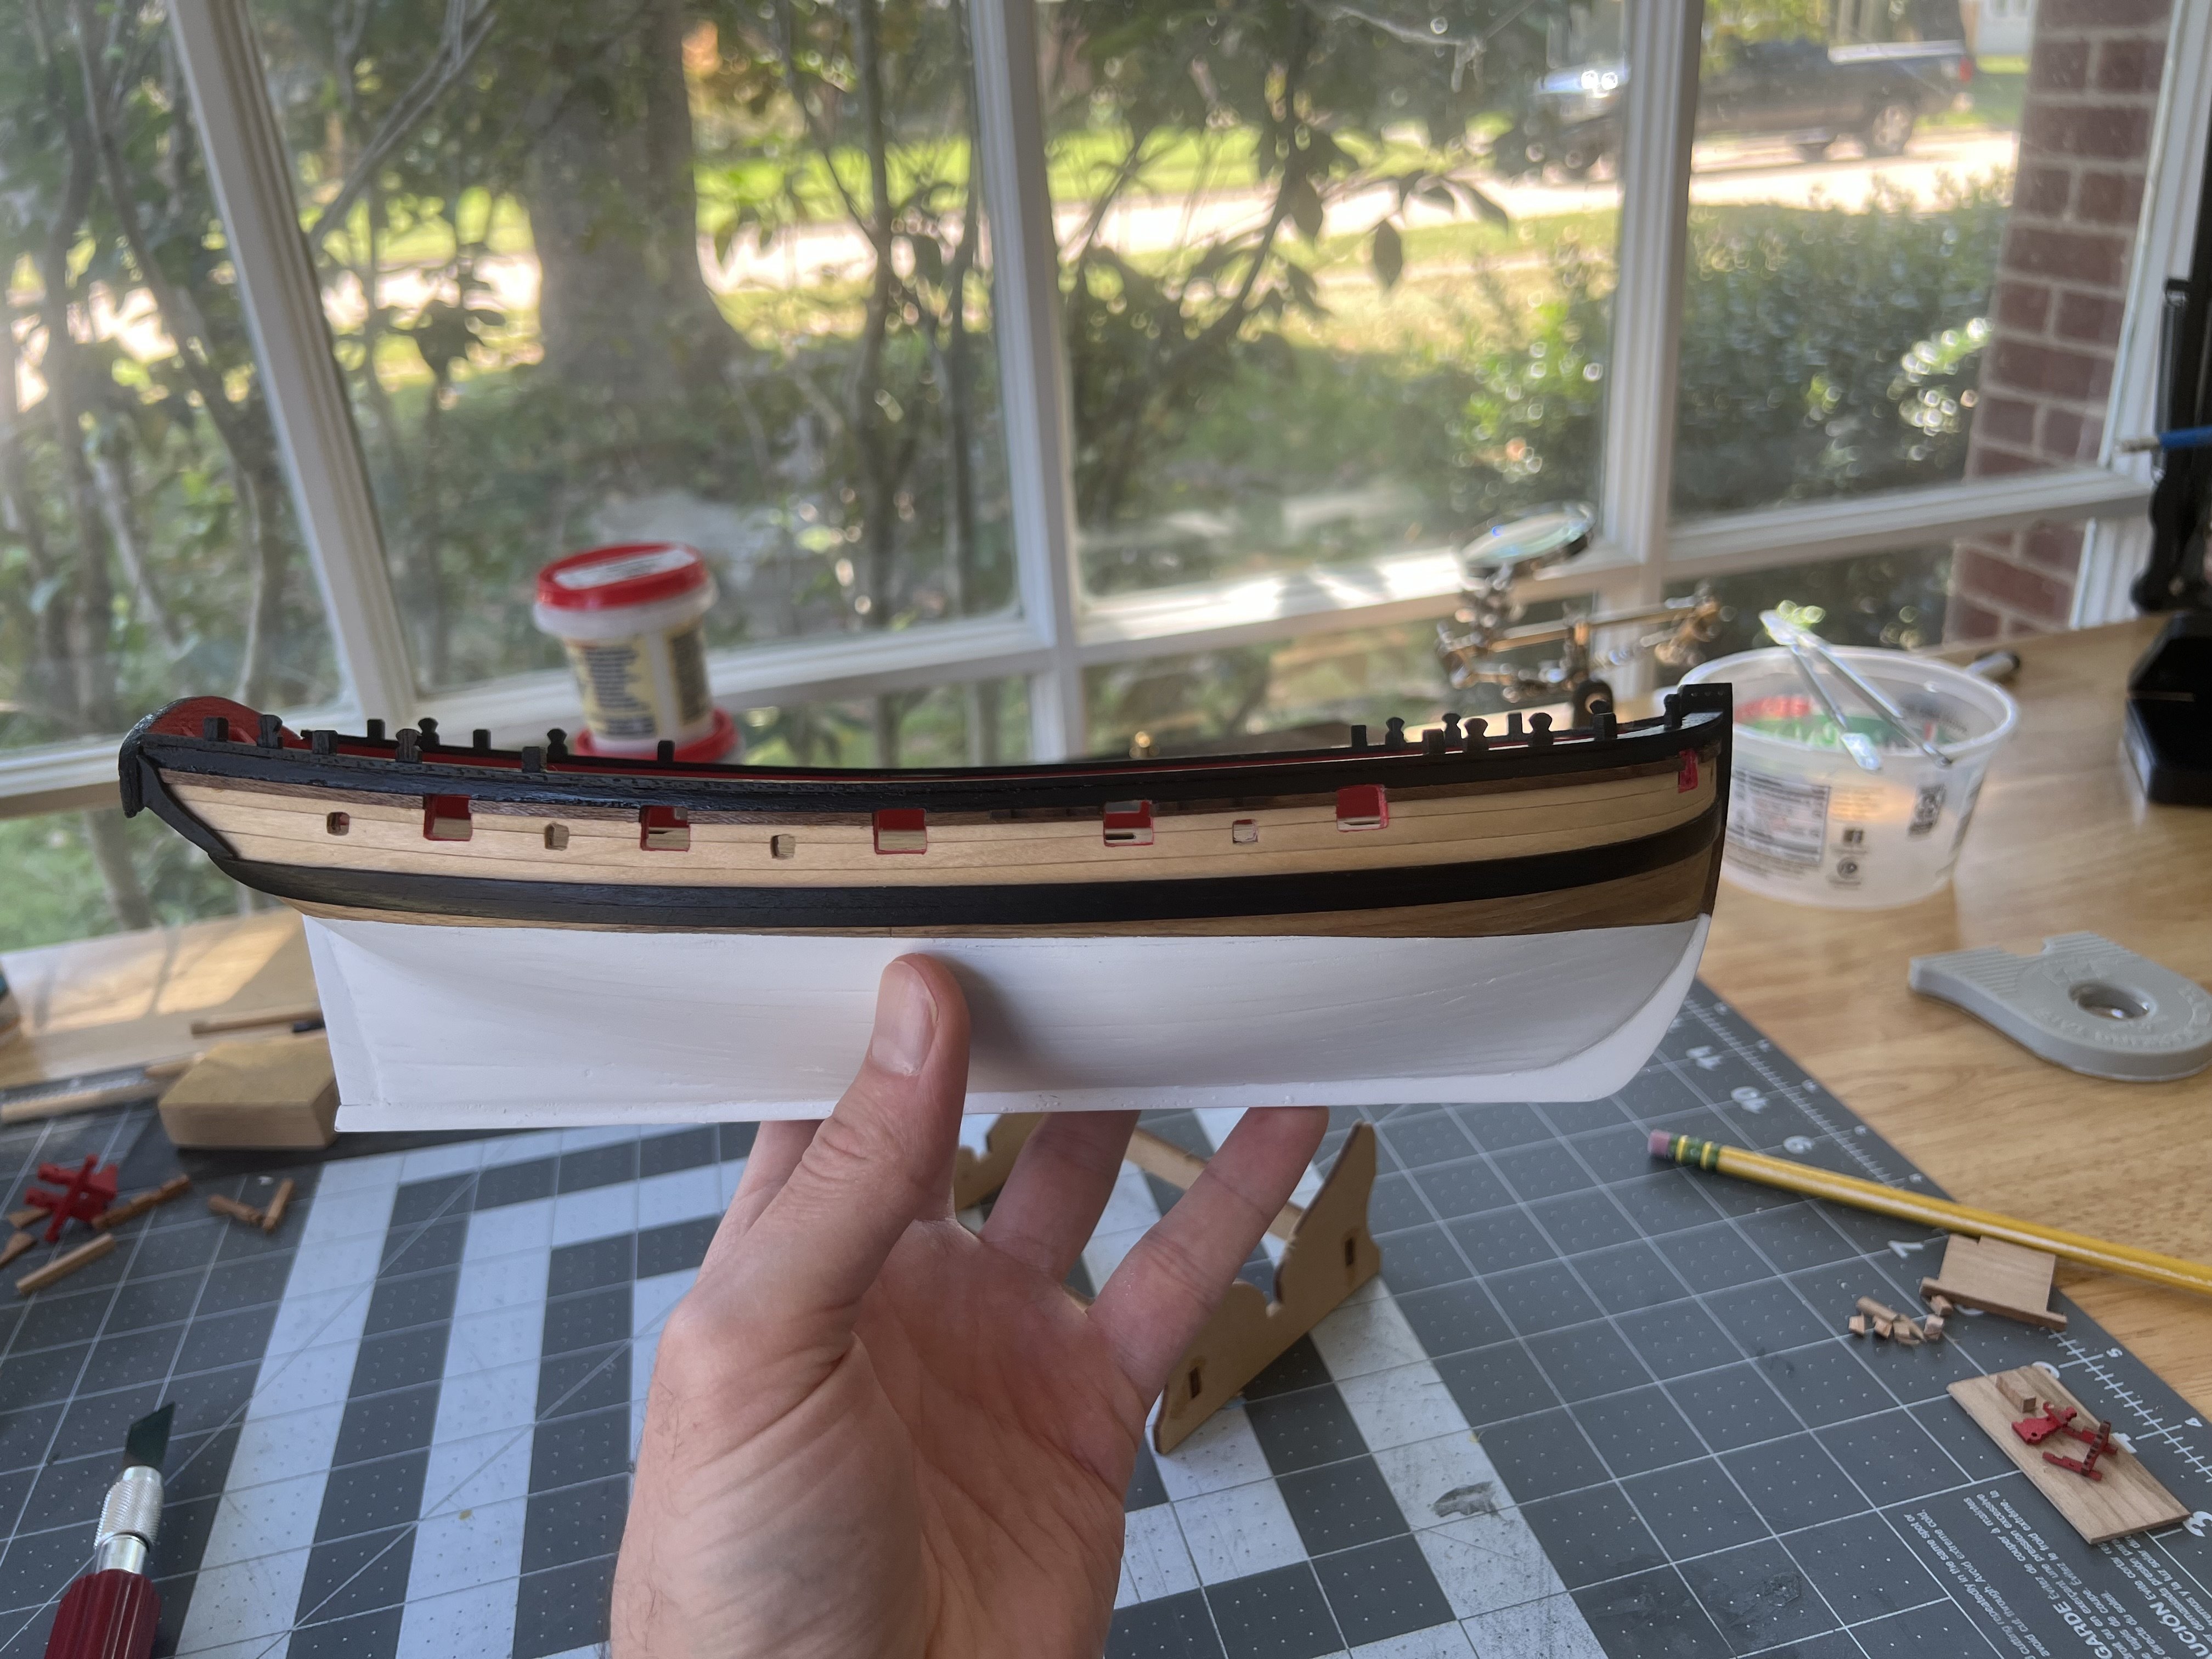
After much thought, I did decide to mark the waterline and paint below. I’m not entirely pleased with the result so I will have to back and sand and add some wood filler. The lines of the planking are quite visible. Seems like most painted hulls I have seen are smooth. Are there any thoughts on this? From a distance it looks decent but zoom in and all the little faults are visible. To mark the waterline, I used the waterline marker that can be purchased at Vanguard. First I measured from the plan sheets the bow and stern using a caliper and made the appropriate marks. Then I clamped the keel in the vise, made the necessary adjustments and marked the line. It was somewhat difficult to mark without the cutter tilting, so I had a little assistance from the admiral to make it work. On to the guns. At the moment, I am sanding the gun carriage wheels, but the carriages and guns have been partially painted, as I painted the carriages prior to removing them from the sheet. They are quite fiddly so as I have noted from others, a jig would be helpful for assembly. And finally, with the cannon barrels, I painted those matte black, brushed with gunmetal weathering powder and used hairspray to seal (it is what I had on hand). Here you can see the difference that the weathering powder made. Thanks for dropping by and for the comments and likes.


- 83 replies
-
- 6
-
-
- Lady Nelson
- Amati
- (and 2 more)
-
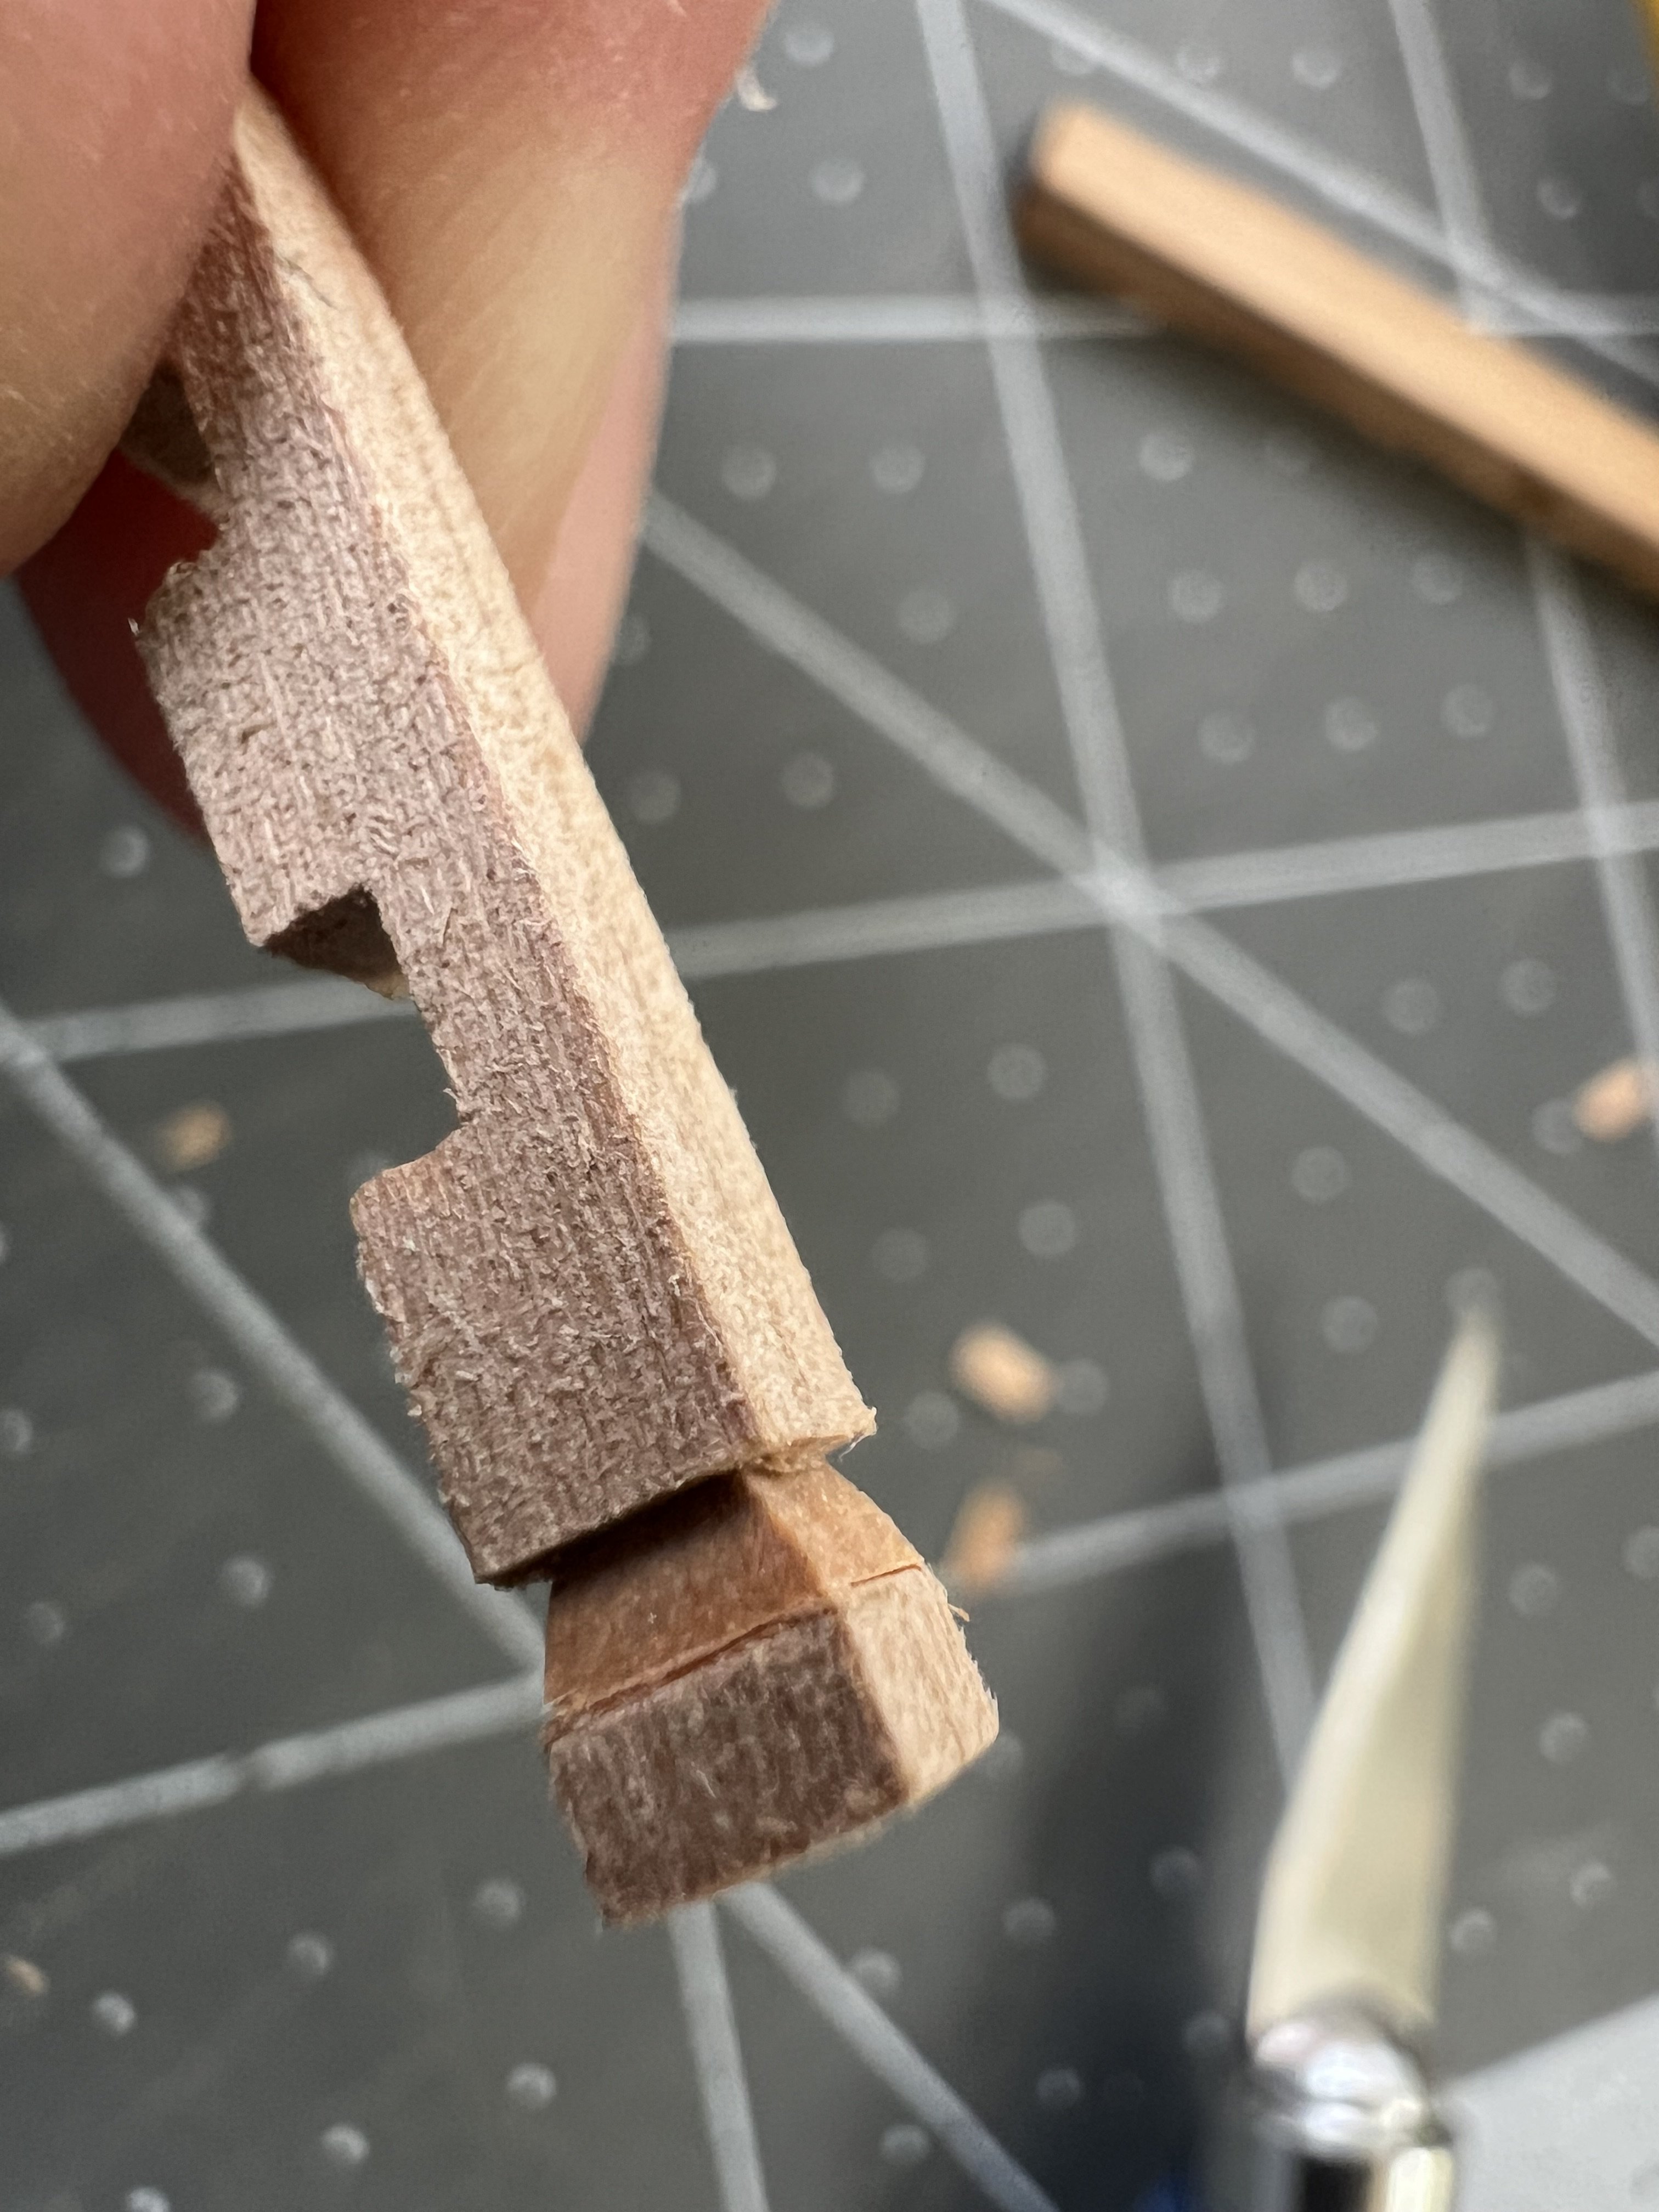
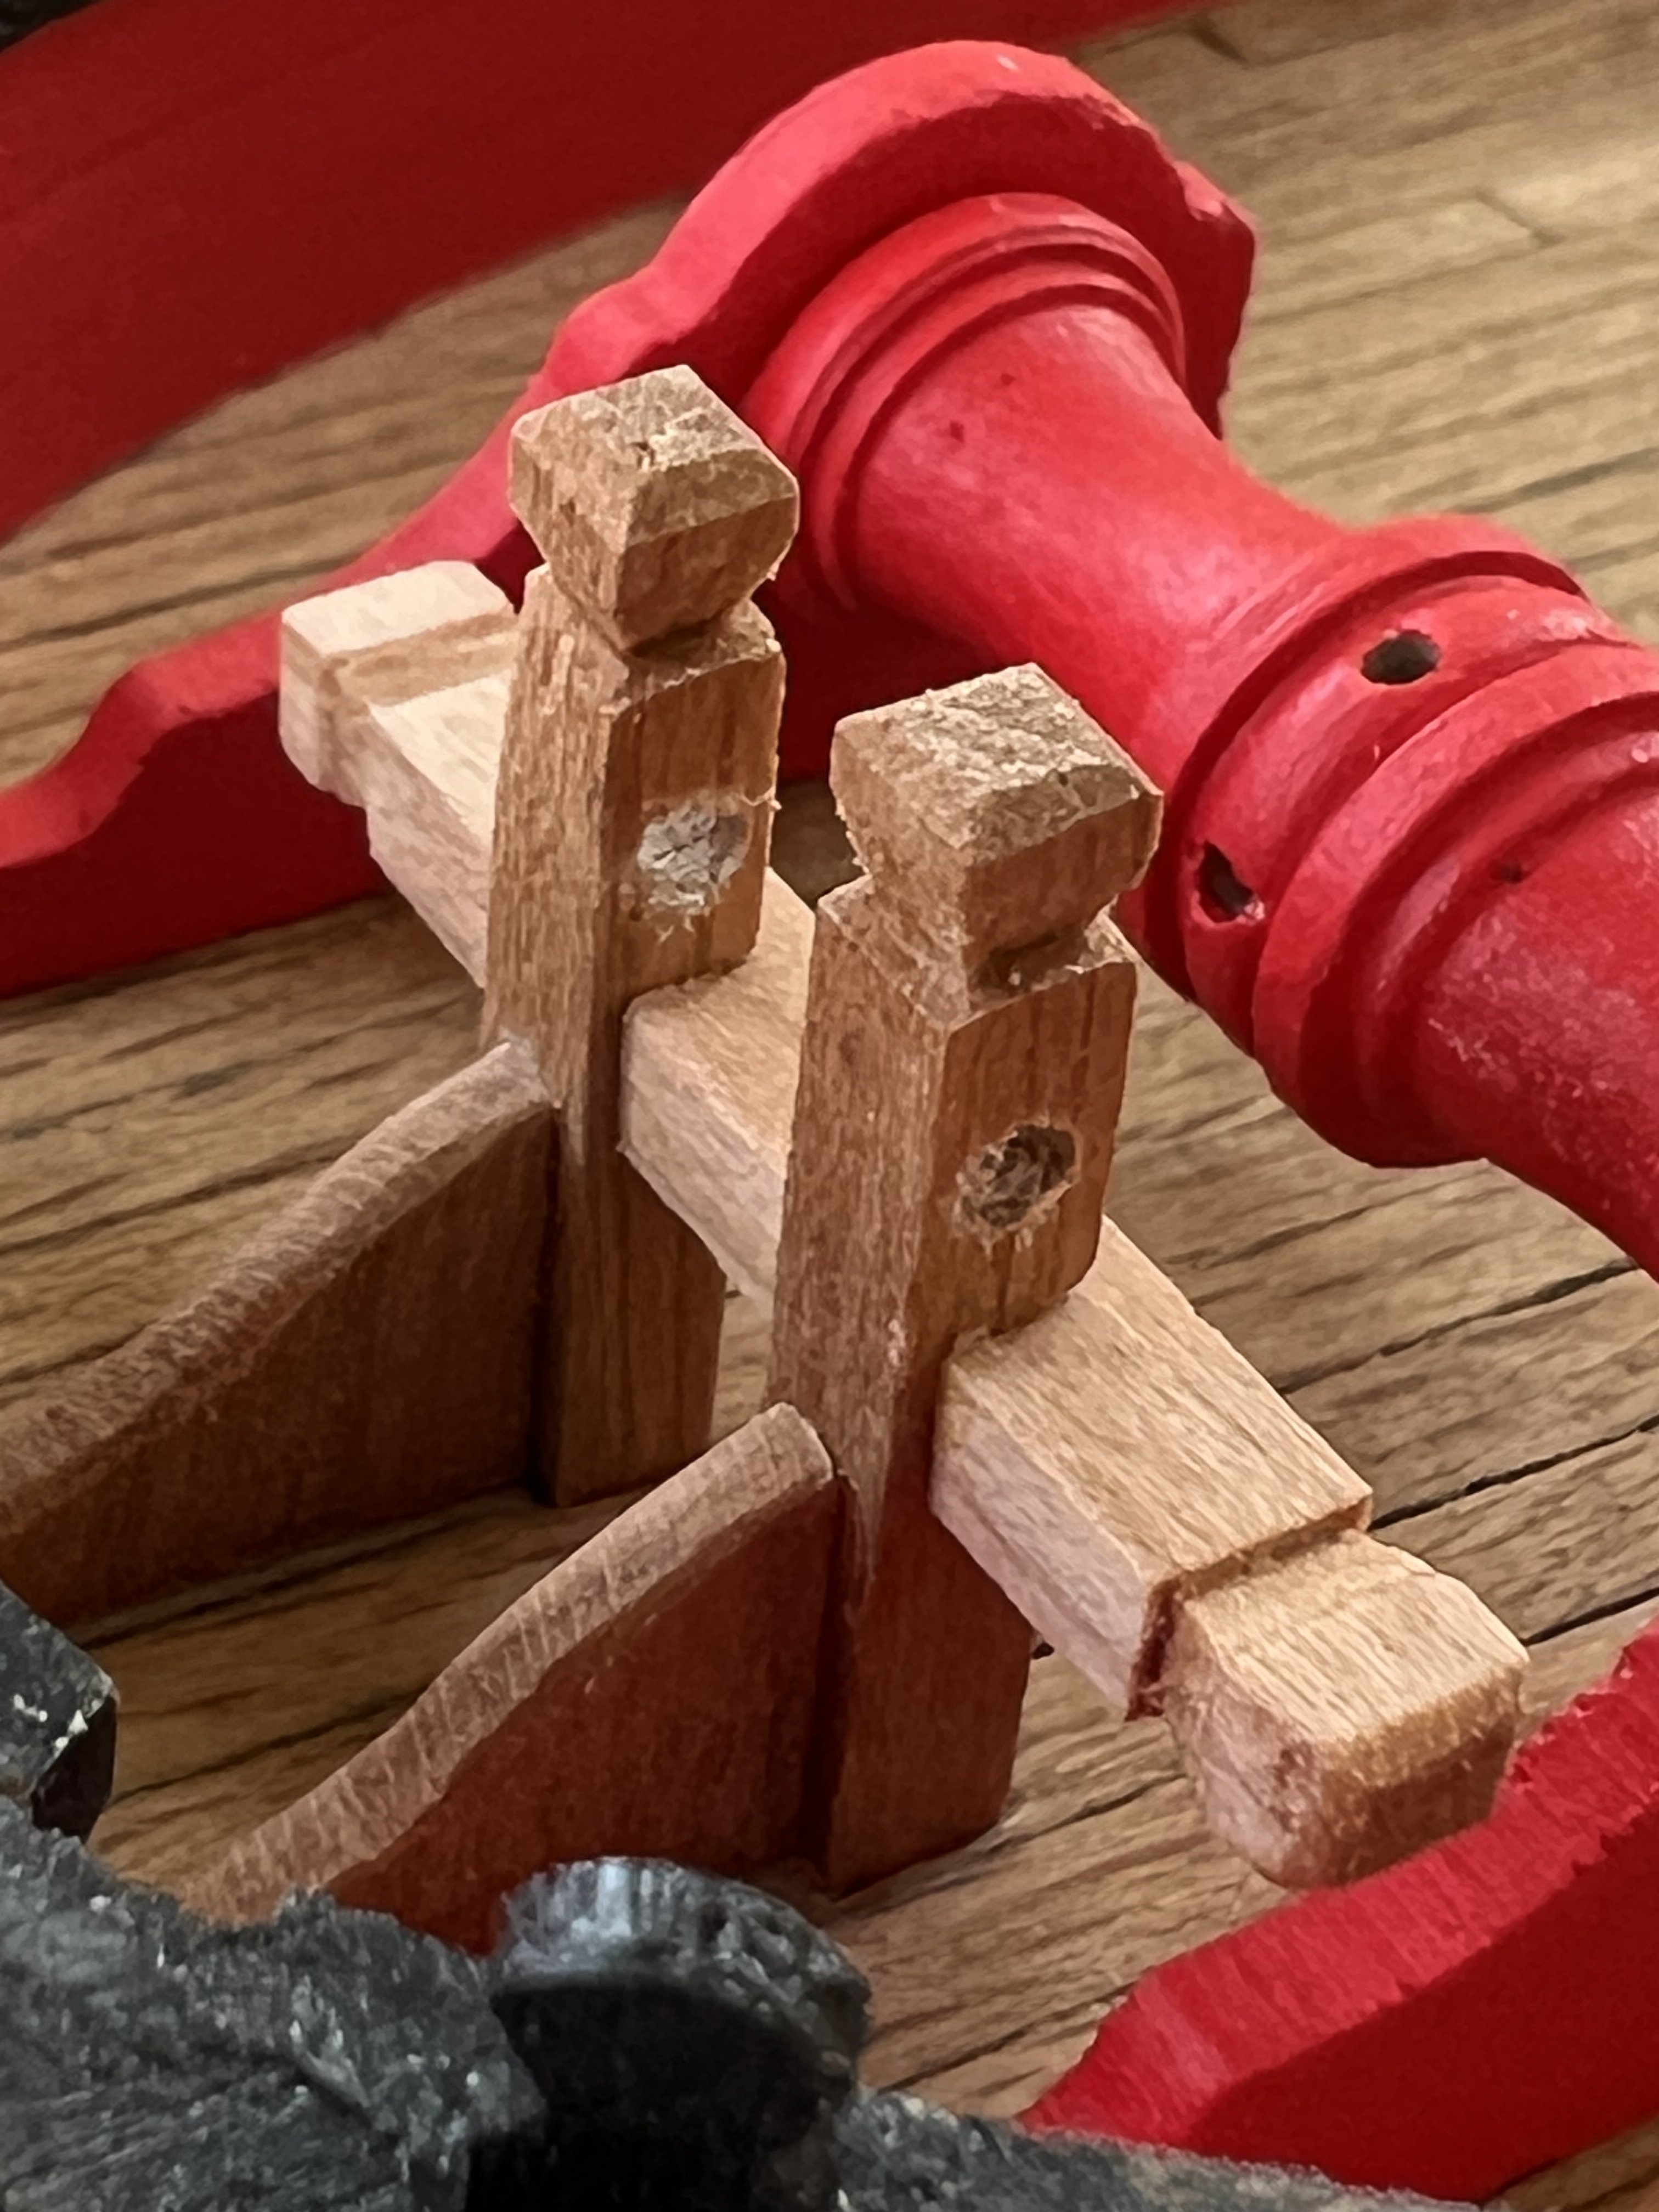
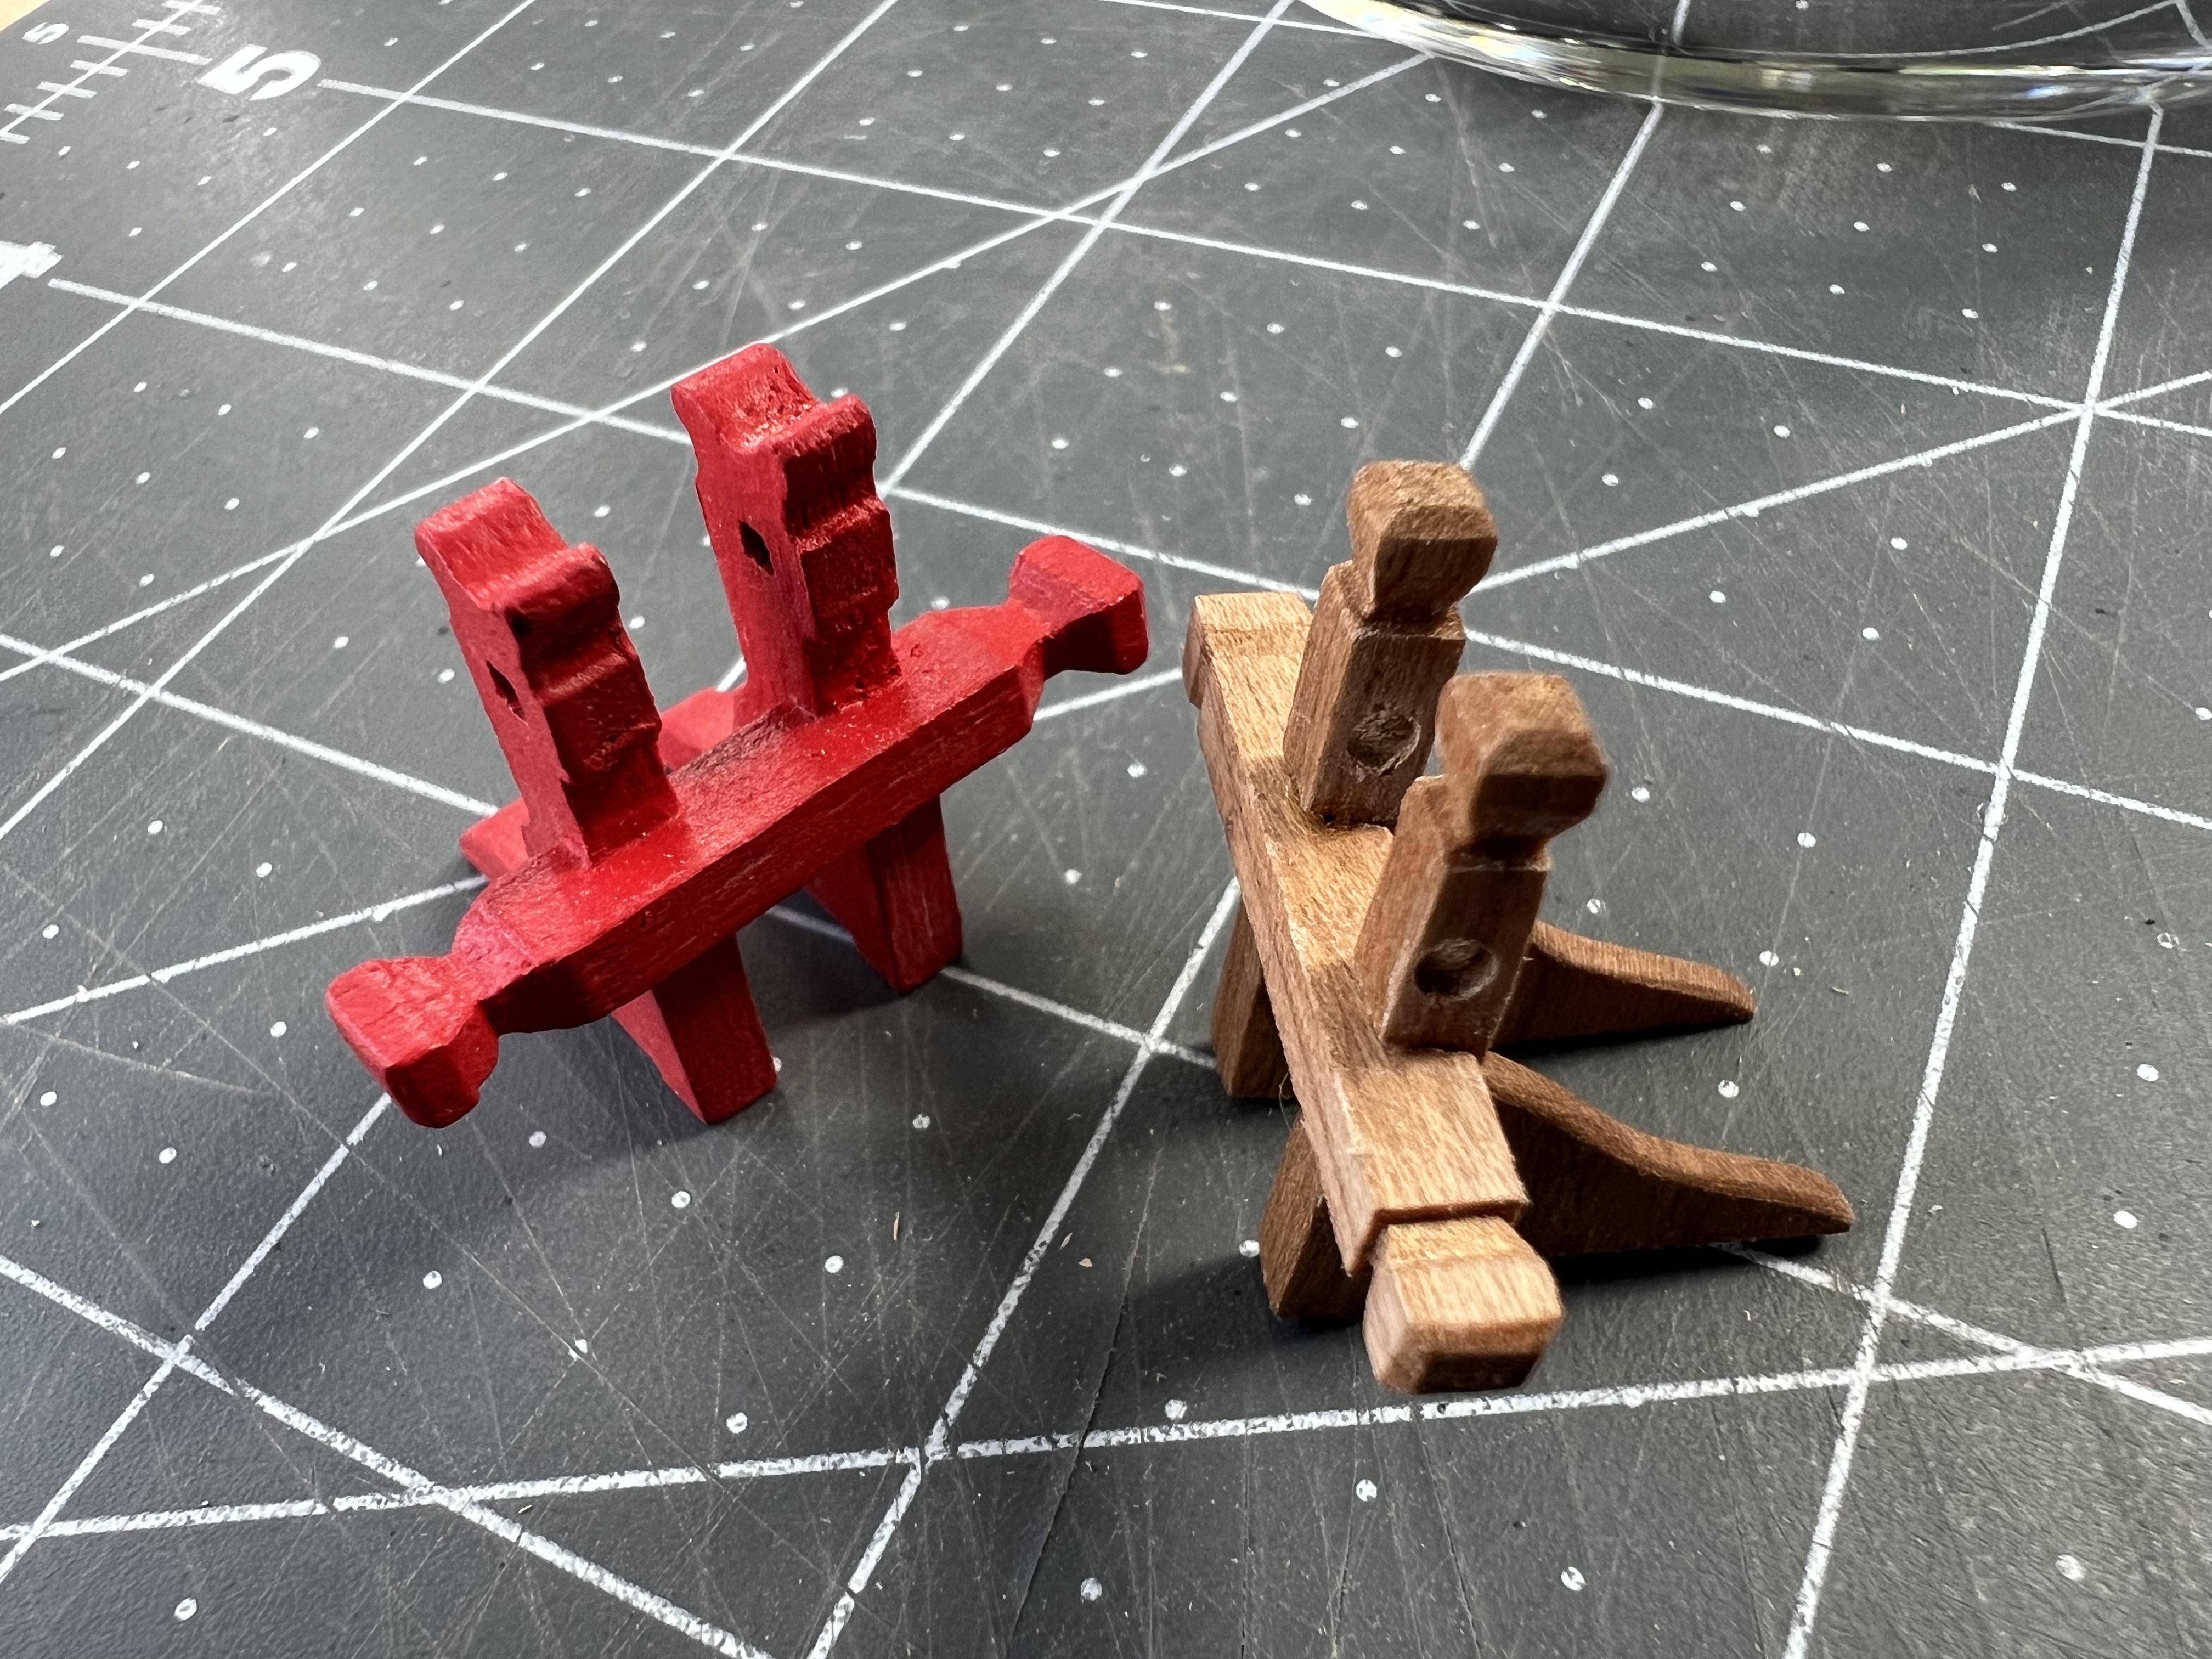
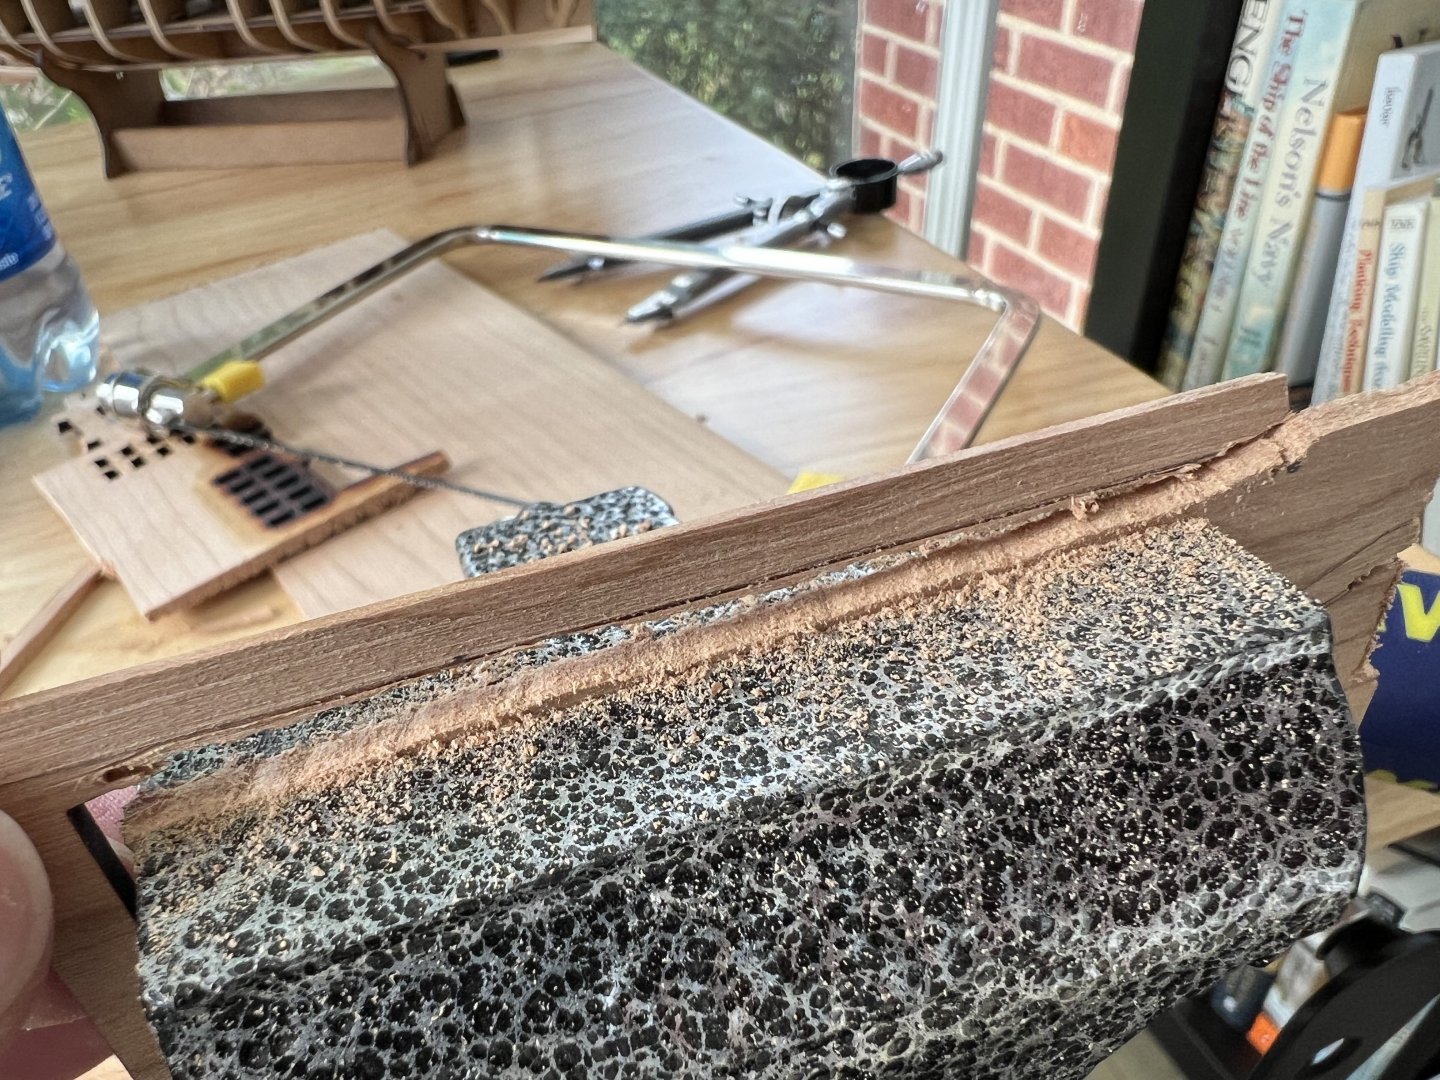
After purchasing a vise from the local hardware store, I decided to give the fret saw another go. I found that I needed to adjust a few things from the laser file for the bowsprit support, so instead of doing that I just used the fret saw to cut new pieces. While it is still challenging to get a perfectly straight cut, sandpaper came to the rescue. I used files to create the grooves and the beveling, and for the peg that will be inserted into the bowsprit, I used a 2mm drill bit and clamped the pieces into the vise to help with making sure I didn’t split the wood. Here is the difference:


- 83 replies
-
- 3
-
-
- Lady Nelson
- Amati
- (and 2 more)
-
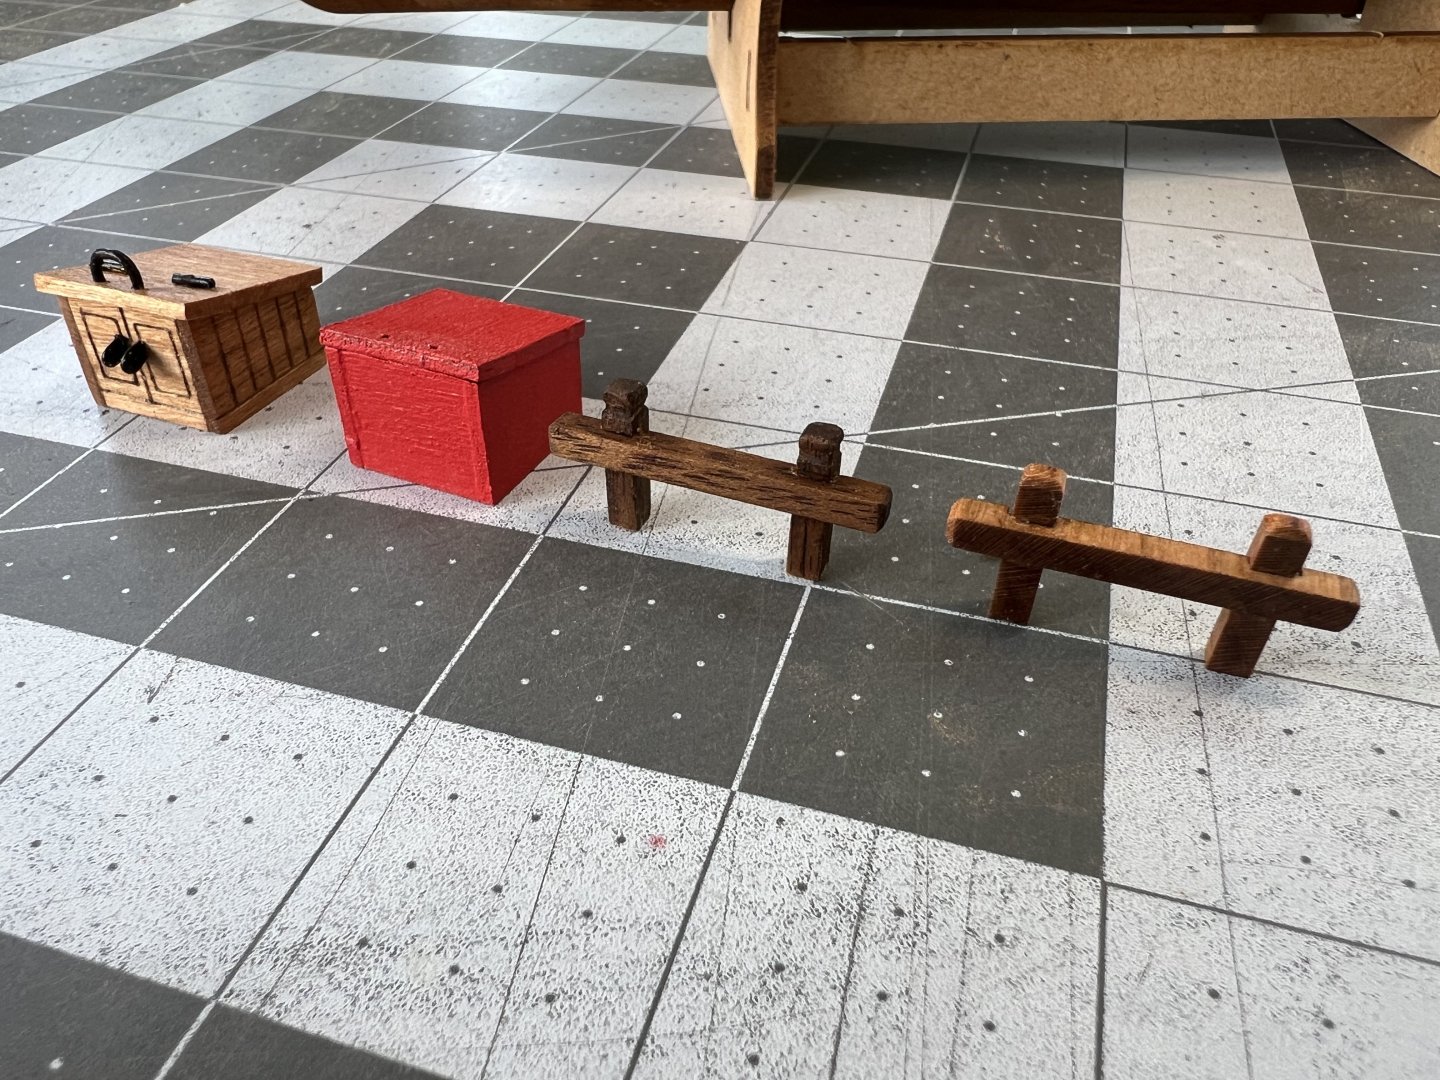
Slow progress this past week, but I have built out the companionway and crossbeam/mast bits. For the companionway, I took some inspiration from HM Trial. I used my #11 blade and cut out the various pieces from a 1/16” sheet of cherry. I thought it would make it more interesting to scribe wood planks and doors, etched with a pencil to make it more pronounced. I feel like it it might be too pronounced? After a few coats of WOP, I do think this as an overall improvement and am content to leave these natural. Here are the results alongside the original pieces. I’ve dry fitted a few of the pieces to see how it all goes together. Thanks everyone for the likes and comments. I appreciate you stopping by.

- 83 replies
-
- 6
-
-
- Lady Nelson
- Amati
- (and 2 more)
-
Absolutely stunning! And you took some really nice shots. Perhaps my favorite was the photo of the bow from the perspective of your two figures. Really compelling, and you can appreciate the just how immense these ships were.
-
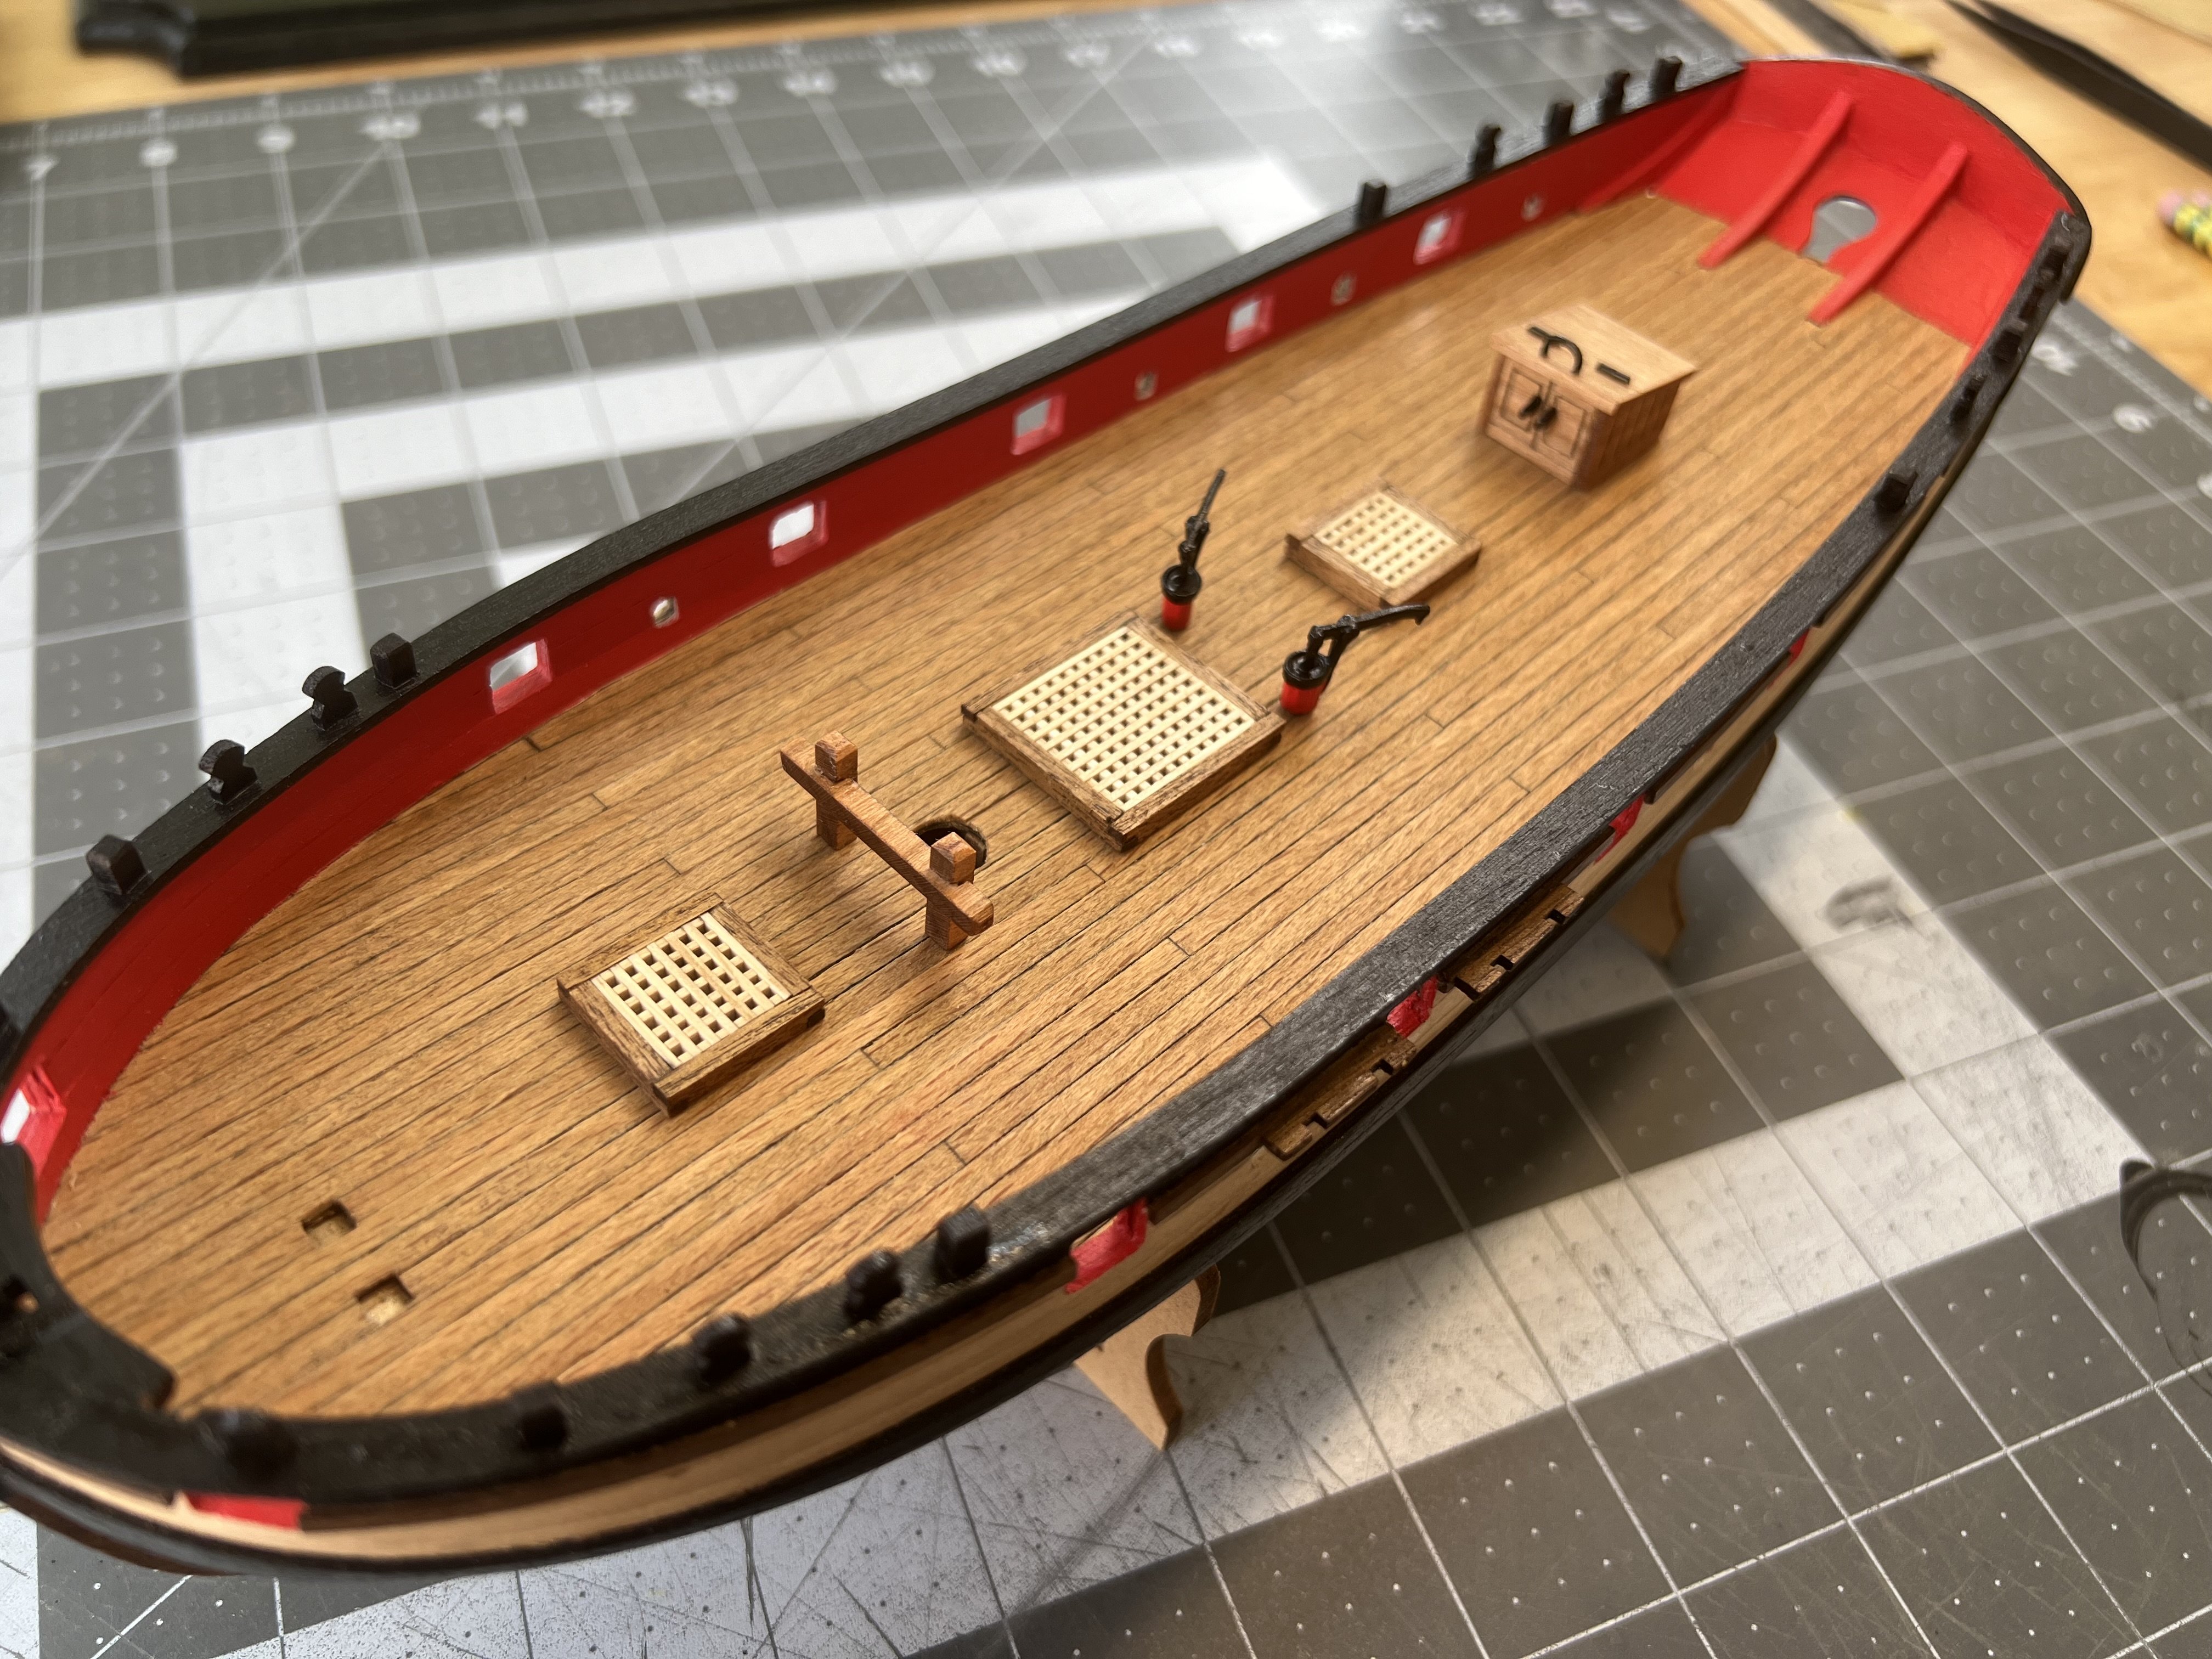
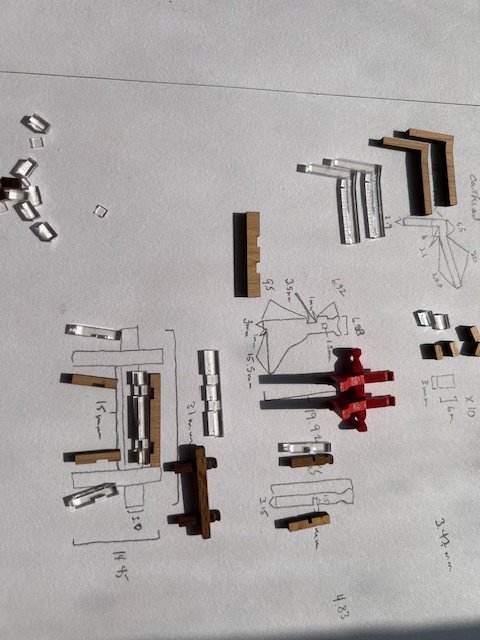
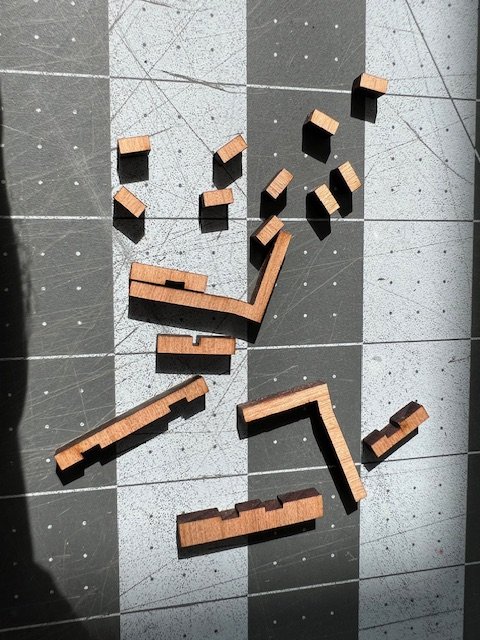
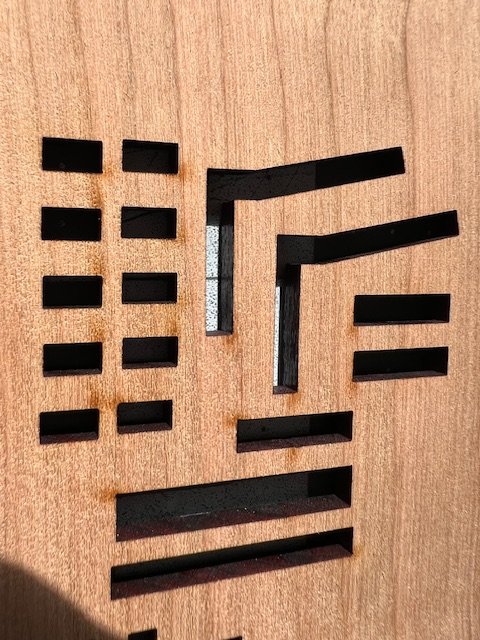
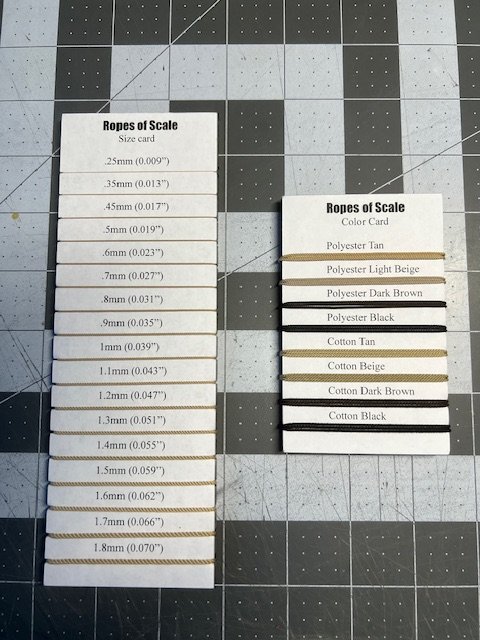
I ordered 1/8" cherry sheet from Modeller's Sawmill so that I could begin scratch building the deck furnishings, and it came in at 3.47 mm thick. With a little sanding, I'll get it closer to 3mm. Joe was also kind of enough to include a sample of both Boxwood and Alaskan Yellow Cedar, of which I have planned use for my next build. My goal is to rebuild the deck furnishings as they are in the kit but with a wood that is not going to disintegrate on me. However, as I got to measuring and attempting to cut out the pieces, I found that using the x-acto blade to slice through 3.47 mm wood sheet was not going to be very efficient. Each cut has to be perfectly perpendicular or else there will be angular cut, which in my case, was exactly what happened. My answer was going to be in a fret saw. Not very expensive, but a vice would be helpful for stability, which I do not have...yet. So what the heck, let's just give it a whirl and see how I do! That also proved difficult on a first try...similar issues, and I thought that perhaps I could make it work, but will need to cut wide and get the final shaping with sanding. After taking a night to mull it over, the Admiral suggested the use of the laser printer, which we have and it would at least provide for precise cutting. Mind you, I've never used the laser printer...that is the Admiral's domain. The program used to produce the shapes are pretty straightforward, though to do more "shaping" of the pieces seems to require a bit more skill on my part; nevertheless, after measuring out the basic shapes for the cathead, swivel gun posts, bowsprit support, crossbeam, mast bits, and pawl post, I designed those for the laser printer programming and made the first attempt with a piece of acrylic to make sure the cuts would have the precision I needed. That worked well here are the results with the cherry along with the previous pieces, acrylic and my drawings/measurements [with caliper]. Obviously, I'll need to get the x-acto blade out to do some carving and shaping as these are very much unfinished, and I still have to determine how best to make the bowsprit support side frames and windlass. I am starting to take a look at the rigging plan using Lennarth Petersson, and if I use that as my guide, there will need to be some modification or reconstruction of the windlass. Also, ordered the sample pack from Ropes of Scale to help my future purchase from them for the rigging, particular to see the difference in the colors available.
- 83 replies
-
- 5
-
-
- Lady Nelson
- Amati
- (and 2 more)