

KJackson
-
Posts
66 -
Joined
-
Last visited
Content Type
Profiles
Forums
Gallery
Events
Posts posted by KJackson
-
-
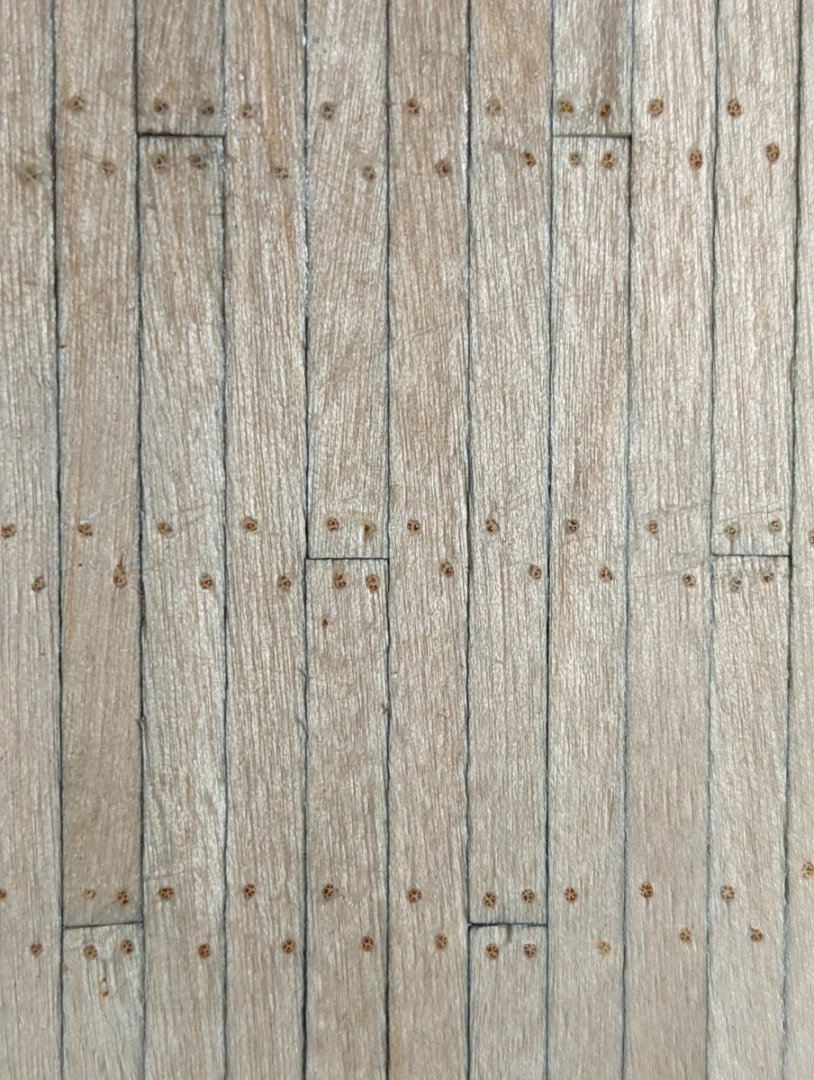
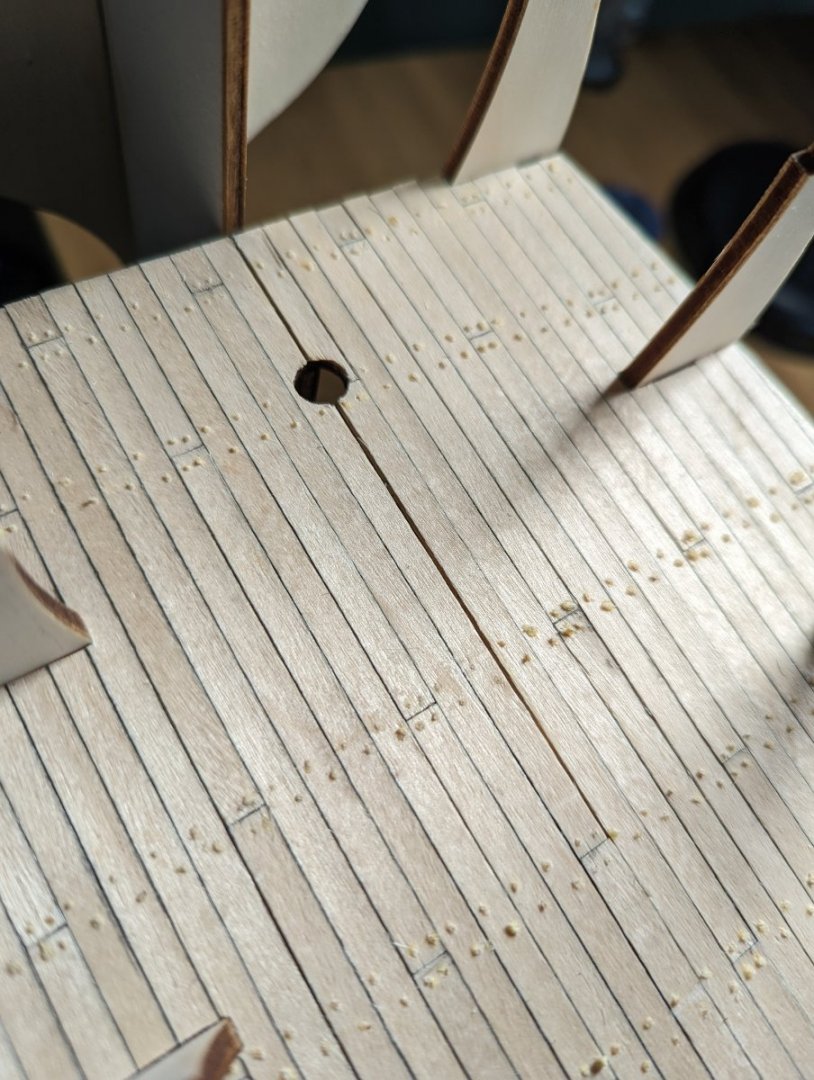
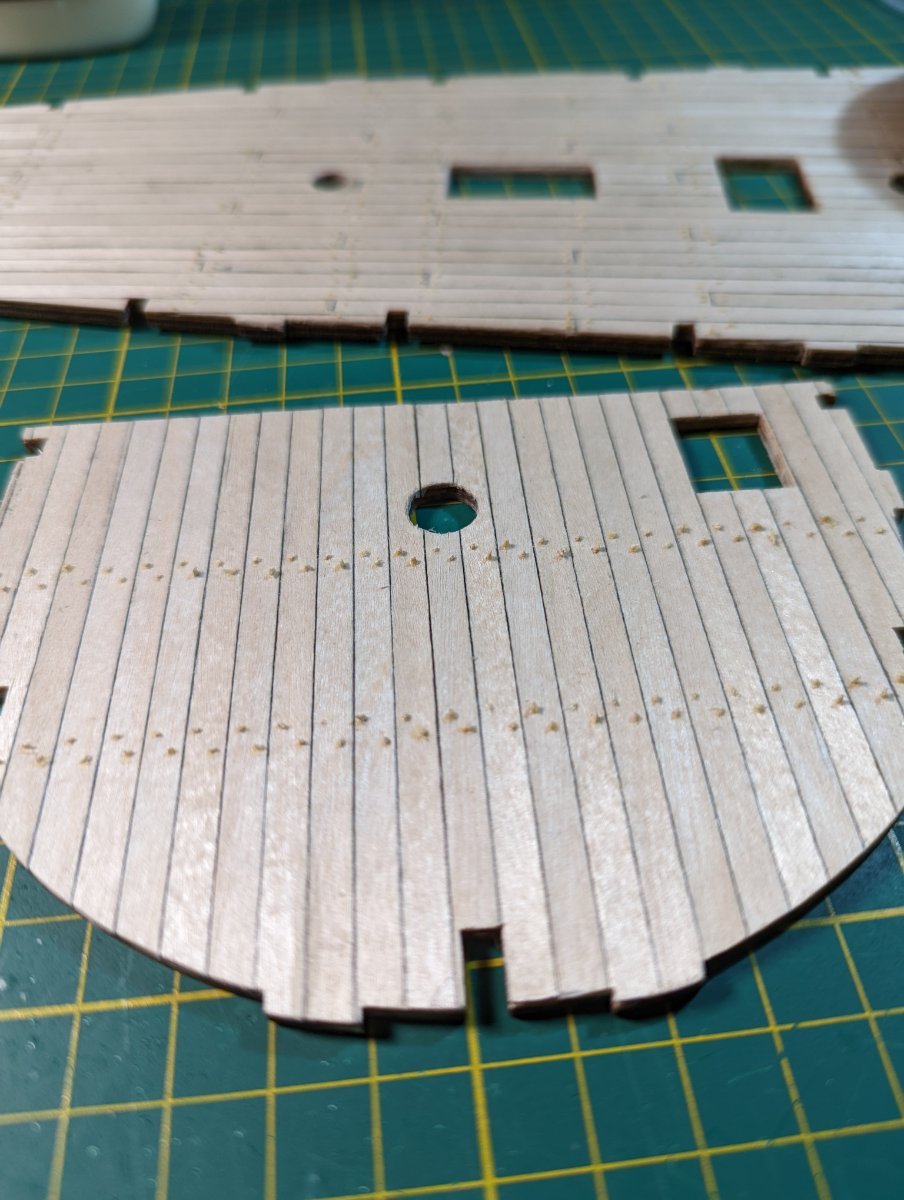
AND THEY'RE DONE!
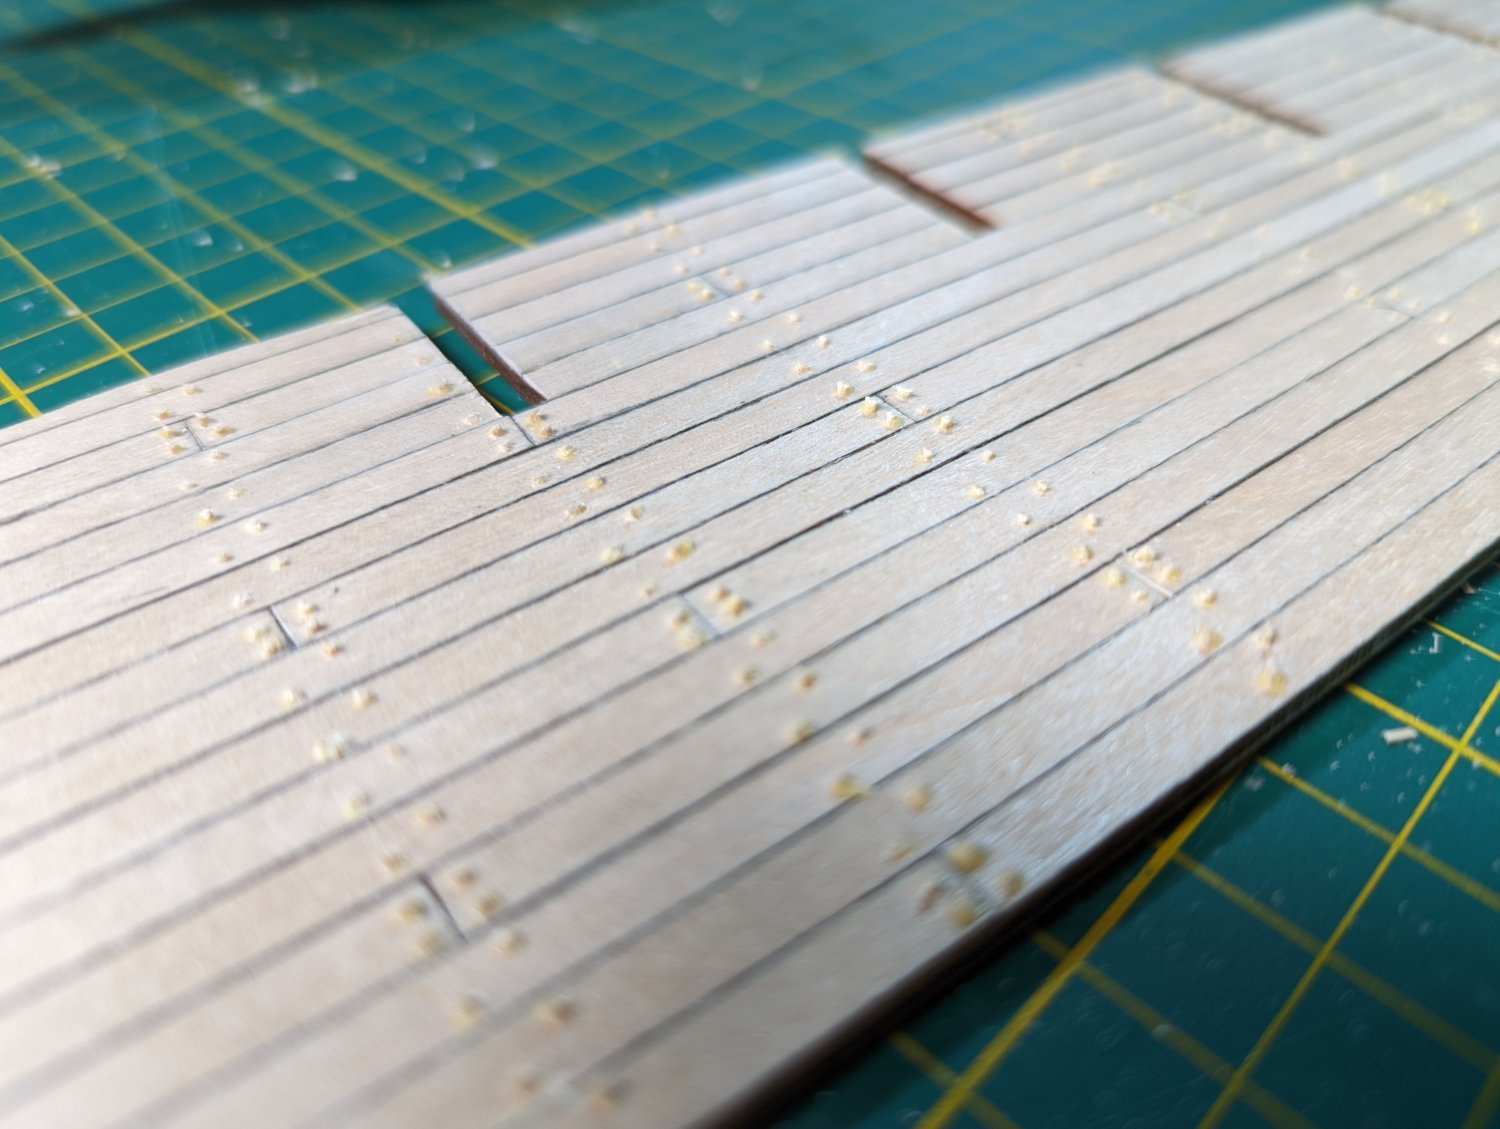
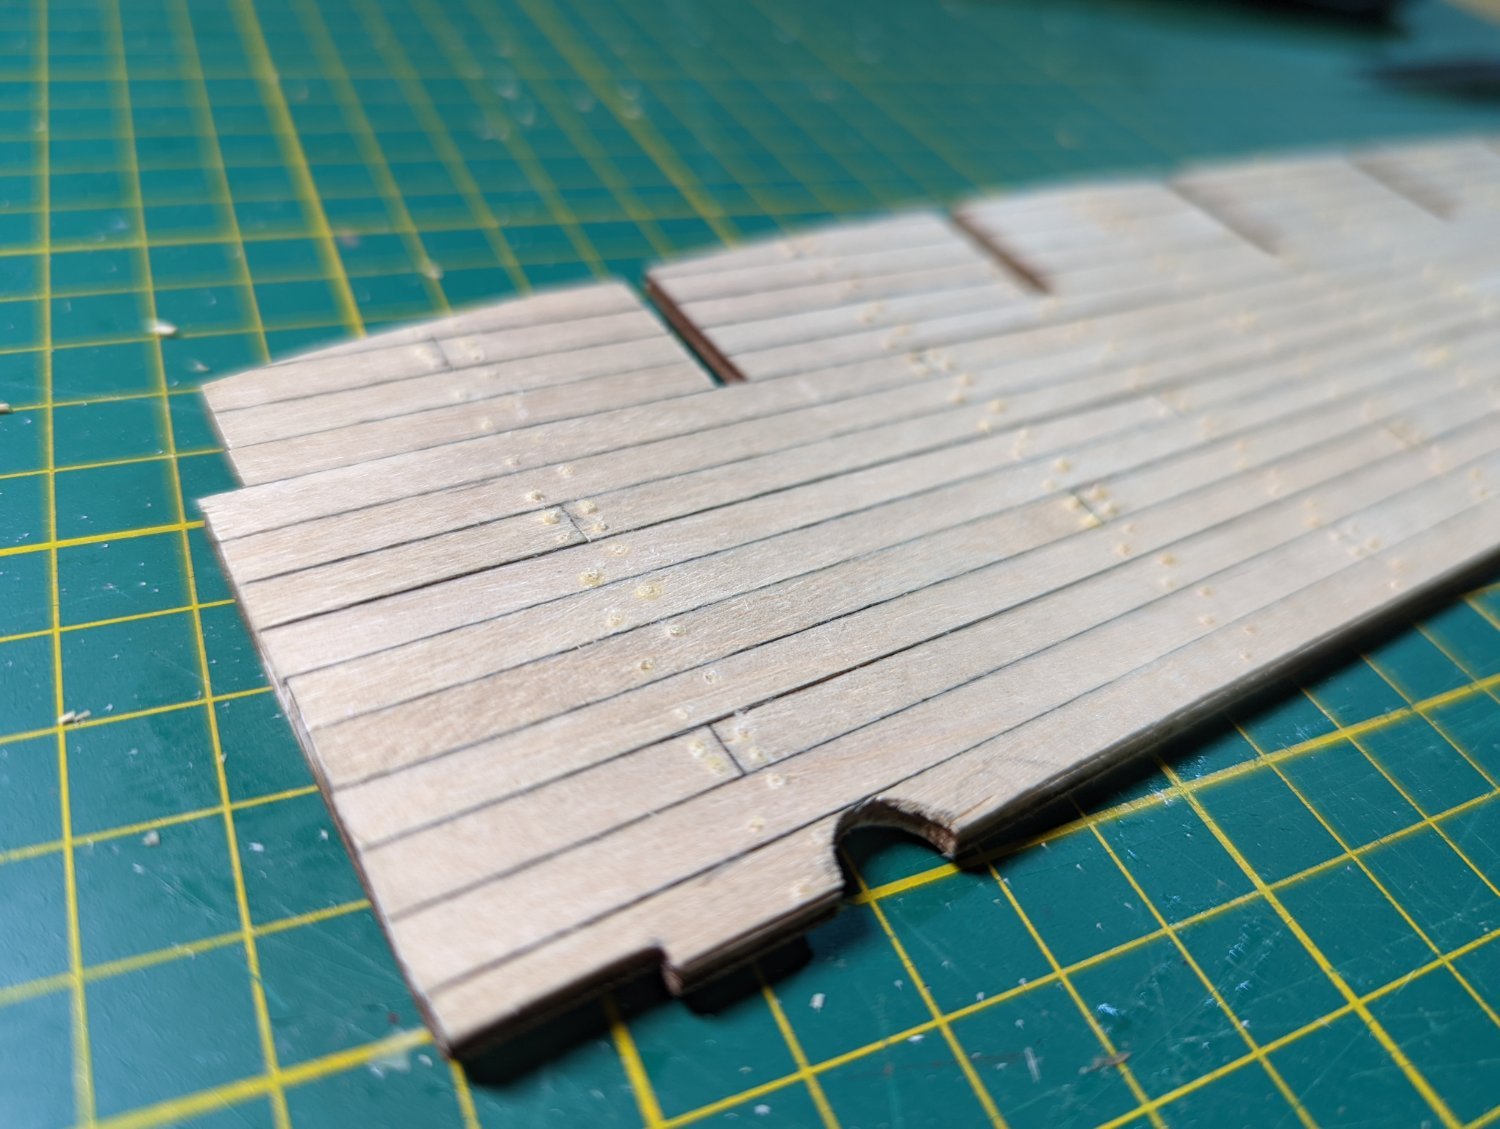
I've chiseled and sanded down the rest of the decks and washed them down to get them nice and clean.
Really pleased with the results! I'm particularly thankful I tested the method out on the lower deck as by the time I got to these decks, the treenails were not only faster to produce but easier and more consistent on installation.

I'll apply the varnish and let these dry.
Onto the deck beams, and hopefully these will be installed to the ship herself in the next day or so.
Kristyn

- Dave_E and Prowler901
-
 2
2
-
FINISHING TREENAILS
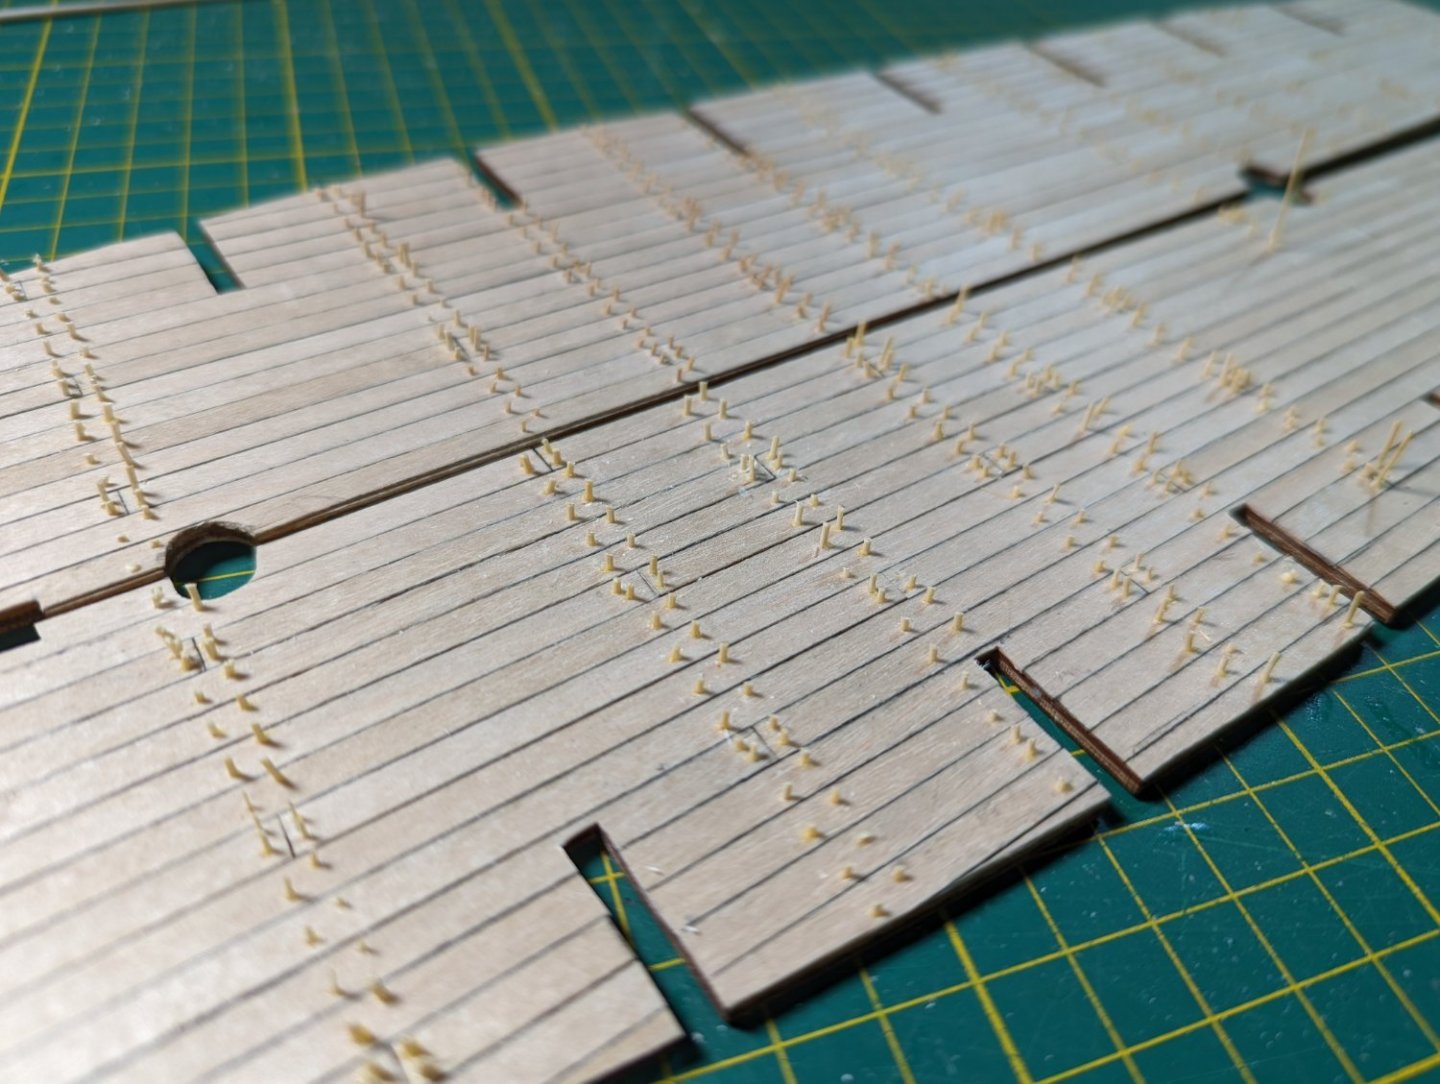
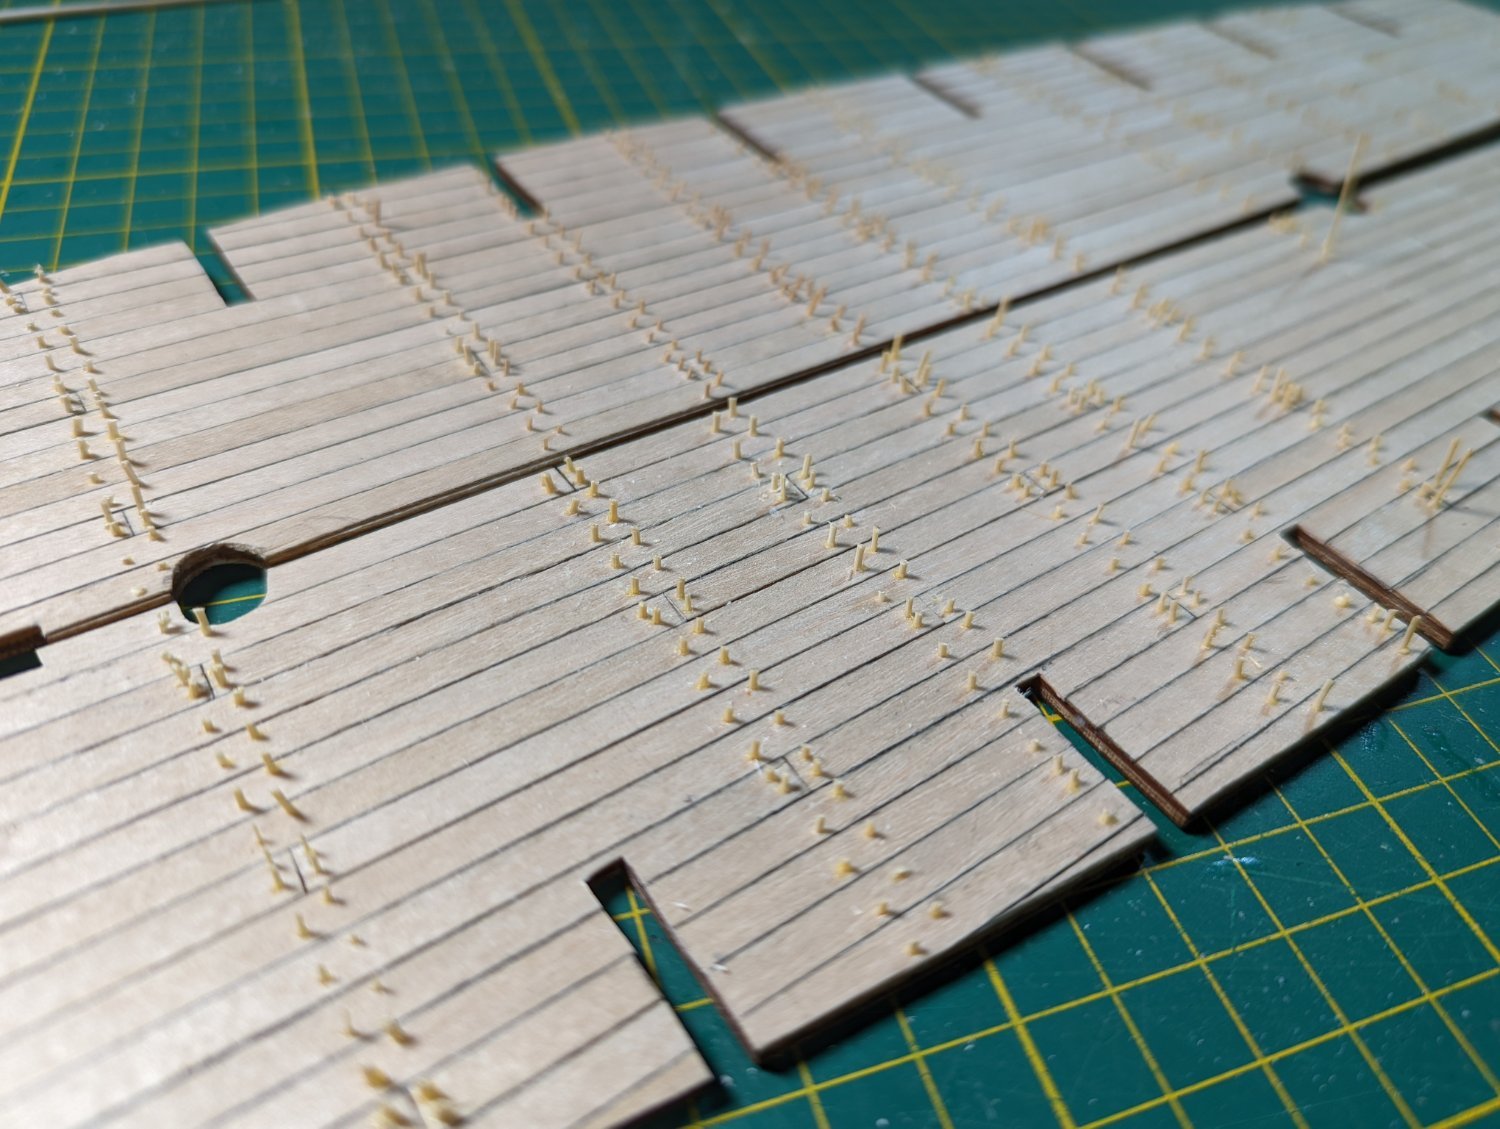
I've made progress over the weekend finishing up the treenails on the three remaining decks.

All that's left to do is to chisel each down and sand them back to a flush finish.
Then we can all move off from decks (hurray) and onto something else!
My trusty DIY drawplate has breathed it's last, and I'll need to find another when I get to treenailing the hull.

While Byrne's drawplate is lovely, my enquiry found shipping to Australia prohibitively expensive (significantly more than the cost of the part itself) so I'll see if I can find a local equivalent.
-
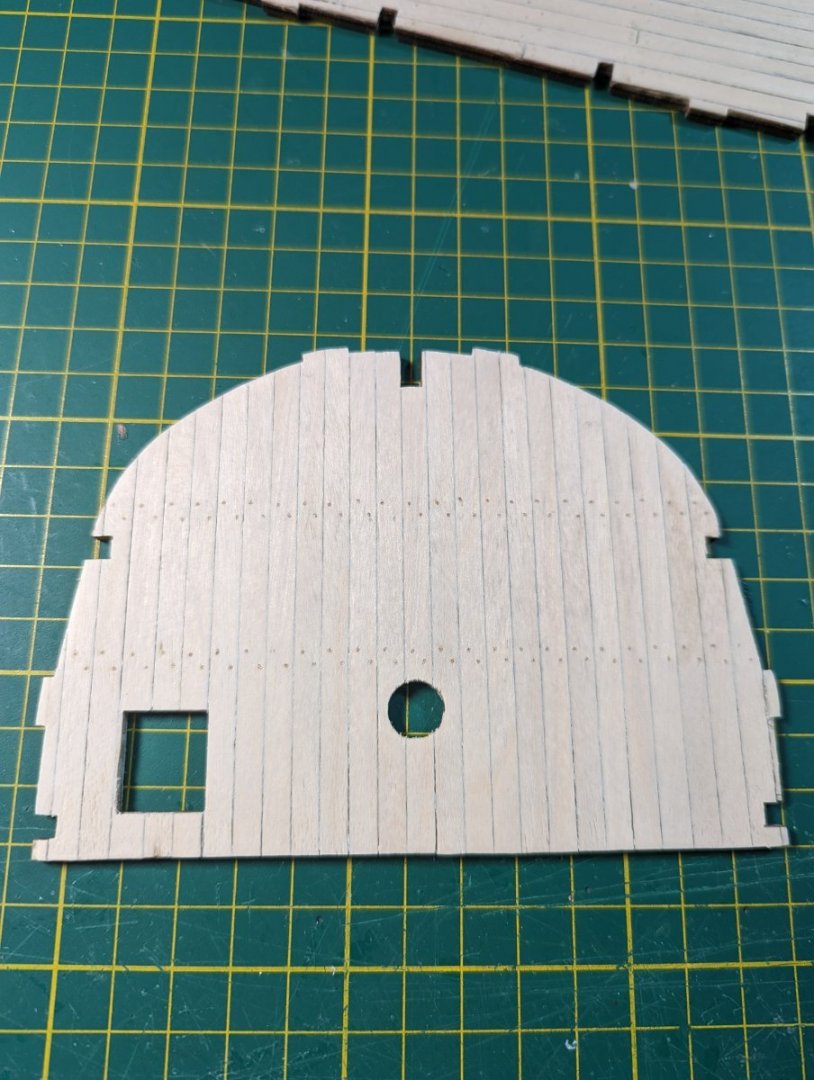
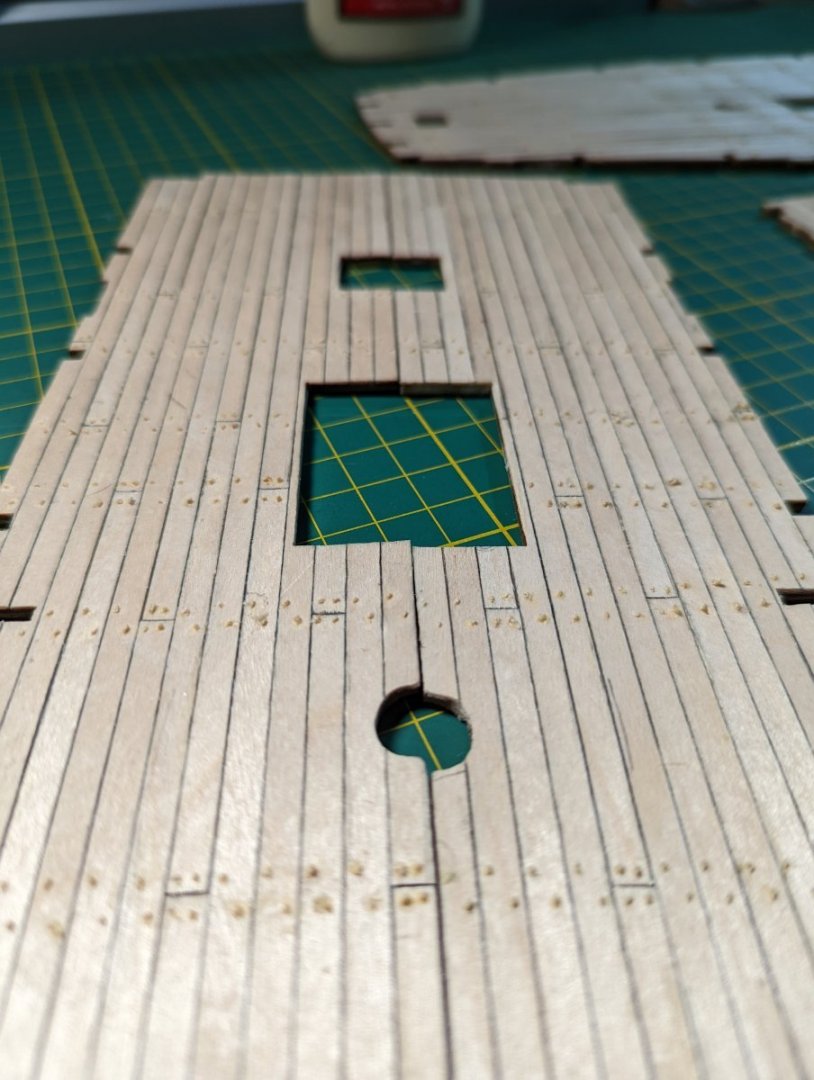
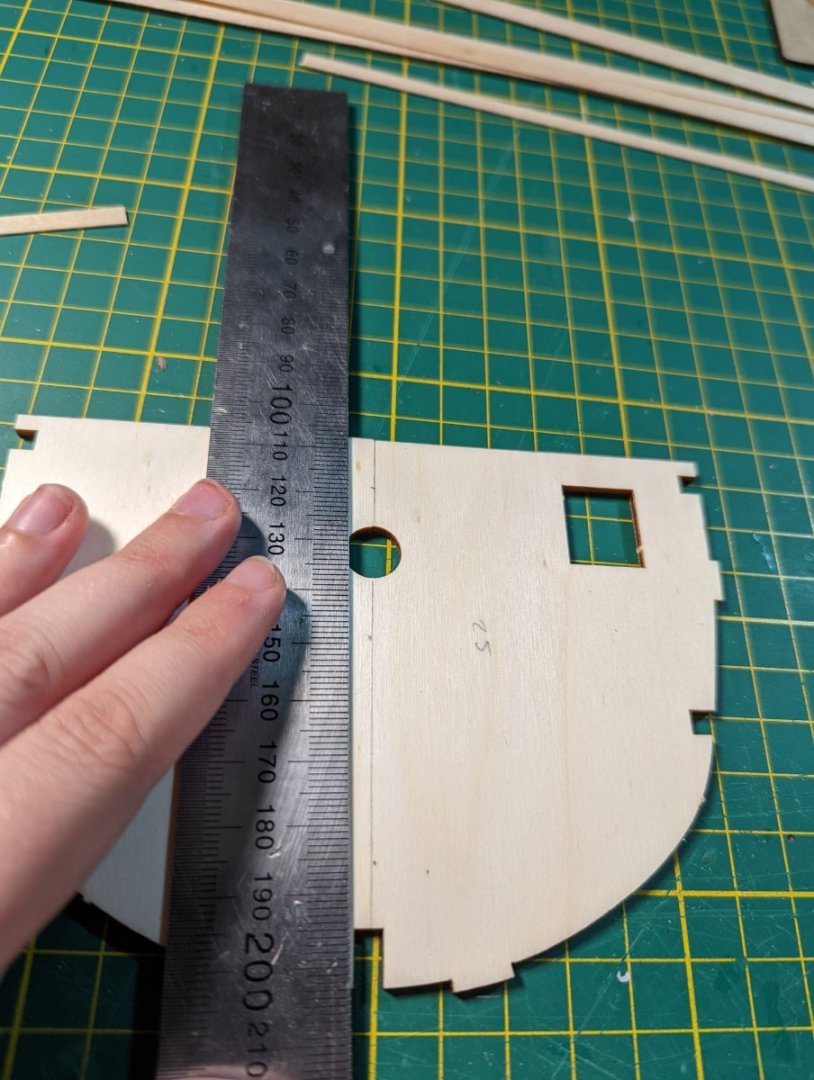
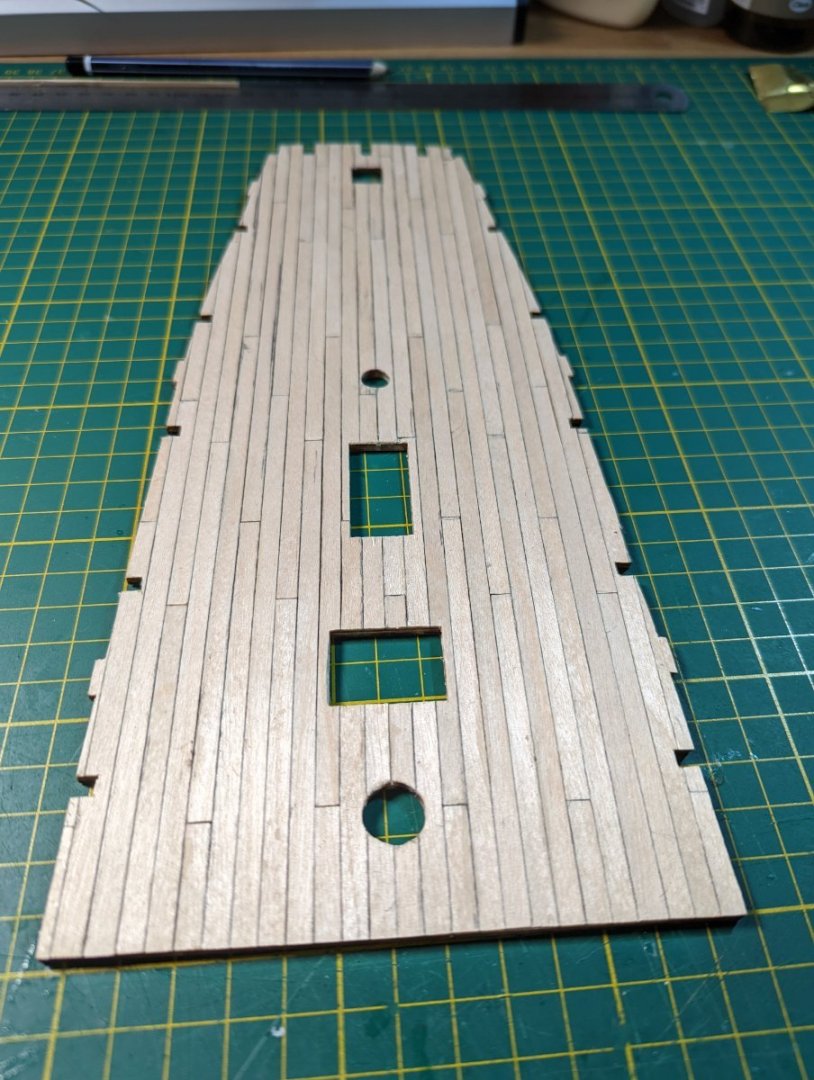
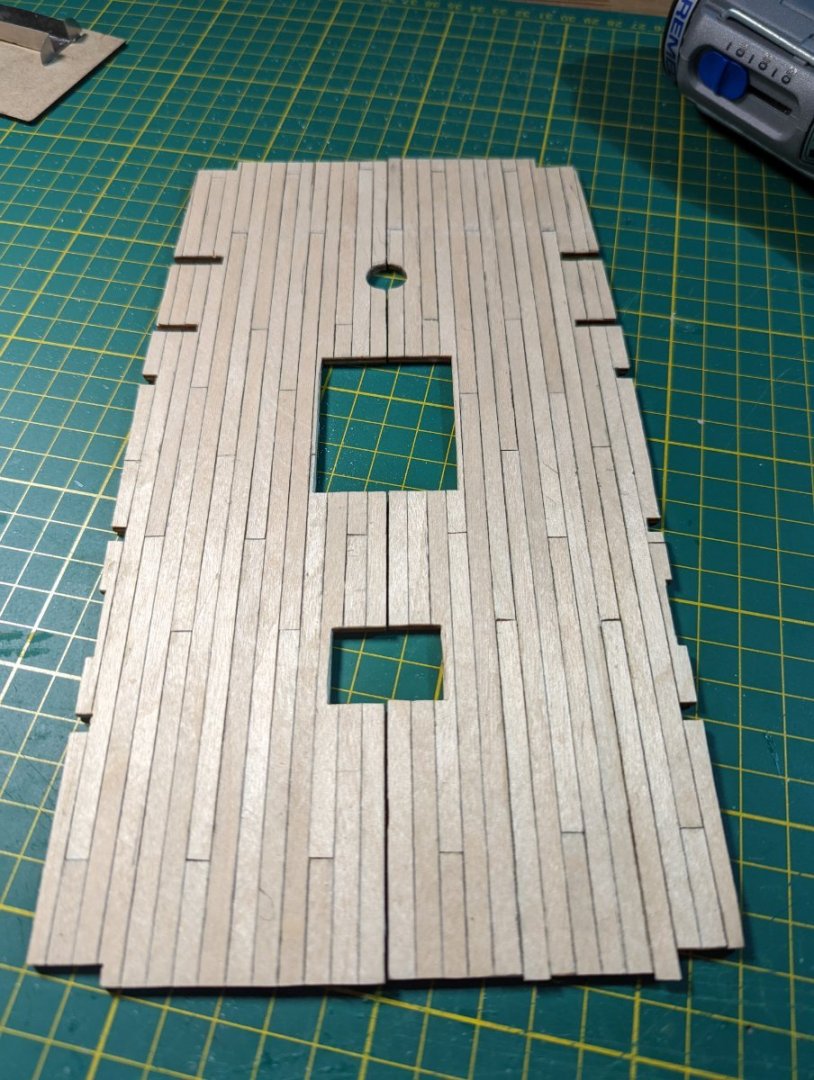
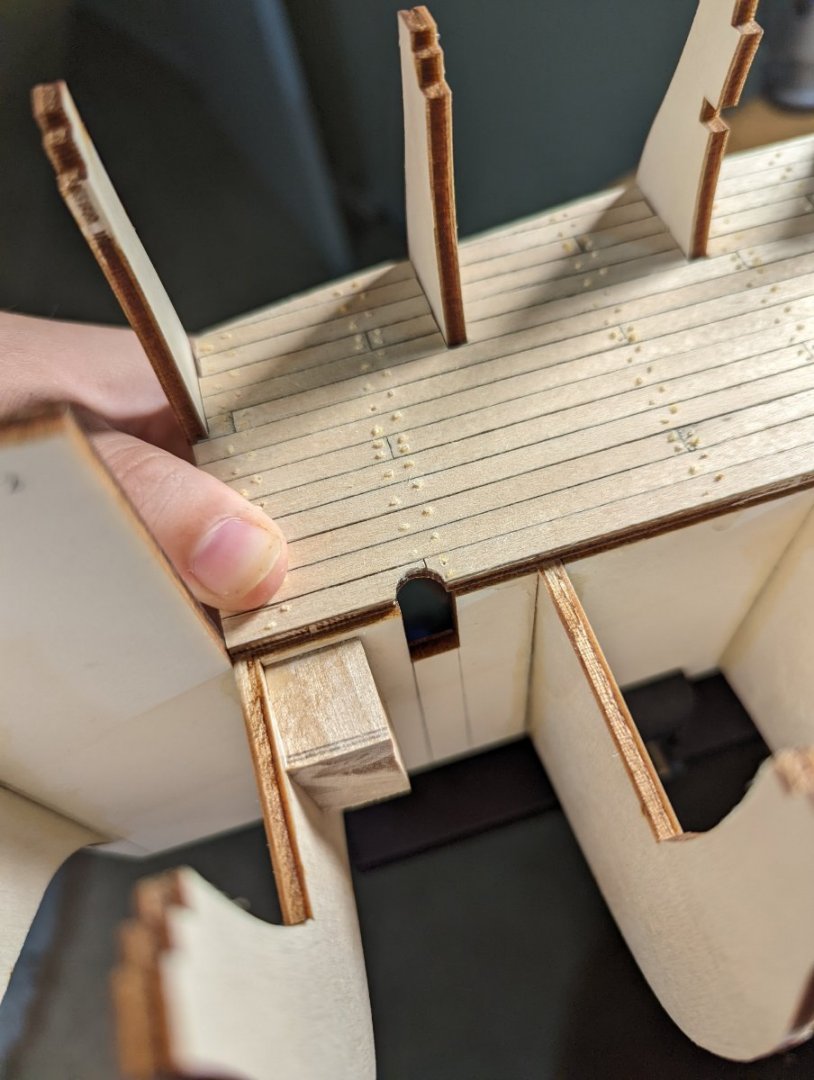
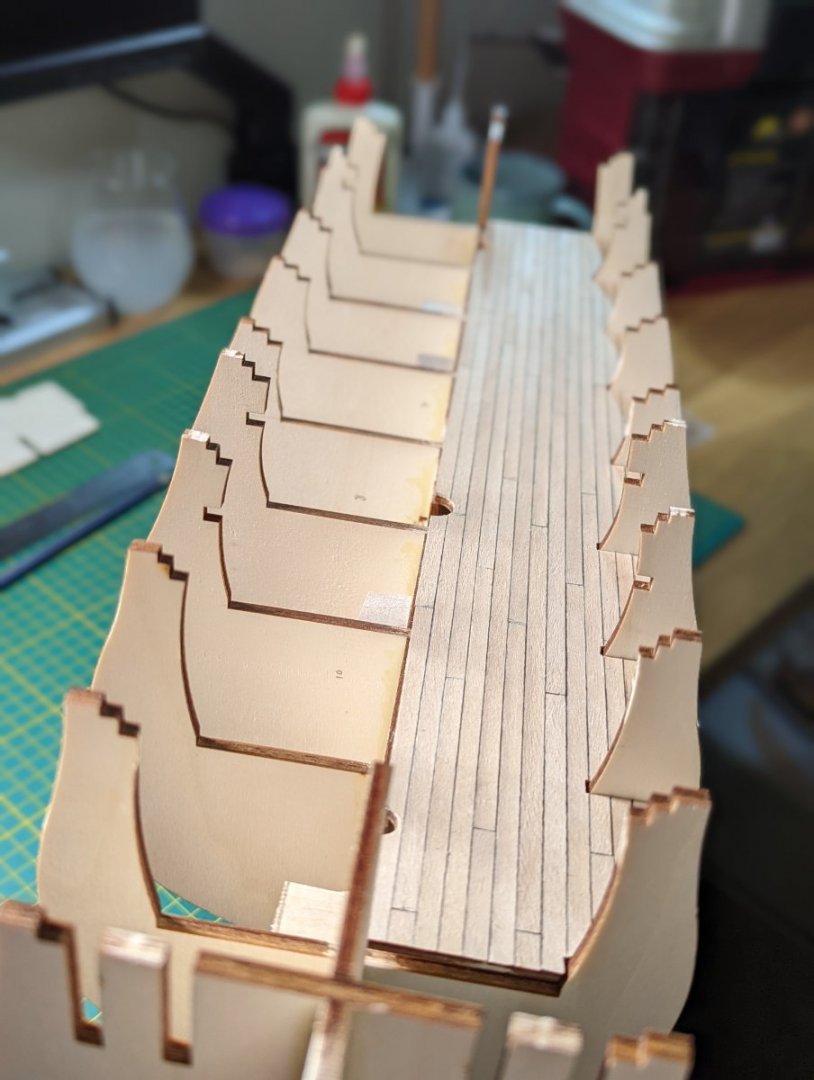
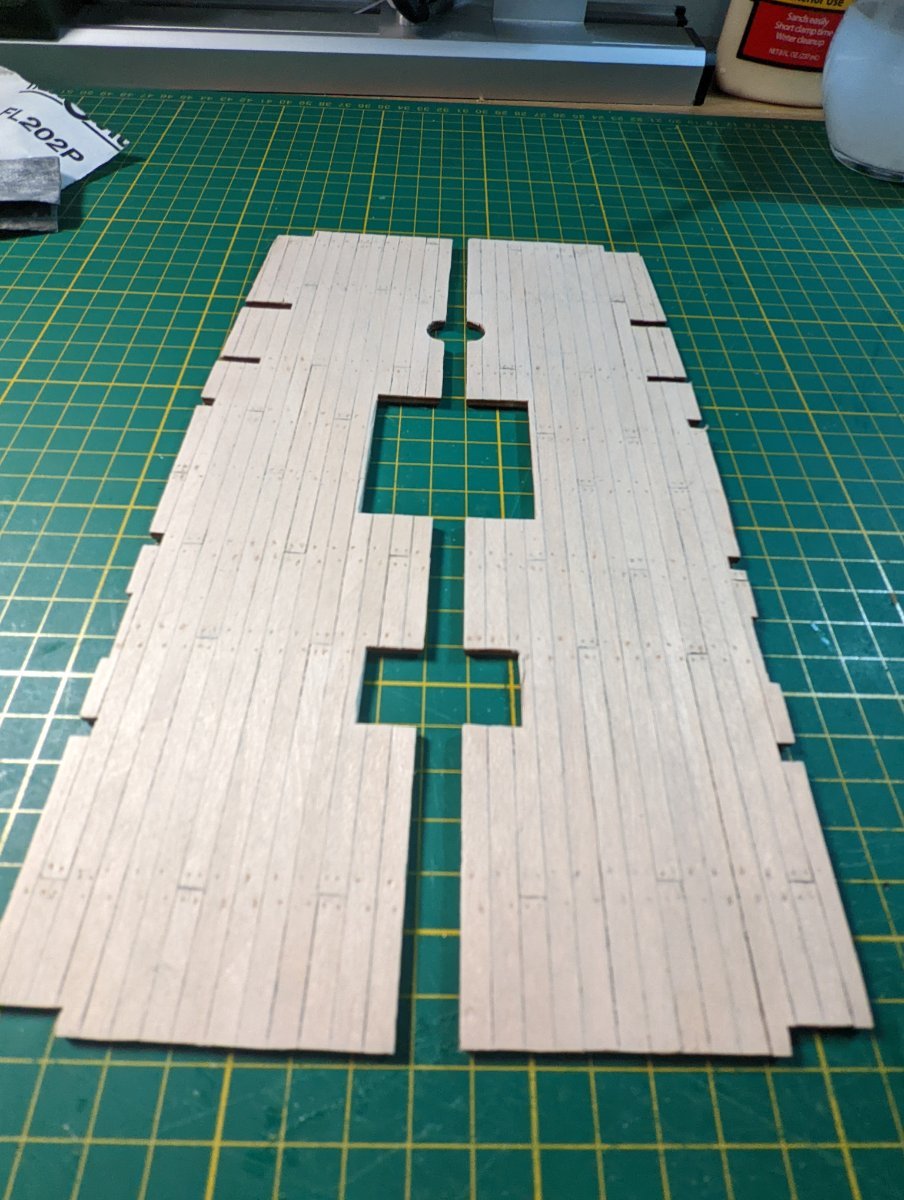
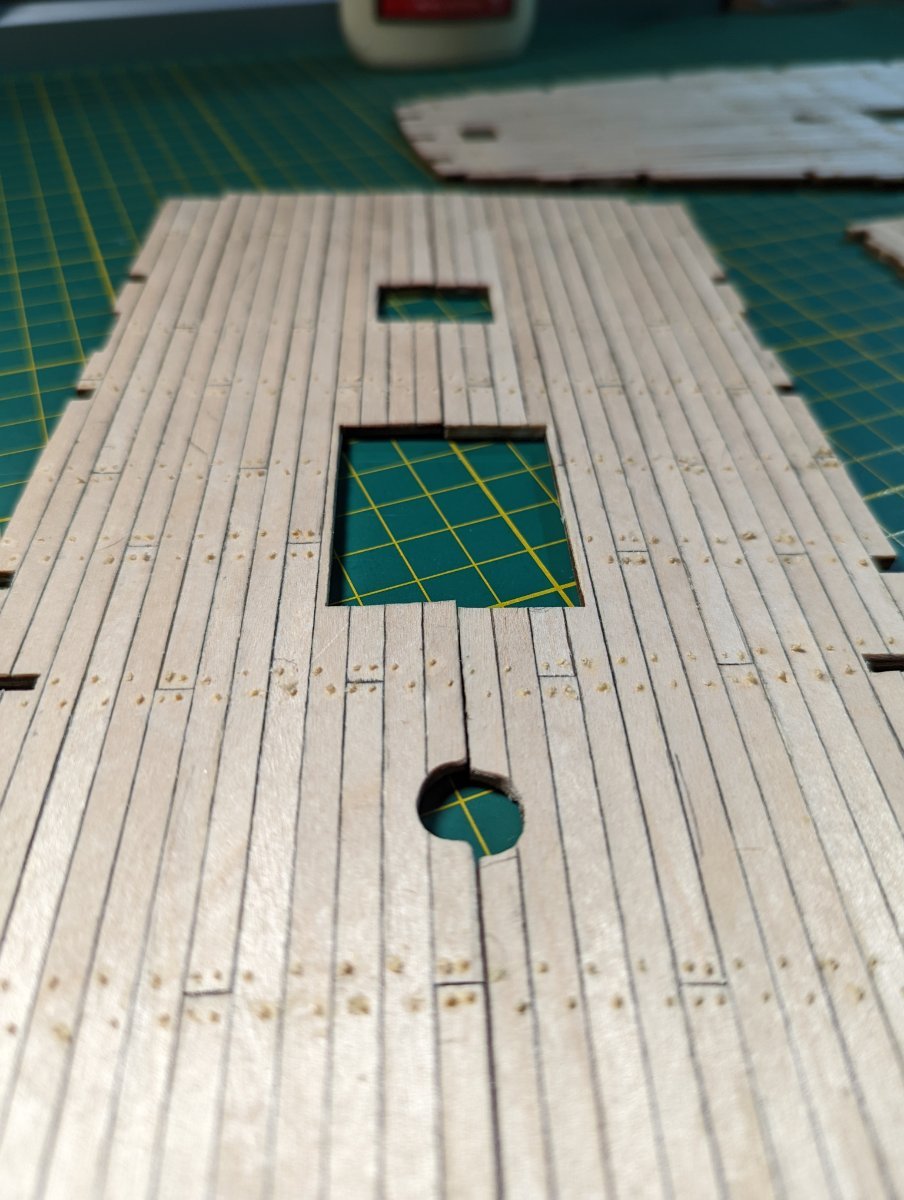
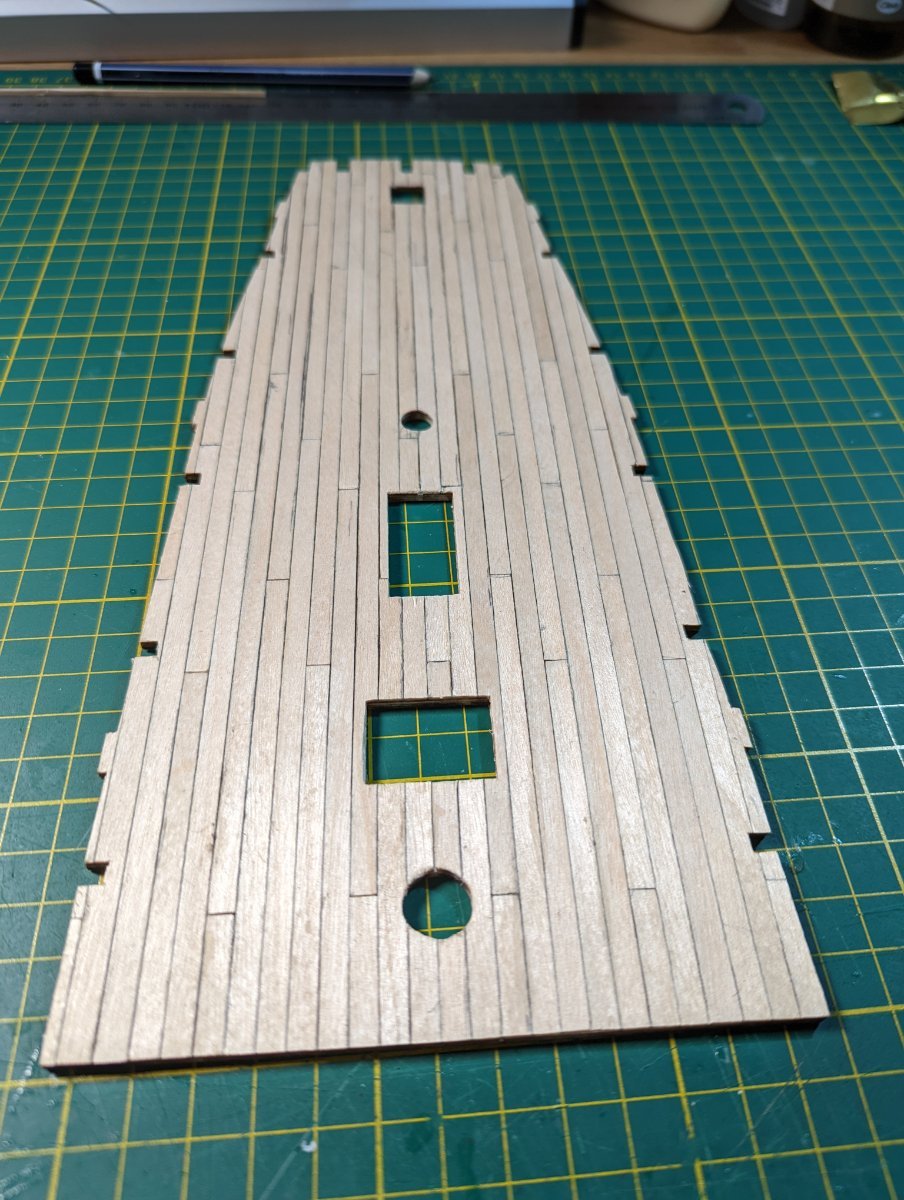
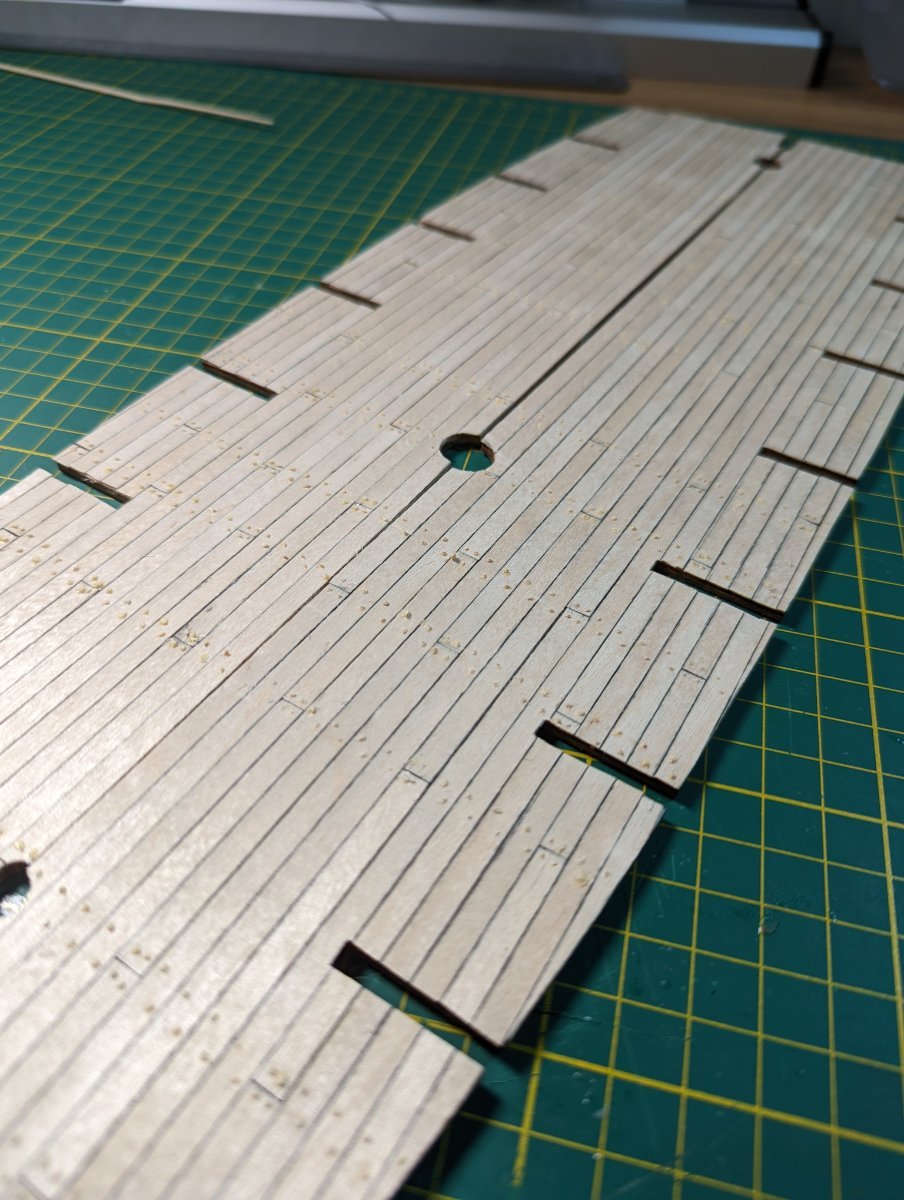
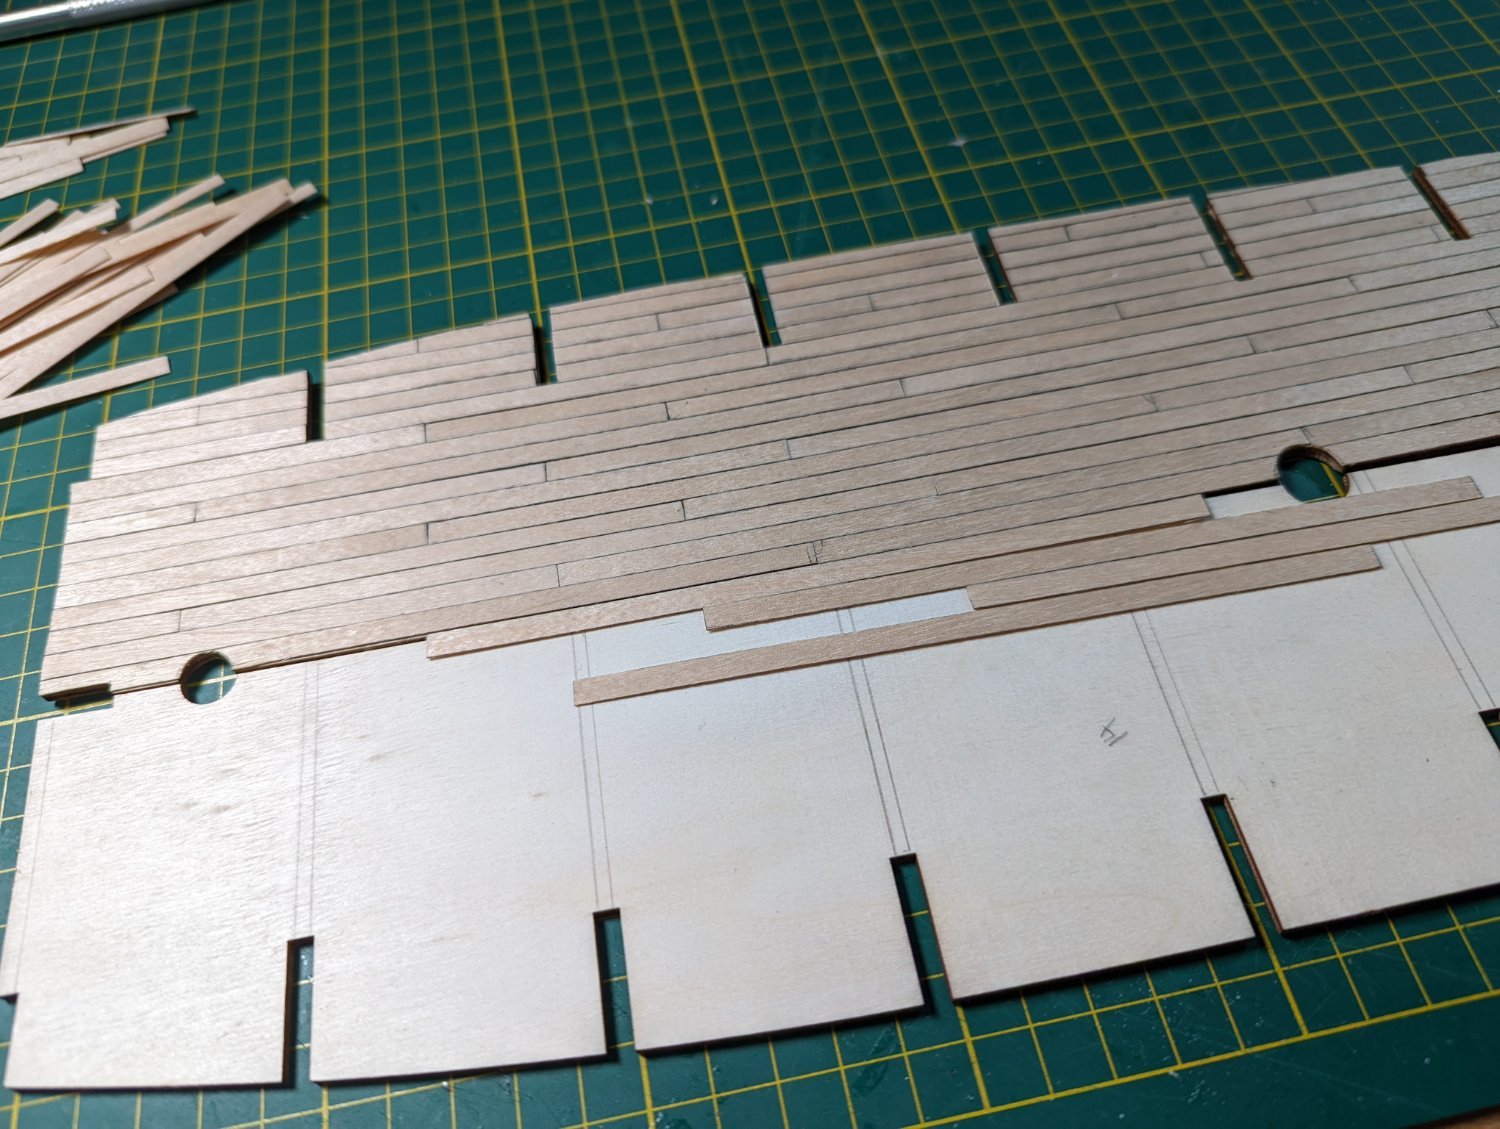
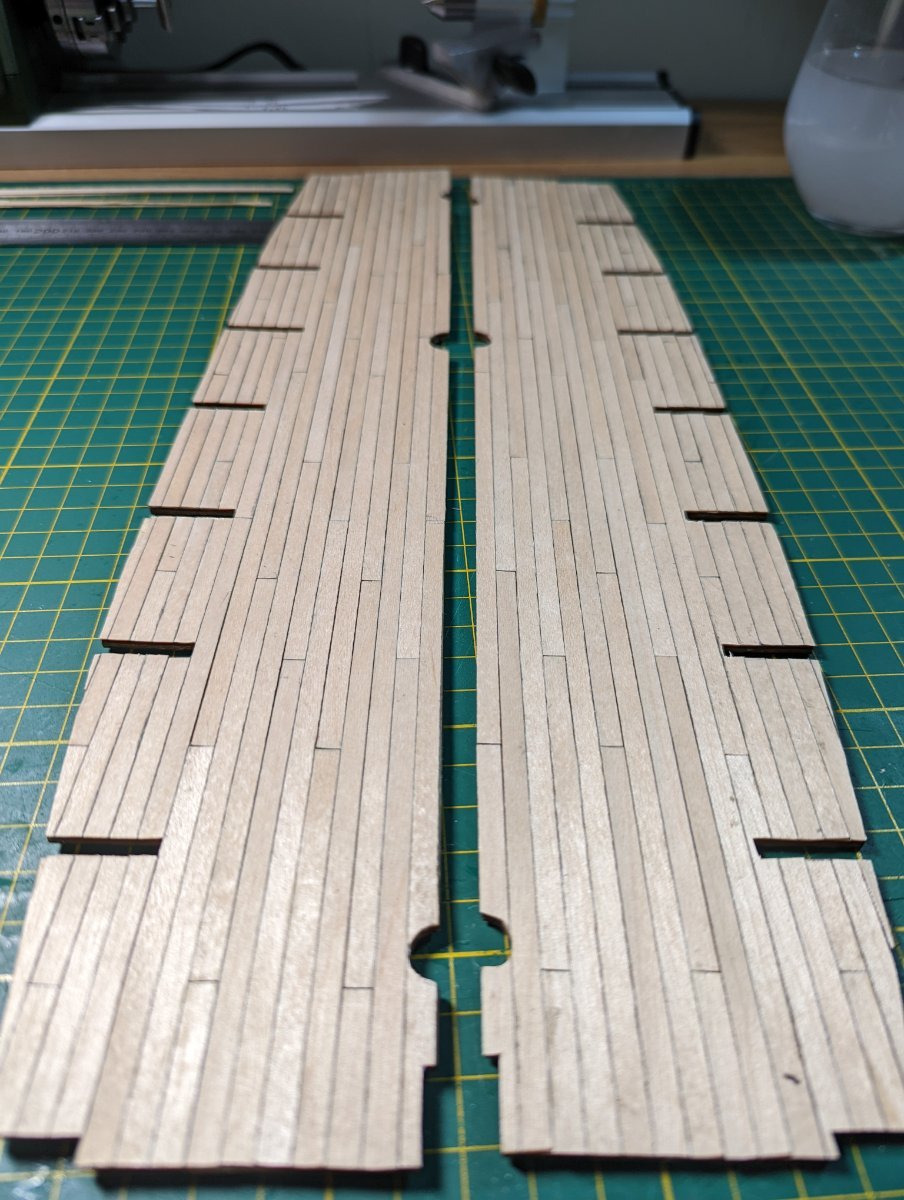
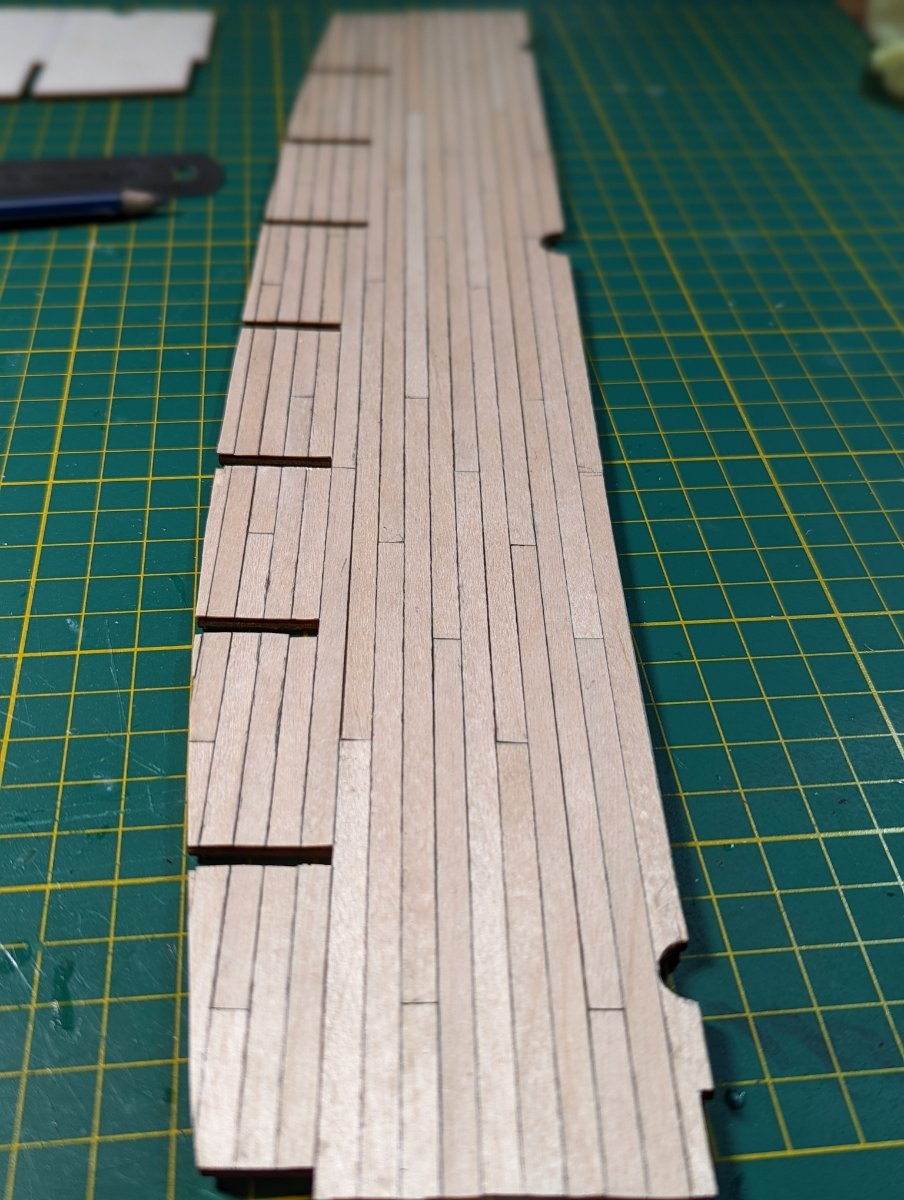
PLANKING THE FORECASTLE, QUARTER & UPPER DECKS:
Before moving onto the deck support beams and camber, I will complete the remaining decks - given I'm in the spirit of treenail manufacture!
Following the same process as with the lower decks, I completed the planking on the three upper decks.
For the forecastle and quarter deck I drew a ruled centreline and started planking from the centre.
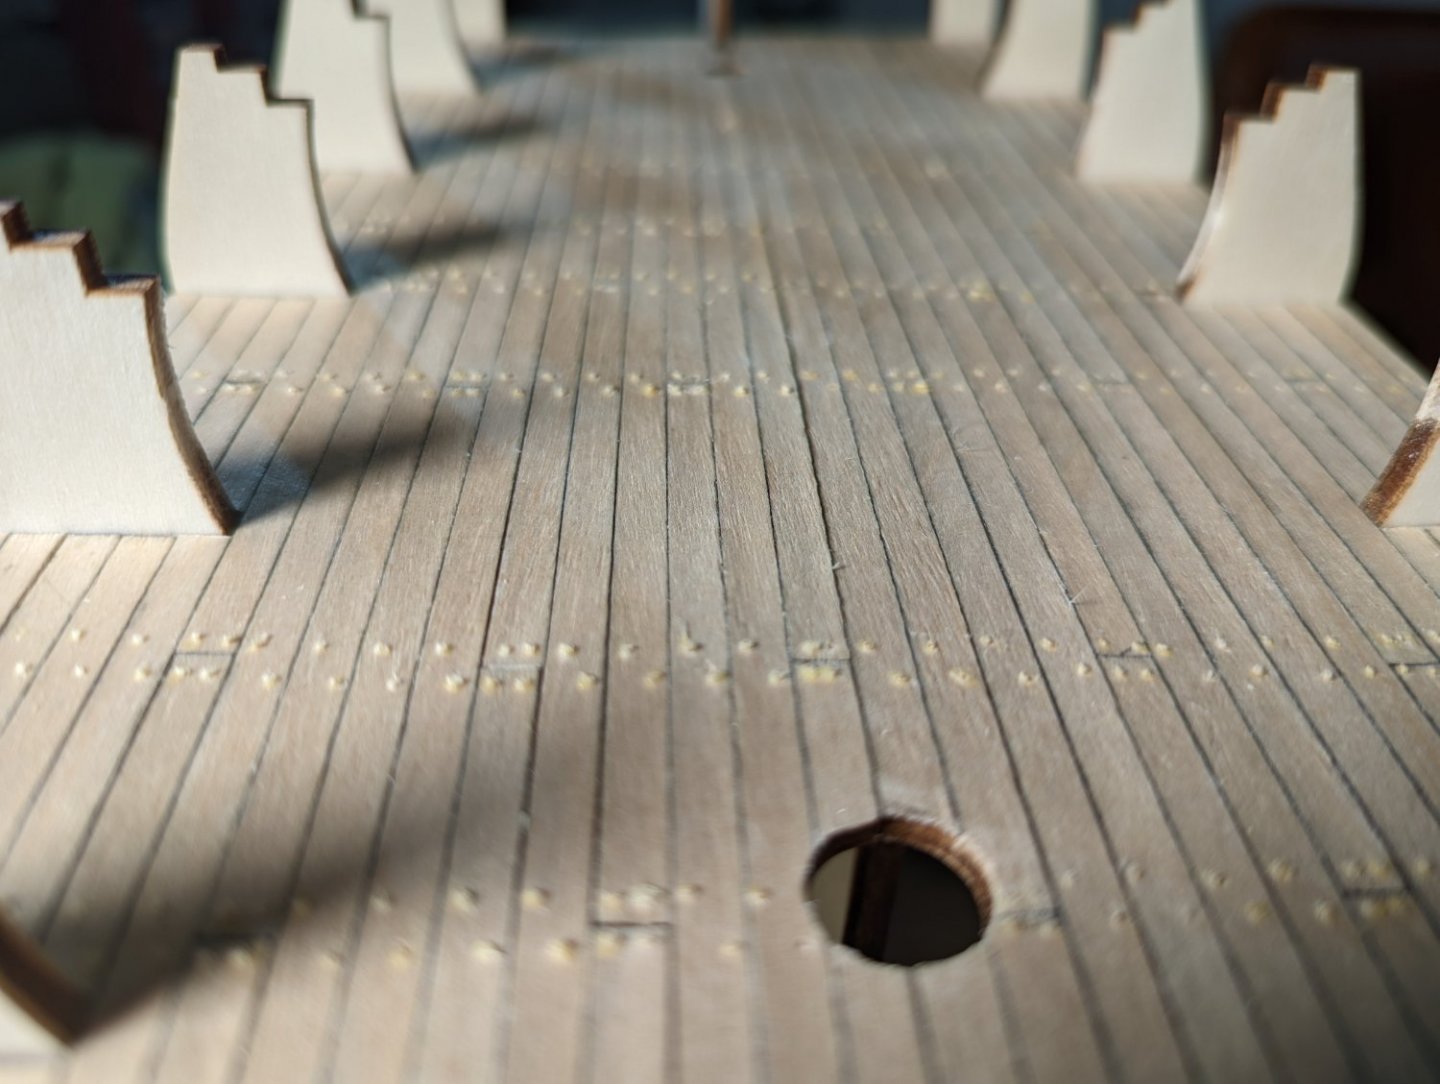
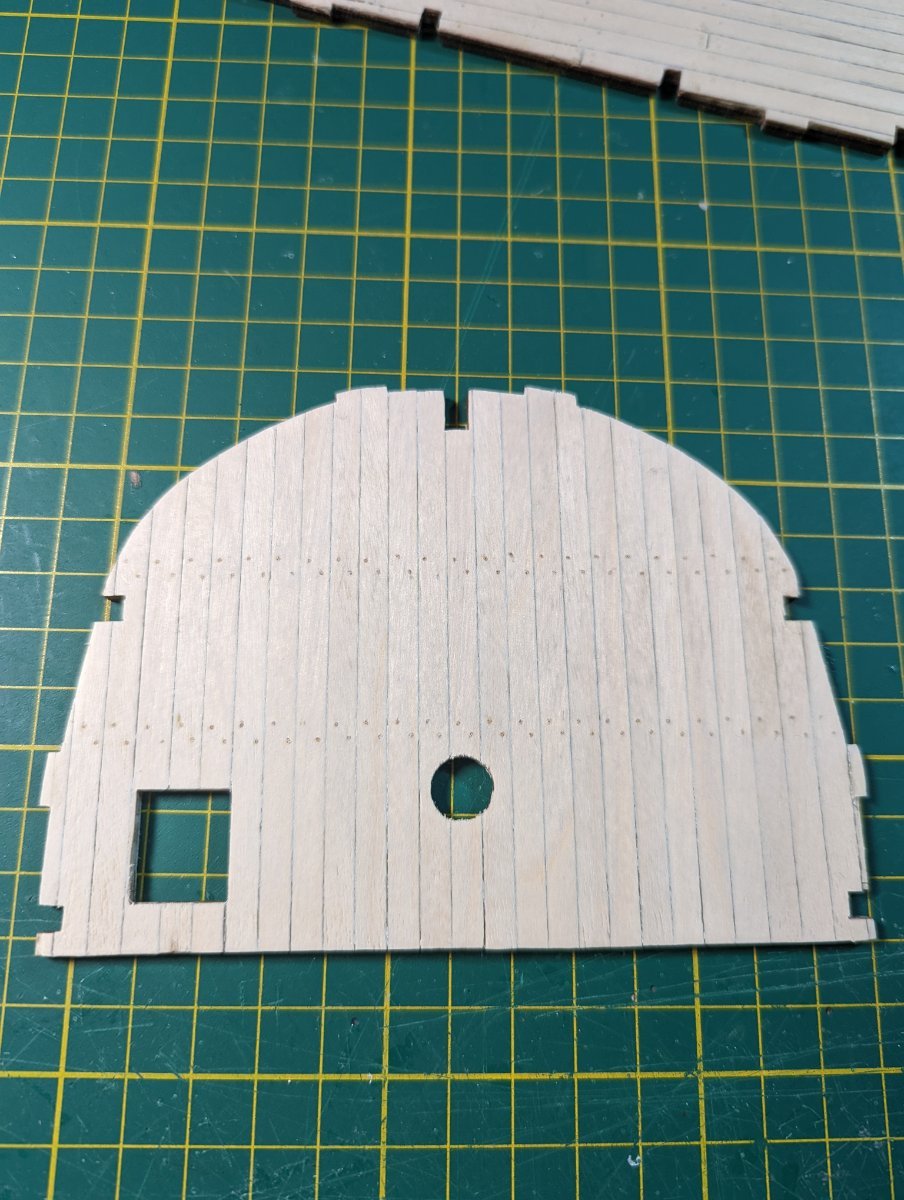
FORECASTLE DECK PATTERN
Before planking, I double checked the treenail and planking pattern by referencing the replica's virtual tour and both Marquardt's and Parkin's plans.
Parkin's plans don't include the deck pattern, but Marquardt's did. Marquardt's aligned to the replica's deck.
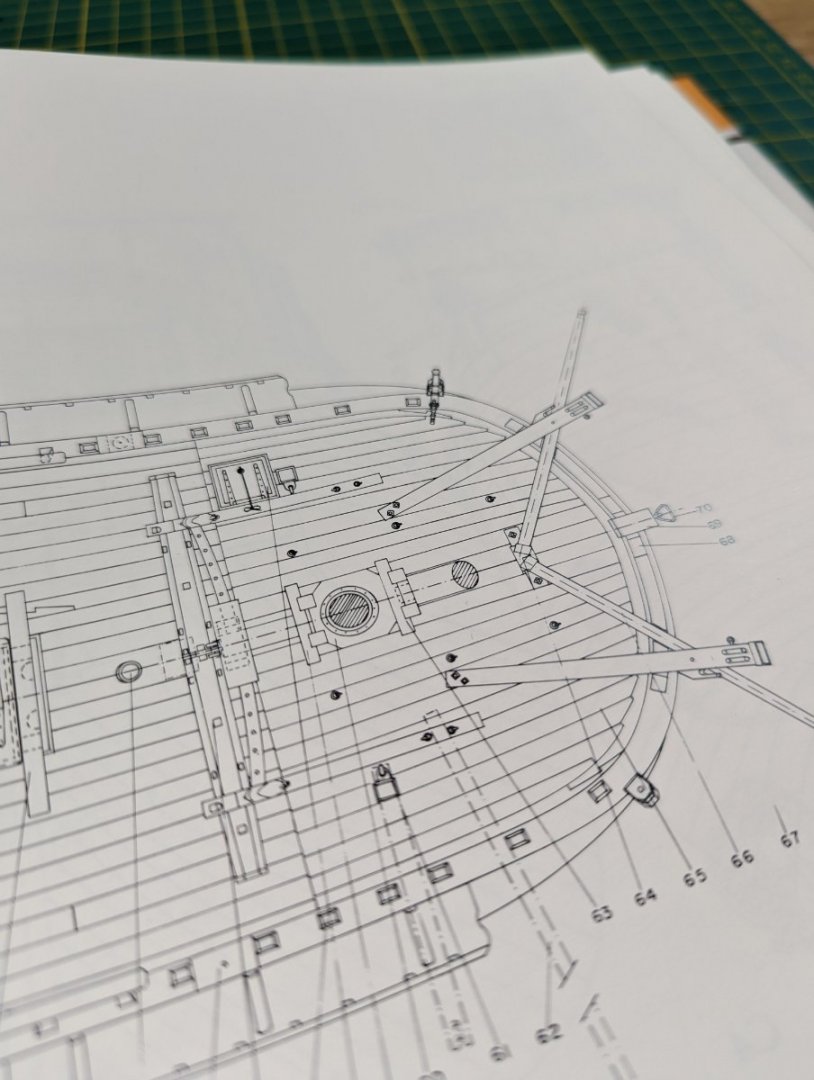
On the forecastle deck there isn't any butting pattern, with each plank instead lined up side by side directly; on my model, each plank measured 100mm.
Excuse the graphite marks on the deck; these will be sanded off once treenails have been installed and the whole deck flushed.
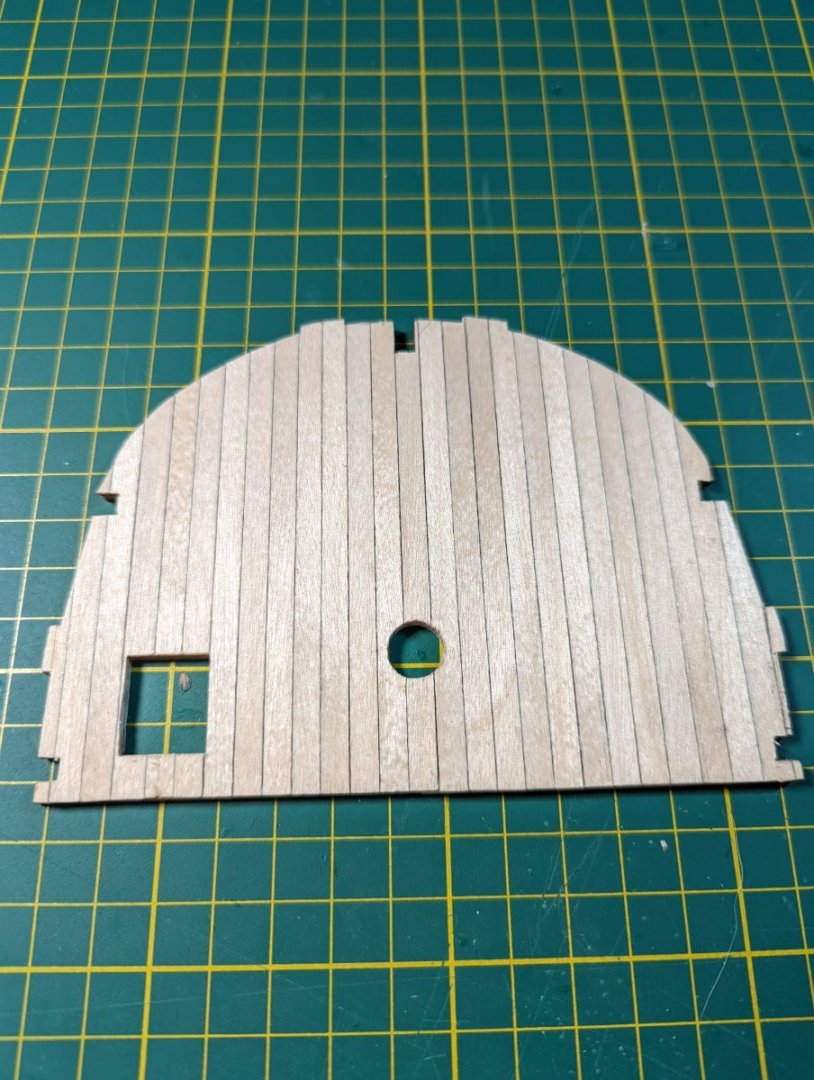
Next up I'll complete the treenails for each. I won't record my process as carefully as it emulates that for the lower deck.
Kristyn
- Dave_E and Prowler901
-
2
-
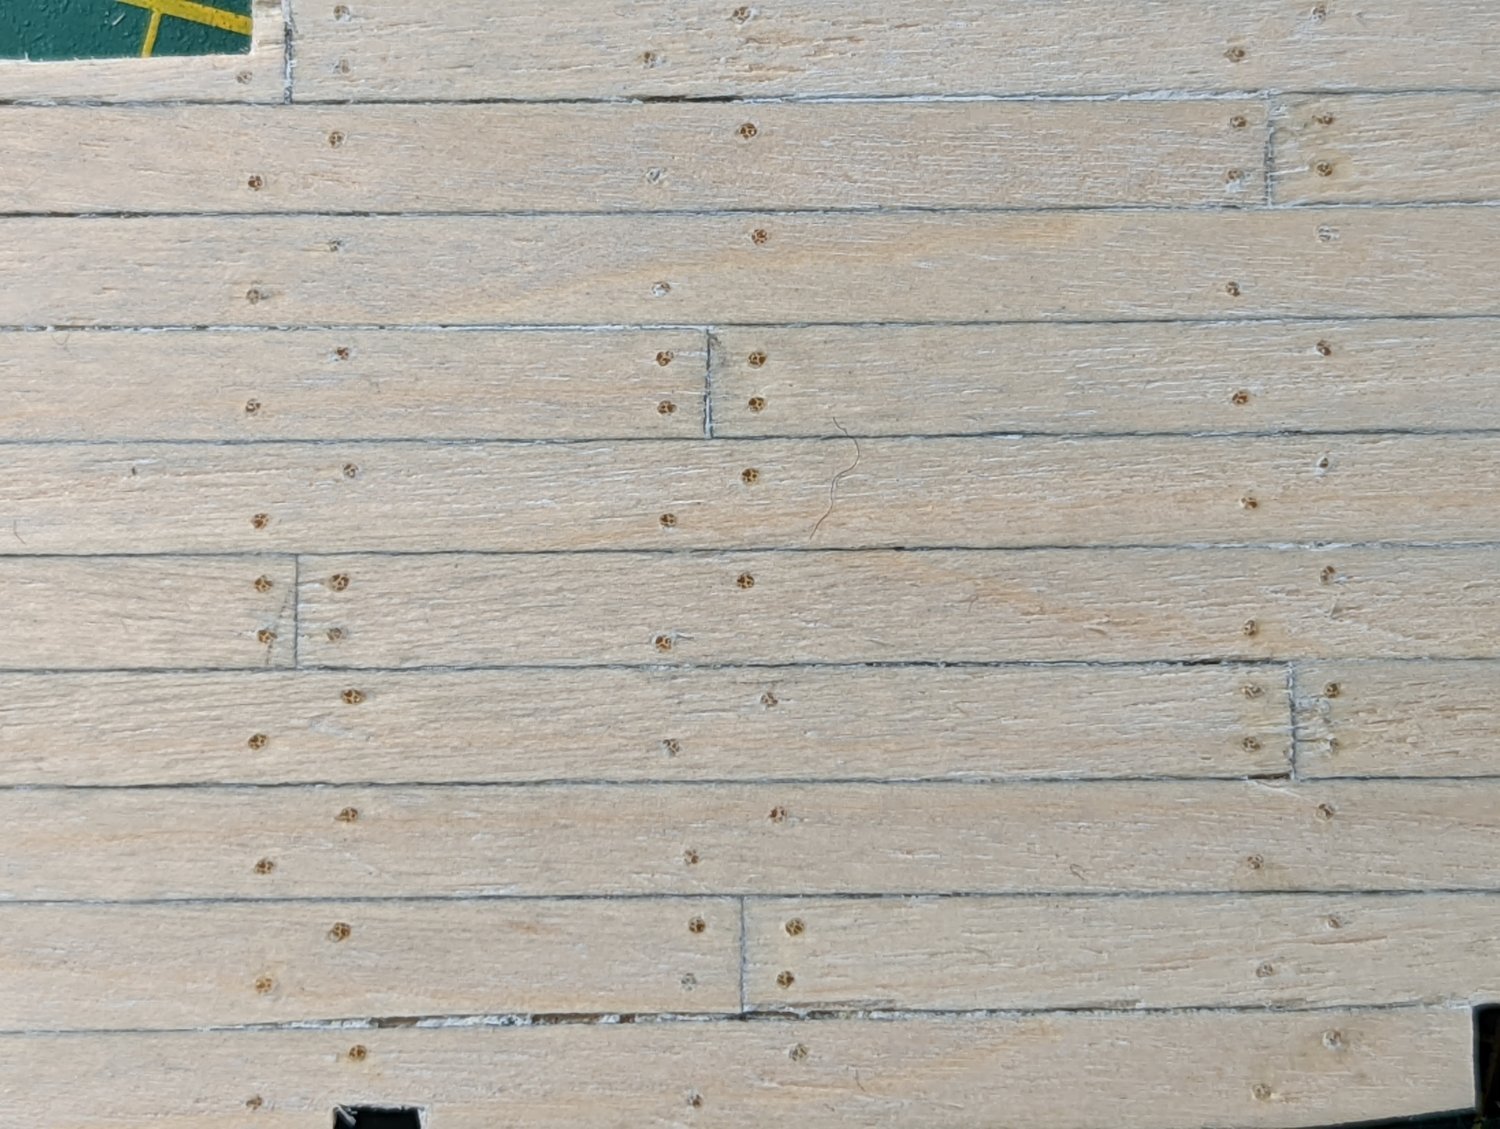
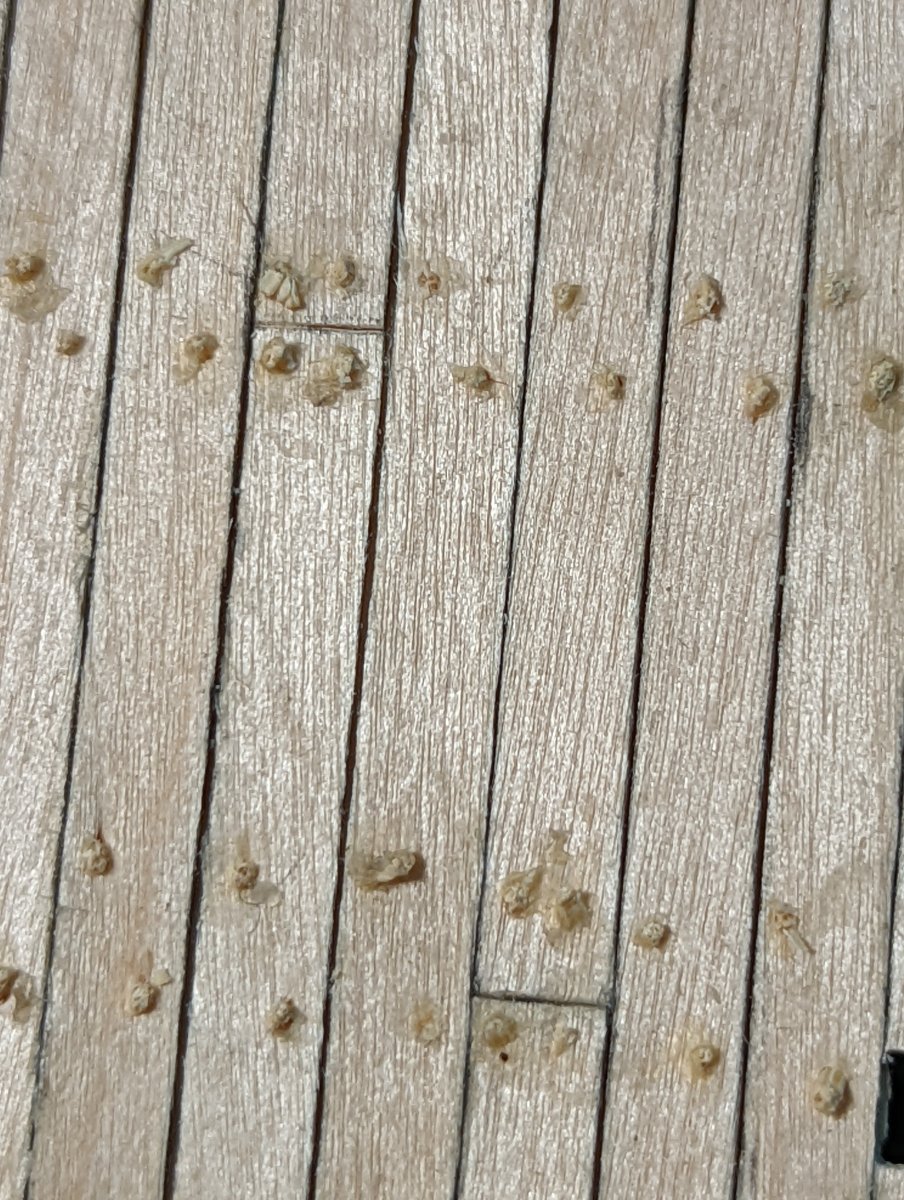
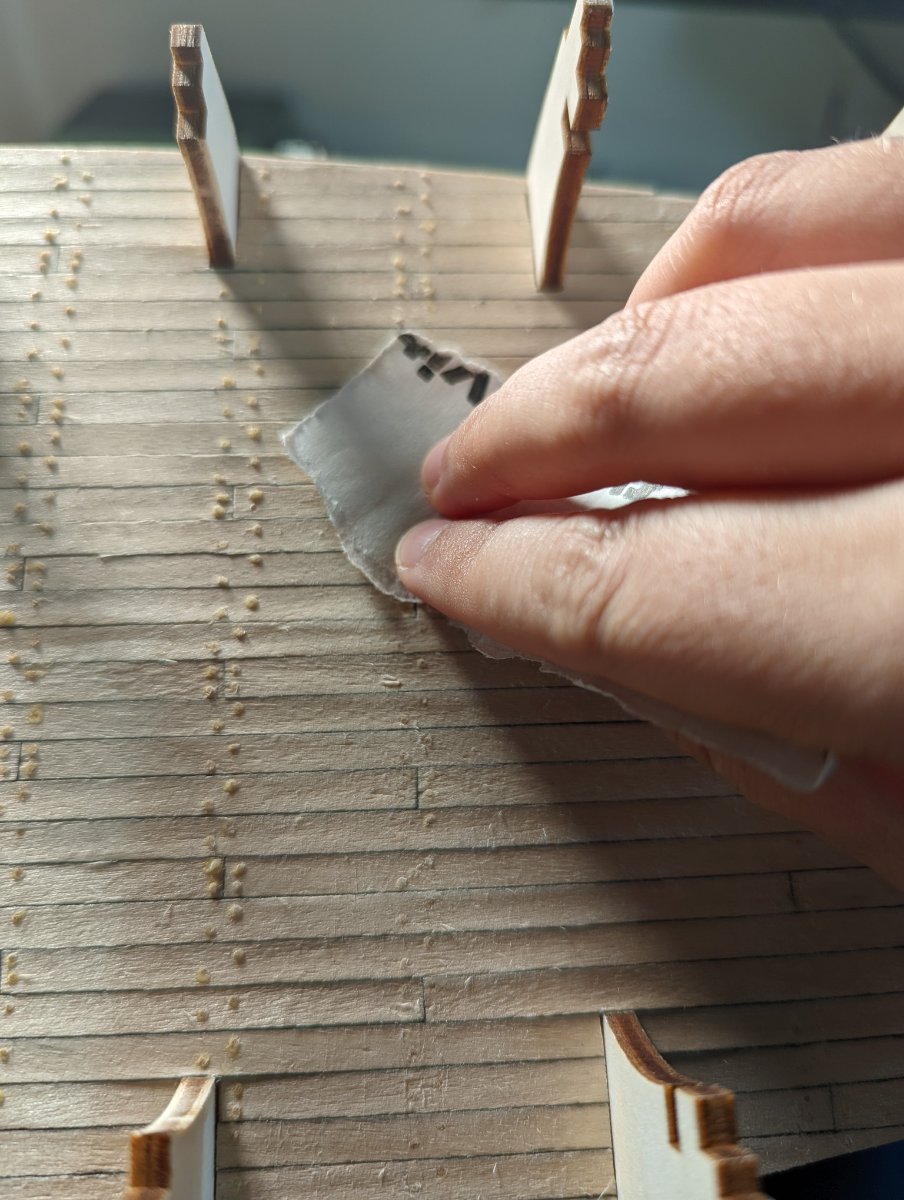
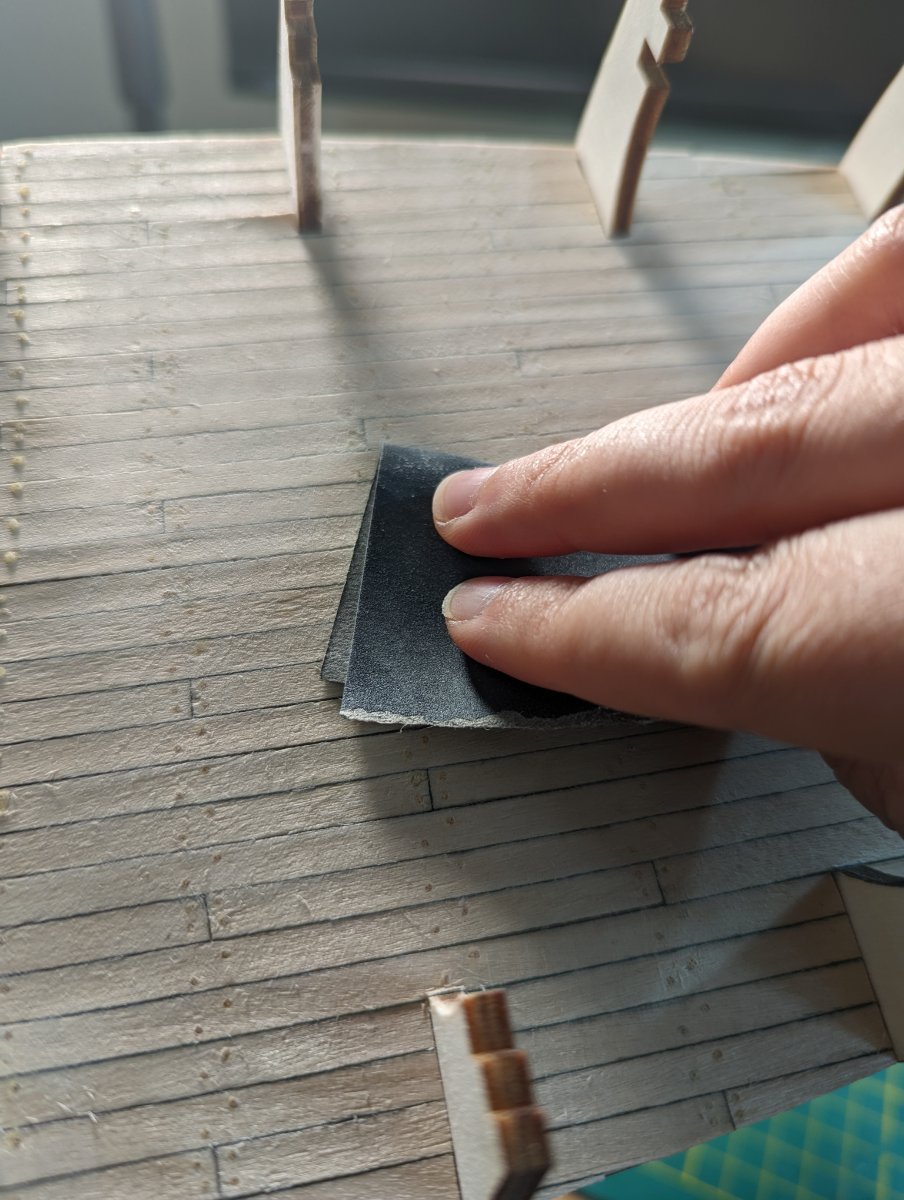
Thanks kindly for the recommendation on the chisel, Alan -
I've carefully chiselled down each treenail using this miniature Japanese chisel I have in my toolbox.
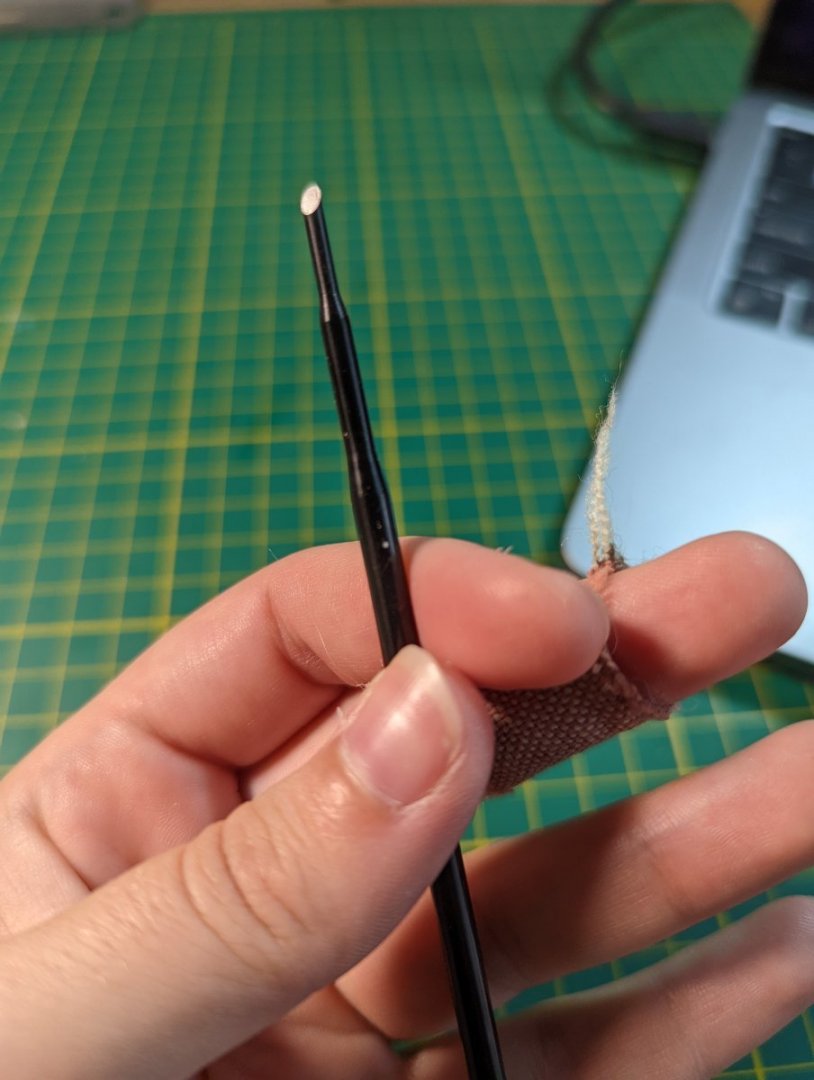

I then hand sanded down the deck, first with dry 240 grit, then dry 400 grit, before using wet 400 grit to pick up any loose fibres.

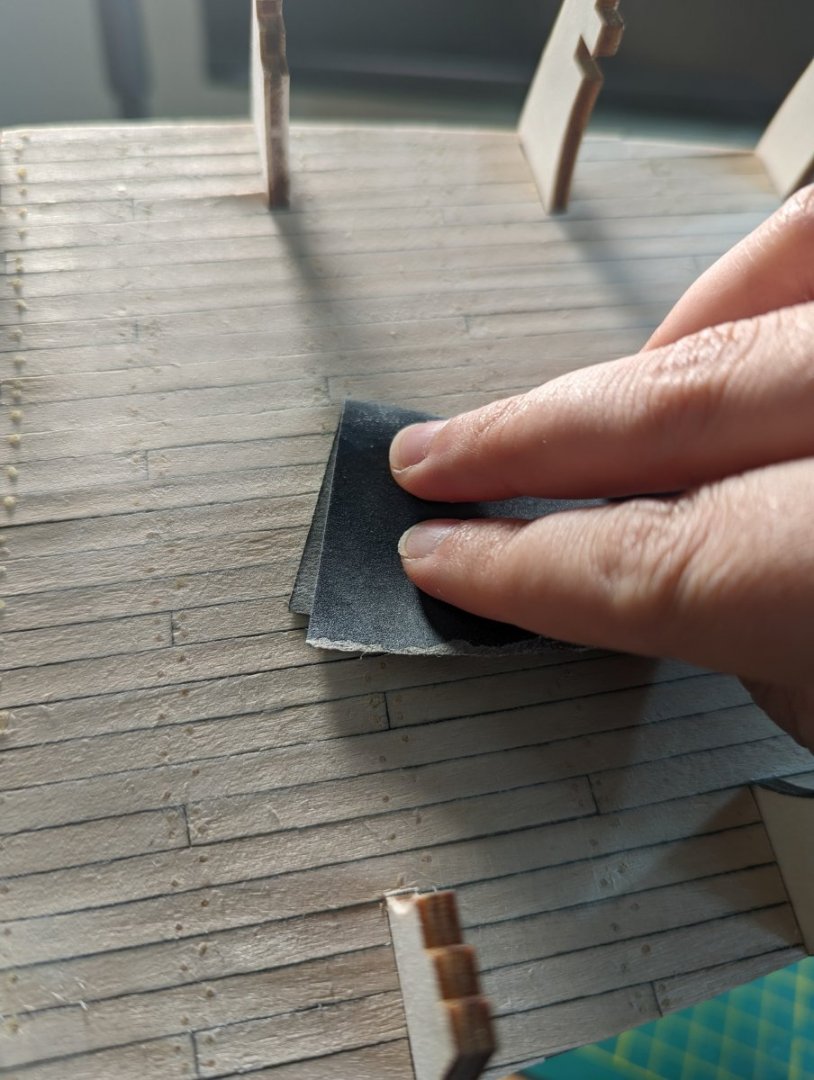
At this time I was able to apply a small amount of wood glue and use the sawdust from sanding to fill the large gap between planks between the two sides I noted previously.
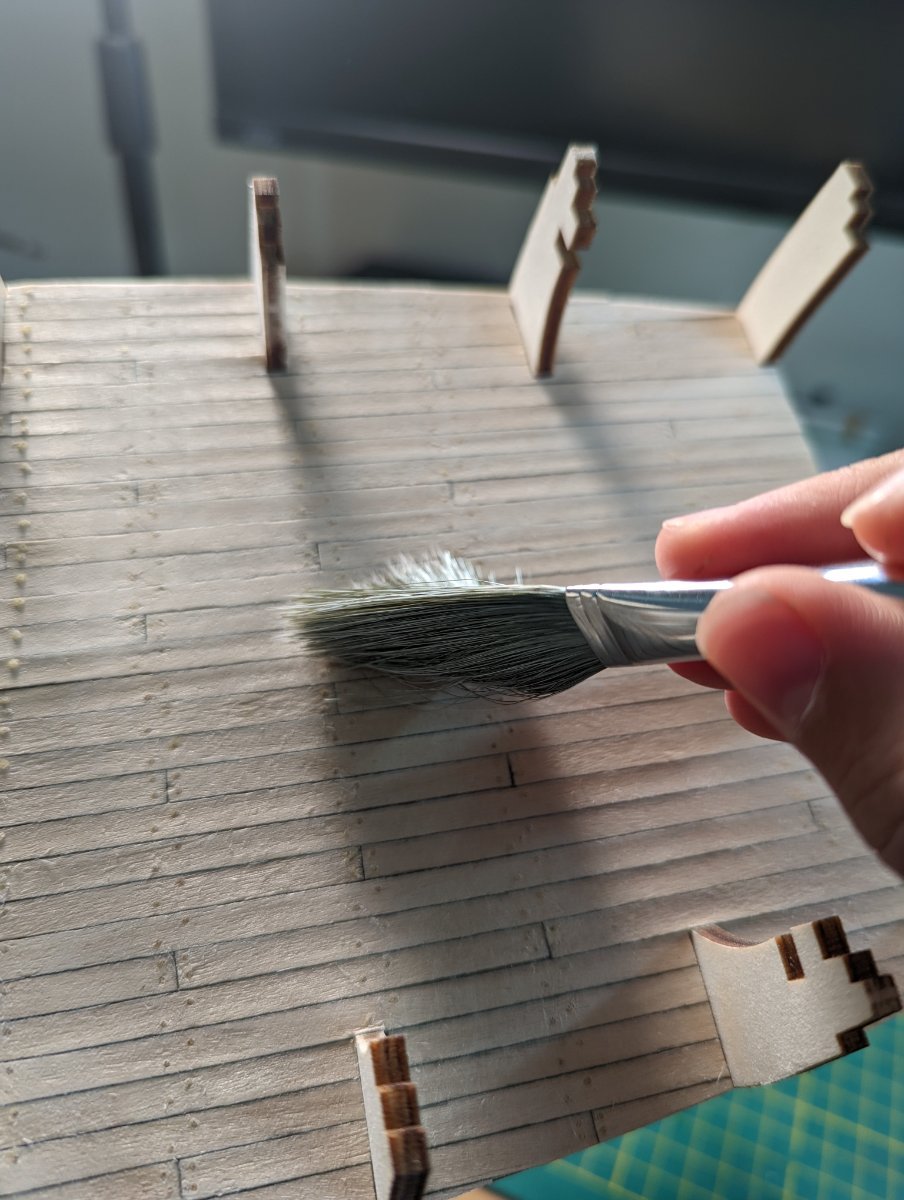
I brushed the sawdust off with my model brush. I then wiped the deck with a damp cloth to make sure the whole thing was squeaky clean.

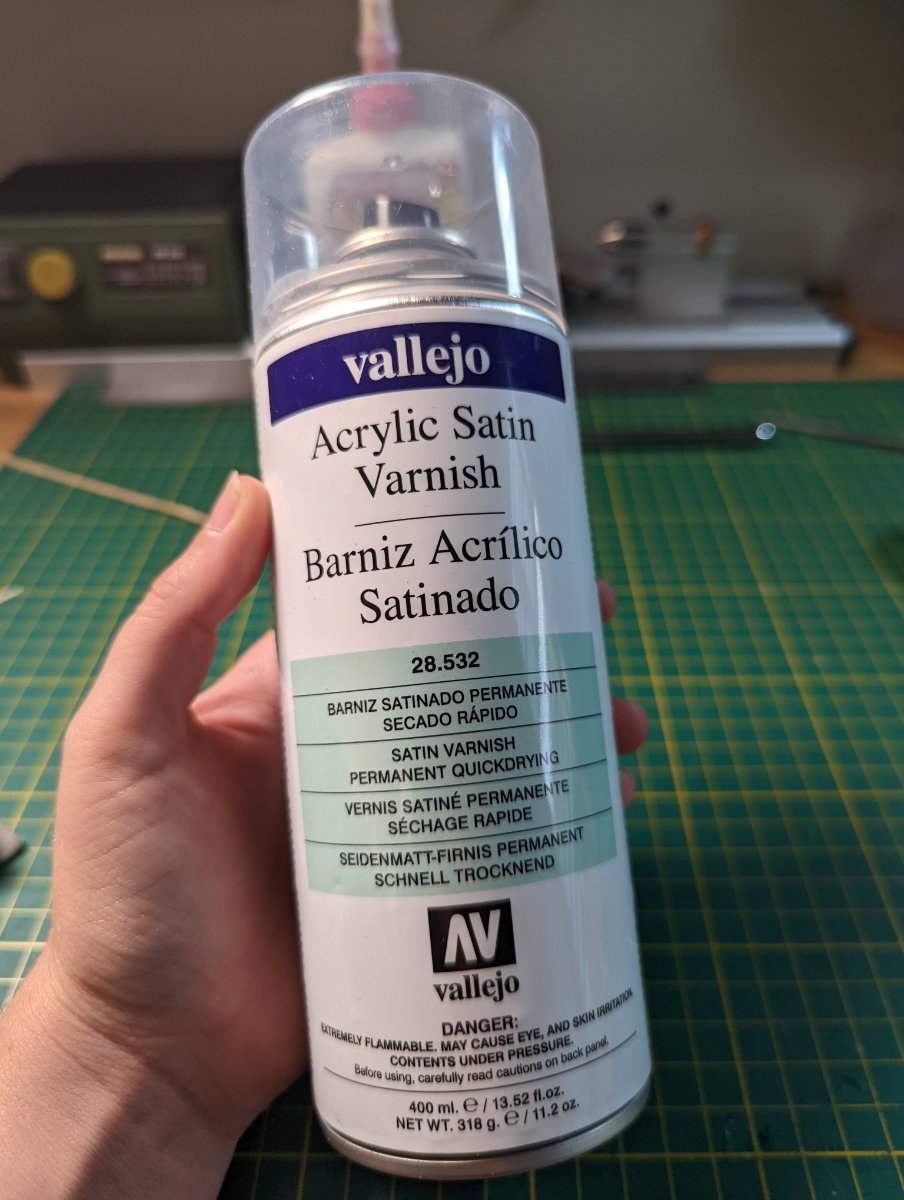
I applied a light coat of Vallejo's satin varnish, and will let it dry.

Some close ups of the final product (only three more decks to plank! Not to mention the hull! 😂)

- Prowler901, Fernando E, Dave_E and 2 others
-
5
-
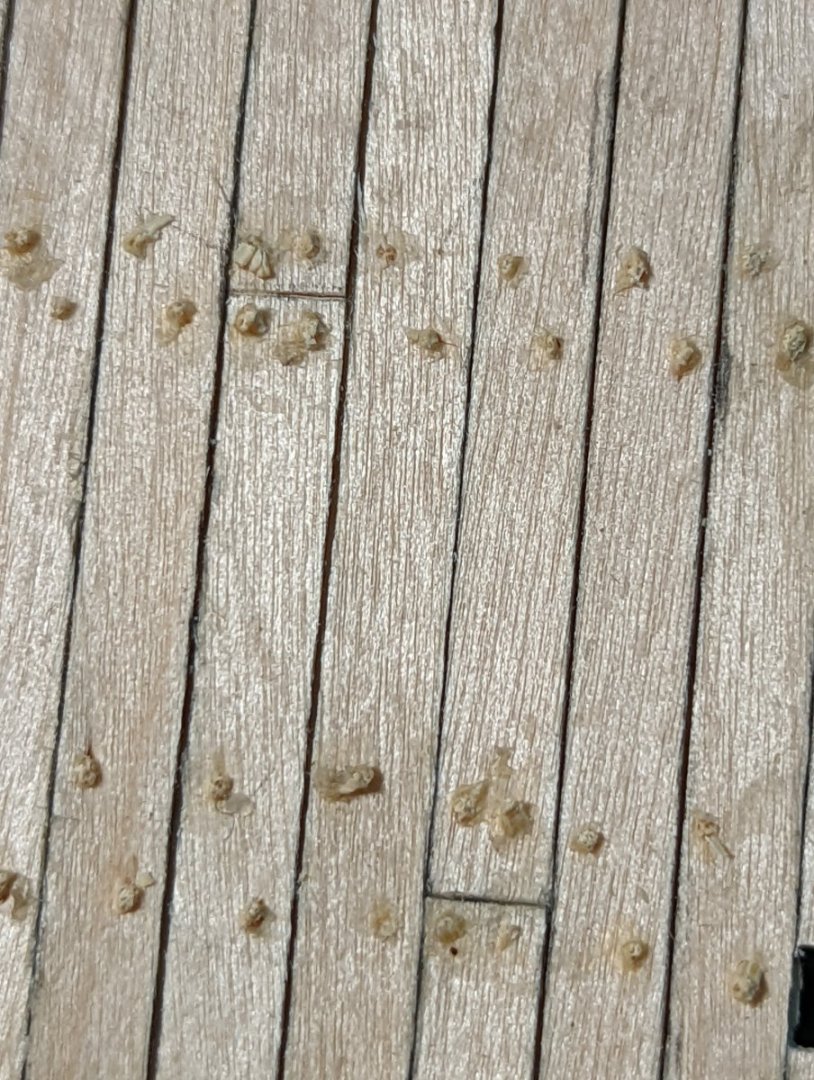
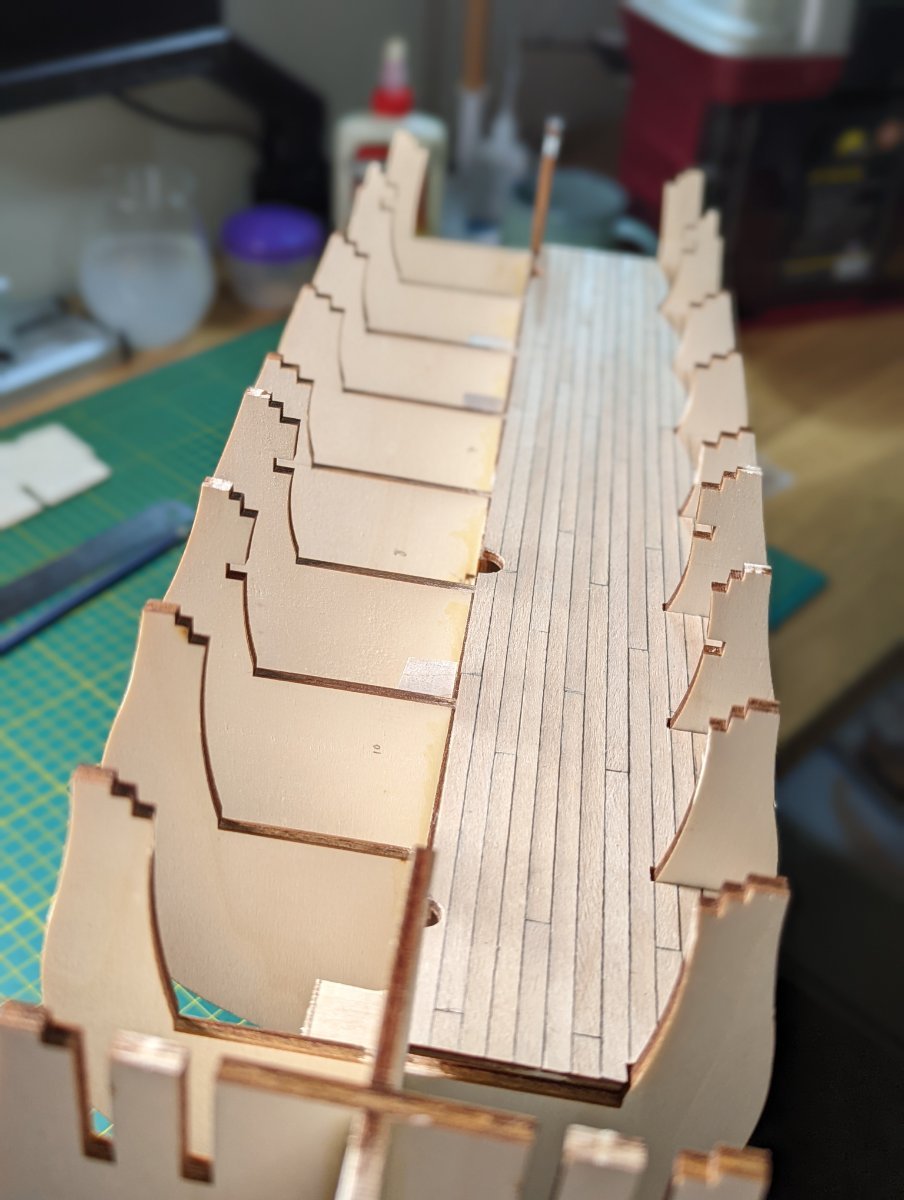
INSTALLING THE LOWER DECK
I finished the final treenails and cutting them down with side snips and safety razor.

I'm pretty chuffed with how they look; nothing too over the top. While they certainly took some patience to install (not to mention my fingers took a beating), I'm happy with the effect and plan to emulate on the top decks.
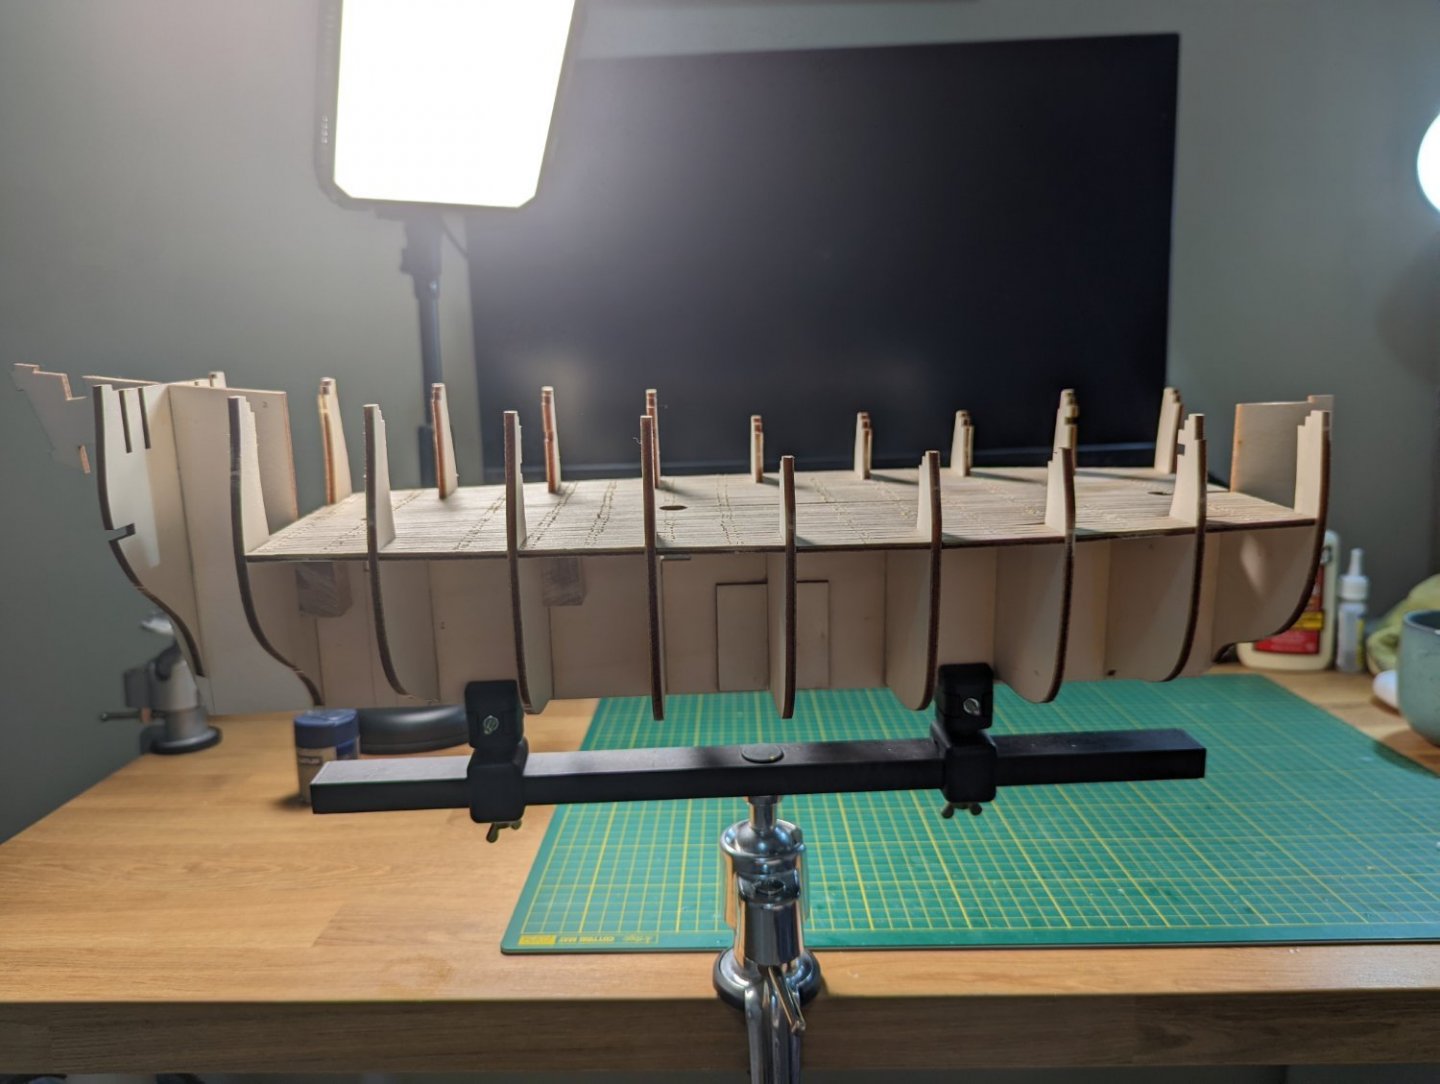
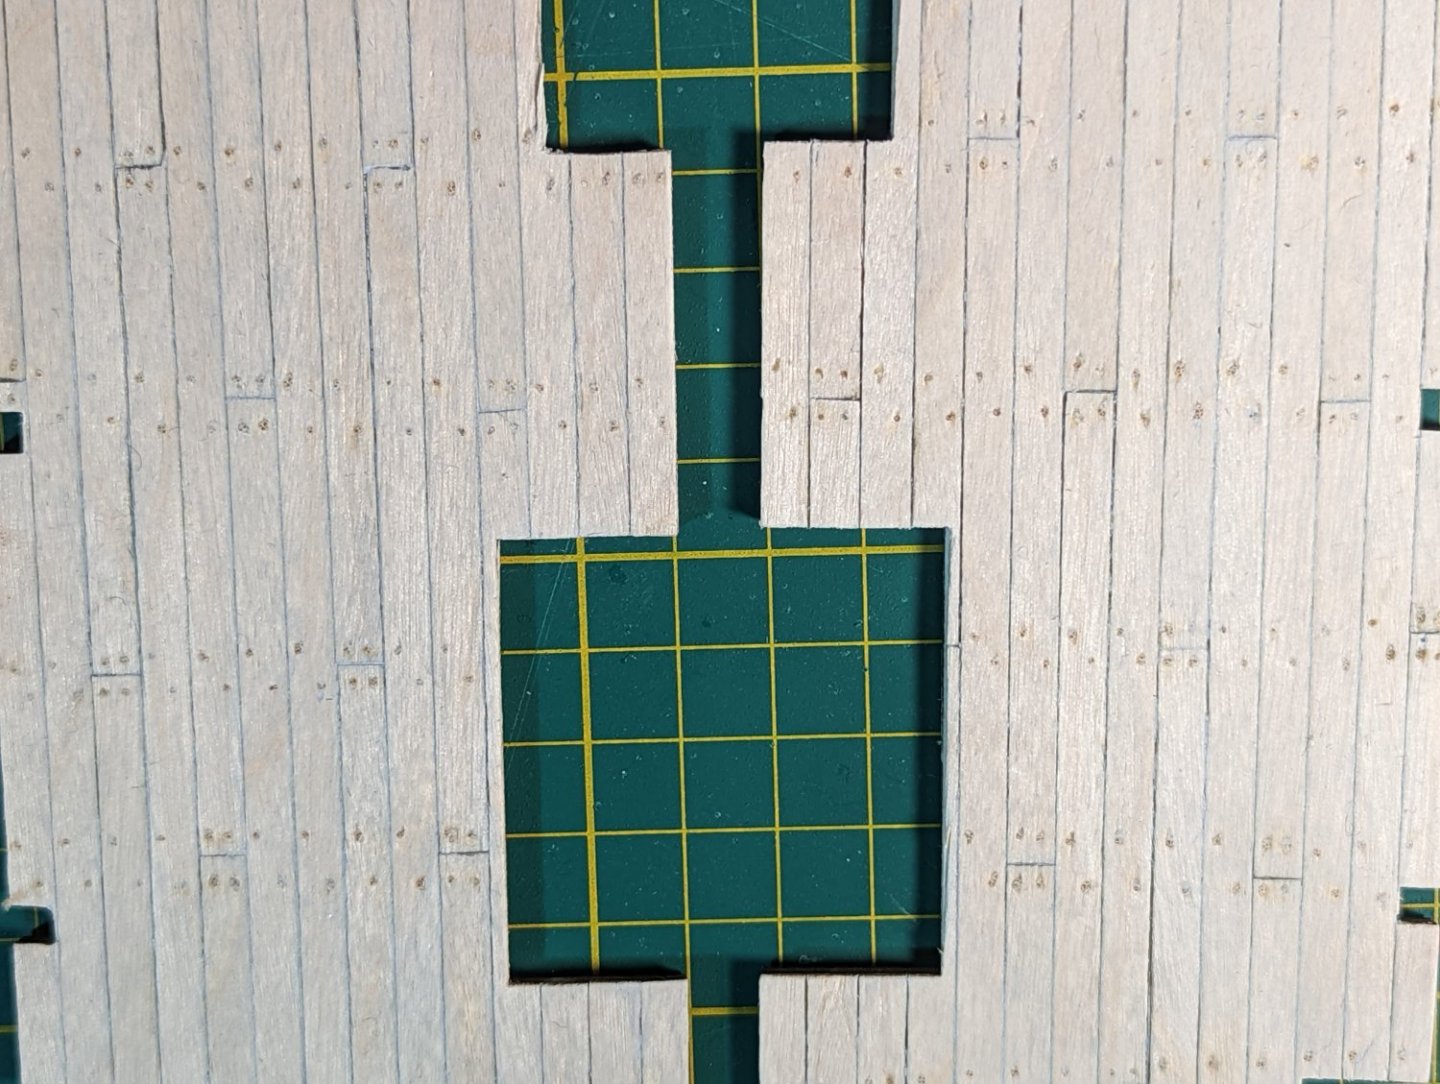
When installing the lower deck, I noticed a visible gap between the two halves. Both false decks are butted squarely against one another; the gap is at the planking layer only.
I think I will replace the centre-most plank on the port side, and bring it over a smidge to better fill this gap, though I welcome suggestions.
Next is installing the top deck beams, and that all essential camber of 2.8 and 3.0mm depending on deck. To do this, I'll be scratch building a filler on top of the kit supplied beam supports.
Thanks for following along,
Kristyn
- Fernando E, Seventynet and Dave_E
-
3
-
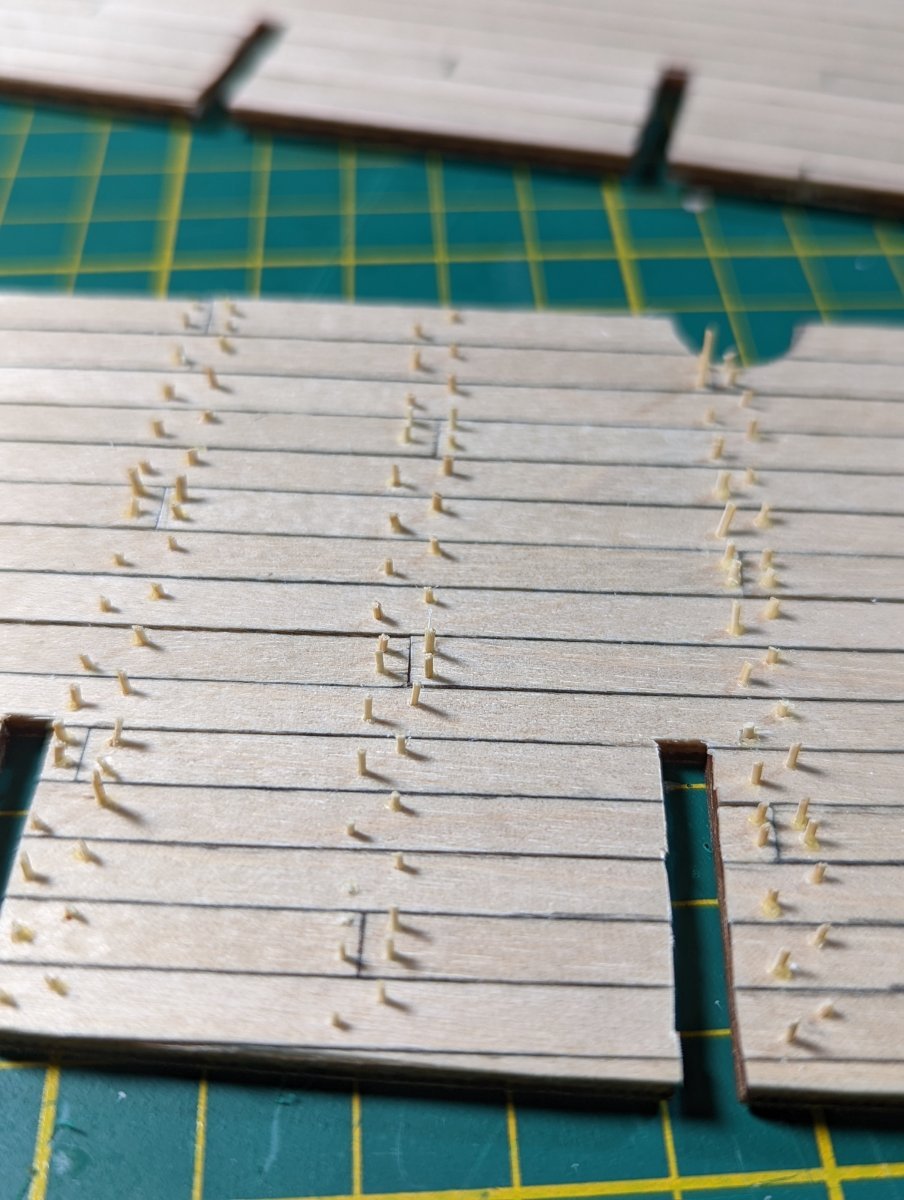
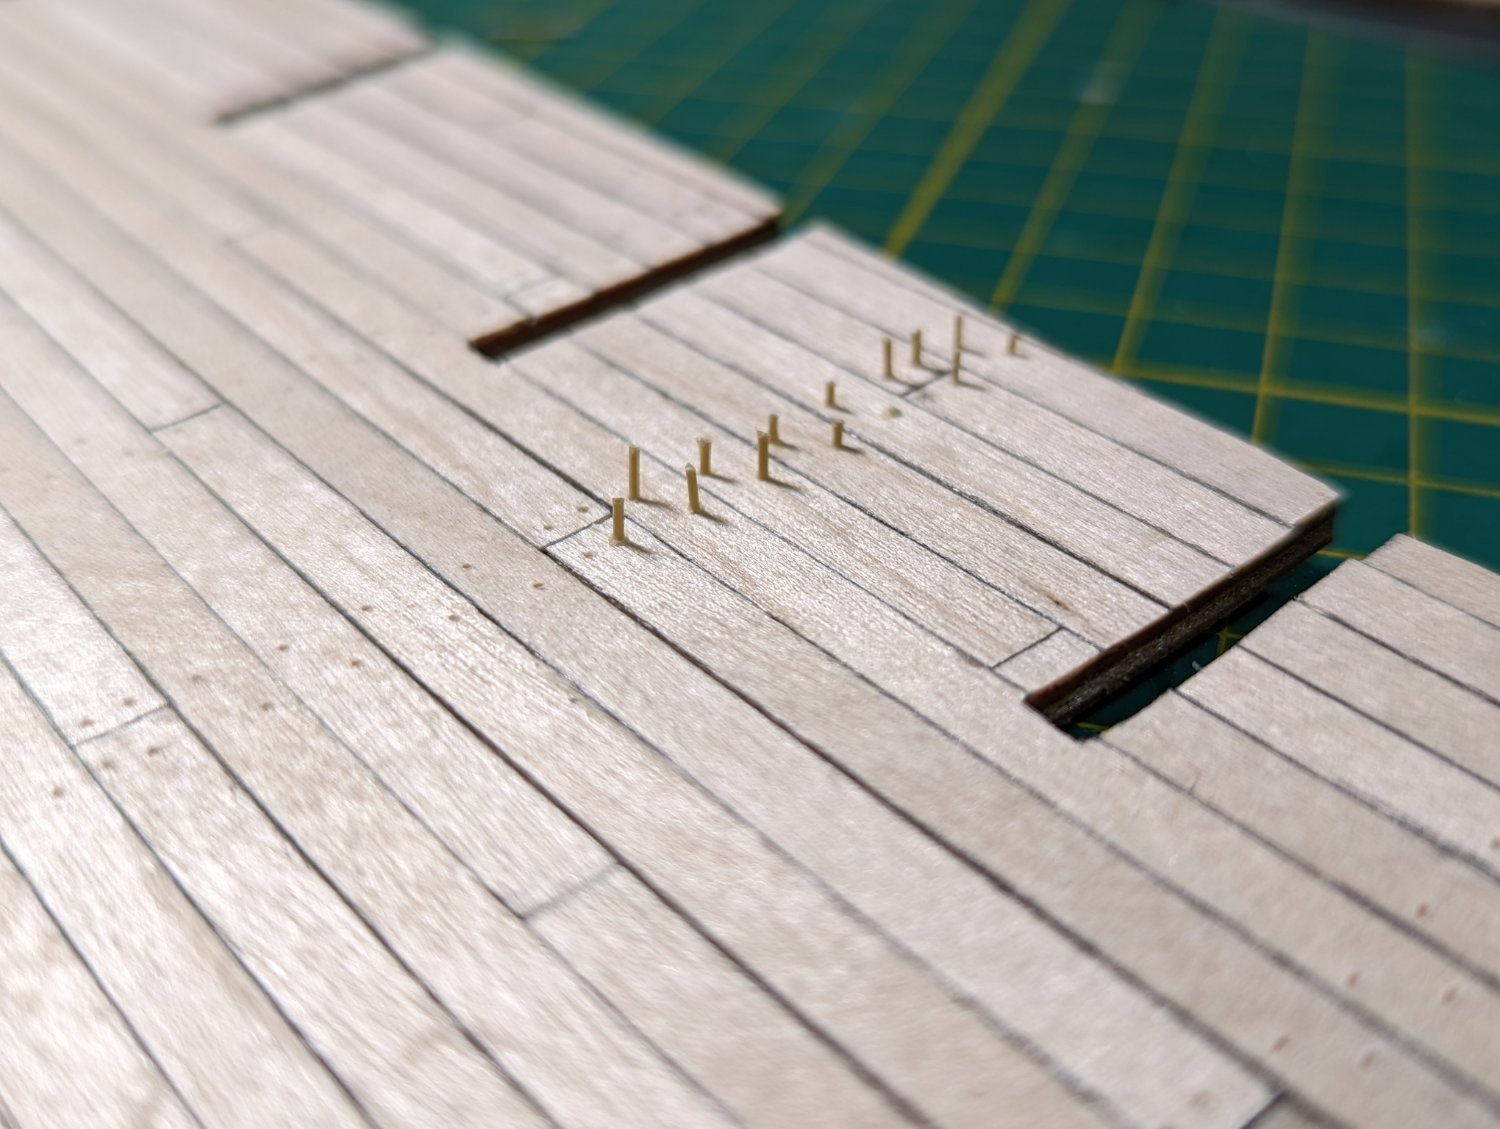
PROGRESSING THE TREENAILS
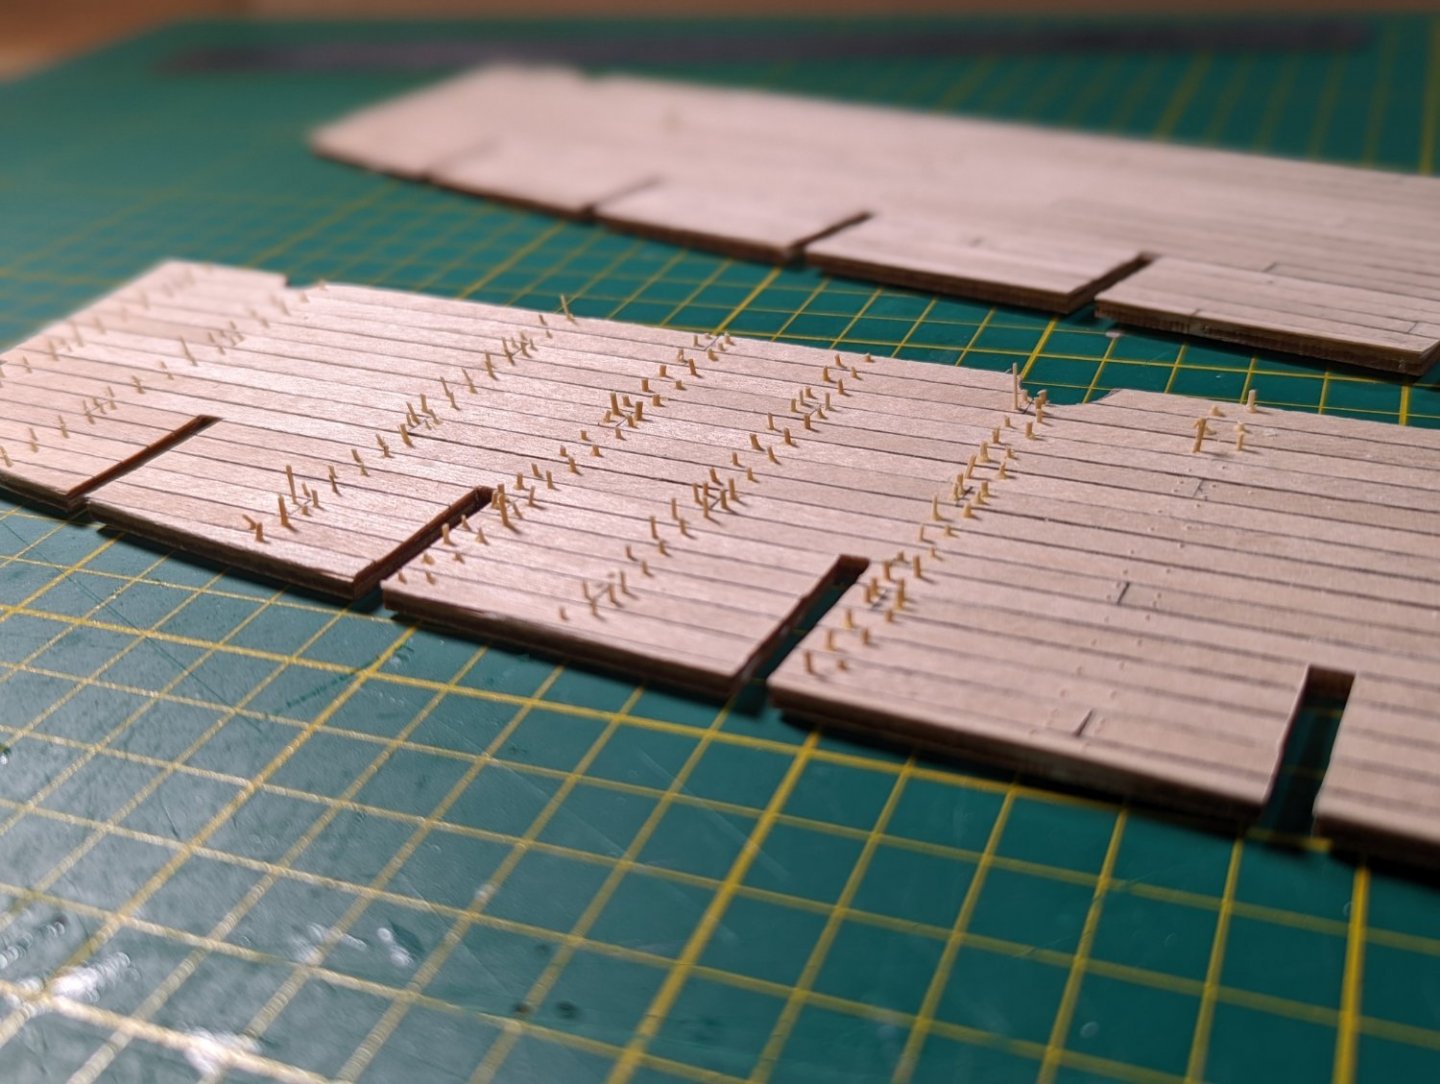
I made some great progress on the treenails, finishing installing all on one side and half on the other.
Once the skewers had cured with wood glue for a good few hours and were sturdy, I then trimmed the excess off with a pair of side cutters as close to the deck as possible.
At this point, I needed to redo a couple that hadn't been installed far enough into the deck and came loose.
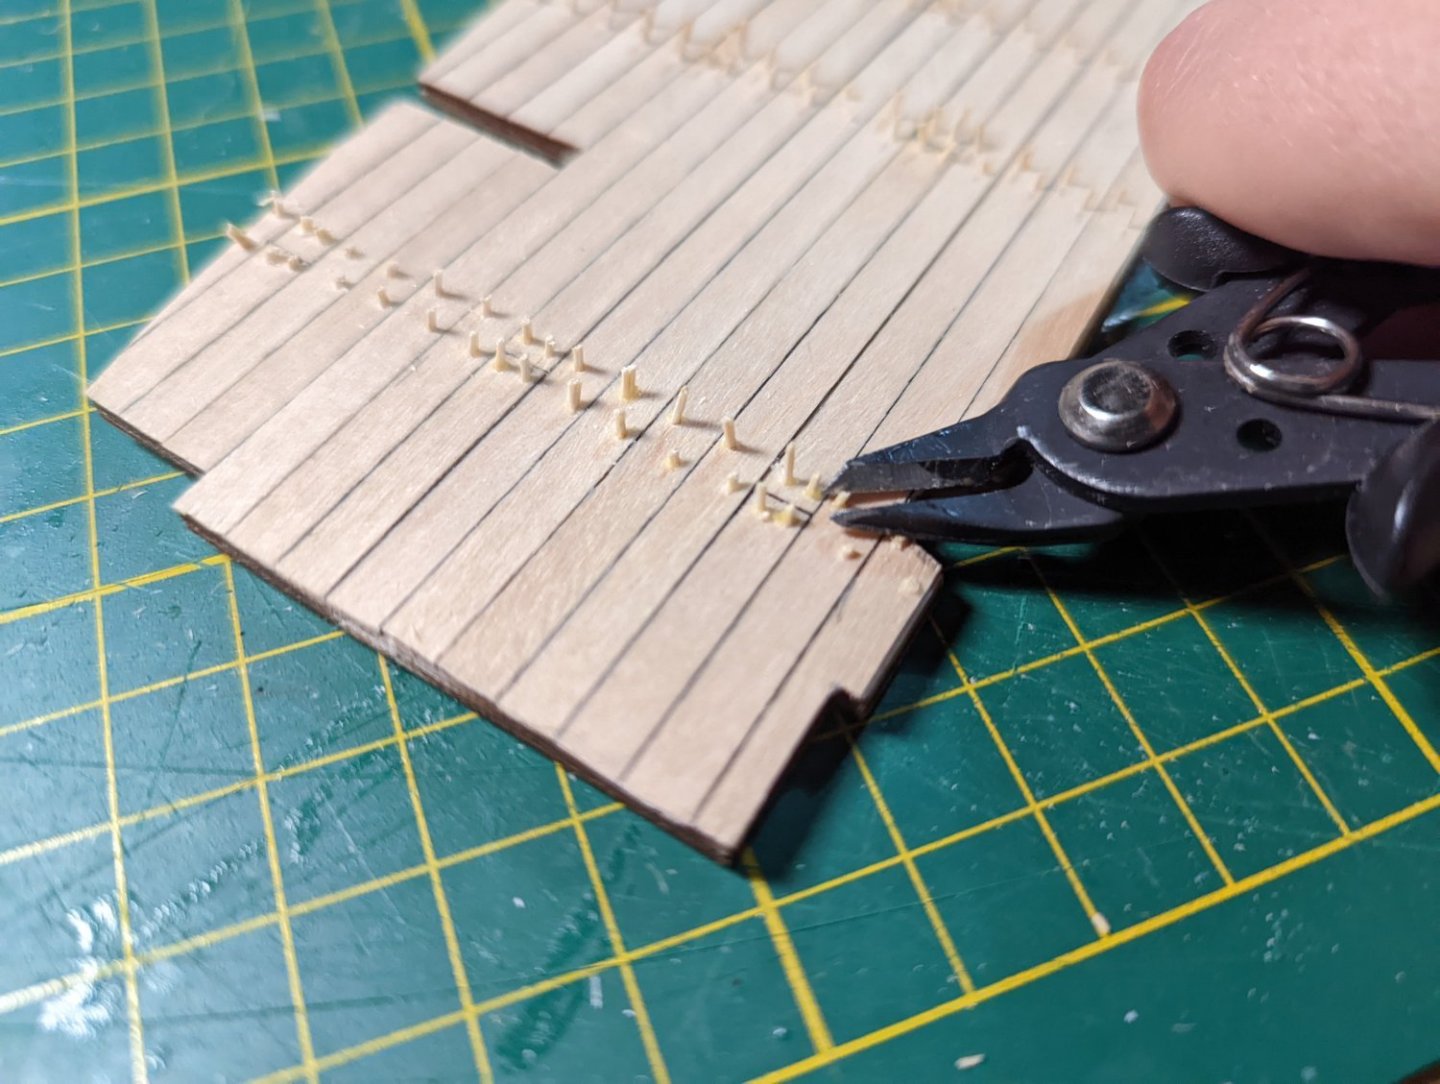
As the final step I started to use a safety razor to cut close to the deck, ensuring each treenail was flush.

I'm pleased with the way these treenails are looking; small and close in colour to the deck enough that they're not too obstrusive.
This photo shows all treenails cut with side cutters (yet to be trimmed with the razor blade):

This final photo shows only some of the treenails cut to the deck with the razor (closest to the camera):

The treenails will be finished tomorrow and the lower deck installed on the keel and bulkheads.
-
STEADY PROGRESS
I am getting faster at making treenails, though it is by its nature a slow and careful job. My DIY drawplate is working well, though the soft brass is starting to deform, and I will be buying a Byrne's one for future models as I don't think it'll last another build.
Photos of the progress so far, where I've been careful to keep each treenail down to 0.5mm.

ANECDOTES
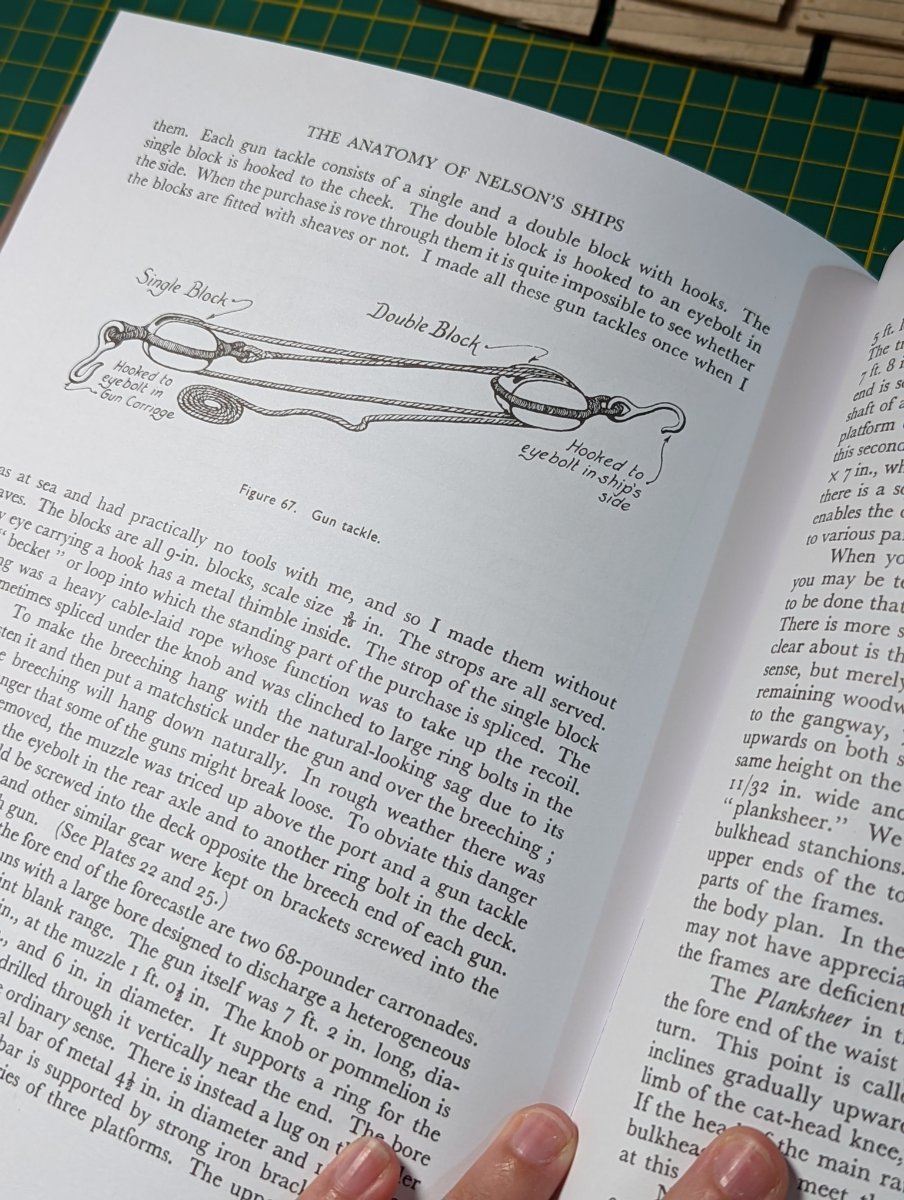
A new book arrived in the mail today. This one, while focused on the very popular HMS Victory, also contains a sheer awe inspiring amount of detailed information, measurements and drawings common to ship modelling and especially to ships of this era.
This book I believe has the foundations to become a seminal cornerstone of my slowly growing maritime history and modelling library.
Just as a courtesy, I'll be taking a break from the ship for the next couple of days as we're going camping with some enthusiastic friends. It's supposed to rain so please wish me luck! 🥲
Thanks for following along!
Kristyn
- Dave_E, Gregory, Fernando E and 1 other
-
4
-
Welcome to MSW, Ken! It's fitting you're building the Bluenose 2, a beautiful Canadian ship. Will follow along with your build log.
I've just finished the Artesania Latina Bluenose 2 and have some good resources (books, practicum, plans) of her if you're interested? DM me if so and I'll share photos and links.
- Ryland Craze, Dave_E, Gabek and 3 others
-
6
-
-
Thanks both so much for your considered thoughts. Much to ponder.
I like the idea of treenails, and think what I'll do is finish them off on the lower deck. This will help me get a good idea about whether they look like I anticipated, before choosing whether to emulate on the top decks.
I'm also going to store away this thinking for my next build (a long way off), which will be at 1:64. At this scale, treenails will be best left off the decks.
-
Amazing build so far 😊 The joinery on the redo looks great! Following this with excitement.
- Seventynet, Keith Black, billocrates and 1 other
-
4
-
-
2 hours ago, allanyed said:
Yours look to be on the smaller size of the range you give which is great [...] Note that contemporary models rarely, if ever, show treenails on the deck
Great insights, Allan -
In your opinion, is it too much (that is, would they look out of proportion?) on the top decks?
I'm playing with the lower deck which, as shipaholic has pointed out, will be barely visible except through grates. This means that I can stop before doing the other decks if needed.
-
1 hour ago, Gregory said:
Give the Syren Rope Rocket a look..
Chuck's stuff is amazing, I had a Syren order arrive this arvo (cannons, blocks, etc.)
I will need to make another order anyway as I'm two cannons shy, so I'll add the ropewalk too. Thanks for the recommendation!
-
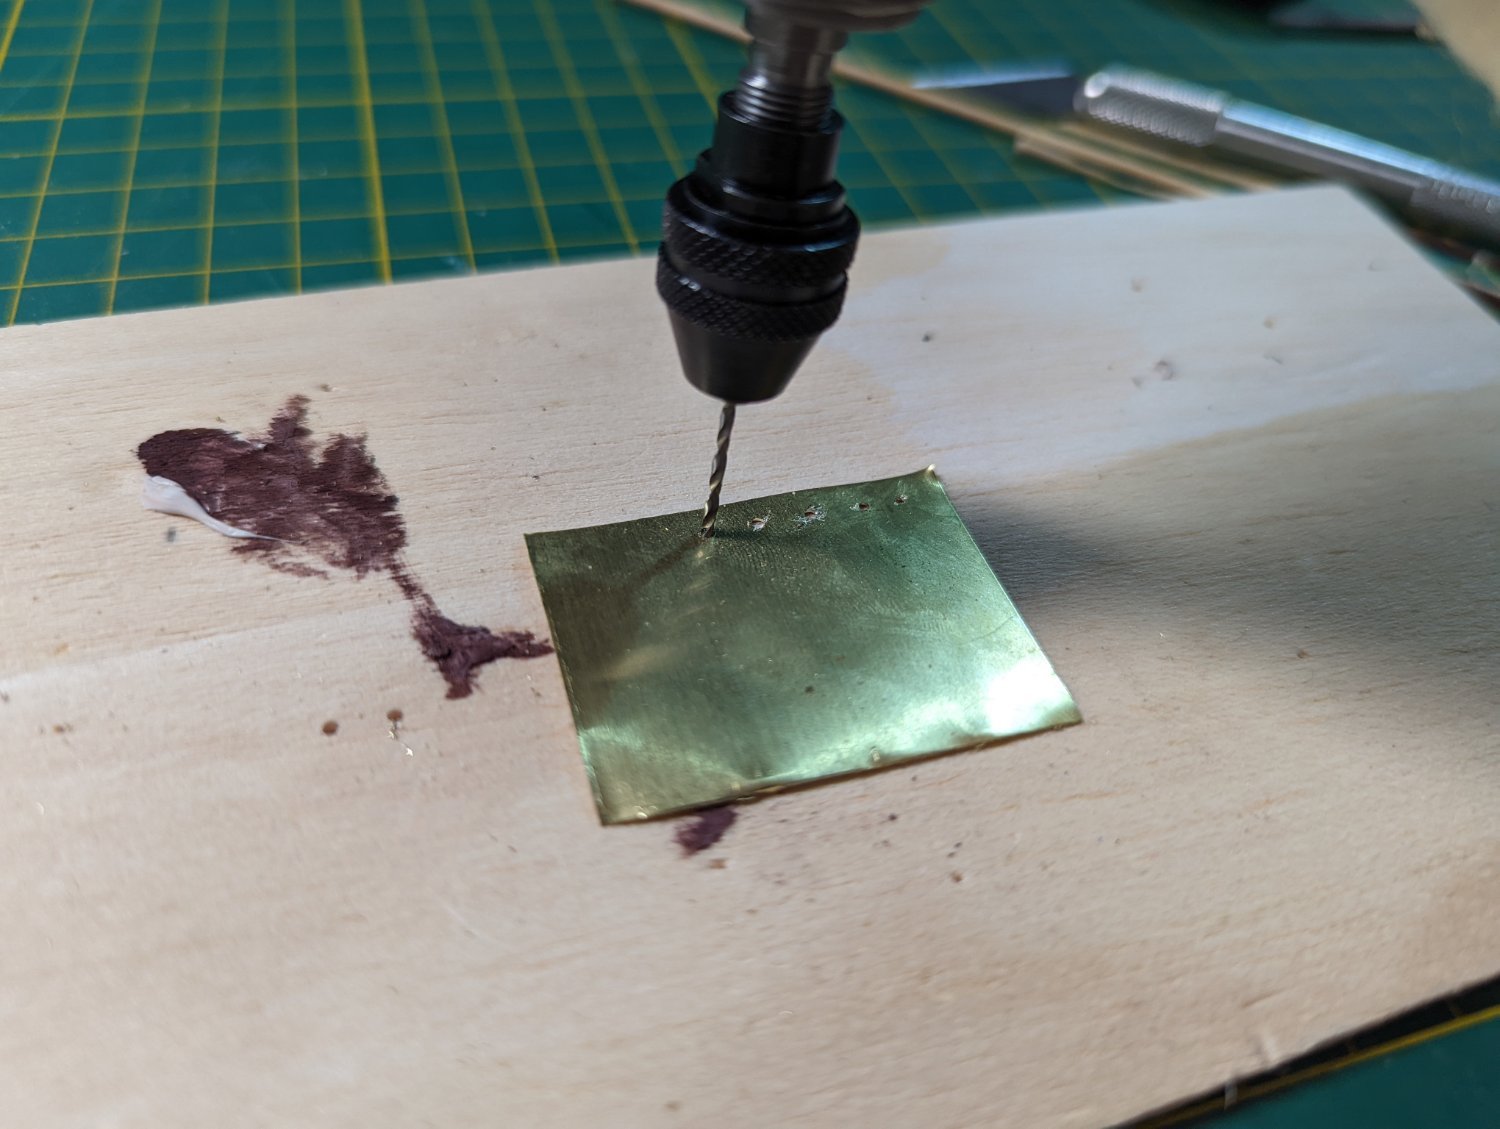
MAKING TREENAILS
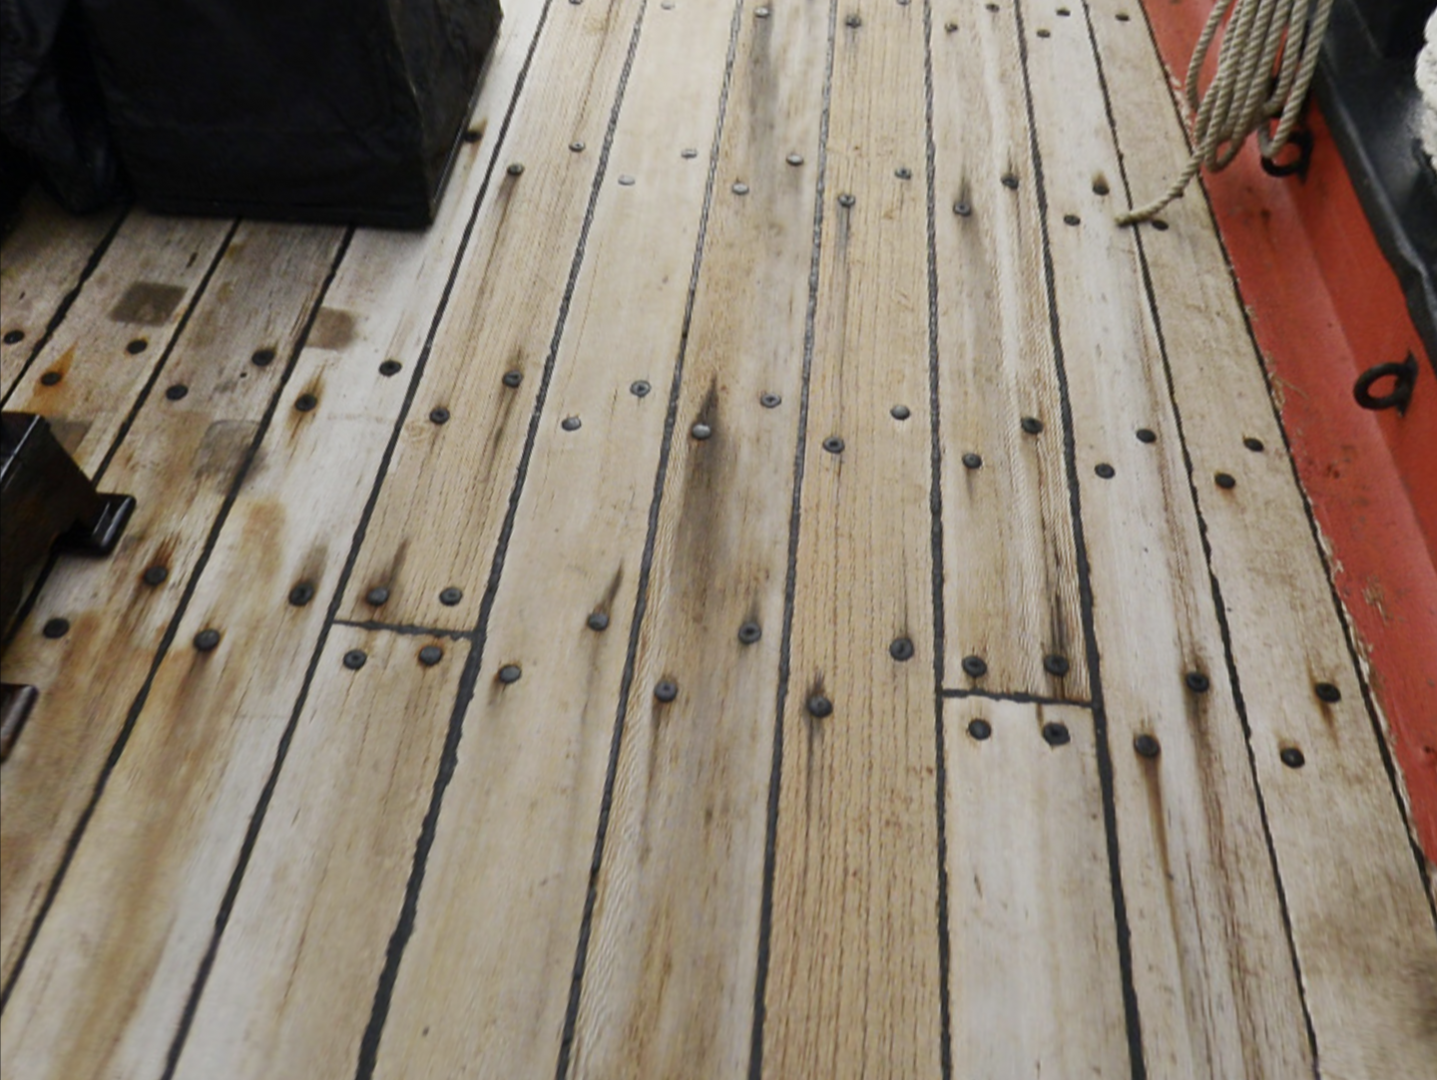
Before starting treenail production I double-checked some measurements. This forum continues to be a great source of information!
From what I read, treenails appear to usually be around 1.1-1.3" in diameter. At 1:54 that's 0.020", or 0.5mm.
I used a ruler to keep a line against which to drill the treenail pattern. And carefully pre-drill the pattern across both decks.
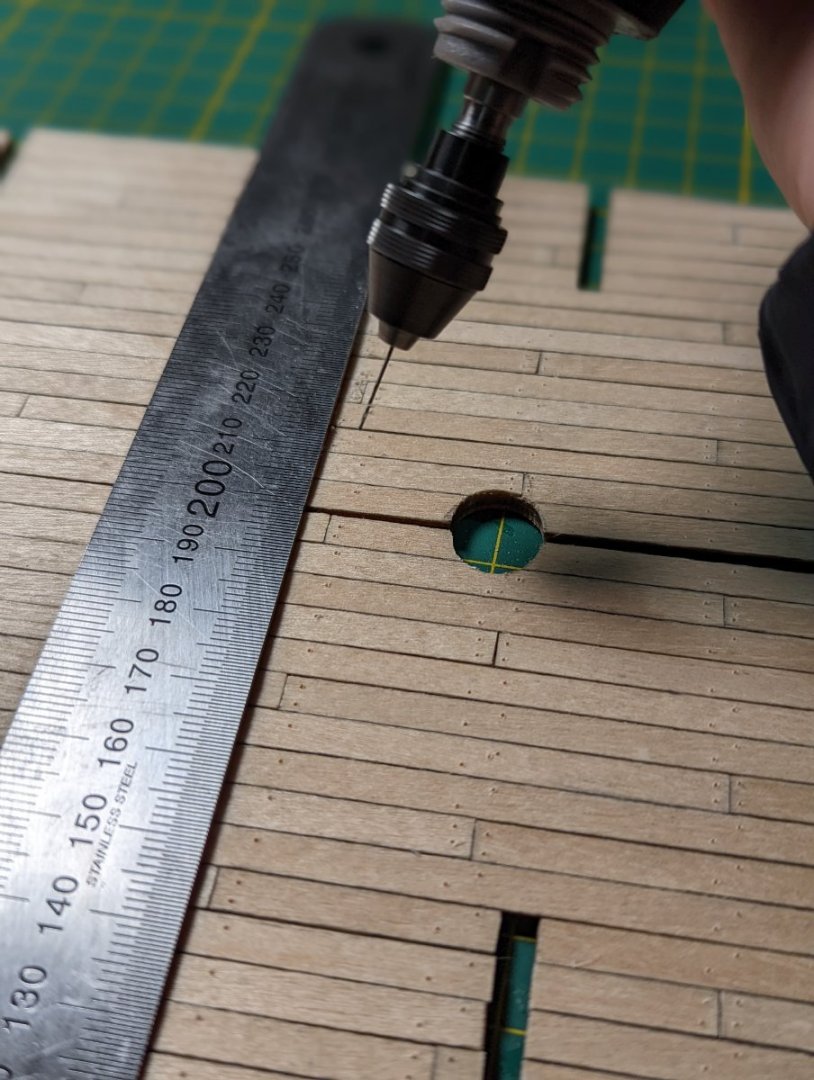
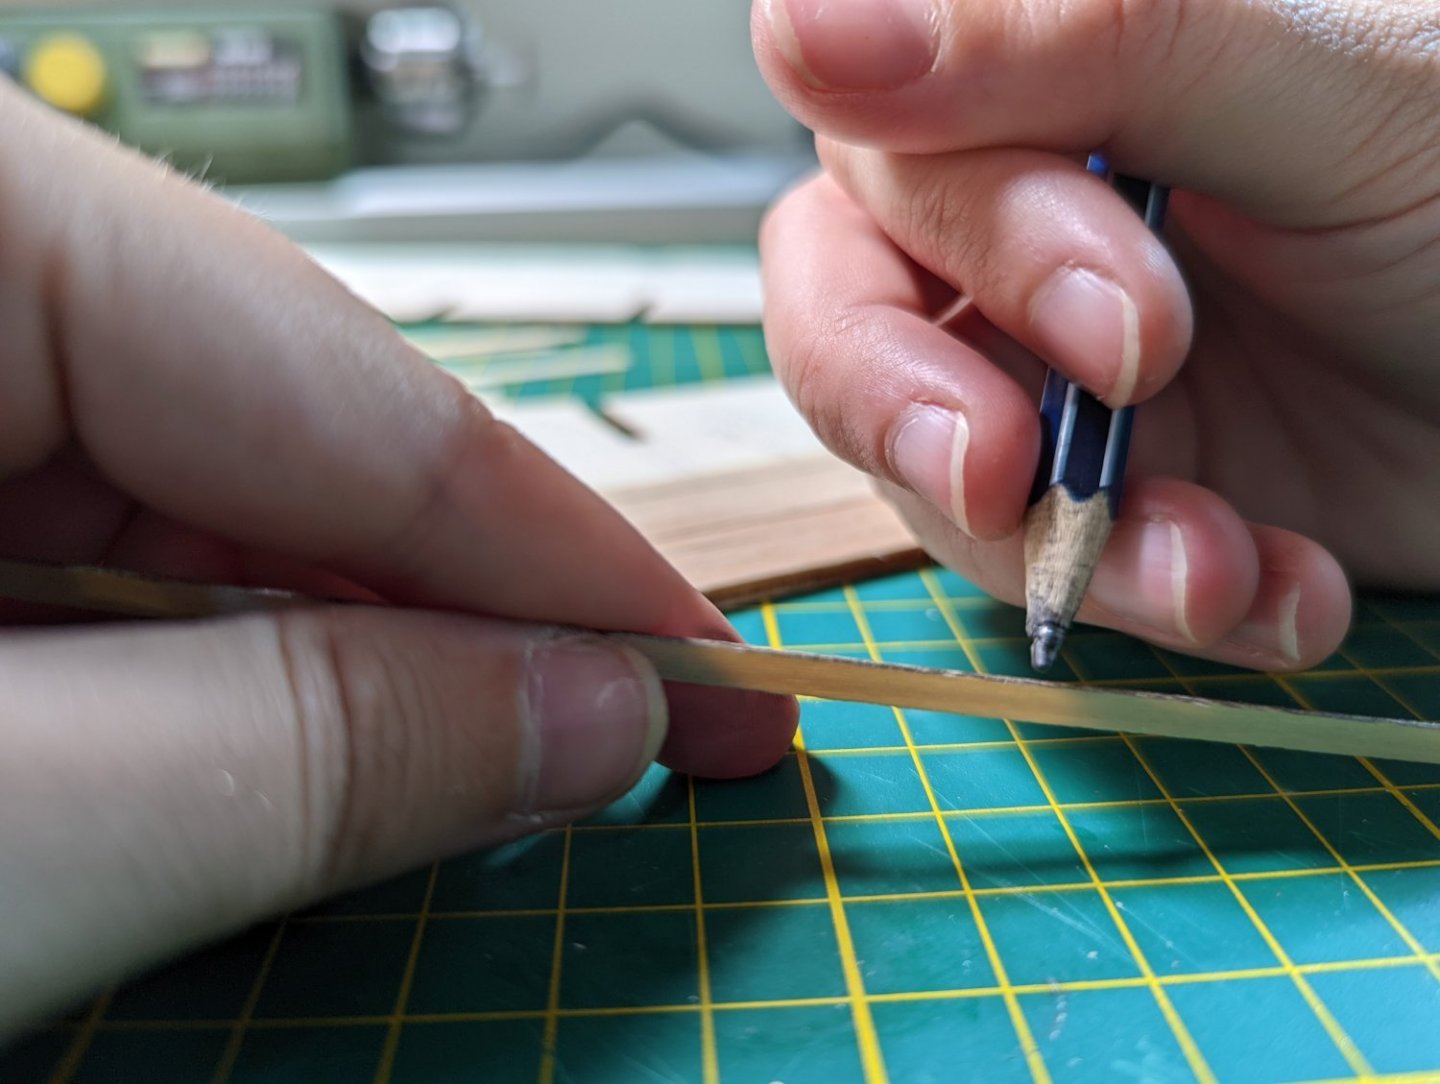
Then I pulled some bamboo skewers I stole from the kitchen through my makeshift drawplate. I found that going through multiple times and at different angles helped shave off excess to downsize.

Finally, I pricked the treenail into some wood glue and pushed them gently with tweezers into each drilled hole, snipping off at the base. I've left these ones to cure and will cut down after a couple days.
- Fernando E, elrojo99, ccoyle and 2 others
-
5
-
9 hours ago, shipaholic said:
I just used clear satin varnish on my deck planks. Deck planks on ships were frequently scrubbed with water and stones (called holy stones) so they would have resembled raw wood.
Ah, this is great - thanks a tonne. I'll ressurect the satin clear varnish spray I've got hidden in the shed.
-
9 hours ago, allanyed said:
KJ
The only other Byrnes tool I have is the thickness sander which I have been super happy with for MANY years now. I have yet to make rope so I have not given any thought to buying his. My wish list does include his table saw once my oldie finally gives it up.
Allan
I have a feeling I'll eventually end up with his whole catalogue! 😂
And now you've got me researching the thickness sander... This hobby is a slippery slope lol.
-
FINISHING PLANKING THE LOWER DECK
Today I finished the starboard side of the deck following the same process as the port side.
Before starting, I made sure to align the start of the plank pattern to the existing section of planking.
This ensured that, when these two halves come together, an even 4 butt pattern is maintained across the whole.
NEXT STEPS - TREENAILS & STAIN
I'll start production of treenails next - give my DIY ugly tool a whirl and see how my patience holds! 😄
I'll also play around with some decking oils / stains. I have both Tung and Orange oil but nothing with a more prominent stain. The replica has very light decks, so Tung oil may work.
Keen to hear what your choice of deck stain has been for this ship?
-
1 hour ago, allanyed said:
Hope yours works out, but if the time comes to buy a draw plate, avoid the cheap ones. The best one many members have found is the Byrnes plate which goes down to 0.016" (0.86" at your scale for the Endeavour.)
Allan
Noted with thanks, Allan -
Jim Byrne's tools are great, and I've read amazing things about his table saw on this forum. It's a wishlist item. I'm tempted to bite the bullet and get the drawplate alongside this machine, given it'll take a bit to get to Aus anyway.
What are your opinions of the Byrnes ropewalk? I have a cheapy Model Shipways model that (like my ugly drawplate) will get the job done ... laboriously
-
I experimented with some treenail types on some scrap wood, and after some thought decided to go for the bamboo skewer approach.
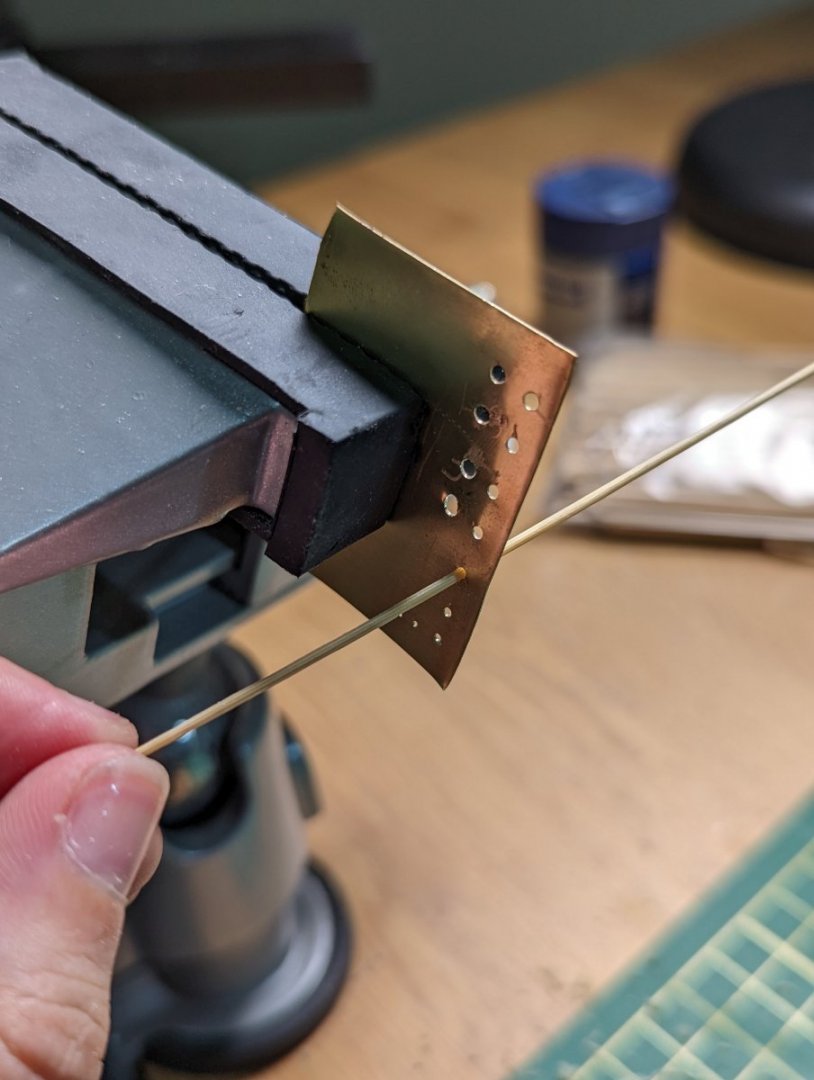
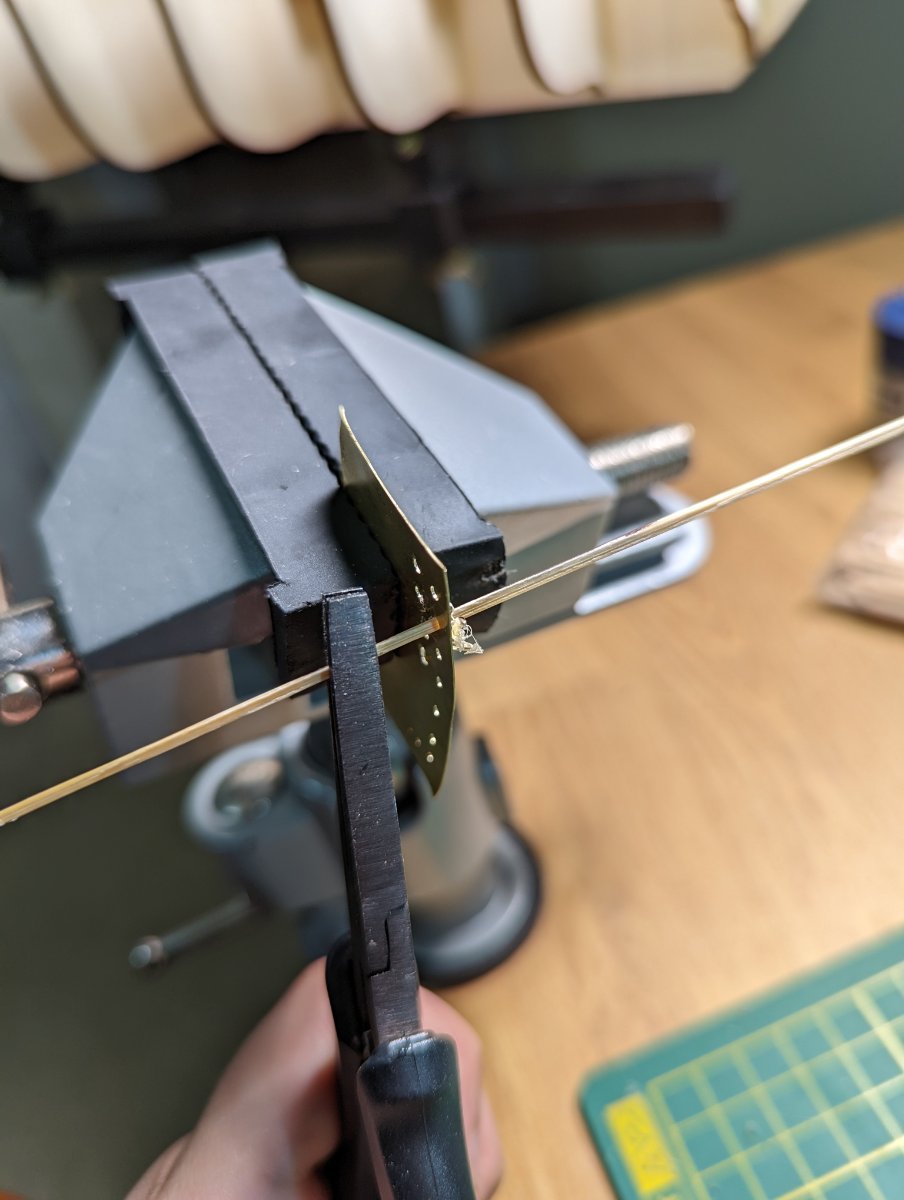
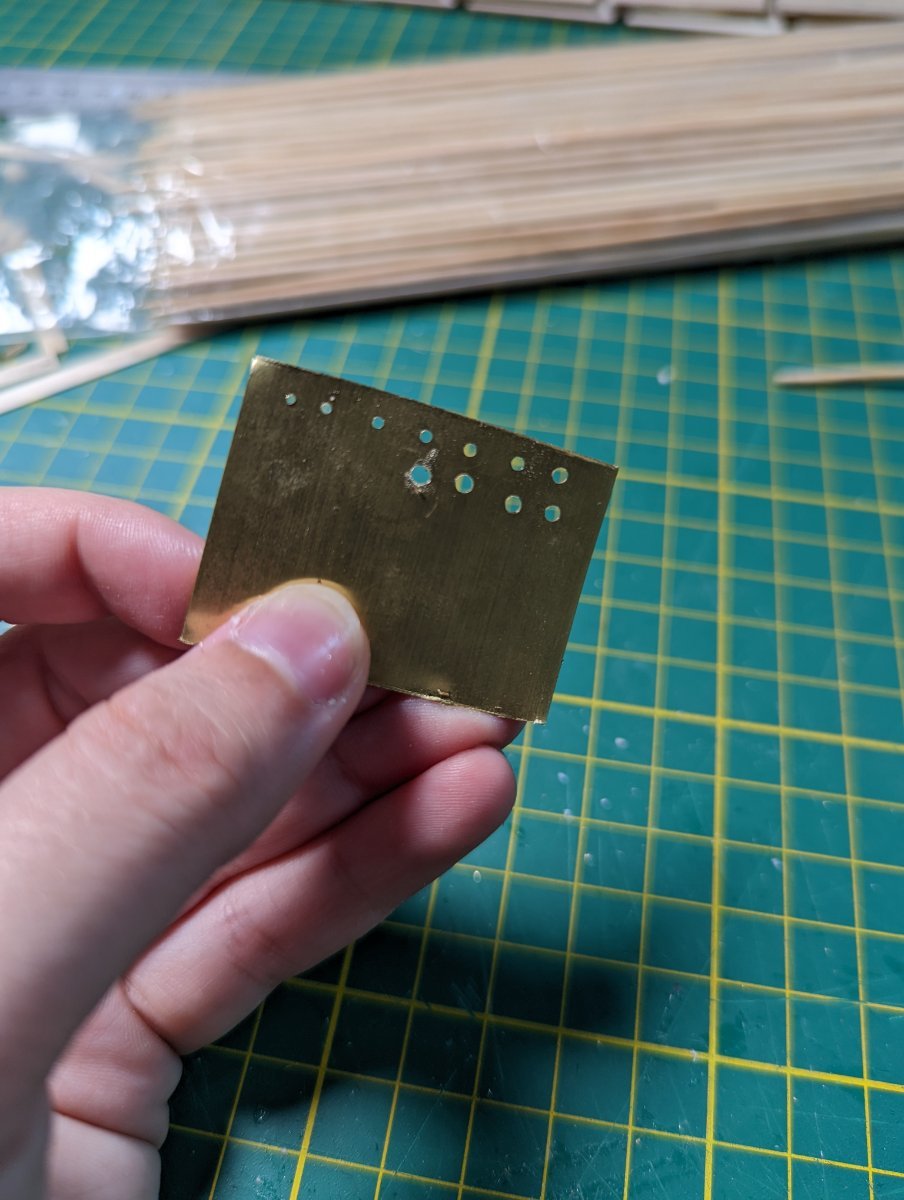
MAKING A DRAWPLATE
Not having a drawplate, I quickly manufactured my own (ugly but utilitarian) tool. It should do the trick and if not I'll buy a ready-made drawplate.

To do so I cut a square of brass plate. I then drilled progressively larger holes into this plate, which I'll draw bamboo skewers through to even up thickness.

Making treenails will be a slow and methodical process over the next however long.
-
9 hours ago, shipaholic said:
For the tree nails I used a sharp pencil. Just put it in place and twist a couple of times. The lower deck is a good place to practice your planking skills because not much of it will be seen
Thanks, shipaholic - I'll have a stab (pun intended) tonight.
-
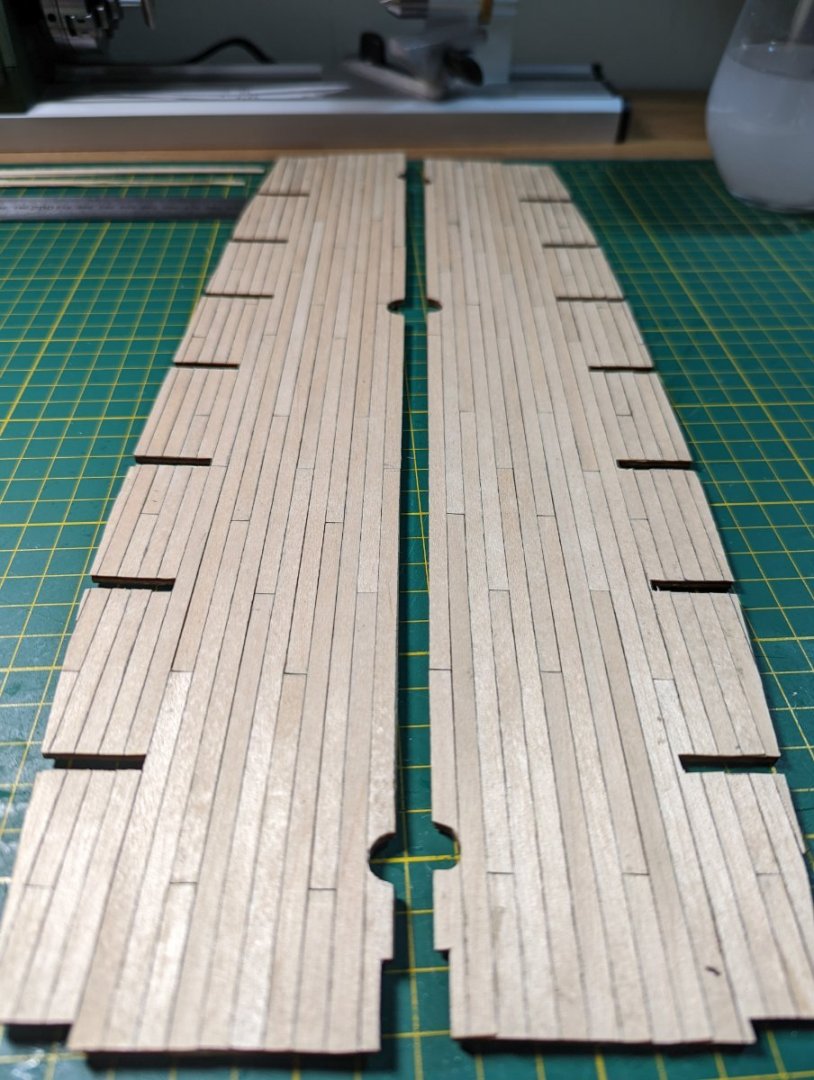
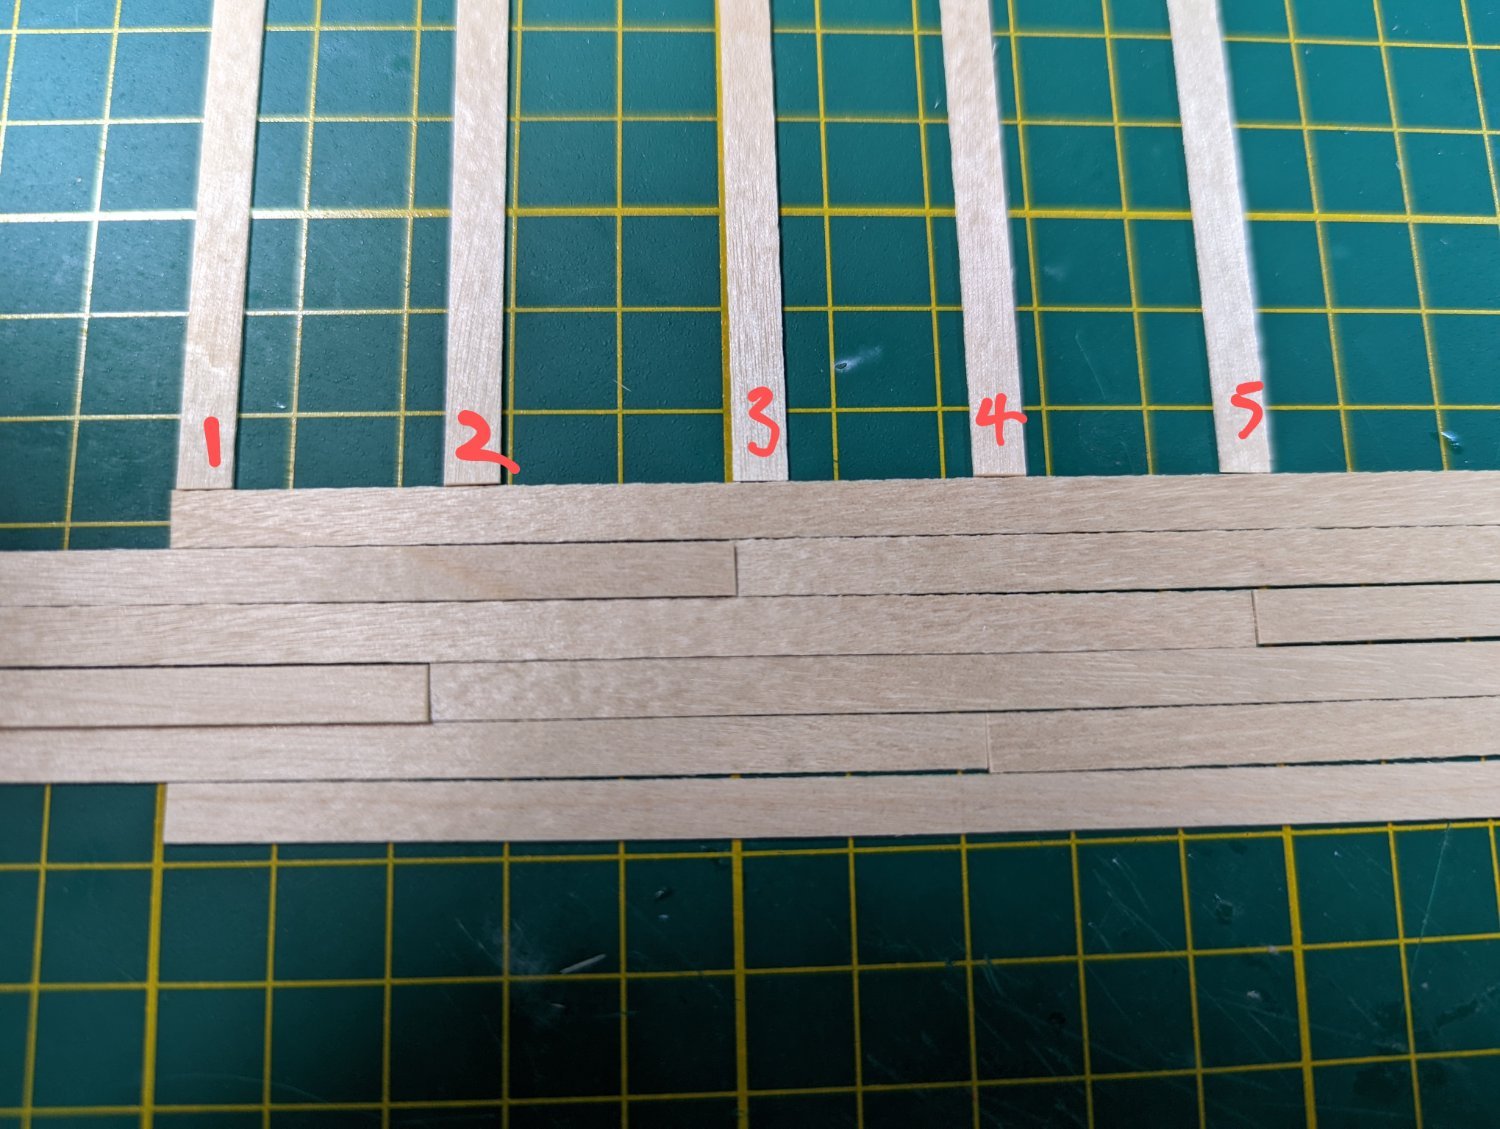
PLANKING THE LOWER DECK
I visited the Endeavour's virtual tour to check the decks. I captured the 4 butt shift and treenail pattern for reference, and counted how many planks there were laid across the width of the ship at its widest point (totalling 31).
The lower deck is widest at 160mm, so 5mm per plank is close enough for me to totalling 31, with some wriggle room.
I opted to cut each length to 150mm; I'm not sure (and despite searching could not find) what the Endeavour's specific deck plank length was. 26' is usual, which translates at 1:54 to 146mm. Given the OcCre kit is probably closer to 1:51, I rounded up to 150mm length.
I followed the 4 butt lay, adopting the 1-3-5-2-4 pattern. To do this, I broke the length of the plank into 5 sections (each 25mm long), testing before gluing to the false deck.

I simulated caulking by running a 3B pencil over each edge of each board, including the ends.
I then brushed on Titebond to the false deck and laid each plank, starting from the centre.
I've completed the port side of the lower deck for now. I still need to complete the starboard deck and then develop a method for simulating the treenails.

- allanyed, Gregory, Prowler901 and 1 other
-
4
-
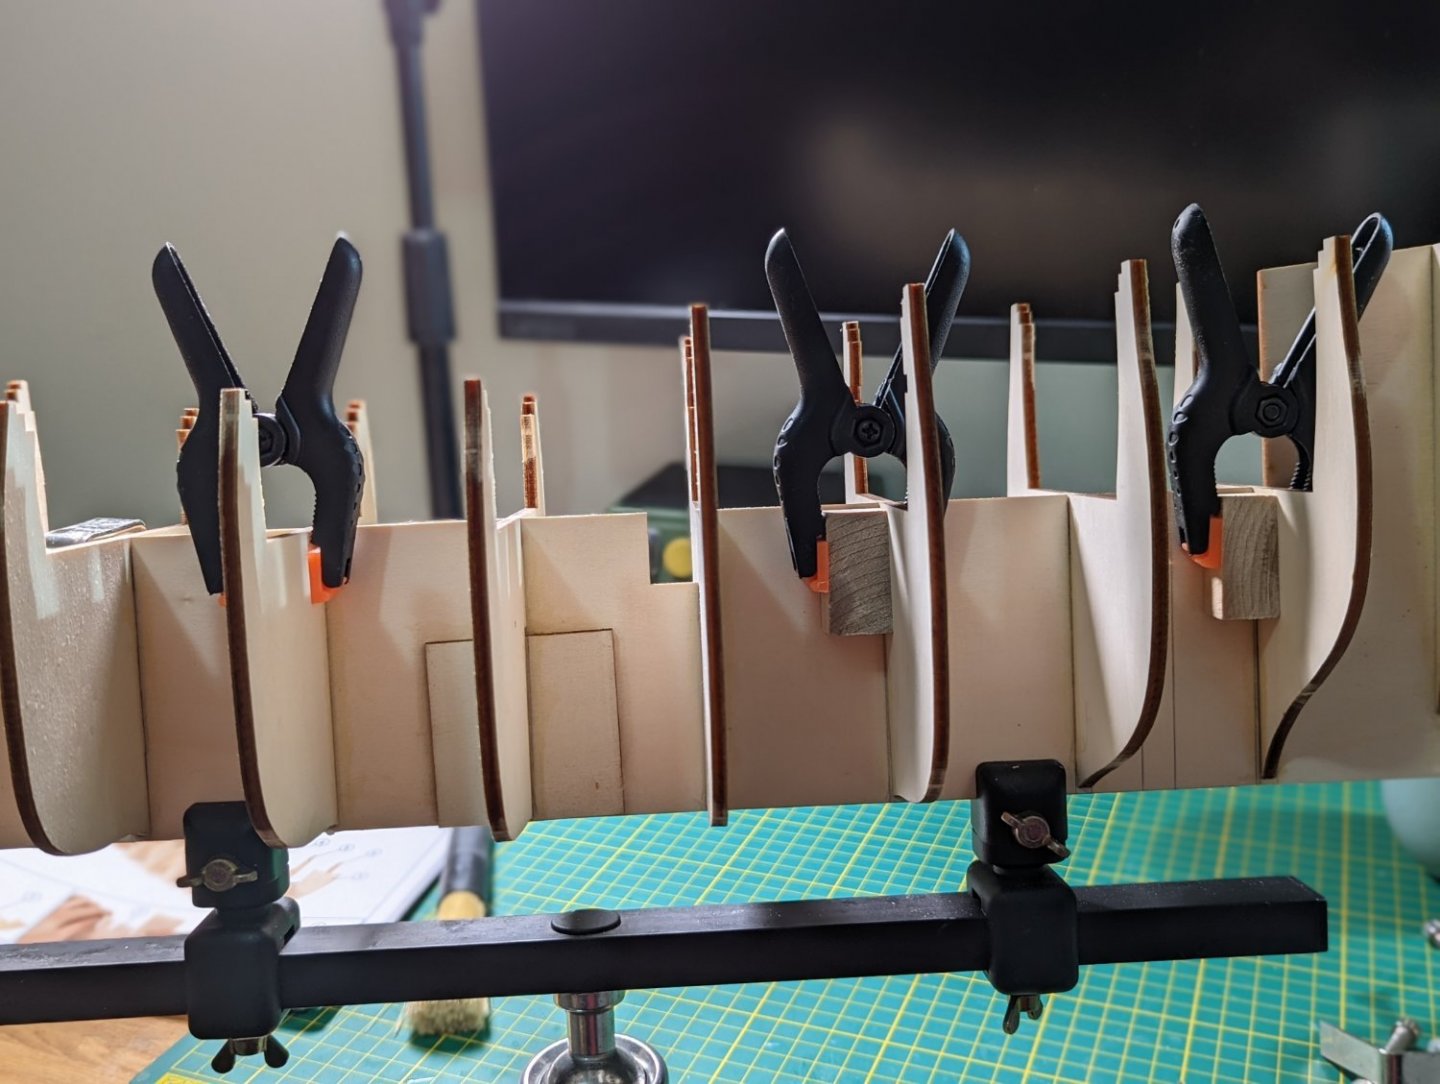
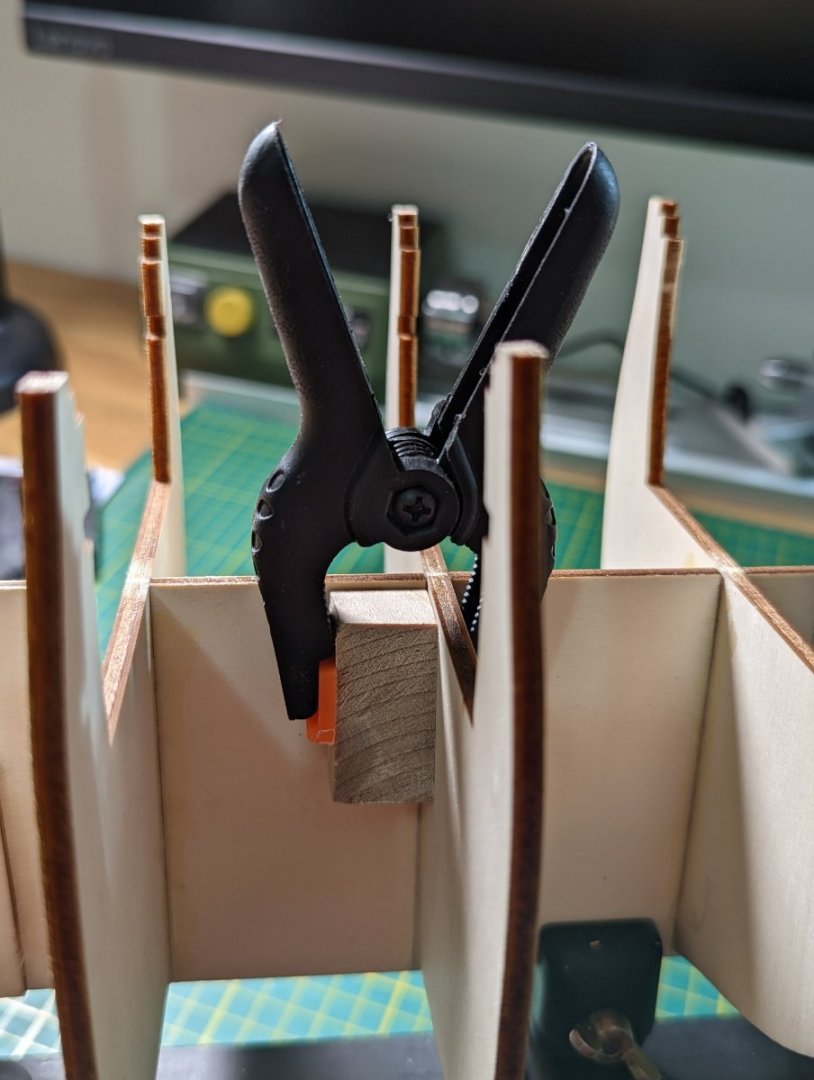
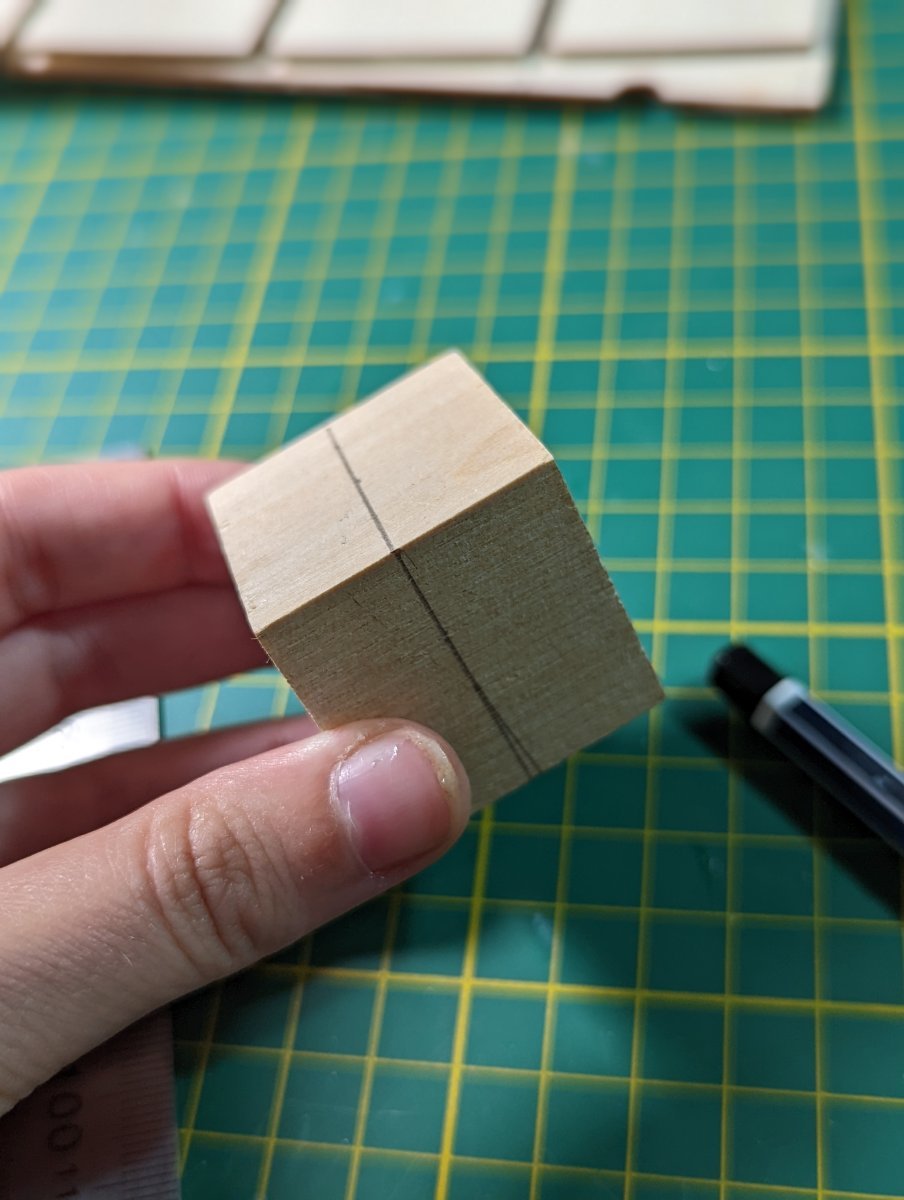
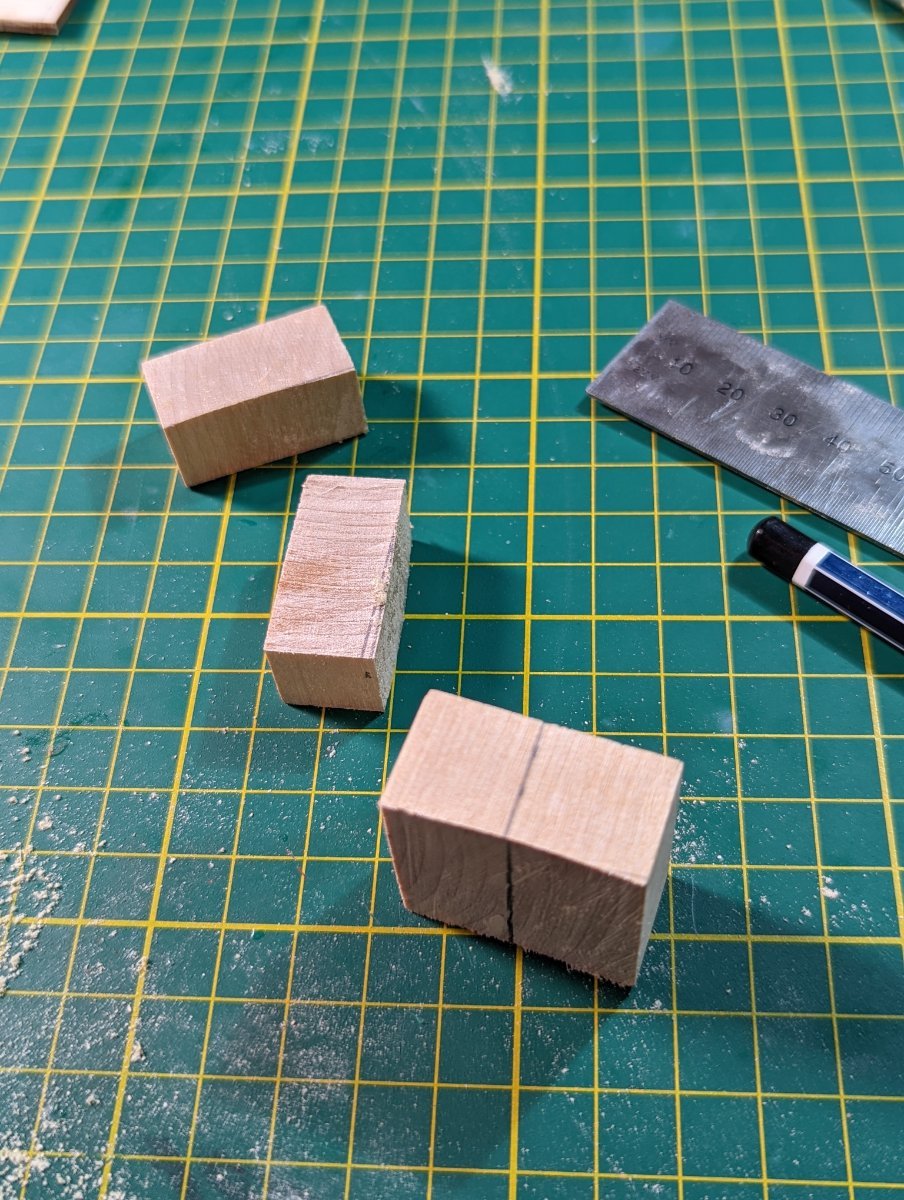
ADDING BLOCKS TO THE BULKHEADS
I added some wooden squared blocks to help add rigidity and ensure the keel and bulkheads remain aligned.
To do so, I used some spare wooden 30mm cubes I had in the drawer, and divided them up into parts.
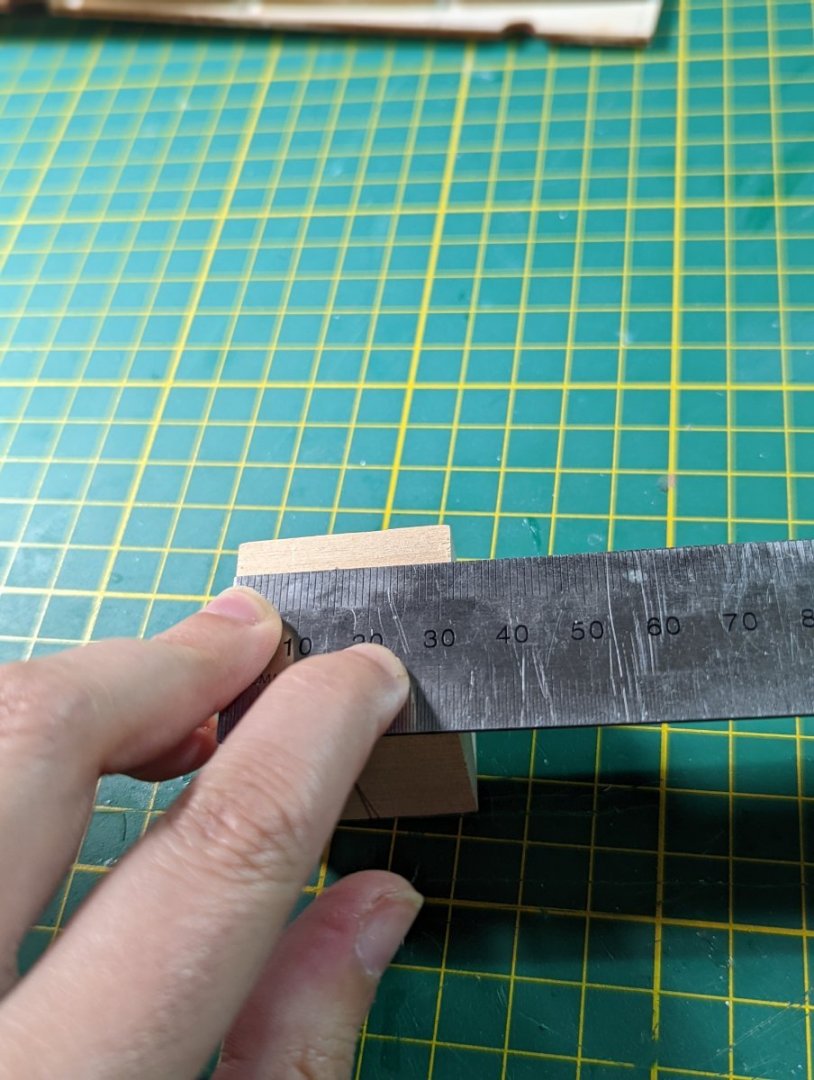
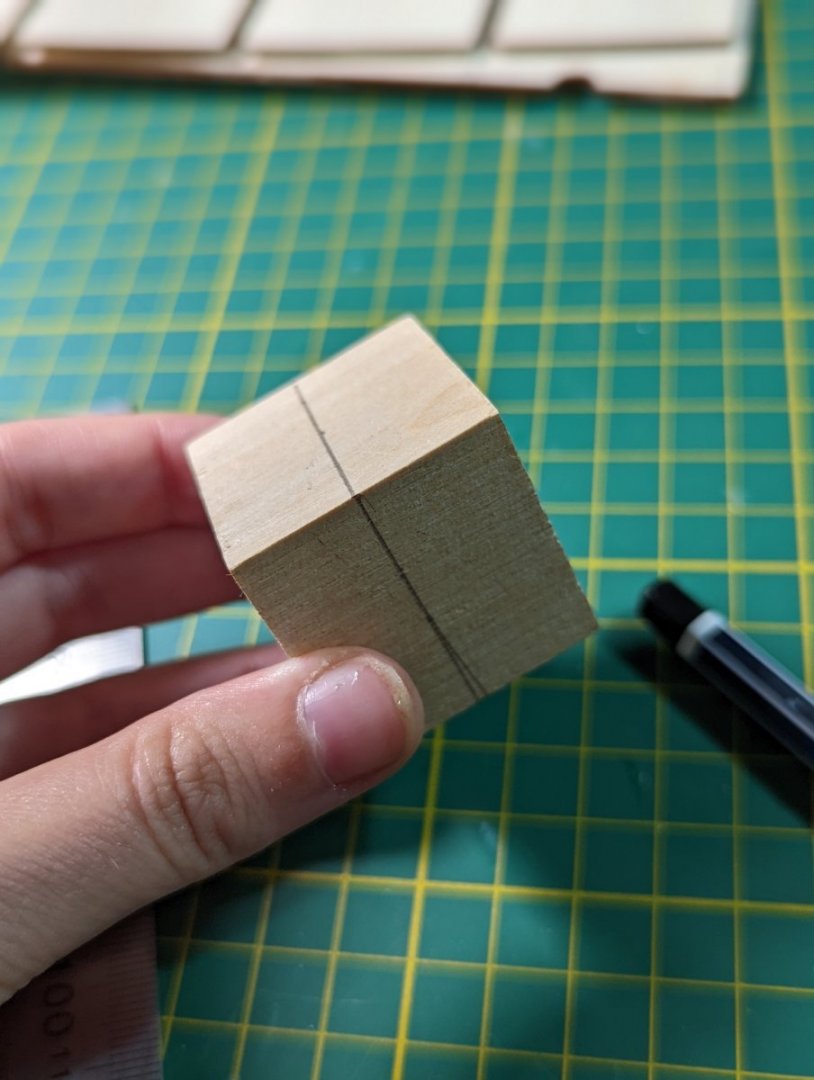
I used my coping saw to cut them to size. I am preparing my argument to the Admiral for the need of a good table and scroll saw.

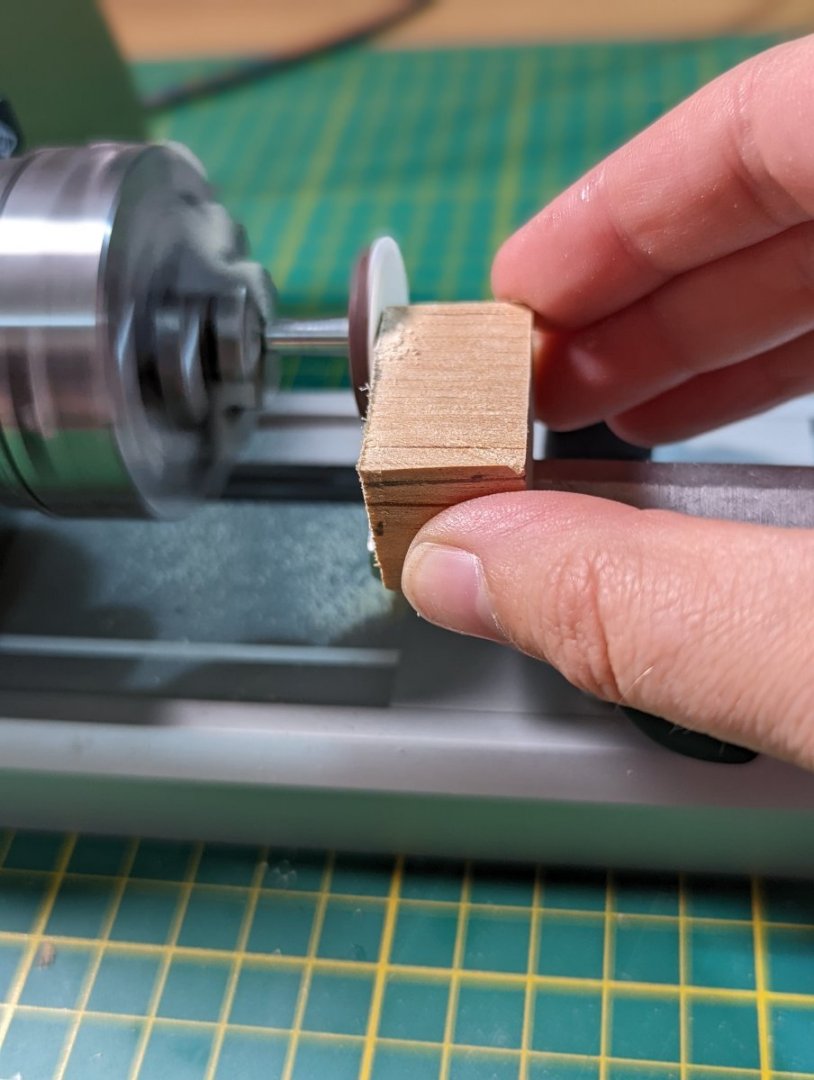
I sanded down the pieces using my mini lathe, modified to act as a disc sander. I wasn't too particular with this as these blocks will be covered.

Then I clamped them at regular intervals on both starboard and port sides and left them to sit overnight.
- ccoyle, Fernando E and elrojo99
-
3
-
Thanks, Allan -
I've just quickly Googled and Endeavour's gross tonnage is reported at 397.
Given this is closer to Shipbuilder's Repository 392 tonnes, I'm going to use these figures.
I could argue either set of figures is accurate. The 1719 figures may still have been in place when the Earl of Pembroke was launched in 1764. Or they could have already transitioned to the 1788 figures. I imagine it may have been somewhere in between.


HM Bark Endeavour by KJackson - OcCre - 1:54
in - Kit build logs for subjects built from 1751 - 1800
Posted
Thanks both for your kind words - especially coming from such experienced modellers I've taken inspiration from! ☺️