


DocRob
-
Posts
1,297 -
Joined
-
Last visited
Content Type
Profiles
Forums
Gallery
Events
Everything posted by DocRob
-
 Thank you Ken, I like it too, even though I don´t like the product and never smoked one, even in my times as a smoker. It´s a classic, like you said, simple, effective, catchy. Cheers Rob
 -
Some little mock up shots after decaling and clear coating, but before that, it was necessary to assemble the wings. The rear wing gave me some resistance, as it was very difficult to glue all parts together, without destroying carbon fiber surfaces. All assemblies of painted parts were done with CA glue. I didn´t want to destroy my finish or decals with plastic cement. Clear coating was done with two misted coats of pure Zero lacquer clear, with about 2,0 bar air pressure and a 0,4 mm nozzle. This was only to seal the decals without harming them with a heavy coat of clear. I tested the process on a paint and decal mule, prepared with exactly the same sequence of steps. Then, after a drying time of about half an hour between coats, I sprayed two heavier "wet" coats on, which had about thirty percent of leveling thinner added for a better finish. Cheers Rob
- 62 replies
-
- 13
-

-

-
I sanded the body with 8000 grit sanding sponges again, cleaned it and gave it another coat of Zero lacquer clear, this time with about 20% leveling thinner in the mix. After drying, I started to apply carbon fiber decals to the wings and air baffles. This is very time consuming and at first, I always think, the decals will never settle around the delicate shapes, but with patience, lots of strong decal solvent and applied heat from a hairdryer, they start to melt in place slowly. It took two days in total and still need a lot of touch up, but they are on. Next was the branding. The TB Decals went on perfectly, with matching colors, not too thin, not too thick, what can I say, it took only two hours, what a relief after the delicate carbon fiber decals Cheers Rob
- 62 replies
-
- 12
-
-
-
The first coat of gloss is on and will be the base for decaling. I used Zero paints lacquer clear for the first time and liked it, besides the horrible smell. I may sand and spray a second layer, but this I will decide after everything dried. The gloss looks actually better than on the picture. I used the same process of painting and glossing on a spare external fuel tank from an airplane kit as a mule. There I can test everything first, before I work on the McLaren body. This will be especially welcome, when it comes to clear coating after decaling, always a risk with the hot stuff. Cheers Rob
- 62 replies
-
- 12
-
-
Next will be the fluorescent red on the body and rear wing (not shown) parts. Again Zero paints will be used, but before, I need to mask off the white areas. There is a template included in the kit, which I took as a guide for my own masking strips. I adhered 16mm wide Tamiya Kabuki tape on top of the templates contour and cut it, following the lines and then applied the tape carefully onto the body, masked the front red section with 3mm wide Kabuki tape and sealed the rest of the body off. I double checked the border lines, pressing with a toothpick to hinder color bleeding. On with the fluorescent red. Like with white, I started to mist on three coats, followed by a pause of about 15 minutes between each. The next three coats went on a bit heavier. I now need sunglasses , because of the intense color. With the last coats, I checked with the decals, if I had the right tone. I removed the masks very carefully after only a few minutes, because I like to do that without the colors fully cured and hope for the last bit of leveling effect on the color borders. Luckily, there is no bleeding or overspray to be found. Cheers Rob
- 62 replies
-
- 10
-
-
-
Better now, phew, thanks for all your help and recommendations. This time, I applied a very faint layer, which only lightened the background grey of the underlying Mr, Surfacer 1500 grey primer. This was followed by three more misted layers with a drying time of at least 15 minutes between each. I raised the air pressure at about 2,0 bar and used the paint without leveling thinner. No orange peel and no attacked plastic, luckily. After a pause of two hours, I added four more layers, the last being a bit more rich, with a half hour between applications. Now it looks good. I also sprayed all parts in white, which will later painted fluorescent red, because on the body, these areas are also painted white down under and I didn´t want another hue in the red. Cheers Rob
- 62 replies
-
- 10
-
-
Thank you Craig, I will dig a bit deeper into the videos. I didn´t know, that my usual primers should not work with resin bodies and am wondering a bit about it. I used Mr. Surfacer on smaller resin kits and resin aftermarket a lot, without any issues. Cheers Rob
-
It seems, I underestimated the hotness of the Zero paint, Craig. Thank you for letting me know your experiences. I hope, my next application in said faint layers with higher air pressure setting will lead to better results. I have to master these type of colors, as I have quite a lot stashed for certain projects. The MP4/6 is now officially a test mule with only slim hopes for a better outcome. Cheers Rob
-
Thank you Alan, I learned so much through MSW and LSM, that it is a pleasure for me to give a bit of my experiences back. With the McLaren. it is like I stepped a Voodoo on the foot, but some projects are like that. If it will be finished, it will not be a show stopper, but I hope to learn a lot out of it for future car building projects. Cheers Rob
-
A while ago, the McLaren was shelved, because I couldn´t mount the body onto the floorpan, without having a gap of 1-2 mm between them. I wanted to keep the body removable and because, I had no idea how to tackle this without the gap, the MP4/6 got benched. Then I had an idea. When I bought my MFH Brabham lately, I also ordered some aluminum rivets and when I saw these, I thought, I could drill tiny holes into the overlapping parts of body and floorpan and insert the rivets, which locks the parts in the correct position. Done and almost invisible, when painted later. I caught some fresh wind on that project and started the bodyworks with priming. Mr. Surfacer 1500 went on super smooth. I wanted to accomplish a bit more practice with paints like Zero or Number 5, before I continue with my Cobra Coupe. Good that I´ve done so, because... ... then disaster struck. I sprayed Zero Paints MP White on in a light but covering layer and all looked good for a minute or two. Then, grey shadows loomed through the paint, followed by the late forming of orange peel. Somehow the paint must have reacted with the plastic through the primer. Normally, that would have been the point to bin the kit, but like I said, I´d like to get a better feel for these kind of colors and finishes, so I stripped and sanded the parts for some hours and will redo everything. I found a video abut how to apply Zero Paints best. It states, that you only mist a tiny bit of color onto the primer wait for ten to fifteen minutes for the next layer and so on. You should use 1,5 bar for that. I usually spray low pressure highly thinned for best results, but these colors seem to need instant drying through the air pressure, because they are so hot. Lets see, how the next try works out. Cheers Rob
-
Thank you Ken, I will post some better pictures when completely finished and will add some of my thoughts about the project. Cheers Rob
-
Thank you Phil and Alan. This projects theme came instantly to my mind, when the "Sandbox" group build started over on Large Scale Modeller. The Neuspotter drone was no part of the initial idea, but when I saw it, it reminded me, that I wanted to build one since my teen age, when it first came out. What better than to grab the 40th anniversary edition and add it to the scene, where it supports the sinister atmosphere. I wanted a bit of black humor or irony seep out of this little dio and hope to have done so. Cheers Rob
-
Almost done with the project. I added lots of details to my main acts, like a syringe made from clear plastic sprue and metal rods and a tiny push disc, dipped into clear green. The mask of the pilot was hanging out of his cockpit by it´s tube made from an old guitar string and many more. The threaded rod, holding the Neuspotter was painted in sand color and surrounded by dry grass from my garden to hide it a bit and simulate a hovering effect. Then I glued the Kampfanzug in place on it´s stone and used AK´s desert sand paste to design the ground. With a wet brush, I formed the typical sand ripples and amassed the sand on the front right side, where the blasting storm came from. Next, I pressed the weapons, the pilots helmet and all the empty squeezed water bottles into the paste and added very fine real sand on top. I used the sunny day to get some really harsh lighted outdoor shots, but will later add some from the photo box, when finished. Cheers Rob
-
Today, I finished the basic setting. The main components of the Neuspotter were airbrushed with chalky white color (washable white) and then weathered with a stiff brush, but only slightly, as the rescue drone didn´t suffer that much. This was followed by a DAK wash with pigments, dotted onto the white color. After drying and manipulating a bit with a flat brush, I assembled the main components of the Neuspotter and added some wires and coils to arms and "body". Then I threaded the drone on it´s mount and the angle, it was hovering was like I desired. The backrest of the deceased pilots Kampfanzug was made from two lava stones from my garden. I liked the bubbly appearance, as it looks a bit strange. Next, I have to add the various bits and pieces, like water bottles, weapons, helmet, etc. and design the dio with sand baste and sand. Cheers Rob
-
Glad you pulled through this demanding build, Alan, if not only for showing us a beautiful rendition of that not often kitted bird. With the NMF you captured the retro futuristic look of the Yak perfectly. Cheers Rob
-
There is not a lot, I have done lately. I like the creative phase of airbrushing and preparing a certain finish, but it comes with unavoidable drying times, which is time consuming. The Neuspotter got red dots, but wait ugly dots, why? Well, the solution to the riddle are the red crosses, which were masked then, using Kabuki tape cut quickly on my Infiny cutting mat. It´s a rescue drone. Next wase the base coloring, sprayed in Tamiya XF khaki. The other parts got different metal shades all from the Extreme metallic range. The exhausts were sprayed with dark exhaust color, the spindly arms with titanium, the drum like anti-grav unit in duraluminum and finally the lower body in gun metal. Cheers Rob
-
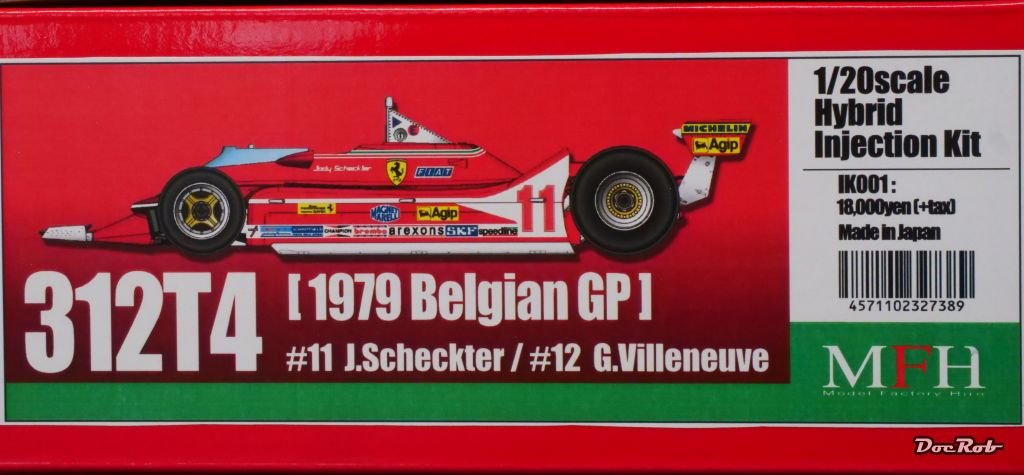
I did realize that, my Cobra Coupe as well as the Ferrari 250 TRI are long gone now. The Williams FW16, I bought was ordered on the firs day of the pre order timeframe luckily. The kit never made it to the normal selling page. Yesterday I received this beauty, which was up as a re-release on the MFH page for one day last month and I missed it. Luckily SpotModel had one left. Cheers Rob
-
My base will be "framed" by a plastic tub, which I sprayed in sand color. For the hovering drone, I added a threaded rod, epoxied onto the base and a nut also epoxied into the lower part of the Neuspotter. I hope, I can cover the rod with some dried grass later. I used it, because it allows to adjust the height of the drone over the surface as well as the angle, because the nut is not glued in in a right angle. The bowl was then filled with plaster of paris. Meanwhile, I primed the parts of the Neuspotter in black and white, black for the pure metal parts, like arms and exhausts and white for the rest. Cheers Rob
-
Congratulations Craig, what a beauty. I hope we will see a future build log about this beauty. I ordered another 1/12 MFH kit yesterday and also received one in 1/20. Lets say, I´m hooked . Cheers Rob
-
The huge Neuspotter drone is nearly finished. Not shown on the pic are the antigrav unit and the exhaust nozzles, which will be added after painting. If I use the Neuspotter in my dio, I have to find a way to let it hover. I guess, I will use slide fit brass tubes for that, epoxied to the base and the drone. Cheers Rob
-
Let me introduce you to this sinister looking drone. The Neuspotter is also based on a design Kow Yokoyama for the MaschinenKrieger universe. The kit was first issued by Nitto 40 years ago and my Wave boxing marks the 40th anniversary. Still it looks cooler and somehow more frightening than modern drones. I started with the sensor unit, which besides the strange colored plastic features coil springs, vinyl tube and different wire diameters for the numerous antennas. The age of the mouldings is visible, but everything fits as it should. I will quick build the Neuspotter and then decide, if I add him in my scenery. To get a better idea about how the Neuspotter looks, I add this illustration, which comes with the kit. Cheers Rob
-
Thank you Alan, I like to build up this kind of weathering in thin layers, which leads to a more real look with depth. Now I have to think about the base and setting. Cheers Rob
-
Well, if that´s your definition of the state the poor pilot is inn, OC . Cheers Rob
-
After evaluating different methods on clear spare parts, I decided to use Tamiya Extra Thin for my sand blasted windows. I used the supplied brush nearly dry and applied the cement very carefully. This is only preliminary, to check the effect and more effects will be added, especially for the front window. Cheers Rob
-
Thank you OC, dusting and some sand residues are for granted. I may try to go a bit further, possibly trying matte clear or even CA glue or thinner for fogging. Cheers Rob

