Supplies of the Ship Modeler's Handbook are running out. Get your copy NOW before they are gone! Click on photo to order.
×


DocRob
-
Posts
1,191 -
Joined
-
Last visited
Content Type
Profiles
Forums
Gallery
Events
Everything posted by DocRob
-
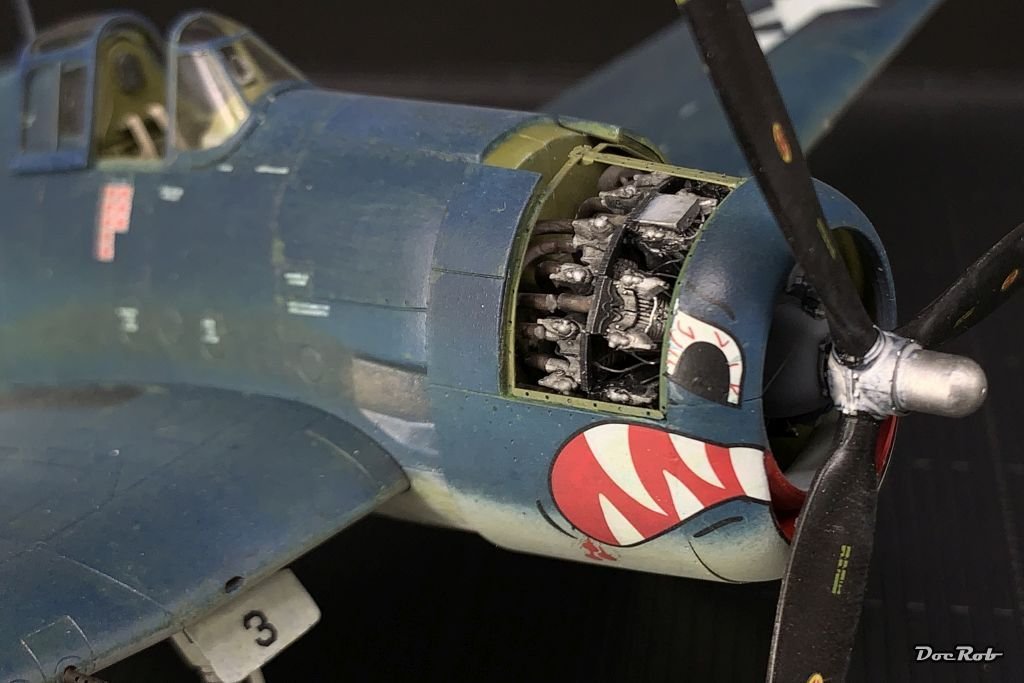
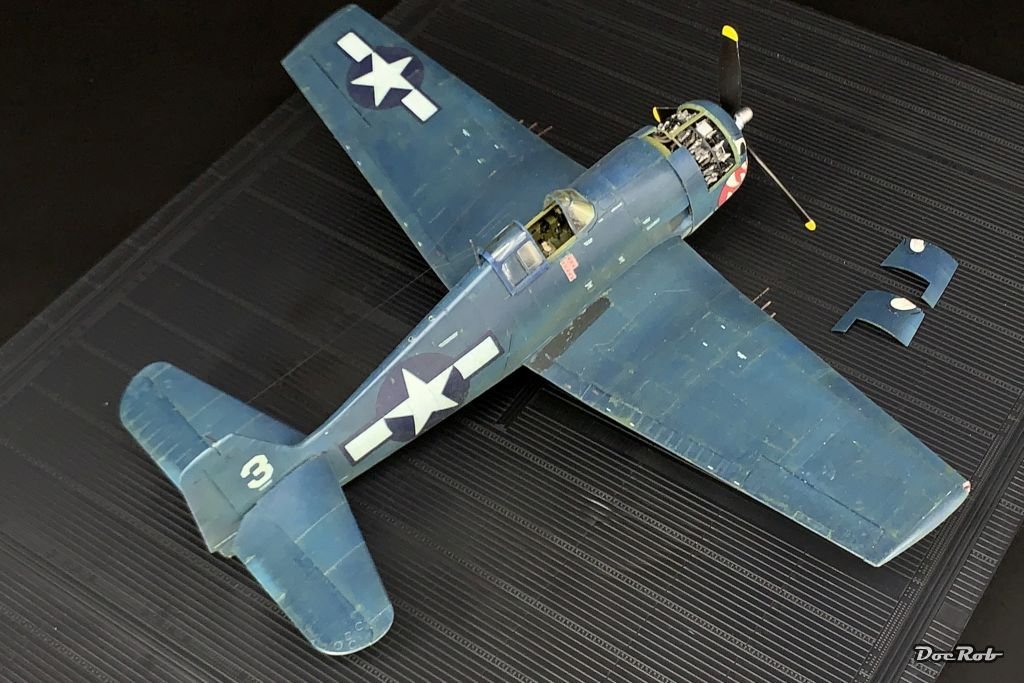
 Yes, I didn't want to mention the shape of the air intake. But in all you will have a nice model in the end, with your super clean way to build. Like my better half use to say: 'leave it, love it or change it' . About the hub, to my knowledge all the Pratt & Whitney driven planes which are air cooled, do not sport a spinner, which would reduce the cooling effect. Cheers Rob
 -
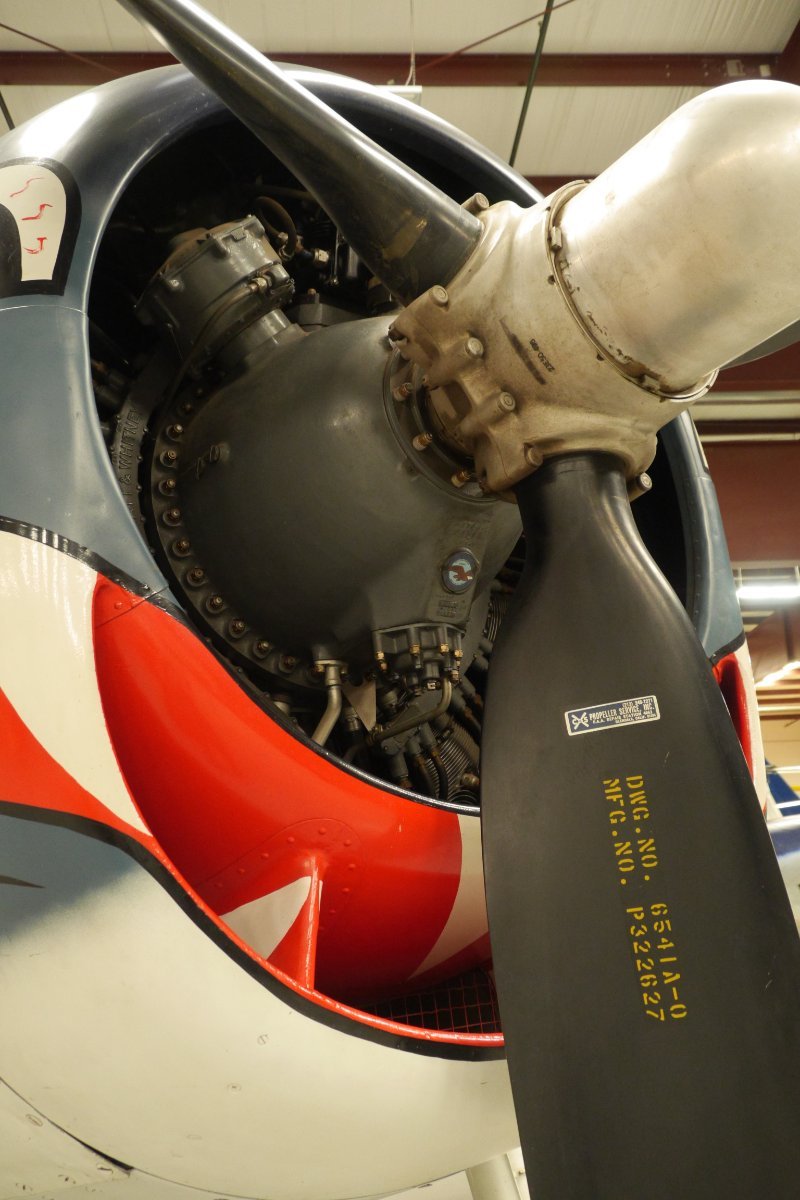
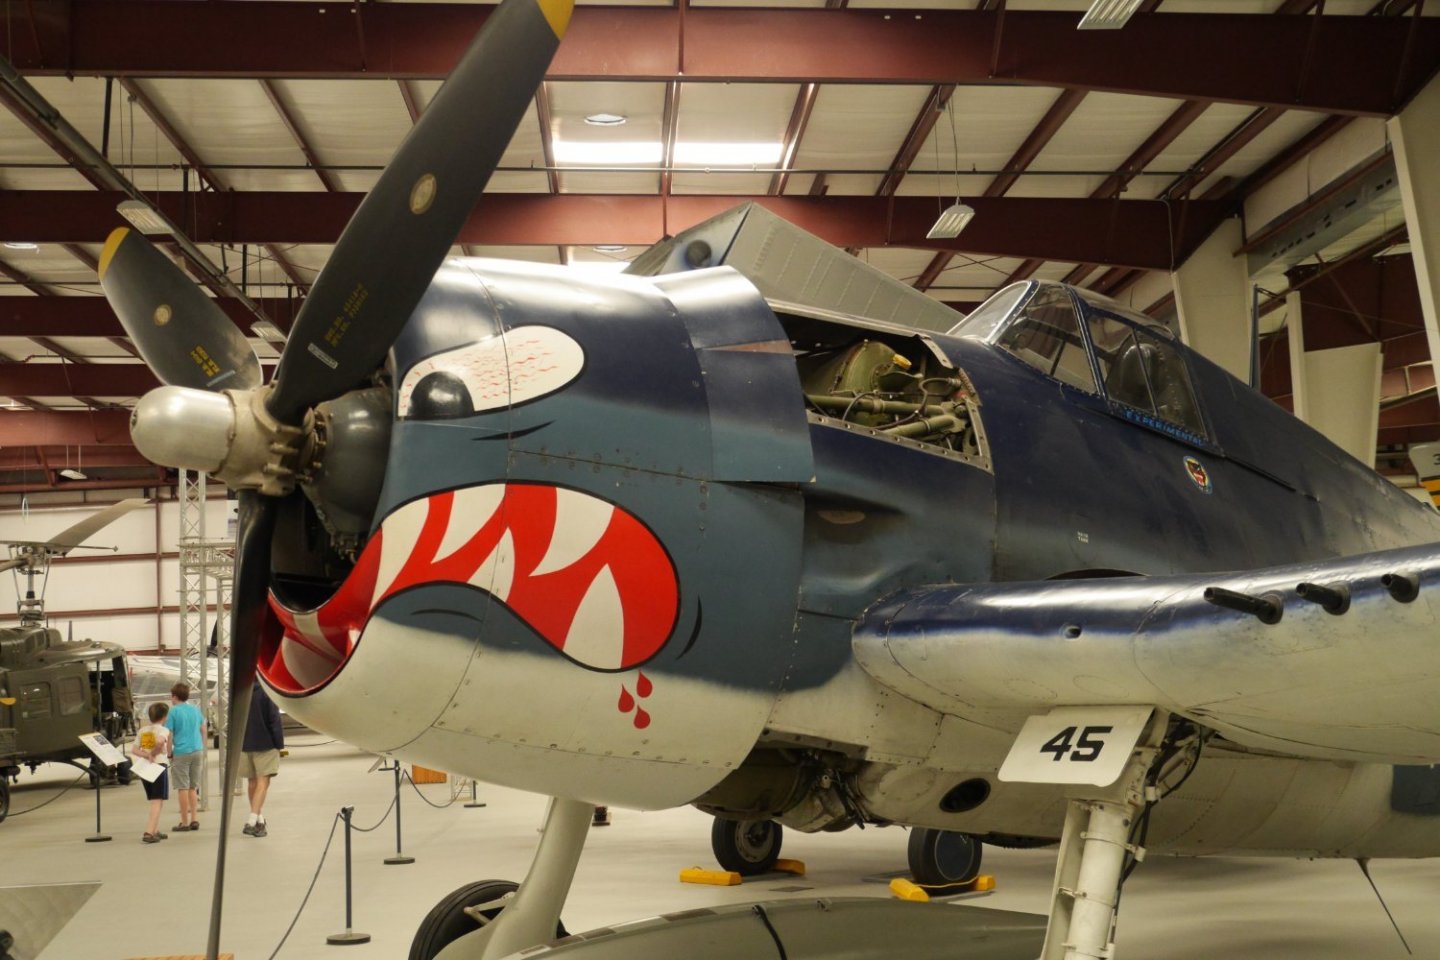
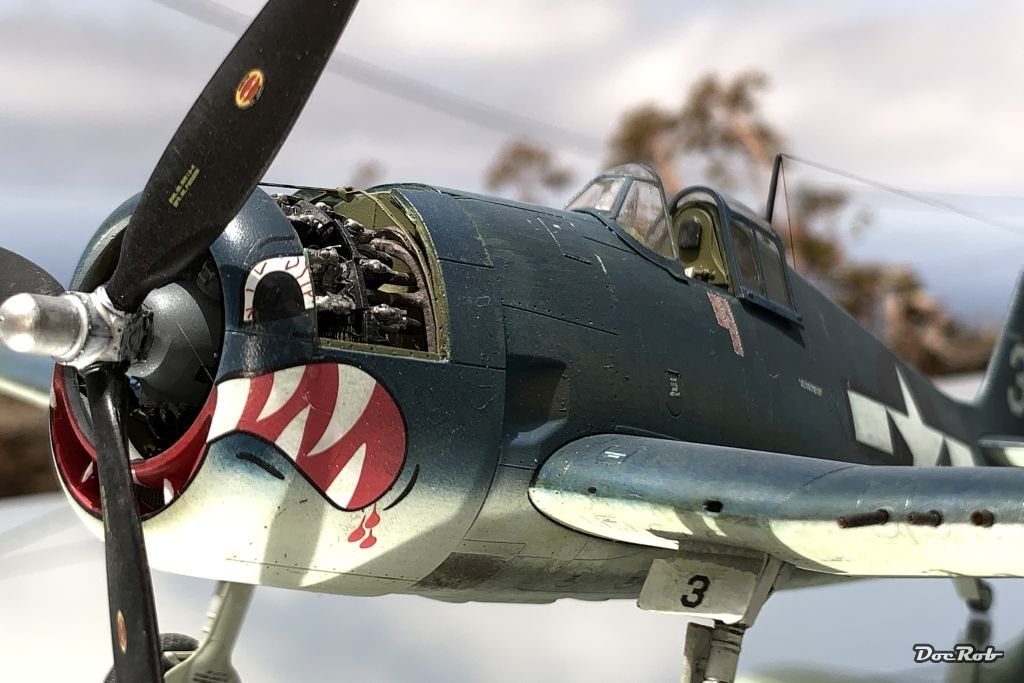
I nearly forgot, that I made some photos of the real thing some years ago in Chino. Cheers Rob

- 150 replies
-
- 10
-

-
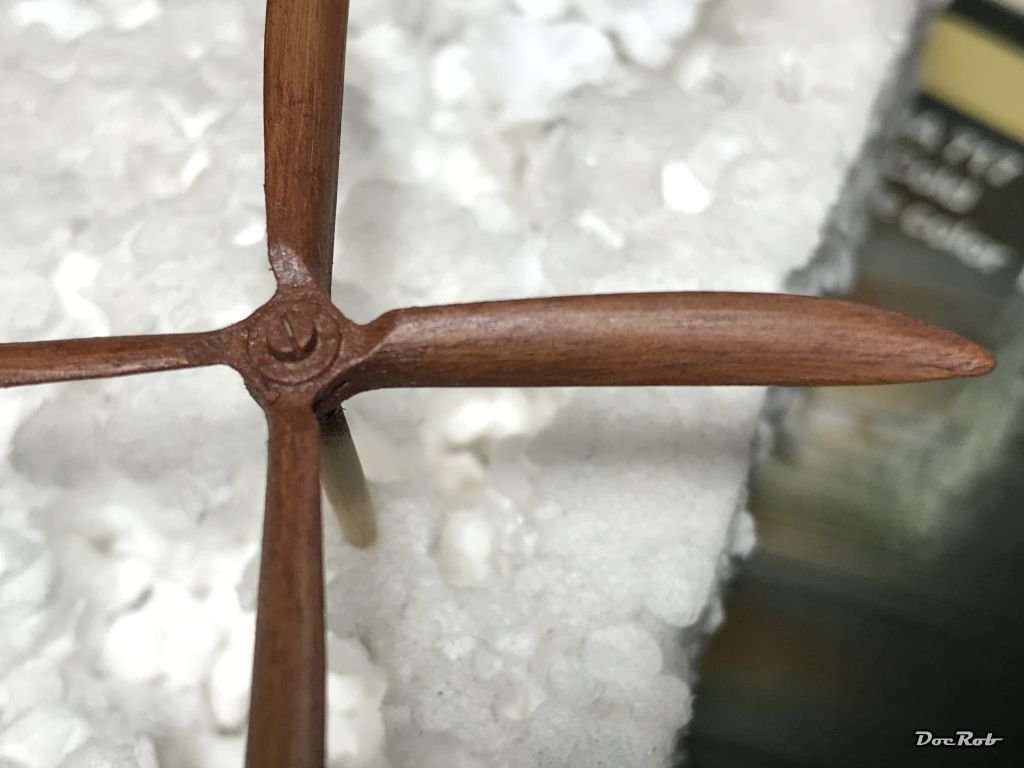
A very interesting project Chris. I never build a cardboard model and your Hellcat looks absolutely great and appetizing. With the hub, I have to go with Andrew, the conical part doesn't look right. I built an Eduard 1/48 plastic Hellcat in the same livery last year and the hub looks like this. Cheers Rob
- 150 replies
-
- 10
-
-
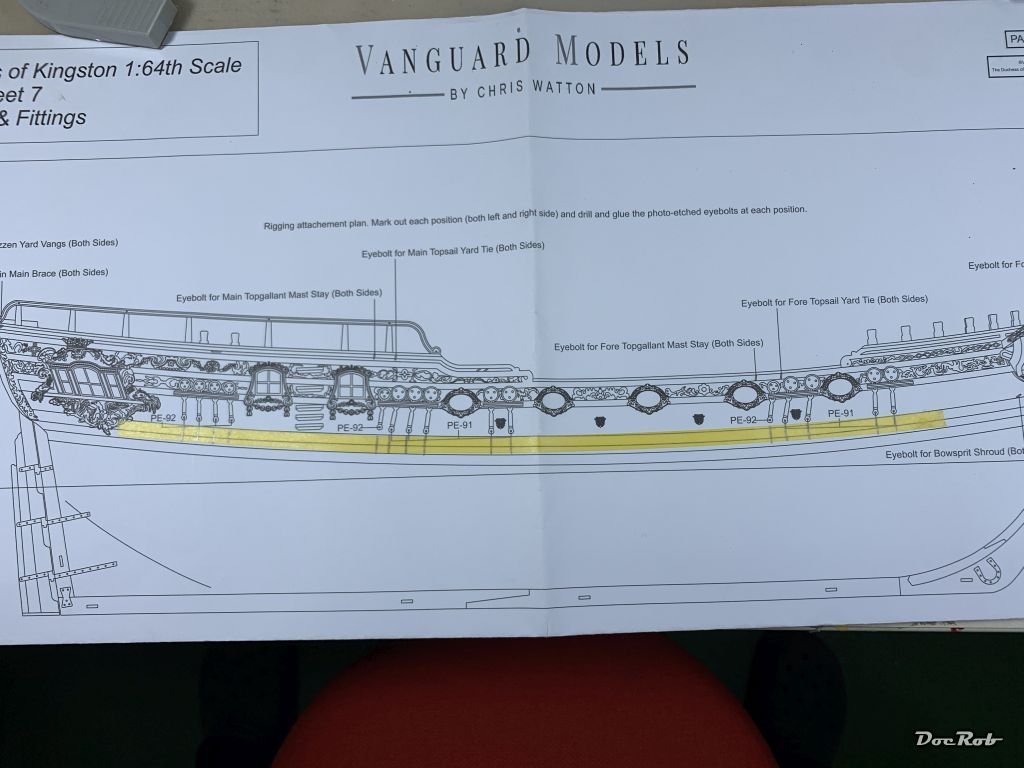
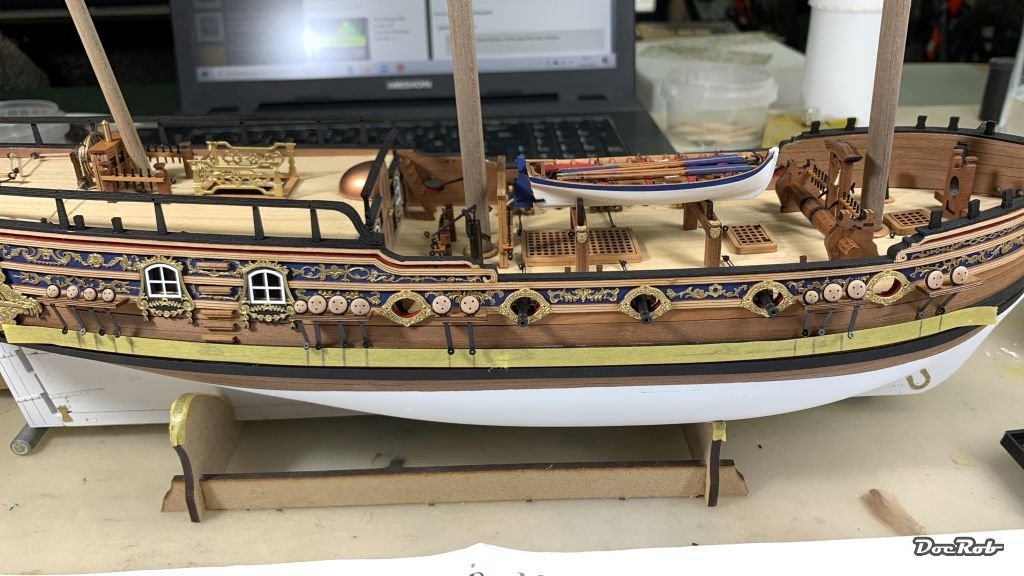
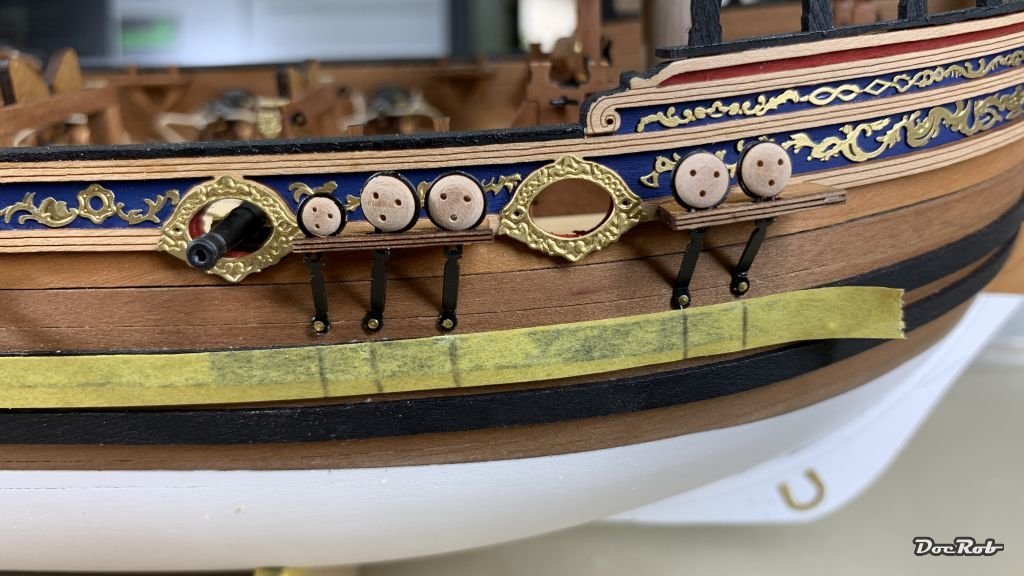
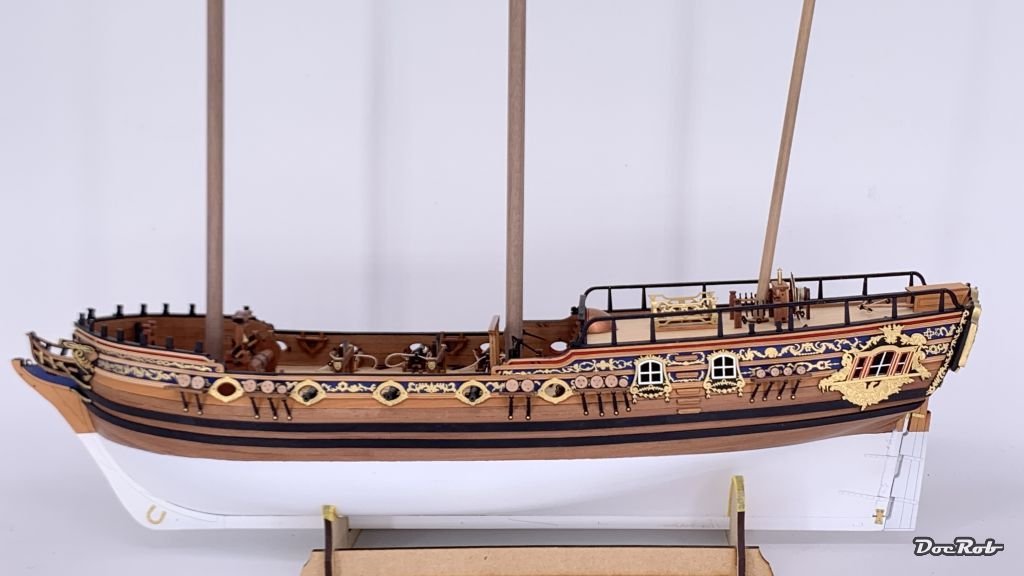
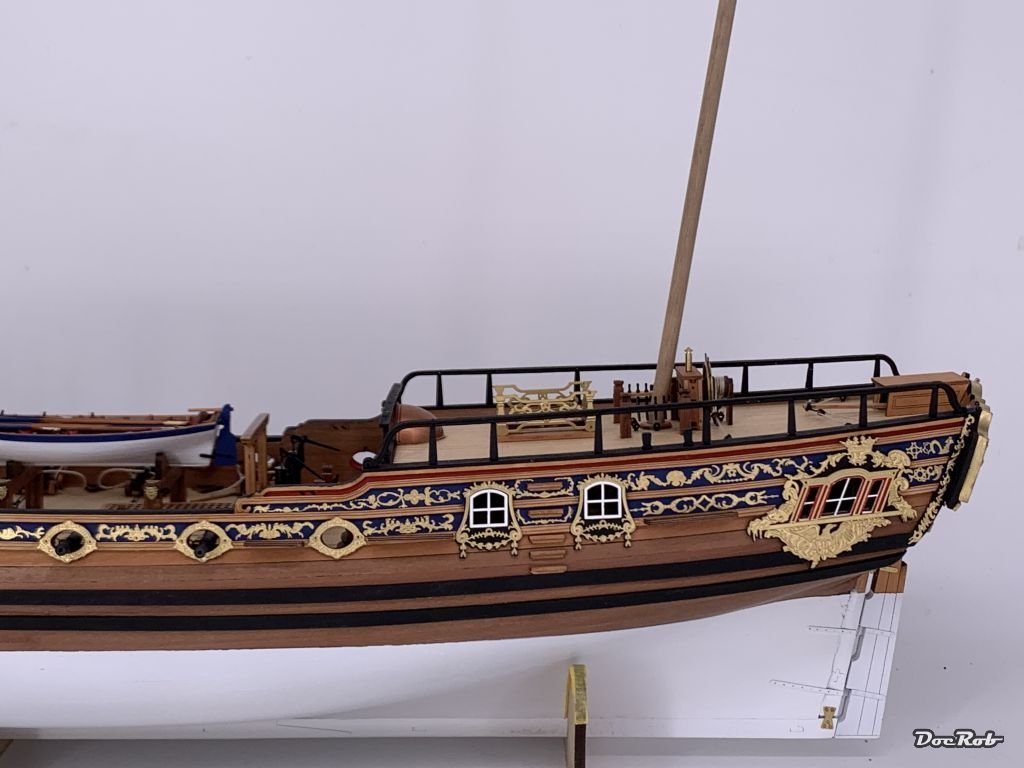
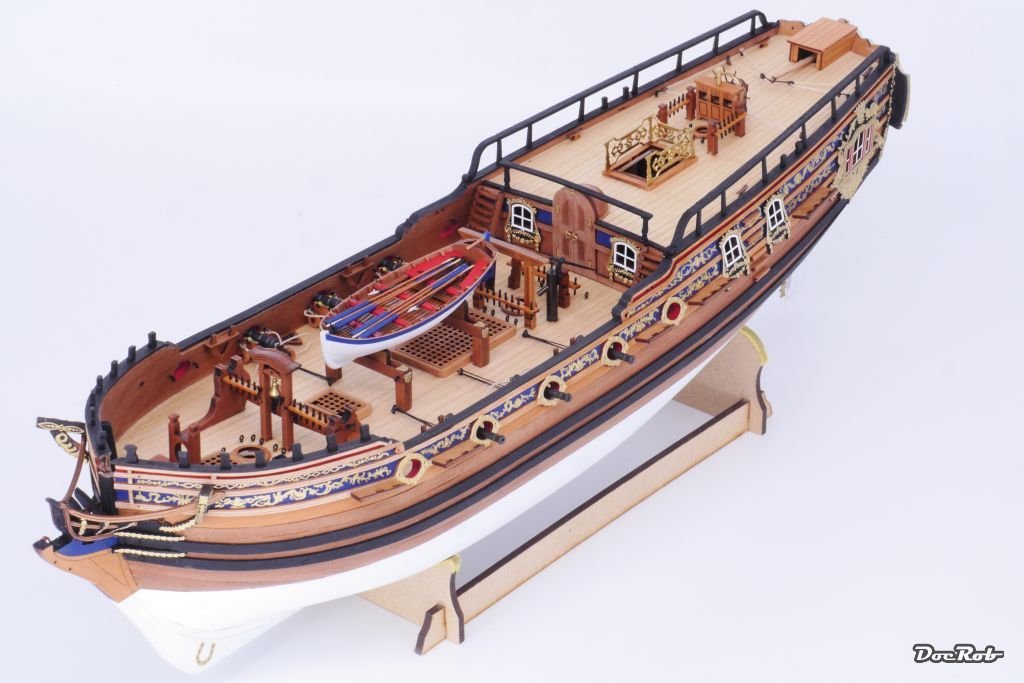
I added the strops to the hull, not before thinking about a proper method to align them correctly. I took some 6 mm wide Kabuki tape and adhered it to the side plan, marking the placement of the chainplates drilling holes with a pencil. With drawing the pencil lines across the Kabuki tape, I could use my template for both sides. I then drilled 0,5 mm holes into the hull at the marked positions, after I checked the angles of the chainplates with a metal ruler to the place, where the mast platforms will be. Then I pushed in the supplied brass nails without glue, but I don't think there is any need for gluing. Guess what, while checking the angles of the chainplates for the mizzen mast, I found, that they perfectly match my mizzen mast rake, which I found to be to far aft angled. Now that everything aligns with these angle, I may consider leaving the mizzen mast angle untouched. Cheers Rob
-
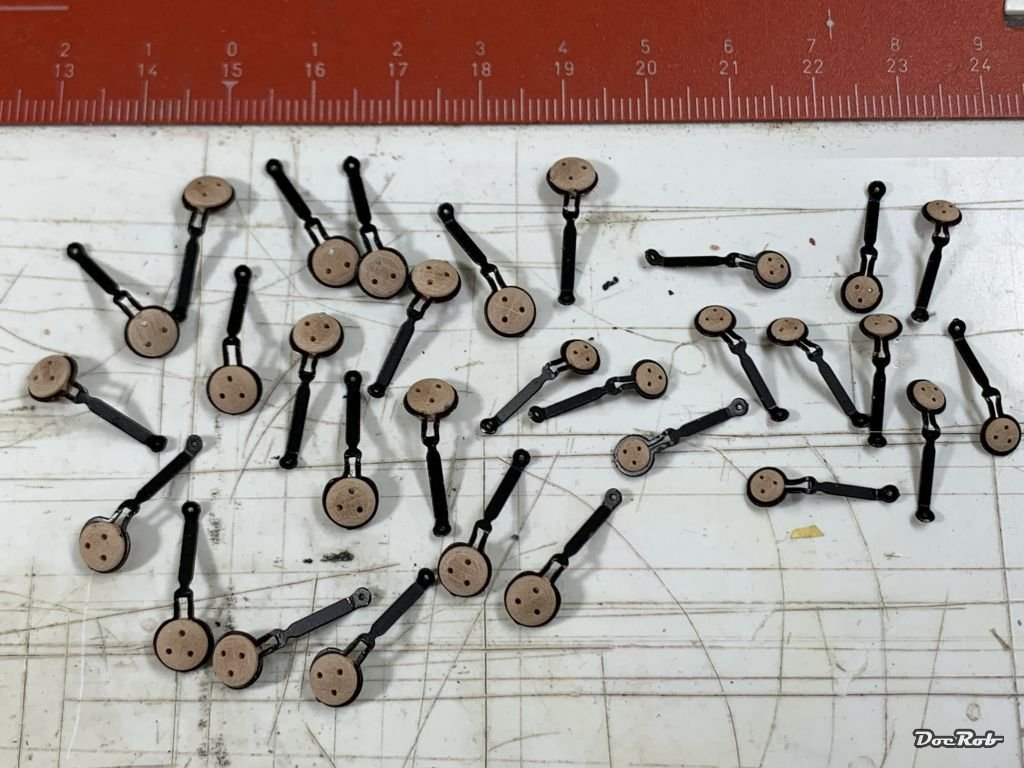
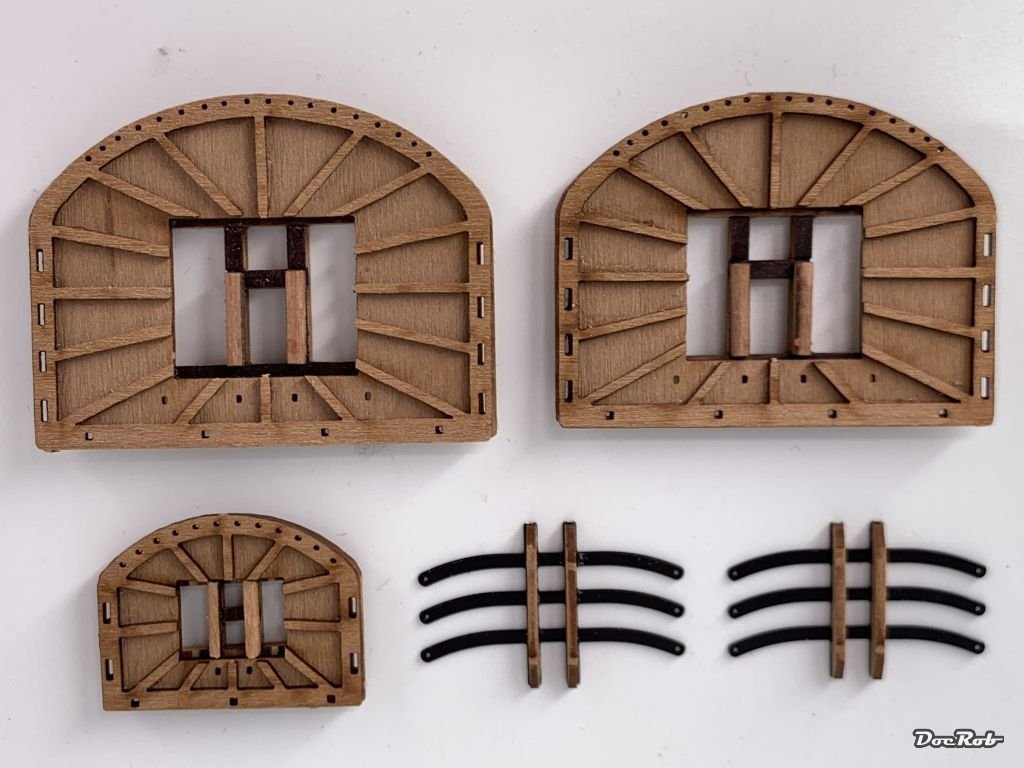
Finally I was able to continue a bit with the DoK. I'm waiting for my Proxxon mini mill to materialize, which will make it easier to get the square parts out of te mast dowels. I prepared the strops, which are made from a PE frame with a pear wood deadeye inserted. That was easy for the smaller variant, but included quite some bending for the larger ones. Naturally, the pre painted PE parts took some damage while bending and needed to be touched up. Next were the mast platforms, which are pre cut pear wood, along with some support framing to be glued together. Alignment of the pre cut holes is most important here. Cheers Rob
-
This was one of my ideas too, but as you say, fiddly to insert into the lower deck and if not glued correctly, it could be a bit unstable with the shrouds under tension. That's another possibility, thank you James. If I remove some material from the backside of the mast in the lower deck area, I could correct the angle and maybe thrust in a peg of wood into the then too wide mast hole in the lower deck through the staircase opening. I have to check, if that might be possible. Cheers Rob
-
Keith, thank you, I think all possible solutions will be a nightmare to do right. I measured again, comparing the supplied plans to the actual masts (the masts plans is not 1/64 scale, so I had to calculate a bit). slightly above the first platform, the distance to the main mast is about one centimeter larger than on the plans. I may leave it that way, pending my shroud test. I will look, how weird the shrouds look, if they are not angled correctly. Cheers Rob
-
Another idea to correct the angle of the mizzen mast could be to insert a wood screw without head into the masts end, glue it in with CA and then screw the mast into the lower deck. Sounds like maybe the most simple option to me. Cheers Rob
-
Thanks for checking Glenn, your DoK looks wonderful, I hope mine come out half as good. Your rake seems to be a bit smaller on mine, but it looked very similar on one of your WIP pics, maybe because of the angle the pic was taken. My mizzen mast almost touches the binnacle housing. I will measure the distance between main mast and mizzen mast at a defined height near the platform, to check against the plan and will decide then, if it's a design feature or if I have to do something about it. Cheers Rob
-
Well, thanks Keith, I always liked problem solving through putting a good story around as an excuse. I thought about that too . Cheers Rob
-
Thank you James, I checked with the plans and my mizzen mast definitely rakes more to the aft. I think, I will extend the masts lower end eccentric under deck, if this is possible through the staircase opening. The part, which will extend below the lower deck will be connected with a brass rod to the mast, which sits on the lower deck than, partly.
-
Thanks for answering Chris. The mizzen mast is inserted correctly into the hole of the lower deck. I checked with other builds here on MSW and the build log from @glennard2523 shows a similar rake. I looked at the manual and drawings and it is angled too much aft for my liking. The last shroud (aft) should at least have an 90 degrees angle, which is not the case with mine. Cheers Rob
-
It looks like I have done not a lot with the build and it's partly true, as I'm pounding a lot of rigging concerned themes in my head and also read a bit in other DoK threads. I've been fitting the deadeyes into the strops, which was easy for the 3 mm deadeyes and a bit more daunting with the 5 mm ones, which needed quite some bending. Meanwhile, I test assembled the masts, to check their angles and found the mizzen mast to be a bit to far angled to the back. I'm not sure, how to adjust this. One possibility would be to enlarge the hole in the lower deck somehow, the other to shorten the mast and insert a kind of support through the staircase onto the lower deck. Any other ideas and suggestions are welcome. Cheers Rob
-
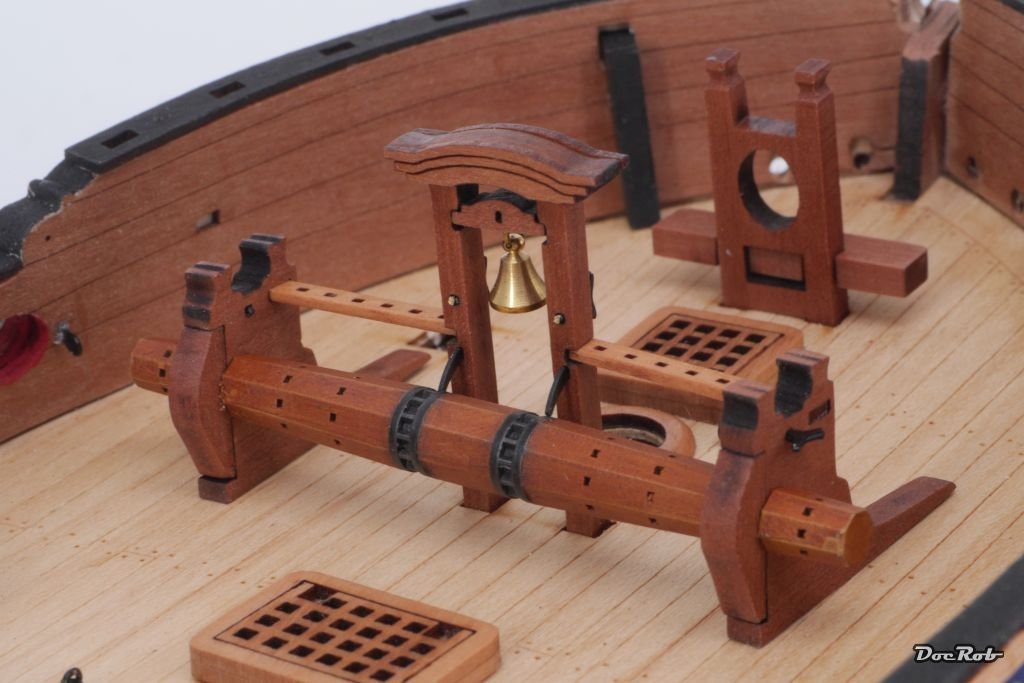
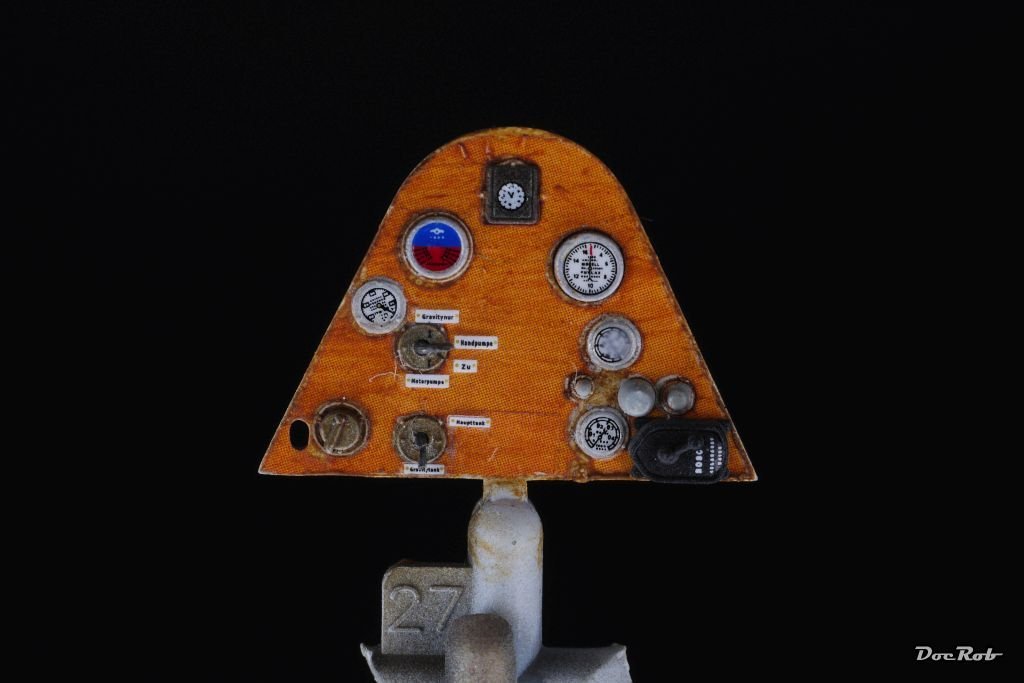
Oils are perfect for replicating woodgrain. It's simple to do and it's completely removable during the application stage. Matte sand brown acrylics are a good base, better than gloss. You can apply the brownish (depending the type of wood) oil colors onto it, better a bit too much than to less. Then use a flat brush and start to remove the oil color with defined strokes and find the right amount of thinner for your purpose. don't let the mix get too wet, it's better to use a paper towel to get rid of the oil color you removed, while gently stroking. Have a good idea about the desired finish, which includes varnishing. For a wooden deck a matt clear varnish should work, for other warmer effects, Tamiya's clear yellow or clear orange, heavily thinned work marvels. Best you try it first on a flat piece of plastic, until you feel comfortable. In your case with a relatively small scale, the brushstrokes should be very light, it's easy to overdo the wood grain thing. I used the oil technique just recently on the anchor winch drum of my Duchess of Kingston build. It's 64 scale and therefore made with only a hint of wood grain texture. Cheers Rob
-
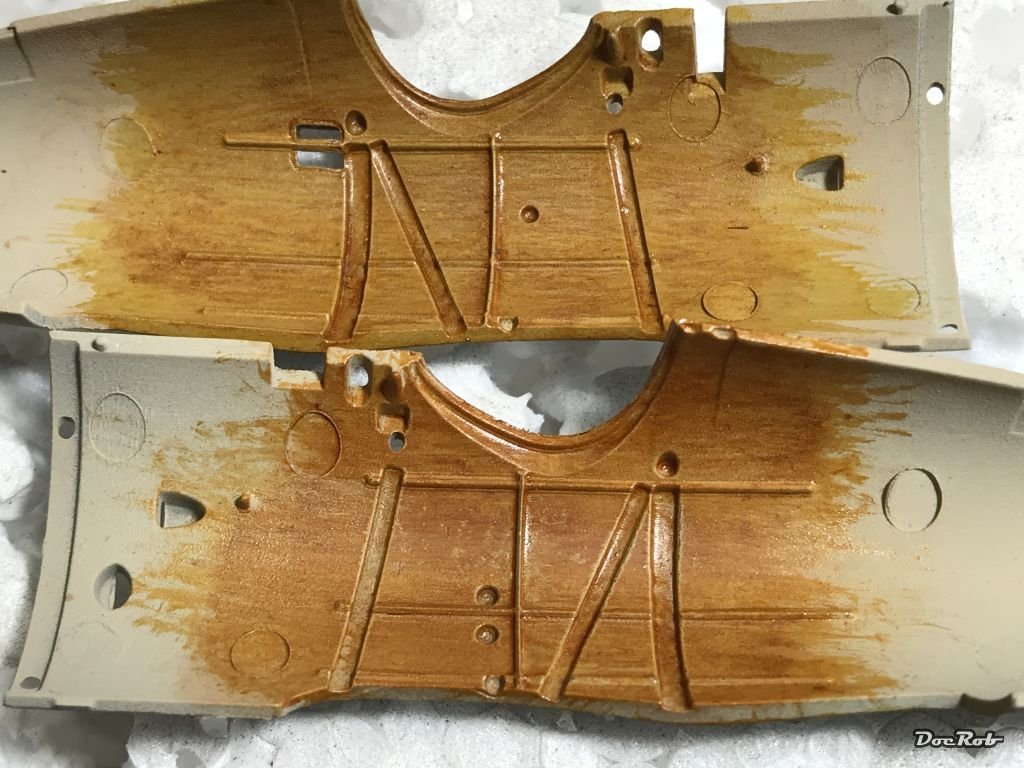
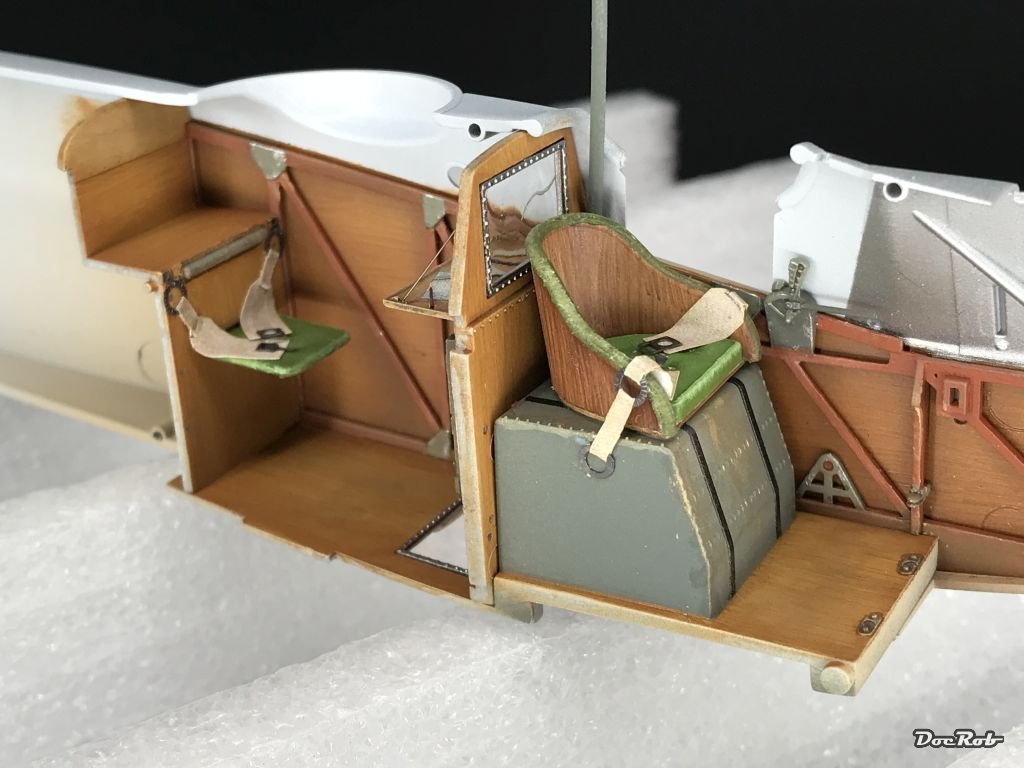
It may be possible to remove only the wash, as most washes are made for application and then to remove a bit until you achieved the desired effect. It depends, what kind of wash you used. You can try to remove the wash with the appropriate thinning medium for the wash, but if it's the same like the acrylics underlying, bad luck, the base layer will be affected too. BTW.: You haven't sealed the wash with varnish afterwards. The best option for a natural wooden finish deck, IMHO is to strip the deck, if possible, paint it in a matte acrylic sand brown and than use the oil paint technique for texturing. With this technique, you can adjust the wood texture as you desire, using white spirit, to spread and erase the oil paint until the grain looks perfect. The effectiveness depends on the scale of course, it's easy to produce too much texture in small scale. If you think, that is a solution for you and you need more information about the how to's, I can explain the technique a bit more detailed. Here are some examples I did with this technique in 48 scale. It's only oils on acrylics, at this stage without varnish. Some more examples in 32 scale Cheers Rob
-
I never used one, but many plastic modelers start to use plotter cutter devices, which can cut PC pre designed contours into vinyl foil. This should be accurate enough. Cheers Rob
-
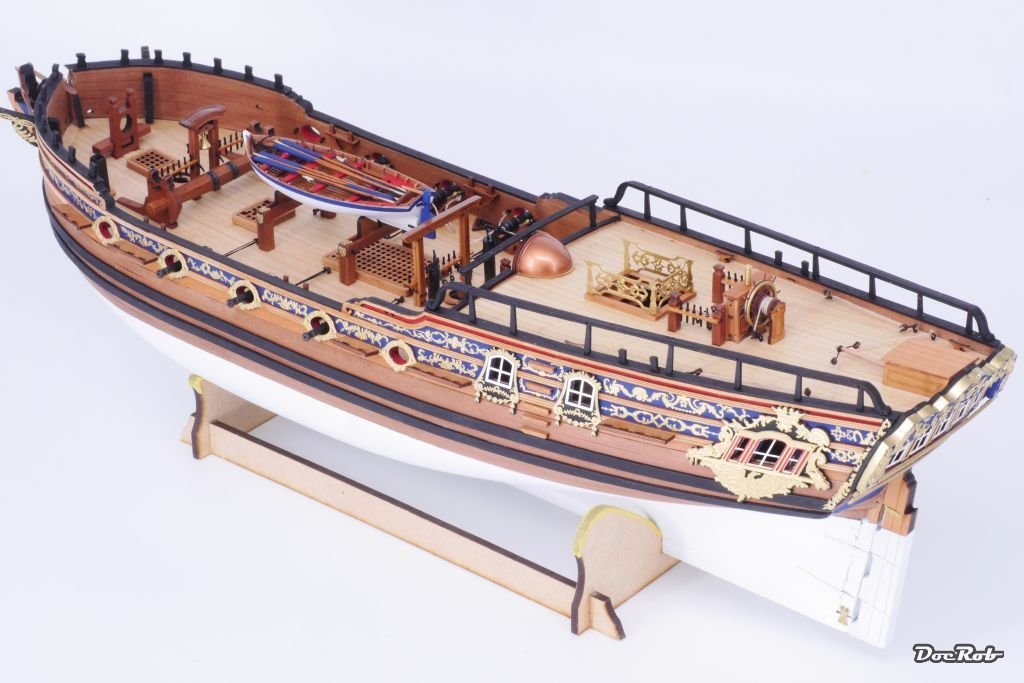
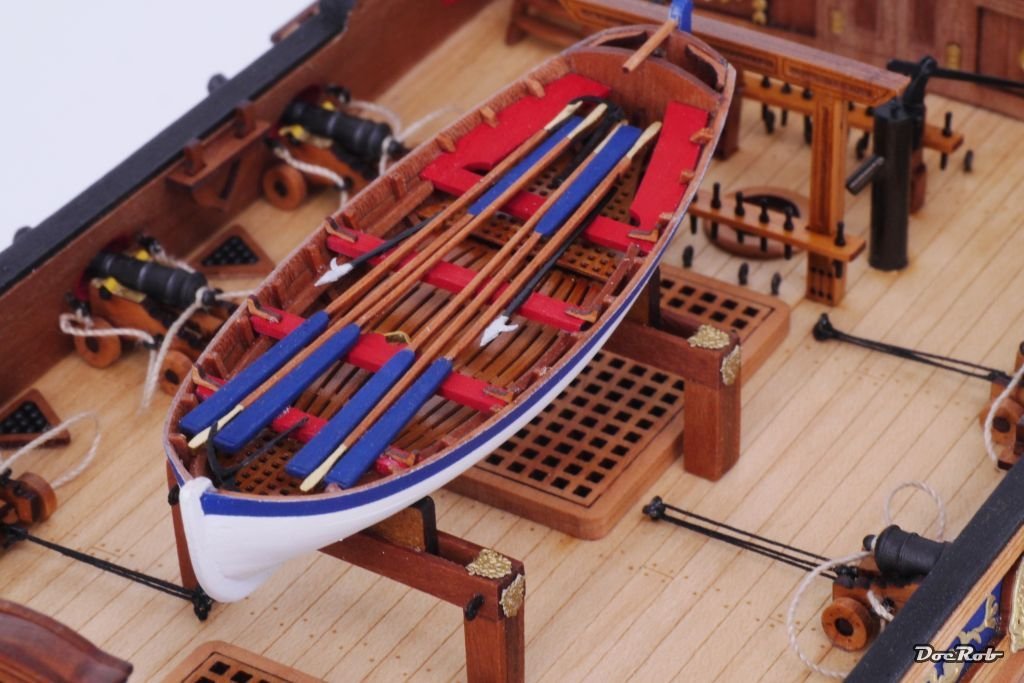
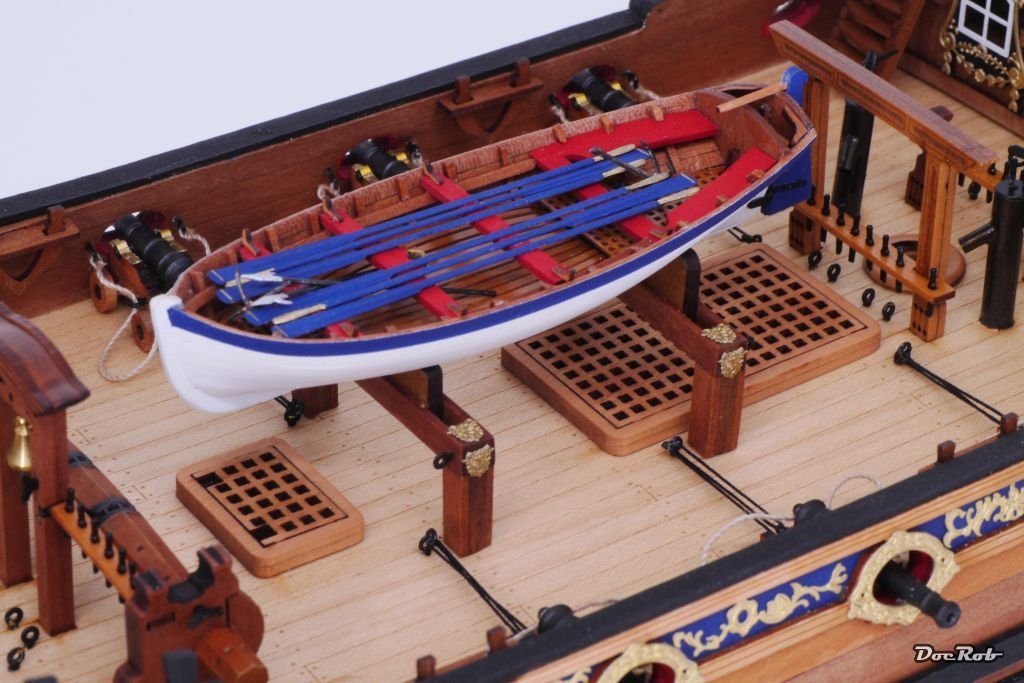
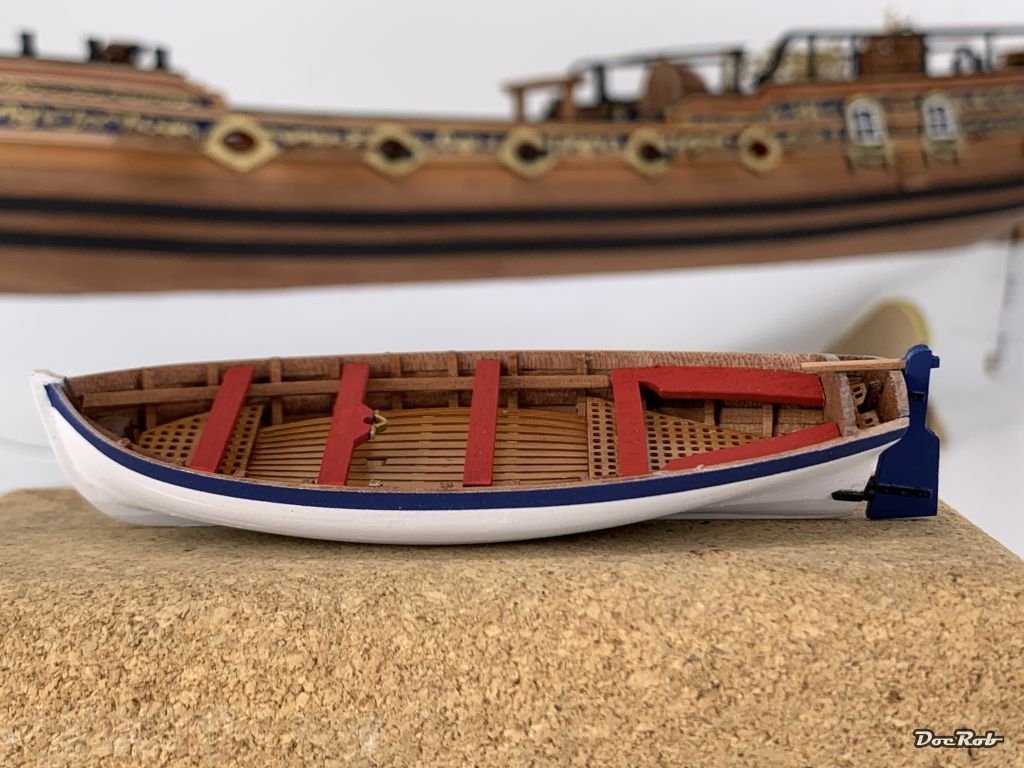
I didn't like the look of my blue PE oars and I had to do something about them, as they were too prominent on deck of the DoK. I de-charred the also supplied ones from pear wood, rounded them cautiously with sanding paper and files and gave them a coat of Wipe on Poly, followed by blue for the blades and gold for the handles. Now I like the look and it was well worth the extra effort to tear off the PE oars, rip of the seat planks, clean them from CA and repaint them. The supports were glued to the deck, but the boat will be removed, as it may is in the way, while rigging. Next is cleaning of the bench and then, it's rigging time . Cheers Rob
-
Thank you very much Glenn, for explaining your methods of rigging ratlines and others. This will be a great help for my very first rigging on my Duchess of Kingston, same scale, same knots. I hope, I will learn from your experiences and don't ruin my nerves and yours along, when I bombard you with questions. Cheers Rob
- 476 replies
-
- 4
-
-
- sphinx
- vanguard models
- (and 1 more)
-
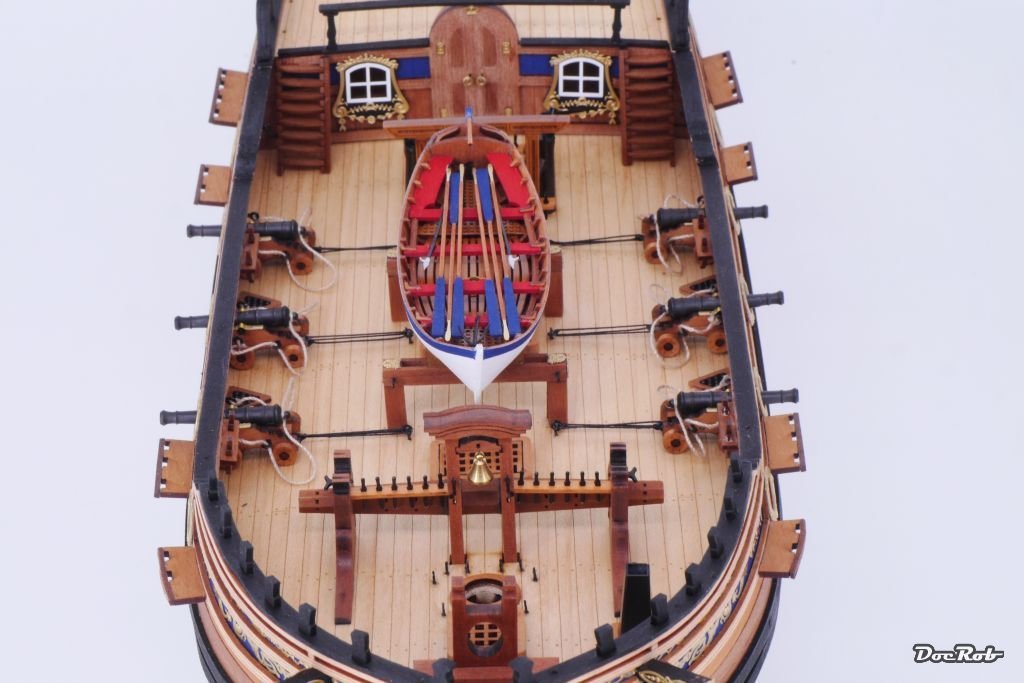
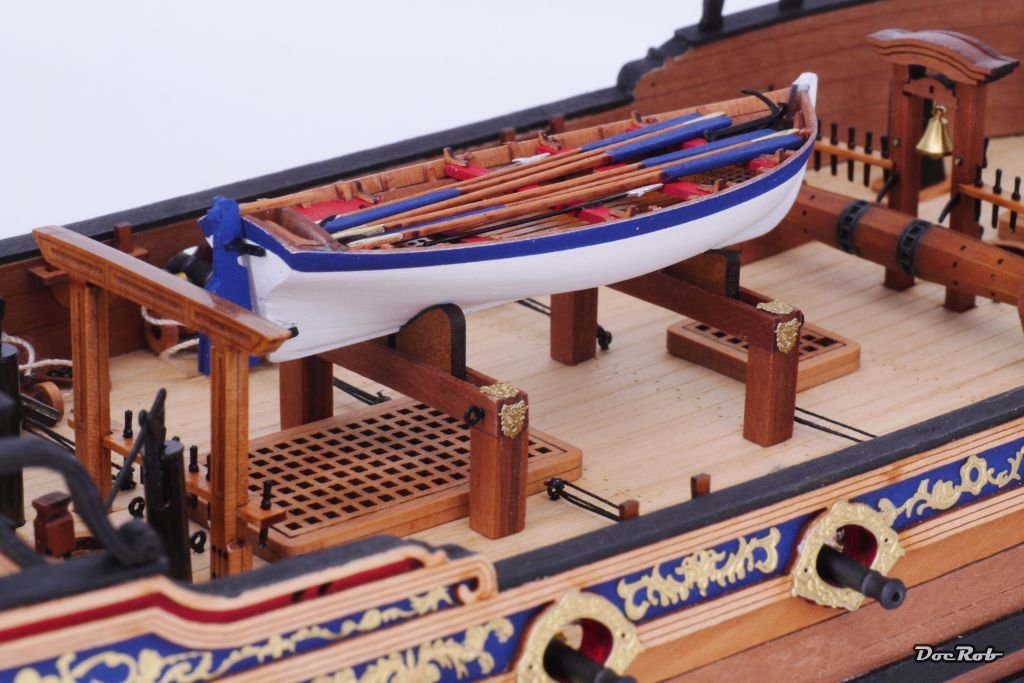
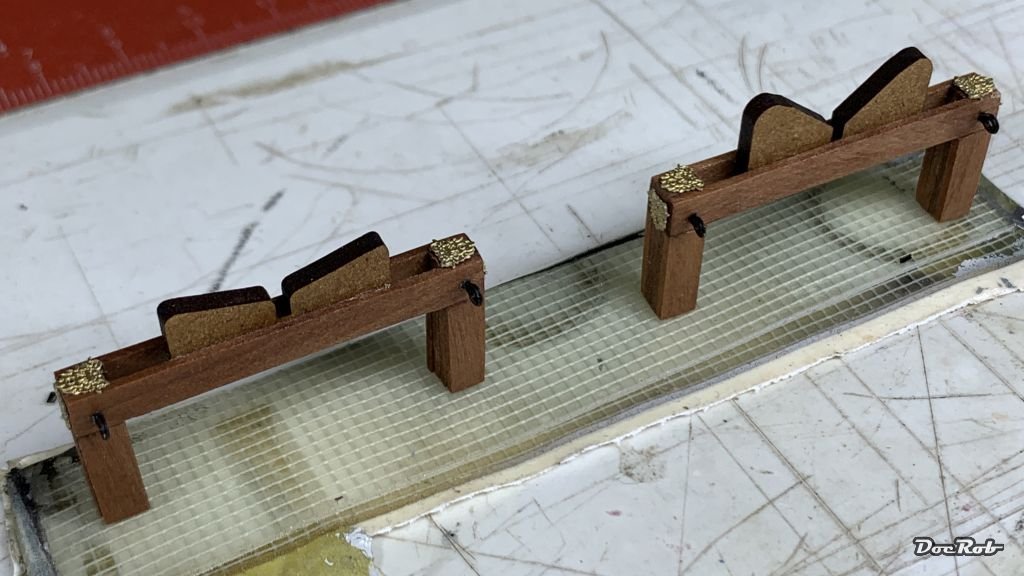
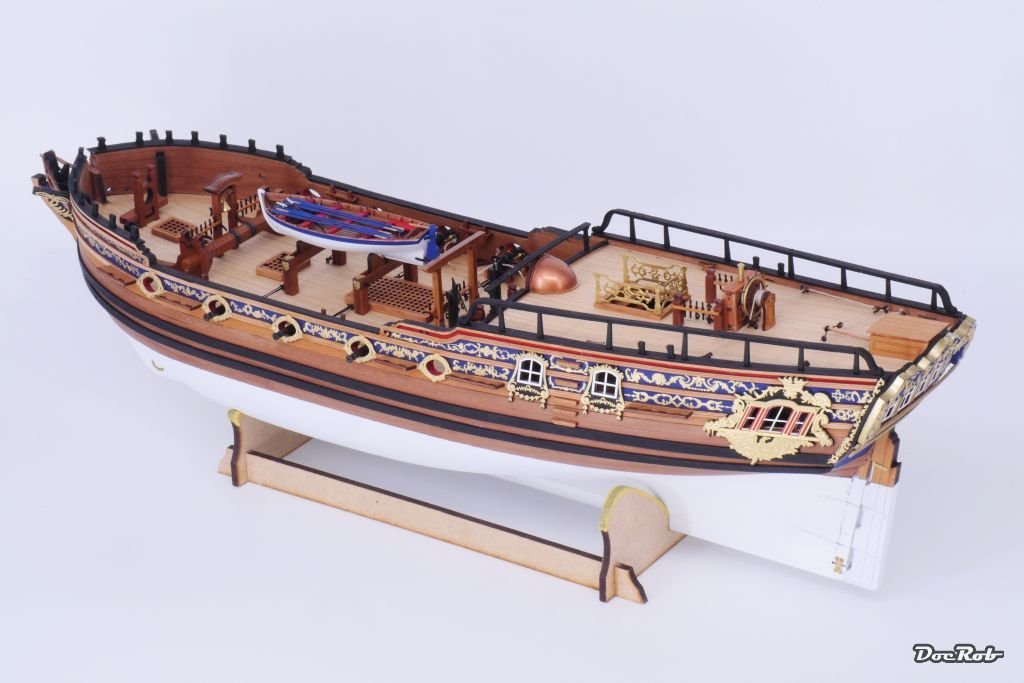
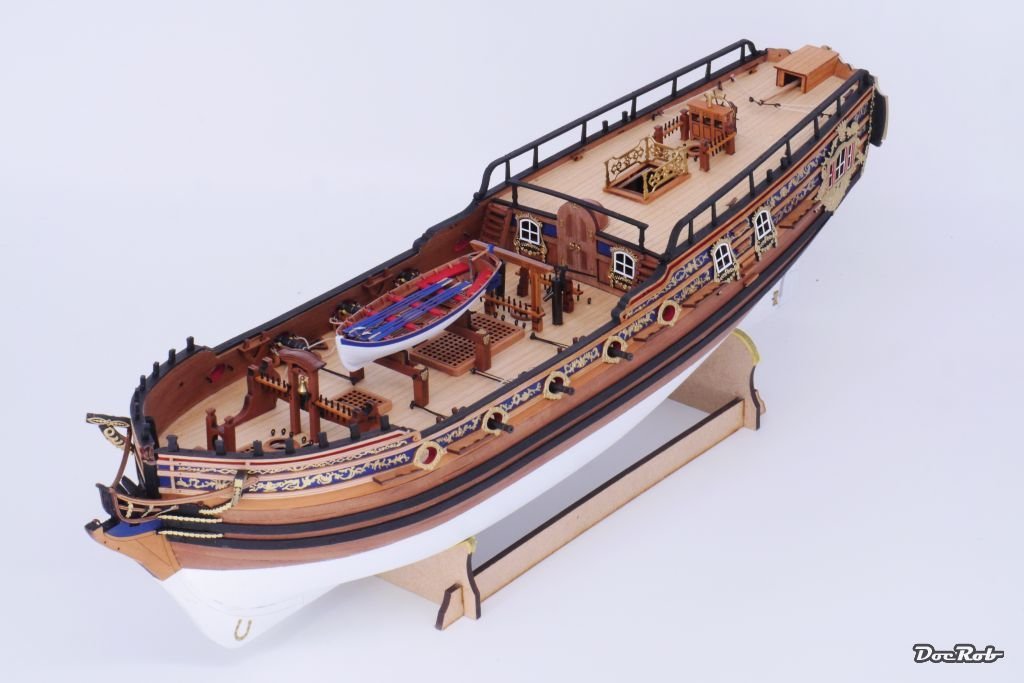
I scratch build my own supports for the boat from planking rests, cut with my trusty mitre cutter and sandwiched the MDF parts for the boats stand between them. After a coat of varnish, I added some eyebolts and decorations, which originally should be used at the hull sides, but I never liked them there. I like the look, as it fits to the other sub assemblies on deck. What I'm not sure about, is the look of the blue etched rows, which I may exchange for the also supplied wooden ones, painted differently, maybe whit and natural wood. What do you think. Cheers Rob
-
Many good advices by Oldsalt, Glomar. Airbrushing is about a certain discipline. It's not overly hard to learn, but you have to train a lot, to get decent results. Try everything on paper or an old model first. Keep the airbrush clean at all times and care for your needle. A bent needle will result in bad spraying. One thing can't be emphasized enough, the mixing ratio. Almost all colors have to be thinned. The rule of thumb calls for a milk like mix to spray. Again, this has to be tested. To thick mixes will clog in the airbrush to thin mixes run under masking and don't cover. Try to get adjusted to the medium you spray, acrylics, enamels or whatever. Use the appropriate thinner for the color. When you have found the possibly correct mix of color and thinner, experiment with the air pressure, until you have the right balance. When you spray, try to avoid start spraying onto the model surface, start before and stop, when moved over the area completely. If there is dotting, you may have color clogged on the needle. This can be easy cleaned off, but can be a sign of a to thick mix or to high air pressure, specially with high pigmented colors. Airbrushing is 80% preparations, masking and cleaning and at max 20% of spraying. Be patient and analyze what you achieve. One word about masking, there are several possibilities, the one I like most is yellow Kabuki tape, which you can purchase from different producers. It's thin, adheres well and can be cut very precise. Sometimes you will need liquid masks or flexible masks for achieving contours. Do yourself a favor and wear a respirator mask and rubber gloves, when airbrushing. Almost all mediums you spray are poisonous or dangerous. If you have more specific questions, I will answer you for sure and don't forget, airbrushing is fun and a great technique to have mastered. Cheers Rob
-
I never tried a carton model, but yours looks sweet and tempting. somewhere, I must have shelved lightship kit, I will look for that. Cheers Rob
-
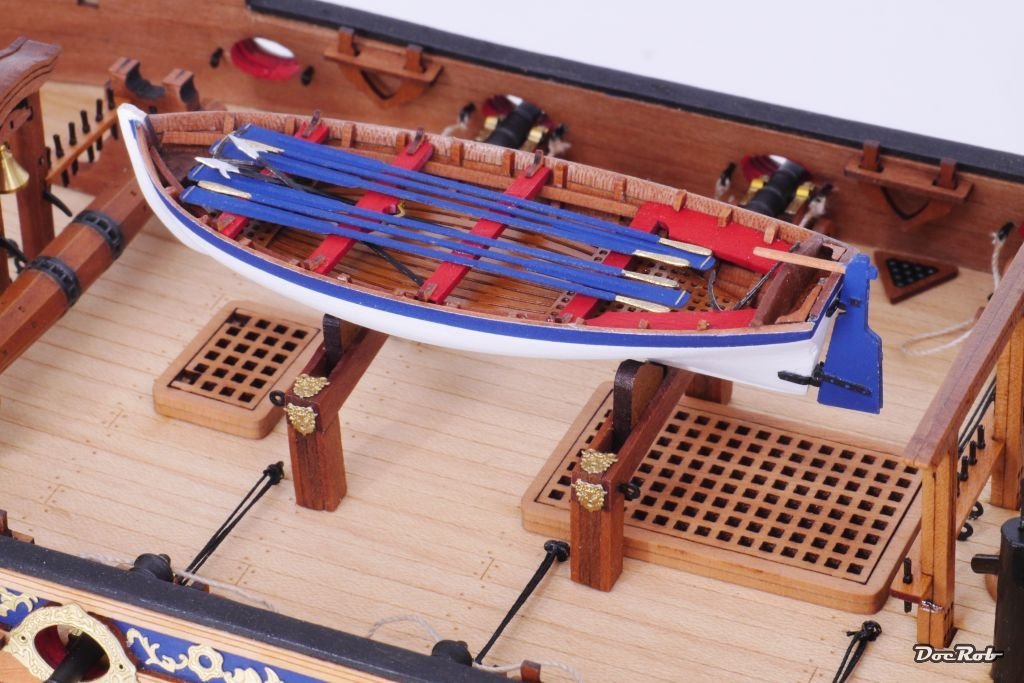
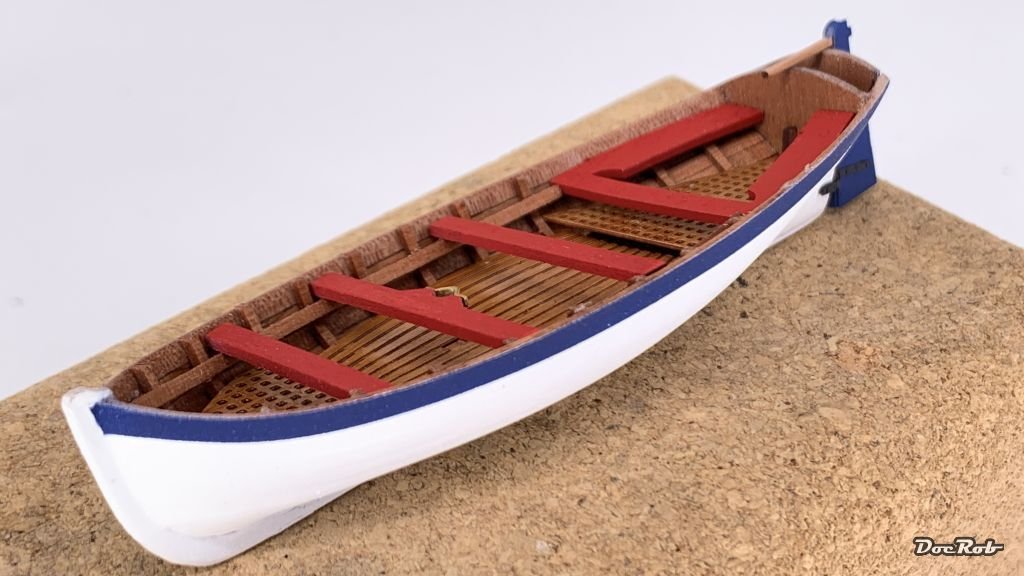
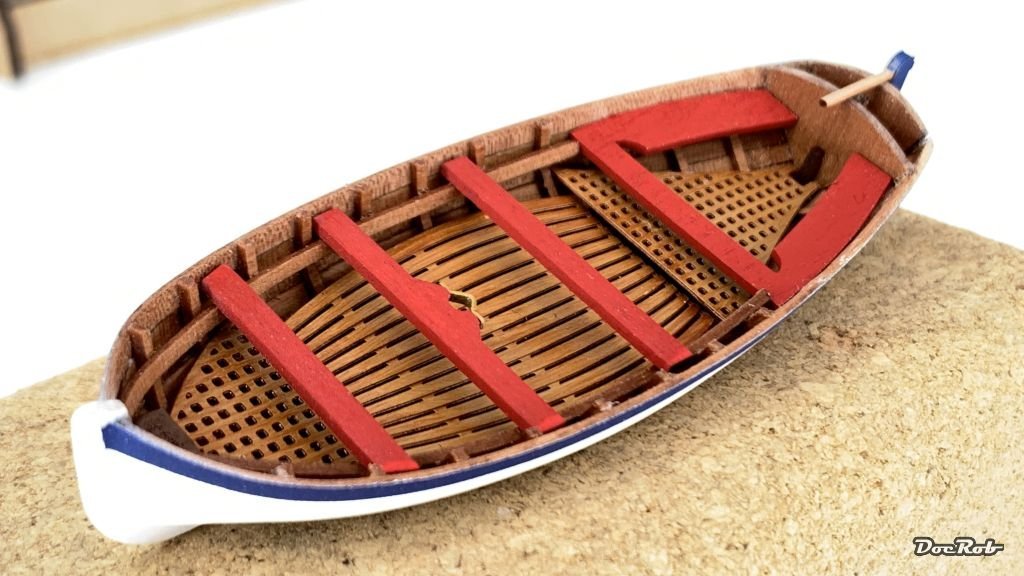
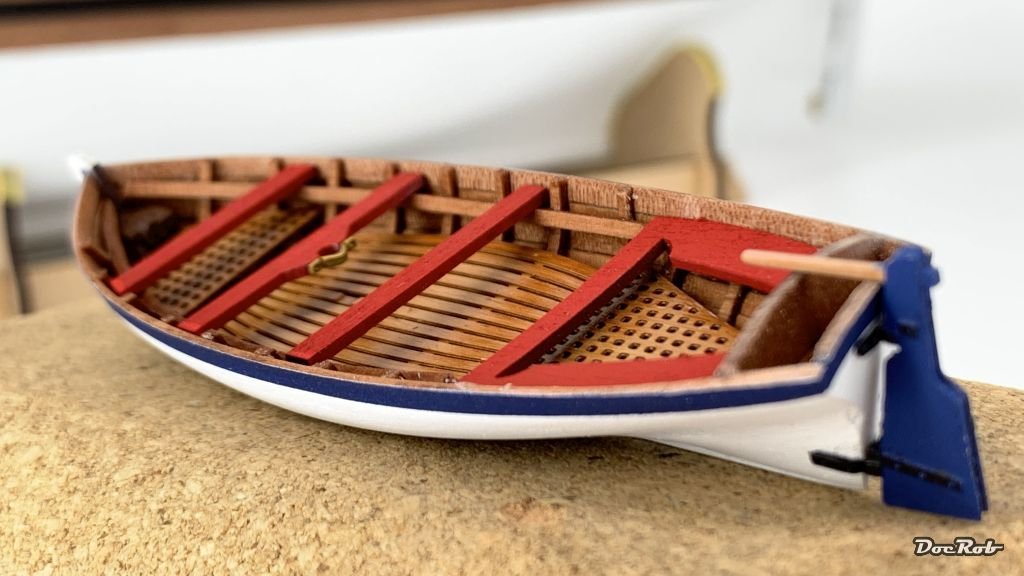
Almost there with the Cutter. I painted the hull flat white, the seats flat red and the rudder, rows and stripe flat blue, all airbrushed with Tamiya's XF colors. The gratings, which are made from PE, were primed, airbrushed with Desert yellow and then received a oil color treatment with a flat brush and whit spirit, to emulate a wood finish. Last was a coat of clear matte. The colors were chosen to match the DoK's colors. Some minor touch ups and fitting the rows, hooks and anchors and this little side project can be called done. Cheers Rob
-
Your boat looks absolutely fantastic, made with great woodworking skills. Cheers Rob
- 216 replies
-
- 4
-
-
- masterkorabel
- ships
- (and 3 more)
-
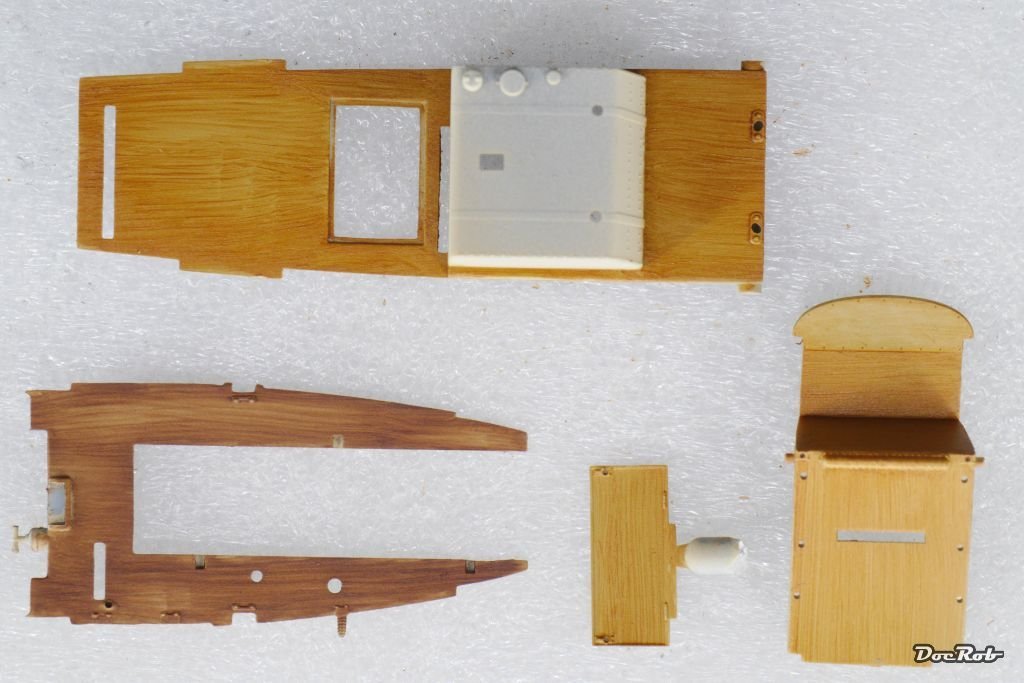
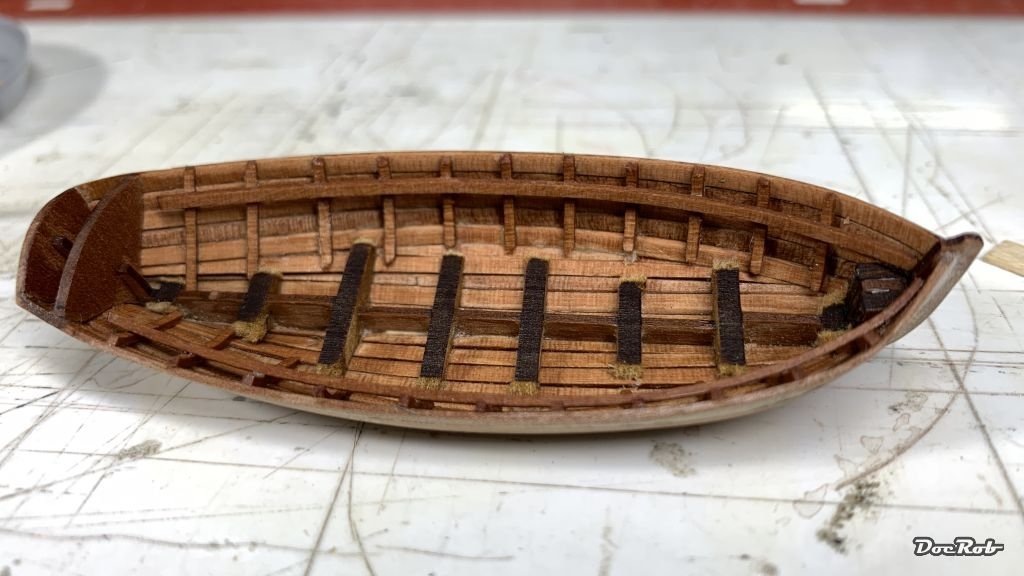
This boat is truly a model in a model and consumes lots of time to build up. My new Sphinx kit has thee boats included, that will be a real test. I added the spars, which are made from pearwood strips, which I soaked and clamped around a tin for drying with a curved contour. These were glued in with CA and then cut. Finally after adding the supplements for the seat panels, the inside of the boat got a coat of varnish. The rest of the boat will be painted matching the scheme of the ship. Cheers Rob
-
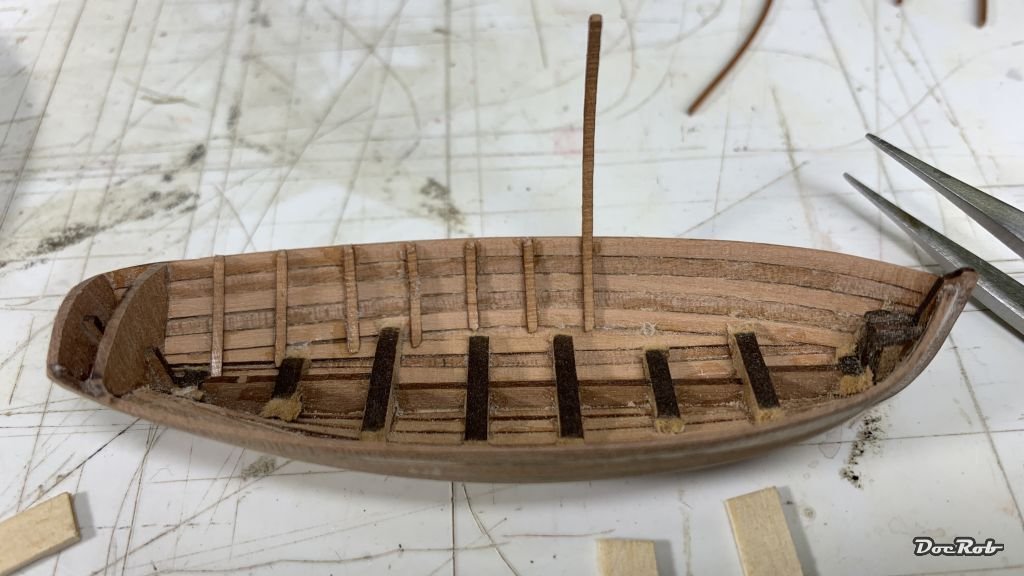
I feel with you Vane, as I'm building a boat for my Duchess of Kingston at the moment. It's a tedious affair for a novice like me and the first planks were not the most difficult. I feared the step of removing the frames, but it worked out good, without destroying the hull. I used PVA for the planks in places, where the frames will be removed and CA on the other parts of the planks. Cheers Rob