DocRob
-
Posts
1,296 -
Joined
-
Last visited
Content Type
Profiles
Forums
Gallery
Events
Everything posted by DocRob
-
 Absolutely right Egilman, there is so much to learn from MSW with all the experienced members around, willing to share their knowledge. Same goes for LargeScaleModeller.com. Cheers Rob
 -
Thanks Ken, the good thing with these subjects is, nobody can blame you for not being historical correct . Cheers Rob
-
After two days of bodyboarding in nice waves, three hours in the water each day, I´m broke, muscles ache, but hey, it was a lot of fun. Why am I telling this here, because it brought me to a decision for the interior color of my Kampfanzug. What looks so beautiful, when you start surfing a wave, looking down in the direction of the ground, right, bright turquoise and then it hit me, why not painting the interior like in a Russian jet with that strange shade of turquoise. Cheers Rob
-
Like Ken recommended, Pledge helps a lot against fogging of clear parts. If you dip clear parts into it and let dry properly, it even reduces the fogging effect of plastic glue and CA glue. If this doesn´t help, it´s sanding and polishing, I guess. I take, most of the clear parts are flat and van be carefully wet sanded on a flat surface and then polished with polishing compounds. Cheers Rob
- 33 replies
-
- 4
-

-
- Queen Mary 2
- Revell
- (and 3 more)
-
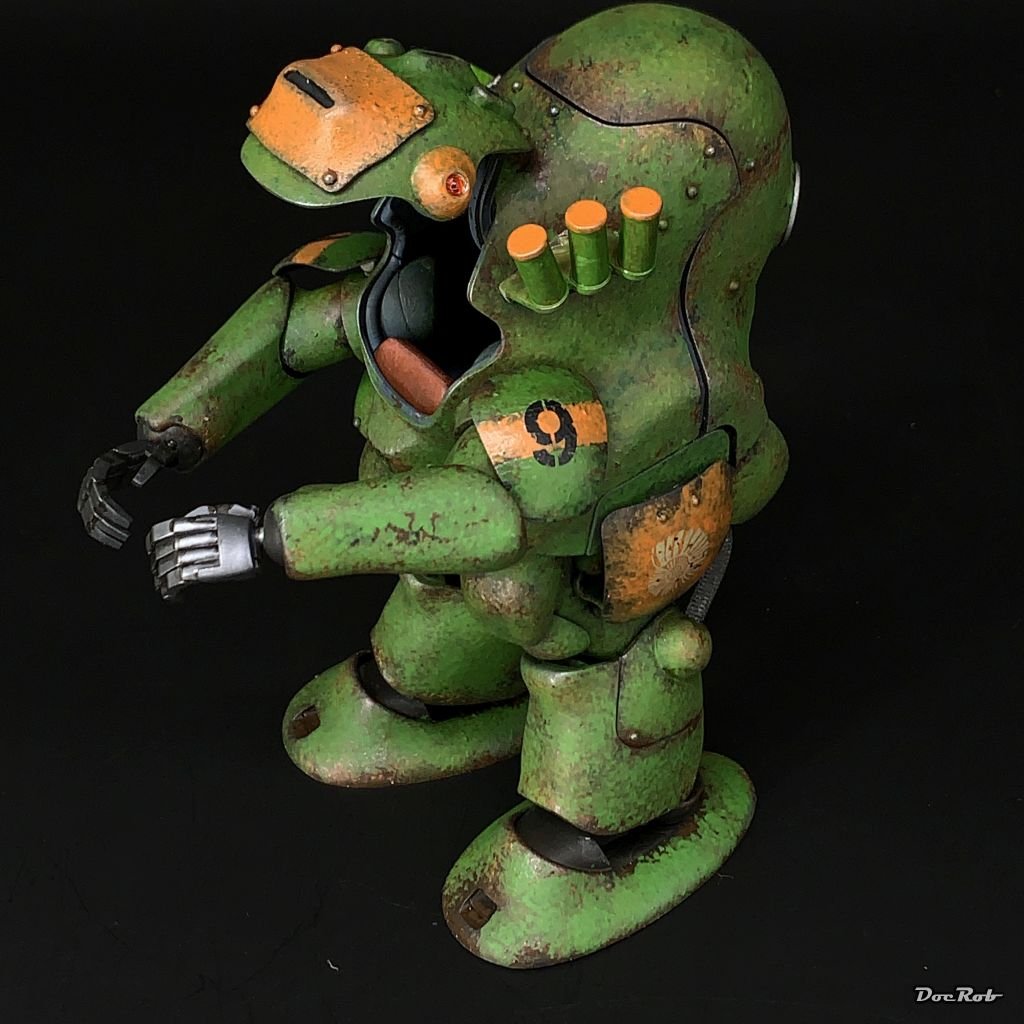
I didn´t had much time recently and made only small progress, but achieved some small steps. The deceased pilot got built and painted up. I used a guitar string for the spine, but the head is not fixed into position yet. I normally don´t like to show death and suffering in my builds, but this one should be a bit different, like black humor and so, I decided to give the figure a bit of a comic look through the paintjob, using heavily thinned acrylics and various shades of inks on top. The Kampfanzug (battle suit) was primed black, then the insides were sprayed with Extreme Metals duraluminum. I wanted to go titanium, but liked the shade of the duraluminum better. After that, the insides received a heavy dose of hairspray. Cheers Rob
- 51 replies
-
- 10
-
-
Orks Dakka Jet by RGL - FINISHED - Warhammer
DocRob replied to RGL's topic in Non-ship/categorised builds
Ugly bugger, but neat painting, Greg. Exhausts look great. Cheers Rob -
Orks Dakka Jet by RGL - FINISHED - Warhammer
DocRob replied to RGL's topic in Non-ship/categorised builds
I like it a lot Greg. I´m eagerly waiting for your paint scheme to work out. I never ventured into Warhammer or similar, but last week found this one and felt, I NEED IT. Cheers Rob- 21 replies
-
- 10
-
-

-
SPAD XIII c1 by modeller_masa - Roden - 1/32 - PLASTIC
DocRob replied to modeller_masa's topic in Completed non-ship models
Indeed, a great looking SPAD. Nice job on the rigging and the faded paintjob. Cheers Rob -
Well earned, the diorama looks absolutely fantastic. There are so many details to catch the eye. I wouldn´t have guessed it´s HO scale, had you not written it. Cheers Rob
-
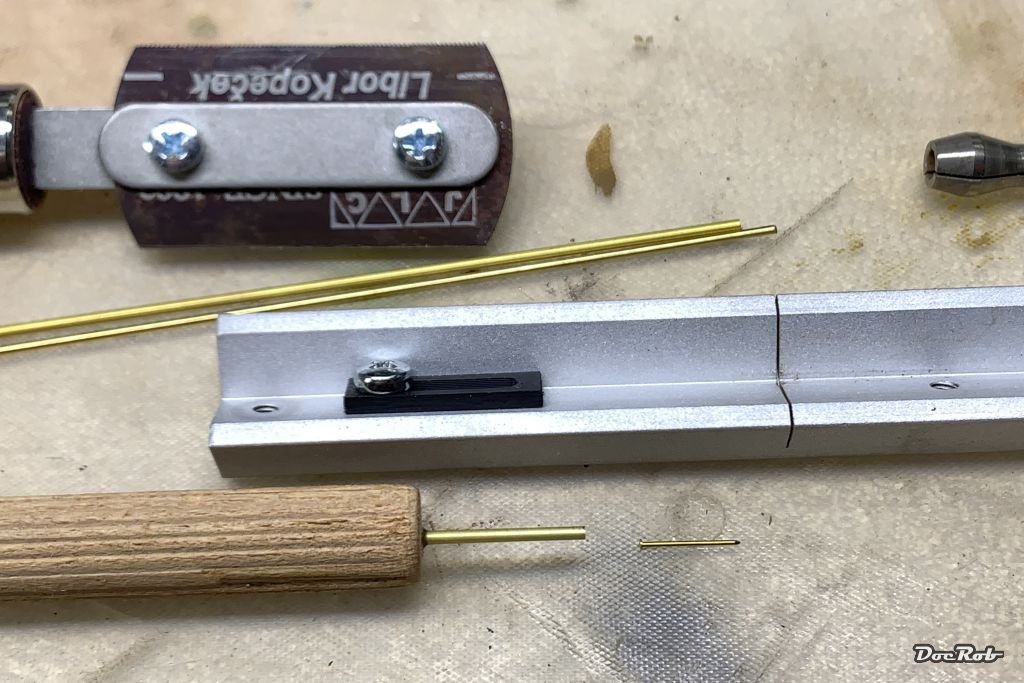
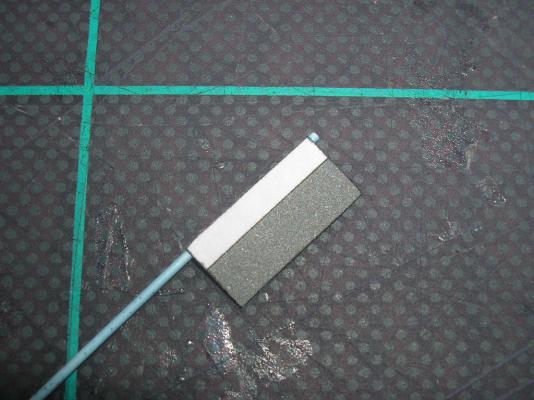
I made one myself for my Duchess of Kingston build, using wood for dowels, drilled a hole into the front, inserted a brass tube, which was before fitted with a brass rod inside secured with CA glue. With the inner diameter of the tube, you can adapt to the size of nails. Easily done. Cheers Rob
-
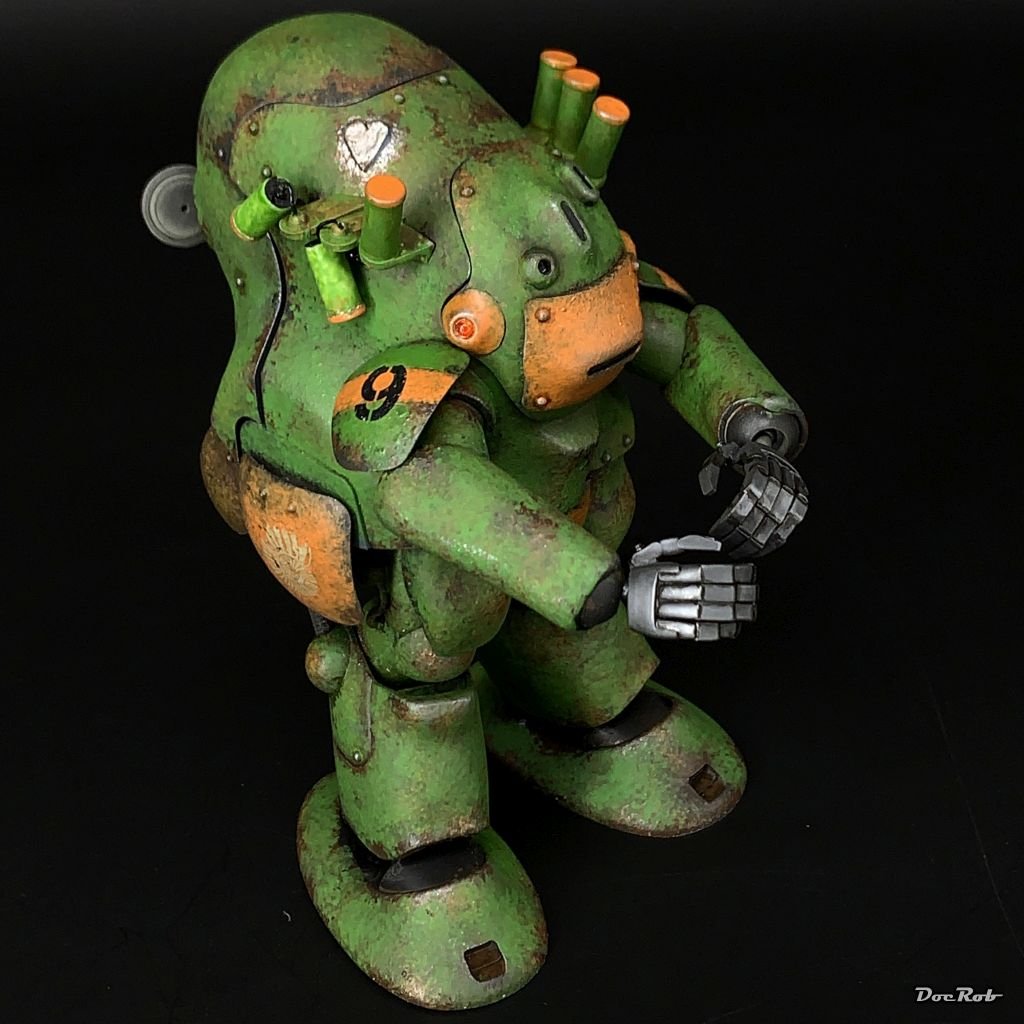
Thank you Ken, I know some of the kits and own two or three, but never cared about the story behind. I like the designs from Kow Yokoyama and wanted to build some of these kits, since I saw the old Nitto boxes, when I was young, but couldn´t afford the hefty prices then. I like the scale and the possibility to go freestyling with detailing and painting as there exist no real examples, naturally. I use these kits as a canvas for my ideas. Once I built an AmmoKnight of the same scale, only to incorporate a, at least to me, new painting technique in dabbing on numerous layers of paint and liked it. Cheers Rob
- 51 replies
-
- 13
-
-
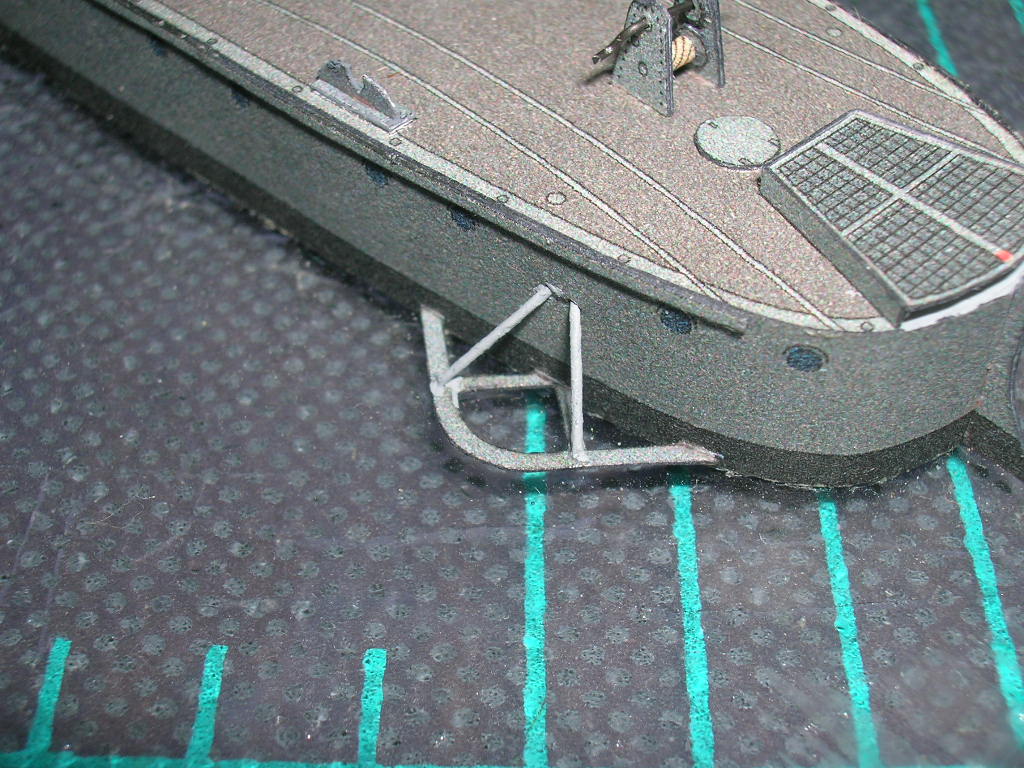
Well, some days later, it´s about time to actually do something with my planned Kampfanzug. I built up arms and legs and parts of the body, which is only fit loosely, to determine, how to line up the extremities for later positioning. The fit of the kit is very good so far and the limbs are connected via vinyl elements to keep everything moveable. I got two different left hands to choose from, but found this one perfect, to hold the squeezed empty PE-bottle. I have to plan the painting of the interior and figure - ahem - the remains of it, to be precise and started to mask the side windows, which unfortunately have to be mounted at a very early stage. That said, many parts are intersecting and depending on the right sequence to be build in. The outer side of the windows is protruding, so I adhered a double layer of Tamiya kabuki tape onto it, sharpened the contour with a fingernail and cut around with a fresh blade. One layer was left on the outside, the other went onto the inside of the opposite pane and vice versa. Inside and outside masking done. Cheers Rob
-
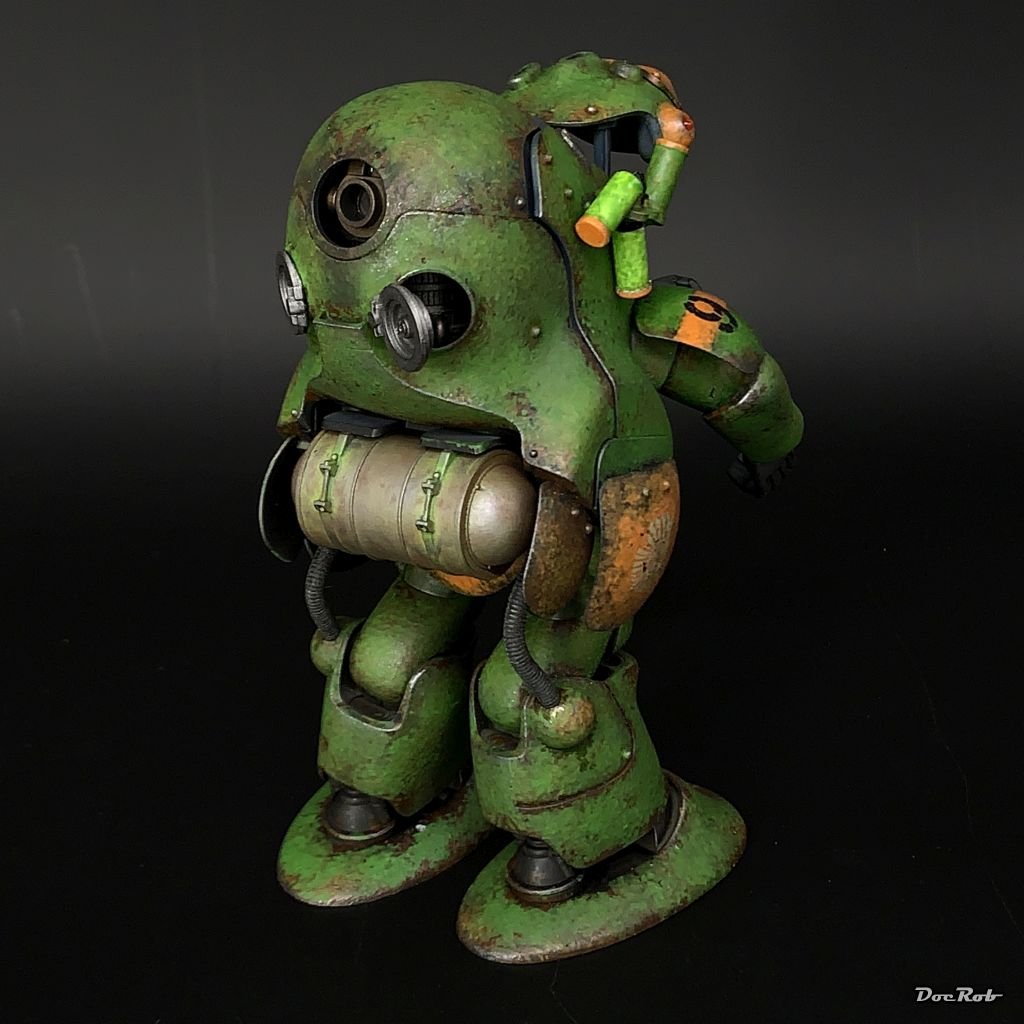
...and now to something completely different. Over on LargeScaleModeler, we started a group build wich is themed Sandbox, meaning all sand related subjects are eligible. I didn´t like the theme at first, as most of the desert related subjects have boring camo schemes. I browsed through my stash, before my Berlin trip and found only a few tempting subjects. A Do-17 in desert livery, yawn, some sand colored tank or LRDG Jeep, also yawn. Then I had an idea, pulling the 1/20 Wave kit of a Ma.K Panzer Kampf Anzug Friedrich out of the shelf. This will be a little dio with the Friedrich´s operator literally having bitten the dust or sand to be more specific. In Berlin, I bought some tiny but welcomed additions for the small scenery, including some squeezed water bottles and 3D printed skulls, which will add to the morbid scenery. Cheers Rob
-
I built several planes with NMF finish over the years and some aspects are making a good `metal` look difficult. As you mentioned the base coat is of great importance. The shinier the result should be, the better has the preparation to be. High shine finish calls for gloss black base coats. My go to here is Tamiya LP gloss black. It sprays very fine and has a high gloss finish, when thinned properly with leveling thinner. If applied correctly, there is no need for polishing. AK has a great range of metal colors called Extreme Metal. Most of them spray very well, fine grained and with a realistic shine. There are more durable than Alclad II colors, which are a tad better, when it comes to high shine finishes. Beware off the AK Extreme Metal Black Base. This stuff never cures and stays tacky forever. The application is another area of difficulties. High shine finishes are best, when carefully misted on in thin layers, until the blackness of the base barely vanishes. If you spray more, you loose luster. Another important step is preparation of the desired paint- and decal job. Most metal finishes are more or less sensible to masking, with Alclad being the worst that way. It pays to paint other colors before, if possible. Decaling with strong solvents can cause irritations in the metallic finish, as well as some clear coats. Generally, clear coats tend to lessen the shininess of the surface, even if it´s a gloss coat. I hope that helps a bit and I link a build thread of one of my more recent NMF projects here, where the goal was to achieve a P-38 as shiny as possible and with additional rivets. I described my testing and methods of application a bit more detailed there Cheers Rob
- 74 replies
-
- 10
-
-
I recently drilled a lot of tiny holes into resin and cast metal during my MFH car and bike builds. I used different set ups and drill bits and gained some experience with these. The Tamiya pin vise accepts drills down to 0,3 mm without problems and centers them perfectly. If you have to change drill bits very often, a chuck pin vise can be helpful, but the minimum diameter for that is about 0,6 or 0,7 mm, as the chucks aren´t that precise (DSPIAE vise). HSS drill bits are preferable, they are made for steel drilling normally and are ok for plastic, resin and wood as well. With small diameter drill bits, lift the drill often during drilling, other ways the residues block between drill bit and hole and the bit tends to heat up and break more easily. The PCB drill bits are easy to change, because of the standardized shaft, but they are hard and brittle and break easily, The cutting angle is not suitable for the typical modeling materials and tools, as they tend to "eat" into the material too fast. I use both, hand vises and a Proxxon power tool, which works great and even better since I spent some bucks and added a foot pedal, which is highly recommended. I also own a Proxxon drill stand, which I use frequently for drilling and polishing. One word of warning, I recently bought a case containing lots of HSS drill bits 0,3mm - 2,5mm from a Chinese online vendor starting with Al... as backup. These are total crap. The smaller diameters don´t even have a tip . Cheers Rob
-
Guilty as charged, Craig, but I share the same fate, as I bought the Cobra as my second MFH kit, after working on the Crocker. These kits can be addictive, somehow. You´ll like the tumbler, but don´t use the needle diameter too big. I choose 0,3 mm and that doesn´t soft the sharpness of the cast and gets into the crevices. With the Corvette, there will be the need of some polishing as well, despite the tumbler cleaning. If I would buy the Corvette directly from MFH, I would pay more or less the same, like you did and they ship within a week, even to my remote island. The Cobra was about 630 $ including shipping and somehow went through customs unharmed, somehow. @yvesvidal: I thought about the Auto Union as well, what a beautiful beast. Maybe, when I can lay my hands on one of these... Cheers Rob
-
I worked on the interior of the Cobra Coupe, lately, installing and decaling the switchboard first, then matte clear sprayed over the decals. Last were the switches, which are glued from the backside. Next was the shifting lever, which was not easy to install cleanly, with the tiny rivets to add. Last for these steps was the fire extinguisher, which is fantastically detailed. The chrome band is made from chrome adhesive tape, instead of the kit´s springy PE part. Then the tub was installed onto the chassis, followed by the seats and seatbelts. I love MFH seatbelts, as they provide double sided adhesive tape for mounting and installing them. No risk of CA blotches, smart. Cheers Rob
-
... meanwhile, the Cobra Coupe isn´t vegan anymore. I bought some self adhesive leather from MFH lately and decided, I give the seats a try with this. What looks better than the real thing . The seats were primed and sprayed semi matte black and then, I cut the leather patches roughly to contour. The shape of the seats is a bit difficult to cover, but the leather is luckily very thin and flexible and adheres very well. I think, with the seat belts applied and some final trimming, they will look good. Cheers Rob
- 225 replies
-
- 12
-
-
-
Sweet, I never had imagined, I could fall in love with this kind of Porsche, but somehow your build ignites some `want` feelings in me. Interior and trunk look extremely good. Cheers Rob
-
Thank you Ken, I will take my time and add more internal components for further evaluation. This is a make or break issue and I will not rush here. Cheers Rob
-
Well, it was about time, to see how the body, hood and doors will fit to the chassis. I cleaned the excellent casted body parts and drilled all the needed holes and joined the hood to the chassis. There are cast metal hinges and the hood will be openable. When adding the body, which is not screwed on for now, I got what I feared, a gap, the hood being to high, because the air funnels don´t have enough room under the hood. I was prepared, as Pooh described the same problem in his YouTube build video. It looks a bit worse on the pics than it is in reality, because, I can lift the back of the body slightly. I inserted the doors on their metal hinges and found the right one fitting too low and the left one was ok. I´m close to the body painting stage and the fit issues have to be solved thorough and now, so next is analyzing, what to do best. Cheers Rob
- 225 replies
-
- 12
-
-
I will join you in the backseat, as I have the early model Halberstadt and plan to build her with a very demanding paintjob. Have fun with the surely great WNW kit. Cheers Rob
-
Spitfire Mk.Ia by davec - FINISHED - Kotare - 1/32 - PLASTIC
DocRob replied to davec's topic in Non-ship/categorised builds
Beautifully done, Dave. Your Spitfire looks very clean painted and finished, like you had it planned with a museum`s exhibits look. Cheers Rob- 35 replies
-
- 10
-
-
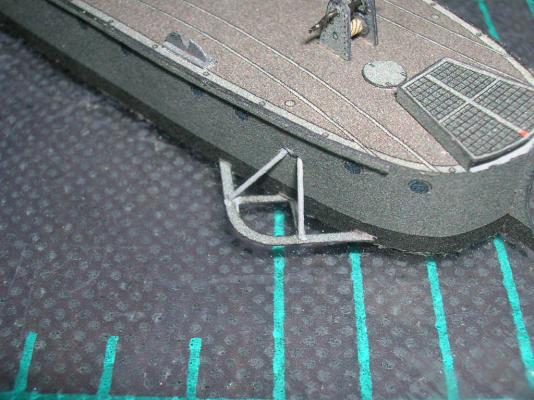
Sorry for being late, I had the same issue, the bowsprit interfering with the figurehead, but I didn´t glue the figurehead in place. It needed some tweaking, but finally, I inserted a piece of wood under the bowsprit, where it passes the hull, which steepened the angle a bit. Components like the figurehead, I glue permanently into place, after all the masting and rigging is done. Same goes for the ships boat, where only the supports where glued onto the deck. I try to keep as much wiggle room for rigging and save the delicate components for last. Cheers Rob
- 207 replies
-
- 5
-
-
- vanguard models
- Duchess of Kingston
- (and 1 more)
-
Thank you Craig, when all is forced into it´s place, it start to look good . You can´t imagine the touch up work, I don´t know, how often, I resprayed or brushed some damaged black areas. Cheers Rob