DocRob
-
Posts
1,297 -
Joined
-
Last visited
Content Type
Profiles
Forums
Gallery
Events
Everything posted by DocRob
-
 Thank you Dan, after working with the decals, I had some really bad experiences, after working with a hairdryer onto one fuselage side, the huge decals wrinkled terribly, where the others worked fine with the same treatment. With a lot of patience, I got it sorted out finally. I always use Micro Set for the application and later, if there are wrinkles or details, over which the decal didn´t conform too well, I use Micro Sol, in this case multiple times, with a hairdryer in between. I wouldn´t use Sol for the first application, because it softens the decal and makes it more sensible for destruction and unwanted stretch, which can cause fit issues. Cheers Rob
 -
Today I decaled the lower fuselage and wing stubs with lozenge camo. The provided decals are ABSOLUTELY fantastic, maybe the best I ever worked with. The fit, even for the cut outs and strut holes are perfect, which is a great relieve. I decided to work my way up, in case there are overlaps, which indeed are minimal. I used Micro Set and Sol and a hairdryer for the application along a flat brush, to push the bubbles away. One strange thing, on two of the five decal sheets, the decals need to soak for more than five minutes, where the others need only a minute. Then I changed plans for the umpteenth time in this build and build the undercarriage, which luckily is a very sturdy construction. Not visible on the pic are the eyelets, which I glued in, before painting as a preparation for rigging. Now the fuselage can rest on the undercarriage and the underside decals remain unharmed. Cheers Rob
- 190 replies
-
- 13
-

-

-
I started to clean up the engine parts and parts of the nacelles, because I wanted to get a grip for the fit and for the painting process. By the way, I decided to wire the engines and pre drilled the magnetos with 0,3 mm holes for the wiring and the cylinder heads with 0,5 mm holes for my brass tube spark plugs. Meanwhile the fuselage was airbrushed with Tamiya XF-17 sea blue. In case you wonder, why the AEG looks like a porcupine, I put in wood plugs into the holes for the struts, adhered with a drop of thinned PVA. If you know about WNW tolerances, you got the idea, I don´t want to clean out every hole, before assembly. For the same reason, the engine support struts were loosely mounted. As much as I like the matte look, I need a glossy surface for the lozenge decals and sprayed on Mr Hobby GX-100 clear gloss, with two thirds of leveling thinner in the mix and ruined the perfect mattedness. Cheers Rob
- 190 replies
-
- 12
-
-
-
I haven´t done as much as I wanted lately, but checked the gaps in the fuselage and sanded a bit. A tiny bit more filling and sanding is needed, before I can continue with airbrushing the base layer for the lozenge decals. What I did, was pondering about the painting and decaling sequence, identifying where the fuselage decals go. Nose, decks and parts of the wing stubs are only painted, the rest will receive decals. The next decision was about the base layer, therefore I decaled a gloss white plastic strip, which I painted with areas of gloss black and added a spare decal, to see, how much transparency the decals have. It´s almost non visible, which means, I will airbrush Tamiya XF-17 sea blue as a base, followed by a gloss coat for the decals. If I would have base coated with gloss white, I would have had the possibility of pre shading, like with Aviatic decals, but this makes no sense here. It has to be post shading then. Cheers Rob
-
Preliminary to closing the fuselage permanently, I made a last test fit of the decks and had a last peek at the interior, where the final details were added, like the folding seat for the commander. I displayed it folded and stored, which leaves a narrow tunnel for the crew to slide through to the back of the cockpit, not too easy I guess with the thick leather outfit and maybe a life jacket. Then I closed the fuselage, did a first bit of sanding on the seams. Fit was good, but not perfect, due to the very thin plastic and multiple parts intersecting. On the lower side, you can see the dark patch of the tiltable window for the fuselage gun. WNW chose to produce the stitching on the lower side as separate parts, which seal the lower fuselage side seamless, genial. There is one rectangular part fitting between the two bomb slots in front of said window, where the WNW manual calls falsely for part A45, where A44 is the correct one. I shimmed the lower nose section with a strip of evergreen, because this area is very flexible, due to the thinness of the plastic. Cheers Rob
- 190 replies
-
- 15
-
-
-
Thank you wefalck, you possibly got me there. I´m mostly sure, these planes had a relatively short service time, due to technical failures, enemy fire, accidents and further technological development. On the other hand, they were used under less than comfortable conditions, at night time in cold, windy and humid weather conditions, with a crew, trying to stay warm, crawling around in the crammed space with their thick leather outfits on. The envisioned picture, I painted in the second part, led to my rendered image, I developed before I even started the build. When I start a project, I always try to get a feel for the subject, the conditions and circumstances and this along with other sources forms that said picture in my head and that´s what I follow through the build. I like to build realistic models, but not to the last possible aspect. With my picture in mind, I keep the liberty of freestyling a bit. With the AEG, I was sure, the question will arise sooner or later, but rendering this picture I have pre-envisioned into scaled reality is what drives me in modeling. On a side note, with wooden ship modeling, there seems to be a great hesitation with weathering and ageing in general, which is a pity. The majority of builds look brand new, my feeble attempt with the Duchess of Kingston included. I think, weathering and ageing is an art and will use it on wooden ships as well, when I have some more experience with the subject. A first try might be a fishing vessel or similar. Cheers Rob
-
I finished the cockpit tub today. You have to be faithful, that a zillion of contact points fit, where they should into the fuselage and to the three deck parts. I test fitted a lot, checked again with the manual, but praise to WNW, the fit is excellent. The seat belts were added, after I mistreated them with pigments, washes and matte coat and the last bits and pieces went in. The inboard LMG can be added later, which I also tested. I prepared the fuselage halves with some fake rigging, made from 0,2 mm nickel rod with 0,5 mm aluminum tube glued to the ends and then Ca-ed into the fuselage. The fuselage got closed and left to dry overnight and I even didn´t forgot to snap in the trap door window for the fuselage LMG. Cheers Rob
- 190 replies
-
- 17
-
-
-
I applied the first batch of lozenge decals today. They went on beautifully on the inside of the fuselage and need to be flat coated then. Initially I wanted to assemble the HGW seat belts, but couldn´t find the heart in me to start. There are four pairs to be made for the captain/observer in the front cockpit, the pilot, the foldable co-pilot seat and the rear gunner. Interestingly these four stations were only manned by a crew of three on night missions often only two crew members. The captain/ observer crept through a tunnel out of the front cockpit for takeoff and landing, because in case of a nose dive, he would be crushed in the front office. Speaking of nose dives, to distract me from the seat belts, I even had a peek on the waves for surfing, but on this cold, grey, stormy day, there was no surf to speak of, so back to the belts. Well in the end, I assembled all four pairs and now my eyes are hurting . They are a bit simpler to build u, than the WWII ones, but fiddly as well. Again, it was helpful to fiddle the belt parts through the buckles, when these are still on the PE fret. On the picture, they havent received their brown oil color wash, which will be followed by a matte coat tomorrow. Cheers Rob
- 190 replies
-
- 13
-
-
More detailing and adding of pre painted parts took place, before closing the cockpit tub. WNW has a great photo in the manual, which shows the bomb release switches in the observer station, but added none in the kit. I used Albion Connecto brass parts for this. I cut the crosses to size and glued them into the switchboard. Later, I added cables for each of the switches. That´s how it looks now: Now it´s time for the seat belts, where as usual the HGW instructions for the paper and PE belts has some errors. It´s always the same with HGW, they have some great products, others are a complete fail, but the manuals are always wrong. I closed the cockpit tub, but not before checking, it fits into the fuselage, which it seems to do, phew. I haven´t added the steering wheel, because I can´t find my PE-fret, where some tiny parts have to be added to the steering column and I hope, I can find it in time. I toned down the backside of the seat with smoke pigment, because my oil color woodgrain looked too new for my bird. Then I simulated the decks for fit and what remains visible. Cheers Rob
- 190 replies
-
- 15
-
-
-
Thank you Ken, looks like a good place for a cigar and a glass of cognac, doesn´t it. I was not satisfied, after I painted the seats up with my usual multicolor blend of oil colors, using near black in the deepest folds and work my way "up" to the most exposed areas with a lighter shade than the base color. Oils blend perfectly, but after coating semi gloss clear on top, the nice effect nearly vanished, maybe because of my chosen dark brown look. I thought about, how old leather looks and decided to play with partly shinyness, which is so typical for used leather. That was where the idea for the sanding paper came into play and I liked the result. Finally, I dabbed on some bronze metal wax with onto the knobs with a toothpicks and now am ready for my cigar. Cheers Rob
-
It starts to get cozy in the front office. It´s time to add the numerous details and it´s a good idea, to follow the manual with the progress. Guess how I found out. I had to wiggle one bulkhead in, because I glued the sliding pad too early. The seats are oil painted on sand yellow and accentuated with toned variations of the base color. After a coat of flat, I had a semigloss finish, which was treated carefully with 4000 grid sandpaper, to remain glossy leather patches and some worn dull areas. On most of the metal parts, I applied a very slight rub of iron pigment with a cotton swab, a technique, I use very often to enhance the metal appearance of these parts. Somehow it looks right scale wise. There was a lot of detail painting in places and I used CA mostly, as it´s not so thin to spoil surfaces and bonds well, even with painted surfaces. Cheers Rob
- 190 replies
-
- 17
-
-
-
Thank you Yves, WNW did a great job, designing the dashboard and specially the perfect fitting decals, which made it easy to achieve a satisfying result. I haven´t spoken about it, but WNW made a mistake with this IP and moulded some British instruments onto it, but mentioned in the manual, that these are to remove. No biggie, it happens to the best. Cheers Rob
-
Thank you Dan, you perfectly nailed the fascination, these WWI planes possess, beside their looks. Everything is about material and surfaces, wood, metal, leather, cloth, it´s the promised land for material replication afficionados like me. Cheer Rob
-
Thank you Tim, the Wingnut kits are near perfect, quality wise, you won´t be disappointed. The kits are the perfect canvas for using new techniques, as you don´t have to care about fit issues a lot. Tolerances are quite tight, so test fitting, especially with a layer of paint on top is a must. Usually you have to remove paint from mating surfaces. Decals are Cartograph printed and very good to work with. Many parts are very fragile, so some extra care during working with them is necessary. I have built two already and enjoyed the builds, a Pfalz D.IIIa and a Hansa Brandenburg W.12 and have some more in stash. The only other comparable company when it comes to WWI in 1/32 planes is Copper State Model, with similar refined kits and even better manuals for my liking. Cheers Rob
-
The instrument panel and other decal receiving parts were gloss coated with Tamiya LP clear gloss and I applied a black panel wash. The decals went on very good, it´s Cartograph quality, but I found, they needed an unusual long soaking time. I shattered one dial, because I started to apply it too early, but could recover the parts. The fit and design of the decals is perfect, which can be seen with the switchboard on the IP, which is one large decal. It lay down perfectly after some applications of Tamiya decal adhesive softener type and pushing the decals down with a soft brush after heating them with a hairdryer. The IP was matte coated at last I decided against gloss for the bezels, which would be too shiny for my wanted appearance. Cheers Rob
- 190 replies
-
- 18
-
-
Among many other things, I finished the bombs, using a brown oil color wash and a light grey weathering pencil to highlight the rivets. The fuses were painted with Ak´s true metal wax brass. The instrument panel got basically painted and after taking the pictures received a coat of gloss as preparation for decaling. The backside will be barely visible, so only a crude detail painting was applied. Cheers Rob
- 190 replies
-
- 16
-
-
Good to have you around, Greg. The AEG was sitting on my shelf as well for a while, until the twins group build over on LargeScaleModeler started and I decided, now is the time, no more hesitation about size or a complicated build. Thank you Dave, when I start a new project, I have a very detailed image shaped up in my head, about how the finished kit should look. I also pre think about the techniques, I´m willing to learn and to use through the build. Some of my builds look also factory fresh, but others not. With the AEG, it was an easy choice, these open topped, oil spilling monsters are an invitation for weathering and wear through usage. Cheers Rob
-
Thank you Tim, it´s a bit stark now, but I think with all the details added, it will come out good. Hard to imagine that these planes had a long lifespan, given the conditions they were flown in, but that was the look, I wanted to achieve from the beginning. Cheers Rob
-
Well, I finished the cockpit flooring and start with the detail painting of the cockpit area now. The wood finished cockpit floor was covered with two layers of chipping fluid, which I used for the firs time. I cannot see, where it performs better than hairspray, which I used successful multiple times, beside the smell. After drying, I spray Nato black onto the floor, slightly mottled and as much, that the woodgrain was barely visible. Next was the abrasion of Nato black with different tools, a stiff pointed brush, a fiber eraser, a toothpick and tweezers after dampening the area. I emphasized the wear, where boots might have scratched the color off, around the seats and close to the sliding tunnel for the crew. That is where I am right now, but I guess, the apparently heavy used look will be a bit more restrained through adding lots of painted details and decals and seat belts. Cheers Rob
- 190 replies
-
- 16
-
-
The last step for today, was applying some wooden texture onto the cockpit floor. This is very crude and only made with a PE template, first spraying desert yellow, followed by red brown. I decided against the much more refined oil technique, because only a bit of this will be visible. Next, I apply some chipping fluid and then spray Nato black on top, which will then be scratched away with different tools. Cheers Rob
- 190 replies
-
- 13
-
-
I also started with the interior painting. As Opposed to other planes of the time, most of the interior was painted and not left in wood. Again, I used the salt technique, which was a bit of a challenge with a humidity around 90%. The salted parts soaked humidity out of the air and stayed very wet. I had to repeat the salting, using less water and let dry for only some minutes and then use the airbrush for further drying, directly before airbrushing. I used Tamiya XF 76 (IJN light grey green). I sprayed a thin layer over the salt with the interior side parts loosely inserted into the fuselage, to have shadows, where the tubes are. The salt was removed then and again, the XF 76 was misted on in pronouncing patterns, until I was satisfied for now. The effect is a bit hard to capture on photos, but it´s more or less the same rendition and intensity all around. Cheers Rob
- 190 replies
-
- 16
-
-
-
I continued with the bombs, removing the salt entirely, which left me with this: Later, I over sprayed everything with translucent layers of RLM 76 and got what I was looking for. Next will be a panel wash and the brass detonator caps. Cheers Rob
- 190 replies
-
- 14
-
-
This is my first take on the salt technique, I chose the bombs for testing, because I wanted to know, how they look in the end, and if I have to replace them with AM. Normally, I build my planes without ordonnance, but in this case, I chose them for contrast and for learning the salt technique. If I´m satisfied, I will use the method for the inside of the cockpit as well, which is primed and salted and waiting for some paint. First they were primed with Mr. Surfacer 1500 in black Then the bombs were brushed with water with an added drop of detergent for better distribution and then salted with irregular salt grains from a mill. After drying, I shot a layer of AK Real color RLM 76 overall and now let them dry until tomorrow, before removing the salt. The contrast will be too harsh by far, but that´s ok, because I want to overspray again with color in translucent layers until I reach the desired effect. First, I wanted to use Tamiya XF-23 but opted for the slightly more bluish tint of the AK color. Cheers Rob
- 190 replies
-
- 14
-
-
AMC DH9 by davec - FINISHED - Wingnut Wings - 1/32
DocRob replied to davec's topic in Non-ship/categorised builds
Like others said, the woodgraining looks beautiful, as does the leather, Dave. You are right, it takes time to put the innards of a WWI plane together, but I always find it very satisfying work. Tolerances are especially tight with WNW and I recommend regular test fitting with the fuselage halves. This will be a beauty, with the lobster livery. I´m still thinking of buying one (there are still some available, new , for a reasonable price) but would choose the Greek color scheme. Cheers Rob -
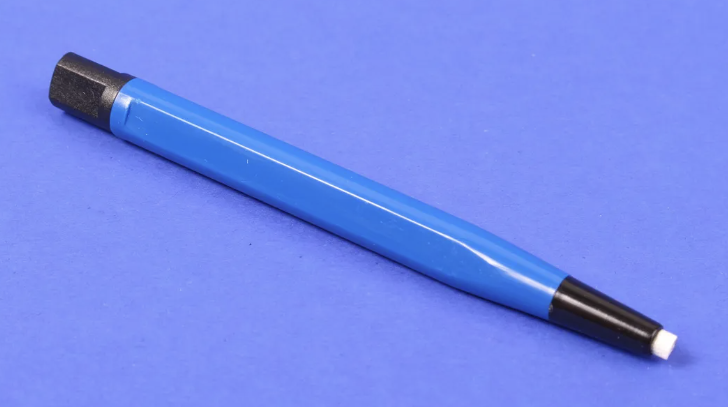
I´m using a similar model like this one here, Dave. The white tip is a bundle of glass fibers. These glass fiber pencils are very useful, to remove paint on mating surfaces or oxidation from electronic parts. If you use them, you should wear a respirator or at leas a dust mask. There are very fine particles of the fibers in the air, while using it. Cheers Rob