HOLIDAY DONATION DRIVE - SUPPORT MSW - DO YOUR PART TO KEEP THIS GREAT FORUM GOING! (Only 44 donations so far out of 49,000 members - C'mon guys!)
×


flutlo6180
-
Posts
146 -
Joined
-
Last visited
Content Type
Profiles
Forums
Gallery
Events
Everything posted by flutlo6180
-
 Thanks. I hope that some day I will be at your level of craftsmanship.
- 59 replies
-
- 1
-

-
- Alert
- Vanguard Models
- (and 1 more)
-
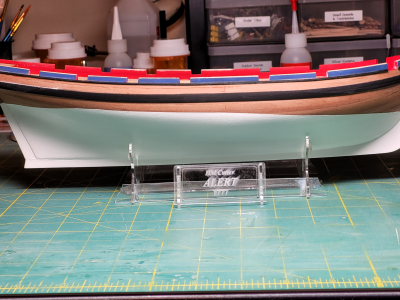
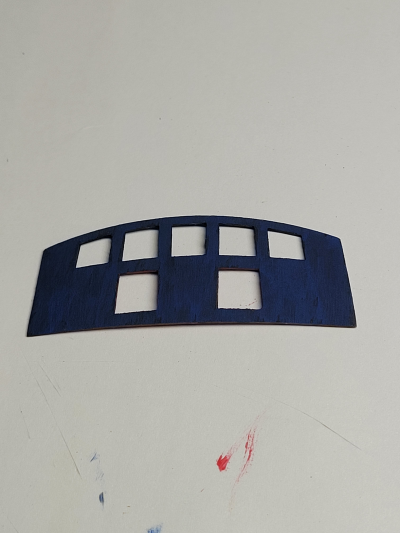
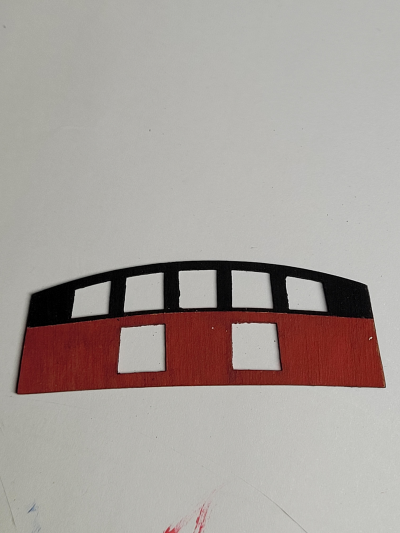
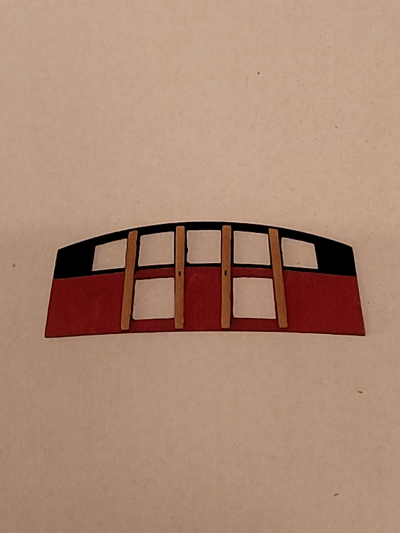
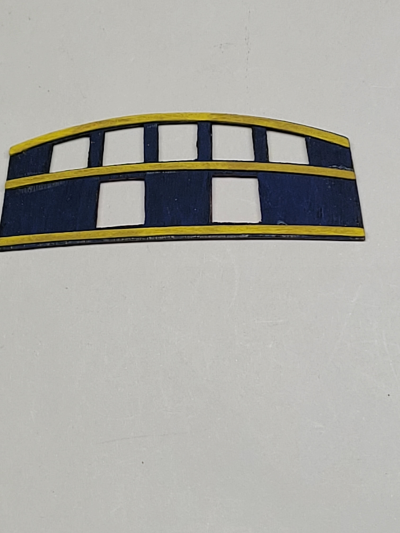
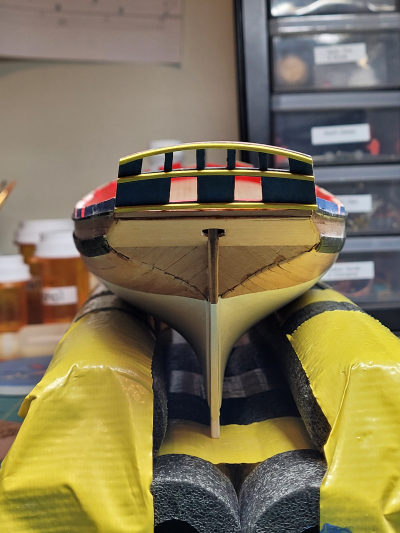
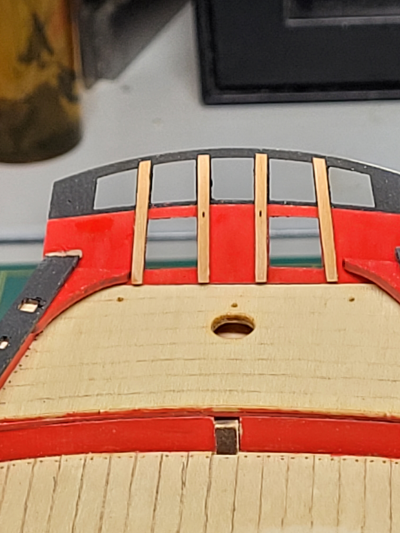
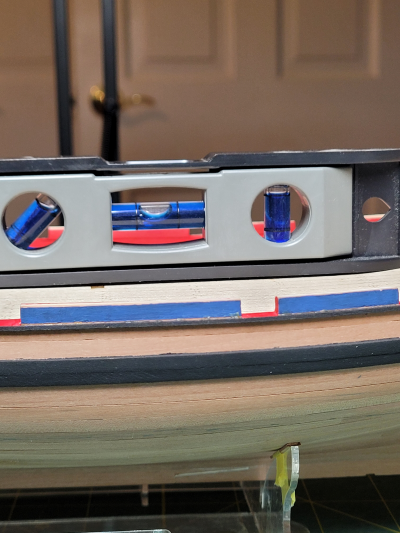
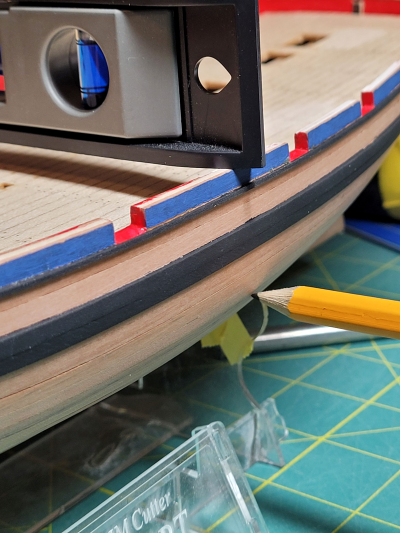
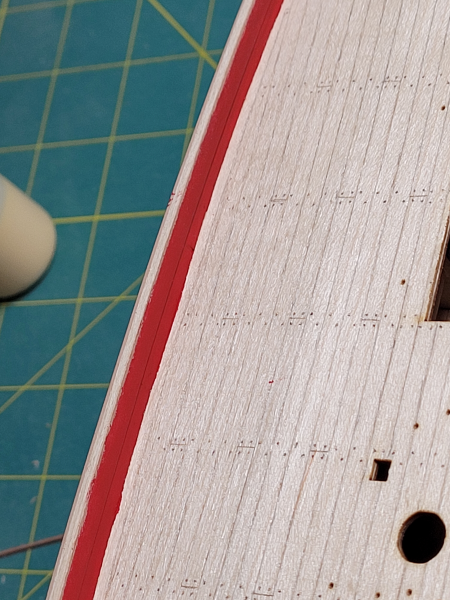
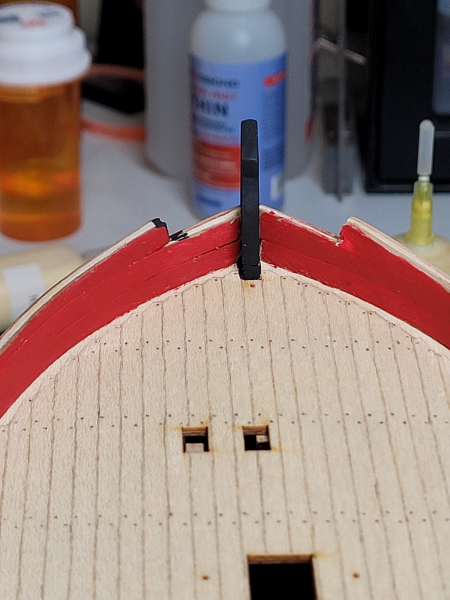
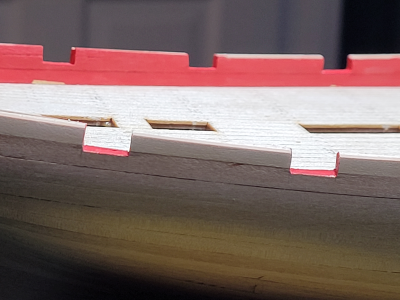
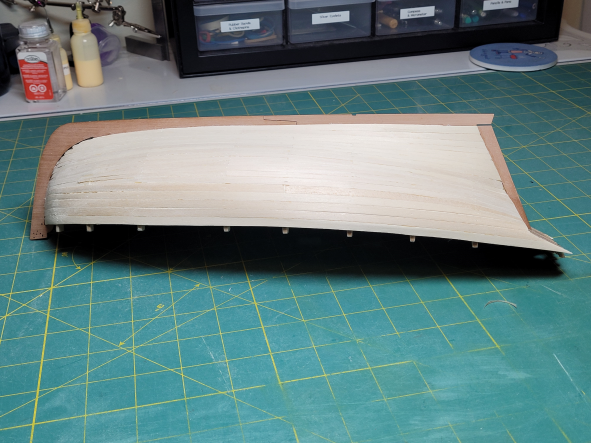
After getting the comments from Glenn and Thukydides (thanks again), I was able to layout the waterline and get the bottom painted. I'm glad I took my time and asked for some guidance as the result looks pretty good (at least in my opinion). With the waterline complete, I moved on to the transom. I used thin detailing tape to get a clean line between the black top and red bottom. And managed to get the transom assembly installed without breaking anything. On to the the top cap and railings.

- 59 replies
-
- 6
-
-
- Alert
- Vanguard Models
- (and 1 more)
-
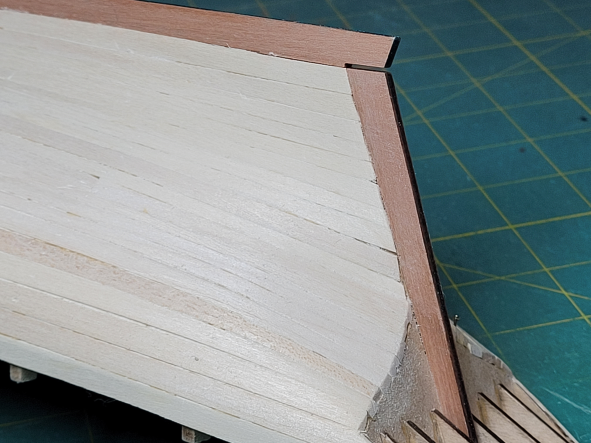
Thanks Glenn. Adding some additional reference points should help to better visualize how the line should look. Thanks Thukydides. The apparent difference in the picture stems from the right hand side being painted and the other side unpainted. I appreciate you sending the link to your log post and the data point on the stern dragging a bit on cutters.
- 59 replies
-
- 2
-
-
- Alert
- Vanguard Models
- (and 1 more)
-
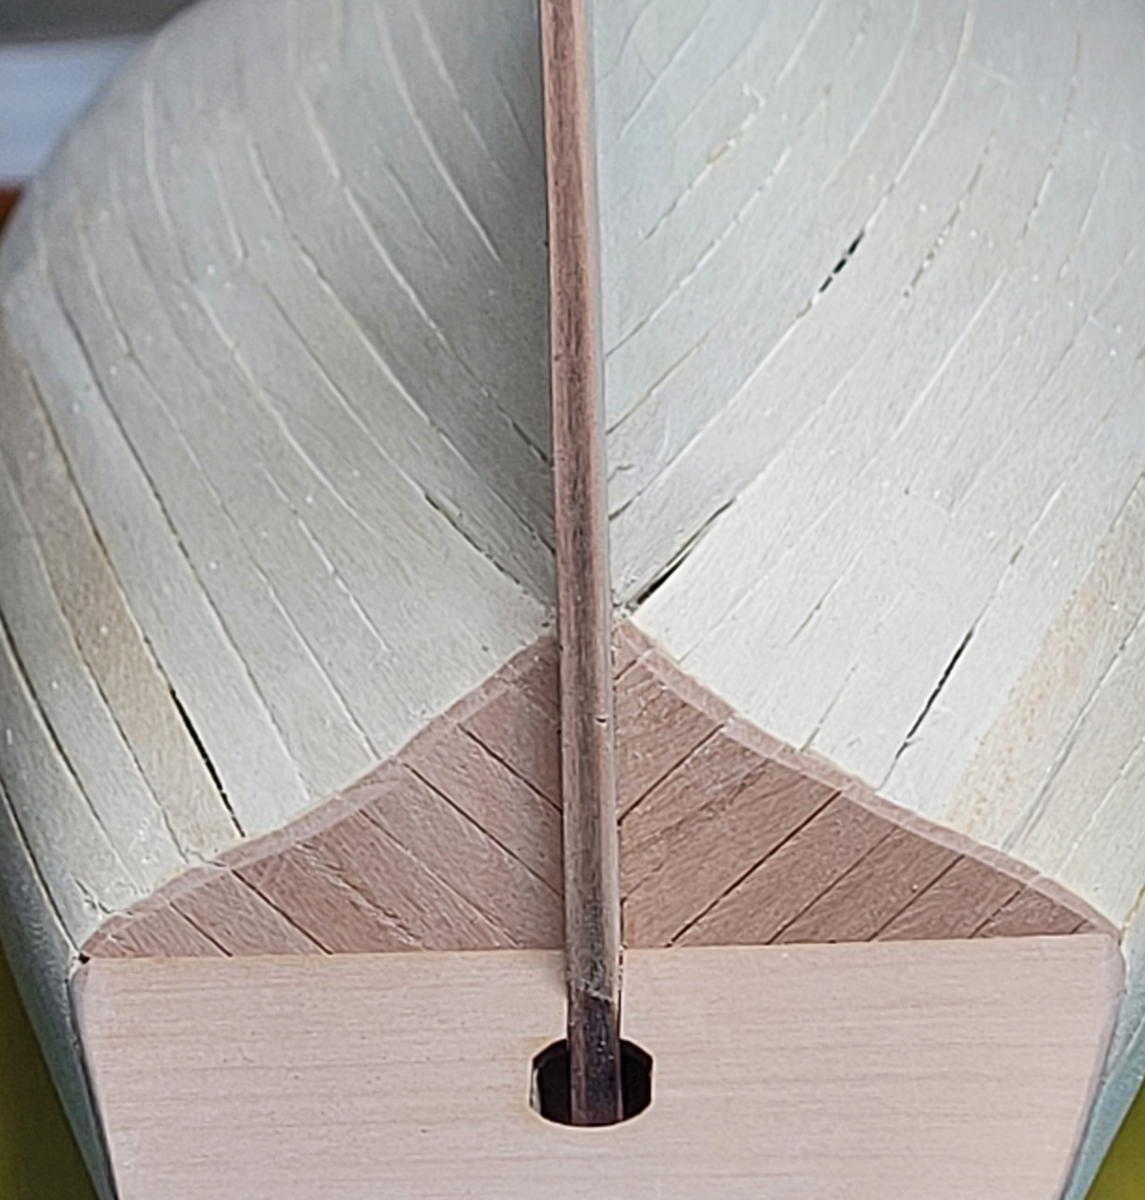
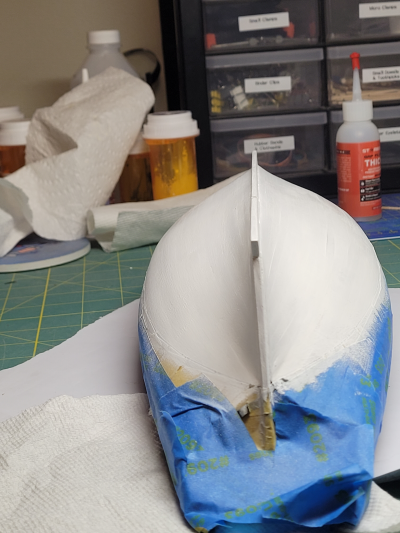
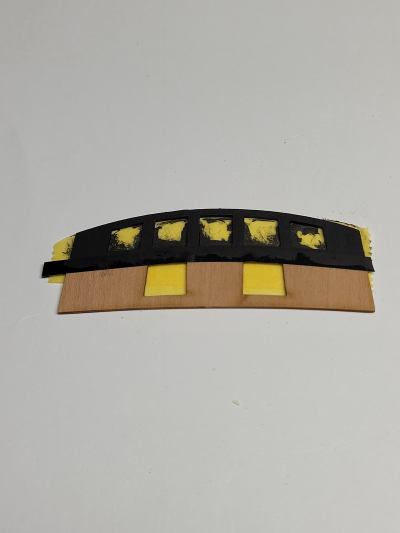
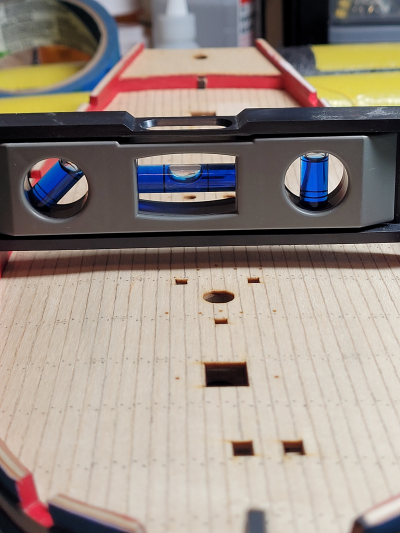
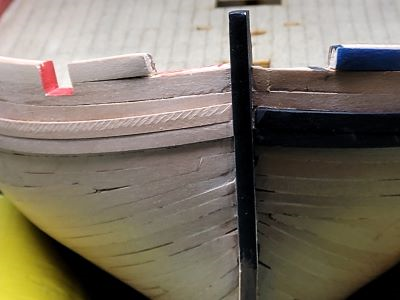
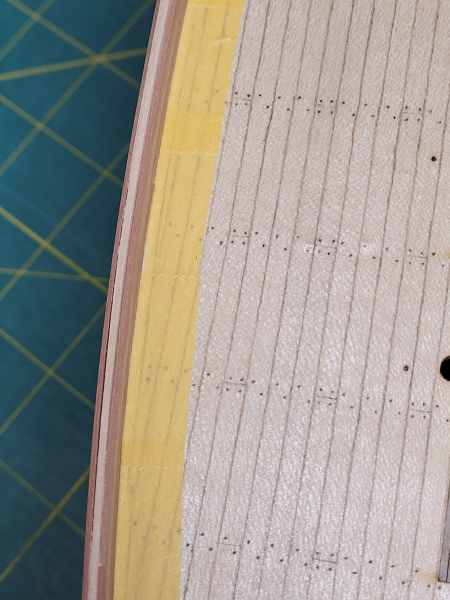
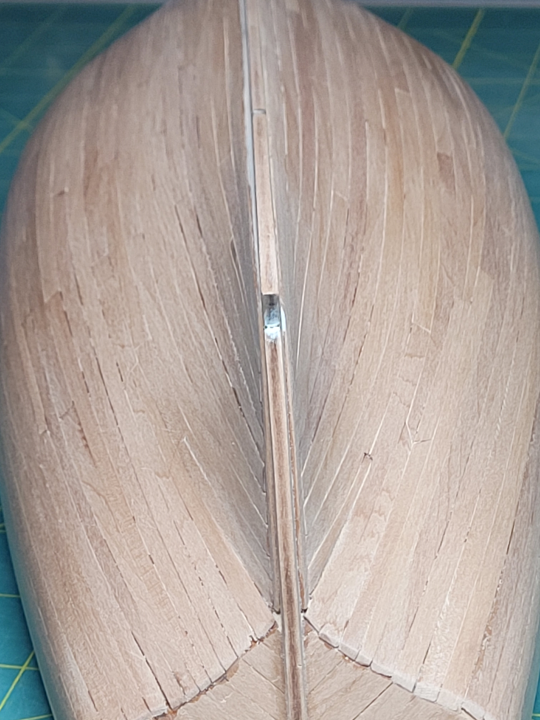
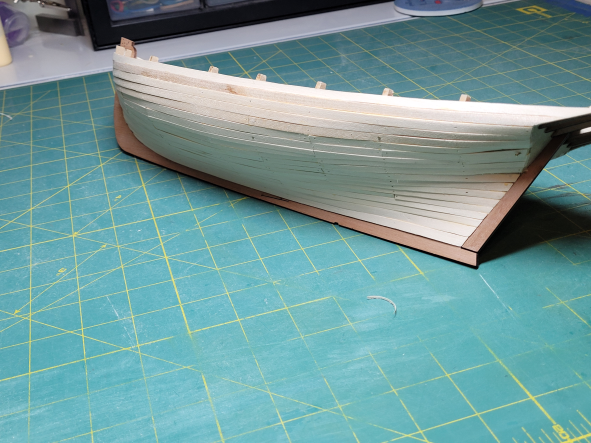
The build is coming along nicely with the progress made the past few days. I was able to install and pain the main wale. Painting between the gun ports is also complete with the strake at the bottom edge of the gunports painted and installed. I decided to wait to install the cap rail until after the waterline is drawn and the bottom painted to avoid the chance of breaking anything. The waterline is proving to be more of a challenge then I expected. I'm using an Amati waterline marker but the result looked really off with the hull placed in the proper location on the acrylic stand. I checked the table and it was level in both direction but the hull was way off level fore and aft. You can see how far back the notch is in the second photo to get to level. The waterline look better after leveling the hull but I am still not convinced it is correct. Clearly there is some proficiency involved with using the marker which I have yet to achieve. I have two questions I'm hoping someone can answer. First, should the hull be level fore and aft or placed correctly in the stand before scribing the waterline? Second, How far below the main wale should the waterline fall at its highest point amidships?

- 59 replies
-
- 3
-
-
- Alert
- Vanguard Models
- (and 1 more)
-
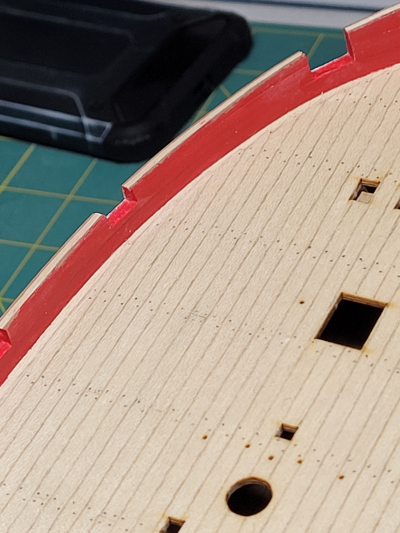
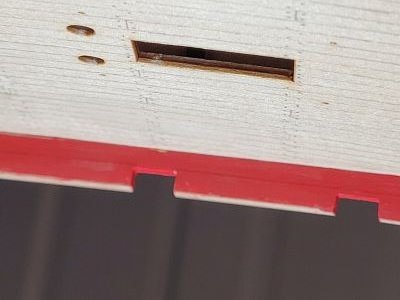
Applying the paint to the inner bulwarks provided a great feeling of progress. Getting the gun ports cutout and painted was even better. I did run into 2 issues where the planking layer section between gun ports came off - not sufficiently edge glued during planking. Fortunately nothing broke and I was able to fix the issues with a quick bead of cyano. Any errors is placement are going to show up when I install the top cap and I have my fingers crossed that won't be an issue.


- 59 replies
-
- 3
-
-
- Alert
- Vanguard Models
- (and 1 more)
-
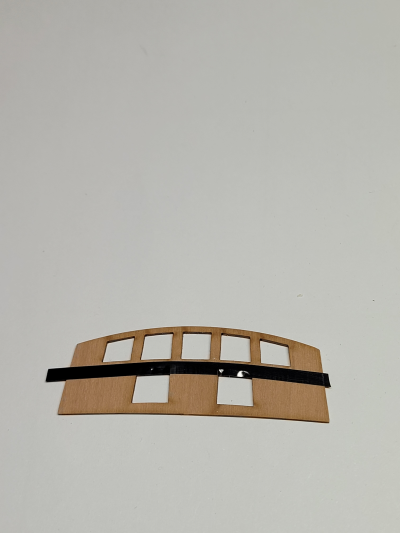
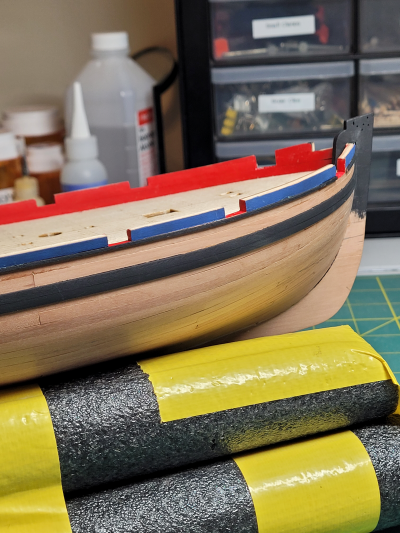
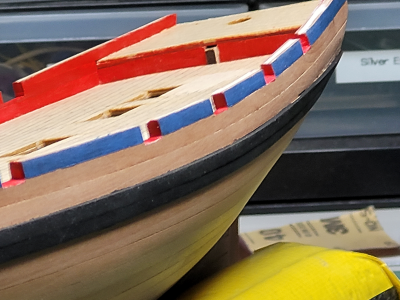
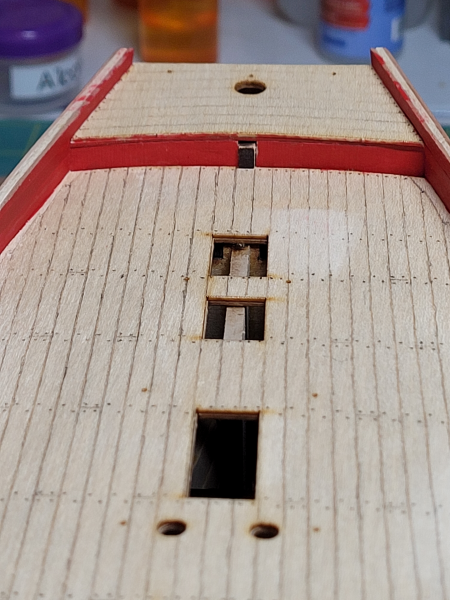
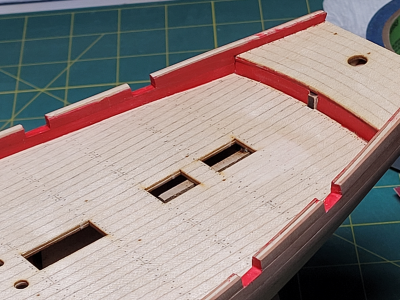
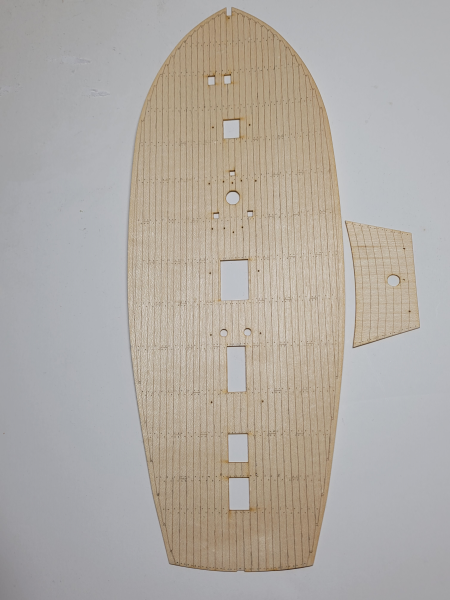
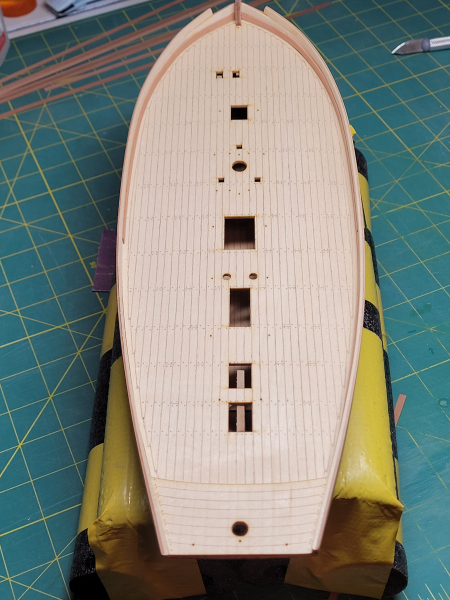
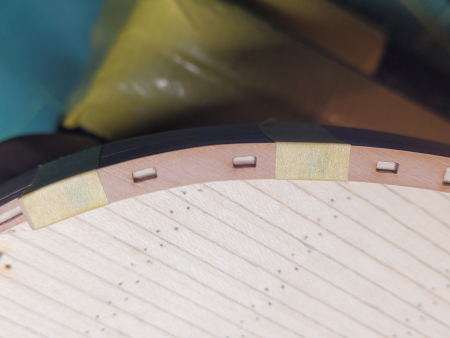
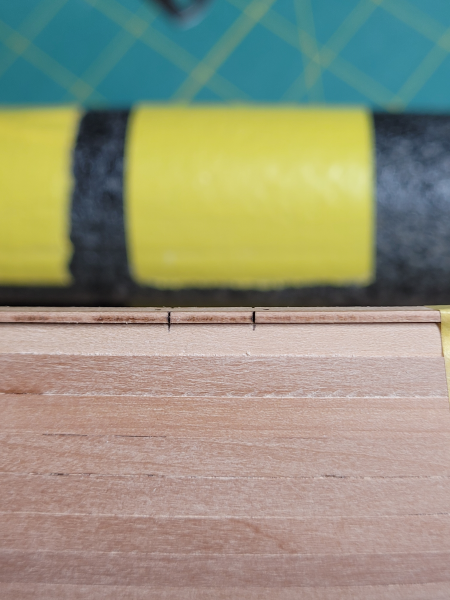
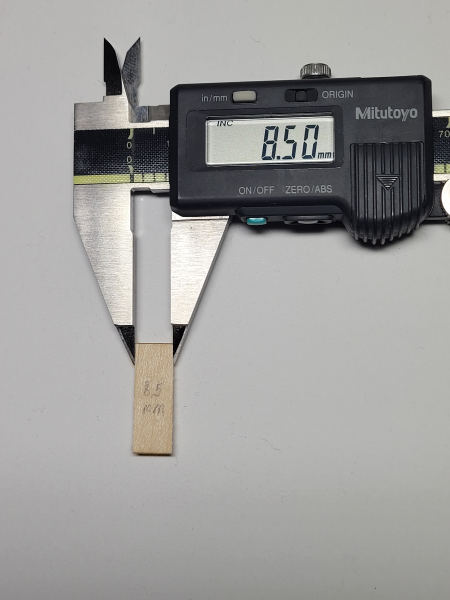
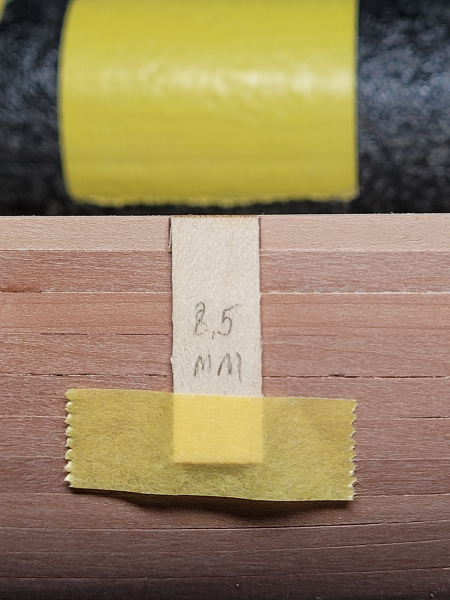
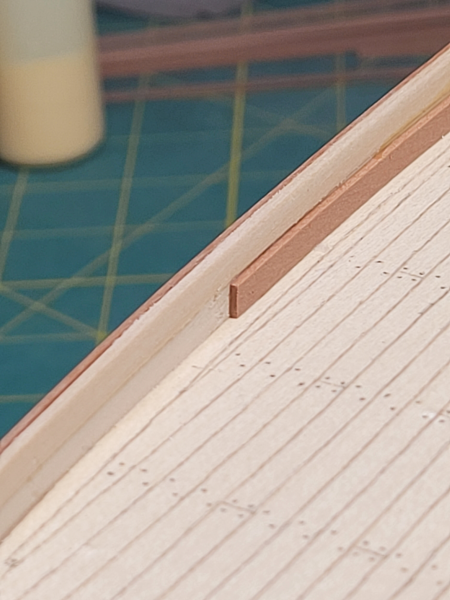
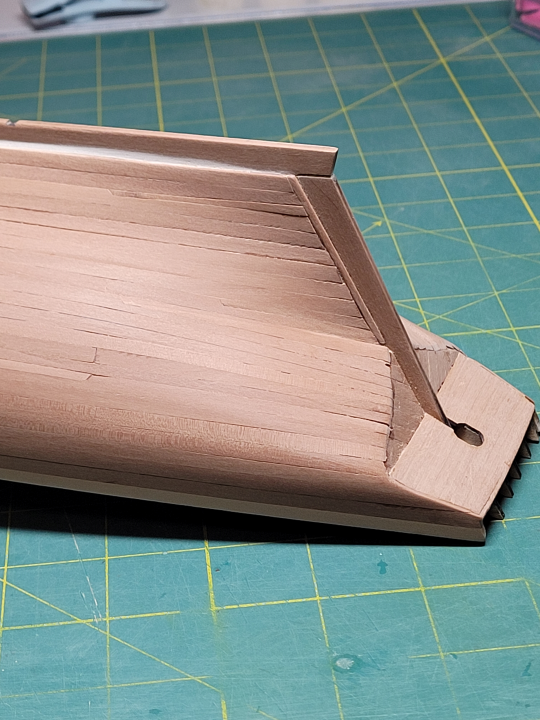
A good day in the shipyard with the decks installed and the seams and nails marks darkened with pencil. The instructions say to line the inner bulwarks before installing the deck, but those were written with the decks being planked and not the full deck cutout. Installing the lining first would have meant taking 1 mm from each edge so I installed the decks first and then added the lining. I think an added benefit is this arrangement hold the deck edges flat and guard against curling up over time. With the decks installed and inner bulwark lined, it was time to move on to marking out the gunport locations with the cap rail taped in place. To make it easier to get the ports straight I took one of the scrapes from the deck openings and made an 8.5 mm template which worked well. I just made an error marking the 4 mm and 6 mm gunport depths which tells me that its time to shut down the build for the day and cutting the gunport openings will need to wait until later. Overall, I am pleased with the progress made this weekend.
- 59 replies
-
- 1
-
-
- Alert
- Vanguard Models
- (and 1 more)
-
Thanks. I'm inspired by your build and will likely check that frequently.
- 59 replies
-
- 1
-
-
- Alert
- Vanguard Models
- (and 1 more)
-
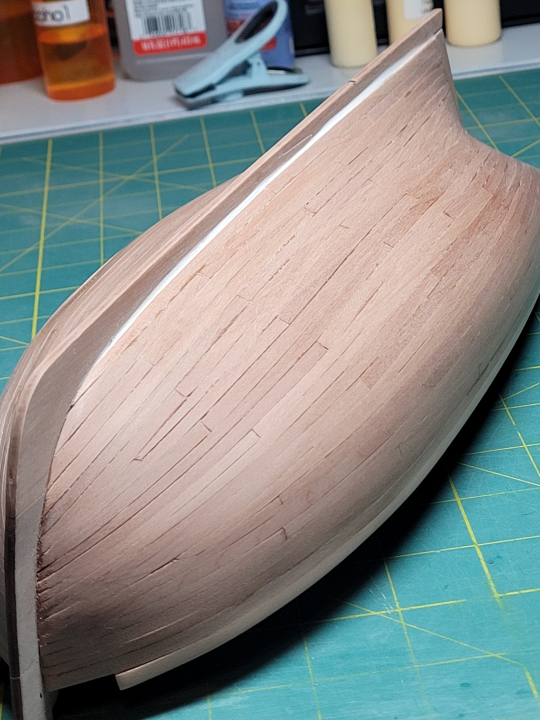
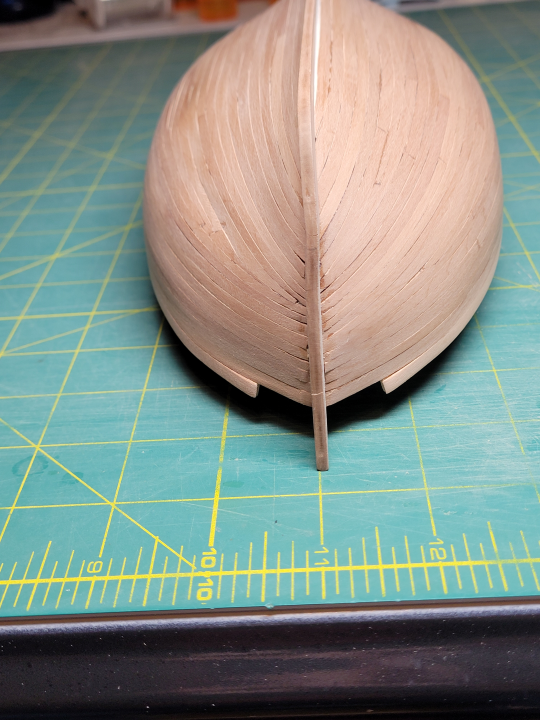
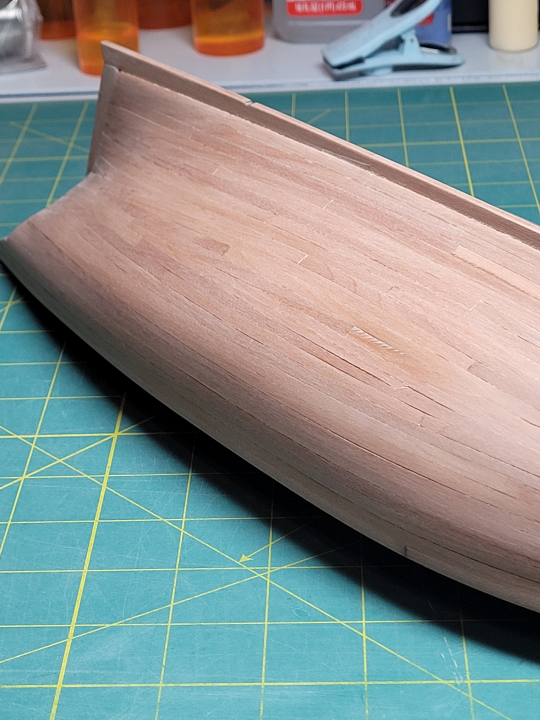
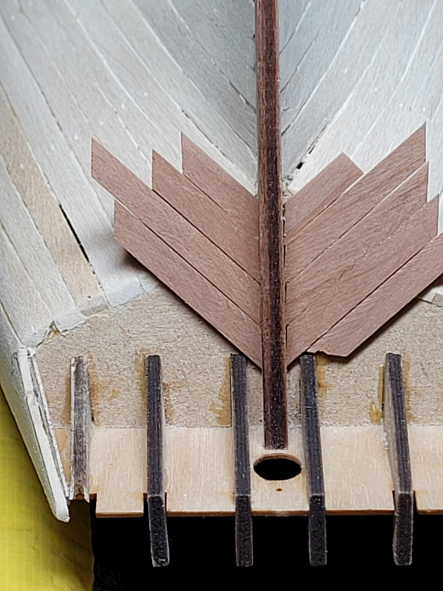
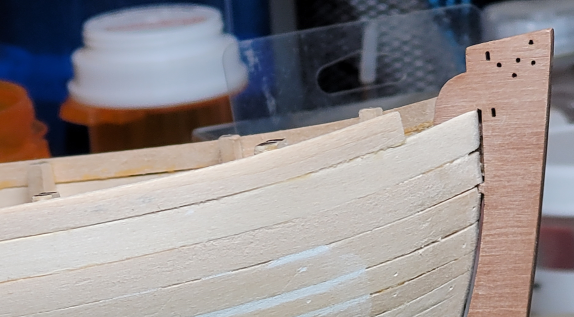
Well, this build is turning out to be a slower journey than I had planned, but life has a way of disrupting plans. Although progress has been slow, I finally finished the second planking. I started off trying to avoid using any cyano but that I couldn't figure out a good method to clamp the planks so I shifted. Thick cyano worked well but you can see where it ran out of the joints is in the stern and bow shots. Even after the half-hull build, I still had challenges with the bow and some of the gaps between planks are wider than I would like. Overall, the second planking turned out neater than my San Juan build - especially at the stem - but that isn't really a good standard to measure against. I also had challenges with the floating end of the top bulwark plank. Even though I thought I had them clamped in position, they sprung a bit on both port and starboard. I don't think it will be a noticeable after the cap rail and catheads are installed.
- 59 replies
-
- 4
-
-
- Alert
- Vanguard Models
- (and 1 more)
-
Hi Will. Thanks for your post. Sorry my reply is a bit late but I've been away from the site for a while. As to finish, I used a polyurethane satin varnish on the hull, deck and all deck structures and fittings. I used a small flat brush to apply. I think the varnish was sufficient to bring out a richer color in the wood. Like you, I added the keel, stem and sternpost after planking per the instructions. I believe the end result would have been better if I had installed them before planking. I found the San Juan an enjoyable first build and learned a ton during the build which got me motivated to continue with additional builds. Ken
-
hello -old shipbuilder signing in for first time
flutlo6180 replied to manning16's topic in New member Introductions
Hi John. Welcome Aboard! -
Hi Andy. Welcome Aboard! Thanks for sharing the photos of your past builds.
-
Welcome Aboard!
-
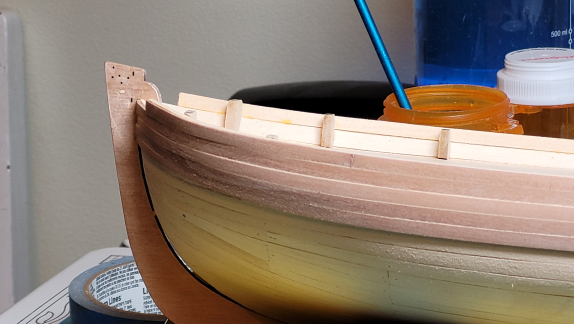
Was able to take some time over the holidays to continue the build. Completed sanding down the hull, planking the stern bulkhead and installing the counter. I was also able to install the top plank for the bulwarks. The floating end of this plank proved tricky to get clamped in place and sits a bit proud of the rest, but I should be able to get that sanding down before planking this side. This starboard side view also shows where I needed to add some filler in a couple areas. And finally, I've been able to begin on the second planking for the port side. This photo also shows the floating end of the top plank sitting proud to the rest of the contour. I believe I can address it with sanding so it won't be noticeable with the top rail cap installed. Wishing you all a very Happy New Year!
- 59 replies
-
- 8
-
-
- Alert
- Vanguard Models
- (and 1 more)
-
Welcome aboard! I look forward to watching as you progress on your Cutty Sark build.
-
Hi Eugene. Welcome aboard! Your models look great.
-
Hi Everyone from Savannah GA
flutlo6180 replied to bgilbertsound's topic in New member Introductions
Hi BG. Welcome aboard! Nice craftmanship. -
Hi everyone from Brisbane Australia
flutlo6180 replied to Ray Durant's topic in New member Introductions
Hi Ray. Welcome aboard! Nice looking models. -
Thanks, and you are correct. There is still some more sanding I intend to do so the second planking doesn't sit proud of the stern post. I also plan to work on the planking at the stem post so the second planking flows nicely into that area as well.
- 59 replies
-
- 2
-
-
- Alert
- Vanguard Models
- (and 1 more)
-
Hi Dave. Welcome aboard! Chuck's advice is spot on. I learned the hard way during my first build that pressing on isn't the answer - errors don't get better with time.
-
Greetings from North Carolina
flutlo6180 replied to PostCaptainAubrey's topic in New member Introductions
Hi Will. Welcome aboard. The San Juan was my first build and I look forward to watching your progress on you build log. -
Introduction - André Dethioux
flutlo6180 replied to Wonko the Sane's topic in New member Introductions
Hi Andre. Welcome aboard! Superb looking helicopter. -
Hi Tim. Welcome aboard! Please do start a build log. I believe the build log is the best way to engage, get encouragement, and find the way forward when you are uncertain how to proceed.
-
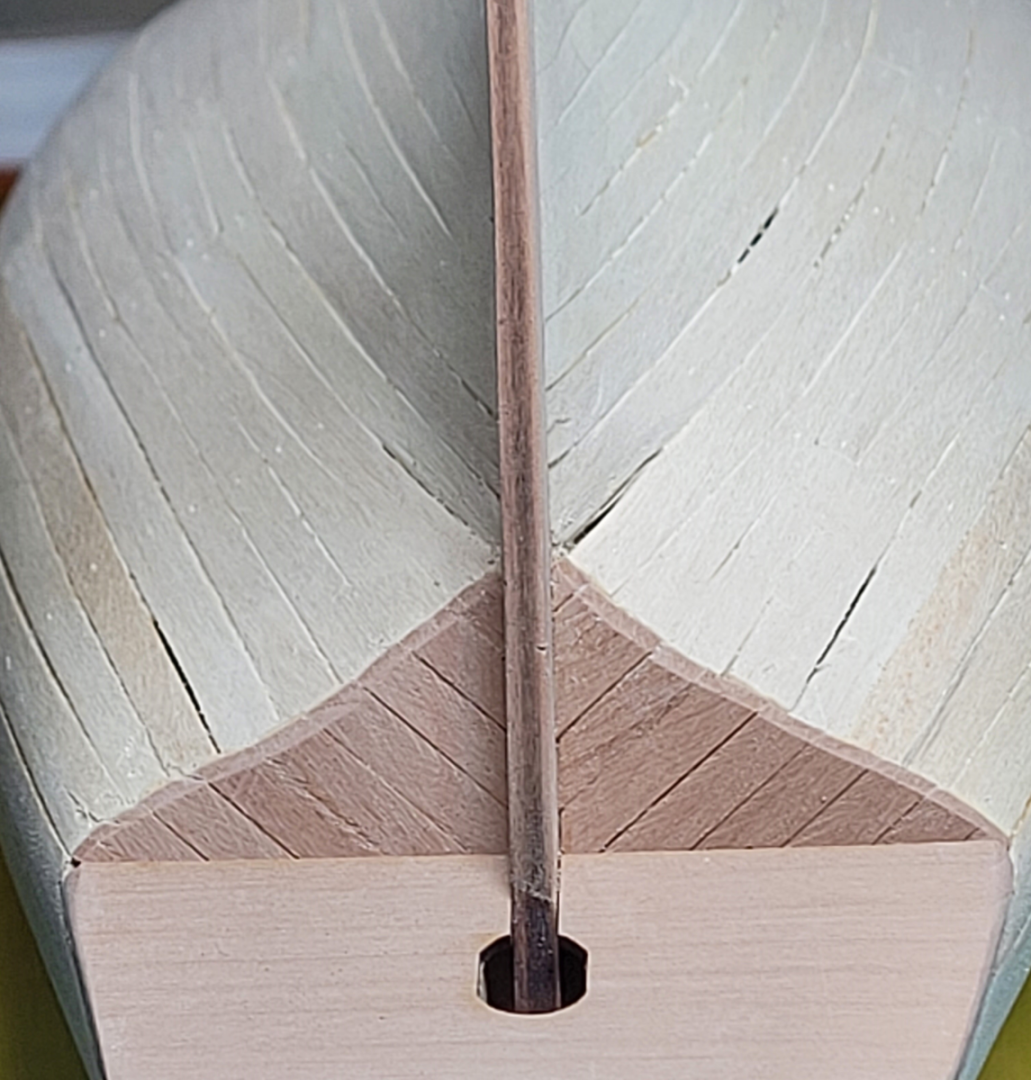
I knew it had been a while since I updated my build, but I am surprised that its been 3-months. Didn't want to bore anyone - including myself - with plank-by-plank updates but I have continued to make progress. Family and professional challenges kept me from getting in the shipyard as often as I would have liked, but I finished the first planking layer today. I took Toni's encouragement to replace the kit planks and use spiling technique I learned during the NRG half-hull kit build and it worked out pretty well. Still need some work on improving the stem joining but overall I am please with the results. starboard view is after some sanding, and here it the port view without any sanding. And here is a close-up of the starboard stern. Thanks jpalmer. Fairing is still a bit of a challenge but I may just be too impatient. I did need to flatten a few spots somewhat during planking to avoid too much of a bow.
- 59 replies
-
- 3
-
-
- Alert
- Vanguard Models
- (and 1 more)
-
HI Marty. Welcome aboard! To improve proficiency with planking you may want to consider NRG's 1800 Century Merchantman Half-Hull planking kit.
-
Hello Ross. Welcome aboard. Very nice looking Beagle build.