Srenner
-
Posts
220 -
Joined
-
Last visited
Content Type
Profiles
Forums
Gallery
Events
Everything posted by Srenner
-
I cut down the tops of the bulkheads after I made the bottom section fit better and also drew that line on. And that's where the planks will rebate into the keel along that line
-
Yes they should... just make the slots a bit deeper so it sits lower down. How much are you out by?
-
3D Printing Cannons in Resin
Srenner replied to thibaultron's topic in 3D-Printing and Laser-Cutting.
Quick question barrel tilted down away from the build plate isn't it... not towards it -
3D Printing Cannons in Resin
Srenner replied to thibaultron's topic in 3D-Printing and Laser-Cutting.
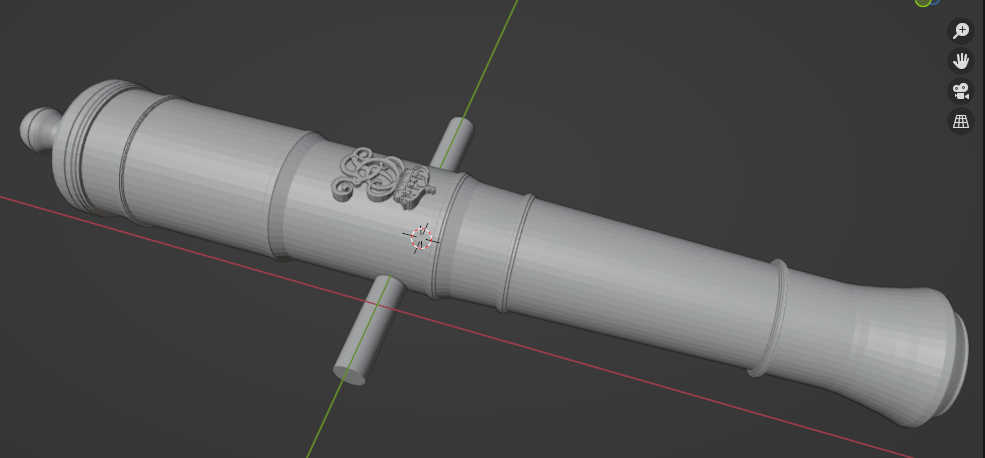
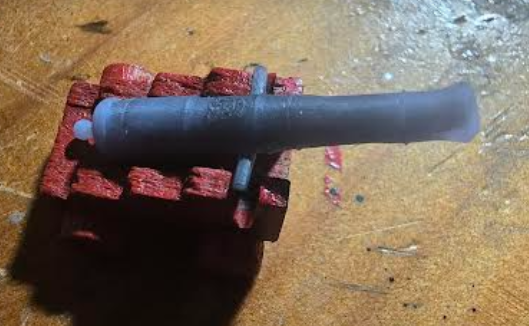
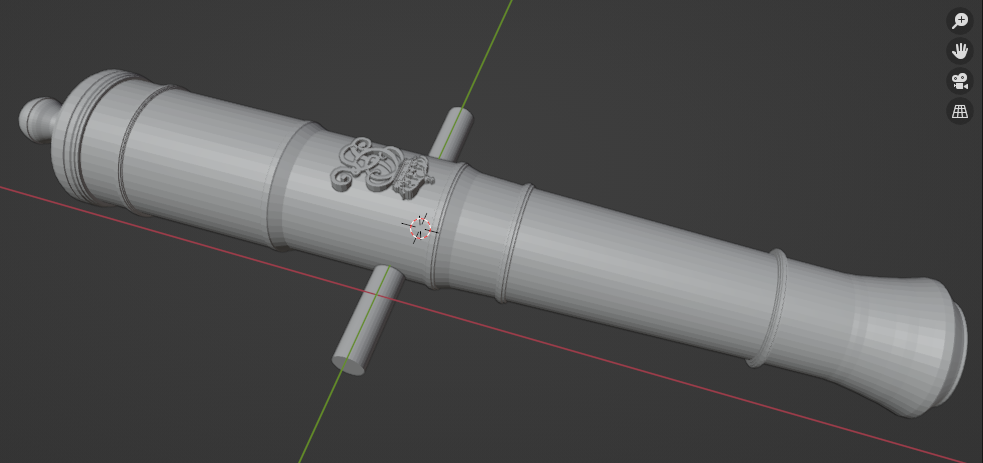
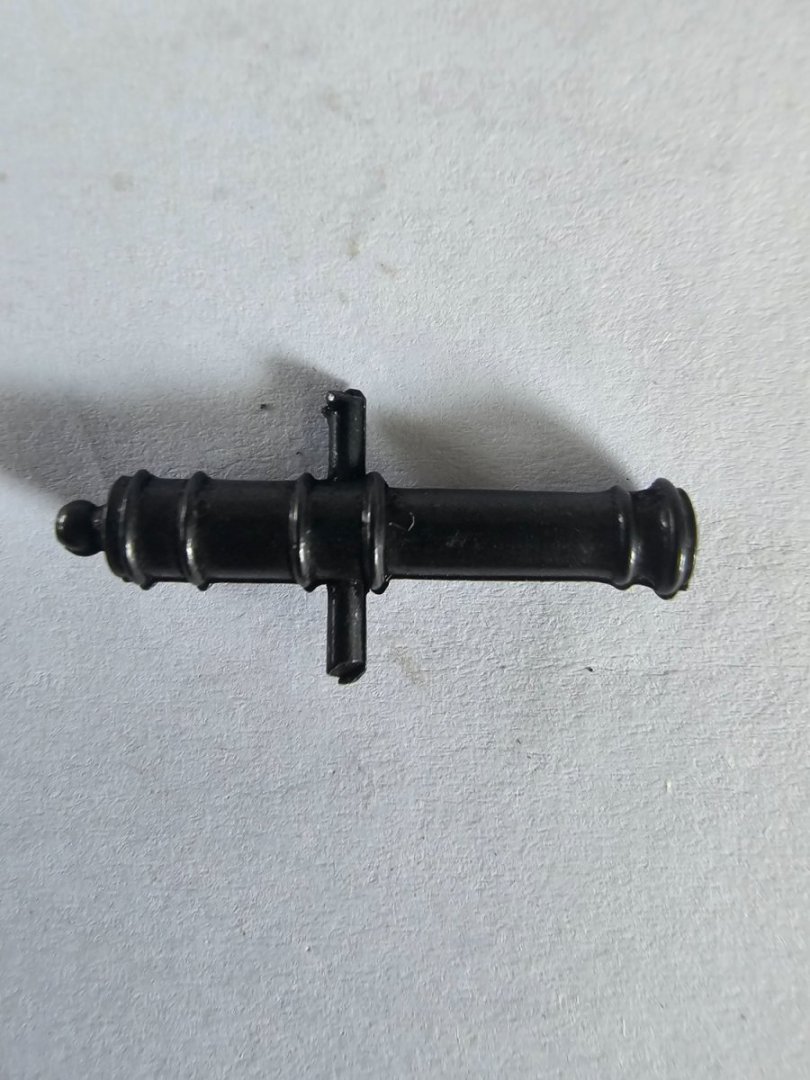
I printed off the armstrong pattern 6 pounder 84 with the george 2 cypher and had quite a few print fails across 20 barrels. Wondering if the resin temp was a bit low - it was only about 22 degrees today. Anyway - some of them turned out ok. Should I tilt the barrels further when I print?
-
finally got back to the model and going to print the barrels up - armstrong pattern 6 pound 84 long with the george 2 cypher 1727 - close enough for 1/100th scale. and slightly better than the barrels from the kit.
-
3D Printing Cannons in Resin
Srenner replied to thibaultron's topic in 3D-Printing and Laser-Cutting.
Have you got the similar table for a pattern already done like a Armstrong 6 pounder 72 to help me work out what goes where? -
3D Printing Cannons in Resin
Srenner replied to thibaultron's topic in 3D-Printing and Laser-Cutting.
No reason.. I don't really know the size so I wiki searched and it said 18 pounders were standard for frigates. I wasn't looking at the right info -
3D Printing Cannons in Resin
Srenner replied to thibaultron's topic in 3D-Printing and Laser-Cutting.
Yes... just replacing the in accurate metal barrels given by the kit Even just a drawing would help -
3D Printing Cannons in Resin
Srenner replied to thibaultron's topic in 3D-Printing and Laser-Cutting.
Hi... do you have an stl of a british 18 pounder long gun circa 1720? I can do my own Cypher but just want the basic shape. Thanks -
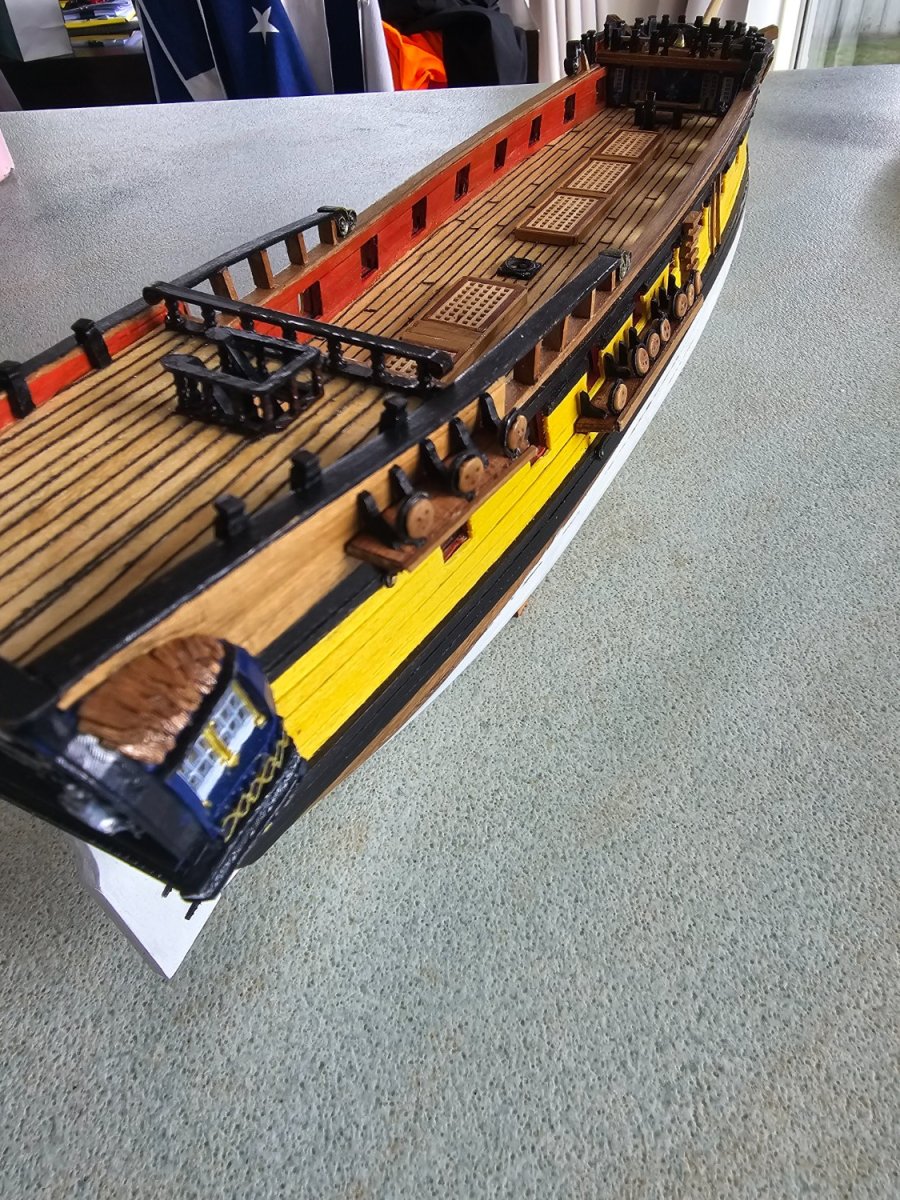
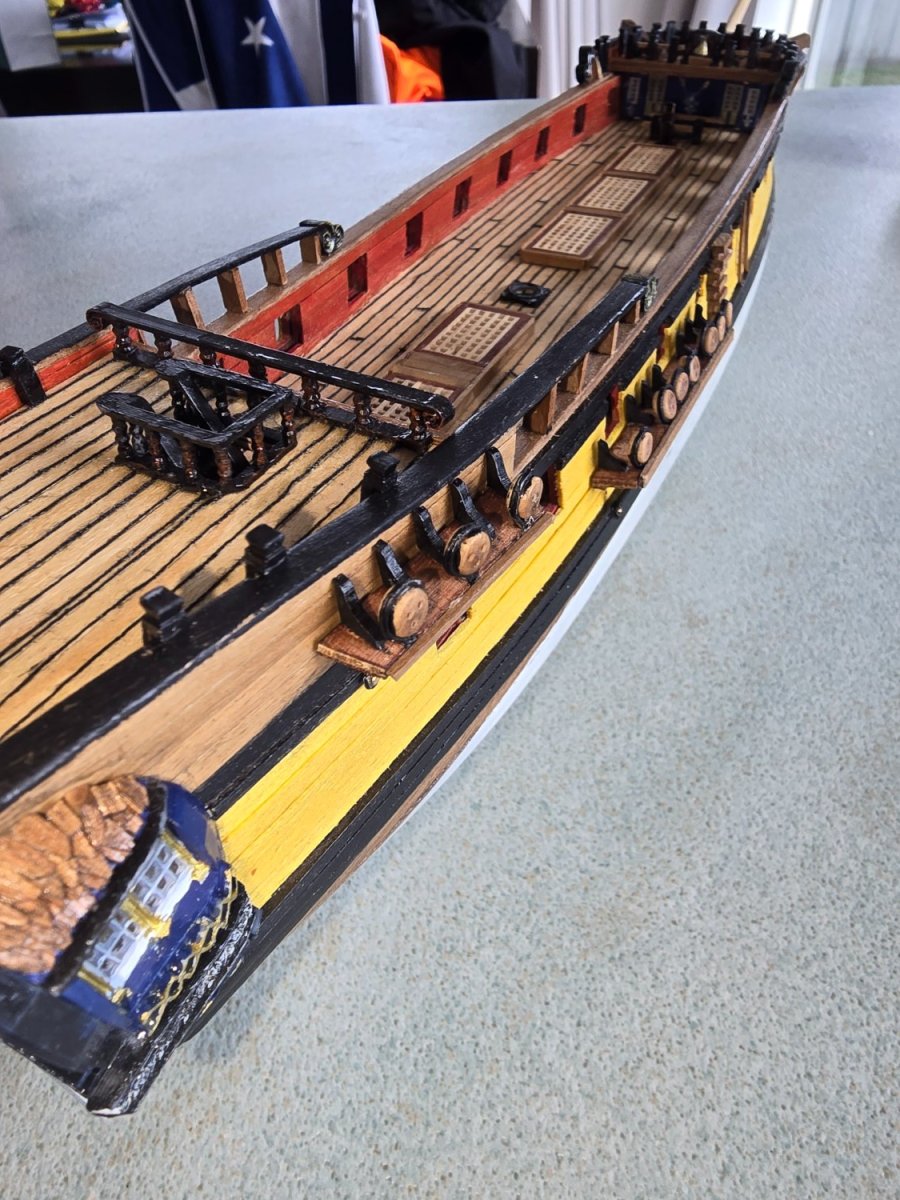
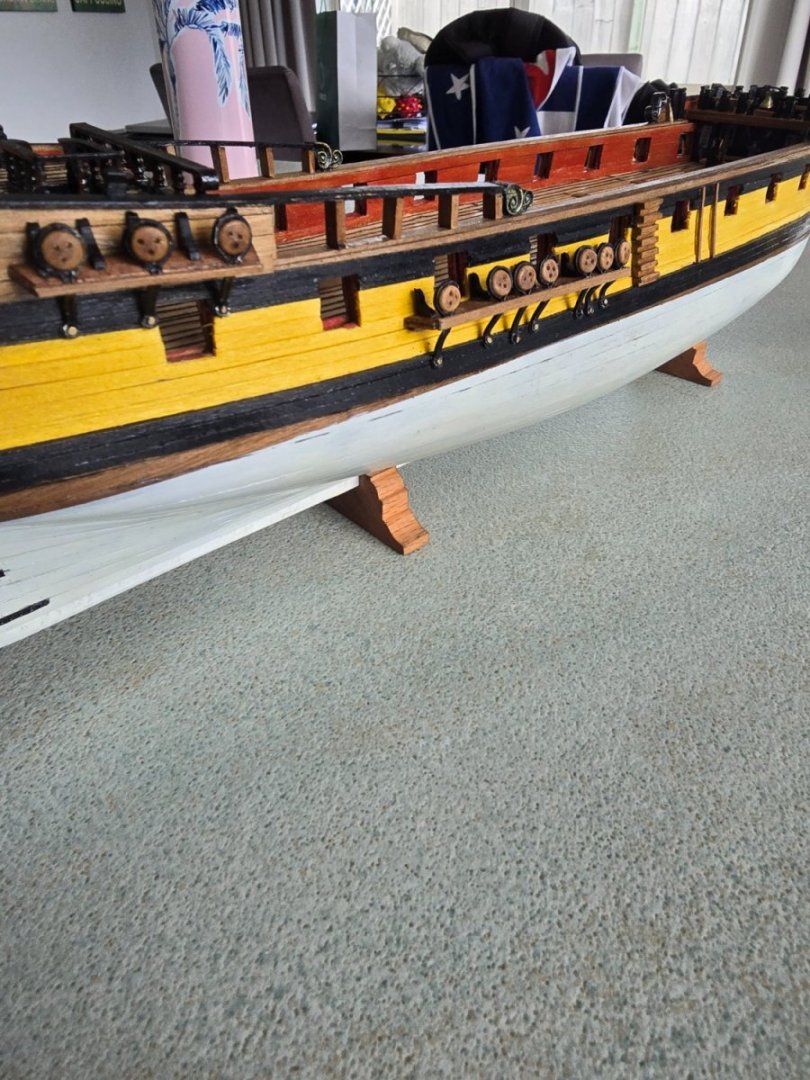
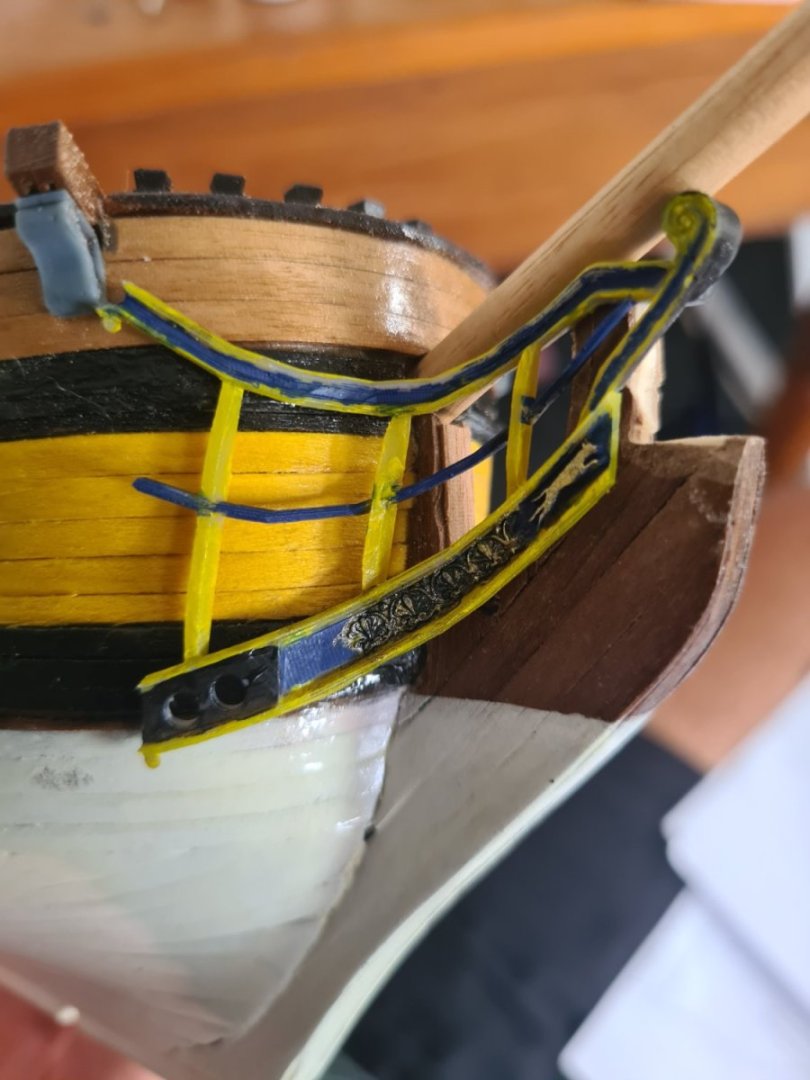
In the spirit of cracking on I am tackling the channels now and just going with the kit supplied chain plates. Did some plastic inverted knee channel supports. And also went with the placement of the channels from the kit even though aren't they supposed to be above the gun ports by 1720? BTW new mobile samsung s24 with 200 MB camera... seems to take a nice picture

-
I've been reading up about the belaying plan of 20 gun frigates in the Lee's book mainly and run into fundamental problem with this kit build. The number of deadeyes per channel 1719 20 gun according to Lee's is 9 on foremast, 10 on main and 4 on mizzen. But the kit only provides enough deadeyes and precut channels for 6 on fore, 7 on main and 3 on mizzen It seems there is a hell of a lot of rigging missing but there isn't enough deadeyes provided to scratch build more. So what do you do? Purchase more deadeyes, scratch build new channels and be correct or just go with the flow for the rigging plan provided by Coral?
-
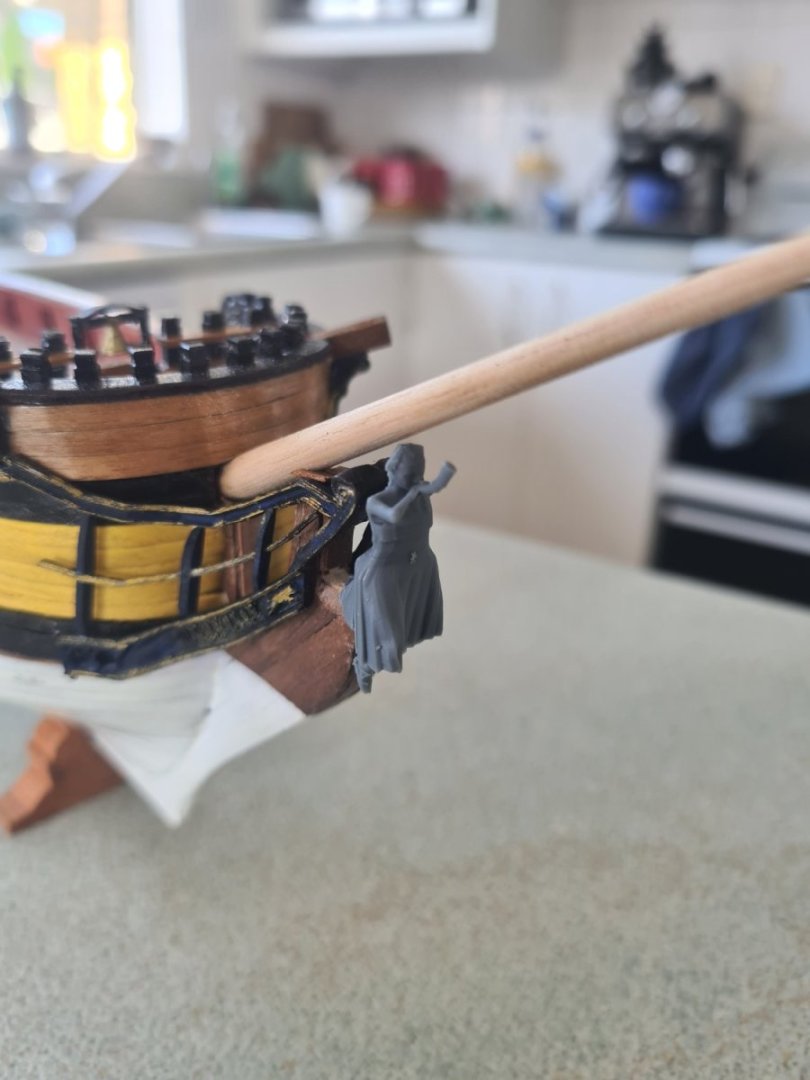
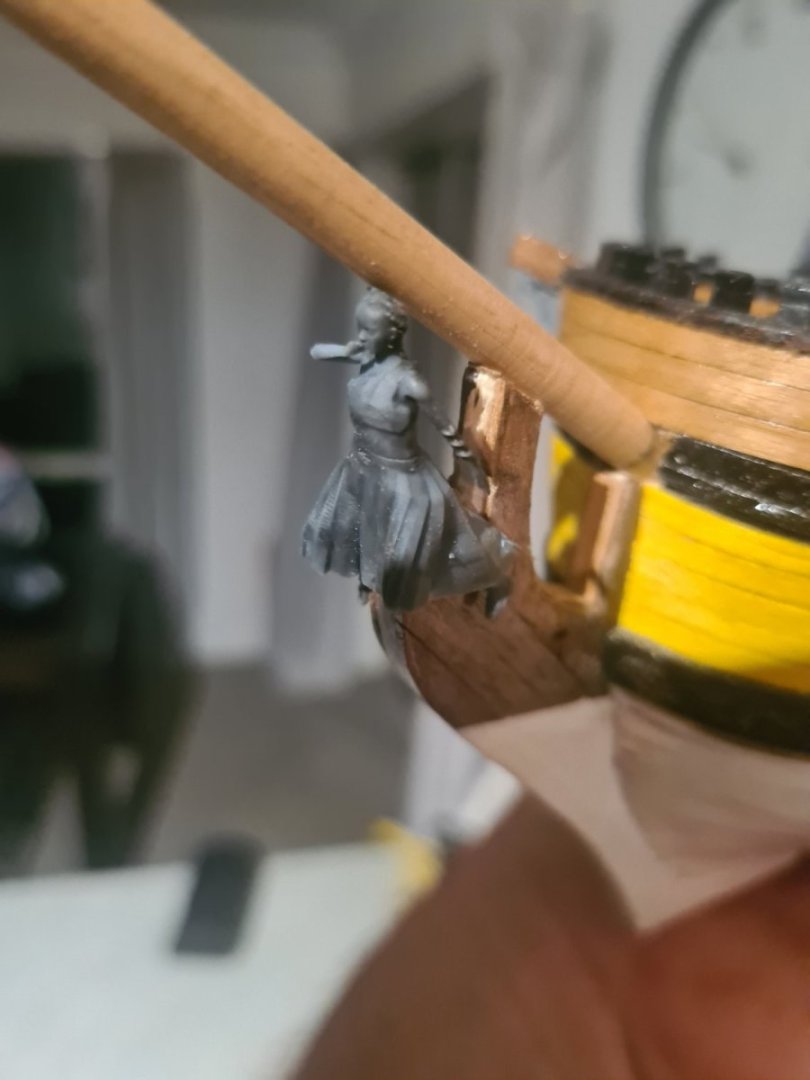
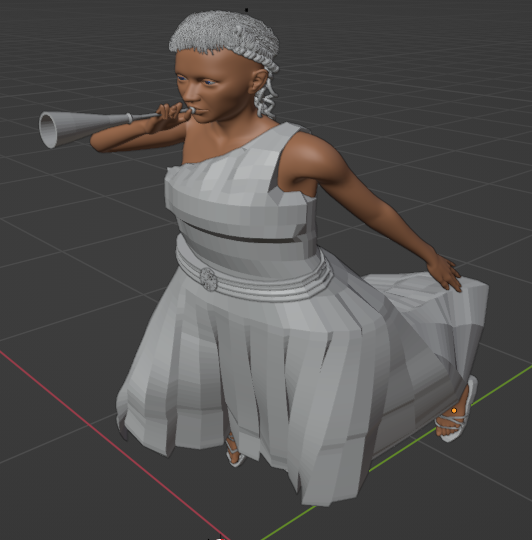
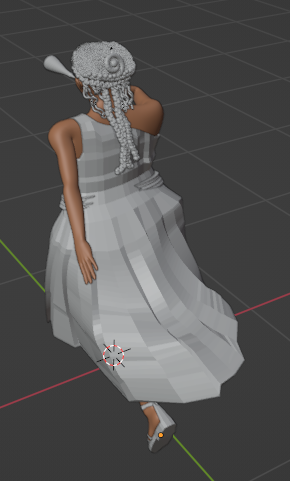
Okay so on this day I've done my final final print of miss greyhound. Overall the pose she has, the clothes, the hair, the hunting horn are all 100% dreamed up. The phrazon 8k resin does a great job of picking out detail at 20 degrees centigrade. No need to heat the resin in summer. If I had my time again I would put all the ship front end into the model and make sure she integrates well.... she is riding right on the front and I would have liked her a little inset but thems the breaks. A few you tube tutorials on miniatures painting I will also so as it's very hard to do a professional job and easy to do a sloppy attempt so taking my time to make it look ok.

-
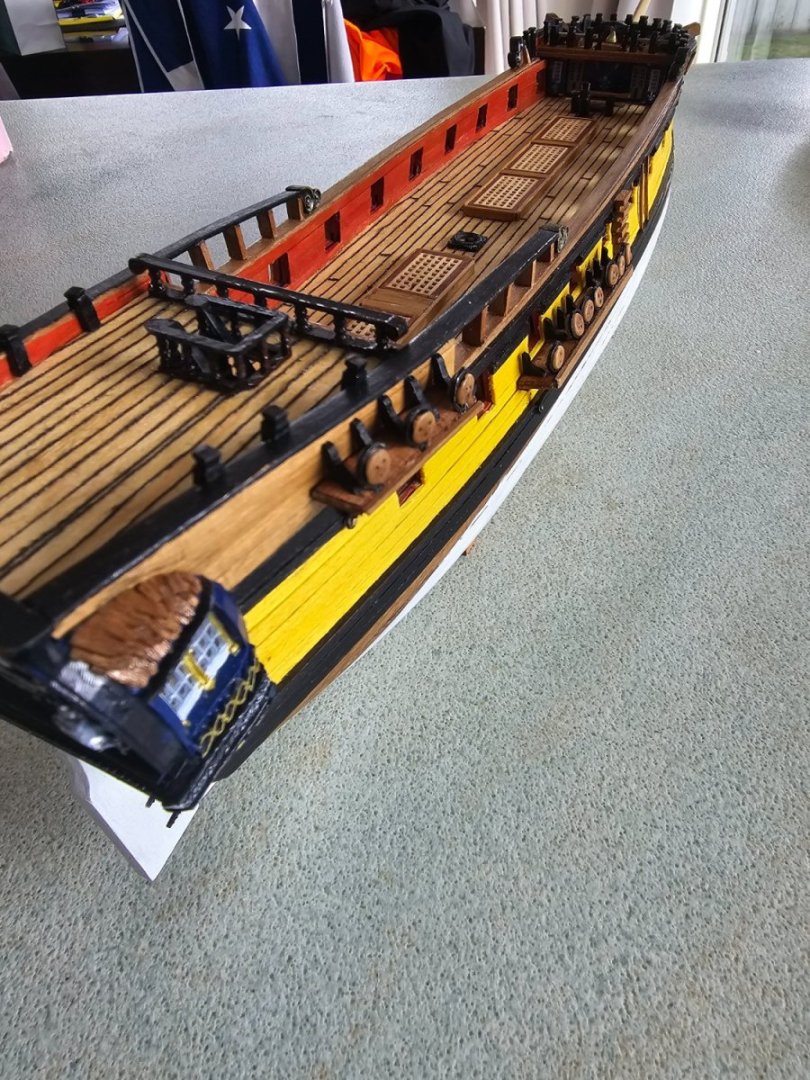
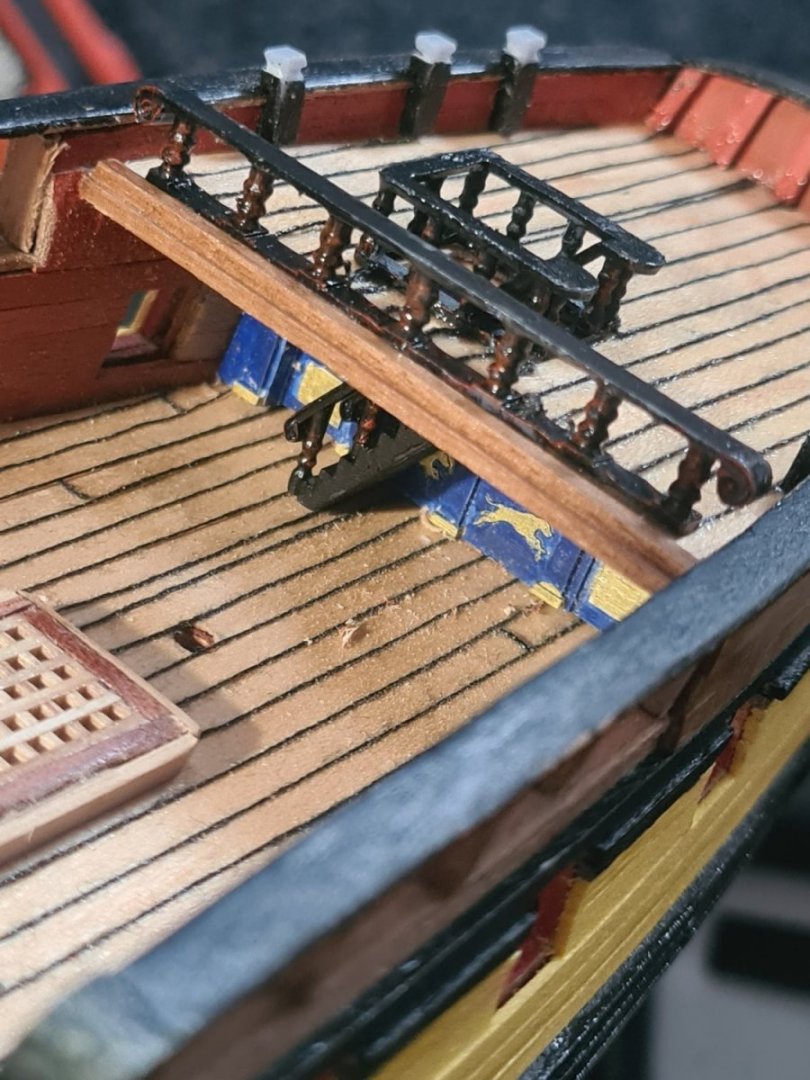
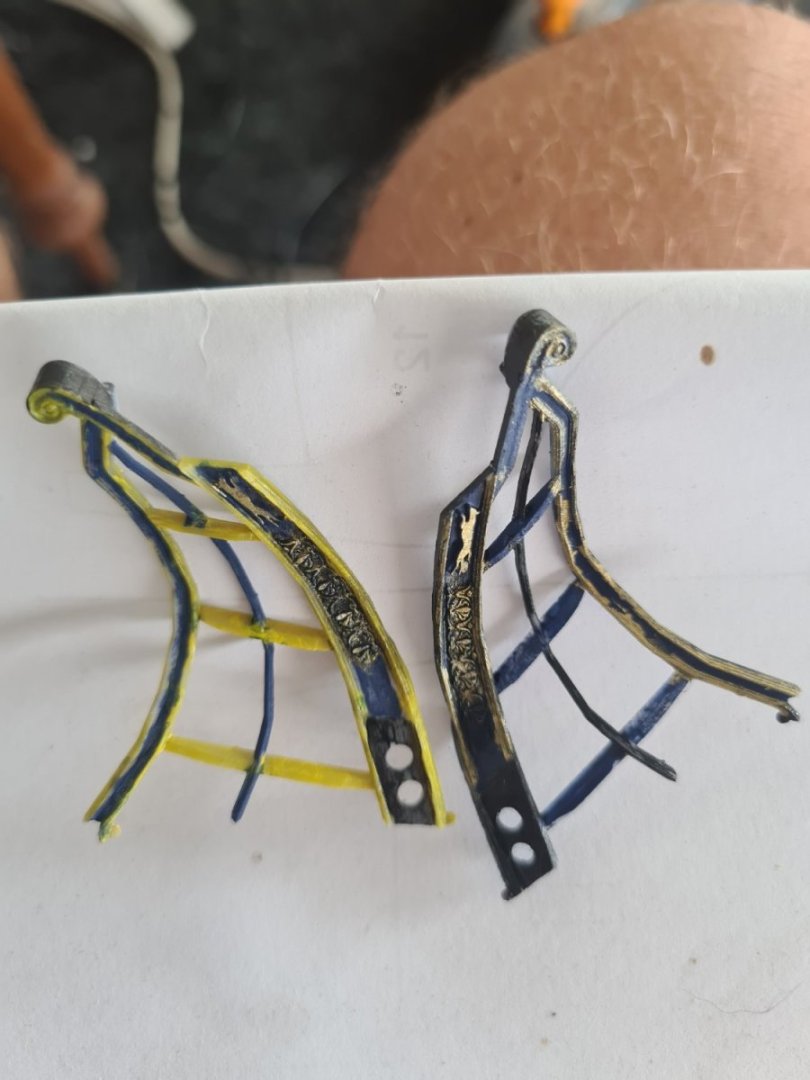
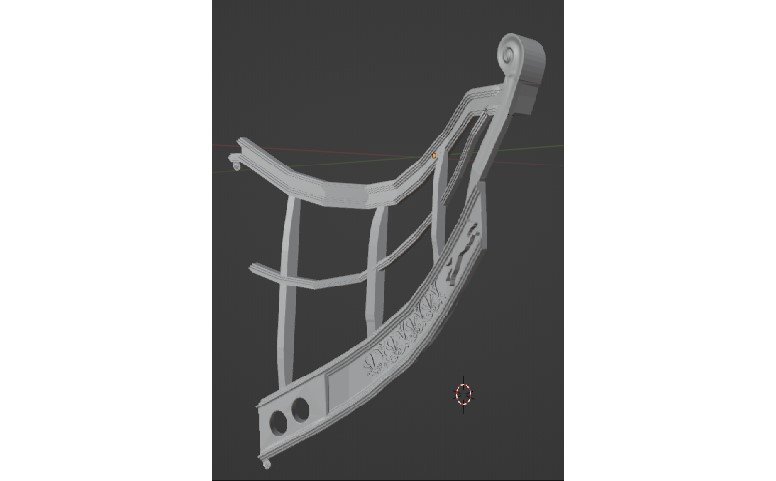
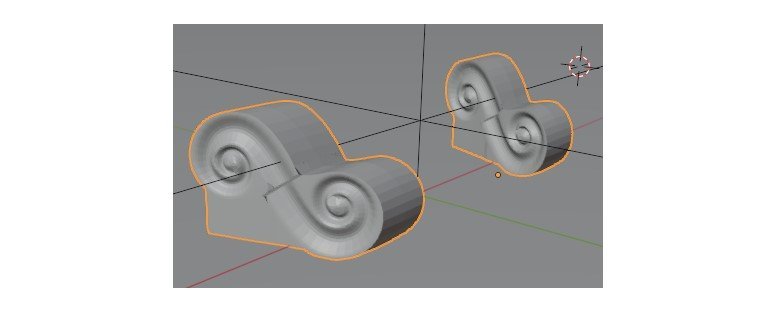
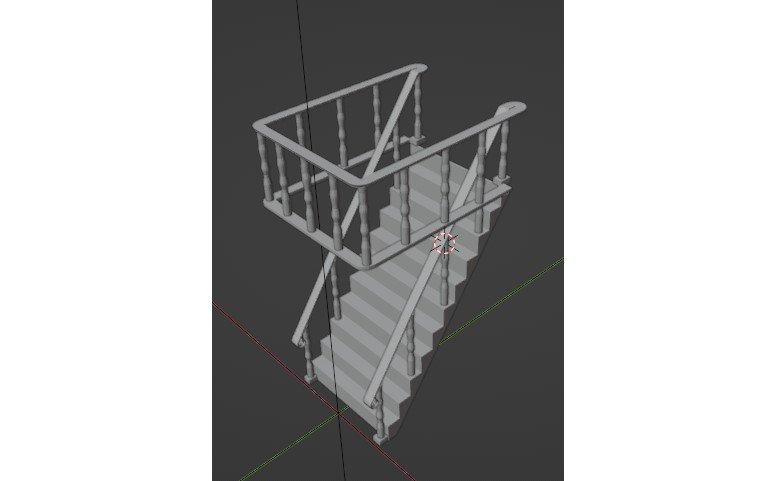
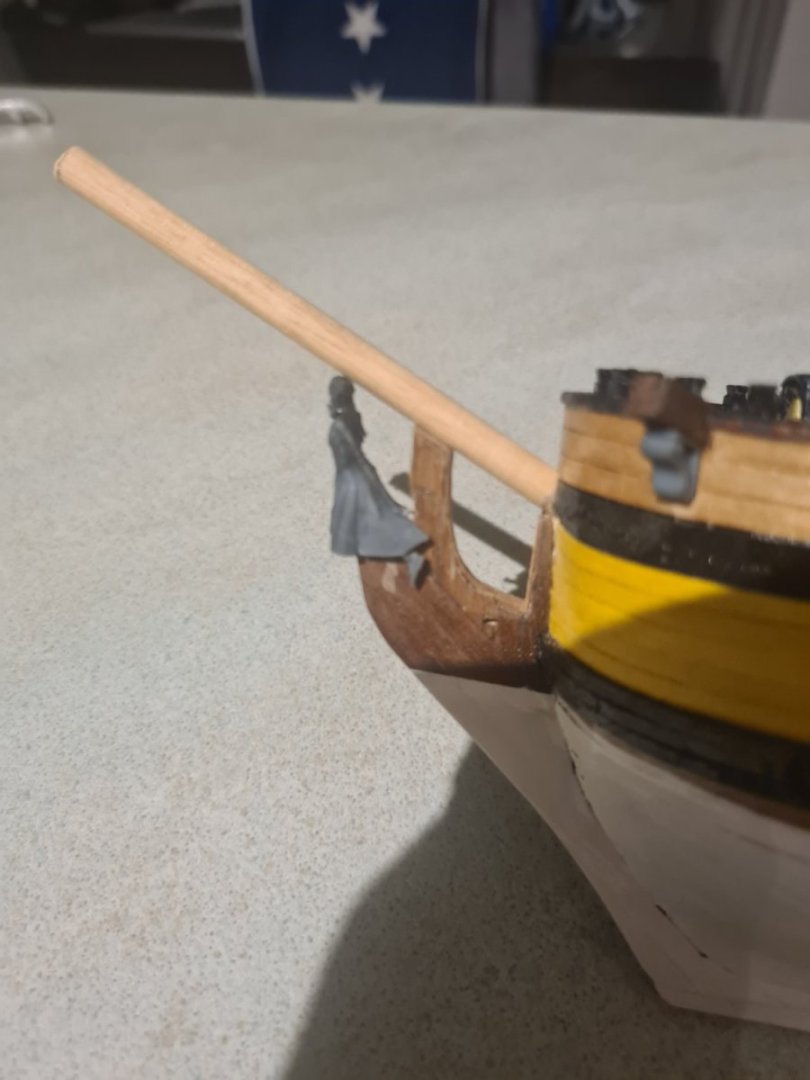
I'm pretty happy with how the stairway and the quarter deck rail have come out. At 1/100 scale it loses some size but still happy with the detailing

-
Don't you hate it when your print in 95% great but it needs a few tweaks? I've been practicing the paint colours. Blue and yellow or black and yellow?

-
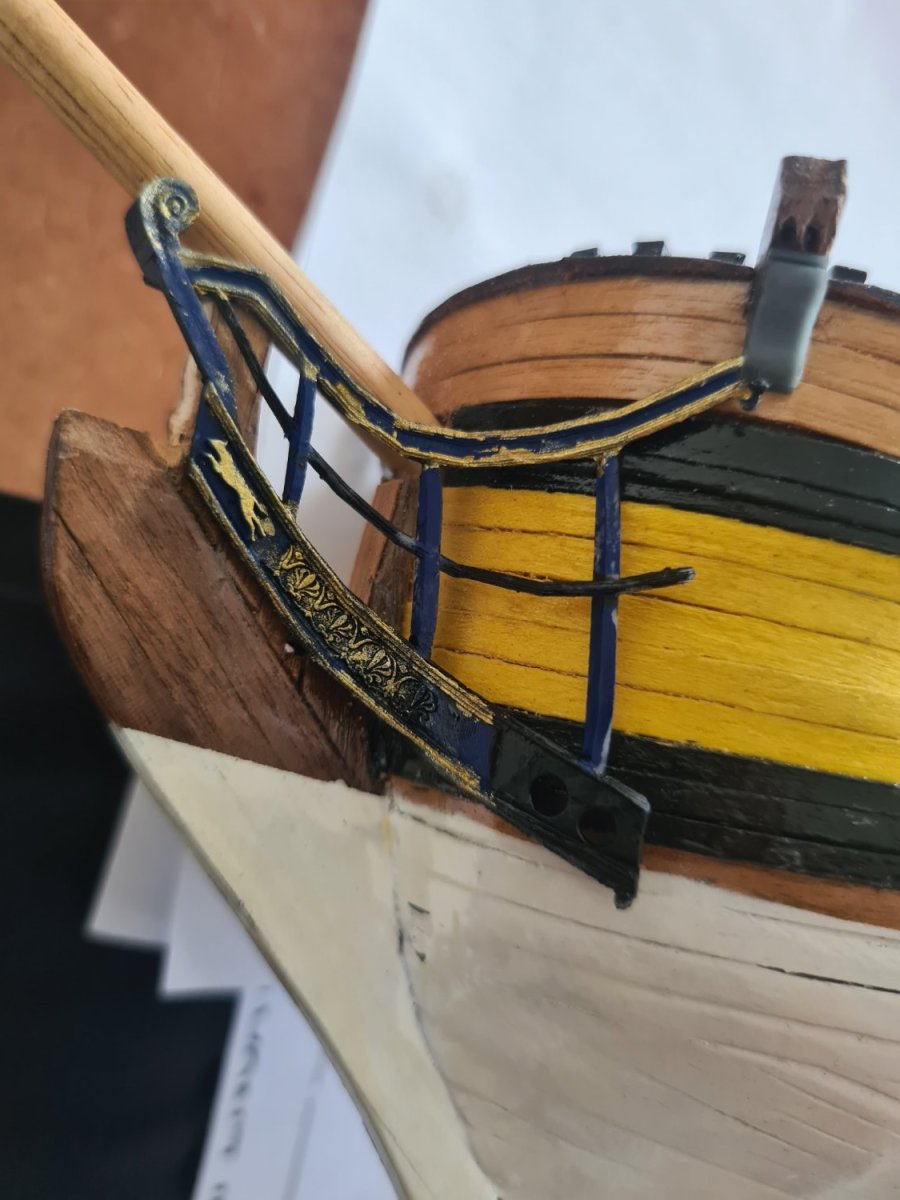
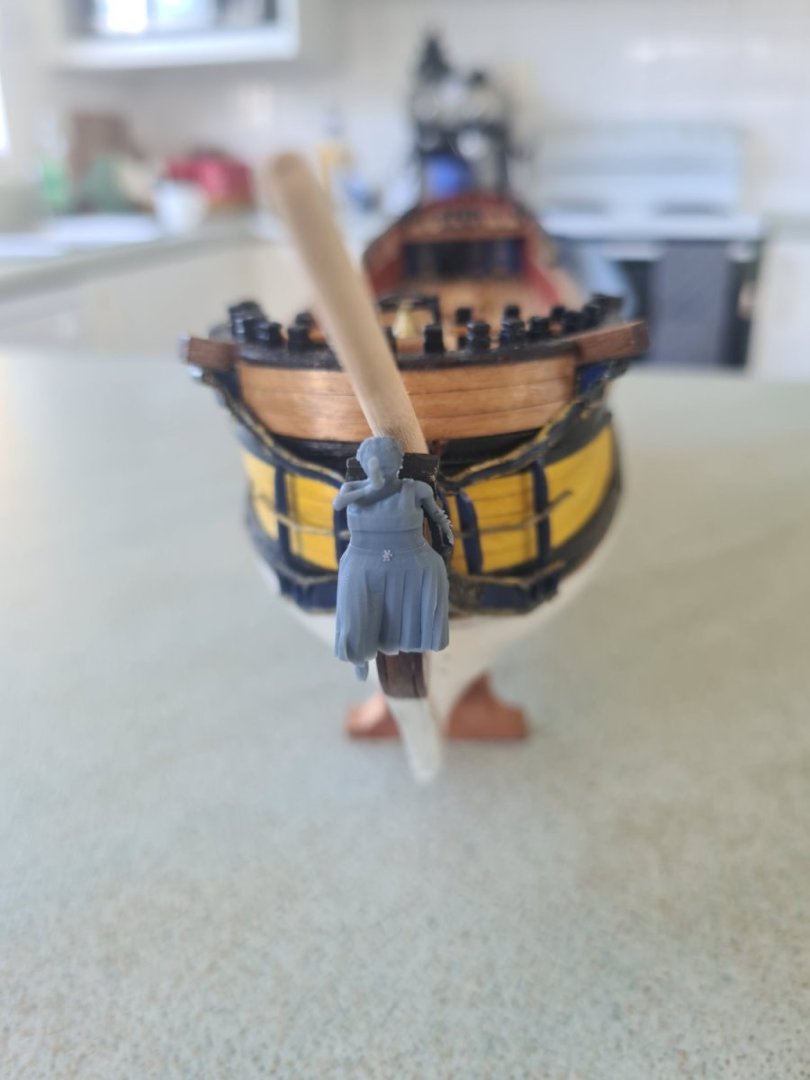
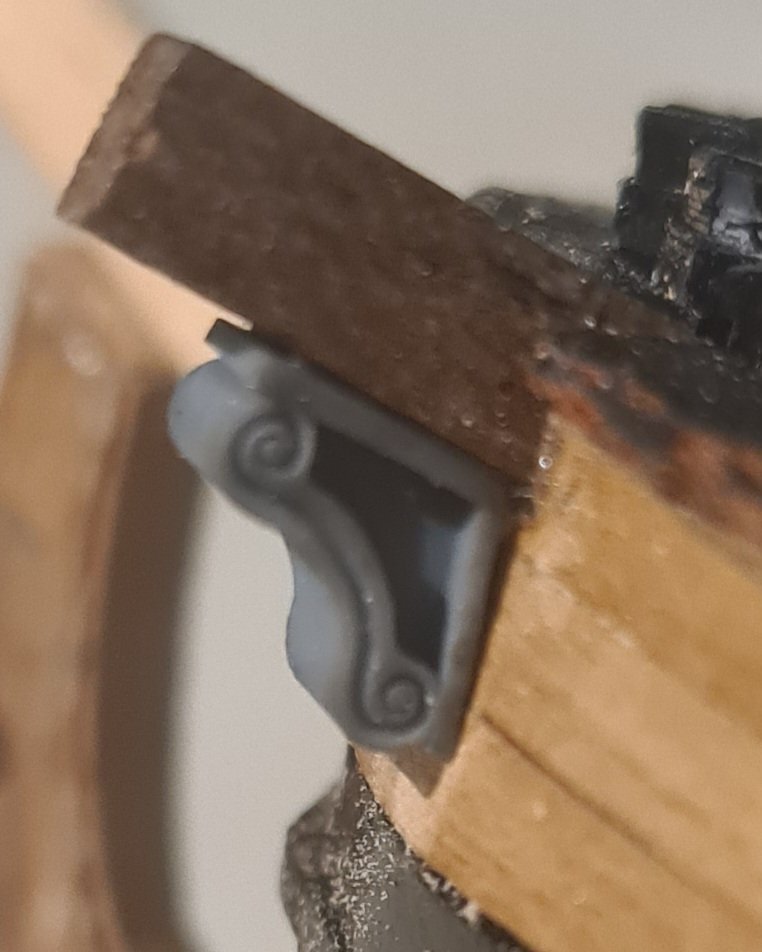
So I am quite a long way towards solving the head rail and figure head junction. I have tried to print the head rail out in one piece but print failed yesterday after a six hour print. So I have split it in half and will print the left and right sides as two pieces to see if that helps - printing out now for another six hours.. In the mean time I am pressing on with other parts difficult to do in wood. The stairs to the quarter deck, the quarter deck rail, other scrolls and I will do some channel hangers or knees. I think the 1720s the channels were supported by inverted knees - too early for a iron support so would have been wood.

-
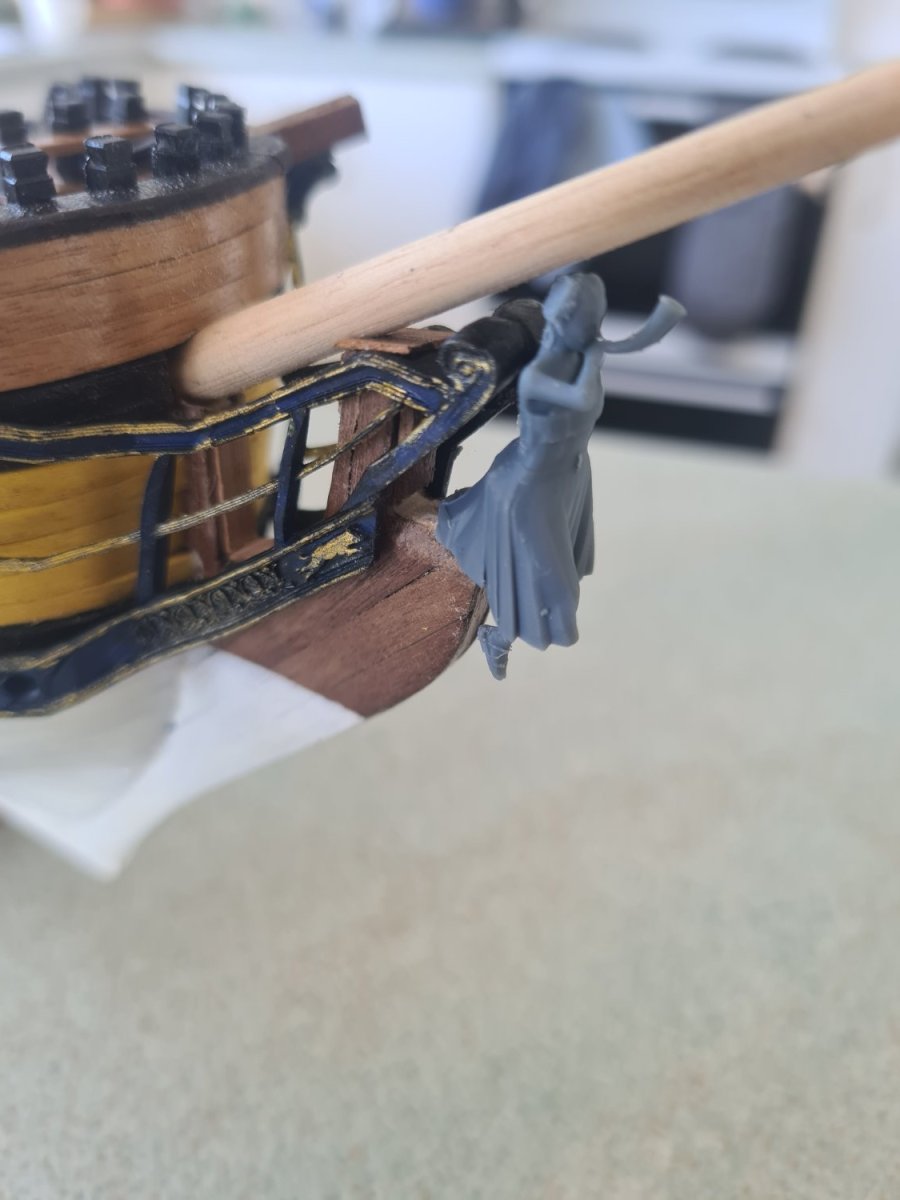
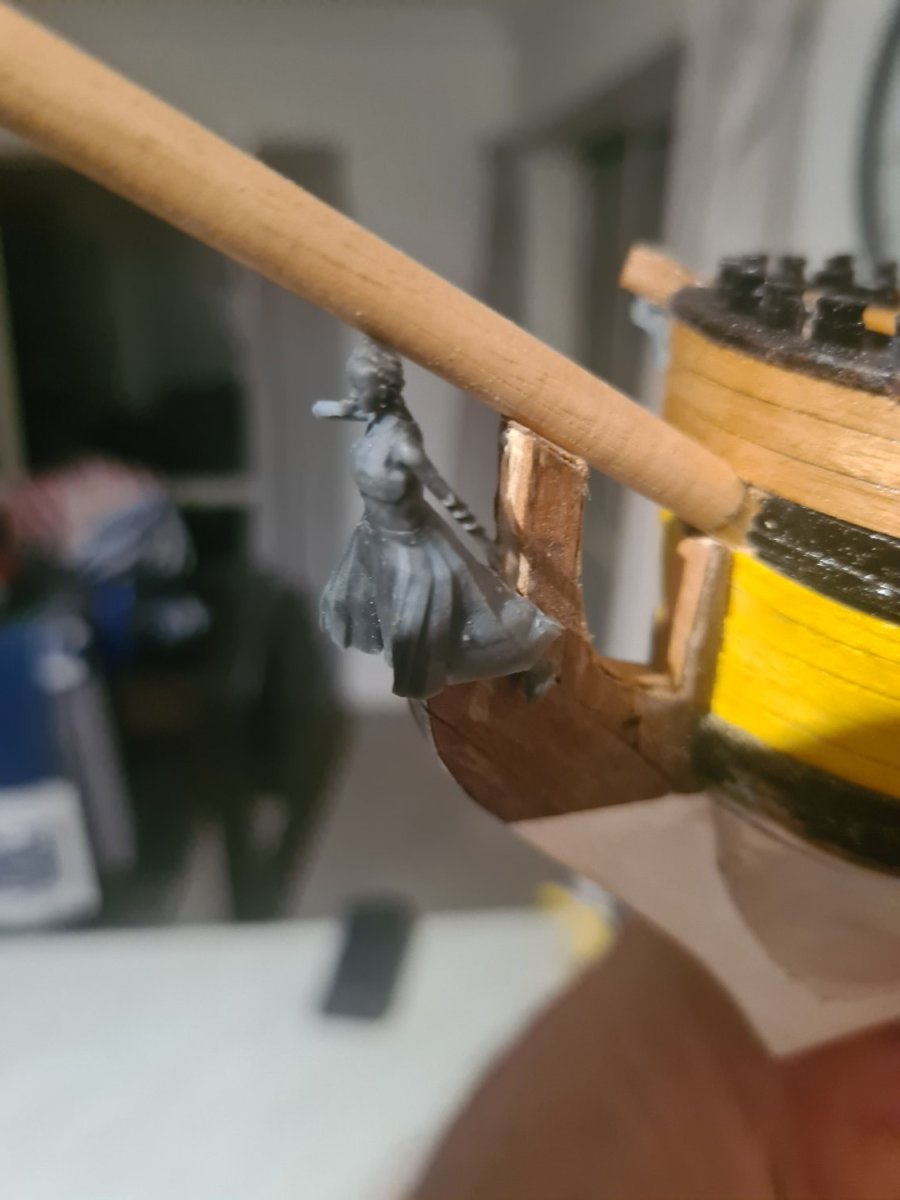
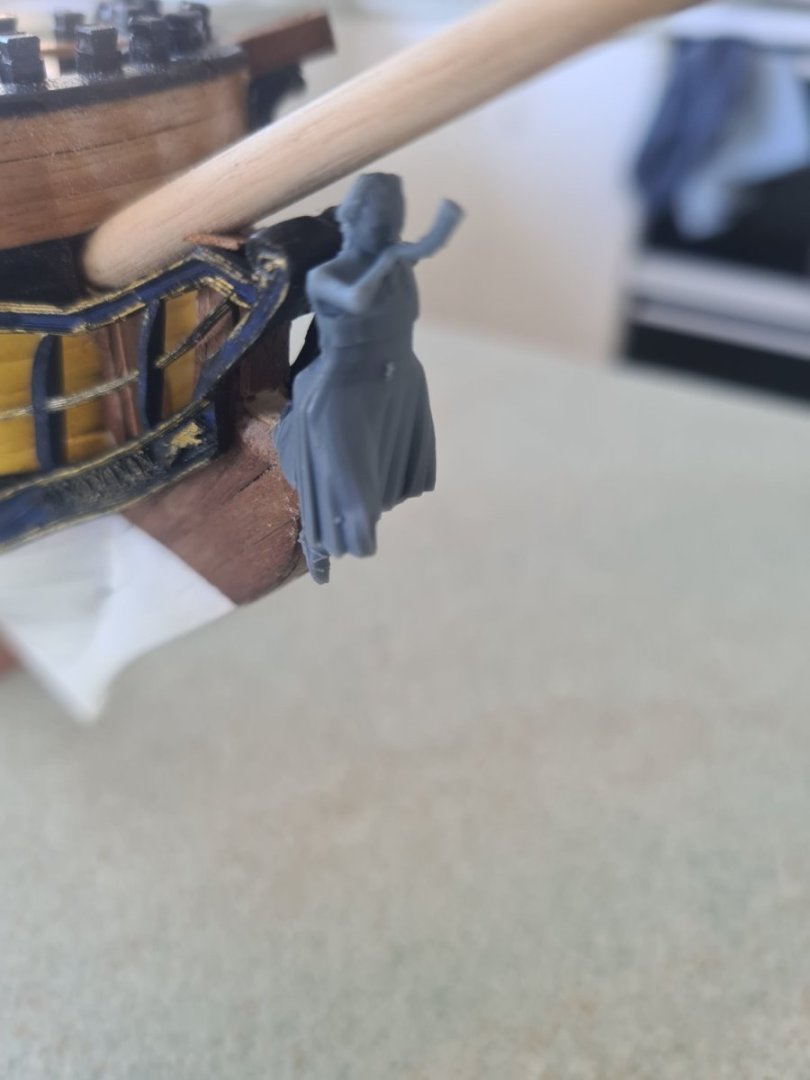
I upscaled Mrs greyhound and printed off again. The hunting horn broke off a second time so I am considering a different shape of the horn. The other thing is should there be a gap between the figurehead and the timber behind like the picture below or do I need to fill that in with some more timber like she is stuck to the prow of the boat? What's everyone's opinion on that? I could also fill in some of the gap with the head board

-
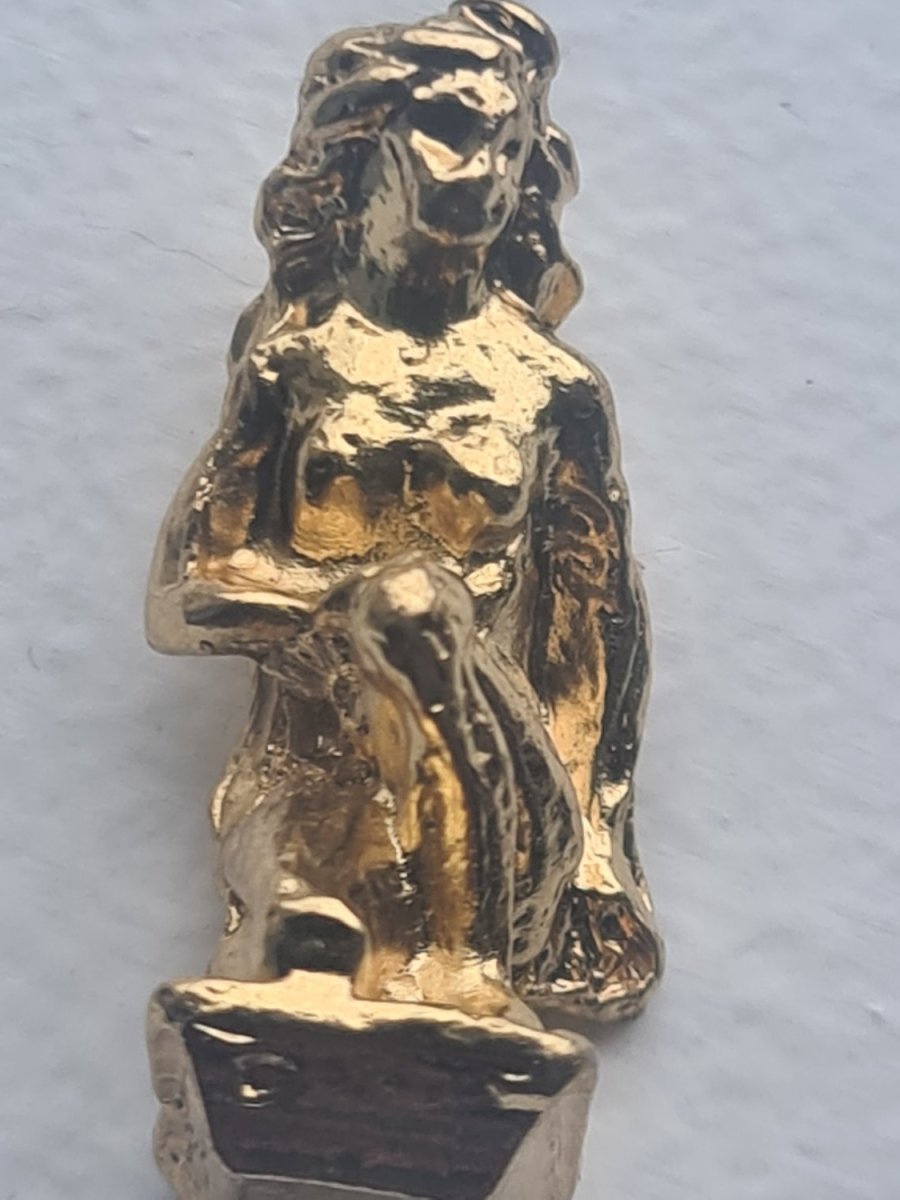
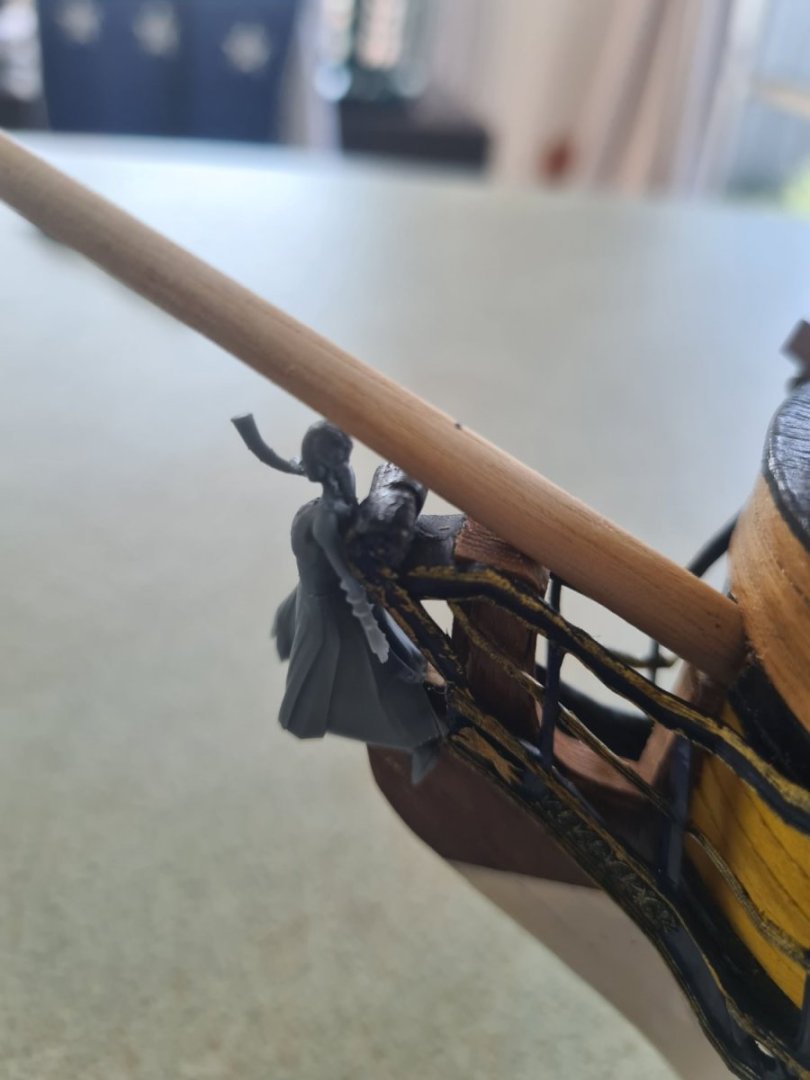
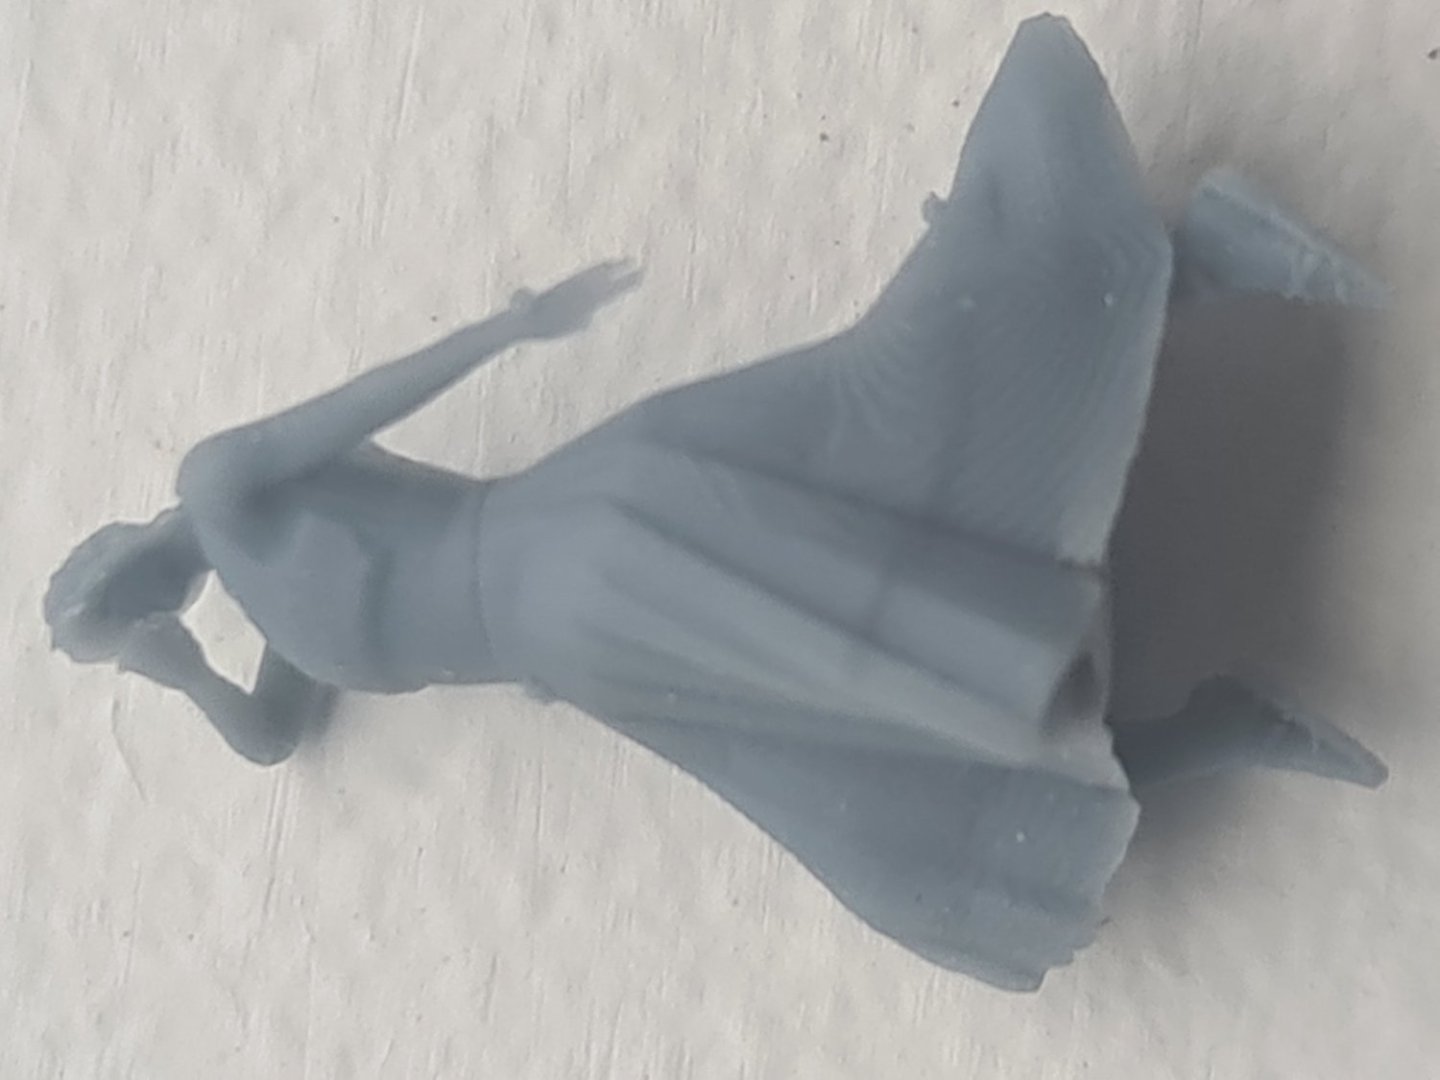
This is the 3d print from my 4k printer. And comparison with the corel kit figure head. The scale looks weird. Maybe I can make mine a wee bit bigger which will help the print. And I broke the hunting horn off... thats ok... I can print another one.


-
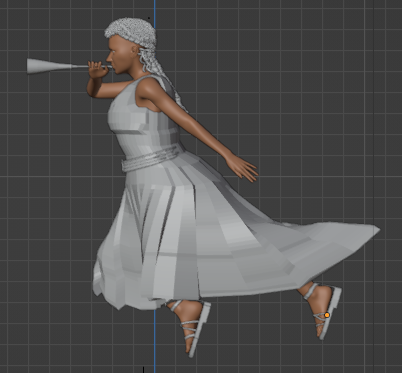
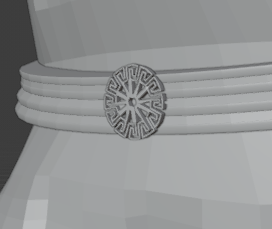
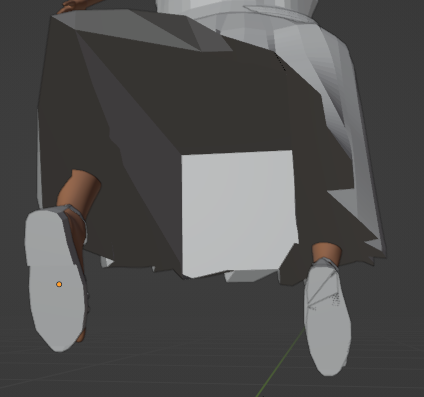
Maybe never again will I do a new fully imagined figurehead from my imagination. It was very difficult and took so long. The problems with it were too numerous to note here. The clothes modifier - nightmare but I did use the wind force to shape the dress and I also draped it over the end of the bow - underneath its been cut out so that it will fit nicely over the bow section. In addition it will be caucasian with brown hair when its painted. total height of the printed figure is likely to be about 20mm so it will probably loose a lot of the details but I did them anyway - I will add a clip on the shoulder of the dress as well but again it might not print out. At this stage its part computer art and part model ship. I will probably reuse quite a bit of this model on future scratch builds - maybe change the hair at some point but based on the number of hours not something to be attempted lightly.
-
Cloth distance from object
Srenner replied to Srenner's topic in CAD and 3D Modelling/Drafting Plans with Software
I have kind of fixed it by pinning the front in a vertex group close to the skin. -
Any ideas why the cloth distance stands away from the object? It must be a offset field in blender I need to adjust. Is it a collision distance or a setting with the cloth itself?
.png.e8a75989f2d1d5e8f8f448e7cef5f263.png)
-
Blender hair... what can I say. It's a beast and has taken me ages but starting to get happier with the workflow to make braids and things. I have sliced this in chitubox and it's a solid piece so it should print but Thinking the detail will get lost to a degree when she is only 20mm tall. Still the figure head is taking shape. She will be wearing a toga of some sort blowing in the wind and blowing a hunting horn. I plan to have a greyhound on her left hand side leaping and looking up at her on the head rails. Has taken well over twenty hours to get to this stage. Its a blender Make human female with rig for positioning her arms, legs, hands and fingers.
.png.f1f410521b0b7eb8acd5e29781c6c7ec.png)
-
Thanks Allan... very helpful
-
It could be the angle of the bowsprit to the keel... should be 23-26 degrees right?