HOLIDAY DONATION DRIVE - SUPPORT MSW - DO YOUR PART TO KEEP THIS GREAT FORUM GOING! (Only 13 donations so far - C'mon guys!)
×


cristikc
-
Posts
590 -
Joined
-
Last visited
Content Type
Profiles
Forums
Gallery
Events
Everything posted by cristikc
-
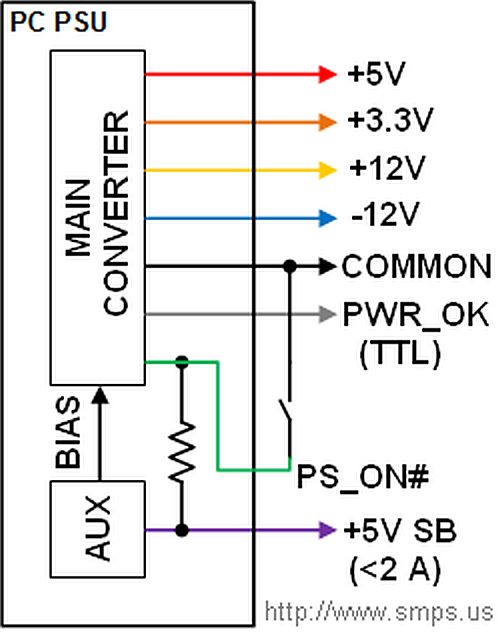
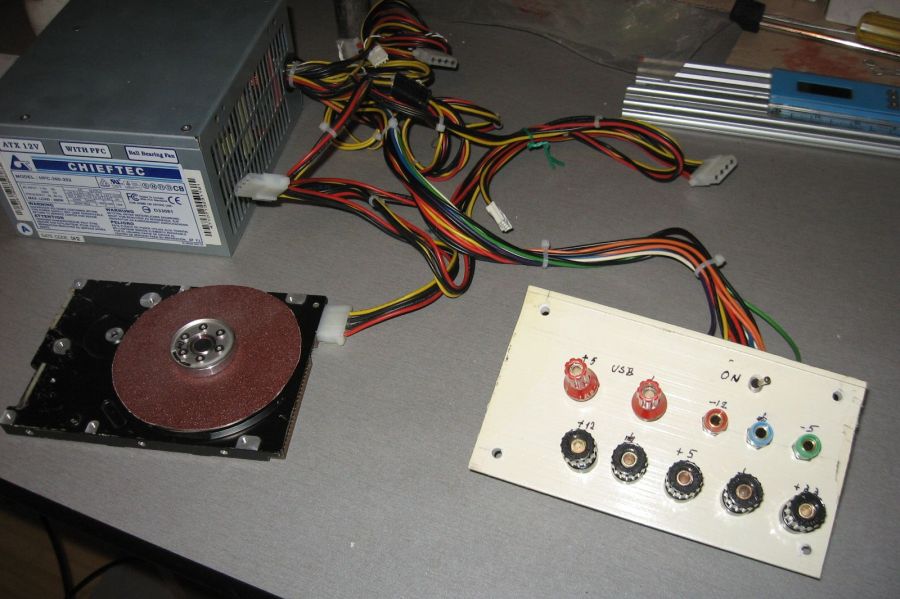
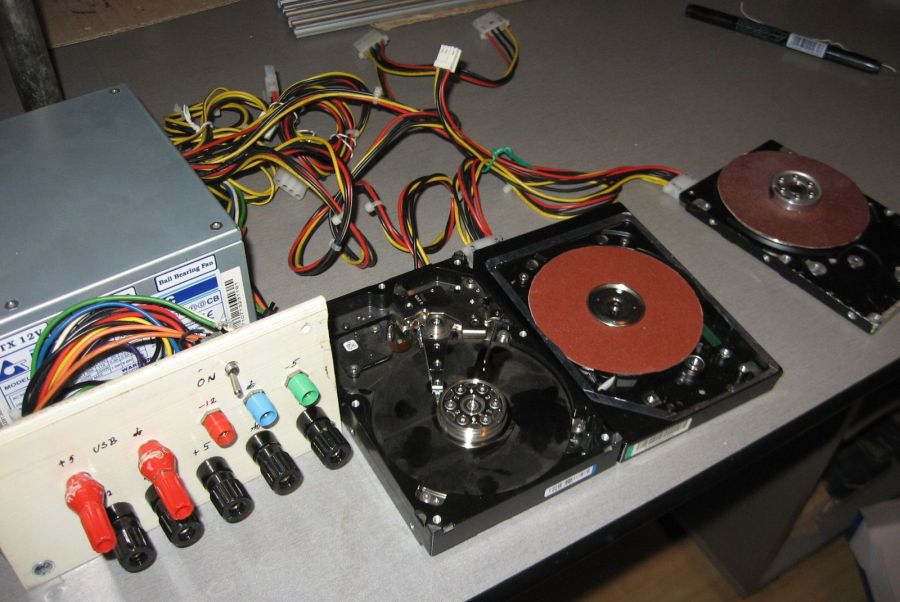
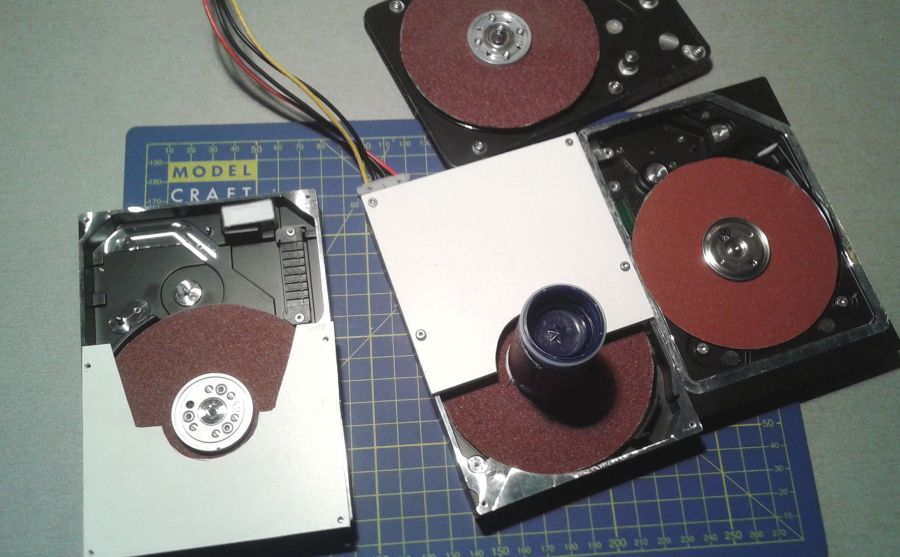
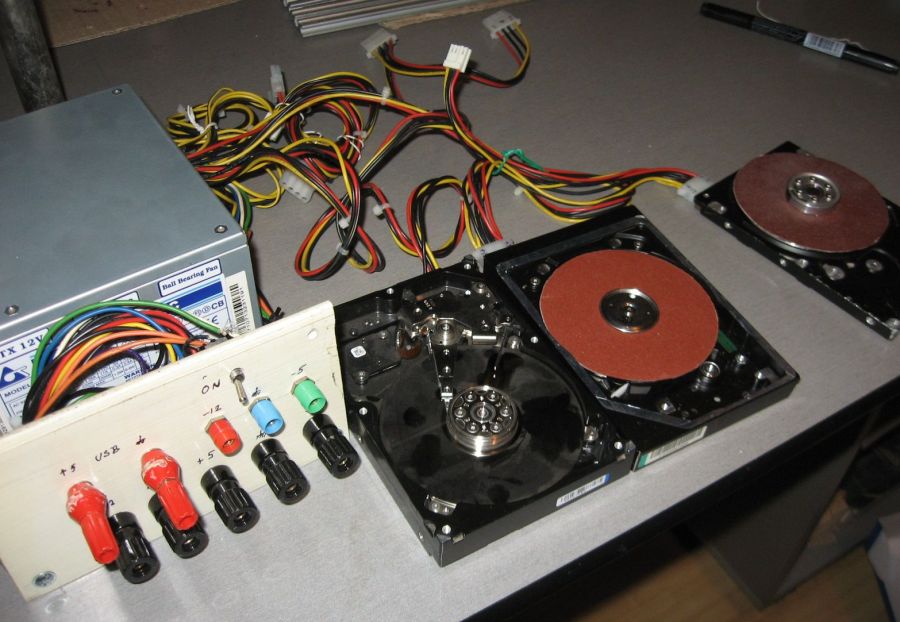
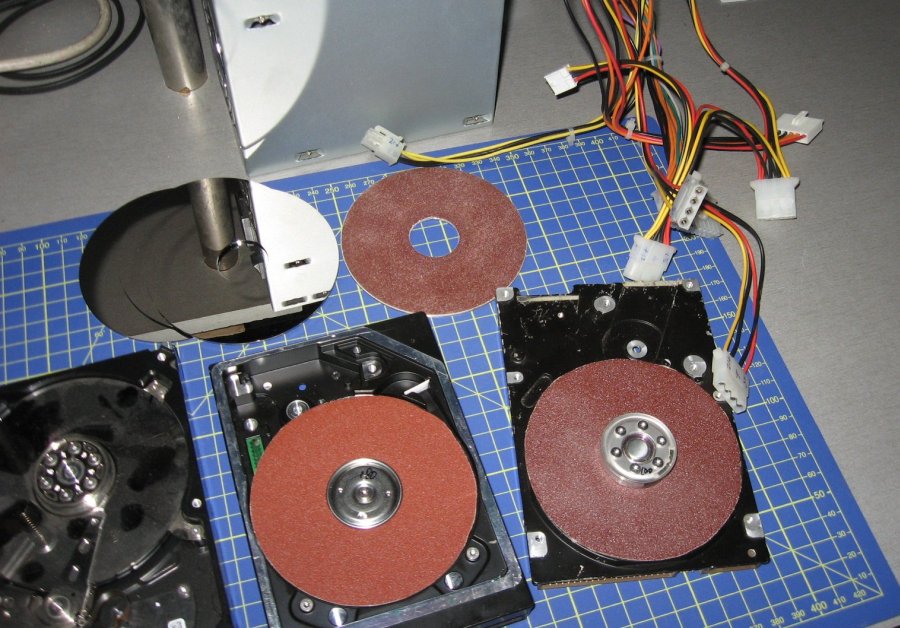
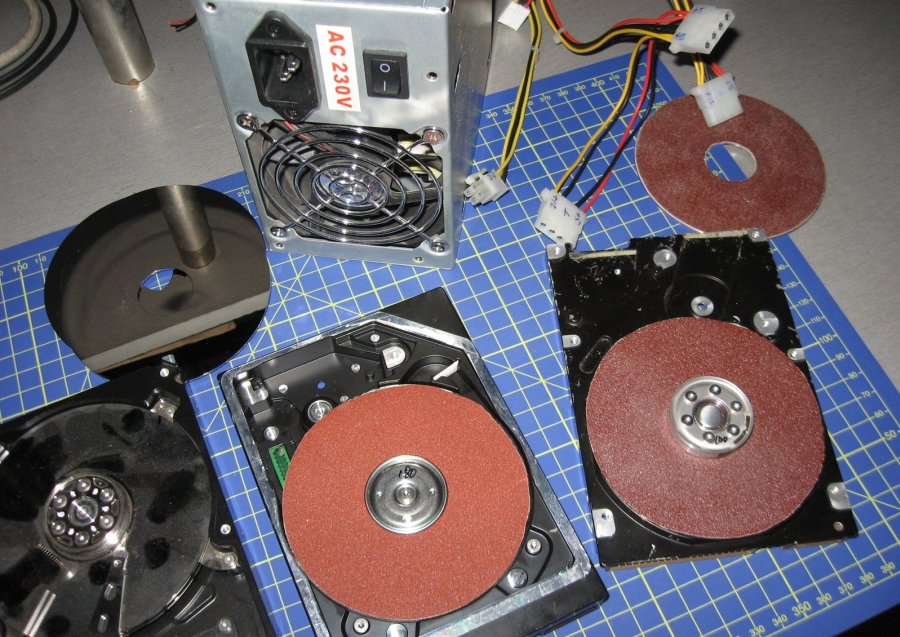
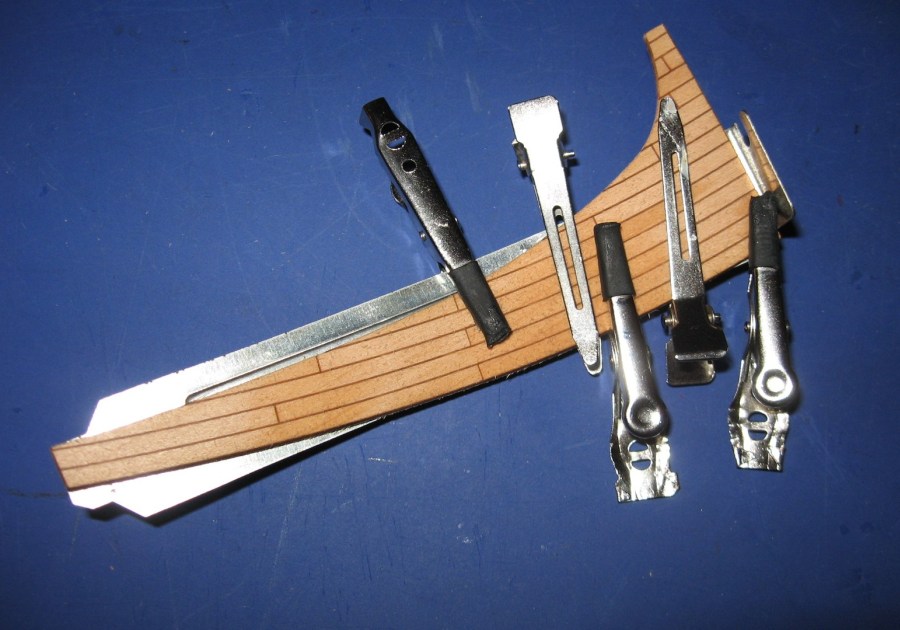
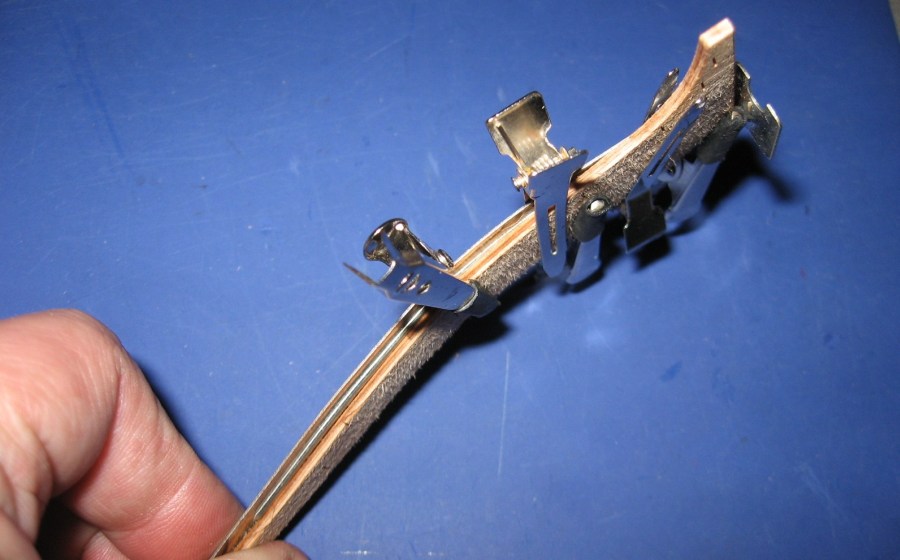
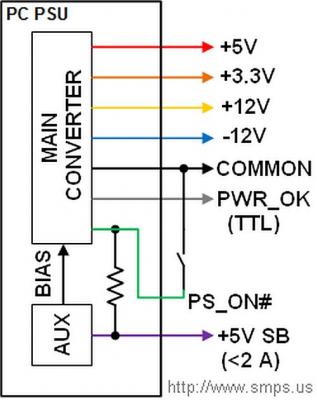
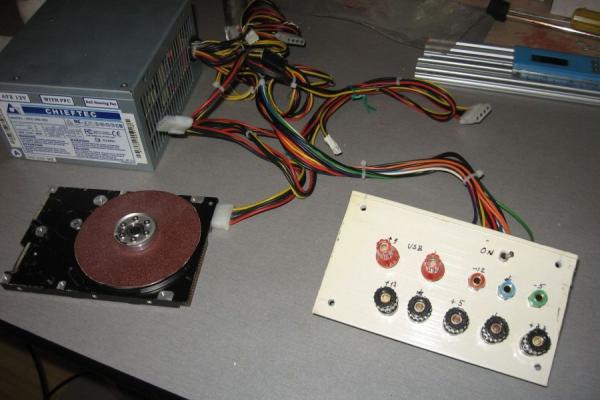
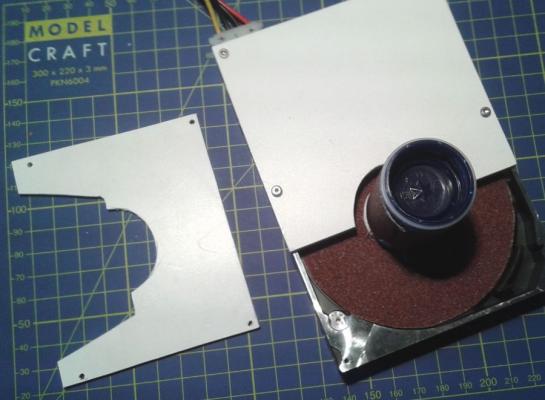
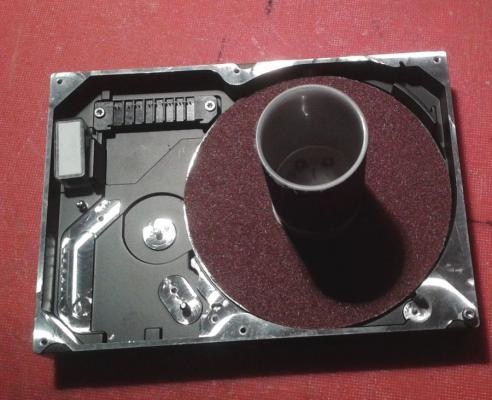
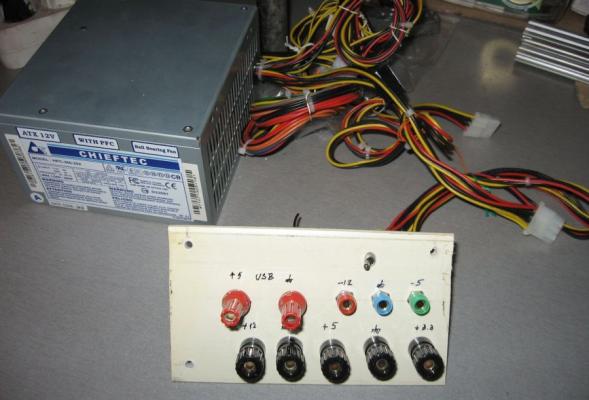
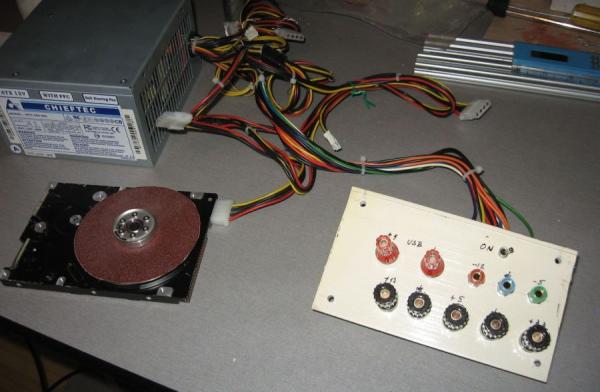
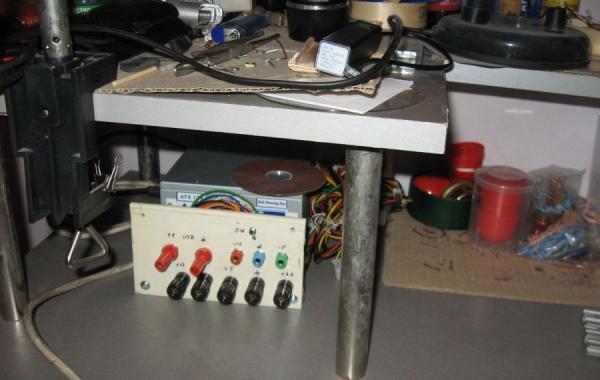
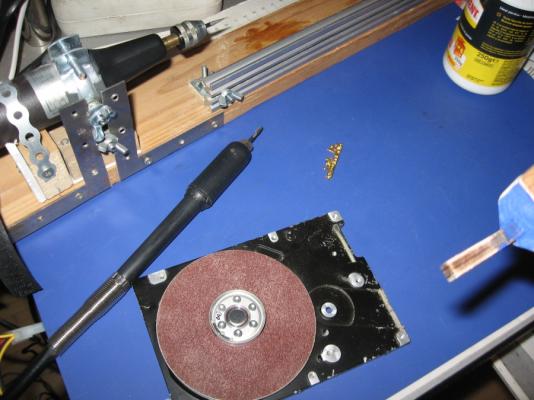
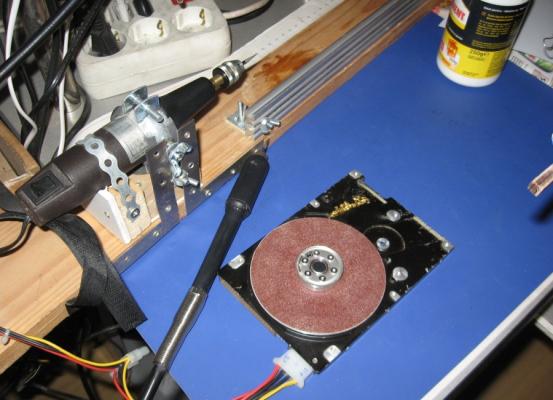
 I also made a "new" power supply. From a PC you can take the power supply. Keep the +5 and +12v connector as they are (you can use to the PATA hard disks), and cut wires just from the 20 -24 connector take one or two wires withe the same color to a new conector use the green and a black to a switch (small one) to switch on the power you cand see what means each color Here is how i made the new conectors the power source with the HDD sanding together


-
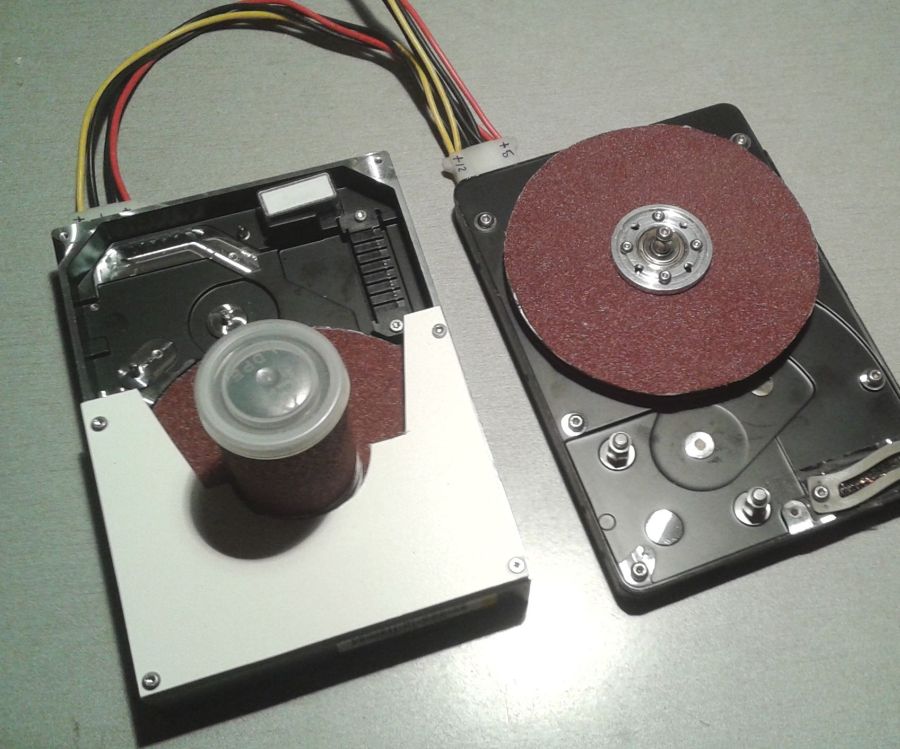
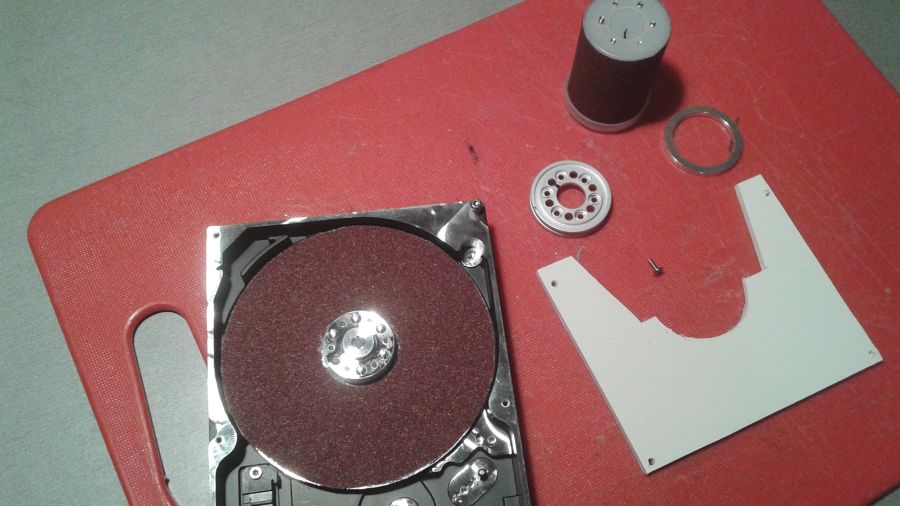
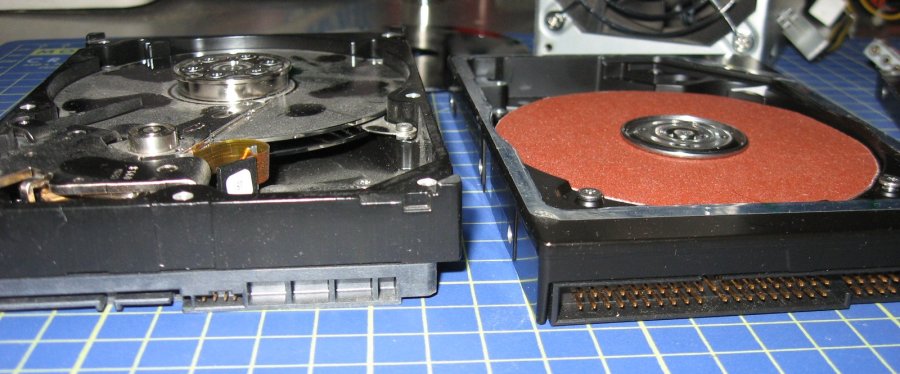
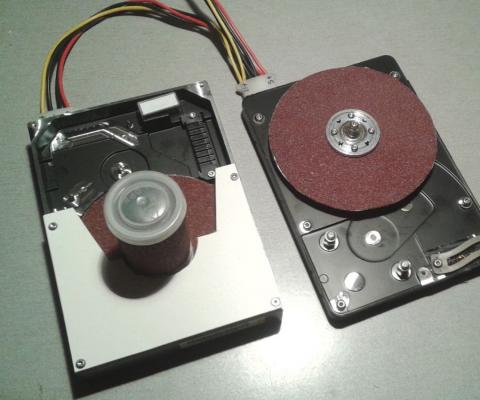
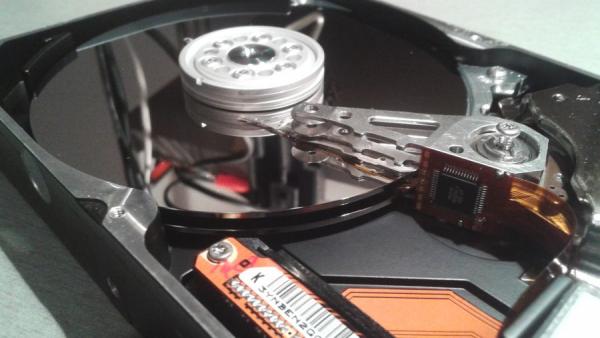
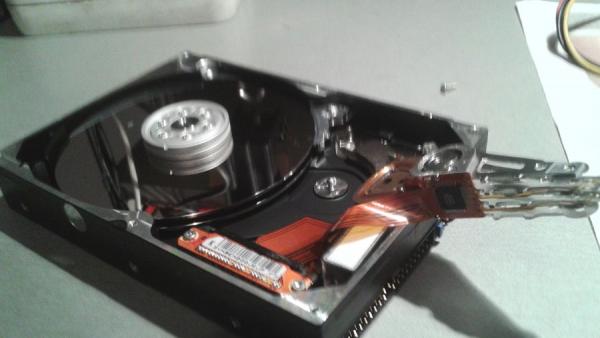
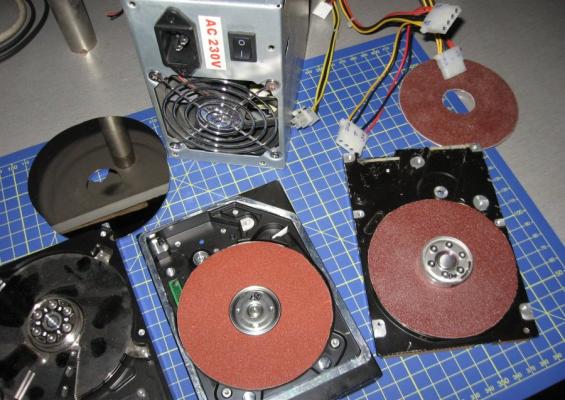
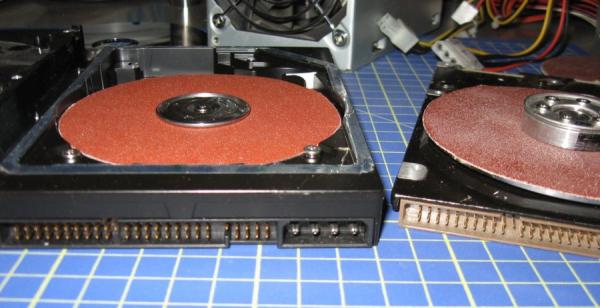
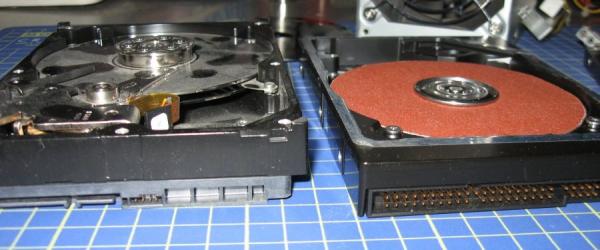
For this to work, you need just ATA (PATA) hard disks, not the SATA ones You can find wich are ok from the conectors this are the PATA that are OK On left is a SATA hard drive (not ok), and on right is a PATA that is OK grup of PATA and SATA that i prepared


-
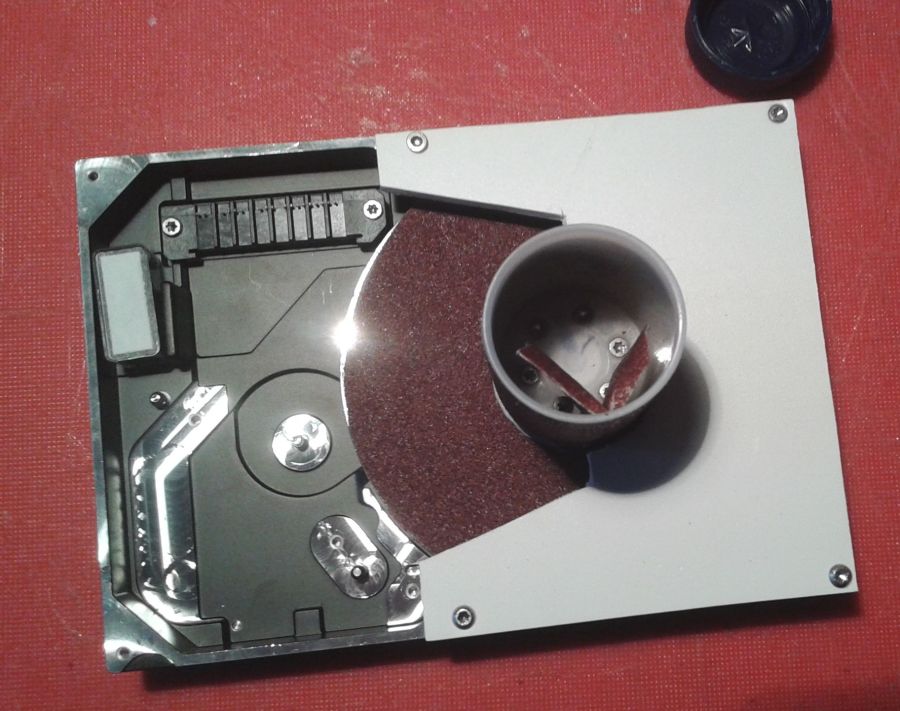
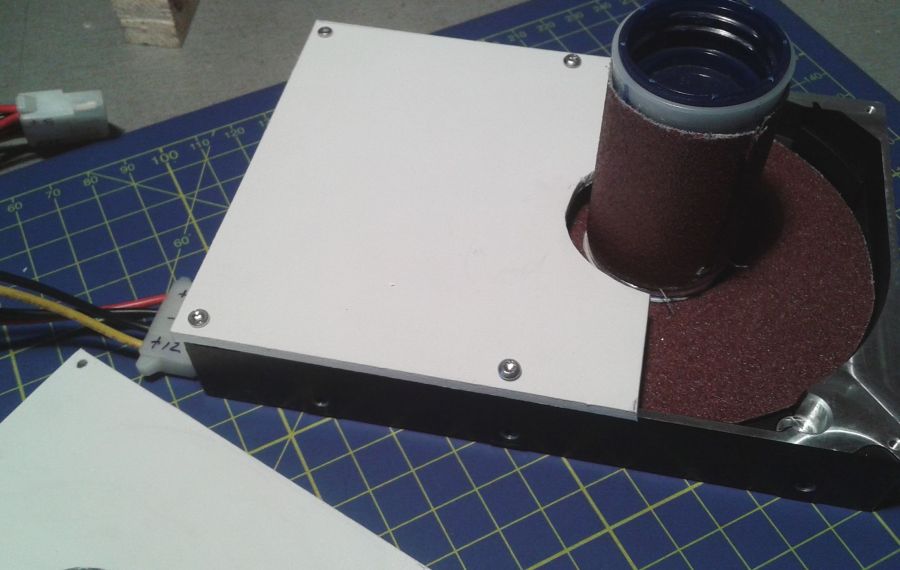
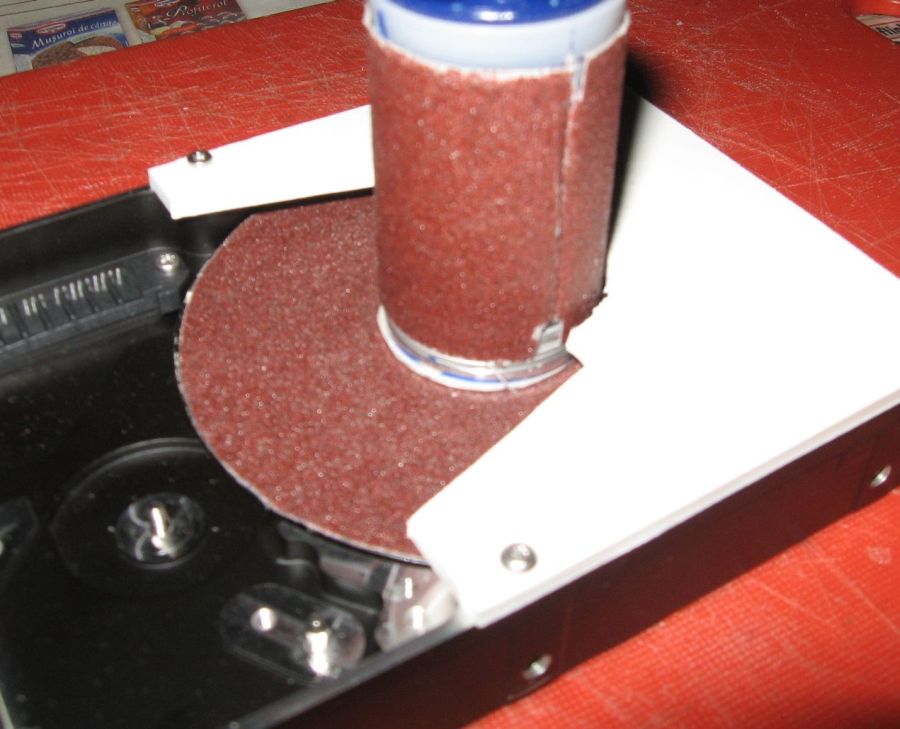
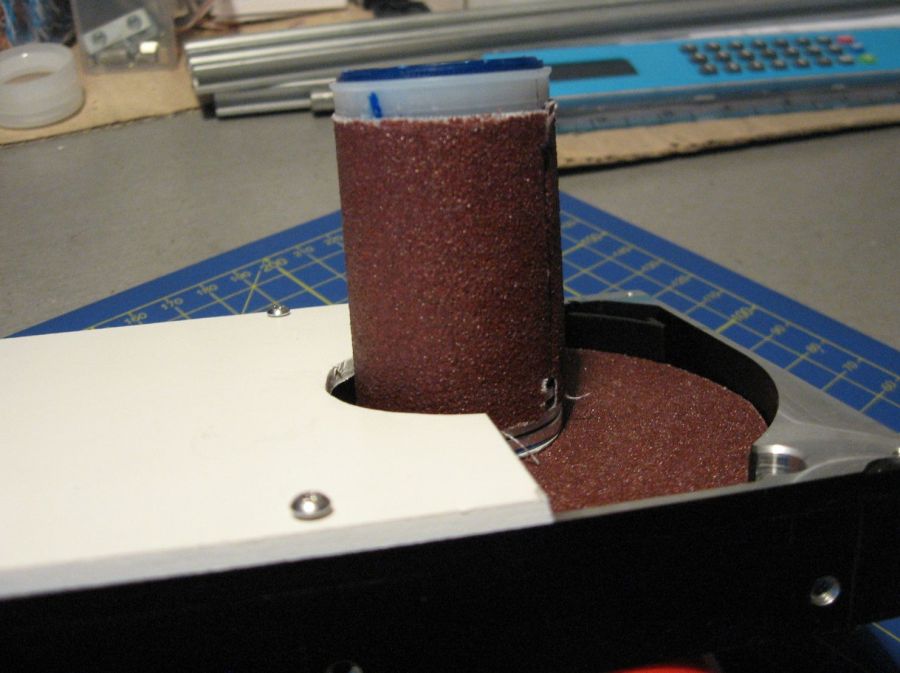
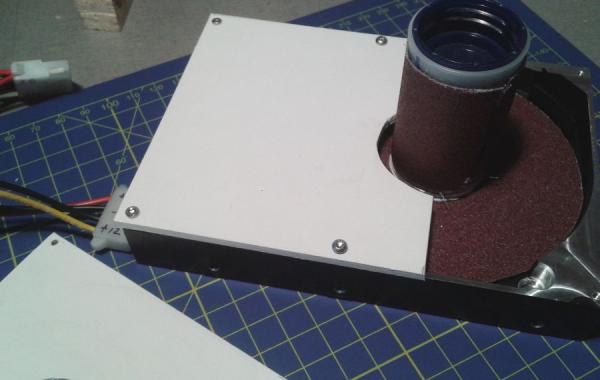
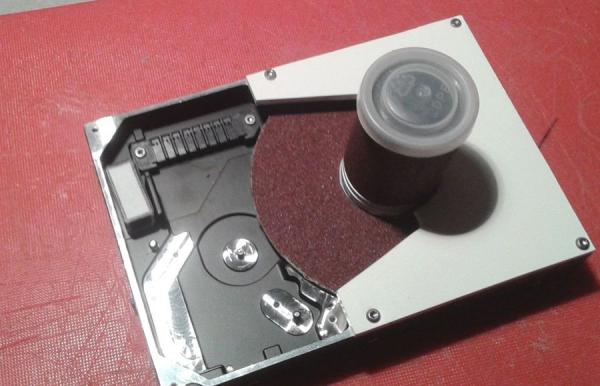
I have made some with vertical tube, and other (with different ganulations) without vertical tube, and also without protect cover different type of protections and sanding paper how to fix inside the vertical sanding tool.


-
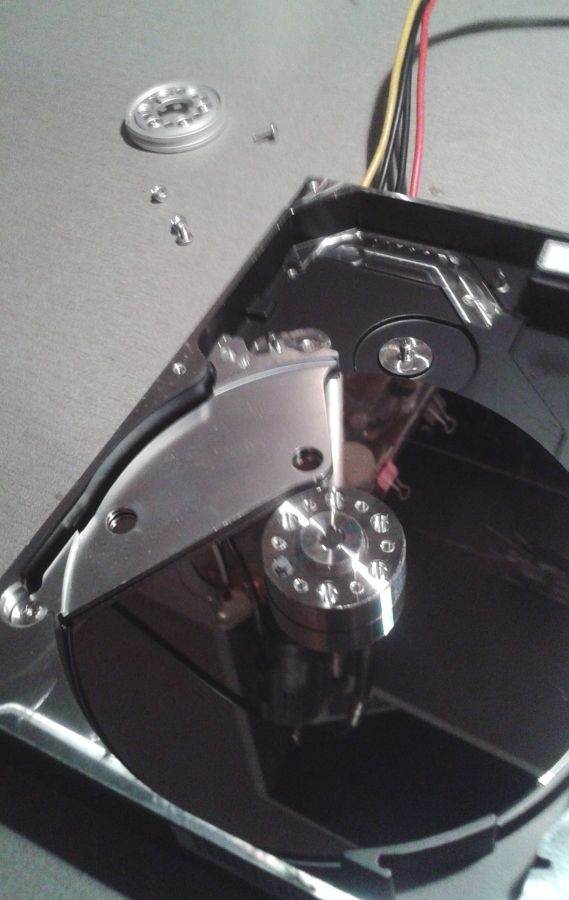
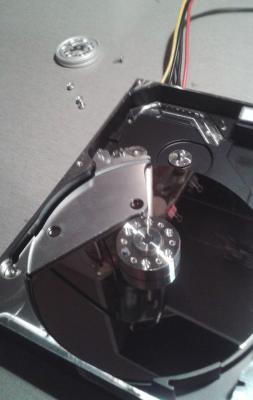
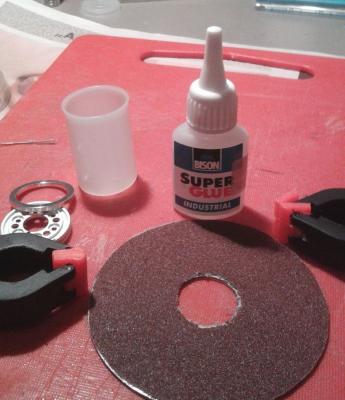
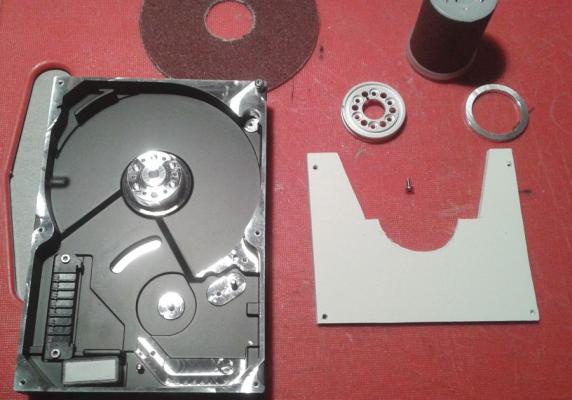
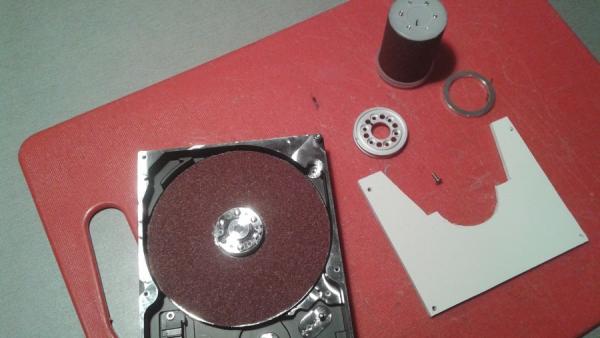
I made some models of sanding tools from HDD parts. I will try to explain with picture how i made. Also i made my "new" power supply from computer power supply. take the cover off remove heads take out magnets and other parts glue paper sand on one of the platans. Al so for the vertical sanding, use a "medical tube" the parts are ready install the disk withe the sanding paper, glued. Make one small cover, if you like install also the vertical sanding tube put the helping and protect cover, in position
-
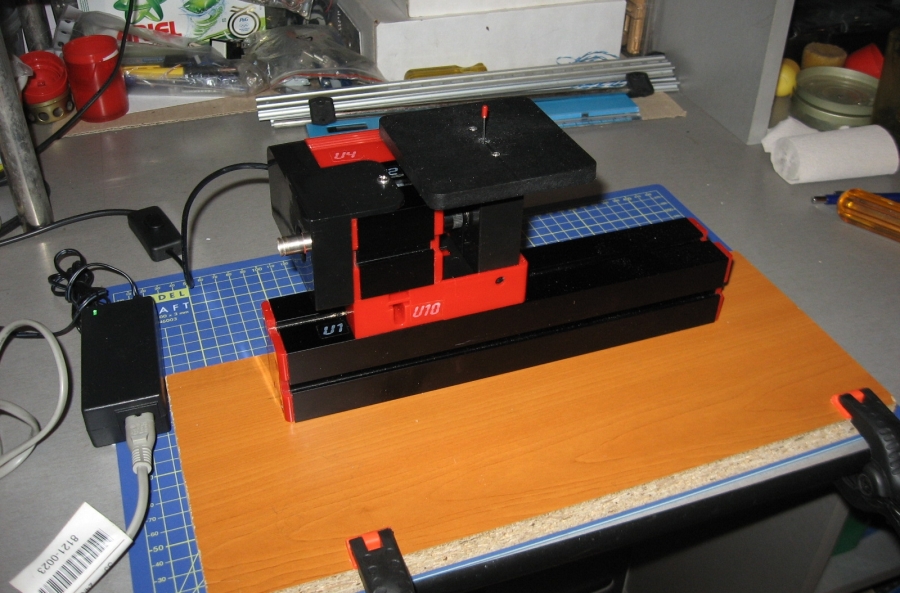
Hi Max, i will put tomorrow the schematic for how to se an old pc power supply to a stand power supply for us. Happy New Year to you, your family, and all our friends. Cristi
-
Having two days free, i finally (after many years) made my power source for the hobby (from an pc power supply). It was not hard, but had no time (every time when i wanted to build - make the conections and the plugs and connectors, and the arrangment - it was something more important) This is how it looks (and how everyone can do) All the best for the end of the year testing with all the HDD used for sanding in final position A HAPPY NEW YEAR to everyone. Cristi

-
I wish to all builder or just watcher from the MSW a Marry Christmas ! This are just a "part" from the list of wishes i sent....

-
Hi Mike, as i said, it works very well, but just the PATA ones. The advantage is that you can make as many as you can, an you can change when the sand paper is not good. For the moment i have just two, because i mede also one for my son, and one for my son in law, but i want to make 4 or 5, and also to make some combinations Cristi
-
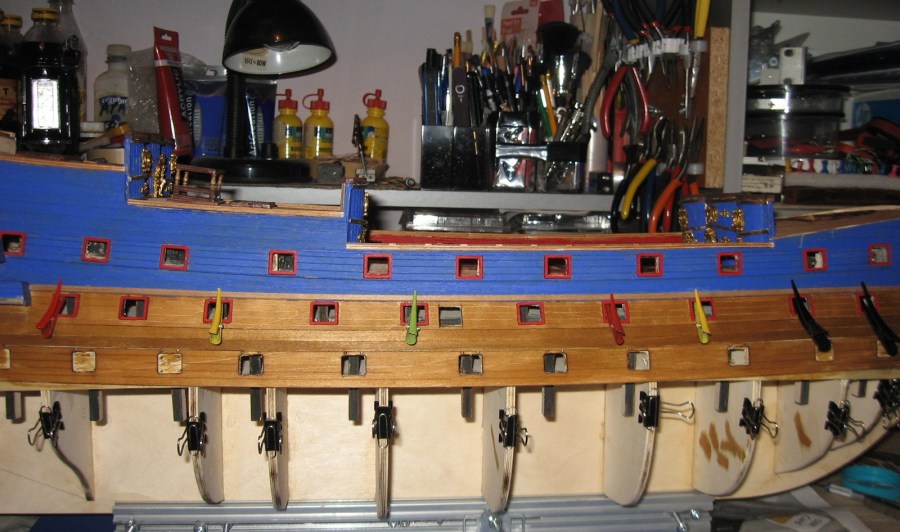
I made the photos for hdd sander two sanders from pata hdd,and one sata that is not ok. also the computer power source, also 1 spare (new format sander disk) and some spares not "formated" two pata hdd, from the connector side left the sata connector (not ok) and right the pata connector ready formated hope this will help everyone Cristi

-
Hi Richard, i use the sander from some years, and it is ok. The only problem, if you want to buid one, is to use JUST the PATA (paralel ata - old type of hdd) and not SATA (the sata hdd start to spin and after 5-10 sec stops - this is the logic it works in computer) while the pata work ok. You can find what type you have, just looking to the connector. Also, you have to take out, the hdd head and magnet. If you need any more info, just write, here or in a pm All the best Cristi. And Marry Christmas to all ps. Ulises, from time to time you have to "reformat" the disk (change the sandpaper with new). But i also have different disks prepared with sanding paper of sand granulation (100, 120, 150, 180, 220) I have already prepared two more, with this sandpaper, and i have some ideas but for the end of the year i heve no time. Next year i will put some more pictures with the new ideas
-
Hi Garym, i like that you think as i think. Family and real life are more important, hobby is excelent, is something that recharge our battery, but has to be at the end, when all are ok. I look to your log, to learn more about Sovereign. All the best from me and Marry Christmas Cristi
-
Mike, i have still to go to my job, stay with my granddaughter and her brother, do things for home, and at the end is the pleasure (my hobby). I'd like to work a lot to finish Sovereign and start a new ship, but... that is life. I love my family very much,and, as you know, we are the last with pleasures in family. All the best Cristi
-
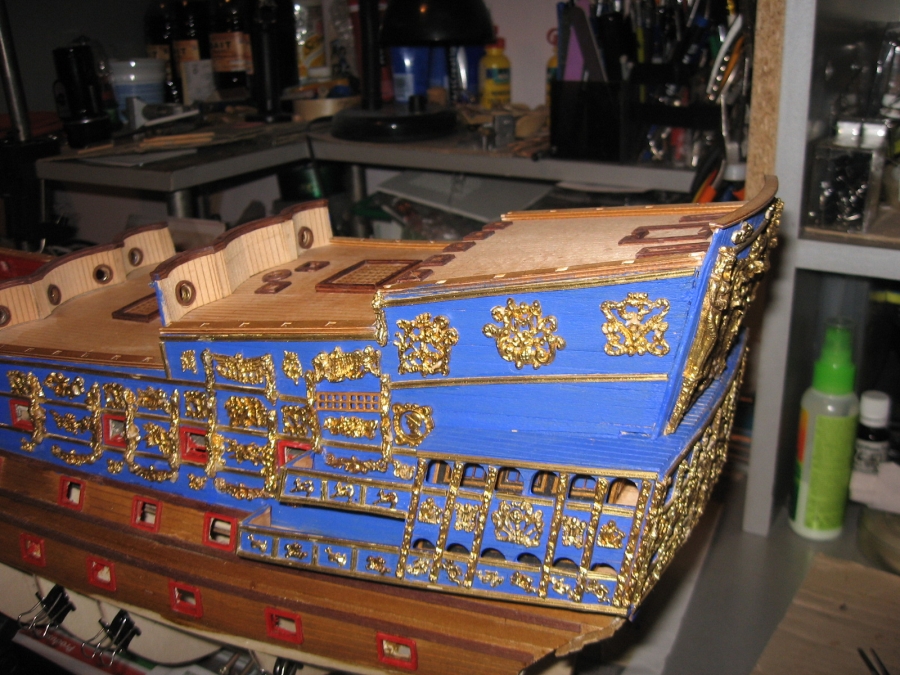
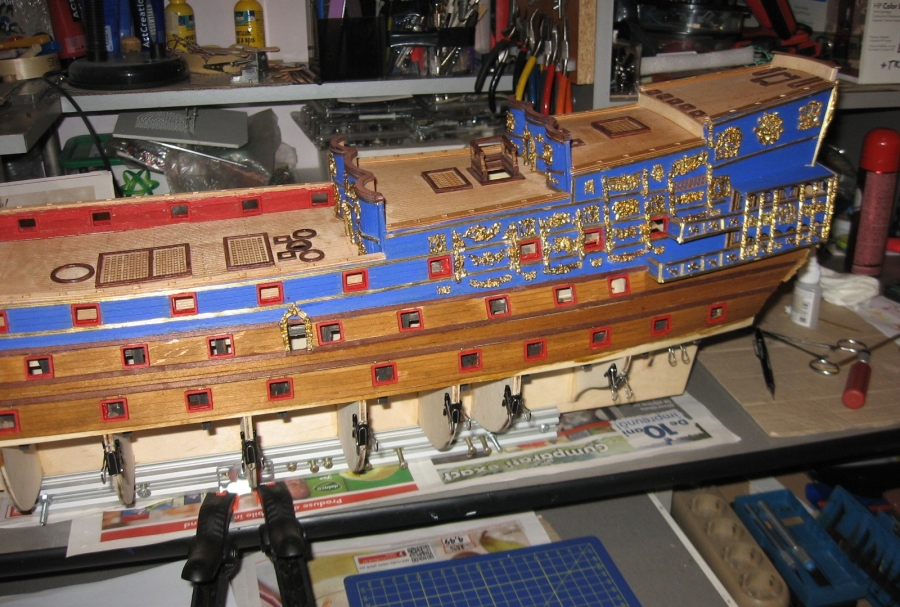
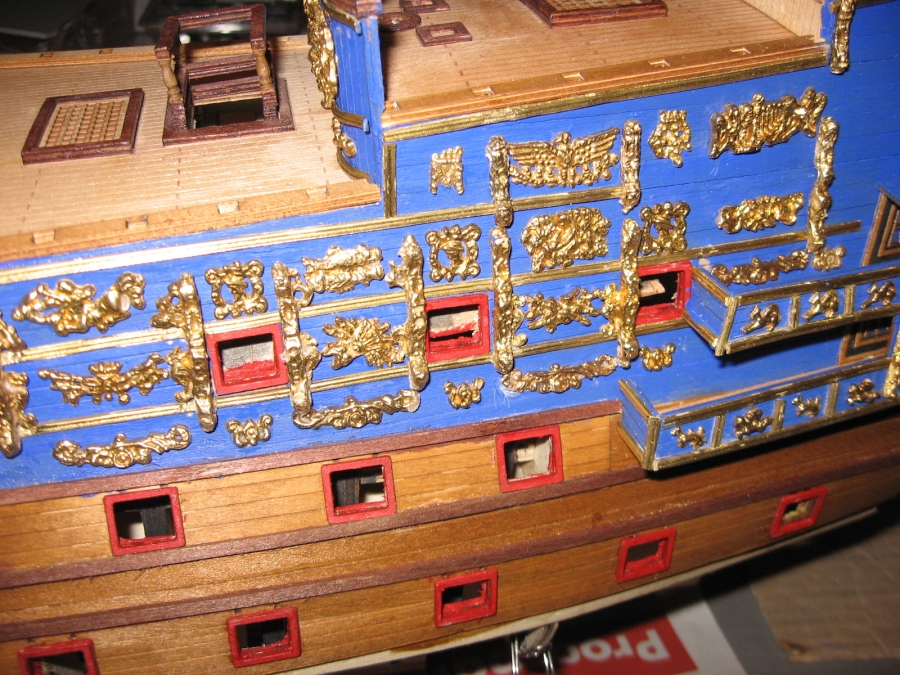
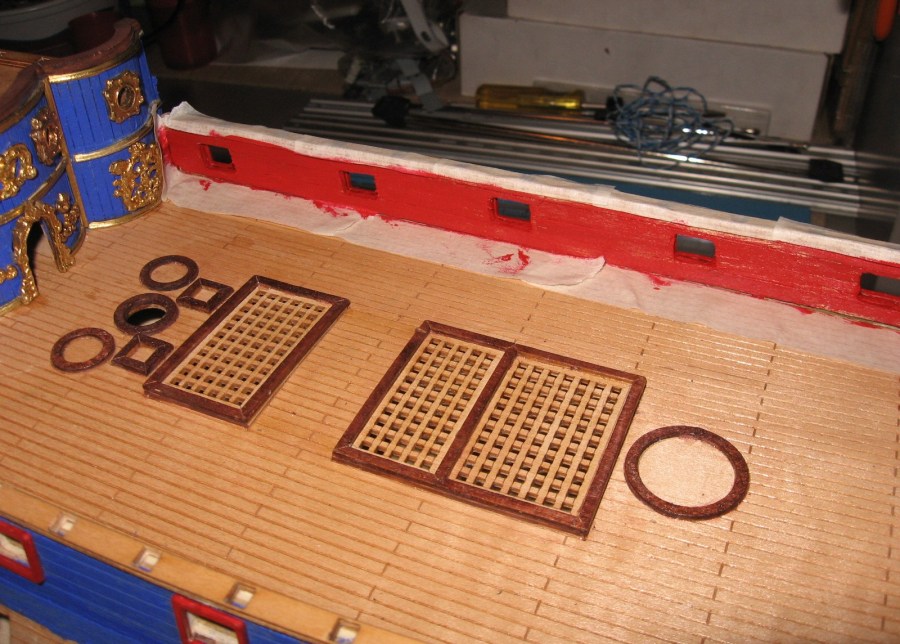
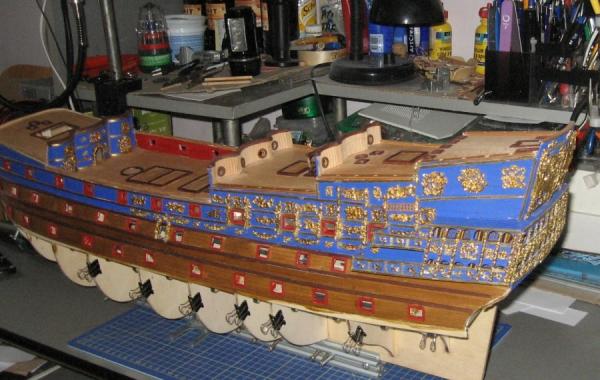
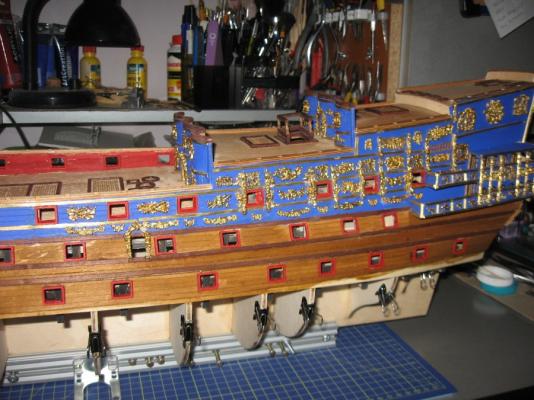
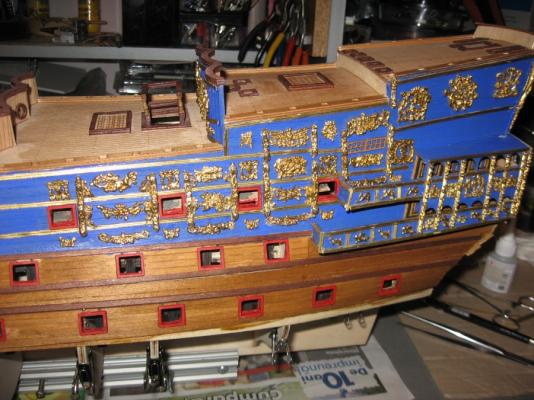
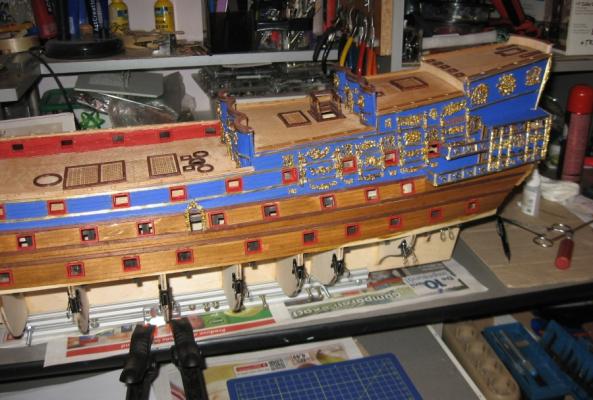
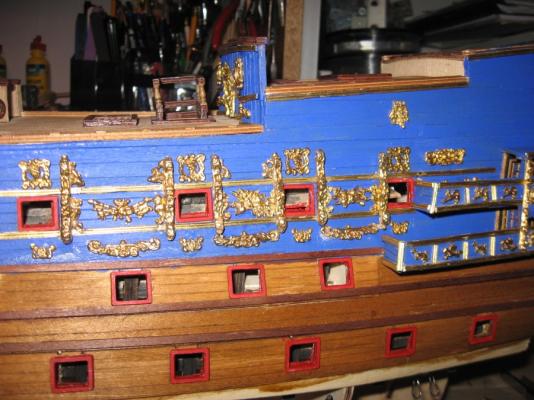
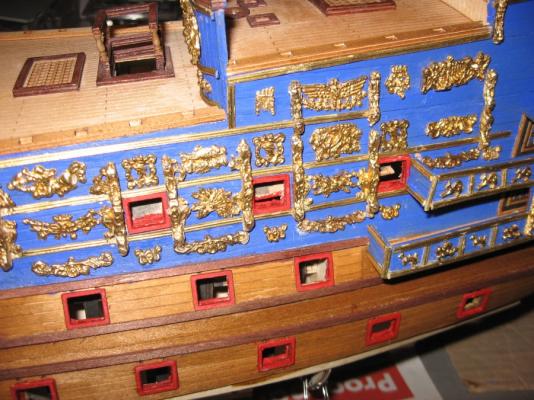
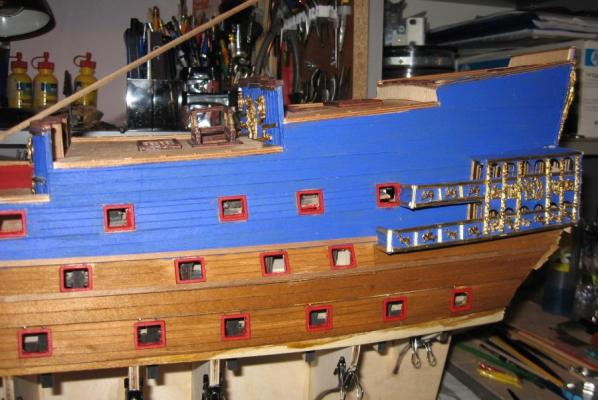
Add some new decorations, and here i am

-
Hi Denis, i had some problems with the brass figures, the dimentions are different, and also a part of the figures are not very clear. I had to use this tools to arrange everything, but i can not say i am very pleased. All the best to you and yhe family, and Marry Christmas! Cristi
-
Hi Garym, exactly this are the problems, and i was wandering if you have the same problems. I have to make a lot of movements, and i still don't like, but that is. I have to finish somehow. I also have a lot of flashes, that i have to sand. Thank's for the answer. Cristi
-
And here i am, before a weekend with my granddaugter, when we have to prepare "decorations" for christmas And a Merry Christmas to all ship modeler builders Cristi

-
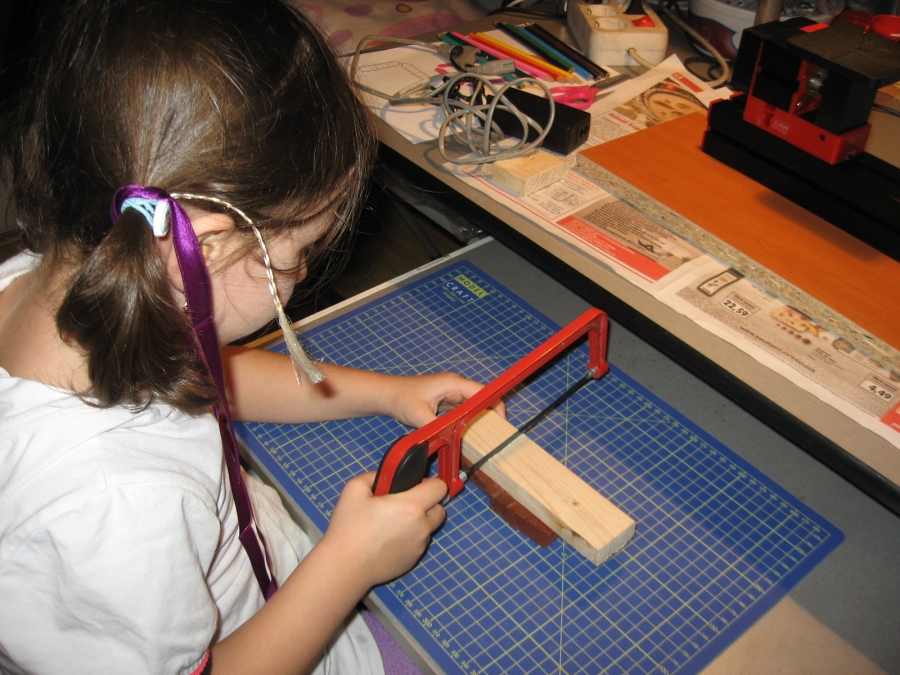
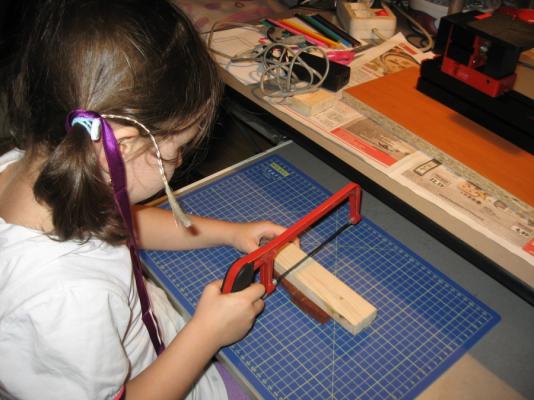
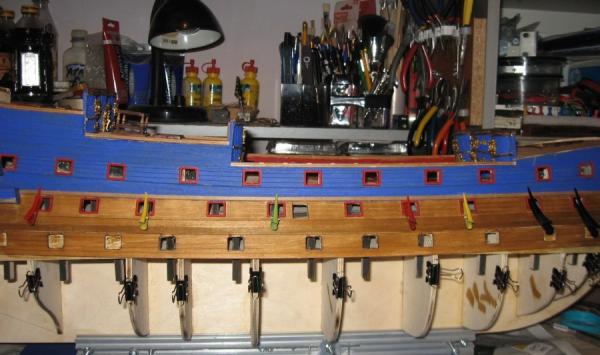
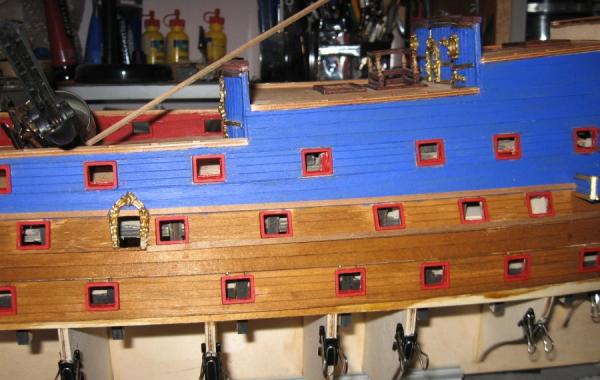
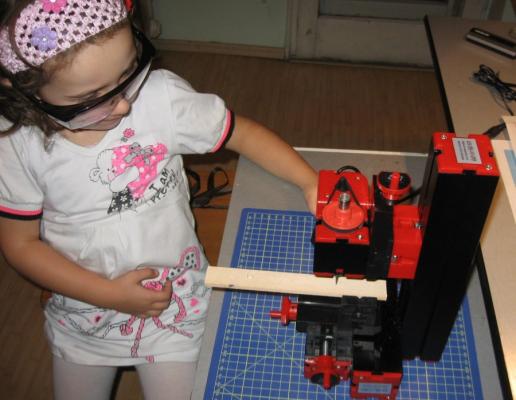
Had just a little time to work I had a big "help" from my granddaughter (i was trying to teach her small thinks, so this was very important to me) also i was helped by her, to transform the Unimat in fret saw (and i build a table for it) After this i warked a little I am a little disapointed for the bras parts (there are not so accurated as i expected, and for the price of the kut) Hope that Denis, Andy, Vince, Garym and other that have build this kit, can tell me how they found the bras decoration Cristi

-
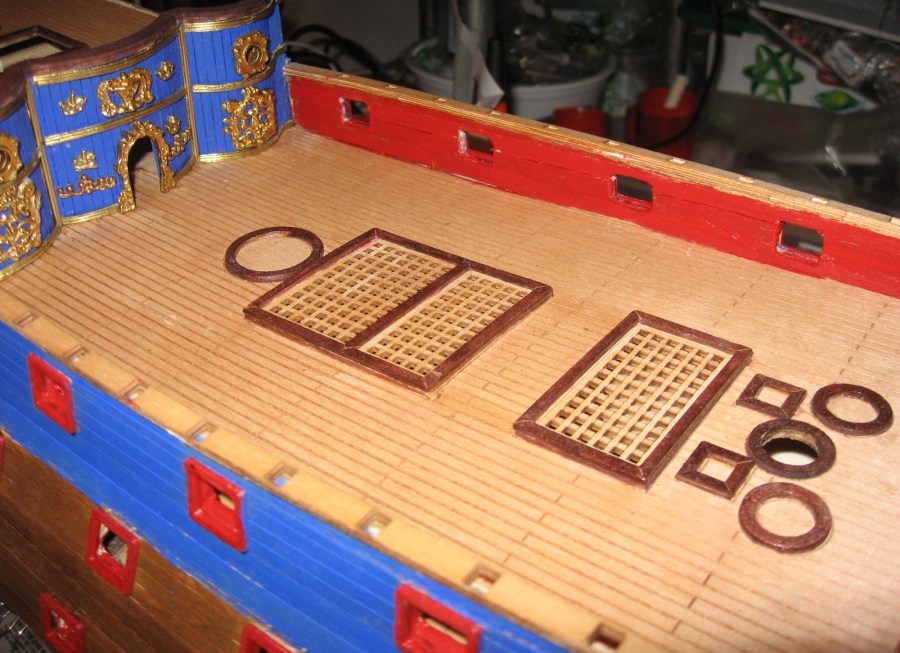
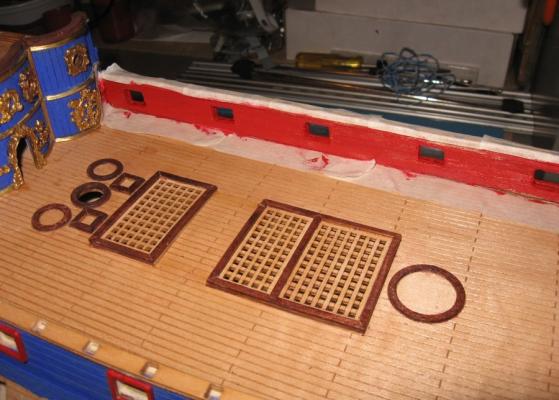
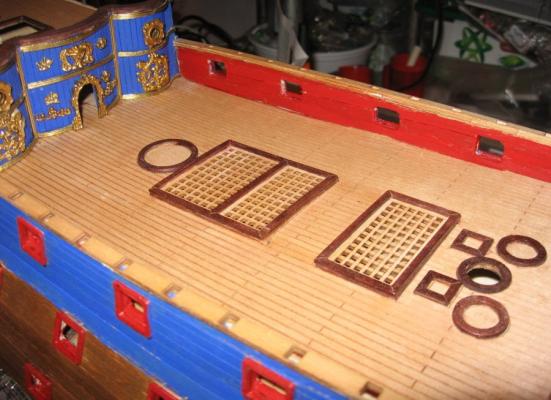
Hi Denis, i understand you, i also prefer wood gratings, and on SIB i have to build all just from parts, but there are better. Cristi
-
Hi Ulises, excellent job. Did you think for a display case? Wait for your next project. Cristi
-
And glue some sticks

-
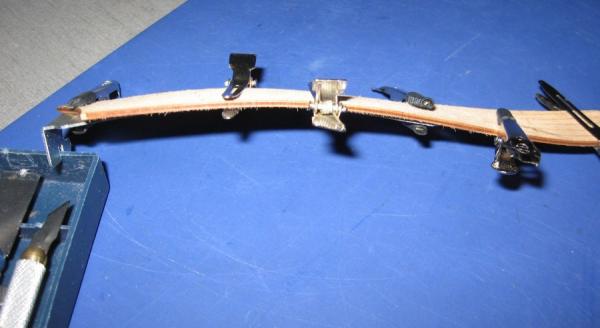
Bending some parts


-
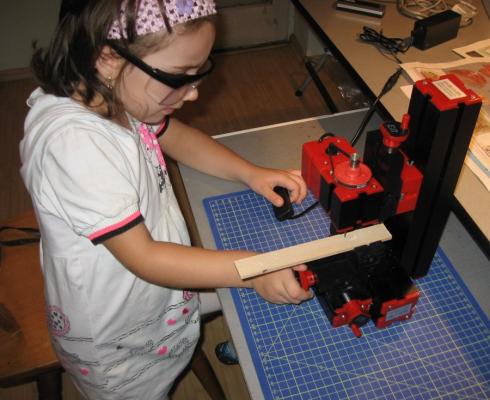
Painted some parts, when i had a little time Also i have to teach my granddaughter how to work with tools, hope she will take the hobby from me:

-
Hi Denis, wait your email. I like help peo[ple, but for tehe moment i have to work a lot to my job Stay with my granddaughter, and at the end "play" with tools to my hobby. I hope i will try a small build, helped by my granddaughter , a scratch for "mantua combat post", from the schematics sent by one kund "colleague" from here, Keven. All the best,Cristi
-
Hi Denis, the kit look nice I understand that you have to start a second "job", i also make the same. There are parts in the build when i make the same think (repeat for days) and i need a change for some days. Vince P is very good, as i saw, and maybe he did not think to change between two works. Both you and Vince are very good, i look with interest to your logs. All the best Cristi