Patrick Matthews
-
Posts
406 -
Joined
-
Last visited
Content Type
Profiles
Forums
Gallery
Events
Everything posted by Patrick Matthews
-
 I'm in the US and have the first 70-odd installments of DeAgostini's SotS (and it's almost unstarted, most parts still in their bags). I do not expect to obtain the rest of the installments. I'd be happy to part with what I have, but the purchaser would need to secure the rest of the installments. > If you are in the UK, I think you can do this... maybe someone can confirm-- can one start a subscription at installment #74, for example? Note that this lot of material weighs a good 15 or 20 pounds, so shipping from the US will have a noticeable cost; > If you are in North America, the shipping will be better, but as far as I know, you cannot order the kit from DeAgostini USA, and I do not know if you can order it at all from the UK.. anyone know for sure? Either way, I'd be happy to talk to anyone on either side of the pond who might be interested... feel free to contact me offline. Pat M p.s.: Photos aplenty at: http://yankeesots.wordpress.com/ ... the long sordid story might be discussed later...
 -
Woo hoo, five copies for my mother! (in re: My article on 3D Printing). I'll also be giving a talk on 3DP at the NRG conference, October in St. Louis. See you there.
-
I'm interested in constructing a larger Pilar, working perhaps from Constructo's basic design. Question: How does Constructo represent Pilar's stern post or skeg? A standard vertical design, or one of these extended skegs, as seen in the linked image? (These were apparently all the rage in that time period). Extended skeg: http://www.rcgroups.com/forums/attachment.php?attachmentid=6303763 EDIT: Nevermind! I see it in this photo of the real Pilar-- it should be the extended skeg (regardless of what's in the Constructo kit): http://upload.wikimedia.org/wikipedia/commons/thumb/7/77/Pilar_%28Ernest_Hemingway%27s_boat%29_Cuba.jpg/800px-Pilar_%28Ernest_Hemingway%27s_boat%29_Cuba.jpg
-
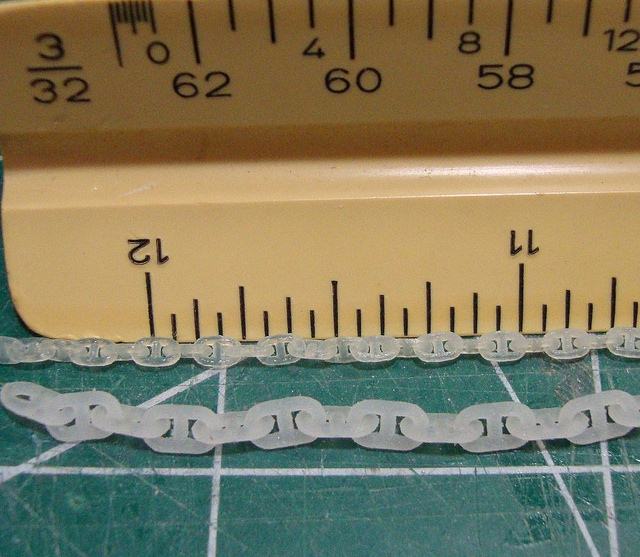
Scary ruler discovery
Patrick Matthews replied to Nirvana's topic in Modeling tools and Workshop Equipment
there's an old story somewhere about the buyer of a ship slipping into the shipyard one night and replacing the shipbuilders measuring stick with one that was stretched by 10 percent. Of course he ended up getting a ship 10 percent bigger! -
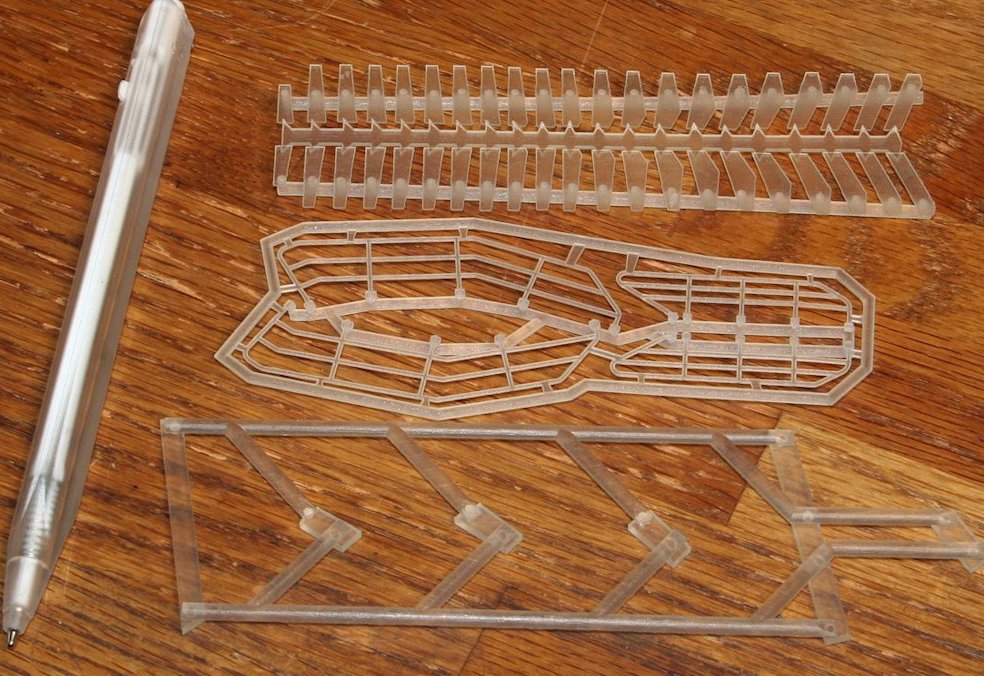
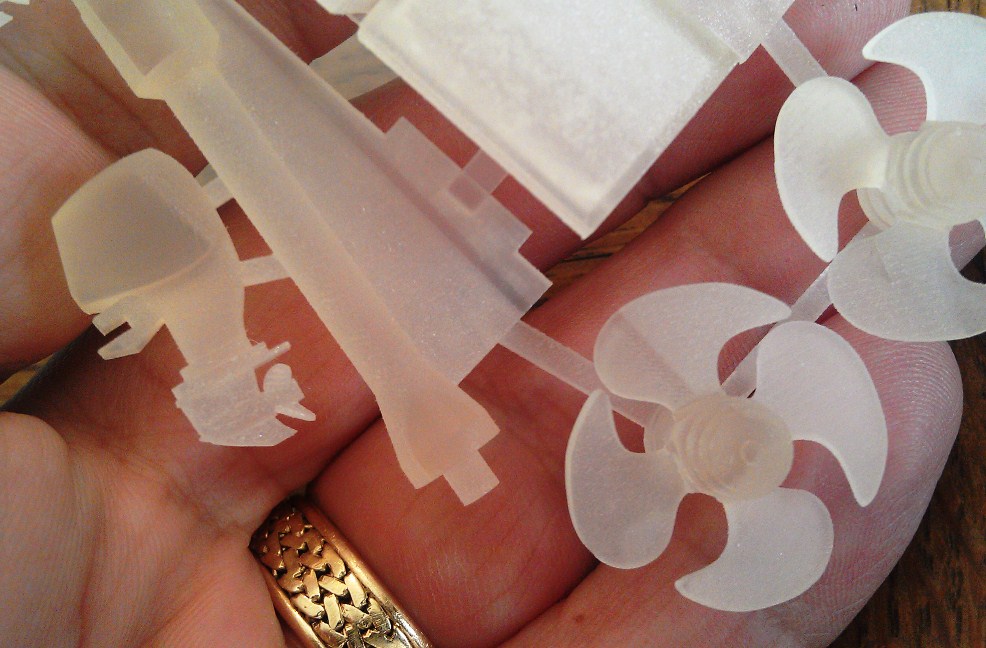
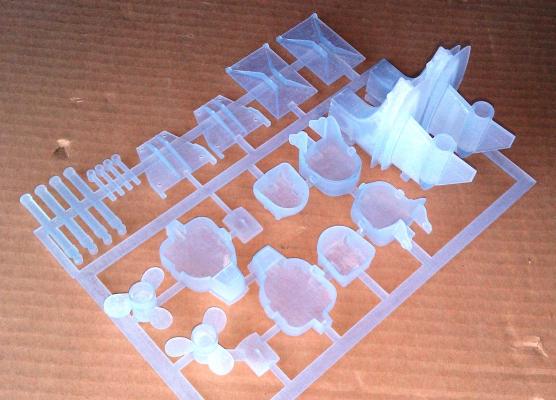
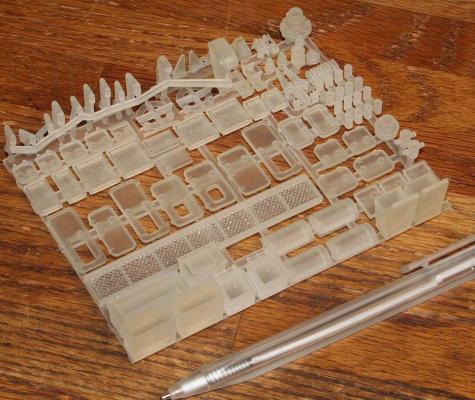
Some more professional grade parts just received in the last few days. One item is 1:9 scale outdrives and trim tabs for an offshore racer display model. The rest are parts for a 1:72 scale Canadian Coast Guard patrol boat, also a display model.


-
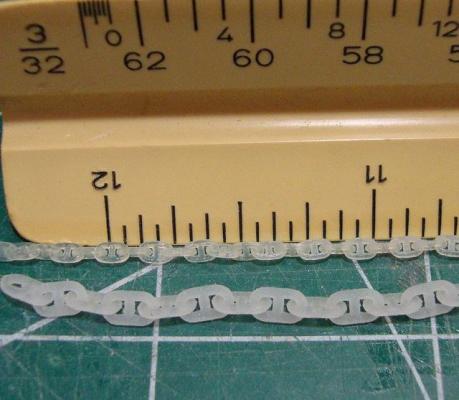
Hi Kurt- If a library is buying it, it's for sure a consumer level FDM machine... see my posts above about THAT trash. But also see my post above about very fine stud link anchor chain made on higher capability printers. Pat M
-
Don, as long as there is wood, there will be people who take great joy in shaping it. And that's an especially appropriate medium and method for building models of wooden ships. But there are other types of ships out there, we don't all do Age of Sail. I have no interest in carving wooden stud link chain at 11 links per inch, wooden cowl ventilators, nor wooden hulls for modern steel patrol craft. 3D Printing is merely another tool in the tool box, to use when appropriate. Ain't nothing wrong with new technologies to help get the job done... I'll wager you'd rather enjoy using a precision Byrnes table saw to rip deck planks, as opposed to hand sawing them and hand shaving them to width? Perhaps you've even enjoyed the assistance of laser-cut bulkheads here and there? And allow me to put it another way: A plastic HMS Victory is available from Heller. For some time now. >> Has this in any way diminished the relevancy of traditional wood ship modeling?
-
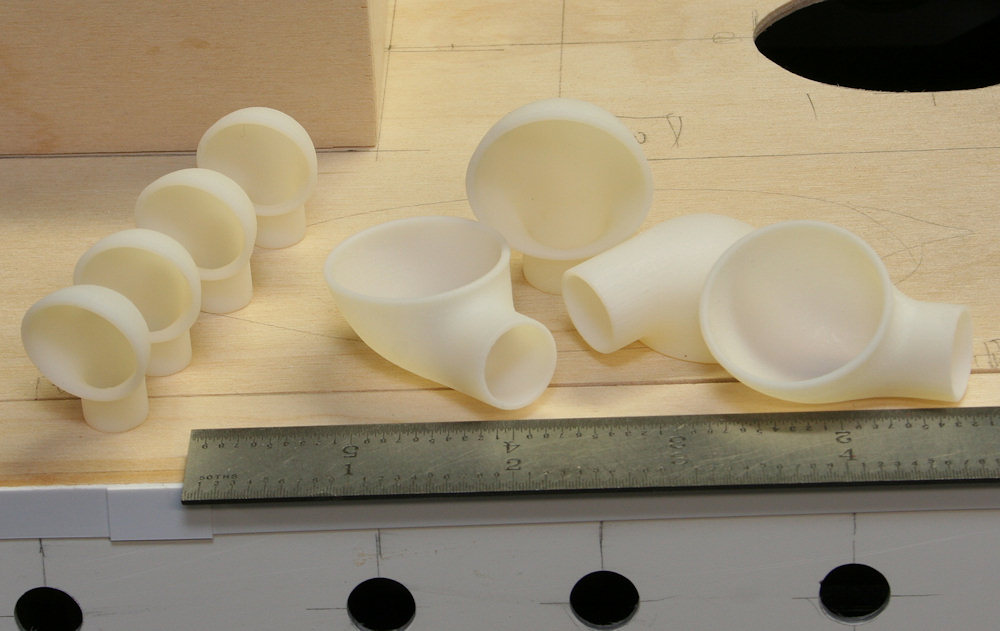
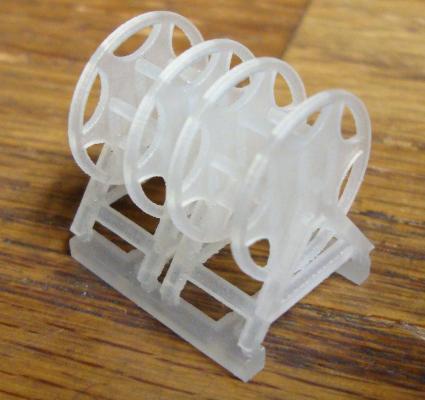
Here's another great application, those pesky cowl ventilators. The link also demonstrates that one can have a "store" (I do) at Shapeways to sell one's creations: Matthews Model Marine Cowl Ventilators

-
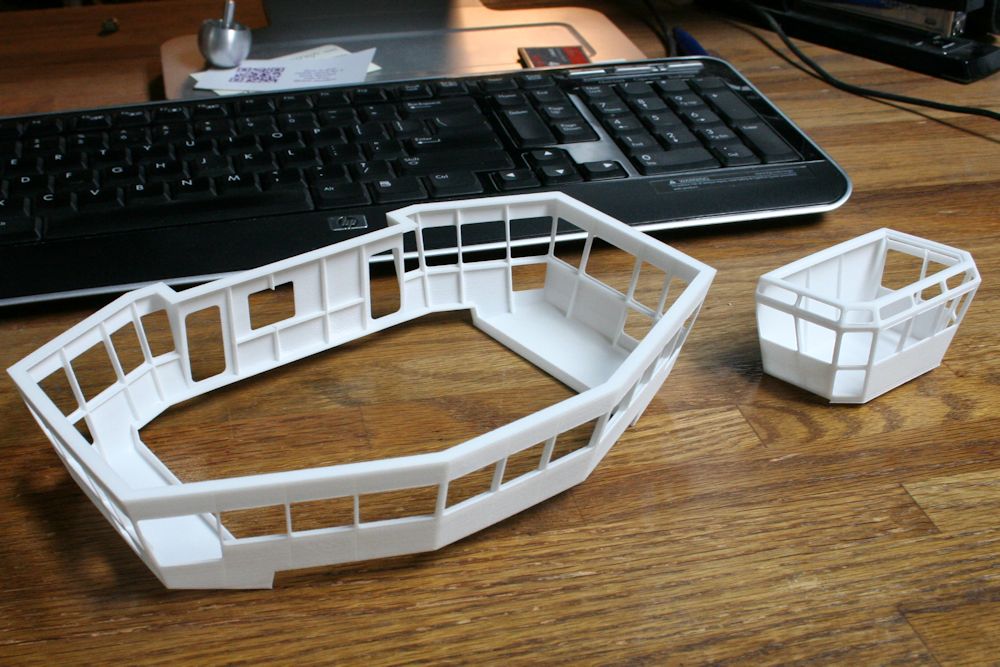
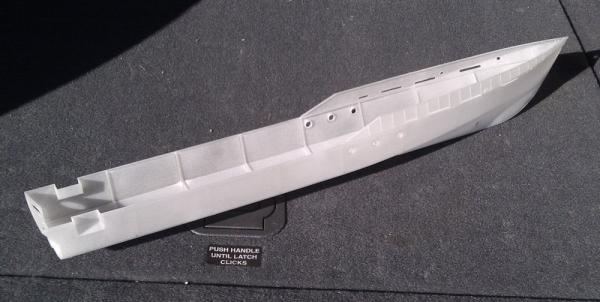
How about the cost? Well, your own time is free, otherwise you couldn't afford to build model ships. But the printer is not. Shapeways has a few different materials, see their site for costs. Typically it's US$2 or so per cubic centimeter of part volume, plus a few bucks per part for handling. With locations in Europe and the US, shipping is reasonable to most of us. Part volume can add up quickly... the 23 inch long hull above, modeled with as thin a wall as I felt safe with in SLS nylon, is about US$150. And if I were to double the wall thickness, the cost would double. Other small parts have been bought in for just a few dollars... all depends on size. Prices for metallic parts are significantly higher!
-
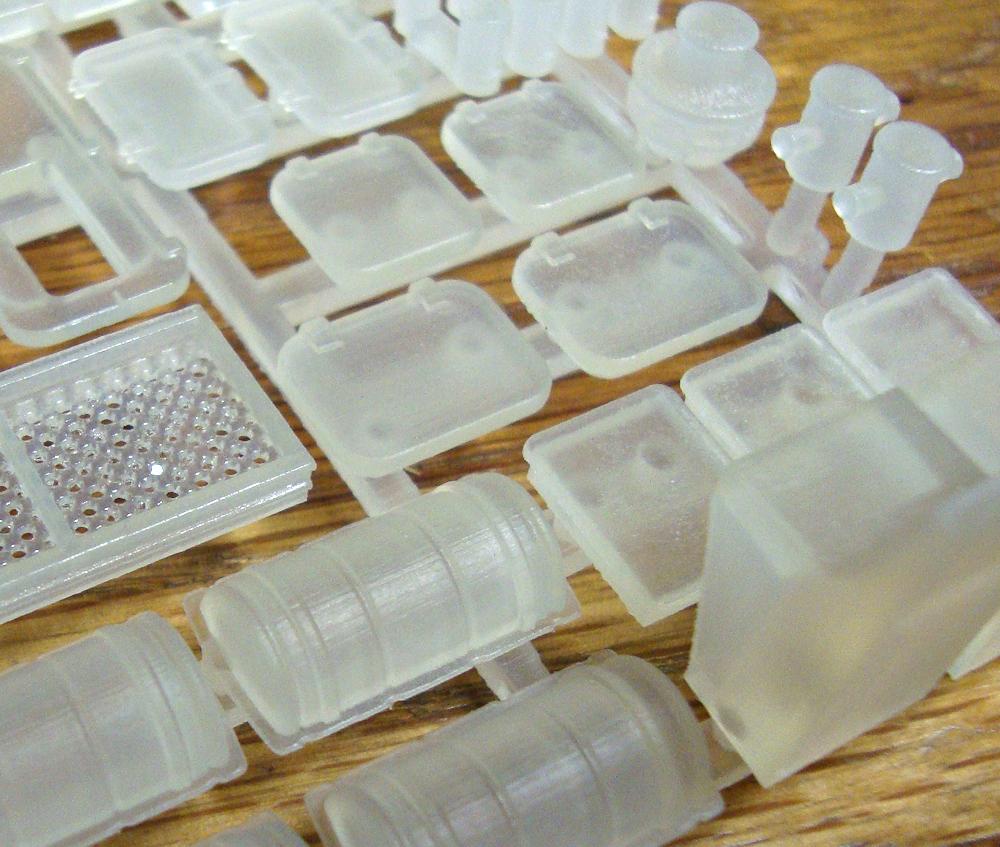
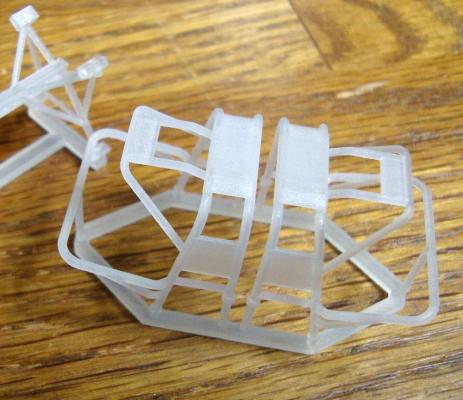
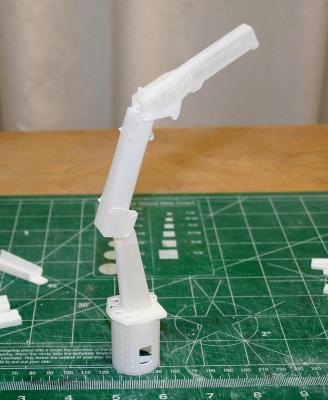
Some more examples of parts I've done...


-
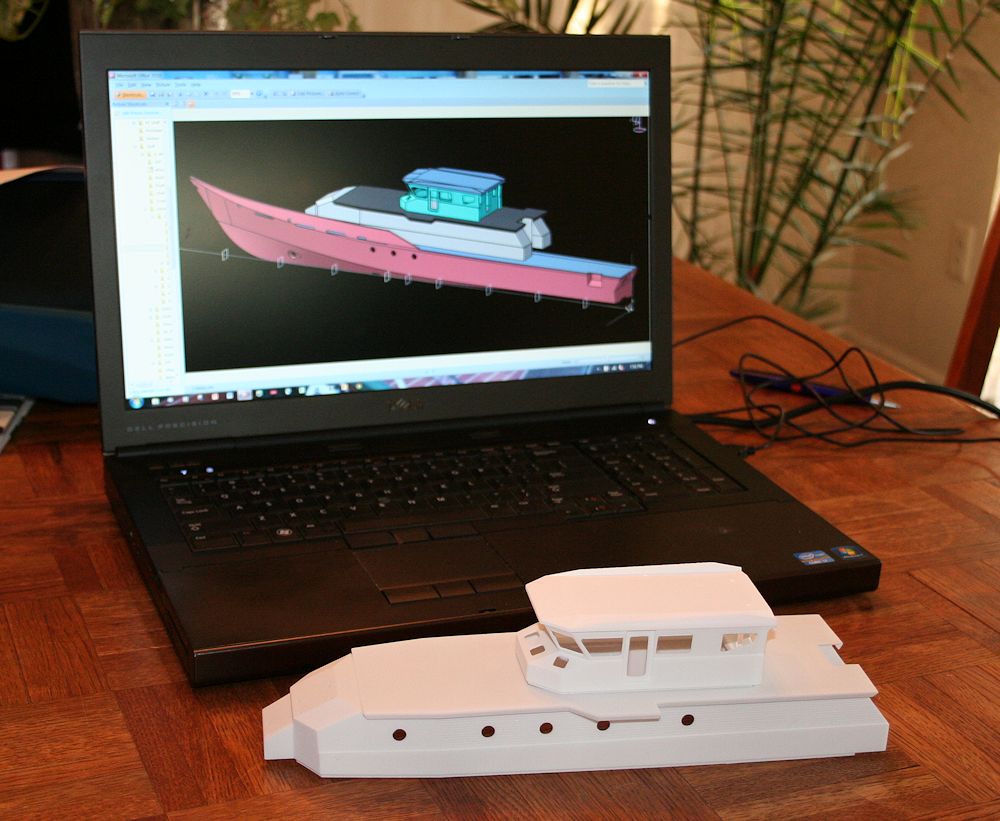
How to design your model? A prerequisite to 3D Printing is the ability to create your part with 3D CAD software... most of us cannot afford to have someone do this for us! I'm lucky and spoiled, I have access to professional software that can design planes/trains/& automobiles. But that also means I am clueless about "affordable" CAD packages, sorry! I hope others can chime in here. Also, while I can design all sorts of mechanical things, I am clueless about creating "organic" shapes like figures and carvings. Others know how to do this and there are packages designed for this kind of work... I just don't know them!
-
Where to get your parts printed? NOT at home. You and I cannot afford the type of machine required, too many zeroes in the price. Also, secondary cleaning and curing processes require additional machines and waste handling. Instead: 1. Borrow time on a machine at work. (Good luck with this!) 2. Go to any of several houses that basically rent out time on their machines. Shapeways is very well known, and offers Objet and SLS processes. iMaterialize is another interesting one I haven't tried, but they offer metal parts from lost wax patterns.
-
Now, the process has many interesting benefits, but also many drawbacks... it's not perfect for every job, but it's improving... and yes it really has the potential to shake things up! Let's review types of printing processes: FDM Fused Deposition Modeling: A nozzle squeezes out strips of molten plastic... much like a cake decorator. This is what cheap home printers use. Forget about it, it's worthless for fine modeling. The best professional FDM machines can't make a part you'd want to use, and affordable home machines are MUCH worse... just put them out of your thoughts. SLA, the original stereolithography: The standard for fine printing. An elevating work table is in a pool of liquid polymer. A UV laser draws on the surface of the liquid, hardening the polymer. The table drops a bit, and the process repeats. The part is relatively soft and requires support under all overhangs. This is generated as a fine mesh in the parent material, and must be stripped off when the part is done and prior to final part cure in a UV "tanning booth". The stripping can also break fine details from thin and spindly parts. Objet/Polyjet/Multijet: A printhead (much like an inkjet printer) squirts out droplets of resin which are immediately cured by UV light. Again, a support structure is required around the part, and this is laid down by the same printhead as a soft wax, completely encasing the part. The wax is stripped off by a low temperature melting operation (!), and the part may be further cleaned... one method is to use vegetable oil (!) in an ultrasonic cleaner... your parts may be delivered with the oil still dripping off. This process can also make fairly fine details, and doesn't have the issue of SLA's integrally attached mesh. You can also make jewelry grade waxes for investment casting. SLS, Selective Laser Sintering: A dry powder is fused together by the laser, again layer by layer. The unfused powder surrounds the part and is self-supporting. Many material variations: - Nylon powder- Part is directly created in 100% nylon. Surprisingly strong. Also has a porous sandstone texture. - Coated casting core sand: Directly make cores for foundry work. - Coated ceramic clay: Make coffee cups! Glazing covers much of the layering. - Coated metal powder: Make fragile "green" parts in stainless steel, which are later infused with molten copper to make very strong parts; Or direct sintering ($$$) to make parts in gold, silver... All of these processes build up parts layer by layer, and even the best process will leave visible striations. For some parts, it is possible to sand and seal the surfaces... but too much fine detail makes this nearly impossible! Some parts (like my anchor chain) are so small that the eye will never see the layering effect.
-
An interesting subject for many, and I couldn't find another active thread here... so this can be it! I'll start it off, but please add your own experiences and questions too. I showed that I can make interlocking parts such as stud link anchor chain in this thread: http://modelshipworld.com/index.php?/topic/2159-3d-printed-stud-link-chain/ And I'm doing an entire model ship here: http://www.shipmodels.info/mws_forum/viewtopic.php?f=13&t=151938 I've also covered some of my experiences here http://www.rcgroups.com/forums/showthread.php?t=1088812 and here: http://www.rcgroups.com/forums/showthread.php?t=1467560&highlight=sikuliaq&page=9 There are many other forum threads out there, but you may be interested in TBowman's HMS Scorpion, a large scale project: http://www.rcgroups.com/forums/showthread.php?t=1716548&page=9#post23251932 THAT should inspire you!