Patrick Matthews
-
Posts
406 -
Joined
-
Last visited
Content Type
Profiles
Forums
Gallery
Events
Everything posted by Patrick Matthews
-

Cutting brass sheet
Patrick Matthews replied to Landlocked123's topic in Metal Work, Soldering and Metal Fittings
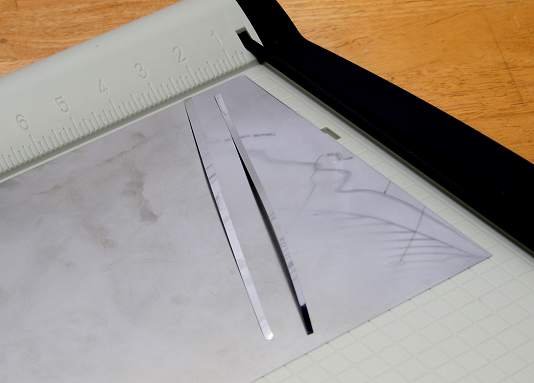
I have even cut nice strips from 0.005" [0.13mm] stainless steel with a paper cutter like that.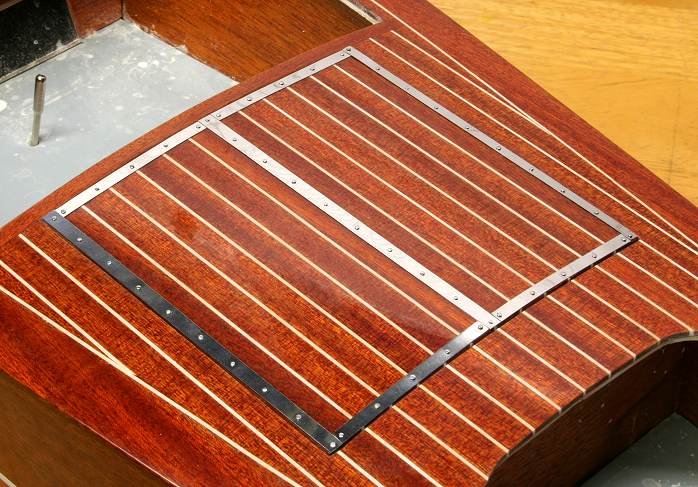
-
Making extremely tiny fittings
Patrick Matthews replied to BETAQDAVE's topic in Metal Work, Soldering and Metal Fittings
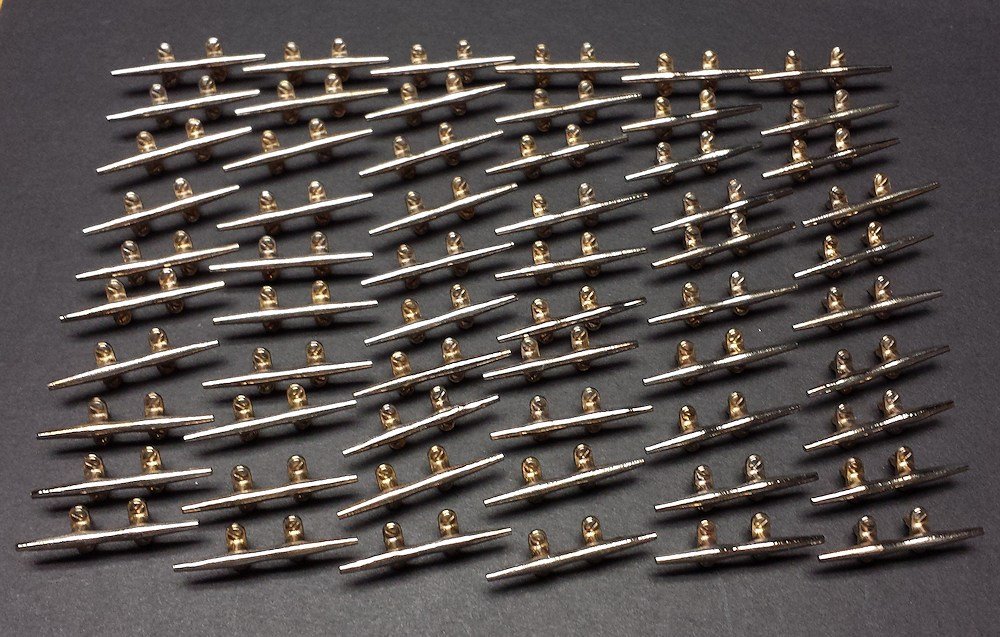
Exactly, Kurt... 'tis easier to "carve" many parts from solid, rather than assembling little bits. A mill is not required... a drill press and a jeweler's saw will often get you 90% of the way. Files and polishing for the rest. Myself, I now 3d print most of these parts (waxes actually, which are fed into lost wax casting). Below: A tree full of printed cleats. The color is misleading, they are unplated brass.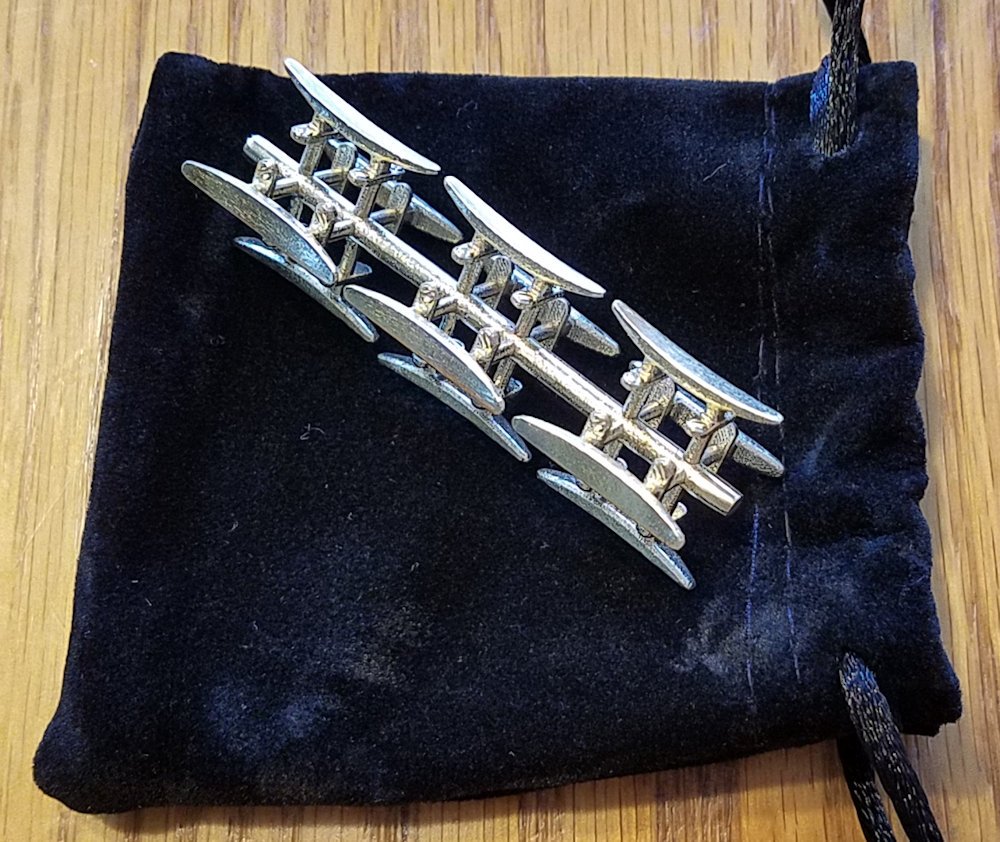
-
Photo Etching - do it yourself
Patrick Matthews replied to Dziadeczek's topic in Metal Work, Soldering and Metal Fittings
I respect all who wish to make a hobby all in itself of photoetching. Having done some PCBs and etched model parts myself, and having dealt with the nasty chemicals, I decided the better approach was to take the same money and pay a specialist for better parts. I've had good luck with Hauler in the Czech Republic: https://www.etchworks.eu/ -
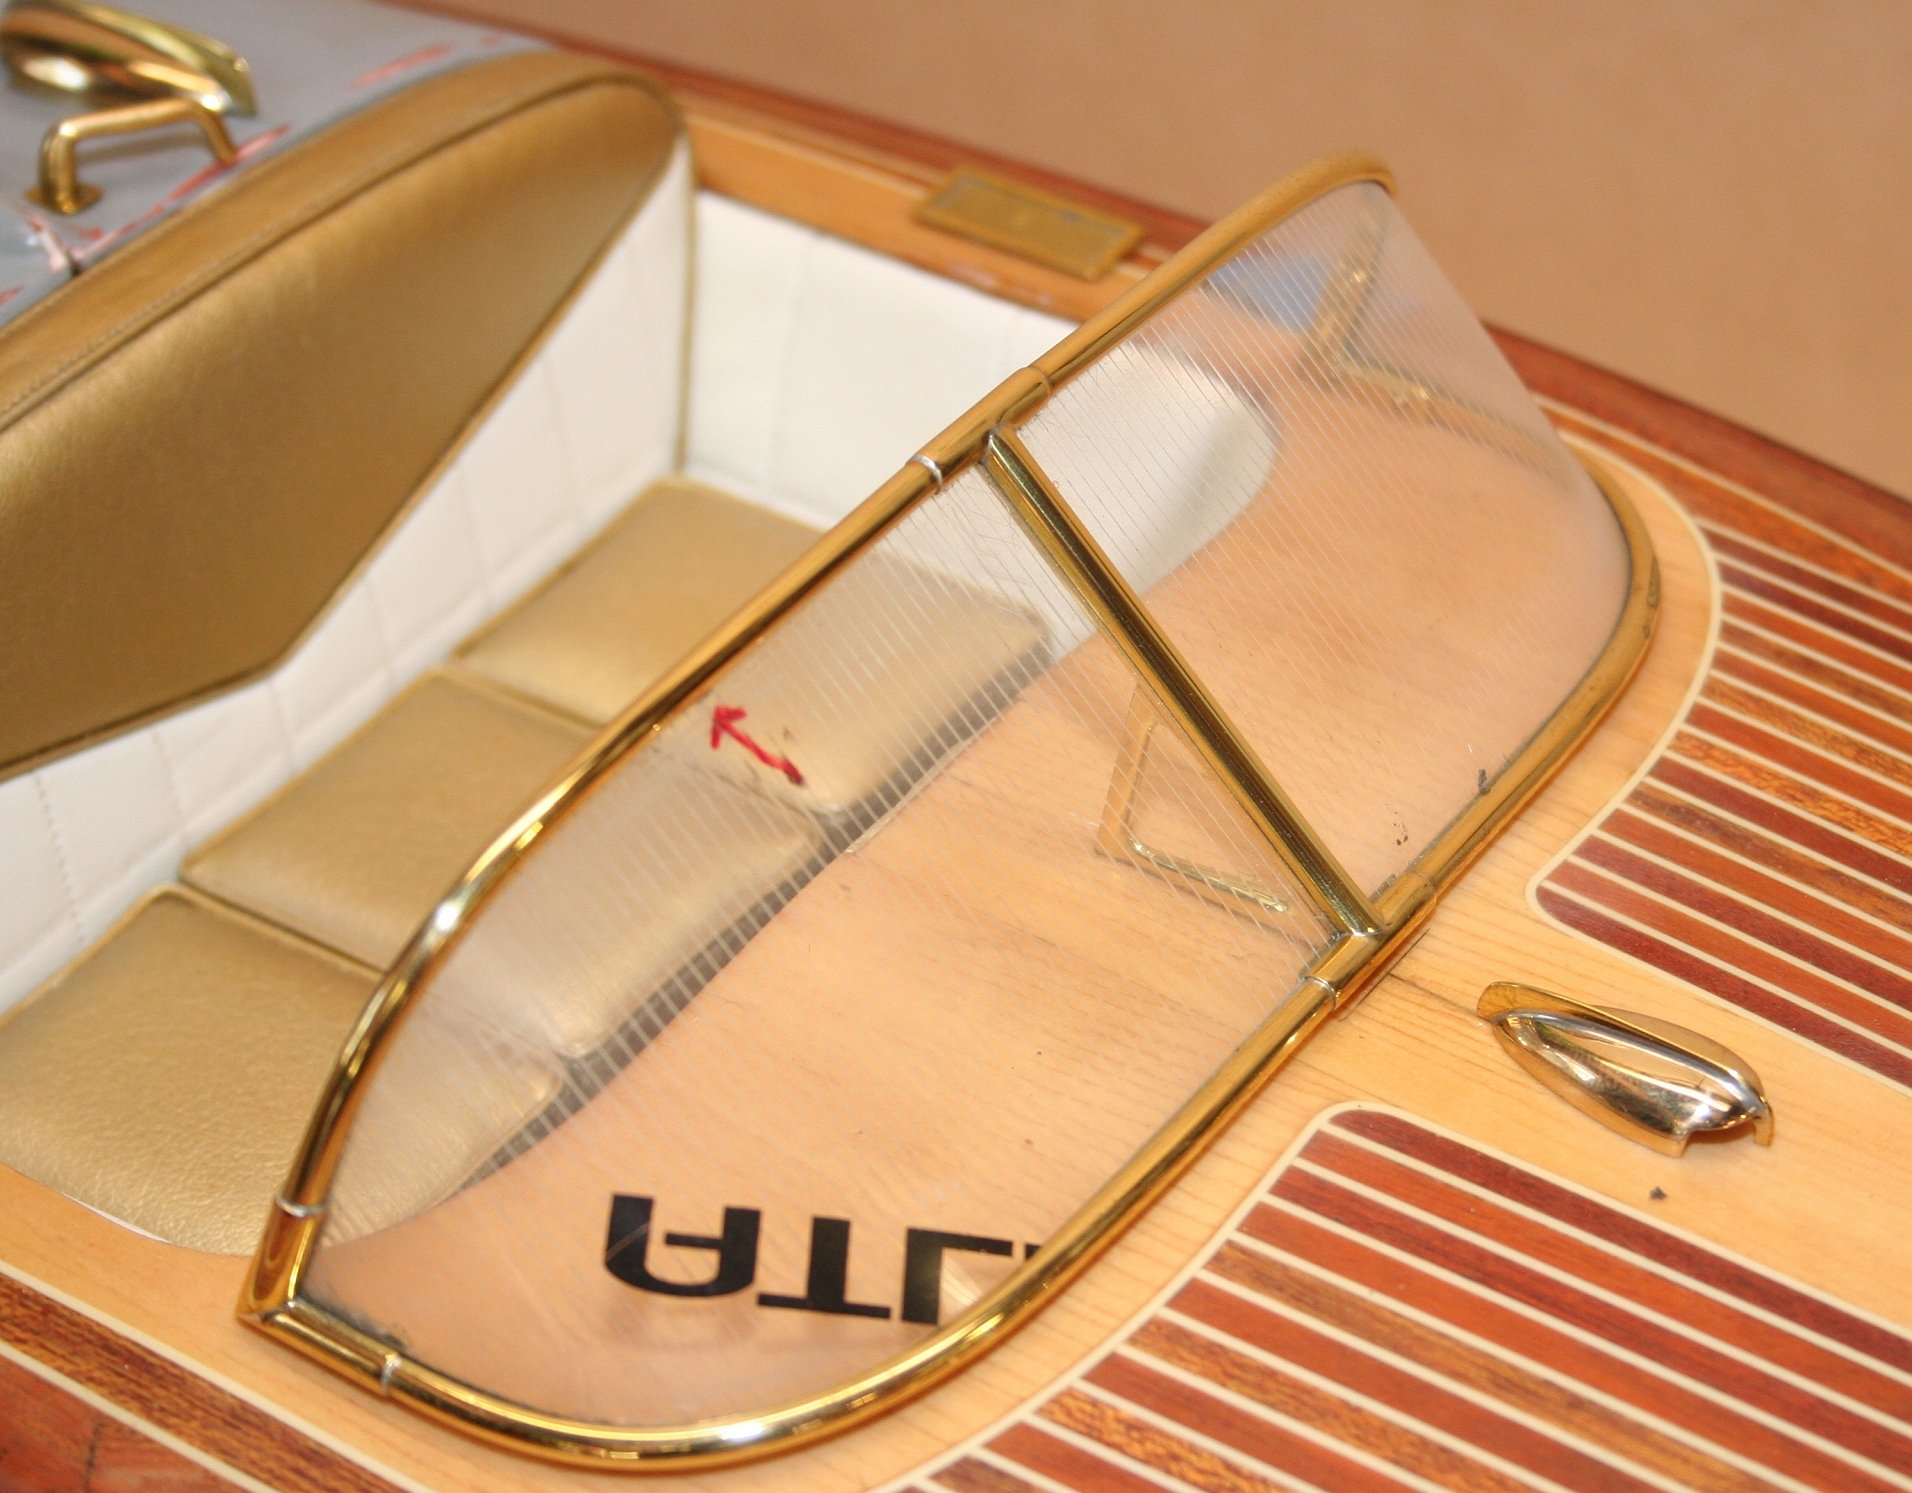
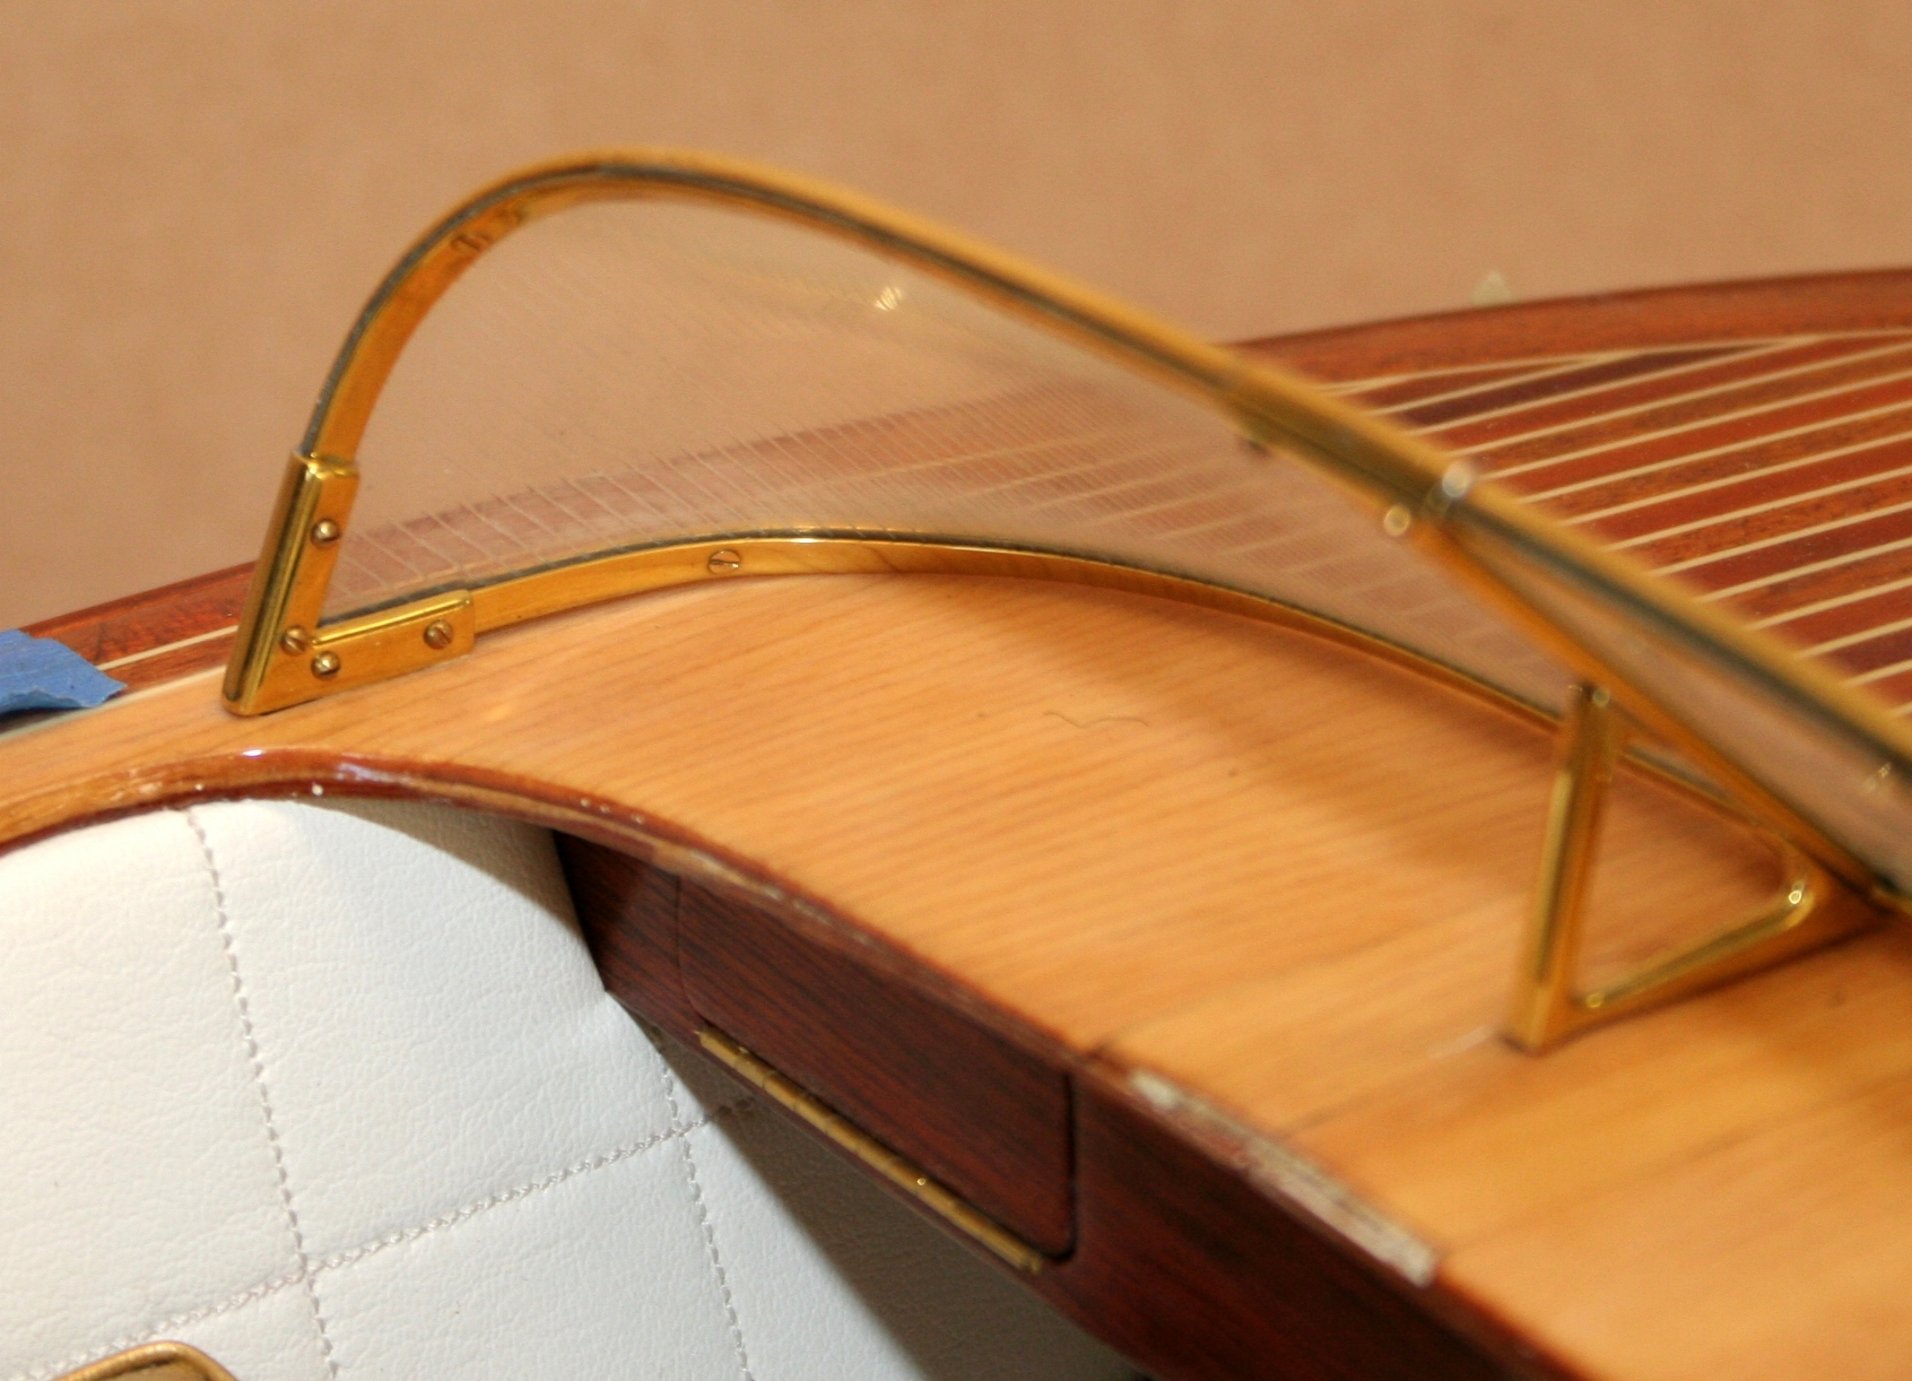
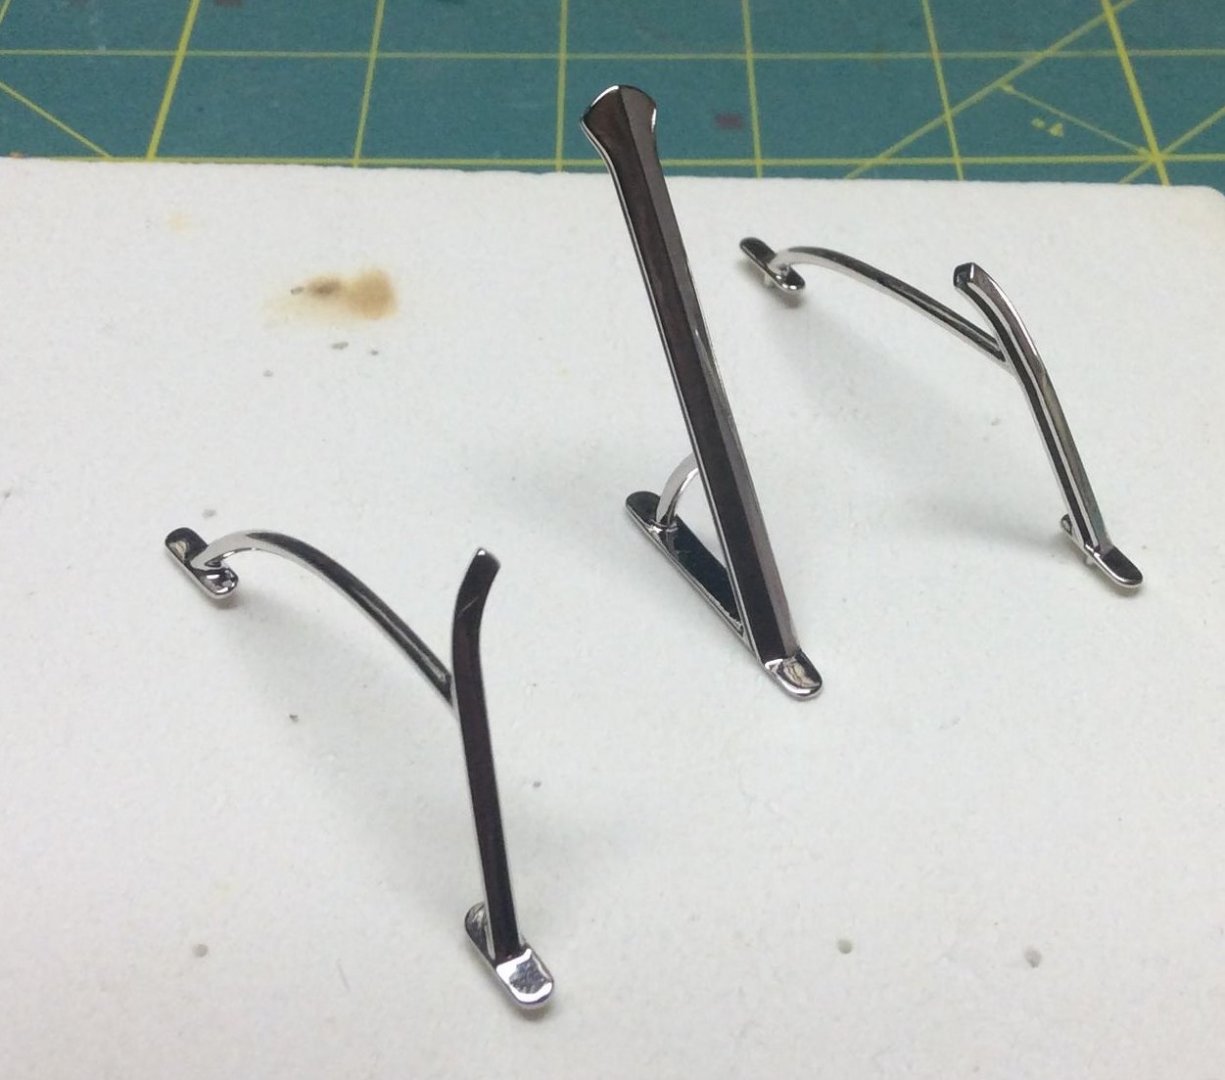
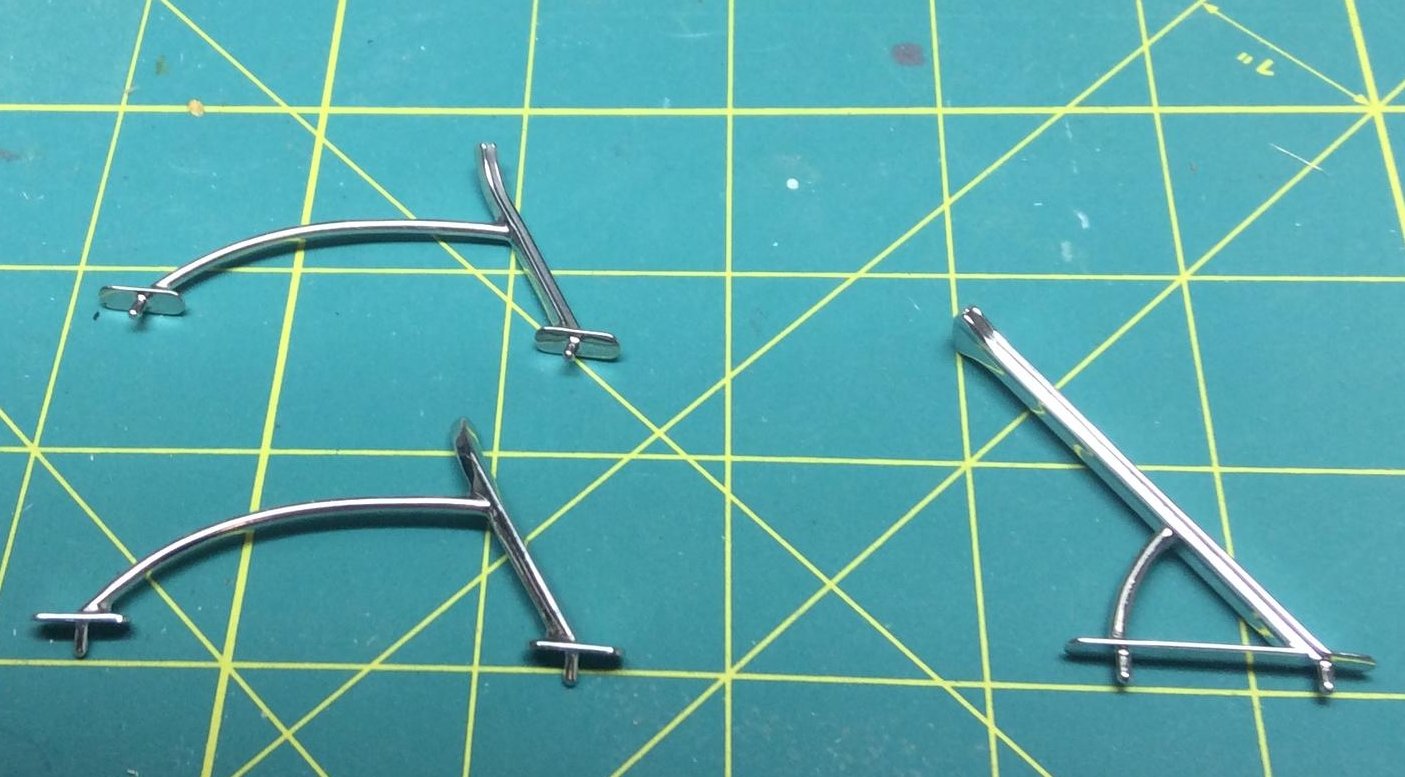
No question, this is a challenging part... almost as bad as stainless steel cutwaters! But it is possible, and is easier in larger scales. The pictures here are for a 1:8 scale model, and all is done by hand (by a friend, who has alien powers). The plastic windscreen is sandwiched between brass frame parts, which are secured with very small watch screws. Note that the plastic is curved in a single direction, not compound curved... the cross section is an "extrusion" in the direction of the center frame. The intersection of this extrusion with the deck is tricky! Work with brass... it can be polished and plated... silver and "chrome" paints will never look good. You can do a convincing job with brush-nickel plating. This takes nothing more than clean polished parts, a special solution, and a metal acid brush connected to a 3V source. You may get even nicer results by going to a jeweler for a pro polish job and then rhodium plating... rhodium looks just like chrome, and jewelers regularly replate rhodium rings and such, as the rhodium is a bit soft and wears off over time. The shiny parts shown here were 3d printed in brass (printed waxes, used in lost wax investment casting), and then professionally polished and rhodium plated. I have also used the 3d brass printing process to make older style windscreen frames, see examples below.


- 10 replies
-
- 12
-

-
I'd use it for... soldering circuit boards! One of my creations:
-
The smallest I've made is 1/8" tube OD (1/4" cowl OD)... but they start to get a little chunky in the smaller sizes. At least they're still hollow! Rendering of the 1/8" tube size:
-
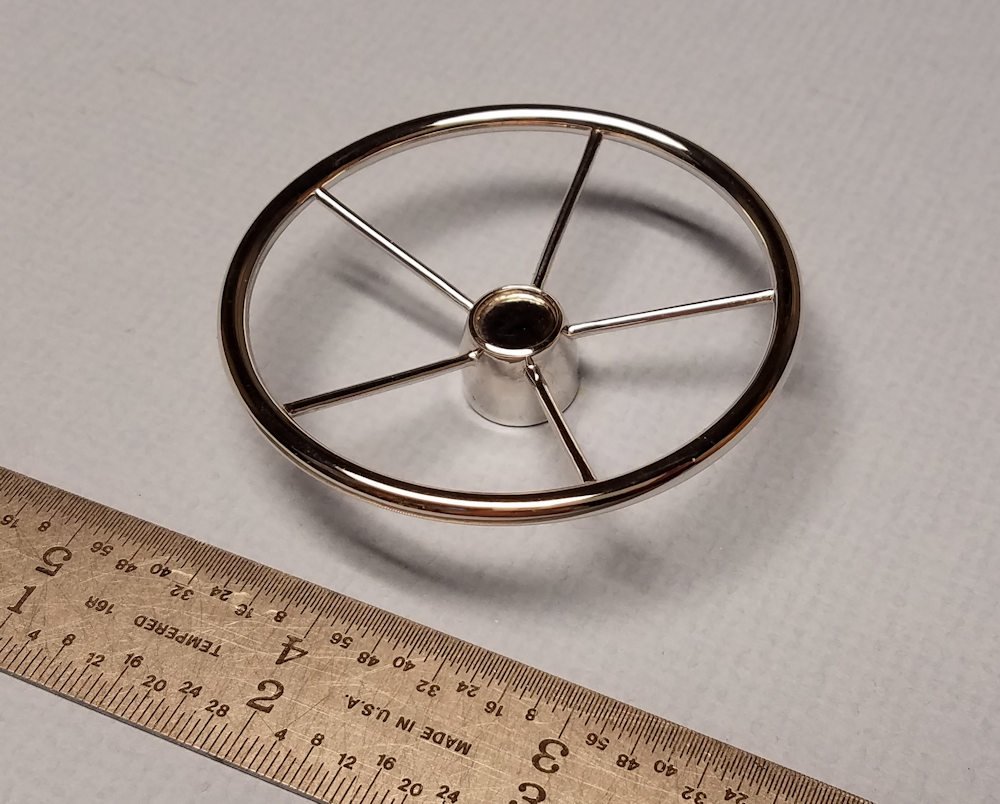
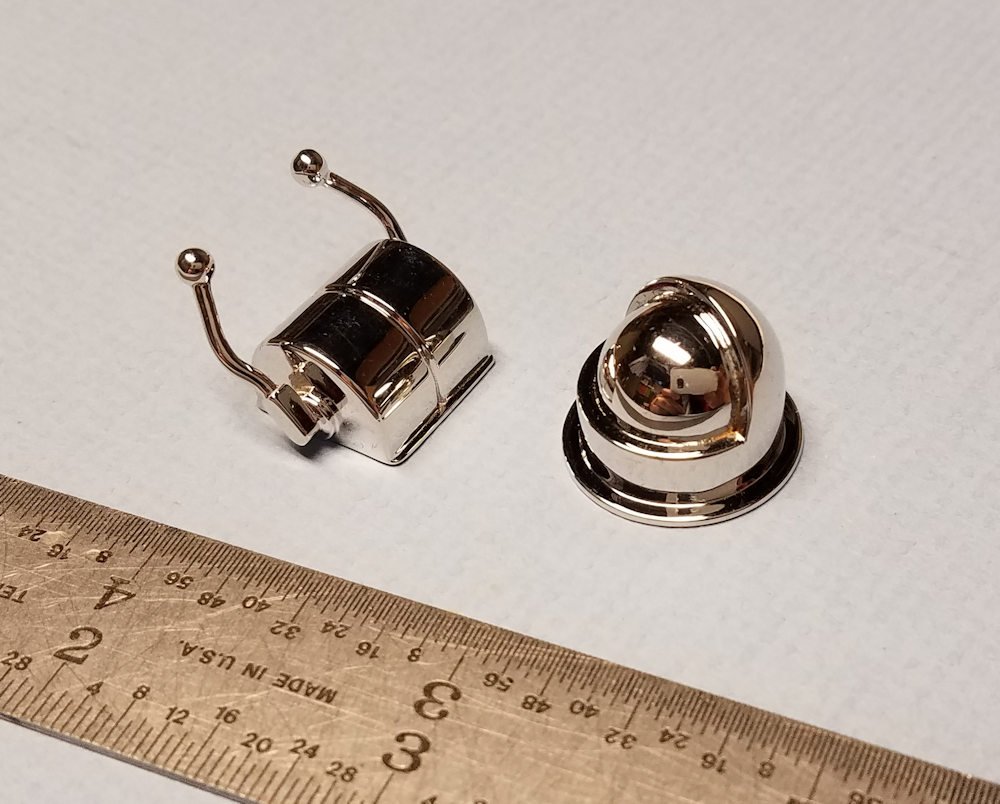
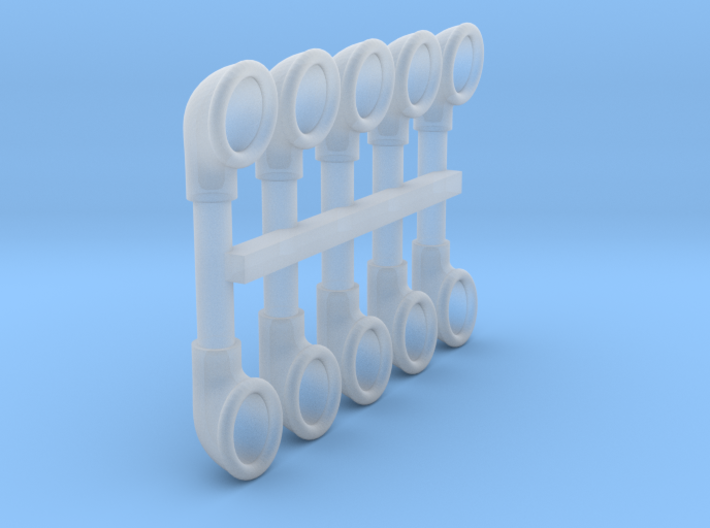
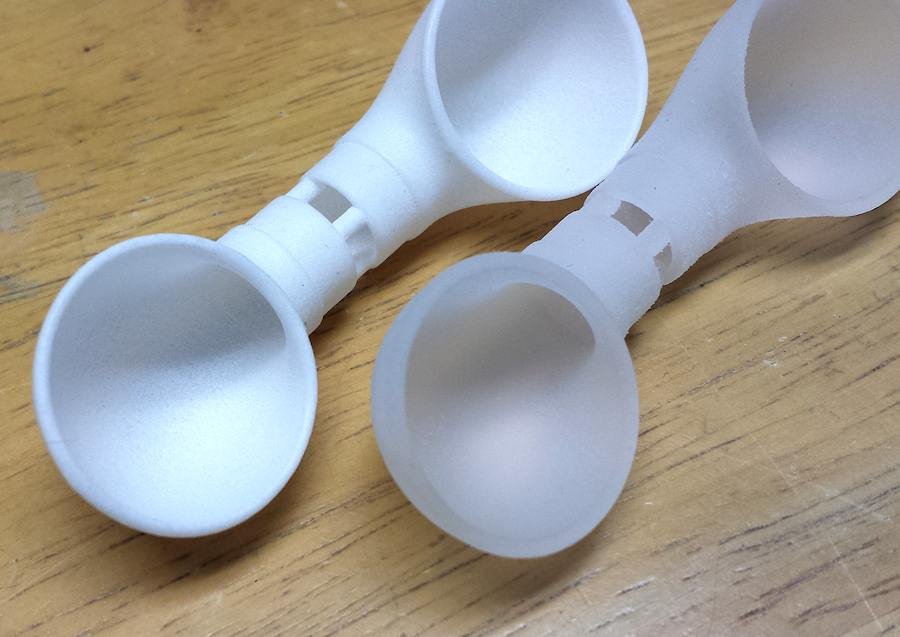
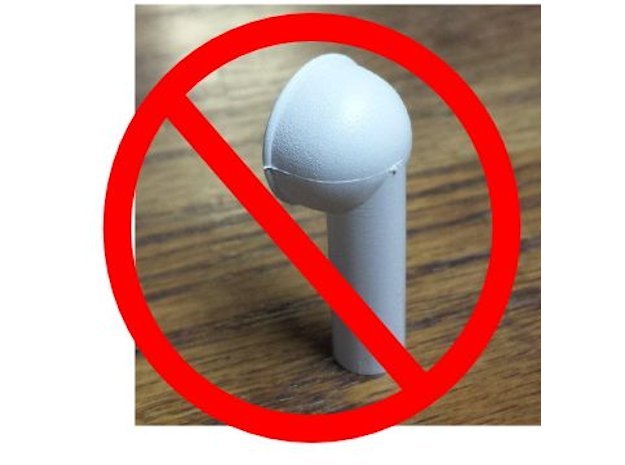
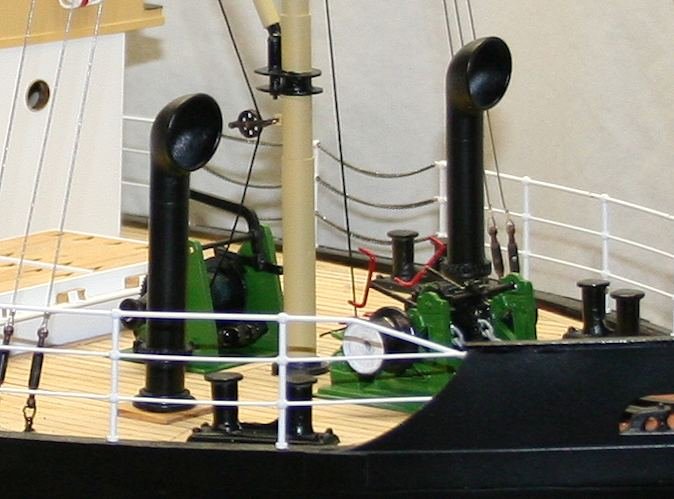
This was the main reason I got into 3D Printing... cowl vents! Maybe the most painful part on a model ship to make. Yes I know about carving masters, been there. And I know about the copper plating method, no thanks. But they are dead simple to do in 3D printing, with nice thin walls and properly shaped cowls- I have even done the segmented style. But please, you don't have to use "bowl on a stick" vents!


-
No argument... except that I've read several e-books of multi-hundreds of pages length, no prob. But that's not the topic... point is, a paper magazine has gone under, and I hold that online sources like this offer a realistic and even improved alternative for the info one could find in magazines.
-
I use both... I prefer enamels when possible, for their durability on plastic and metal surfaces, and for friendlier function in airbrushes.
-
Ah, but how did you just respond to this topic- digitally with instant publication and near instant response, or via a letter to the editor, with a 3 month leadtime to publication, and another 3 months for an answer? Realize that digital editions of published magazines aren't the competition to print... but rather, Wikipedia and forums like this. I don't have a single digital subscription... but I practically live on several forums, because they ARE convenient. I don't miss print. I have several magazines laying around that I never seem to get to... all while having posted scores of times online. I do miss the curated and edited content, it's a little bit Wild West online... but the range of material is nearly infinite, compared to what is pared down to fit in a given magazine. Get used to it, and let's learn to make the online content as useful as possible.
-
Another one bites the dust. Back in the (fairly recent) day when "Ships in Scale" only published in B&W, and was literally the only ship model building mag left in the States (not counting research and prototype focus mags like the NRG Journal and Steamship Bill), I openly wondered why the USA could only support this single title, and at a mere 6 issues a year, while the UK and Germany each supported TWO magazines, MONTHLIES, in full color? ("Marine Modelling International", "Model Boats", "ModellWerft", und "Schiffs Modell")... and each of these countries having only about 25% of the US population! Well, one more is gone-- Marine Modelling International's parent company, Traplet Publishing, is in receivership, and it appears not to be a mere re-org. This actually takes a number of hobby titles out of print in one swoop. Discussed in more familiar detail at Model Boat Mayhem: http://www.modelboatmayhem.co.uk/forum/index.php/topic,58598.0.html
-
Adding Weight to the Keel of a non-RC Model
Patrick Matthews replied to Julie Mo's topic in Wood ship model kits
Will anyone be picking up the model? Or will it be firmly, permanently, and safely mounted on pedestals? If pedestals are in the model's future, spend some time on internal structure to accept the mountings... and lose little sleep on the weight. -
Atlantis by Thistle17 - FINISHED - Robbe
Patrick Matthews replied to Thistle17's topic in RC Kits & Scratch building
Most any RC hobby shop will carry this or similar: http://www.bsi-inc.com/hobby/ic_2000.html The image shows the thick stuff building a fillet on a Robbe Happy Hunter kort assembly, with ABS hull.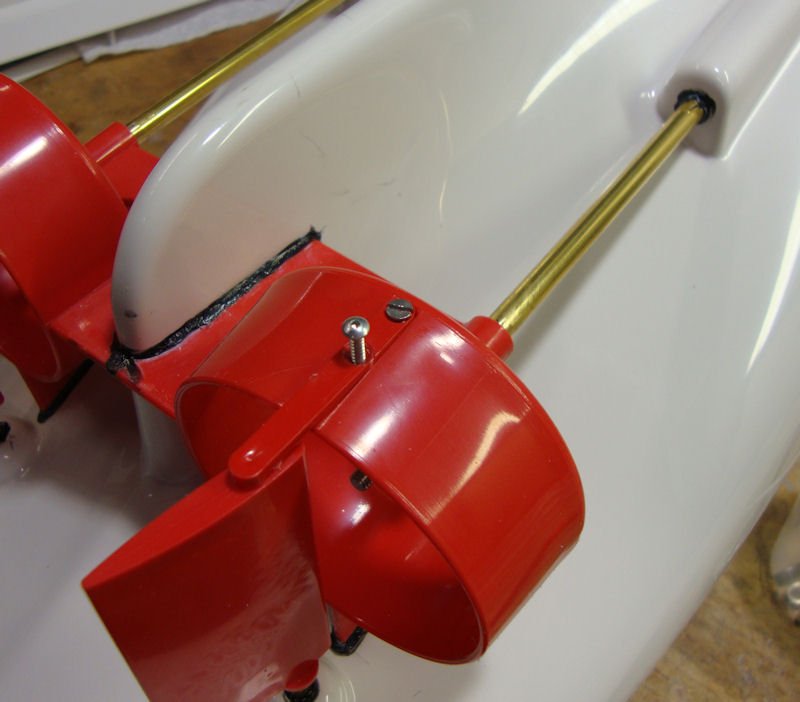
-
Dumas usss Whitehall Question.
Patrick Matthews replied to BassicBill's topic in RC Kits & Scratch building
A major challenge with the Dumas model is that it relies on fittings from HR Products... whose tooling, and maybe even the company, are virtually defunct. There may be designers on Shapeways who offer suitable fittings, but I haven't researched that. -
Atlantis by Thistle17 - FINISHED - Robbe
Patrick Matthews replied to Thistle17's topic in RC Kits & Scratch building
ABS is a tough material to glue to, and I'm always leary about things like polyester and epoxy resins' adherence as well. Maybe less of an issue for a display model, but the ABS hull can flex and pop these things loose. If the defects aren't deep, I'd start with regular or 2-part primer filler as the first coat, then use the appropriate glazing compound to take care of what's left. But yes- clean, most any primer, and most any top coat. For gluing: Robbe recommends the 2-part methacrylate adhesive "Stabilit Express"- expensive and hard to find in the US. For joints requiring a wee bit of flex (anything attached to the ABS hull), I find that rubberized CA (aka "tire cement") is perfect. It has a bit of flex, so it won't crack like regular CA; it can be built up in thick layers (use CA kicker to help it cure), yet cures hard enough to grind or sand. I use it when mounting bow thruster tubes through fiberglass or ABS hulls, for example. -
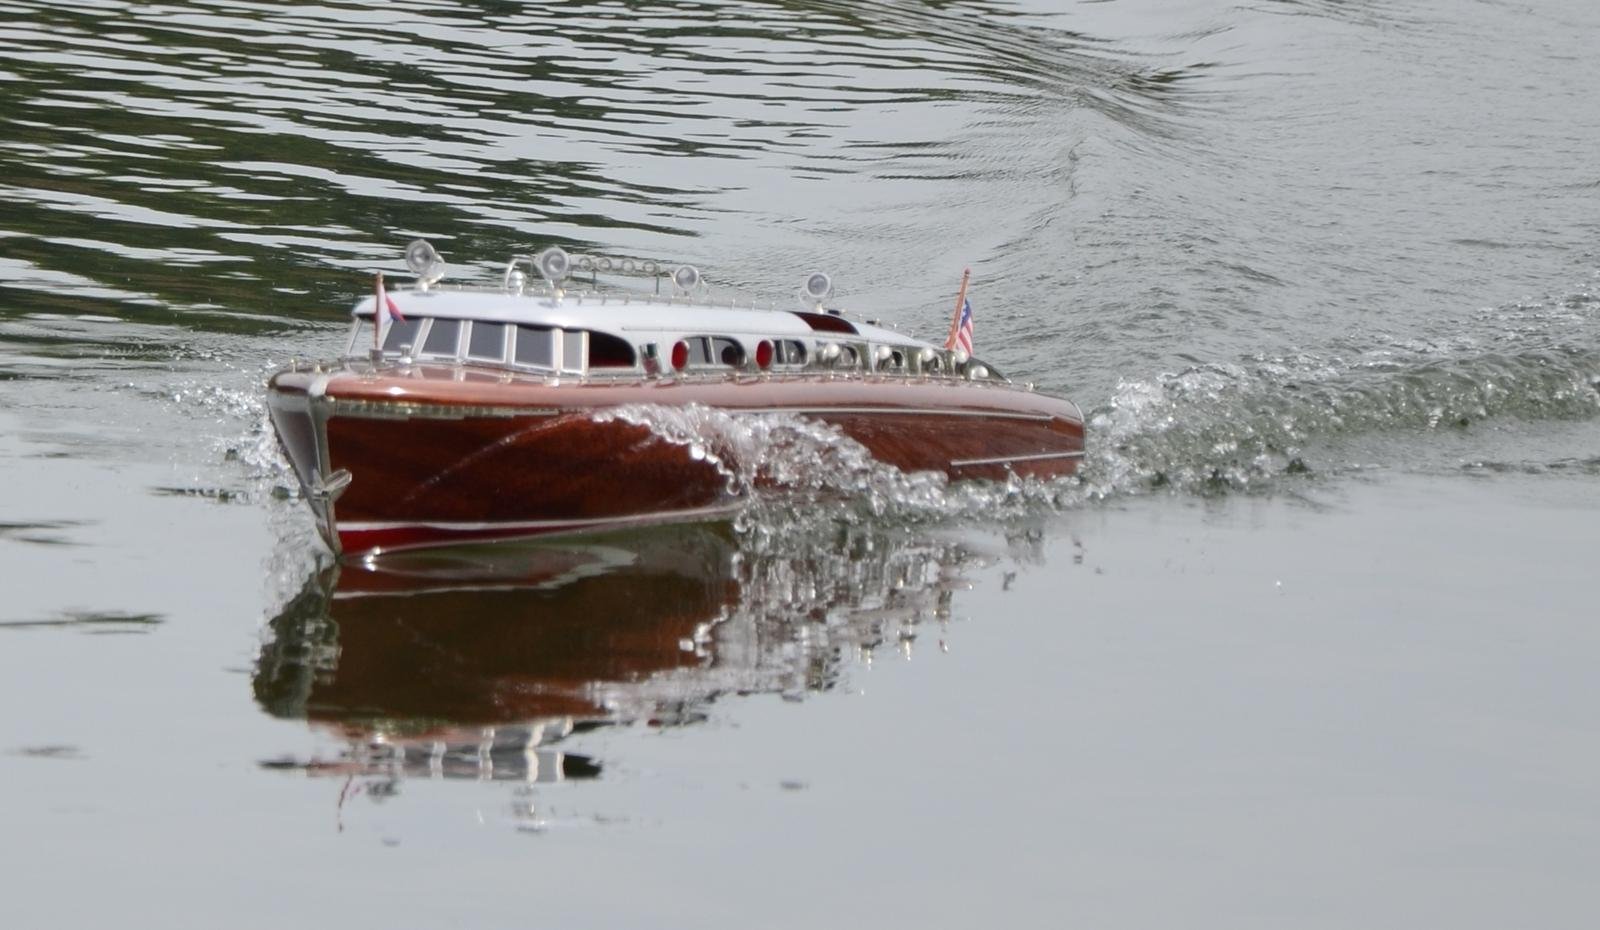
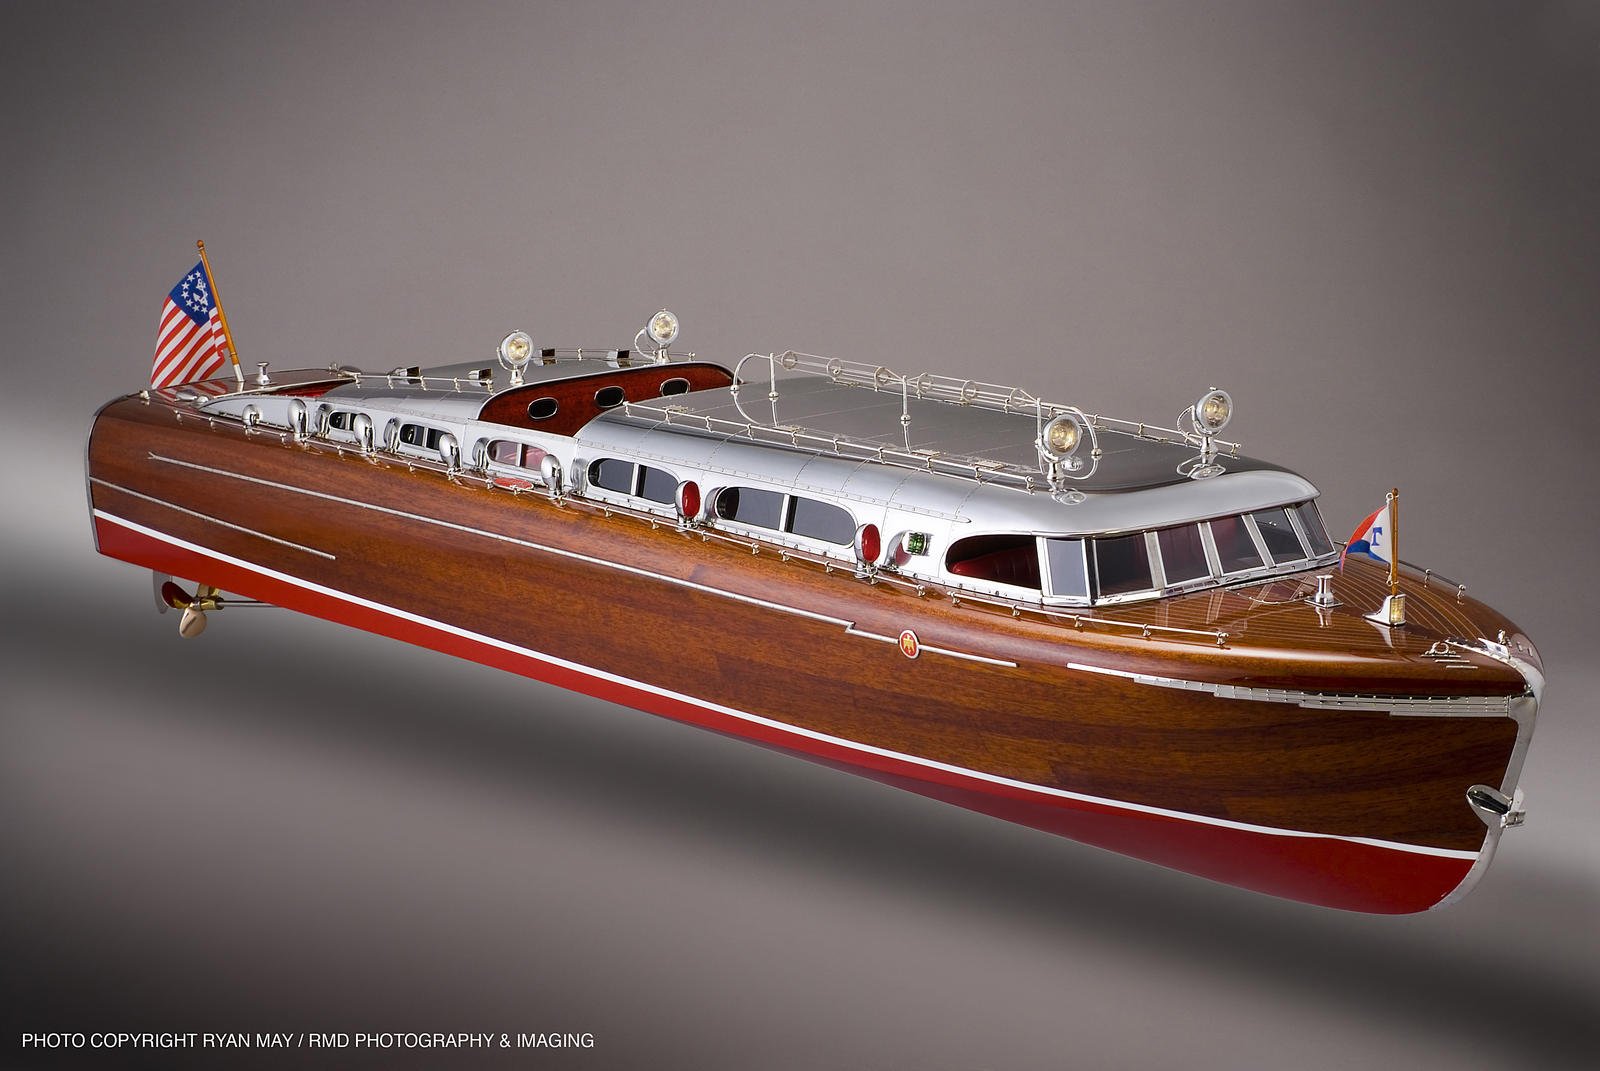
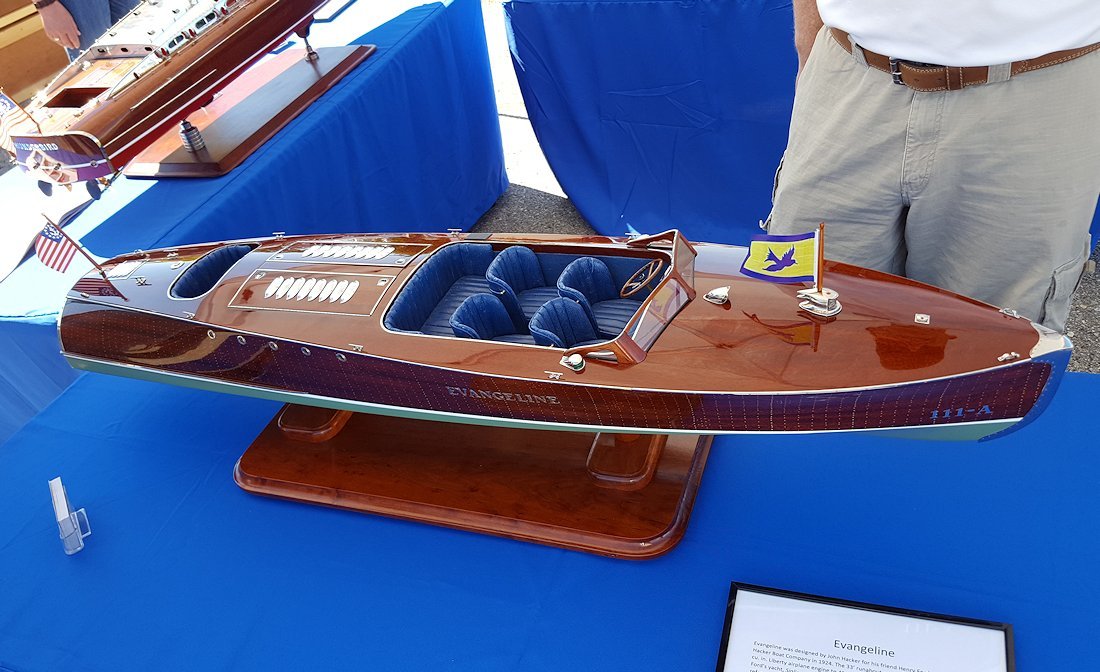
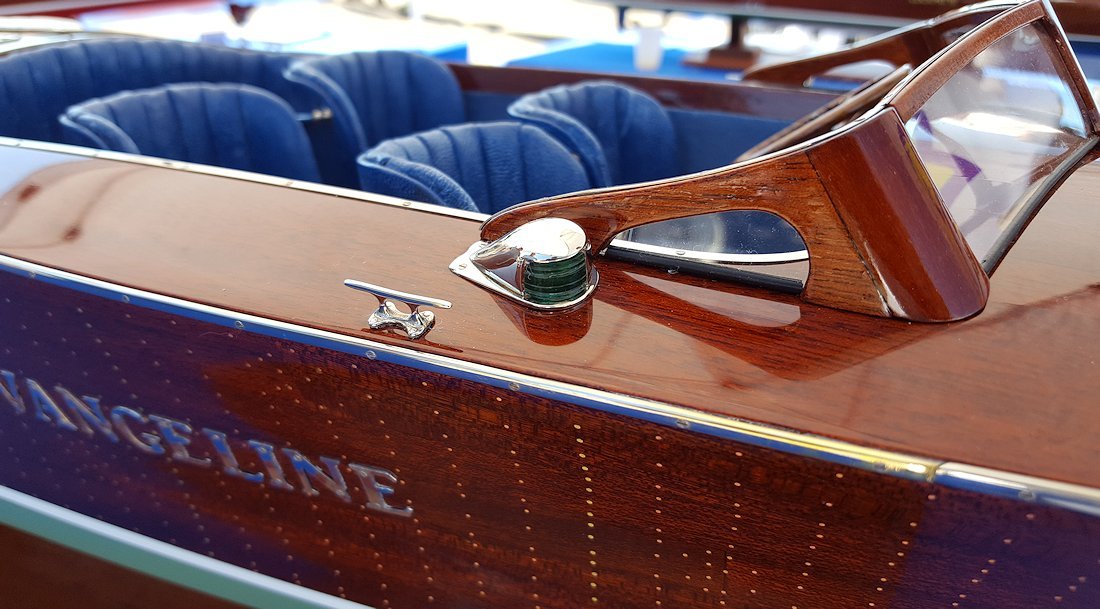
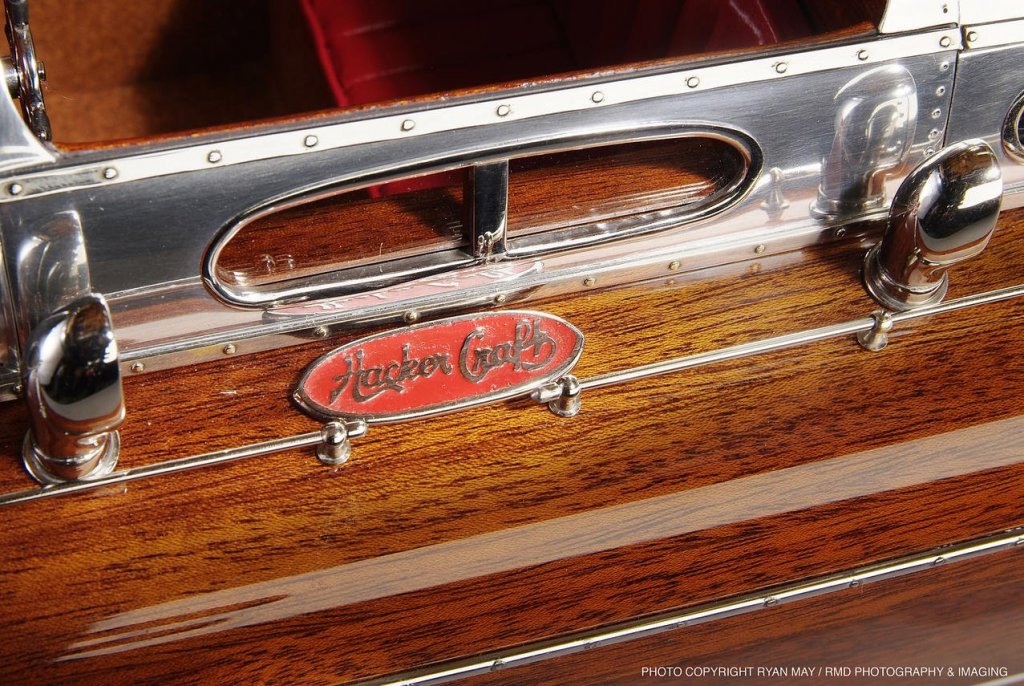
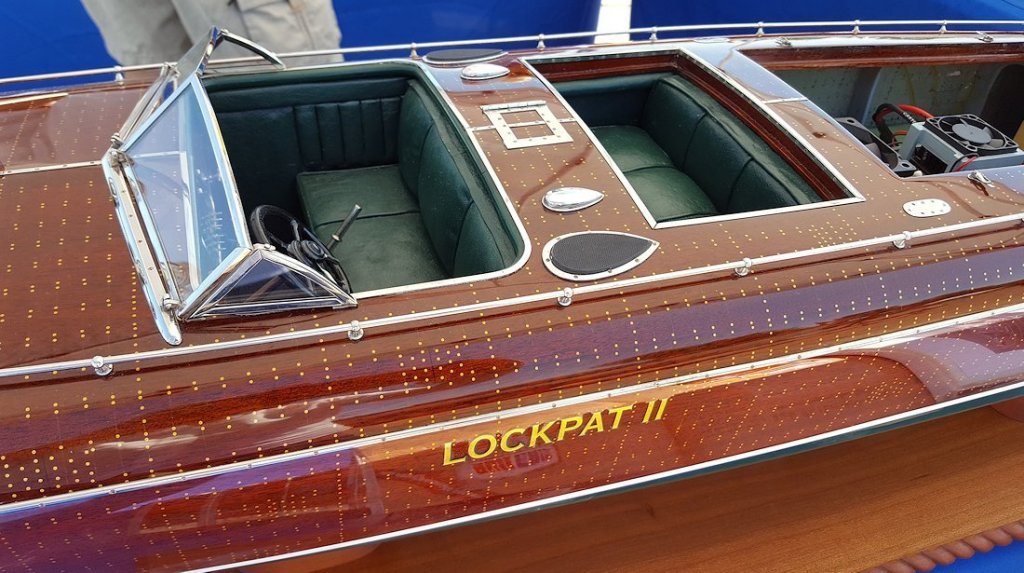
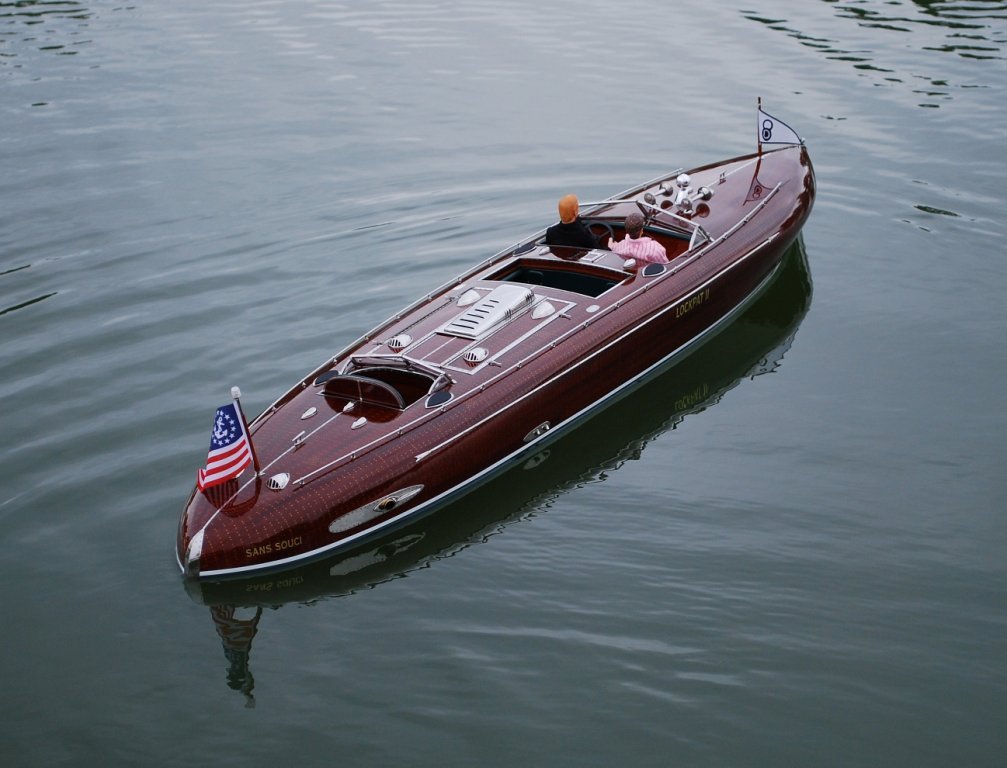
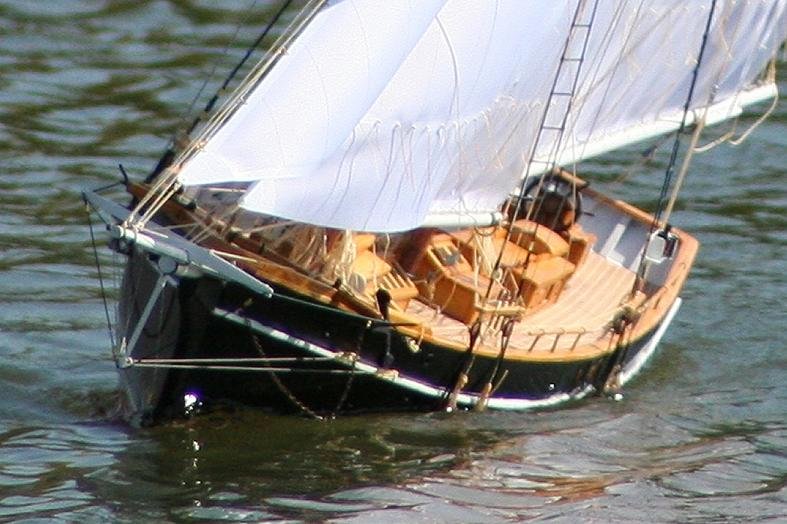
I'd like to bring to your attention a few marvelous mahogany boats built by GPR (aka Greg R.). The build threads are on R/C Groups (links below), and indeed the models are operating, and built in the large scale of 1:8. But they also stand as examples of the research that can go into such models, and the high standard of detail, which is NOT exclusive to a model being operable. In each case, few or no plans exist for the subjects. Greg needed to visit the originals, work with current or previous owners, and then work out his own plans. Folks who visited the Manitowoc show a couple years ago will have seen two of these models; Evangeline is new. Evangeline, Henry Ford's Hacker https://www.rcgroups.com/forums/showthread.php?2592838-Evangeline-Scratch-build-of-Henry-Ford-s-Custom-Hacker-Runabout Lockpat II https://www.rcgroups.com/forums/showthread.php?1875686-Lockpat-II-Scratch-build-of-a-custom-Hacker-Streamliner Thunderbird https://www.rcgroups.com/forums/showthread.php?1025991-Thunderbird


- 6 replies
-
- 11
-
-
That's fantastic, Jim & Joe! I hope that the material can be made available to others, either through yourselves, or at least via links to the appropriate government office. But I wonder how that would work... doesn't such material only go to NARA, from where one can eventually get copies?
-
Dave Hampton in Indianapolis showed a nice 1:6 example (IMEX based) at the Manitowoc show a couple years back. He has some reference and build threads on RCG: https://www.rcgroups.com/forums/showthread.php?1749558-PBR-Photos-up-close https://www.rcgroups.com/forums/showthread.php?1768099-Converting-1-6-scale-PBR-from-gas-to-electric https://www.rcgroups.com/forums/showthread.php?2071875-1-6-PBR-Part-2-before-painting-begins
-
casting metal parts including cannon
Patrick Matthews replied to rtropp's topic in Metal Work, Soldering and Metal Fittings
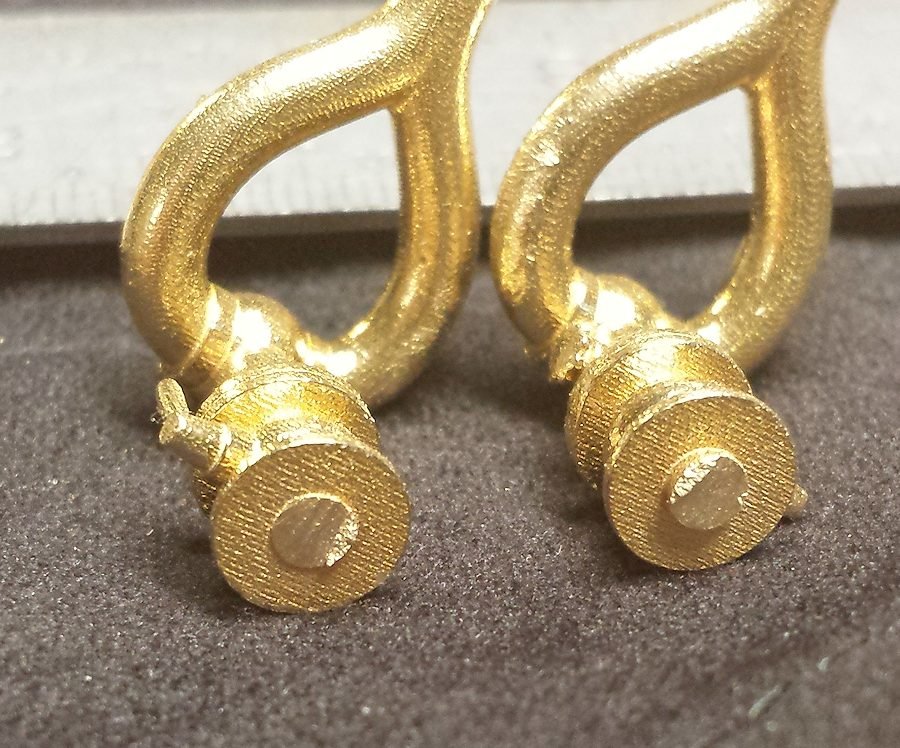
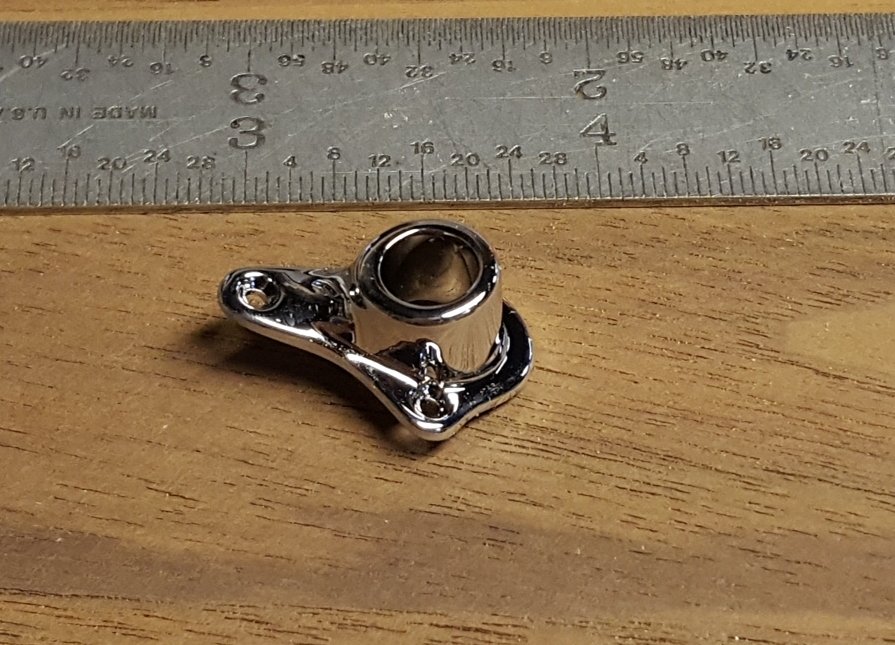
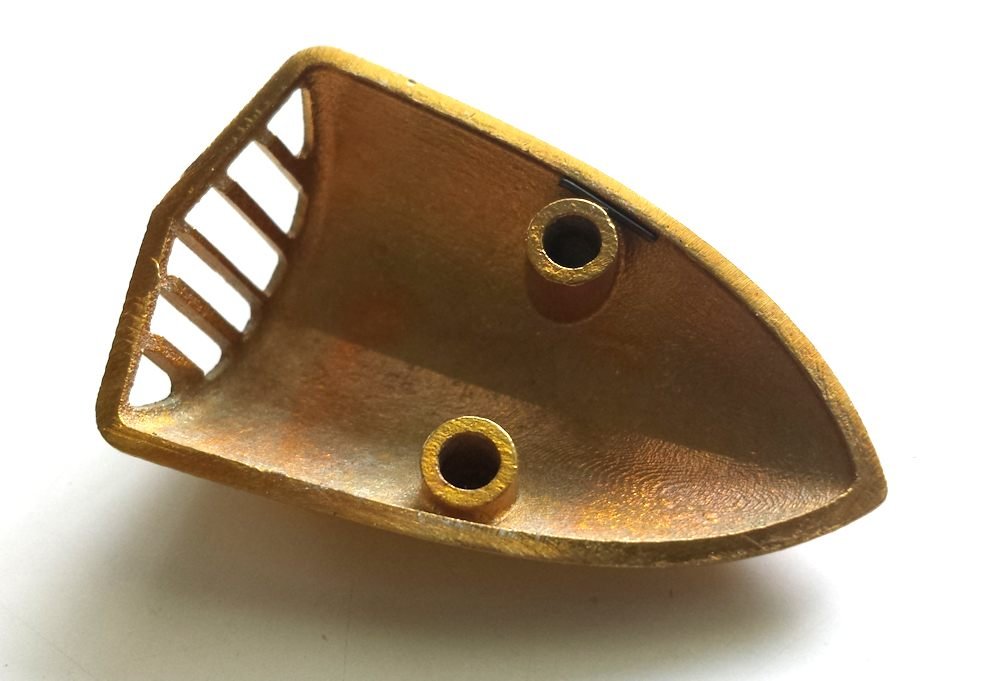
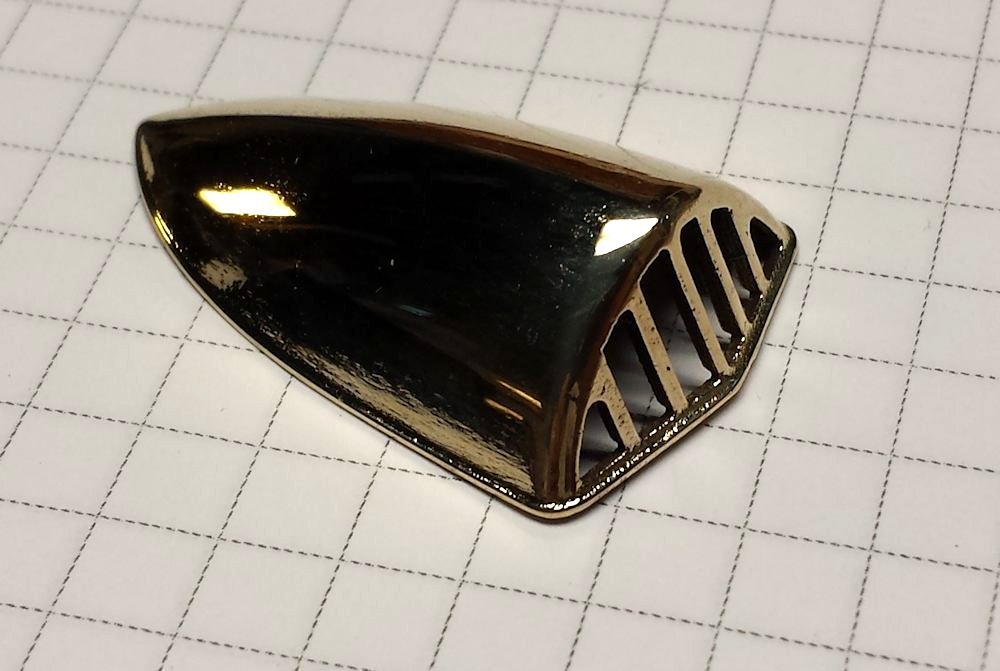
I'll just mention (again) another alternative... if you just have to have brass or bronze, and you'd like to just order parts and have them delivered, it can be done via houses like Shapeways and iMaterialise. These places will take your CAD model, print the part in wax, and pass it on to an investment casting house. Not cheap, but not impossibly expensive either. Some examples: Pair of deck mounted fire monitors... I had the yokes cast. 2nd pic shows the as-delivered surface finish, an artifact of the 3D printer resolution... be prepared to polish your parts. A passel of Herreshoff style cleats I made, polished, and home-nickel plated: A flag staff socket, polished and true chrome plated at iMaterialise: A deck vent, rough, and then (roughly) polished and home nickel plated: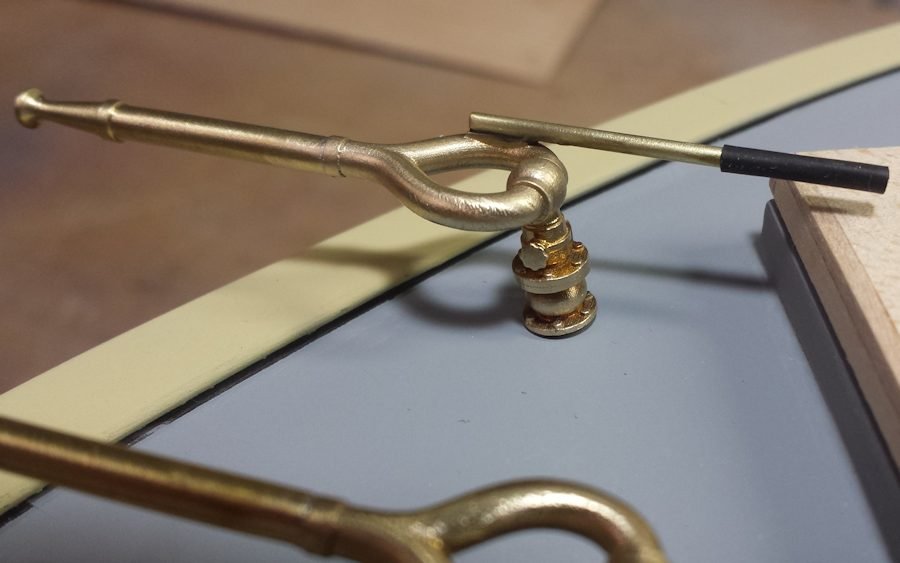
-
Making Fire buckets
Patrick Matthews replied to steamschooner's topic in Metal Work, Soldering and Metal Fittings
Don't forget the round-bottomed fire buckets! Could only be stored in the fire bucket rack... kept the deck gang from stealing them for mop work...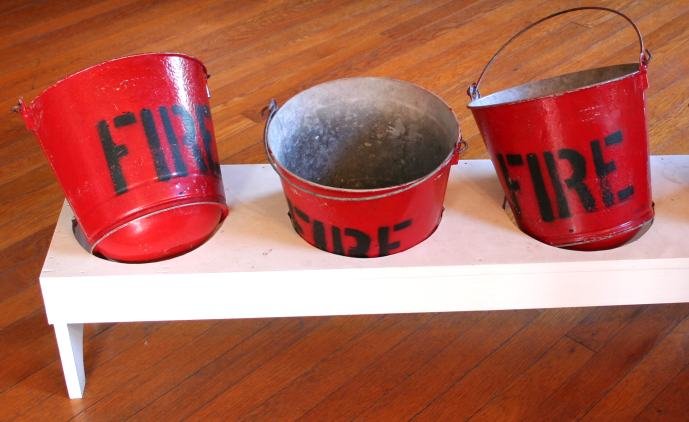
-
Atlantis by Thistle17 - FINISHED - Robbe
Patrick Matthews replied to Thistle17's topic in RC Kits & Scratch building
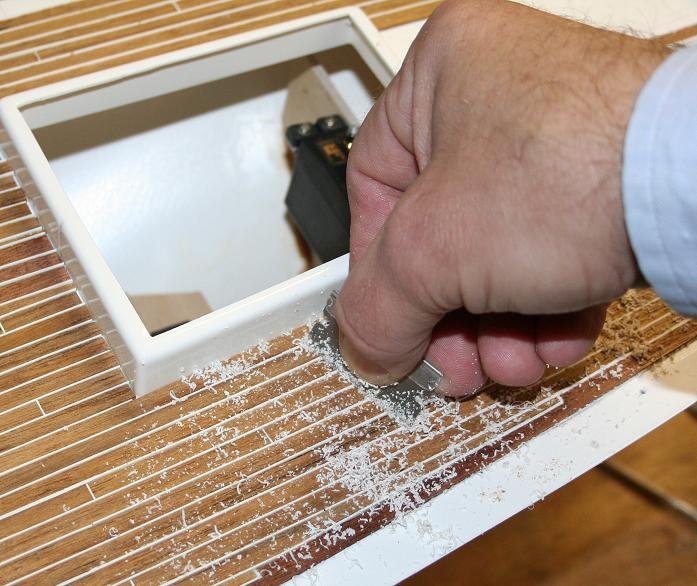
Sorry to come to this party late! But a couple links: Taylor Sparks' build of Atlantis: http://sparksstudios.com/boatyard/atlantis.htm and some others too. My build of the Robbe Valdivia (with many similar construction features): https://matthewsmodelmarine.wordpress.com/writings/robbes-valdivia-rc-schooner/ Hopefully you have the complete Robbe instruction set? Used to be available online... I have an e-copy for Valdivia, maybe Taylor has Atlantis. The hull should be vac-formed ABS (not injection molded styrene). Valdivia's decking is real teak, with some mahogany trim. The teak planks are a bit overscale in the grain department, but are soft enough to bend sideways. Gluing with CA is the plan, but have plenty of CA "kicker" on hand, as the CA is stubborn about setting on the porous wood. Not sure what was specified for Atlantis, but on Valdivia there were white plastic strips to use as caulking, and instructions on proper joggling and plank-end staggering. A scraper was the best way to smooth out planks and caulking; avoid sanding, as even light sanding can soften the plastic and drive its dust into the wood grain. BTW, I waxed my wood deck, never had a problem after sailing. Real boats get wet, no? Pat M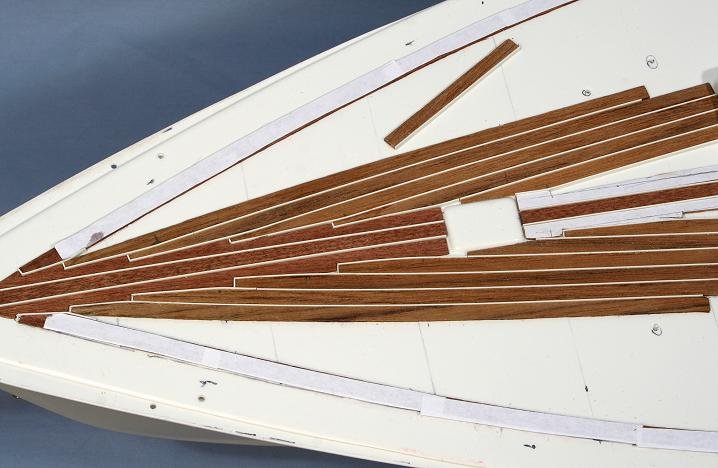
-
Thanks. More at:
-
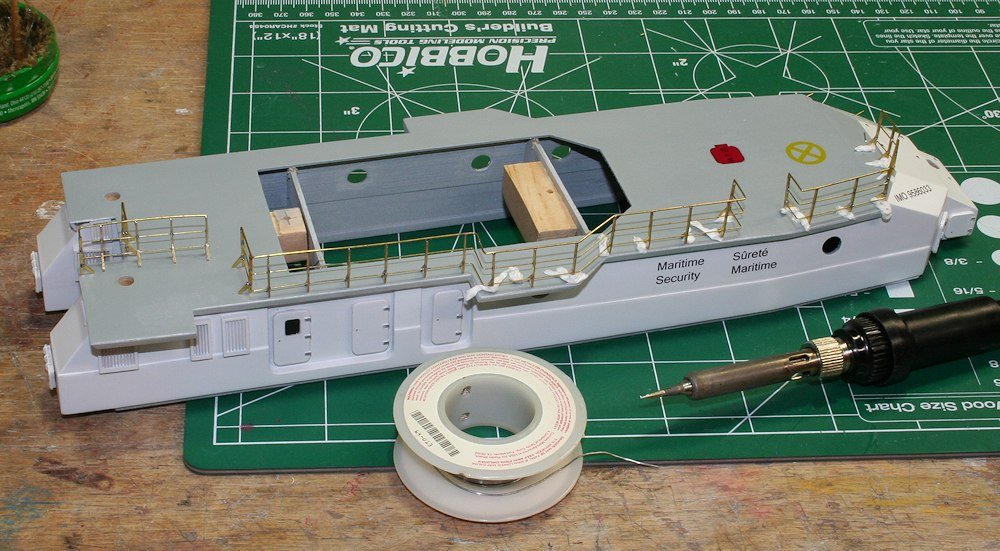
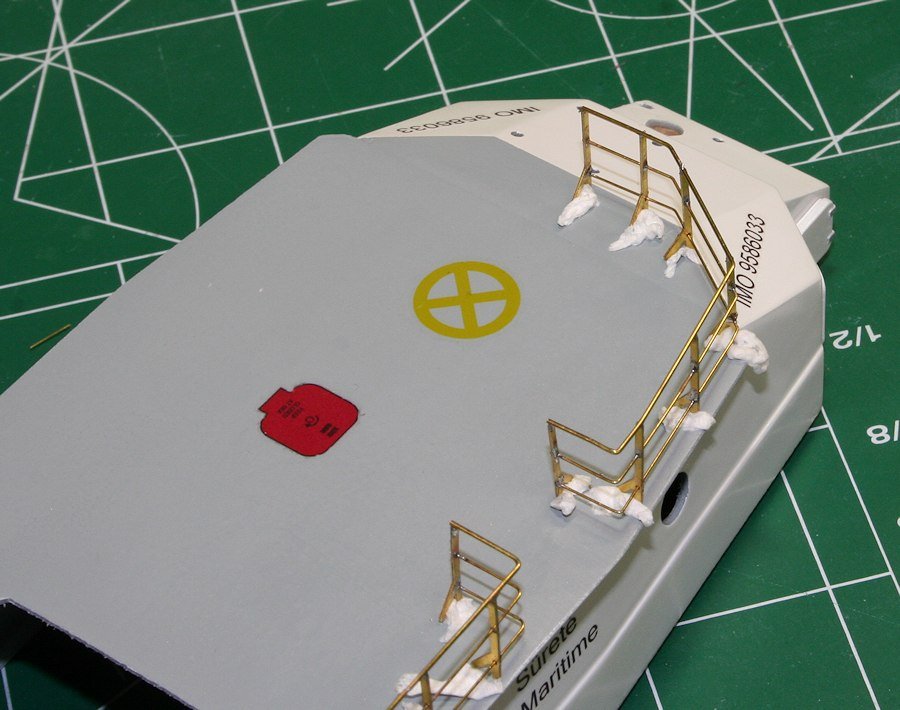
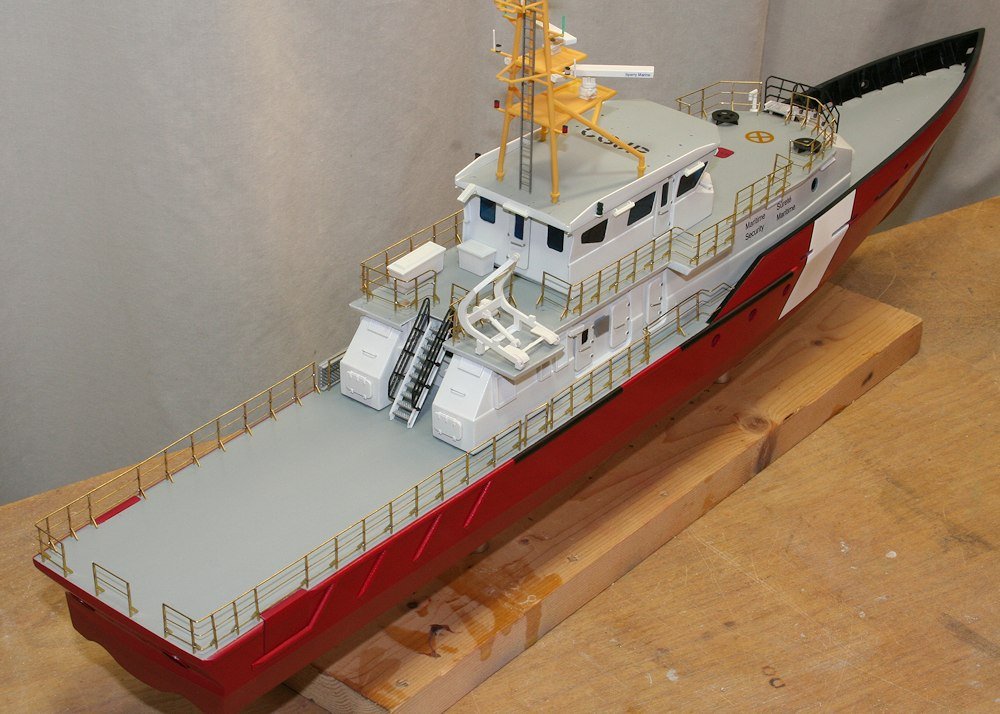
Old thread alert! But I'll repeat something I just mentioned in another soldering thread: soggy globs of toilet paper (umm, use fresh water...) as heat sinks. I soldered a whole mess of brass rails to brass stanchions, pre-situated in drilled holes on a painted plastic deck... with the soldering taking place as close as 1/4 inch from the deck. The soggy blobs did the trick, no damage at all.
- 14 replies
-
- 12
-
-
Place blobs of wet tissue paper on previously soldered areas, then use a hot iron to solder the next. Pretinning can help, and use flux.
-
Even easier... look for larger stranded wire made up of fine uncoated strands. Done. But not quite... straighten the wire: clamp one end in vise, and firmly pull the wire until you feel it yield just a bit... let loose, and the wire will be straight!