Patrick Matthews
-
Posts
406 -
Joined
-
Last visited
Content Type
Profiles
Forums
Gallery
Events
Everything posted by Patrick Matthews
-
 Even with free s/w like Fusion360, much can be accomplished:
 -
I used to have access to CATIA through work... but now retired, I must satisfy myself with Fusion360. In CATIA: Part of Fire Fighter in Fusion360:


-
I've been designing and sourcing printed parts for some 11 years now. I still do not own a printer, as I don't want it to become the hobby itself. No interest in maintaining the equipment, tweaking it, and otherwise being encumbered by it, just to get sub-standard results. So I pay more and and just get my parts from pros, like Shapeways and Sculpteo. And these pros keep a stable of different types of printers, whatever is best suited for the job. FDM if you like making wicker chairs, multi-jet, true SLA, several flavors of SLS, and even waxes for investment cast parts. Have yet to pop for laser-sintered metal parts, though I did some back in my working days. Two models I did, with almost 100% printed parts:

-
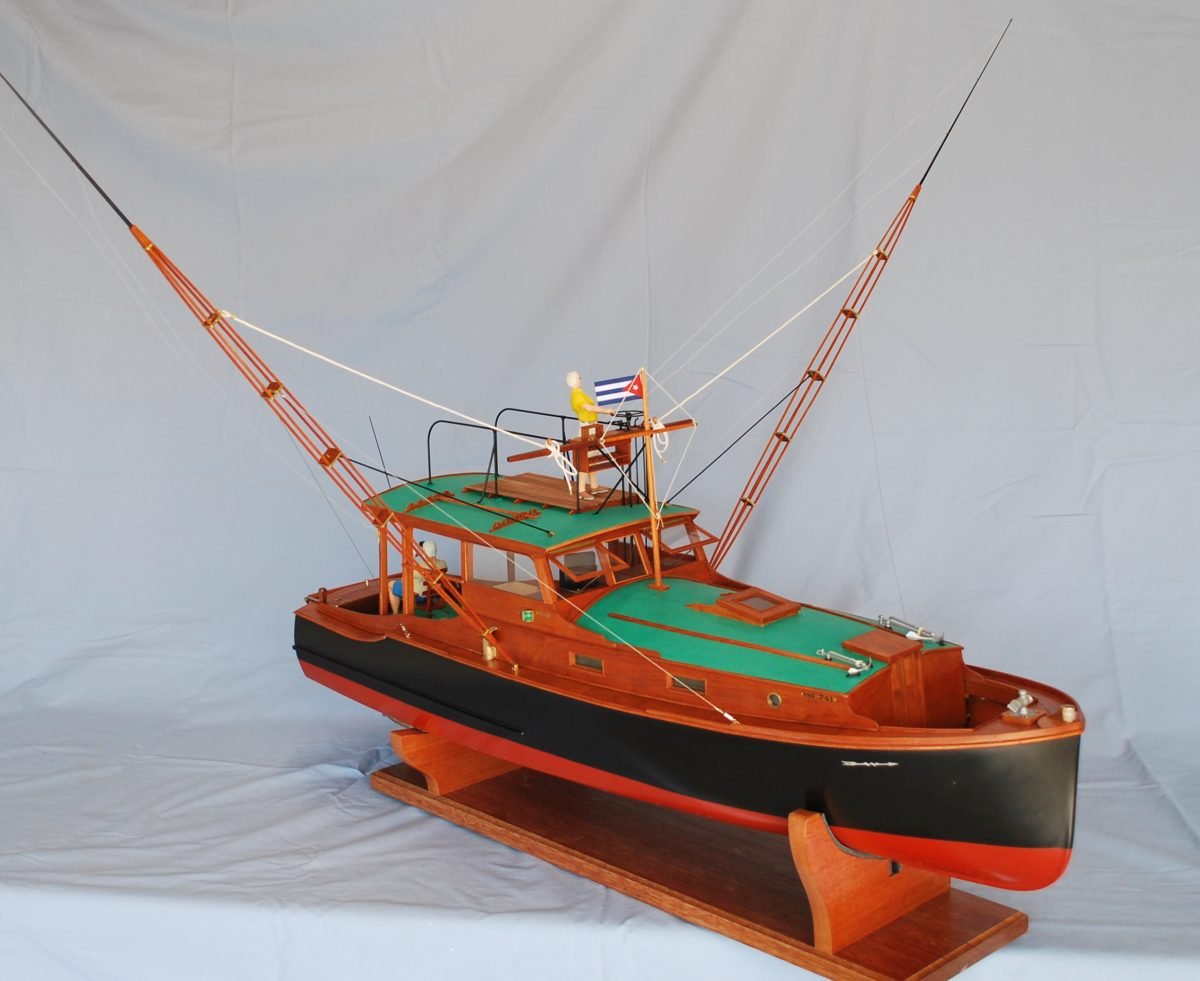
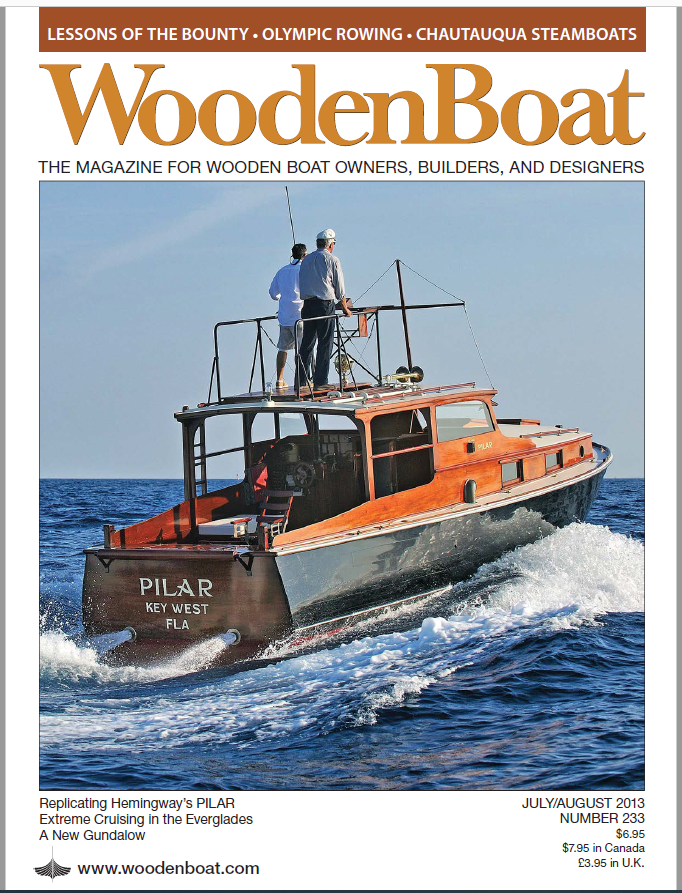
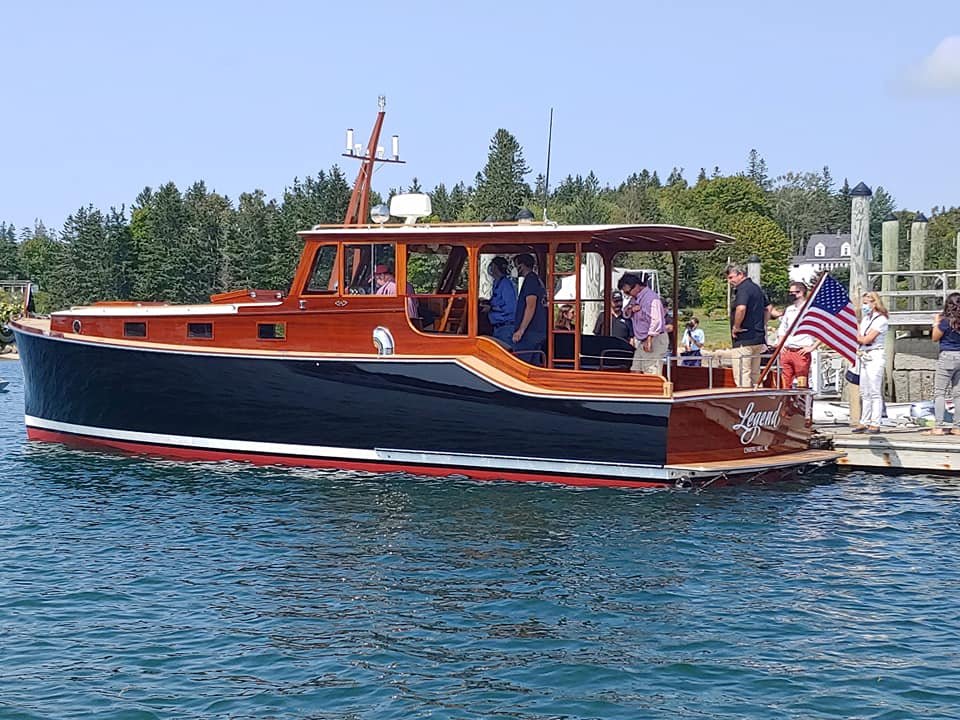
Thanks Kurt. Indeed, and Wes Wheeler has big hopes for it. While he has detailed measurements from the original Pilar, the new boat differs in many significant ways... just as with the movie "replica" previously featured in Wooden Boat, it should not be used as a reference for models of the original Pilar. Much like BMW's version of the Mini vs. the original Mini Cooper!
-
200' standard barge, about 6' long at scale. Not too bad, but what about an 12 barge float!?
-
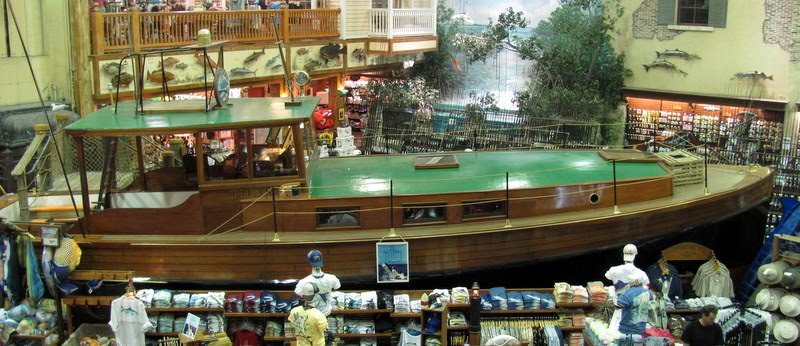
But don't look at it too closely, that's NOT Pilar. Another boat converted to loosely resemble Pilar, but wrong in major ways. Also don't look too closely at Wes Wheeler's modern interpretation of Pilar, it too is different in many ways, not at all a replica. Also don't look too closely at the thing in the BassPro shop in Florida, it is neither Pilar nor even a Wheeler.
-
A while back I did a repair job on an Ingram towboat model, and noticed that it seemed to have a thick build of hard paint, which I assume was epoxy or automotive 2k. I imagine that a nice self-leveling epoxy could be an expedient way to achieve a smooth surface on a wood model of a steel boat. Does anyone know if this is a typical trick of the commercial trade? . Some of the damage, but the paint could take a beating! All better now

-
Sorry to everyone back east...
Patrick Matthews replied to Patrick Matthews's topic in Modeling tools and Workshop Equipment
It's becoming Winter, a time when I'd retreat to my well heated basement shop where I could only get a little glimpse of the slate gray skies through the little casement window yet could hear the sound of the howling wind resonating down the furnace flue. -
...but here's the mid November view out my shop "window" in southern California I'll spare you the photo of me in shorts .

-
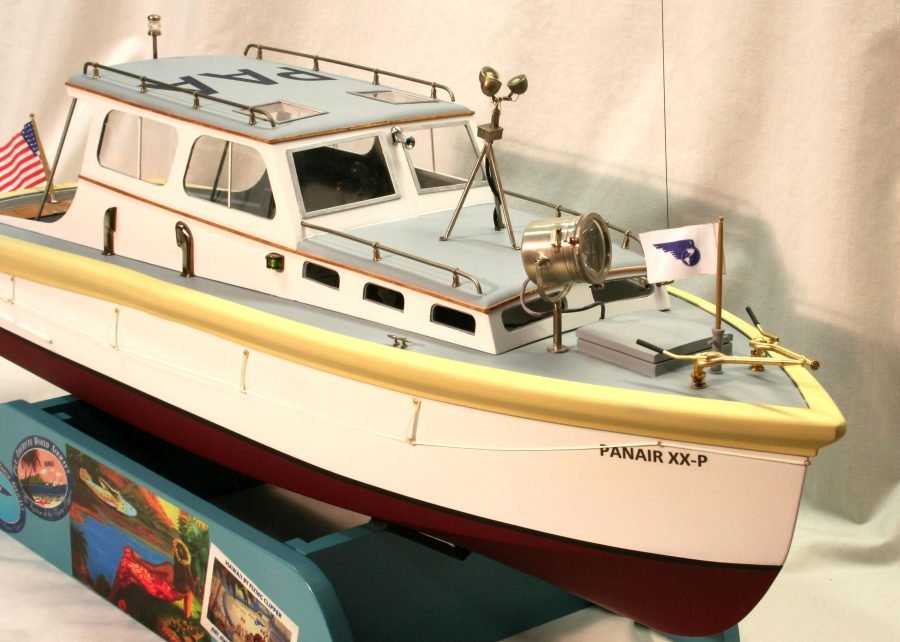
Thanks. Cabin is cherry with Minwax Gunstock and spray can semigloss lacquer. Hull is fiberglass over basswood, primed and semigloss Rustoleum black, wet sanded and waxed (!)
-
Any varnish could be used, builder's choice. But note that many details in this kit are completely wrong, including the finish shown on the box art. Hull should be black with a red bottom; transom MAY be varnished mahogany. I haven't confirmed what the cabin was... one source says mahogany (quite possible), and it may have been unstained early, and a darker stain later... the wood would be frequently refinished over the years. The kit represents the boat as it sat at Finca Vigia before its latest restoration, including later gaudy modifications that Hemingway likely never saw, and loss of critical drive hardware like the bronze rudder footing and auxiliary drive. Here's my interpretation of what the boat should look like: https://modelshipworld.com/gallery/album/2157-hemingways-pilar-in-112/
-
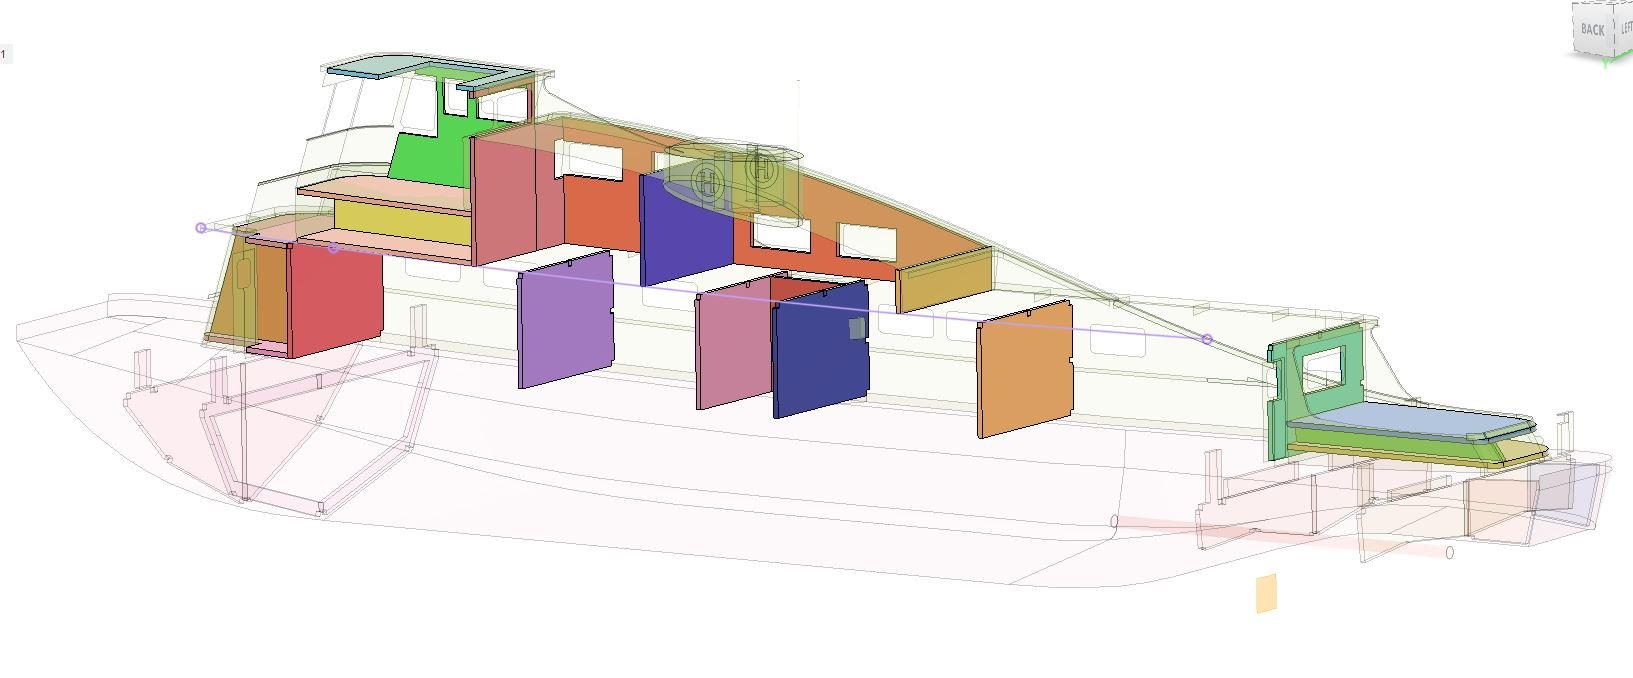
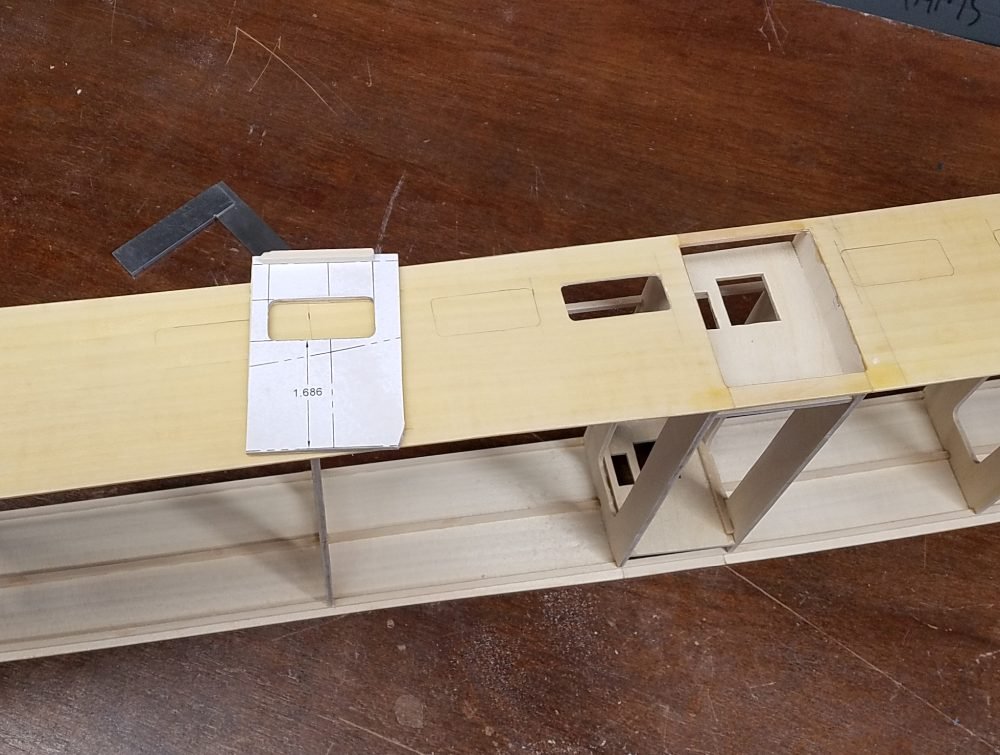
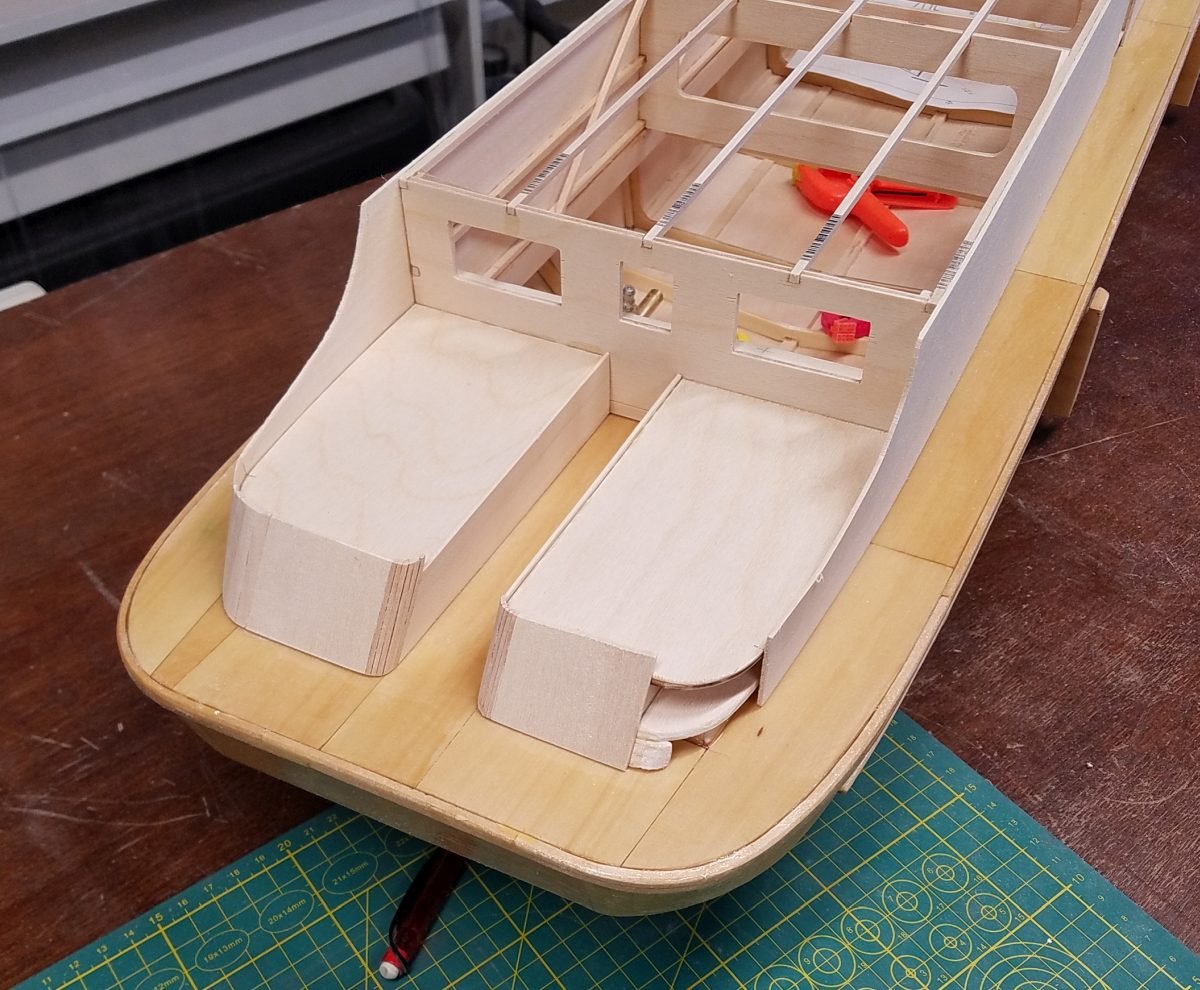
The cabin walls, be sheeted in basswood, are subject to splitting over time due to humidity changes. So they receive the same fiberglass treatment as the hull. It's easy to deal with here, as the large surfaces are flat or simple convex. Windows are cut after walls are installed to ensure correct location. A simple template aids in marking out, and holes are opened and finished by Dremel, files, and sanding sticks. The aluminum sliding window frames will be installed later, likely made by printing. A sheet of 1/16" plywood covers the lower house... it seems big enough to double as a boogie board. The bulwark around the pilot house is basswood sheet again, this time being sheathed in 0.010" styrene. .
-
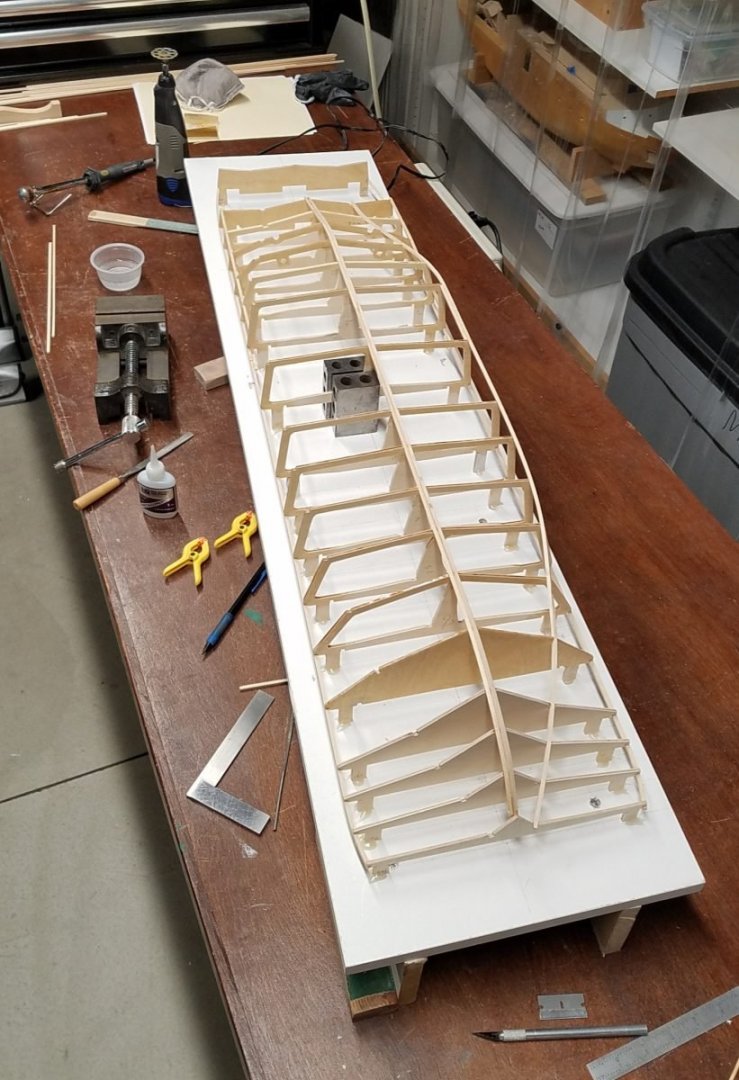
Main cabin is built up from frames and stringers, and sheeted in 1/16" basswood. The tricky corners are "planked" or covered with steam-bent sheet, depending on the radius. Traditional ship models are built from wood, often in a fashion that follows the prototype build method. If I wanted to keep that link to the prototype, I'd be rolling sheet metal skins here. It is possible- many modelers have built ships from soldered tinplate in the past. Today, modern ship modelers in Europe make use of thin phosphor bronze sheet. It's stronger than regular brass, allowing very thin gauges to be used... it works nicely enough and solders like a dream. But that's a bridge too far for me! I'll stick with simple wood. .
-
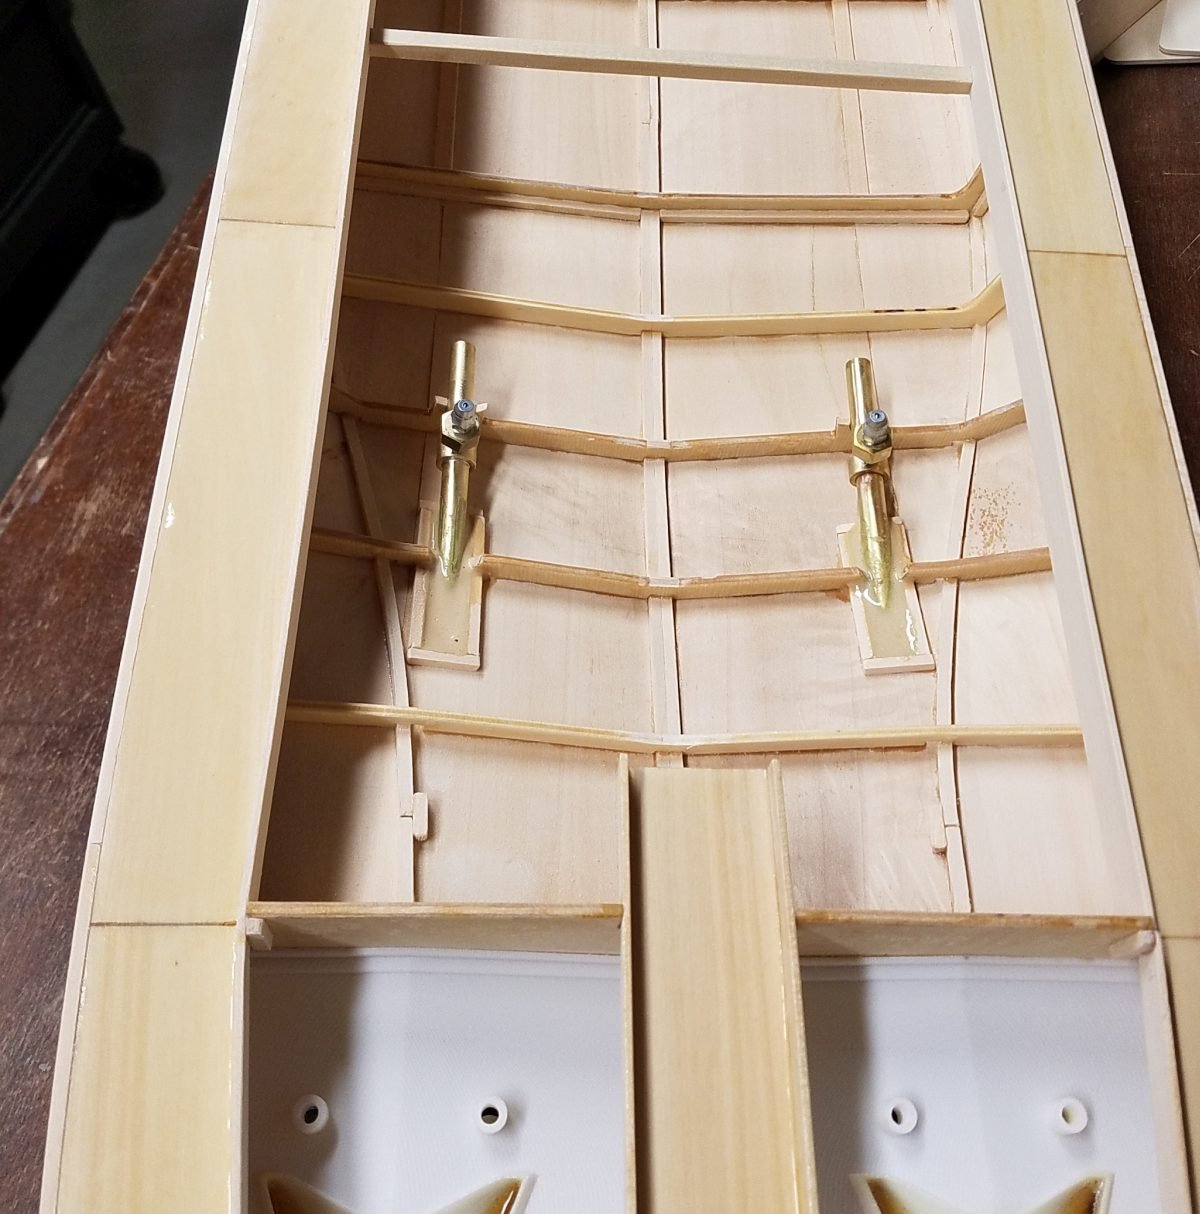
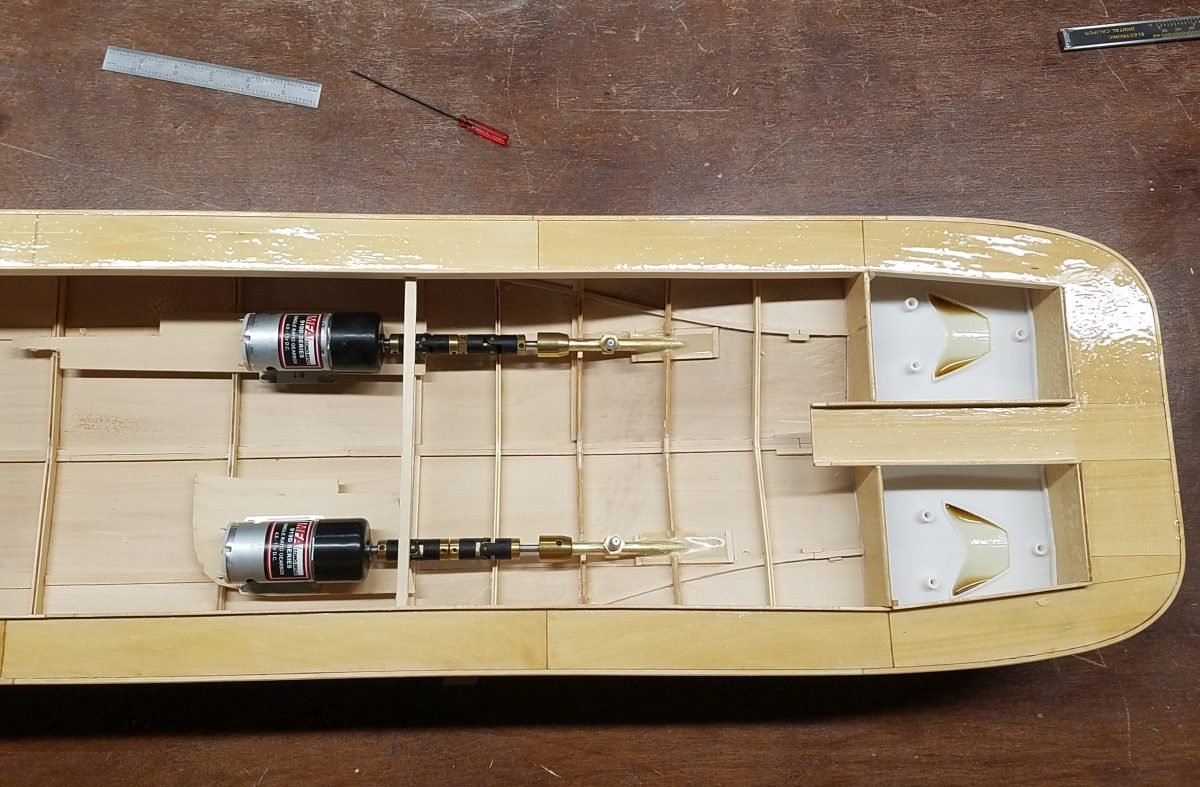
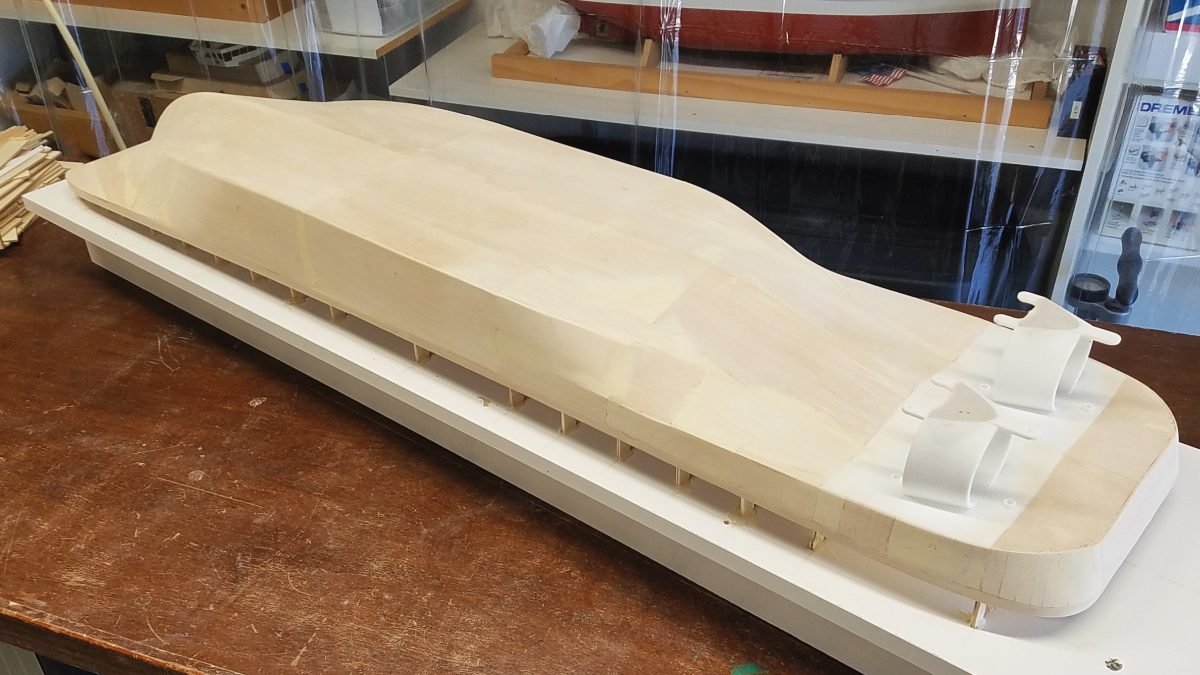
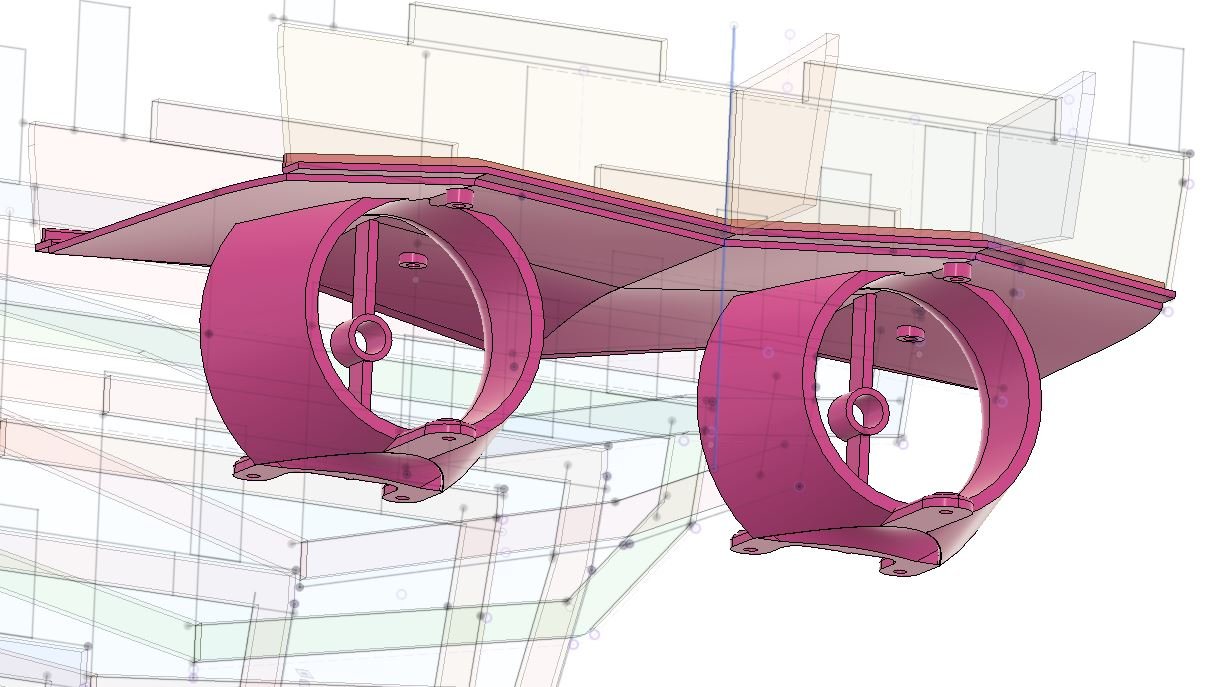
Prop shaft tubes and motors in place. While it's a cheat on my part to run the tubes out to the struts/nozzles, instead of the headache of aligning an exposed shaft, I do have a couple photos of real boats that had enclosed tubes like this. Motors are MFA-Como from the UK, with 6:1 gear heads mounted conveniently on 500-sized brushed motors. They'll spin the 2" props at the correct model speed. Couplings connecting the 6mm motor shaft to the 5mm prop shaft, and the modified prop tube parts, are from Raboesch.
-
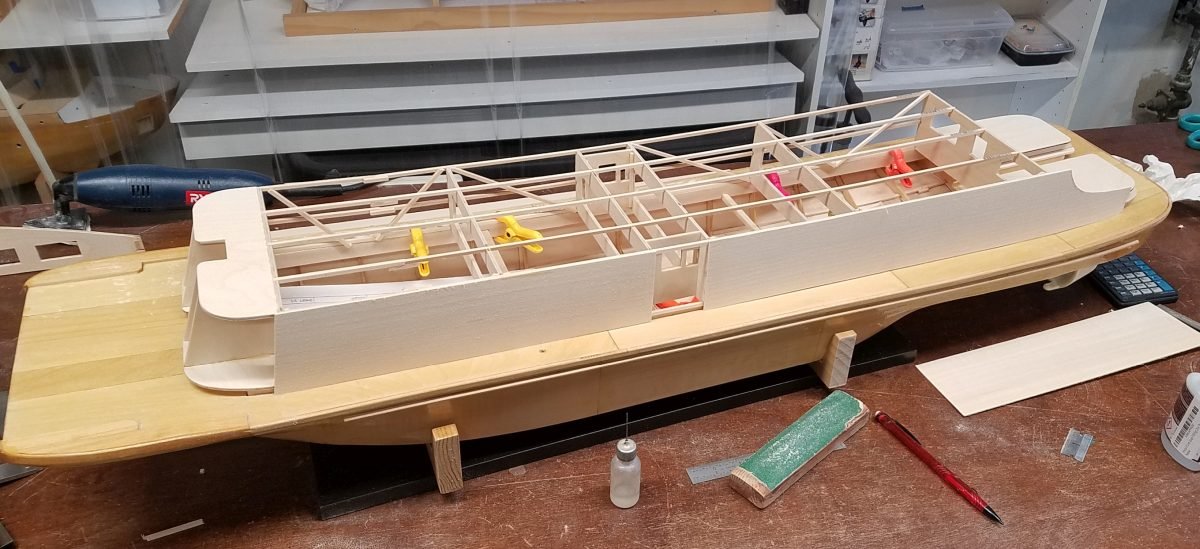
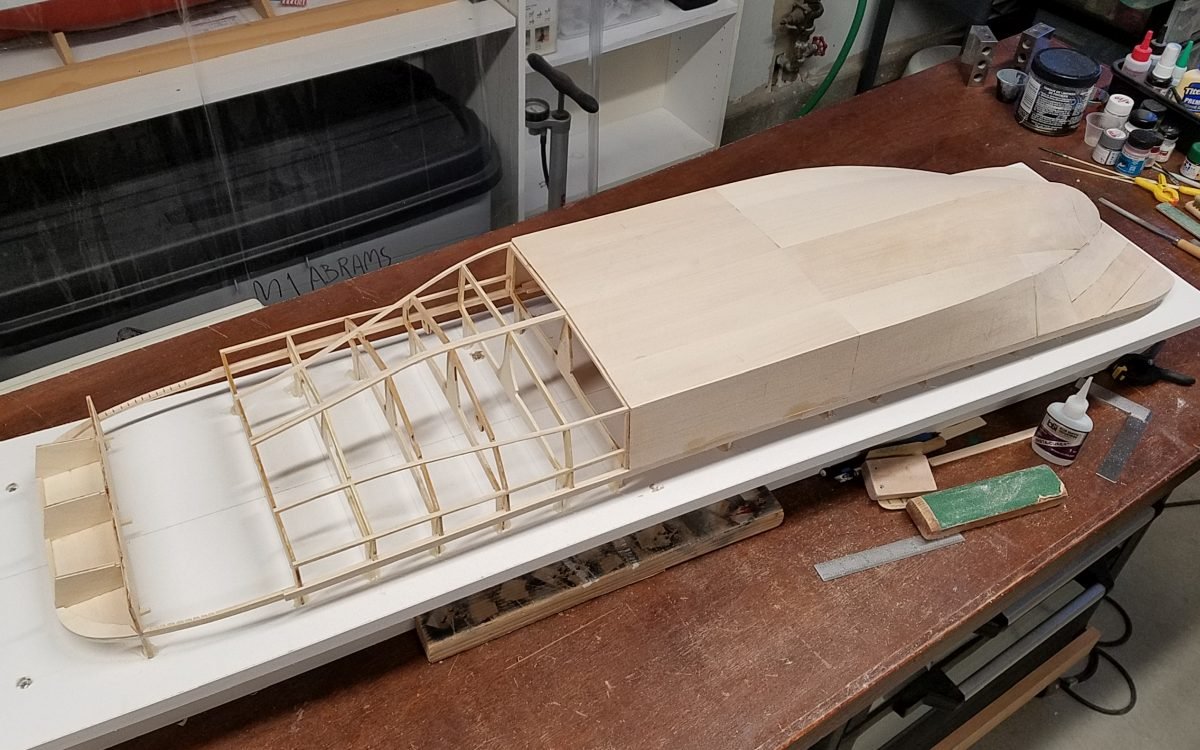
Get the deck "plating" on, and start fiberglassing.

-
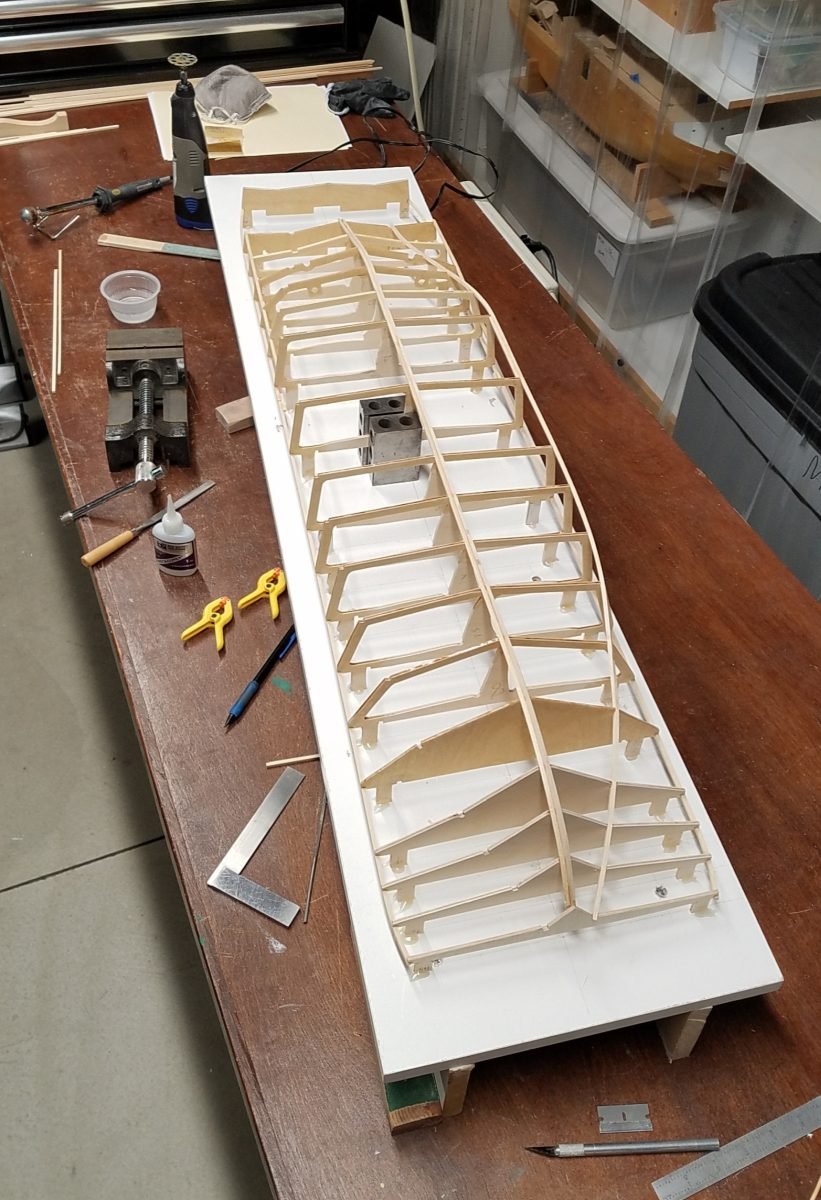
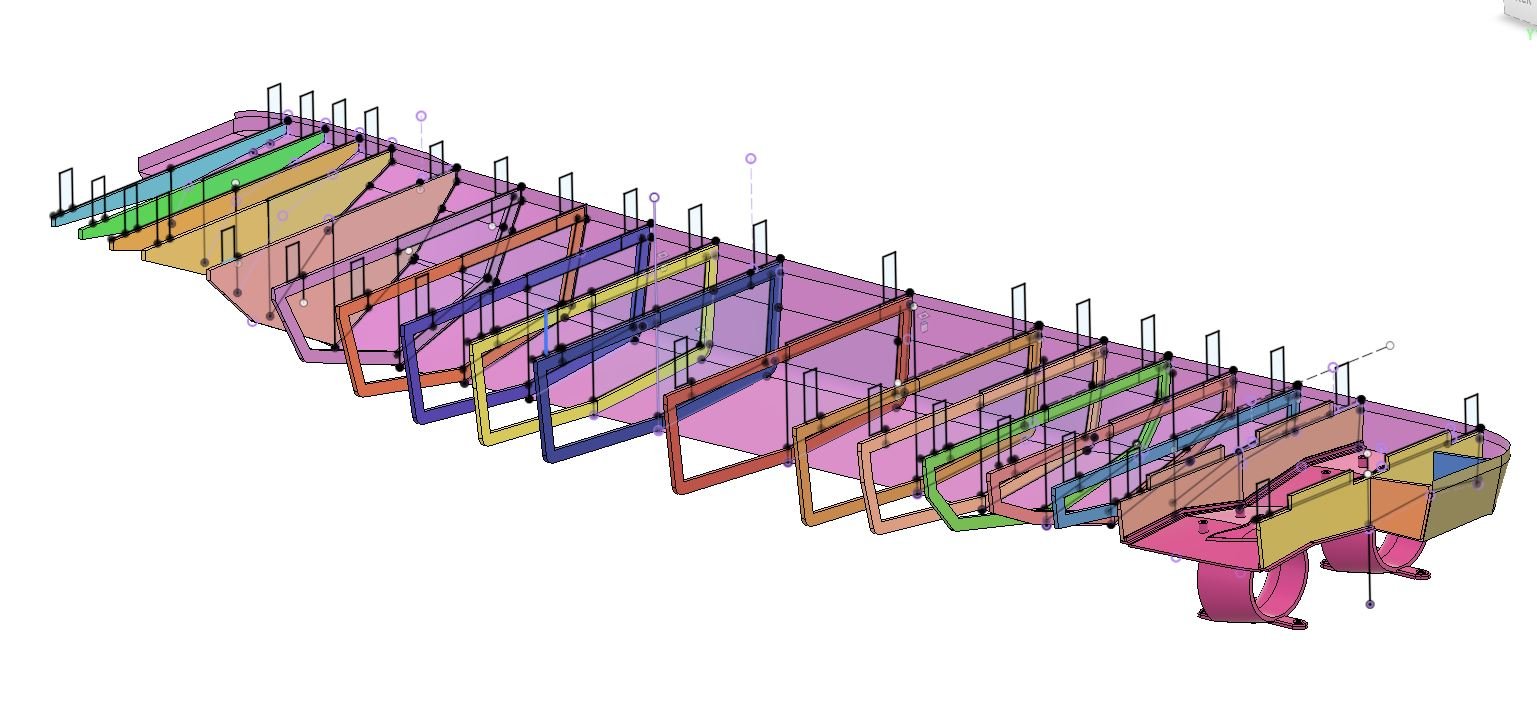
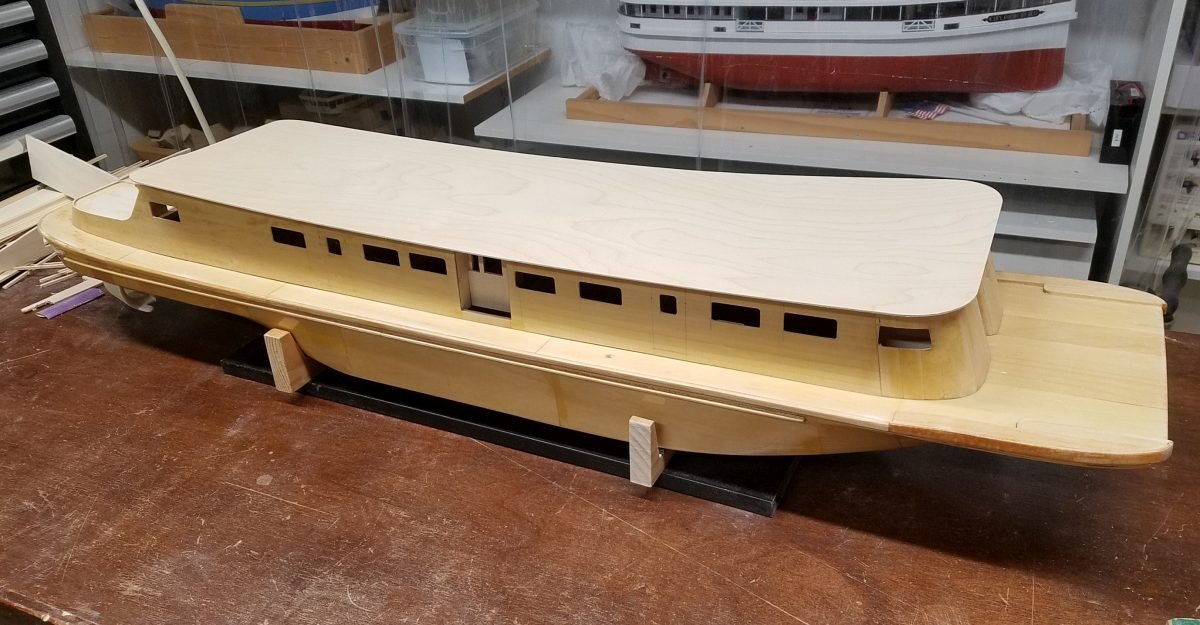
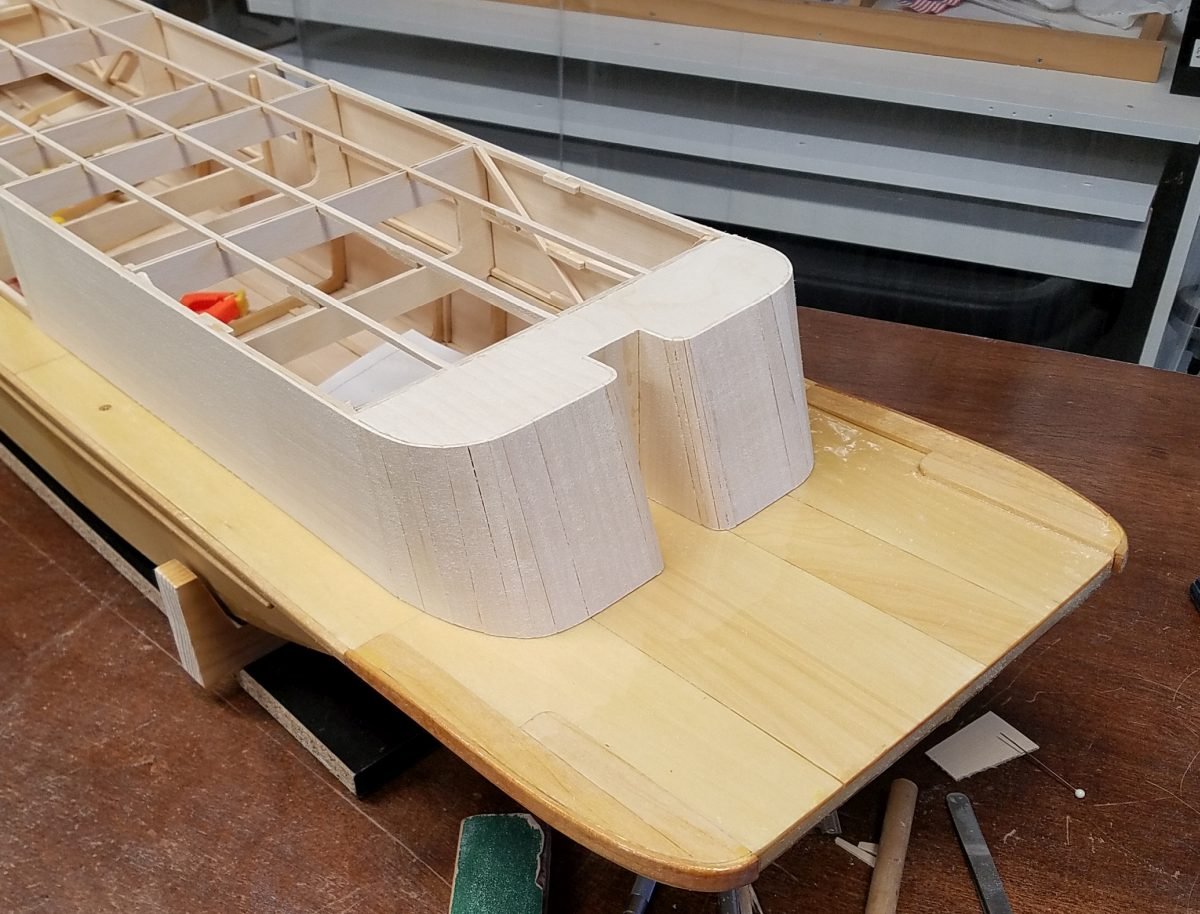
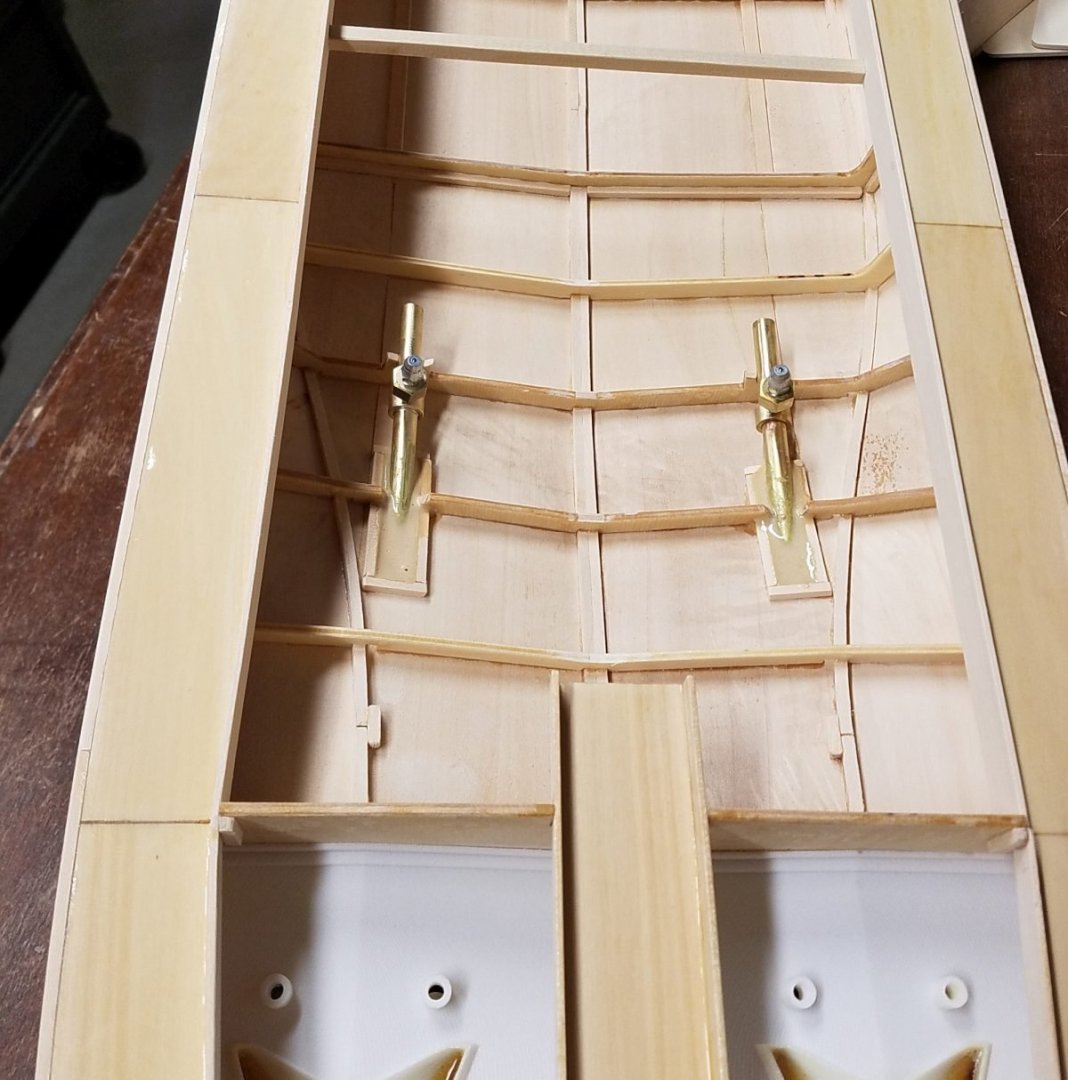
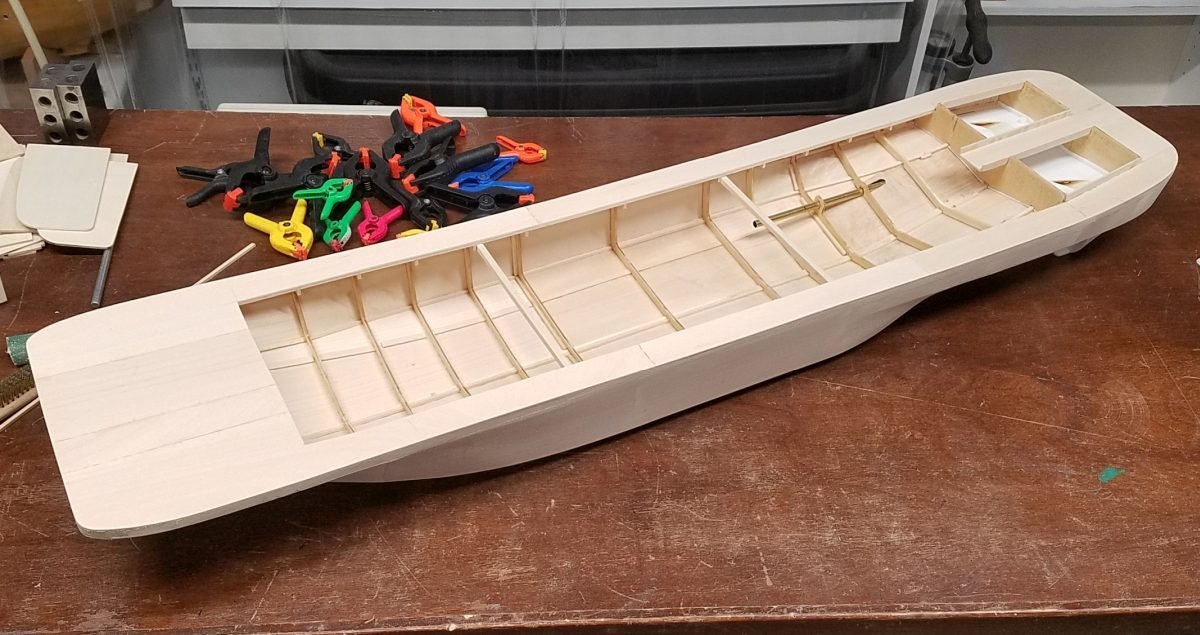
The frames are designed with tabs reaching "up" (down?) to the build board datum surface. The board is marked out, and the frames are simply hot-glued in place. The hull has a "model bow", as opposed to the simpler scow bow used on many towboats. Looks nice, but it's debatable if it's of any use behind a raft of deeply loaded barges. Hull is sheeted in 1/16" basswood. The real boats weren't planked, and there's no reason to use planking on a model. 3d-printed nozzle set attached to the frames and sheeting blended in. After a bit of filling and sanding, the hull is cut free, and the tabs are cleaned off the frames. Ready to deck and for installation of prop shaft tubes.
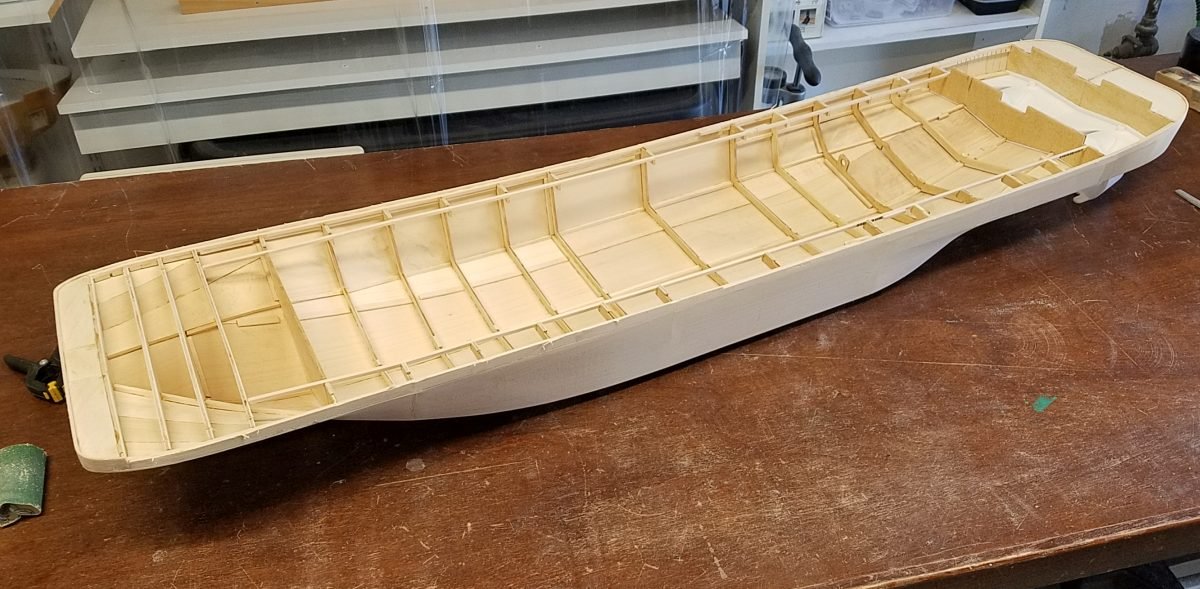
-
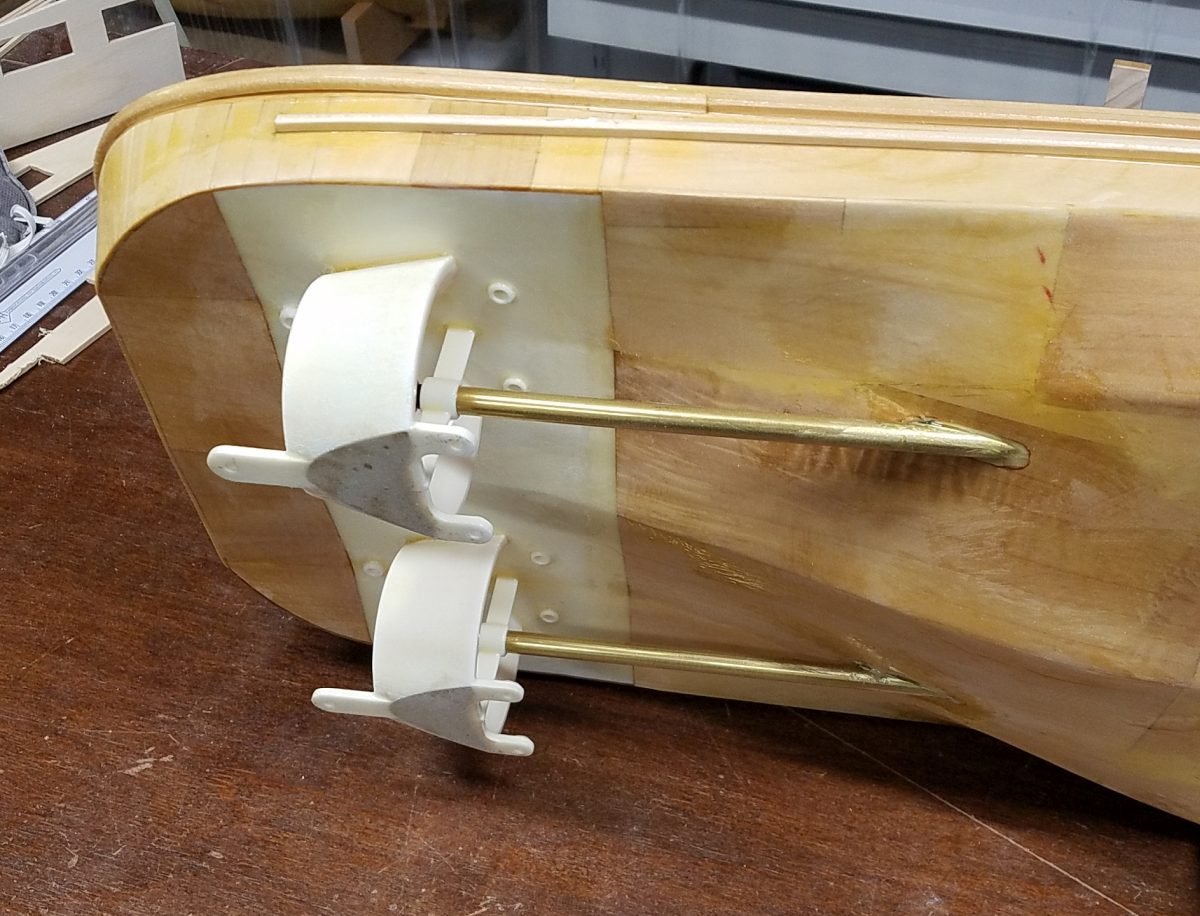
My original CAD model only represented the "skin", enough to show lines and detail placement. More recently I drew up model frames and a 3d-printed Kort nozzle set. On towboats like this, the nozzles are flat bottomed, and the tops are blended into the curvy tunnel portion of the hull. It was just easier and more precise to print this as an assembly to splice into the wood hull model.


-
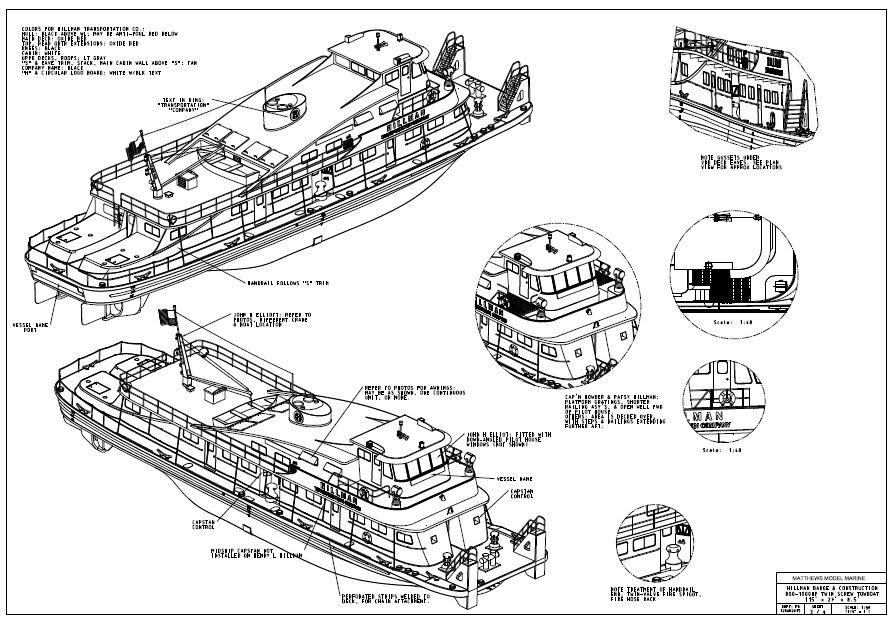
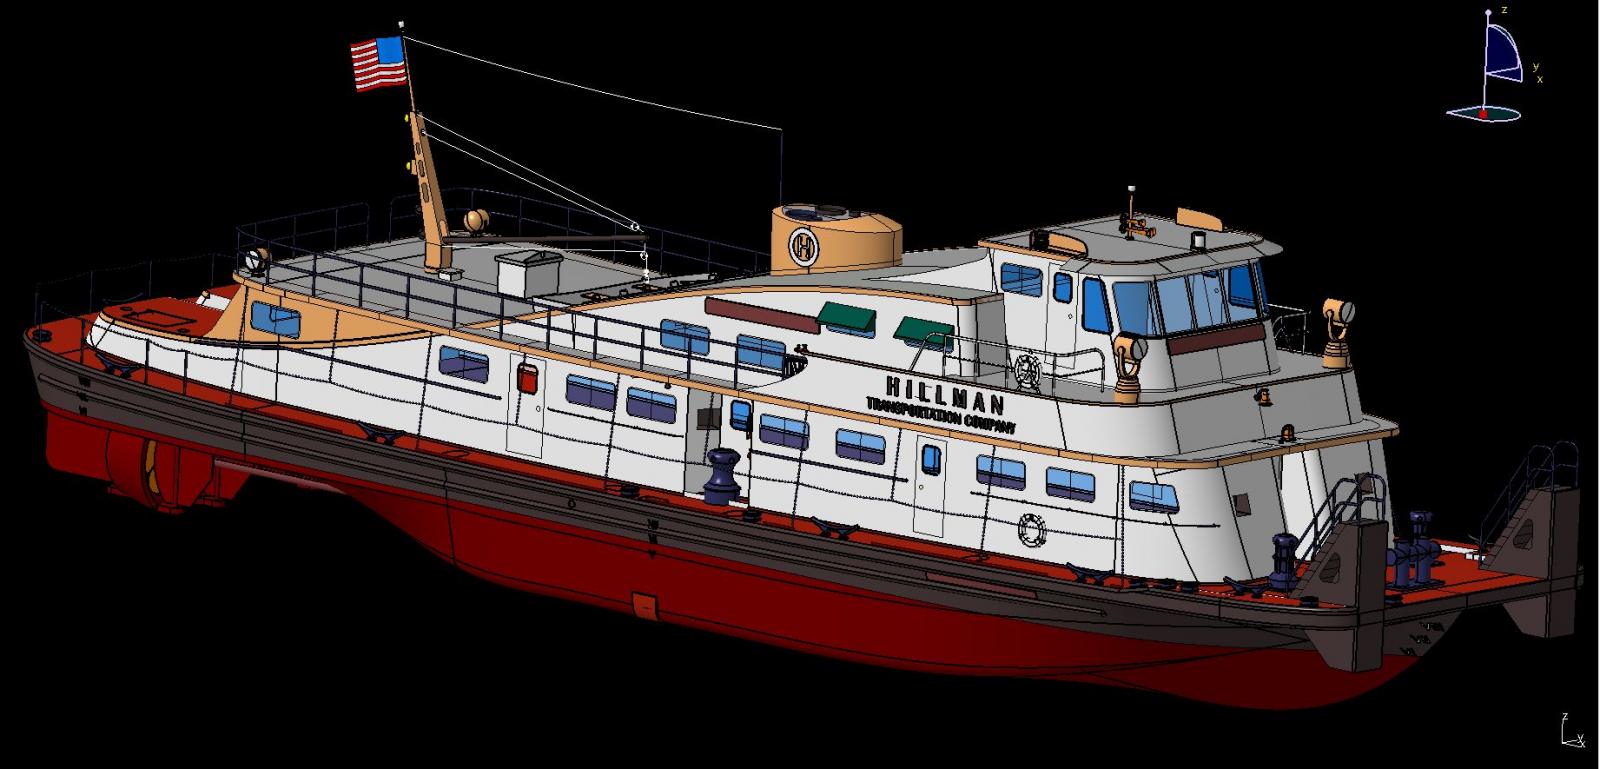
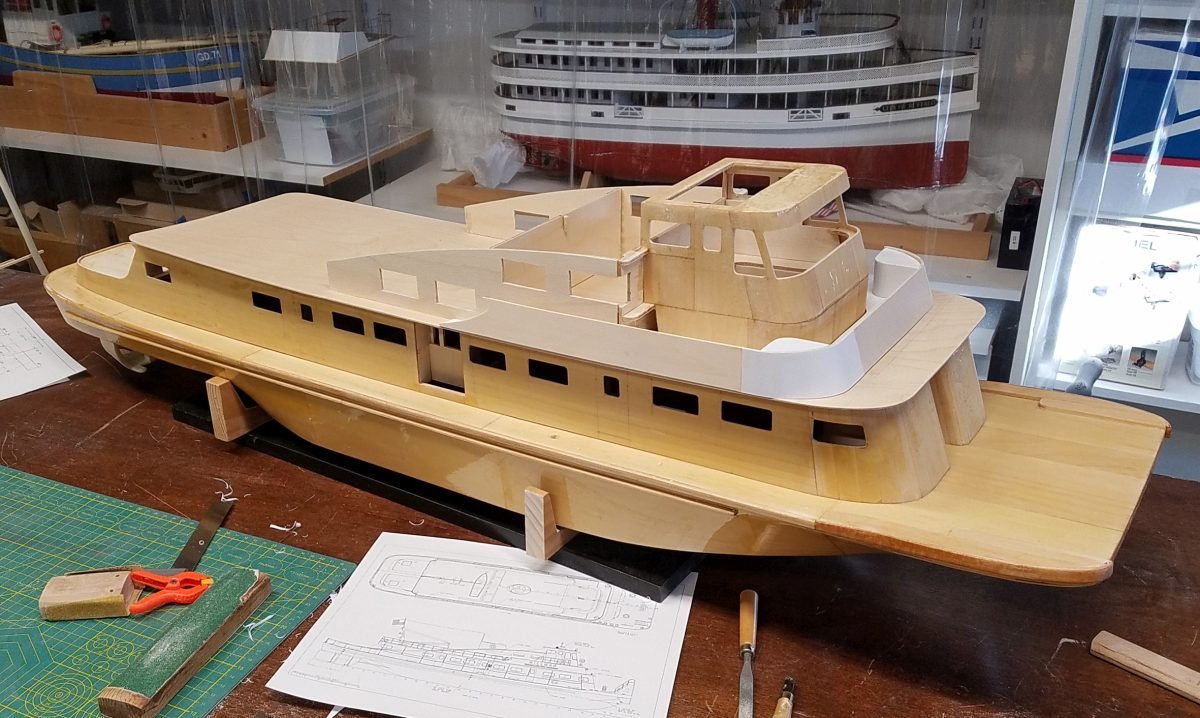
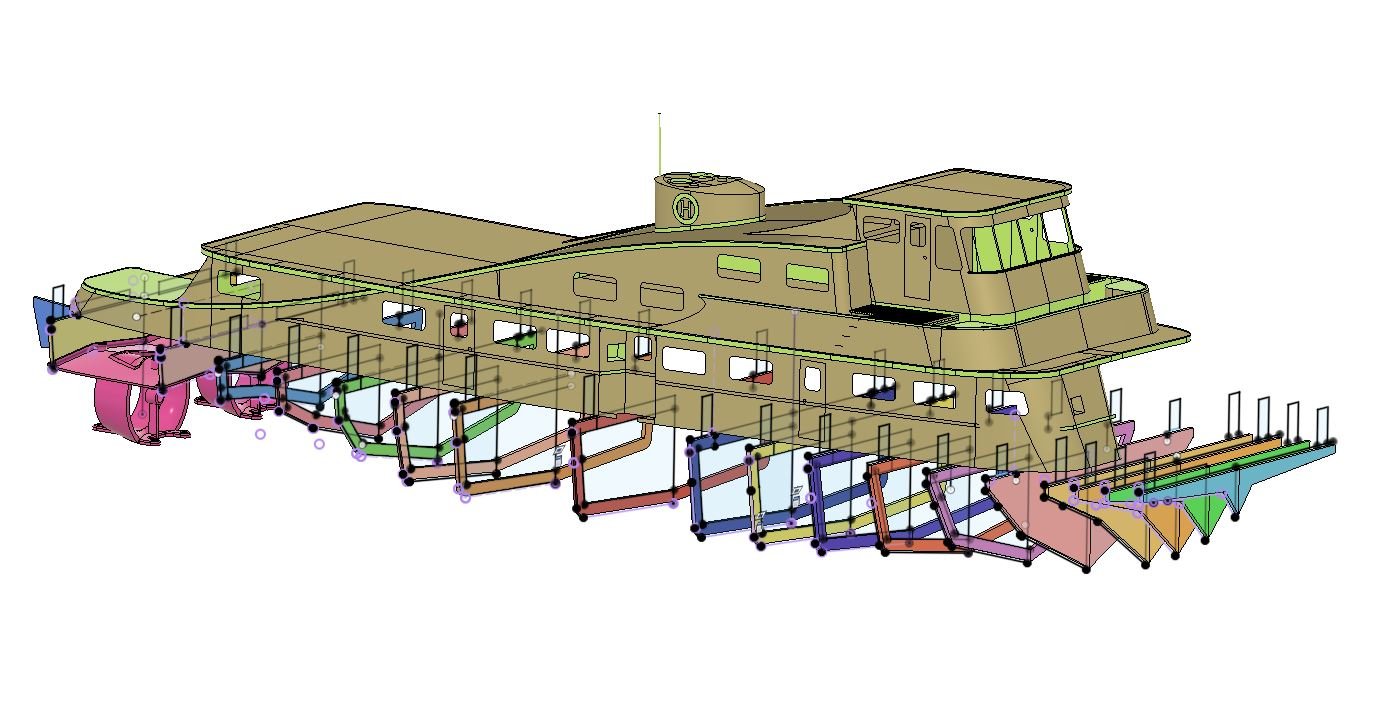
Using information provided by John Fryant, I was able to create a set of plans for the 115' towboats from Hillman Barge Co., five sisters built between 1949 and 1959. More discussion of all that in the Plans area: https://modelshipworld.com/topic/10027-diesel-towboats-from-hillman-barge-construction/ I'm attracted to these boats because of the unusually graceful styling. Several still operate today, and rivermen still acknowledge their attractiveness. The design, I suspect, results from the pent-up yearnings of a 1940's designer, Elmer Easter, who still recalled the "streamline moderne" styling of the 1930's. Now it's time to build a model! Which will be R/C in 1:32, making for a nice sized model that should operate stably. .


-
See above- done not by me, but someone with alien powers over the metal.
-
Silver soldering
Patrick Matthews replied to Dziadeczek's topic in Metal Work, Soldering and Metal Fittings
?? I've filled ugly gaps and even created fillets with true silver solder. Biggest problem for me has been the amount of heat required for even "easy" grade silver solder- it totally anneals any brass I'm using. I do most all work now with Stay-Brite low content silver solder and flux. -
Silver soldering
Patrick Matthews replied to Dziadeczek's topic in Metal Work, Soldering and Metal Fittings
53 pages... sigh, just have to go through them! The M1Ax was an obsession of mine for a while... had a lot of info, but I needed to crawl on one to get more. Had an appointment to do just that on the display unit parked in front of TACOM Sterling Heights (MI), behind their secure fence, just up the road from GDLS. The appointment was on 9/12/2001. Did not happen- there was much else on everyone's minds. While I focus on boats today, I do have one HL 1:16 model in a box, and a 21st Century 1:9 corpse in a crate... someday... -
Hmm, in another forum, I see that Steinhagen stopped producing their hulls last year. No idea about the plans. But again, try asking on the German forum- no worries, their English is better than mine!
-
I believe Steinhagen is active. https://www.steinhagen-modelltechnik.de/htm/igl-capsandiego.htm You can also ask on the German RC model sites, like: https://www.schiffsmodell.net/
-
Silver soldering
Patrick Matthews replied to Dziadeczek's topic in Metal Work, Soldering and Metal Fittings
Barry- would love to see more of your M1 (?) ! -
As above- may not be the BEST wood choice, but I used cherry, as with the rest of the cabin. Added the brass reinforcing straps and mounting hardware, and now I can display the outriggers up or down. BTW, that was a whole 'nuther detective job, figuring out how Hemingway rigged the outriggers... not obvious from available photos.