


Rustyj
-
Posts
2,516 -
Joined
-
Last visited
Content Type
Profiles
Forums
Gallery
Events
Posts posted by Rustyj
-
-
Very nice job on what I consider a difficult part. Well done!

-
Looking really good. I really like your method. Much nicer than the jig I used.
-
Hi Russ,
I used some .028” line I had for the breeching rope. It was the closest I had on hand.
Thanks on the colors. I’m real pleased with how they came out.
Hi Ben,
Have you still got that spy hidden in my shop? I started dusting the Echo off just last night!

-
That's very nice Bob. I really like the way you are presenting her.
-
Hi Ron,
The planking is very nice. With all the beams covered you are
the only one who knows the joints don't fall on them.

-
-
Good catch there. I think I've had that same supervisor on some of my builds. Had to fire him more than once too!
-
Hi Ben,
You're making good progress. Seeing you're doing such a good job of it I think
I'm gonna mail my frames to you so you can raise them too!

-
Only because I had to go to work my friend.
-
-
Hi Bob, Very nice job on on the deck and bulwarks planking.
Also lining the ports with red heart came out very nicely too.
-
Wonderful Chris! Keep it going your almost there.
Plus I'm greedy and love seeing your work on her.
-
Thanks Paddy and Antony.
Ben, I used a torch and regular solder.
Grant. Plans and build match? Never had that happen for me! I also used
a plank to check both the height and angle. I marked each bracket and each
location as they were all unique.
Here they are drying. Coat two of ?????? Not gonna be twenty though Ben.
-
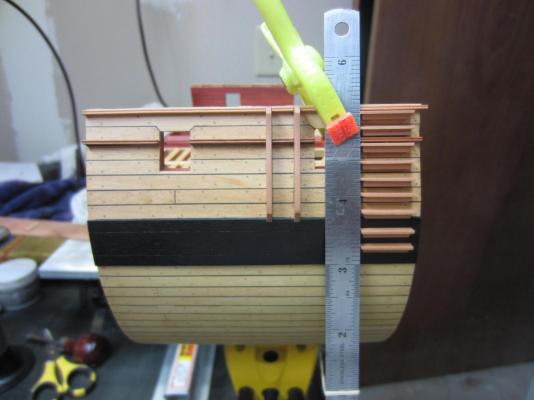
It’s time to make the gangway iron supports.
Between the various heights of the gun deck spirketing and the gangway
clamp each bracket will have to be to custom fit at their correct location.
Here is the first bracket being test fit.

All the pieces ready for soldering.

And the first one soldered.

Now I just have to clean it up and make seven more.
-
Hi Paddy, Ah you are off and running now! Looks good so far.
-
-
-
Hi Harley,
That's what I did too. Sand and sand and sand with a little more sanding thrown in for good measure.
Patience and time are what is needed. Best of luck.
-
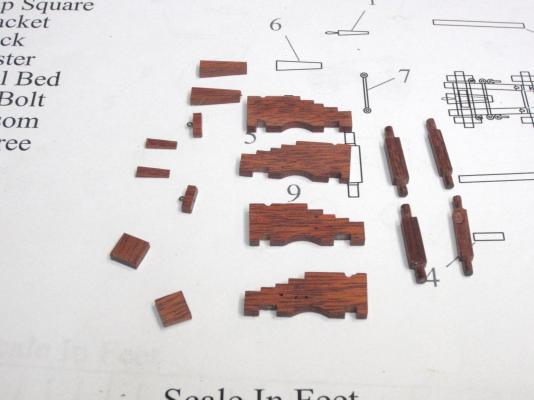
Thanks Grant.
They were done individually as I did not have a block big enough. I set the
table saw blade for each cut level and the cut 5 blanks progressing from
lowest cut to highest. The extra one was for an oops moment.

-
Thanks Paddy
Hi Rob Yes the great crash of 2013 did touch us all. I learned I hadn’t saved as much
of my work as I though I had and having a system melt down to boot would have
been terrible. Well we all just start over where ever we can.
Good luck with the Pinnace. It’s a wonderful kit.
-
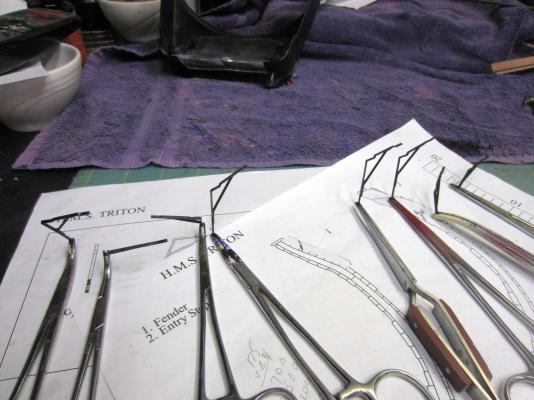
Thank you all for you kind words. The ruler was what was at hand
but any flexible straight edge will do.
Ok the nerves have settled a bit. I guess I can start working again.
I've wandered back to the gun carriages. I cut them out of Bloodwood.
Just because I had some and wanted a little color variation.

-
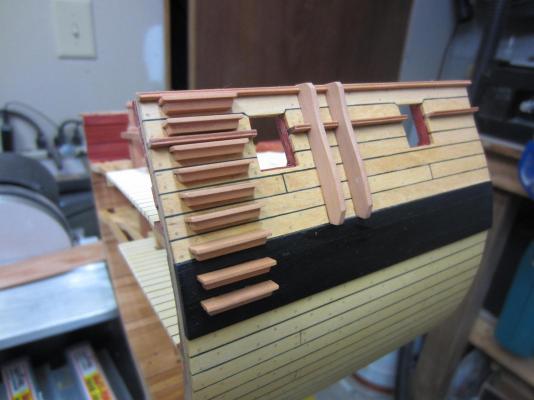
Well all of the steps have been made and attached to the hull. The back of
each step had to be sanded to fit so the tread was level. I did them one at a time
so I didn’t mix them up. To keep the steps in an even row I clipped a ruler
to the hull and used it as a stop.
Then while I was working on the Triton the Admiral called to me and wanted
me topside. Being the good mate I jumped to, set the cross section down and
went to see what was up. Upon returning to the shop I looked at my work bench,
and mind you I have a mastiff that can put her head on my desk with all four feet
on the ground and regularly does, and almost had heart failure…………...


I tipped toed over, gently picked her up and placed her squarely back away
from the edge. Needless to say I didn’t do anything more that night. I figured
I had used up every bit of luck I had and only bad things could happen!
- fatih79, sonicmcdude, Paddy and 1 other
-
 4
4
-
Very well done Bob. Love it!
-
Hi Rob all I can say is

 . Typing was never one of my strong points.
I went back and hopefully made all the corrections.


Scratch building the Syren using the kit's plans
in Wood ship model kits
Posted
Hi Richard,
The Syren was my first adventure to the "dark side" of scratch building and was a wonderful experience.
As Chuck said "Go for it"!