


Rustyj
-
Posts
2,516 -
Joined
-
Last visited
Content Type
Profiles
Forums
Gallery
Events
Posts posted by Rustyj
-
-
-
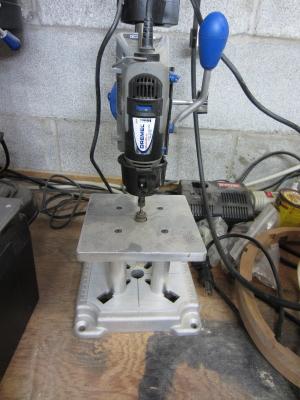
Hi Chris,
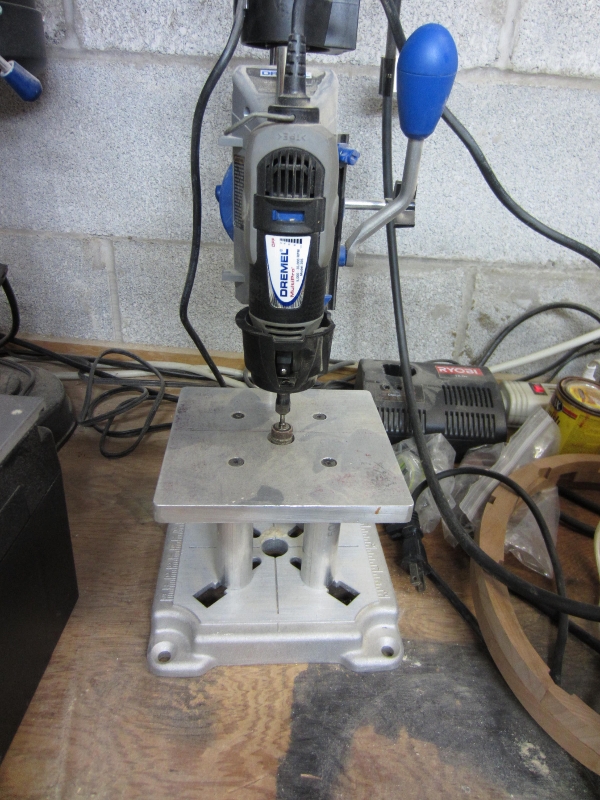
I've used a dremel in the dremel drill press for many a year and has worked well for small items.
My brother made a raised bed for me but it is not necessary.
It is an option for you until Jim Byrnes builds one.

-
-
Hi Ben, Thanks for your continued support. I’ve done a couple of admiralty
style POF’s already and I’m not sure when I will do a full one again.
So many things to build.
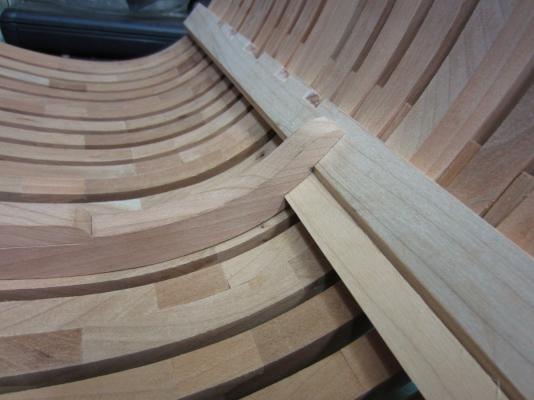
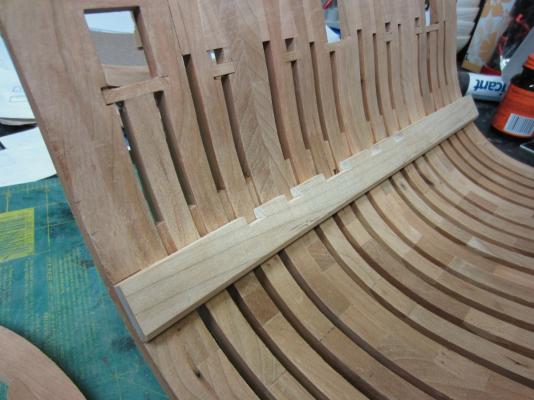
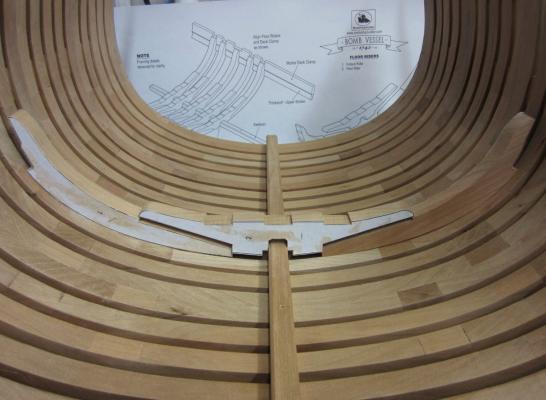
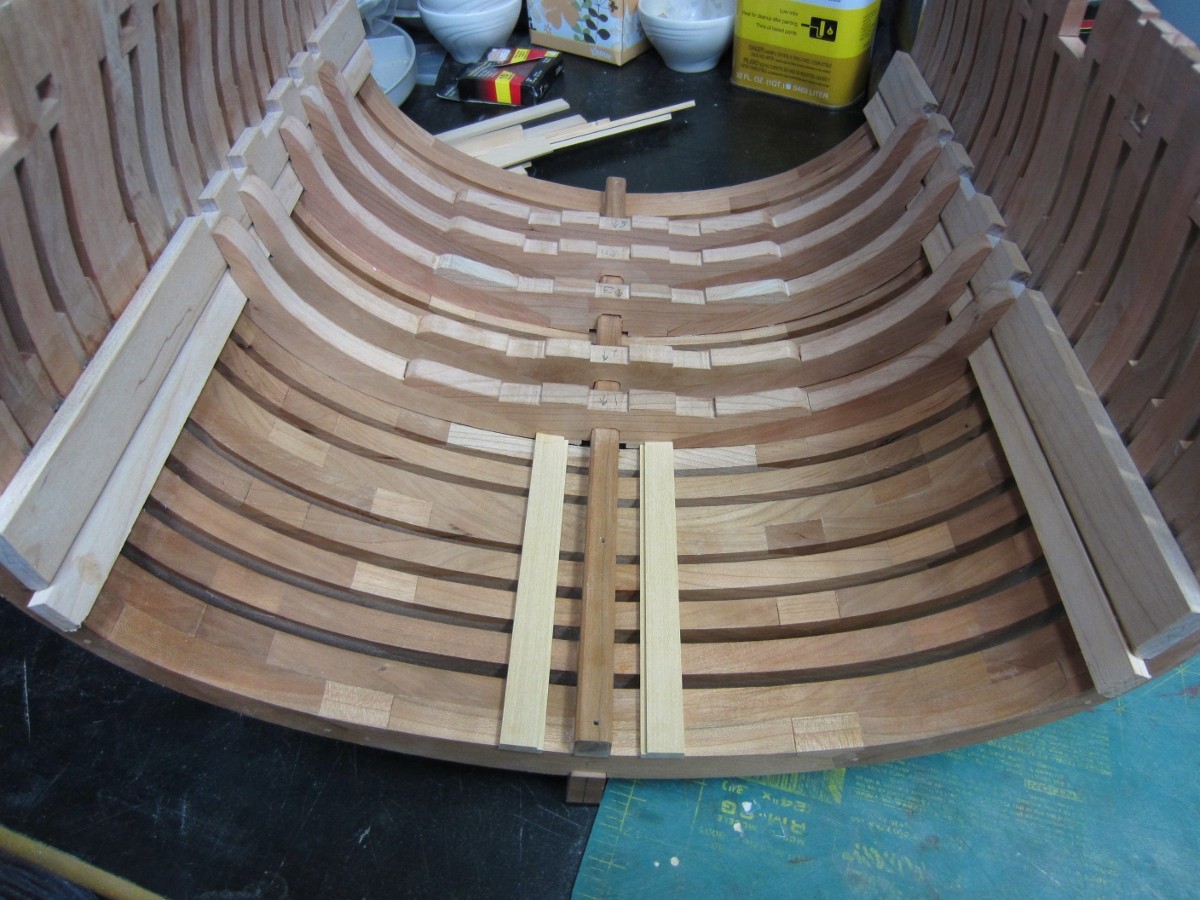
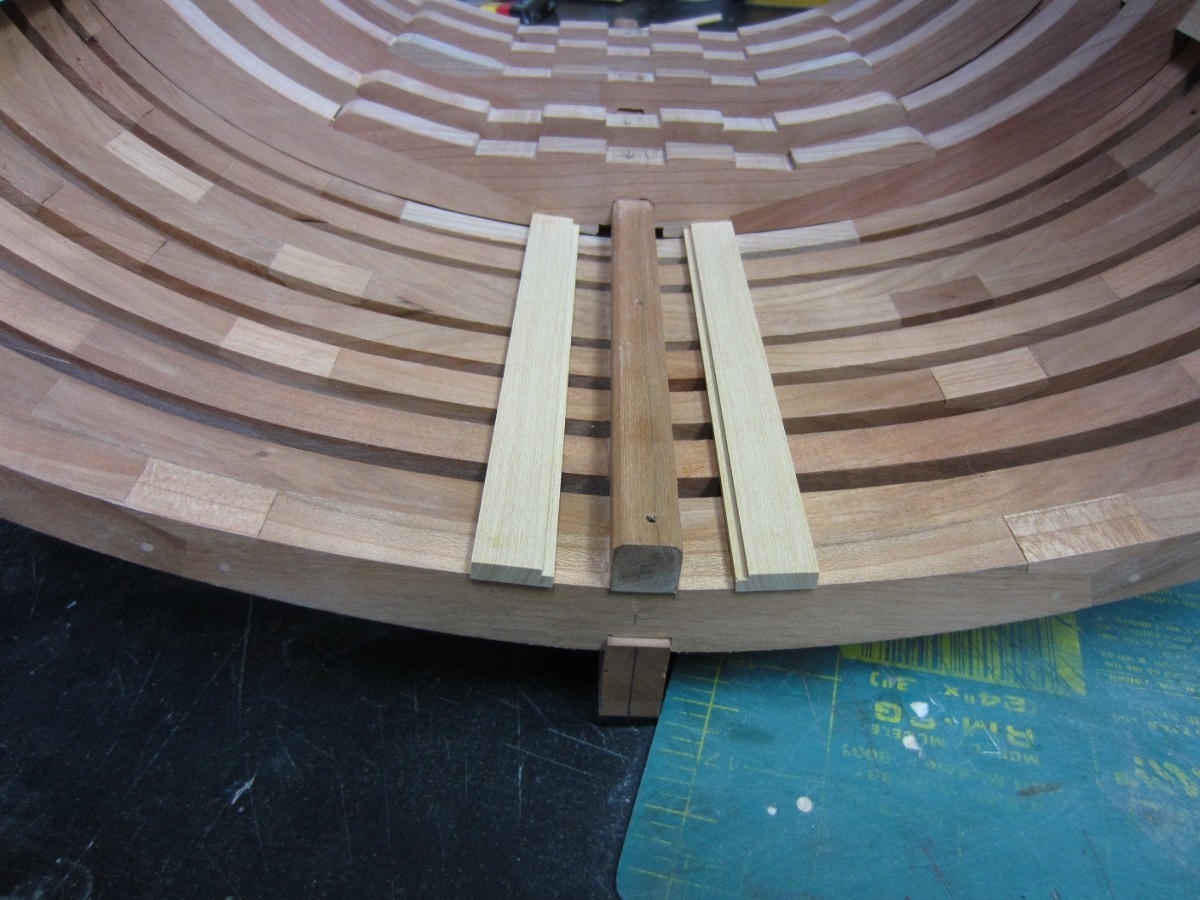
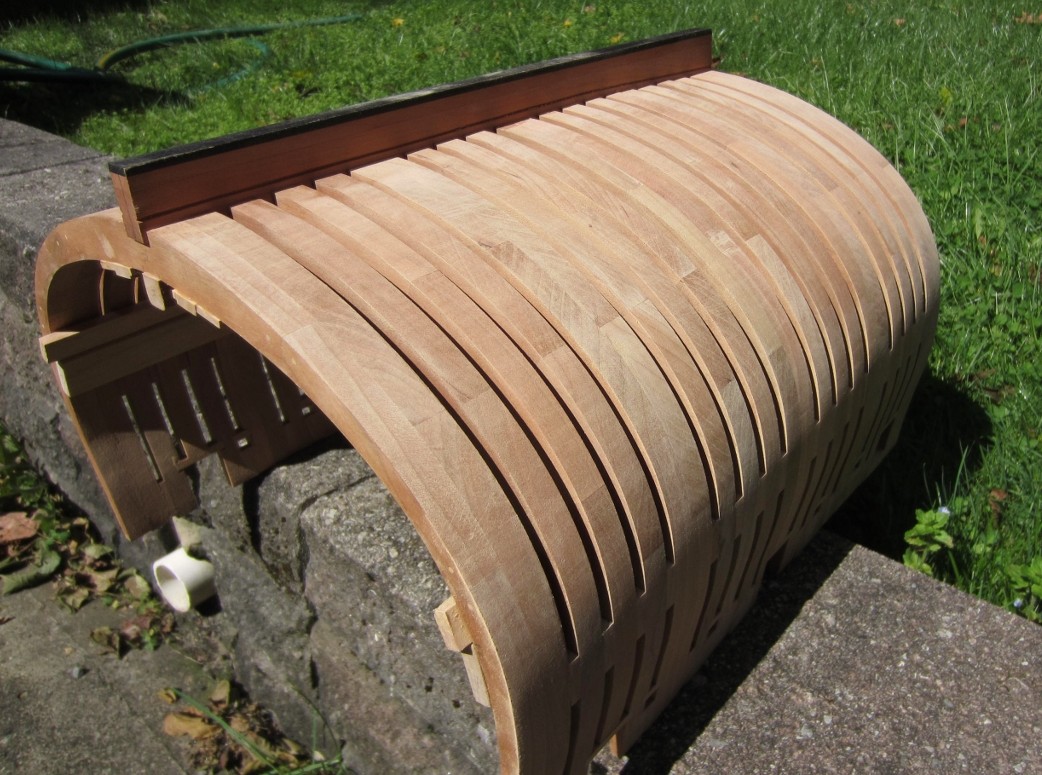
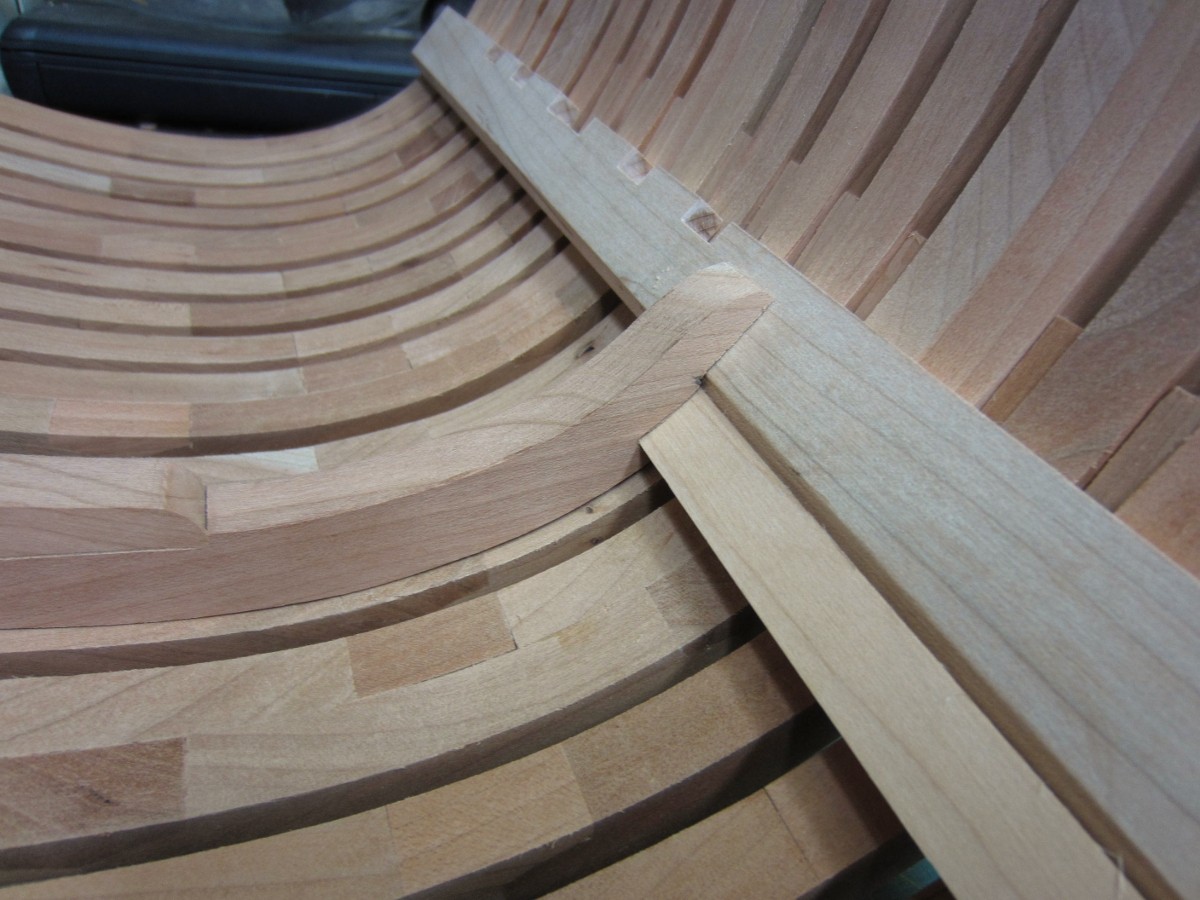
Well the floor riders have been shaped and installed along with the motor deck
clamps. I’ve also placed the first of the inboard planking between the keel and
the deck clamps. The channel has been cut for the limber boards too.

Seeing that the clamps and riders are installed the framing is stable enough to fair
the outer hull now. So I took her outside and seeing she is so big I was able to use a
palm sander I normally use on full size work to rough her in.
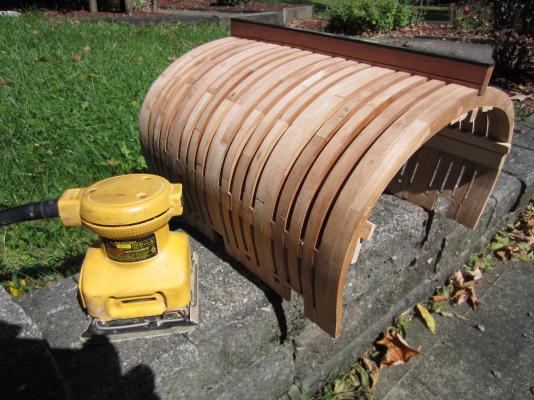
Here you see one side has been done with 80 grit. I’ll work out to 220 grit for now.

-
Hi Chris,
How could they not like it? Besides I think large portion of MSW members would send along
some "encouragement" if they didn't!
Have a safe trip and I'm still saving my money for when they decide to produce it.

-
Thanks Bob, very appreciated.
-
-
-
Thanks Greg and Grant.
Greg I owe it all to you from when you showed how to use the disk sander and chisels on the Echo Cross Section!
-
Hi Ben and thanks. It was good to see you back at the echo cross section but no nothing
from me on the echo right now. That’s a story I’ll have to post there sometime soon.
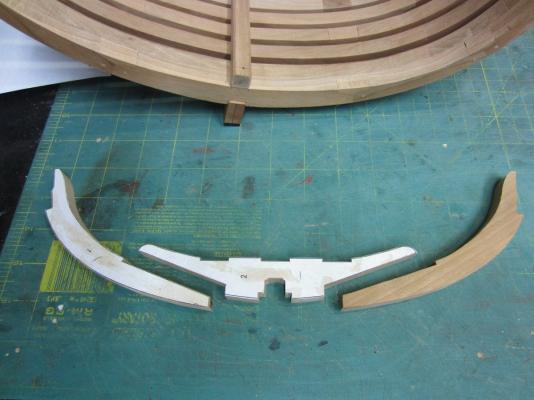
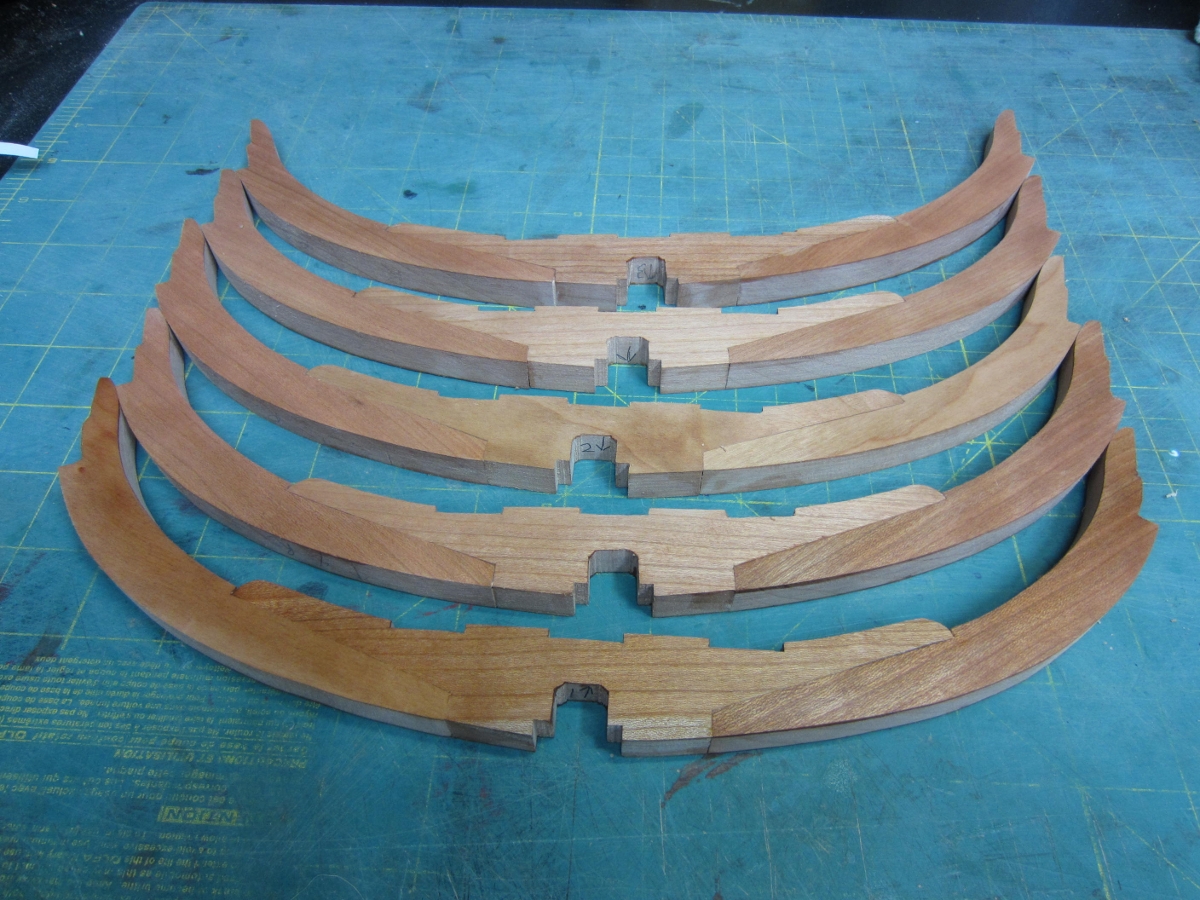
Here are all of the floor riders constructed. Then I took and numbered each one as they would
be unique as I'm sanding them to fit both the hull frames and the mortar deck clamp.
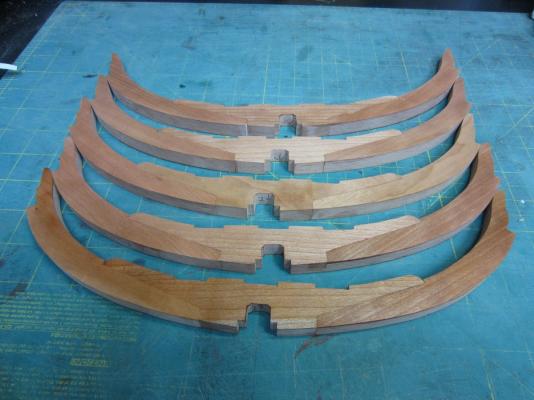
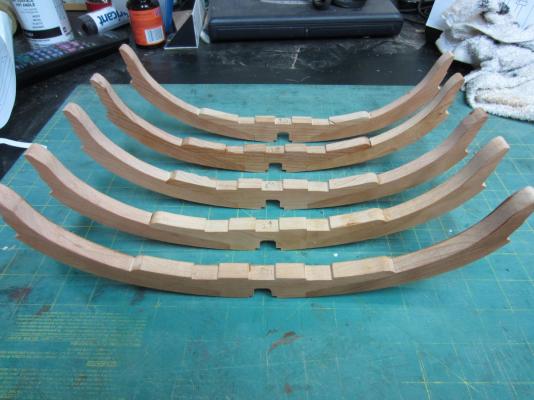
Once they are finished and in place it will time to put the limited inboard hull planking.
-
Hi John.
Nice choice and it will be a lot of fun following along.
-
I have not used the dye ...yet.... but I have used swiss pear and for me it has similar bending characteristics as boxwood.
-
Hi Ben,
Very nice. It really looks sweet. I'm glad you've been able to find sometime to work on her again.
-
Thanks Augie. A mans gotta do what a mans gotta do.
Hi Greg. The simple answer is yes and no. As the clamp is tacked temporarily in place
for measurements etc I’ve not made the final adjustments to it for the deck beams. Also
the hull is laying on its side which makes it look even worse. Thanks.
-
Looks real nice Bob. A nice smooth run. Also tons of time to procrastinate
I mean think about those treenails! -
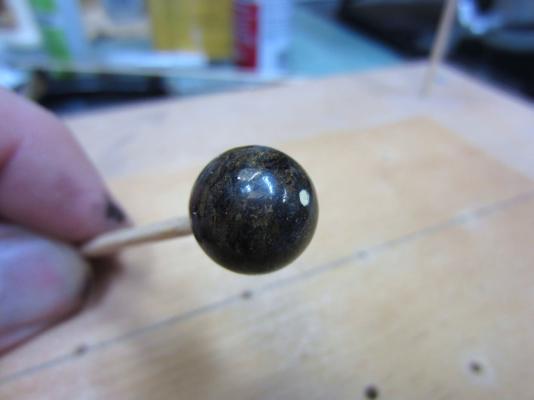
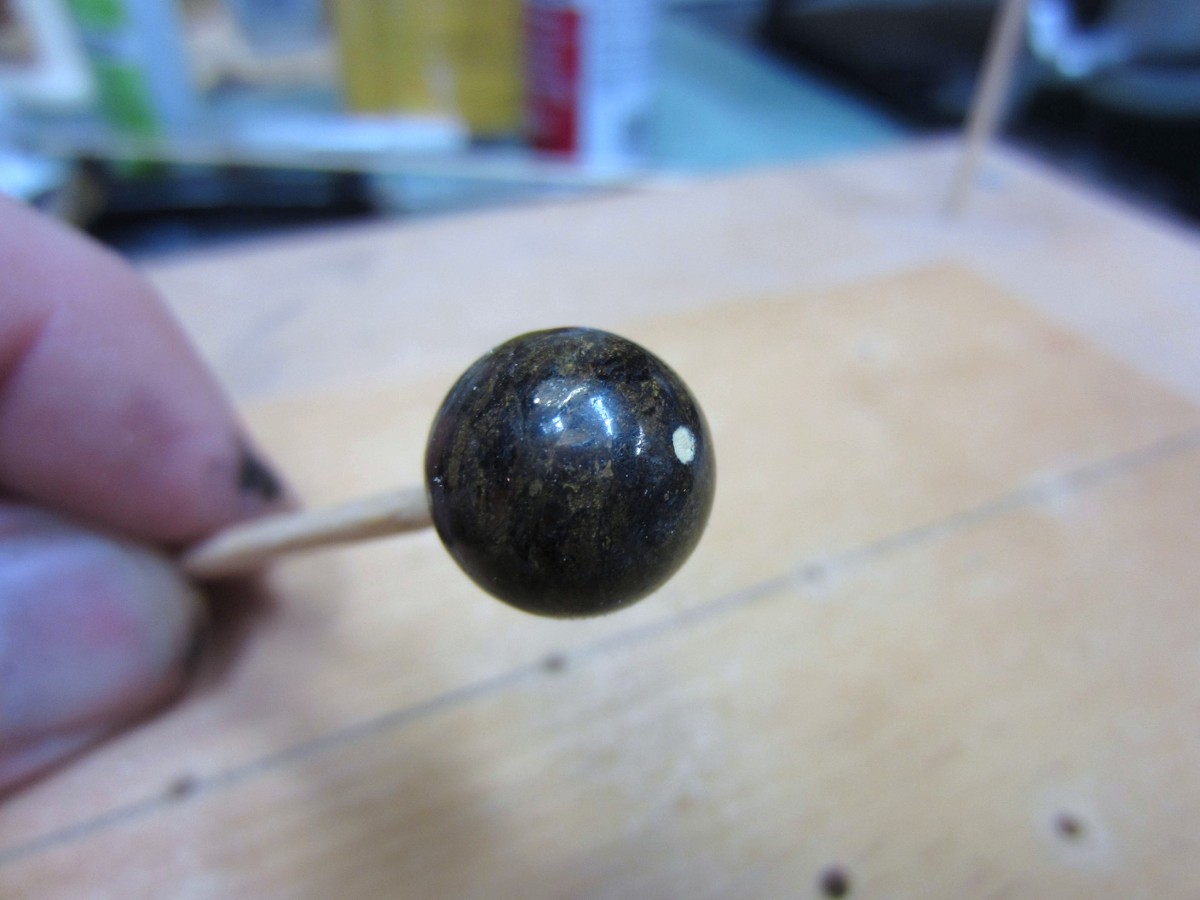
As I was making the floor riders I looked ahead in the plans at the shell room
as that comes after the floor riders. I measured up the cannon balls, went to the
shot locker and I just couldn’t understand why I didn’t have any cannon balls
big enough. I mean they are only 14mm (.55”).
So I had a not so bright idea. I tip toed into the Admirals craft room, located her
stash of jewelry making supplies and found some 14mm beads. Then with the
saddest face I could make asked permission to use them.
Permission was granted, hole on one end filled, paint administered and tada cannon balls!

-
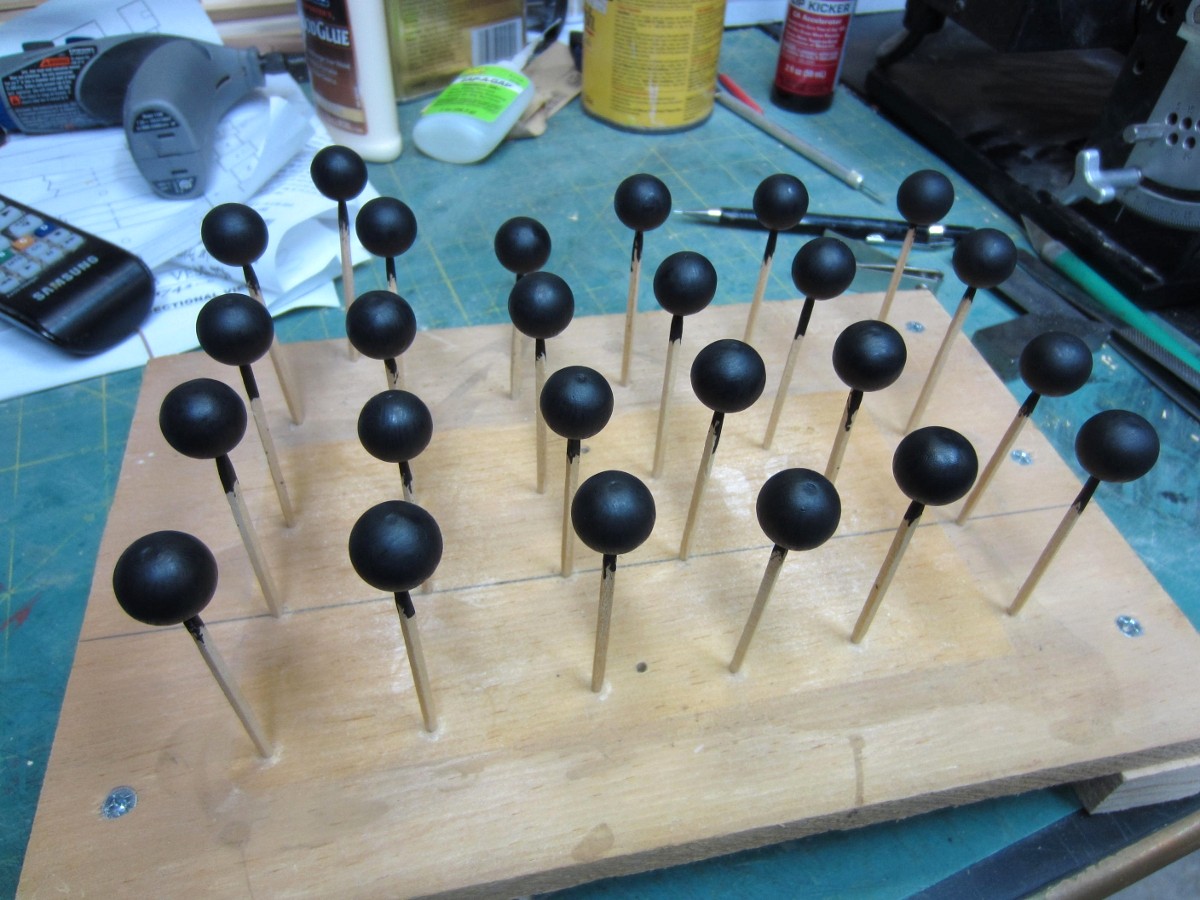
Hi Ben,
Thanks for stopping by and yes it is fun to experiment. I believe the smaller ones
are closer to scale so you will be seeing them again.
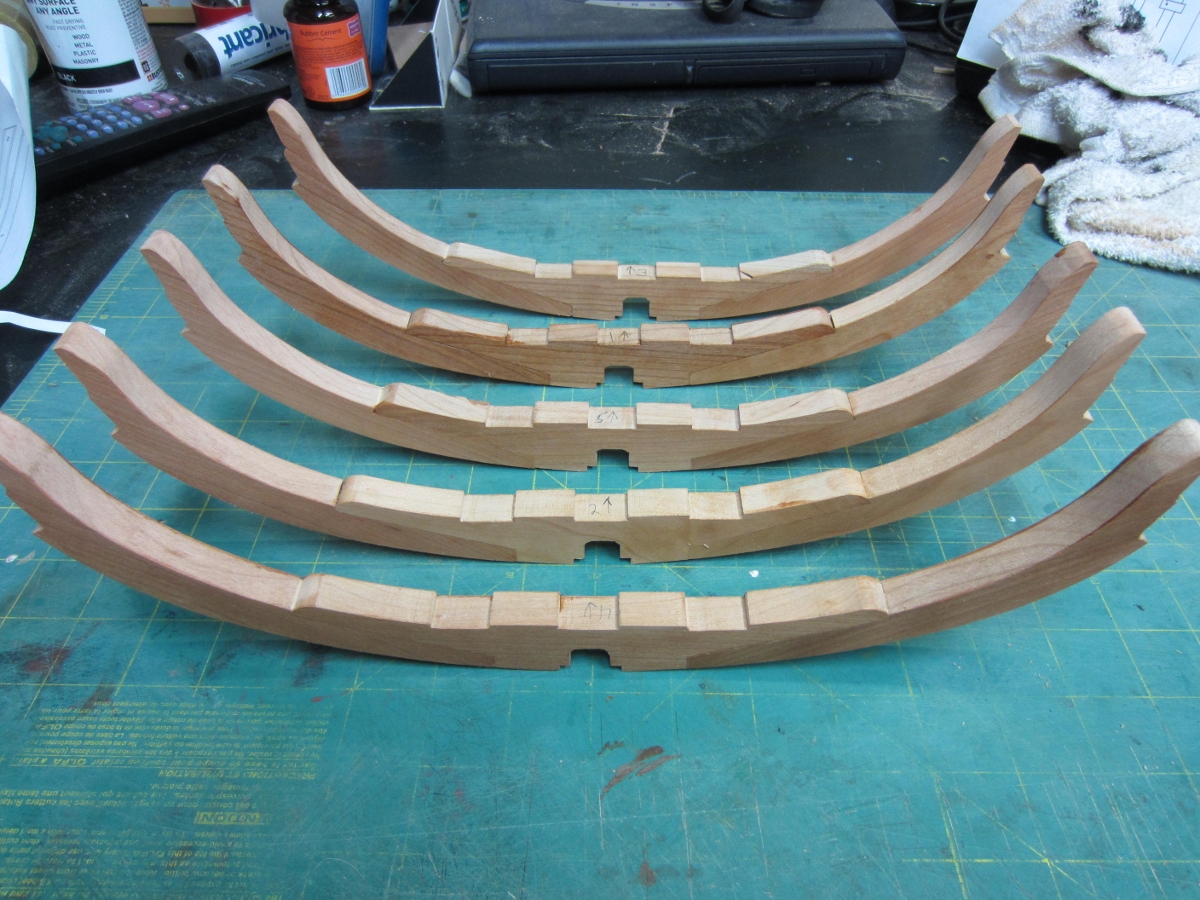
Onward we go. The mortar deck clamps have been cut and test fit.
I have also started cutting out the floor riders and will have to shape them to fit the hull.
So much fun and so little time!
- mtaylor, dnputnam, fnkershner and 6 others
-
 9
9
-
Congratulations John on a really beautiful model. I love it!
-
-
Thank you Greg. She's fun so far.
-
Hi druxey. Thank you for letting me know the correct size! When I get there 3/4" it is!
-
Grant and Bob thanks for your opinion on the treenails. I too like the larger one.
To me it’s better on the eye. I’ll hold off for a while on making a final decision though.
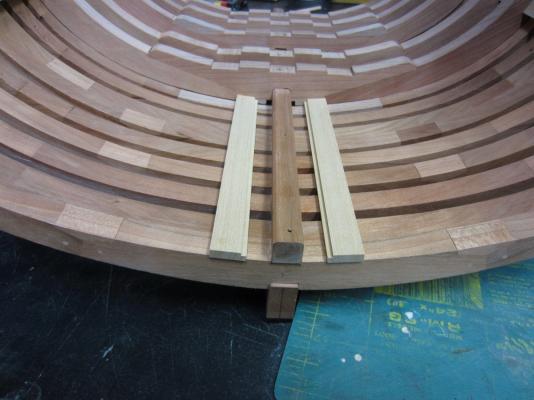
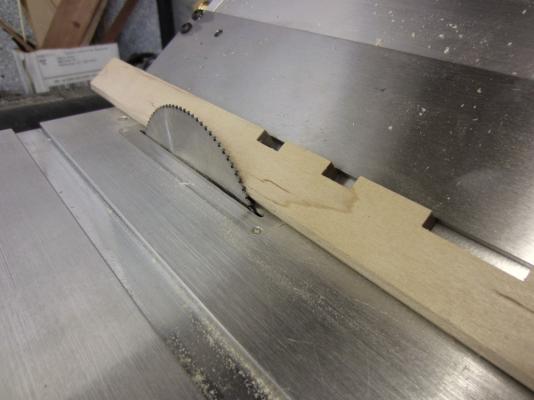
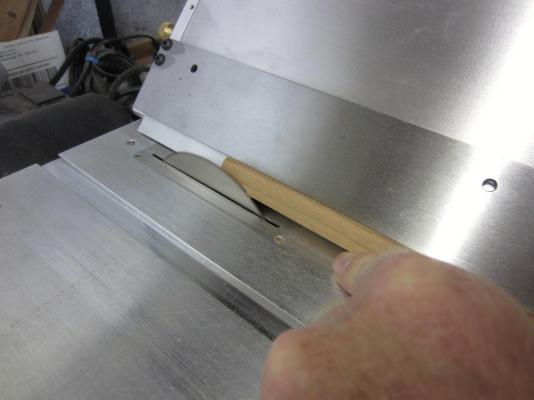
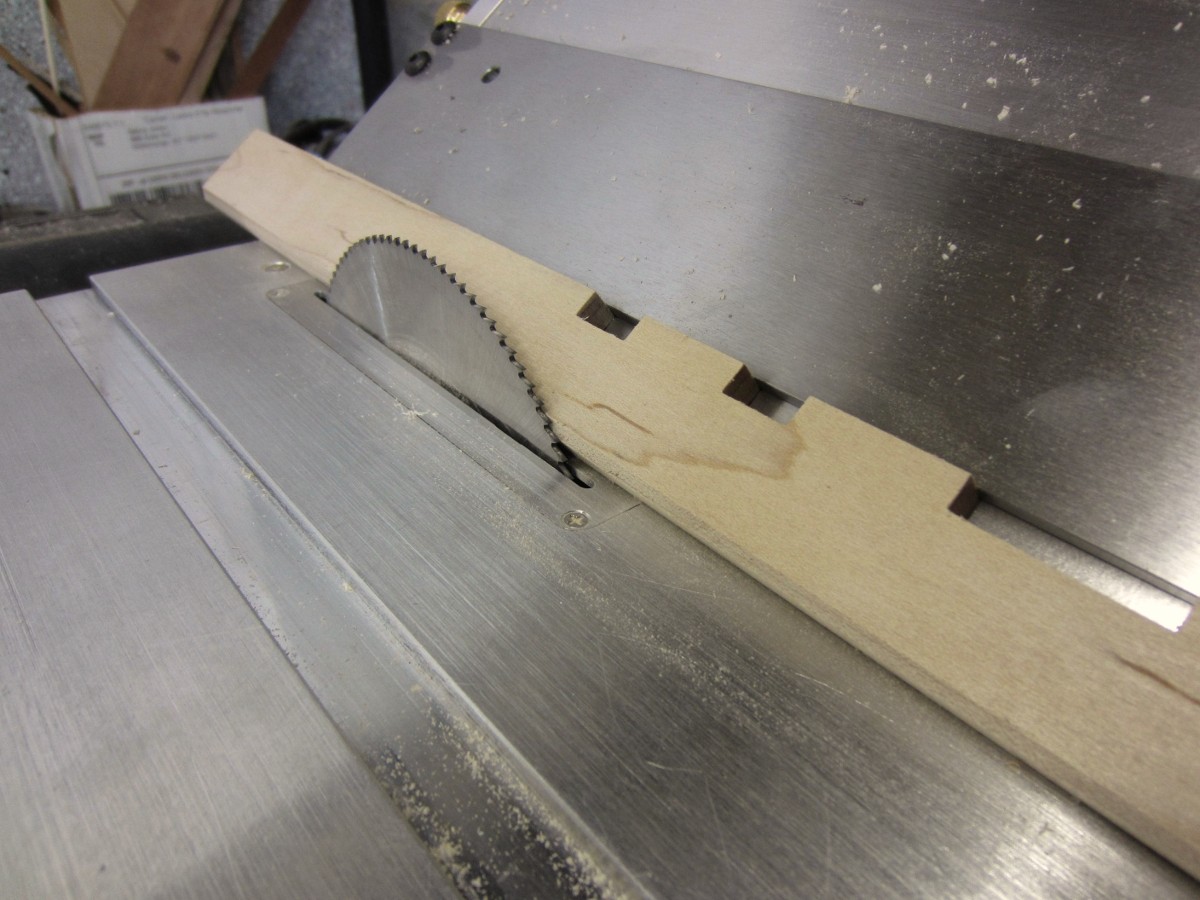
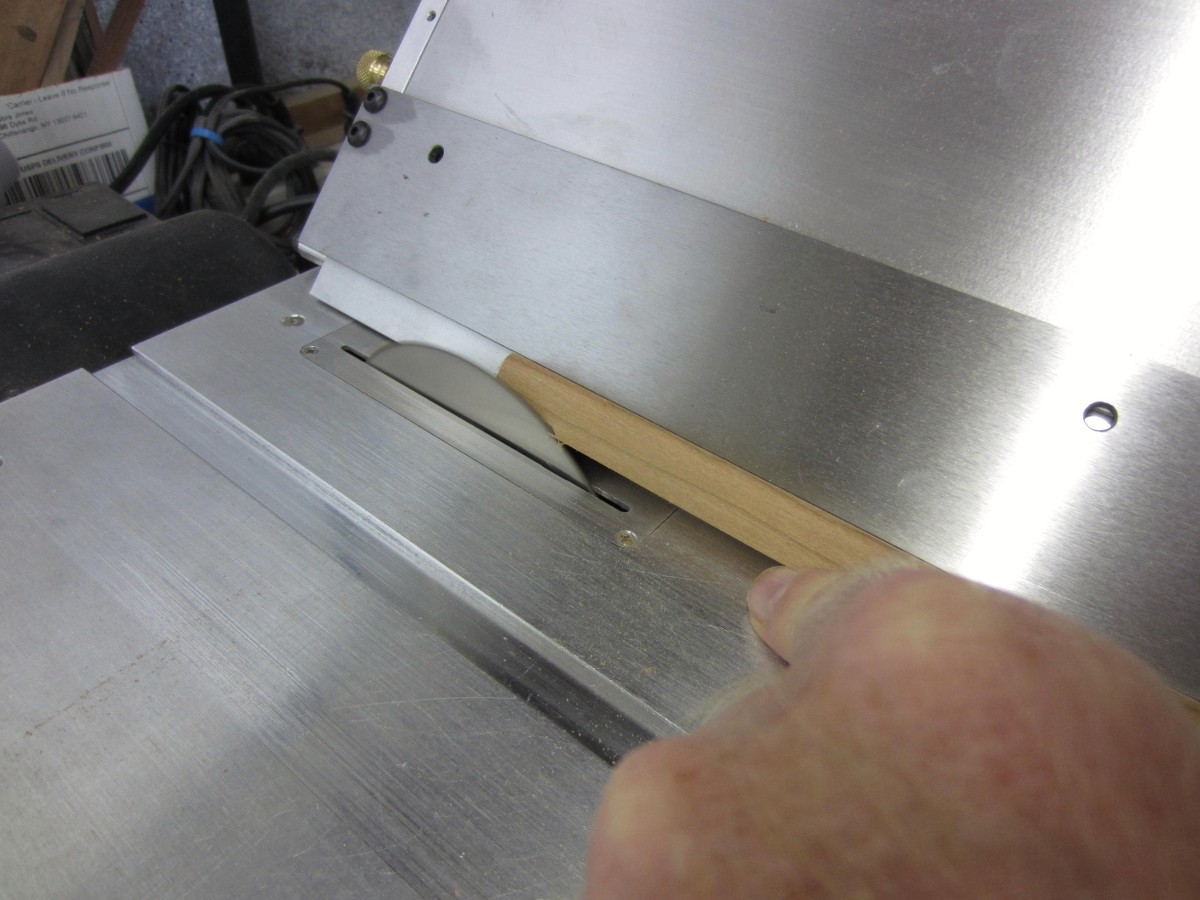
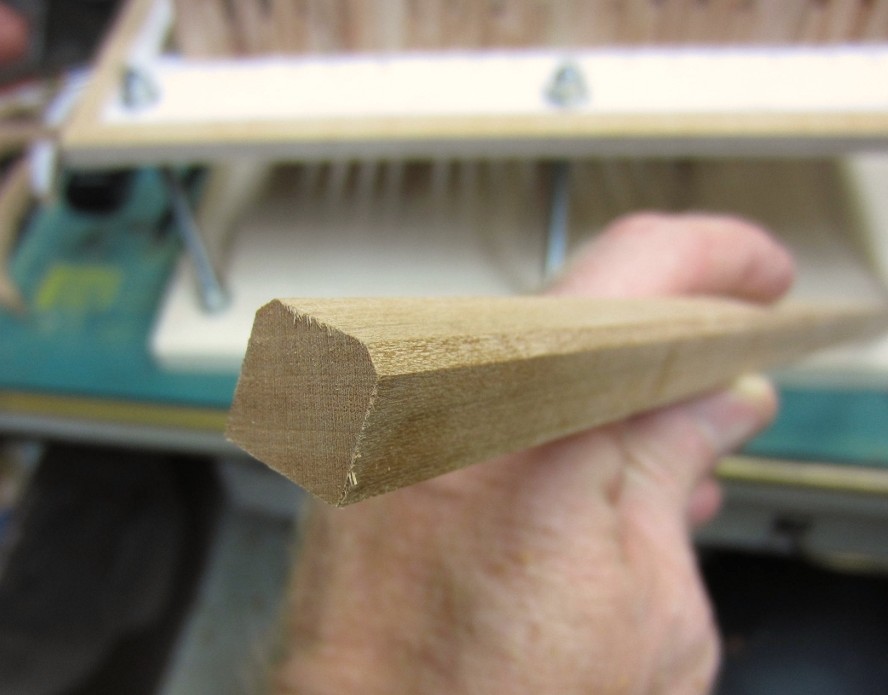
Here I’ve made the false keel. It calls for the top edges to be beveled and to do this I used
the Byrnes table saw with my new tilting table. Once I figured out the angle it worked great.
No surprise there.

I then glued the false keel in place. I used a second piece clamping the ends to hold it in
place. I also put a ¼” thick piece in the middle between the false keel and the second
piece to put pressure there until the glue dried.
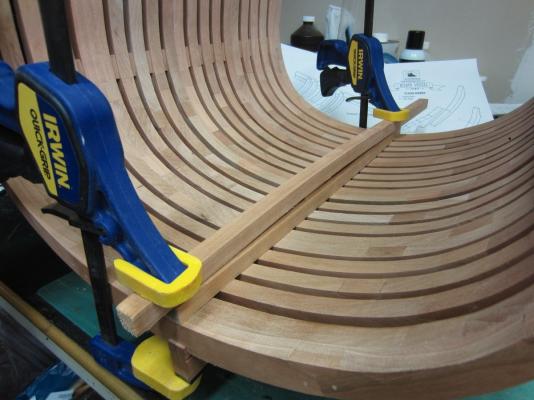
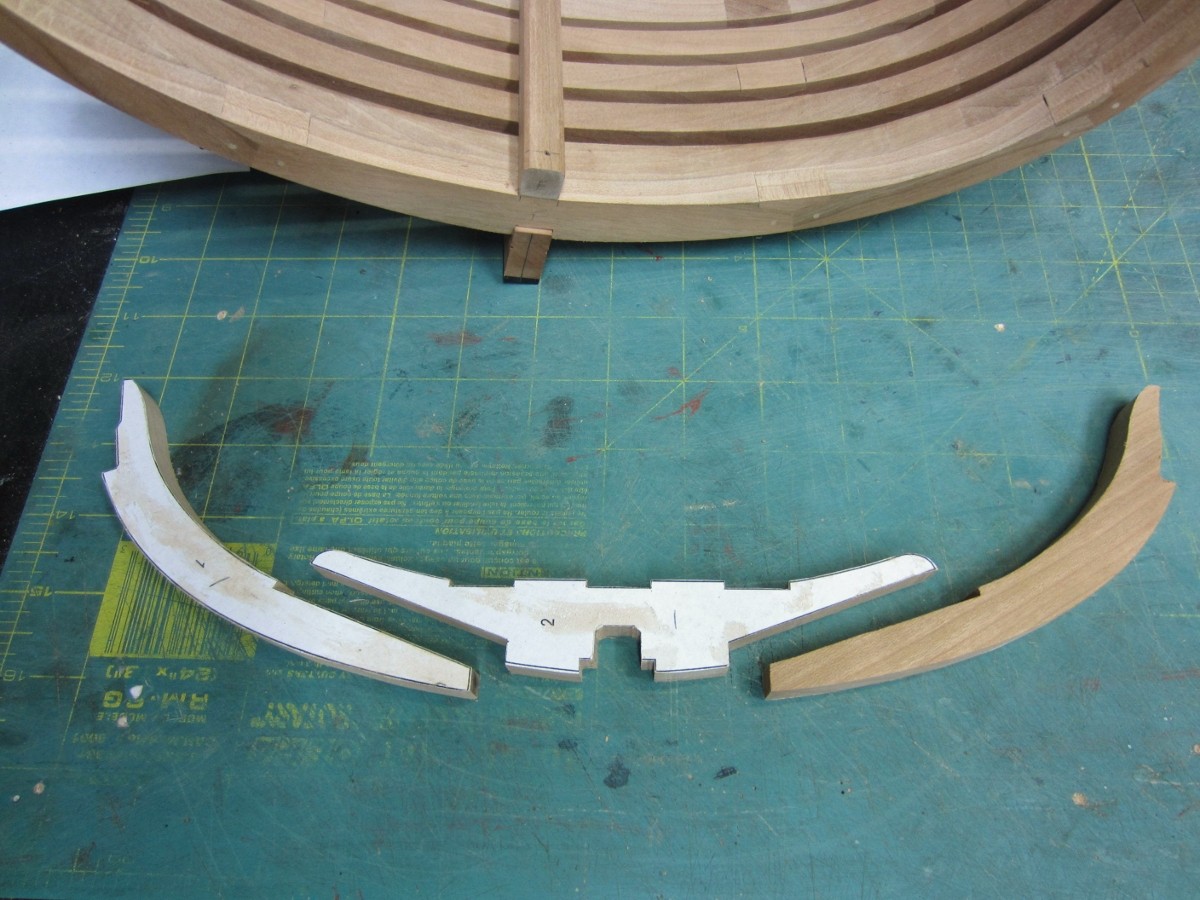
Next up will be making the deck clamps and floor riders.
-
-


 I’m sure whatever you do will look great.
Bomb Vessel Granado by Rustyj - FINISHED - 1:24 - cross-section
in - Build logs for subjects built 1501 - 1750
Posted
Hi Ben, Yeah I thought it was kinda neat. I had set the sander next to it while getting more paper
then thought it was a good reference to the size.
Thanks Mark, I guess “different” would be the correct word. The size throws off what we are used to
doing. When doing joints a little flick of a chisel or knife would fix a bad fit. Here a little off requires
the removal of a ½” wide piece of wood!
On the plus side there is a lot more to hang onto so the tips of my fingers have suffered less.